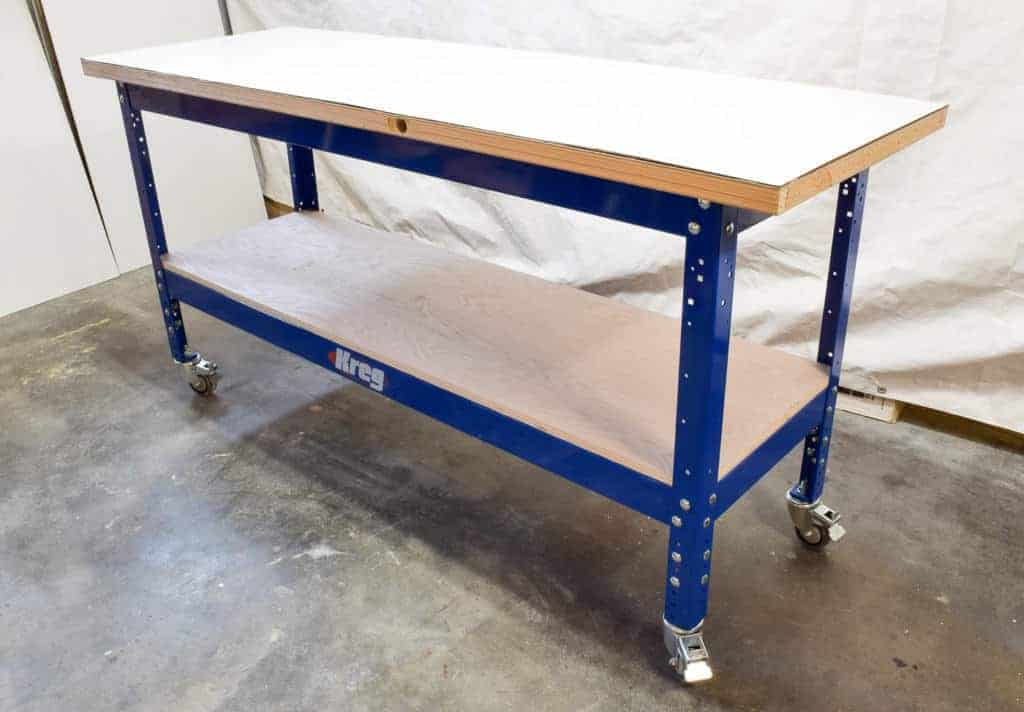
This DIY workbench is a huge upgrade for my workshop! It's easy to assemble with a steel frame from Kreg that's solid as a rock!


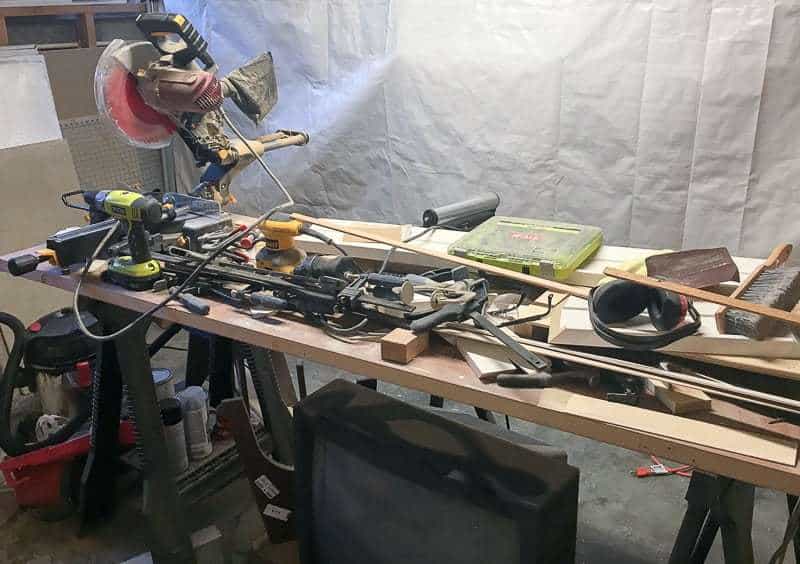
I have big plans to overhaul my entire workshop to make it a more functional space. You can check out all my workshop organization ideas here. I started off with a good, old fashioned cleaning, which turned this mess...
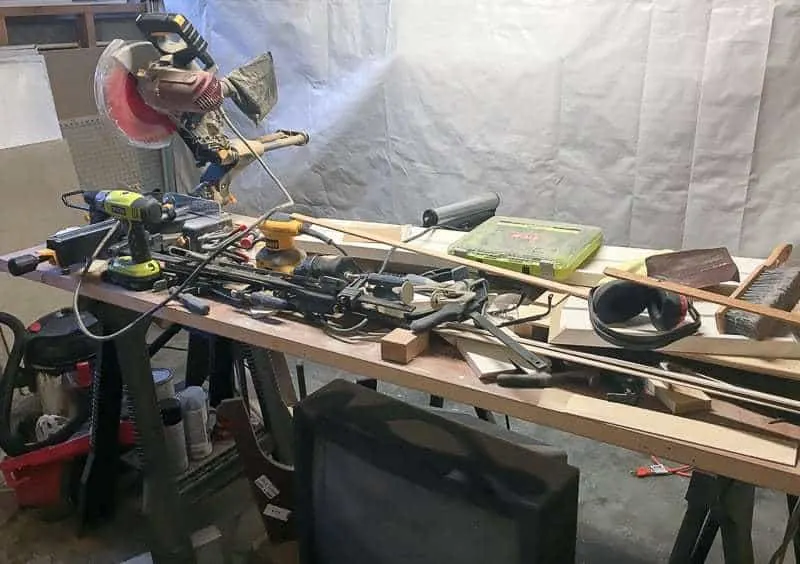
to this!

I feel so much better already! There's nothing like a clean slate to make you feel more productive. Even though this current setup isn't working for me anymore, there were a few things I really liked about it.
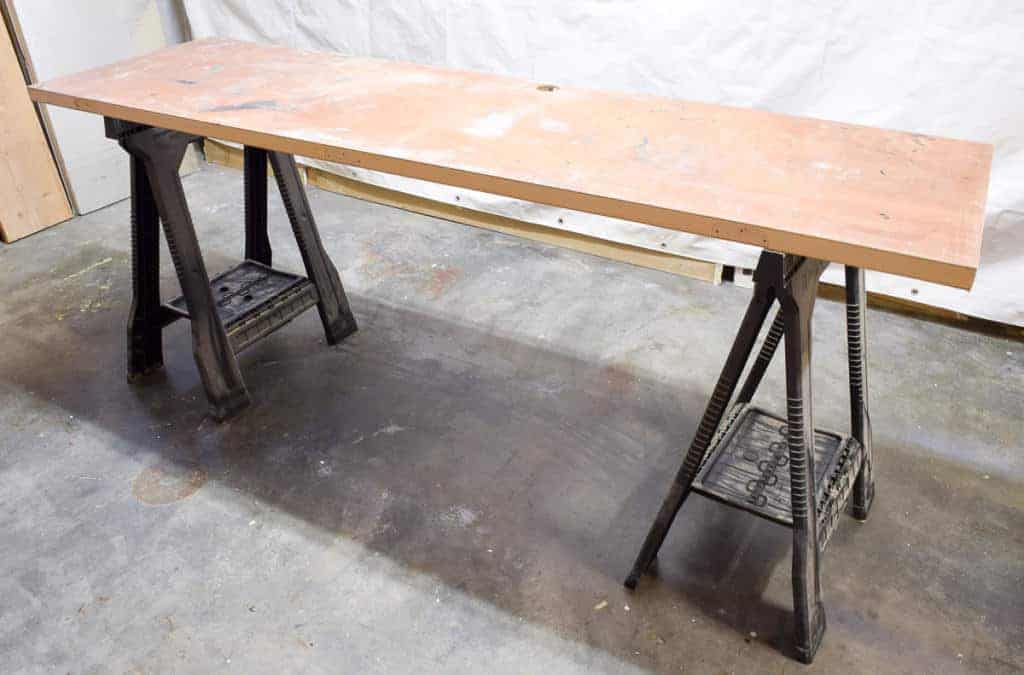
The solid-core door will remain as my work surface, since it's perfect for clamping and assembling projects. I found this door at my local architectural salvage store for less than $20! It's less than two feet wide, which gives me plenty of space to work without having to reach over too far.
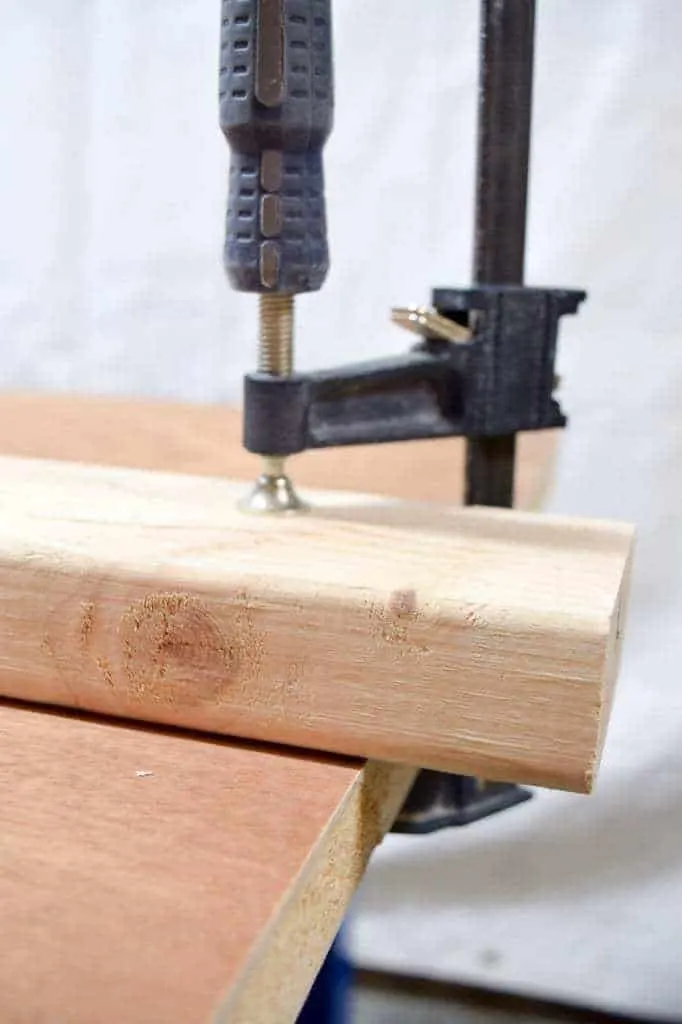
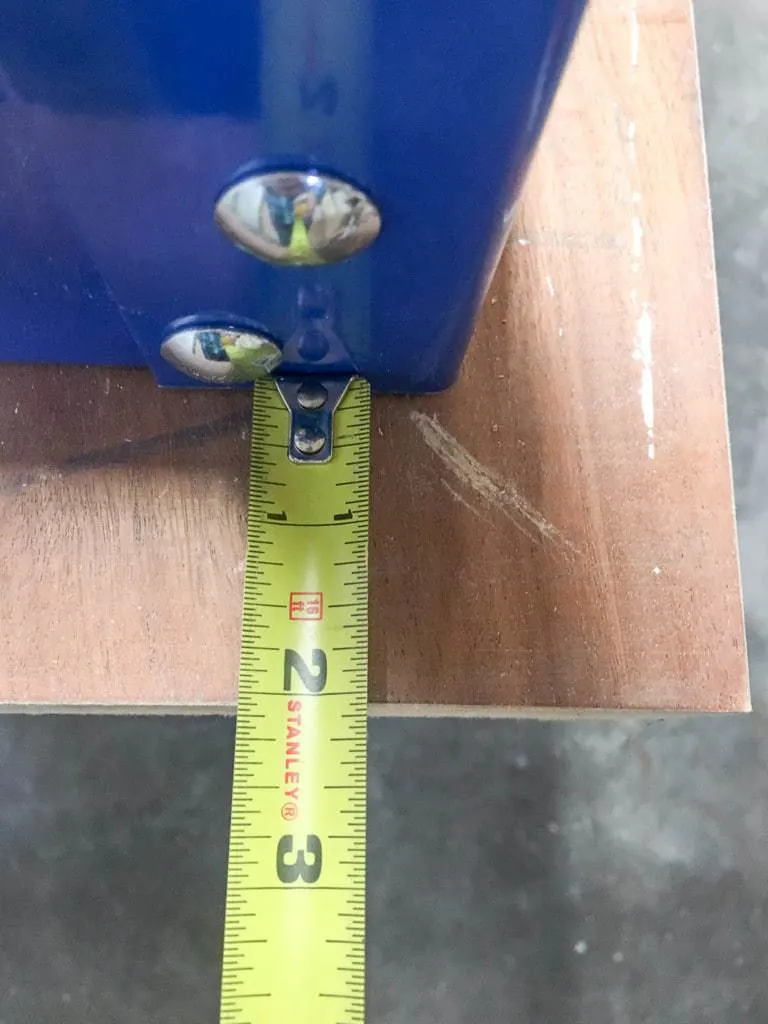
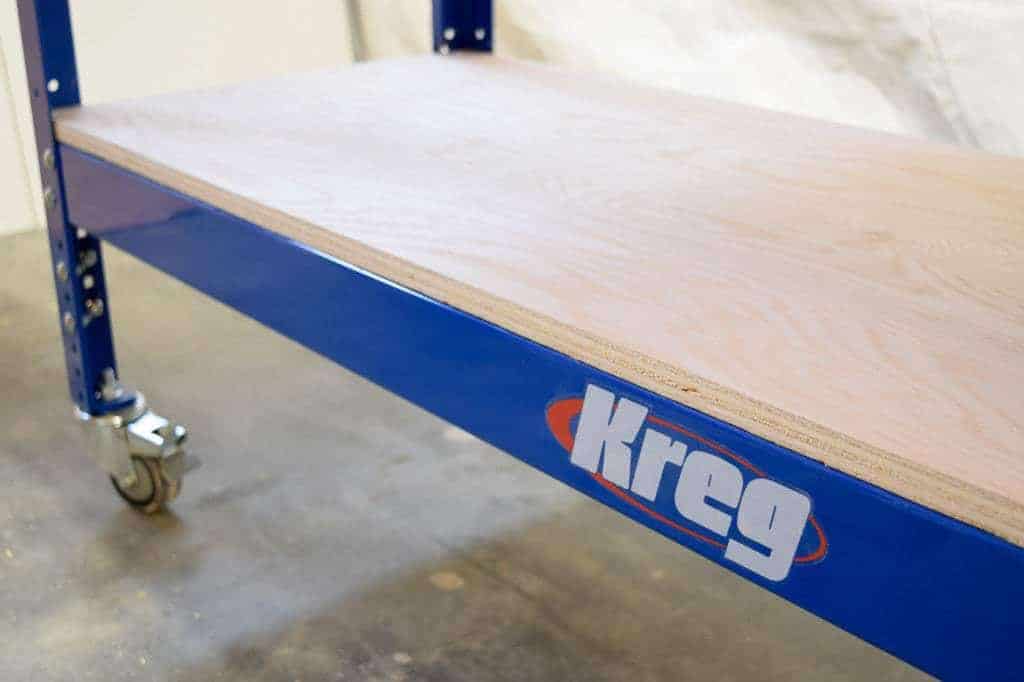
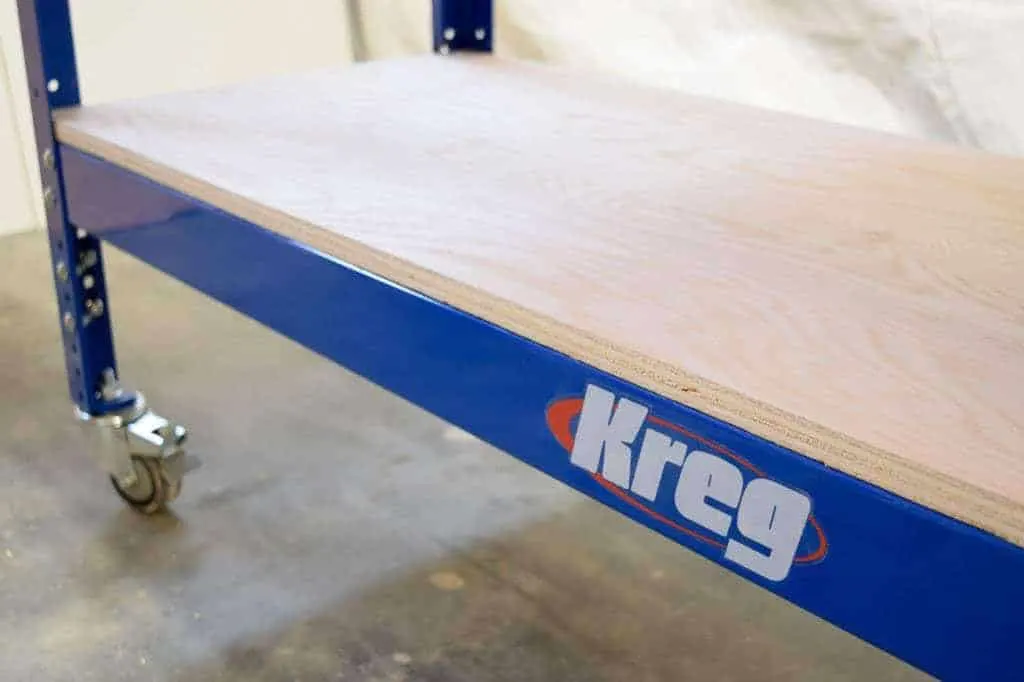
Clamping down pieces during assembly helps prevent them from shifting and getting a screw in the wrong spot. Some workbench plans have the base frame right up along the edges of the tabletop, leaving nothing to clamp on to! I need about 2 inches of overhang all the way around my new workbench.

I also love being able to work on a project from all sides, so my new workbench will remain floating in the middle of the room. However, it would be nice to be able to push the whole thing off to one side if I need extra floor space. The rest of the time, it serves as the outfeed table behind my DIY table saw stand.
This post is sponsored by Kreg Tools, and contains affiliate links for your convenience. Purchases made through these links may earn me a commission at no additional cost to you.
Since I spent so long building this 2x4 workbench, I thought I would save myself some time by using a kit for this project. The Kreg steel frame workbench has exactly the features I need!
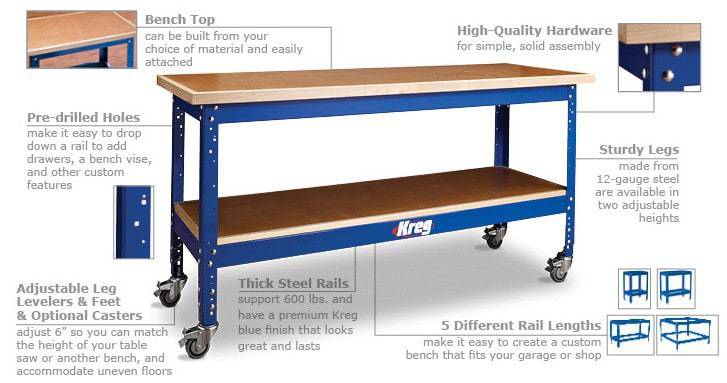
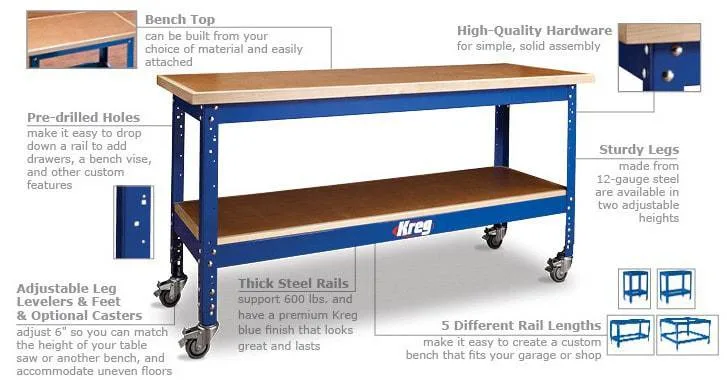
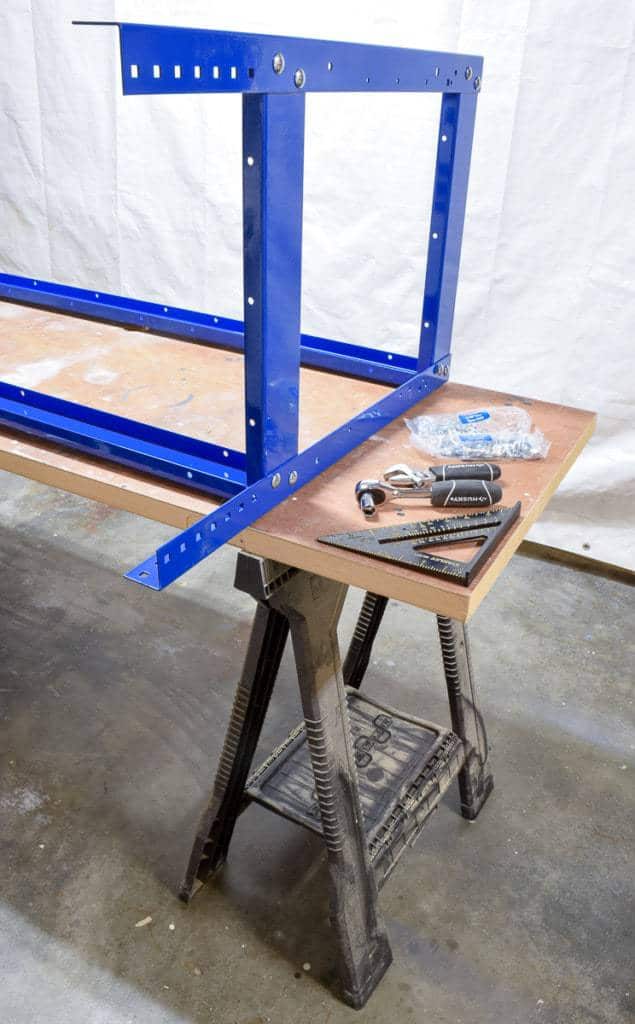
Building the Kreg Workbench Steel Frame
I was lucky enough to have Kreg Tools provide me with the pieces I needed for this project. I decided to go with 20" wide rails, 64" long rails, and standard size legs, which will allow me to take full advantage of almost every inch of the old door.
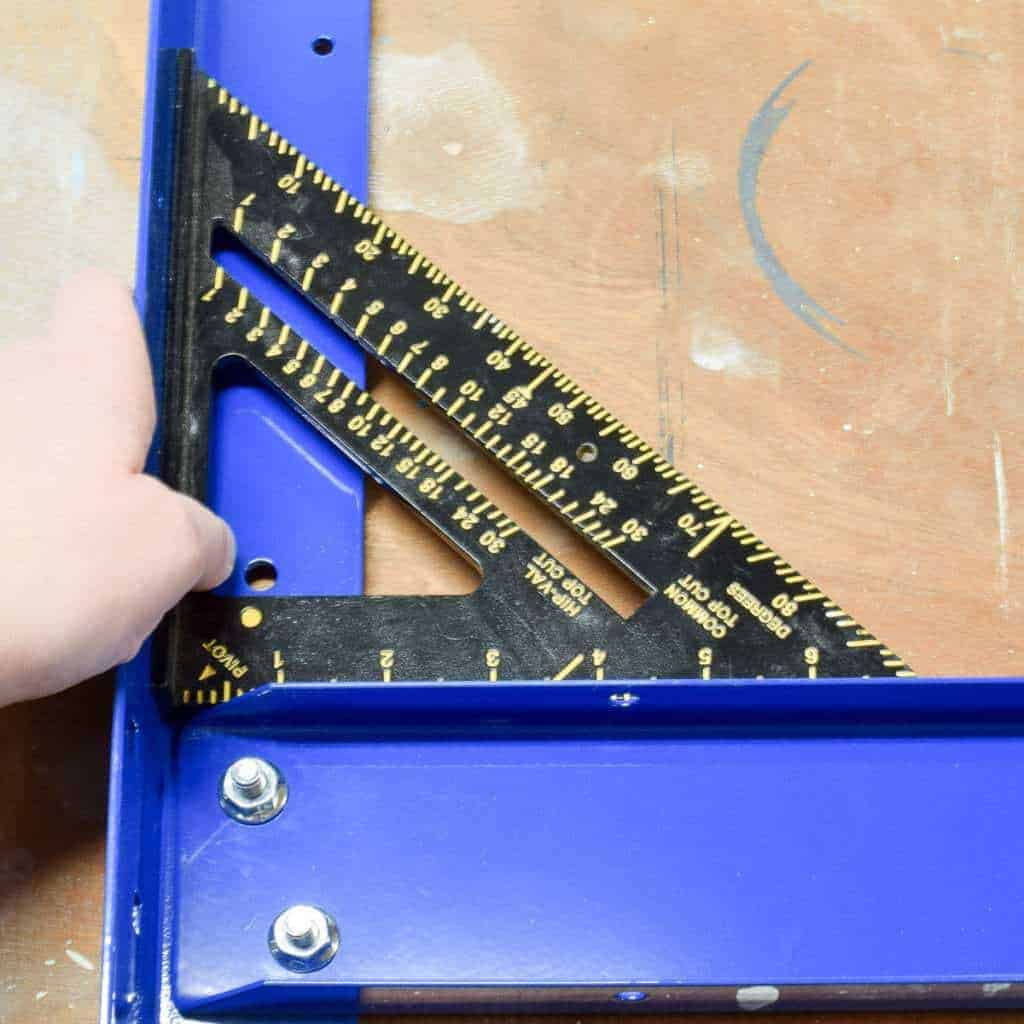
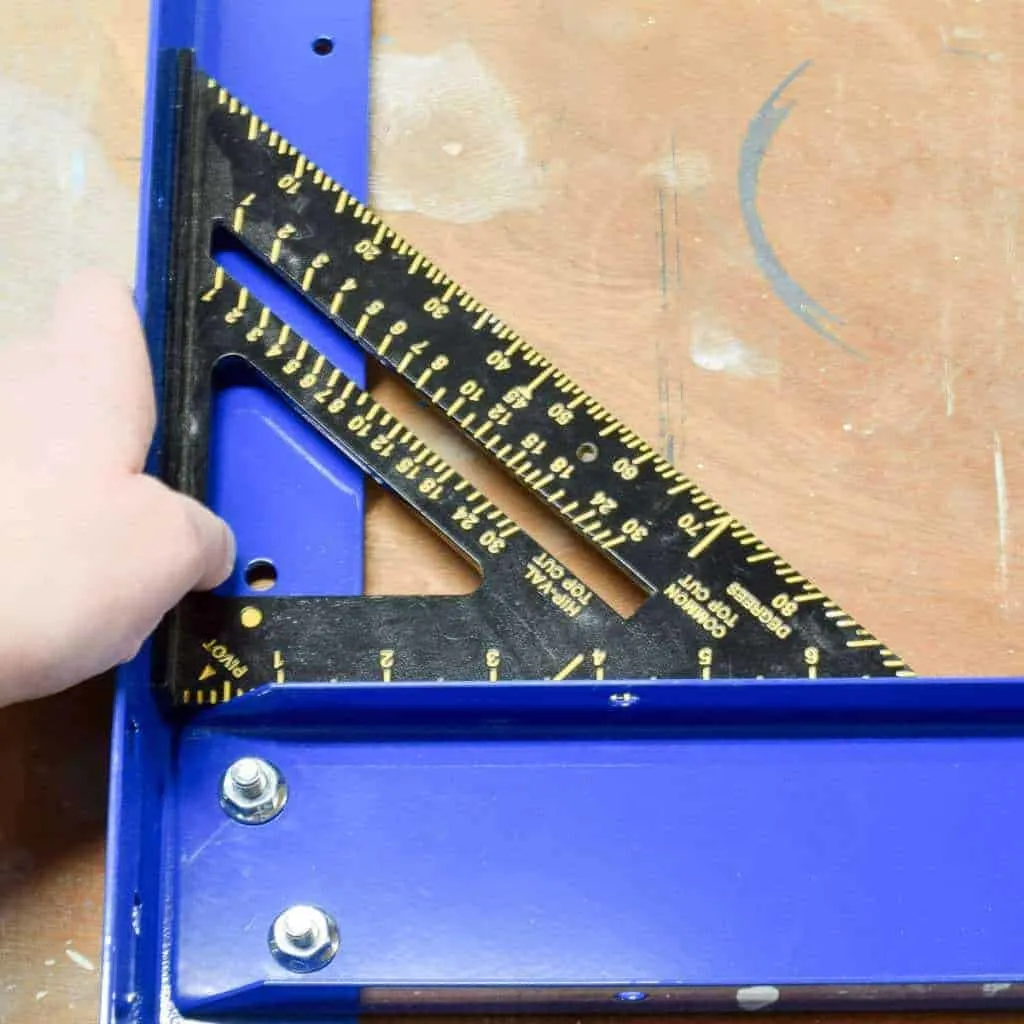
Assembly was really easy. I started with the smaller 20" rails, attaching them to the legs with the included carriage bolts to make the two ends. Use a speed square to make sure everything is lined up at a right angle.
Then I flipped the ends on their sides and added the longer 64" rails.

The feet are a separate piece from the legs, which allows you to adjust the height to your preference. My DIY table saw stand is 36" tall, so I was able to adjust the height of the Kreg workbench to be slightly below the table saw surface. Now I can use it as an outfeed table too!
Prepare the Workbench Top
The workbench top should be made from at least ¾" plywood or MDF, but you may want to consider doubling up on the thickness for extra stability. A solid core door works great too!
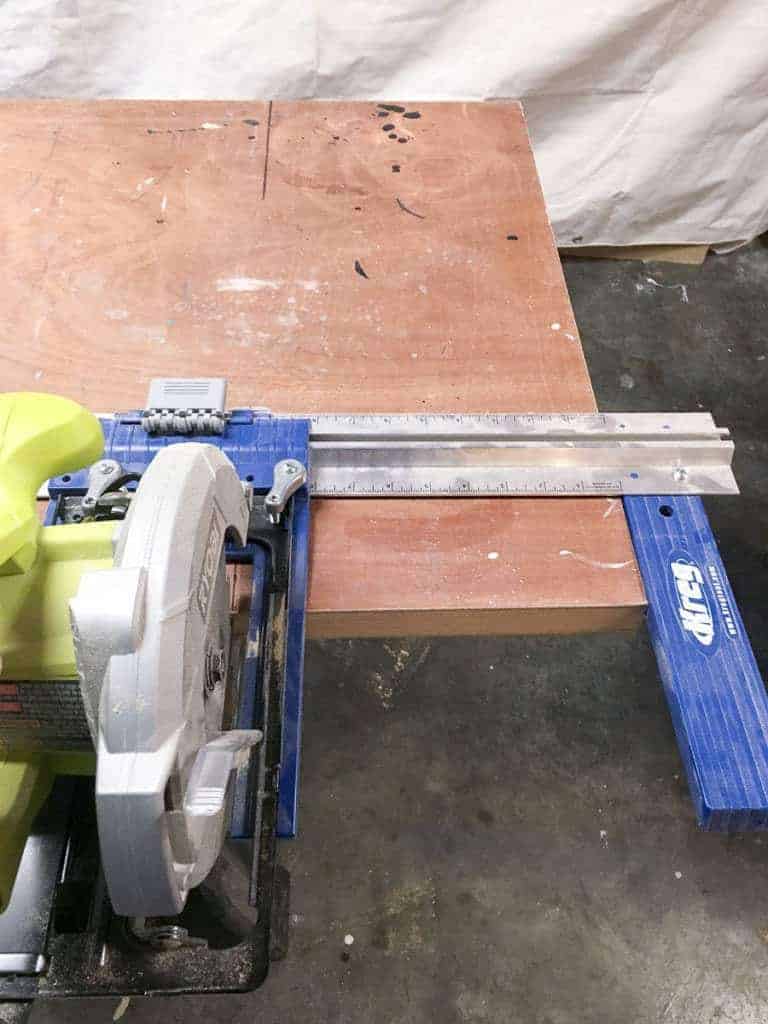
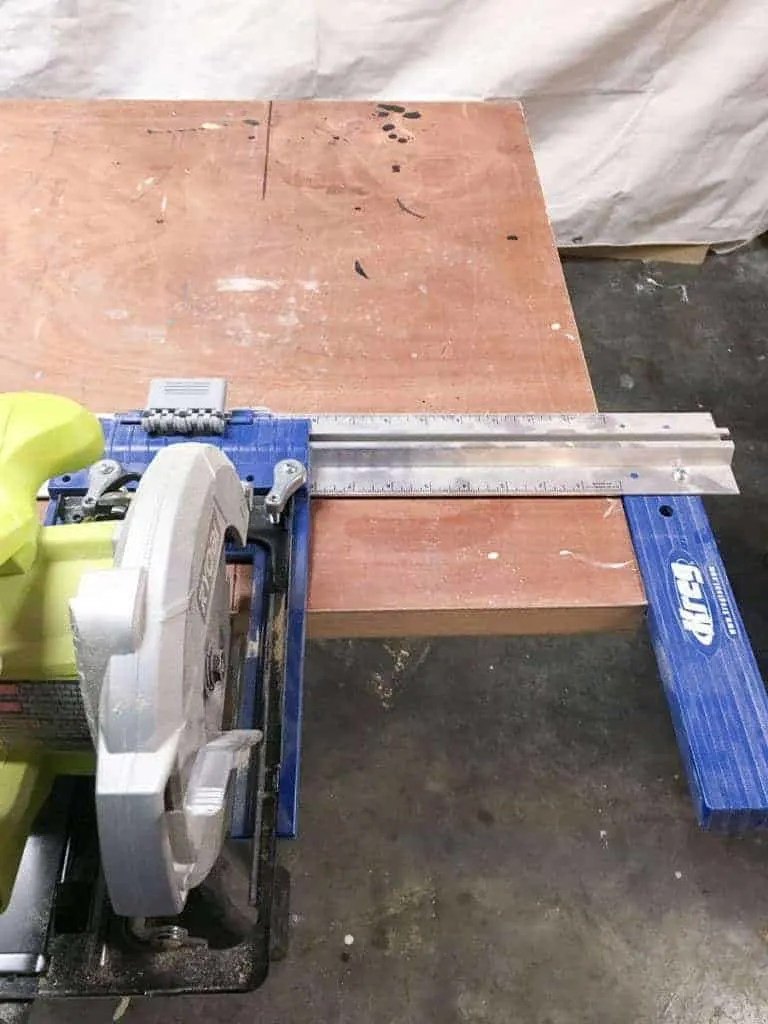
Before attaching the door to the frame, I needed to shorten it a bit. I used the Kreg Rip Cut attached to my circular saw to cut about 8 inches from one end. You could also do this with a track saw. You can learn more about the difference between a circular saw vs track saw here.
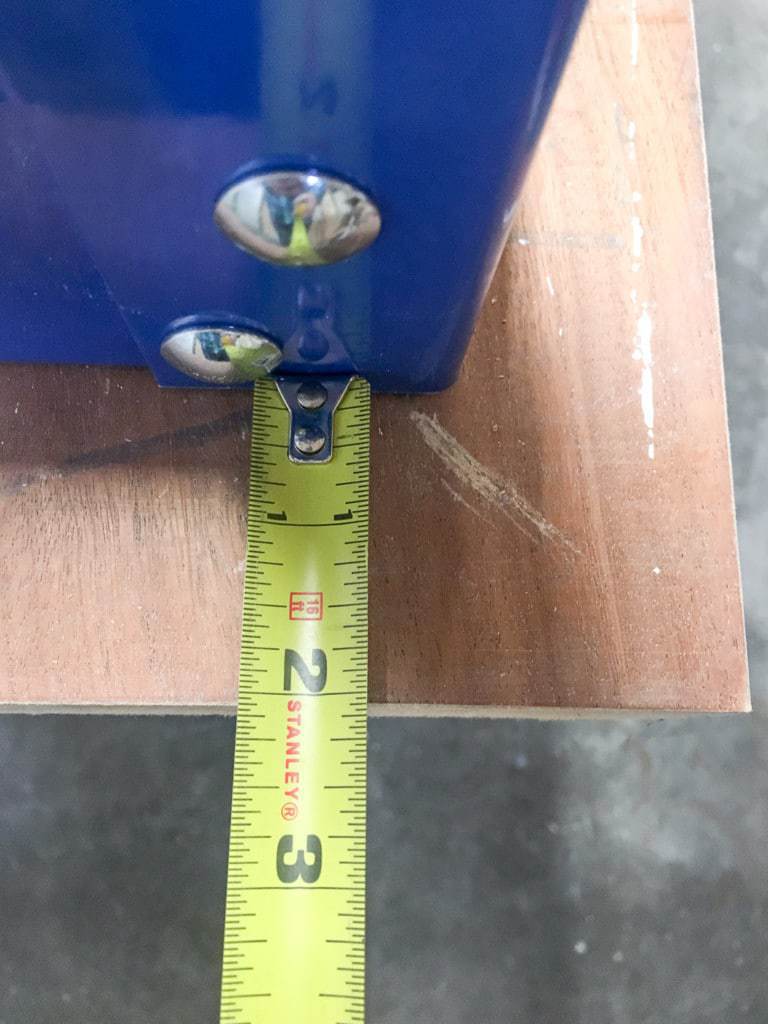
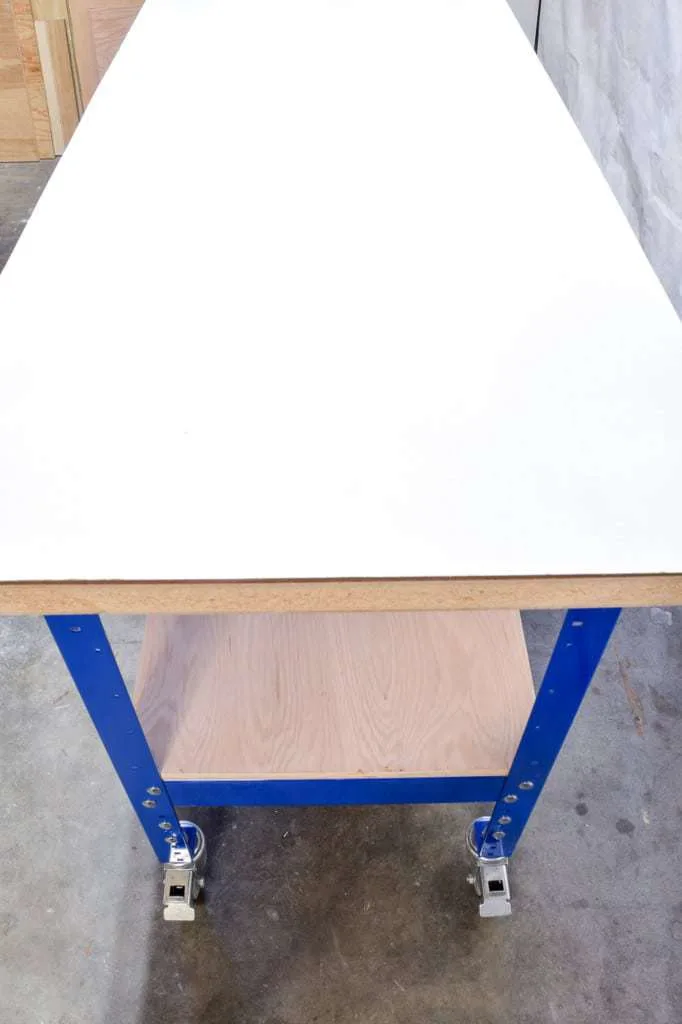
Then I centered the workbench frame upside down on top of the door, making sure I had about 2 inches on three sides, and 4 inches for the paper roll dispenser on the far end.
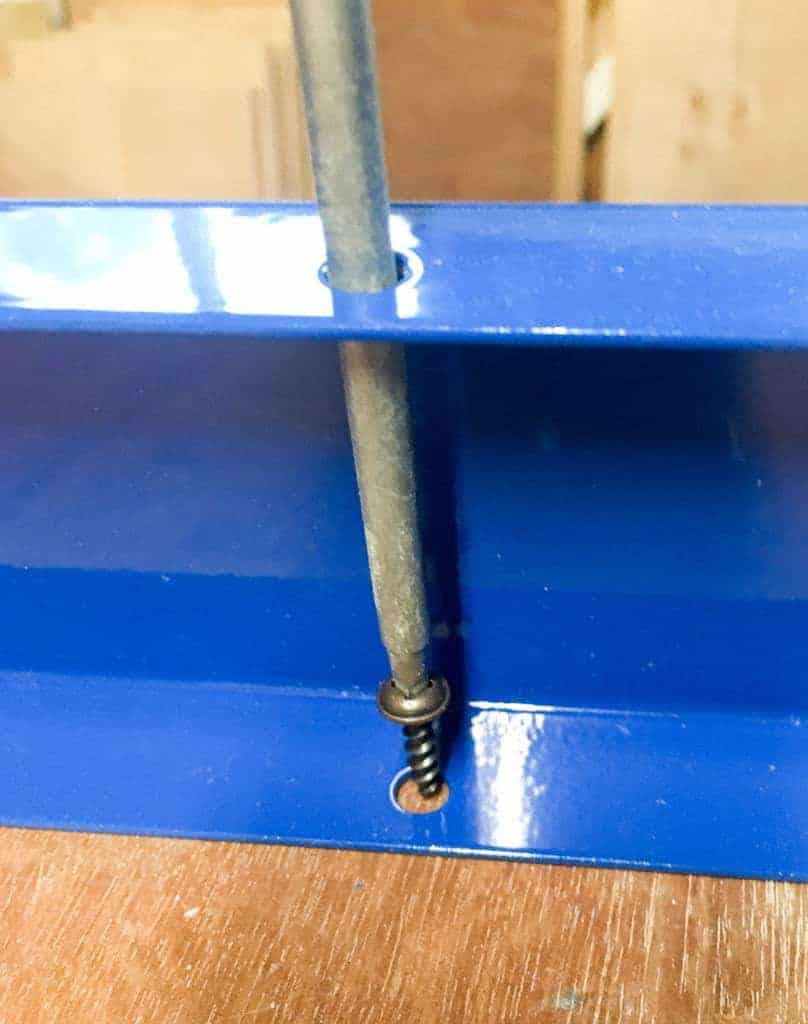
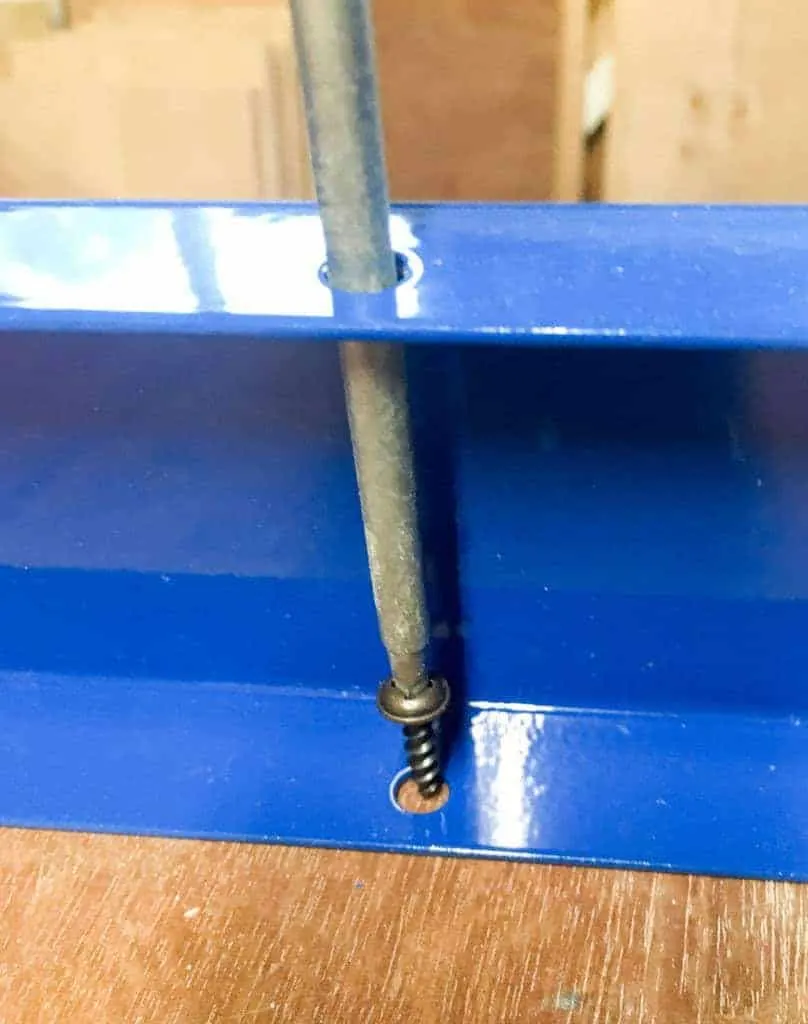
When everything was just the way I wanted it, I screwed it all into place with the ¾" screws that were included in the kit. The 6" Kreg square head bit fits perfectly through the holes in the frame so you don't have to screw them in at an awkward angle.
I had to wait for my husband to get home from work to help me flip the whole thing over. That sucker is heavy!

Apply Laminate (optional)
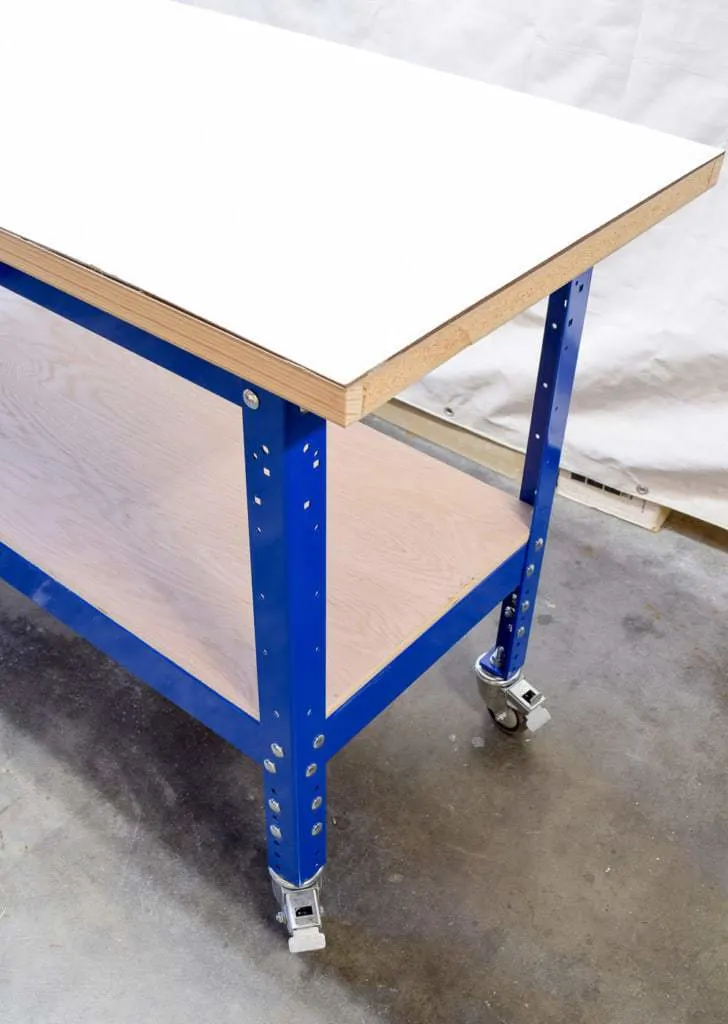
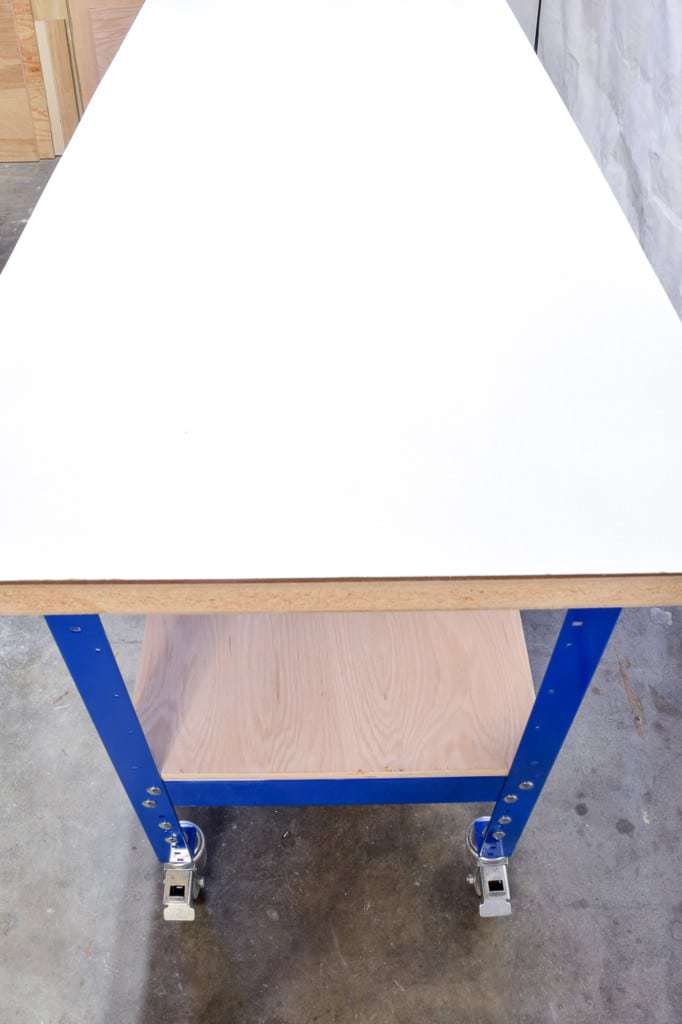
I was never a huge fan of the dark brown door color, but I didn't want to paint it because it might transfer to my projects. This white laminate was the perfect solution! Wood glue and other spills clean up easily, and it can handle all the abuse I dish out! Find out how to cut and install laminate sheets here!


Install the Bottom Shelf
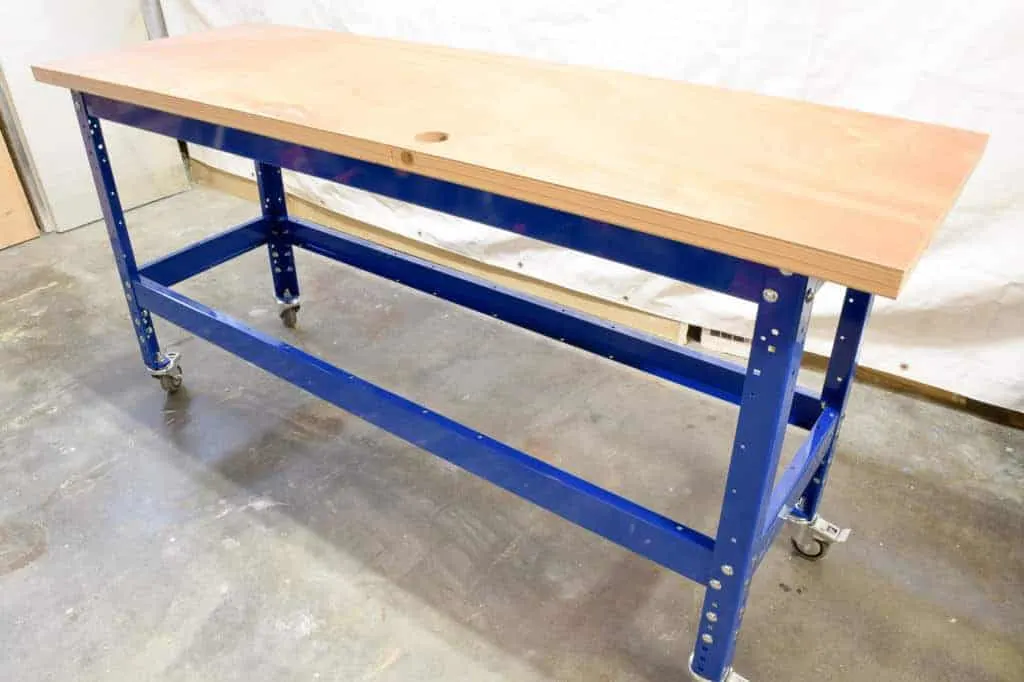
Finally, I inserted a piece of ¾" plywood onto the bottom rails to serve as a shelf. It fits snugly into the corners, so I didn't even go through the effort to screw it down.
Isn't it a beauty? I can't wait to start using this super sturdy Kreg workbench to create all my projects!


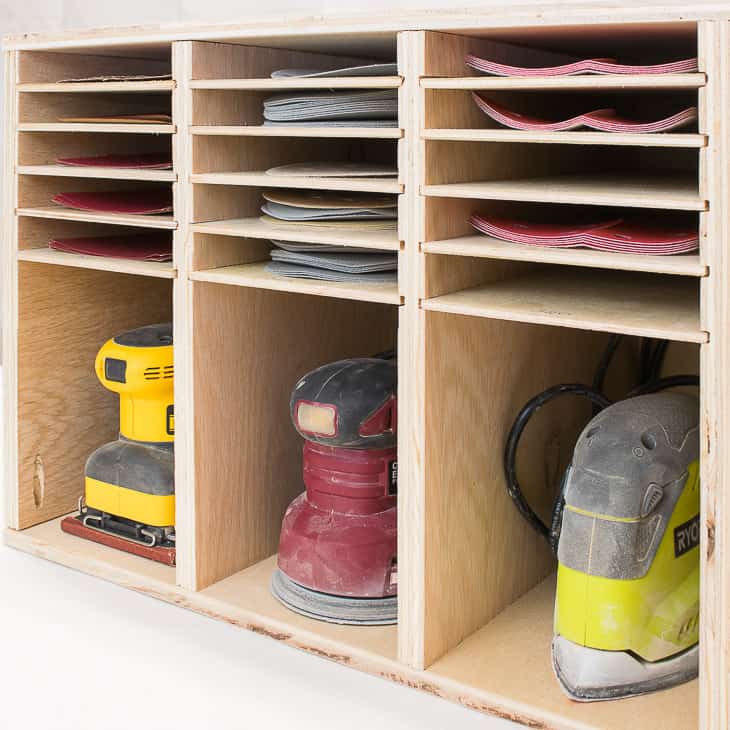
Add Custom Storage
After building the steel frame workbench, I customized it with a sander and sandpaper storage unit that fits perfectly on the bottom shelf!

Then I added this nail gun organizer with a drawer to keep all my brad nails, pin nails and staples in one spot. Check out the difference between brad nailers vs pin nailers and brad nailers vs finish nailers if you're curious why I need so many different types.
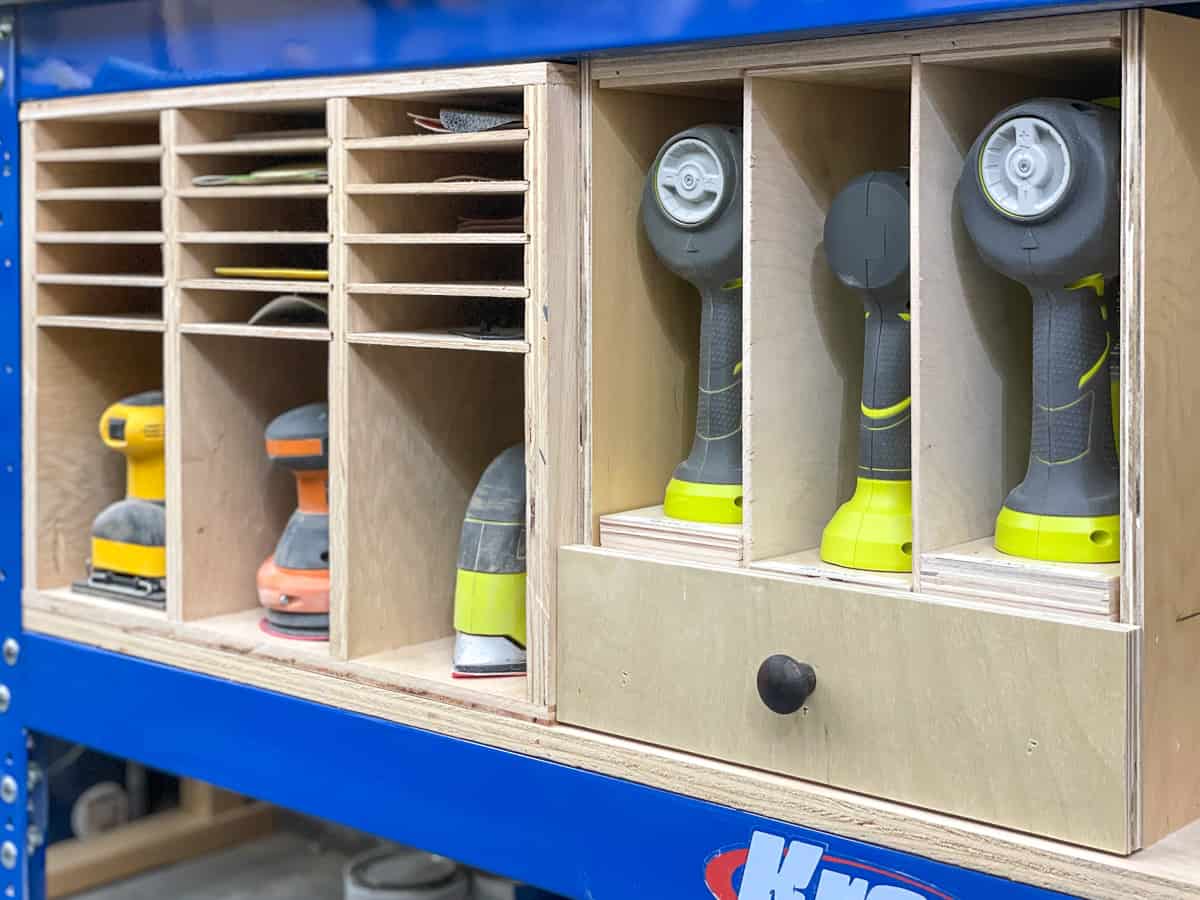

Both of these storage units fit perfectly on the bottom shelf, and prevent me from cluttering it up with random stuff. A place for everything and everything in its place!


Emily@ juicer healthy
Sunday 15th of January 2017
Great! It's so awesome. But I can't do it my self like you. It's so difficult to do that so I will buy my self. .