

Keep all your spray paint cans in one convenient location with this simple DIY spray paint storage rack! Hang it on the wall with a French cleat for easy access!

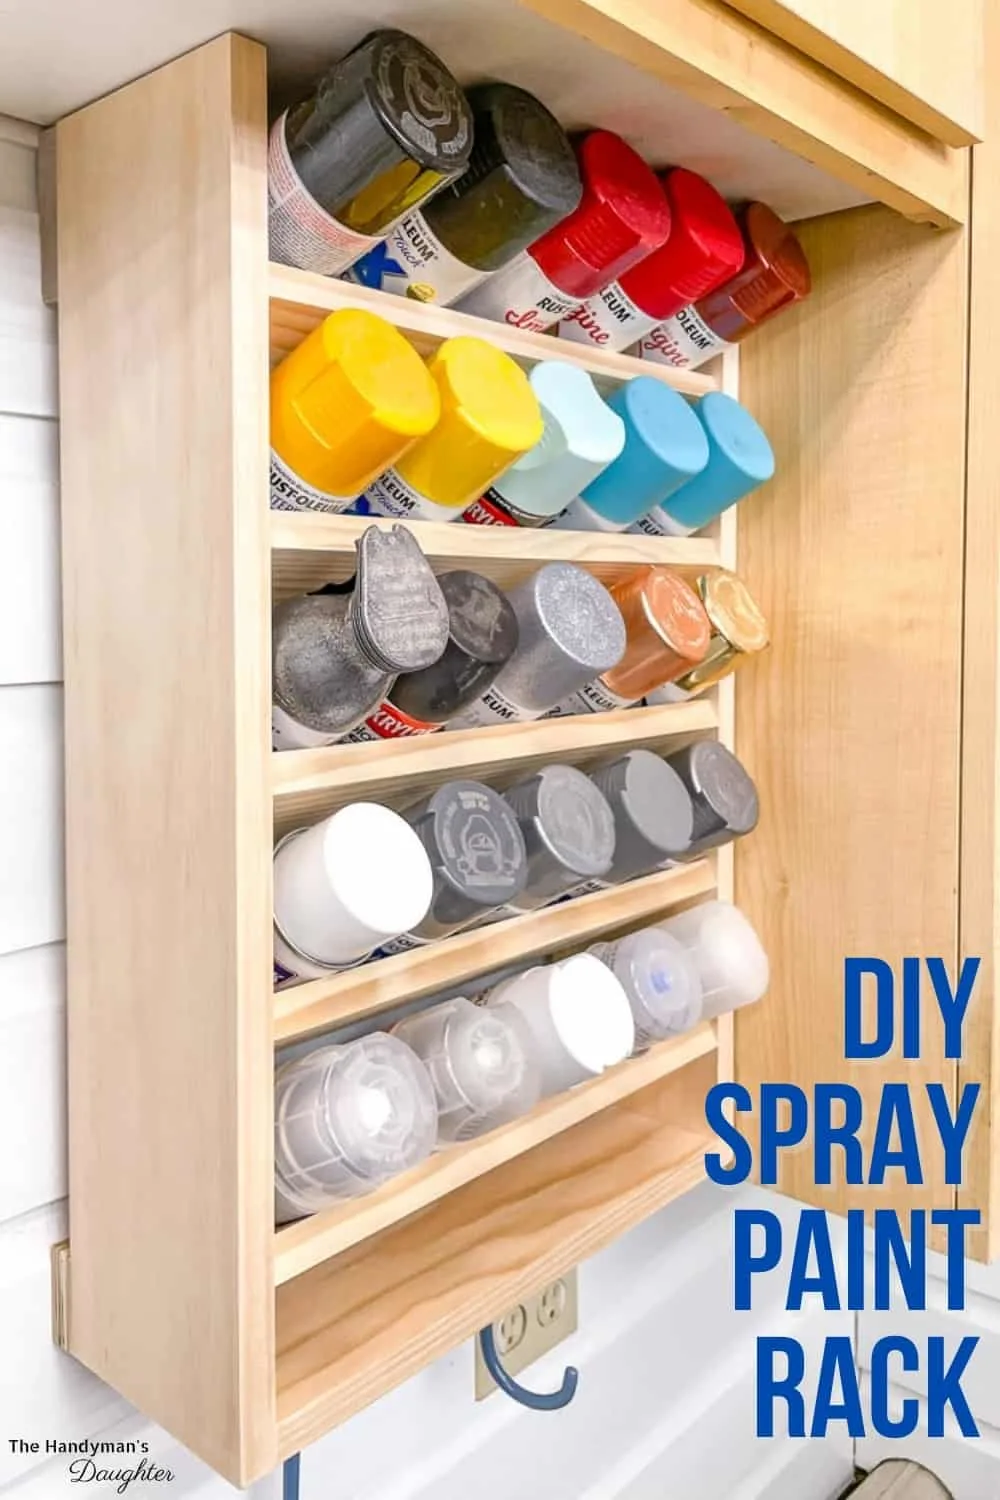
My workshop has spray paint cans scattered everywhere, and I never seem to find the color I'm searching for. Then I'll go buy a new can, only to find the one I was looking for as soon as I get home! I decided to make something to keep them all in one spot, where I can see what I have at a glance.
This post contains affiliate links for your convenience. Purchases made through these links may earn me a small commission at no additional cost to you. Please visit my disclosures page for more information.
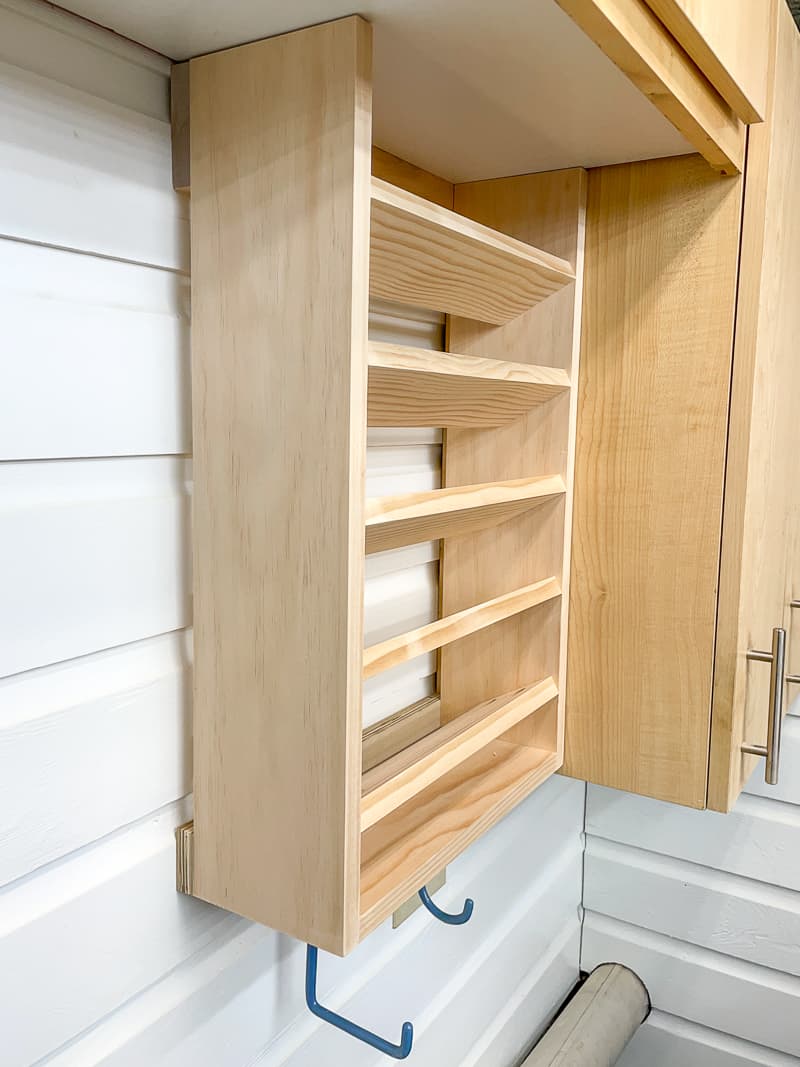
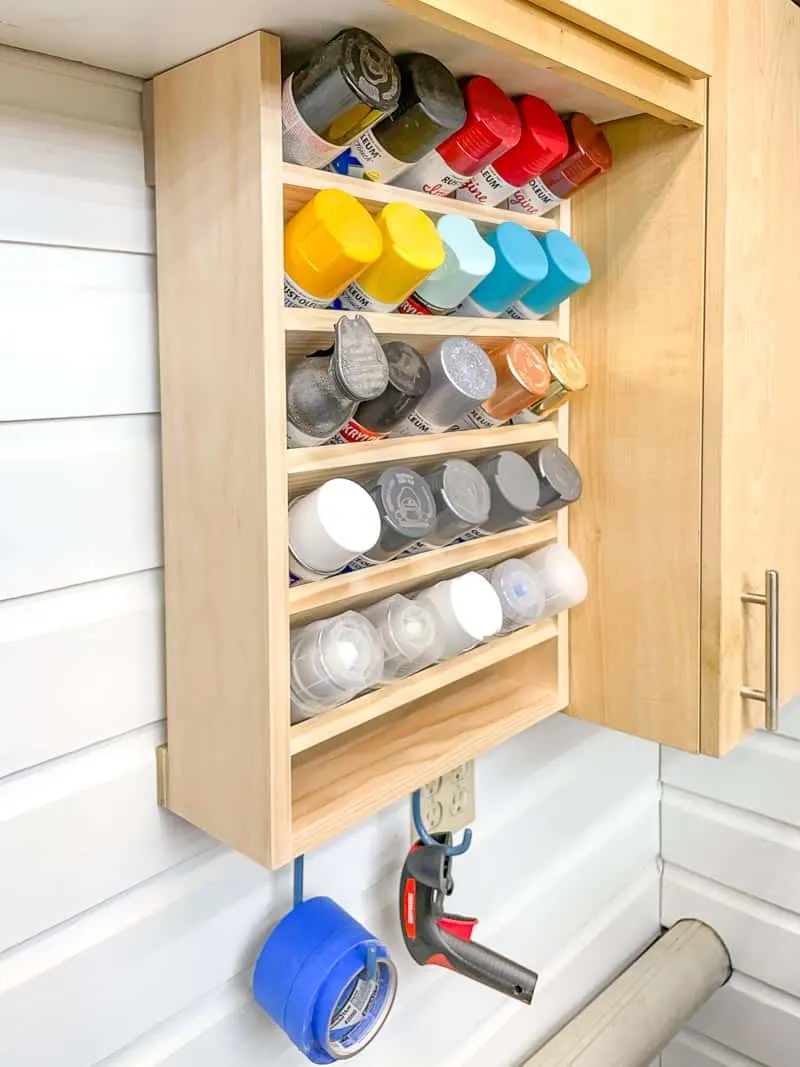
This spray paint storage rack holds up to 25 cans, and is easy to customize to fit your needs. It mounts on the wall with a French cleat, and holds the cans at an angle so they don't roll out or fall over. As an added bonus, it adds a fun pop of color to my workshop wall!
Materials needed for spray paint rack
- One 1x6 board (8 feet long)
- One 1x4 board (8 feet long)
- 16” x 24” sheet of ¼” plywood (optional)
- Pocket hole jig
- 1 ¼” pocket hole screws
- Wood glue
- Countersink bit
- 1 ¼” and 3” flat head screws (to mount French cleat)
- Miter saw or circular saw
- Drill
- Clamps
How to make a spray paint storage rack
Download the plans
You can download the DIY spray paint storage rack plans by clicking the button below! The printable plans include a cut list, step by step instructions with 3D models, and a handy checklist to keep you on track.


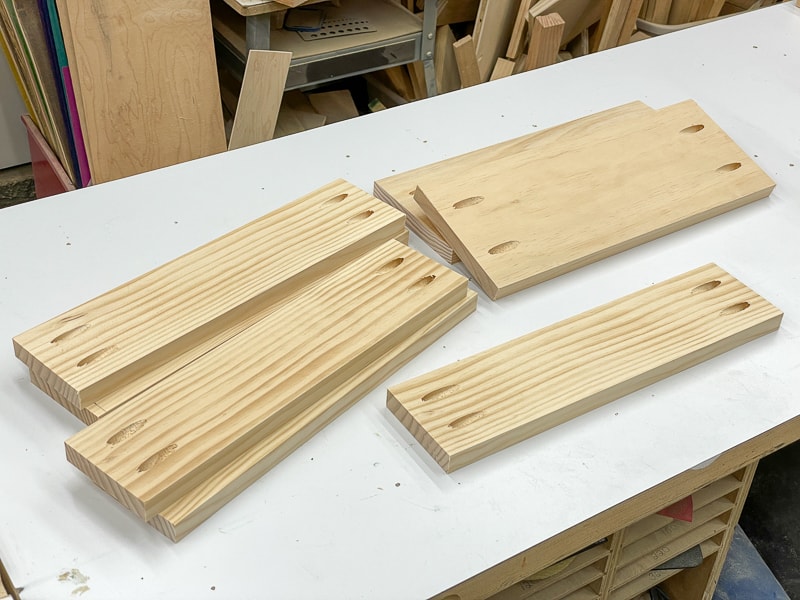
Cut the boards and drill pocket holes
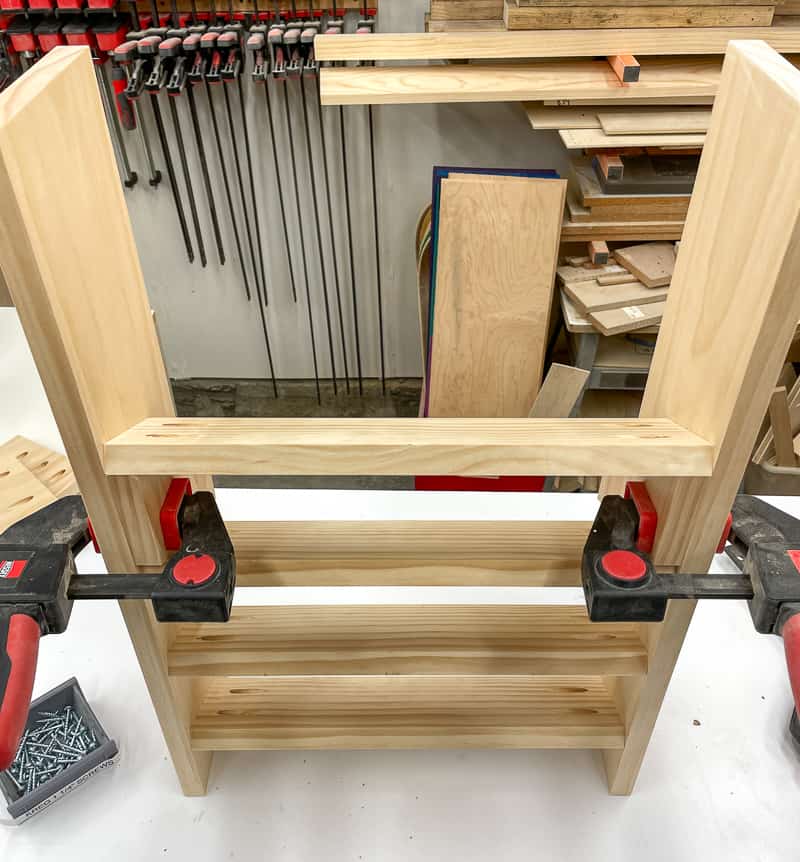
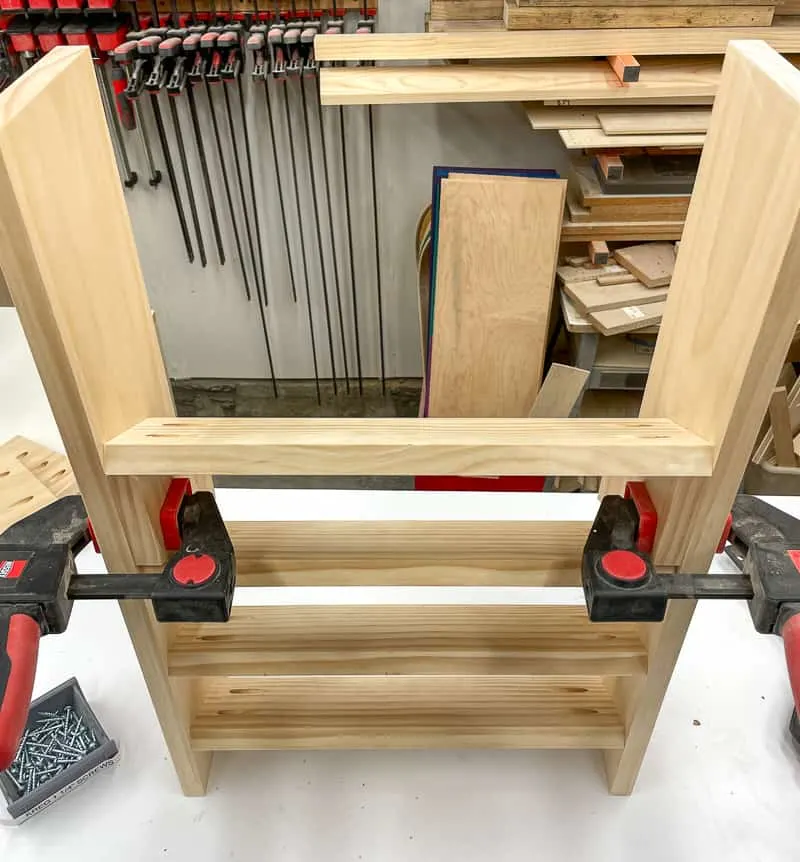
The frame is made with 1x6 boards, and the shelves are 1x4 boards. Cut them all according to the list in the plans.
Drill pocket holes in both ends of all the 1x4 boards, and the shorter 1x6 boards.

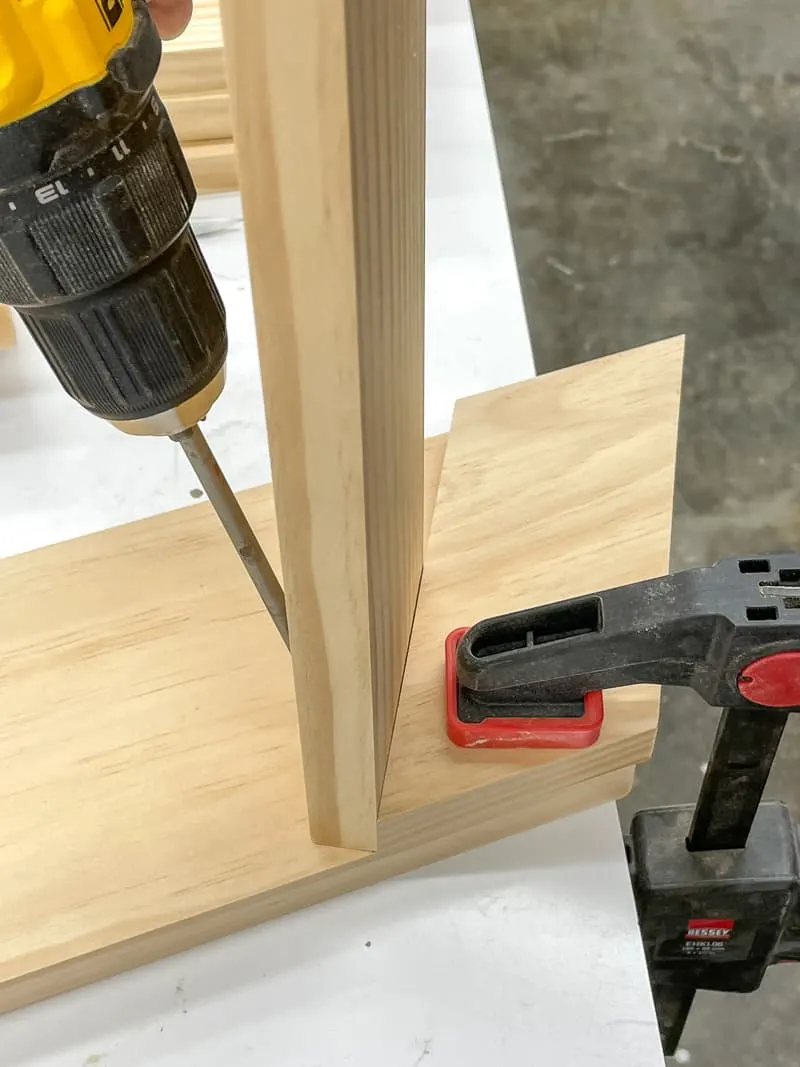
Cut a spacer block
All the shelves are installed at a 30 degree angle, which can be a little tricky and tedious to measure. I cut a couple spacer blocks to make this process much easier!

The width of the spacer block matches the height between each shelf. I cut two so I could use one on each side.
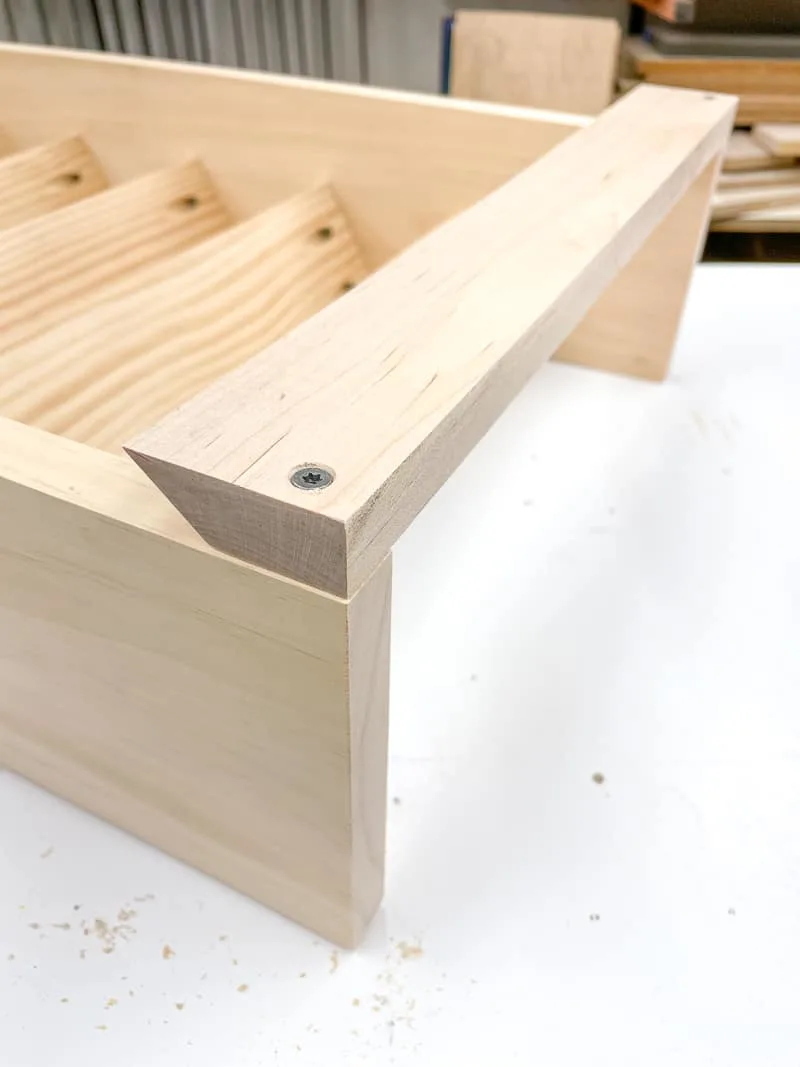
Attach the shelves to the sides
Mark the position for the first shelf, then clamp the spacer block in place. The front edge of the spacer lines up with the front edge of the side piece.
Align the corner of the shelf with the front edge. The pocket holes should be facing up (they'll be covered up with spray paint cans later). Attach the shelf with 1 ¼" pocket hole screws.

Move the spacer blocks up on top of the first shelf, and clamp them into place. Then attach the next shelf the same way. Keep working your way up until you've assembled all the shelves (without any measuring, yay!)
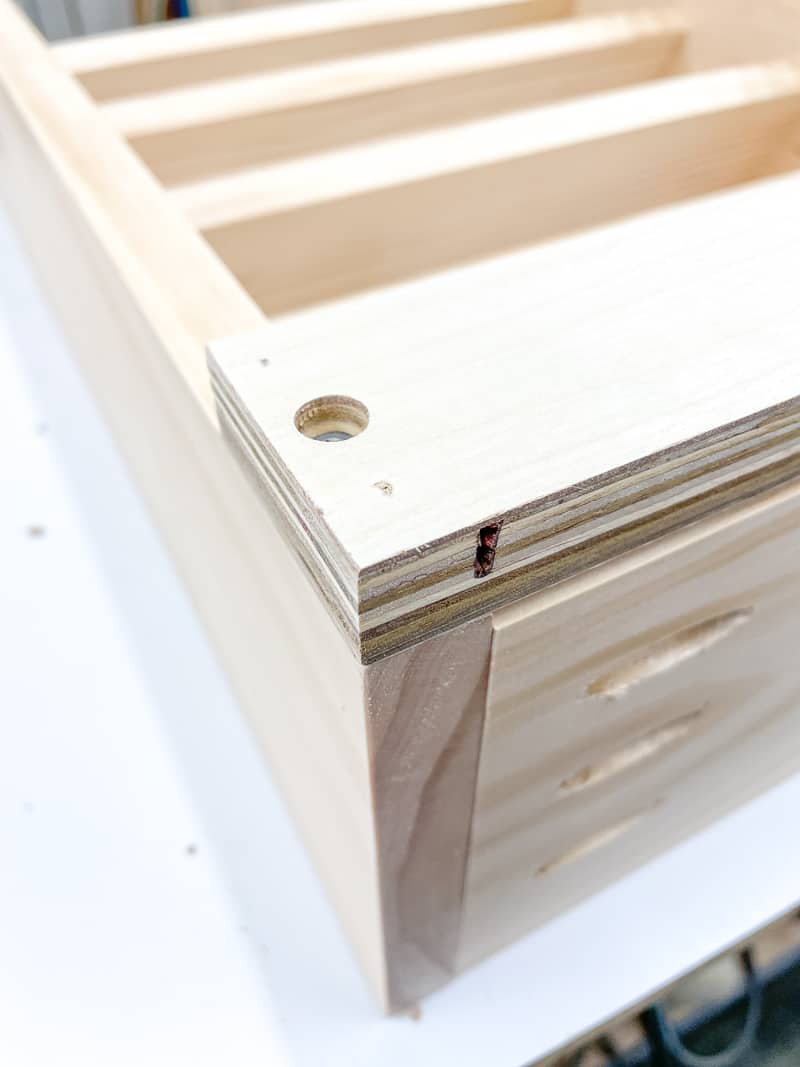
Attach the top, bottom and back
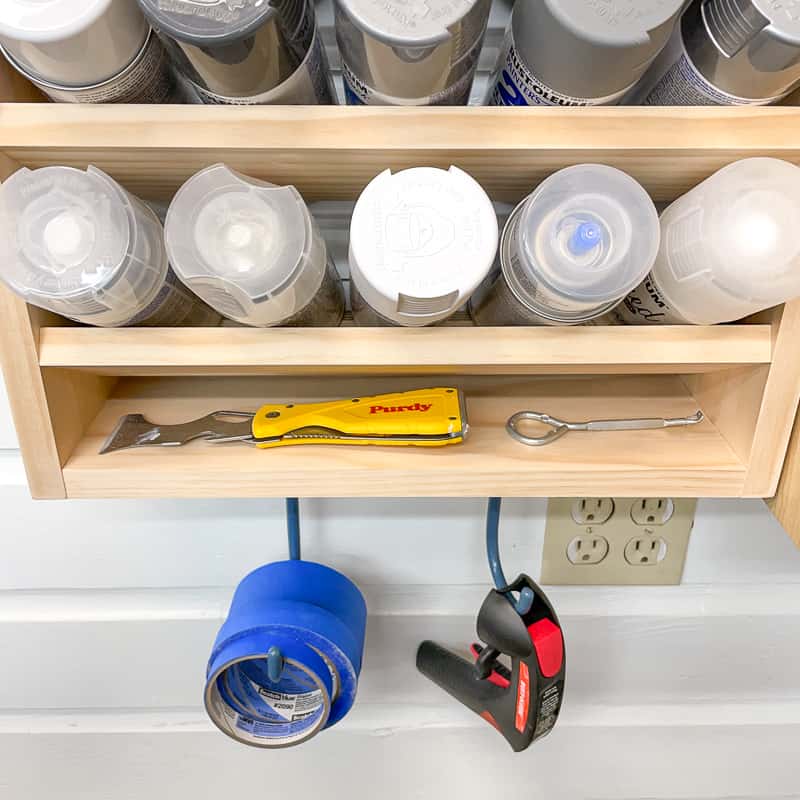
The top and bottom aren't totally necessary, since the shelves are holding the whole rack together. I added a bottom so I could screw some hooks into it for hanging a few painting accessories.

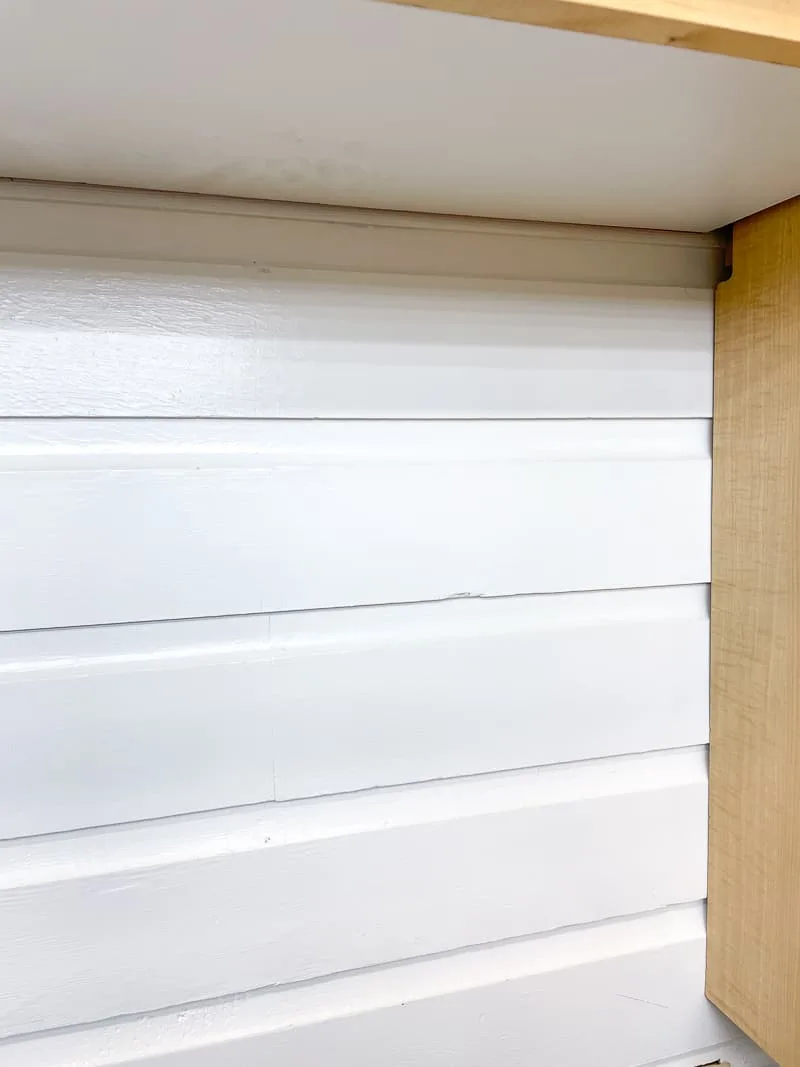
But I left off the top because the storage rack will be mounted underneath an existing cabinet in the workshop. (Yes, my workshop walls are weird! This was a garage back in 1946 with dark wood paneling that I painted white so it feels less like a dungeon.)

Cut a piece of ¼" plywood to the exact dimensions of the frame, then attach it to the back with brad nails or countersunk screws. You can skip this step (like I did) if you don't mind the cans potentially denting your wall when they slide into place.
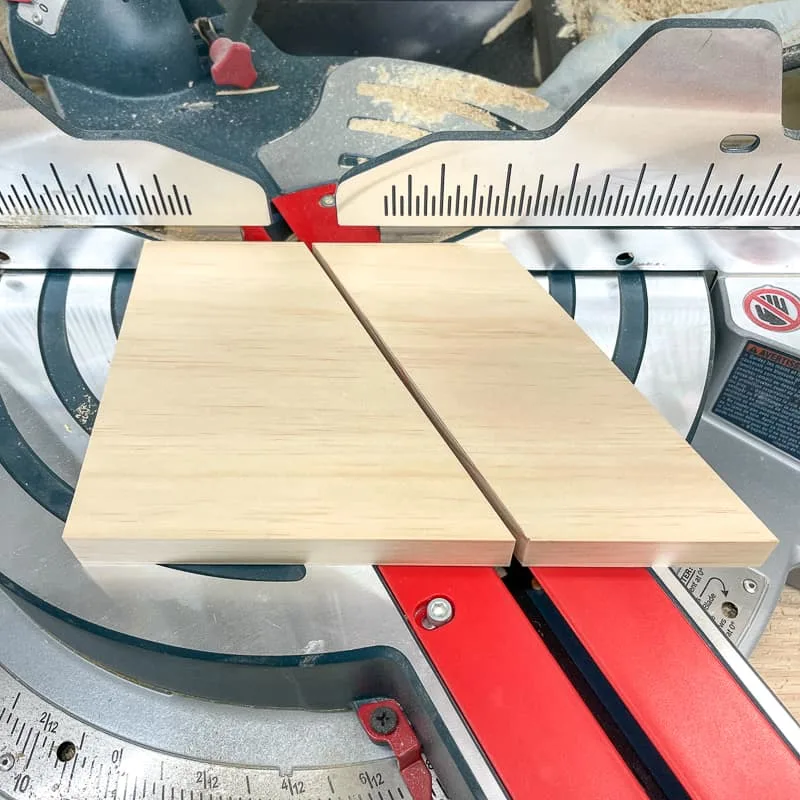
Install the French cleat
French cleats are a great way to mount heavy items (like a full spray paint rack) on the wall. You can learn more about how to install a French cleat here.
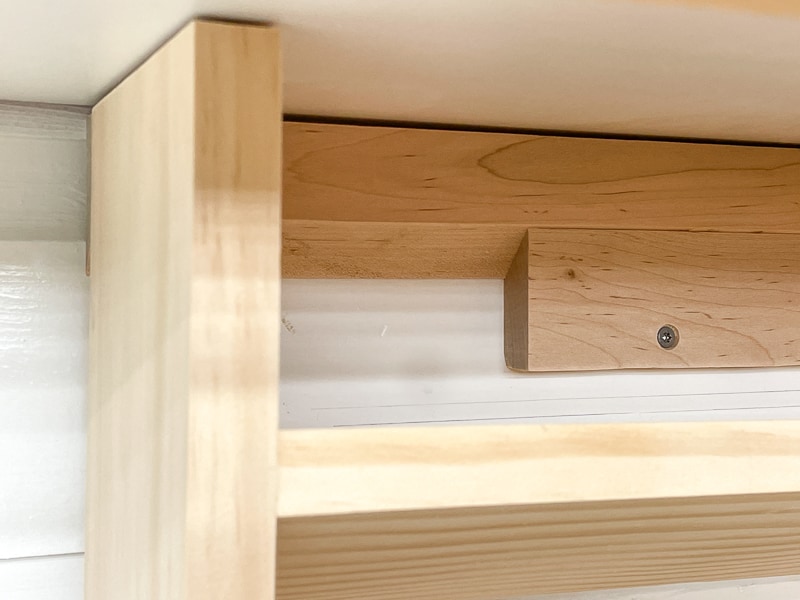
Cut a piece of 1x6 board down the middle at a 45 degree angle with a table saw or circular saw. Attach one half to the top of the spray paint rack with the point facing down and away from the back. Countersink the screws so the heads don't interfere with the cleat.

I also recommend adding a strip of wood at the bottom to hold the rack straight on the wall. Otherwise, it will tilt under the weight.

Attach the other half of the French cleat to the wall with countersink screws. You'll need to find the studs in the wall or use wall anchors strong enough to hold the weight of all the spray paint cans. One benefit of wood walls is that you can screw into it anywhere! 😉

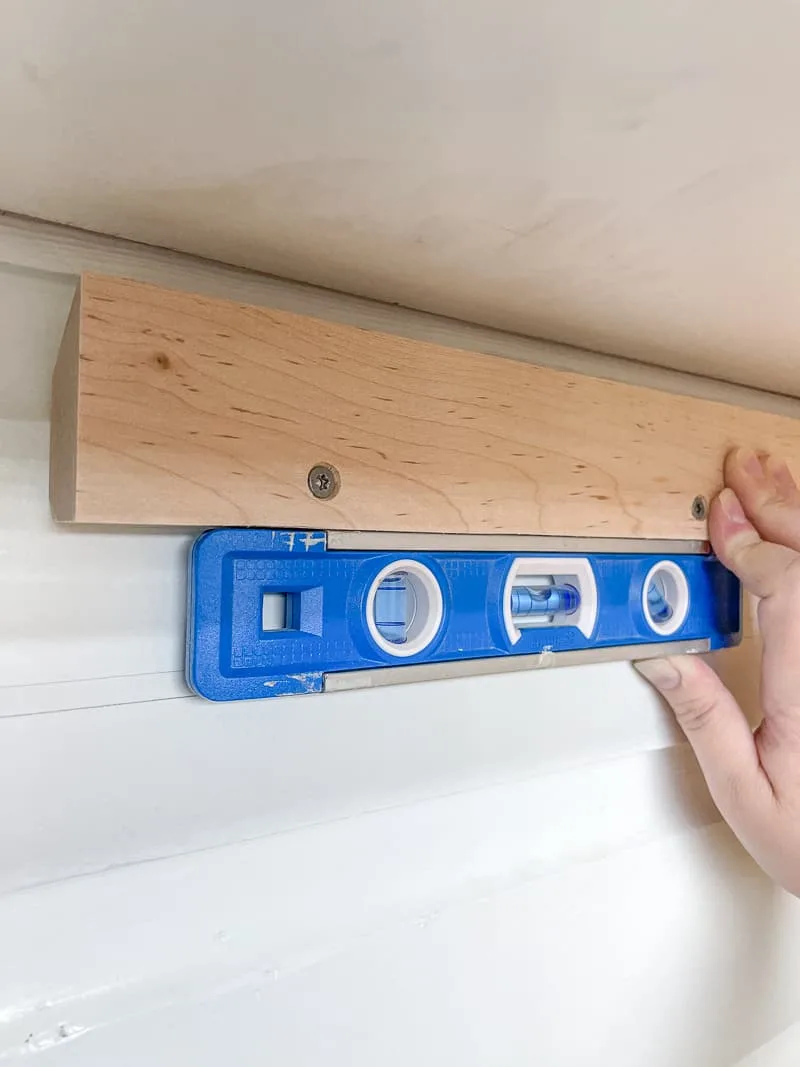
Check that the cleat is level, and has room above it for the other half to slide in (I had to adjust mine down a bit because I didn't leave enough space!)

Load up your spray paint storage rack
The rack fits this awkward corner between the two cabinets perfectly! There's enough space next to it to add another one as I expand my spray paint collection.

I dug through every cabinet, shelf and bin to round up all my spray paint. Turns out, I had EXACTLY 25 cans! Each shelf holds five cans, so I had just enough room for them all. Looks like I either need to use up a few or build another storage rack!
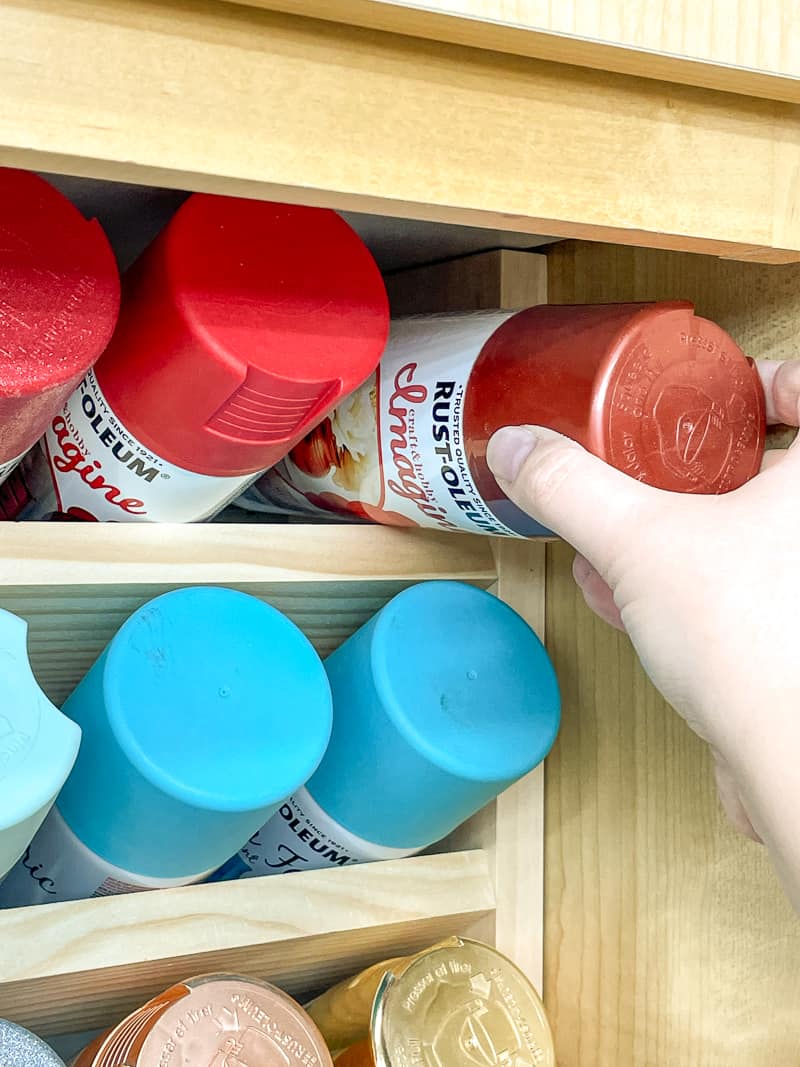

I love having all these fun colors at my fingertips, instead of hunting around for the right can! The hooks on the bottom hold several rolls of painter's tape and a spray paint handle, so I'll always be ready for my next project!

Are you ready to get your paint organized? Download the woodworking plans for this spray paint storage rack project and get building!
Check out these other garage storage ideas!


Ed Eaglehouse
Sunday 18th of April 2021
30 degrees is actually very simple to measure and not very tricky any all. If the height of your piece is at a right angle to its width, or "square", the diagonal of the triangle they make measures 2 times the height. Example: height is 4 inches, diagonal will be 8 inches, angle is 30 degrees. Want 60 degrees? Just flip the width and height.
Sabah
Monday 23rd of November 2020
Thank you for sharing. My husband and I are currently building me a little workshop for all my tools and decorating stuff. I'm definitely building a spray paint holder like yours but much longer. I also like all your other projects which I believe I will be copying. 😊
Veronica
Saturday 14th of November 2020
I couldn't wait to see your paint storage rack. Nice, but it's small. My spray can storage is one of those freestanding sheds that I stacked 12x12 cubes in. I was sure you'd have more cans than I do. Maybe I am a spray paint hoarder like my darling man says.
Vineta
Monday 16th of November 2020
It's easy to make the rack as big as you need, just by lengthening the side pieces. I wanted mine to fit under the cabinet, but there's room for a second one next to it if I run out of room. I don't use spray paint as much as regular paint, but it sounds like you have quite the collection!