Want to take that builder grade door trim to the next level? Adding plinth blocks and rosettes to your door casing will turn your door from average to amazing!
Plinth blocks and rosettes are small architectural details that are easy to install and can solve a tricky transition problem. I've rounded up a variety of different ways you can use plinth blocks and rosettes to update your door trim.
What are plinth blocks and rosettes?
These decorative elements can be found at the bottom (plinths) or top (rosettes) of door trim. You can use one or the other, or both! Windows only use rosettes in the top corners. They're more commonly found in traditional style homes, but I'll show you examples of more contemporary or rustic looks as well.

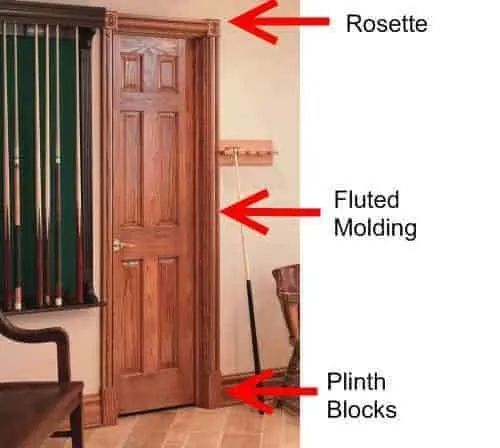
Plinth Blocks
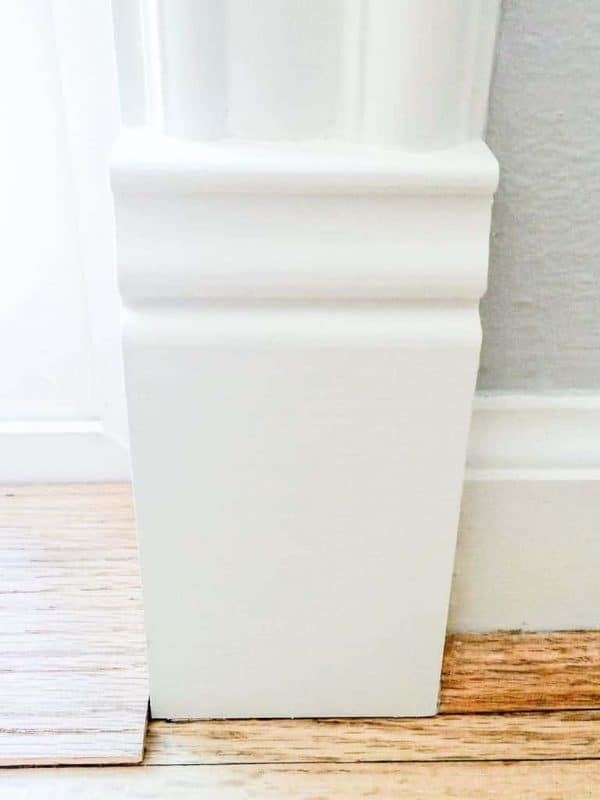
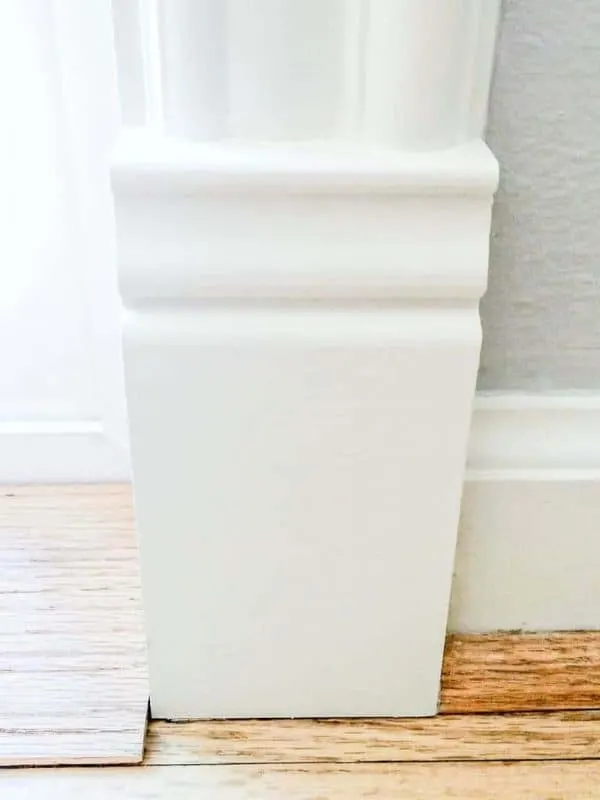
Plinth blocks are a great way to fix an awkward transition between door trim and baseboards. When we turned a window into a sliding glass door, I tried to find a similar style to the existing trim. But it turned out to be much thinner than the baseboards.
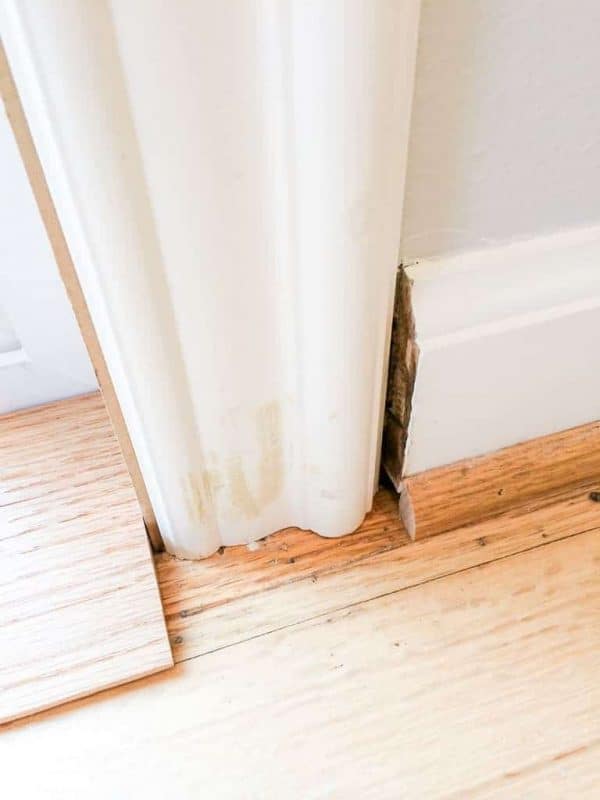

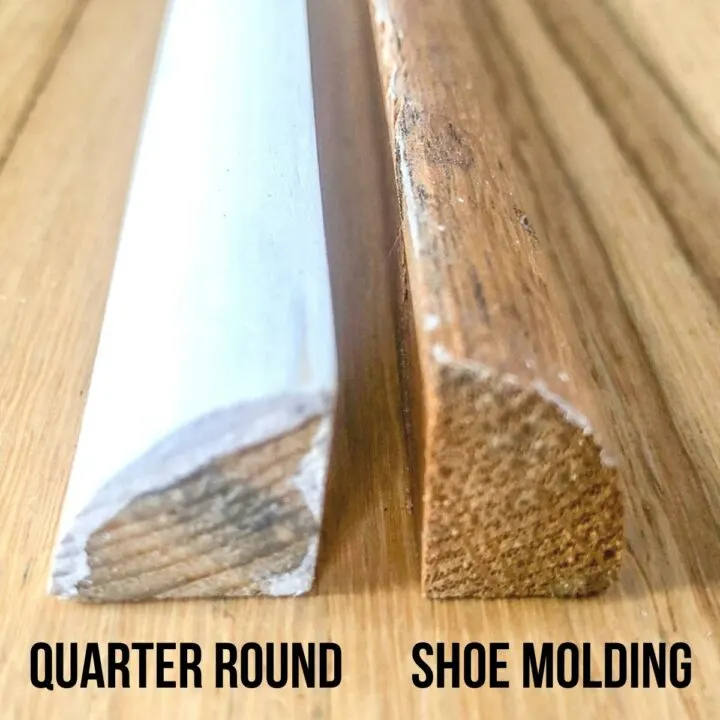
To solve the problem, I used plinth blocks that are slightly deeper and taller than the baseboards. You can see how I installed the plinth blocks here. The result is a much cleaner look that fits perfectly! My next task is to remove and replace the quarter round trim for a more consistent appearance.
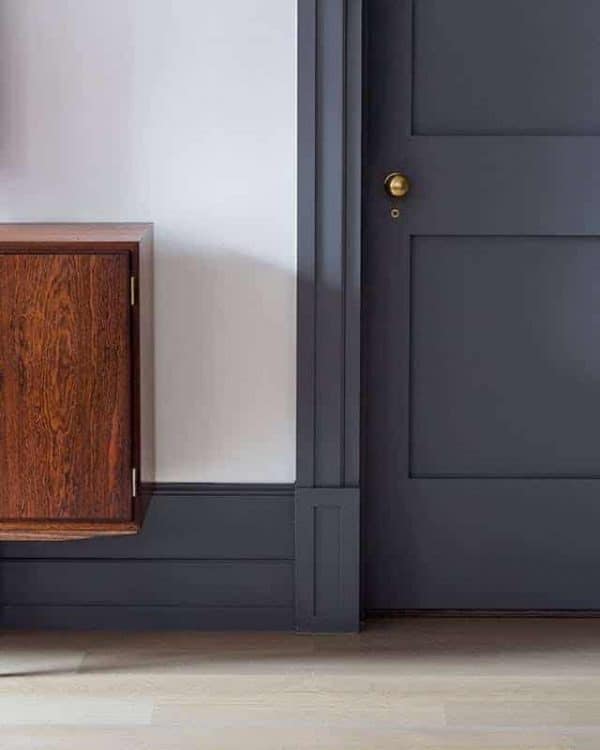
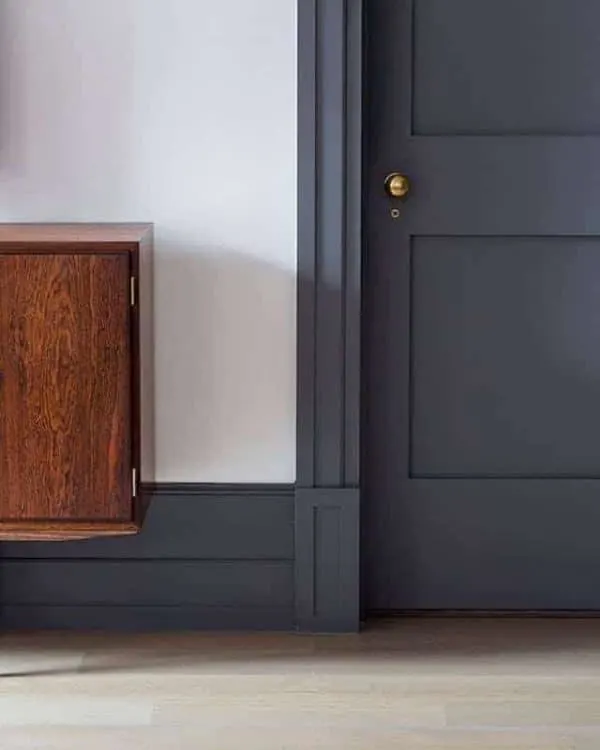
Here's another example.
The tall baseboards line up with the top of the plinth blocks, which then line up with the door trim. A simple plinth block breaks up all those lines and keeps it from looking too busy. The recessed detail in the block echoes the paneled door, and everything is painted a gorgeous dark gray for a cohesive look.
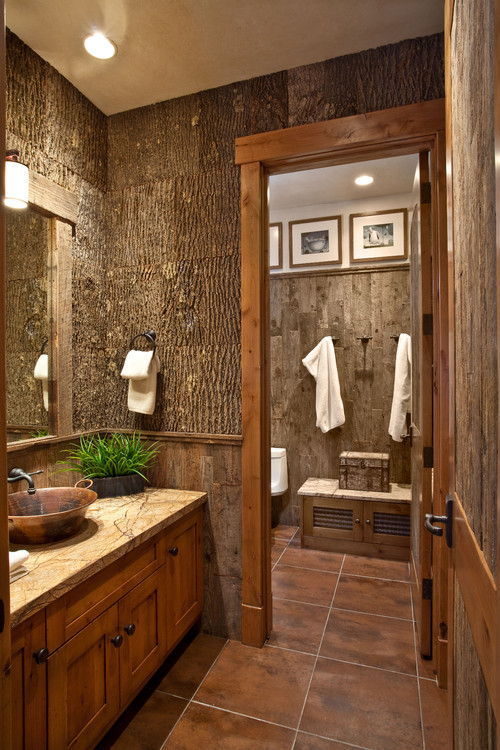
Fancy trim would look out of place in the bathroom below. Instead, they used 1 x 6 boards and a rectangular plinth block stained the same color as the vanity for a rustic look. Note that they didn't even use baseboards, so the plinth blocks are purely decorative.
Rosettes
Rosettes are the cousins of the plinth block, and are found at the top of window and door trim. If you are struggling to get the mitered corners to fit just right, this is an easy solution.
Rosettes tend to be more ornate since they're closer to eye level. Check out these fun options!
Here you can see the rosette detail on both the door and window trim draws your eye around the room.
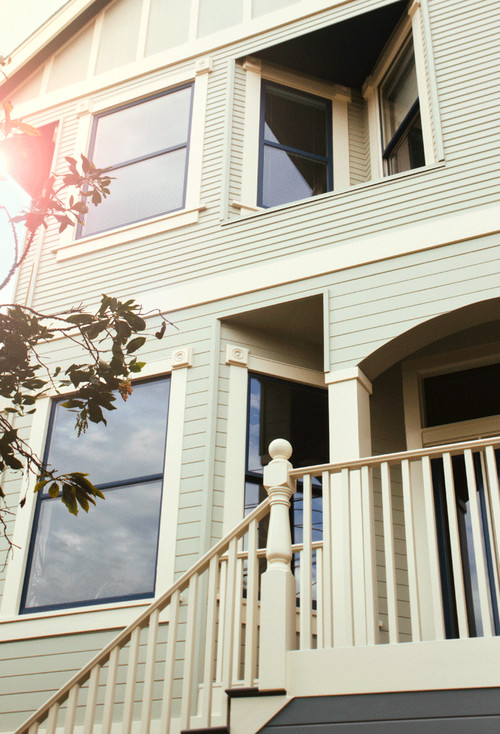
Rosettes don't need to be confined to the indoors! This San Francisco home brings these ornate details to the exterior windows. Just make sure the materials are suitable for outdoor installation if you go this route.
Combining Plinth Blocks and Rosettes
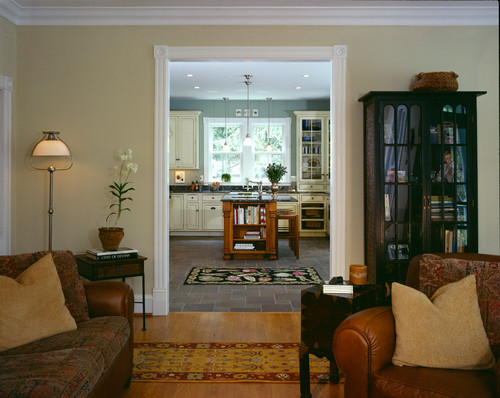
Here's an example of the most traditional use of plinth blocks and rosettes. This home uses them to elegantly frame the opening between the kitchen and living room. I especially like this look next to the crown molding!
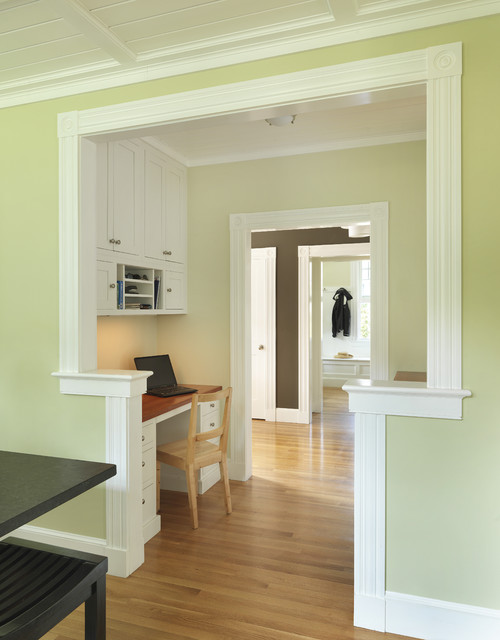
I've never seen a cased opening like this one! The wide top section makes the room feel bigger, while the narrower bottom gives the feeling of privacy when working at the desk. Rosettes and plinth blocks punctuate the corners.
I hope these examples have given you some great ideas for updating your own door and window trim. These small details can make your home feel like a million bucks on a tiny budget!


Laura
Sunday 16th of December 2018
Someone down the street from me cleaned out their mother's Victorian house after it sold and threw away 8 bull's eye plinth blocks. I picked them up. They are stained (not painted), but are extremely grungy. I'm sure that I can restore them to their original splendor, but they don't go with my 1930's brick Tudor house. You will think this strange, but I'd like to use some of them at the top corners of my interior windows in my "she-shed." Do you think this would look stupid? The "she-shed" has a Victorian art nouveau stained glass installed in one window and antique wavy glass in another window..
Vineta
Tuesday 18th of December 2018
I think that's a great idea! Go for it!
Cathie Anderson
Thursday 15th of November 2018
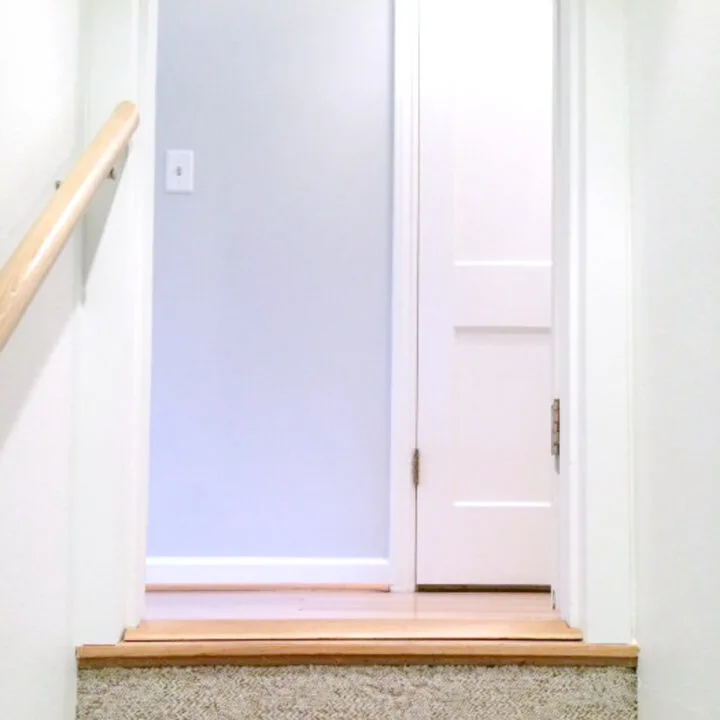
Your finished door looks so nice...good job!! My issue is a step down living area. The step and living area are carpeted which honestly I don't mind because we live in the northern U.S. However, they didn't finish the sides on the riser. I've tried quarter round, but it doesn't look right. Do you have any ideas on how to give this a finished look?
Vineta
Sunday 2nd of December 2018
You could use corner trim, which would cover up any unfinished edges. You can find some examples here.
Donna Reidland
Monday 6th of August 2018
What a nice finished look these give a doorway!
Ann
Wednesday 1st of August 2018
This post is so informative!! I'd luv for you to share it with us at Wall to Wall DIY Wednesday!
Kippi
Tuesday 31st of July 2018
Oh how I love details. Great post thank you for sharing.