Stumped on how to transition between your baseboards and door trim? Try a plinth block! This tutorial will show you how to install them for a finished look.

Adding new doors to an old house can be a challenge, especially matching the trim. A plinth block can be the perfect solution for these transitions.
This little piece of molding can completely change the look of your baseboards and door casings. Check out all these different ways you can use plinth blocks in your home!
In this article, I'll show you how to install a plinth block to fix awkward transitions between the door trim and the baseboards.
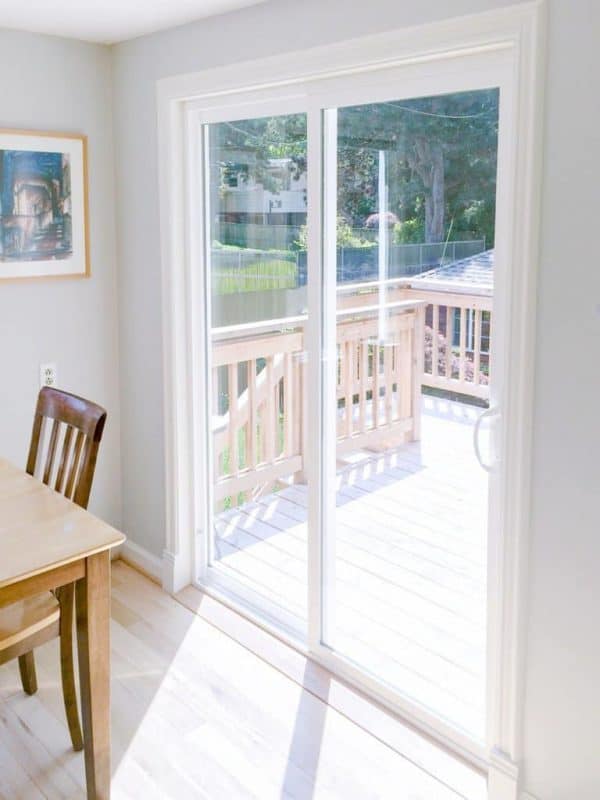
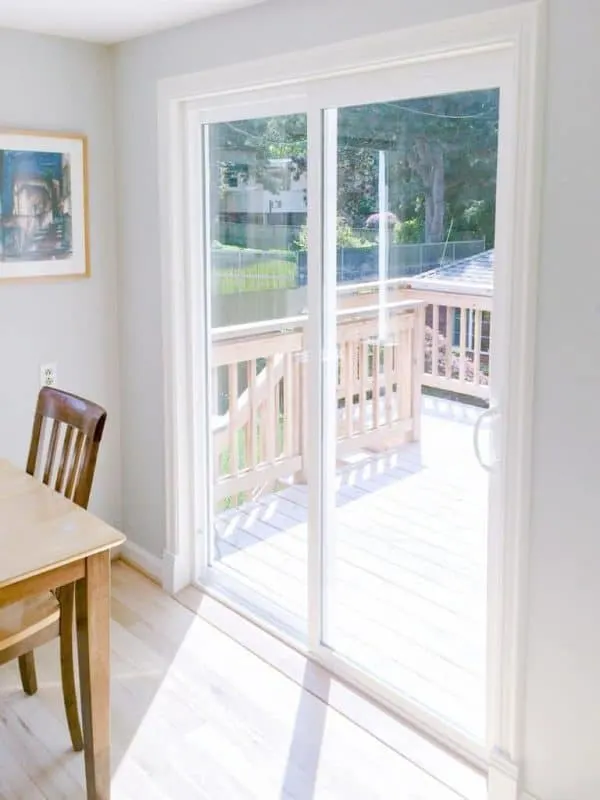
As part of our deck remodel, we turned a window into a sliding glass door. Our contractor specialized in exteriors, which meant the work done on the interior door trim wasn't exactly stellar.

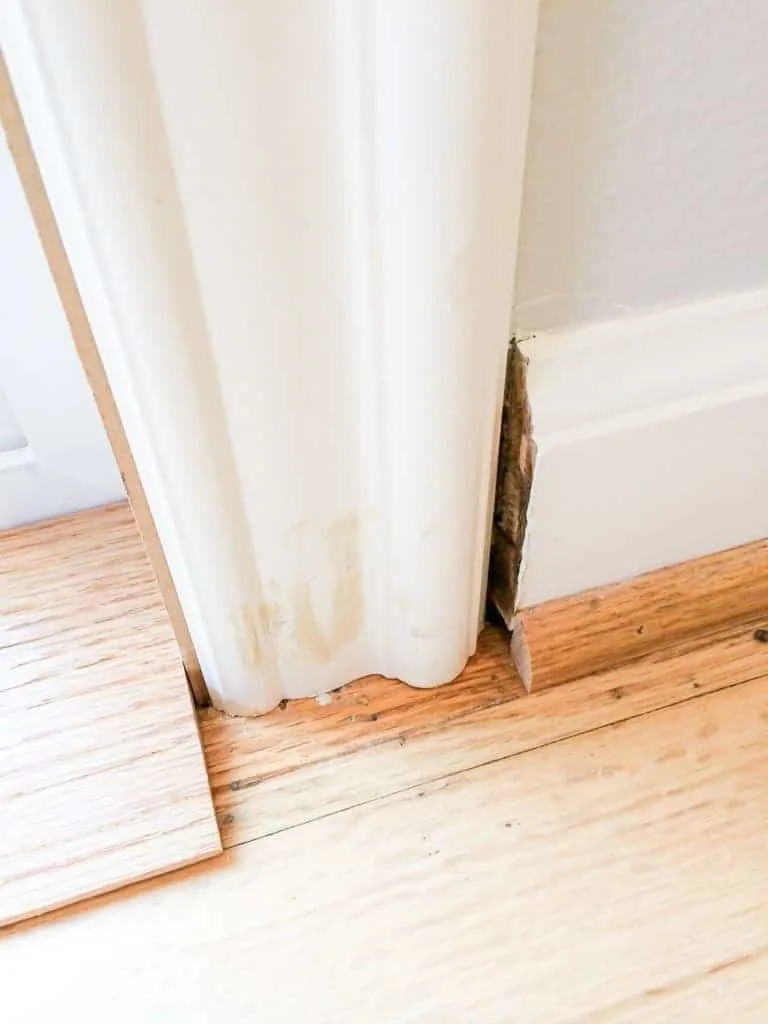
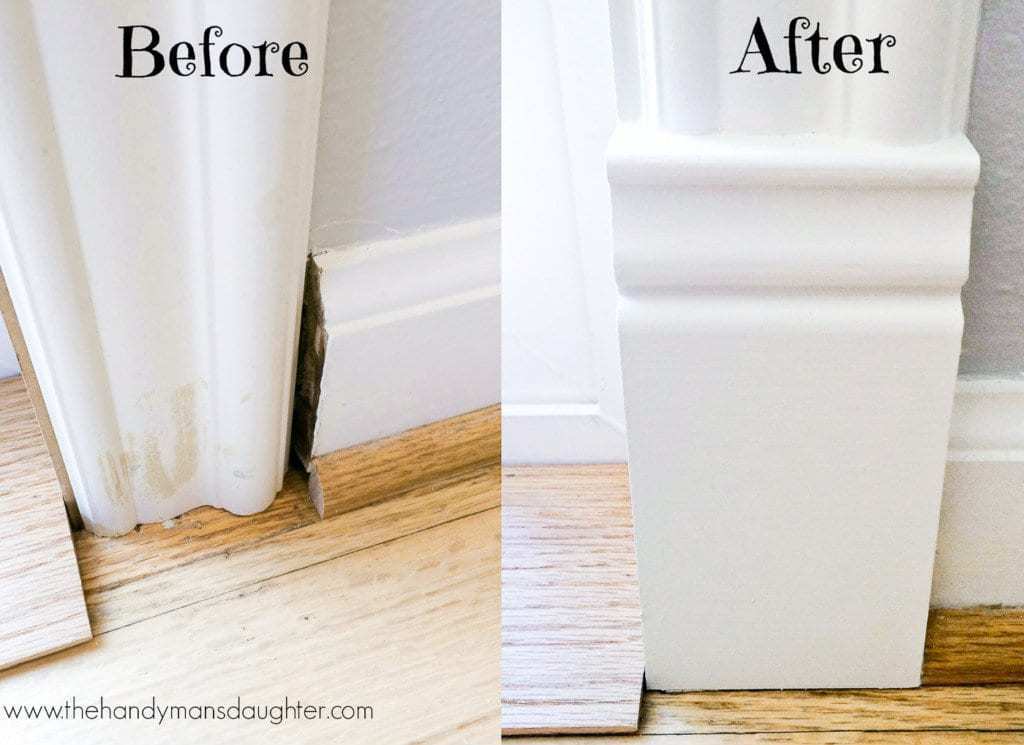
Yuck! Now the edge of the baseboard was exposed, as well as the slightly damaged hardwood floor. The entire transition just looked wrong! I decided to take matters into my own hands and fix it myself.
This post contains affiliate links for your convenience. Purchases made through these links may earn me a small commission at no additional cost to you. Please visit my disclosures page for more information.
Straightening the Threshold
Not only was the door trim a mess, but the threshold had some issues as well. Something must have warped, because there was a ⅜" gap in the center between the back edge of the threshold and the door.
The gap was too big to fill in with clear caulk, so it was just a great place for dirt and crumbs to get trapped.

Luckily, the threshold hadn't been nailed down yet, so I brought it down to the workshop to give it a little trim. I used a block plane to shave off a little bit from each end of the back edge, leaving the center intact.

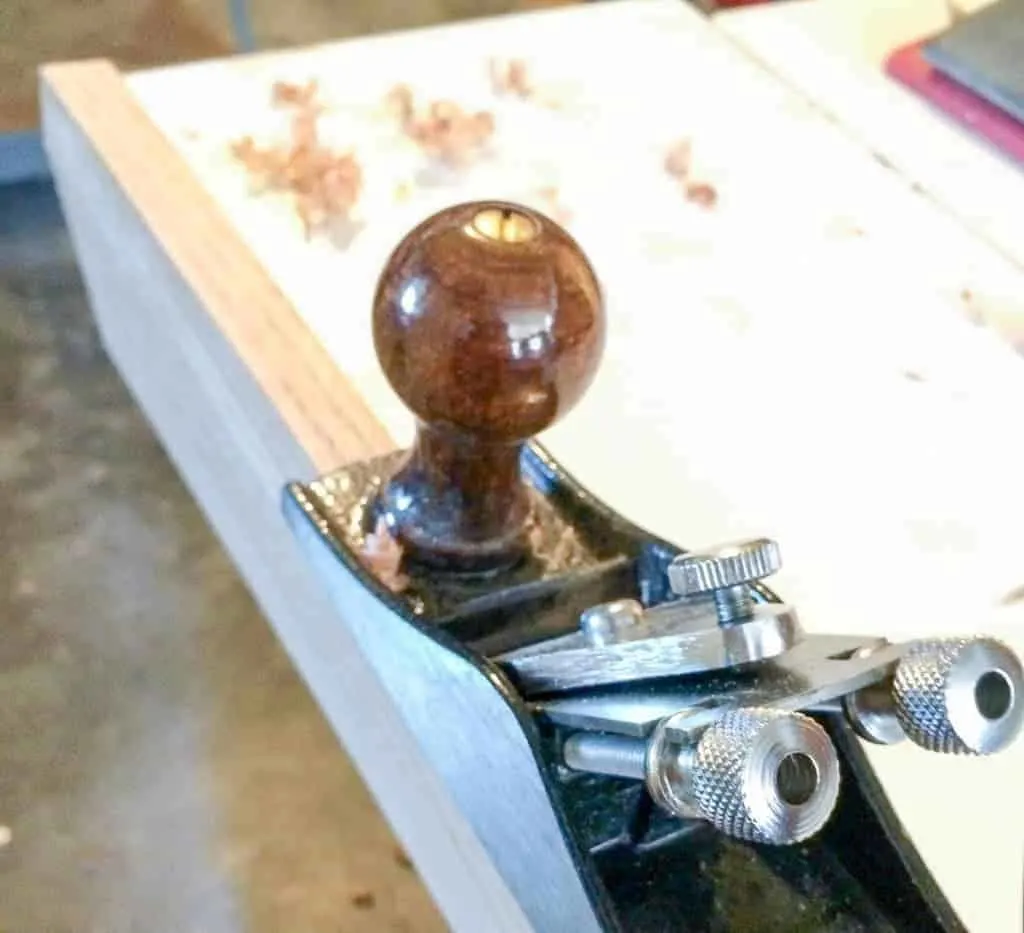
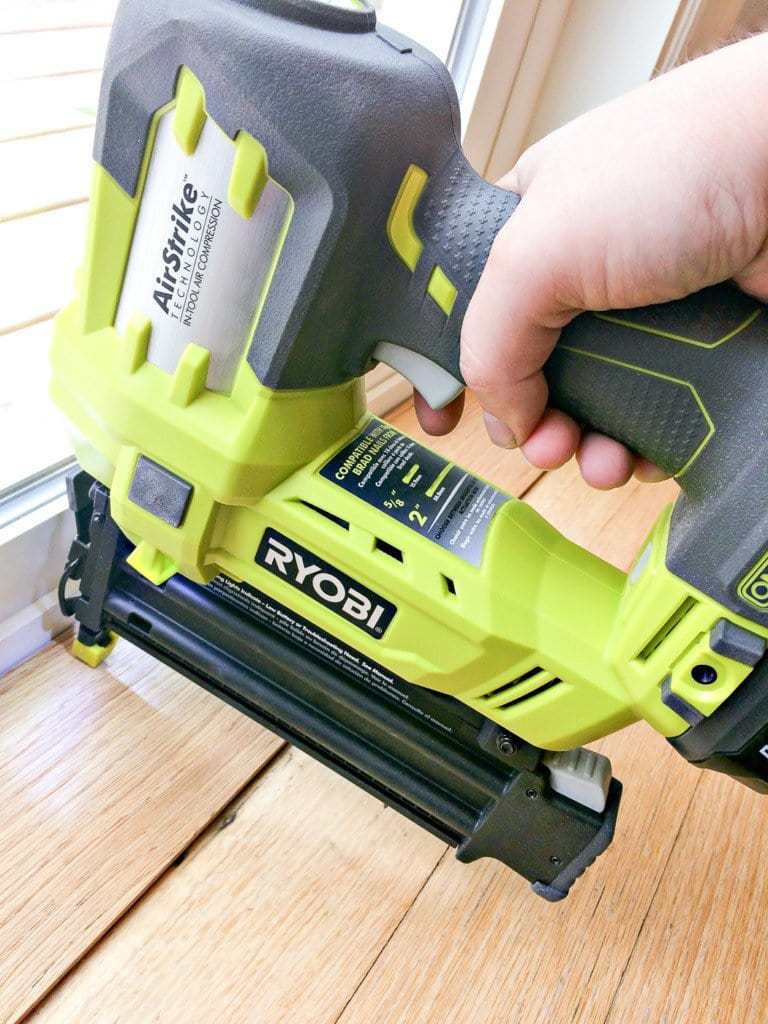
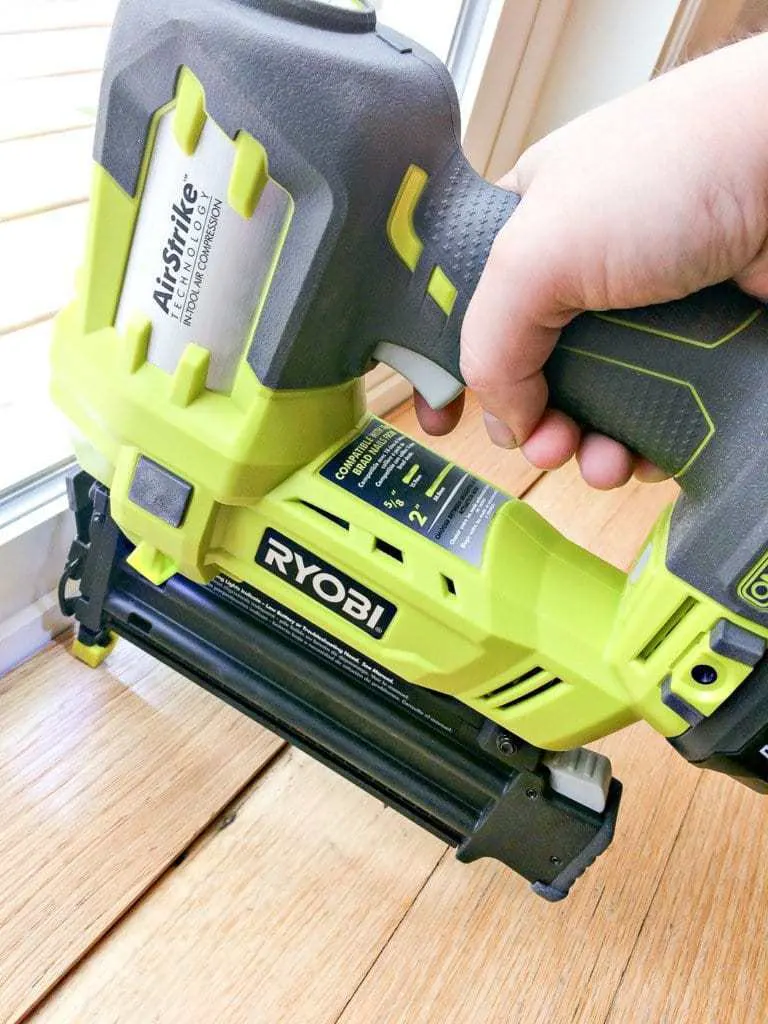
It took a few trips back and forth to test the fit before I finally got the threshold to lie flat against the new door. Once the gap was gone, I nailed it into place using a brad nailer.
Installing the Plinth Block
Next, I wanted to find a way to improve the transition between the original baseboards and the new door trim.
I carefully removed the door trim so it could be reused. Run a box cutter along the caulk line so you can remove the trim without ruining your drywall.
I found these plinth blocks among the many options on the Home Depot website. You can also find other styles of plinth blocks that may work better with your decor.
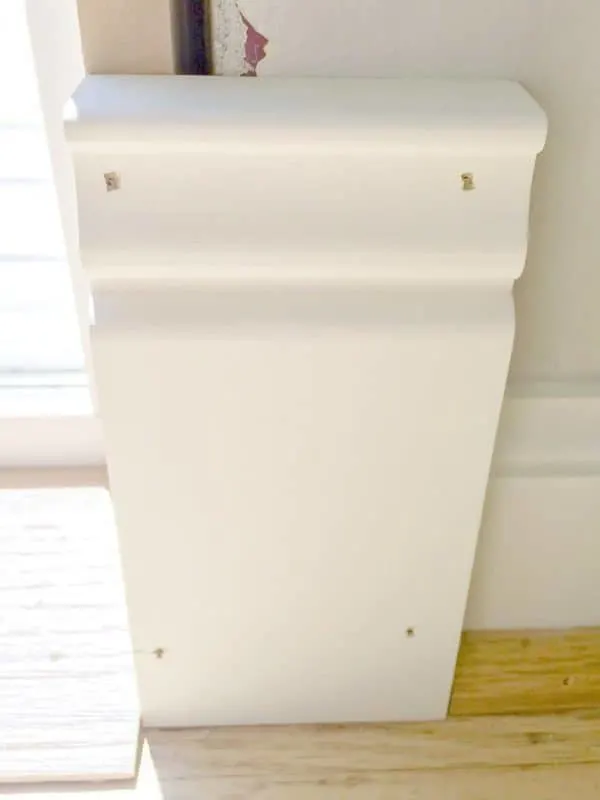
The dimensions of this particular plinth block fit the gap perfectly, and it was a similar style to the original trim. I gave each plinth block a couple coats of our trim paint color, then nailed them in place.

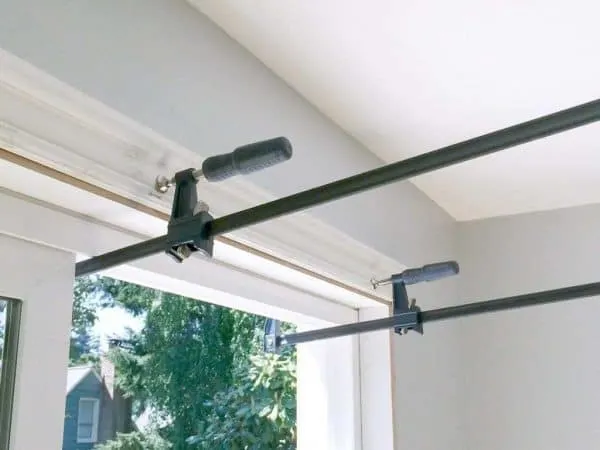
After setting the plinth block in place, I put up the rest of the trim, following this great video tutorial from the Family Handyman. I had to improvise a bit when it came to installing the top piece, because it was long and floppy and no one was home to help.
Luckily, I could just open the door and clamp it in place from the outside. It was like having an extra set of hands!

I reused the mitered end of the trim done by the contractor, so no mitered cuts were necessary. I just marked where the plinth block started and cut the bottom to fit.
Then I lined up the outer edge of the trim with the outer edge of the plinth block, and nailed it into place.
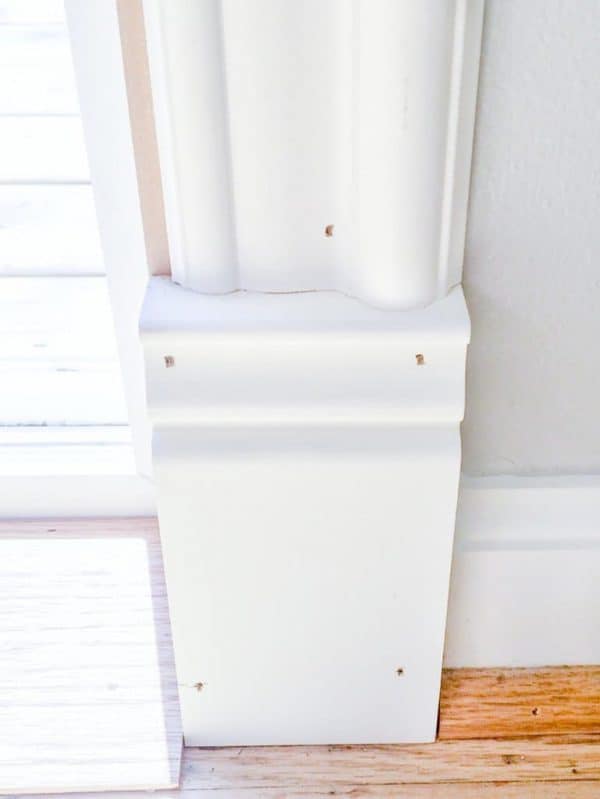

To finish it up, I spackled the nail holes, caulked all the edges, then painted everything the same trim color.
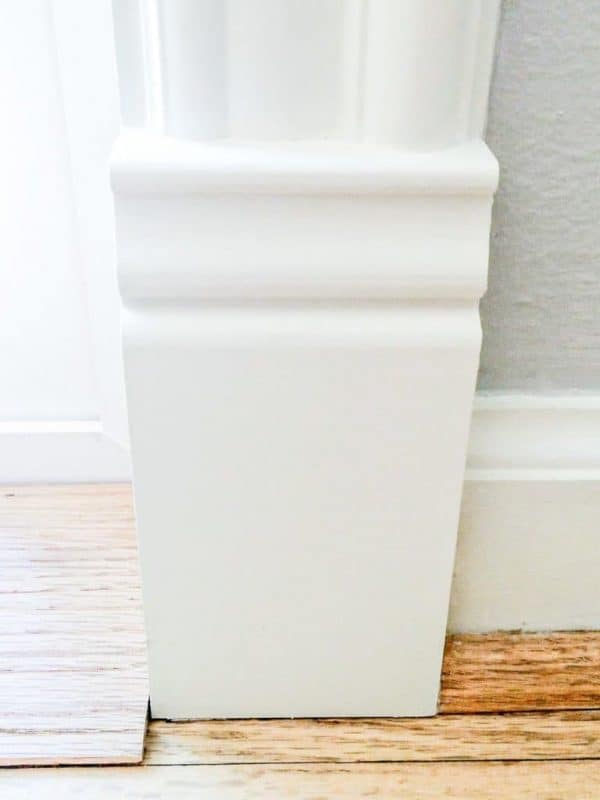

I'm glad I put the extra time and effort into finishing the trim properly. A sloppy detail like that drives me crazy! It was a simple, inexpensive solution that made the whole project come together.
Check out these other home improvement tutorials!
Denise
Saturday 4th of March 2017
So I learned something new today.....I have plinth block in my house and didn't know it. This turned out great and a clever solution to your problem.
Frani
Thursday 9th of February 2017
I am new here. Wanted to tell you "You are Wonderful" and I love your site. I don't have the tools or the know-how to install plinth blocks but love seeing what you have done!!!! Thank you for all the fun information!
Vineta
Thursday 9th of February 2017
Aw, you're so sweet! Thanks for your kind words!
Cathy
Thursday 9th of February 2017
Brilliant! It looks so good - like it was there from the get-go!!!
Heather
Wednesday 18th of January 2017
Looks great! Our 128-year-old house came with plinths but I had no idea you could buy them on Amazon.
Angie ~ ambient wares
Tuesday 10th of January 2017
So clever and it looks spectacular!