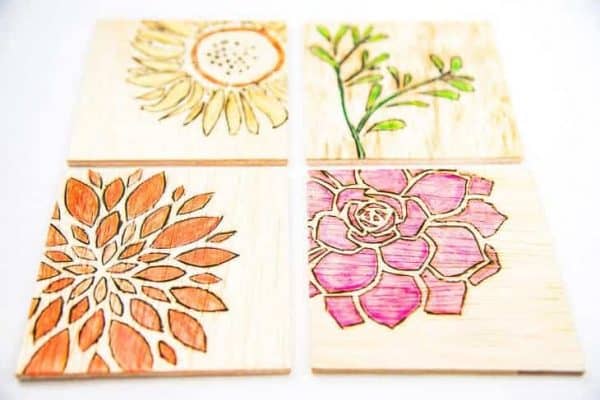
These wood burned coasters are beautiful AND easy to make! Burn in your design, then use watercolor pencils to make them pop!

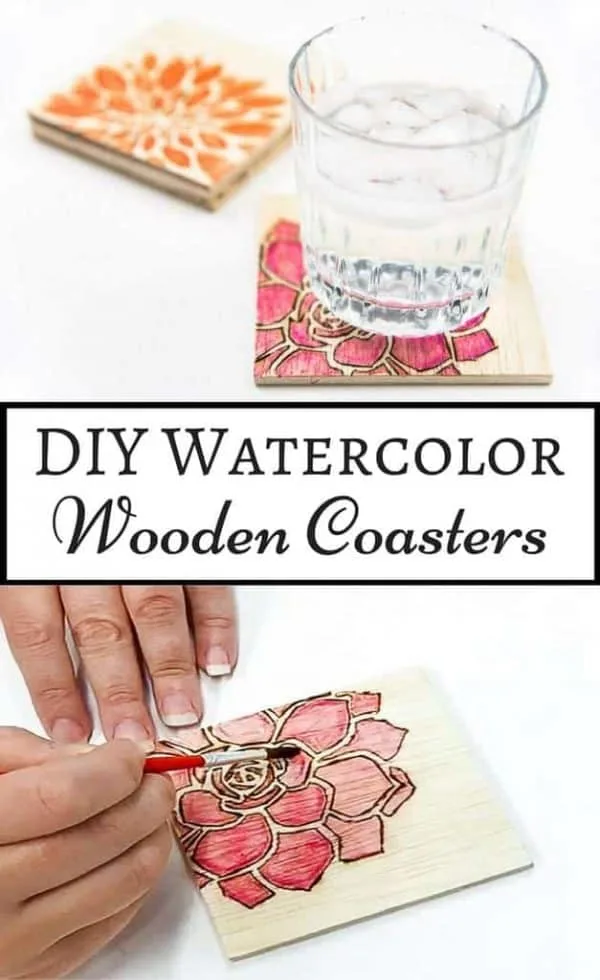
Want an inexpensive way to create a personalized coaster set? Combine wood burning and watercolor techniques for gorgeous wooden coasters in any design you want! Make a set for yourself, and another as a gift!
Don't have a wood burning tool? Try one of these other DIY coasters instead!
This post contains affiliate links for your convenience. Purchases made through these links may earn me a small commission at no additional cost to you. Please visit my disclosures page for more information.
Materials Required
- ¼" plywood, cut into 4" squares
- You can also use blank coasters like these.
- Stencils (or freehand your own design!)
- Wood burning tool
- Watercolor pencils
- Sandpaper
- Artist paintbrush
- Polyurethane spray
How to make wood burned coasters
Check out this short video of the process before you begin to see how easy these are to make!
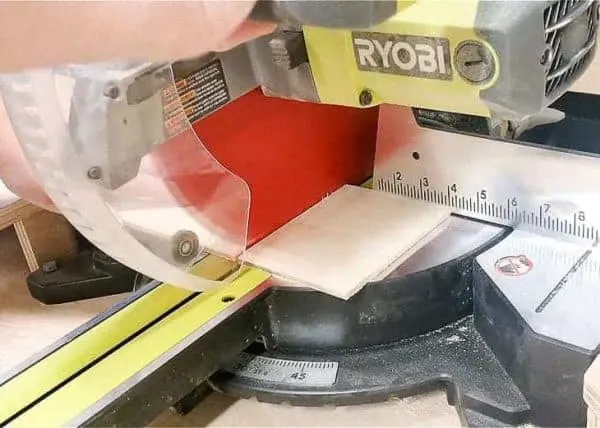
Cut wood into squares
Start by cutting a piece of ¼" plywood into 4" squares. I dug out a piece from my scrap pile, making this project practically free! You can also use blank wooden coasters like these.

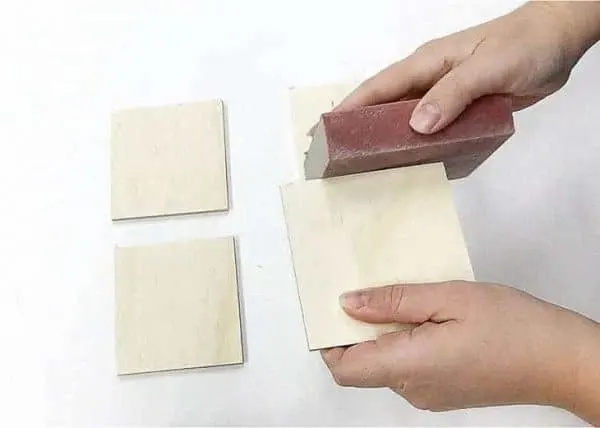
Sand down the surface and any rough edges.

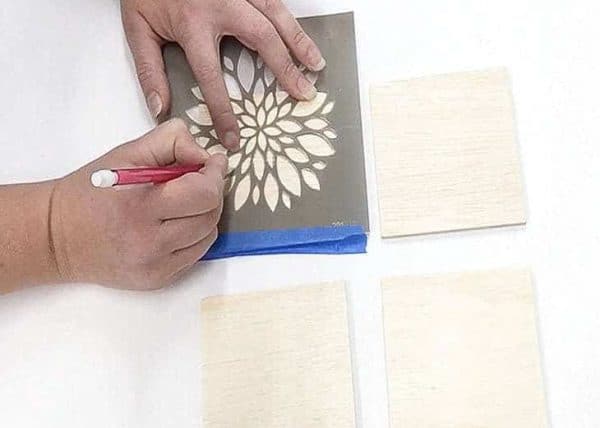
Draw your design in pencil
If you're artistically-inclined, you can draw out your design by hand. But I can't even draw a stick figure, so I used stencils instead. DecoArt was kind enough to send me a few of their botanical themed stencils for me to try out for this project.
I wanted to offset the design off the edge of the plywood, but you could center it if you prefer. Trace the design onto the plywood in pencil.

Trace your design with a wood burning tool
Heat the wood burning tool up to high. Trace over your design with the tip of the tool, making sure it burns in deep enough to create a channel in the wood. This will prevent the watercolor from seeping out of your design in the next step.

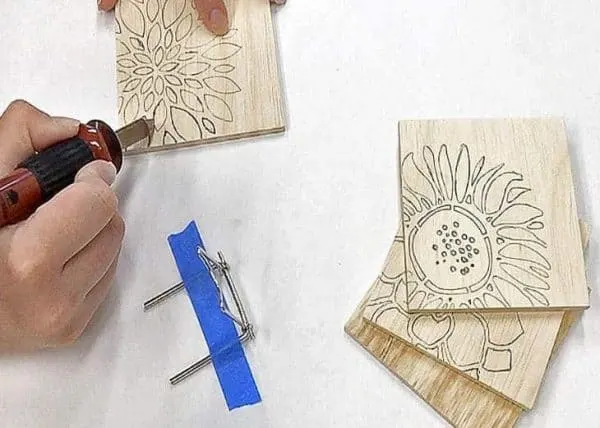
If you make a mistake with your wood burning tool, you can sand it out with 120 grit sandpaper if it's not too deep. When you're finished burning the design into the wooden coasters, erase any remaining pencil marks.
Add watercolor (optional)
Using watercolor pencils, color in your design. I like to layer a few colors in the same range on top of each other, so they'll blend when you add water to them. If you don't want to add color, you can skip this step.
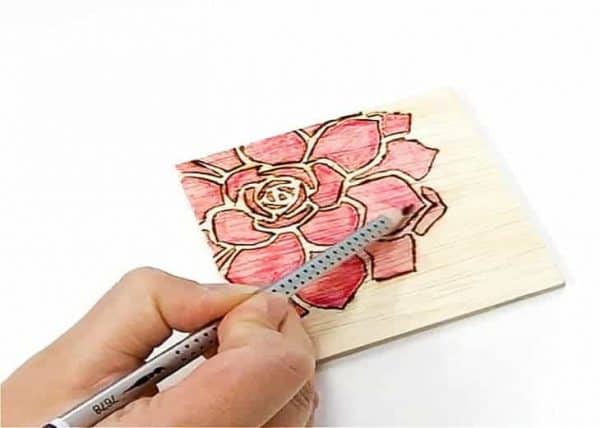

Then, the magic happens! Add water to each colored section, using a brush to blend the colors. You may have to repeat this process a couple times to get the effect you want.

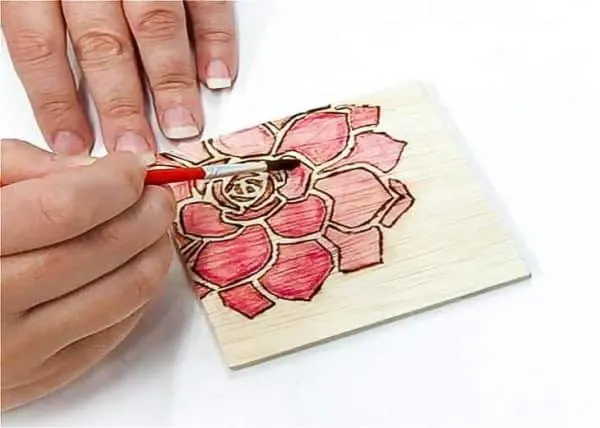
If the color bleeds past the burned lines, allow it to dry, then carefully sand those areas with a folded piece of sandpaper. This also helps to clean up any lightly burned areas that you want to remove.
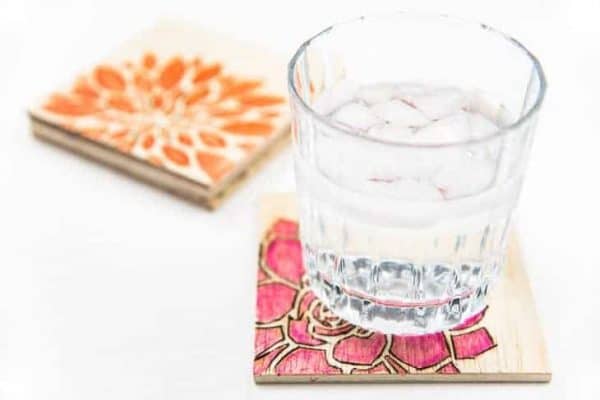
Apply a protective finish
When you have the design exactly how you want it, spray it with multiple coats of polyurethane or shellac to protect the wood from condensation. The spray works better than a brush, because it won't cause the color to bleed.

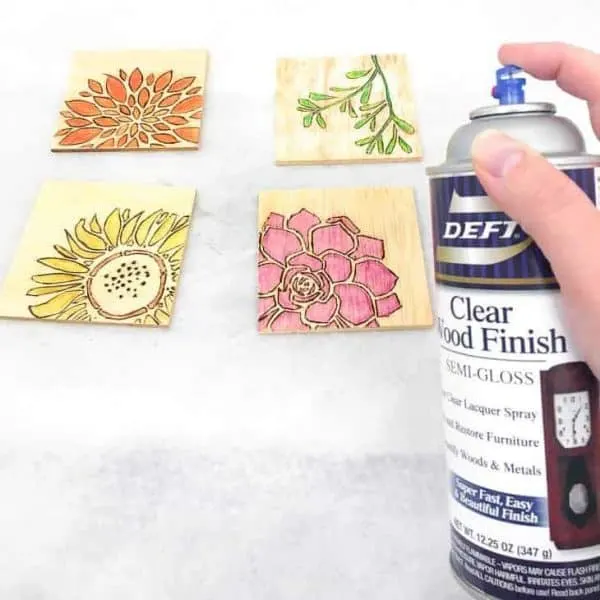
Let them dry overnight, then they're ready to use or give as a gift! I can imagine so many different themes for these wooden coasters...florals, holiday, monogrammed. The sky is the limit!


Check out these other easy DIY project ideas!
Theresa
Sunday 29th of April 2018
super cute diy! Thanks for sharing at the Inspiration Spotlight party @DearCreatives pinned, and sharing. See you again soon.
Cindy@countyroad407
Saturday 28th of April 2018
Saw this on the SIOMTInspiration link party. Super cute idea! Pinned!
Chas
Wednesday 25th of April 2018
These are so beautiful! Thanks for sharing on To Grandma's House We Go!
Victoria @DazzleWhileFrazzled
Monday 23rd of April 2018
Great project and great gift idea!
Bethany
Thursday 14th of December 2017
Cool project! I’ve seen people decorate spoons like this too, but I love the warecolour element.