Skylights can make your room way too hot or bright! Learn how to cover a skylight with a DIY skylight shade made from a blackout curtain.
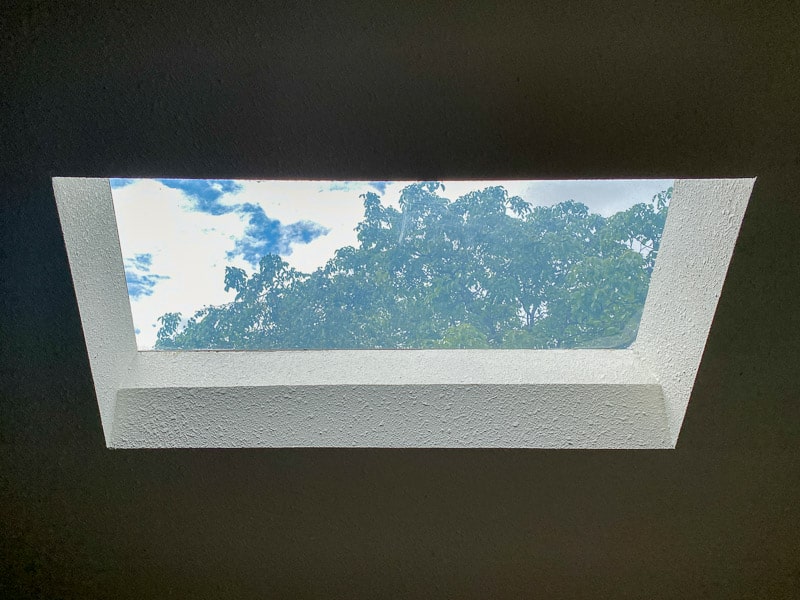
My son's room has a big skylight that lets in lots of natural light. This is great during the dreary winter months, but it makes the room WAY too hot in the summer! The portable air conditioner we have set up in his casement window struggles to keep up with the sun's powerful rays.
This post contains affiliate links for your convenience. Purchases made through these links may earn me a small commission at no additional cost to you. Please visit my disclosures page for more information.
I ordered a really expensive skylight shade before the weather started heating up, and it arrived without the frame to install it. The company ordered a new one for me, but it still hasn't arrived two months later! 😡
Now that school is starting, the sun beats down on him at his new desk. He could barely see the screen because of the glare! But I wanted to cover the skylight from the inside, so we can adjust it with the seasons. We need all the sunlight we can get in the winter!
I decided to take matters into my own hands and make my own skylight cover instead. It worked out better than expected, and I wish I had done it months ago! I was able to cancel my order and save myself a ton of money!
Materials Needed for DIY Skylight Cover
- Curtain with rod pocket
- To avoid hemming the curtain, I'd recommend getting a door sidelite window curtain which has rod pockets on the top and bottom (if you can find one in the right size).
- Two closet rod brackets
- Two adjustable closet rods
- Sewing machine or iron-on hem tape
How to make a skylight shade
Measure the skylight opening
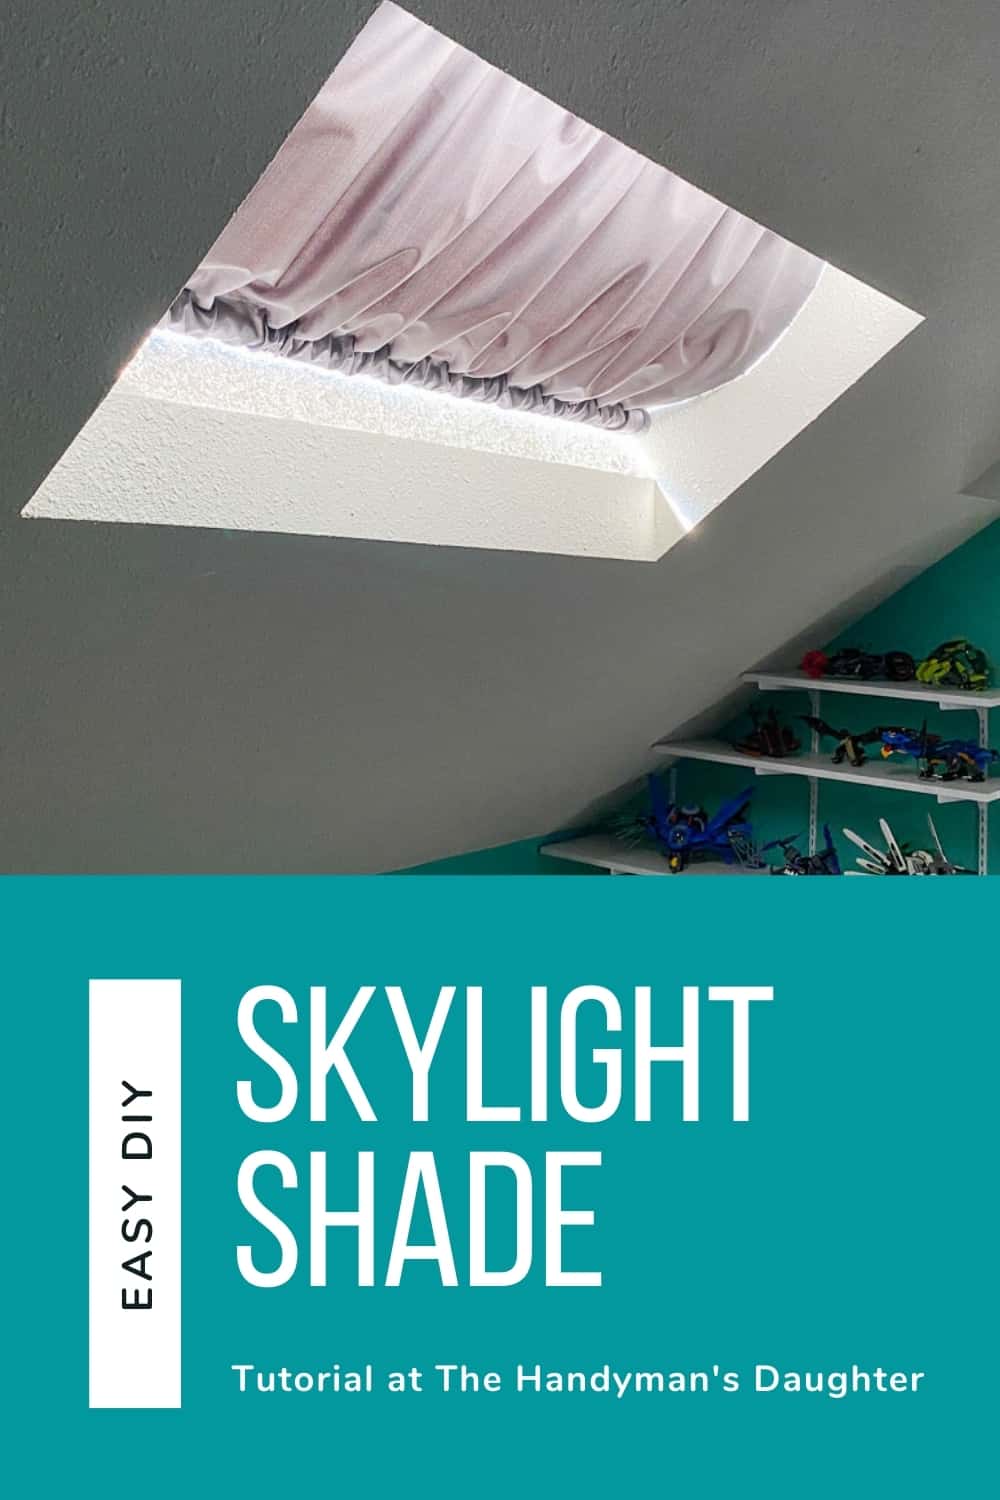
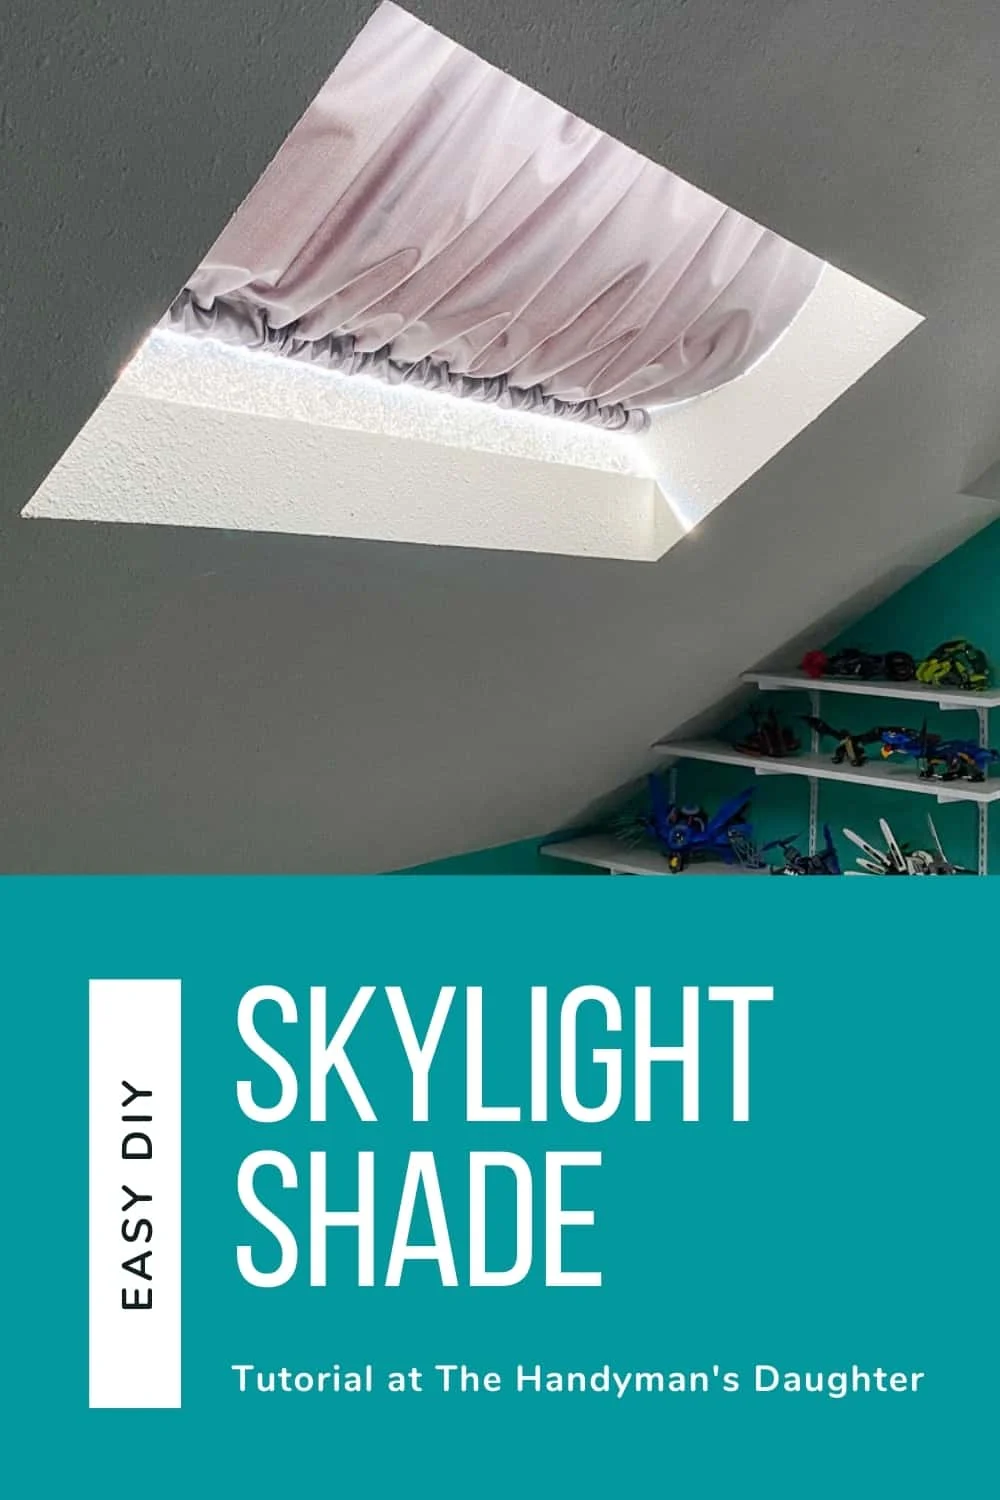
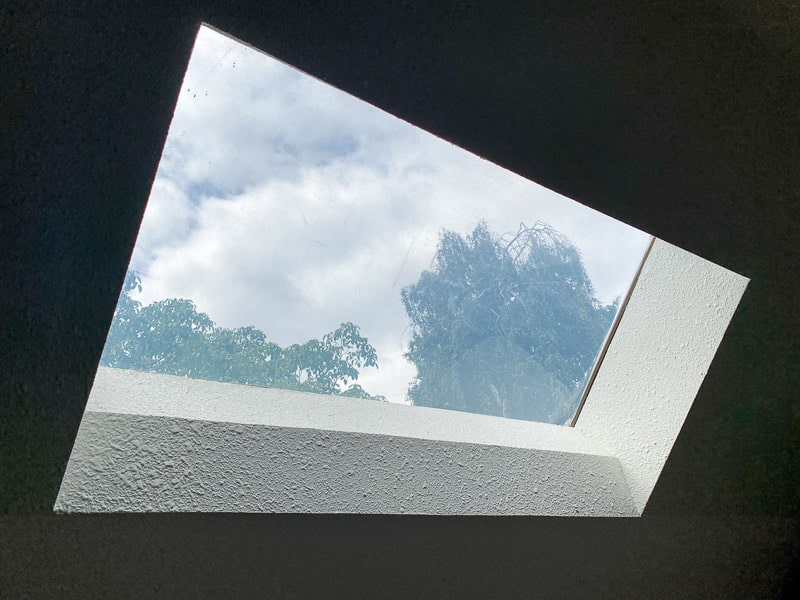
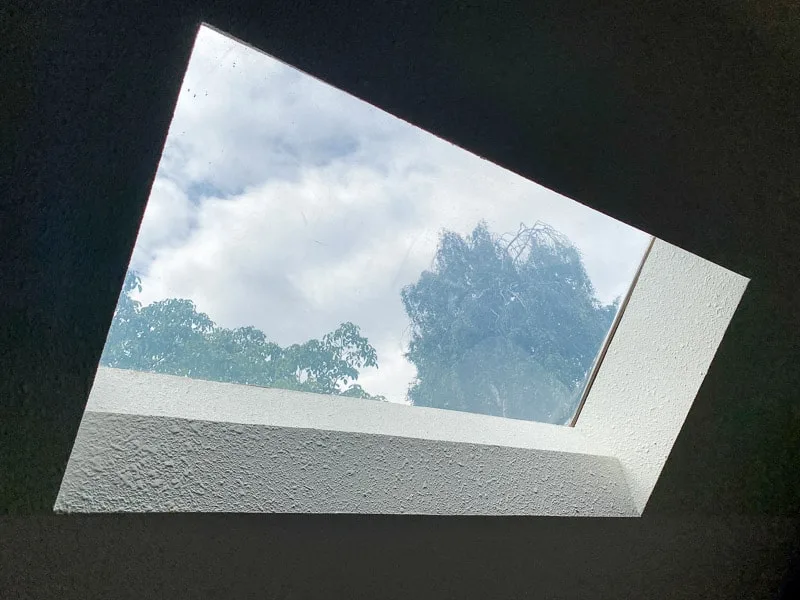
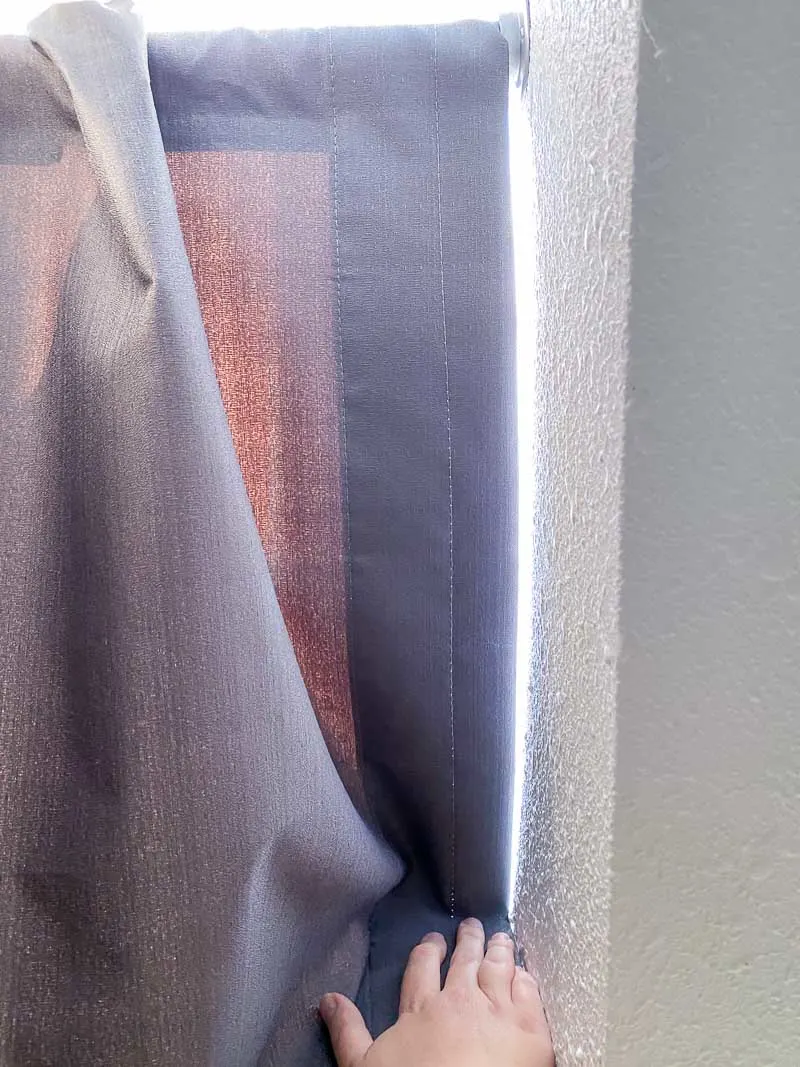
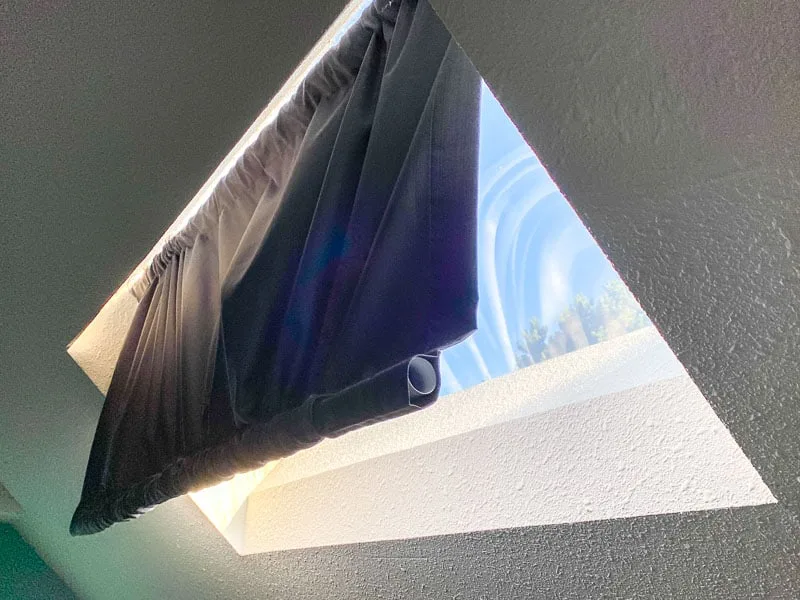
Our skylight is in a deep recess with an angled part on the bottom of the opening. I wanted the shade as close to the skylight as possible, so it could drape down within the opening without extending past the ceiling. I measured the length and width right along the edge where the skylight meets the drywall.

Install the brackets
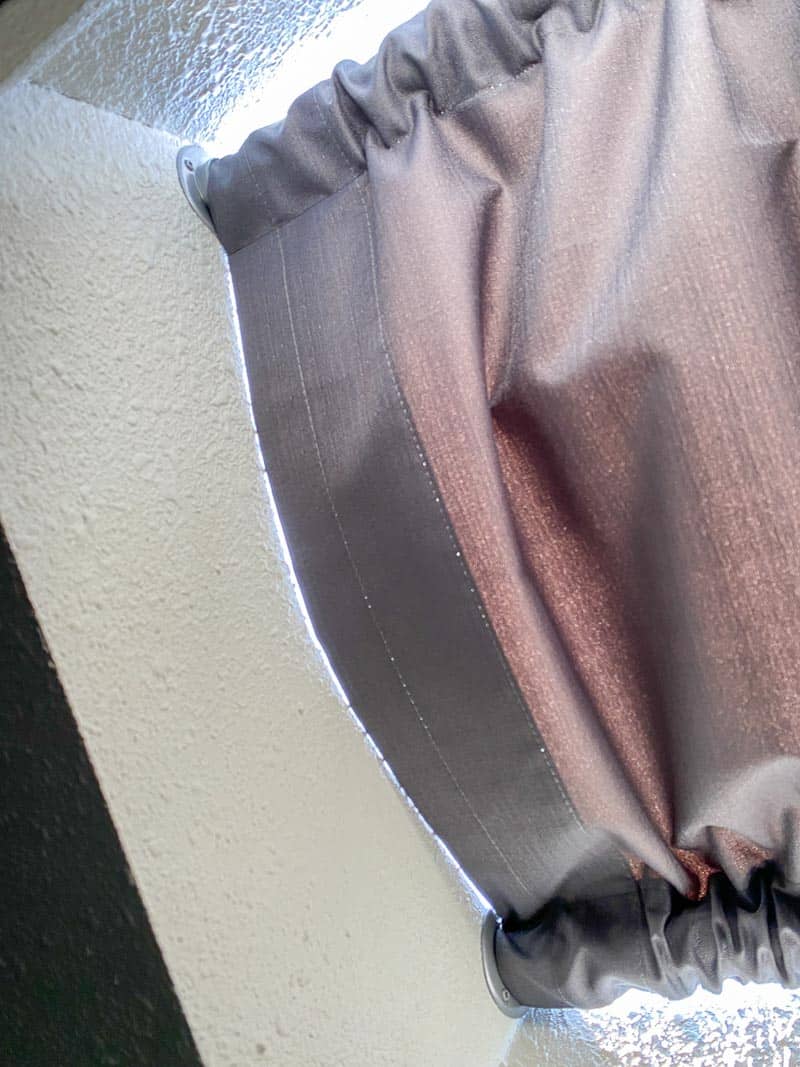
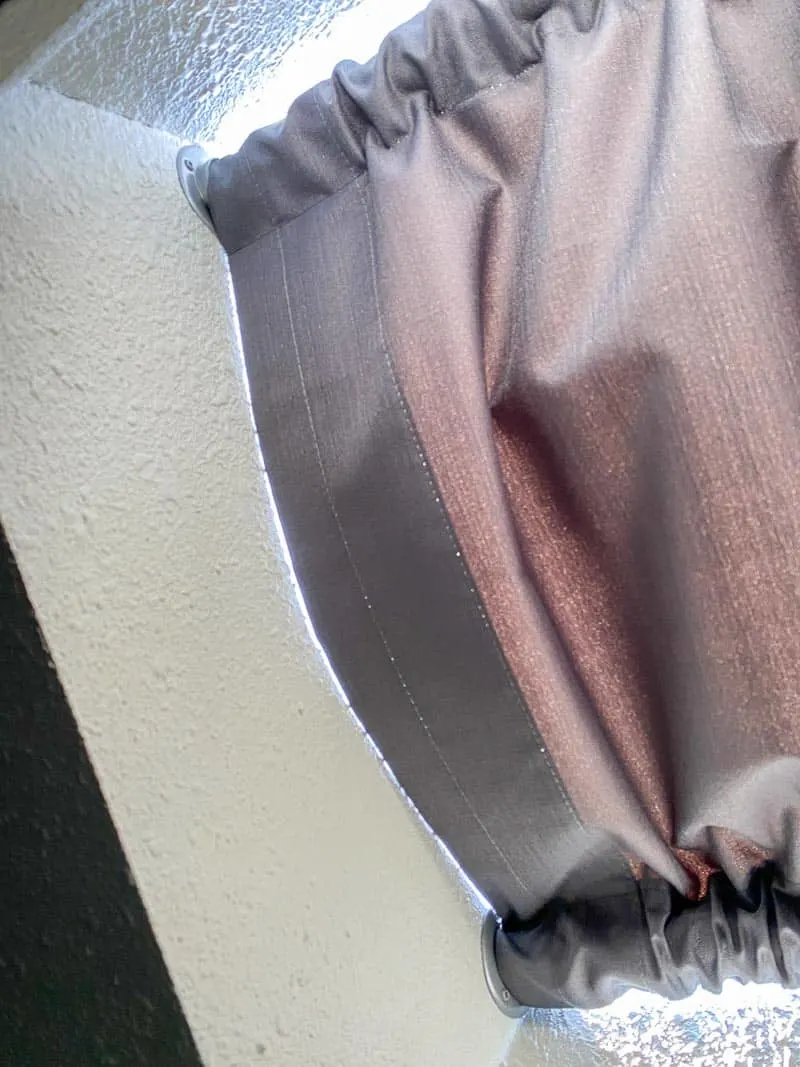
While you're up there, install the brackets at the top and bottom of the opening. These closet rod brackets have one closed end and one open end. Attach one set at the top edge and another at the bottom.

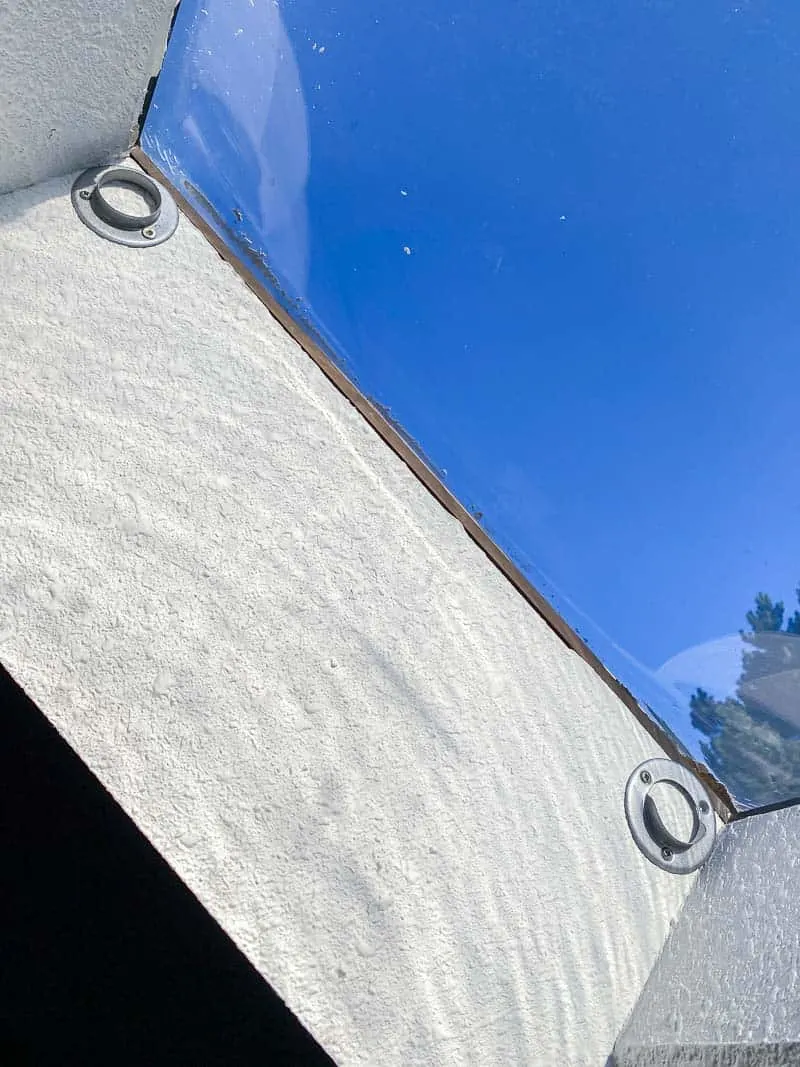
Make sure that the open side of the brackets is installed facing up (like the bottom bracket shown above), so the rod can sit inside without falling out.
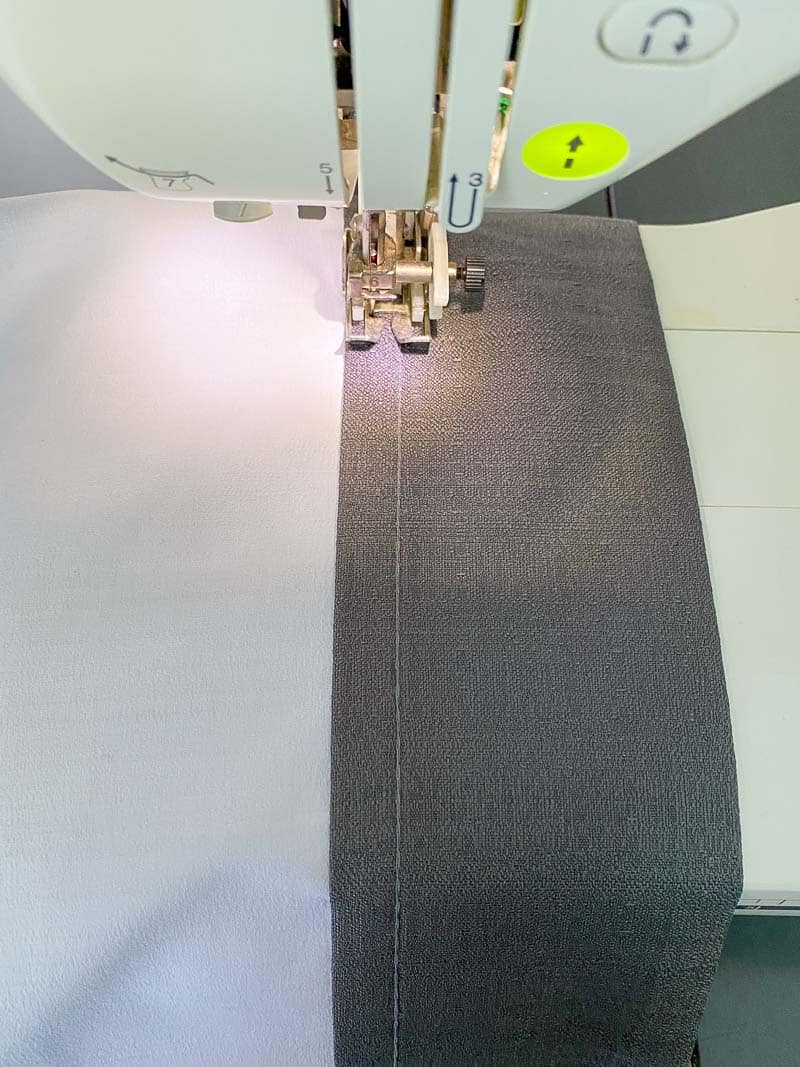
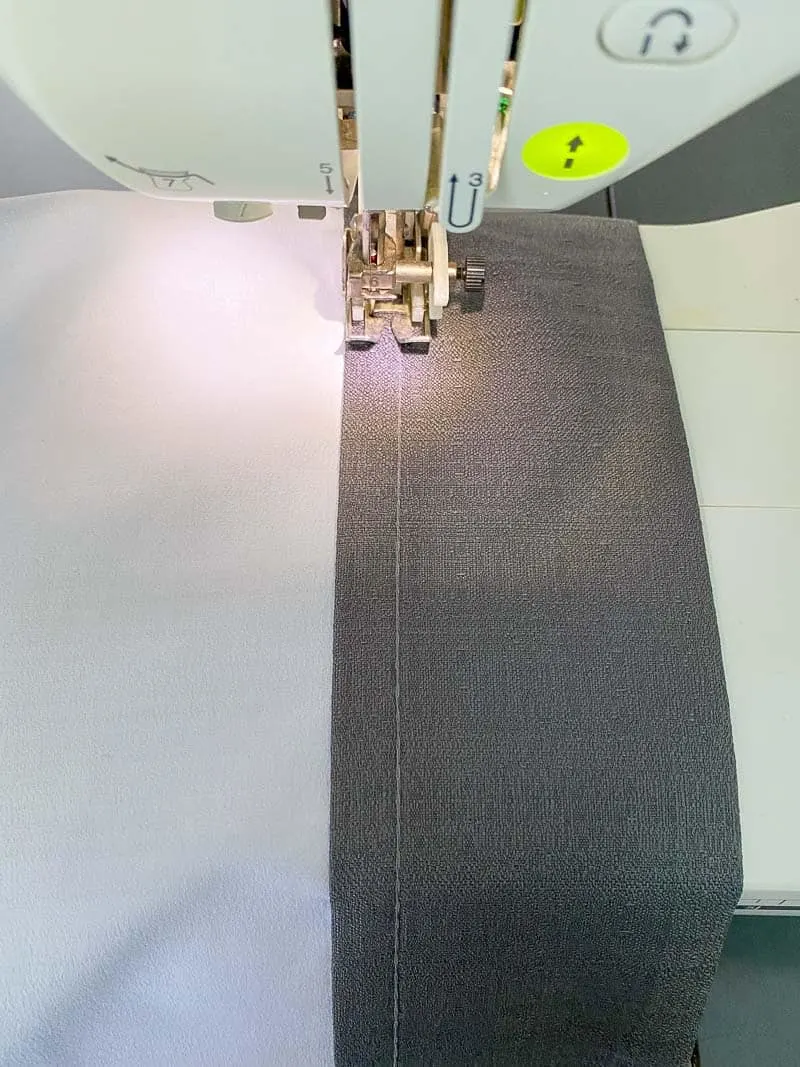
Hem the top edge of the curtain
I was in a hurry to get this project done before school started, so I bought these blackout curtains at Target, even though they were slightly too narrow for my skylight. But if you turn the curtain sideways, it's almost a perfect fit!
But this would put the hem for the rod on the side, rather than the top. So I hemmed the new "top" edge to create a sleeve for the rod. First, I folded it over 2 ½ inches and pressed it with an iron.
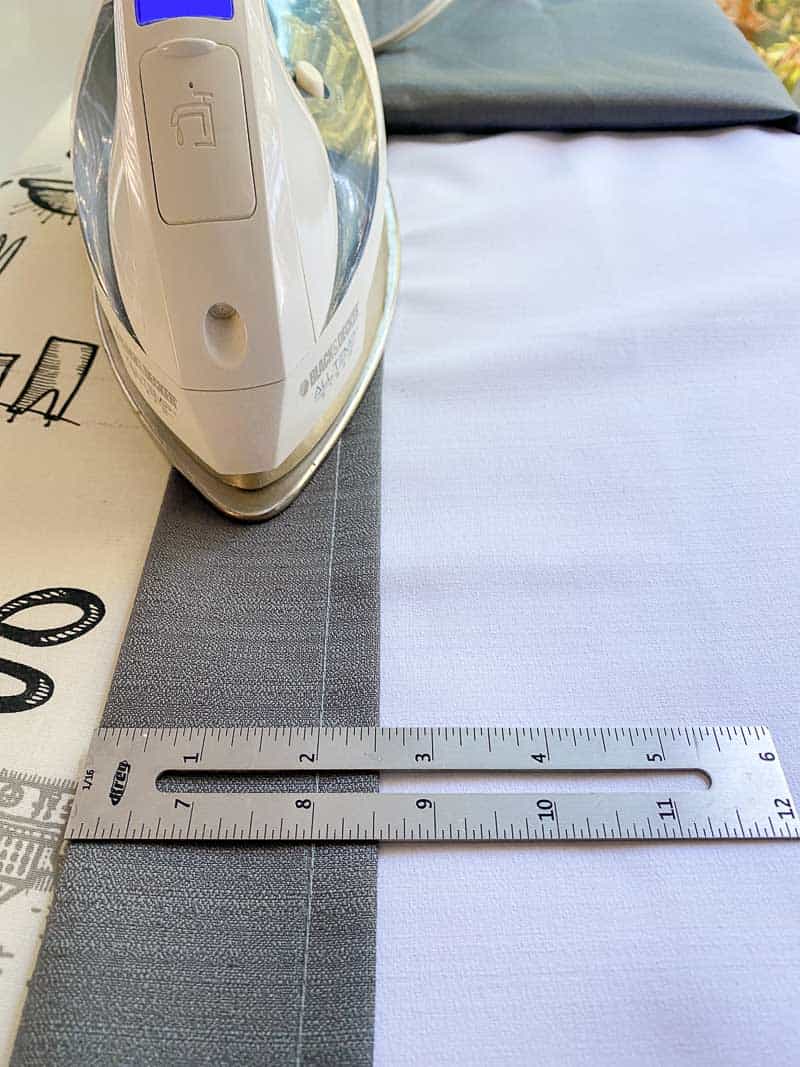
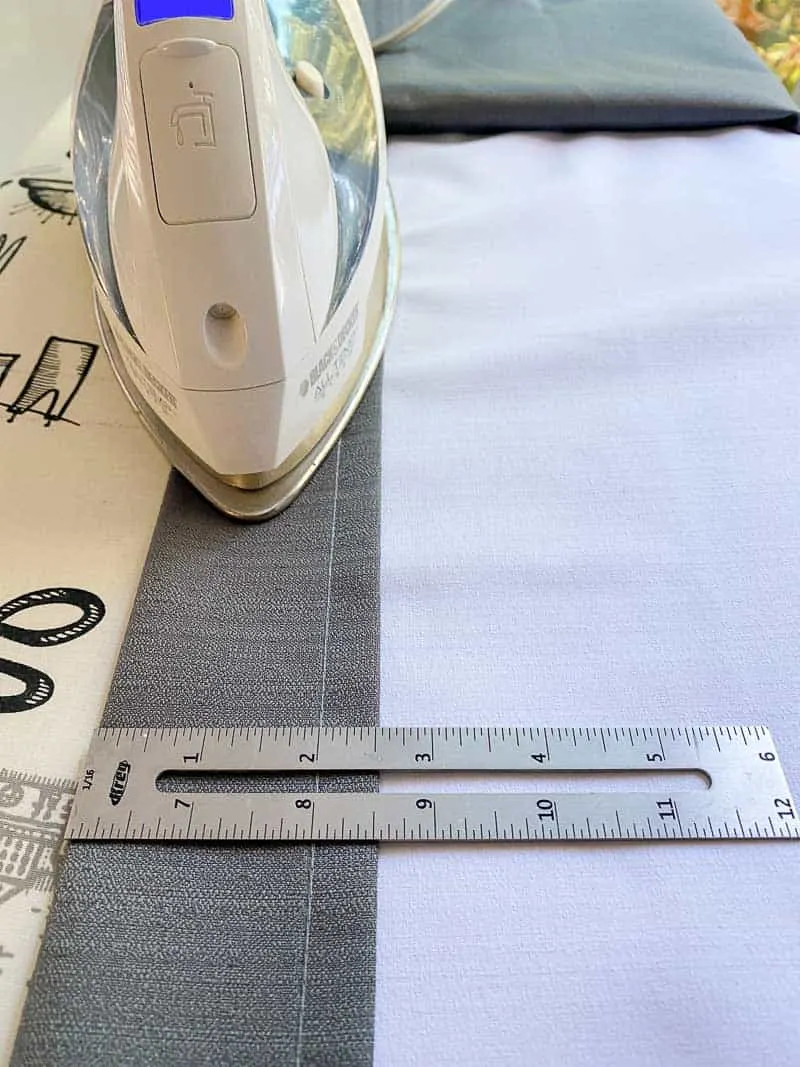
Then I unearthed my sewing machine from the bottom of the closet and sewed the hem in place. You could also use iron-on hem tape if you don't have a sewing machine.
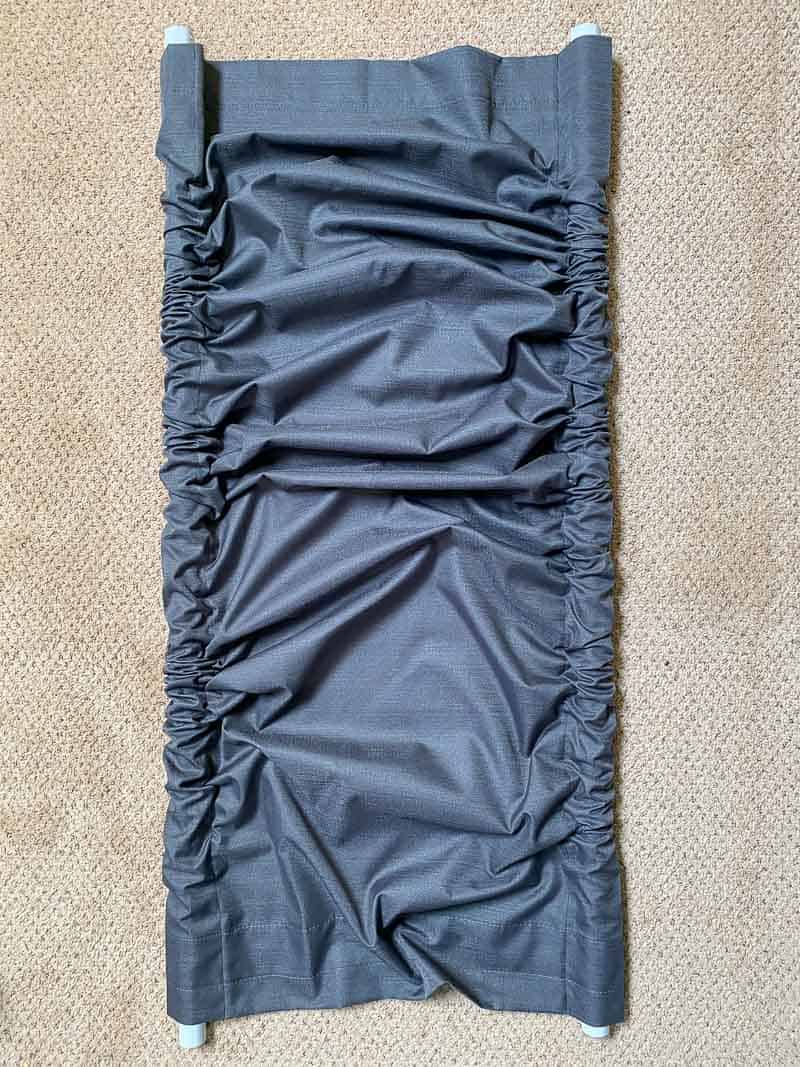
The closet rod should fit fairly snugly in the sleeve. If it's too loose, it will droop down rather than stretch tight across the opening.
Test the fit
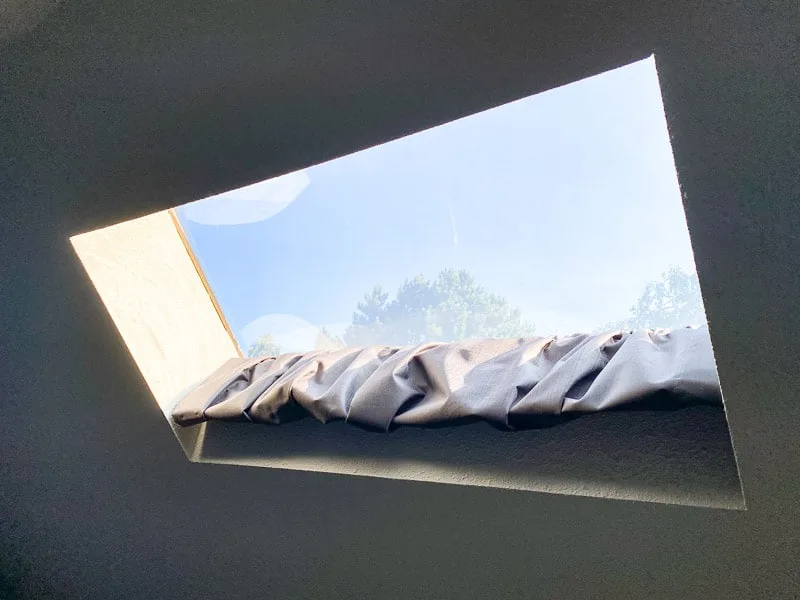
With the first hem complete, I wanted to test out my idea and see if it would work. I put the rod into the top brackets and let the curtain hang down. So far, so good!
I held the curtain taut at the bottom of the skylight opening and marked the position for the second rod sleeve.

Create the bottom hem
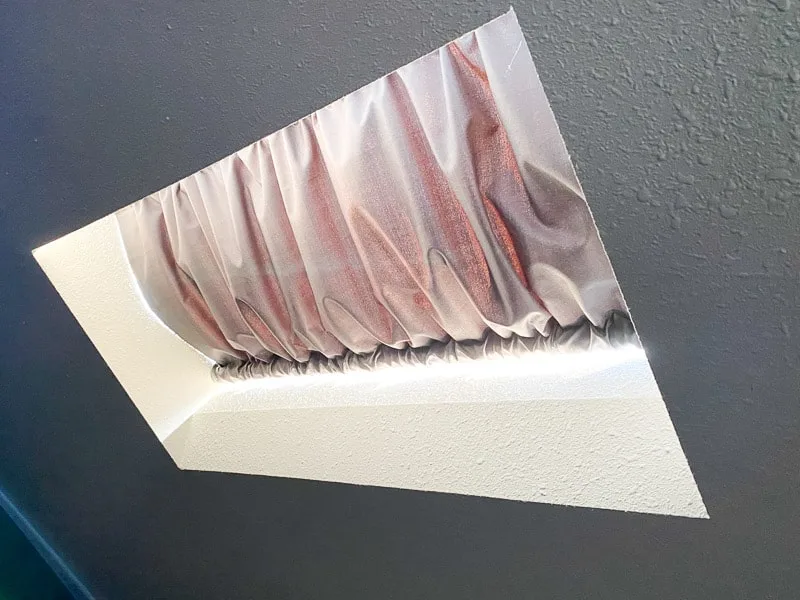
Fold the bottom edge of the curtain up at the mark, and sew another 2 ½" wide hem. Then cut off the excess. Slide the second closet rod into the bottom sleeve, then adjust the pleats until they're even across both rods.
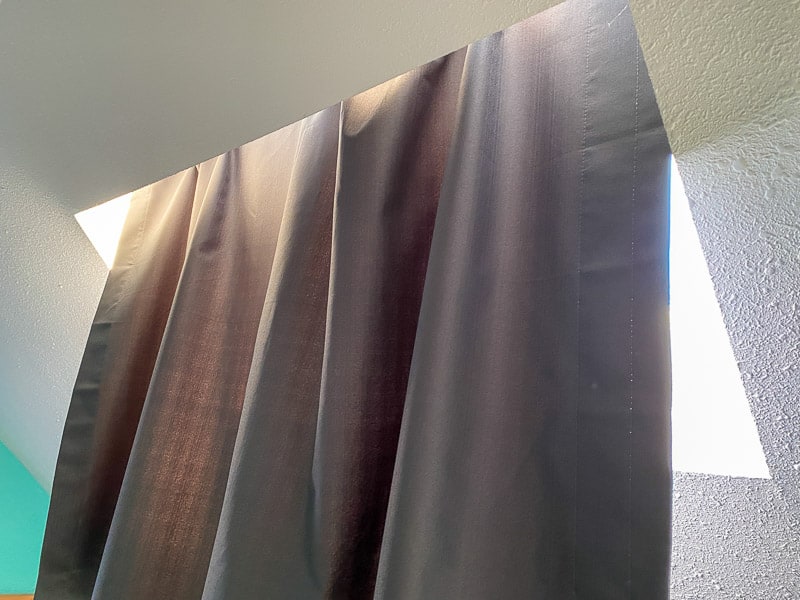
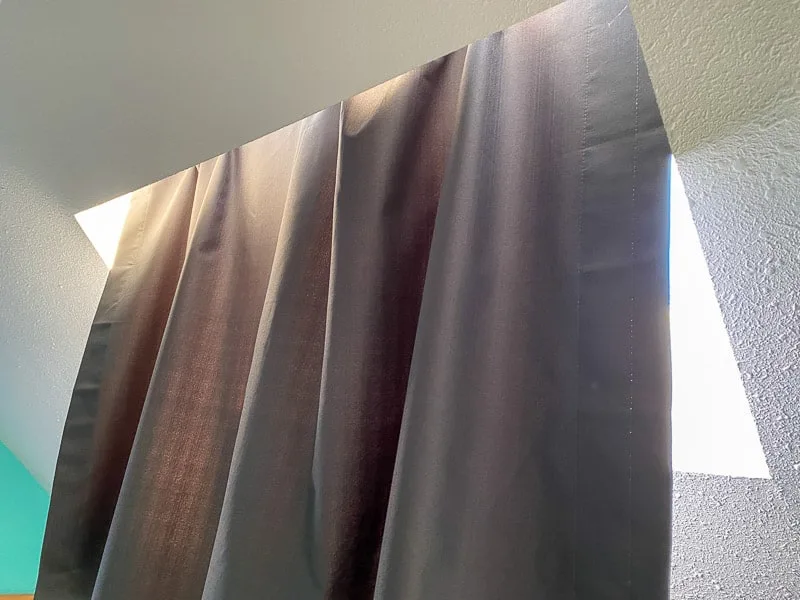
Install the skylight curtain into the brackets
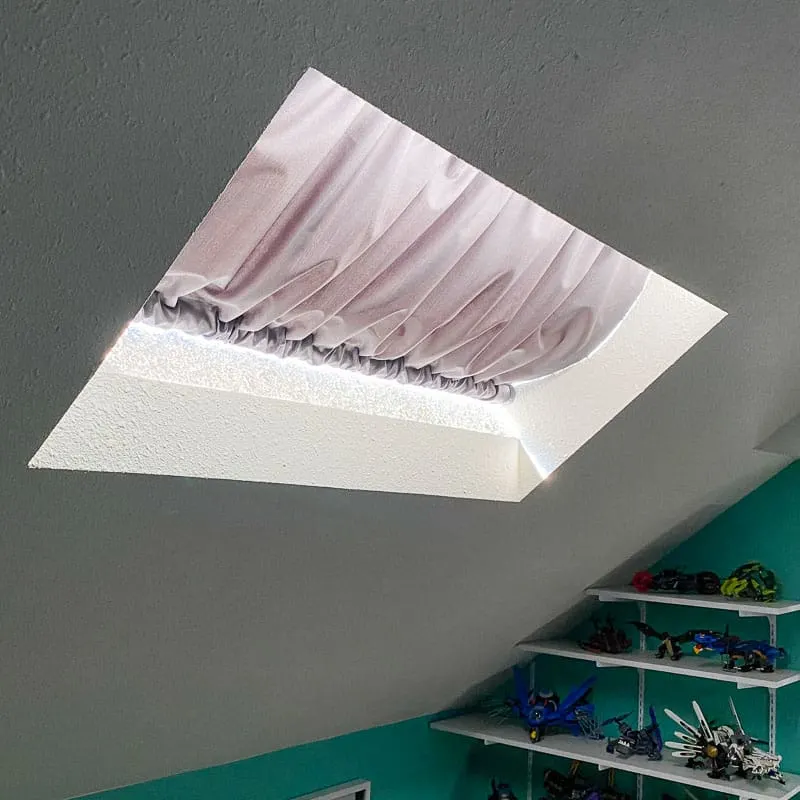
Adjust the top rod until it spans across the width of the skylight and rests inside both brackets.
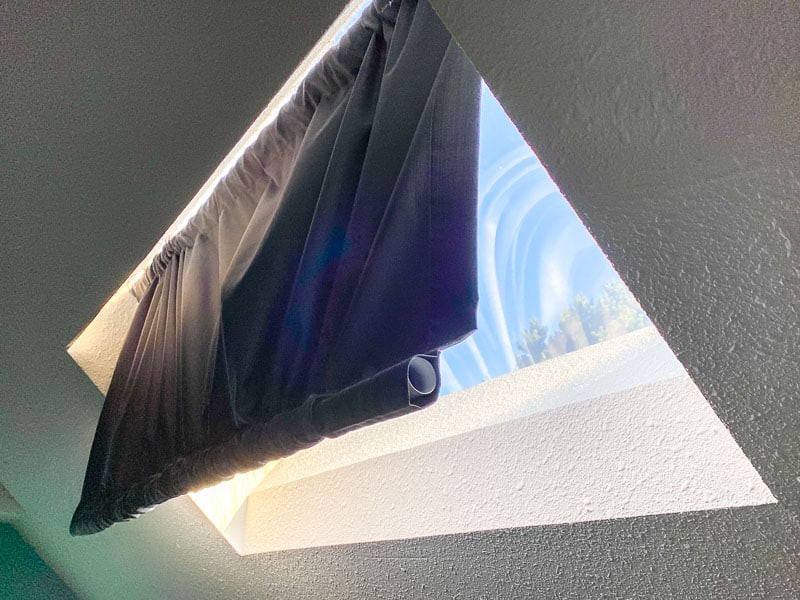
Then install the bottom rod the same way. Instantly, the room felt 10 degrees cooler!

The skylight cover lets in enough light that you don't have to turn the overhead light during the day, but it's significantly darker so my son can sleep in on weekends. A non-blackout curtain would let in more diffused light, and I'm thinking of making another one to switch out in the winter.

The brackets allow you to slide the shade all the way to the edges, so there's not a lot of light leaking through the sides. If the sunlight coming in through the top and bottom is a problem, I'd recommend these brackets that have screw holes on the inside so you can mount them closer to the wall.
If we want to let in all the light, the top rod can be removed easily and rests on the bottom one. I might add another set of brackets in the middle so we can leave it partially open sometimes.

I'm so glad I was able to cobble together a cheap fix for the skylight shades that never showed up! You could even make a skylight blackout shade just by using a different type of curtain.
Check out these other easy DIY projects!