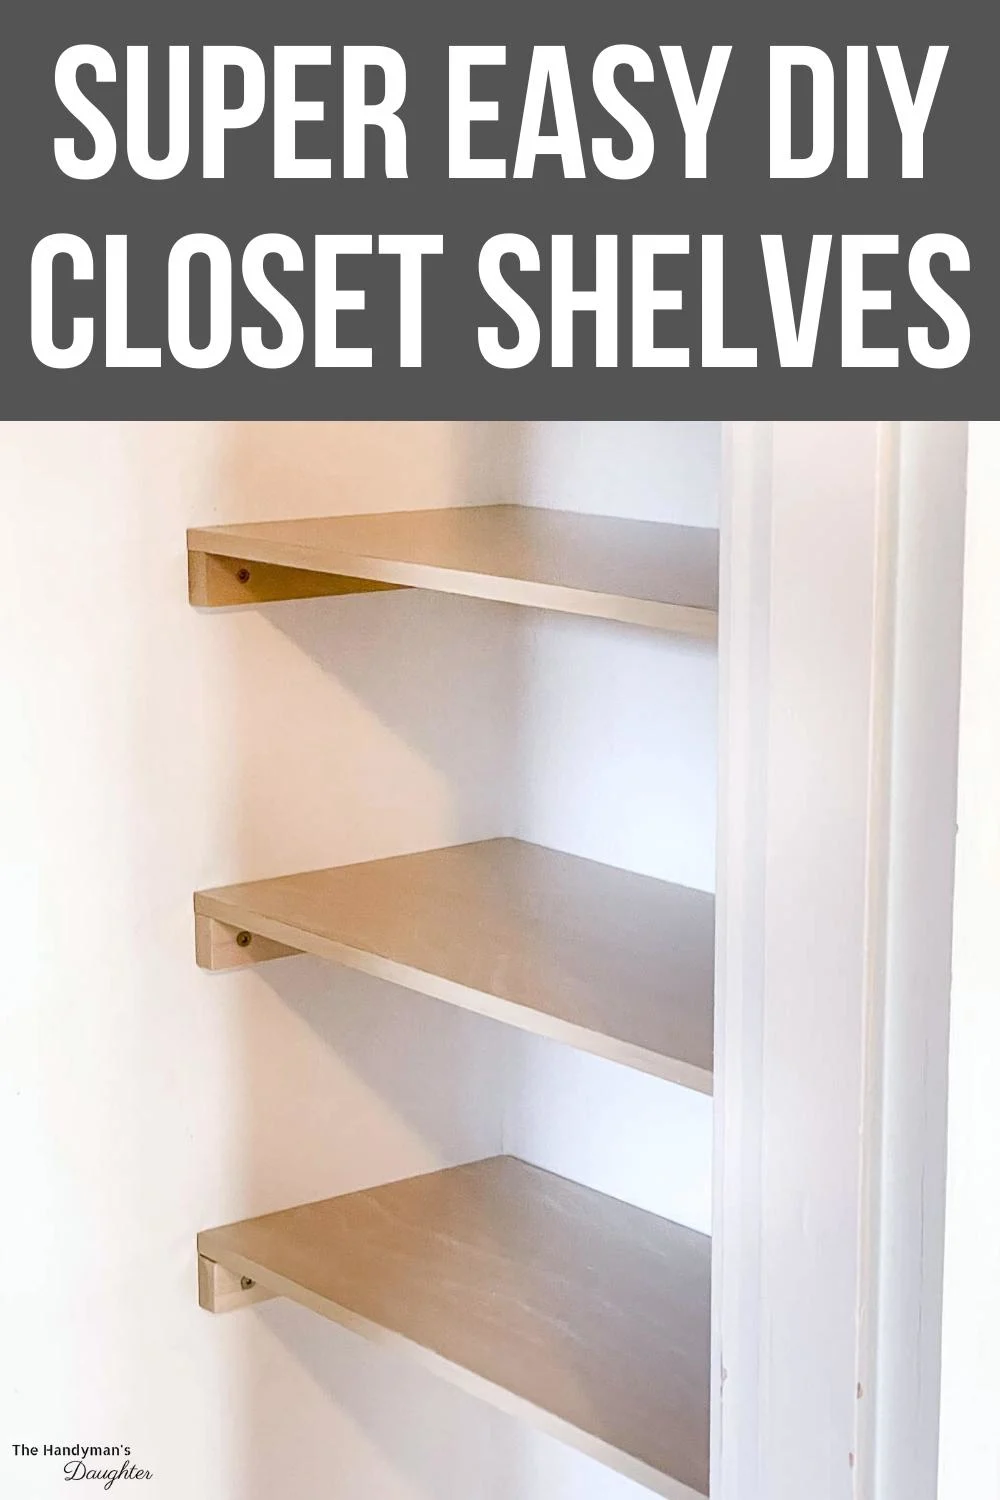
Want to add shelves to your closet? These DIY closet shelves are easy for a beginner to make! All you need is a 1x2 and precut shelf boards!

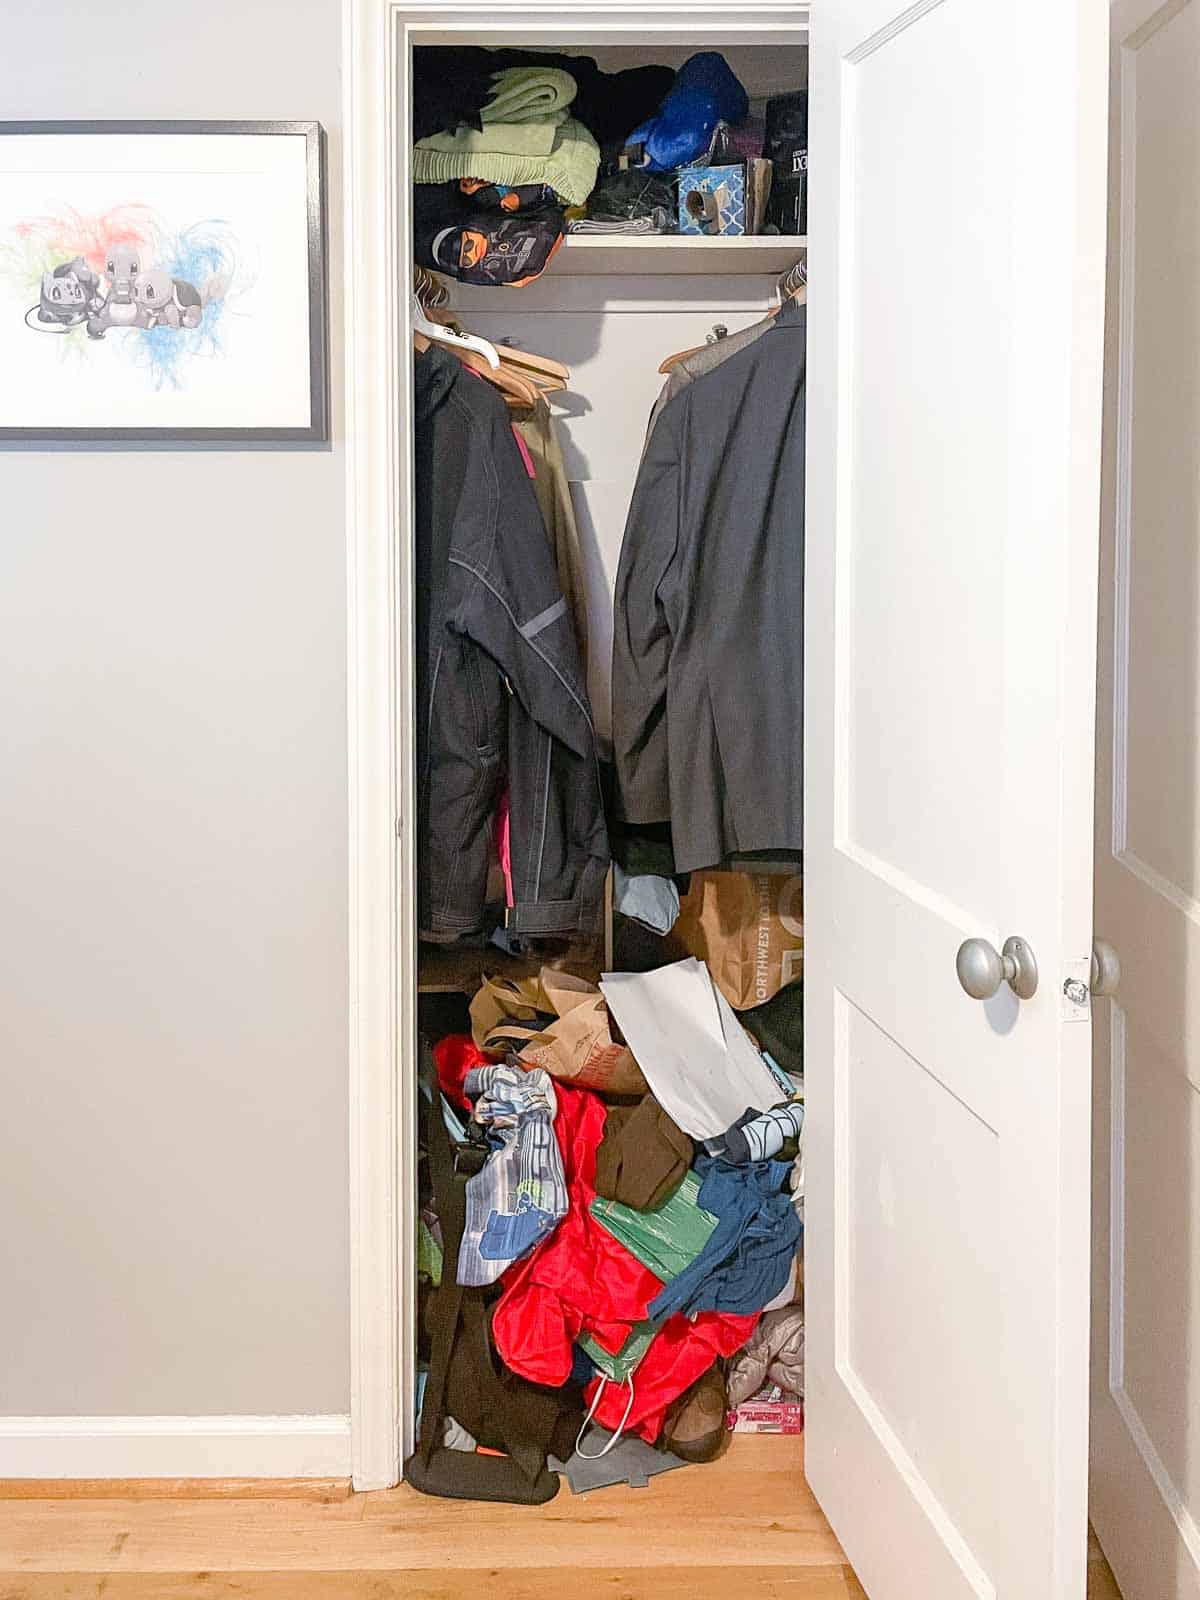
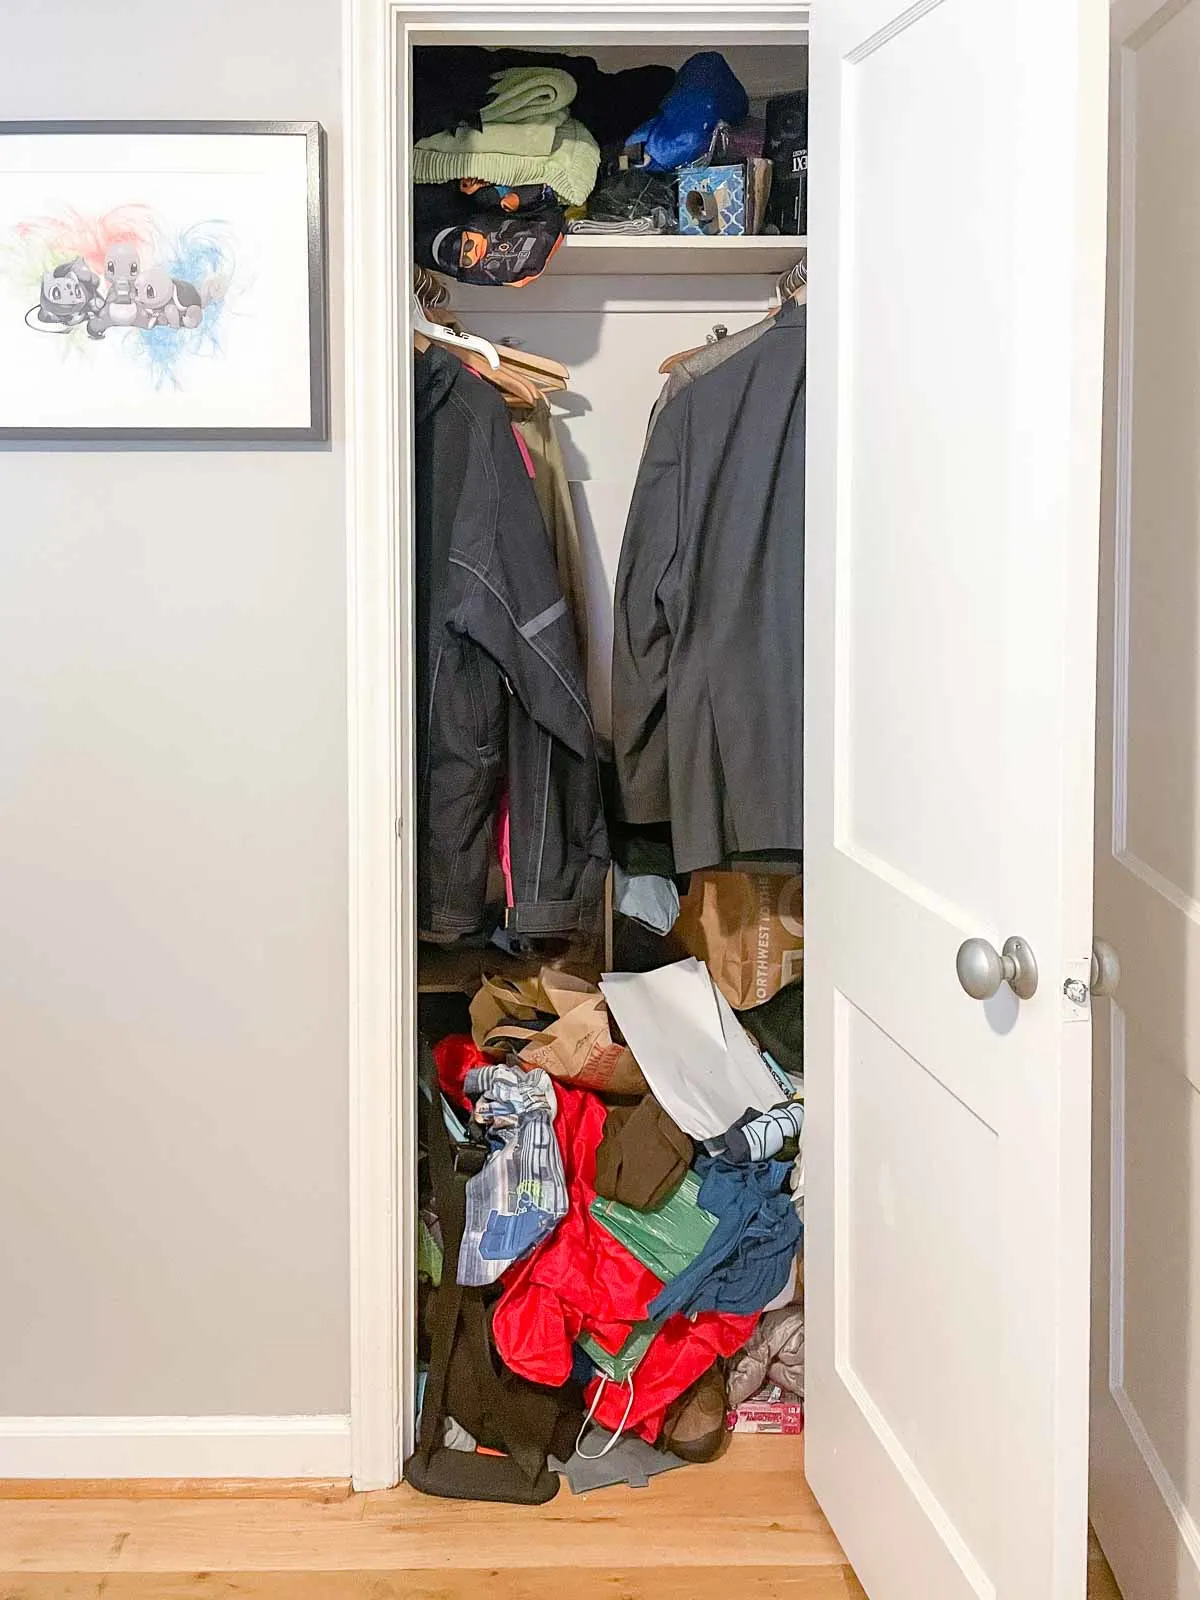
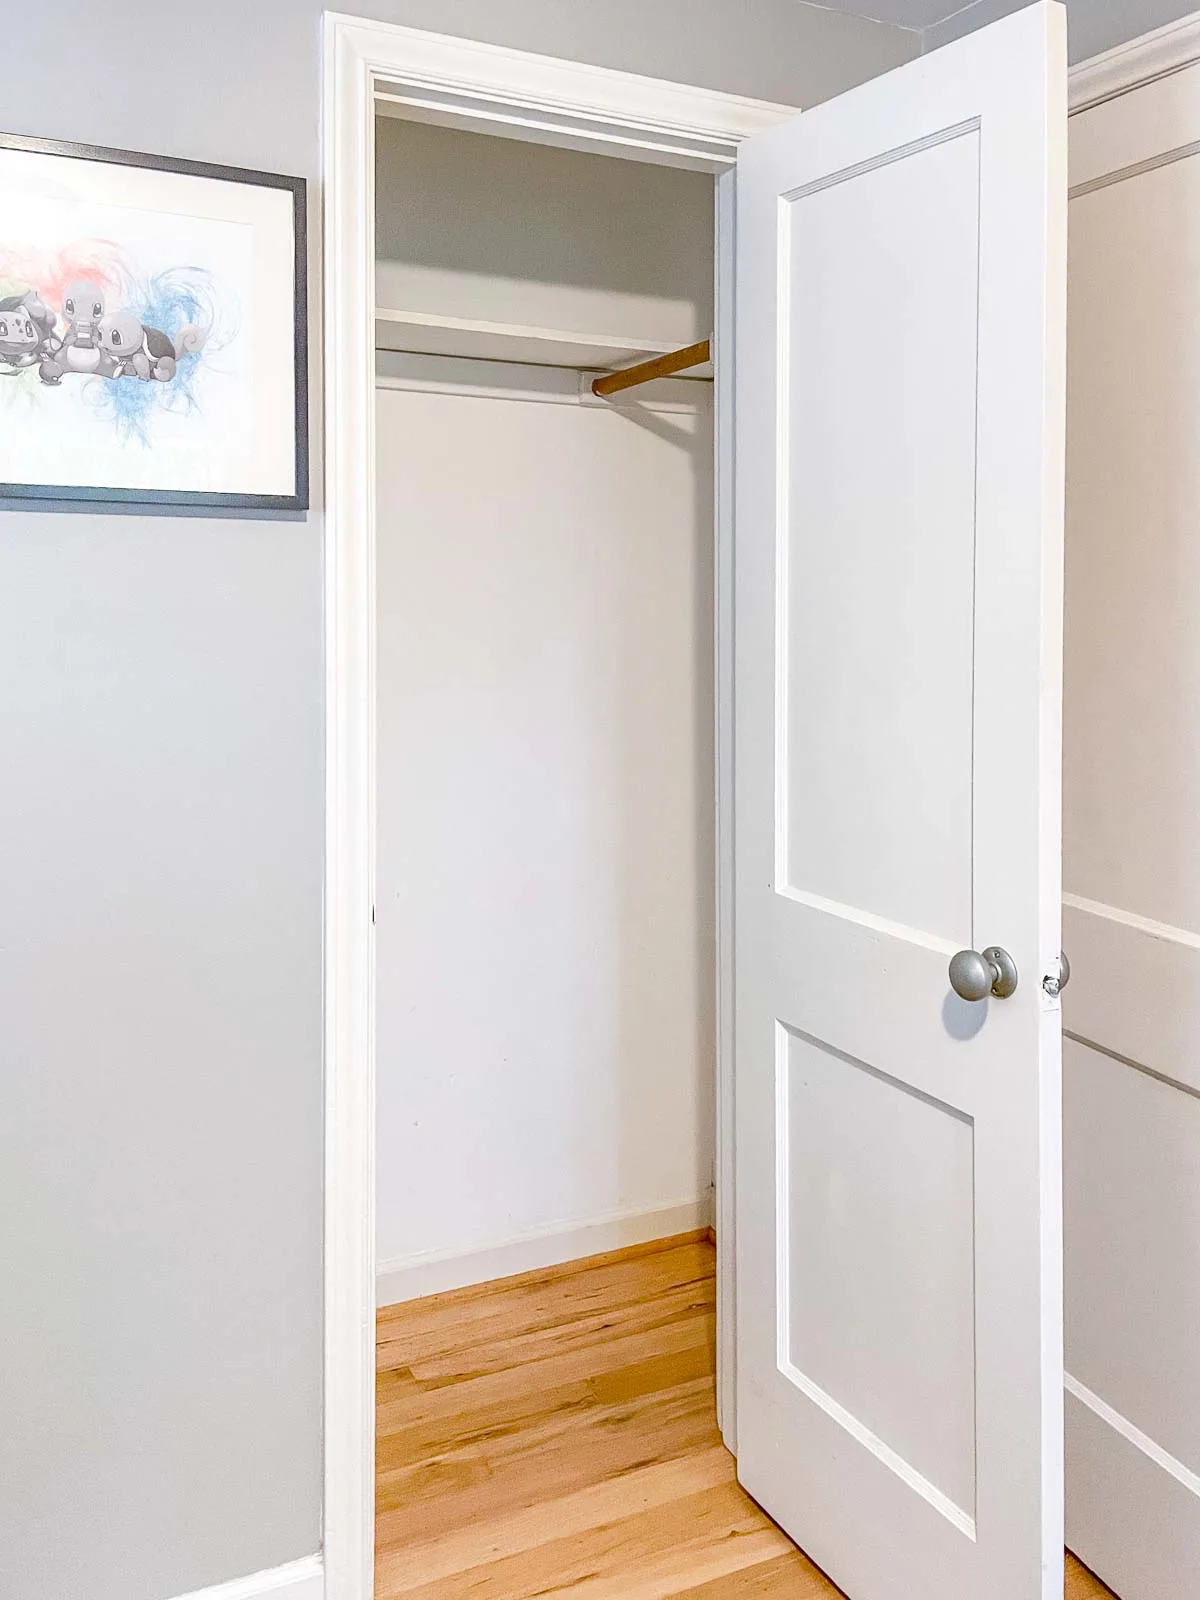
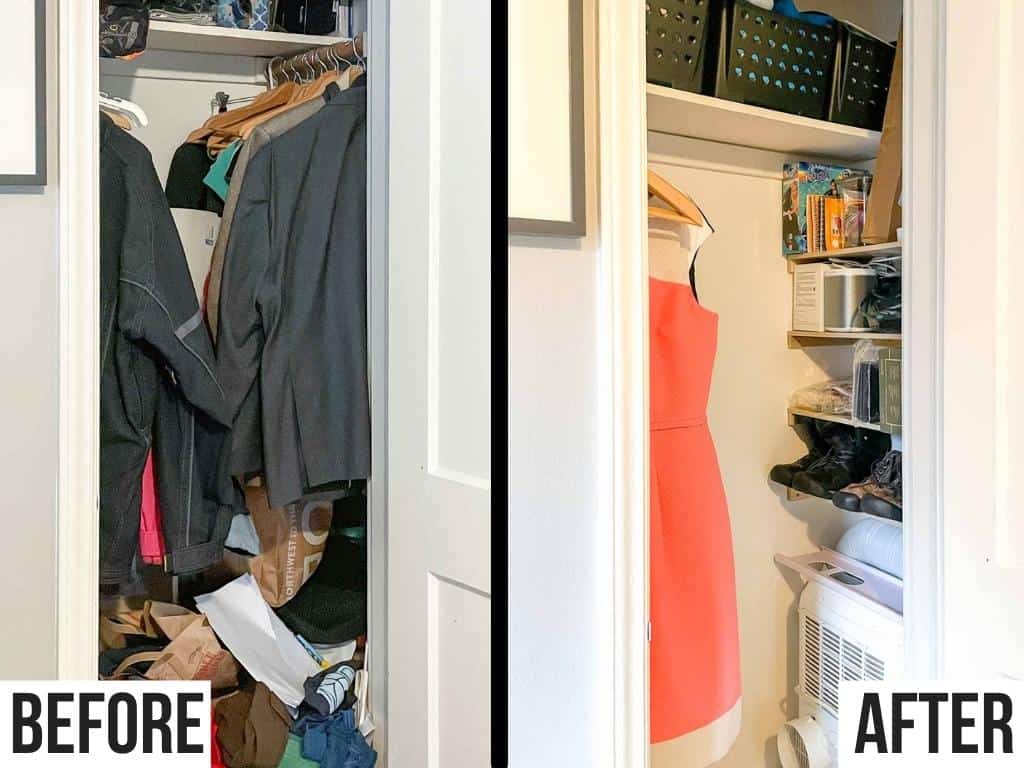
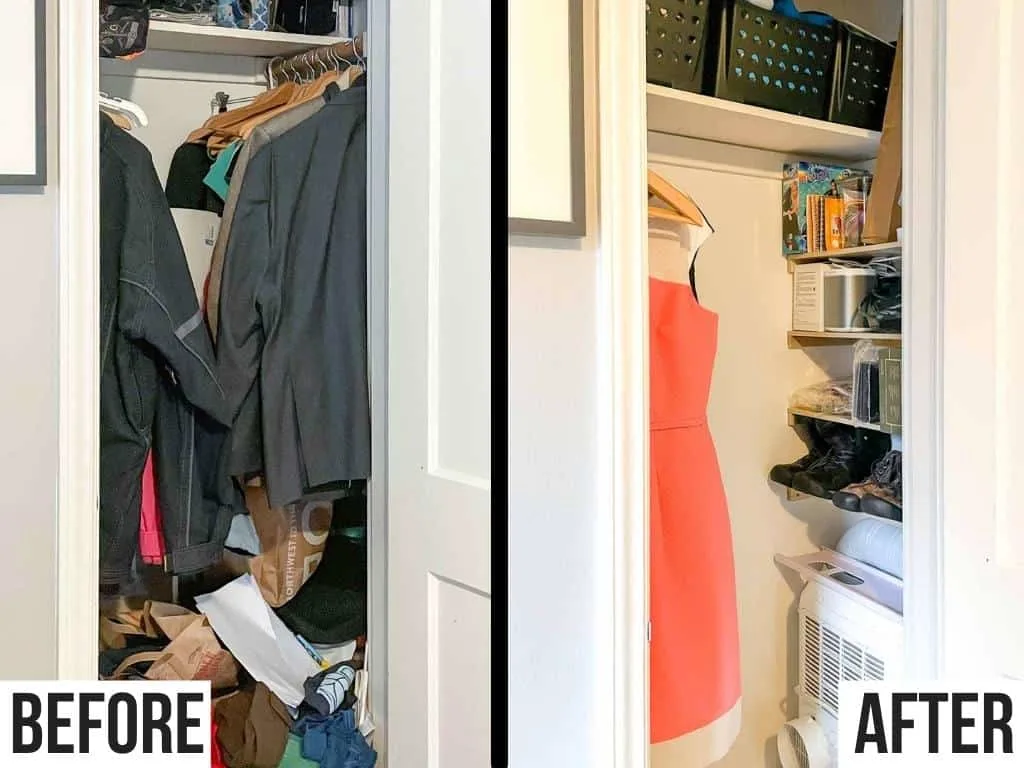
We all have that one closet that has become a black hole for junk! In our house, that was the one in the office, which was previously our son's bedroom. It was an untamed mess of clothes, toys, shoes and other random stuff. It was a disaster, and you could barely shut the door!
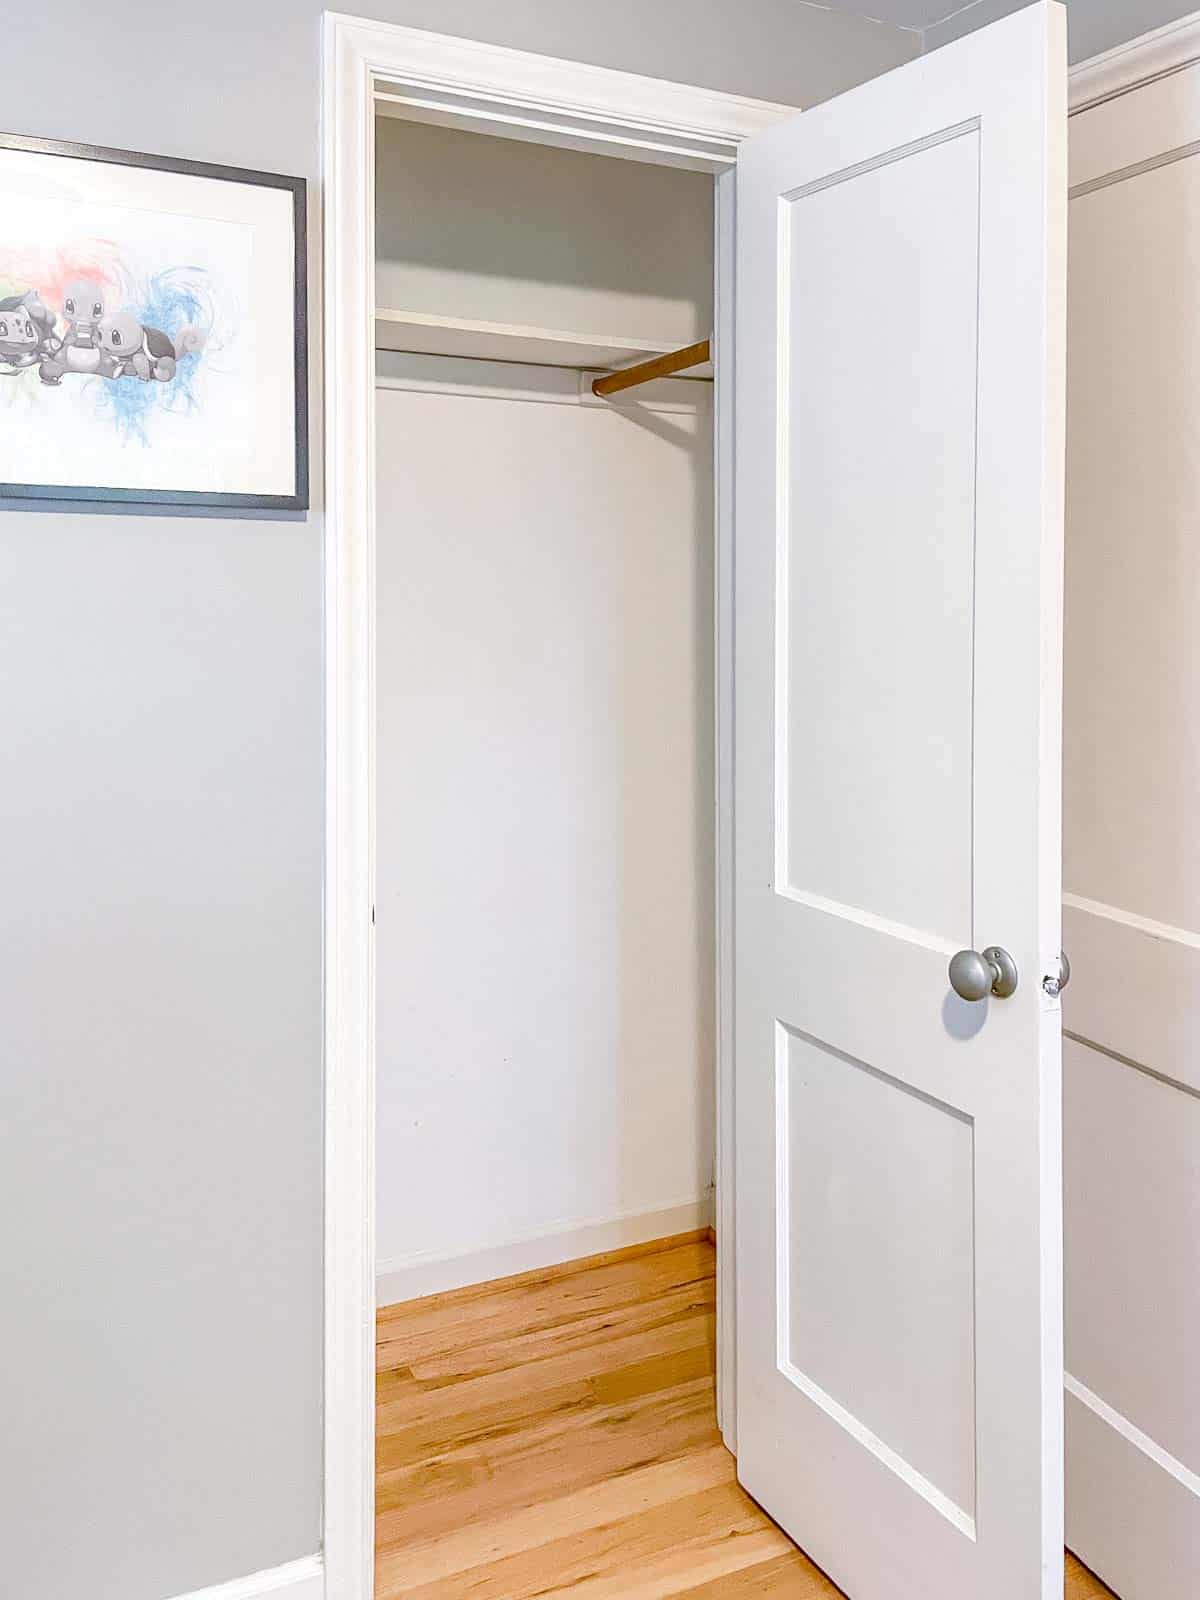
After clearing everything out, it was much easier to see what I had to work with. It turns out that the right side is deeper than the left, which is perfect for a few simple closet shelves!
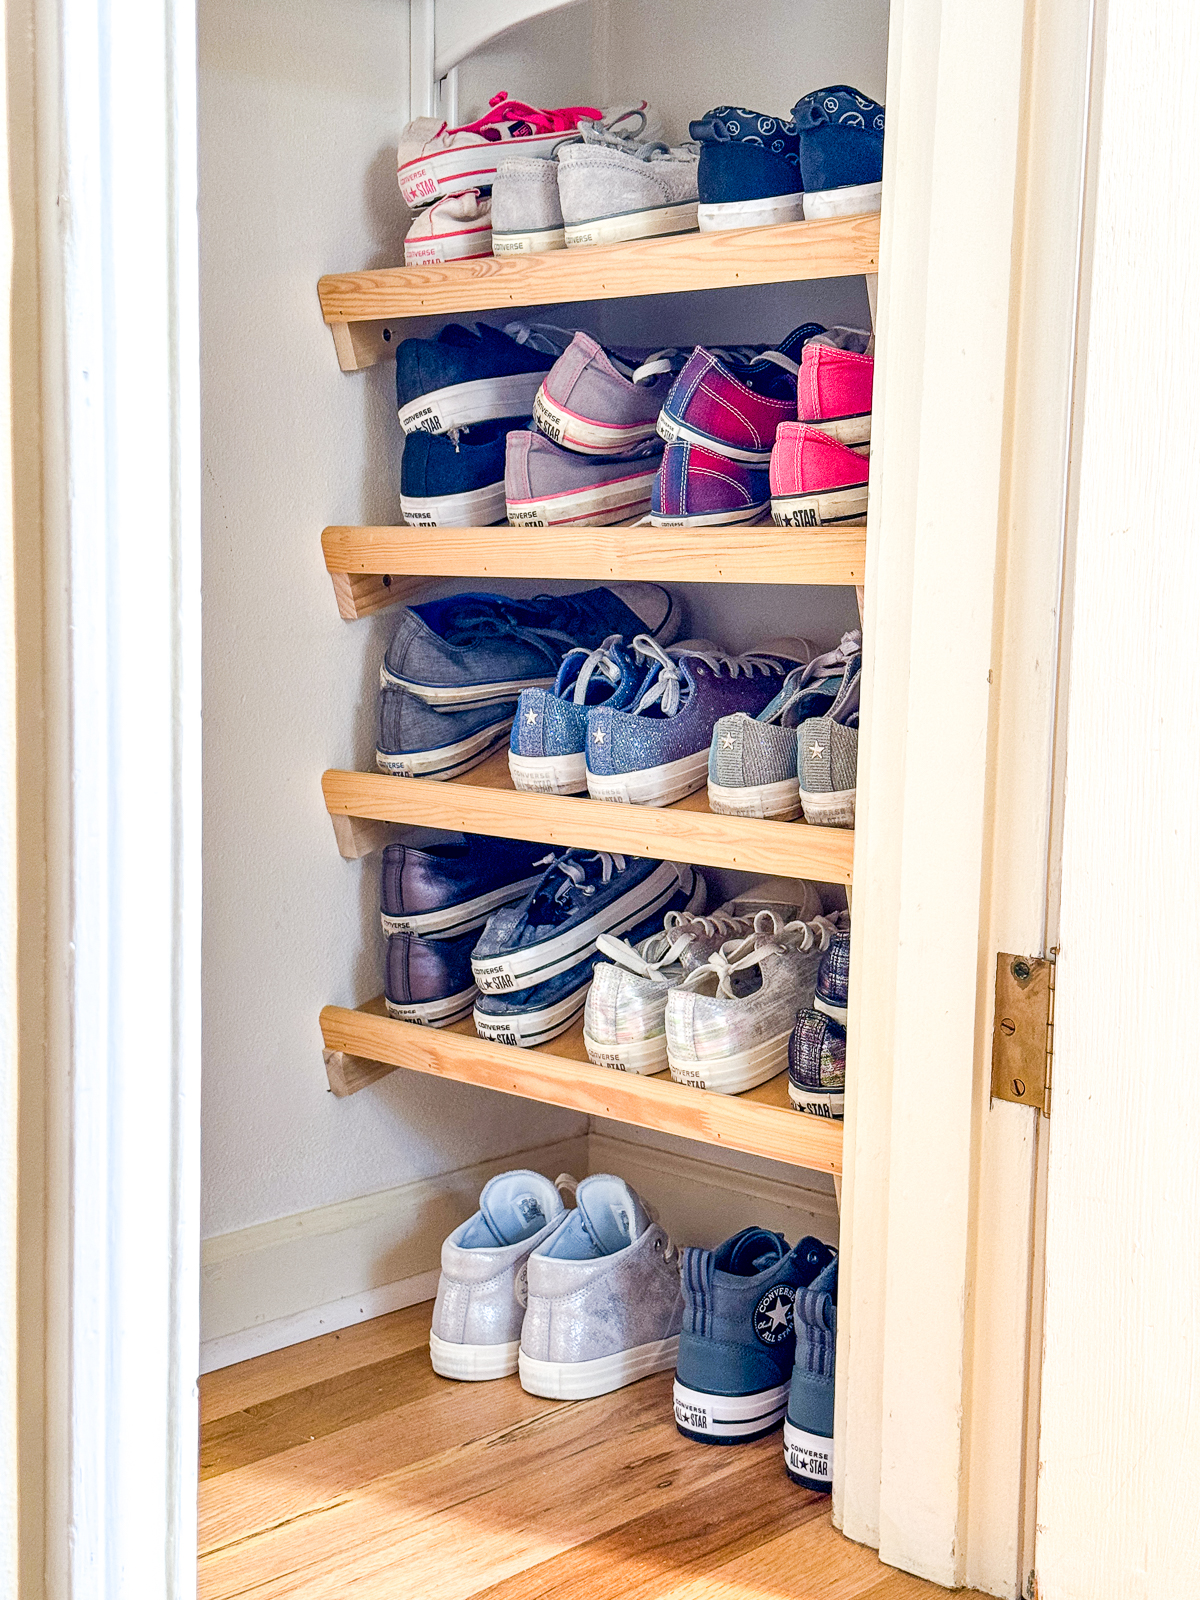
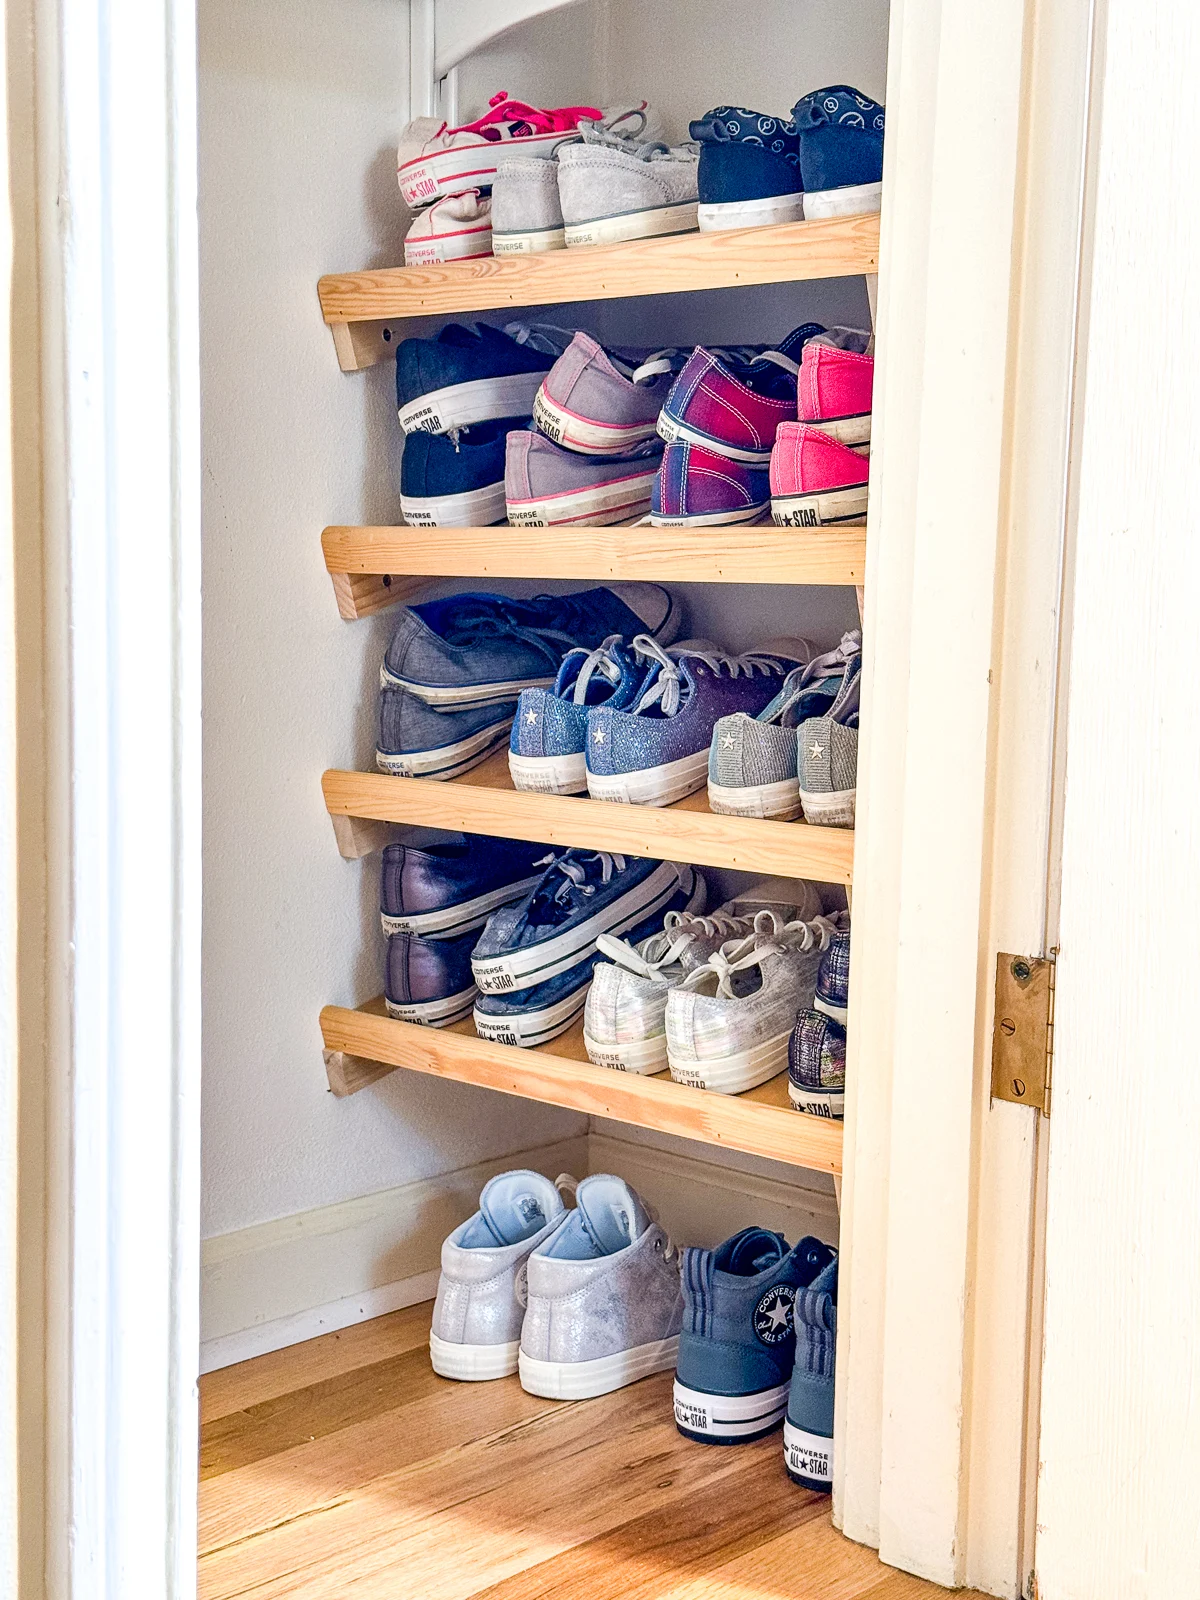
I've made a lot of different closet shelves over the years, including these slanted shoe shelves for our bedroom. These ones are made the same way, but flat and with extra support at the back for heavier items.
This space will be a lot easier to tackle than my son's bedroom closet with a sloped ceiling and attic access door. I created a custom closet build with French cleat shelves that can be easily removed if we need to get into the attic crawl space.

Check out these other DIY closet organizer ideas for more inspiration, and learn how to cover a box with fabric to create custom storage! Now, let's get to work!
This post contains affiliate links for your convenience. Purchases made through these links may earn me a small commission at no additional cost to you. Please visit my disclosures page for more information.
Materials Needed
- 1x2 board
- Laminated wood shelves
- Wood glue
- 1 ¼" wood screws or brad nails and brad nailer
- 3" wood screws
- Stud finder
- Level
- Drill
How to Build Closet Shelves
Measure your space
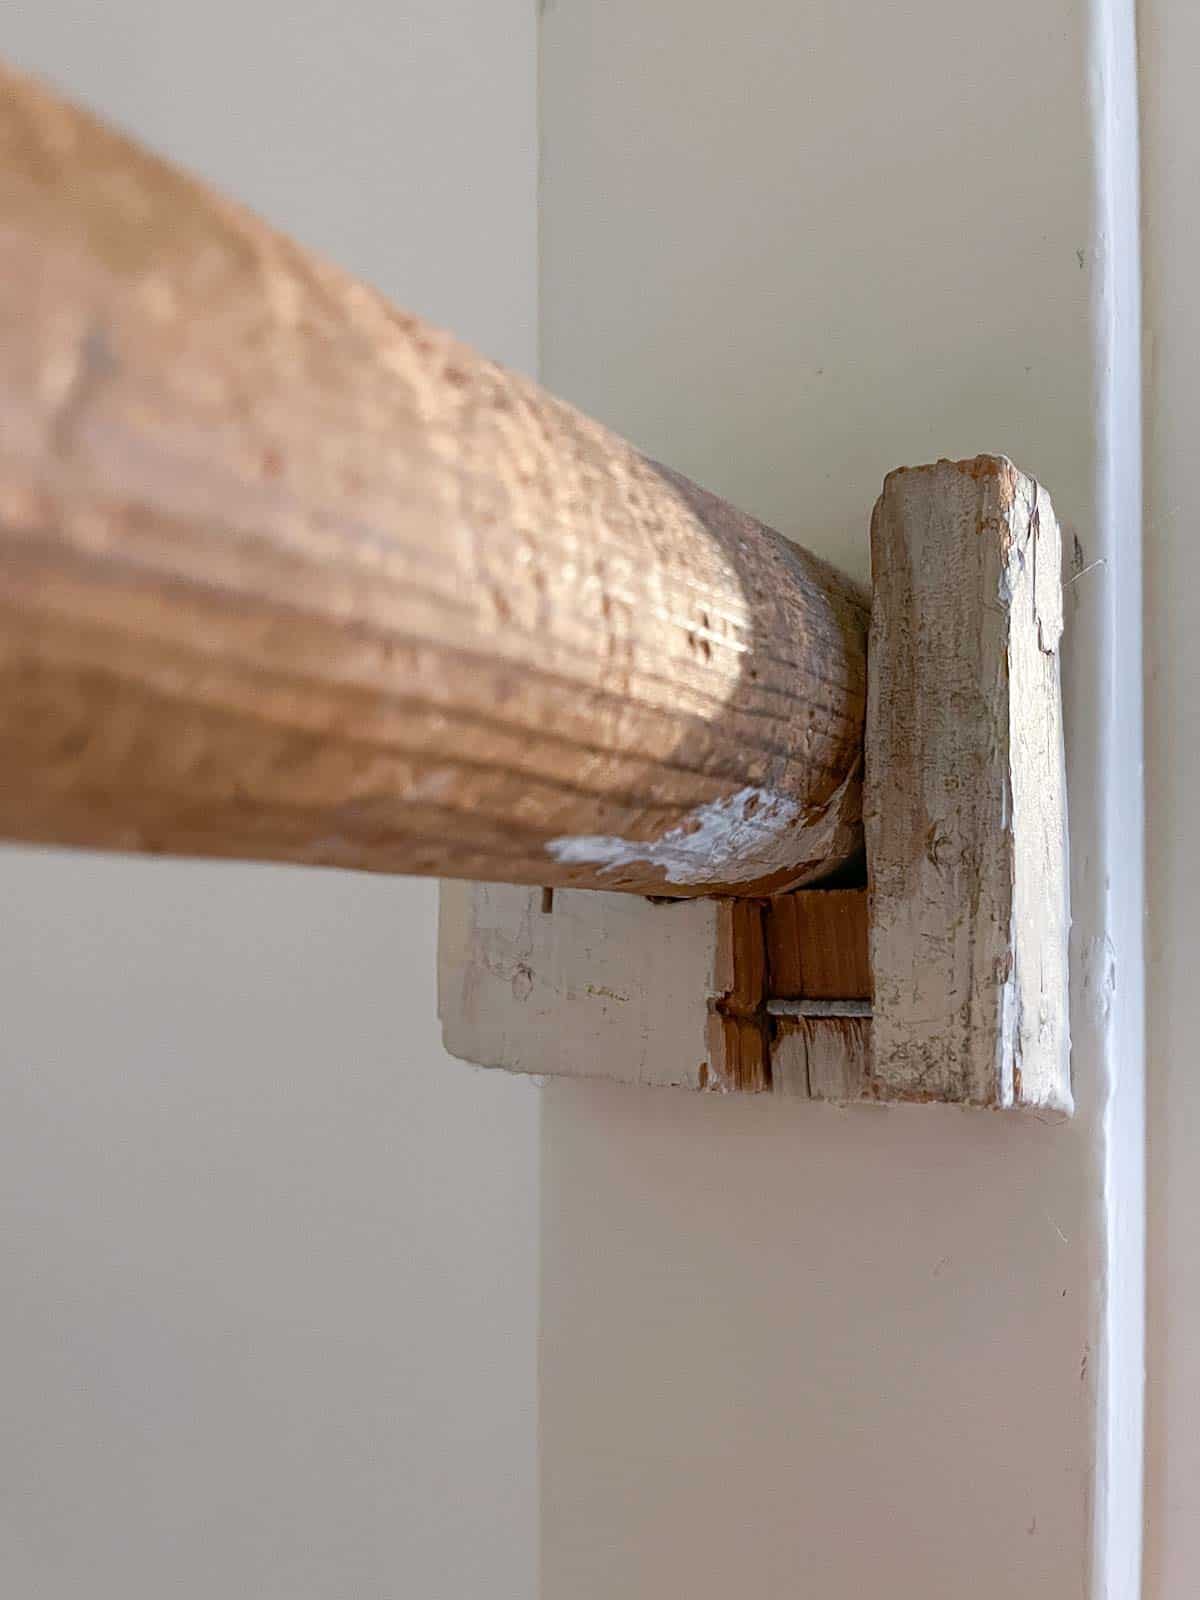
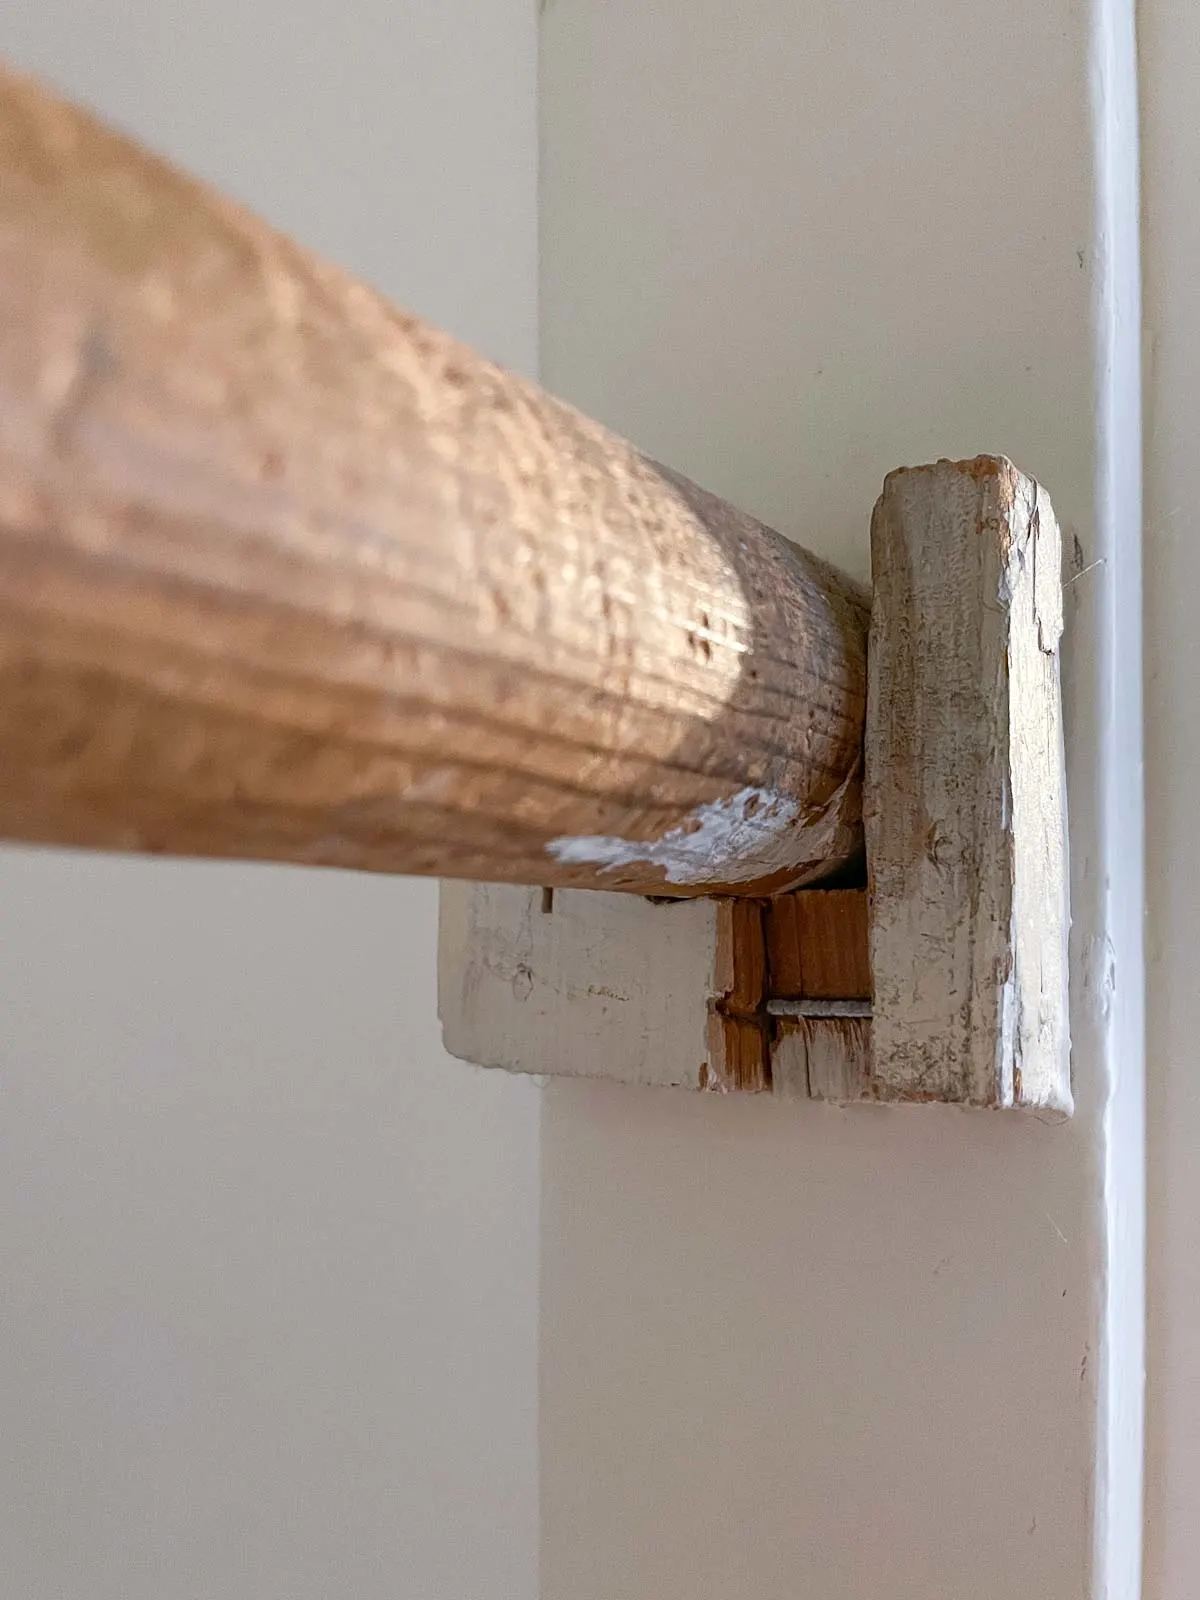
This small closet had two rods extending front to back, rather than side to side. We don't need that much hanging space, so I removed one of the rods. I'm amazed this thing could hold any weight at all! That's some quality craftsmanship right there...
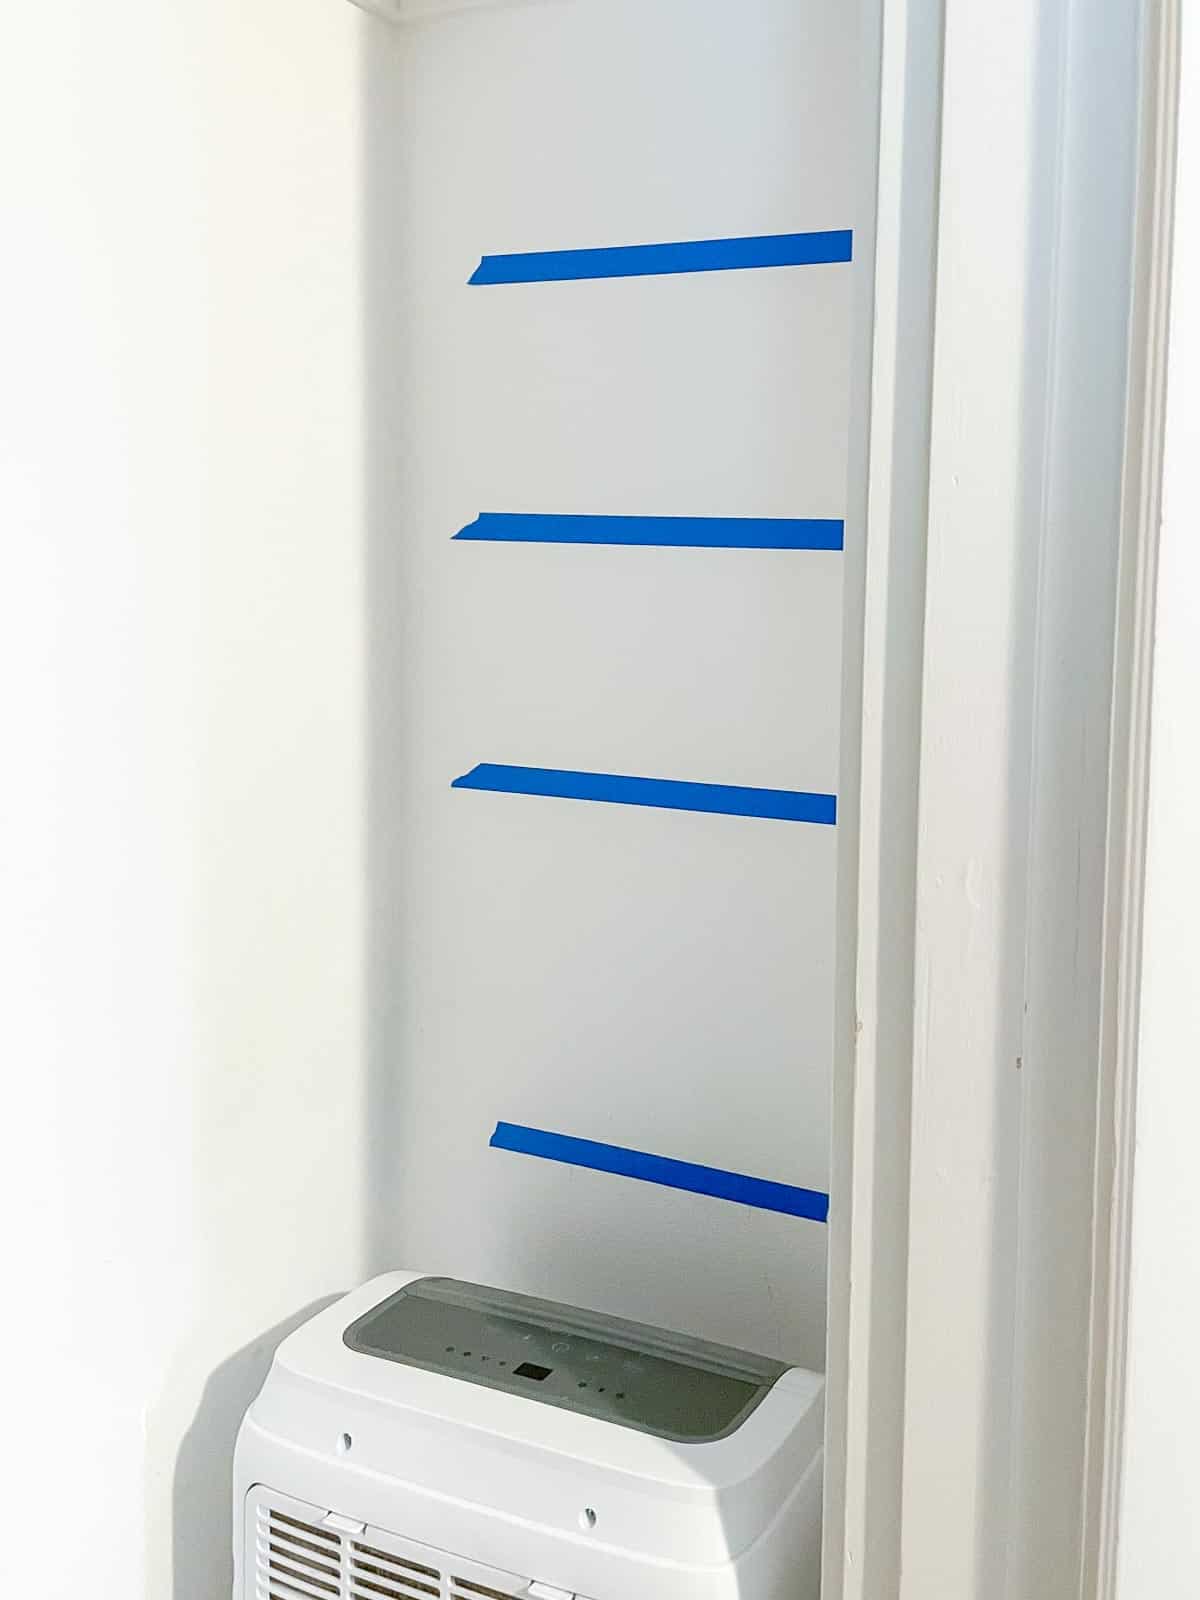
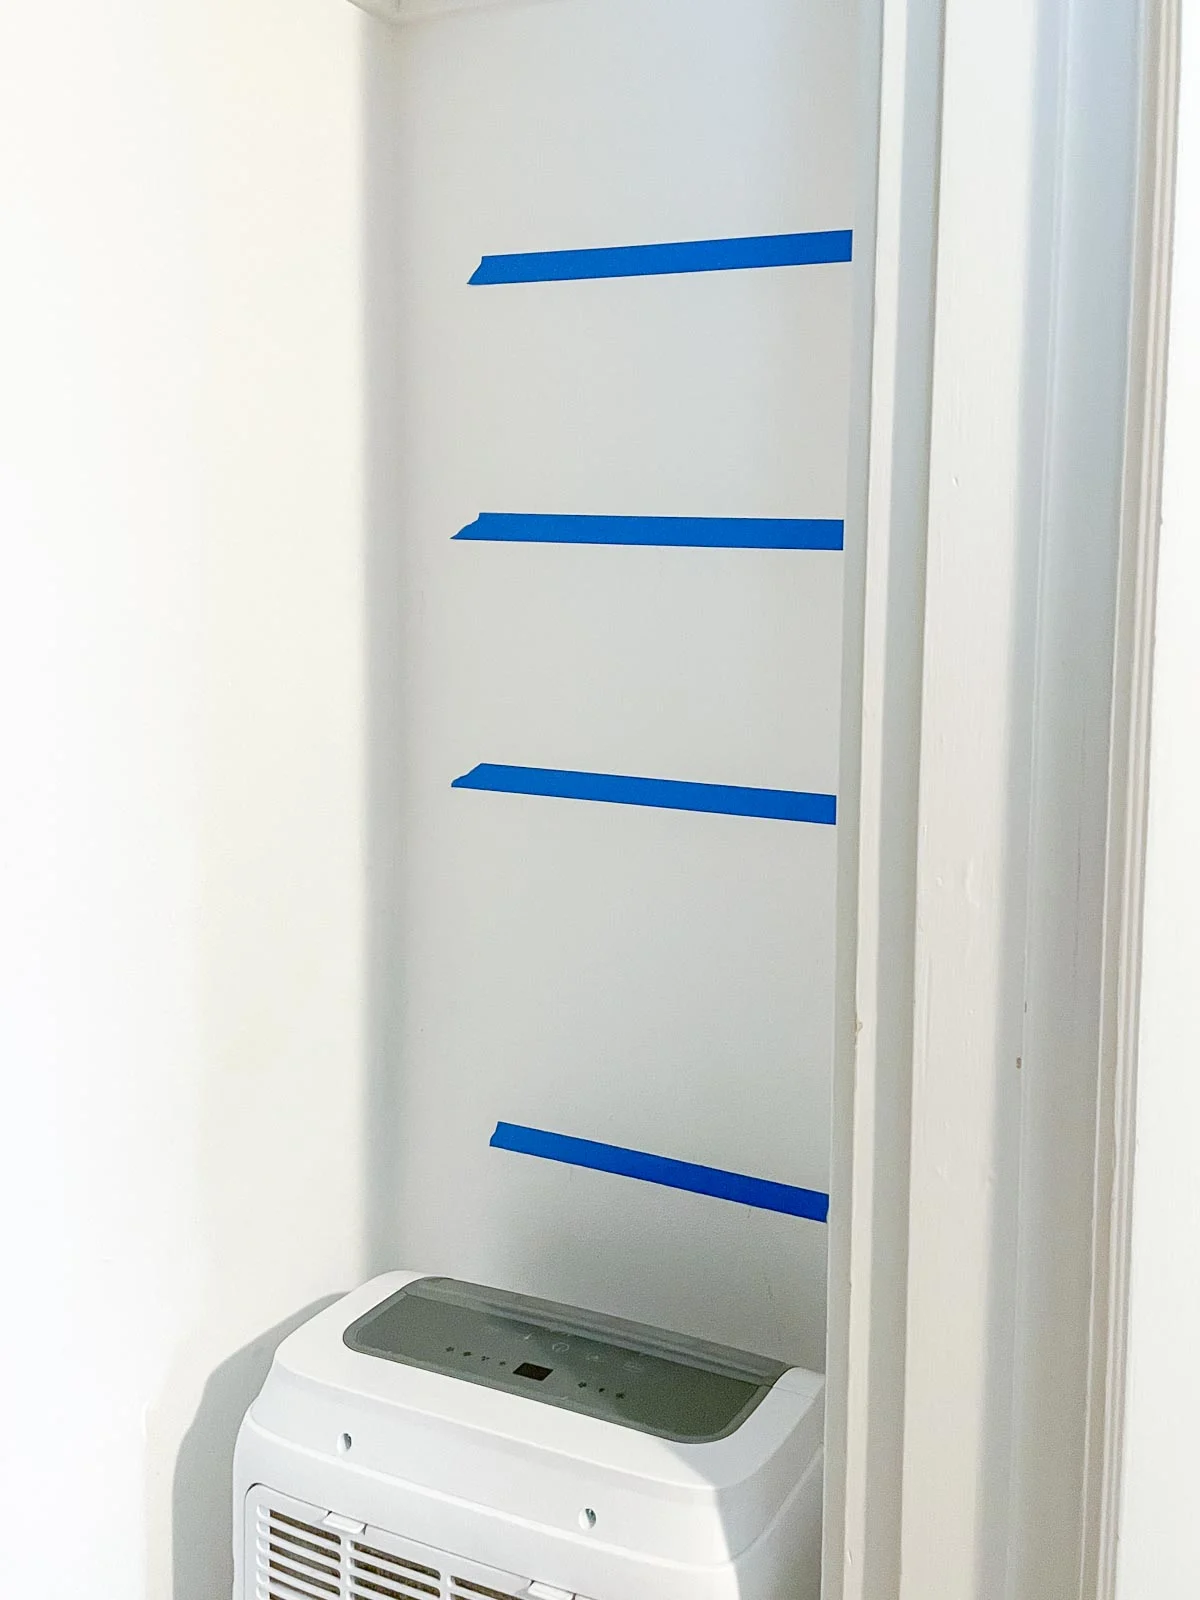
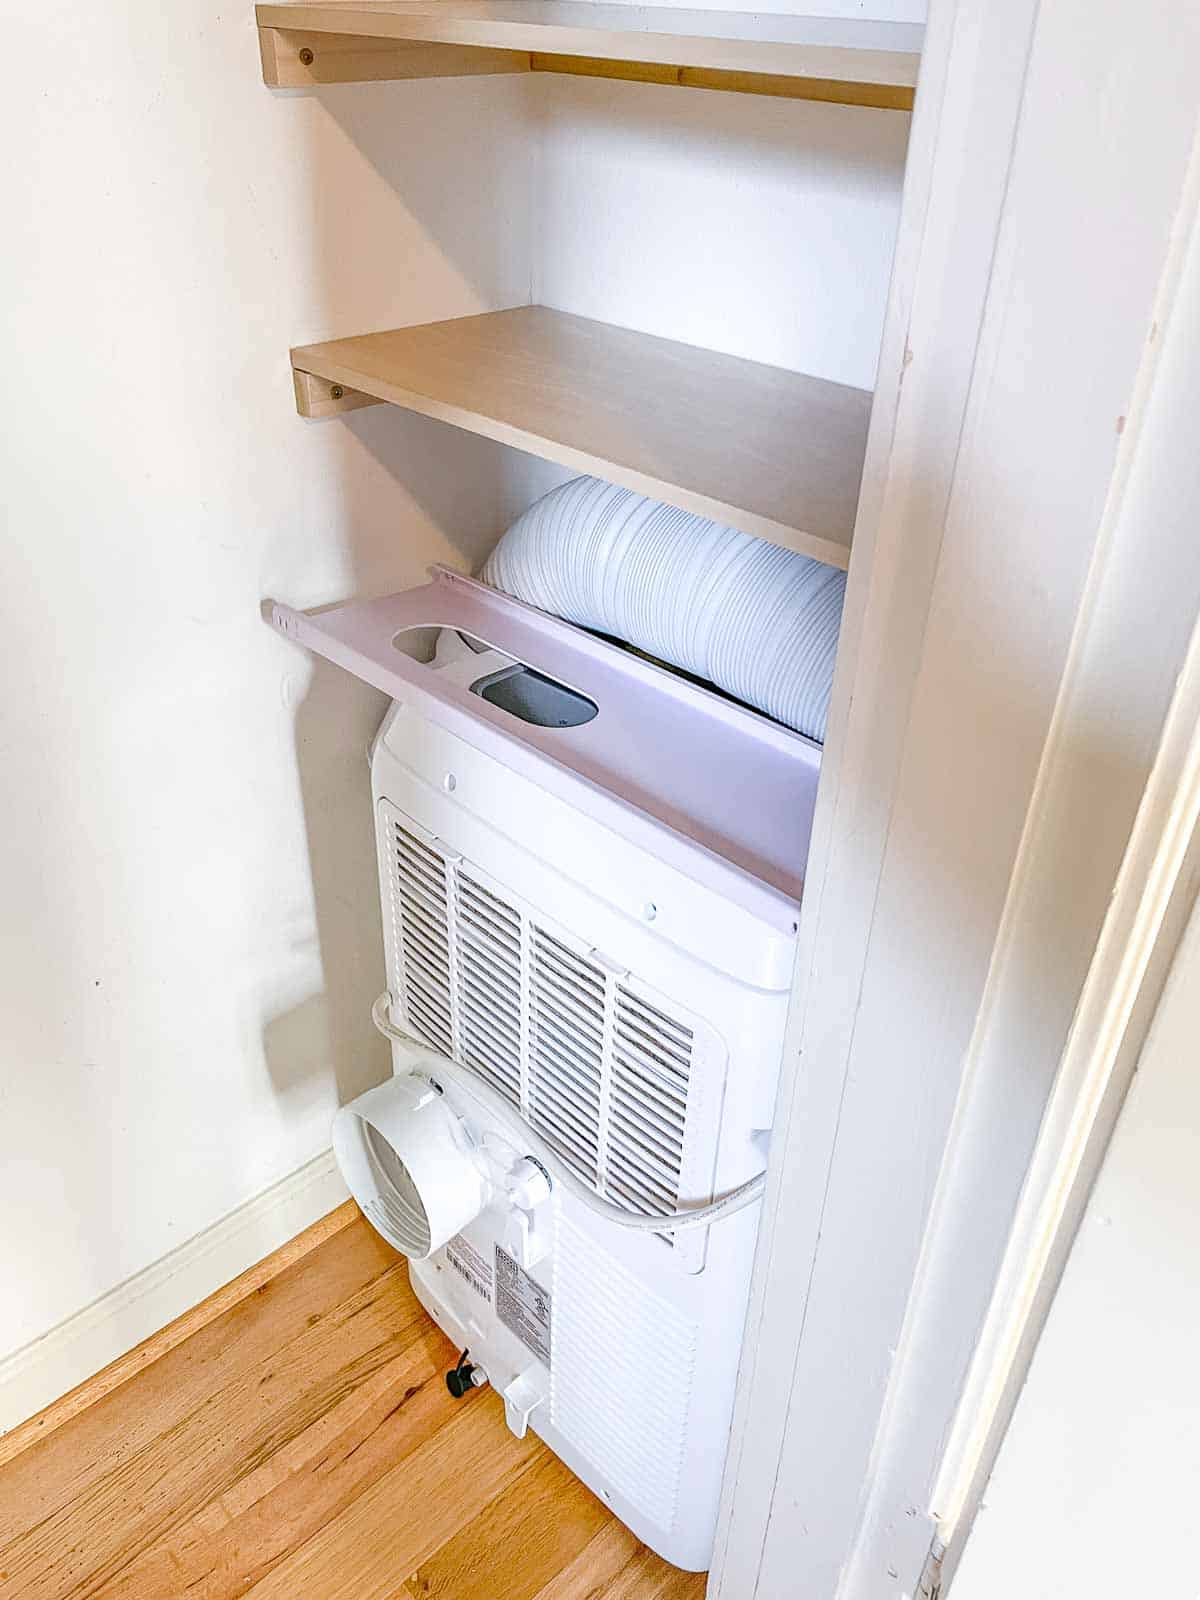
Now I could measure the interior available space and decide how many shelves I needed. Consider what you plan to store inside before you start building. I wanted a spot for our portable air conditioner, and it fit perfectly in the recessed side of the closet.


Using strips of painter's tape, I marked roughly where I wanted the shelves above the air conditioner to be. I just eyeballed the spacing and decided to make four shelves. Don't worry, I made sure the spacing was even when I finally installed them!
I measured the width of the wall from front to back in several places (since walls are rarely perfectly straight). There was trim around the inside of the closet door, so I also measured from the side wall to the trim.
Locate the studs
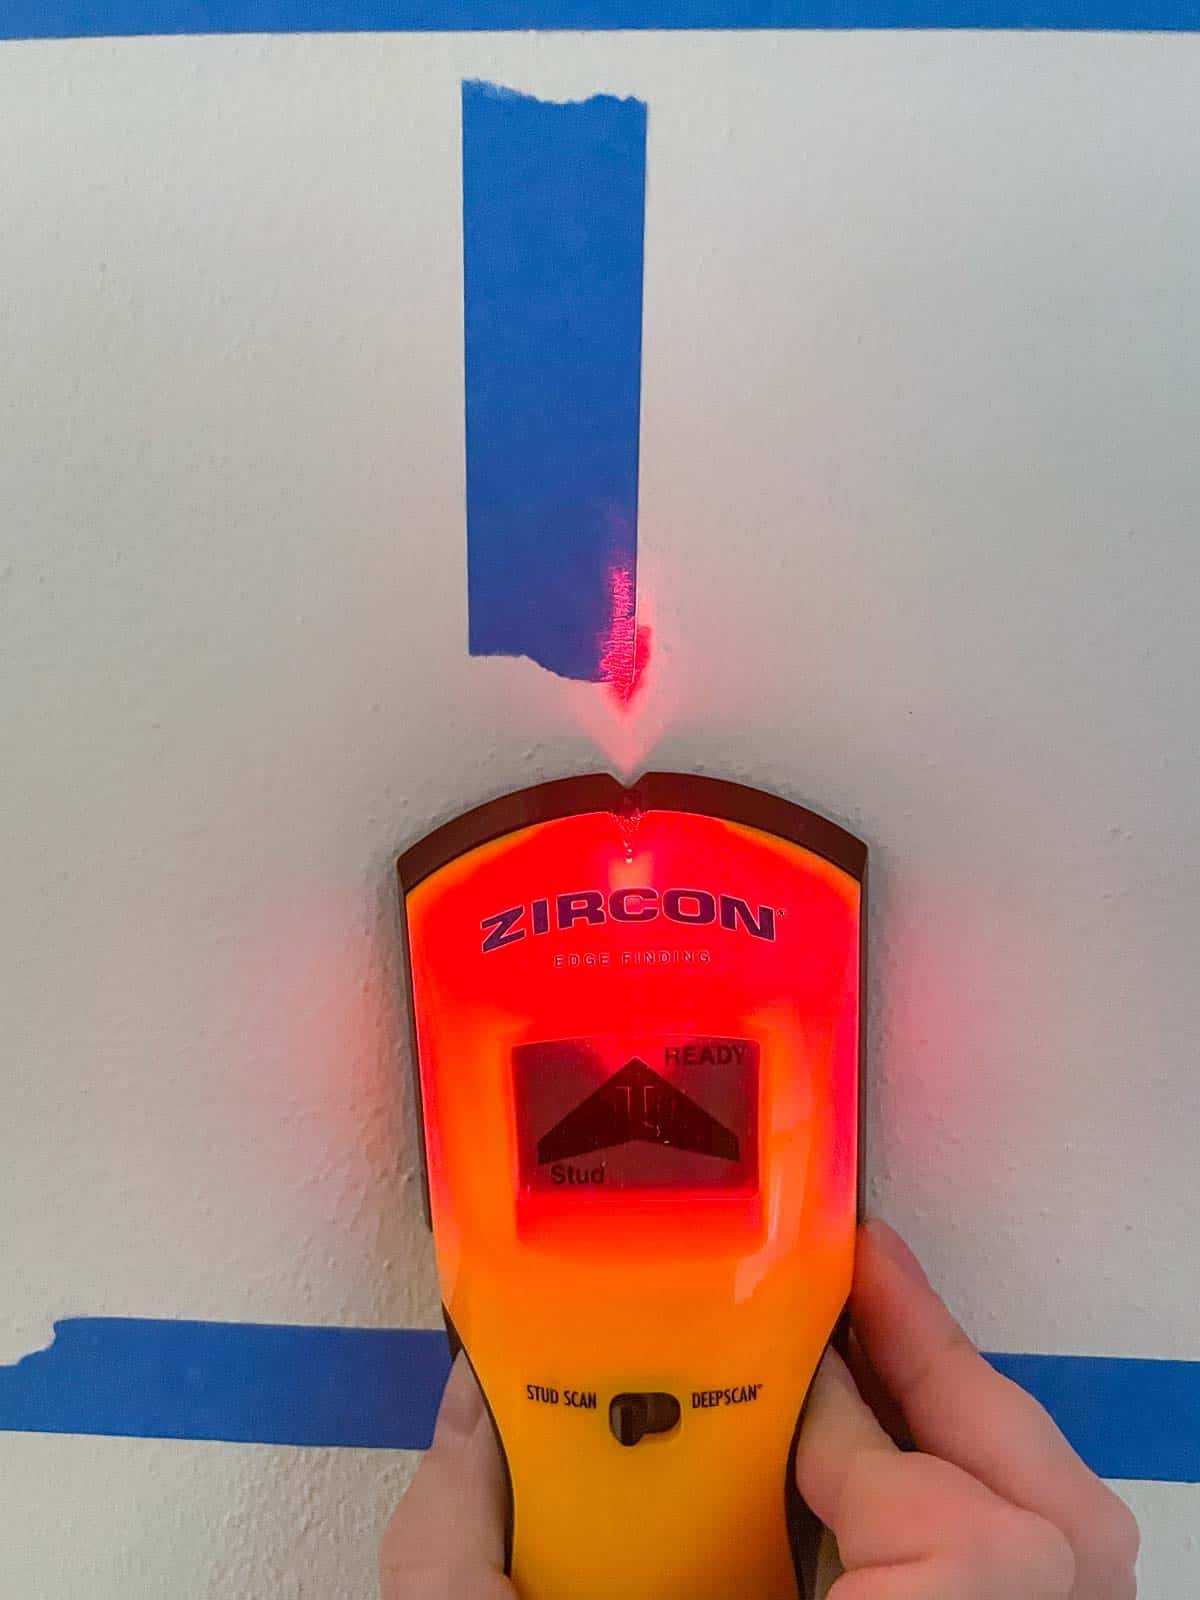
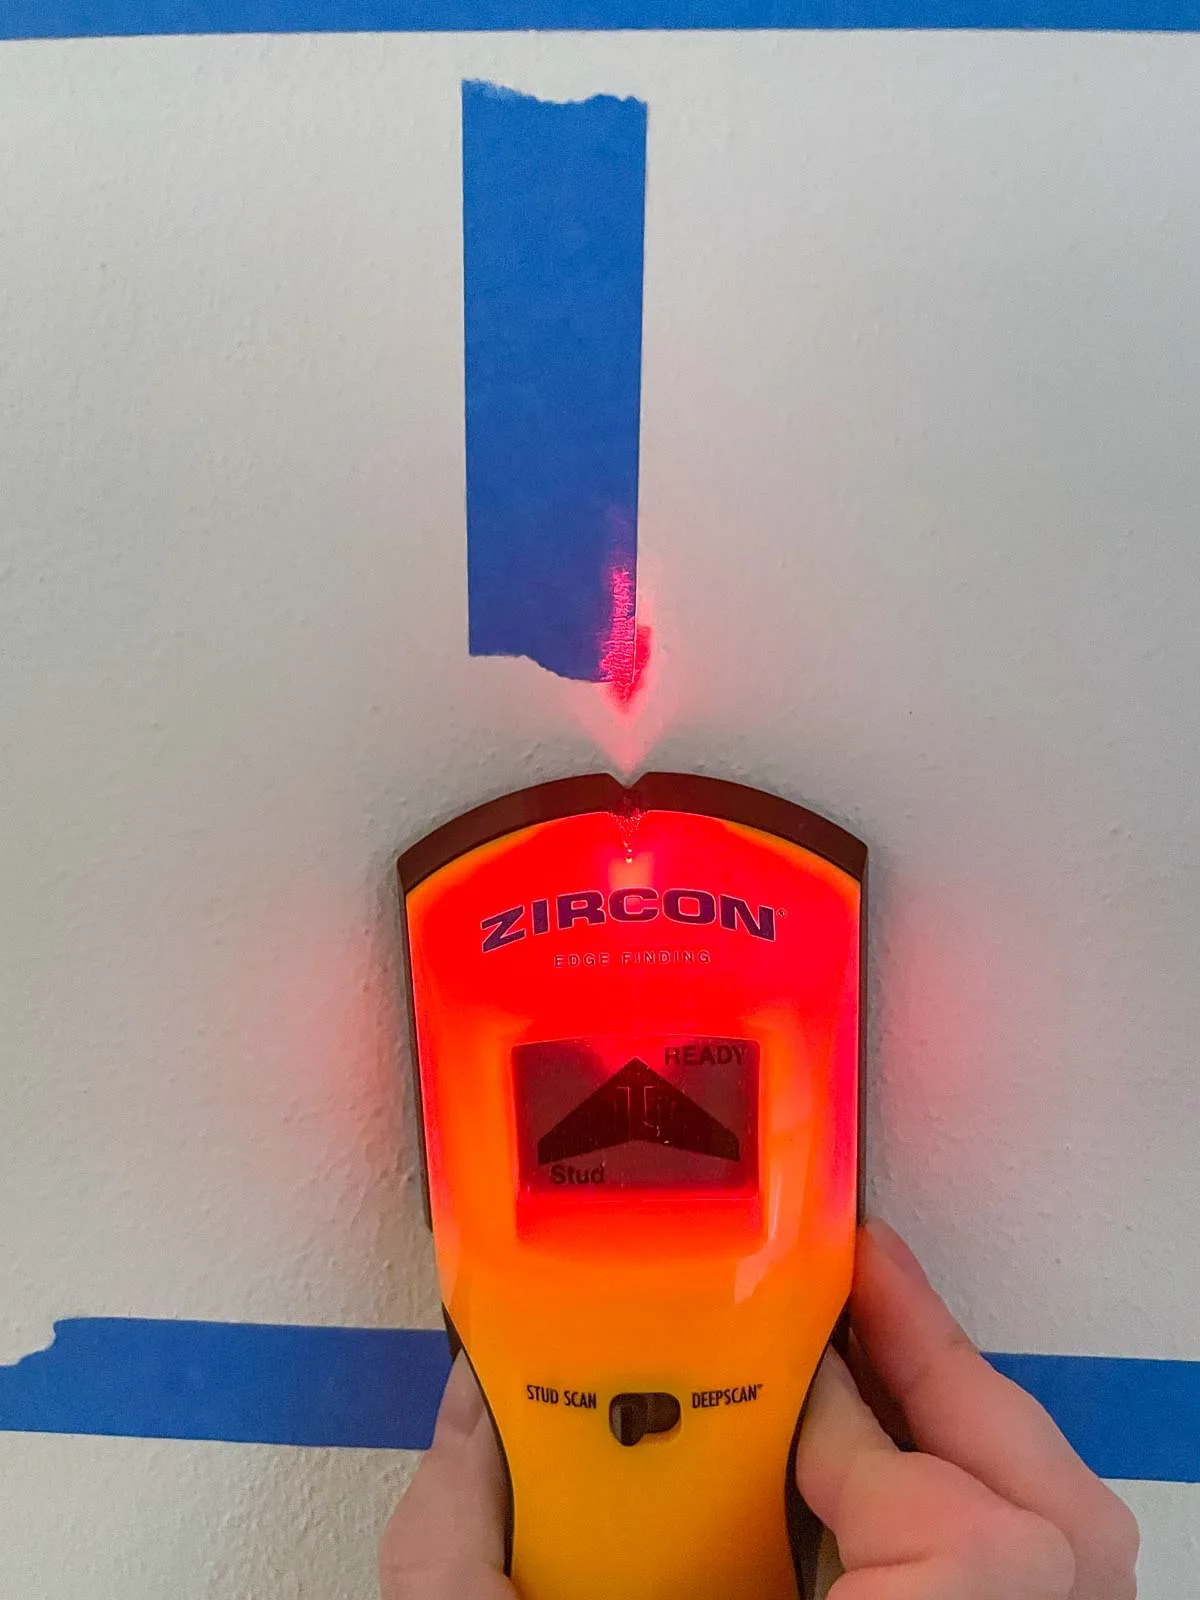
Use a stud finder to locate the studs in the walls on all three sides. I was thrilled to discover that there were studs exactly where I needed them! If you don't have a stud on one wall, you'll need to use drywall anchors to hold the shelf brackets in place securely.
Mark each stud with painter's tape, and take note of the locations so you can predrill holes in the brackets later on. Remember that the stud finder tells you where the edges of the stud are, so test from both sides and place the tape in the middle.
Cut the shelves to size
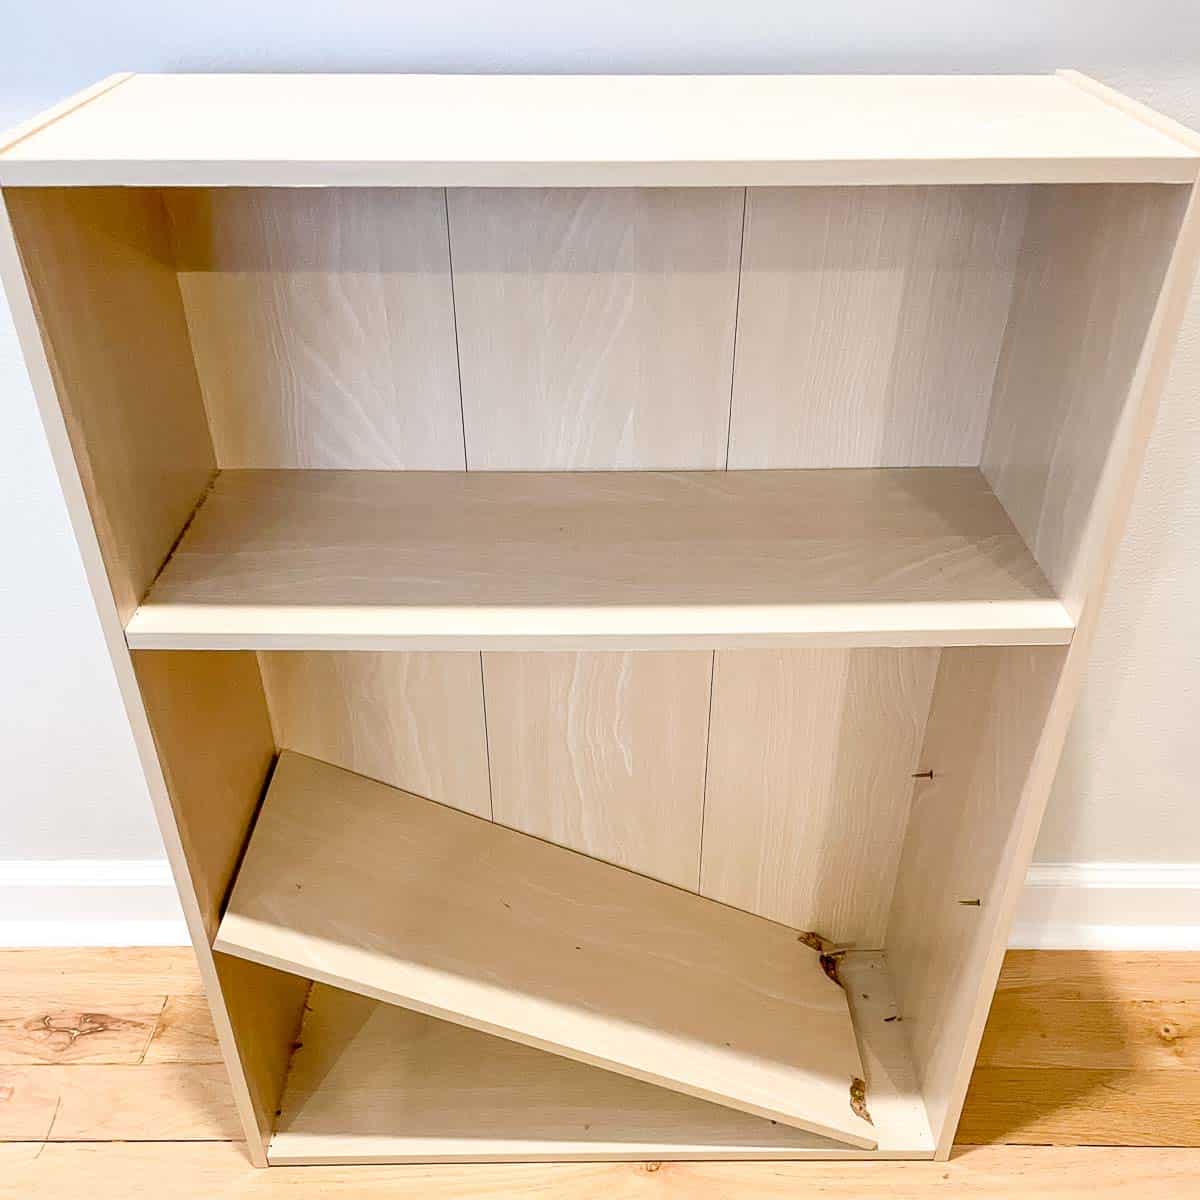
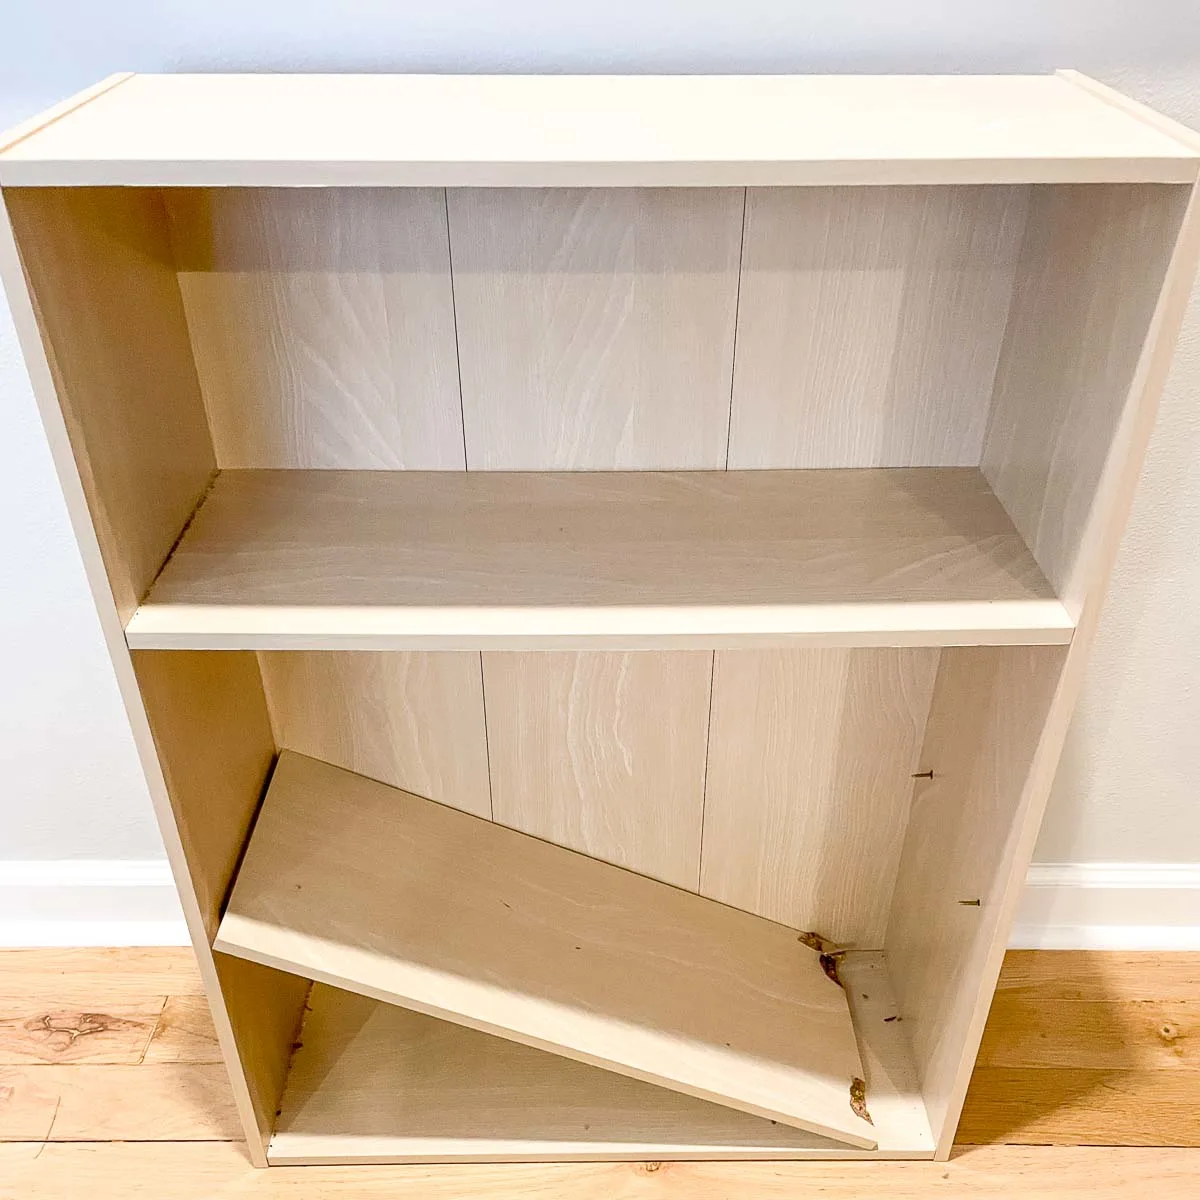
One of the things I unearthed from that mess was this cheap, broken bookcase. it just happened to be the exact depth I needed, so I took it apart and salvaged the top, bottom and two shelves. The chipped end will be cut off to fit the width I need, so it worked out perfectly!
Of course, you could make solid wood shelves instead! You can also find simple melamine shelves like these at the big box store, although there's a bigger selection of colors and sizes online if you want something other than white.
They typically come in 24", 36", 48" and 72" widths. If your closet doesn't fit these exact dimensions, buy the next one up and cut it to the length you need.
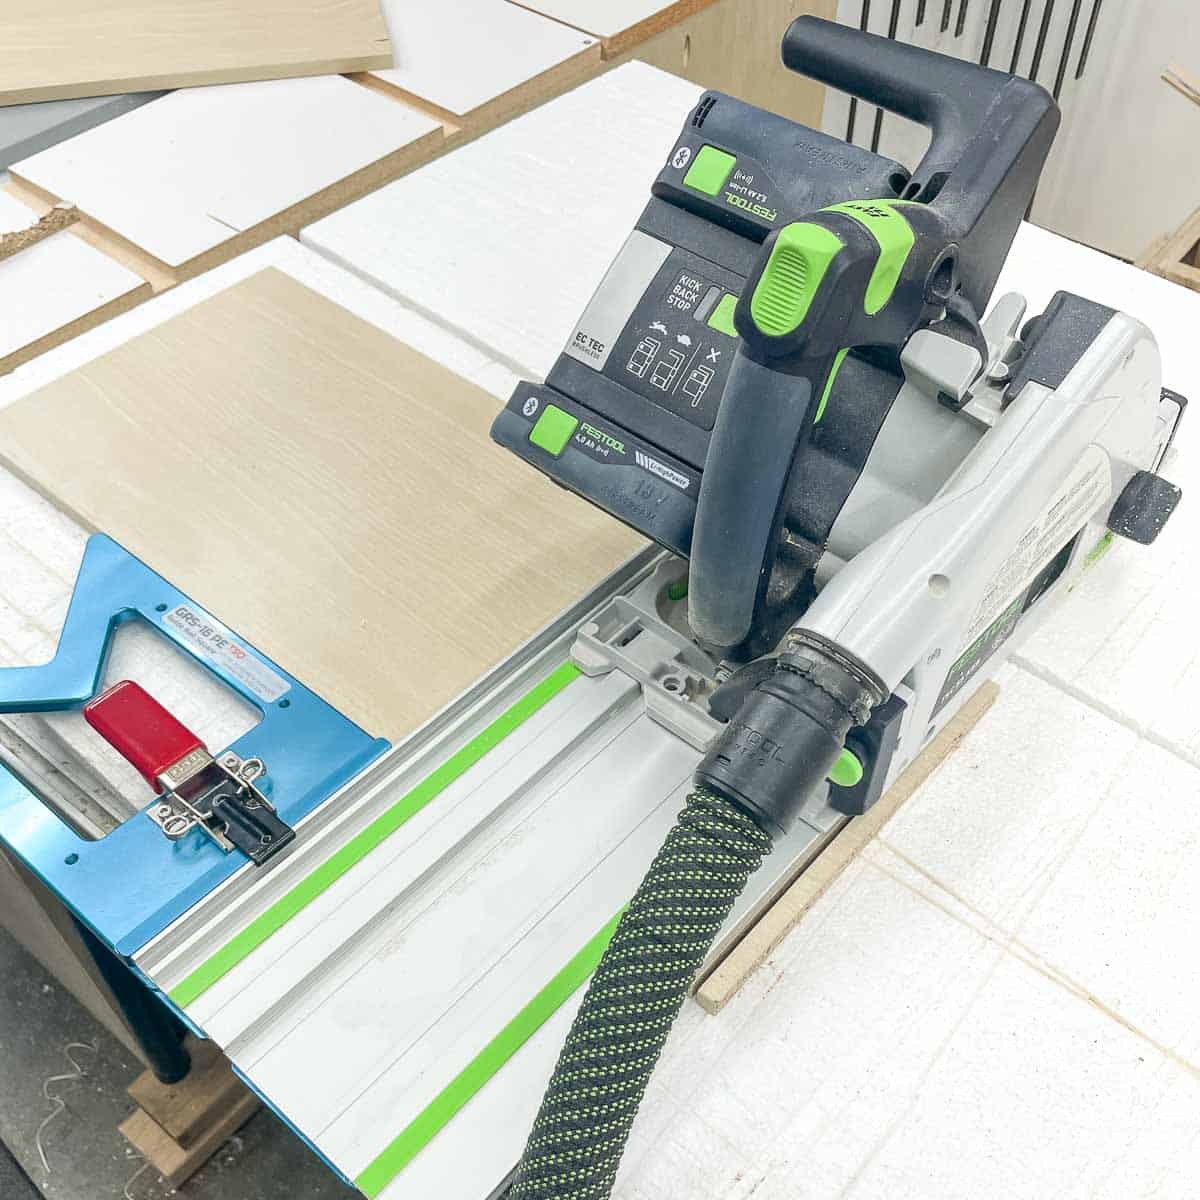
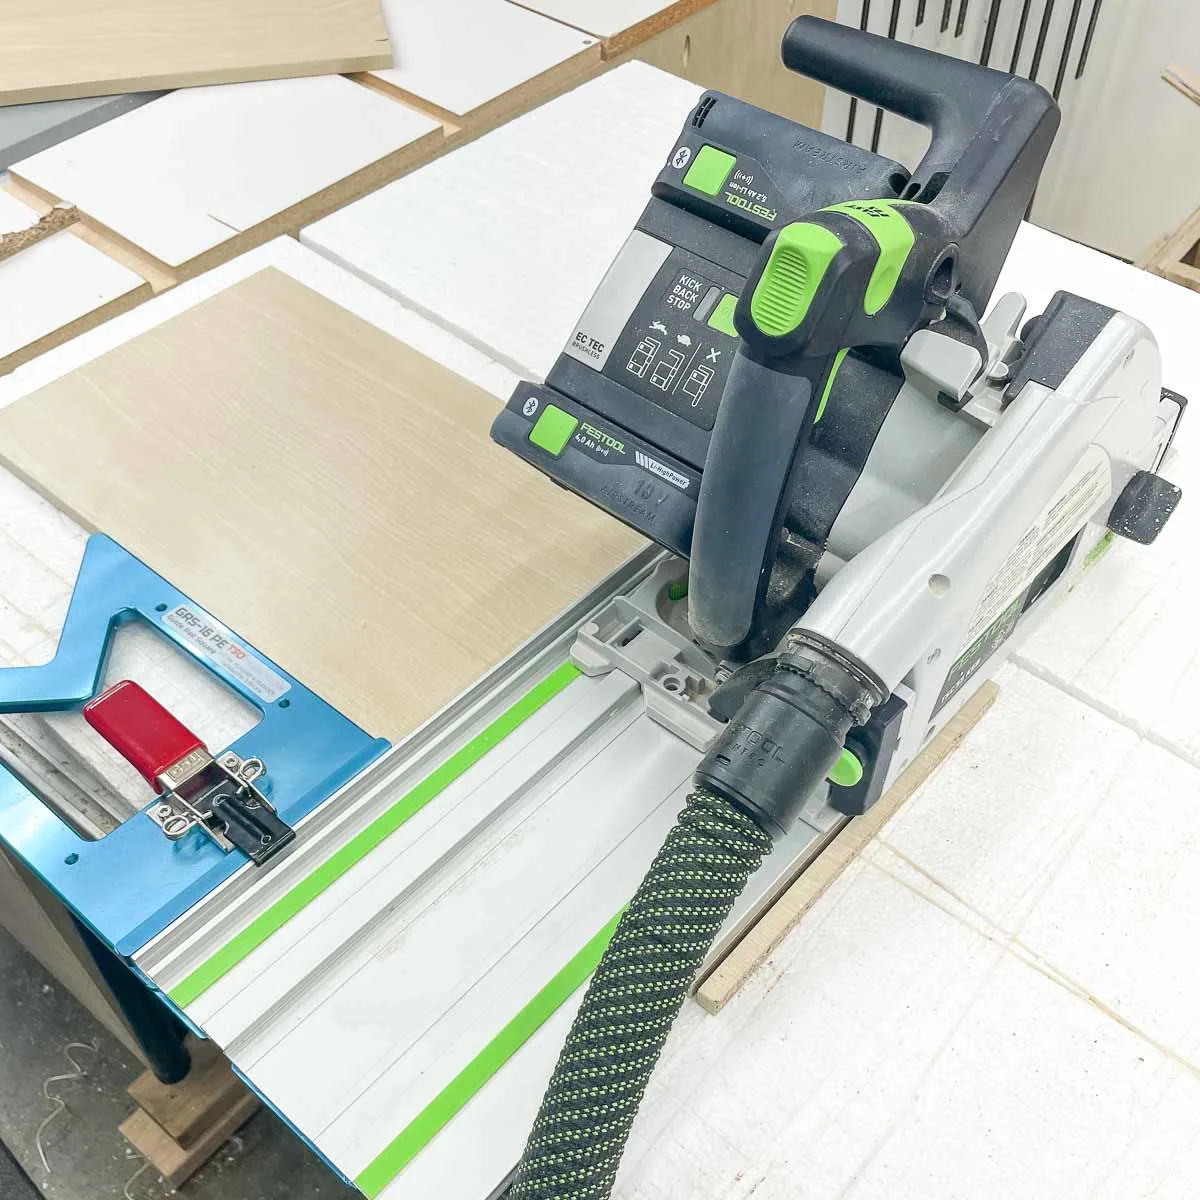
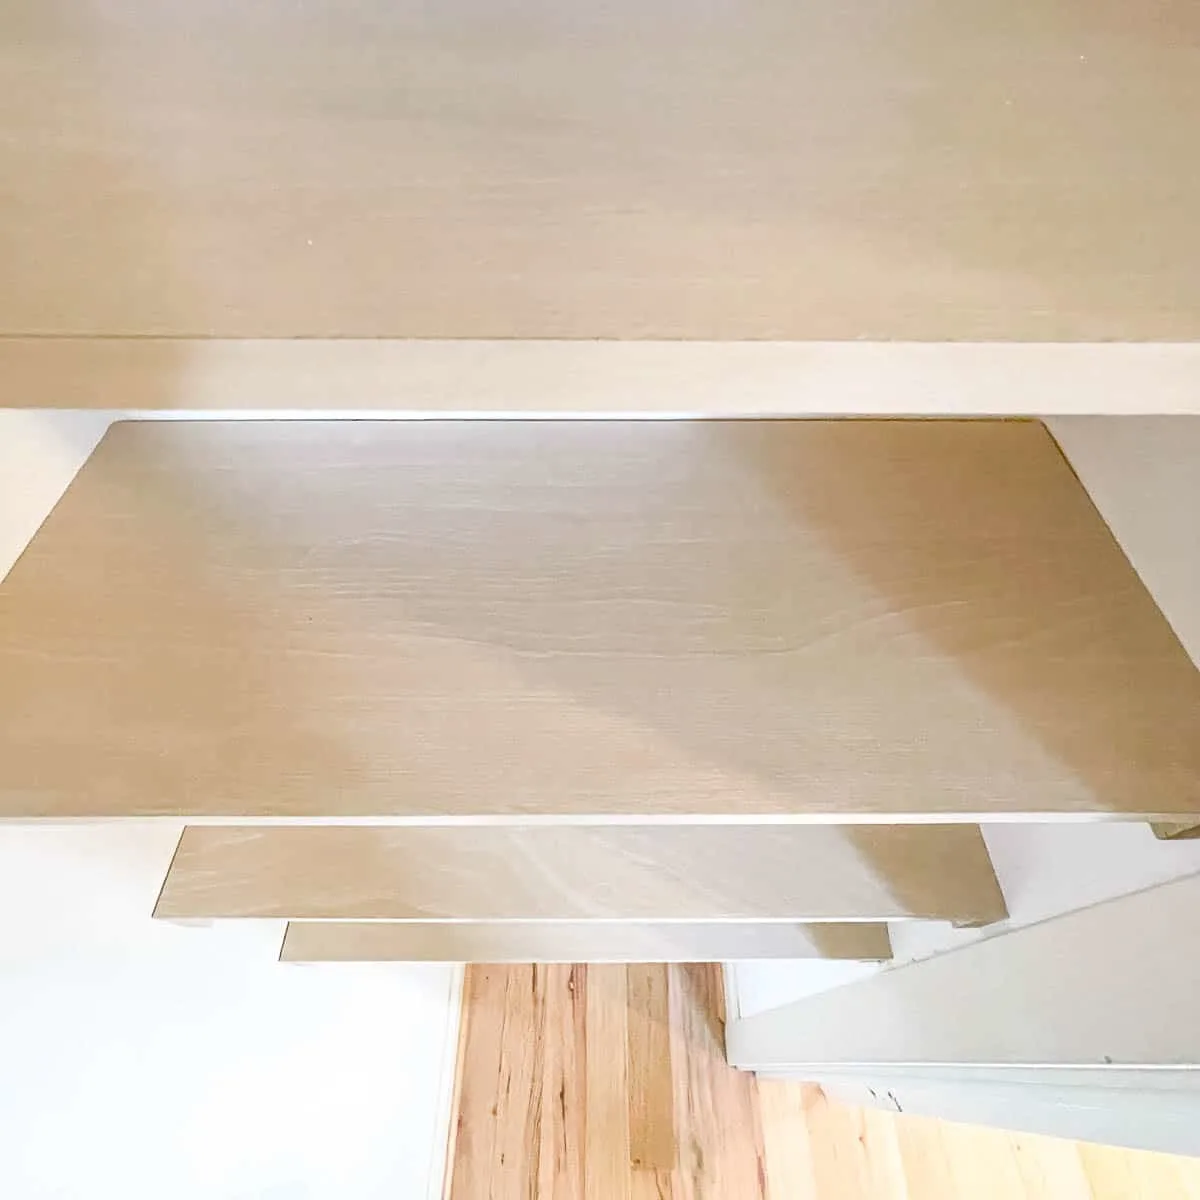
You can use a circular saw or track saw to cut the shelves down to size. You could also use a miter saw depending on how wide of a board it can cut. I used a track saw with a rail square to ensure that the cut was straight and splinter-free.
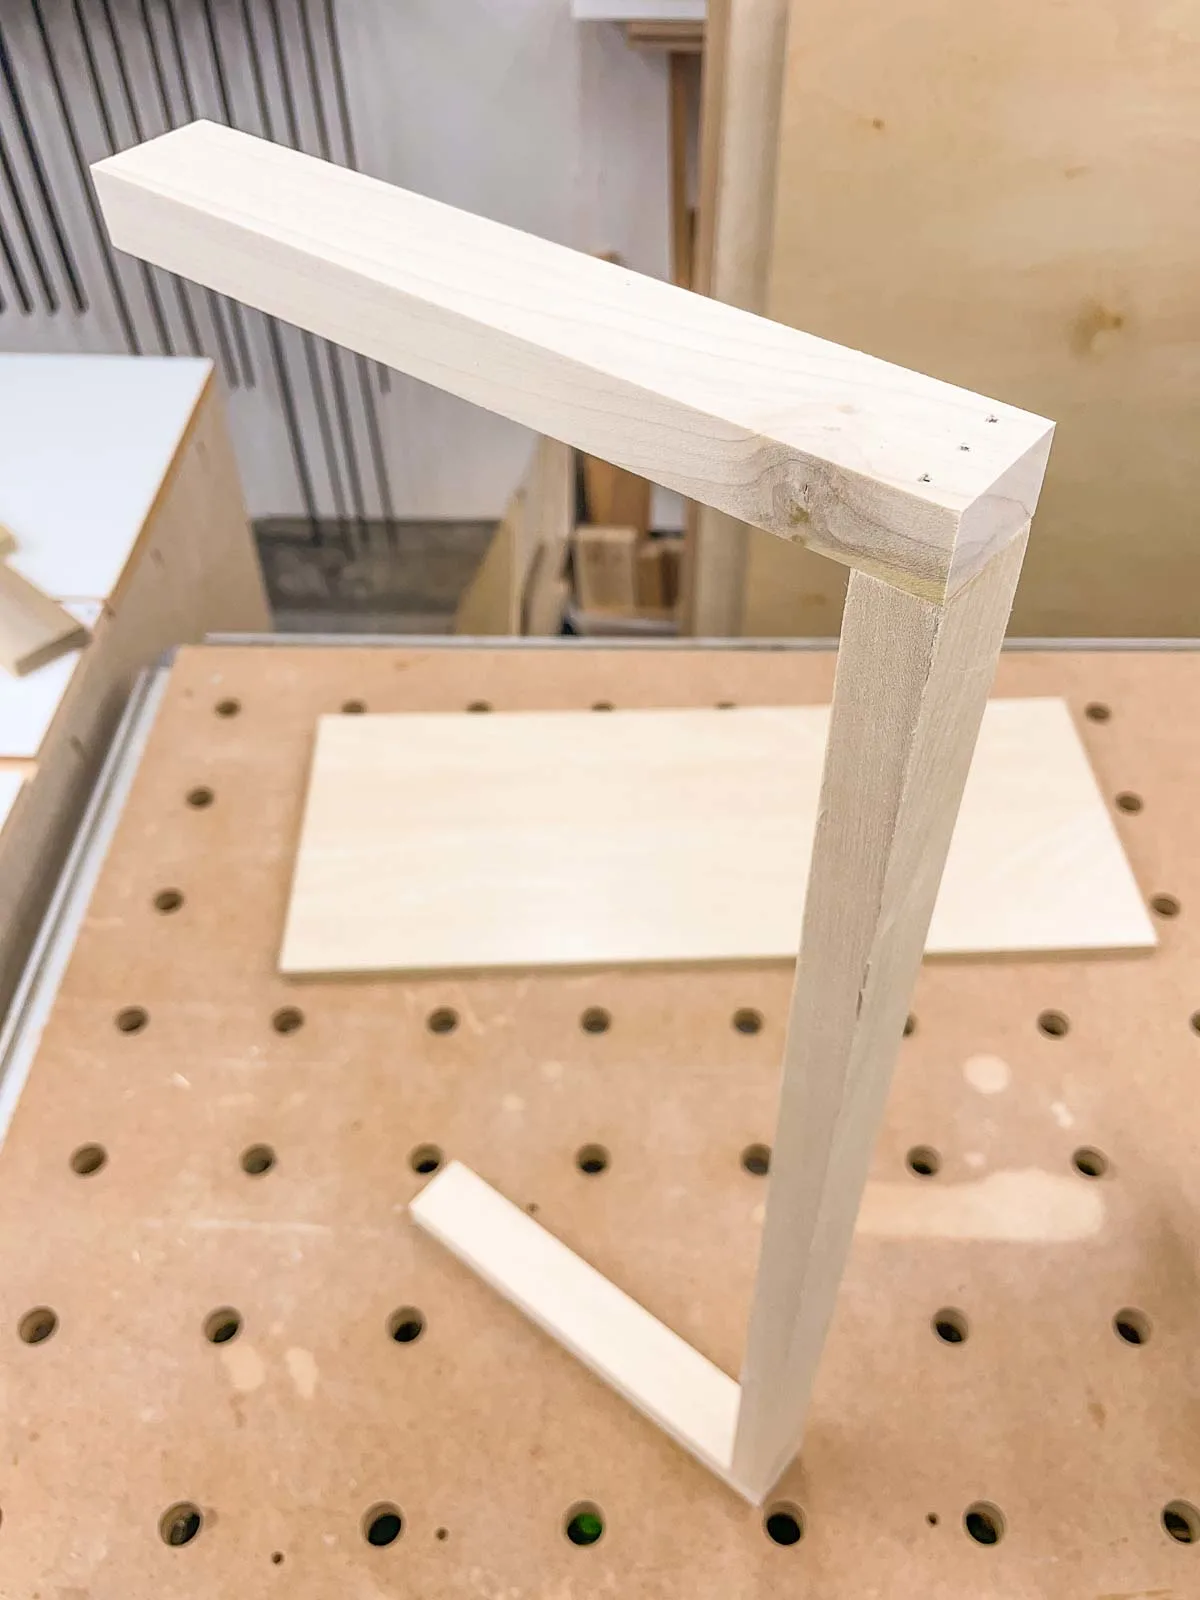
Build the shelf brackets
These simple shelf brackets are made out of 1x2 boards that I dug out of scrap wood lumber cart. You could easily cut these boards with a miter box by hand if you don't want to deal with power tools.
Start by cutting two end pieces to the same width as the shelf. Place the end pieces on top of the shelf, then measure the exact length of the space between them. Then cut the back piece to that dimension. Double check to see if everything lines up with the shelf edges.
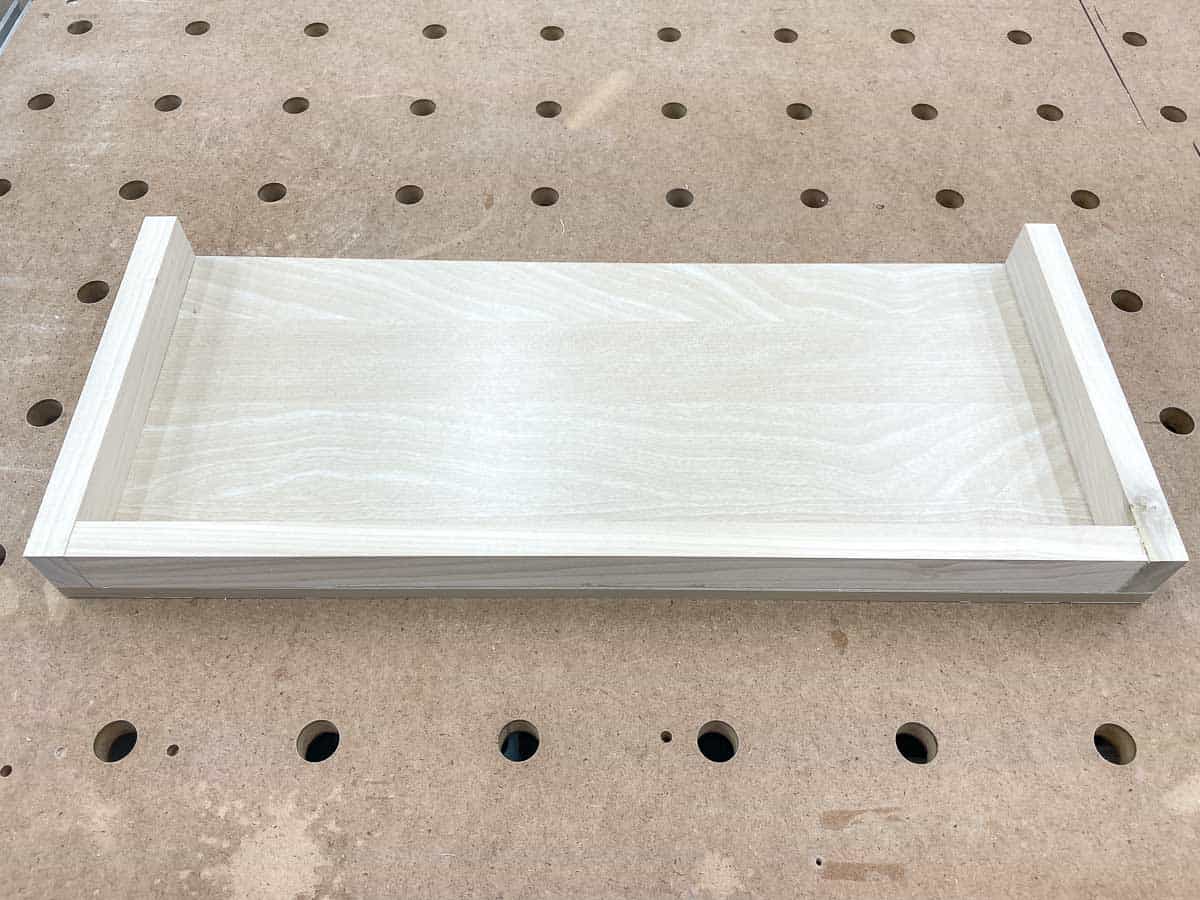

Apply wood glue to the ends of the longer piece, and place it between the end pieces. Tack the bracket pieces together with brad nails or wood screws. Make sure you countersink the screws so the heads don't get in the way during installation.

Keep in mind that the brackets will be visible, so you may want to consider painting or staining them to match either the shelves or the wall. I used poplar, which coordinated pretty well with the shelf color.
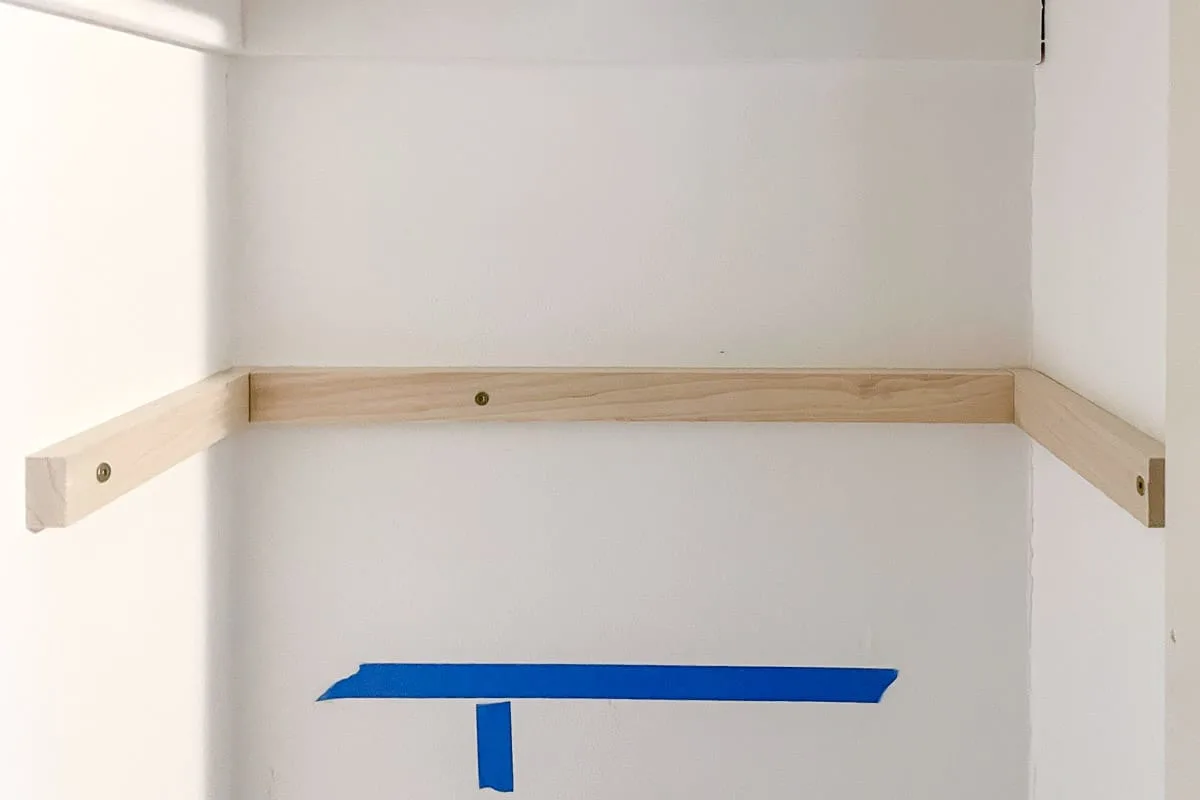
Attach the shelf brackets to the closet wall
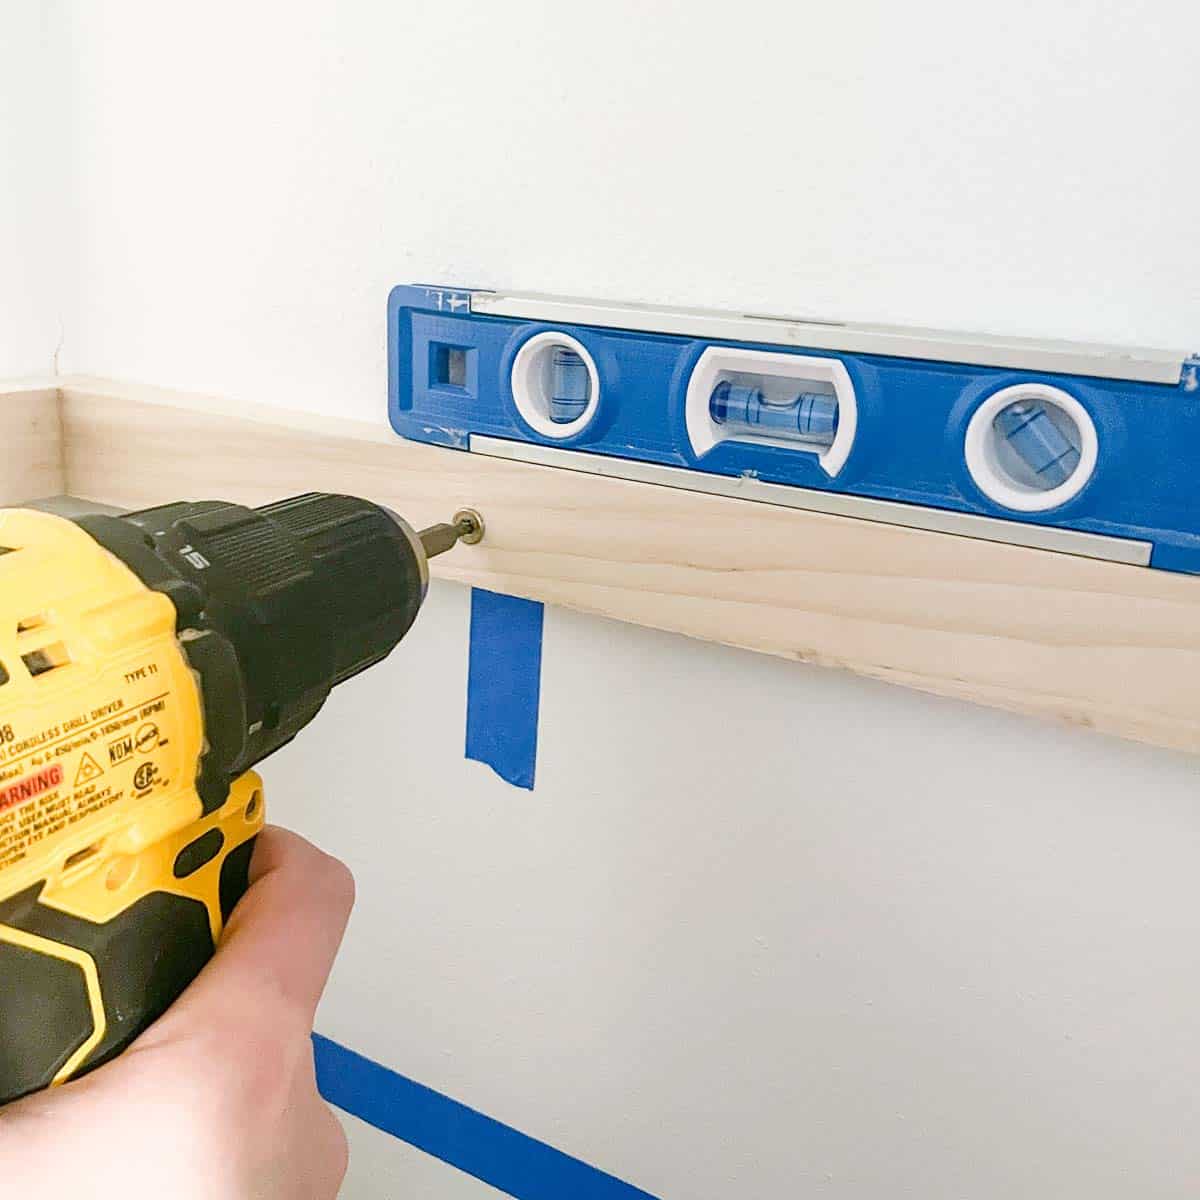
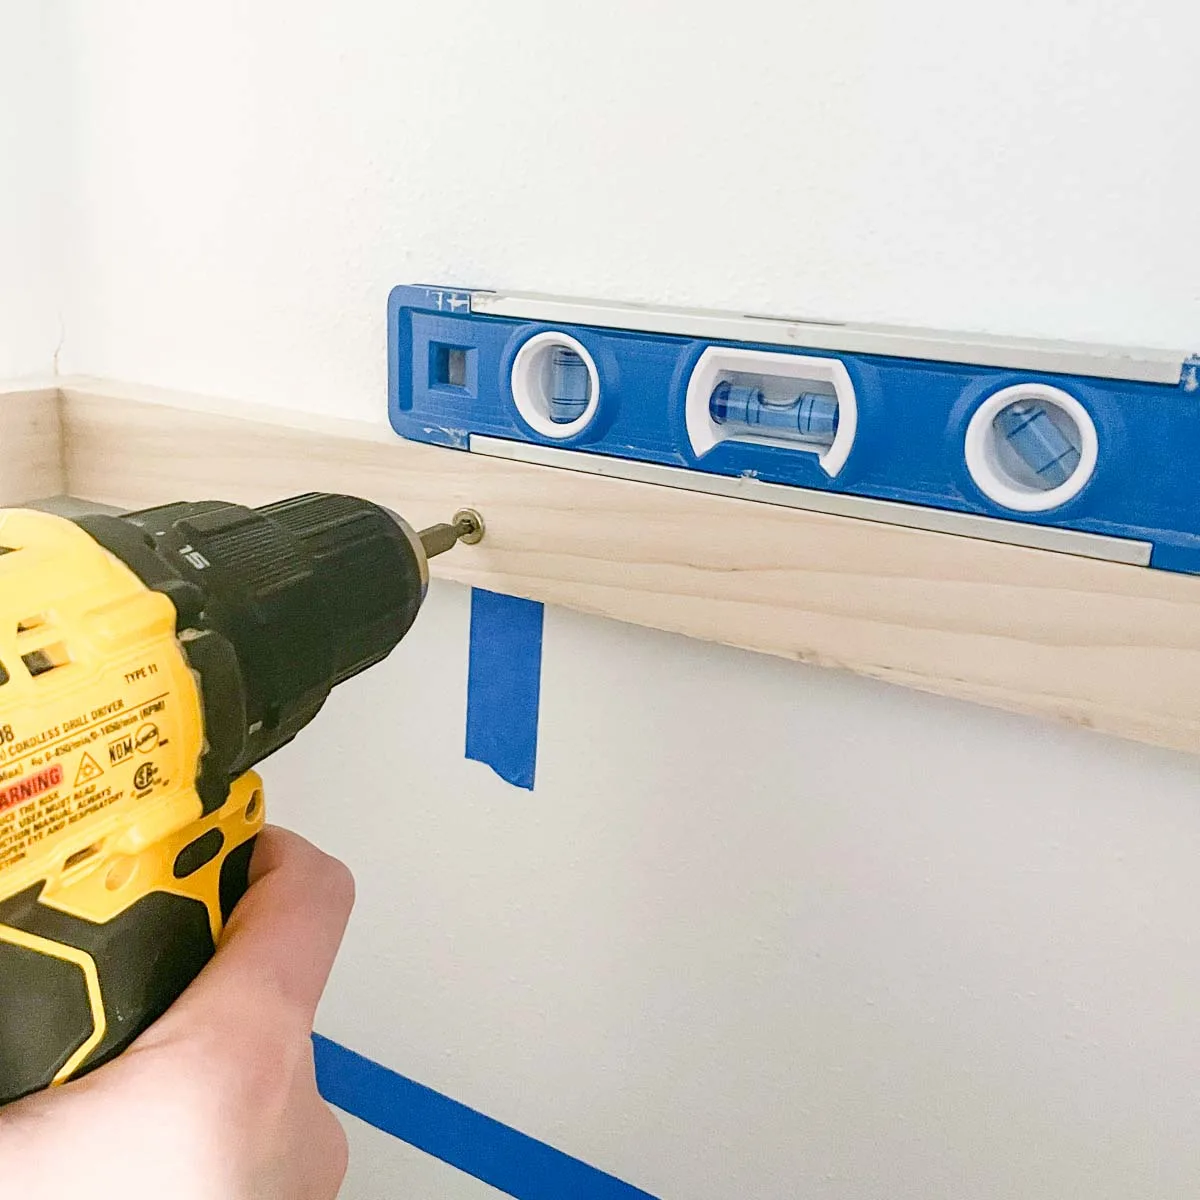
Hold the first bracket on the wall of the closet, and predrill a hole wherever the bracket lines up with the studs or the hollow wall anchors. This will prevent the wood from splitting when you drive in the screw.
Place a level on top of the bracket, and screw the back of the bracket into place. Leave the screw a little bit loose and adjust the angle until it's level, then tighten it all the way.
Repeat the process for each end of the shelf bracket.

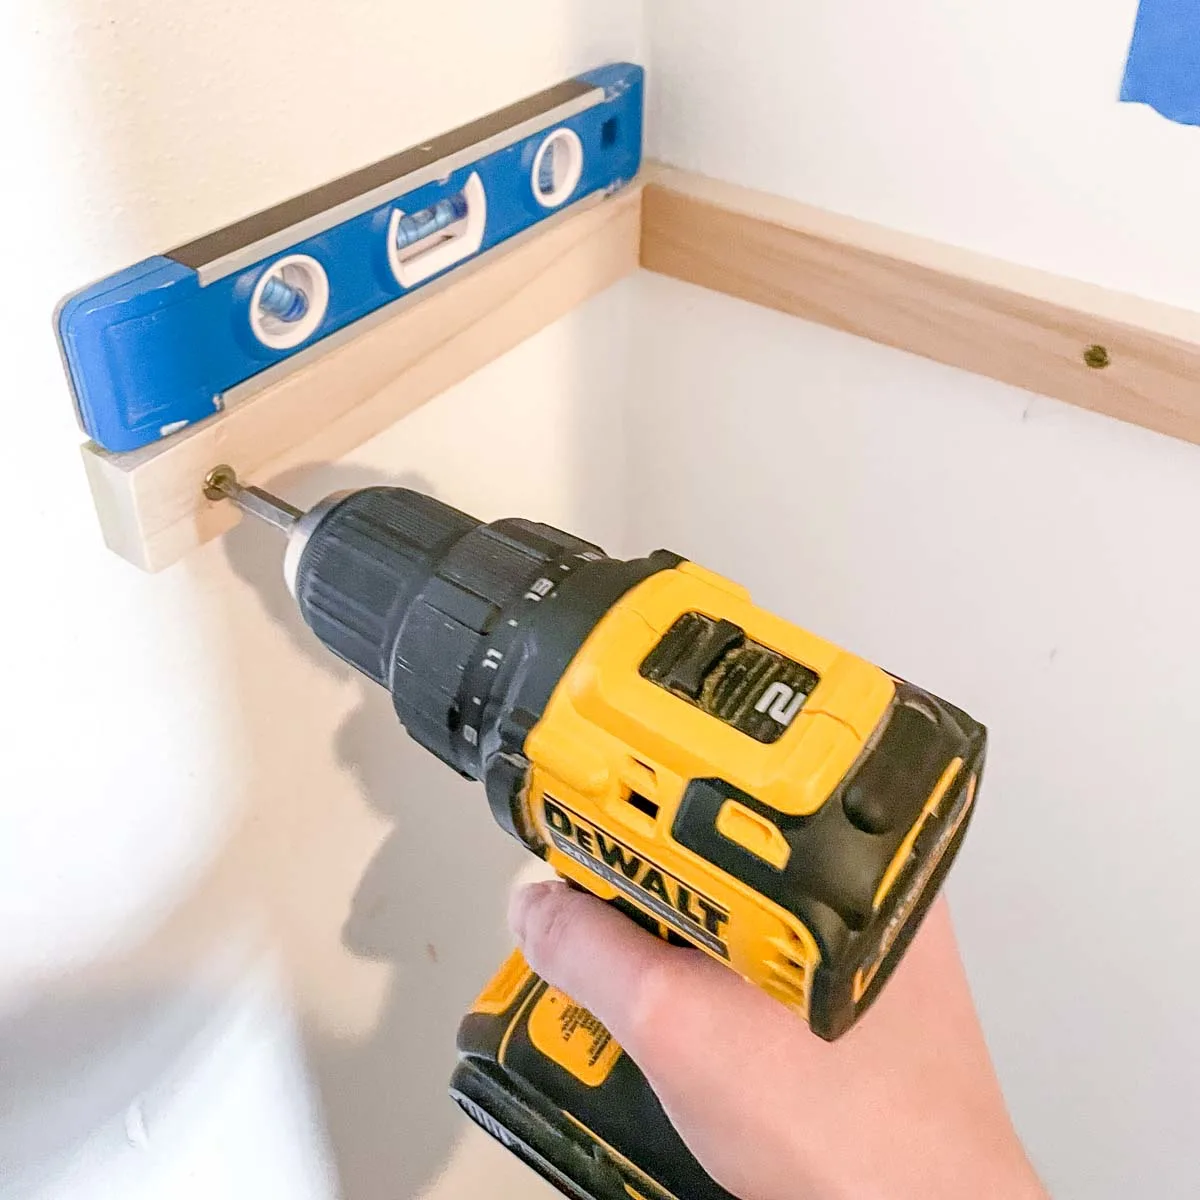
Ideally, you'd want at least two screws through the back so the weight is evenly distributed. But with a small shelf like this, I wasn't too worried about it.
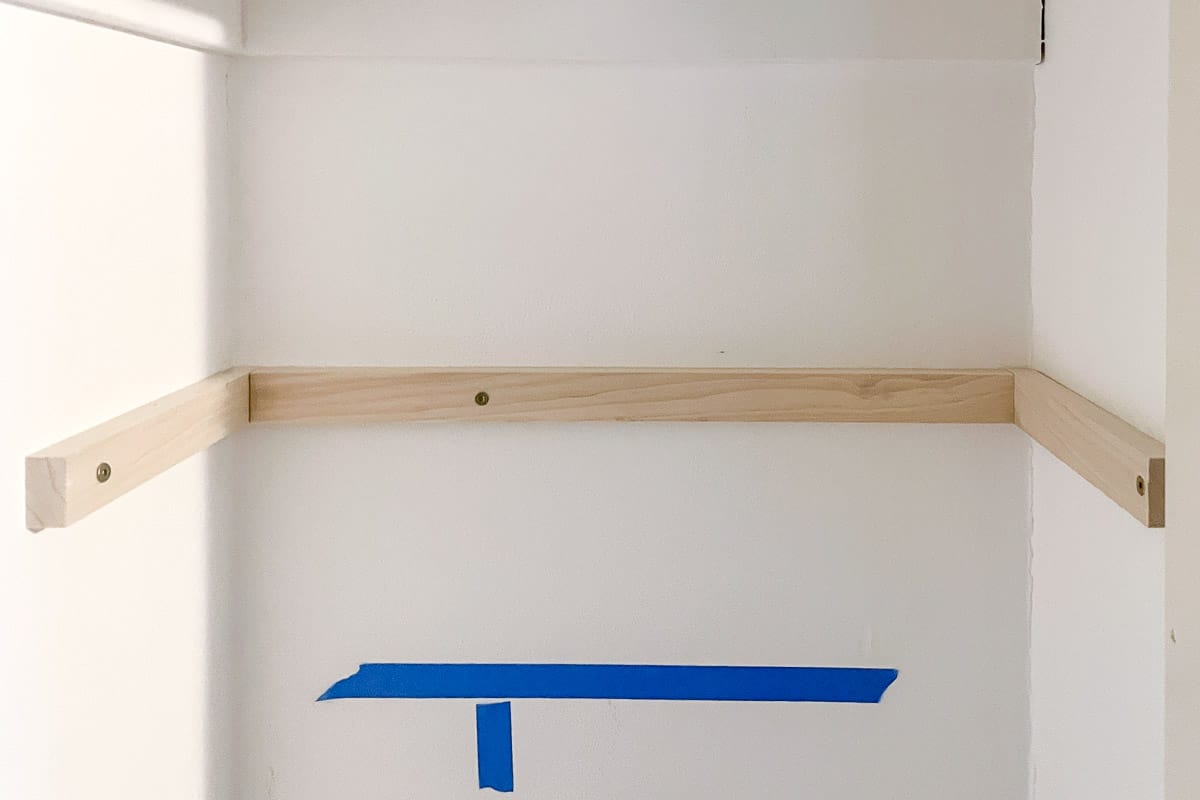
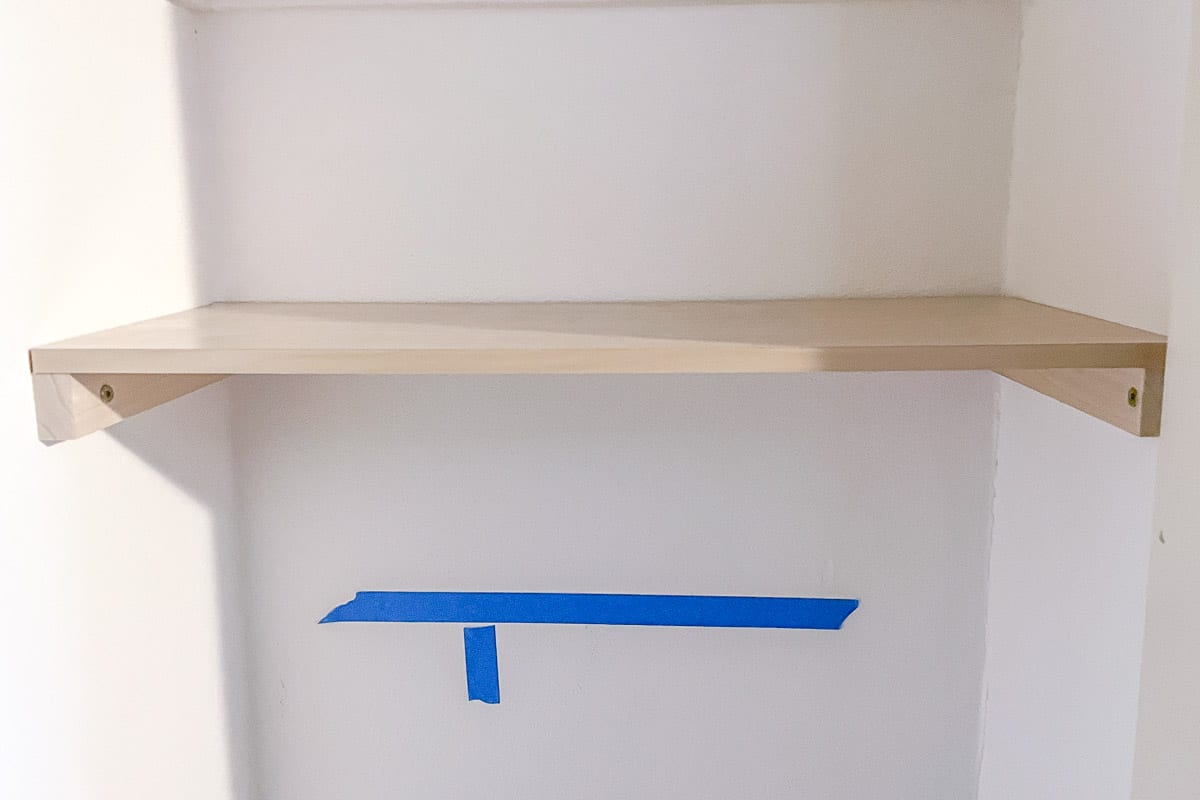
Slide the shelves onto the brackets
With the bracket secured to the wall, simply slide the shelf into place on top!
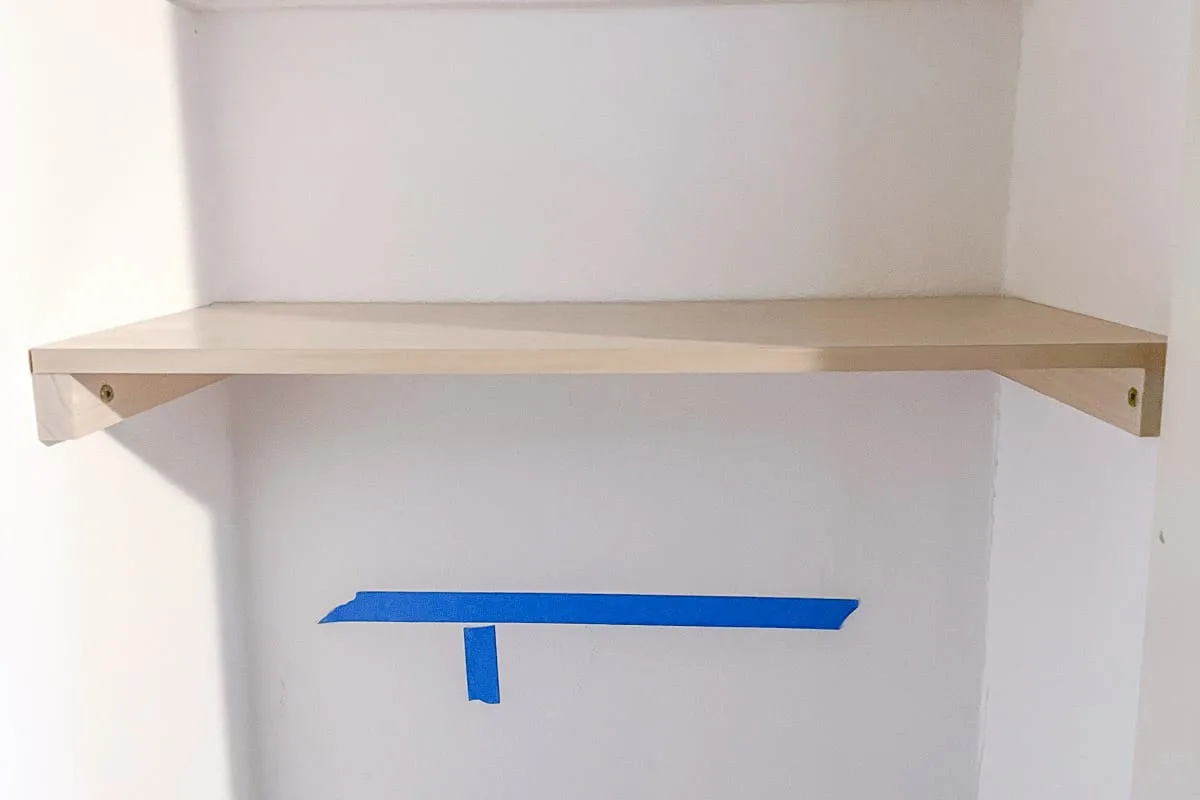
I installed the remaining brackets the same way, with 8 ½" of space between each one.

If you're worried about the shelves moving accidentally, you can tack them down at the corners with a nail or screw. Mine are locked in place by the door trim, so they're not going anywhere!

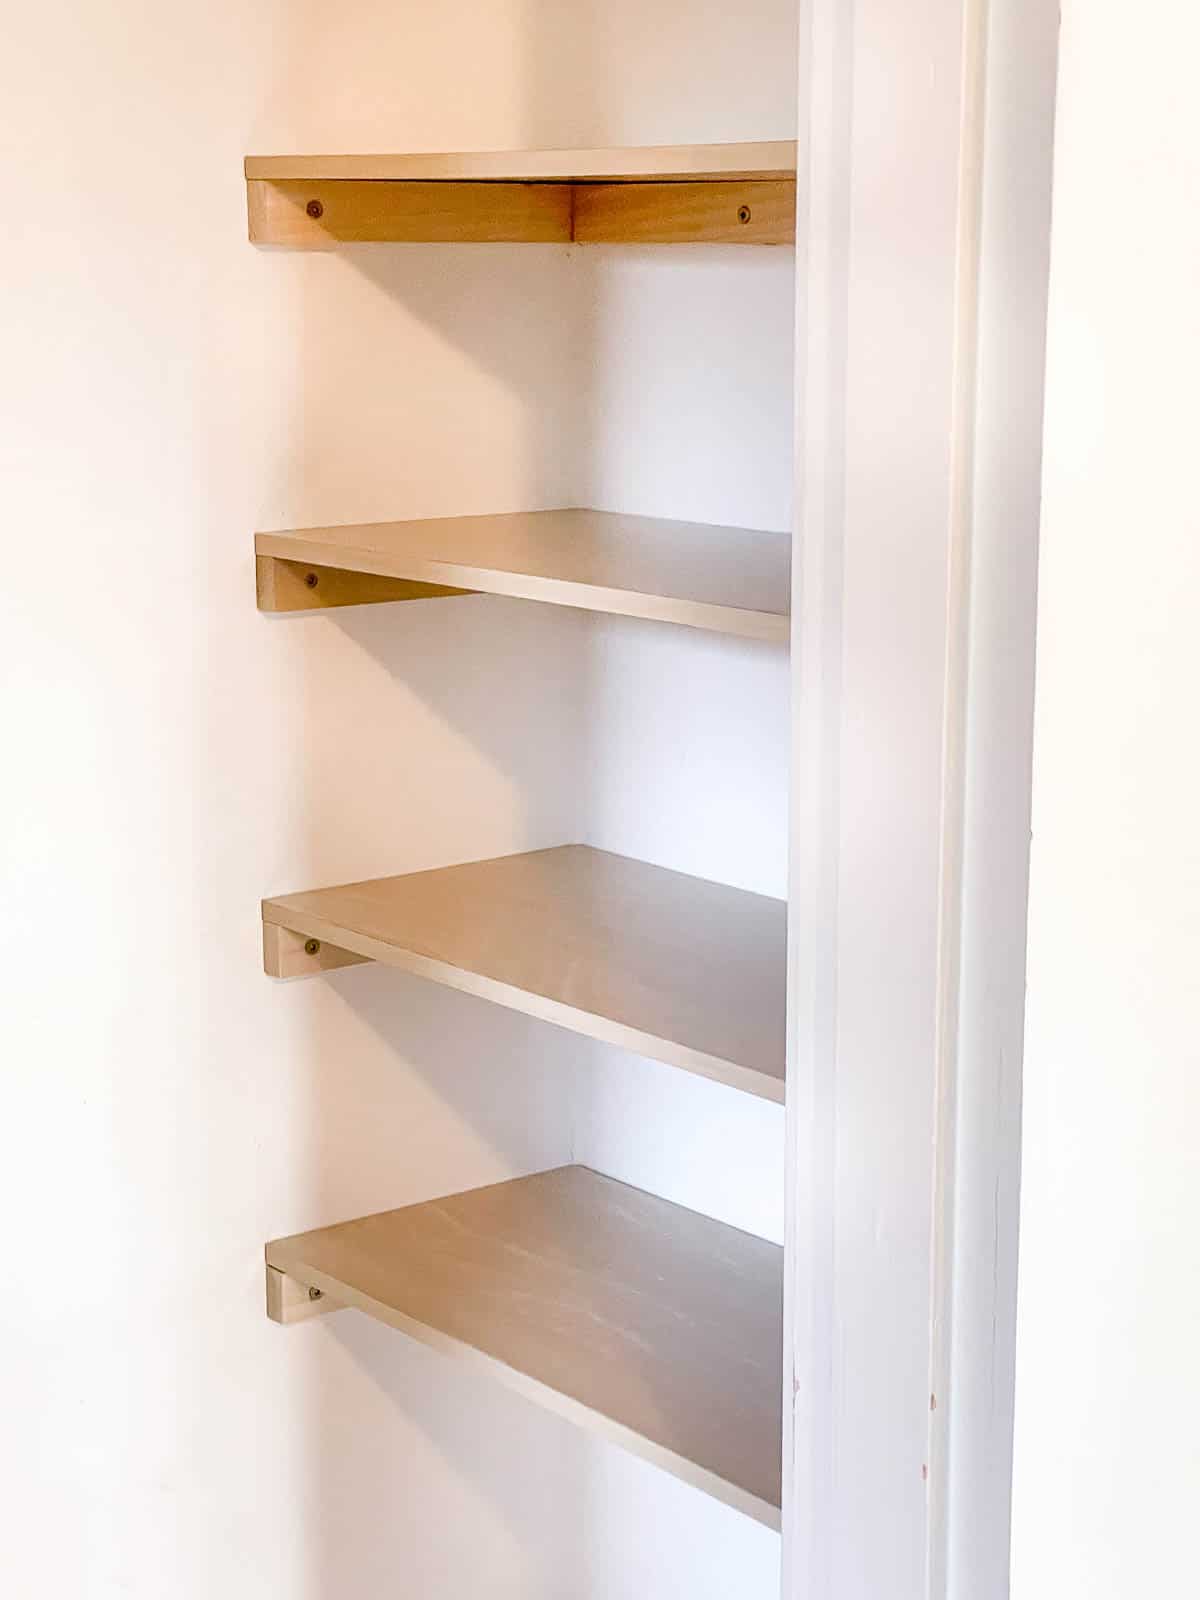
Load up your new DIY closet shelves!
I was thrilled to discover that both the air conditioner and the exhaust hose fit under the bottom shelf nicely. I was planning to hang the vent hose from the ceiling of the closet, but this works much better!

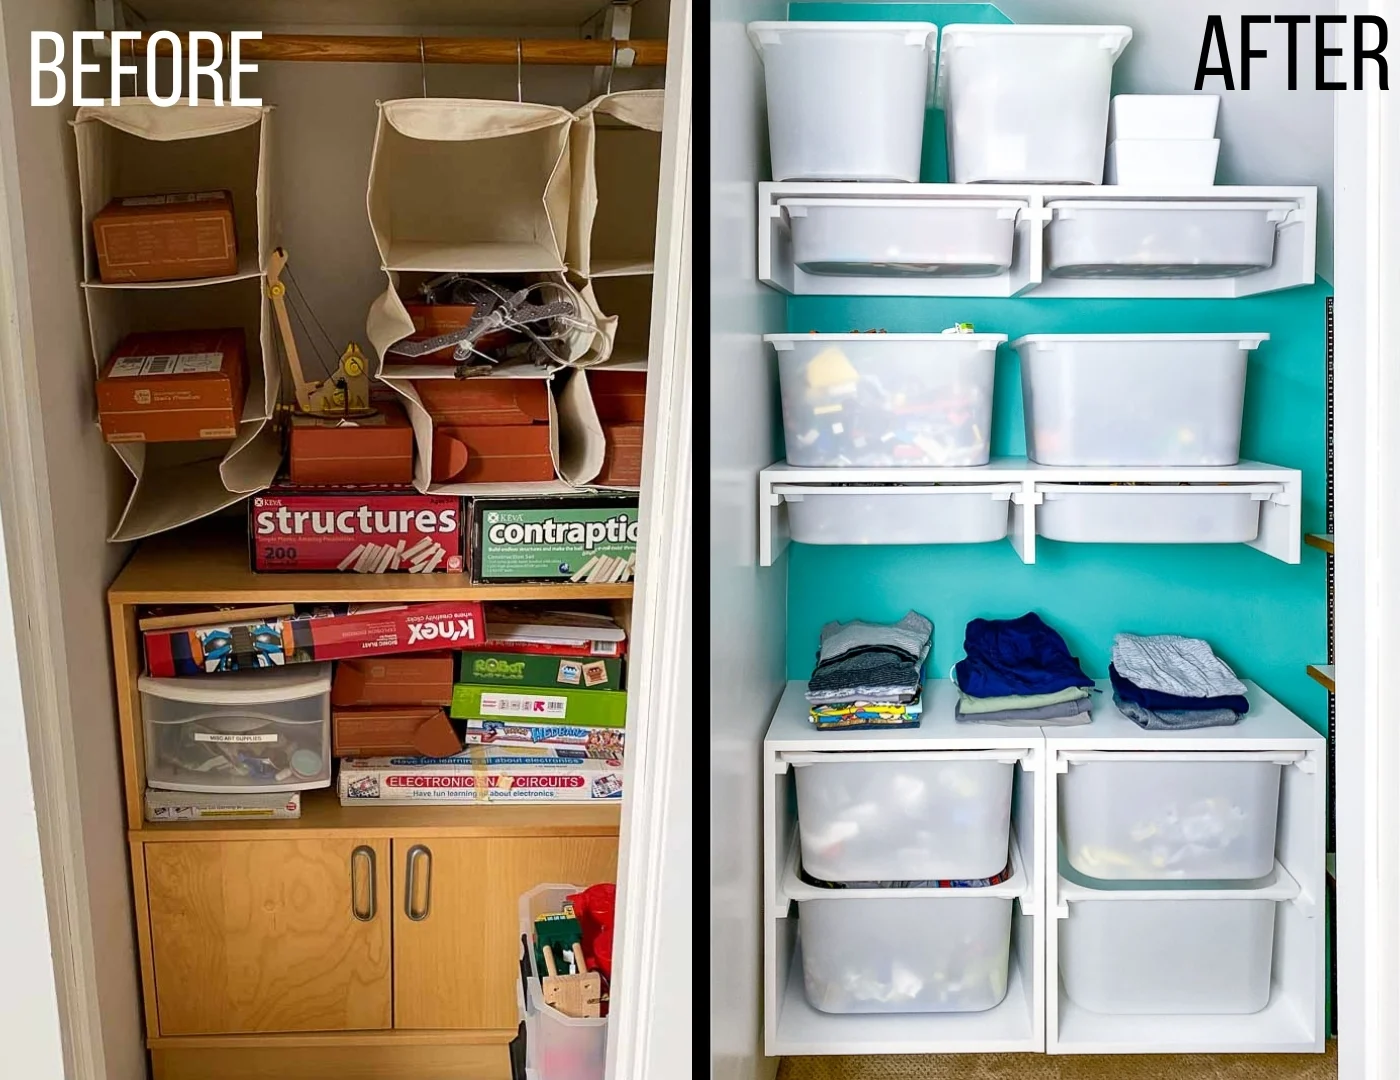
Almost all the junk is gone, and the remaining items fit neatly on the closet side shelves.
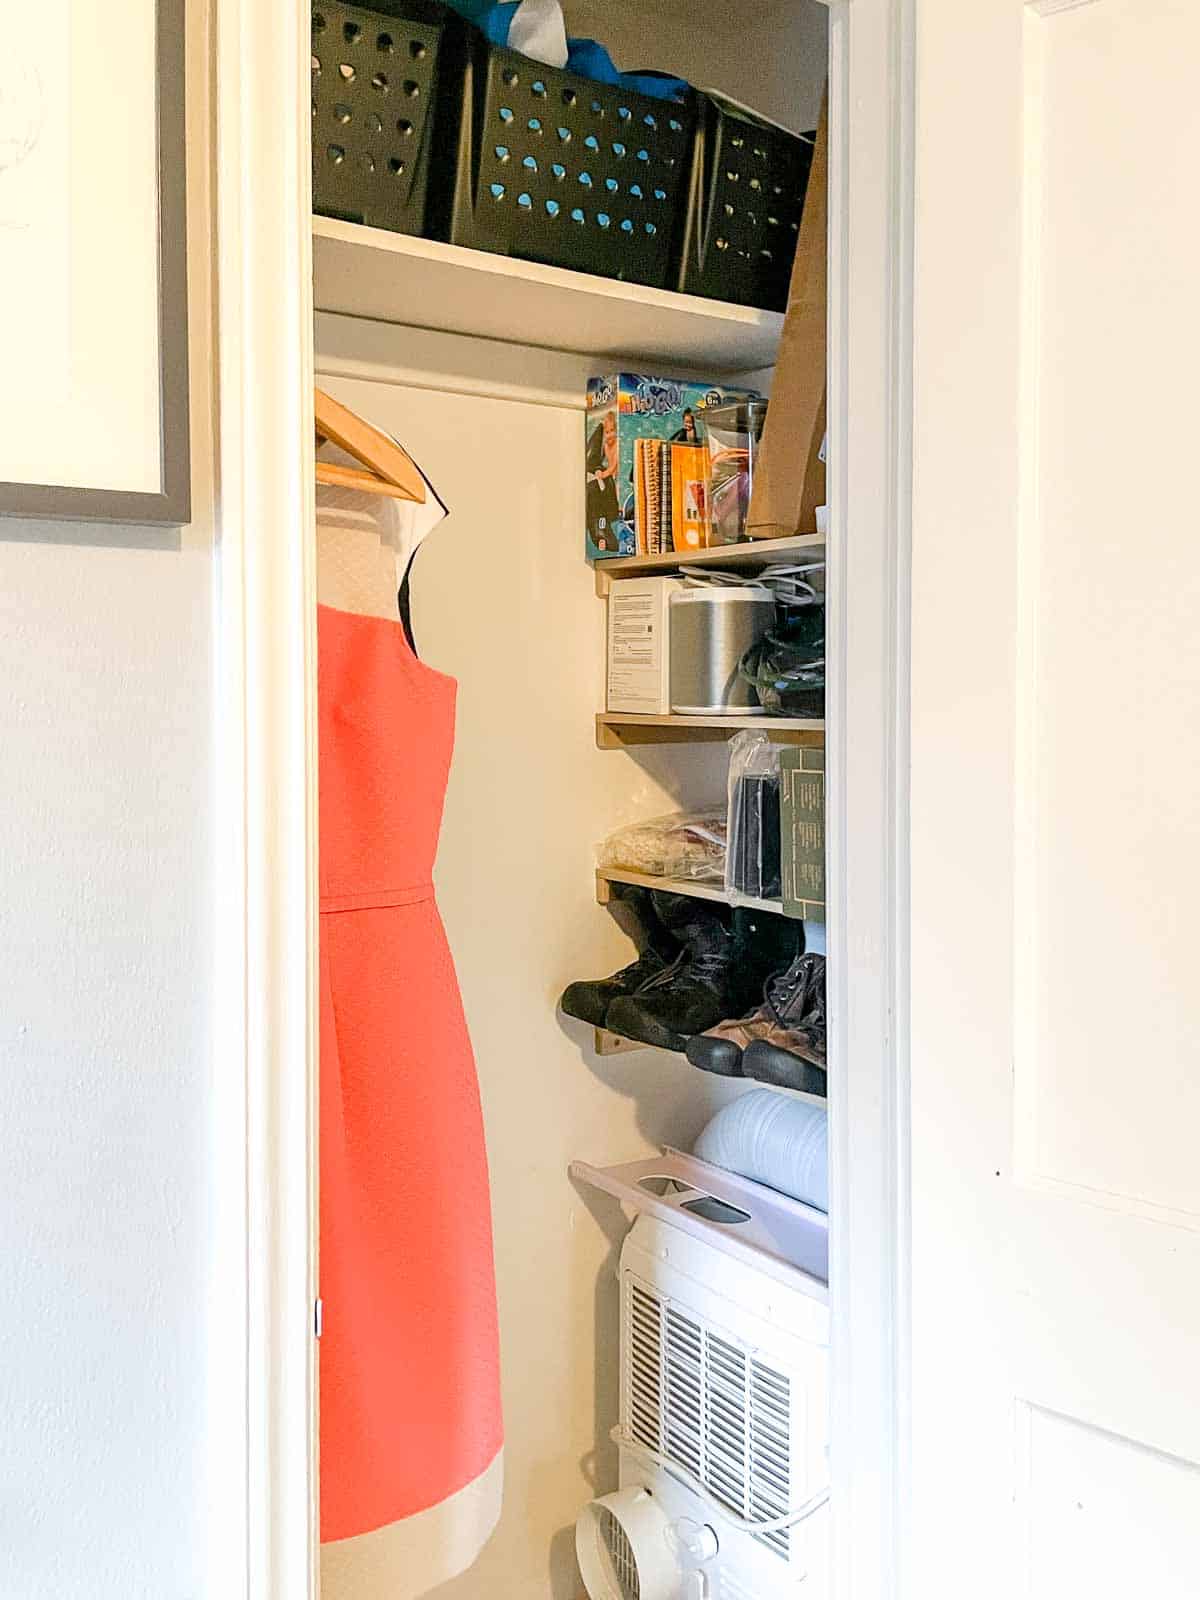

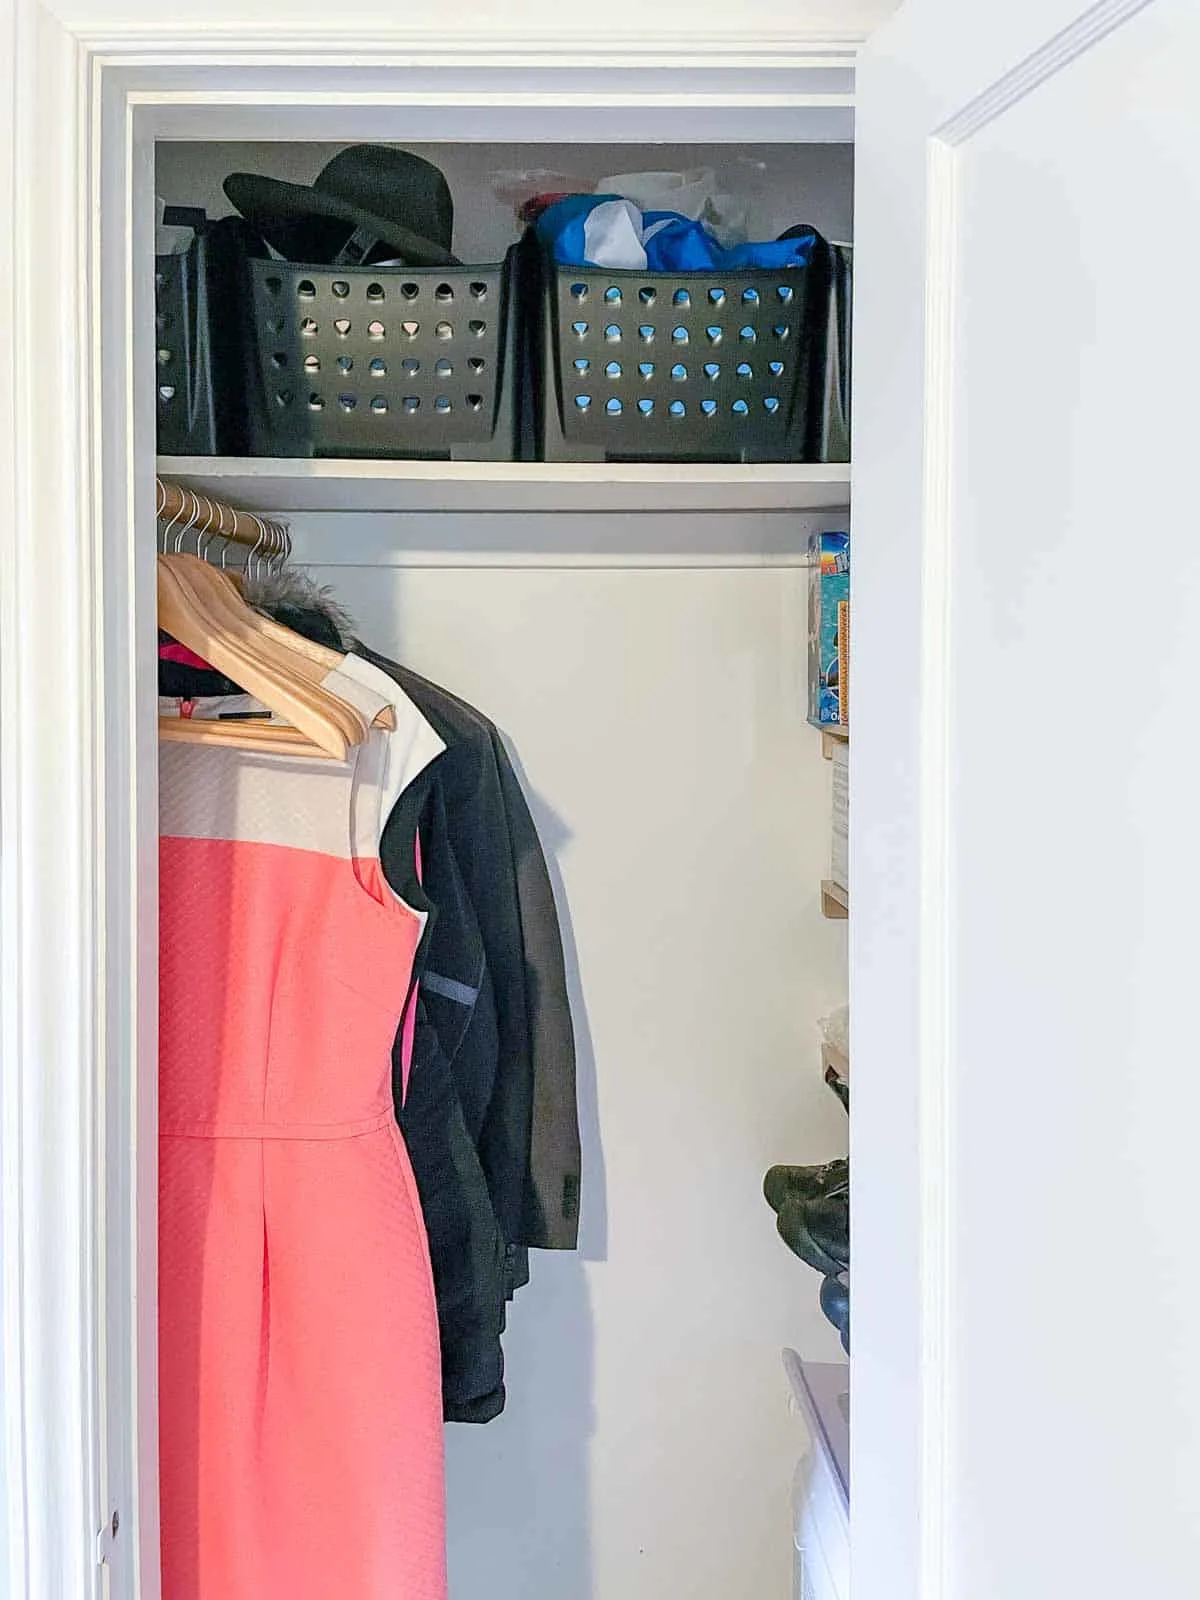
I found one of these cargo bins on the top shelf when I was clearing everything out. The lower front edge makes it easier to grab things without taking down the entire bin, and helps keep stuff from falling off the shelf. I picked up three more to span across the entire top shelf.
Suit jackets and dresses (which are rarely worn around here!) fit on the single rod that extends front to back on the other side of the closet. There's even empty space in the middle of the floor, but I'm hoping to keep it clear for as long as possible!
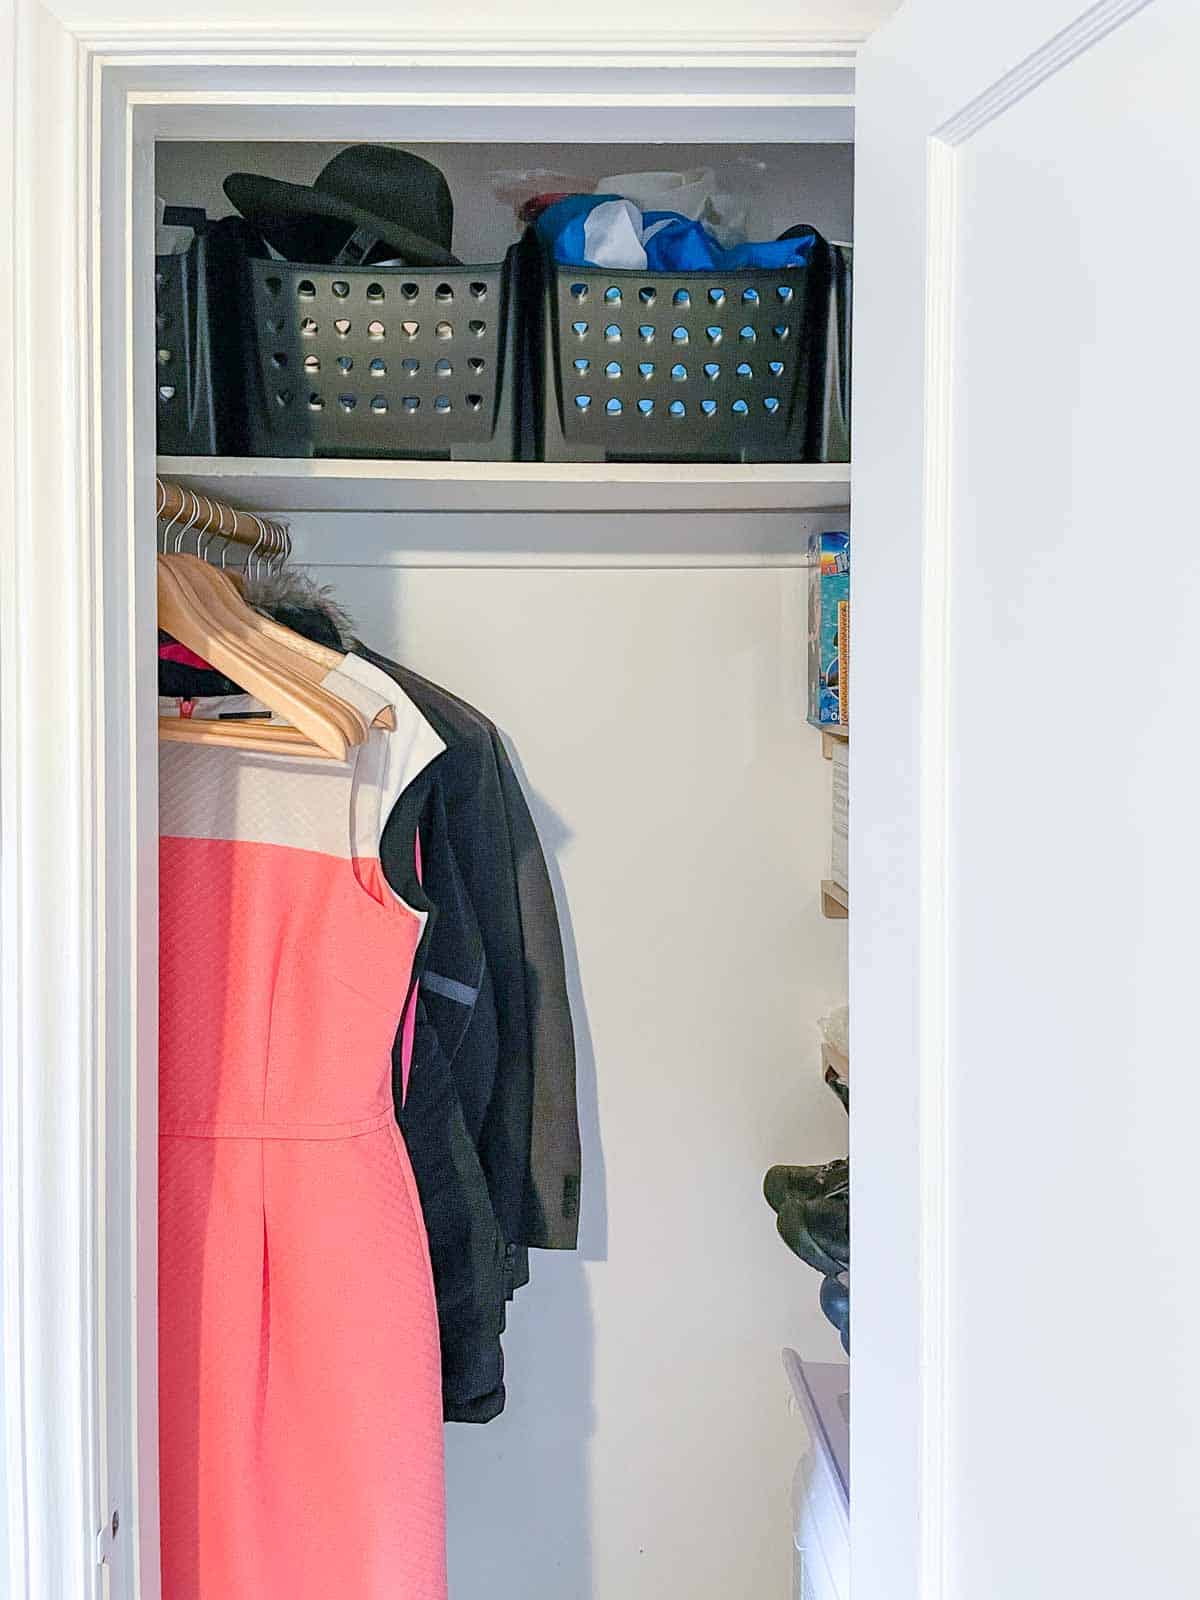
What a difference! All the clutter and junk is gone, and only the things we truly want and need are left. This easy DIY project is quick to knock out in a weekend and makes much better use of the space!
Check out these other DIY shelving project ideas!
Sadhana Subramanian
Saturday 16th of July 2022
I am looking to do this in my study closet to make a built in desk and shelf look. I was wondering how much weight these shelves would hold?
Vineta Jackson
Monday 25th of July 2022
Since the back of the shelf is supported by the bracket, it will hold more weight than if you just supported the ends. The material you use will have an impact on how much weight the shelf can hold. Plywood will be stronger and less likely to sag or break.
Linzie
Wednesday 29th of June 2022
I did the shelving and it is great, now I want to know how can I add a door, is that possible?
Tonya Reitz
Monday 30th of May 2022
Just a quick thank you for your instructions and photos here. I now have some nice pantry shelves because I found this post!
Vineta Jackson
Thursday 2nd of June 2022
So glad I could help!
Claudine Martin Nunez
Thursday 20th of January 2022
this is just what I've been looking to do, your ideals are just what I needed and helpful procedures.
Vineta Jackson
Thursday 20th of January 2022
Glad I could help!