Learn how to countersink screws to give your projects a professional look! This easy technique allows you to hide screw heads in wood.


When you learn how to countersink screws in your projects, your work immediately looks more professional. It's not that hard to do, and with the right tools (and sometimes with no special tools) you can give your woodworking projects a more flawless finish.
This post contains affiliate links for your convenience. Purchases made through these links may earn me a small commission at no additional cost to you. Please visit my disclosures page for more information.
What Does it Mean to Countersink a Screw?
You may have noticed that some of my woodworking plans call for countersinking screws. If you're just beginning woodworking, that phrase may not ring a bell, but it's pretty simple.
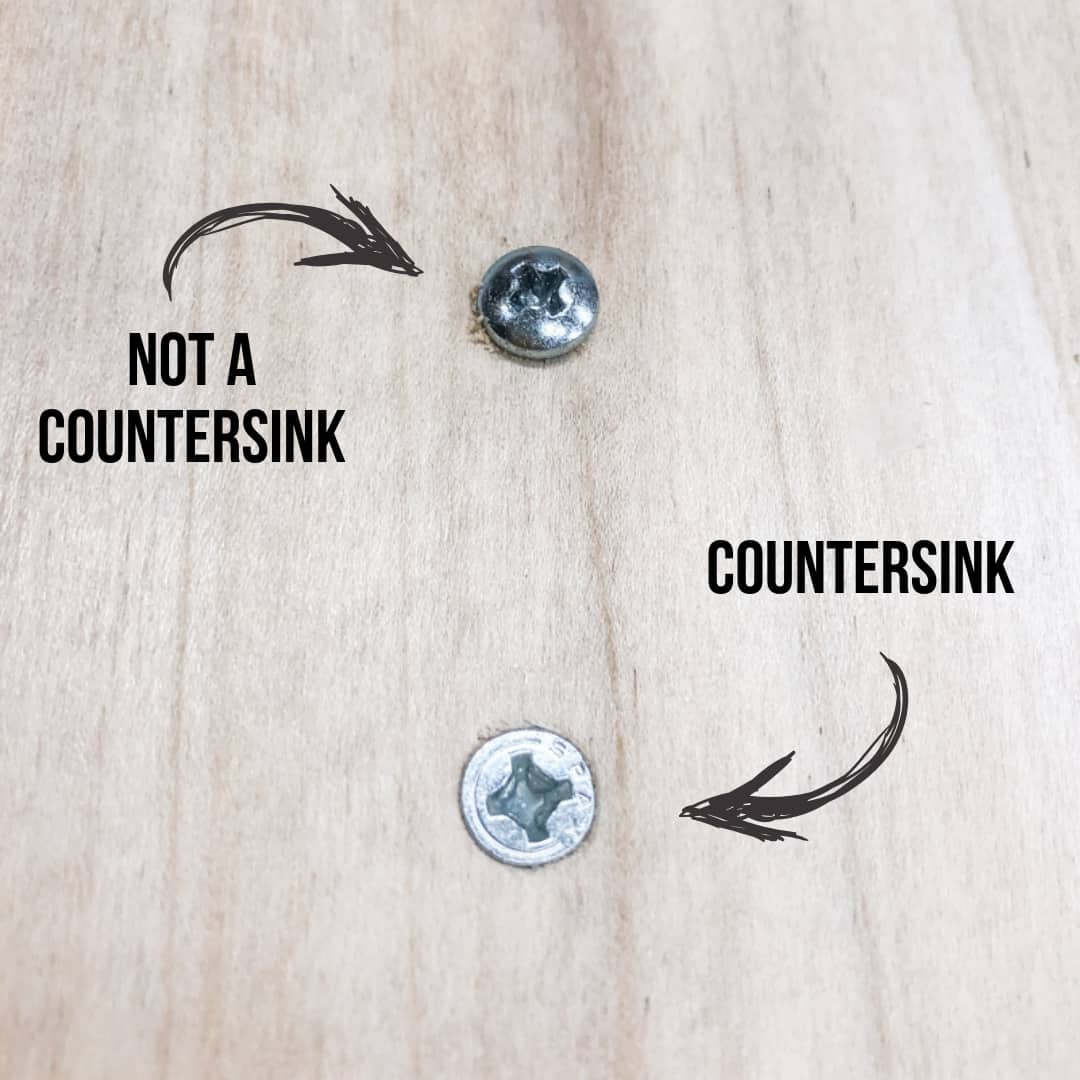
When you drive a screw into any material, you typically stop when the screw head hits the surface. To countersink that same screw means you are going to drive it below the surface.

If your project calls for bolts, or you need to use a washer under the screw head, you'll want to use a counterbore hole instead. This article compares counterbore vs countersink and when you'll want to use each type of hole.
Types of Countersink Bits
There are numerous ways to countersink a screw. The ideal method is to use a special bit made for that purpose. There are a few different types.
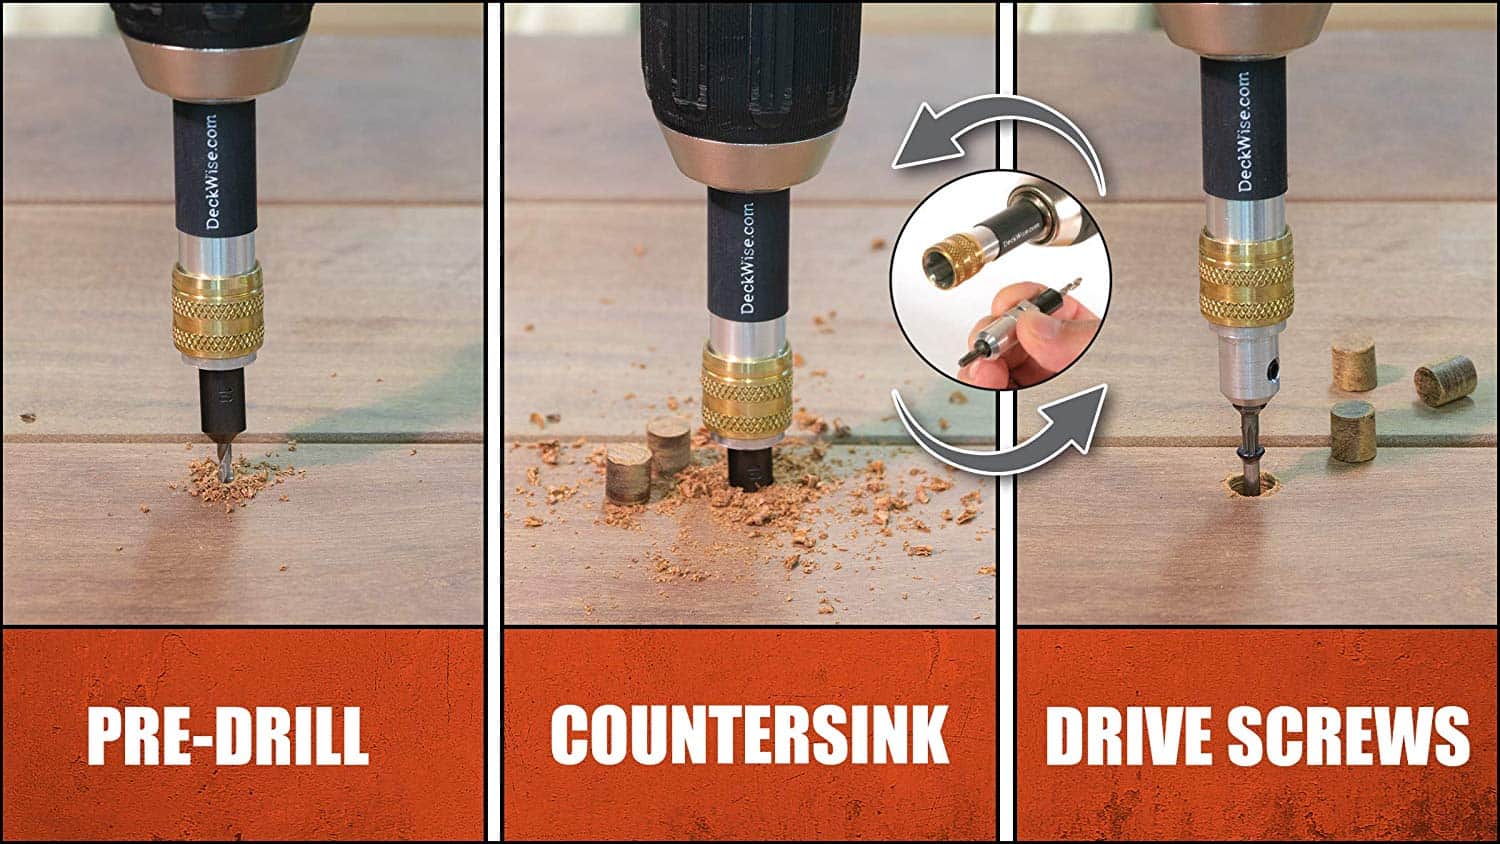
Pre-Drill Countersink Bit
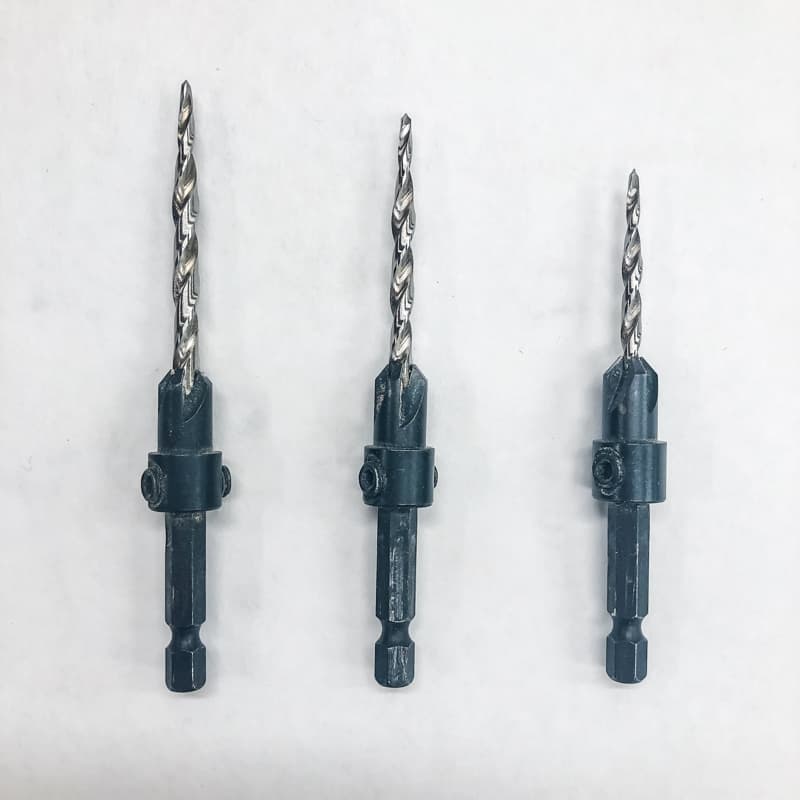
A pre-drill countersink bit makes a pilot hole for the screw and the conical countersink hole at the same time. This method easily gives you consistency as you move from screw to screw.
I've used this set for years in countless projects! There are three different sizes and an adjustable collar so you can set the depth.
Stand-alone Countersink Bit
The second method is to use two different drill bits. The first one predrills a hole for the screw so the wood doesn't split. The second bit makes the cone-shaped hole in the surface of the wood that will allow the head of the screw to sit below the surface.
This method takes a little more time, but can create cleaner holes. A stand-alone countersink bit can usually be used on both wood and metal, making it more versatile if you work with both on a regular basis.
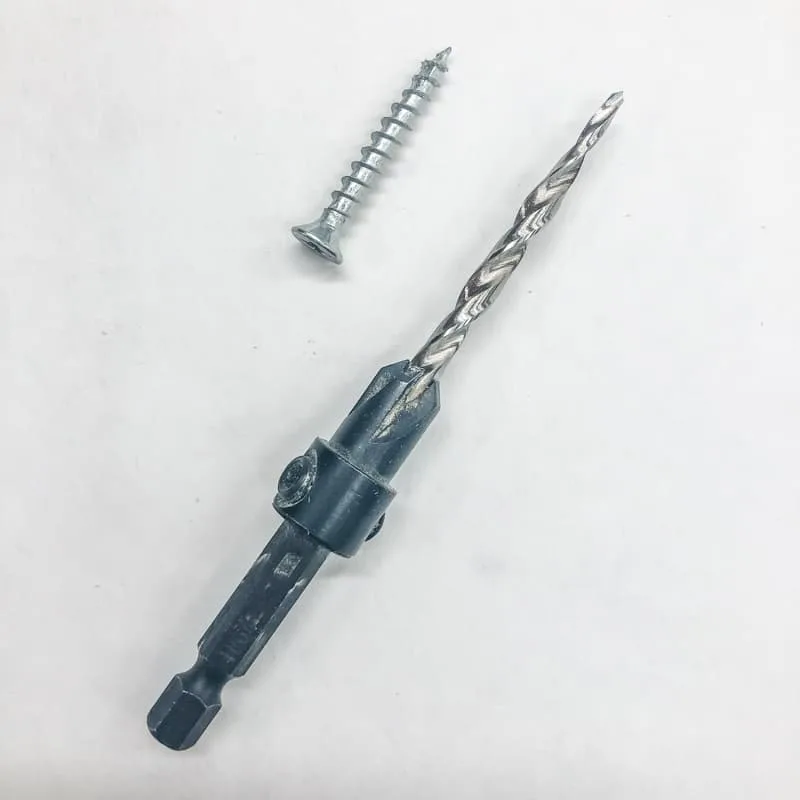
Quick-Change Countersink Drill Bit and Driver
If you hate switching between a countersink bit and a driver bit constantly, this is what you need! I plan to pick up this set the next time I'm at my local Rockler store. It has a metal sleeve that slips over the countersink bit and can be fitted with the right drill bit to drive in those screws.
There are other types that have a countersink bit on one side, and a driver bit on the other. Just flip the bit around to quickly switch between operations.
How to Drill Countersink Holes
Things to Consider
Before you start drilling, there are a few things to consider.
- Do you plan to hide the screws?
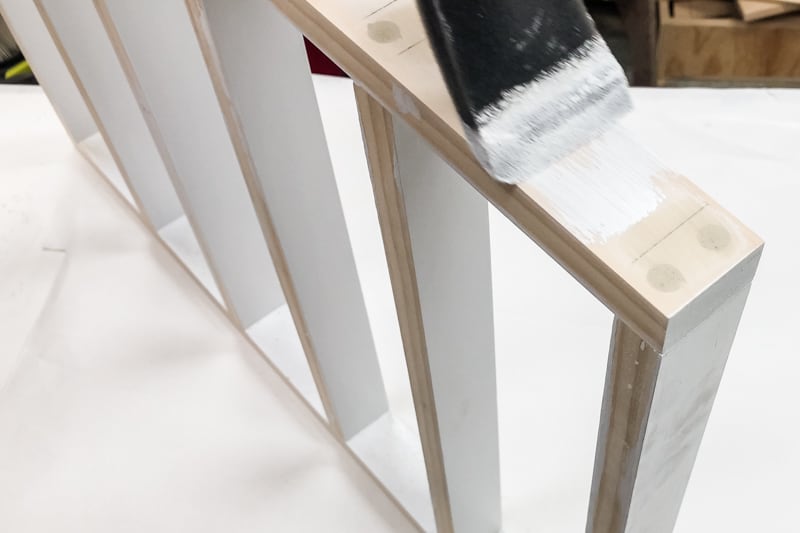
- If you're painting your project, sinking the screw heads slightly below the surface and filling the hole with wood filler or putty will give you a flawless look.
- If you're leaving the screw head exposed, you want to drill the hole so the screw head will be flush with the wood surface.
- How large is your screw head? Is it flat or rounded? What angle is the underside of the head?
- A flat screw head with a tapered underside is the best choice for countersinking screws. Make sure your screw head size matches the size of the countersink bit you plan to use.
- If you're attaching a thin piece of plywood or metal to a thicker piece, you may want to find a screw head with a 100° angle rather than the standard 82º head. This gives it more surface area to hold on to and there's less risk of it pulling through the material.
- You can learn more about the different types of wood screws here!
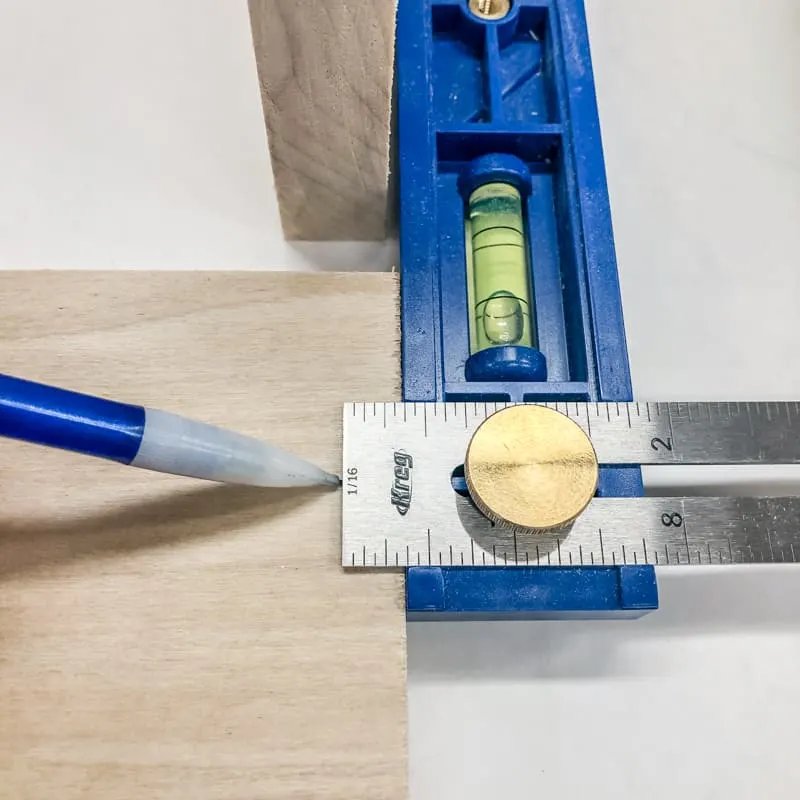
Mark the Hole Position
Mark the position of each hole on your workpiece with a pencil. If you're joining two pieces at a right angle like you see below, draw a line to mark the center of the board you plan to drill into. The Kreg Multi-Mark Tool makes this easy!

Choose the Correct Countersink Bit Size
The size of your countersink bit should match the size of the screw you plan to use. The number size of the screw is typically on the packaging. #6, 8 and 10 are most common. Make sure the screw has a flat head with a conical shape underneath.

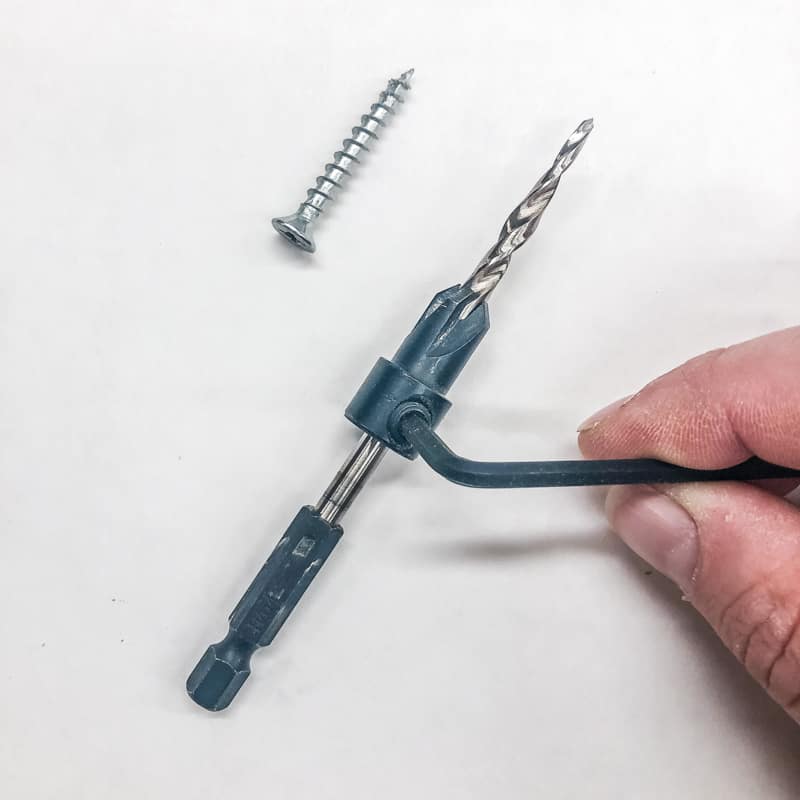
Adjust the Countersink Bit Height
Set the height of the countersink to match your screw length. To do this, insert the corresponding hex wrench into the hole in the side to loosen. Then raise or lower it to match the depth of the screw you'll be using in your project.

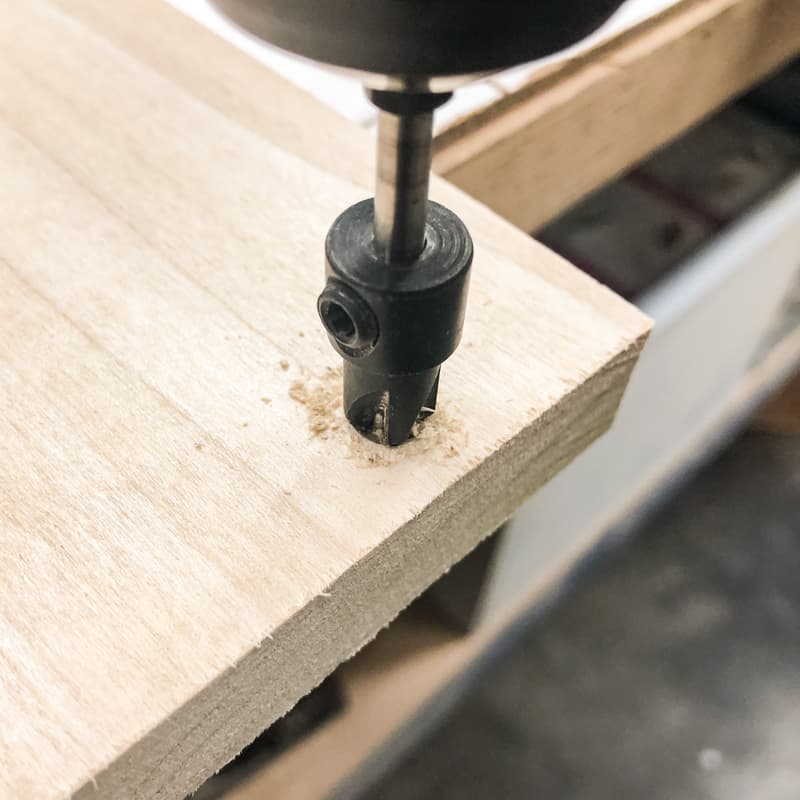
Drill the Countersink Hole at the Marked Spot
Line up the tip of the drill bit with the mark you made earlier. Make sure the bit is straight and perpendicular to the wood surface.
Start the drill off at a faster speed to sink the bit cleanly, then slow it down to make the countersink. Drilling the countersink hole too fast can produce tear-out or make it too deep.

Test the Fit
After making the first countersink hole, test the screw to see how it sits. If it's too high, the screw head will rise above the surface of the wood. Too low, and it will take more time to fill the hole.

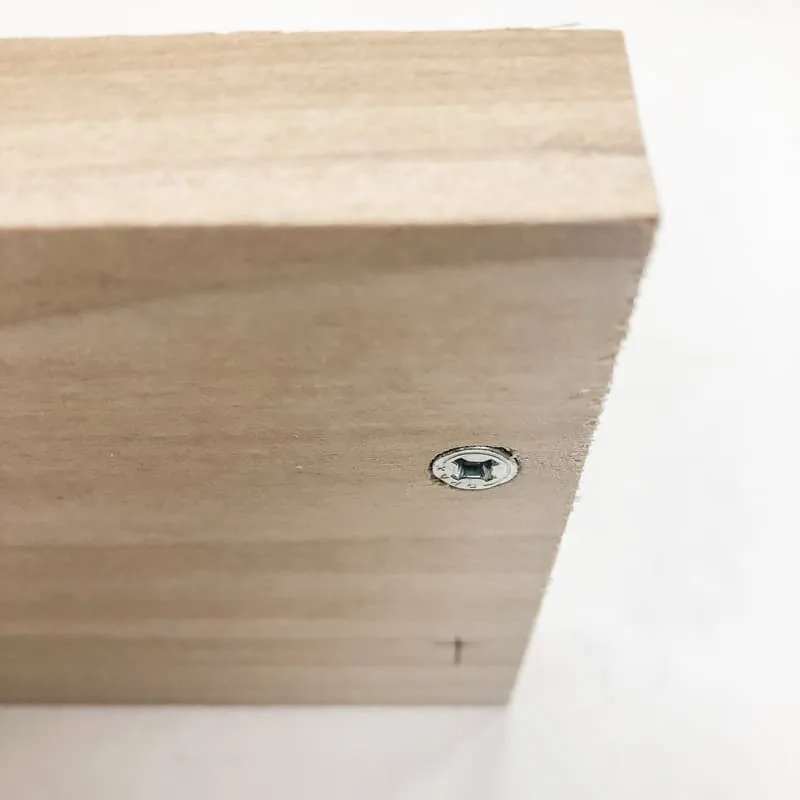
By testing the fit on a scrap piece of wood first, you can perfect the countersink hole before drilling into your project!
How to Countersink Without a Bit
If you don't have a countersink bit, there are two ways you can create one using standard bits.
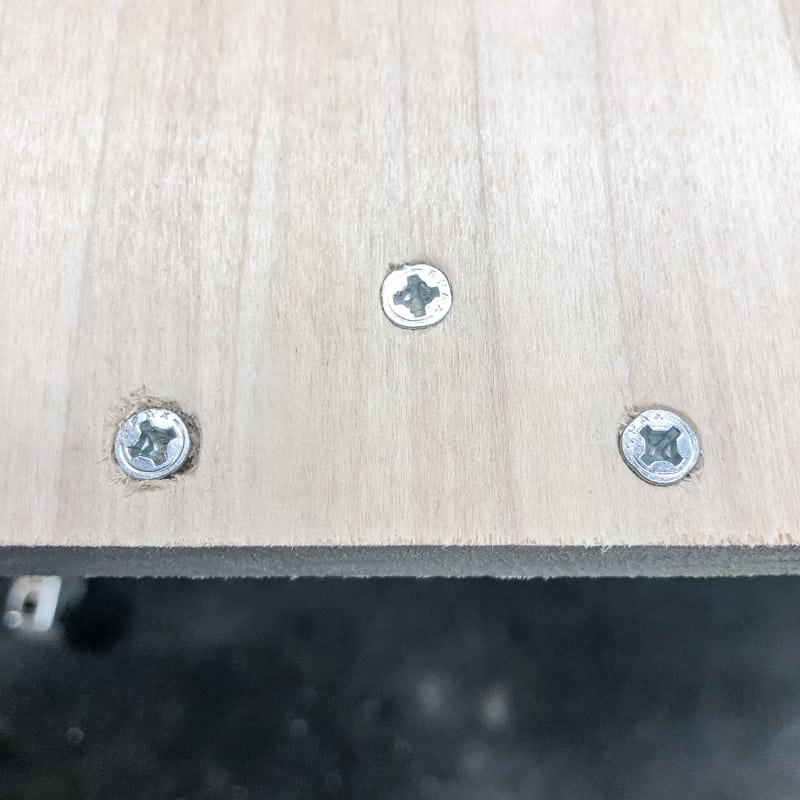
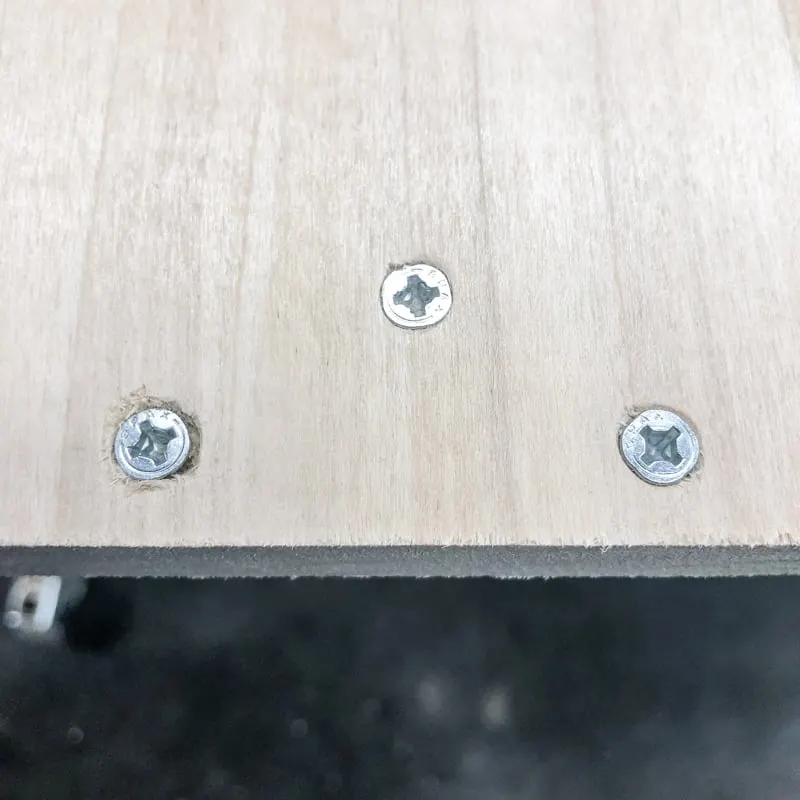
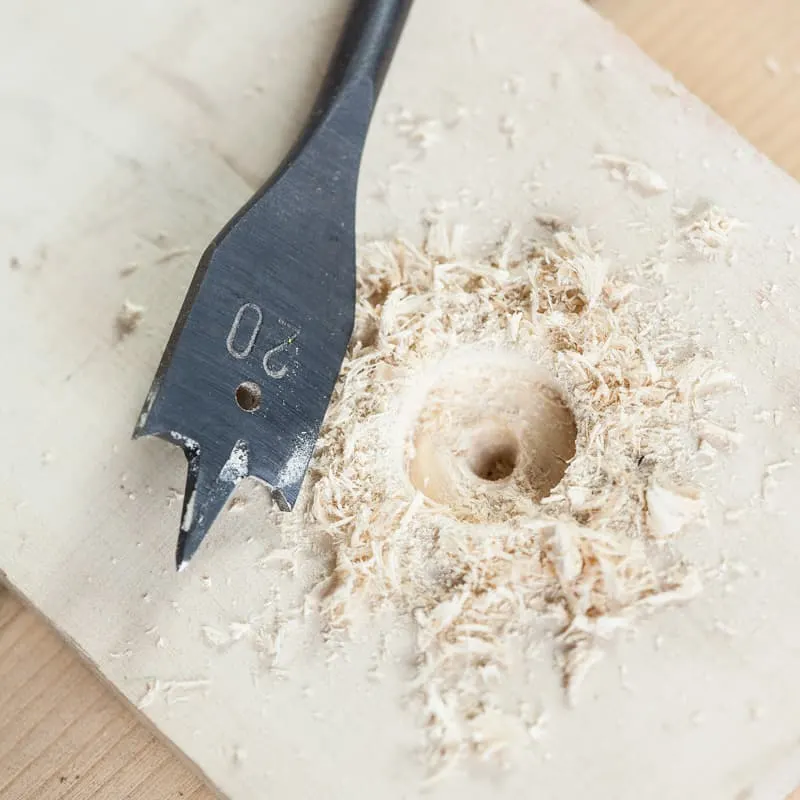
Two Drill Bit Method
Predrill a hole that matches the diameter of the screw you're using. Place a piece of tape on the bit to mark a stopping point the same length as the screw, so you don't go through the material.
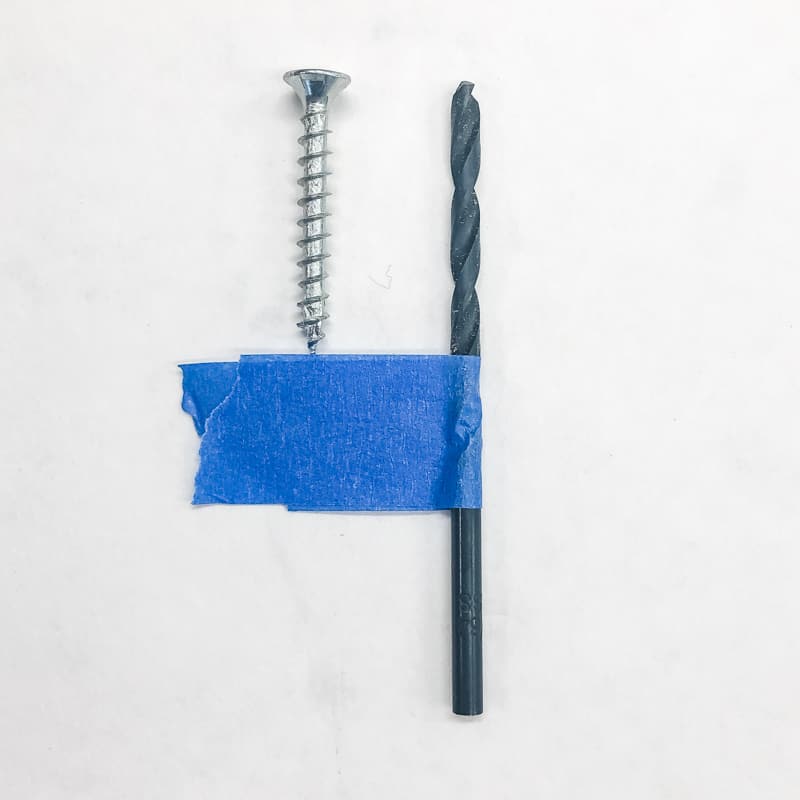
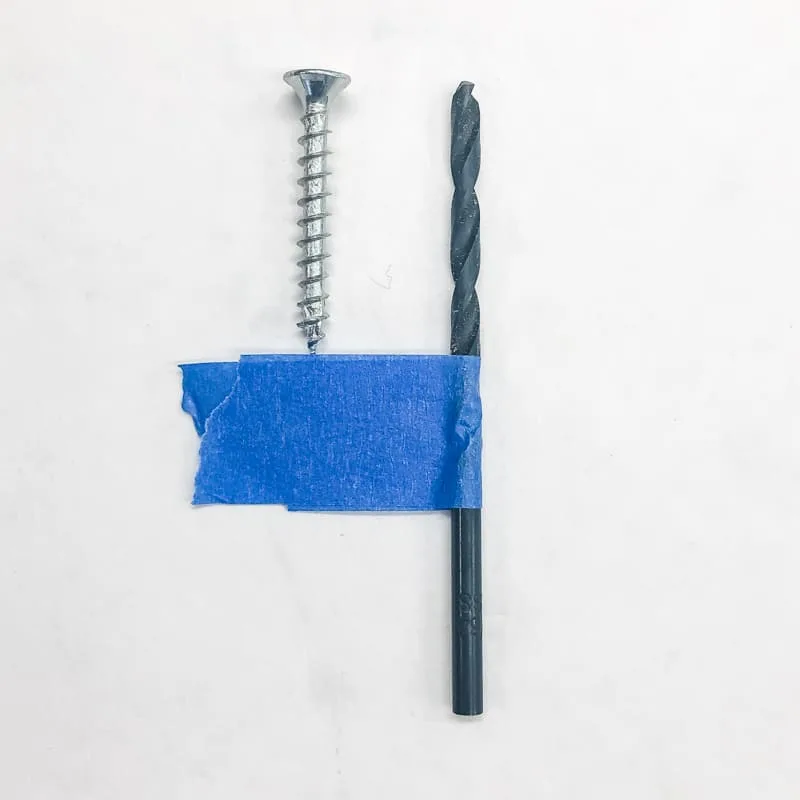
Next, choose a bit that is slightly larger than the screw head. Make a shallow hole for the head of the screw to sit just below the surface of the wood or metal.
This doesn't make the cleanest hole in the world (the one on the left), but it will do if you plan to cover it with wood filler later anyway.

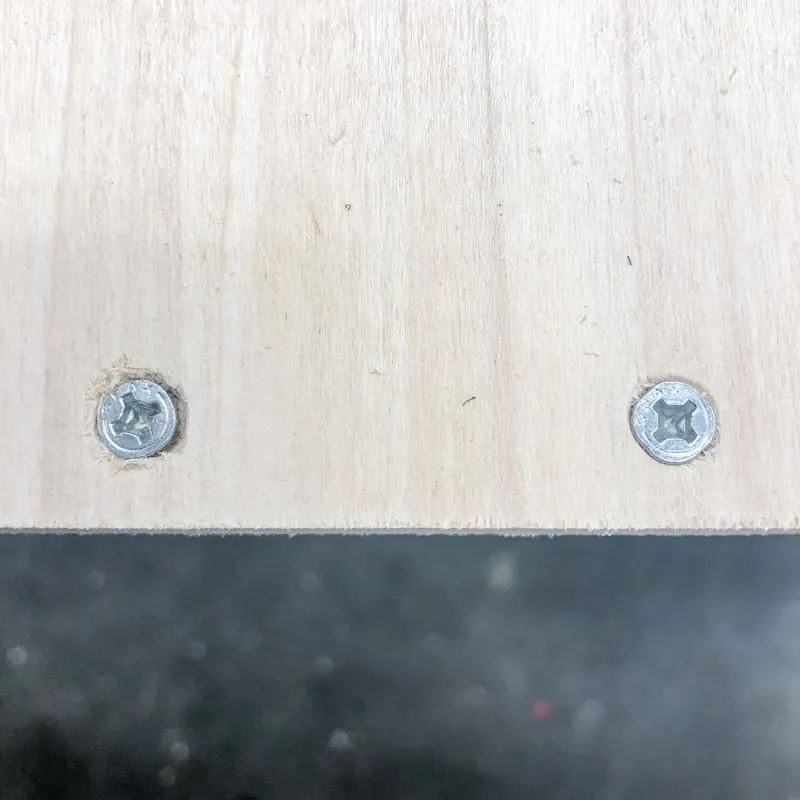
Philips Head Bit Method
If you are out on the job and find yourself without a countersink bit, this method will work in a pinch. Take your Philips Head bit and place it in the spot where the screw will go. Start the drill and move it around in a circular motion, widening the hole as you go until you get the desired size.

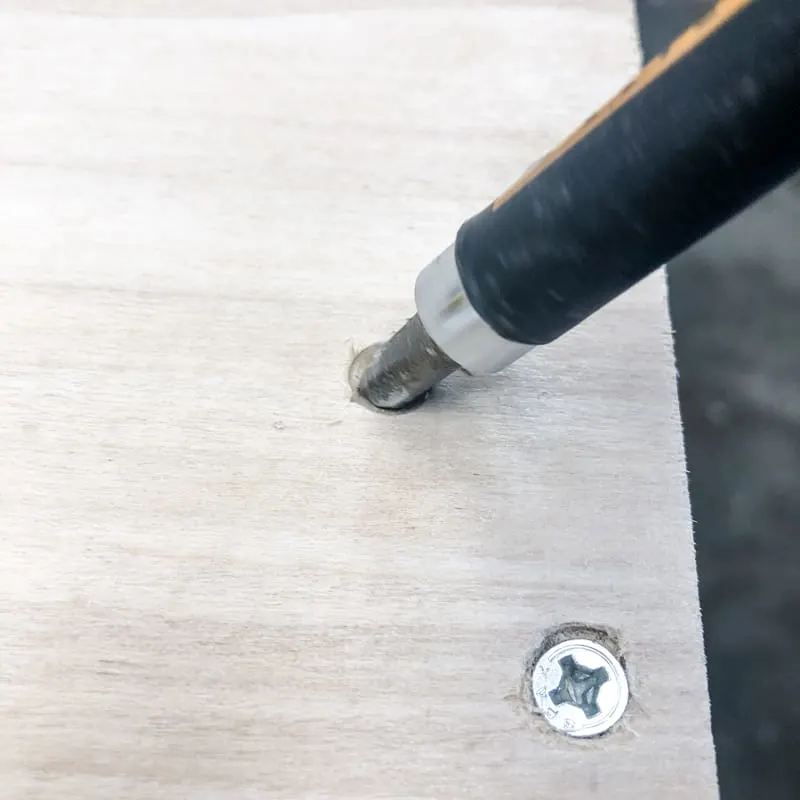
This method makes a surprisingly clean hole (the center one), although it's a little too small. The screw head sits just slightly above the wood surface and wood filler wouldn't be able to hide it.
Hiding Countersunk Screws
After you've finished countersinking your screws, you can leave them as is, or you can make them disappear! There are two different methods for hiding countersunk screws.
Hide Countersunk Screws with Wood Filler
This is my preferred method of hiding screw heads when the project will be painted. Use paintable wood filler to cover the hole, overfilling slightly.
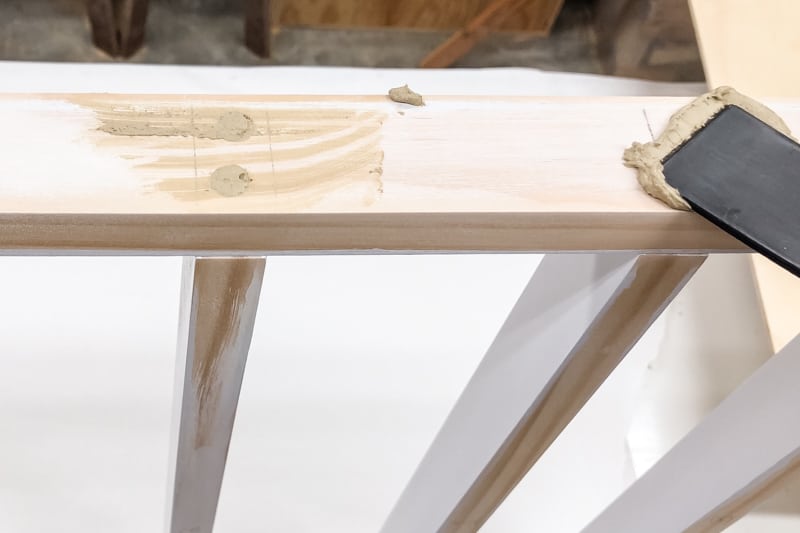
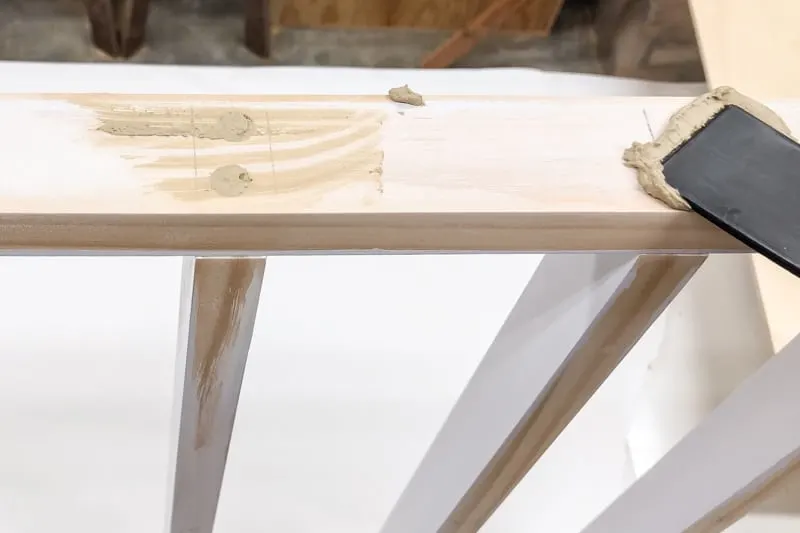
Once it's dry, sand it smooth and paint your project. Poof, the hole is gone!

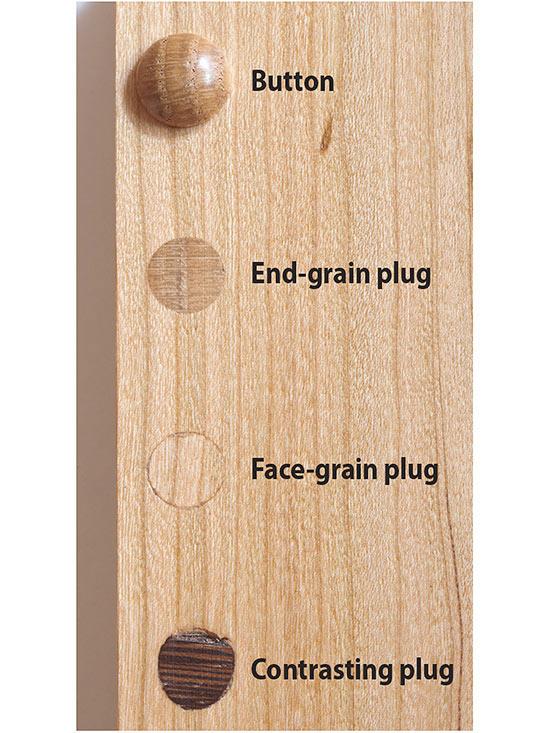
Hide Countersunk Screws with Wood Plugs
By drilling your countersink hole deeper or using a special counterbore bit, you can fill in the holes with a wood plug that disappears into the grain. You can also use a contrasting wood color or a button to show off the hole instead!

How to Countersink Deck Screws
Self-Countersinking Screws
With all of the specialty screws available in the decking market, it is easy to find self-countersinking screws. They can easily sink in below the surface of the board, and the wood covers back over the specially-designed screw head without leaving any bumps.
Deck Countersink Kit
If you find that you need to countersink the deck screws the old-fashioned way, you can purchase a kit that comes with a pilot bit, countersink bit and screw driver. The countersink is a little bigger than normal so you can use a plug to hide away the hole.

Countersink Lag Bolts
When building a deck, you will usually have to install lag screws or lag bolts to hold the framing components together. You can install them and leave the head and washer exposed, or you can countersink these as well.
First, measure the width of the screw portion of the lag and find a corresponding bit. Then measure the size of the washer that you will be using and locate a paddle bit just slightly larger.
To make the countersink hole that will hide the washer and bolt head, drill the hole for the body of the lag and then come back, and using the paddle bit, cut a hole deep enough for the washer and the lag head to sit below the surface.

How to Countersink Drywall Screws
The basic premise behind driving a drywall screw to its proper depth is knowing when to stop! This inexpensive bit prevents you from going too deep and breaking the paper face.
The strength of the drywall is primarily in the paper face, so the ideal countersink in drywall doesn't break the paper face; it just sinks slightly below the surface. Trying to do this by "eye" will usually result in most of the screws breaking the paper and ending up inside the gypsum.
How to Countersink Screws in Metal
While you may not come across the need to do this very often, it's nice to know that most everything you learned about countersinking screws in wood, will be applicable when it comes to metal. The main difference is that you will need bits that are made to cut into the metal.
You can find the countersink bits that will work for metal, but these usually do not come with a pilot bit. You will need to find a bit that corresponds to the body size of the screw and drill that hole first.
Just as in the case of wood, place a piece of tape on the bit to mark your desired depth. Then you can use your countersink bit to make the conical hole for the screw head.
I hope this article answered all your questions about how to countersink screws. It's an easy technique that will take your woodworking projects to the next level!
Check out these other beginner woodworking tutorials!