Does your wood stain always turns out blotchy? You might need some pre-stain wood conditioner! Learn how it works and how to apply it!

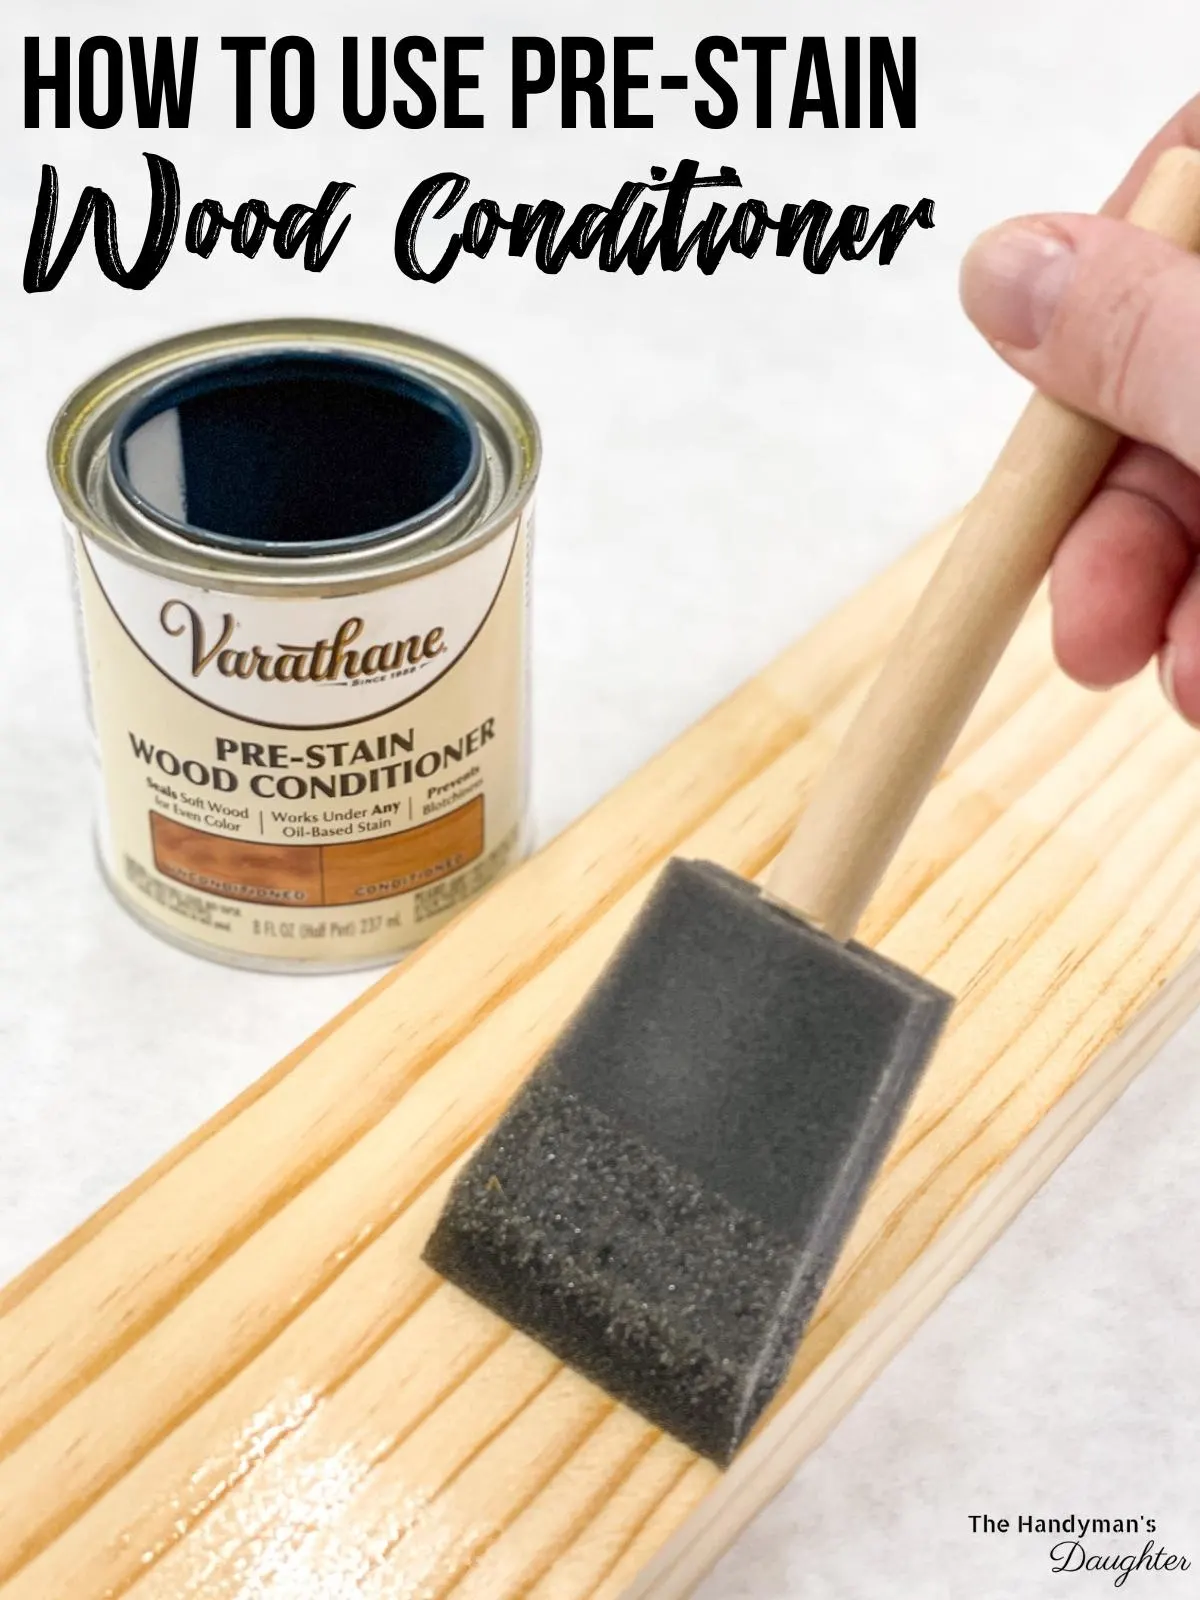
A pre stain wood conditioner is like a primer for stain. In porous woods, the grain often absorbs stain unevenly. Applying a wood conditioner helps stabilize the grain, giving your project a beautiful finish.
Below, we discuss several types of pre-stain wood conditioners and how to use them. Let's figure this out!
What is Wood Conditioner?
Some wood species are more agreeable to stain than others. Soft or porous woods like pine are easy to use, but has an open grain that can cause uneven stain absorption.
Wood can soak up moisture inconsistently, depending on the grain direction and knots. This can cause some areas to retain more stain than others - which can cause the wood to look blotchy!
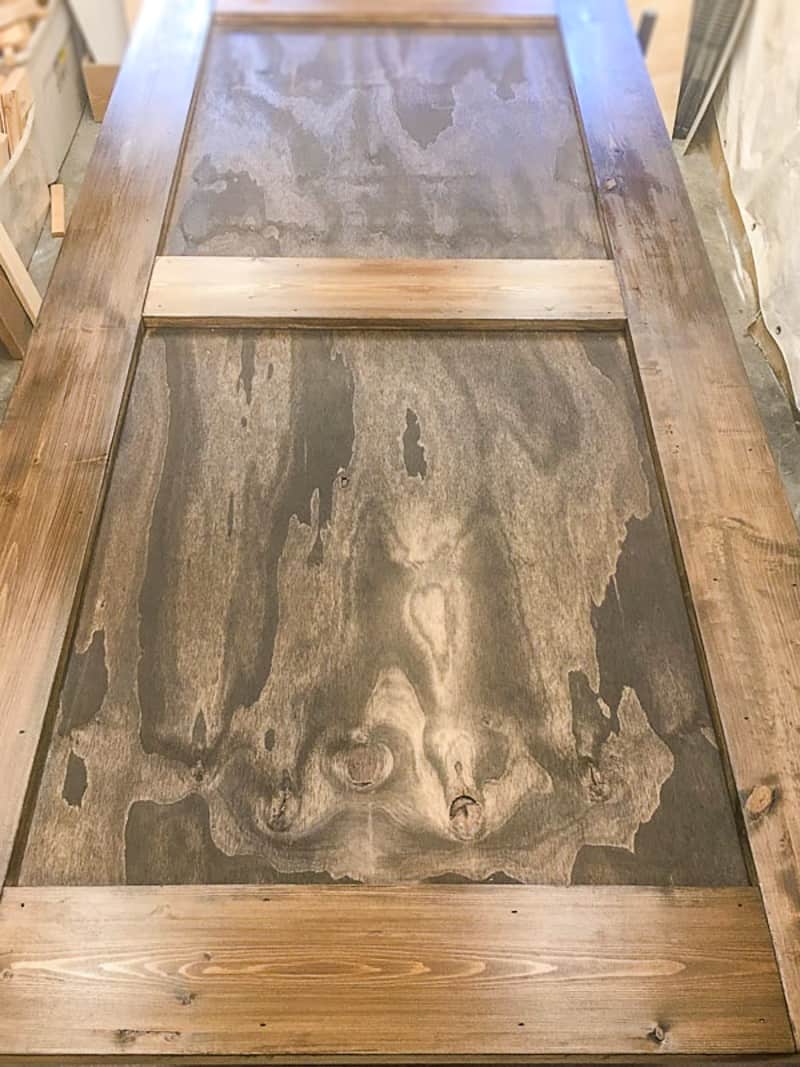
You can see the variation between the light and dark areas of this birch plywood, as well as the pine trim, on the barn door I built. Luckily, the plywood was hidden behind layers of wood shims, but the outside frame could have used a pre-stain to even out the color.

This blotchiness is what we're trying to avoid, unless you like the rustic look. When you apply a stain, your goal is to bring out those beautiful, natural grain patterns. For some types of wood, achieving a clean finish is difficult without a stain conditioner.
What Does Wood Conditioner Do?
A stain conditioner works by filling the pores in the wood. Think of this like construction workers filling potholes in a road before applying blacktop.


With the uneven grain direction and knots filled, the stain can brush on smoothly for a uniform finish without unsightly blotches.
Which Wood Species Require Pre-Stain Conditioner?
Here's a list of several types of wood that could benefit from pre-stain conditioner:
- Pine
- Fir
- Spruce
- Birch
- Maple
- Alder
As you might notice, both softwoods and porous hardwoods are on the list. More expensive hardwoods like oak and walnut have a tighter grain, so the conditioner will be less helpful (and why are you staining walnut, anyway???)
The quality of the wood also matters. For example, you'll see more blotches after staining construction grade pine 2x4 boards than you will after staining a perfectly milled piece of pine.
If you're curious to see a test, here's a video showing conditioner on both hardwoods and softwoods.
Different types of wood conditioner
There are two types of commercially available stain conditioner - water-based and oil-based. Oil and water don't mix, so make sure you use the same base for both the conditioner and stain.
Oil based wood conditioner
An oil-based pre-stain conditioner is for use with oil-based stains. The main thing to know about oil based stain conditioners is that you'll likely be dealing with more VOCs (volatile organic compounds), so it's smart to apply this stuff in an open area.
The second thing about oil-based products is that you'll need mineral spirits to clean it up. For this reason, I recommend using a cheap foam brush that you can simply throw away when you're done.
Water based wood conditioner
Use a water-based pre-stain wood conditioner with water-based stains. With a water based stain conditioner, you don't need to worry as much about strong smells and harmful fumes. Many people like water-based products because you can easily clean it up with soap and water.
You can see how well water based wood conditioner works on pine in the video below.
Shellac
Shellac is typically used as a finish, but can be used under stain as a wood conditioner as well. Specifically, you should use dewaxed shellac, also called sanding sealer. You can dilute the shellac with denatured alcohol, or use it full strength on particularly tricky wood species.
DIY wood conditioner
Here are a few easy options for making your own wood conditioner that you probably have in your pantry:
- Black tea. Brew a strong cup of black tea. Allow it to cool, then wipe it onto the wood.
- Coffee. Not a tea drinker? Try coffee instead! Apply it to the wood the same way as tea.
How in the world does coffee and tea work as a pre-stain conditioner? The tannins in coffee and tea react with the pores in the wood, leading to a more uniform surface for the stain. I would recommend testing your brew on a scrap piece of wood first, and only use it under water-based stains.
You can also use a mixture of wood glue, water-based clear finish and water to create what is called "glue-size." You may have noticed that wood glue prevents stain from soaking into the wood, which creates light spots at the joints that can seriously mess up your project.
You can take advantage of this by diluting the wood glue with water and clear finish and applying it to the entire surface. The video below shows you how.
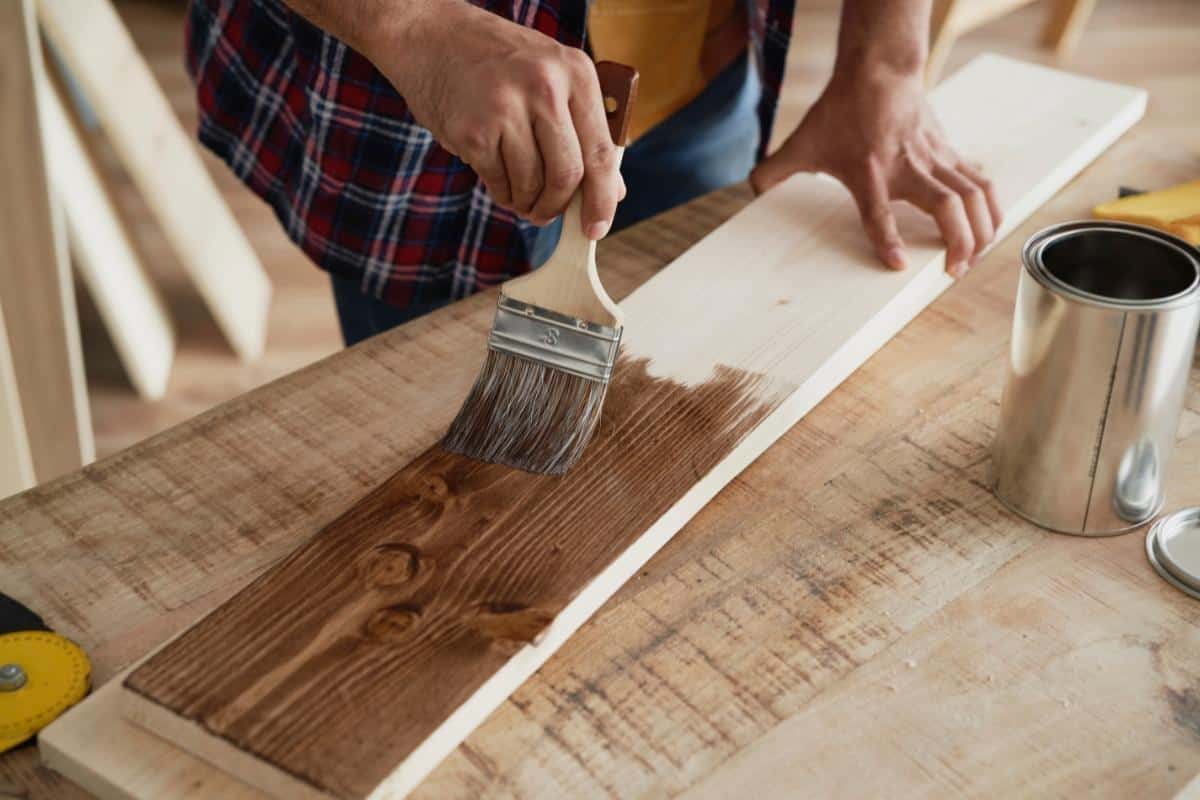
How to Apply Wood Conditioner
Now, let's learn the steps for applying wood conditioner. This section will give you the general guidelines, but each brand and type of pre-stain conditioner might have slightly different steps. Follow the instructions on the container - it saves more hassle than you think!
- Sanding. If you haven't already, sand your bare wood to at least 180 grit. It's important to sand with the grain and avoid over or under-sanding any one location - good sanding can prevent a lot of blotchiness!
- Smooth it out. Use wood filler or wood putty to fix any holes or dents in the surface of your board if necessary. Check the label to ensure that the filler or putty is stainable!
- Cleaning. Make sure the wood is clean and free of dust. I recommend using a tack cloth to wipe up any dust you may not be able to see.
- Apply the pre-stain. Wipe the pre-stain conditioner onto the wood with a rag or foam brush. Try to be as even as you can, though don't stress it - you'll wipe off any excess later.
- Wait. After about 5 minutes, wipe any excess pre-stain away. Most manufacturers recommend applying the stain in a window between 15 minutes and two hours, but consult the can for specific dry times. Applying stain too soon may just dilute the color without preventing blotching, but waiting too long may prevent the stain from soaking in at all!
- Apply the stain. Wipe the color over the entire surface with a rag or brush and allow it to soak in.
- Wait and wipe clean. Wipe away any excess stain after a few minutes.
- Apply a top coat. Protect your stained wood with a clear top coat. Stain by itself doesn't offer any protection against moisture, and may come off on your hands or clothing.
Frequently Asked Questions about Wood Conditioner
What happens if wood conditioner is left on for too long?
Some products recommend that you stain within two hours of applying the wood conditioner. If you forget and don't come back to your project until much later, the conditioner will act more like a sealer, and prevent the stain from penetrating into the wood.
If you left your wood conditioner on for too long, you can lightly scuff up the surface with 220 grit sandpaper.
Does wood conditioner make stain darker?
In general, wood conditioner does not make stain darker. Most people will notice their stain is slightly lighter after using wood conditioner. The reason is that the conditioner prevents uneven absorption of the stain. In the process, it prevents as much stain from being absorbed overall, leading to a lighter color.
What happens if I don't use conditioner before staining?
If you don't use a pre-stain wood conditioner, your stain could end up looking blotchy, almost like someone spattered different amounts of stain in different areas. The effectiveness of wood conditioners varies based on the wood and the stain, so be sure to test before committing to an entire project.
Do you sand after using wood conditioner?
After using a water-based wood conditioner, you might notice the grain raises and feels rough to the touch. You can use fine-grit sandpaper to smooth out the surface. For oil-based products, once you've sanded initially, you won't need to sand again.
Now you know the secret powers of pre-stain conditioner! If you've been noticing your stain looks blotchy, then this extra step might be just the thing to bring out that gorgeous wood grain on your next project.
Check out these other staining tutorials!
Aaron
Tuesday 2nd of August 2022
Can Minwax water based Pre-Stain be used when staining and sealing outdoor furniture with a water-based staining/sealing product? The label says, "indoor use only."
Vineta Jackson
Thursday 1st of September 2022
I've never used wood conditioner on outdoor furniture before. Outdoor stain is used for more than just looks. It helps to protect the wood from water and UV damage, so it needs to soak in deeper than regular stain. I would skip the wood conditioner on outdoor furniture and just use the stain and sealer.
MaryLou
Friday 1st of July 2022
I stained a board and it’s is blotchy. I have remanded but not all came off. I didn’t condition the board first. Can I do it now even though there is some stain still in the board?
Vineta Jackson
Sunday 3rd of July 2022
It's worth a shot! The wood conditioner will fill in those stained areas and prevent more stain from being absorbed, so hopefully it should even out the color.
Lisa
Saturday 5th of March 2022
Thanks for this advice. I did not even think to use a pre wood conditioner. It makes a lot of sense as to why my maple chairs came out blotchy n I had to pay a professional to restrain them!