Learn how to drill a pilot hole correctly, how to choose the right size bit for your screw or bolt, and tips for getting the best results!

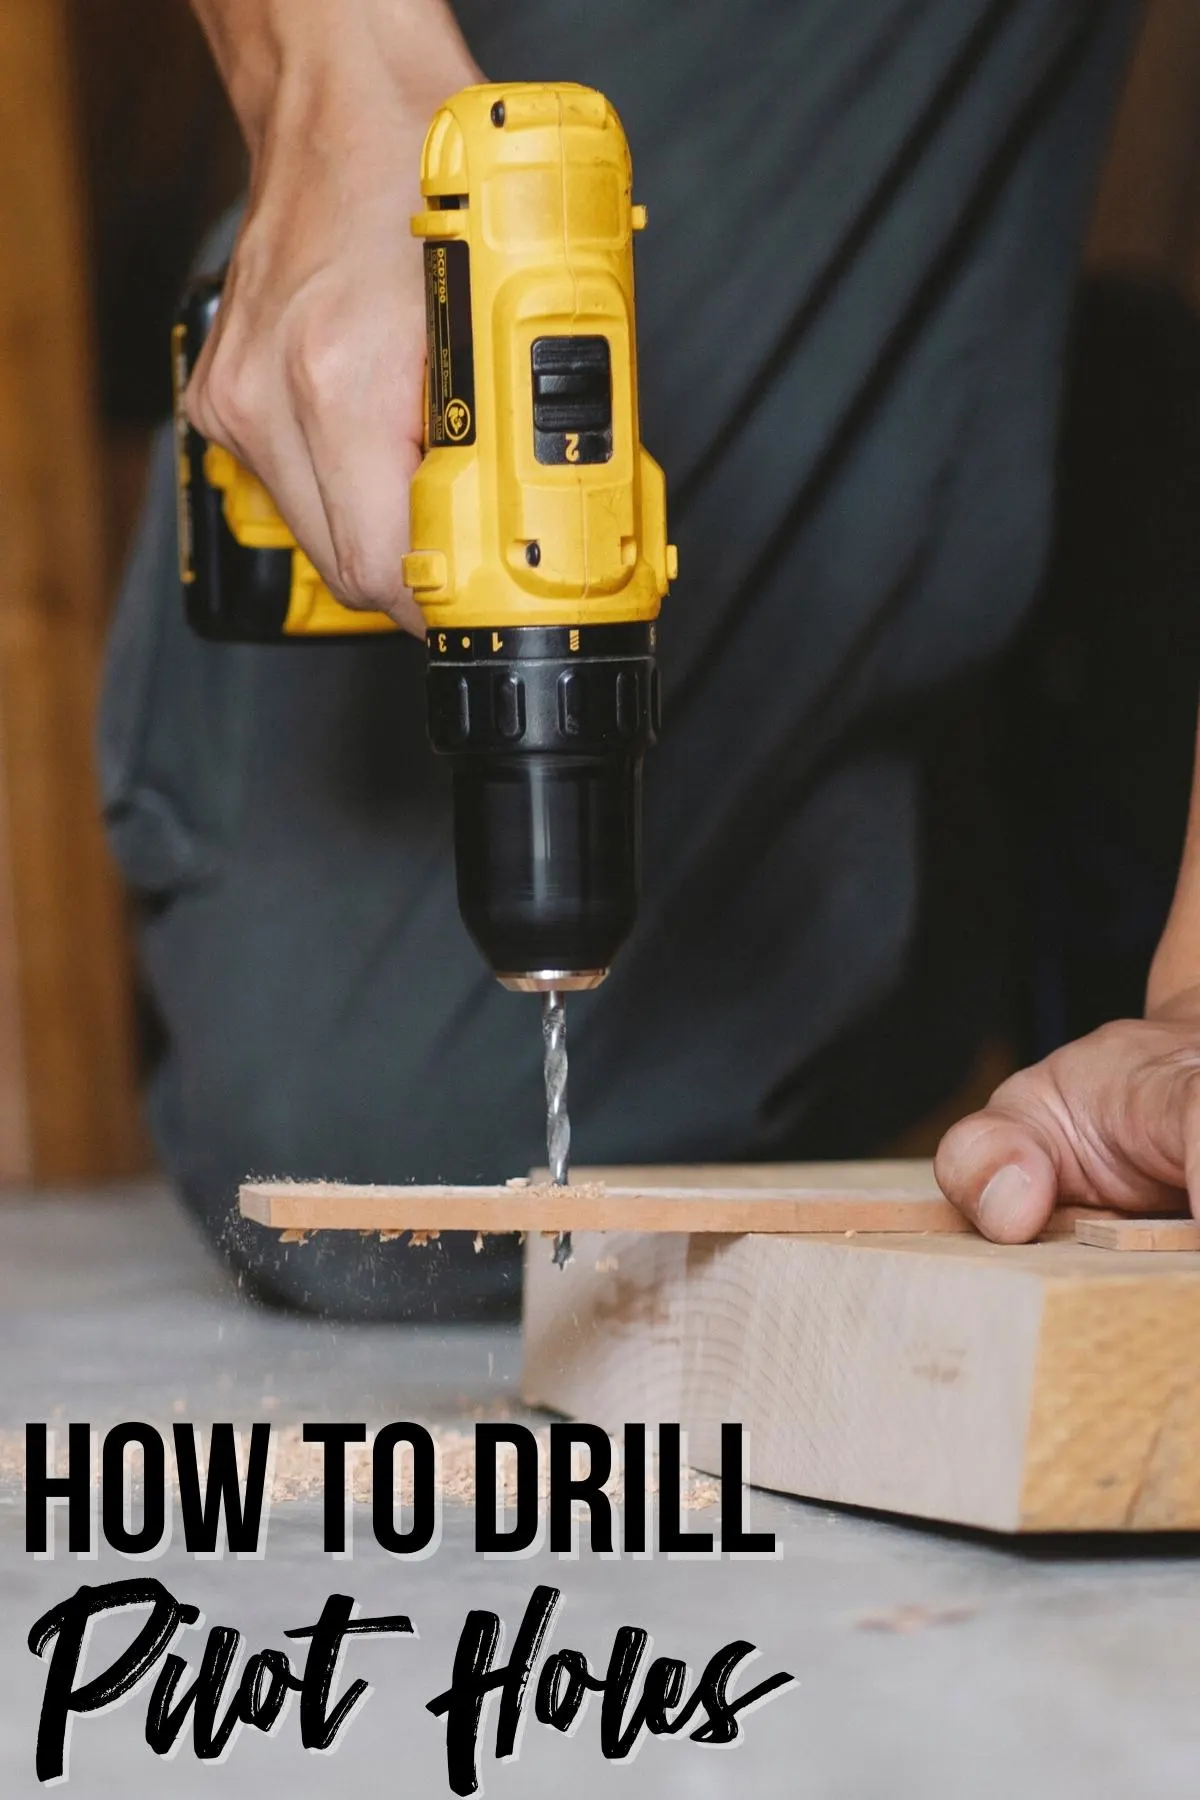
Learning how to drill a pilot hole correctly can literally make or break your project! In this article, we'll discuss why you need pilot holes and how to choose the right size drill bit to create a pilot hole for your wood screws.
To drill a pilot hole, you need to start by assessing the screws you're using and the wood you're drilling. A pilot hole is designed to improve the holding power of a fastener while reducing the likelihood that a board will split.
This post contains affiliate links for your convenience. Purchases made through these links may earn me a small commission at no additional cost to you. Please visit my disclosures page for more information.
What is a Pilot Hole?
A pilot hole is sometimes called "pre-drilling" or a clearance hole. The goal of the pilot hole is to remove material from the wood, so the screw doesn't force the board apart and cause it to split.

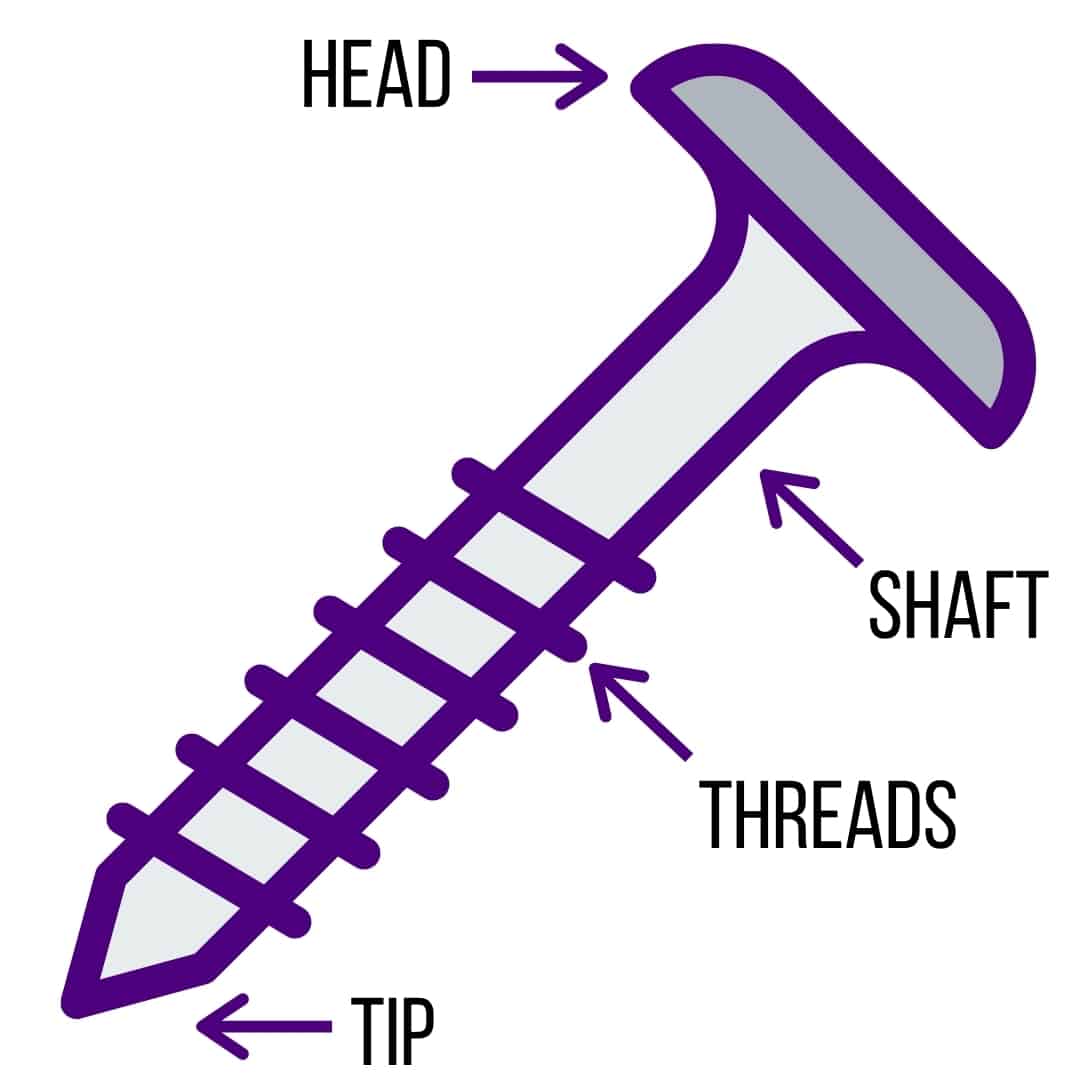
Typically, a pilot hole is created using a drill bit that is the same diameter as the shaft of the screw, not the threads. This will clear the way for the shaft of the screw through the first board, while leaving enough wood for the threads to bite into and hold the screw in place.
When joining two boards together, you should only predrill a hole through the first board, not the mating piece. Many wood screws don't have threads at the head end of the screw, and a pilot hole clears enough space for the shaft to fit through.

In addition to reducing the likelihood that the wood will split, the pilot hole also serves several other purposes.
- Easier to get the screw started
- Improves accuracy
- Increases the strength of the joint
What size drill bit do I need?
The thickness of your screw will determine what size drill bit you'll need. You can find the size of your screw listed on the package. The higher the number, the thicker the screw shaft.
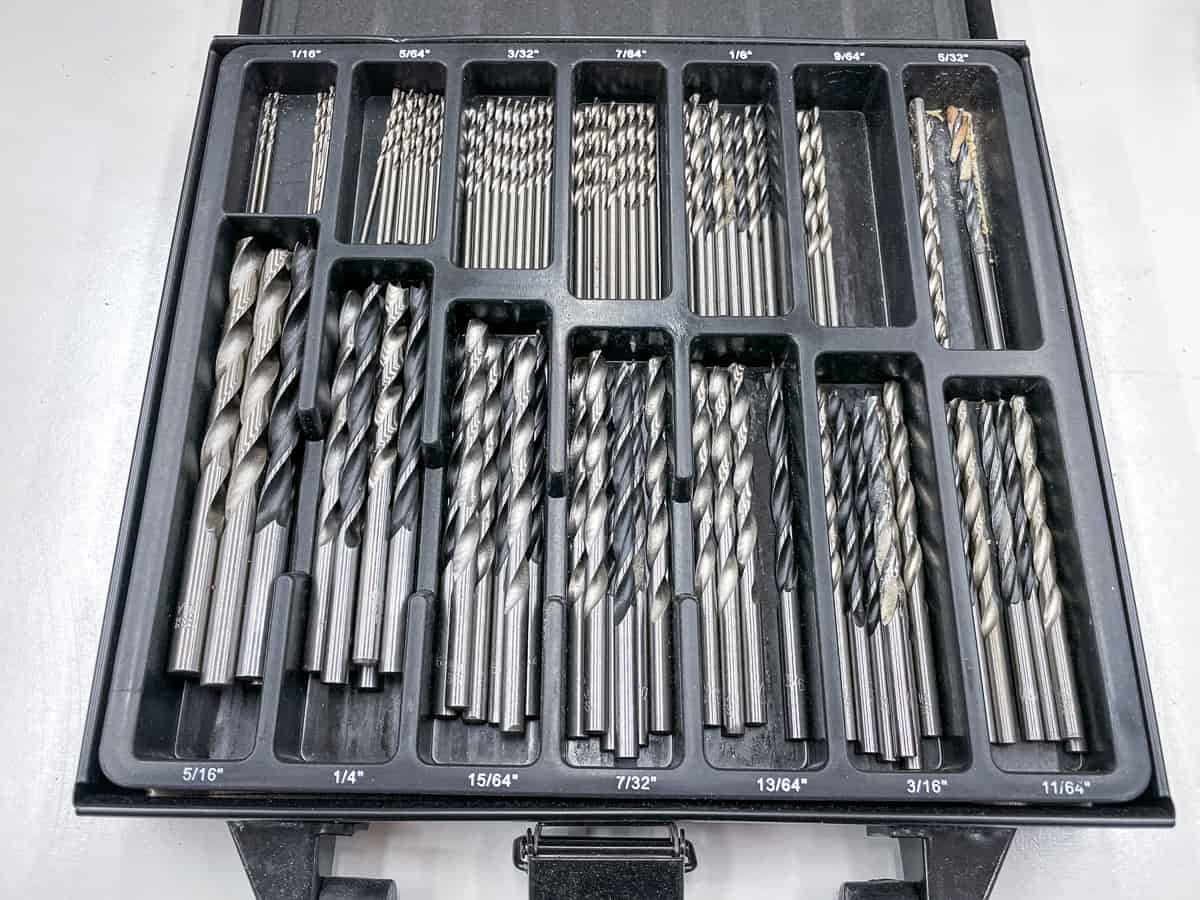
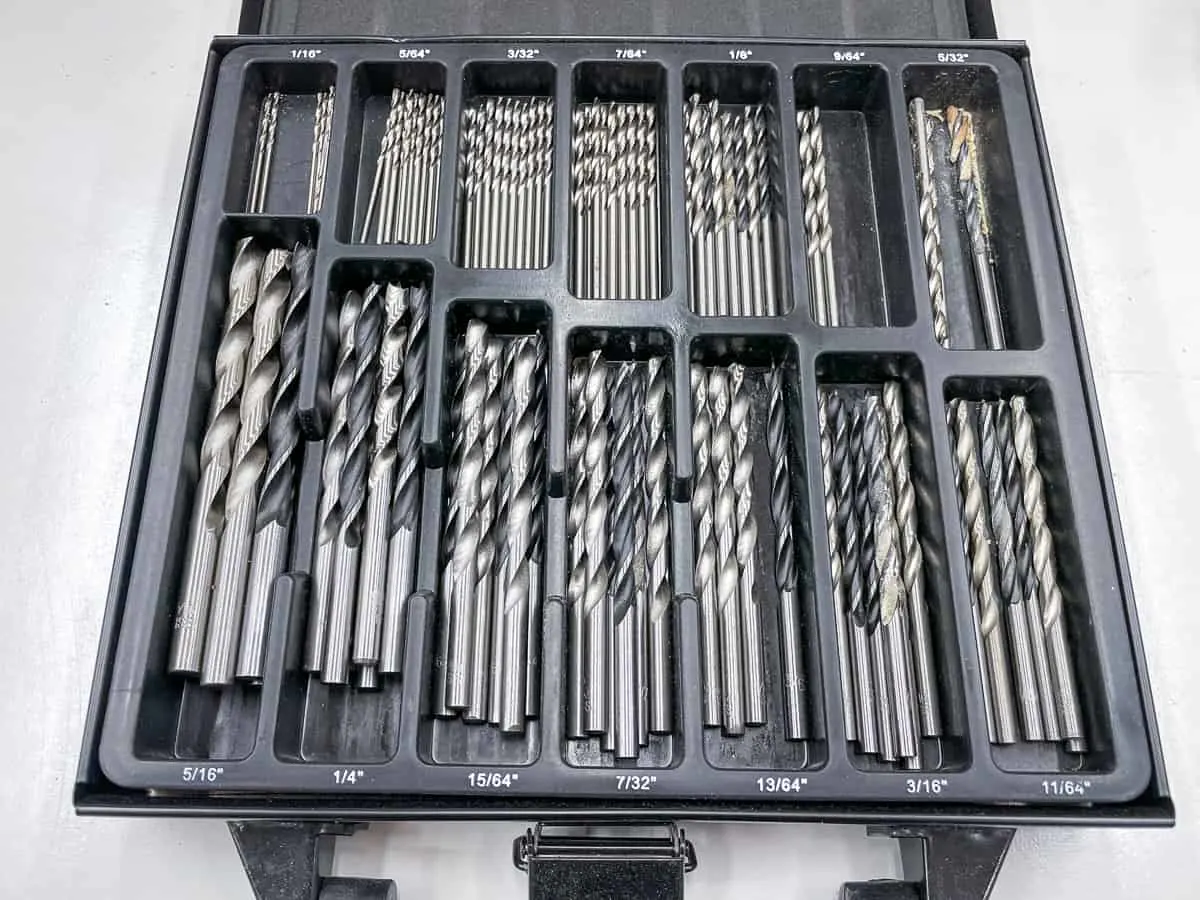
Most drill bit sets come with the standard sizes required to make pilot holes. Look for the size inscribed on the shaft of the drill bit, or in the storage case. Those tiny numbers can be hard to read, but you can check the diameter with a drill bit gauge or digital calipers if you're not sure.
You'll also need to consider the type of wood you are using for your project. If you're drilling into hardwood, err on the side of a slightly larger pilot hole. If you're drilling into softwood, you can get away with a smaller pilot hole.
Here's a quick chart of the most common screw sizes and the drill bit you'll need to make a pilot hole in soft wood like pine:
| Screw Size | Drill Bit Size |
| #6 | 3/32" |
| #8 | 7/64" |
| #10 | ⅛" |
| #12 | 9/64" |
| #14 (or ¼") | 5/32" |
How to Pre-drill Holes for Screws
Drilling pilot holes is an easy task, but here are a few things to keep in mind to make your project successful.
Safety
While drilling a hole doesn't seem dangerous, you should wear safety glasses just in case. Cheap drill bits can actually shatter under too much heat and pressure, and you don't want that going in your eye!
You should also be aware of where your hands are in relation to the drill bit. Clamp the board to your work surface to keep your hands free of wandering bits. This also allows you to have both hands on the drill to help keep it straight.
Choose the Right Pilot Hole Bit Size
What size should the pilot hole be? Choose a drill bit slightly smaller than the thickness around the screw's threads. You don't want it to be the same size, or the threads won't have enough material to bite into! Check the chart above for exact dimensions.
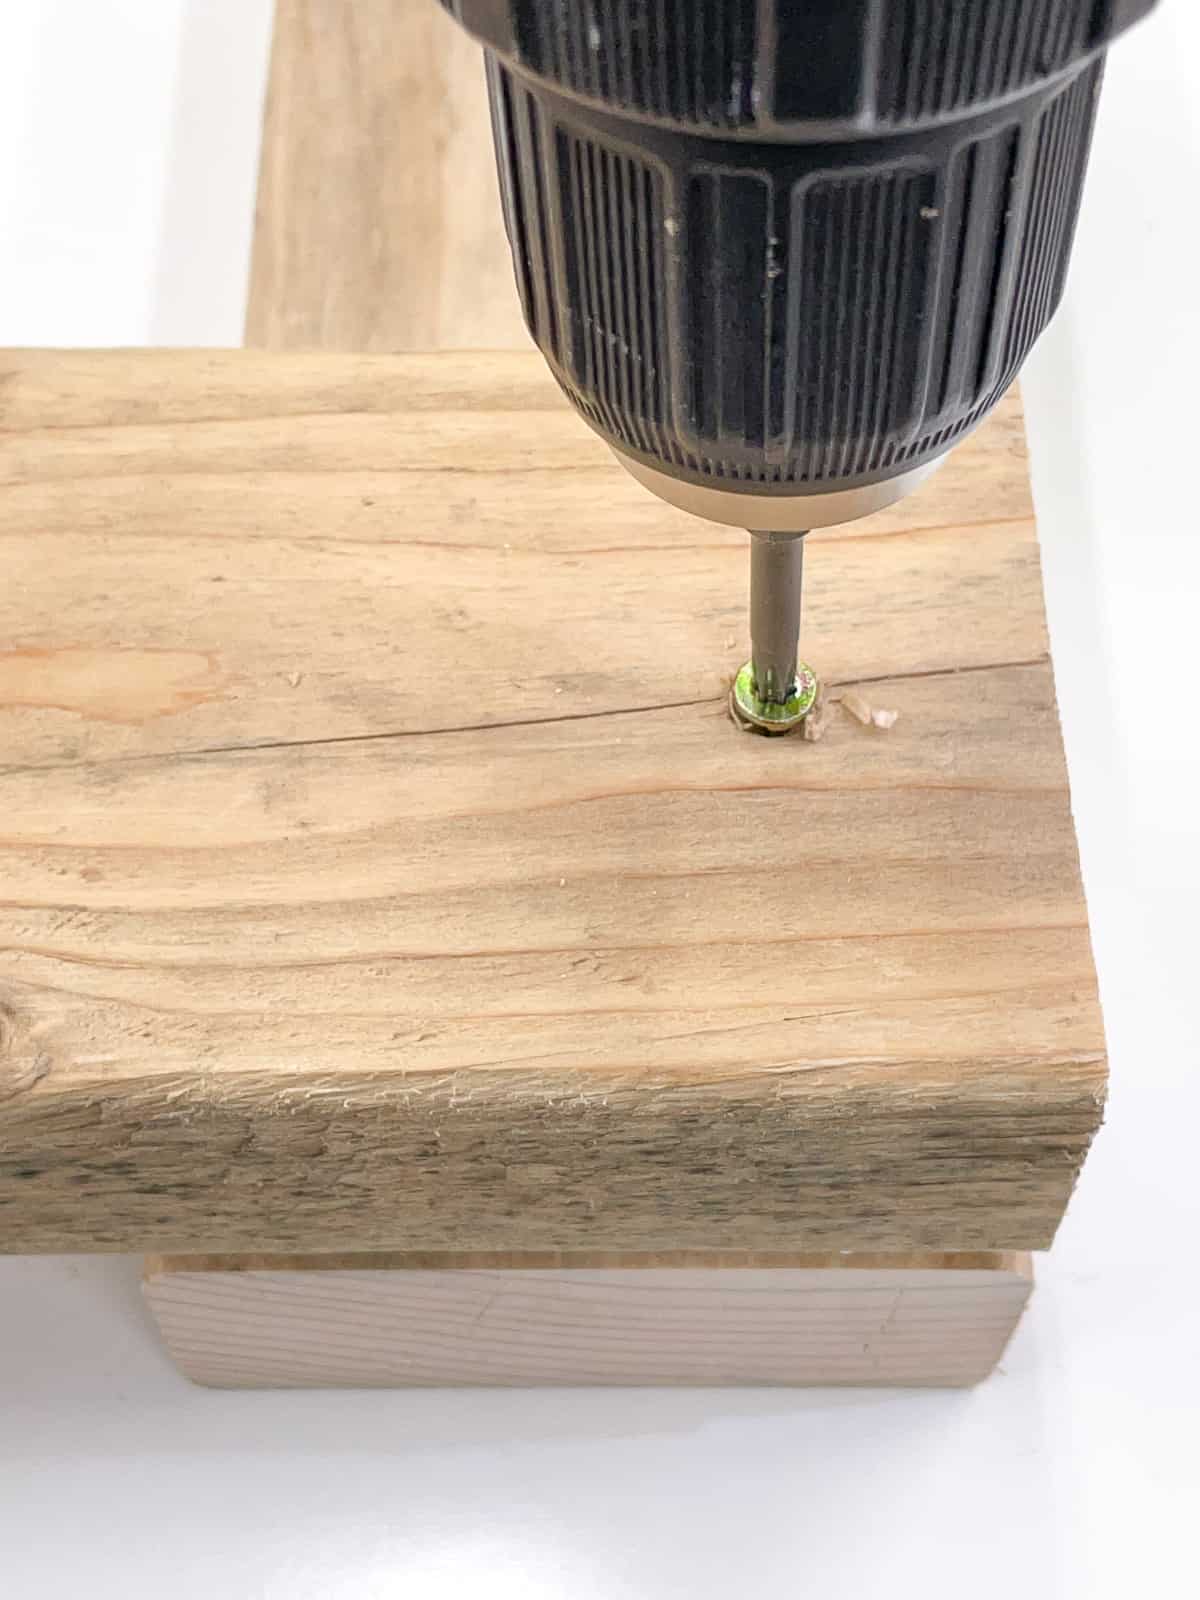
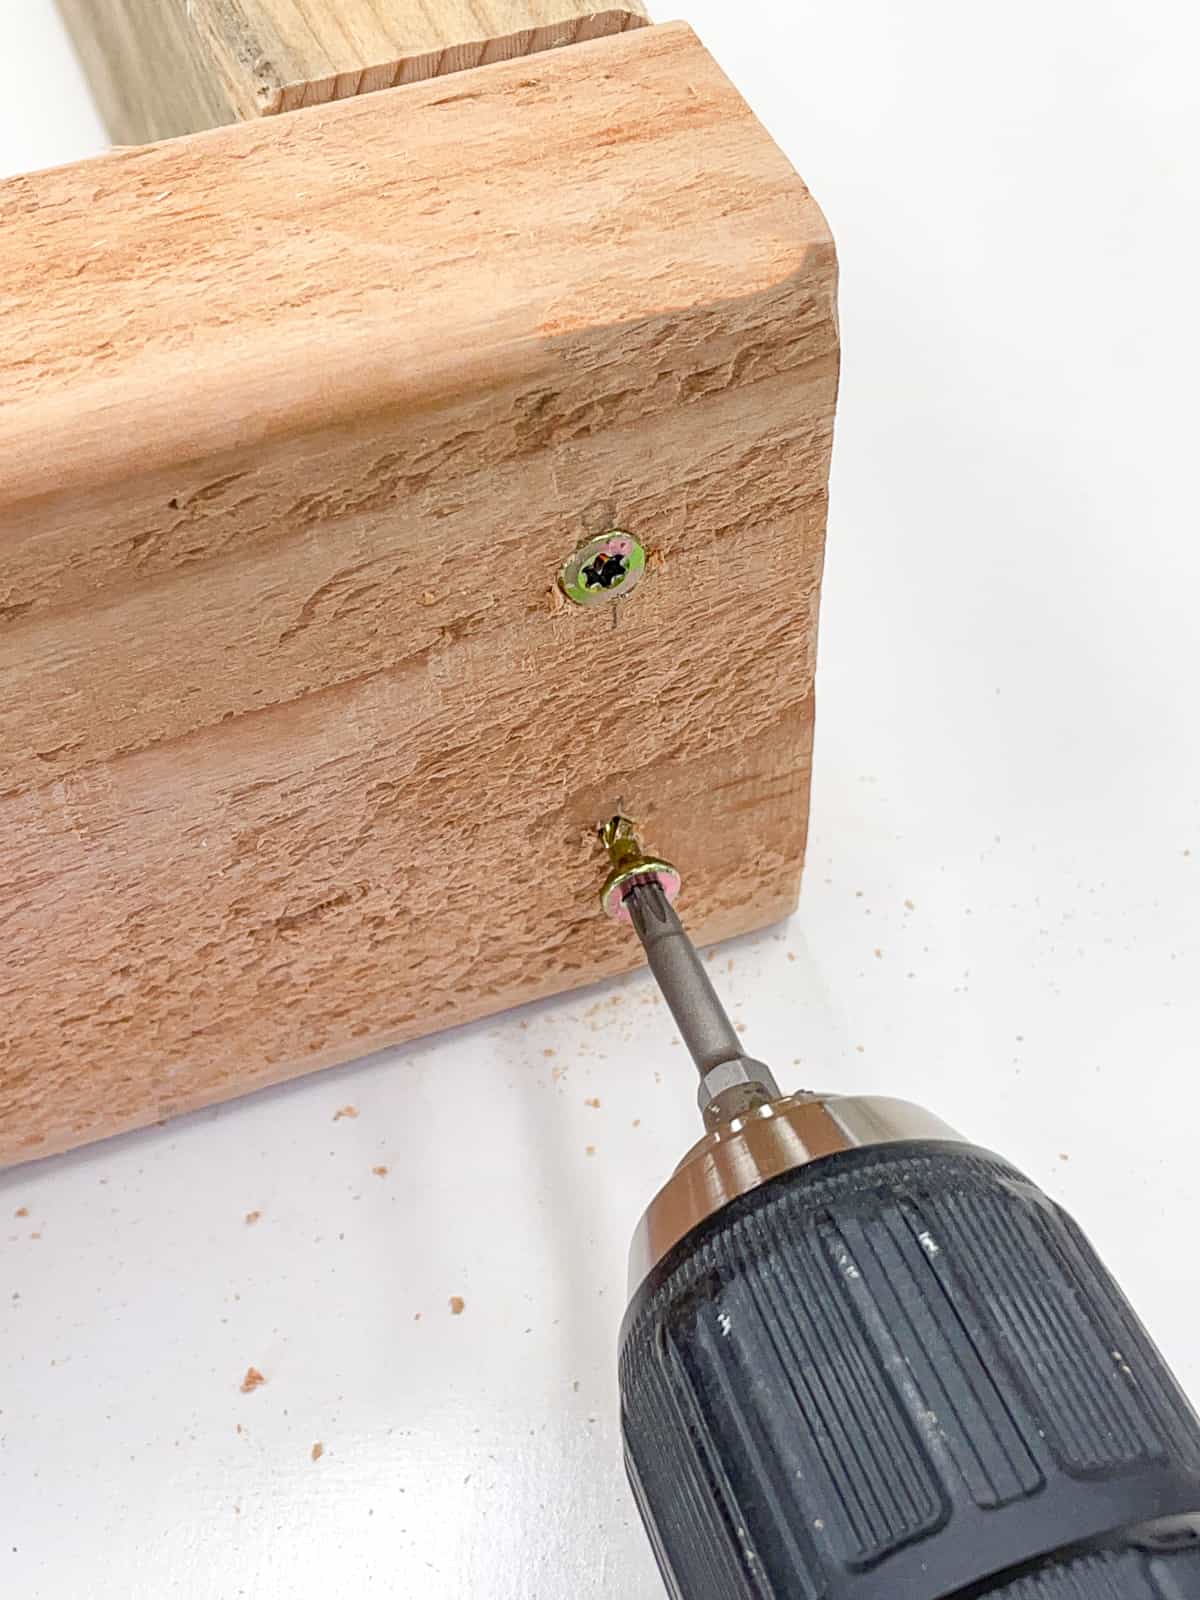
If you're drilling a pilot hole for a board that will be attached to another board, only pre-drill the top board so that the head of the screw applies pressure while the threads grip from the bottom.
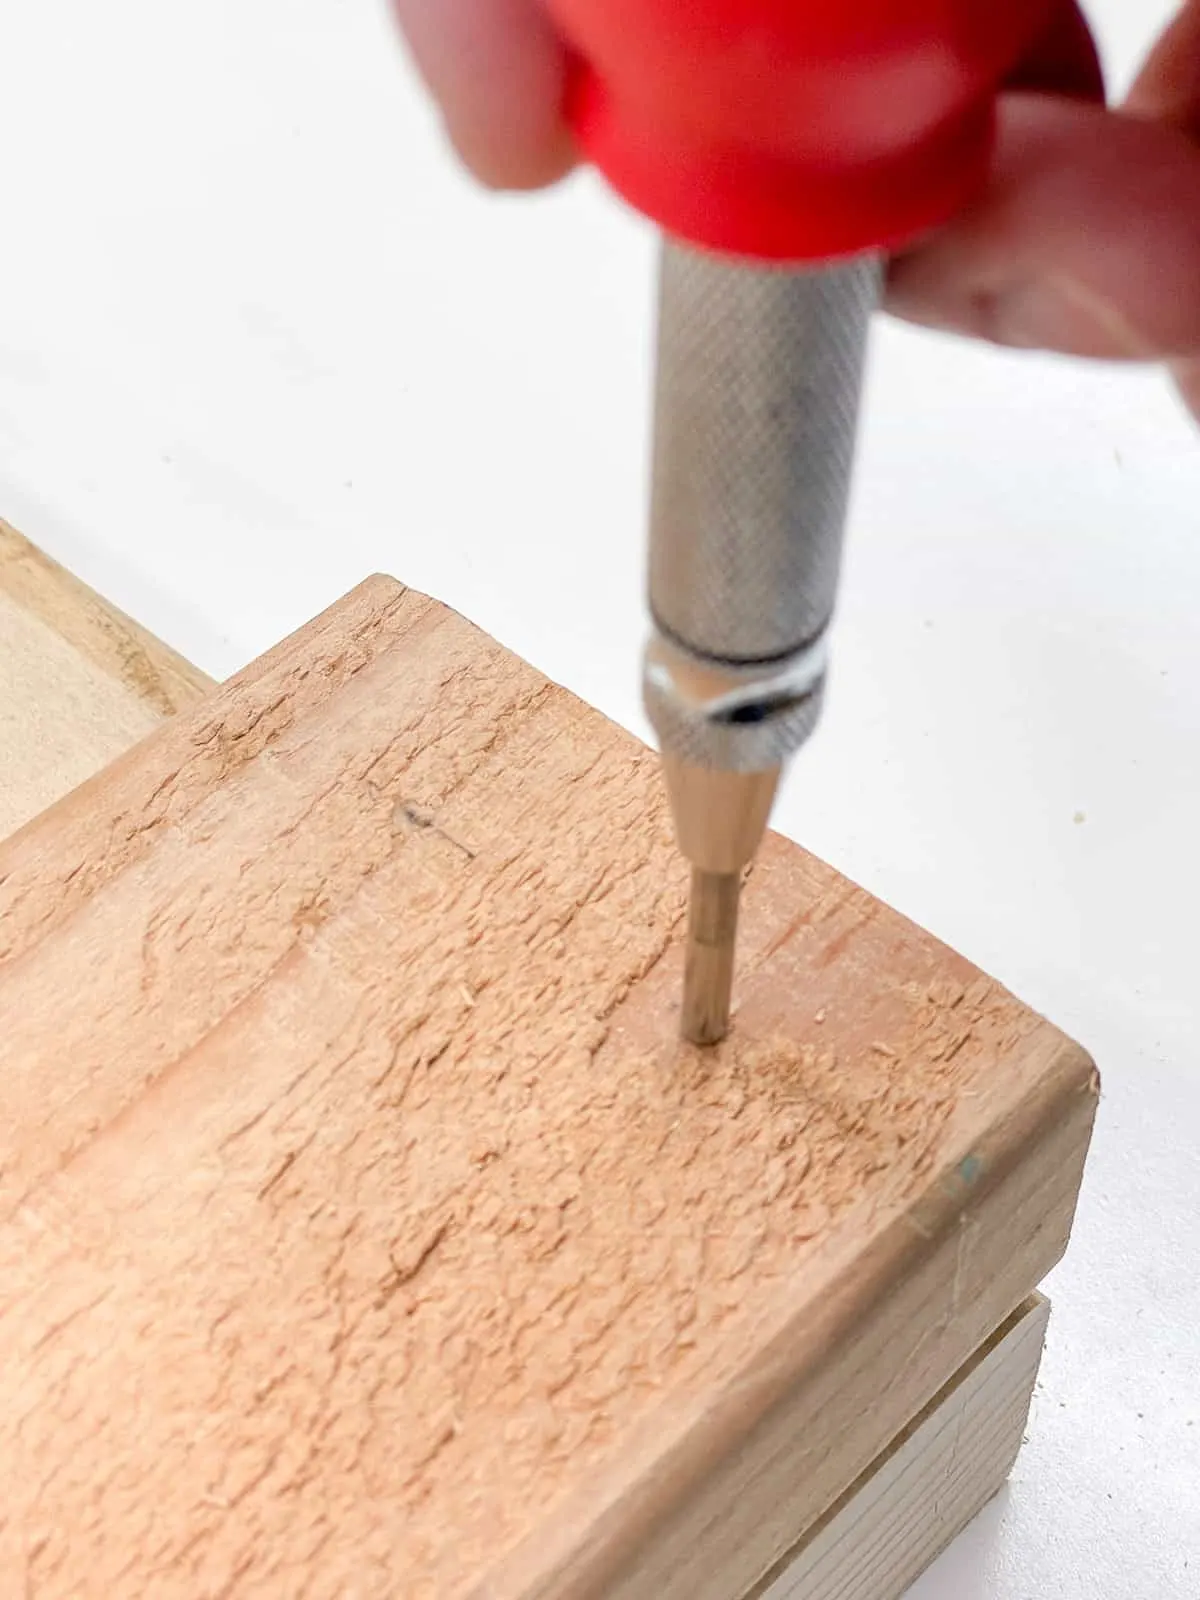
Mark the Pilot Hole Locations
You can use a pencil or a small center punch to mark the spots where you want to drill. The little divot created by the punch also helps gets the drill bit started so it doesn't wander.

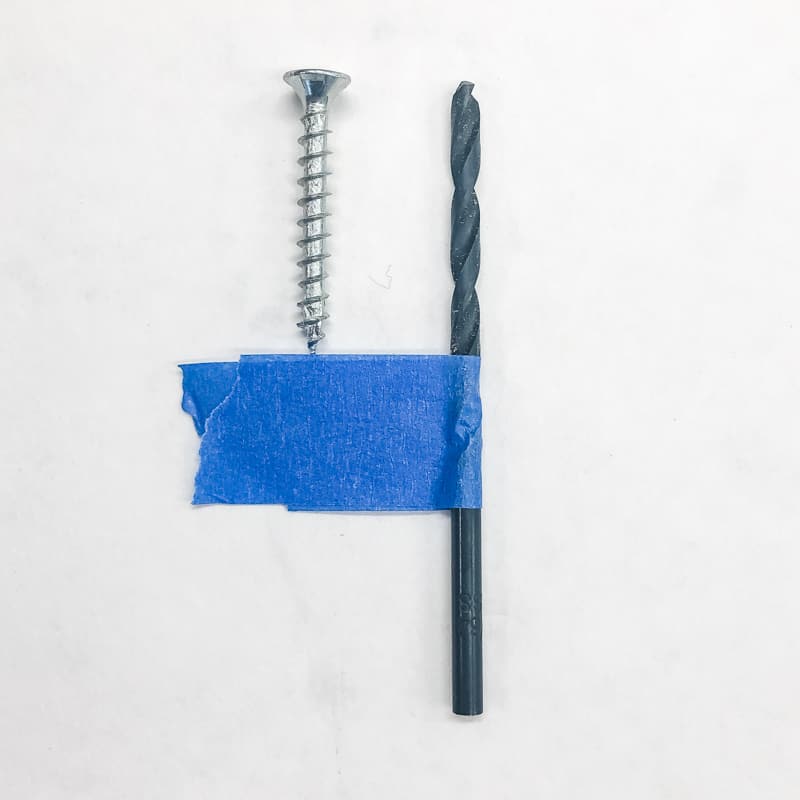
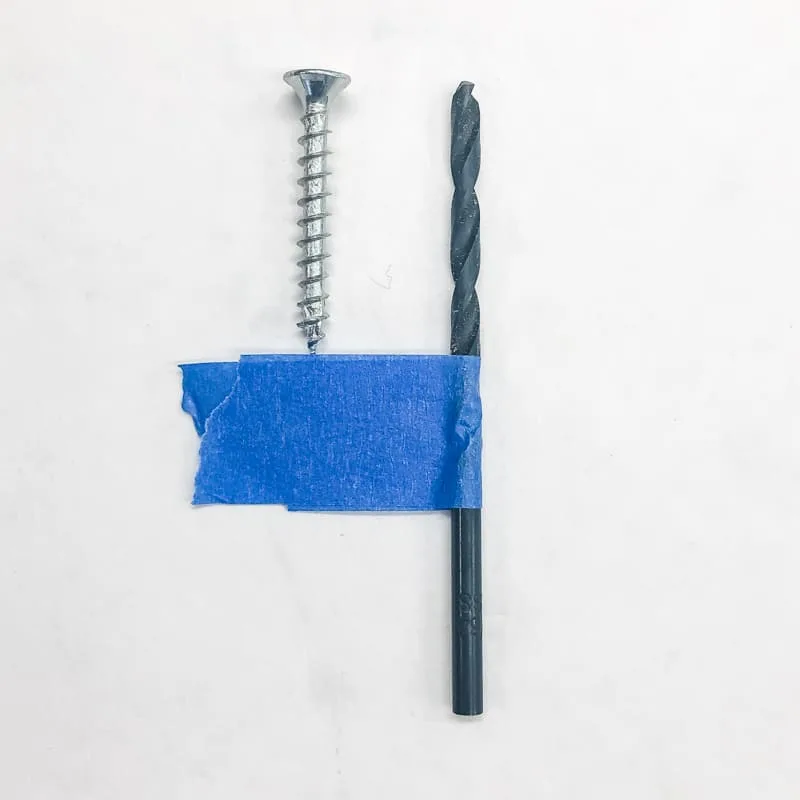
Use a Guide or a Stop Collar if Necessary
Depending on where you're drilling, you may need to be careful about drilling it too deep and busting through to the other side. In these cases, it's best to use a drill bit stop collar. This collar will make sure you only drill as deep as you need!
If you don't have a drill collar, you can wrap a piece of painters tape around the drill bit to mark the same depth as your wood screw. This won't stop the drill, but it will give you a visual guide. When the tape pushes away the wood shavings on the surface, stop the drill.
When making a pilot hole with a handheld drill, it can be difficult to get it perfectly straight. You can use an inexpensive drill bit guide to hold the bit perpendicular to the surface, or a portable drill press attachment if you need to make an angled hole.
Drill the Pilot Hole Slow and Straight
Hold the drill perpendicular to the board and start drilling the hole slowly. Once you get it started, you can move a little faster. However, make sure that you don't go too fast, or you might accidentally place the hole at an angle or blow out the other side!
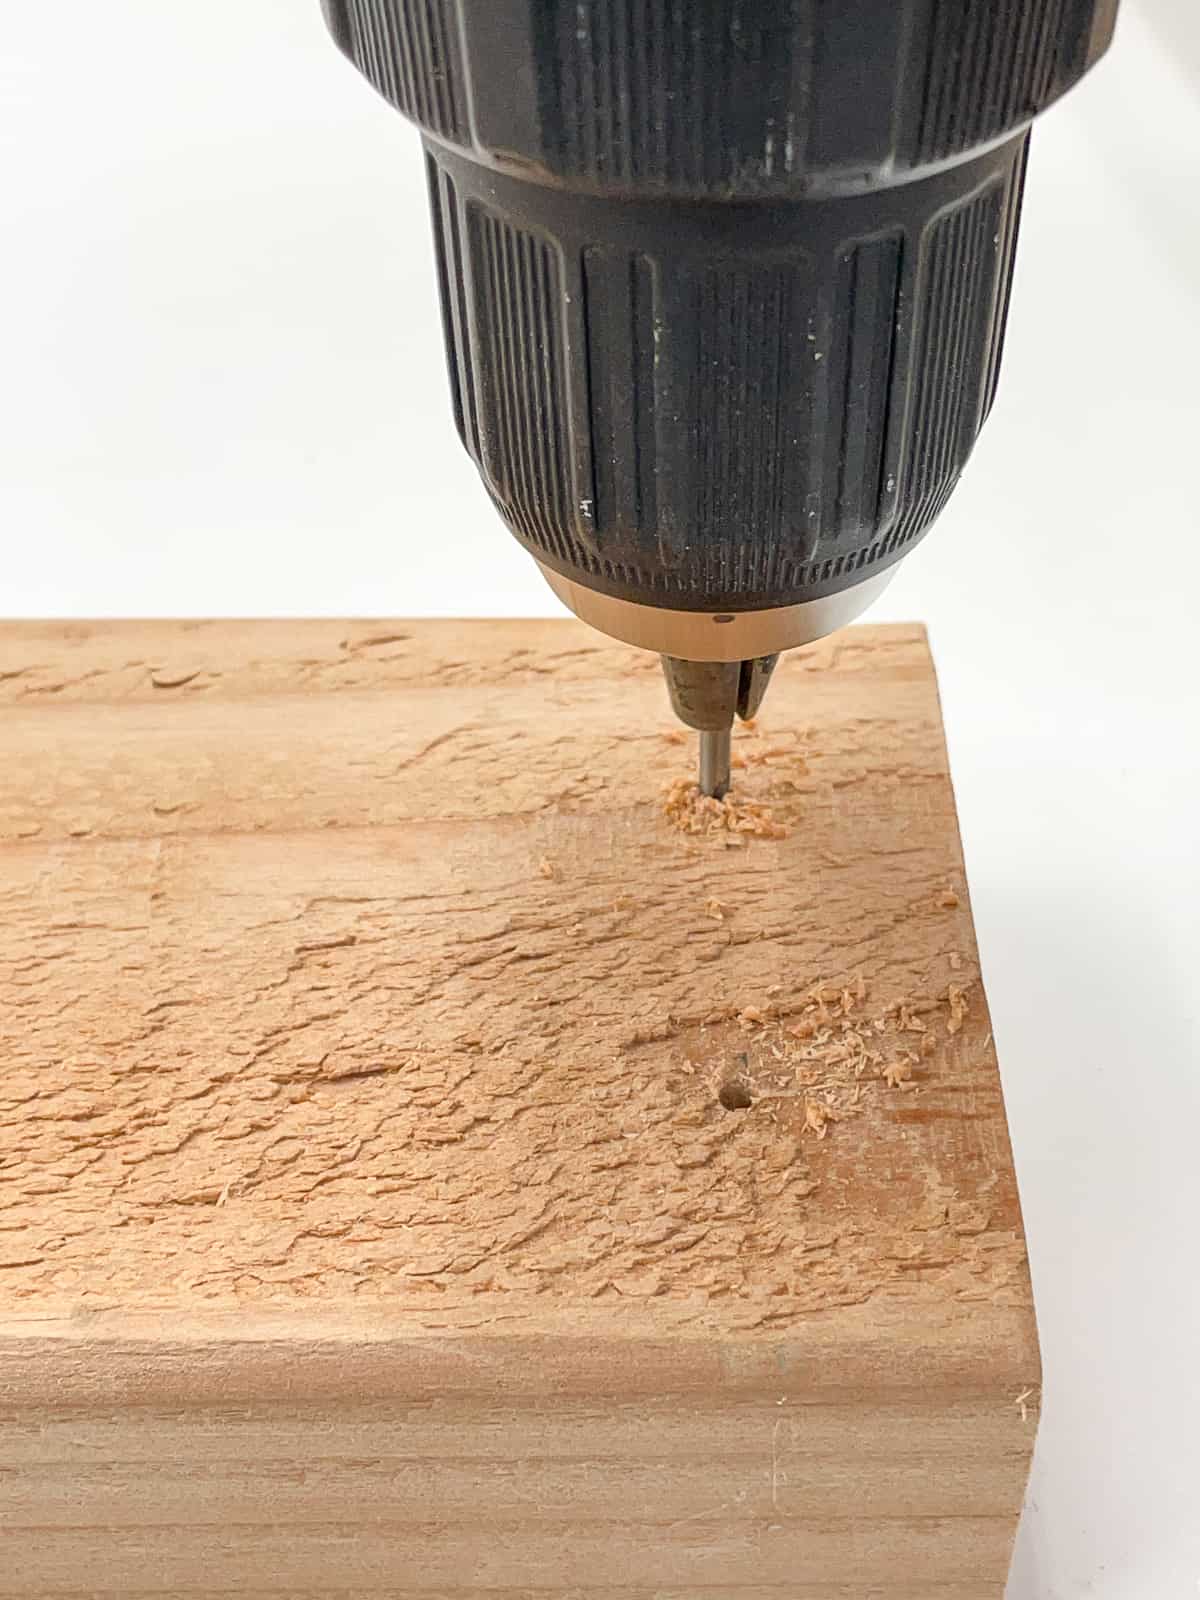

Depending on the size of the bit, you may need to drill it in stages, pulling it out periodically to remove excess wood chips.
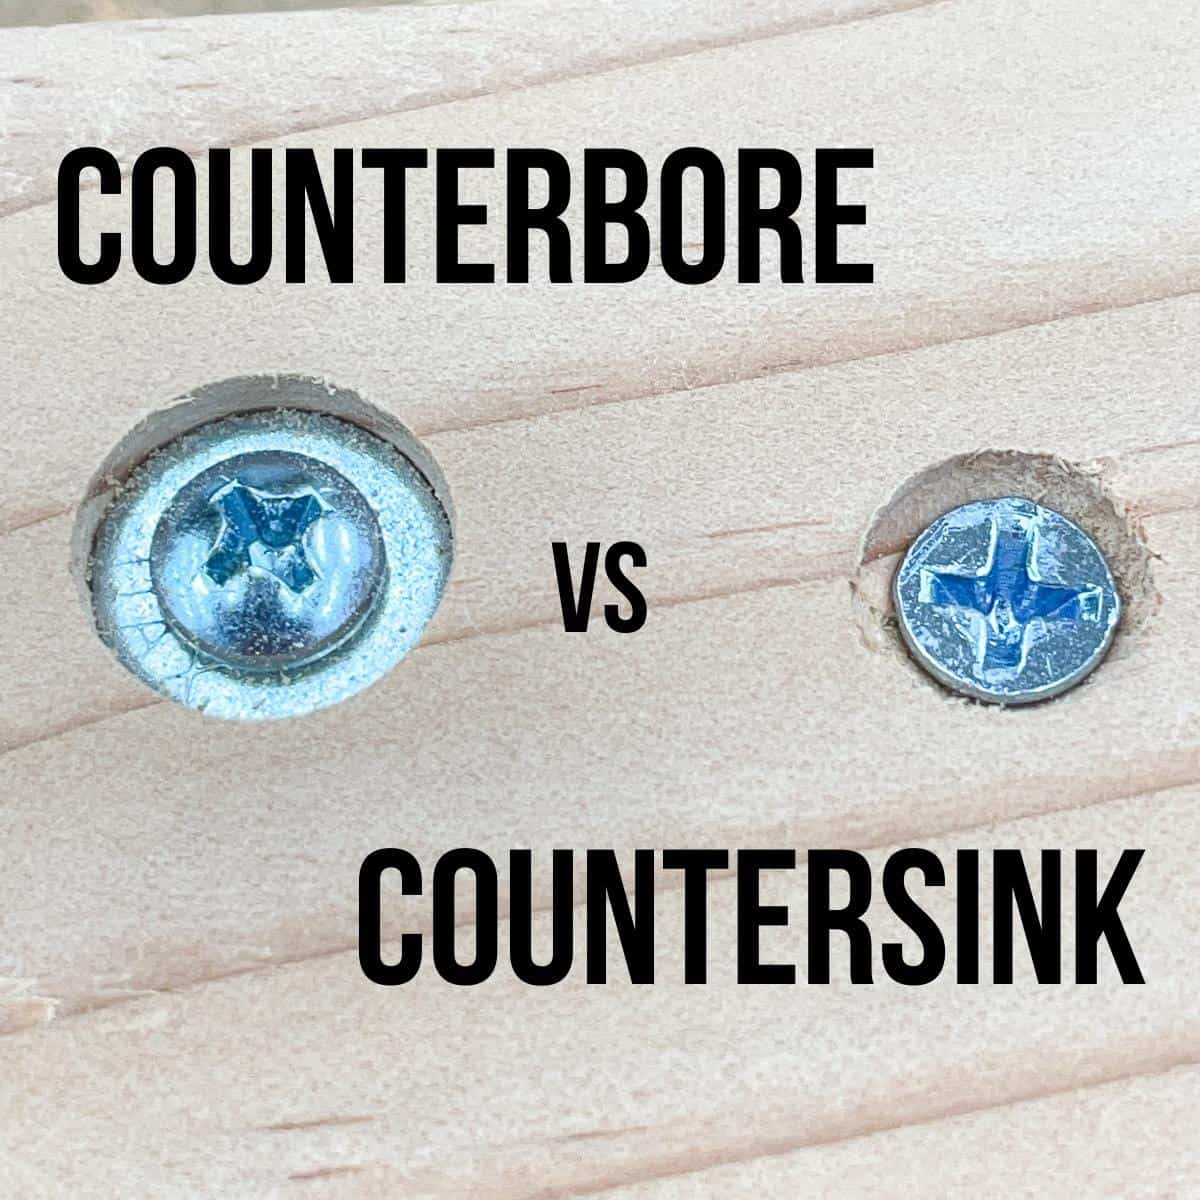
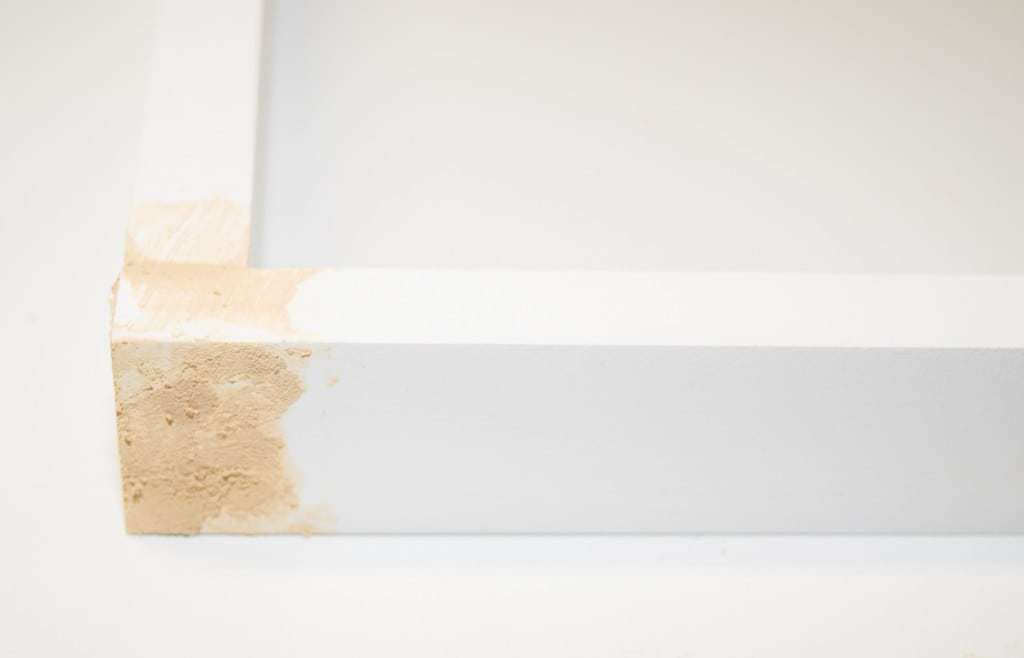
Countersink the Hole (optional)
Countersinking screws will make your projects look clean and professional, but isn't always necessary. It creates an angular hole for the conical screw head to sit in, so the top is flush or below the surface. If you're using bolts or washers, you'll want to counterbore the hole instead.

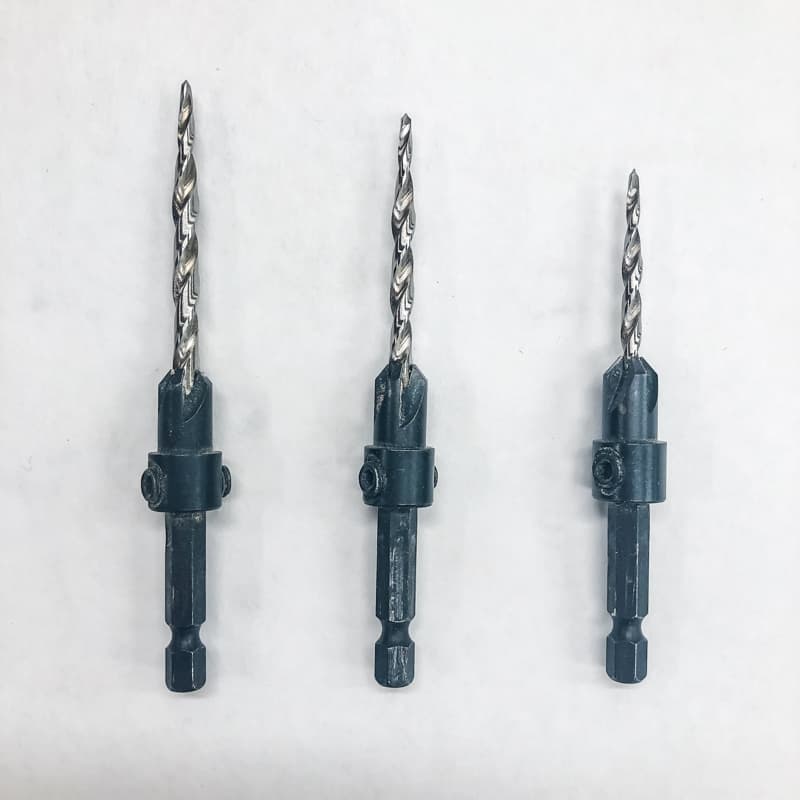
Most countersink bits can double as pilot hole bits, so you can perform both operations at once. This set has several different sizes, so you can match the countersink bit to the wood screw you're using for your project.
Here are a few more ways to hide screws in wood to make your project look more professional!
Drive in the Screw
Finally, you're ready to place the screw. You can use a drill or a screwdriver for this step. I usually keep two drills on hand, so I can keep the drill bit in one and the screw driver bit in the other.
Be careful not to force the screw, or tilt it an angle. Although the pilot hole helps to guide the screw straight through the wood, it can still turn out crooked if you apply too much sideways pressure.

As the screw enters the bottom board, the top board might jerk and spin out of your grasp. Keeping the boards clamped firmly in place will prevent it from smacking you!
If you're having trouble getting the screw seated in the hole, try backing it out and driving it in again. Sometimes the wood shavings from the bottom of the hole prevent the screw from going in all the way, and you need to clear them away before the screw will tighten correctly.
If you're painting your project and you predrilled countersink holes, you can use wood filler or wood putty to cover up both the screw and the hole. Check out this tutorial on how to use wood filler to make the screw disappear!
Pilot holes are useful to prevent cracking, improve accuracy, and increase speed. The best way to use pilot holes effectively is to practice! You'll gain a steady hand, and an understanding for how different materials react to different sizes of bits and screws.
Check out these other beginner woodworking tutorials!