Edge banding is a simple way to hide exposed plywood edges. When done properly, it looks like a solid piece of wood! Here are my tricks and tips for getting a professional finished look.
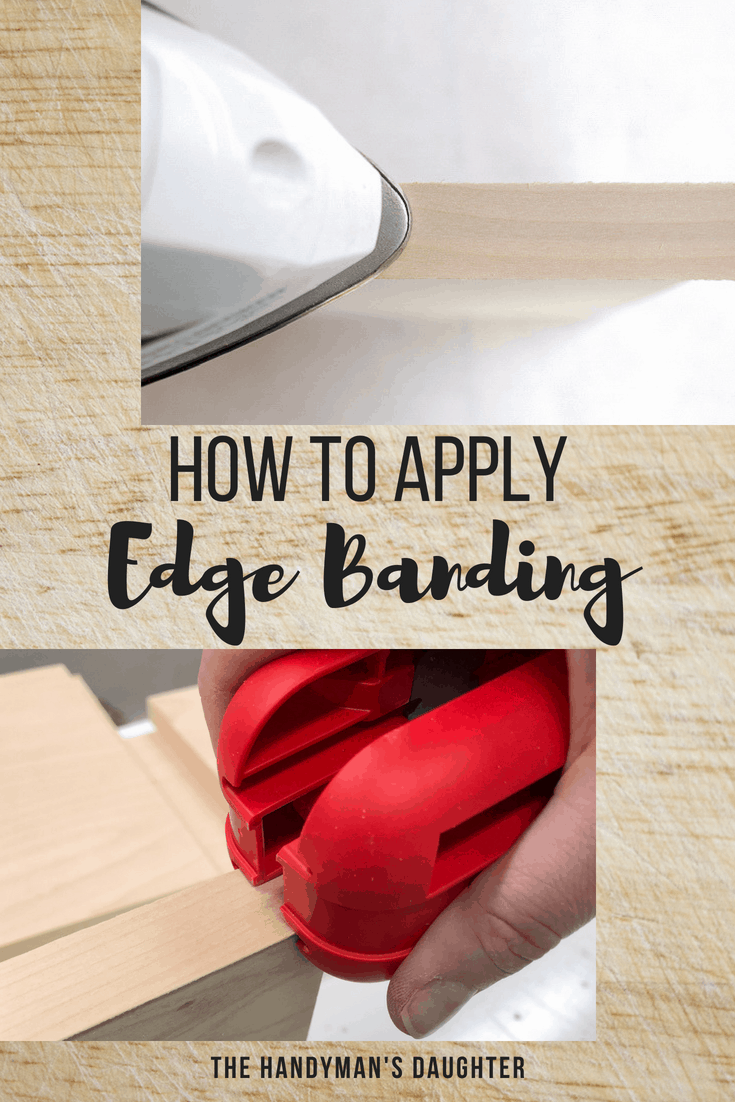

Plywood edges aren't the prettiest thing to look at, and can make a woodworking project scream "homemade." There are a few different ways to finish plywood edges, but my favorite is edge banding.
This simple finishing technique creates clean edges that give your project a professional look. All you need is a household iron and a utility knife!
This post contains affiliate links for your convenience. Purchases made through these links may earn me a small commission at no additional cost to you. Please visit my disclosures page for more information.
Materials Needed
- Edge banding matching the species and thickness of your plywood
- I usually buy ¾" birch plywood, so I stock up on big rolls like this one.
- If you're planning to paint your project white, or you're using MDF or melamine, try this white melamine edge banding.
- Iron
- I keep an old, worn out iron in the workshop just for this purpose! The steam function stopped working, which is perfect for edge banding.
- Utility knife or flush cut trimmer
- Cutting mat (optional)
- Scrap piece of wood
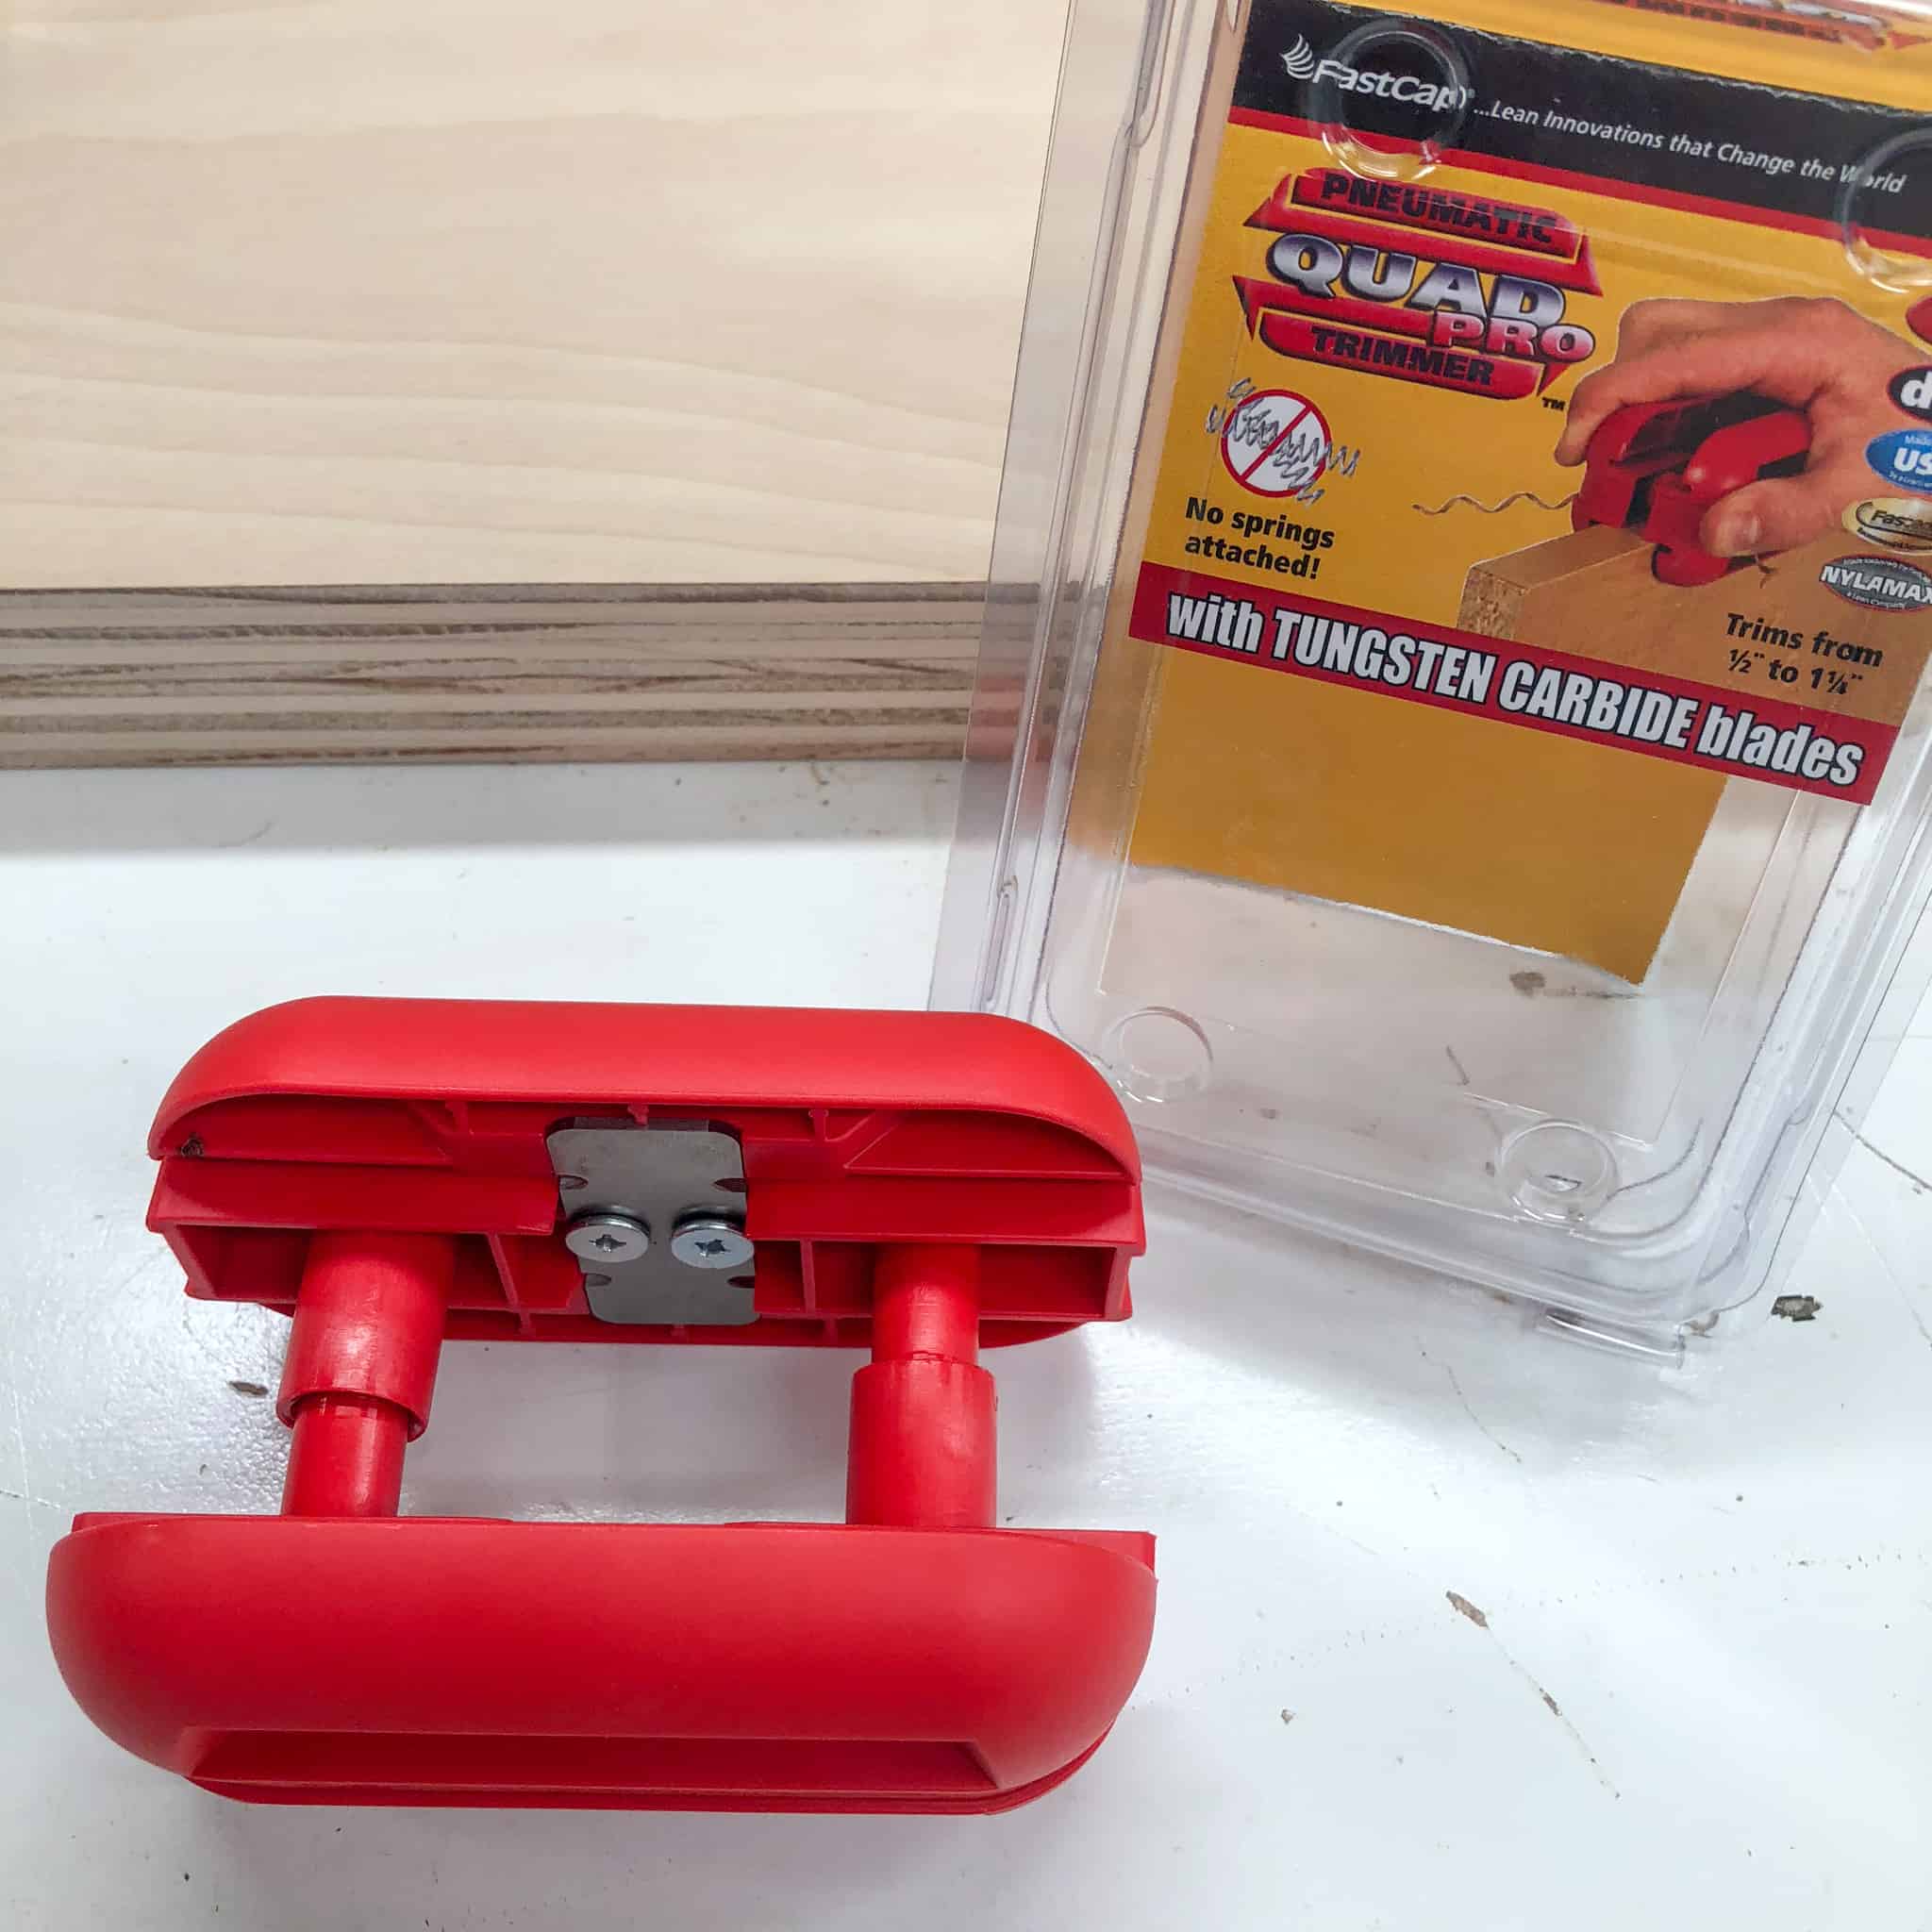
- Edge banding trimmer
- Trust me, you'll want this one if you plan to do a lot of edge banding. I've tried a few different versions, and this one is the best by far!
- Sanding sponge or edge sander
How to Apply Iron on Edge Banding
Plan Which Edges to Cover Ahead of Time
When planning out your project, you'll want to apply edge banding before you start assembly. This may take some mental gymnastics as you figure out which sides will be exposed in the final product. I always seem to pick the wrong one on the first try! 🙂
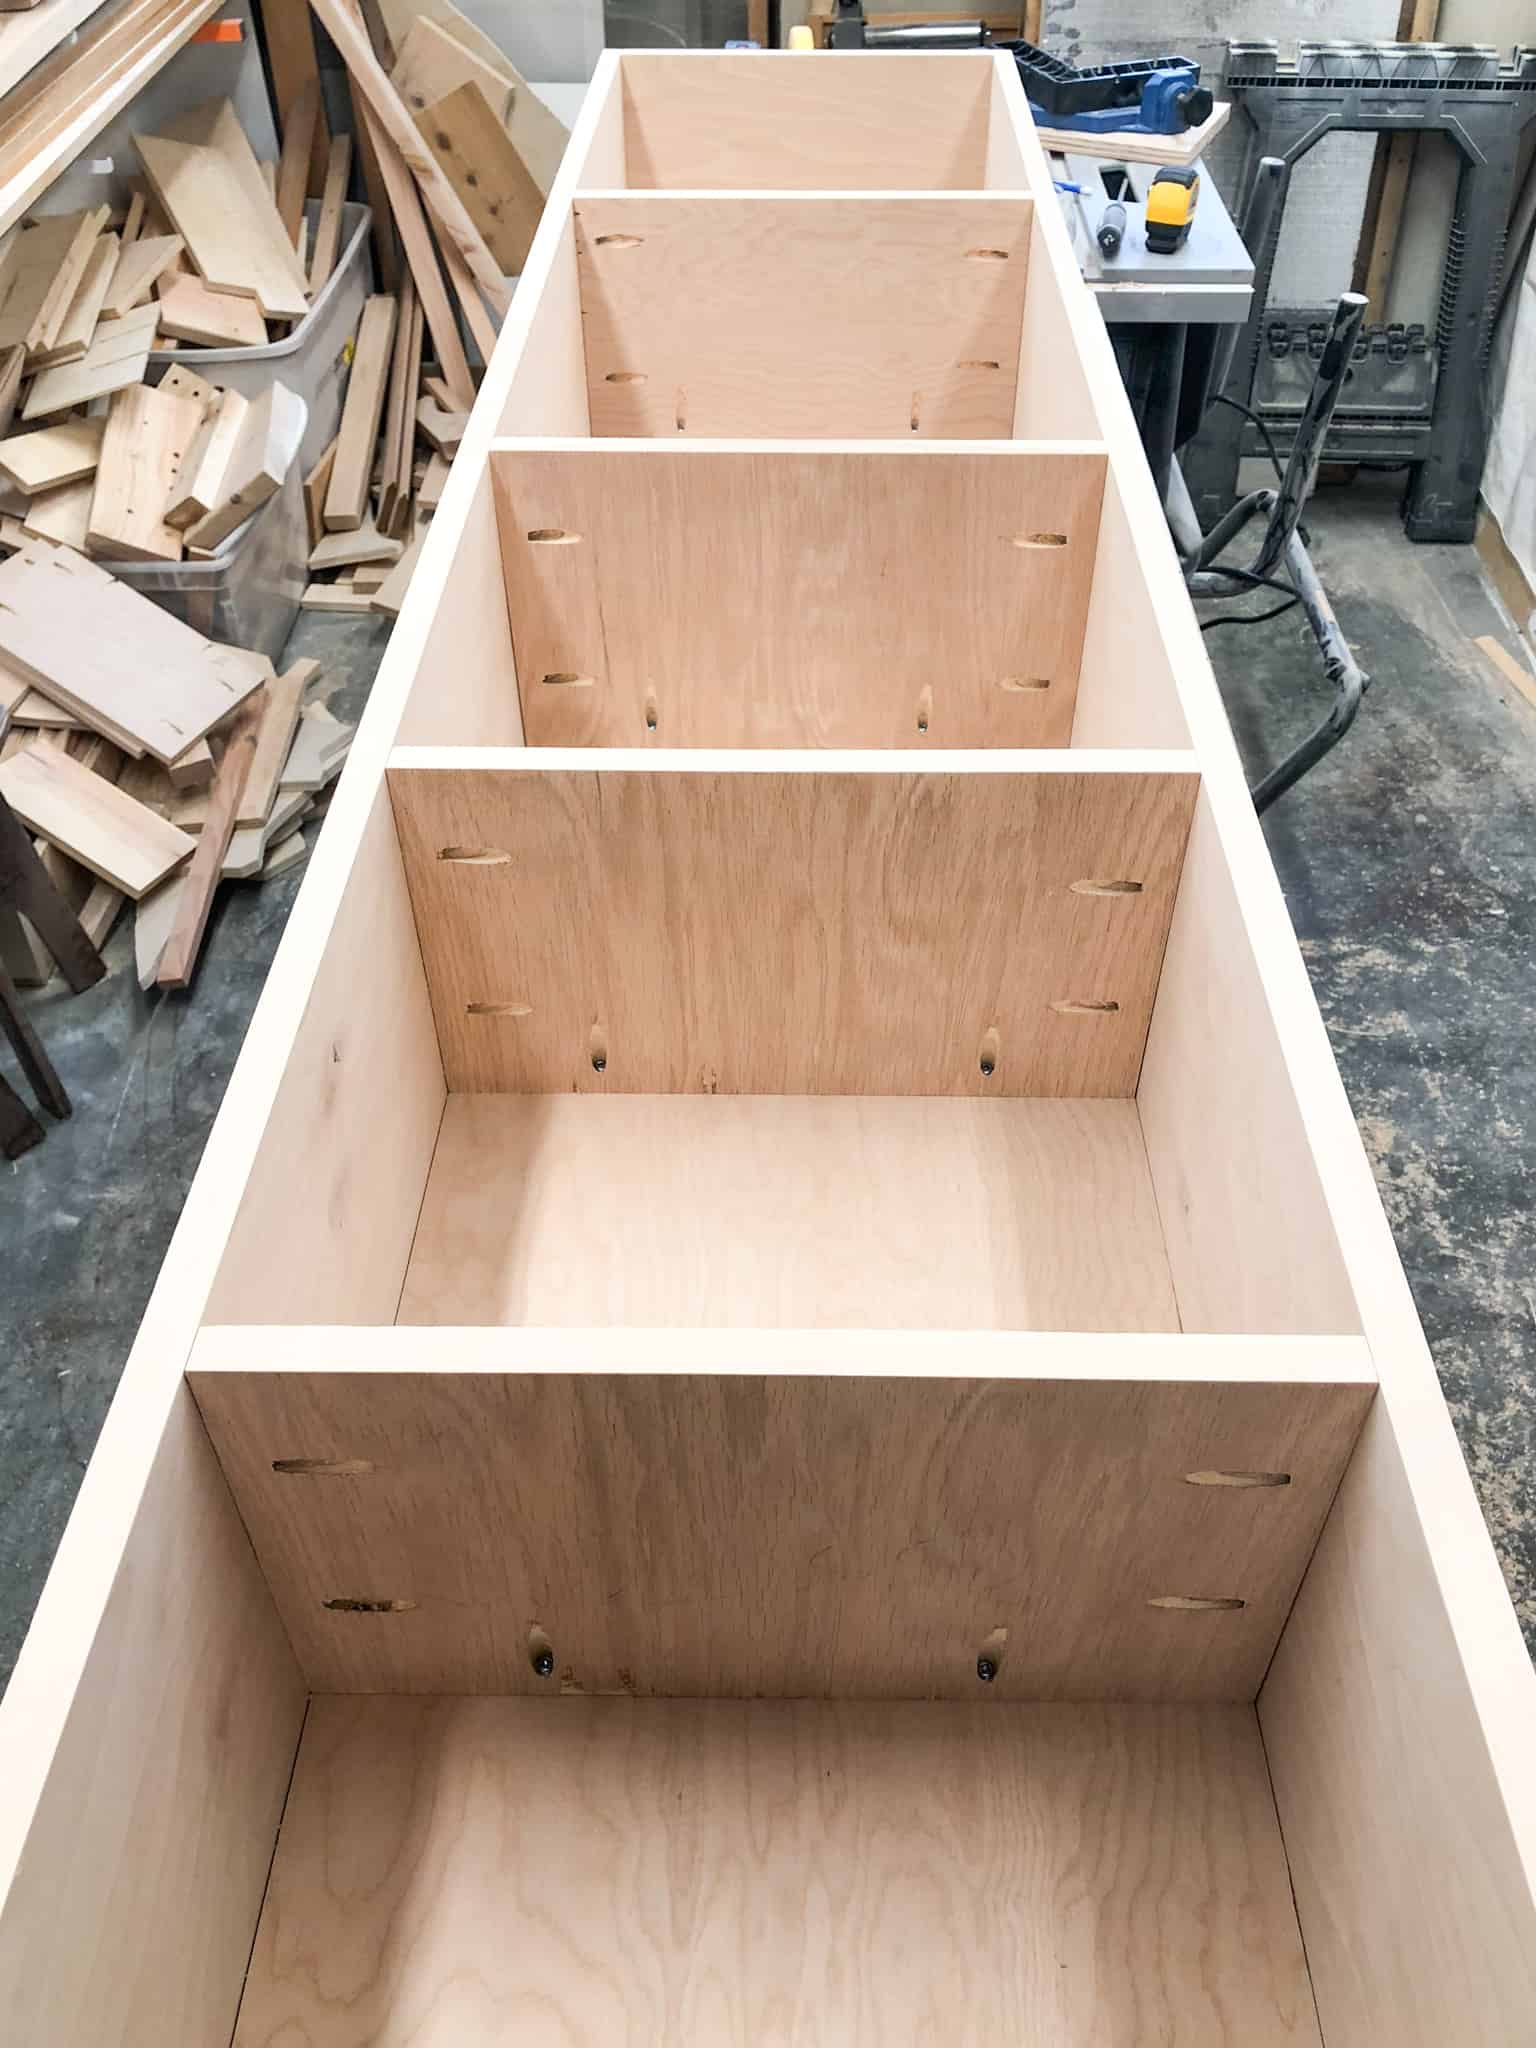
In most cases, you'll just need to finish the front edge, like on this pantry cabinet.

My wood shim barn door was backed with plywood, so I used edge banding on the sides and stained it to match the rest of the door.
Sand the Plywood Edge
Before applying the edge banding, make sure the plywood edge is smooth, flat and square. There's heat-activated glue on the back of the veneer, and it needs to adhere to a flat surface.
Remove any splinters or fuzzy bits with a sanding block. The stiff sides of the block will prevent you from rounding over the corners accidentally.
Cut the Strip to Size
Cut a strip of edge banding slightly longer than the side of your plywood piece. You'll want to leave half an inch or so on either end so it can be trimmed to size when you're finished.
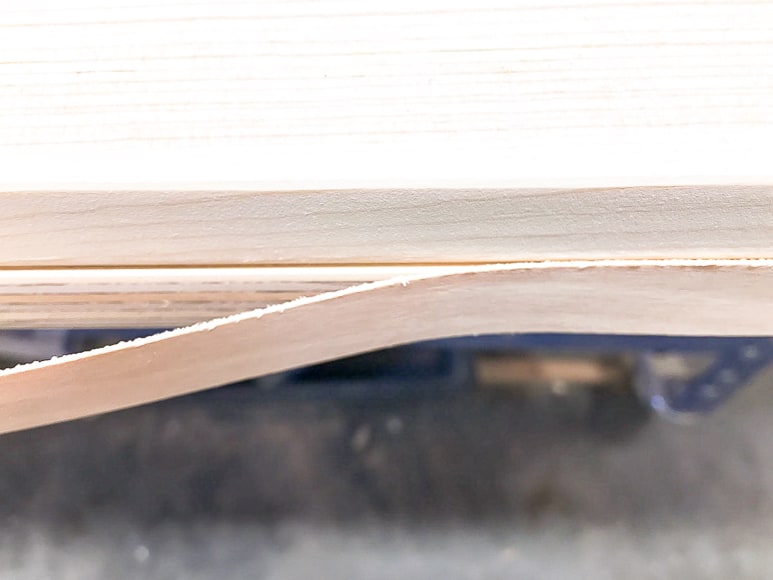
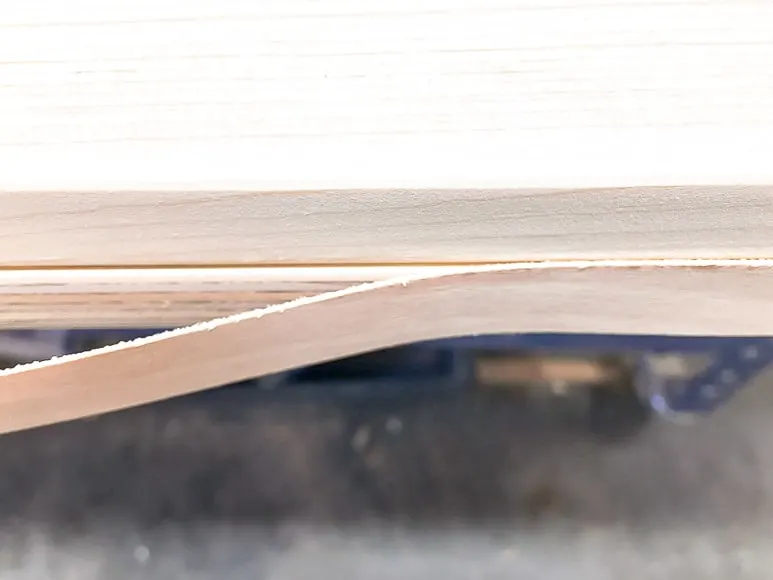
Apply Heat to the Edge Banding
Heat up your iron to the highest setting without steam. Center the edge banding strip over the plywood with a little bit hanging over the ends and both sides. The banding is slightly wider than the plywood, so you'll have some wiggle room if it's not perfectly straight.
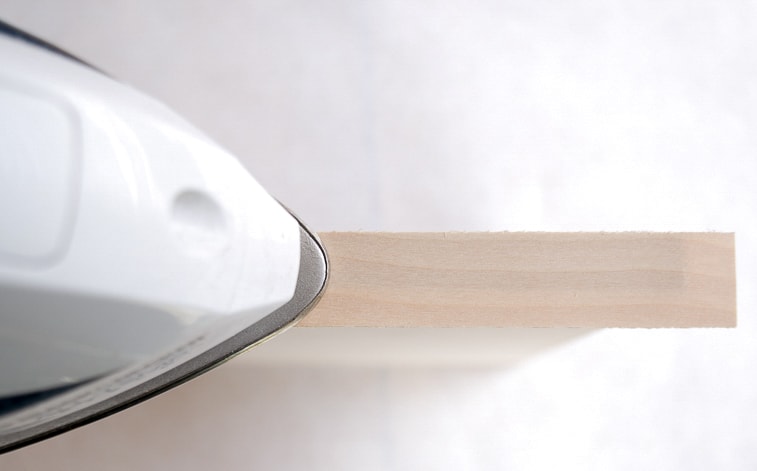
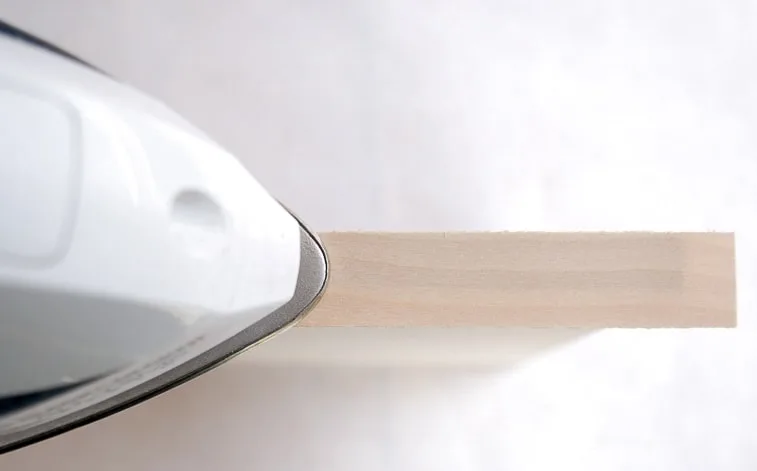
Start at one end and heat up the veneer until the glue sticks to the plywood edge. Then slowly work your way down the length of the board.
If your edge banding was tightly coiled in the packaging, it may spring back a bit before the glue has a chance to adhere properly. Use a scrap piece of wood to apply pressure to the heated section as it cools.
Trim off the Ends
When the edge banding has cooled, trim the ends flush with the edge. You can simply bend the end over the corner to snap it, although you'll have to sand the jagged edge smooth. I like to use a utility knife and a cutting mat to get a perfectly straight cut.

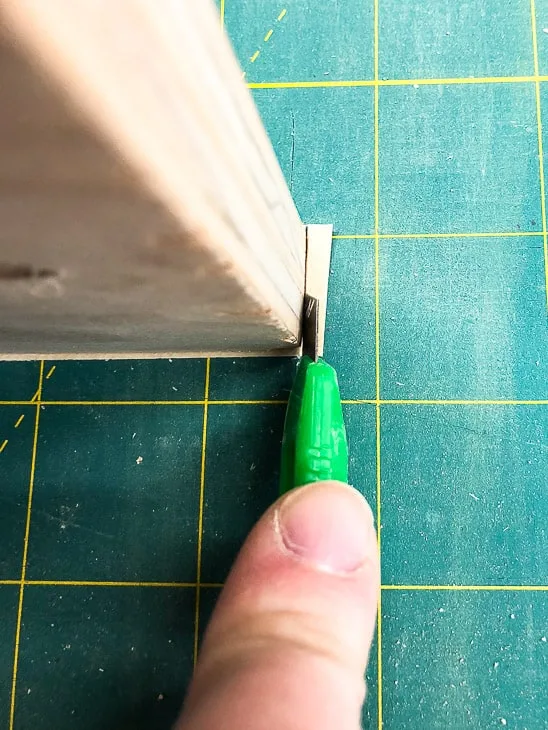
If you have a big project that will involve a lot of edge banding, you may want to consider using these flush cut trimmers instead. The flat side rests against the plywood edge, so you get a crisp, clean cut right at the corner.
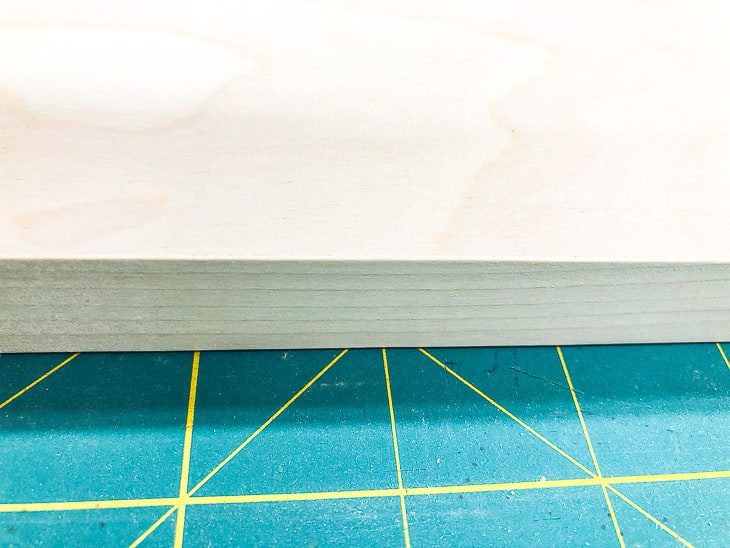
Trim the Edges
You can try to trim the long edges with a utility knife, but it doesn't always come out straight. Once the blade starts following the grain of the veneer, it's hard to get it back on track! I was never satisfied with the finished look when using this method.
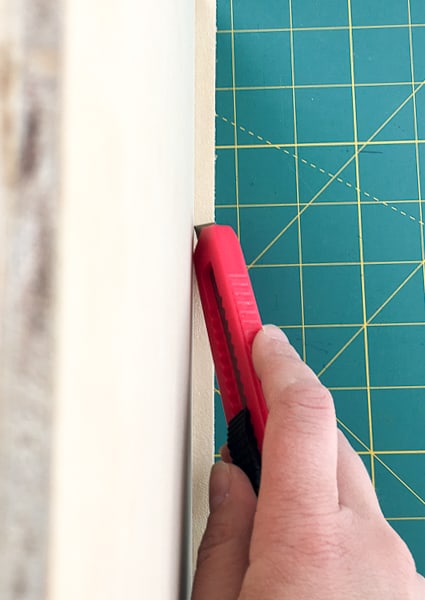

There are a few different edge banding trimmer tools on the market, but this one is my favorite. It cuts both sides in one pass, and comes out perfect every time! If you're going to build with a lot of plywood, I highly recommend investing in one.

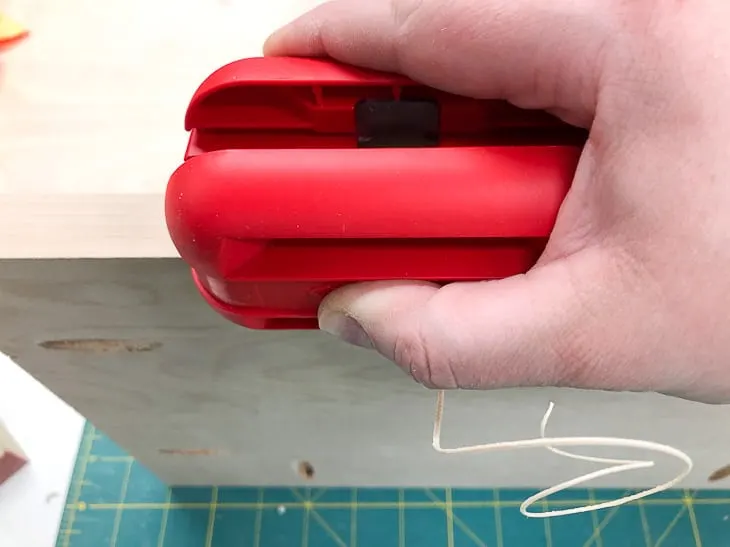
Align the trimmer's grooves with the edge banding edges. It should start before the blades in the trimmer.


Squeeze the trimmer on both sides of the plywood, and run the blade across. I love that little curl of veneer that comes off!

Sand the Corners
Do a quick pass over the corners with sandpaper or this nifty edge sander. This will blend the banding with the plywood and prevent it from catching on something and separating. Check to make sure the glue adhered properly. If it's lifting up anywhere, just heat it with the iron again.
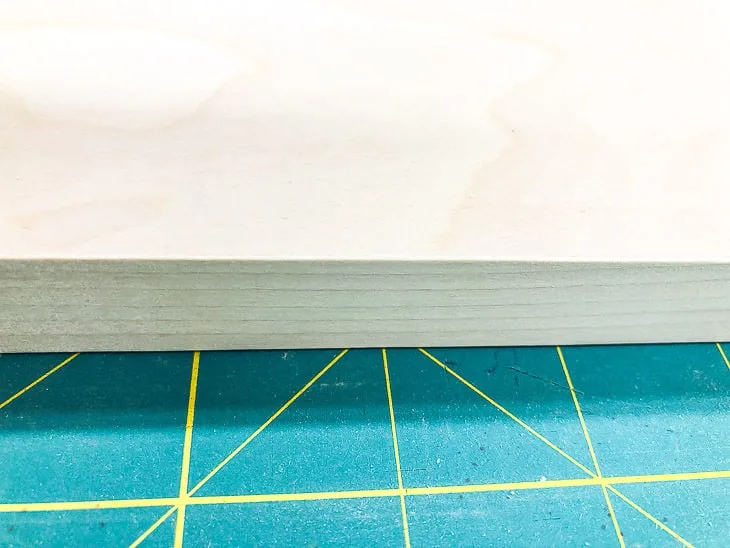
Now the plywood looks like solid wood!
Edge banding is real wood, so it takes stain just like the rest of your plywood piece. Just be sure to sand down any glue that might have worked its way out from underneath before you stain.
I hope this guide helps you create a more professional finish in your plywood projects!
Check out these other woodworking tutorials!
Maureen
Saturday 7th of July 2018
Vineta,
How cool would those wood veneer curls look in a clear glass Christmas ornament? Popped into my head as soon as I saw your comment about how cute they are. Memories of Projects Past. LOL
Maureen
Jann Olson
Friday 22nd of June 2018
What a great how to post! Thanks for sharing with SYC. hugs, Jann
Carol@BlueskyatHome
Friday 22nd of June 2018
I absolutely love this tutorial. I've had to attach thin molding in our laundry room makeover and this method is so much better. Thanks so much for sharing at Happiness is Homemade. I've Pinned it too.
Marti
Wednesday 13th of June 2018
I like that edge band trimmer. I usually use a utility knife too and you're right, it can follow the grain and not go straight. Most of the time we just use 1/8 inch wood strips on our plywood edges. But I'm going to buy that tool and see if I like banding better. Thanks!