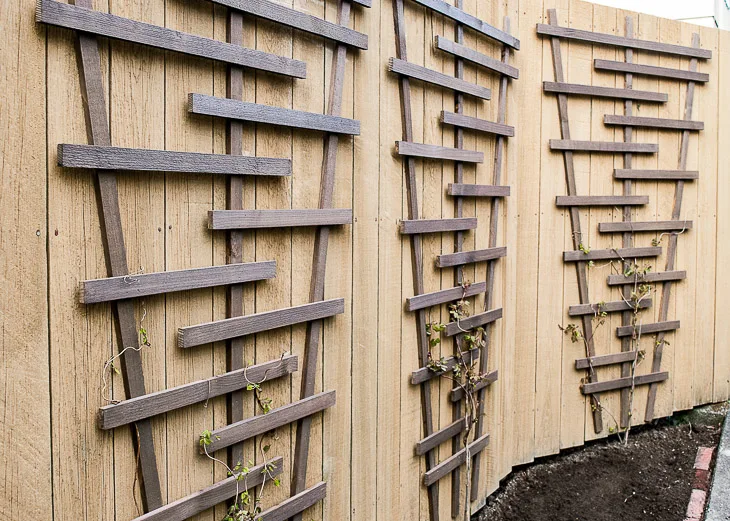
This easy-to-make DIY trellis gives vines a place to climb, and attaches to a flat fence. Get the free wood trellis plans here!

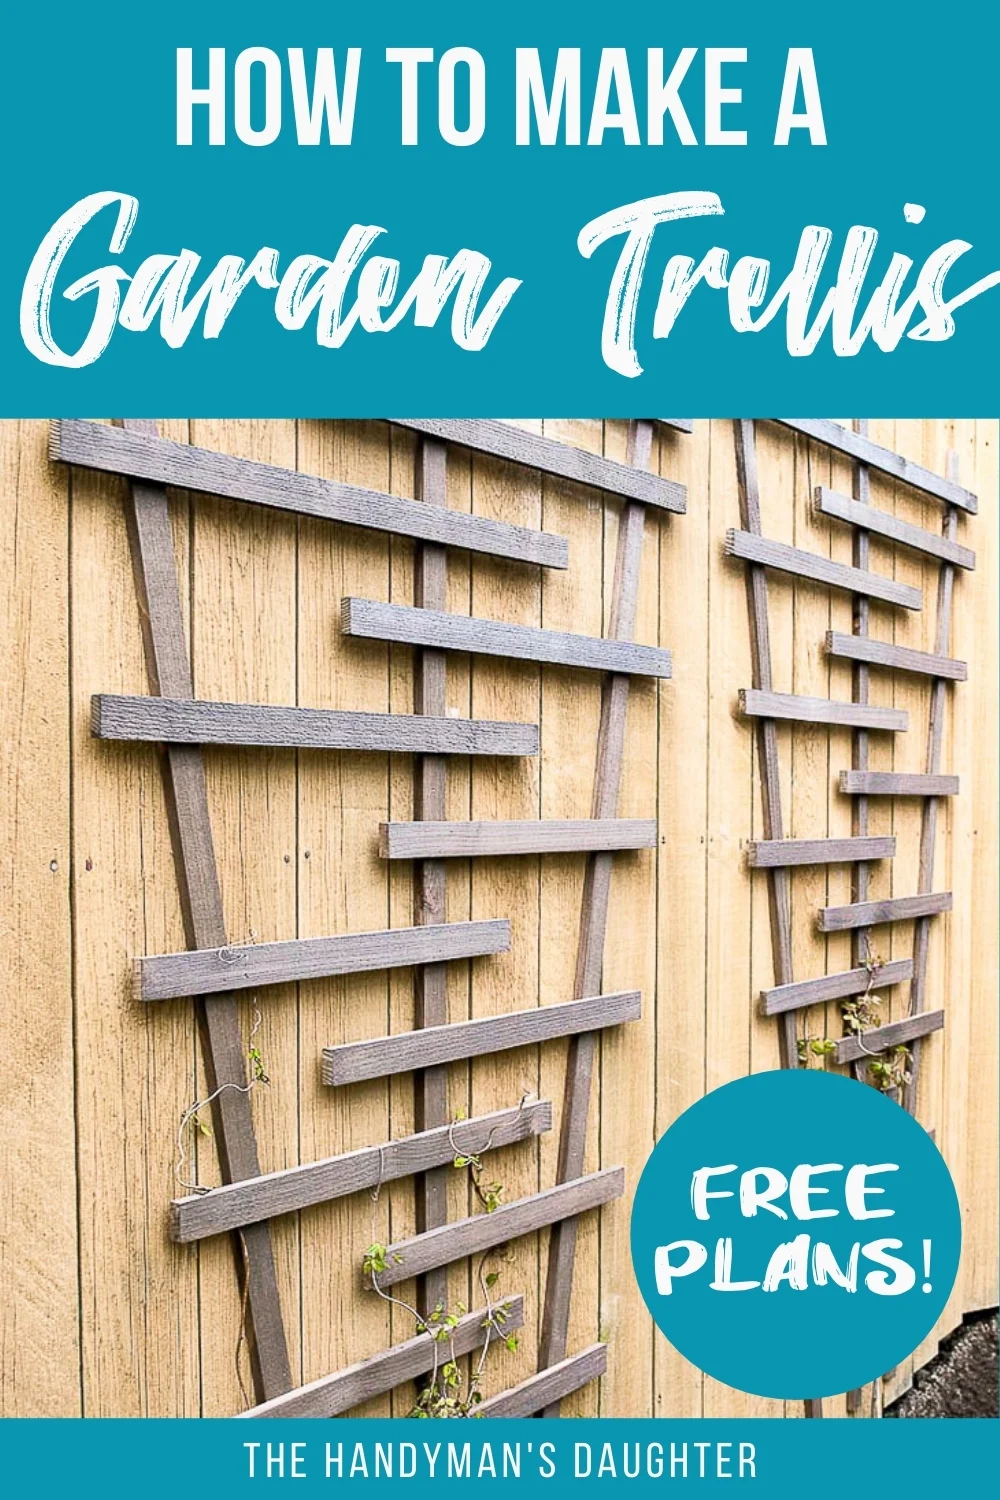
This DIY garden trellis provides a place for beautiful flowering vines to grow and covers up the plain backdrop. Best of all, you can make it with just a few cheap fence pickets cut into strips!
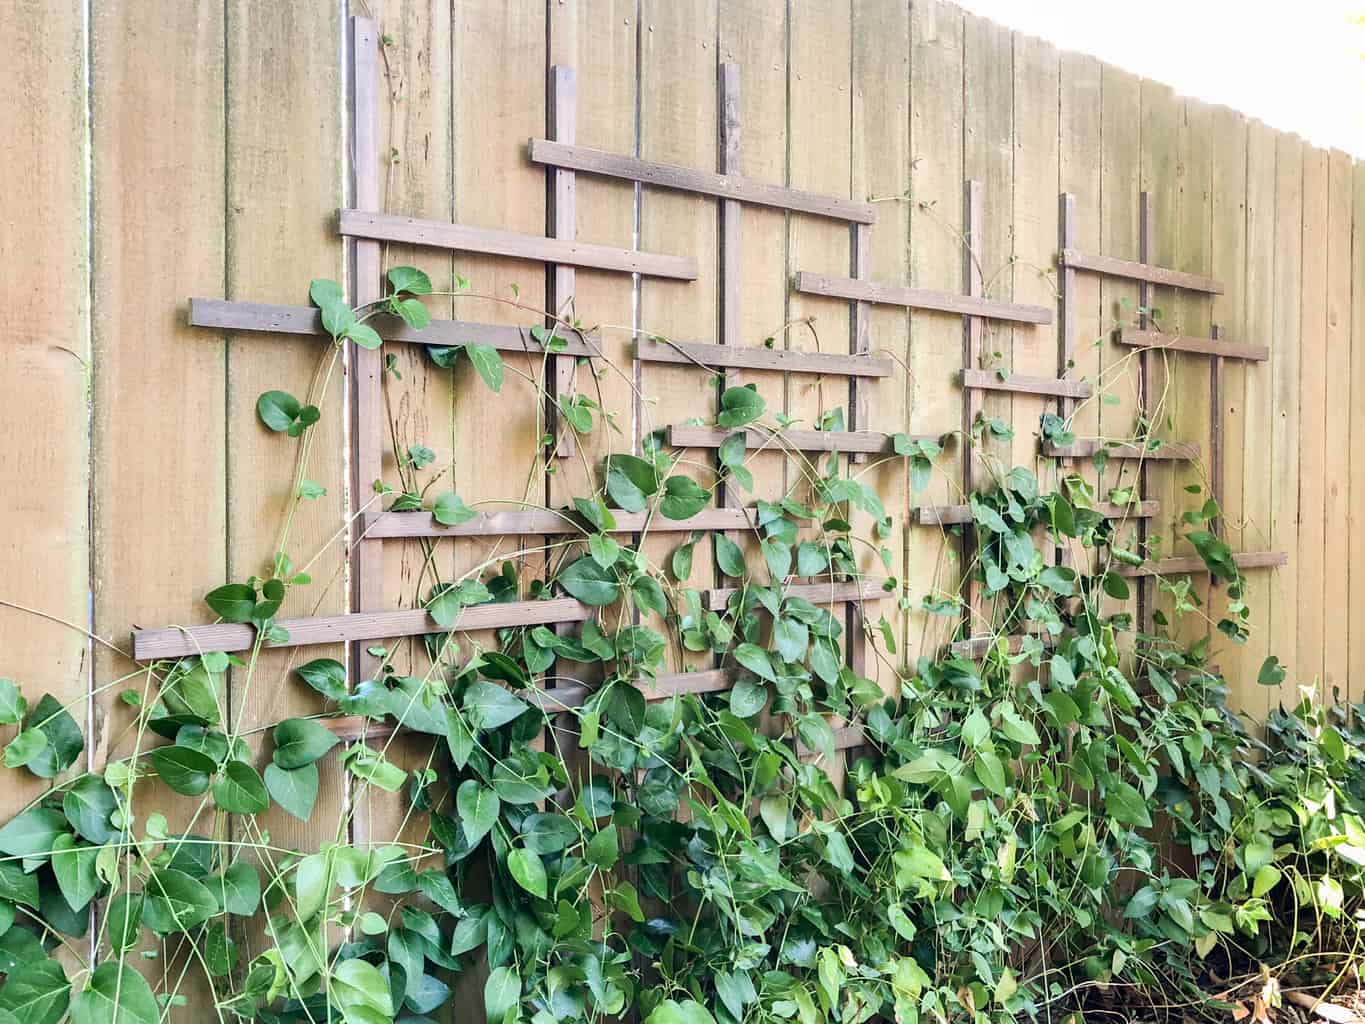
I created something similar with this clematis trellis on the other side of the backyard fence too!

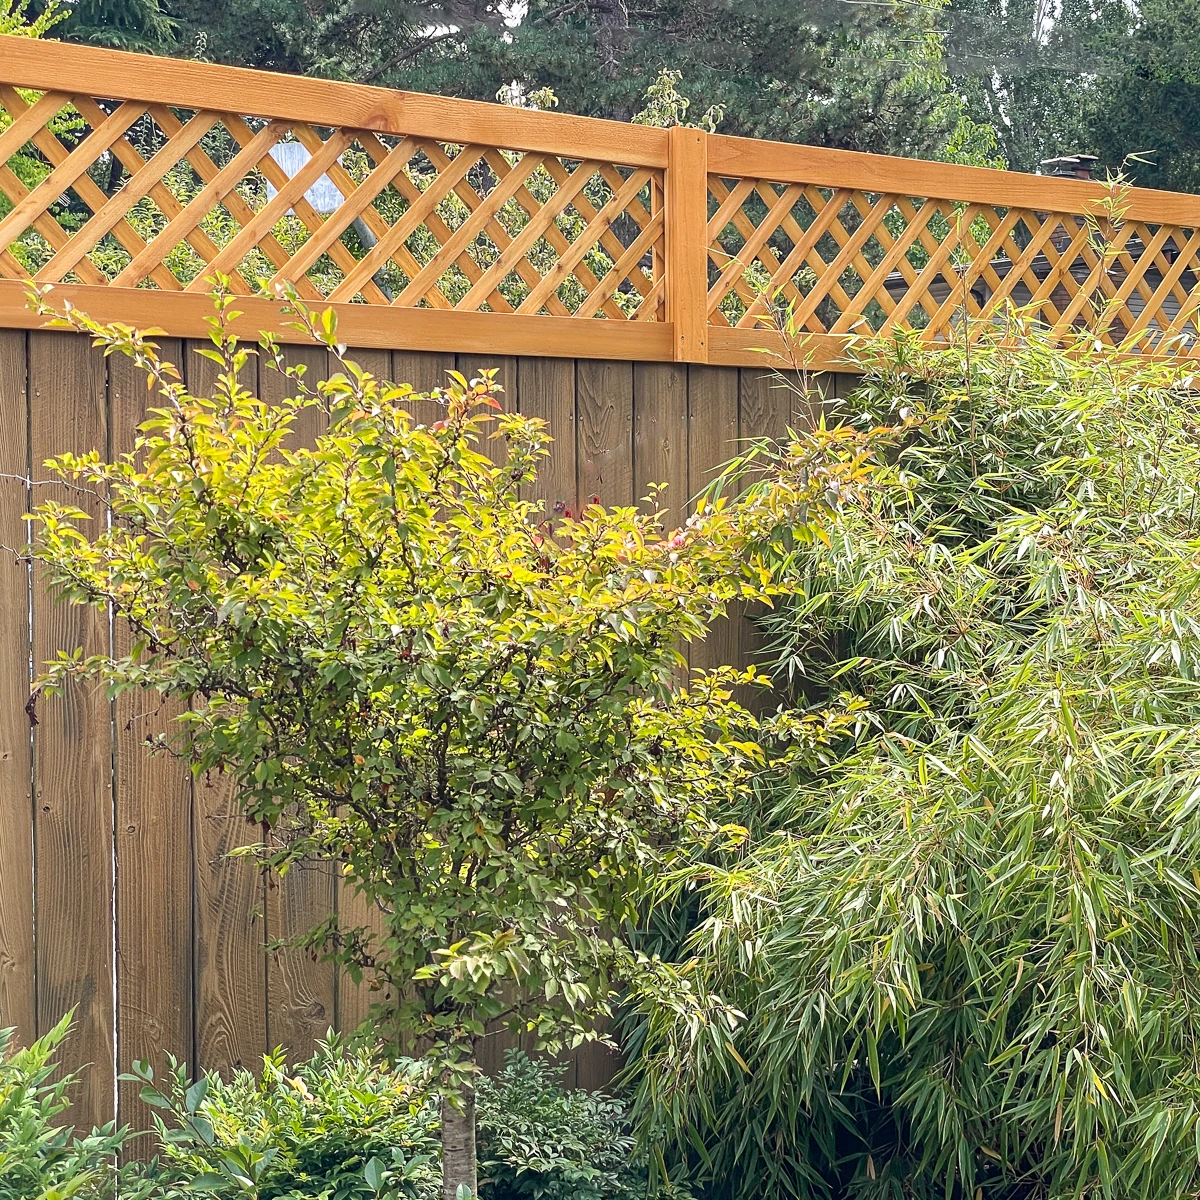
I also added this fence top trellis to the other side of the backyard for additional privacy.

If you're looking for something a little different, check out my list of DIY arbor and trellis ideas to find your perfect project!
This post contains affiliate links for your convenience. Purchases made through these links may earn me a small commission at no additional cost to you. Please visit my disclosures page for more information.
The small garden area I'm working on is a great spot for a climbing vine. The previous homeowner must have thought so too, because there are climbing roses attempting to make their way up the fence. Unfortunately, there's not much for the rose to cling onto, so it just grew straight up about 8 feet!
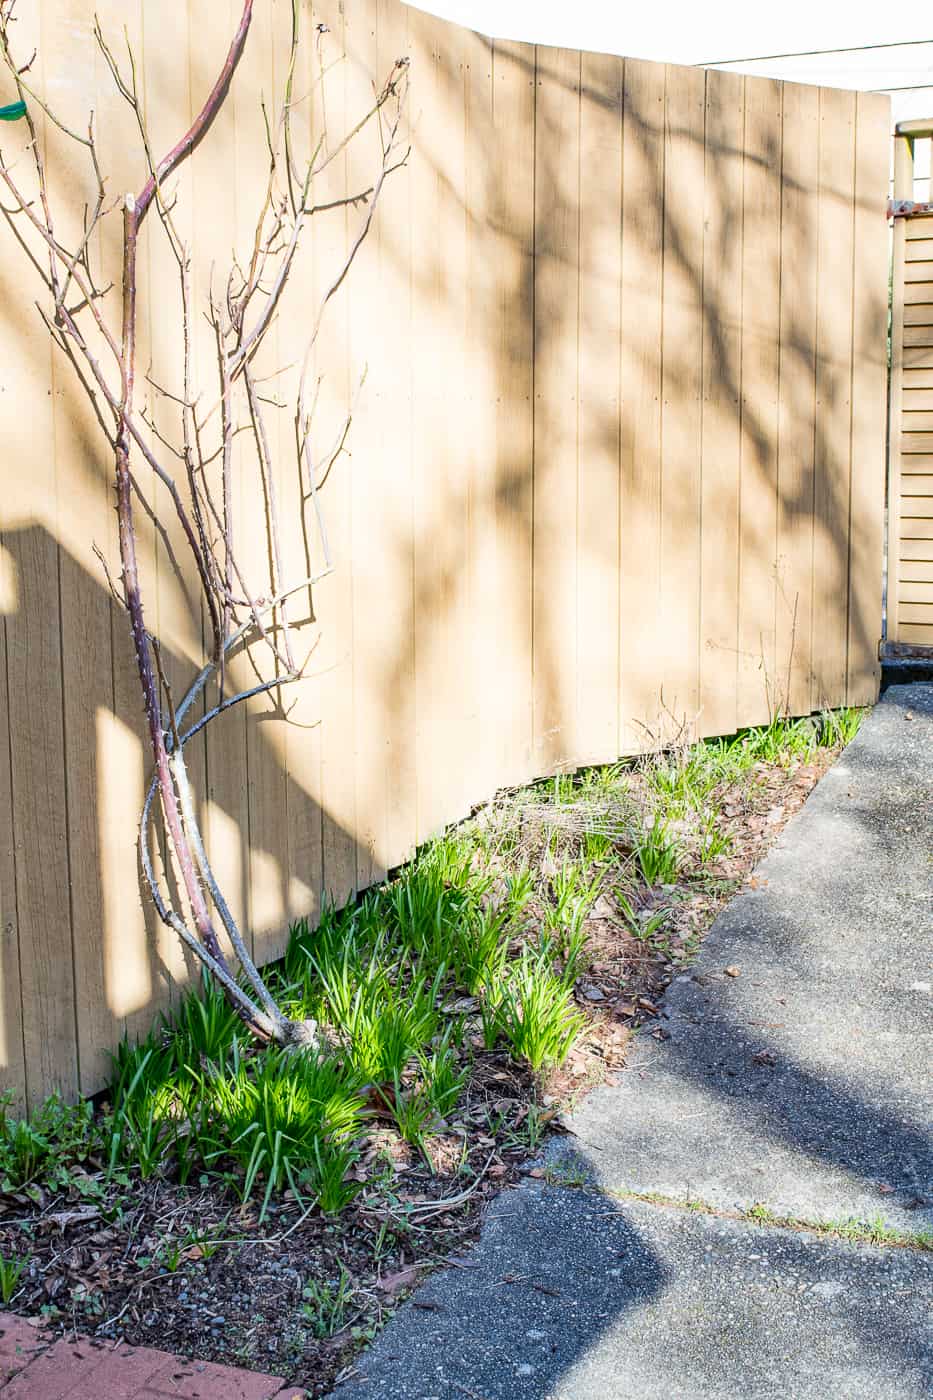
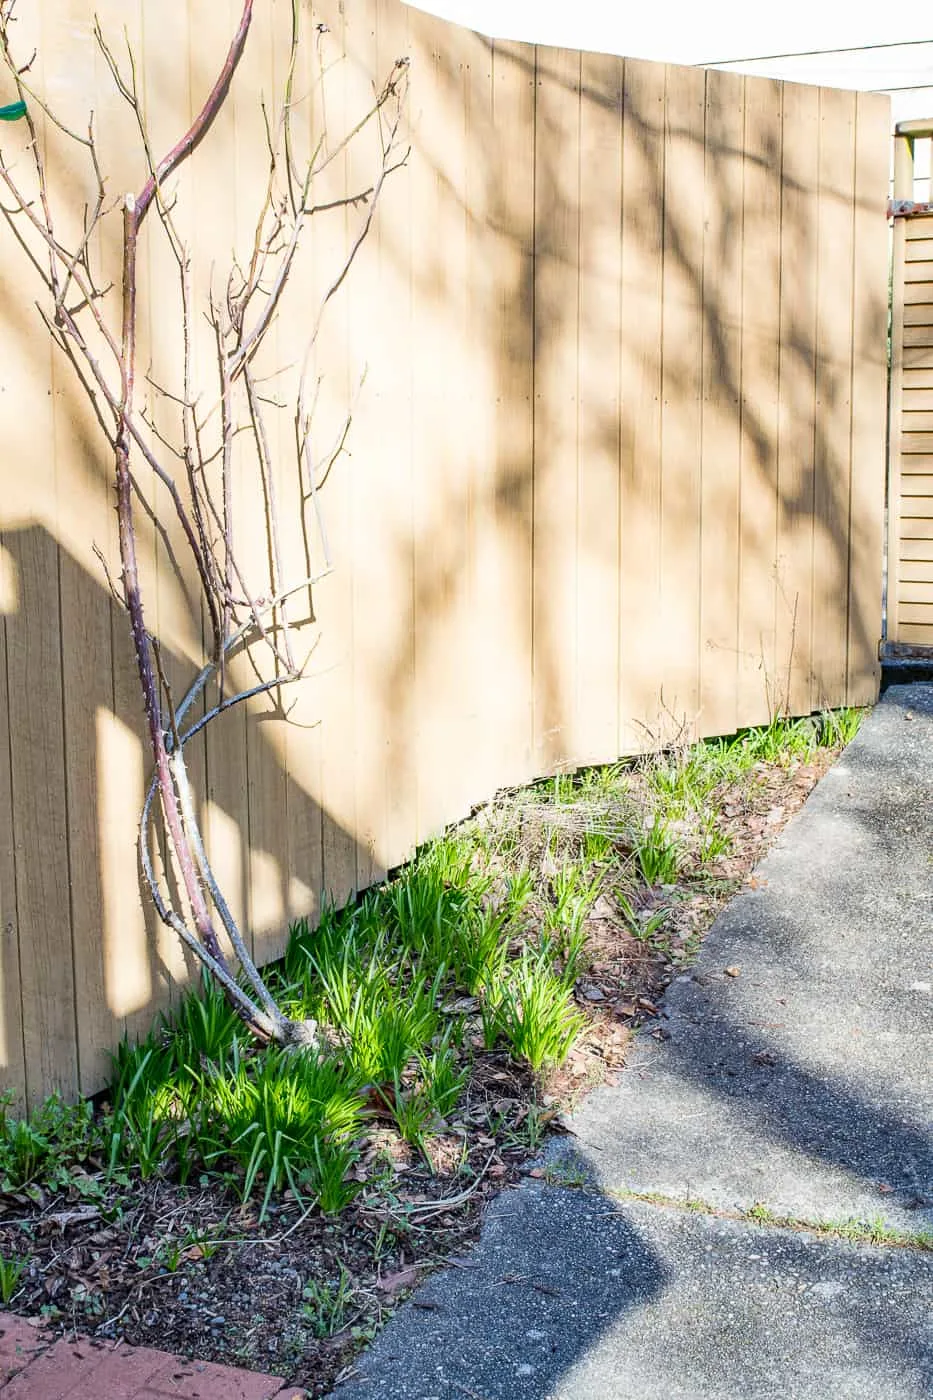
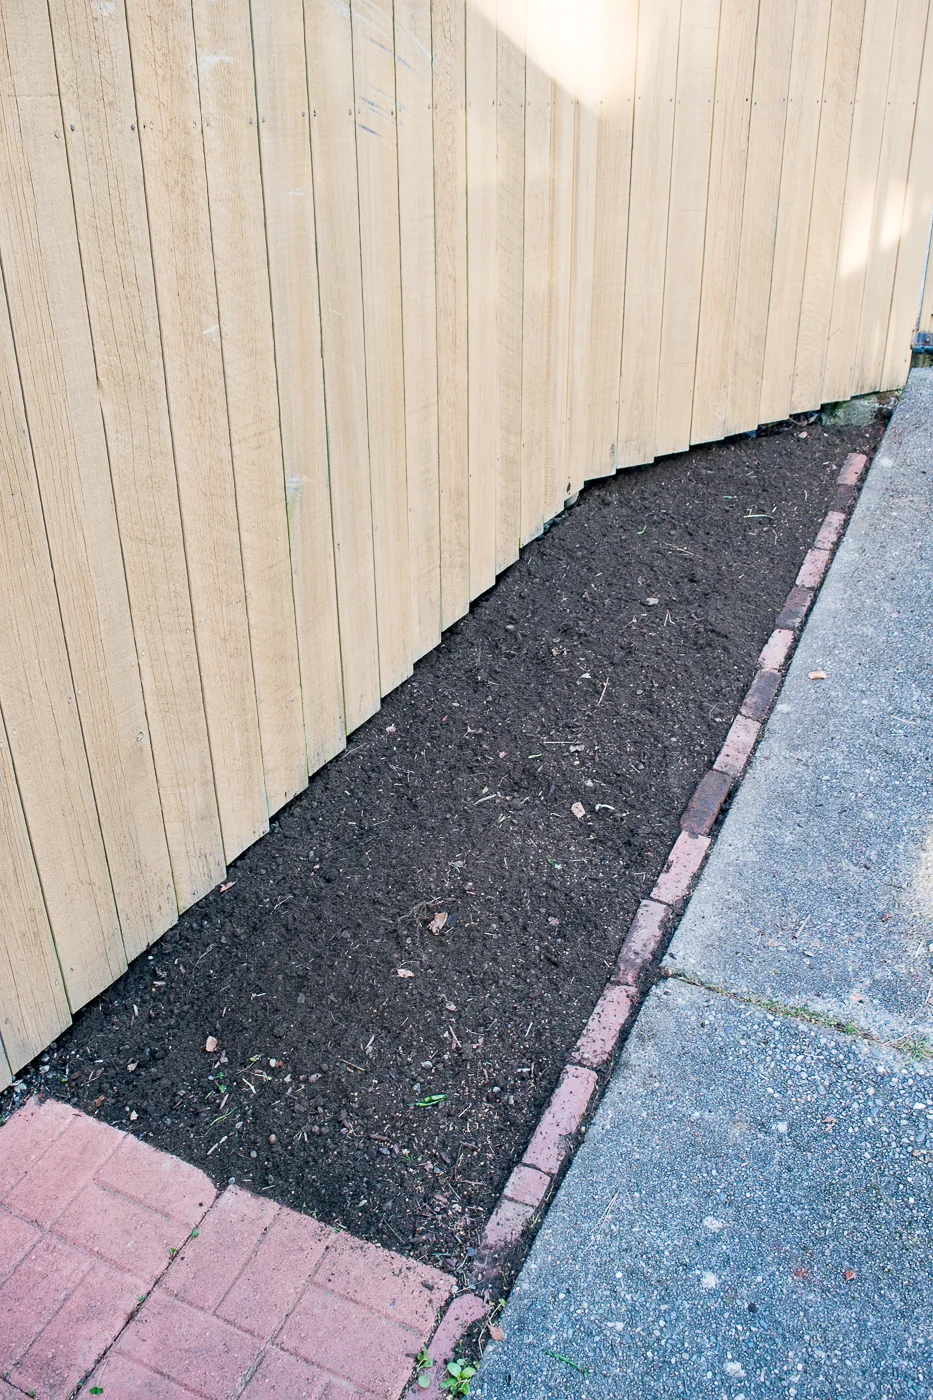
I'm not much of a rose person, and this particular plant isn't producing many blooms anymore, so I decided to start with a fresh slate. I cleared the entire area, and mixed some compost into the soil so my new vines would have plenty of nutrients.

There are a lot of choices when it comes to vines. Check out this article on how to grow plants on a trellis to help you find the right one for your space.
Materials Needed
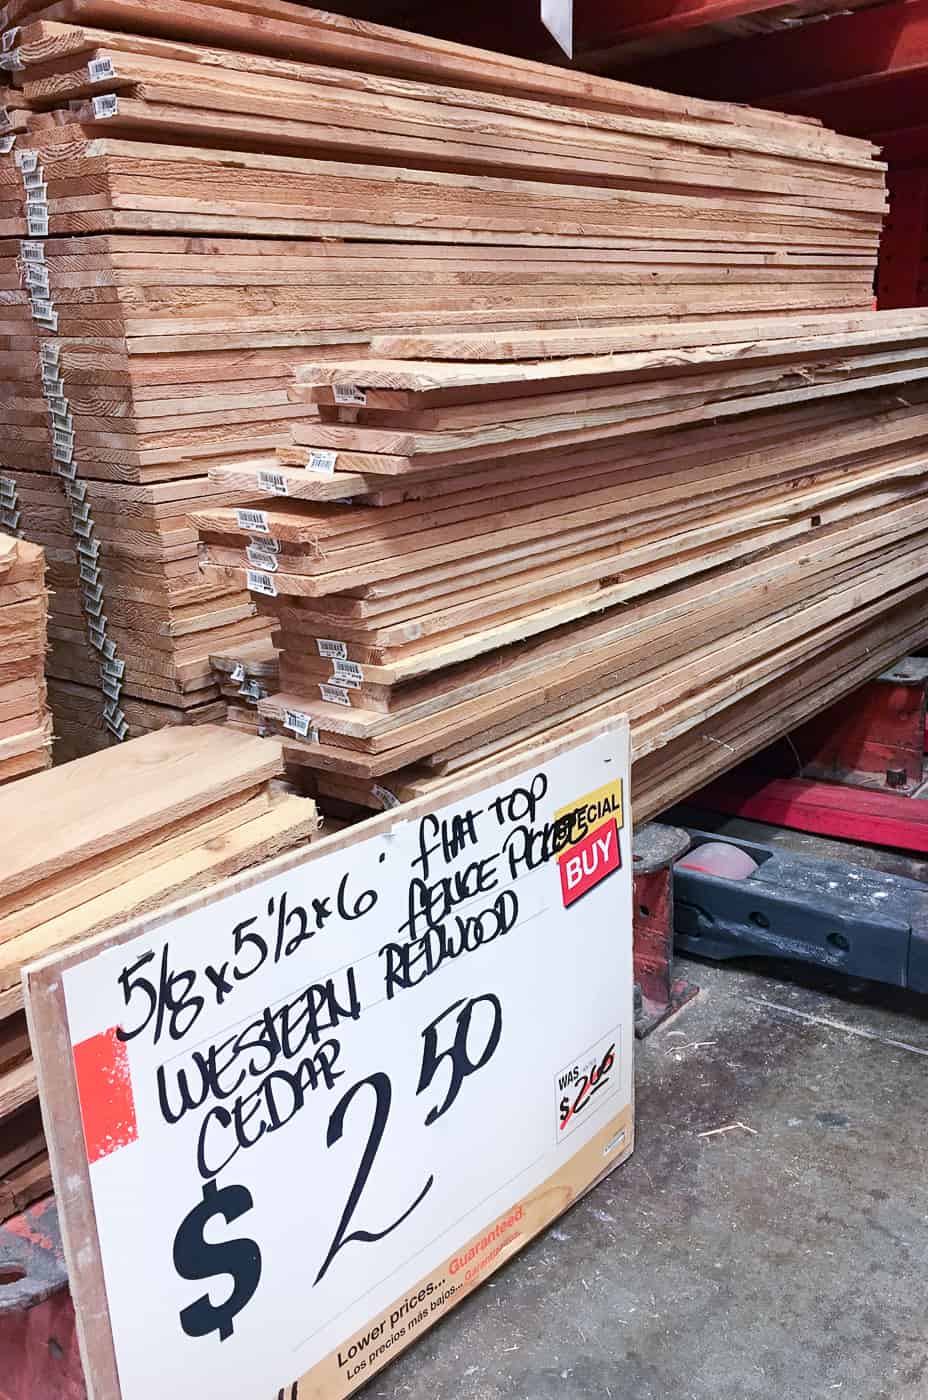
- Three 5 ½" wide, 6 foot flat-top fence pickets
- If you don't have a table saw, you can also use 1 x 2 cedar boards. You'll need six of them.
- Table saw
- Any saw you prefer for crosscuts (miter saw, circular saw, jigsaw, or even a hand saw and miter box!)
- Sander and sandpaper
- Outdoor wood stain
- Speed square
- Measuring tape
- 1" nails
- Brad nailer (optional, but makes the process much faster)
How to Make a Wood Trellis
Make sure your fence is stable
The weight of the vines plus the trellis itself can cause a flimsy fence to lean. You can reinforce loose posts with brackets to prevent any further damage, and keep the fence upright!
Choose the Right Wood
The wood you choose for an outdoor project is important. Cedar doesn't rot, so it's the perfect choice for a trellis like this. I use cedar for almost all of my outdoor projects and they've held up well even after years of Seattle rain.
I bought these cedar fence pickets, which are the cheapest source of rot-resistant wood you can find. You'll need three pickets per trellis, which costs a grand total of $7.50. Can't go wrong with that! You can also use 1 x 2 cedar boards if you don't have a table saw, but you'll pay the same price for a single board.

You could also use pressure treated lumber, which is usually cheaper. While there are chemicals in the wood, there's really not enough contact with the plant to cause any problems. If you're worried about it, stick with cedar!
Prep the Wood
Give both sides of the fence pickets a good sanding. It's ok if they're not perfectly smooth (it might actually help the vine cling), but you want to take off any splinters on the surface.
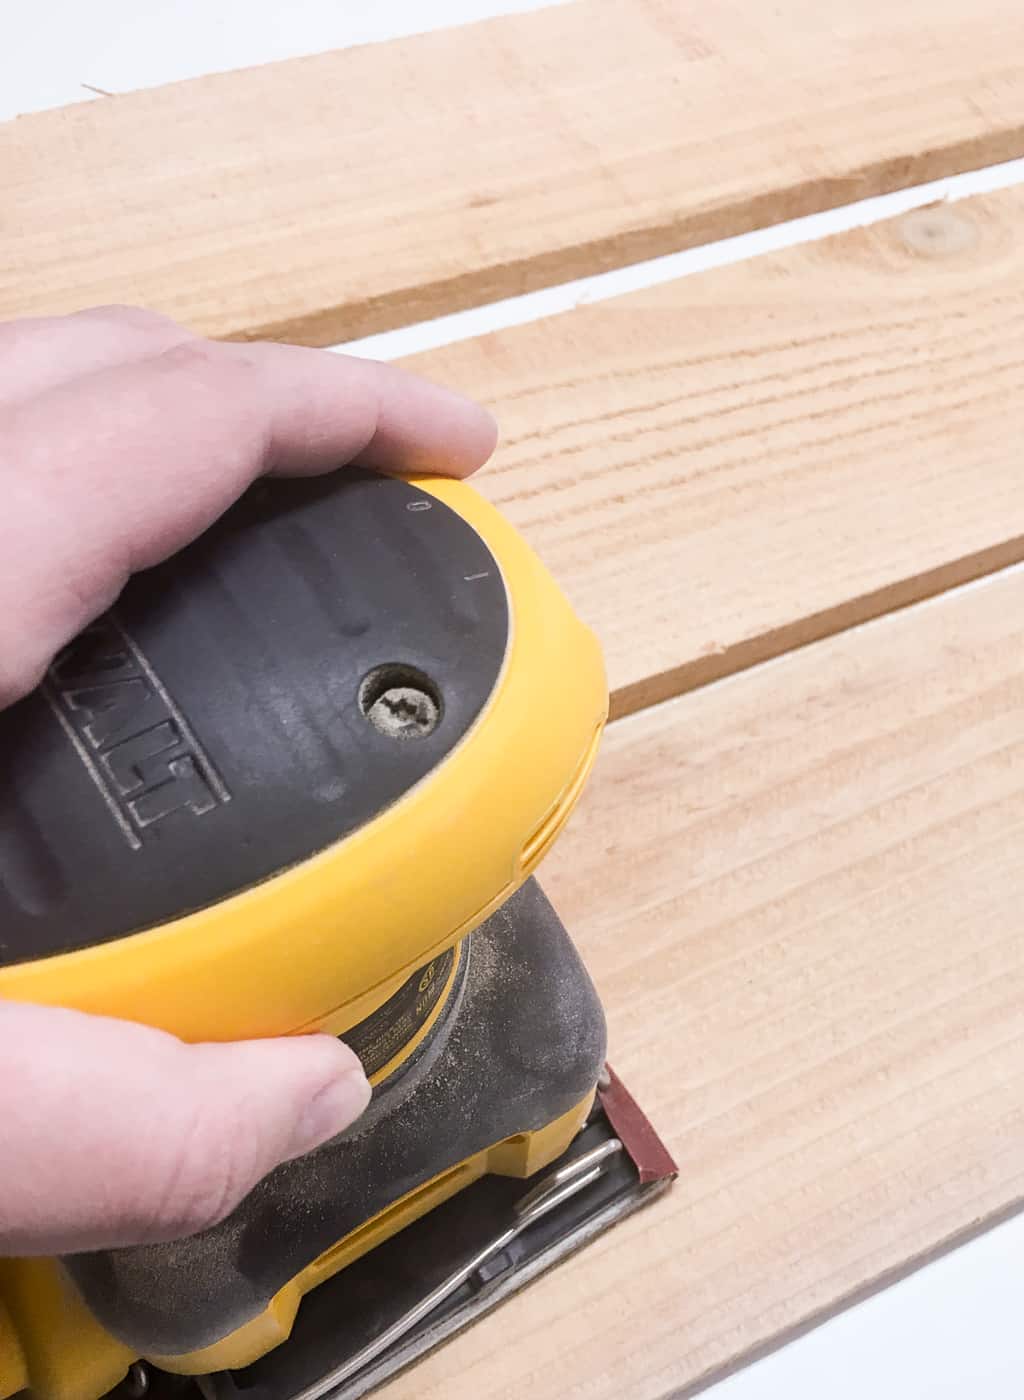

It's much easier to do this when the boards are wider, so you can use the entire width of your sander to smooth out the surface.
Cut the Trellis Slats
My free woodworking plans for this project includes clear 3D models of each step in a checklist format so you can keep track of your progress as you build. Download the PDF here!
Set your table saw to 5 ¼" wide and run each picket through to remove the rough outside edge.

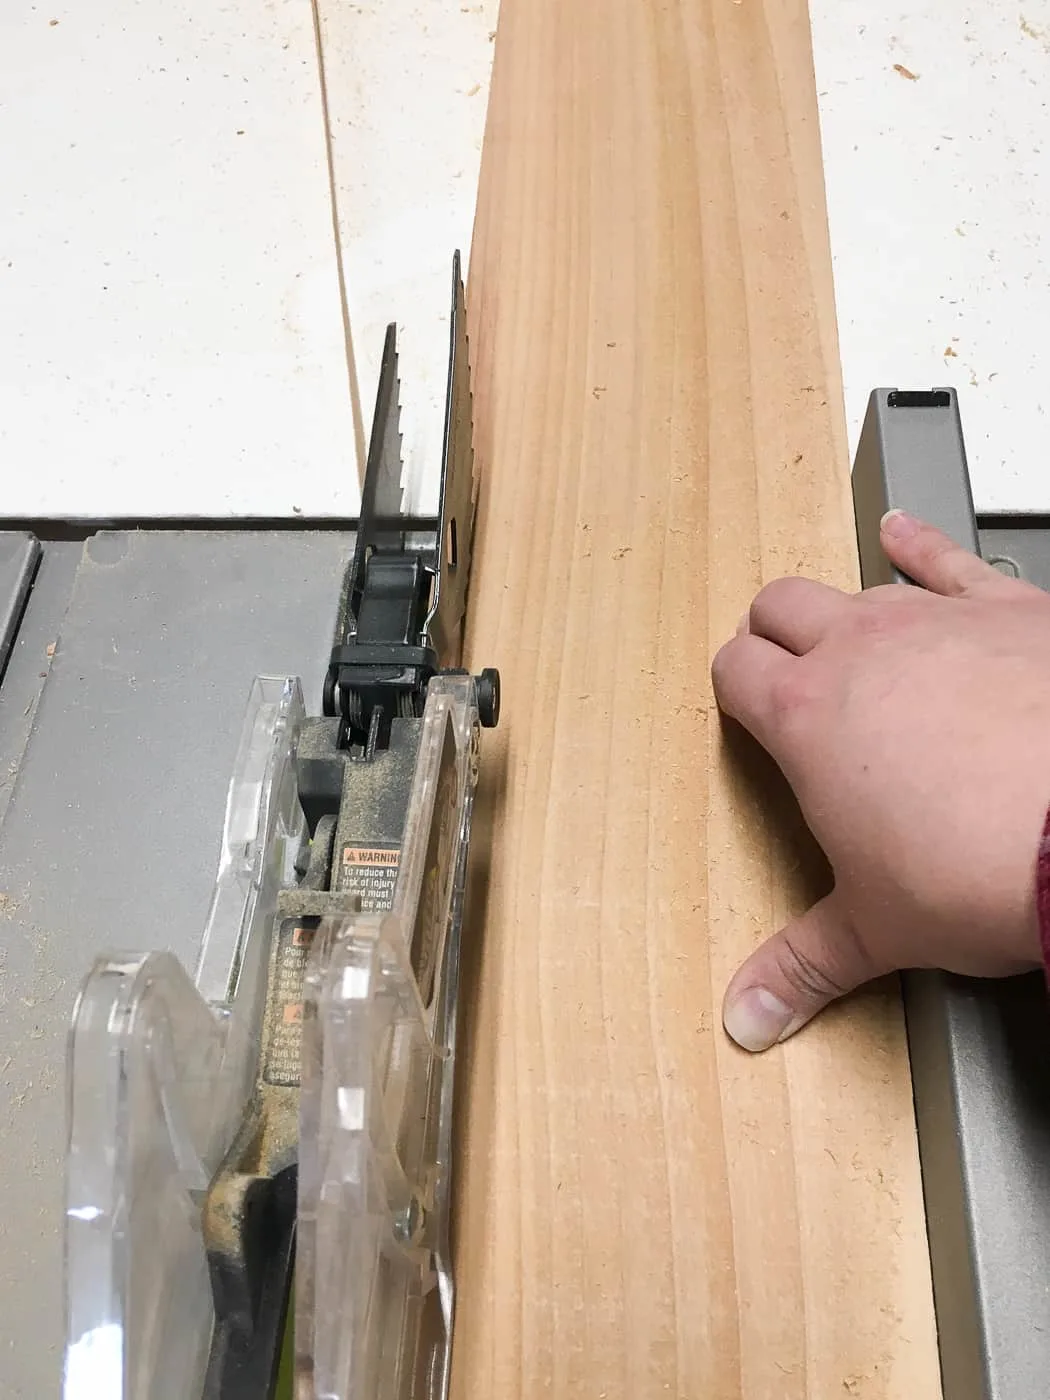
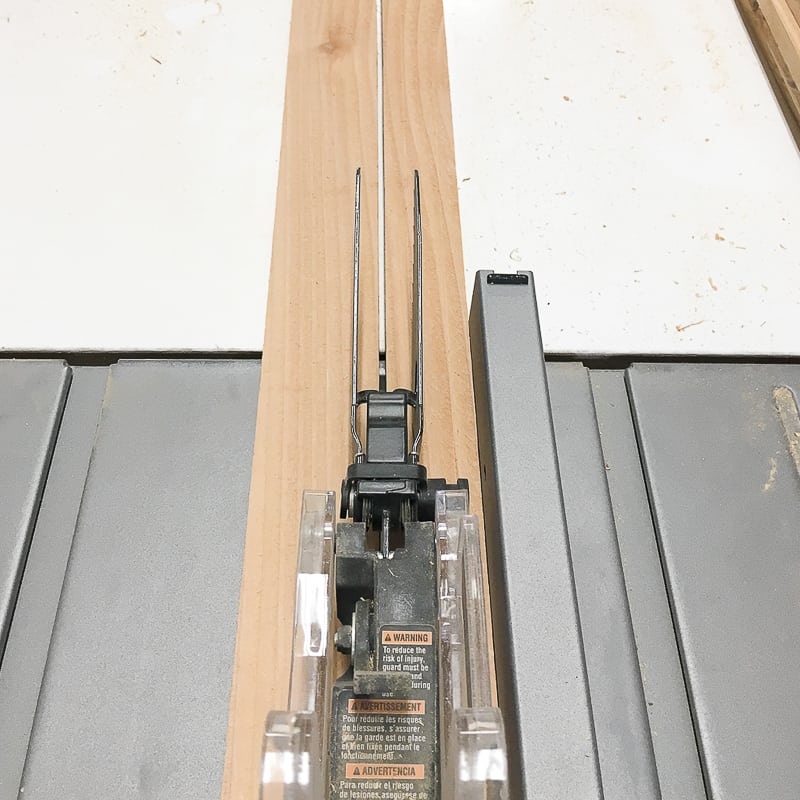
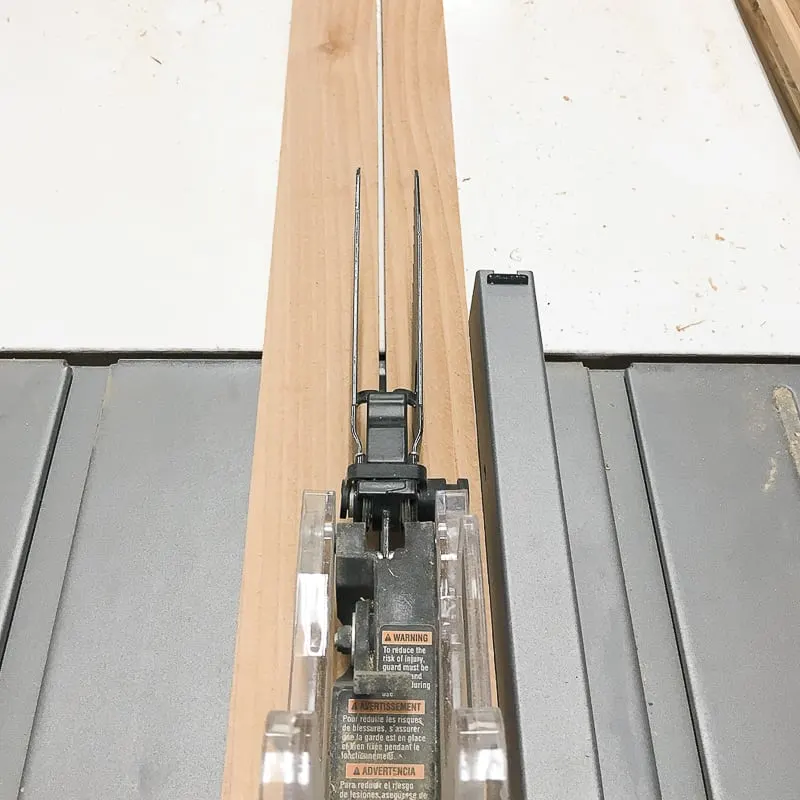
Now set the table saw fence to 1 ½" wide. Place your freshly trimmed edge along the fence, and rip three strips. Make sure to use a push stick when you get down to the last cut. Safety first!
Three of these 1 ½" wide strips will be used as the vertical supports of the trellis. You can set those aside for now. The rest will be cut down to various lengths to create the horizontal slats.
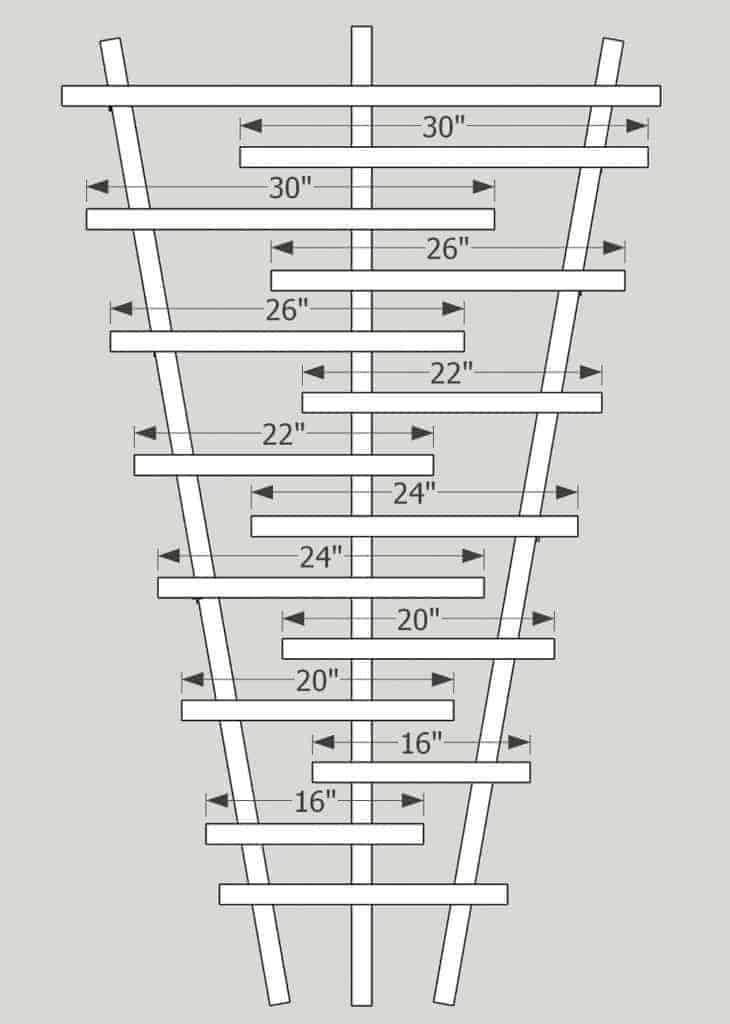
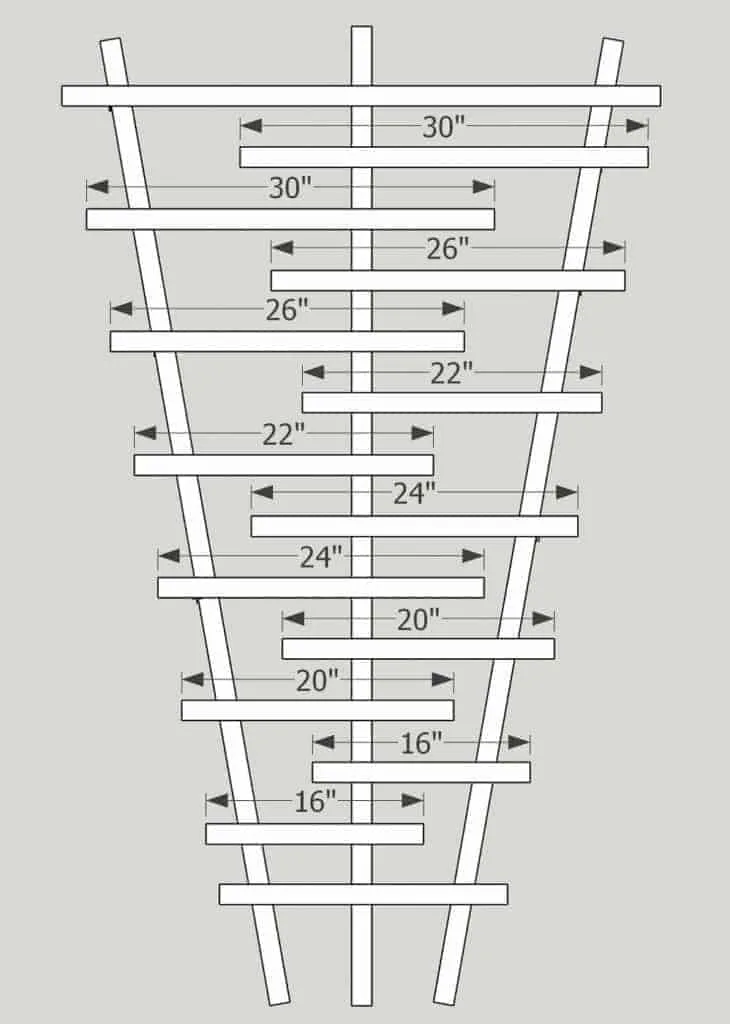
Cut List for Horizontal Slats
| Cut 1 at 21" (bottom slat) | Cut 1 at 44" (top slat) |
| Cut 2 at 16" | Cut 2 at 20" |
| Cut 2 at 22" | Cut 2 at 24" |
| Cut 2 at 26" | Cut 2 at 30" |
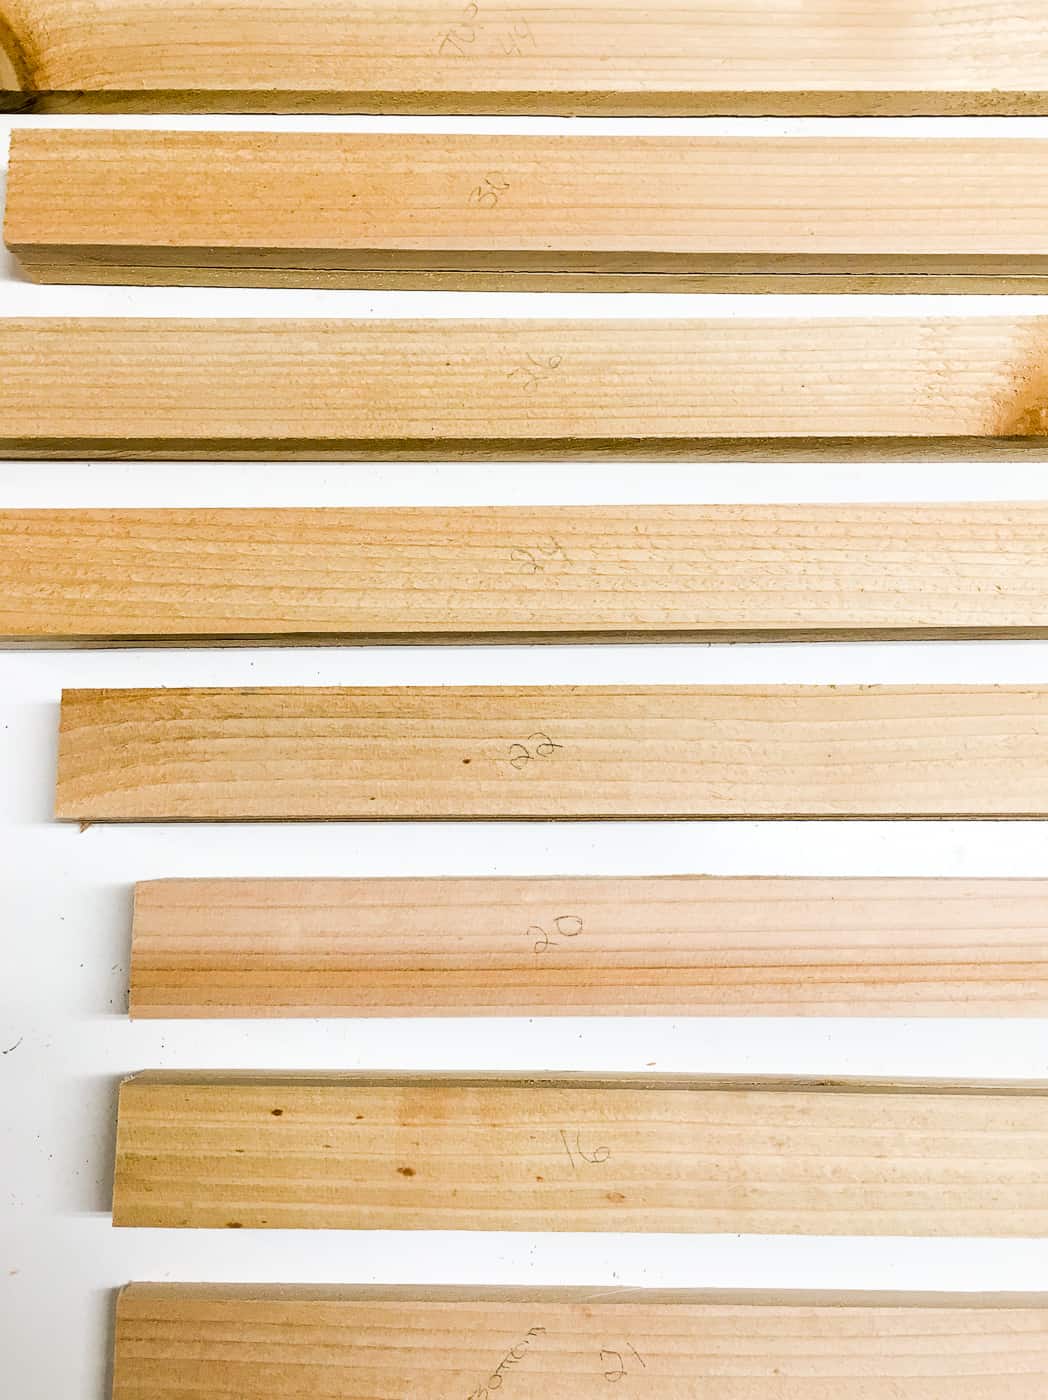
It might seem like a lot of cuts, especially if you're making three trellises like I am. Using a stop block at the miter saw makes the process a lot faster. You can check out how I use the Kreg stop block system on my miter saw stand here.
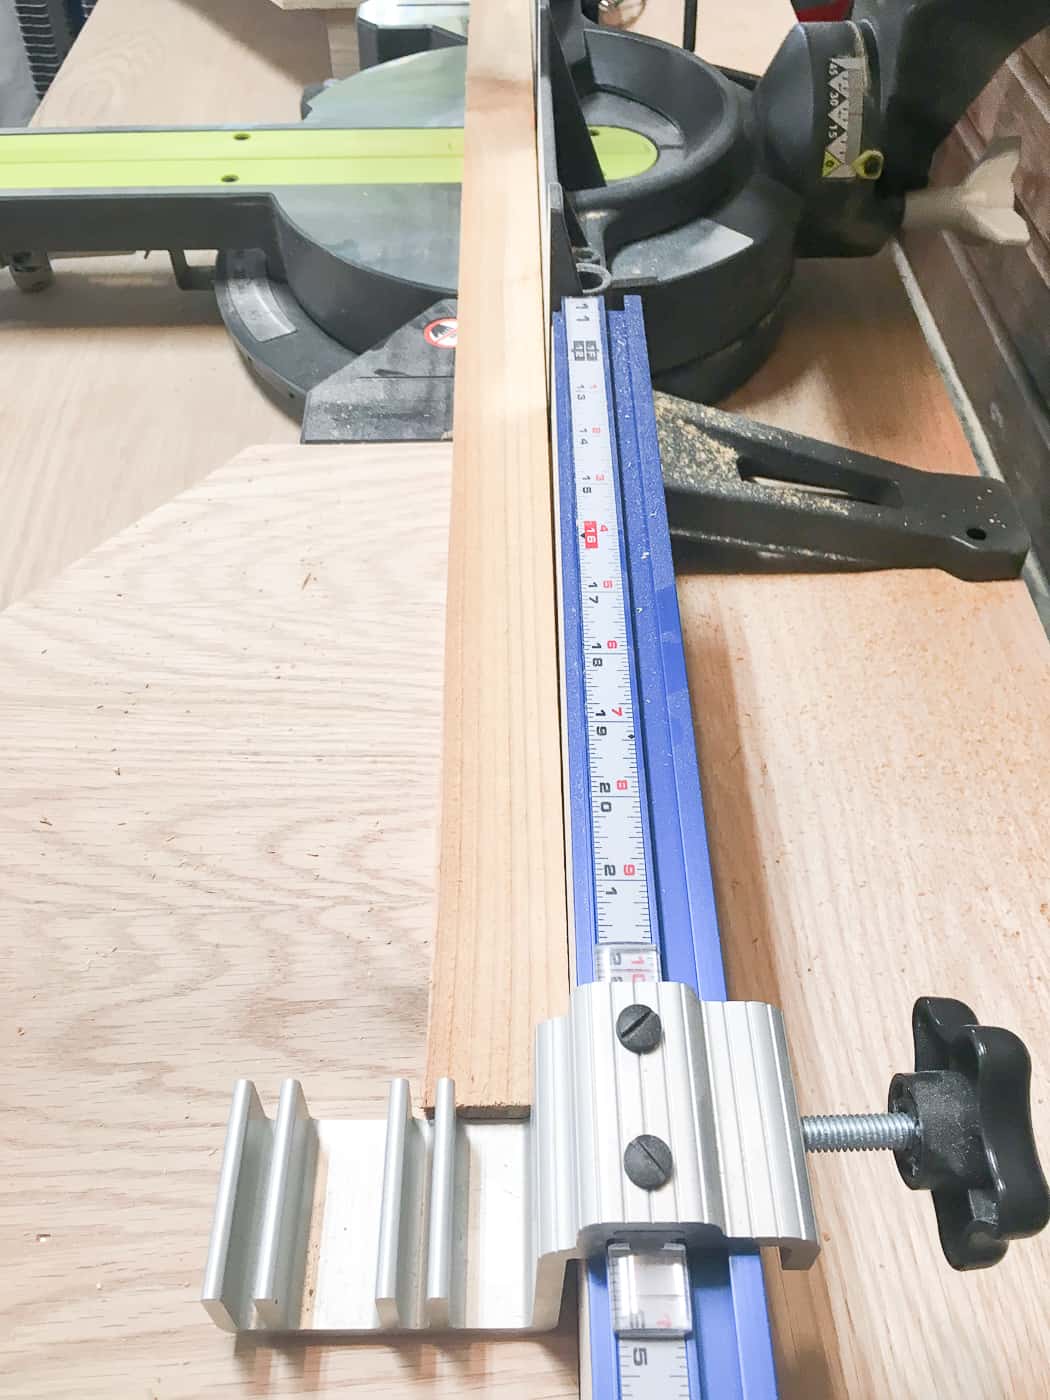
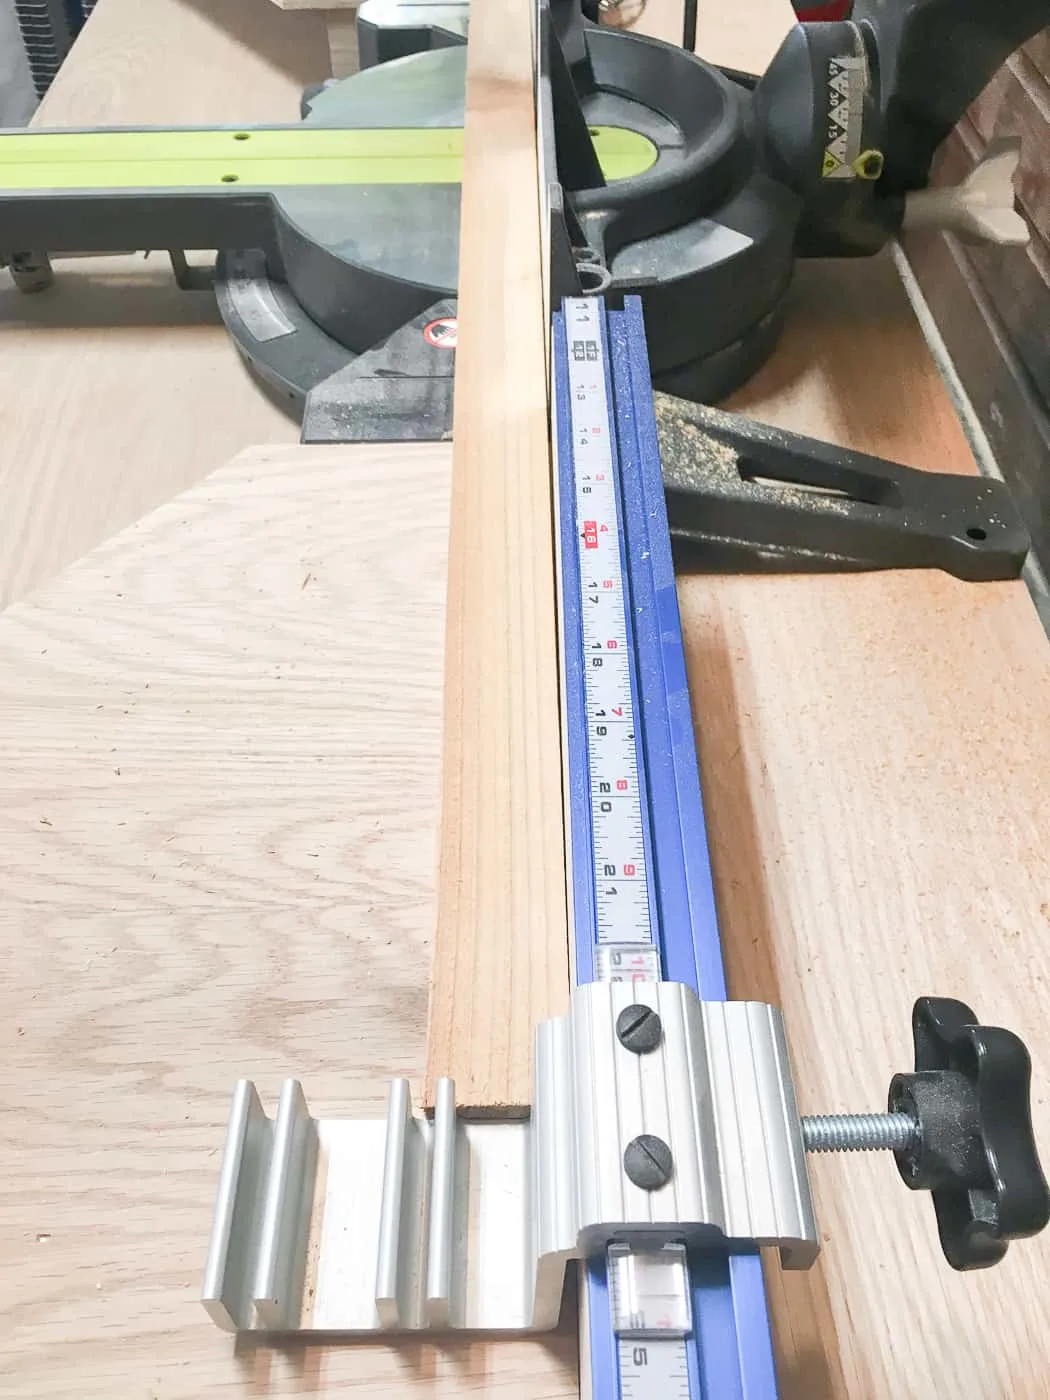
As you make the cuts, write the length on the back with a pencil. That way you won't be pulling out the measuring tape every time you switch sizes during installation.

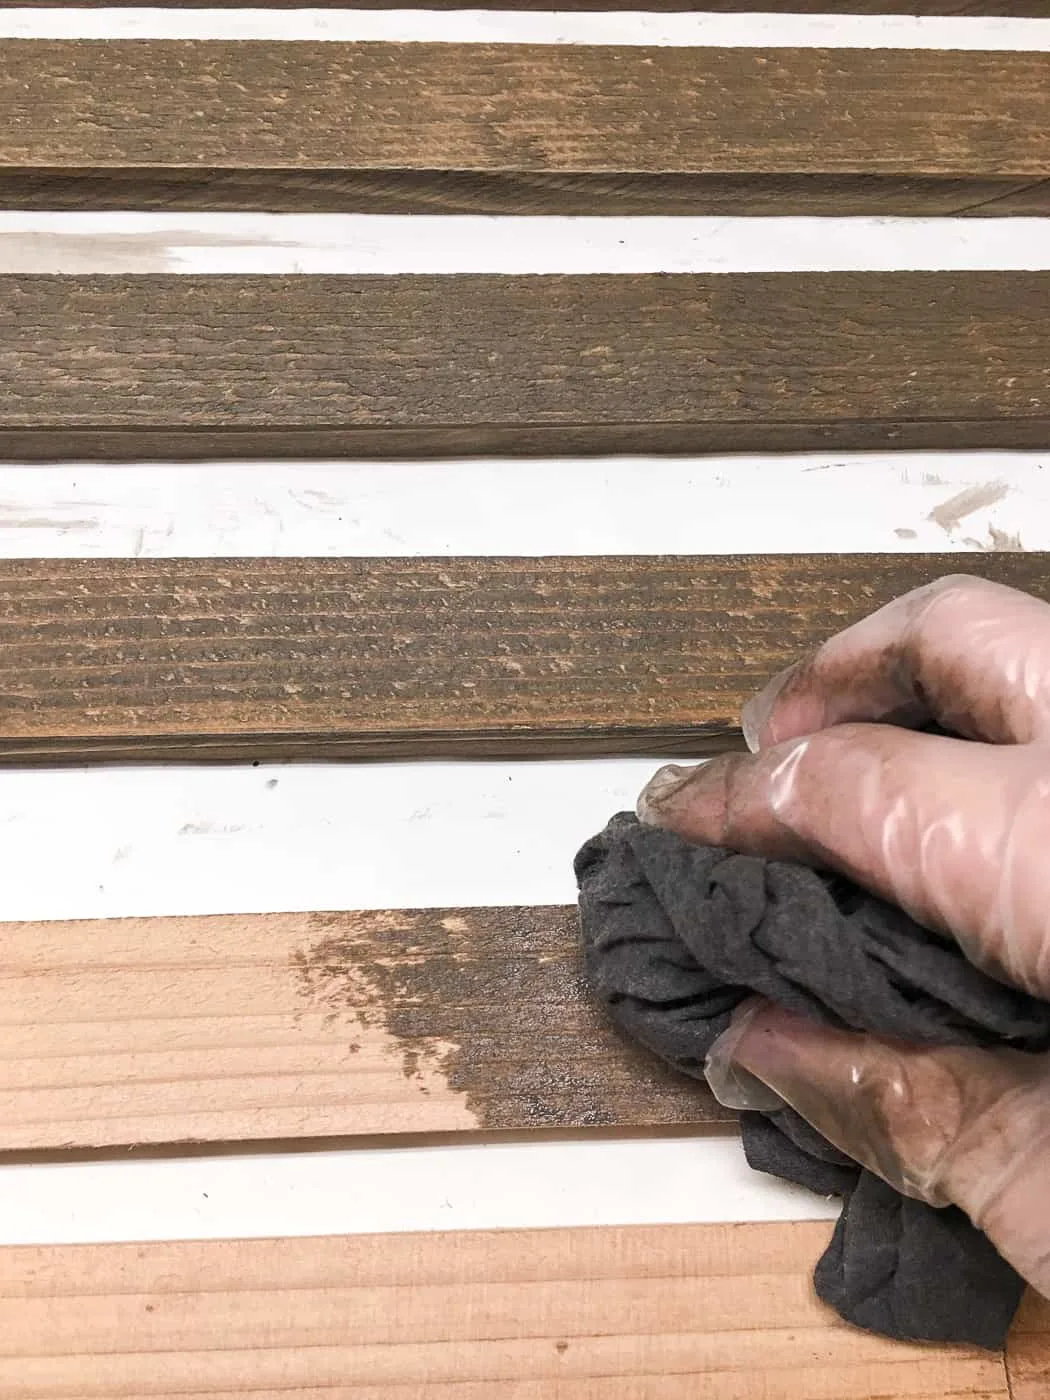
Stain the Slats
It's much easier to stain the individual pieces at this point, using a rag to quickly coat each side. I had some of Behr's outdoor stain in Coffee left over from my outdoor sofa project, and I thought the dark espresso color would be a nice contrast to the natural cedar fencing.

Assemble the Trellis
Once the stain is dry, it's time to start assembly! Lay out your three 72" vertical supports, and find the 21" and 44" slats.
Mark the center vertical support 7 ½" up from the bottom with a pencil. Then mark the center of your 21" slat.
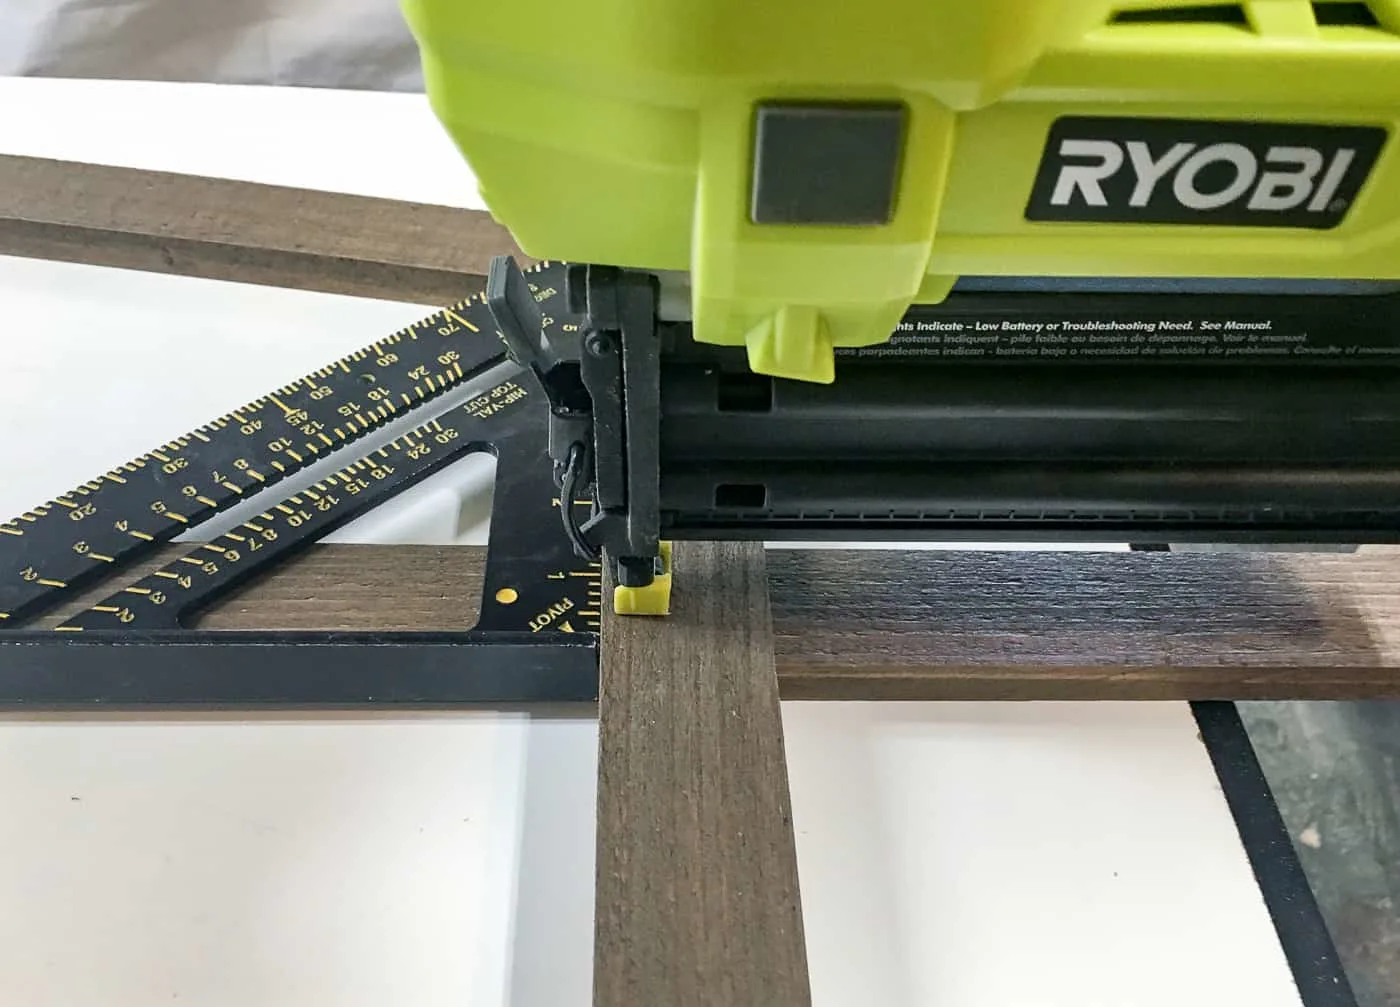
Line up the bottom of the 21" slat with the 7 ½" mark and center it. Check that everything is square, then nail it into place. I used my Ryobi Airstrike brad nailer, and it made assembly incredibly fast and easy!
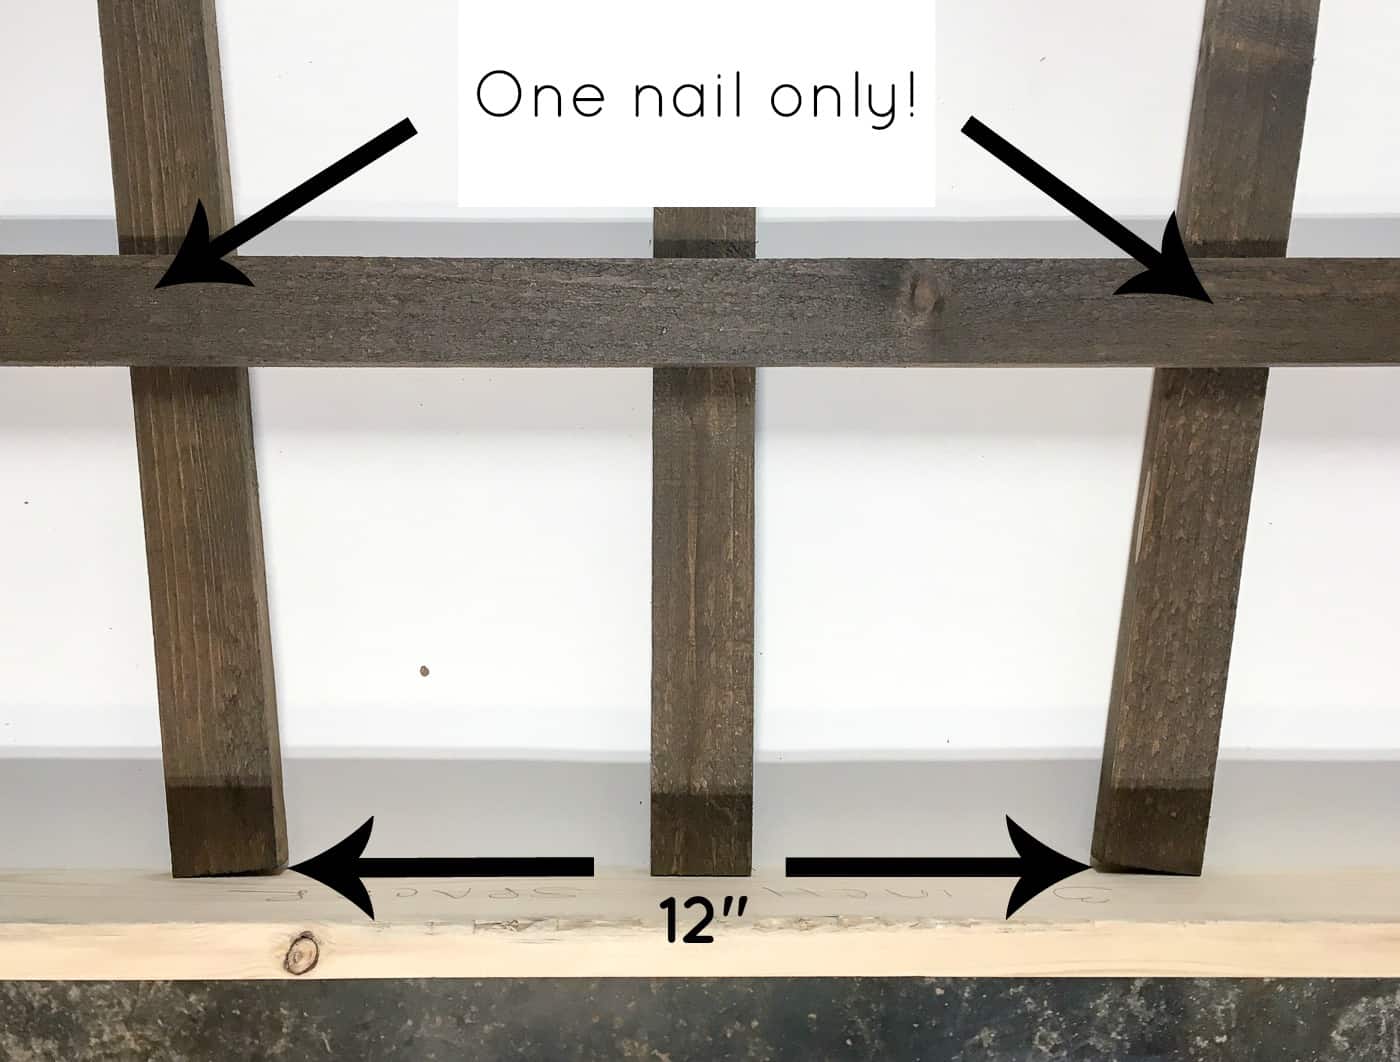
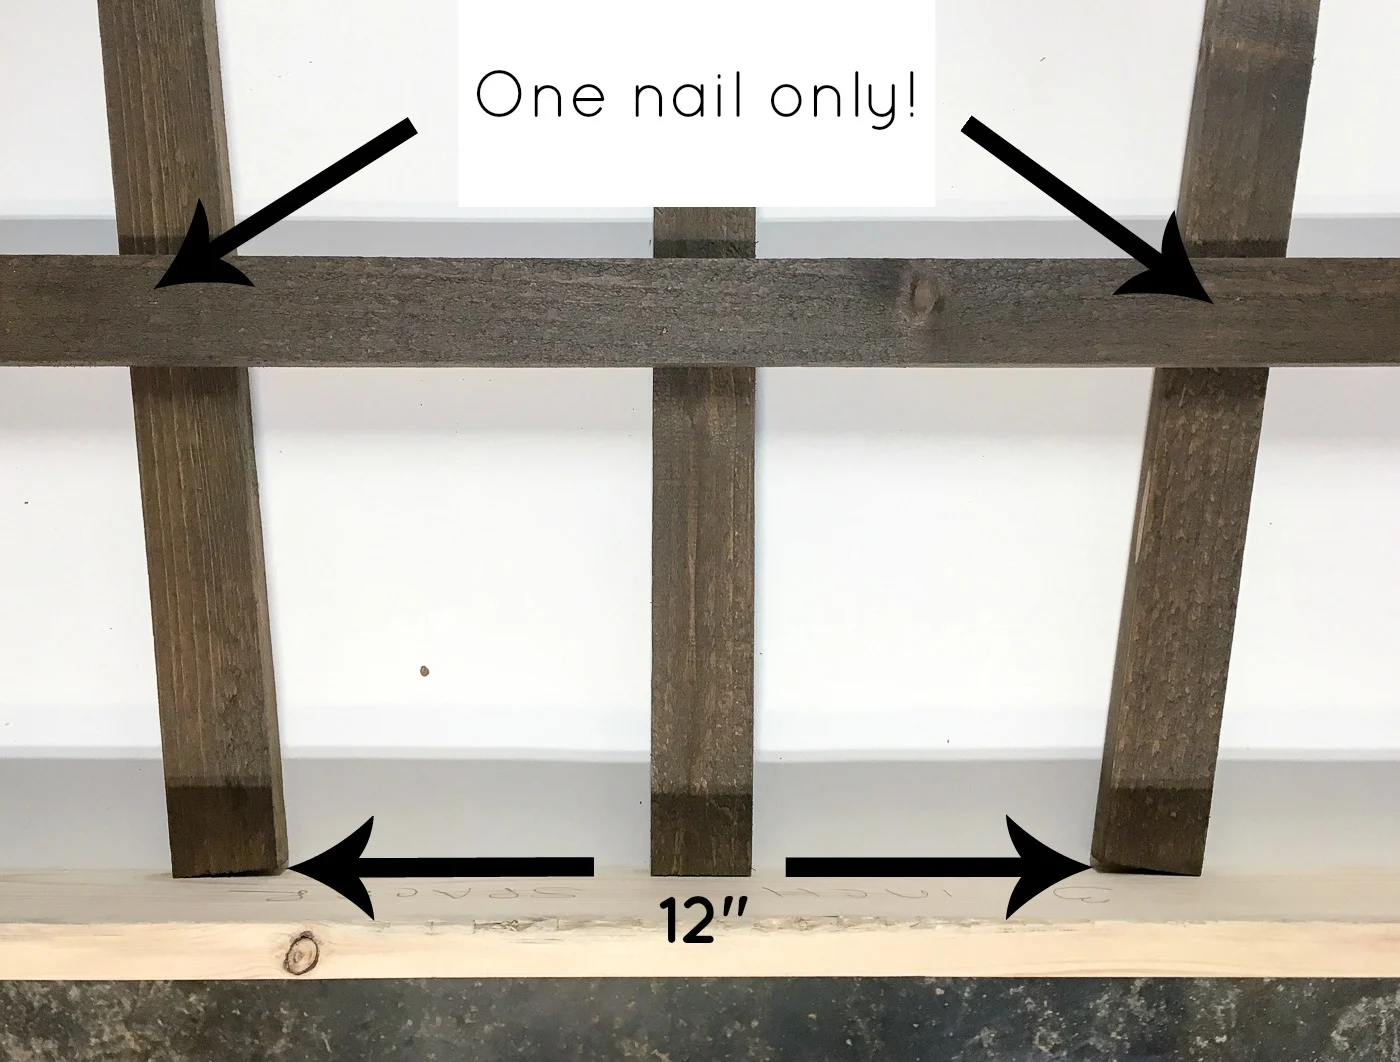
The outside vertical supports are 12" apart. Use a board flat against the bottom to keep the ends even. Once you have them in the right spot, put ONE nail in each side. You'll need to pivot the top of the supports to get the right angle.
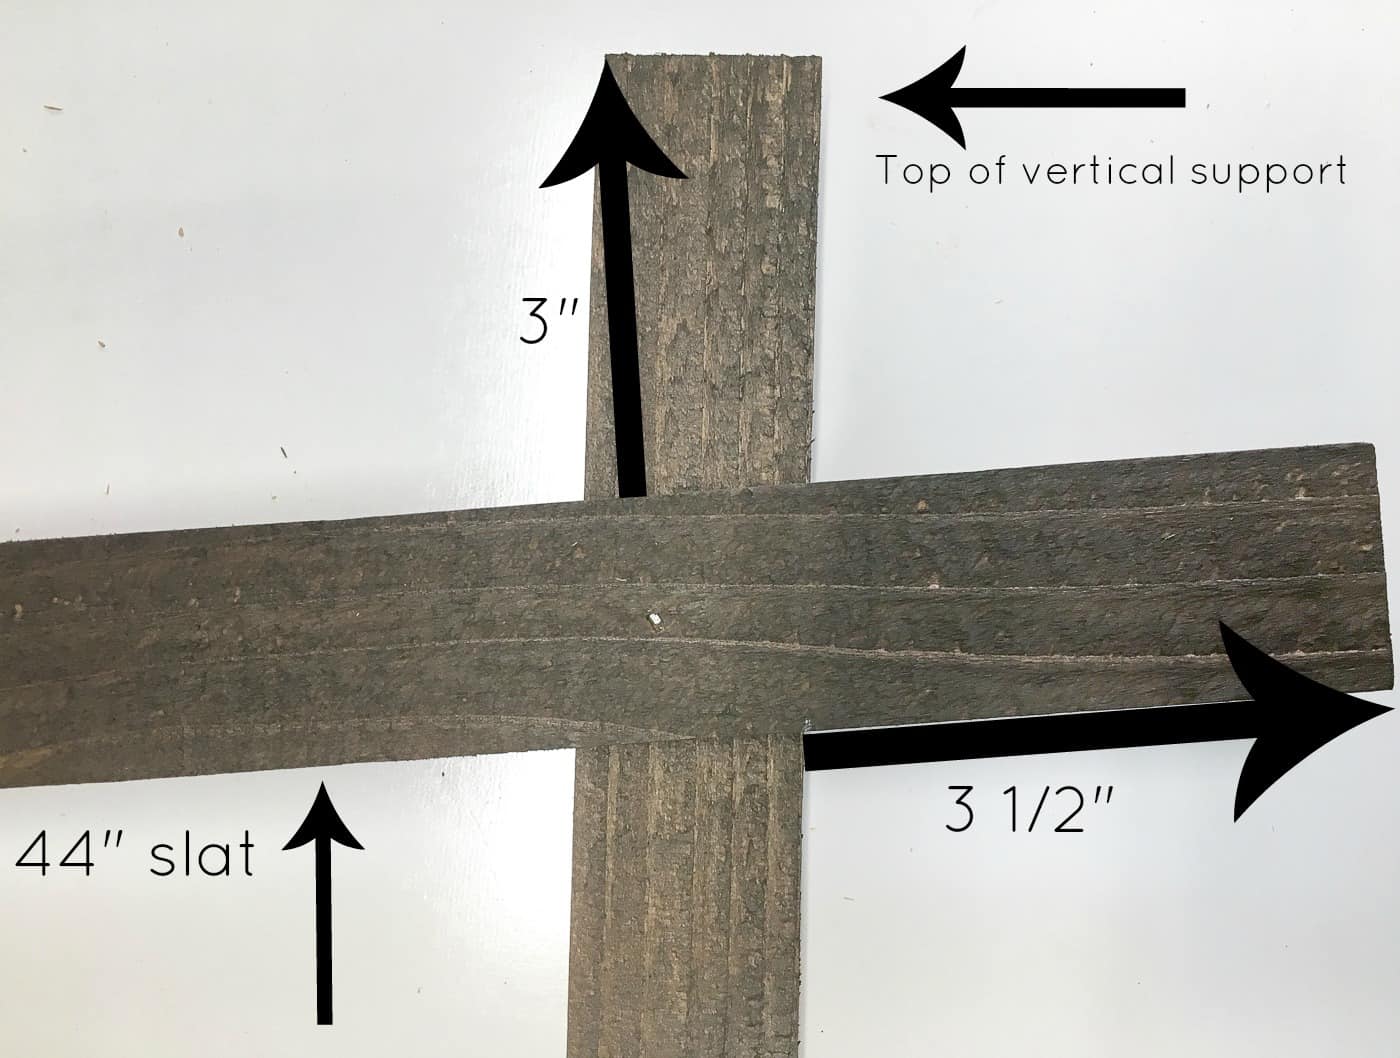
Place the 44" slat three inches down from the top of the side vertical support. Then measure 3 ½" in from the ends of the slat, and line that mark up with the edge of the support. Nail it into place.

Then mark the middle of the slat, and line that up with the center vertical support. Check for square and nail it into place. Now you can go back and securely attach the bottom slat that only has one nail.
That's the hardest part! The next part is sooooo much easier if you have a 3" wide piece of scrap wood (about 2 feet long should be enough). This scrap is used as a spacer between the slats, and makes assembly a breeze.
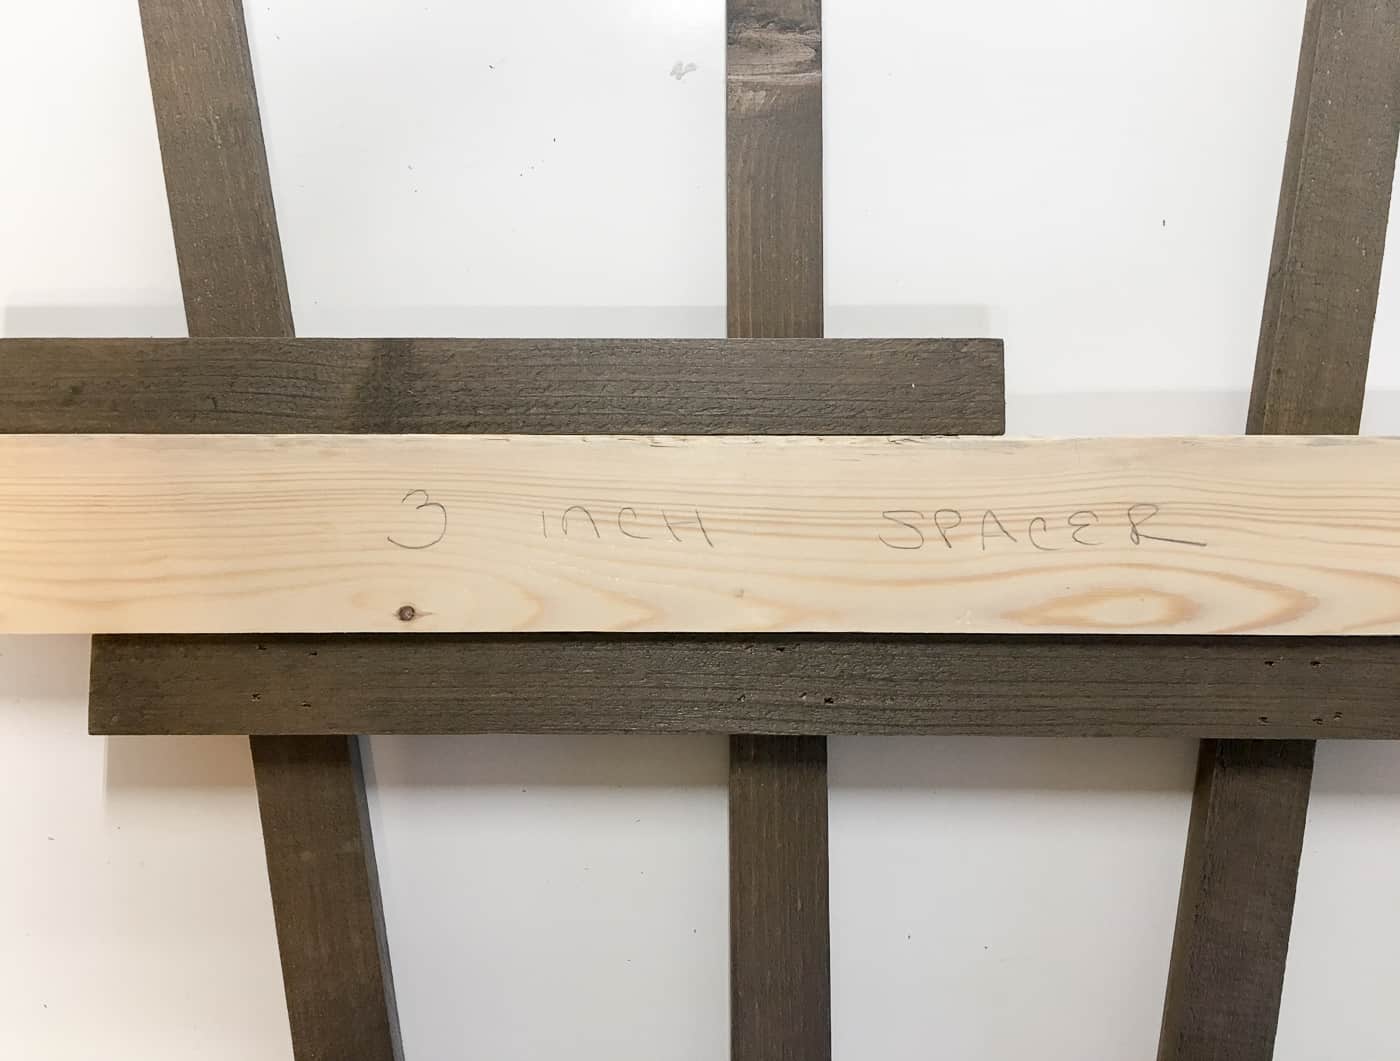
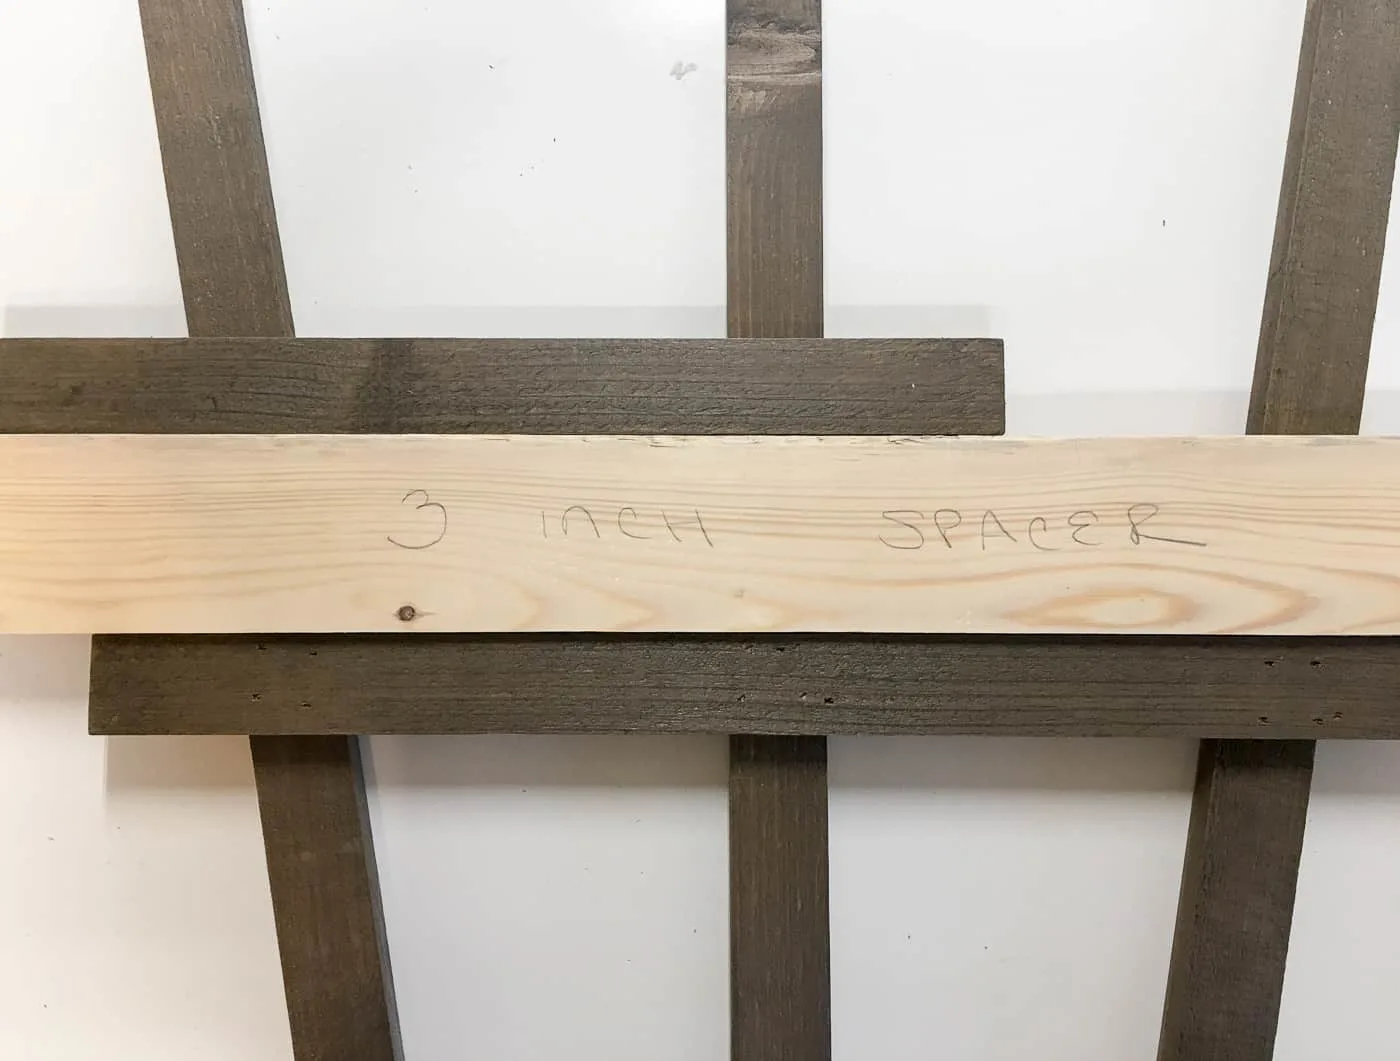
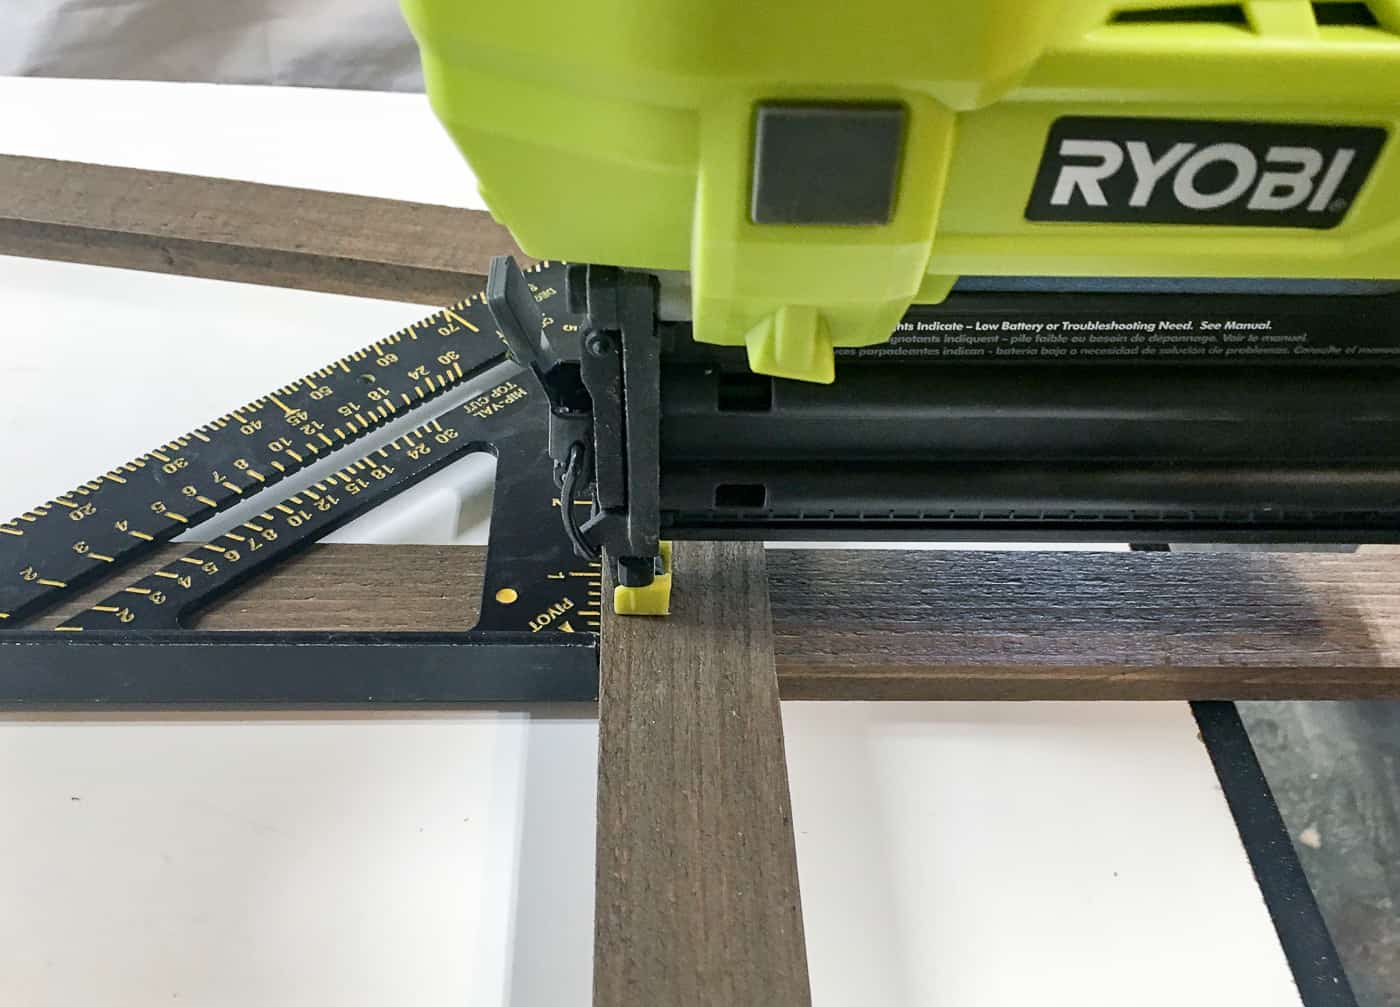
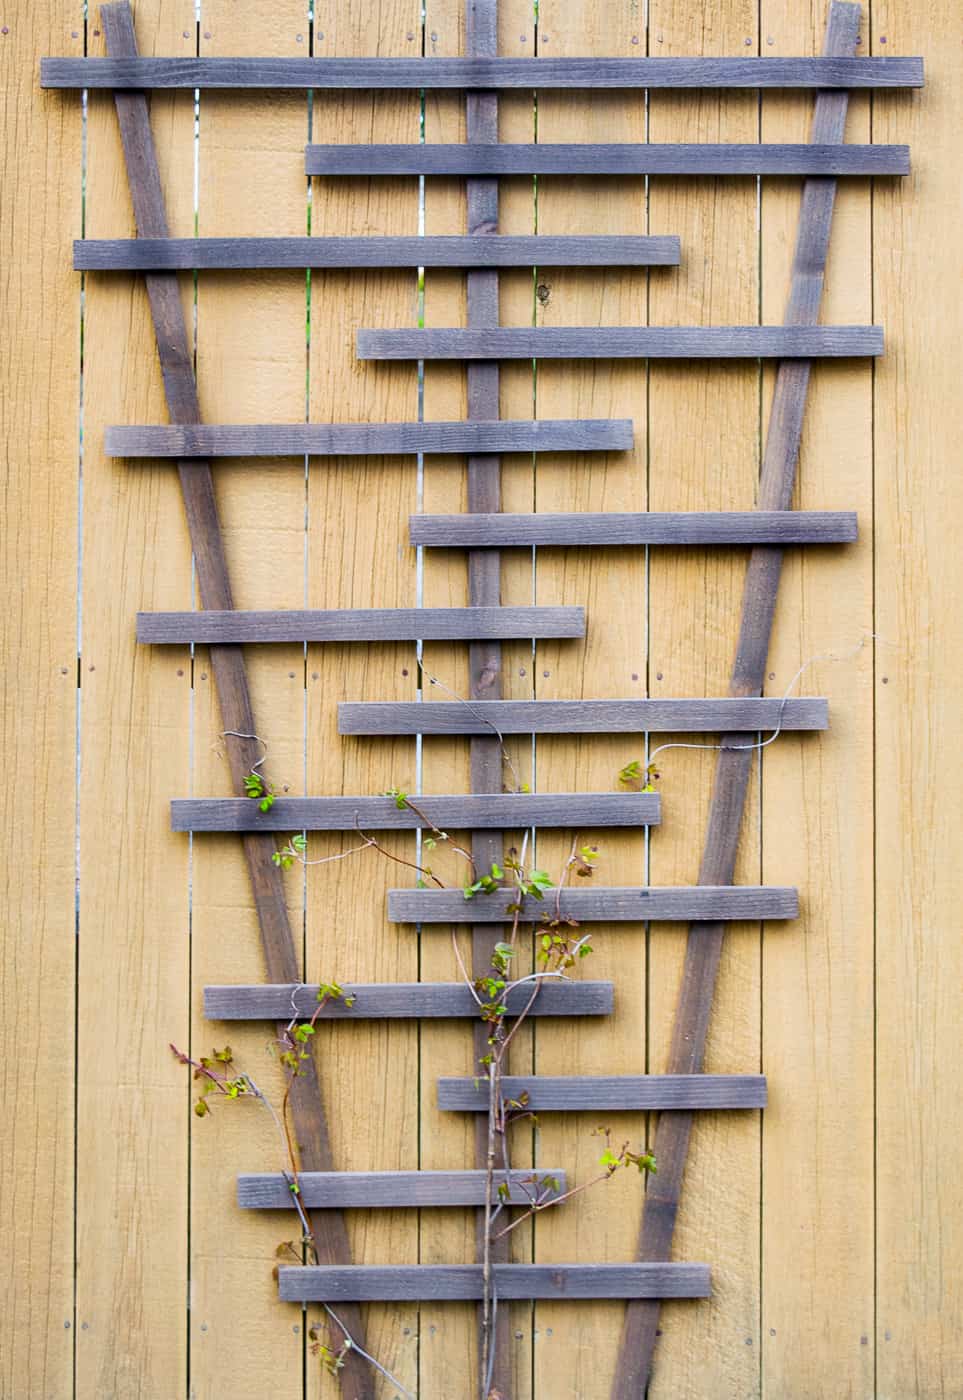
Mark the bottom edge of the 16" slat 3 ½" from the end. Place the spacer above the bottom slat, and lay the 16" slat with your mark lined up with the edge of the vertical support.
Nail the 16" slat into place, then move the spacer above it. Then attach the other 16" slat on the other side. Keep alternating sides while adding longer slats until you get to the top.
Attach the Trellis to the Fence
Once your trellis is assembled, out to the garden it goes! You can choose to simply lean it against a fence or siding, but I decided to mount it with a few nails through the vertical supports directly to the fence.
If you want to give the vines a little more room, you can add some wood blocks behind the slats to use as spacers to raise it off the fence. Now that my vines are much bigger, I wish I hadn't skipped the spacers!
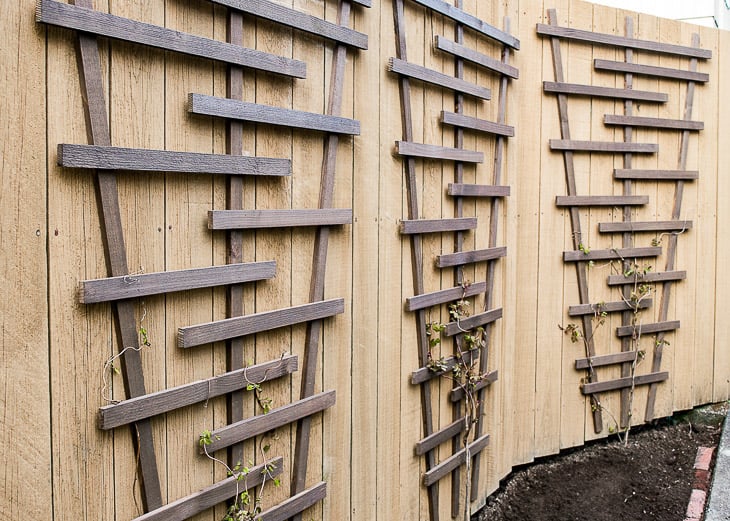
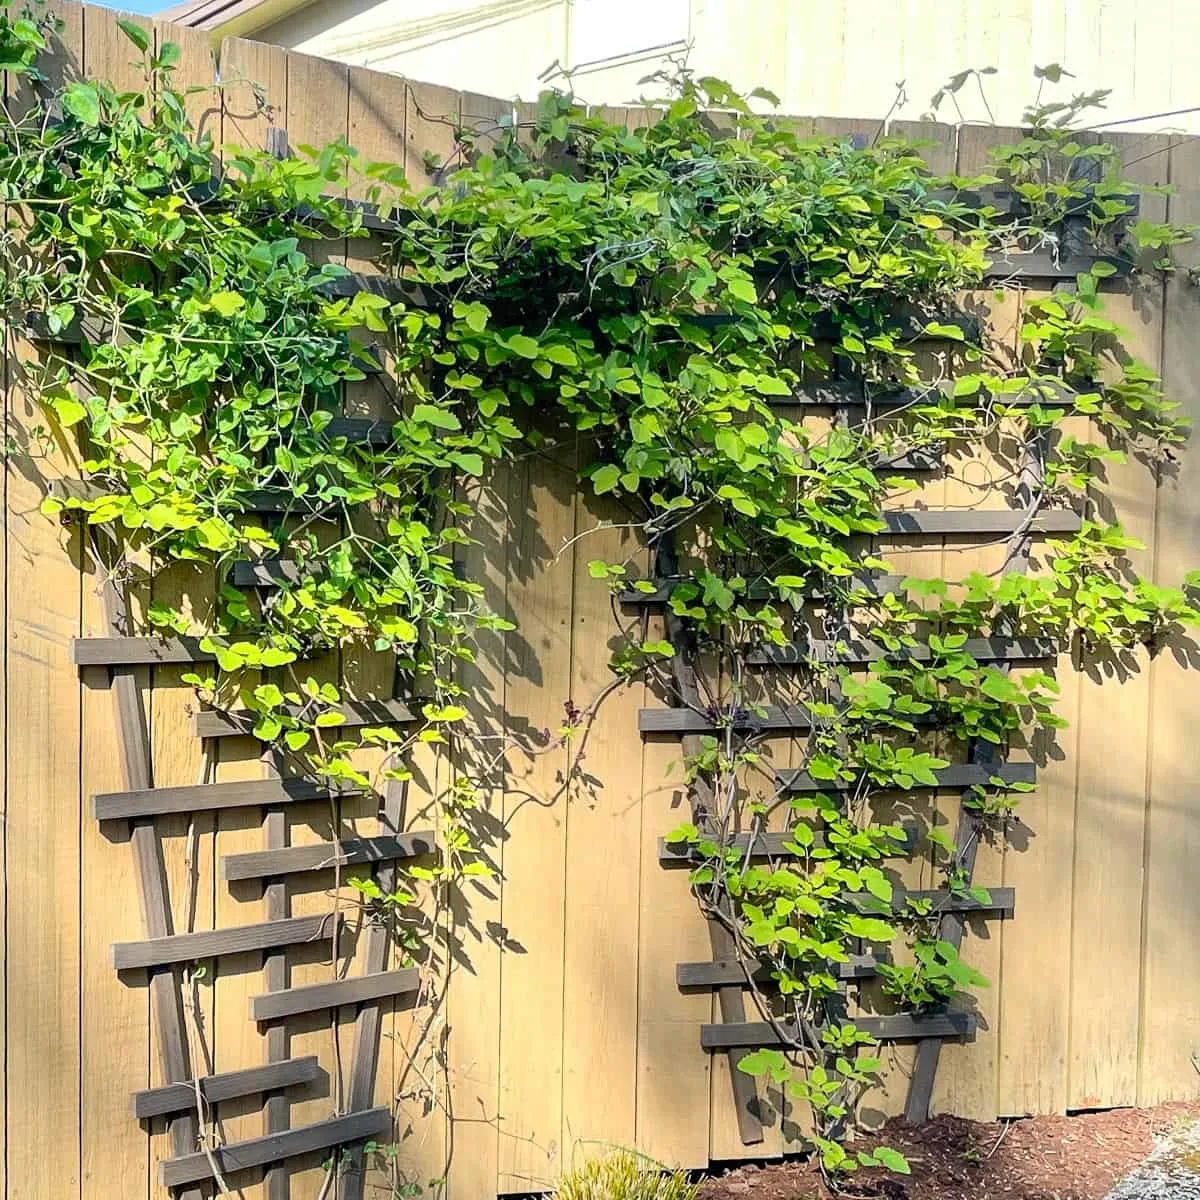
Give your vines a little hand getting started by weaving them through the bottom slats of the trellis. Soon they'll take off and cover the entire fence with beautiful blooms!

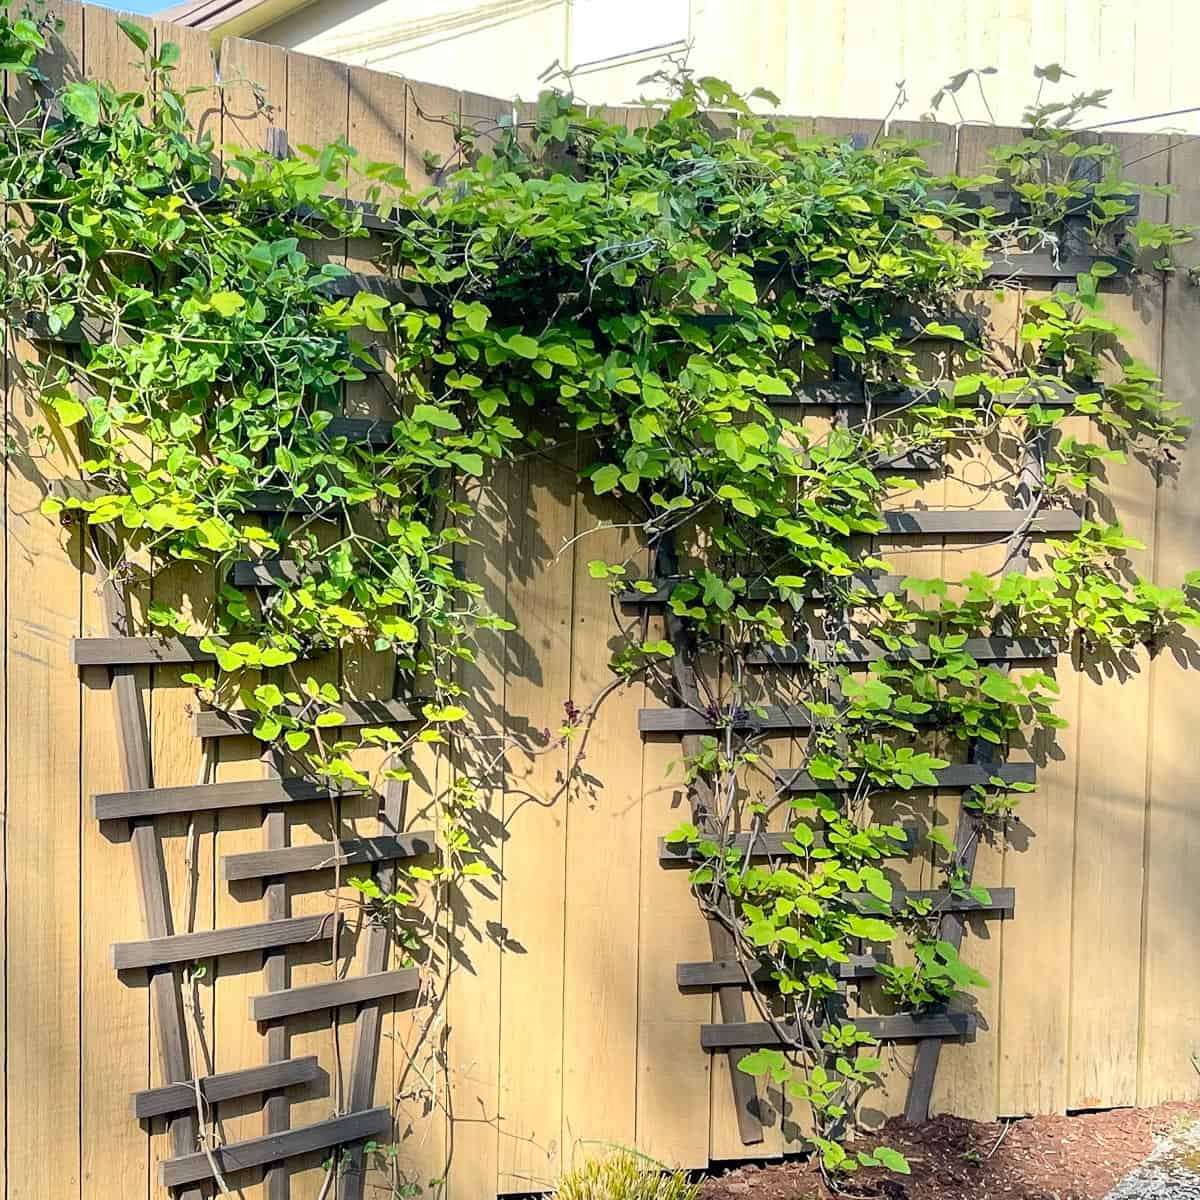
UPDATE: It's been almost four years, and these trellises and vines are still going strong! This past summer was the best yet, with flowers and leaves completely covering the entire fence! It's hard to believe those tiny little plants grew so huge!
Check out these other garden project ideas!
Kim
Thursday 8th of March 2018
Love your garden trellis! I'm so ready to get my hands in the dirt this year! Thanks for sharing your post on the Encouraging Hearts and Home blog hop! I featured your post this week at daytodayadventures.com which means I gave it some extra love on social media! Make sure you come link up today! Have a great week!
Vineta
Saturday 10th of March 2018
Thank you so much for featuring me, Kim!
Two Chicks and a Mom/Donna
Tuesday 6th of March 2018
Great plans and the trellis looks nice! Thanks for sharing at Party in Your PJs.
Denise
Friday 2nd of March 2018
What a great idea! Thanks for sharing! -From Pretty Pintastic
Nikki Gwin
Friday 2nd of March 2018
Very cute and you make it look so easy! What vine did you plant? :) gwingal
Vineta
Friday 2nd of March 2018
I planted an akebia vines and anenome clematis vines. They didn't grow very well last year, so I might try something different this spring.
Milena | Craft Beering
Monday 26th of February 2018
Great idea and tutorial. Was just planning garden work yesterday and determined we will be planting many more trellis needing veggies. Have a great growing season!