Boost your productivity in the workshop with a miter saw stop block! It allows you to cut boards to the same length without measuring every time!
You know what they say . . . measure twice, cut once. But what if you could measure once, and cut dozens? A miter saw stop block is an easy way to get repeatable, identical cuts so you can be sure all those pieces are the same length!
I've had three different miter saw set ups in my workshop, with three different stop block systems. In this article, I'll share with you how miter saw stop blocks work, and the pros and cons of each method.
This post contains affiliate links for your convenience. Purchases made through these links may earn me a small commission at no additional cost to you. Please visit my disclosures page for more information.
What is a miter saw stop block?
A miter saw stop block is a piece of wood or metal bar that is clamped down at a set distance from the blade. When the end of a board is set against the stop block, it will be cut to the same length as the stop block edge. So long as the stop block doesn't move, you can repeat the cut multiple times and get the same length every time!
Types of miter saw stop blocks
There are lots of different variations of the stop block, but they all fall into one of three categories.
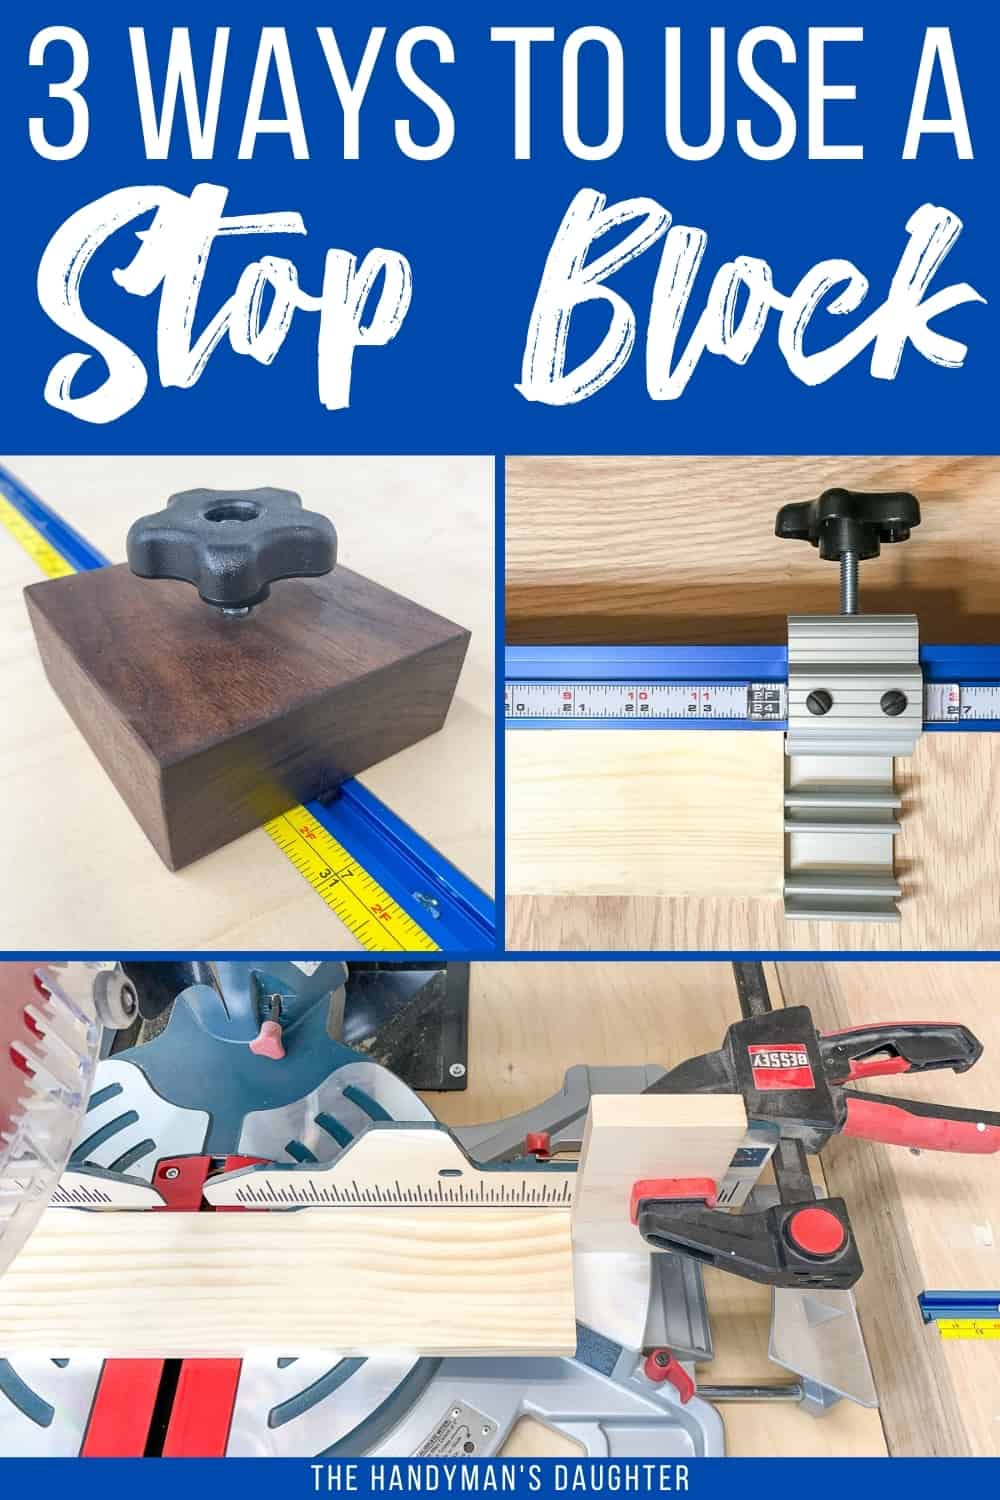
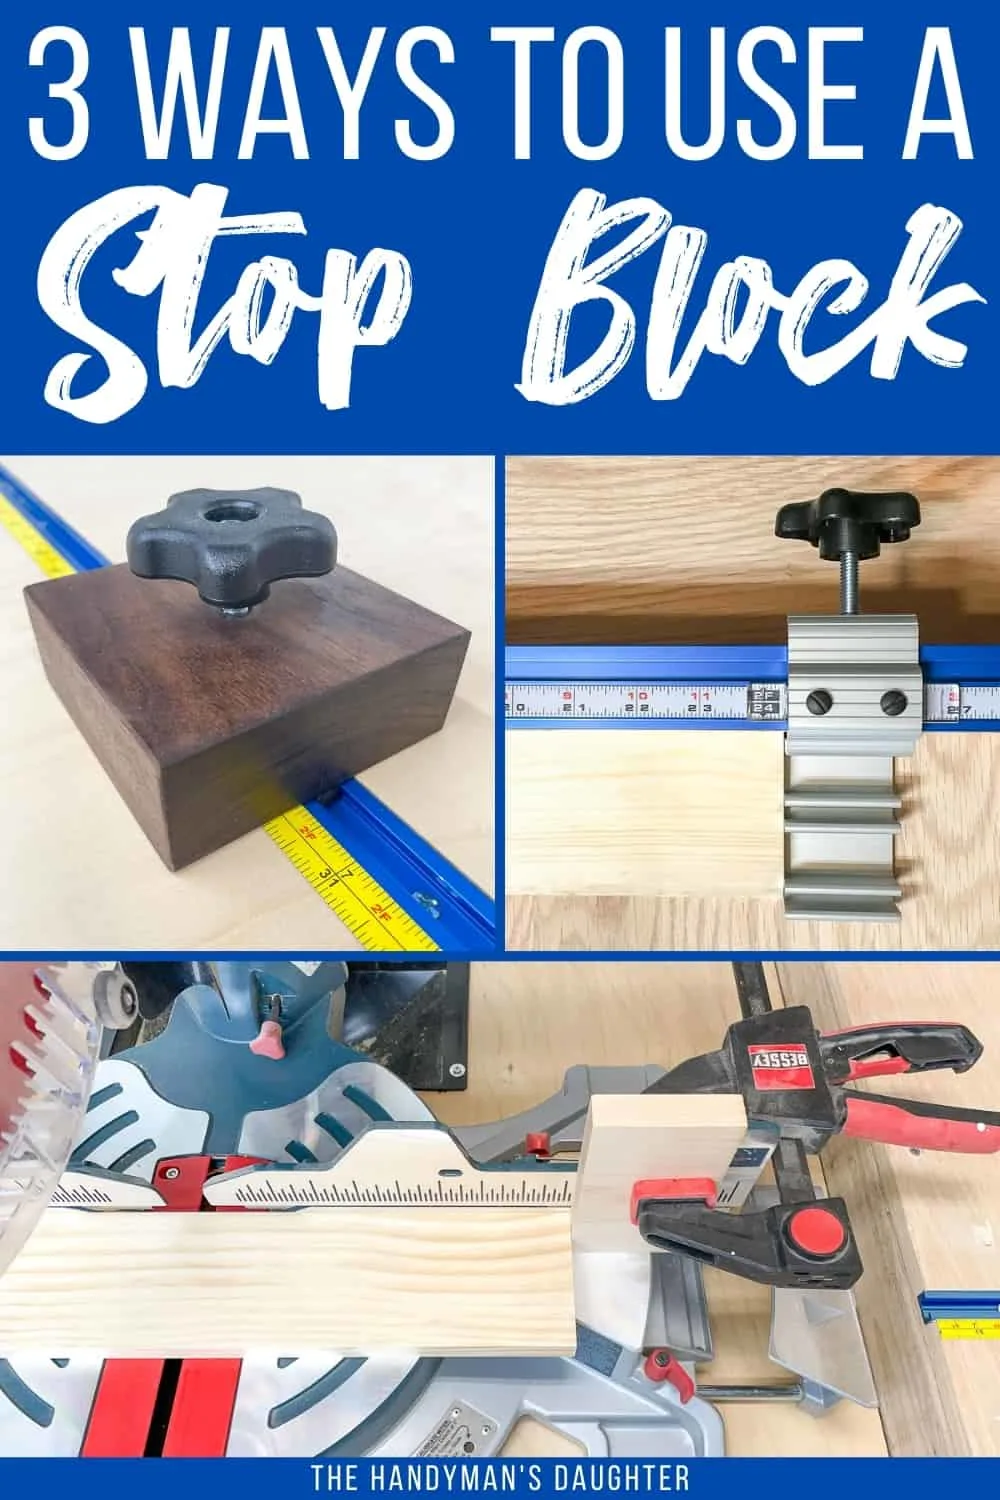
Stop block clamped to existing miter saw fence
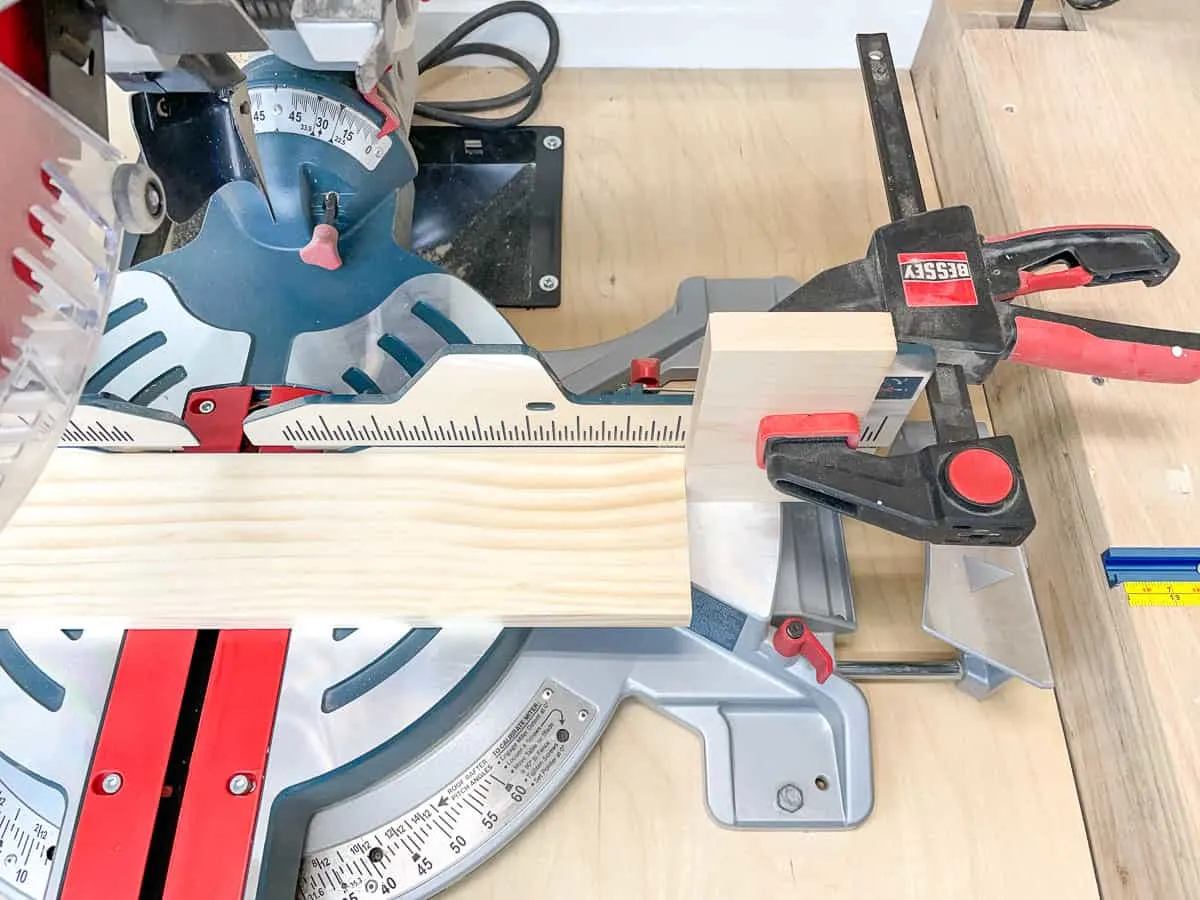
If you're cutting a lot of shorter lengths, a stop block clamped to your existing miter saw fence is the easiest way to go. You don't need any fancy set up or track, so it's perfect for beginning woodworkers!
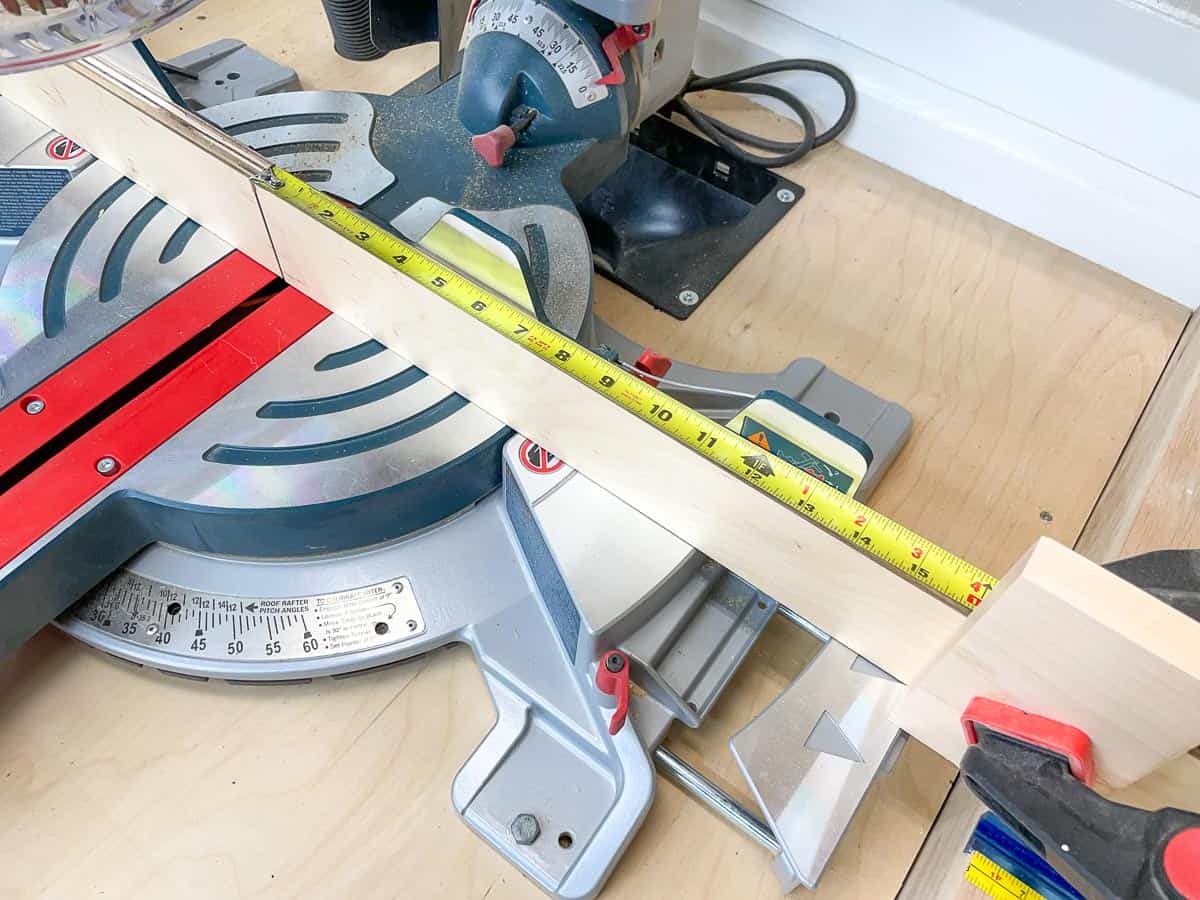
Just grab a scrap piece of wood with a straight 90 degree angle and clamp it to the miter saw fence at the desired length. Make sure you measure from the outside of the blade's teeth to the edge of the stop block to get the exact dimension of the board to be cut. If you're not familiar with the miter saw and all its parts, check out this miter saw guide for more information.

If you need to cut longer lengths, you can create a extension fence by screwing a longer board to the existing miter saw fence. There should be holes in the metal fence specifically for this application.

Screw a long, straight board to the fence from the back on both sides of the blade with short screws and washers. A 1x4 is the perfect size, because it gives you enough height to easily clamp the stop block in place without taking up a lot of cutting depth.

Once both sides of the fence are attached, cut it in half. This shows you exactly where the blade cuts, so you can get precise measurements from either side of the gap.
Now just hook your measuring tape into the gap, and clamp the stop block to the extension fence at the desired length. In the photo below, you can see how I set the stop block to 16" from the cut, so every board will be cut to exactly 16" without having to measure each time! Plus, now you have a zero clearance slot that supports the back of the cut and prevents tear-out!

Pros
This is the easiest method, and it doesn't require a permanent set up. You can drag your miter saw out to the driveway and make a bunch of cuts with the stop block clamped in place, then put it all away until your next project.
Cons
If you use the miter saw more than a couple times a year, setting up the temporary extension fence every time can be a chore. You could reuse the same boards, but eventually the screw holes will get worn and loose.
Any imperfections in the board being used as an extension fence can translate into your cuts. If there's a bend in the fence, it may hold your board slightly askew and cause your cuts to be more or less than 90 degrees. This can result in a wobbly table or joints that don't line up correctly, which will frustrate any beginning woodworker!
Miter saw fence extension with stop block track
After you've been building projects for a while, you may want to make your own miter saw stand. This will support the board so the cut ends don't fall to the ground, and you'll get lots of extra storage space underneath. A miter saw stand also allows you to set up a permanent extension fence with a stop block track on top.
My first miter saw stand was a long workbench on wheels, with platforms on either side of the miter saw to support the boards. An extension fence attached to the platform can be used to clamp a stop block in place, but Kreg Tools kindly sent me their stop block track kit to try out on my new setup.

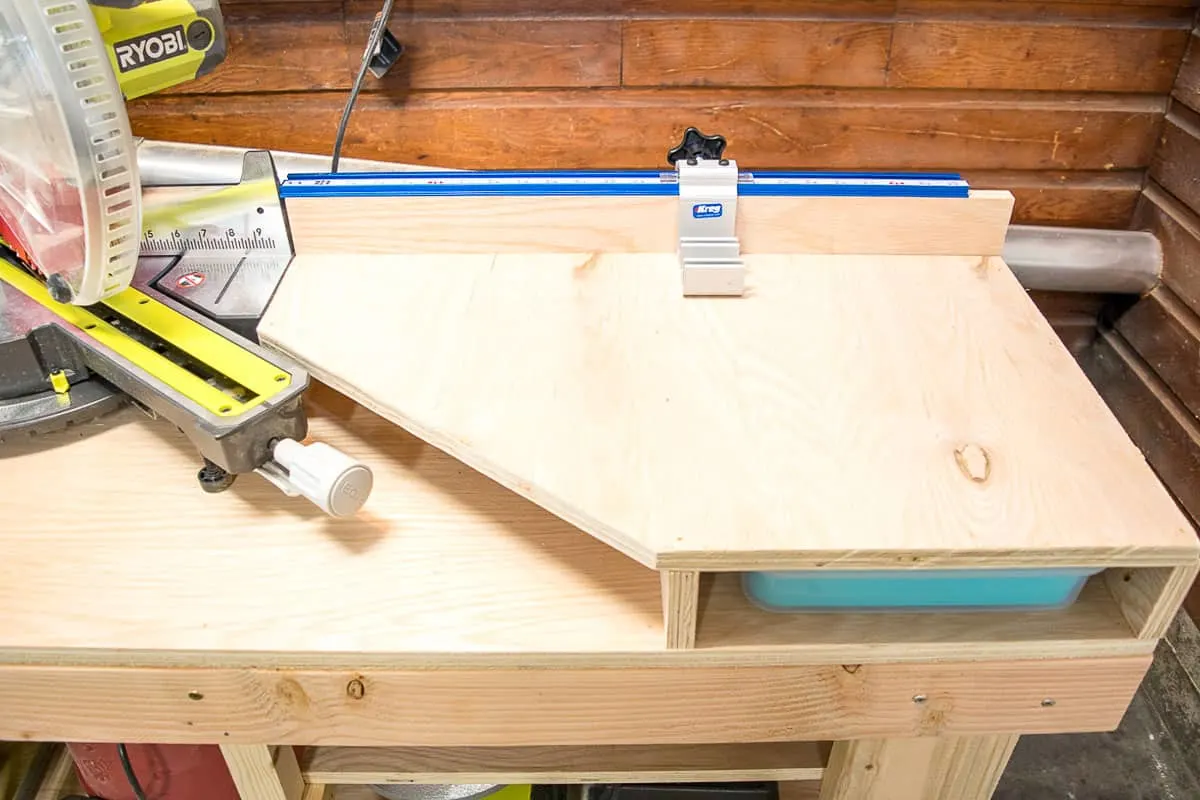
It features a measuring tape on top of the t-track to make it quick and easy to lock in the exact length you need. You just have to calibrate the tape to your saw blade to get perfect cuts every time! I go into more detail about how to set up the Kreg stop track system here.


You can also integrate the extension fence into cabinets behind the miter saw. This prevents the area behind the fence from becoming a cluttered mess, like mine was! You can see a great example of this system in the video below.
Pros
Having a tape measure integrated into the stop block system is a total game changer if you use the miter saw frequently! It sped up my building process considerably, and made the pieces more accurate too.
The t-track on top of the fence can also be used for hold down clamps to keep your workpiece from moving during the cut. I didn't use this feature much, but it can be helpful!
Cons
When you upgrade to a new miter saw, you have to recalibrate the entire platform and fence system to match. The distance from the blade to the measuring tape markings will be off, and the height of the platform may be different with the new saw. When I switched to a new miter saw, I ended up removing the stop track fence altogether rather than fiddle with recalibration.
The bigger problem is that the long fence can cause your cuts to be crooked if the board you're cutting is slightly warped. If there's a bend in the wood pressing against the far end of the fence, it could force the section directly under the blade away from the miter saw fence.
You can adjust for this problem by setting the extension fence back slightly, and only using the miter saw fence directly under the blade to align the board.
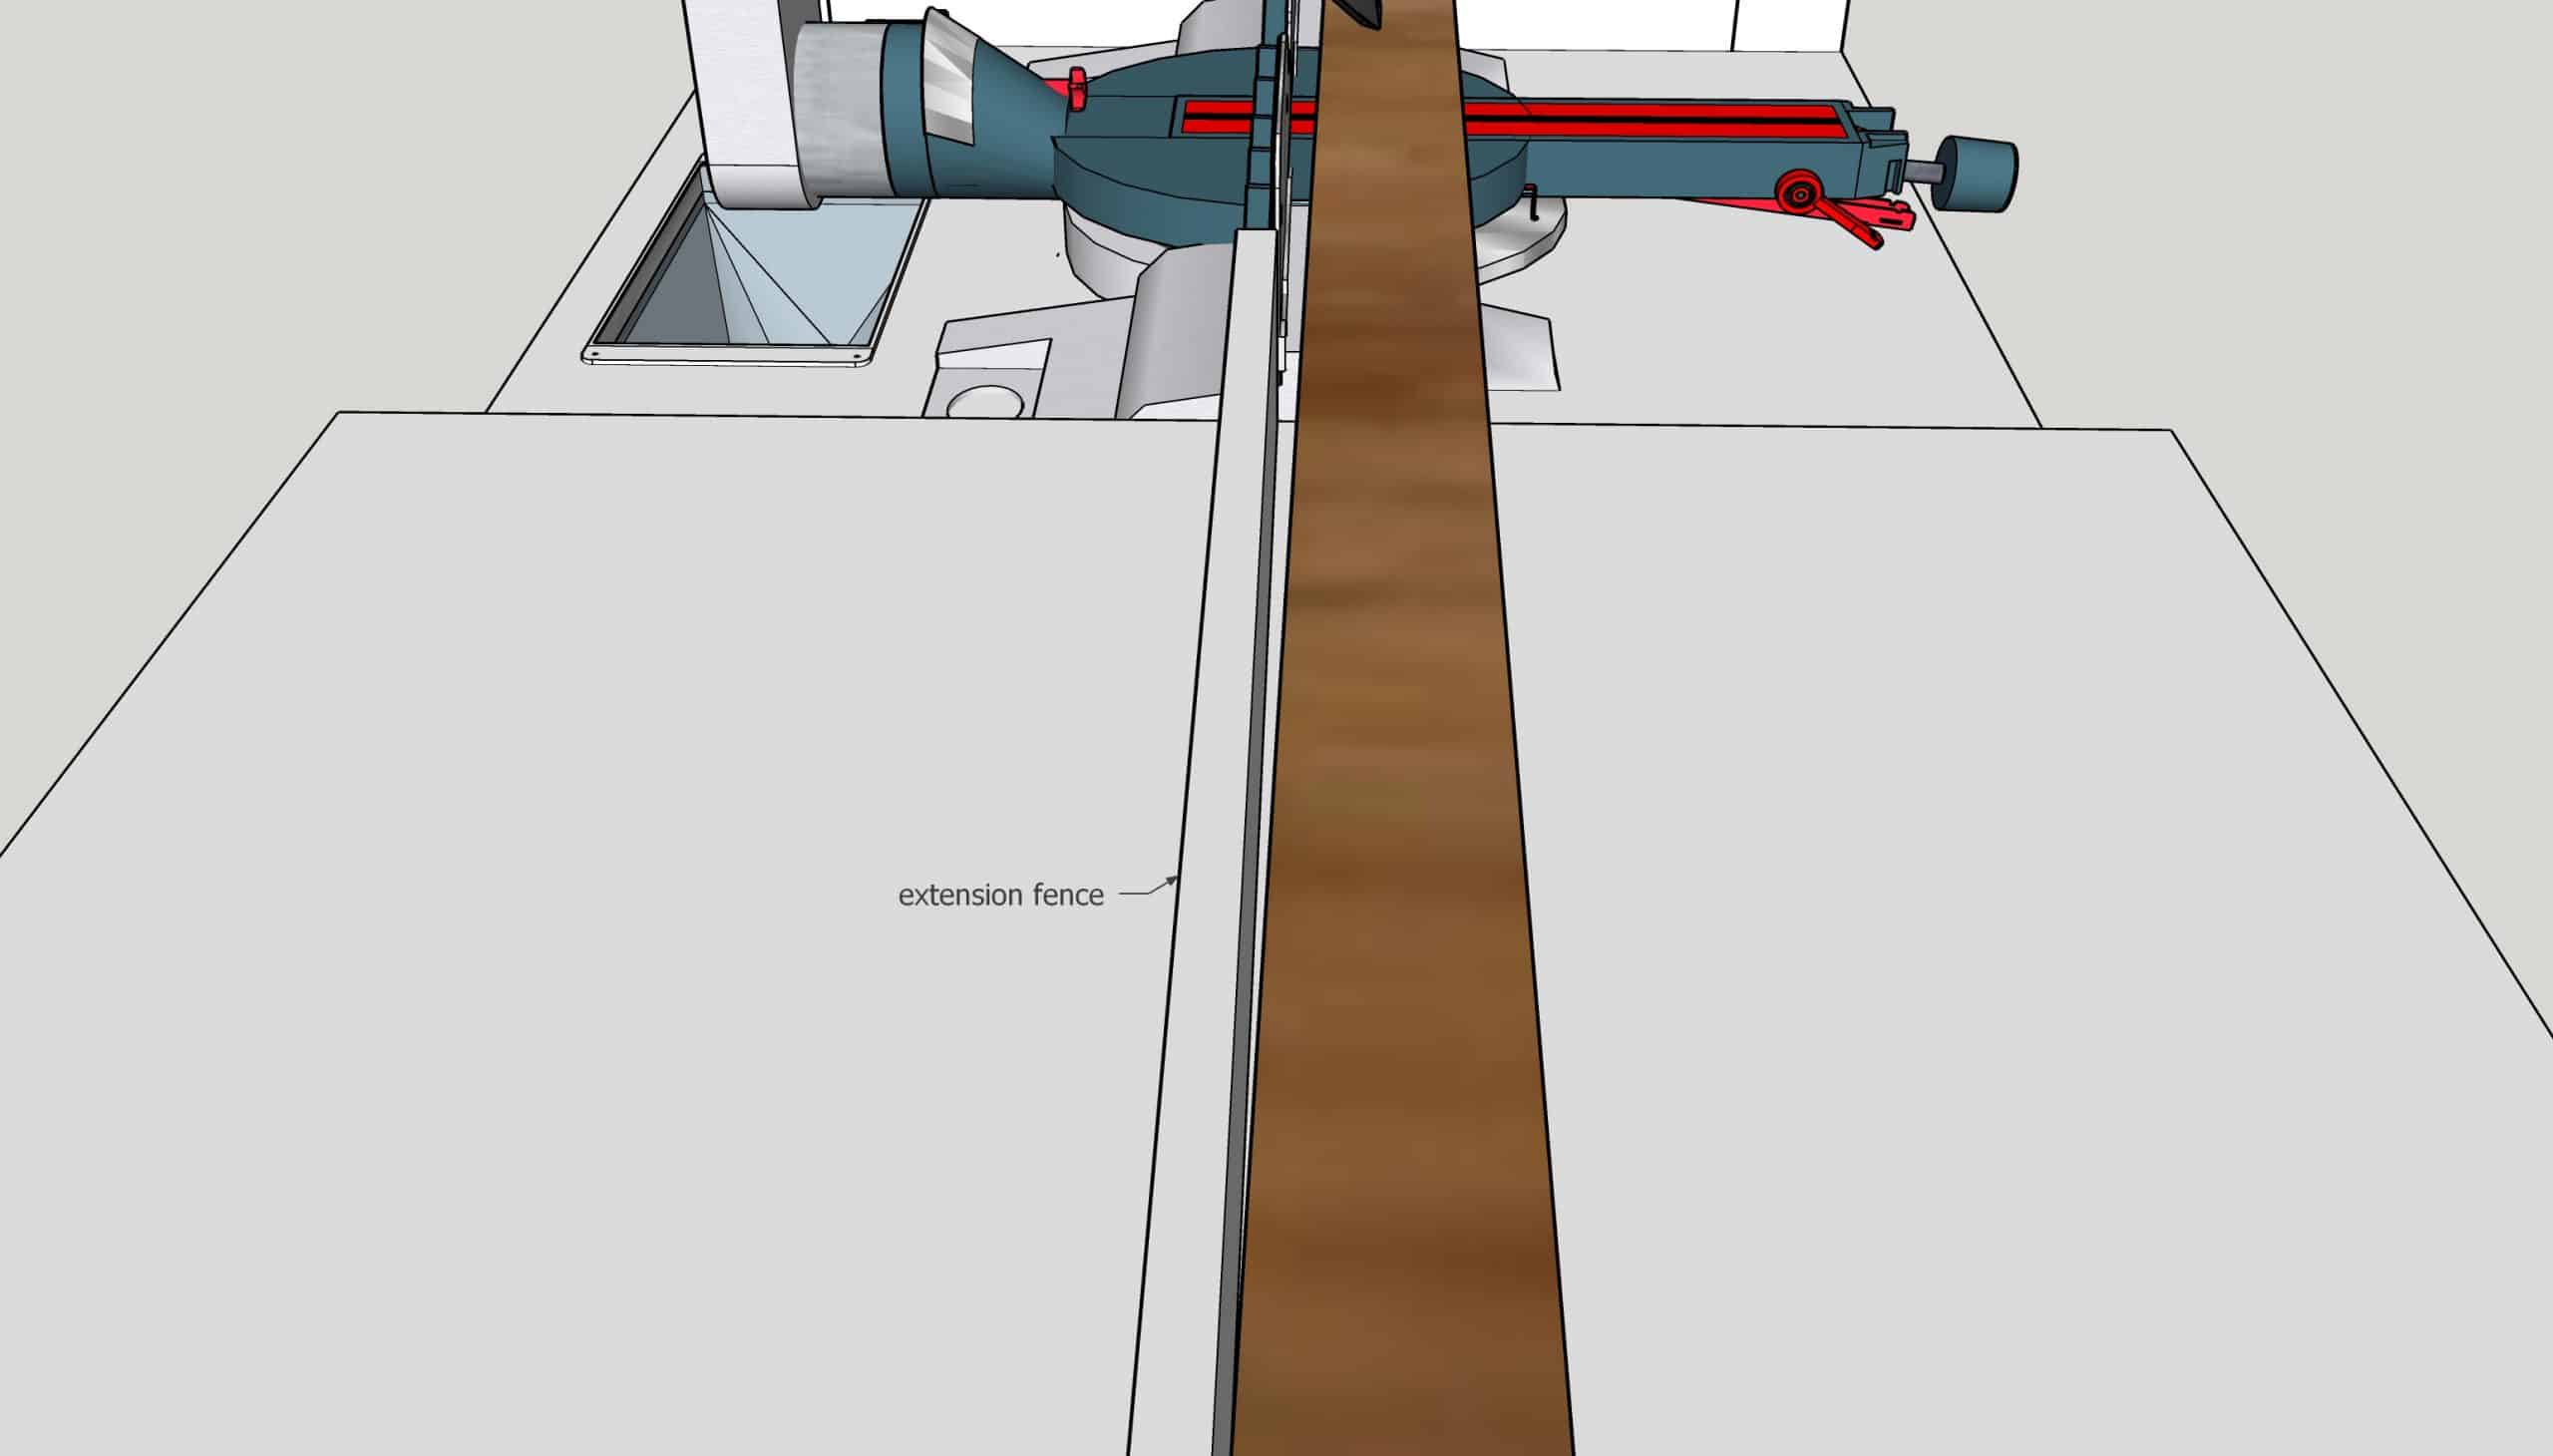
T track stop block
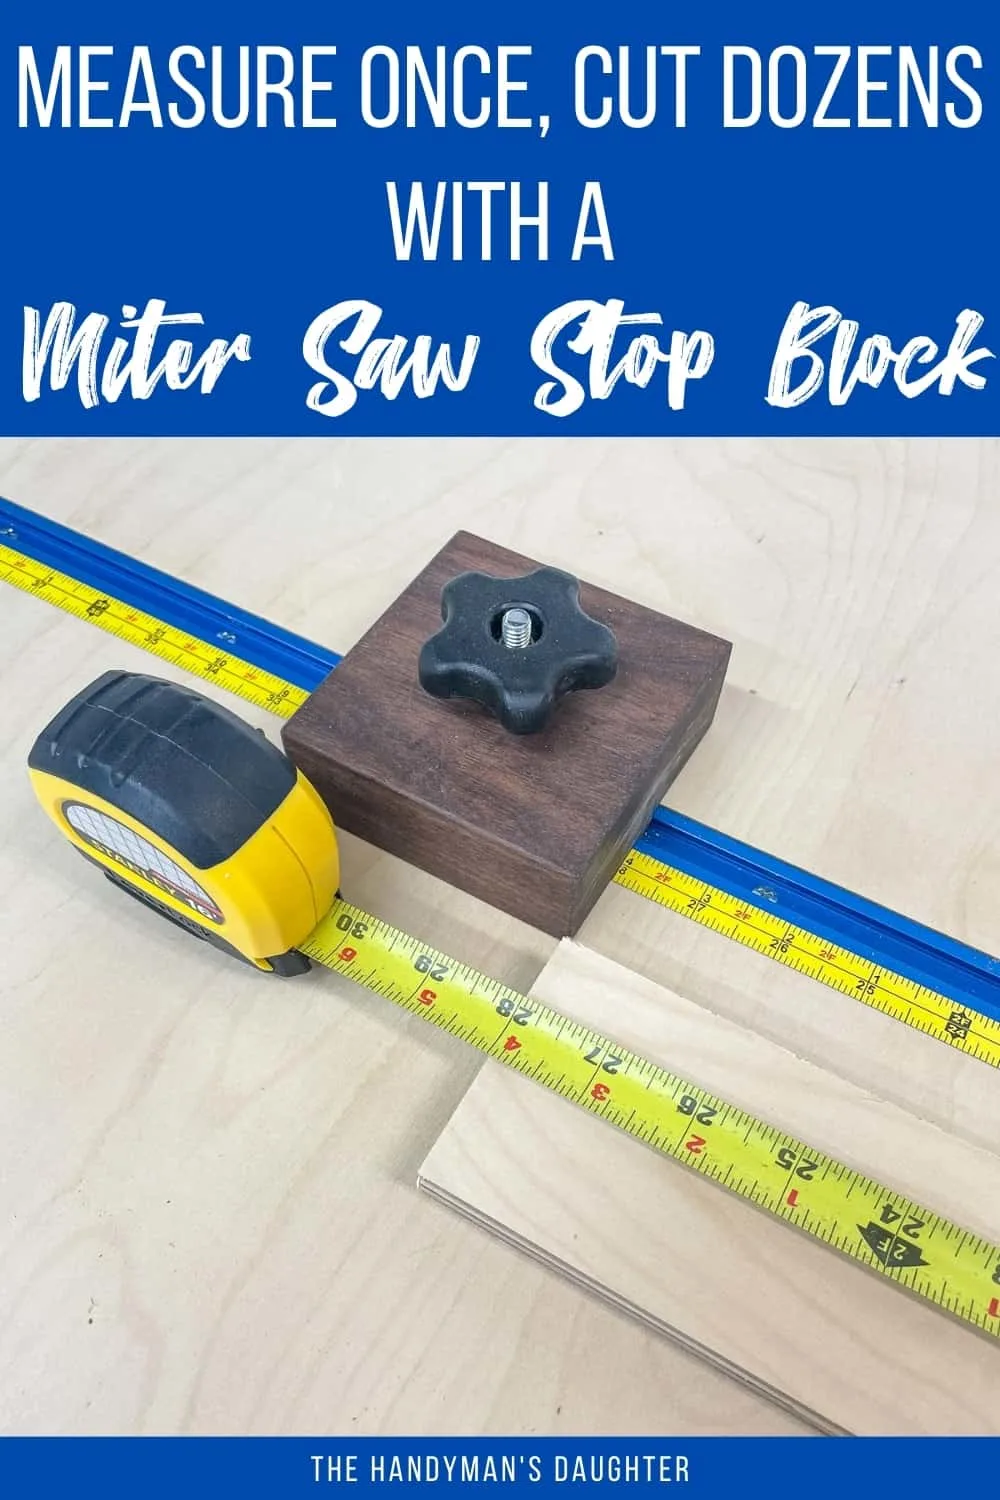
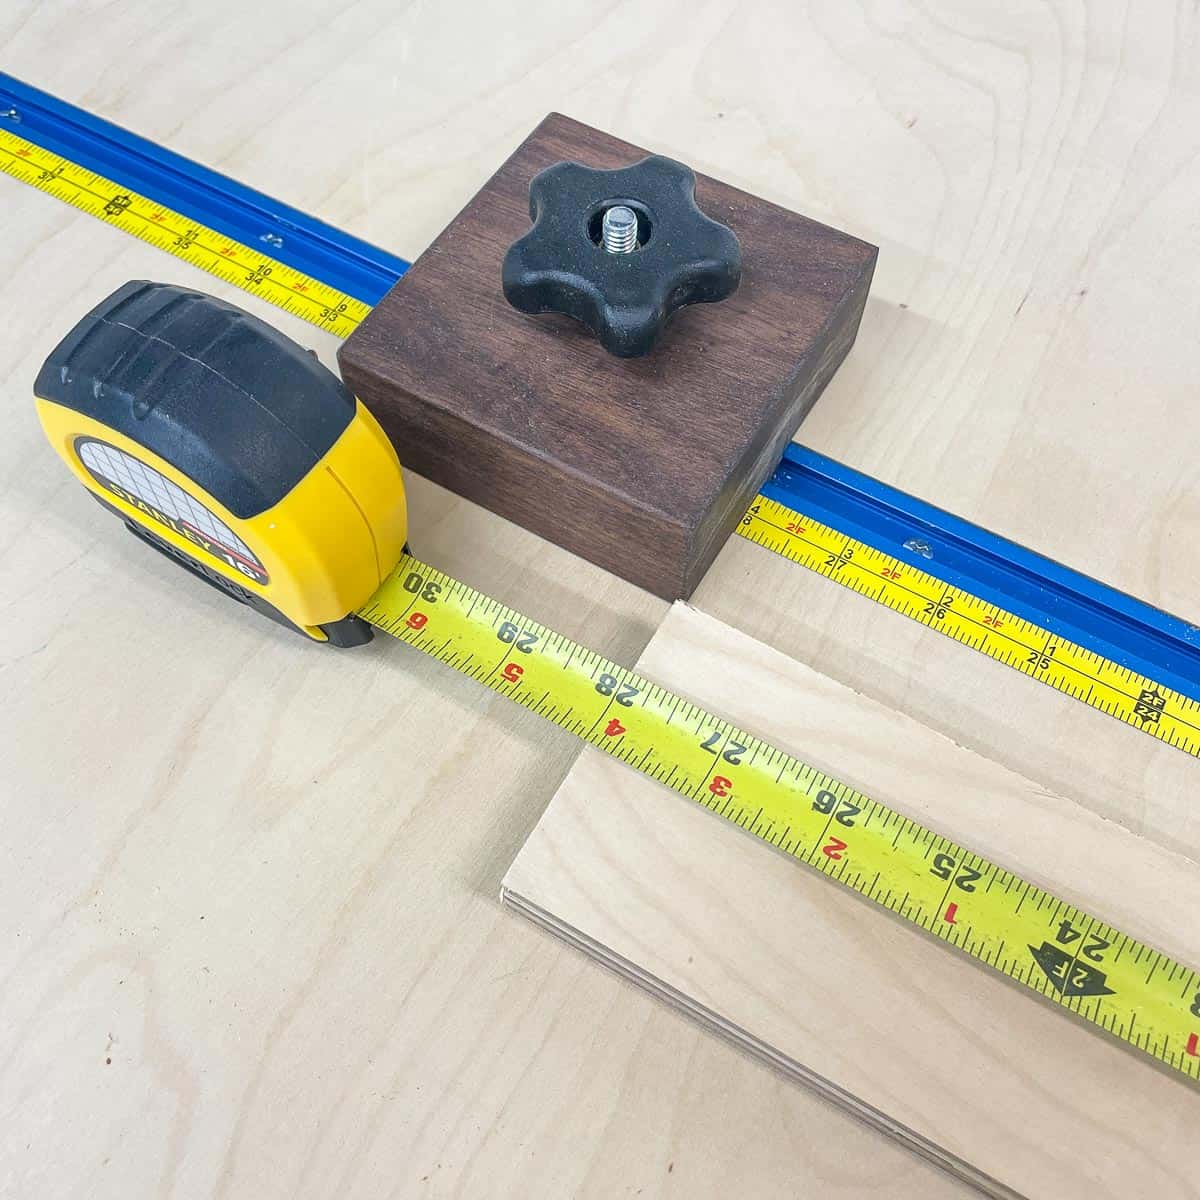
For my new miter saw station, I decided to go with a recessed t-track stop block. This system allows me to easily move the stop block from one side of the miter saw to the other, or remove it entirely if I need the flat surface for something else. Space is always at a premium in a small workshop!

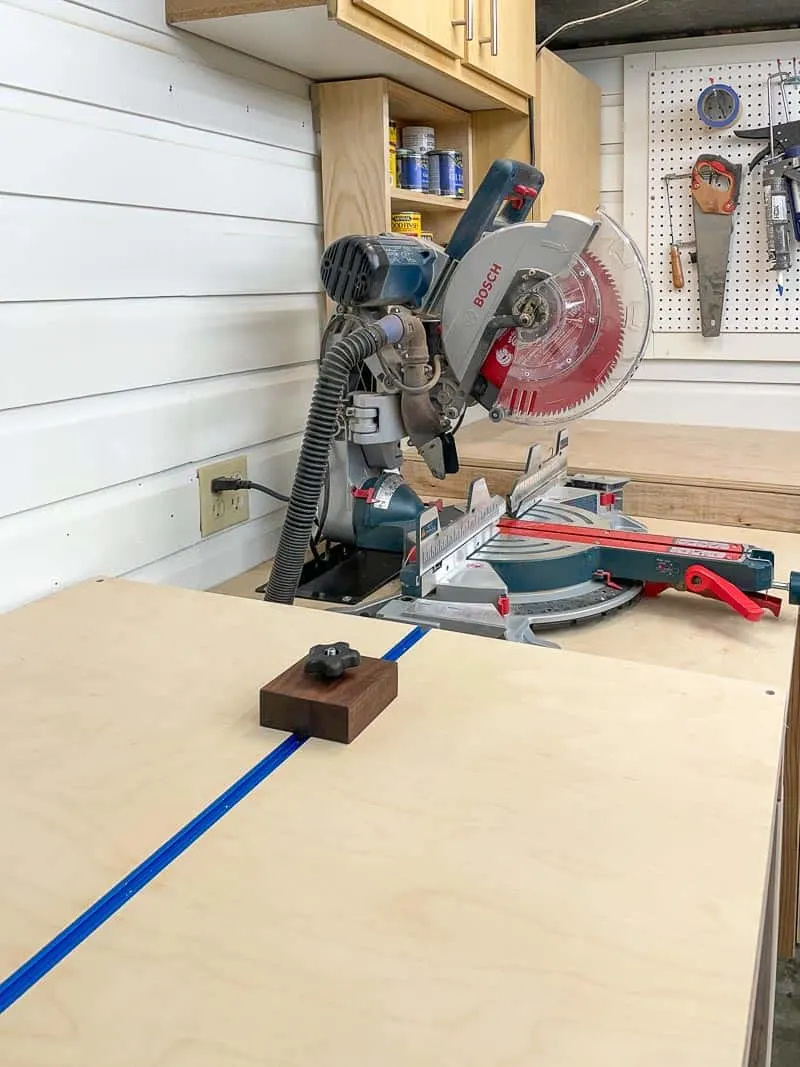
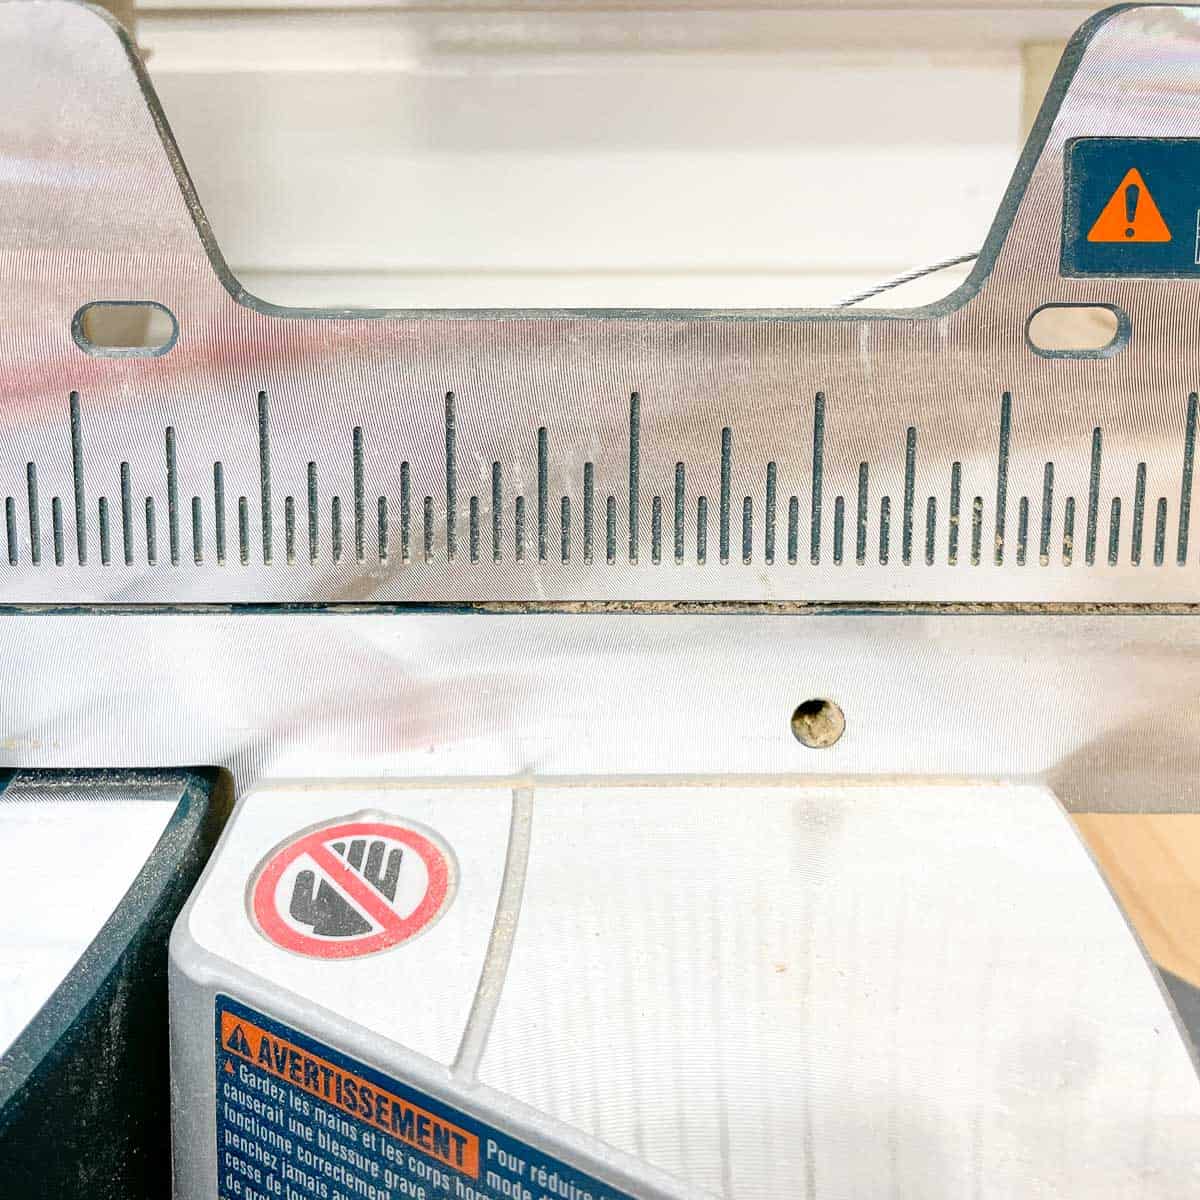
The t-track is recessed into the plywood top on either side of the saw by cutting a channel with a plunge router or dado stack at the table saw. A thin, metal measuring tape with an adhesive back runs the length of the track. You could cut a groove for the tape so it's flush with the surface, but so far I haven't found it necessary.
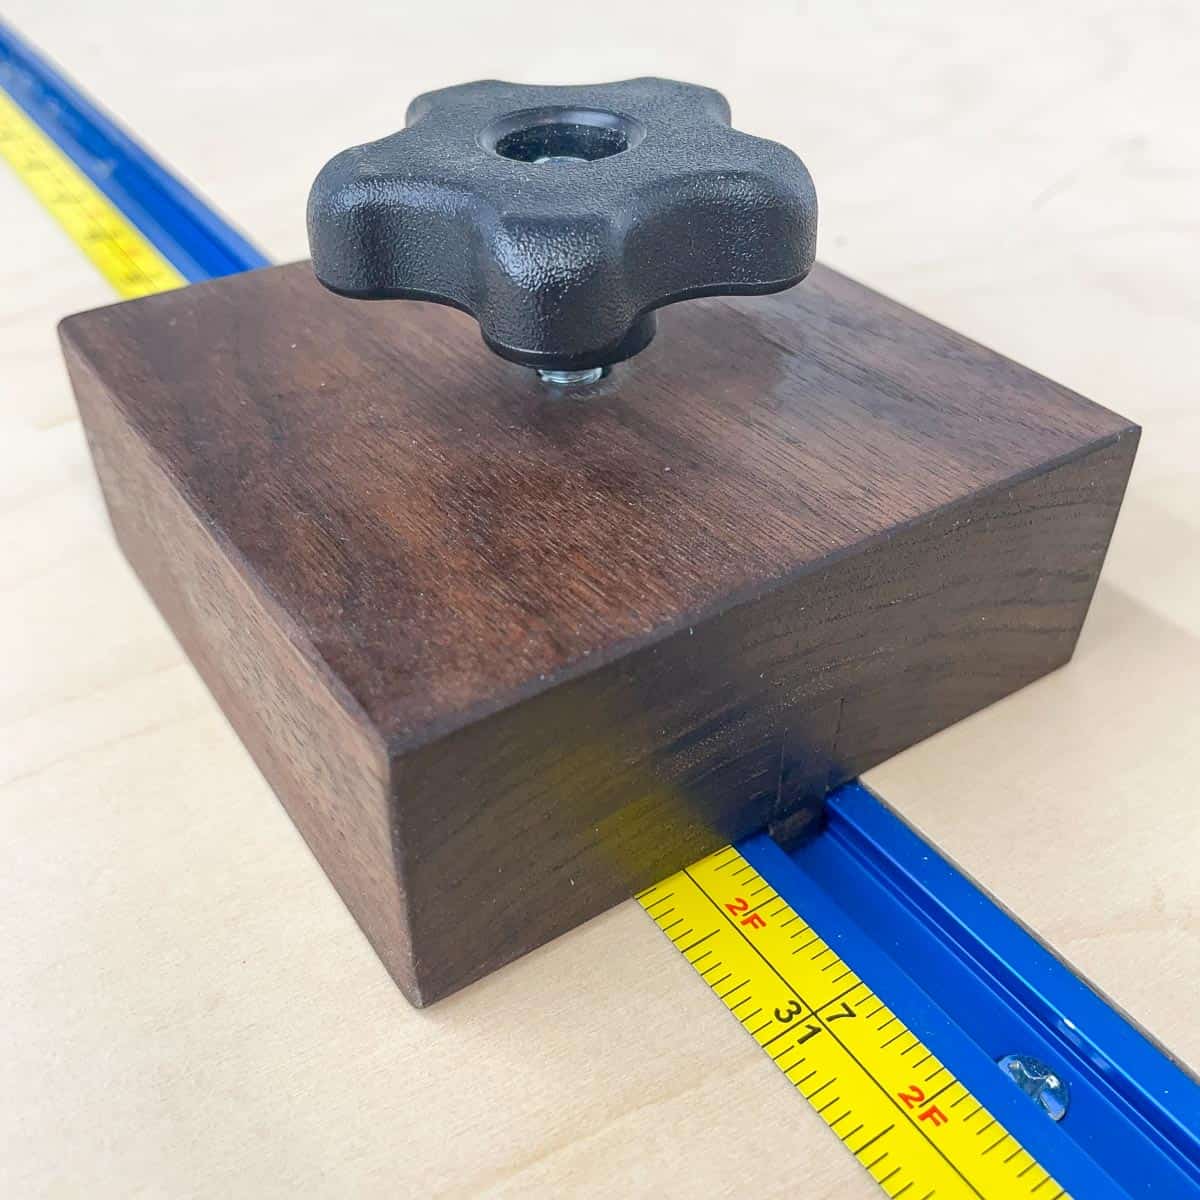

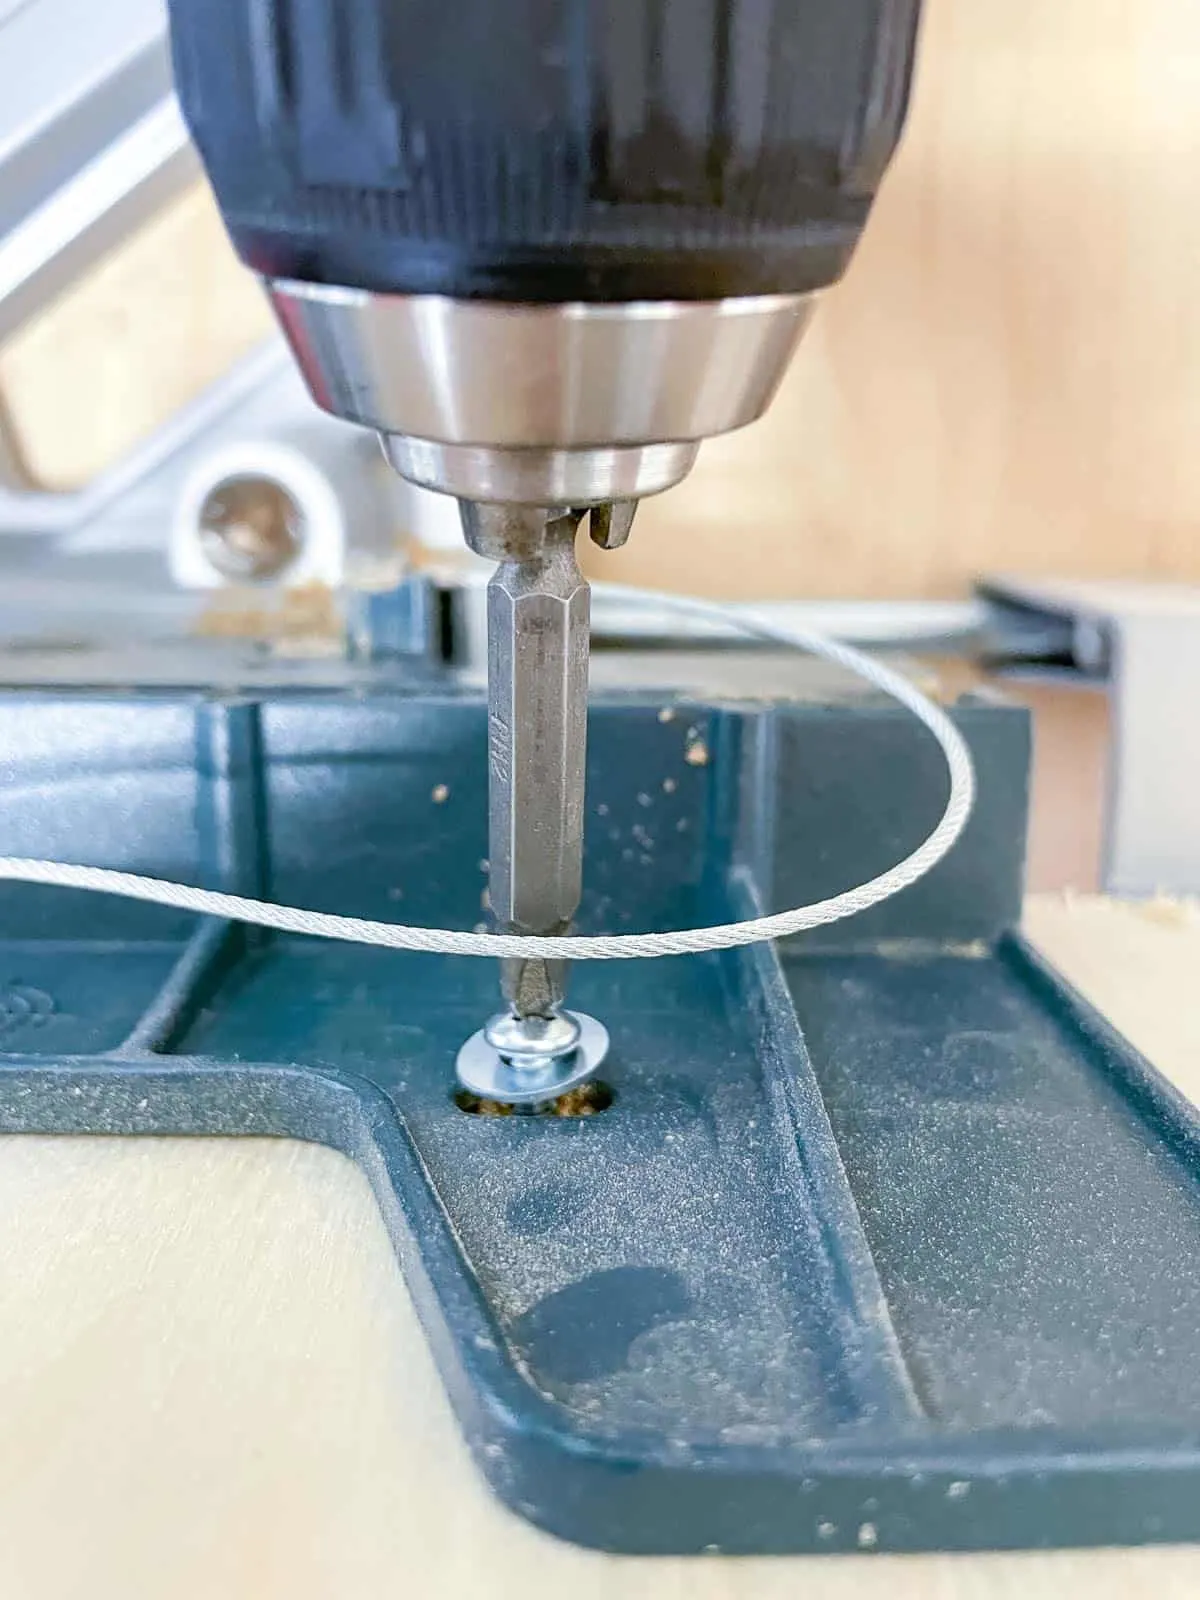
I made this simple miter saw stop block with a chunk of walnut I had leftover from another project, with a groove cut through the middle. Wooden runners the same width and depth as the t-track opening are glued into the groove, with a gap in the center for the t-bolt head.
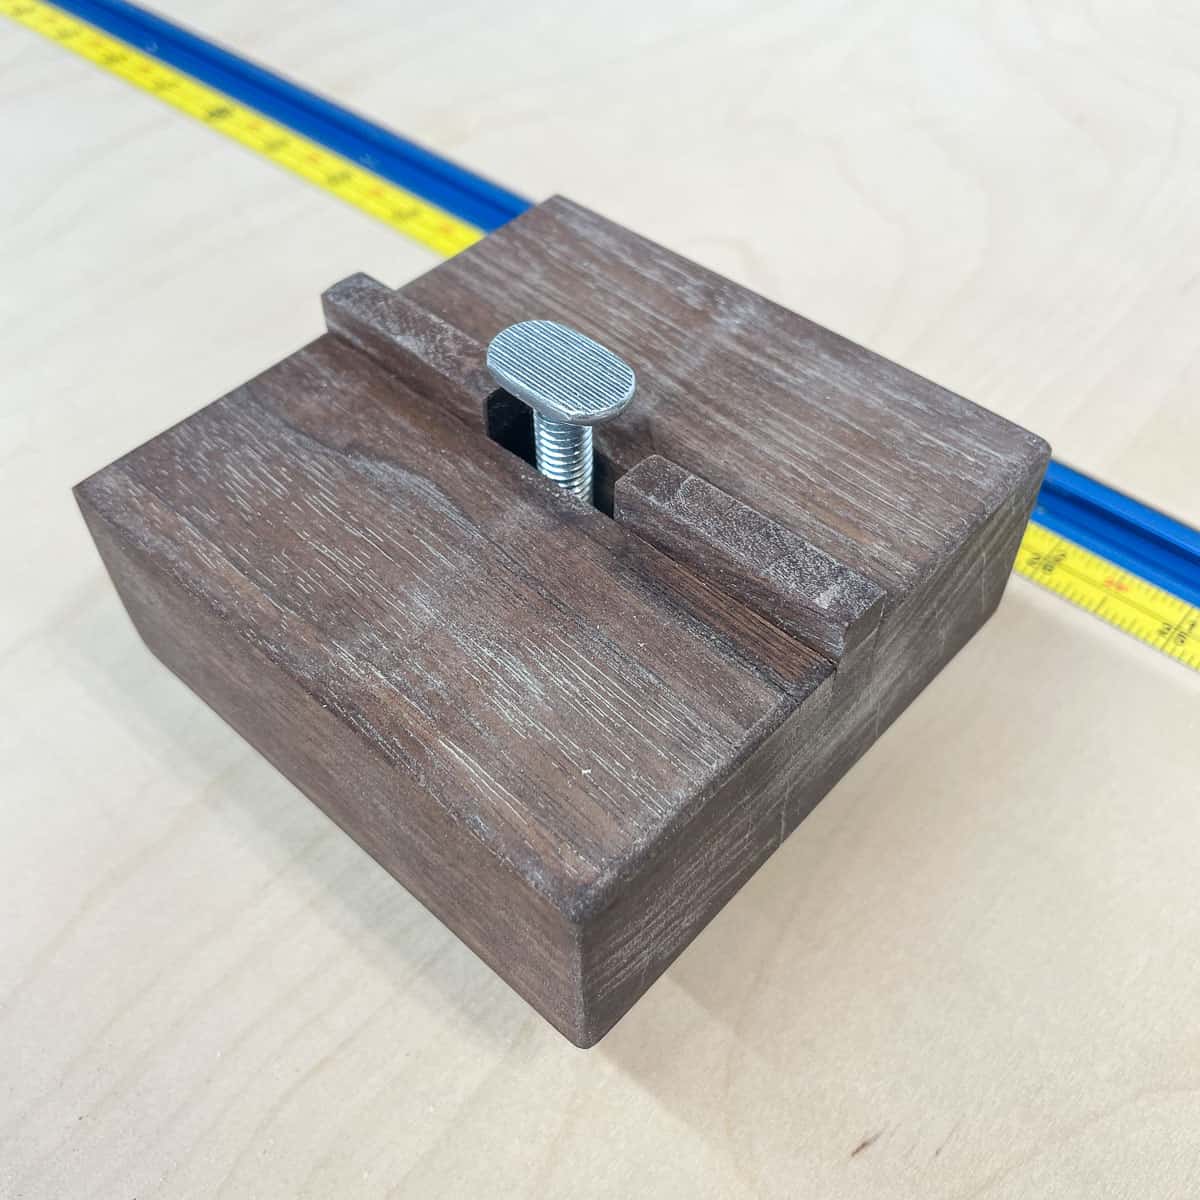
When the t-bolt and runners are inserted into the t-track, you can lock it down anywhere along the track with the star knob on top. The runners keep the block parallel with the track, so it doesn't twist when you tighten it.


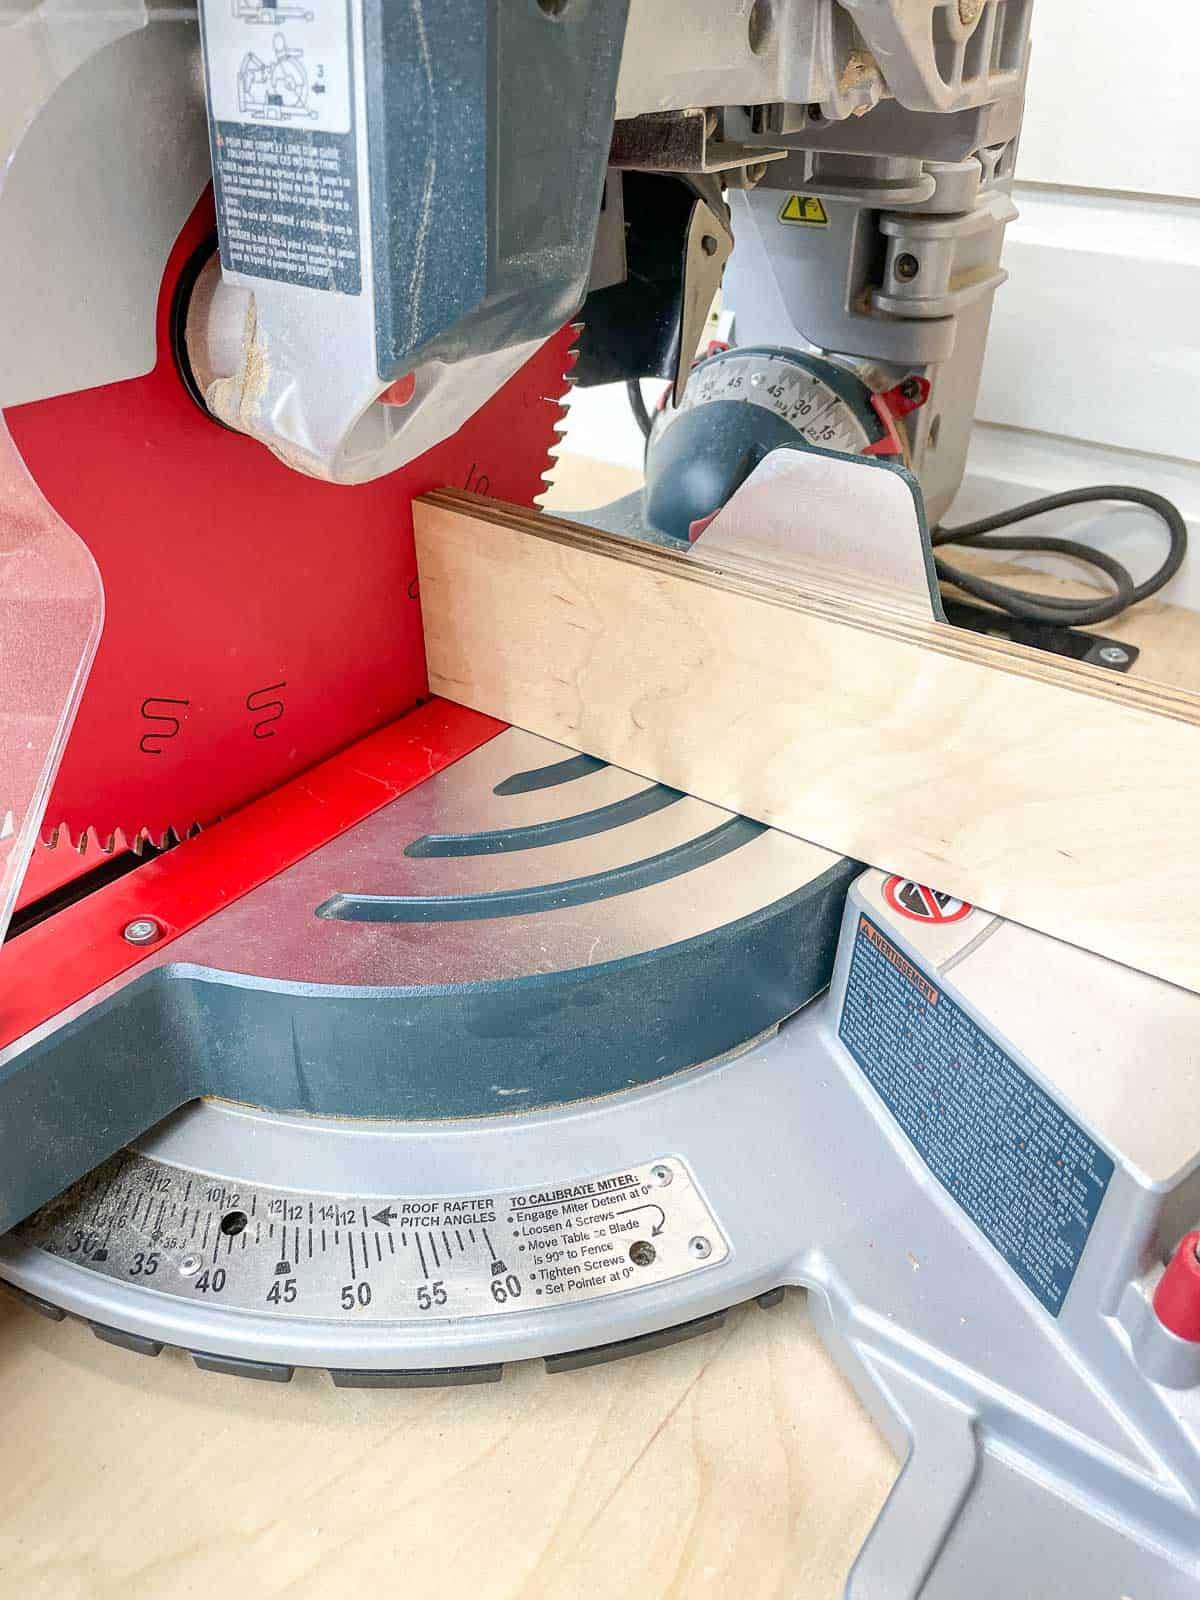
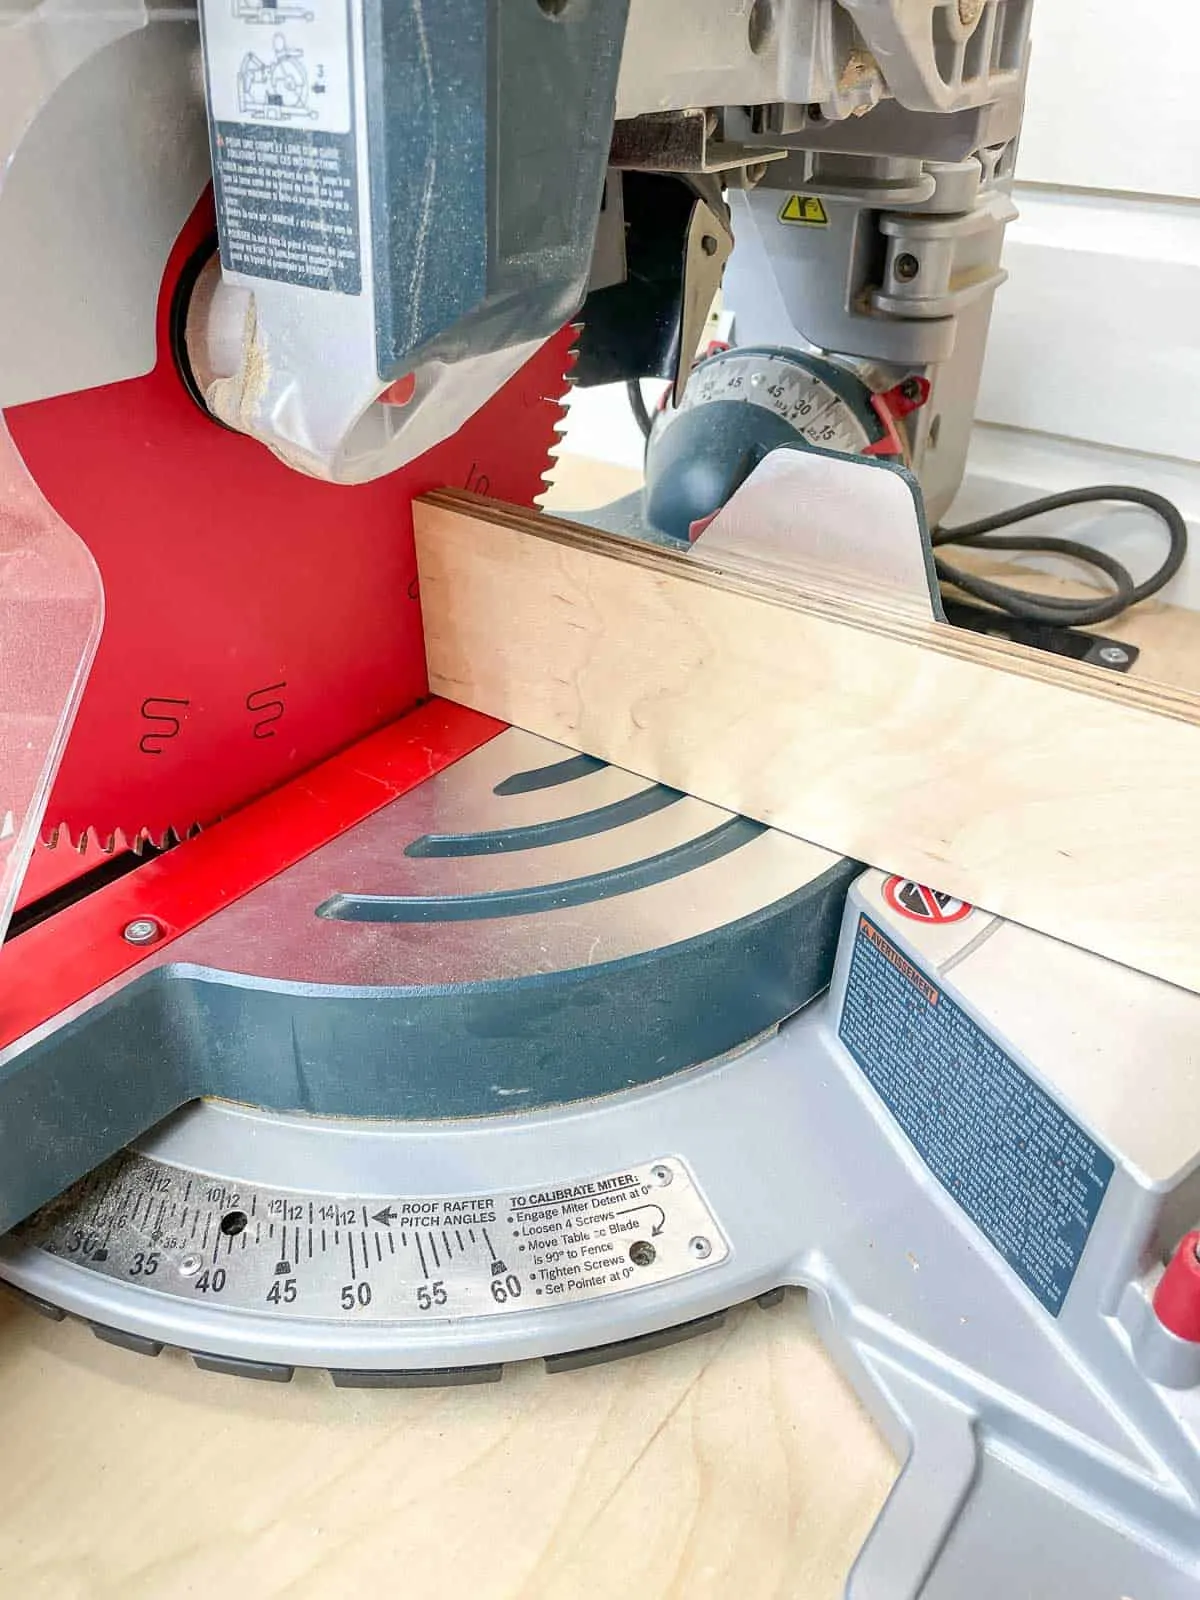
Once you have the measuring tape dialed in to the saw blade, just line up the edge of the stop block with the dimension you want. Then make as many cuts as you need, all the exact same length!

Pros
This stop block system allows you to use your miter saw station for things other than cutting at the miter saw! I love having the extra workspace for assembly or finishing, especially in my tiny workshop!
This method also allows for a straight cut at the blade, even if your board is less than straight. I've been working more with rough lumber, and my first step in the milling process is to cut it down into more manageable chunks. Now I can remove the worst of the board while keeping my cuts square.
Cons
You'll need a plunge router or a dado stack in the table saw to cut the groove for the t-track. While it isn't difficult, it may be a little advanced for a beginner.
Now that you know the three methods for making a miter saw stop block, you can crank out those woodworking projects without having to measure for each cut! This simple system really improved my productivity in the workshop, so I can keep making new builds to share with readers like you!
Check out these other workshop ideas!