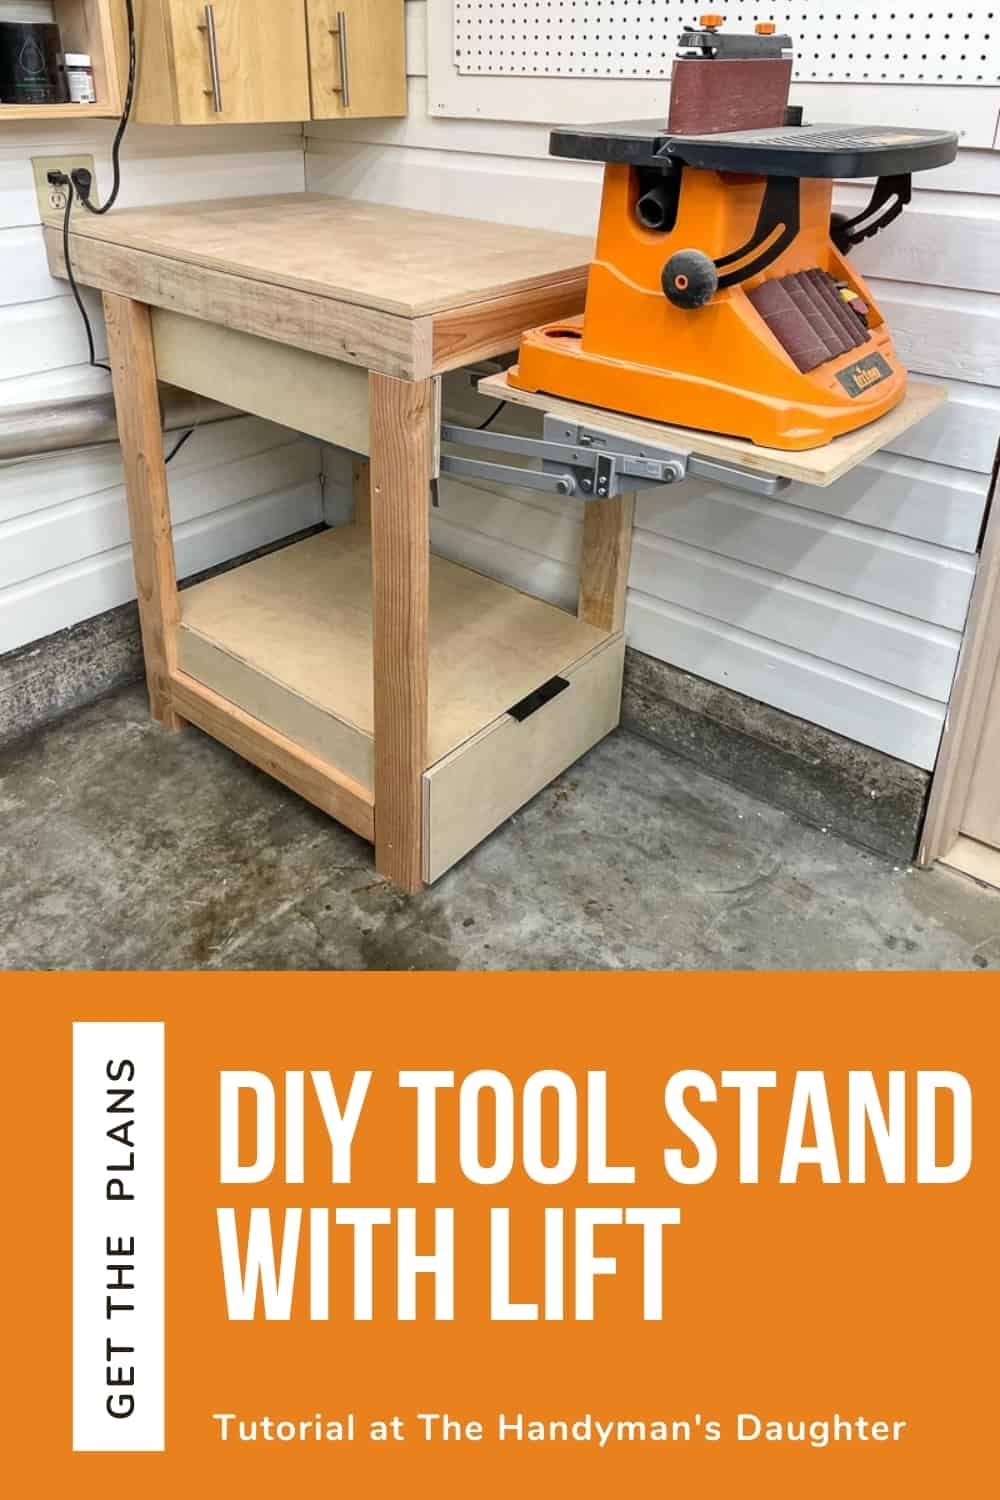
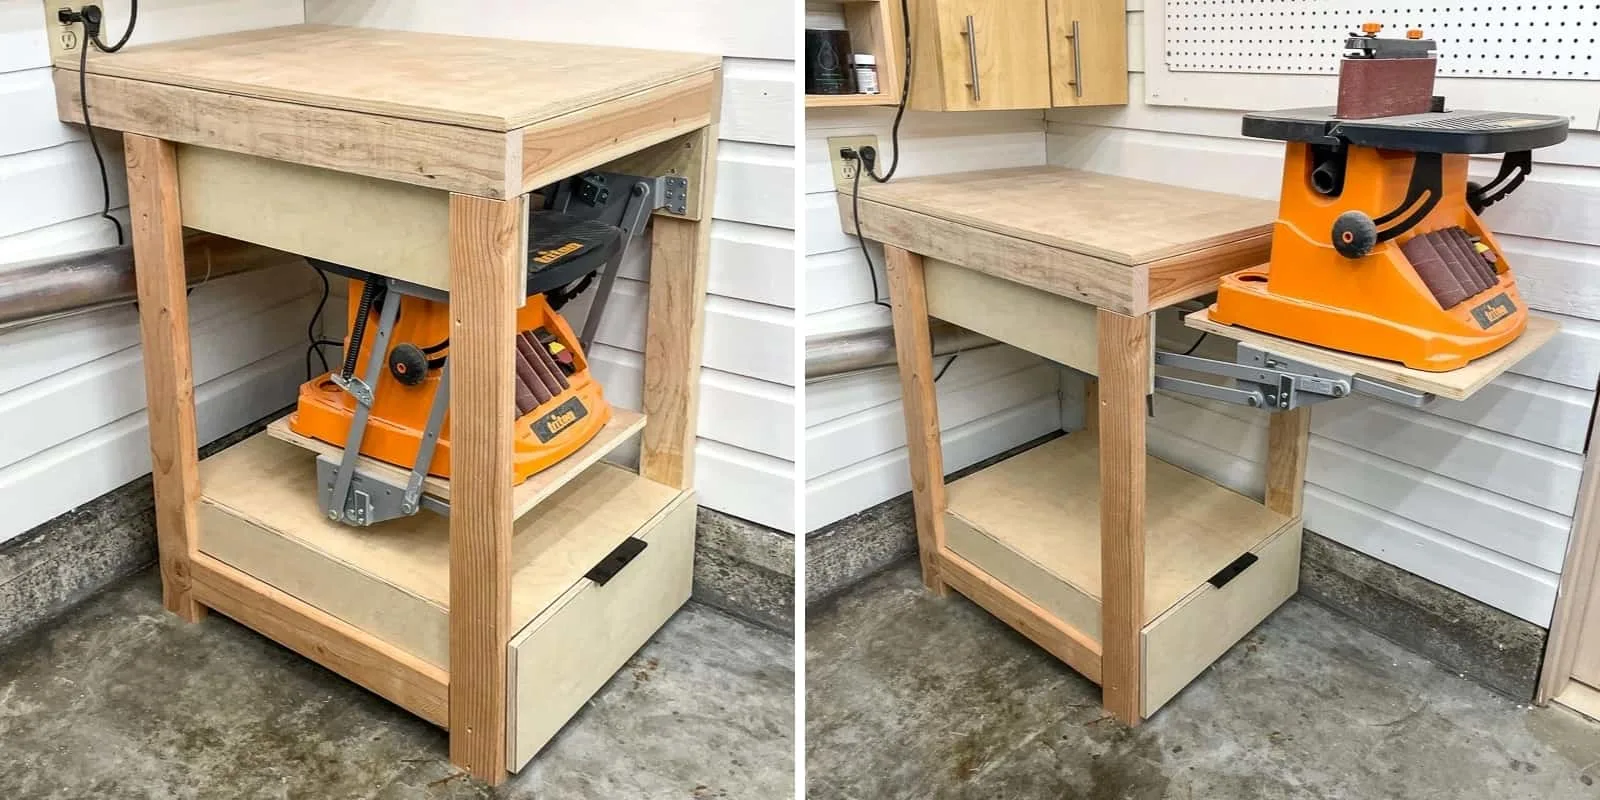
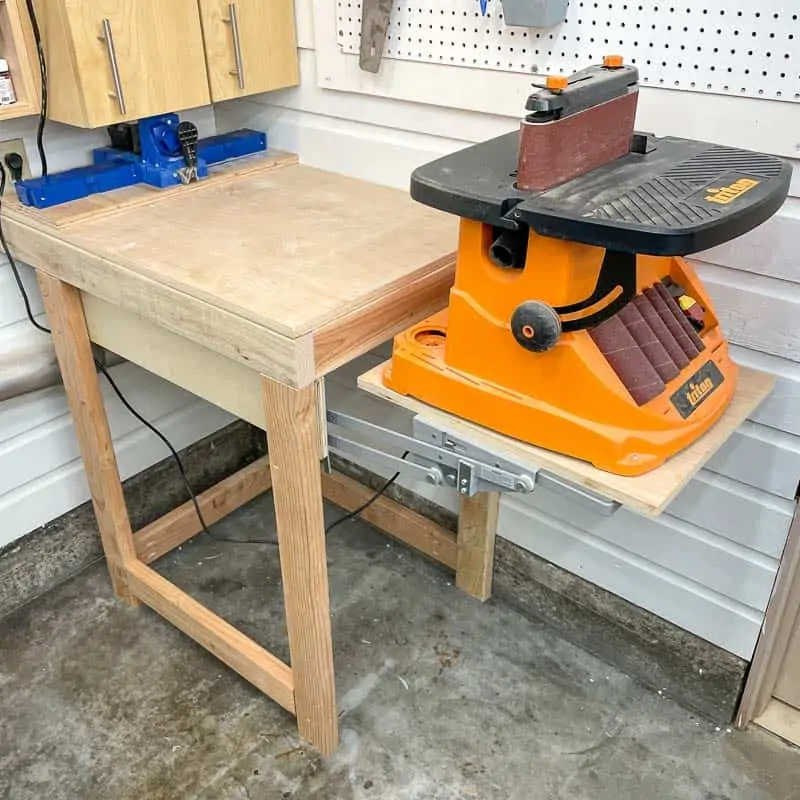
Instead of a flip top tool stand, try this clever alternative! A mixer lift slides the tool under the DIY tool stand, but pops up in seconds!

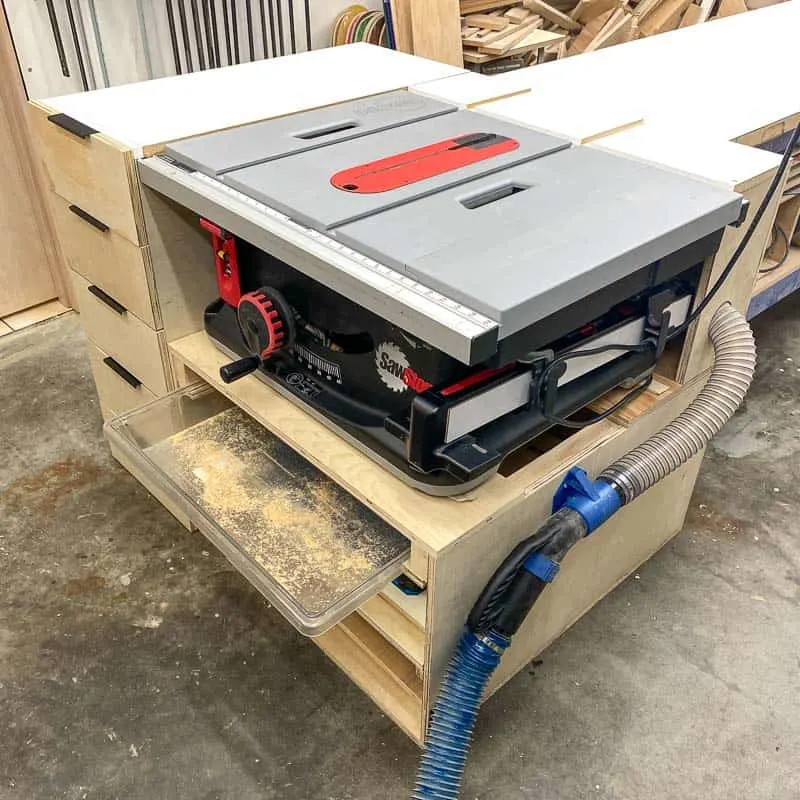
When you have a small workshop like mine, every inch of space counts! I've crammed a lot of power tools and storage into this one car garage, like this table saw stand or t-track table.

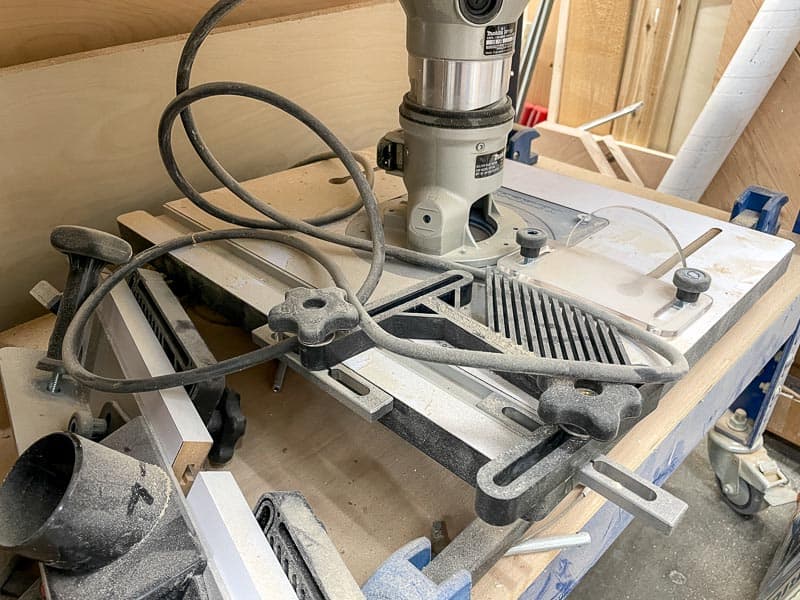
But I'm always adding new tools to my collection, and it's a challenge to keep them all accessible. If it takes too long to set up or dig it out from under a workbench, I won't use it! Case in point: this little router table that I haven't touched in a year...

I recently bought a new spindle/belt sander, and I was thinking of building a flip top tool stand like this one so the sander and thickness planer could occupy the same footprint. But there's not a lot of room for flipping action in this corner with the cabinets and shelves above it.

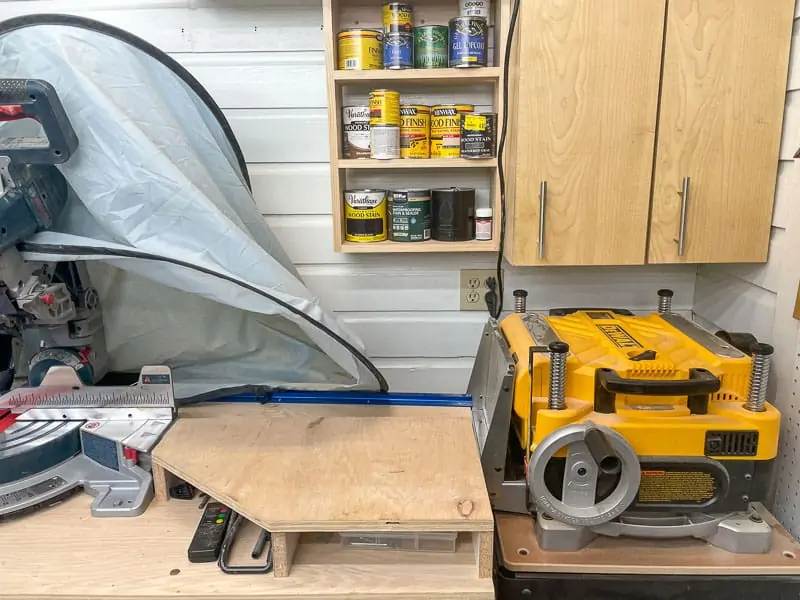
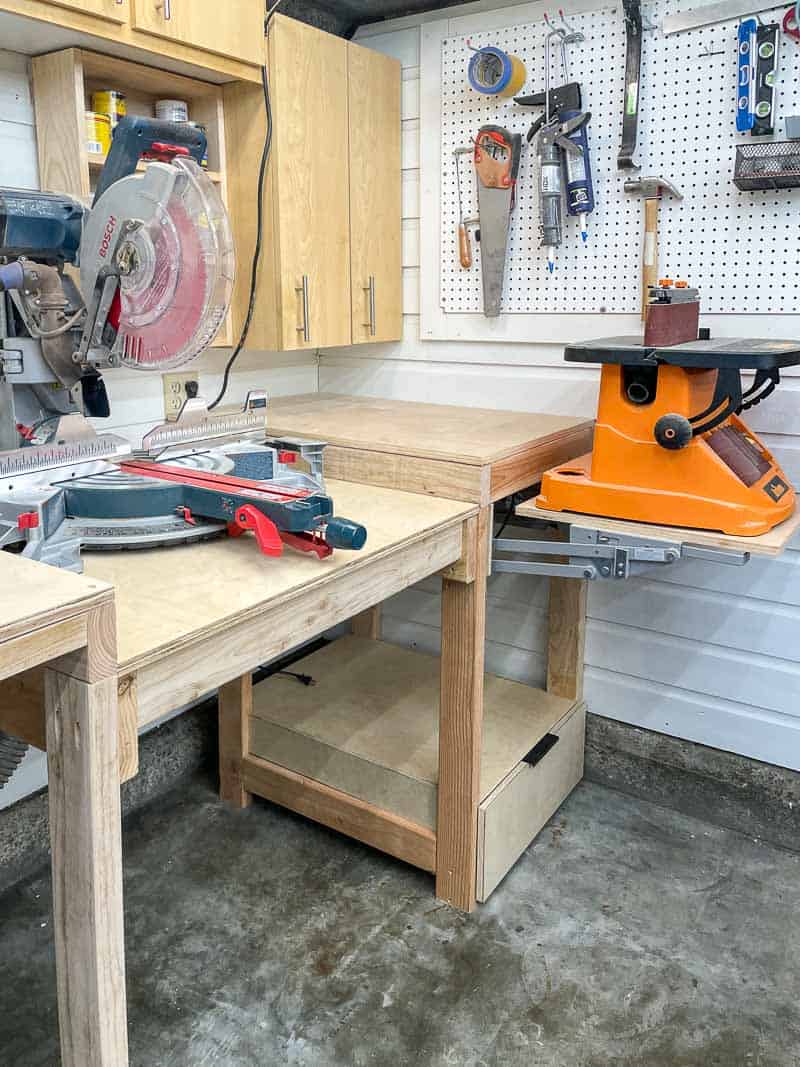
The other problem is that the planer gets in the way of long boards being cut at the miter saw. I really want to keep this work surface clear at all times!
After a lot of thinking, measuring and planning, I came up with a miter saw station design for this wall with easy access to four different tools.
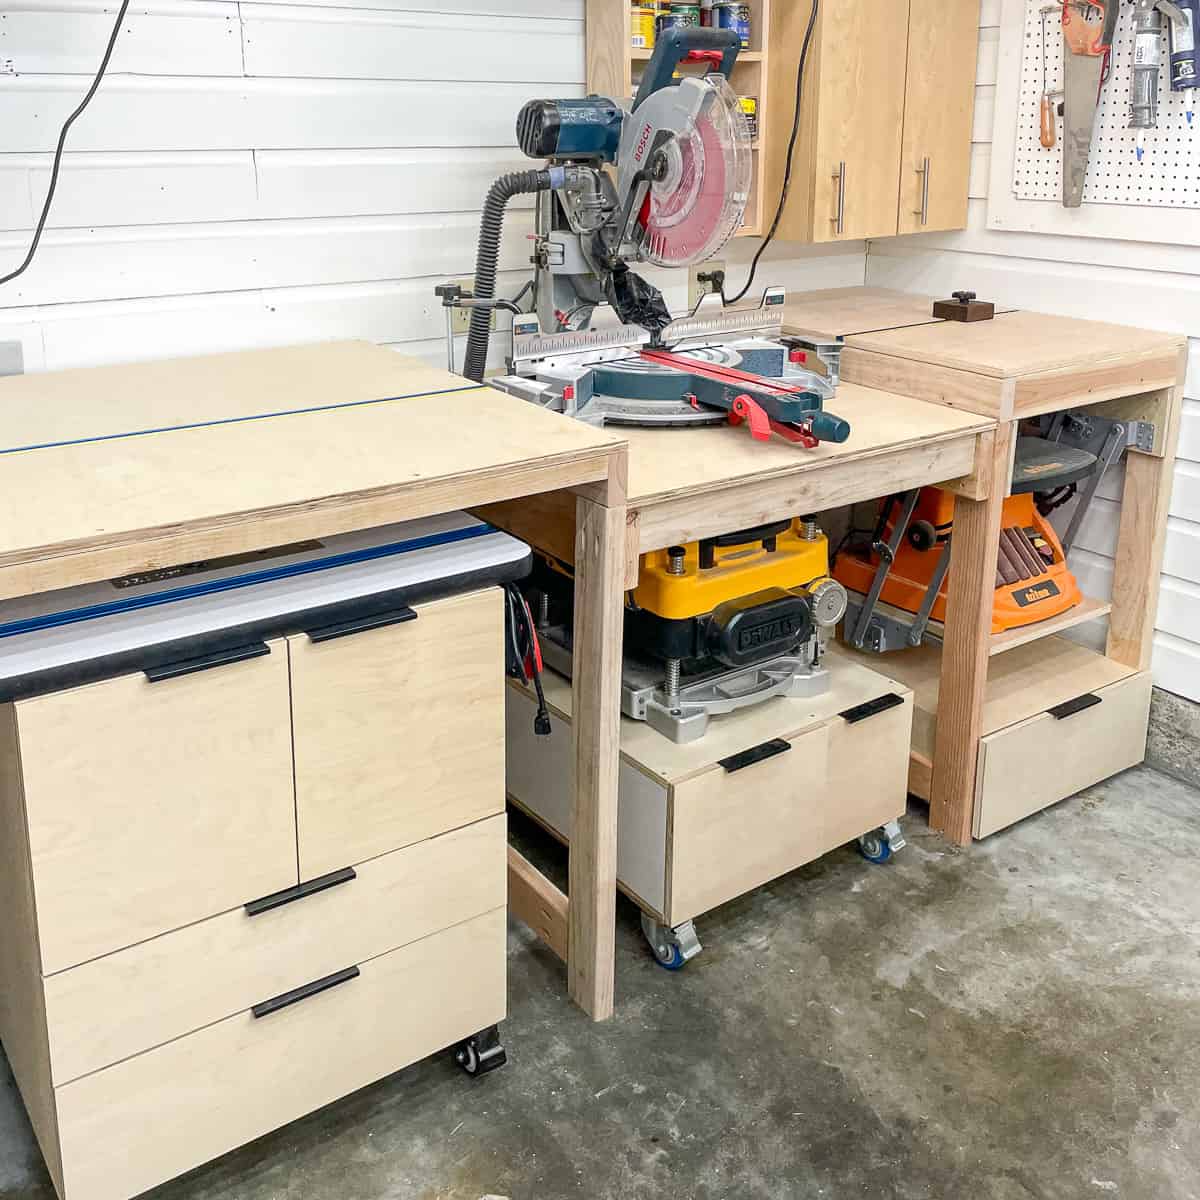

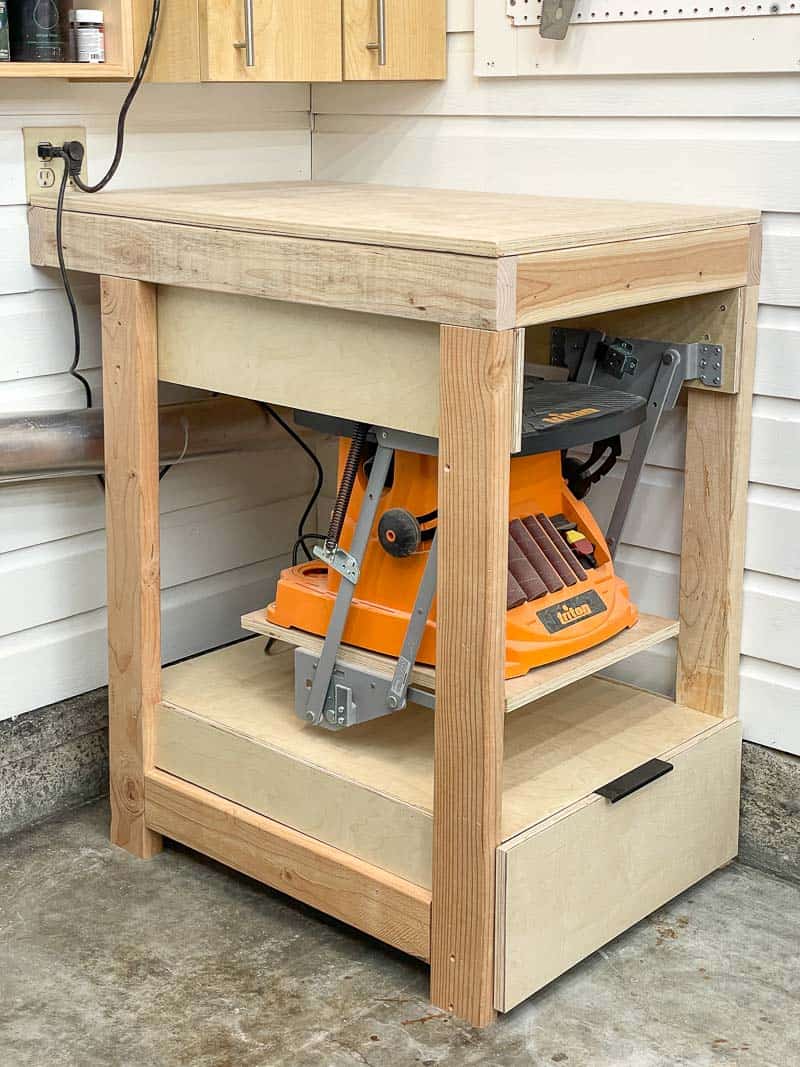
This simple benchtop tool stand is the first section, and I customized it with a mixer lift to raise and lower my new sander to countertop height easily. You could also skip the lift part and turn it into a mobile tool stand for your drill press or other benchtop tools by adding caster wheels.

It connects to the miter saw platform and creates a stable surface for cutting longer boards without cluttering up the top.
Ready to make your own simple power tool stand? Let's get building!
This post contains affiliate links for your convenience. Purchases made through these links may earn me a small commission at no additional cost to you. Please visit my disclosures page for more information.
Materials needed for DIY tool stand
- Four 2x4 boards
- One 1x6 board for drawer box
- One 4'x8' sheet of ¾" plywood
- 2'x4' sheet of ¼" plywood for drawer bottom
- Mixer lift
- 28" drawer slides
- Drawer pull
- Pocket hole jig
- 2 ½" pocket hole screws
- 1 ¼" pocket hole screws
- Table saw or circular saw
- Drill
- Square
- Wood glue
- Clamps
Things to consider before you begin
- This DIY tool stand is deeper and taller than a standard cabinet (usually 25 ½" deep and 36" tall). Adjust the dimensions accordingly if this height is uncomfortable for you.
- This tool stand MUST be attached to the wall to prevent it from tipping when the lift is raised.
- The lift should only be used for tools that don't have a blade, such as a sander. The lift will vibrate with the motion of the tool, and may cause a blade to move unexpectedly. Safety first!
- You could fit two tools in this stand by adding a second lift to the back and attaching the stand to the wall along the side.
- Measure the width of your tool before you start building. You may need to alter the opening to accommodate larger sanders or other benchtop tools.
How to make a tool stand with lift
Download the woodworking plans
You can download the tool stand plans by clicking the button below! The printable PDF includes a cut list and diagram to get the best use out of your materials, step by step instructions with 3D models, and a handy checklist to keep you on track.


The woodworking plans differ slightly from the photos shown below, because I was making it up as I went along! Here are the differences, and why I made the changes:
- I recommend plywood panels for the sides to prevent some of the issues I had installing the mixer lift and drawer. You could even make the entire tool stand out of plywood!
- I had to work around the dryer vent that extends the entire length of this wall, so the back legs are set back from the edge about six inches. I'm assuming you don't have this issue, so I left that part out in the plans.
Assemble the frame
I took apart my old miter saw stand and reused the 2x4 lumber for this project, so you might see stray pocket holes that aren't being used for the tool stand. Just ignore them! 😉
Cut all the 2x4 pieces as indicated in the plans, and drill pocket holes in both ends of the shorter pieces. Put together both sets of legs, then join them with the back pieces.

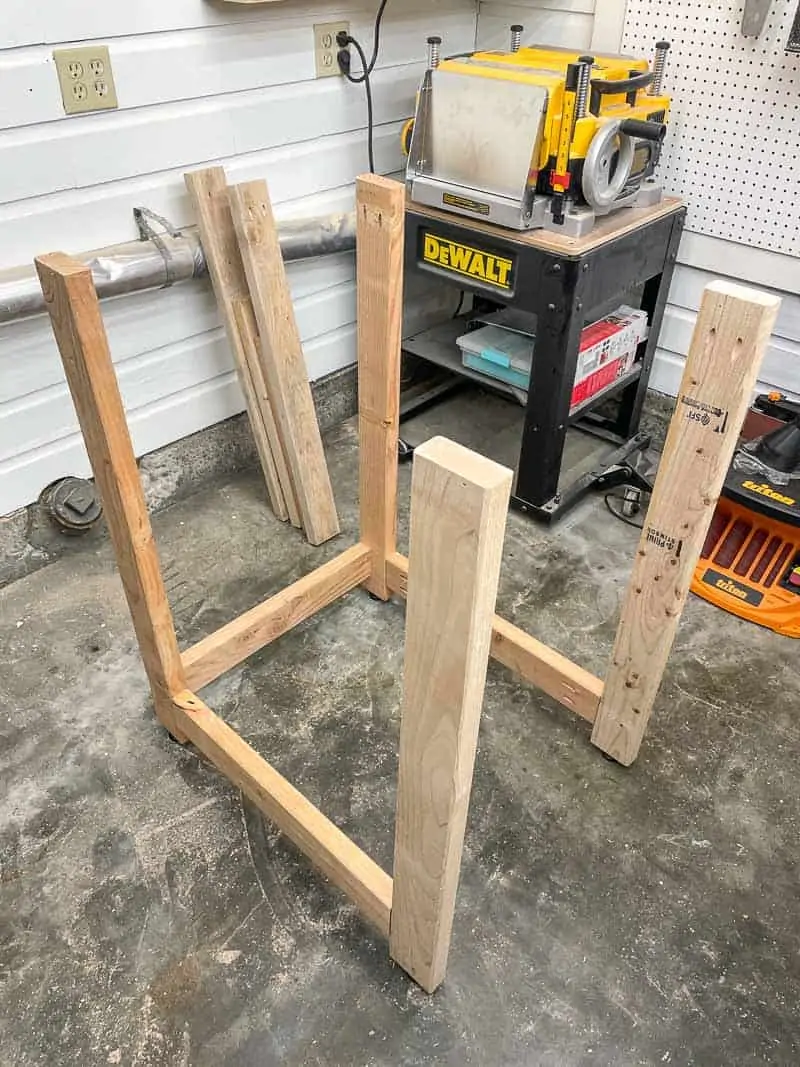
The top of the frame extends past the back legs to go over the dryer vent, and rests just below the electrical outlets on the wall.

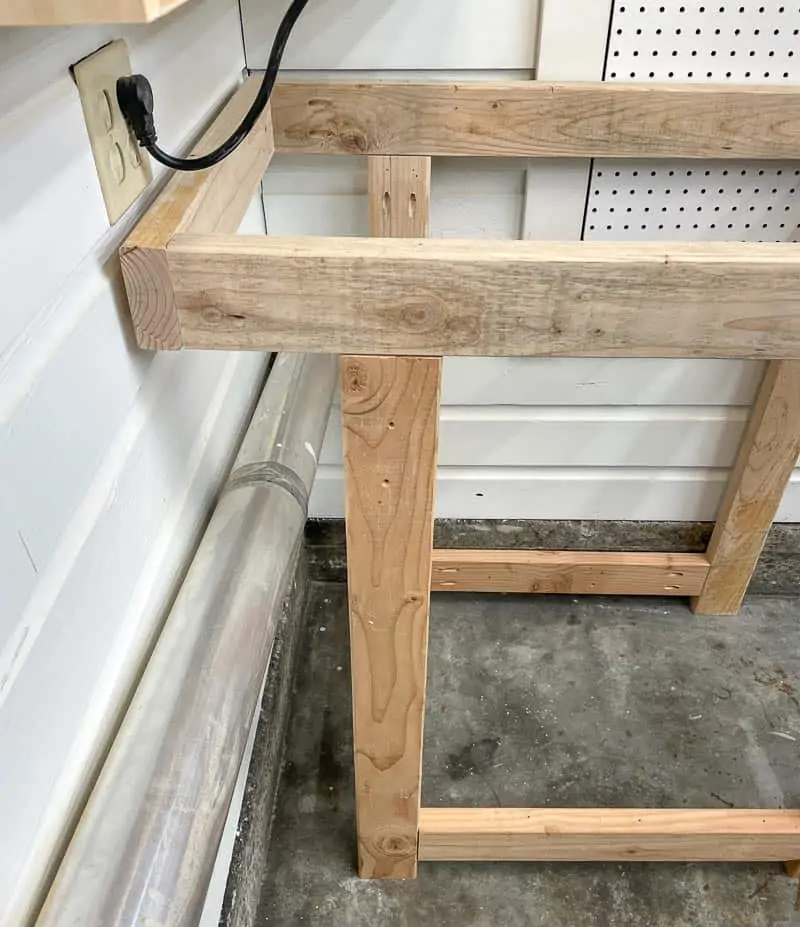
I shortened the pegboard behind the stand, then attached the frame to the wall. One of the benefits of having solid wood walls is that you can screw into it anywhere without having to worry about hitting a stud!
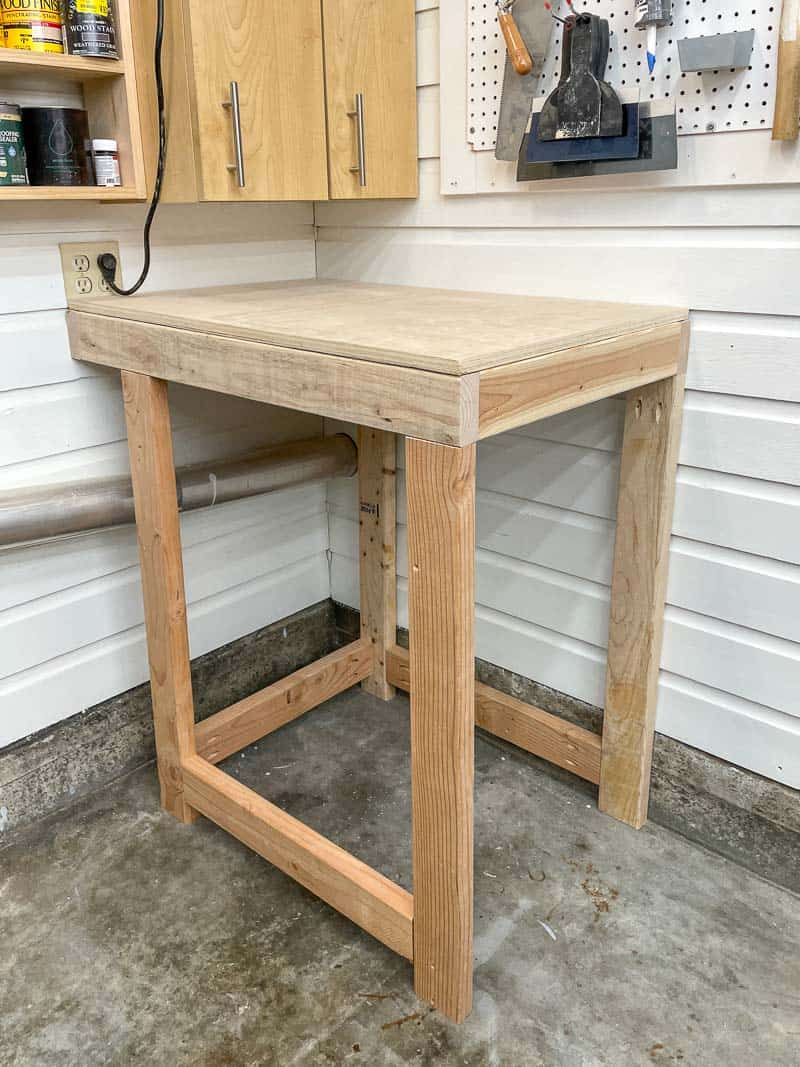
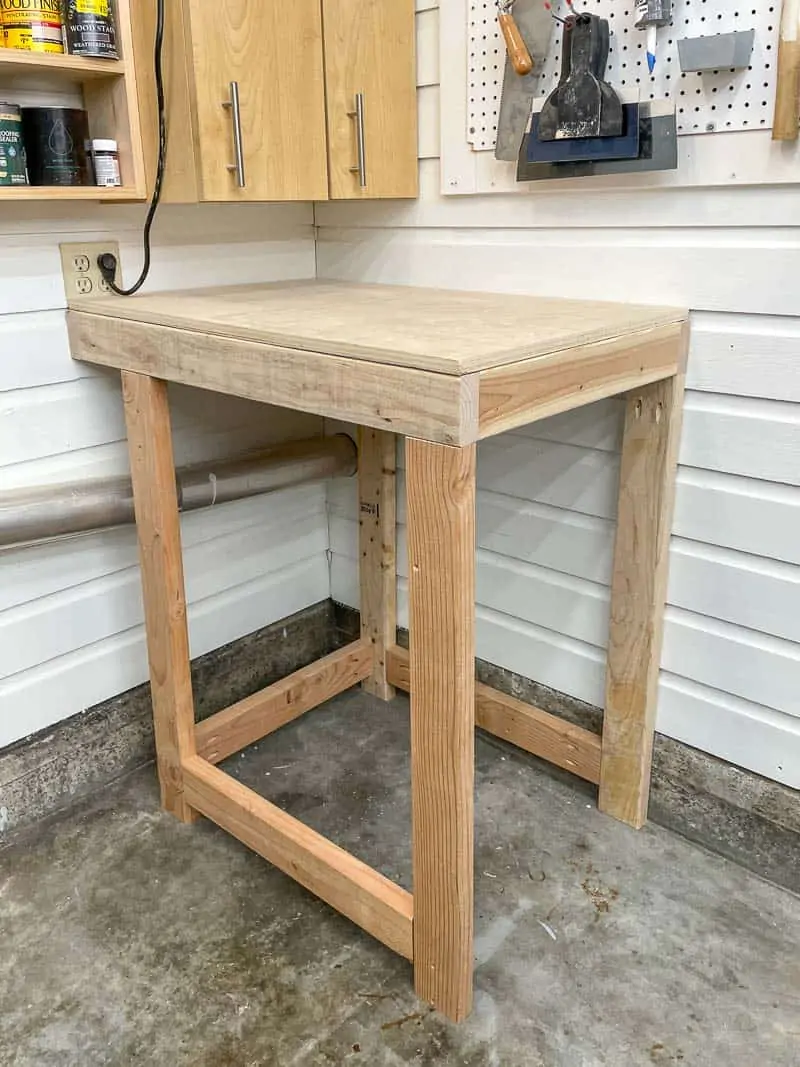
You can cut the plywood for the top now, but wait until after the mixer lift is installed before you permanently attach it to the frame. It's much easier to access the lift hardware with the top removed!
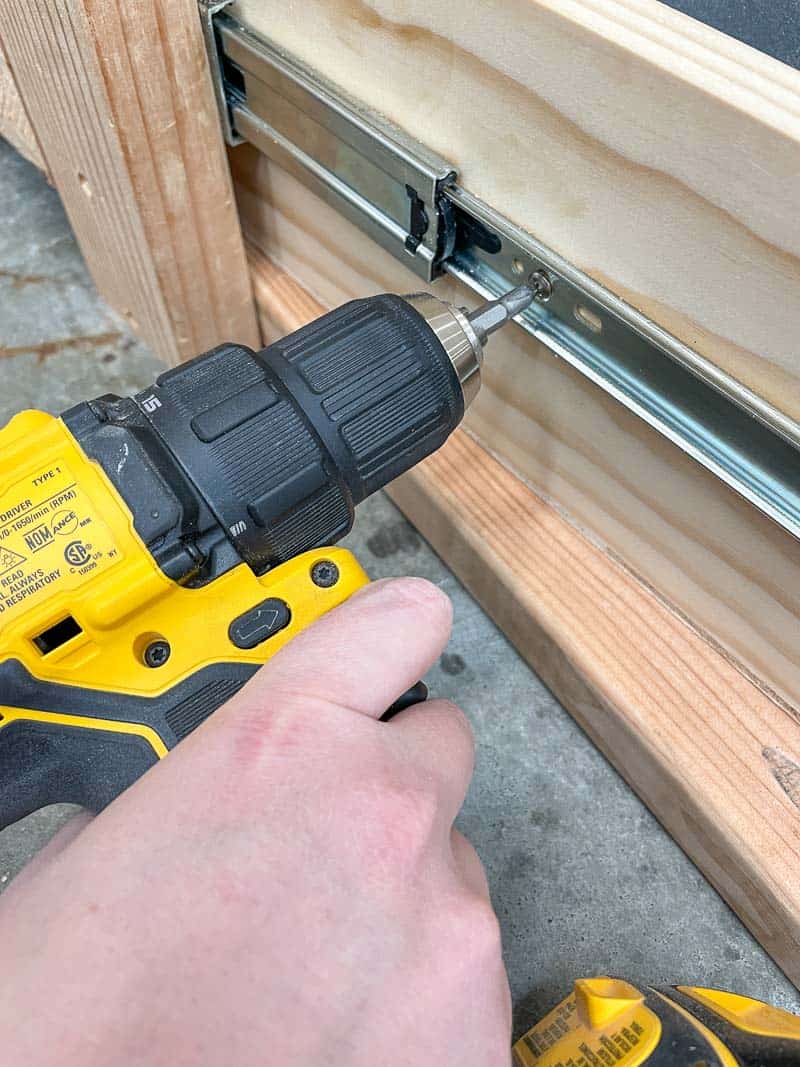
Install the mixer lift
Follow the manufacturer's instructions on how to install the mixer lift. I used the Rev-a-Shelf mixer lift, and it includes detailed instructions that I'm not going to repeat here. The video below was also really helpful!
I had to add plywood to the inside of the frame to install the lift properly, and it caused a few headaches during installation. In the woodworking plans, I changed the design to incorporate plywood panels into the frame so you don't run into the same issues!
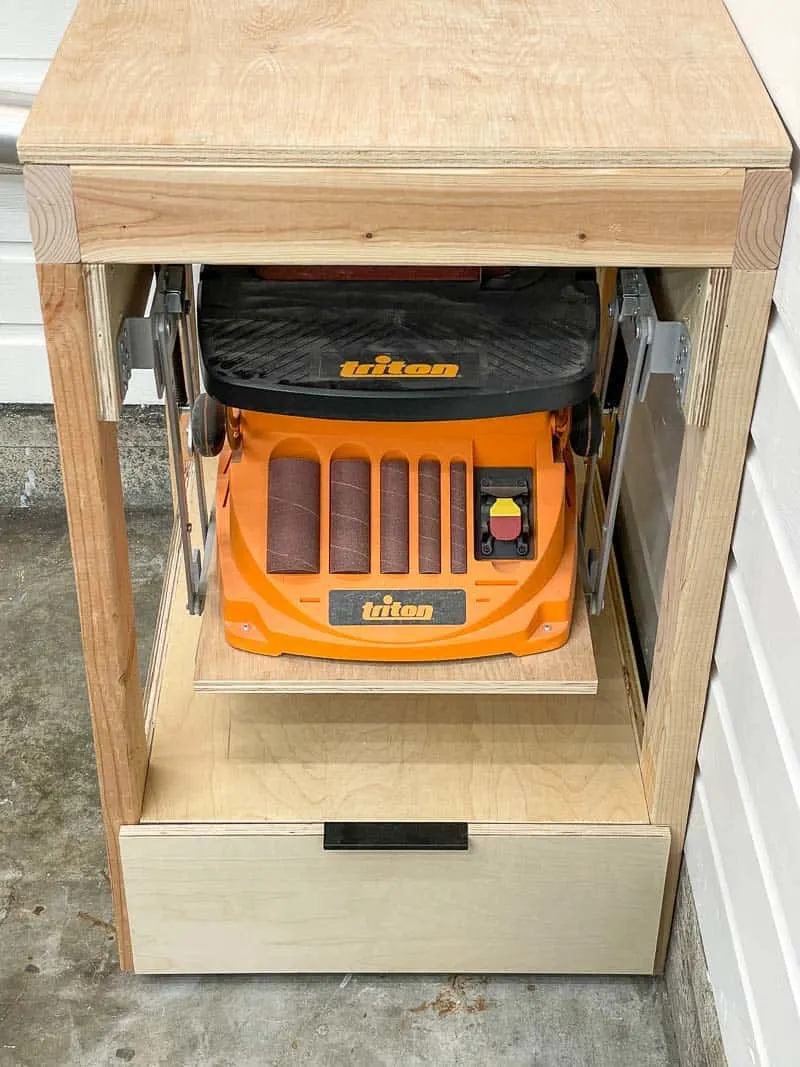
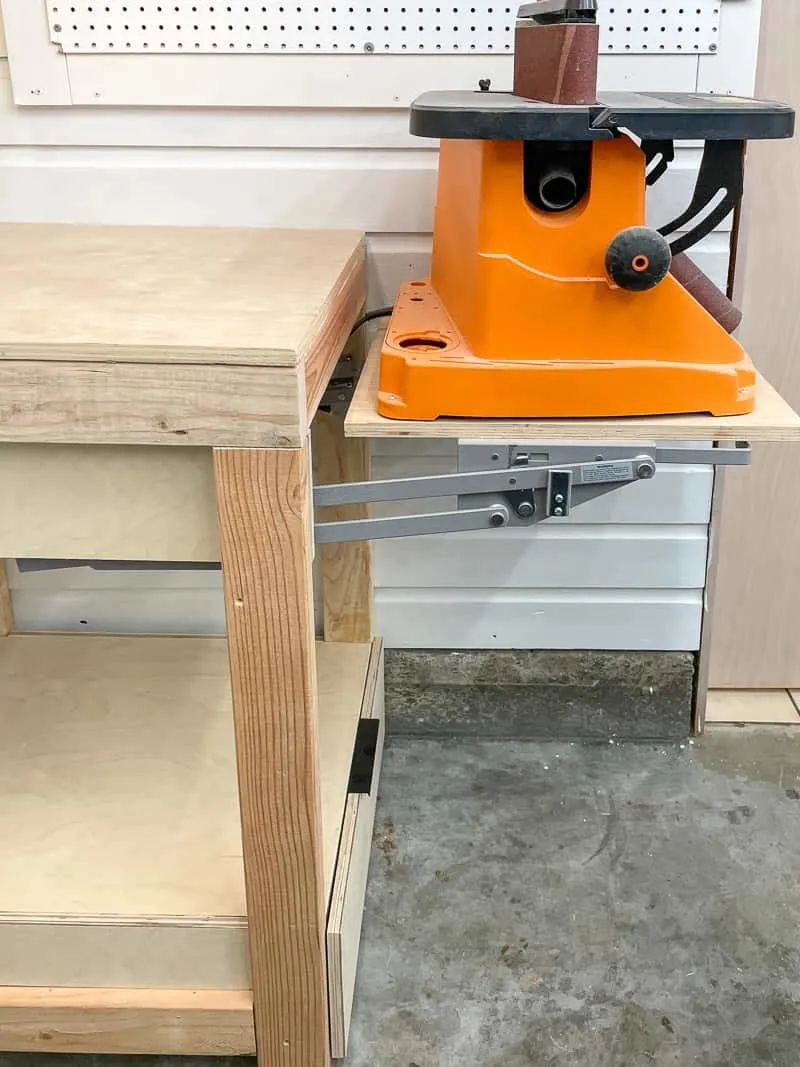
Once the lift is installed, measure the space between the two brackets for the platform. I had just enough room to fit my sander facing forward, but I might change it to face sideways so the wall doesn't get in the way on the right side.

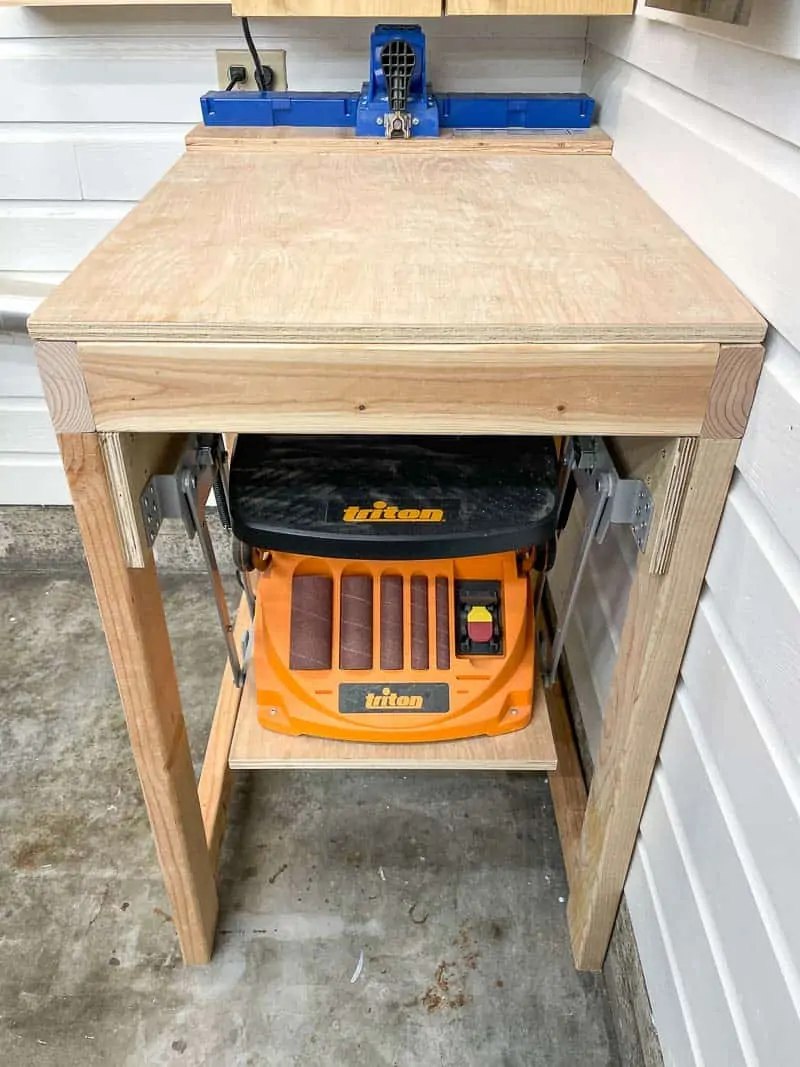
Make sure your tool is bolted securely to the platform, and the frame is attached to the wall, then test it out! I was pretty excited to see it all working smoothly on the first try!

Install the drawer
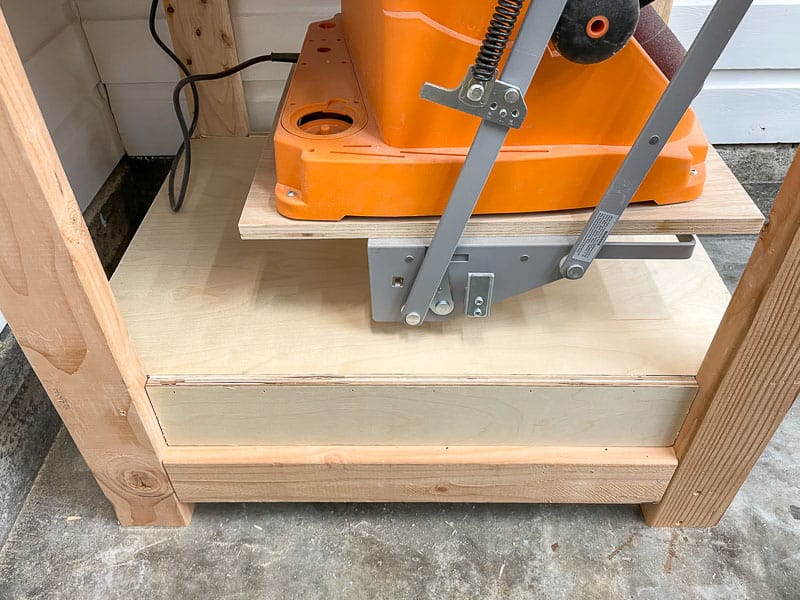
You could skip this step and call the tool stand complete, but I just couldn't waste any of that space below the sander! I wanted one deep, long drawer underneath for all the sander accessories and sandpaper, plus my dust collection supplies.
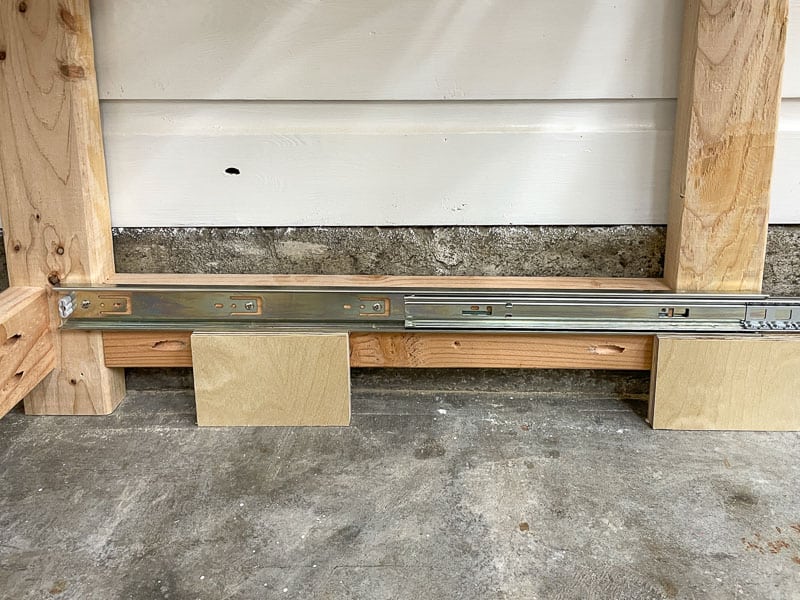
First, I installed the cabinet side of the drawer slides, using scrap plywood as a spacer. These are 28" drawer slides, which is the same depth as the inside of my tool stand frame.

I slapped together a little platform with supports on the sides to create a shelf under the sander. This shelf will serve as the top of the drawer and the sides prevent sawdust from getting inside.

The woodworking plans show a much simpler solution to this problem! This is why you should plan things out before you start building! 😉
The drawer box was built from a single 1x6 board I had left over from my spray paint storage rack project. I like to buy an extra board whenever possible in case I screw up!
There are a lot of different ways to build a drawer. This one is assembled with pocket holes with a ¼" plywood bottom glued and nailed in place. I propped up the drawer box on some 2x4 scraps while I screwed the other side of the drawer slides in place.

Finally, I cut the drawer front out of plywood and added a drawer pull to the top edge. I used these drawer pulls on the table saw stand, and I had one left in a drawer. They're low profile, so I won't accidentally snag something on them as I rush around the shop, and they're super easy to install.

My shop is a disaster with everything that was stored in the miter stand scattered all over the place. It was nice to corral all my dust collection accessories into this huge drawer!


Enjoy your new tool stand!
This is such a great alternative to the popular flip top tool stand. You could easily add a second lift to the back, giving you access to two tools in the same footprint while keeping the entire workbench on top clear. In a small workshop, every piece needs to do double or triple duty!

The lift is really sturdy and locks into place in the upright position. There's some wiggling when the sander is moving, but a mixer would do the same thing!

Don't forget to download the DIY tool stand plans by clicking the box below!
Check out the rest of the miter saw station projects!