This small workbench features a T track top for clamping, lots of shelves for storage, and wheels to move it around. Get the woodworking plans to make your own!

The workbench is the heart of every workshop. In a small shop, it's where you cut, assemble, sand and finish all of your projects.
So the ideal workbench needs to fill a lot of different roles:
- large enough to build an average project, but small enough to move out of the way
- a perfectly flat surface with plenty of clamping areas
- lots of storage for tools underneath
- wheels to move the workbench around that also lock securely when in use
My Kreg workbench has served me well over the years, but it has a few frustrating limitations that has me looking to upgrade.

I can only clamp along the outside edges, so I have to get creative positioning boards on top. It's also long and narrow, making it difficult to build larger projects. And even with the addition of a laminate sheet on top, it still wasn't perfectly flat.
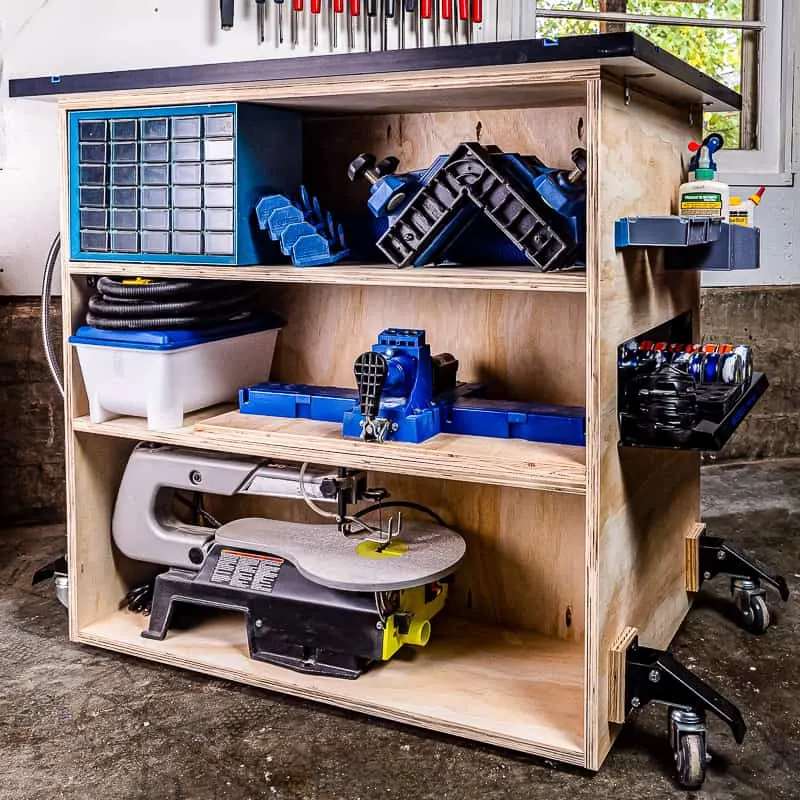
I built a sander and sandpaper storage box and nail gun organizer to fit underneath, but the rest of the bottom shelf is still a dumping ground for tools that don't have a home elsewhere.

So I decided to build a new mobile workbench with a clamping table top and tons of storage! Here's how I made it!
This post is sponsored by Rockler and contains affiliate links for your convenience. Purchases made through these links may earn me a small commission at no additional cost to you.
Materials Needed
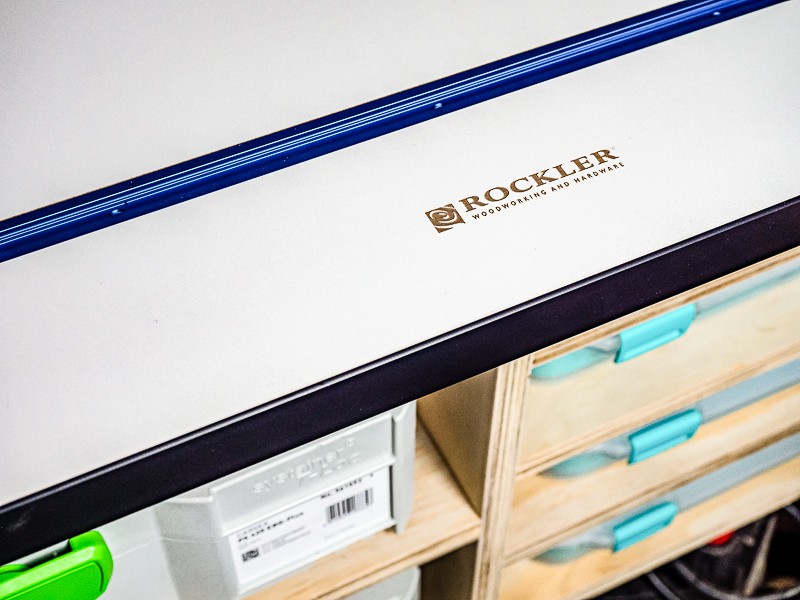
- Rockler 28" x 40" T-track workbench top and accessories
- 2 sheets of ¾" plywood
- Pocket hole jig
- 1 ¼" pocket hole screws
- Workbench casters
- Small L brackets with ¾" wood screws
- Clamps
- Square
- Measuring tape
- Drill
- Table saw, circular saw or track saw
- You can also have the plywood pieces cut to size for you at the store! I usually have plywood cut down into manageable sizes first so I can fit it in my car.
Download the Plans
Before I start any build, I make a 3D model in SketchUp first. I started by measuring all the tools I wanted to store, and came up with a configuration that would fit them all with room to grow.
I've included the model of my exact set up, plus a blank one so you can customize the shelves to fit your needs. You can get the woodworking plans by clicking the button below!

Cut and assemble the base frame
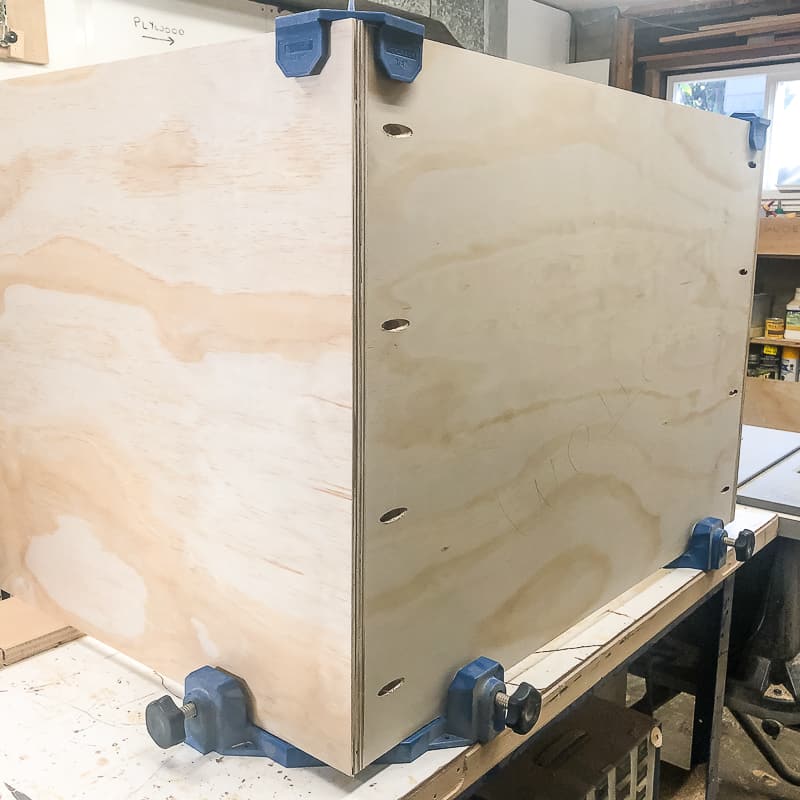
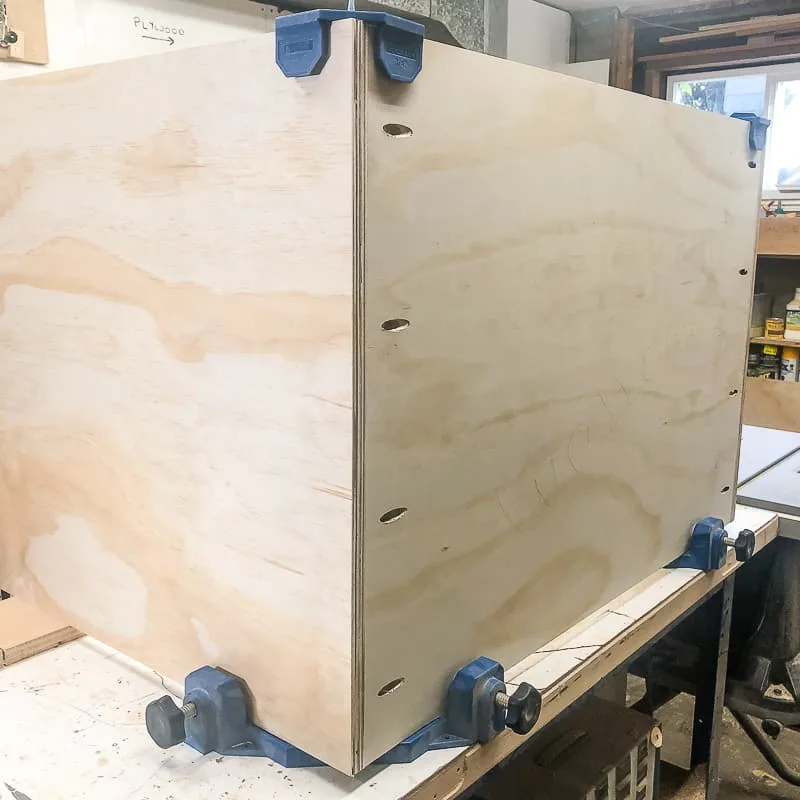
The base of the t track table is shaped like an H. The center divider supports the top and creates two separate sides for shelves instead of one big, cavernous space.
That divider is the biggest piece of the entire build, so cut that part from your plywood sheet first. It gets pocket holes drilled all the way around.


The remaining frame pieces are cut from the second sheet of plywood. I've included a cut diagram in the plans, as well as a pocket hole checklist so you can drill them all at once.

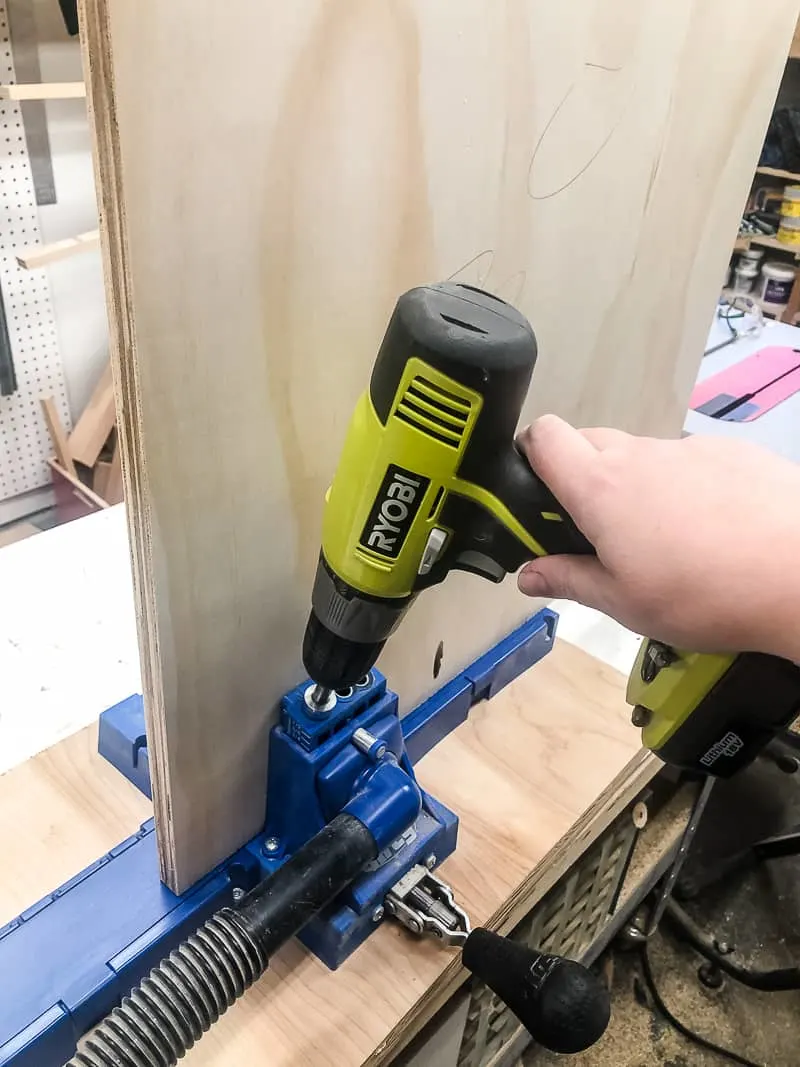
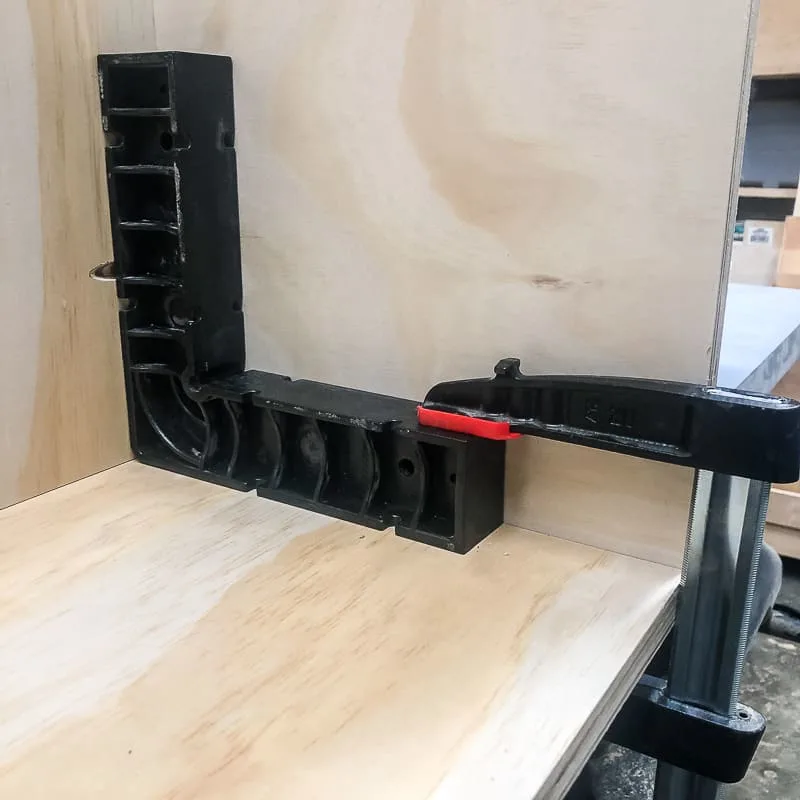
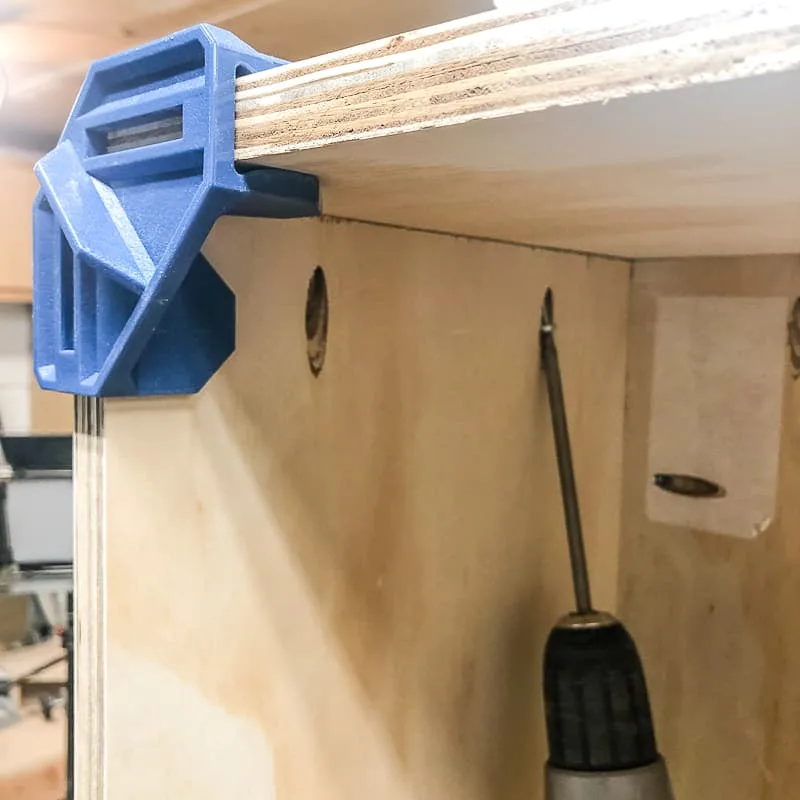
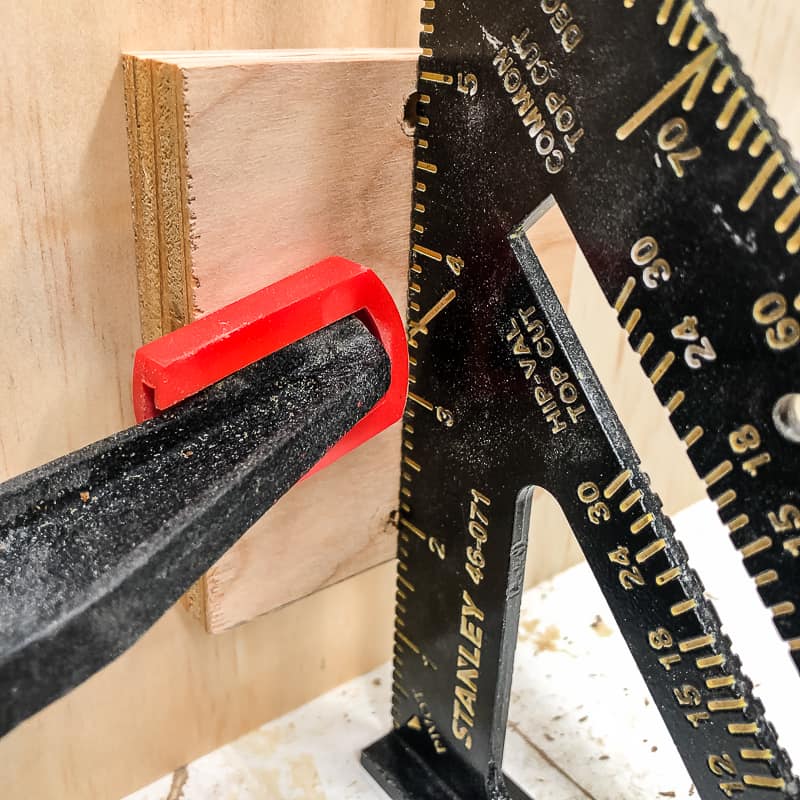
Attach the bottom to the sides with 1 ¼" pocket hole screws. I used Rockler's corner clamping jig and clips to hold the sides in place while I screwed everything together.
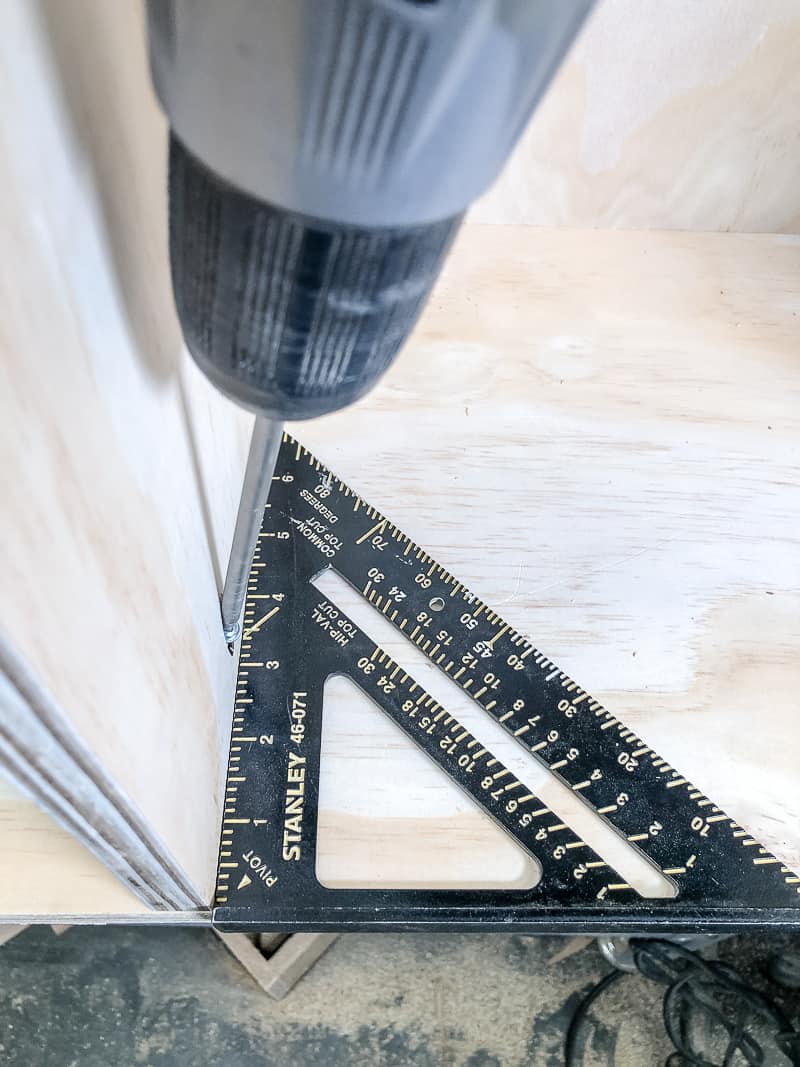
Next, slide the center divider between the two sides and position it at the depth you want your shelves to be. Hold the divider vertically by clamping a square against it while you drive in the screws.

Finally, attach the top of the box with more pocket hole screws. You could save yourself some plywood and just use the t-track top, but I wanted to avoid putting a bunch of holes on the underside that could weaken the melamine.

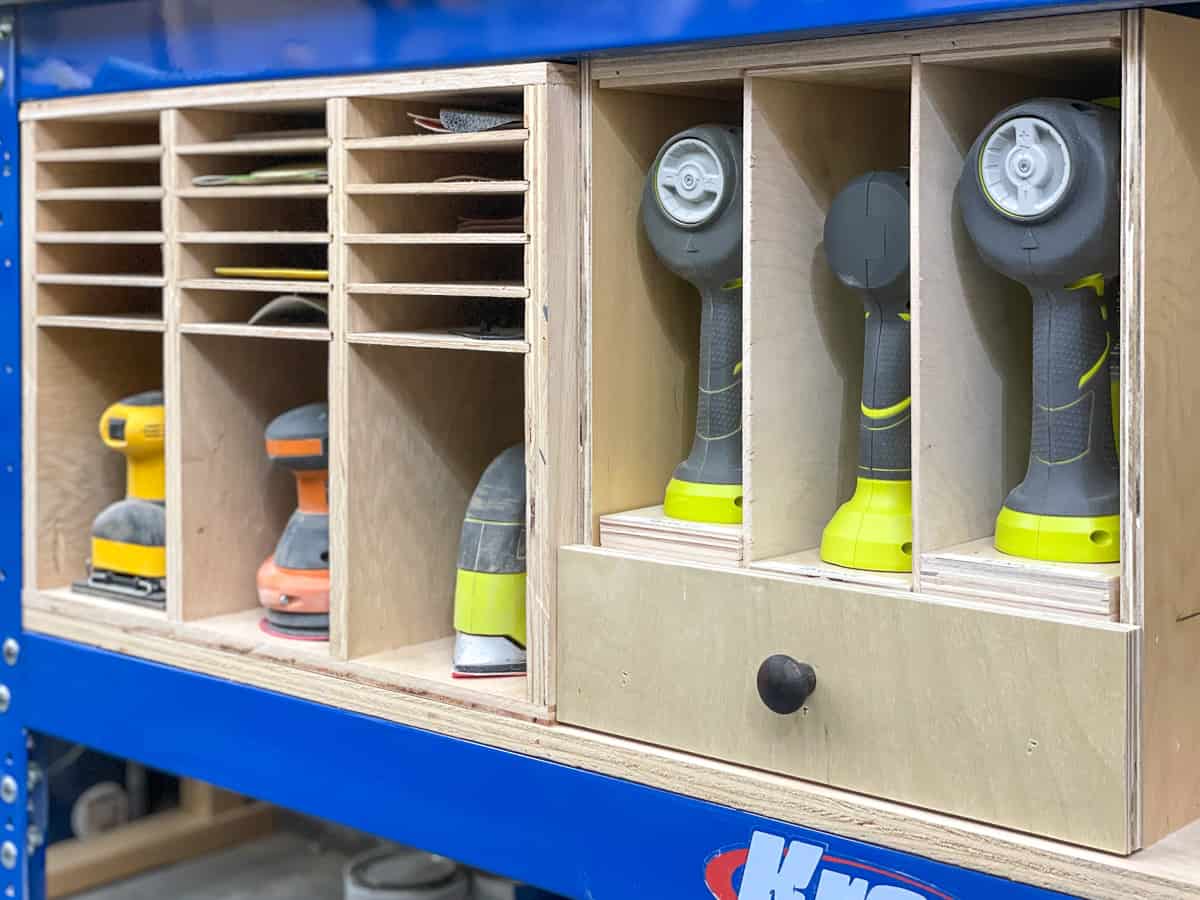
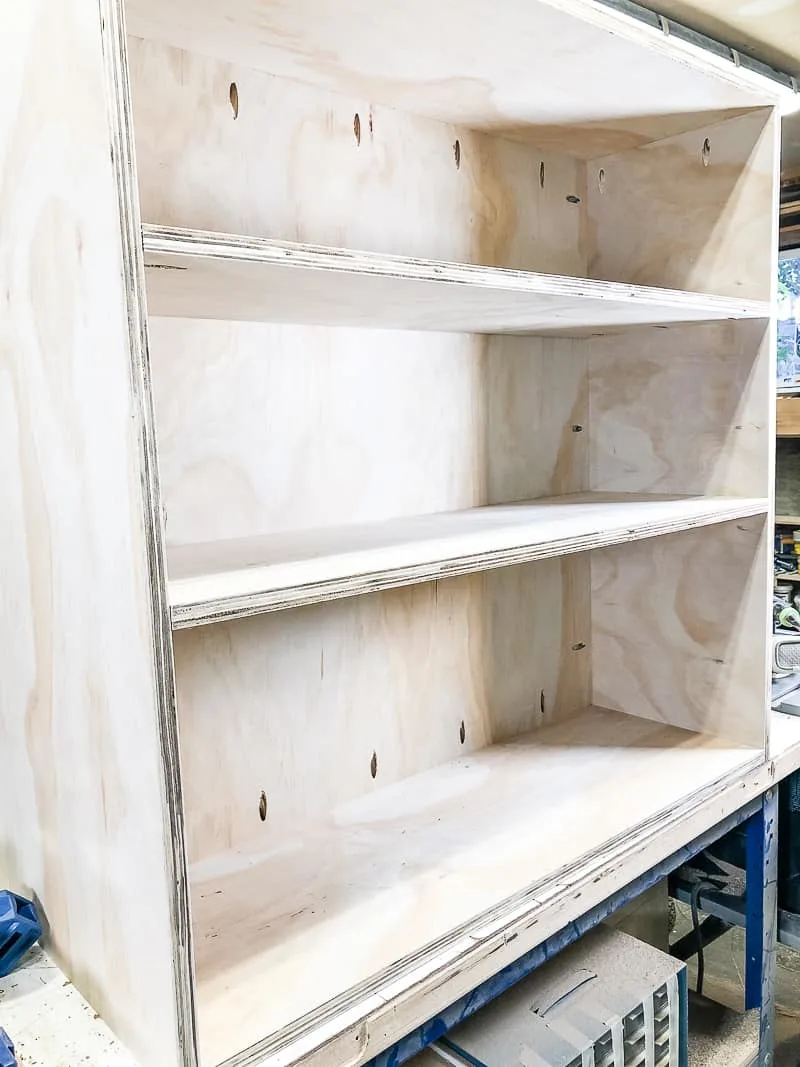
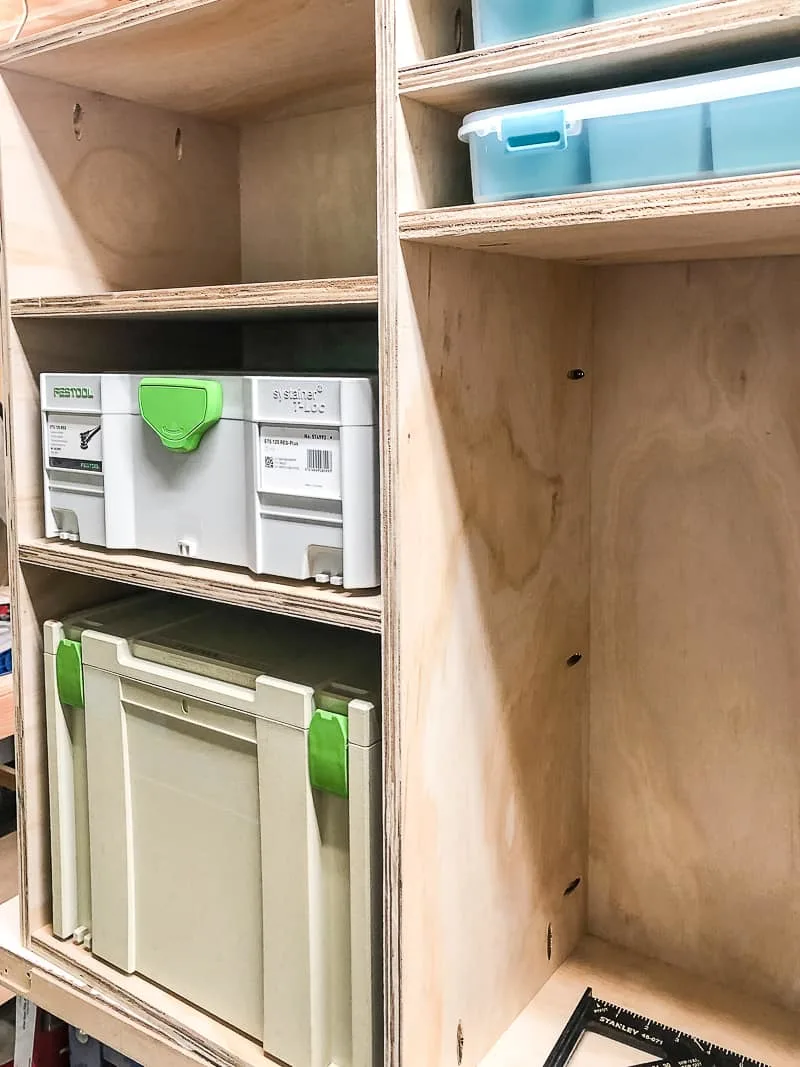
Attach the shelves
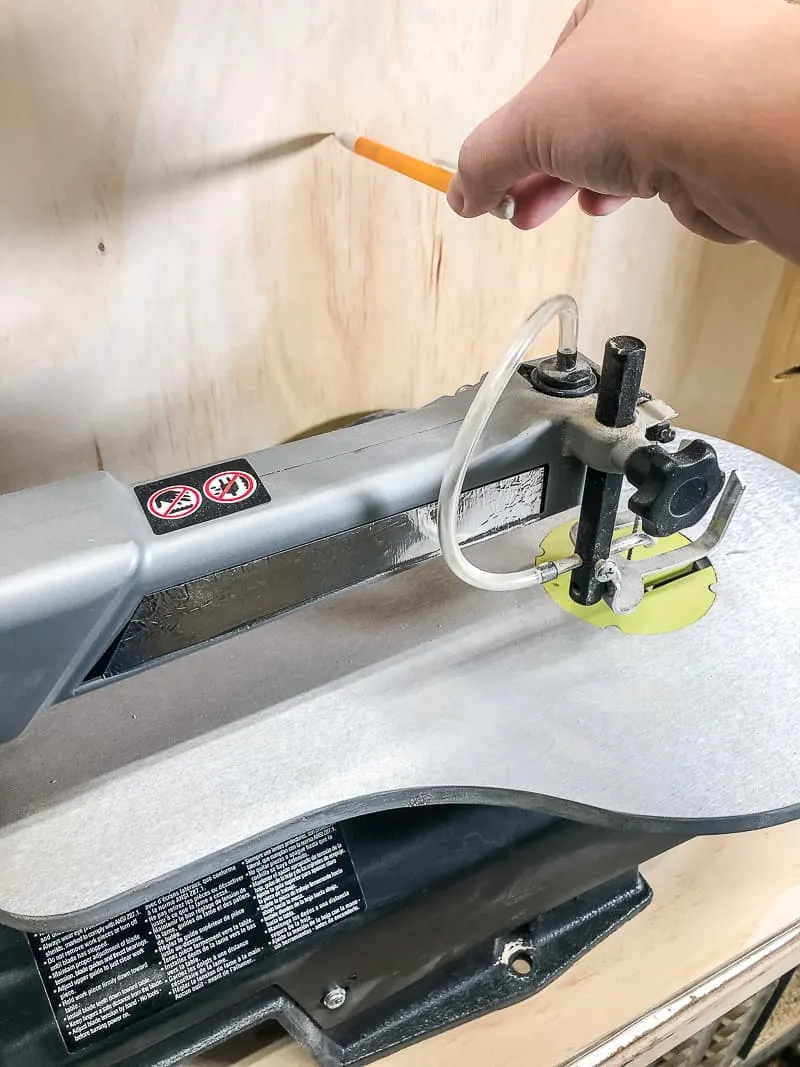
Each shelf in this DIY workbench is custom sized to fit my tools, so your configuration may be different. I just placed each item inside the base (like this scroll saw) and marked the height plus an inch or so of wiggle room.

Then I used the squares and clamps to hold the shelf at that height while I screwed it in place. You could also drill shelf pin holes in both sides to make these shelves adjustable.

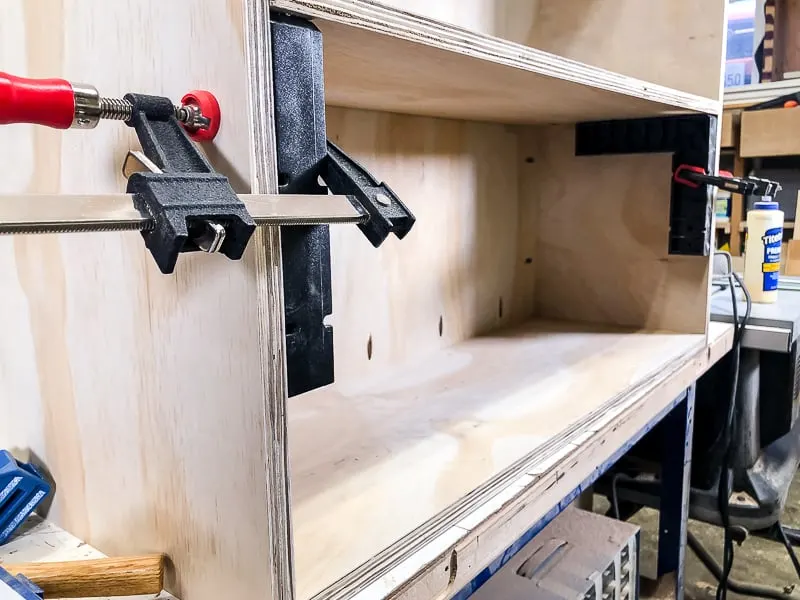
I didn't have a specific tool in mind for the other two shelves, so they're just installed evenly in between.

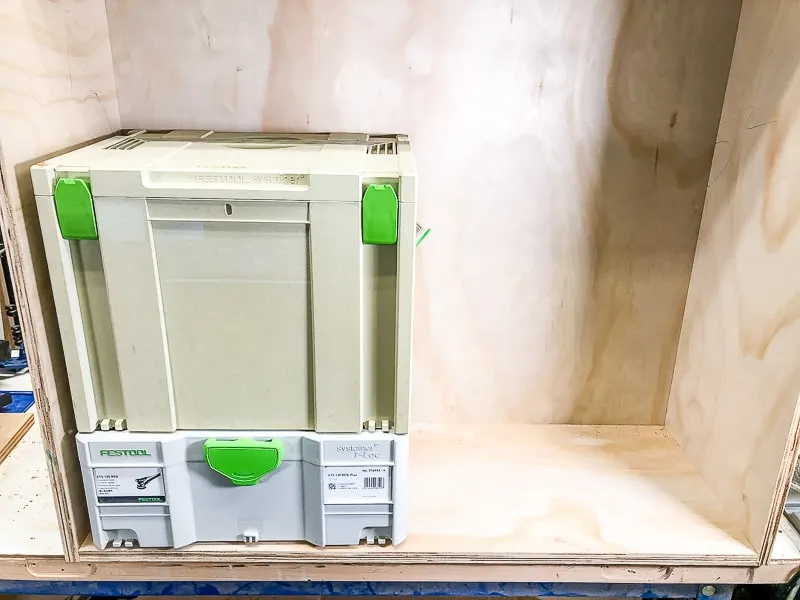
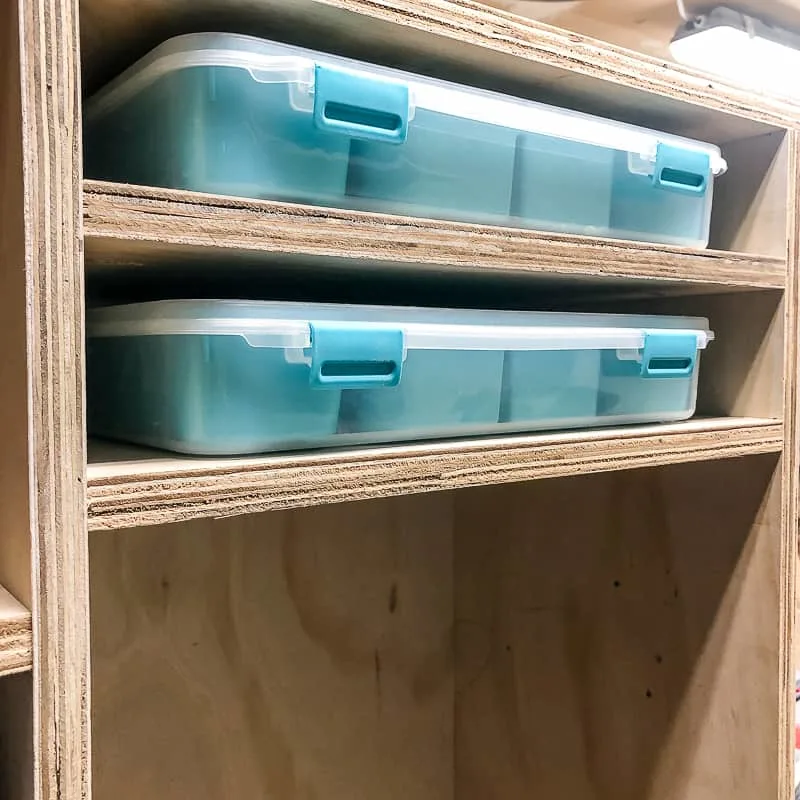
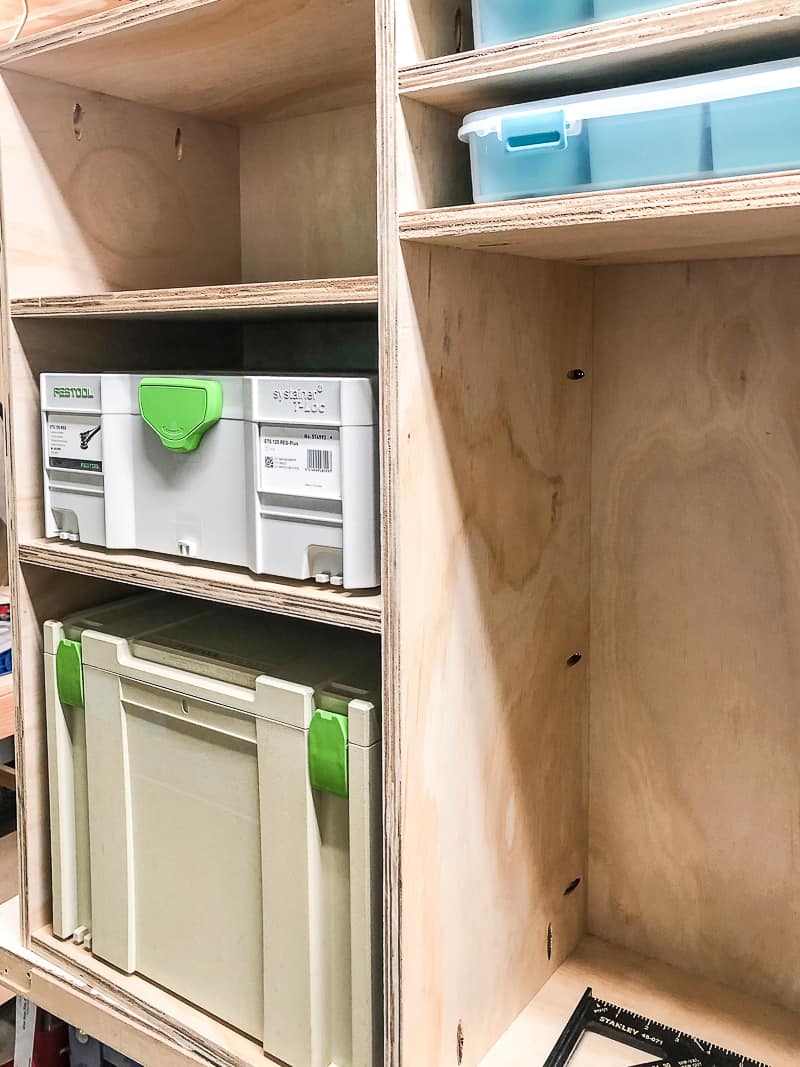
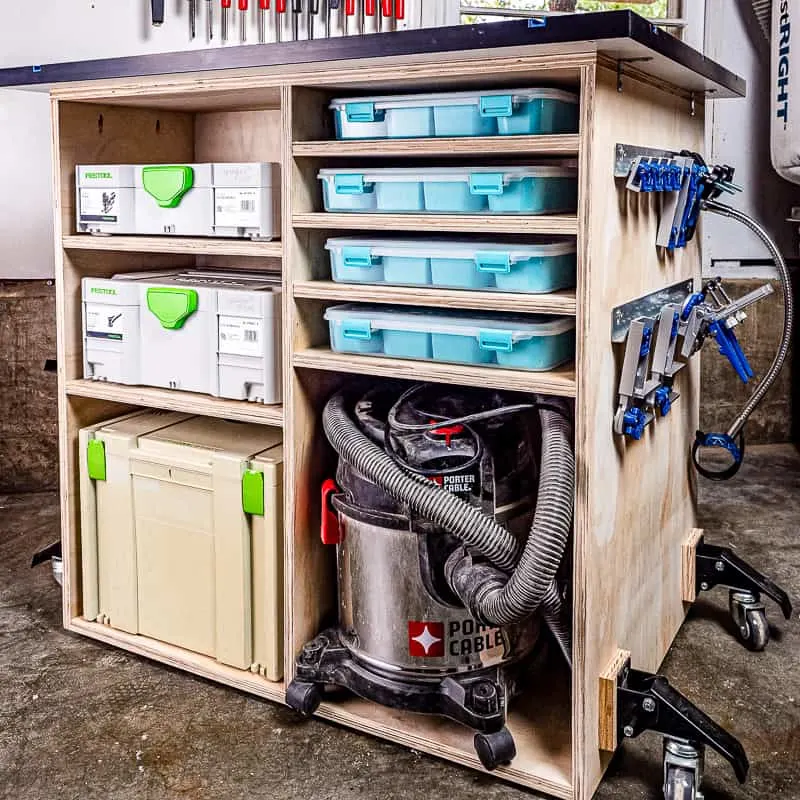
The other side of the mobile workbench will house my Festool Systainers and small part bins. I measured the width of the boxes first.

Then I added a divider down the middle, using a square to keep everything straight.

Install these shorter shelves starting at the top and working your way down, so it's easier to reach the pocket holes. Make sure you leave enough space to get your fingers around the bins to pull them out!

Each systainer now has its own shelf, instead of stacking them all up in the corner! I might turn these into pull outs with drawer slides in the future, but it'll be fine like this for now.
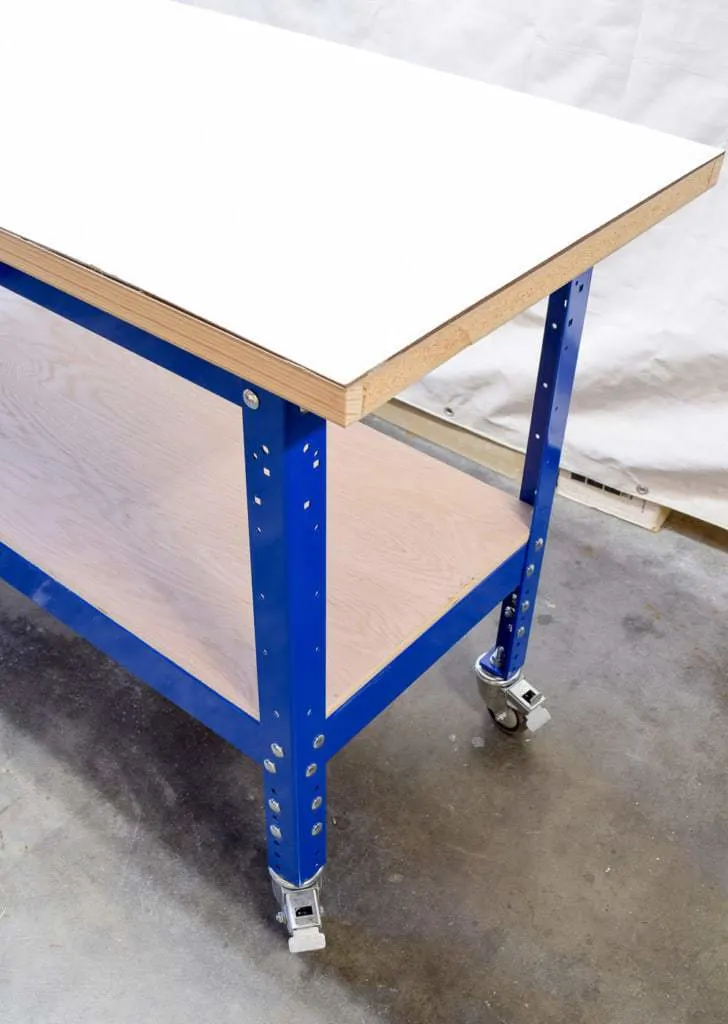
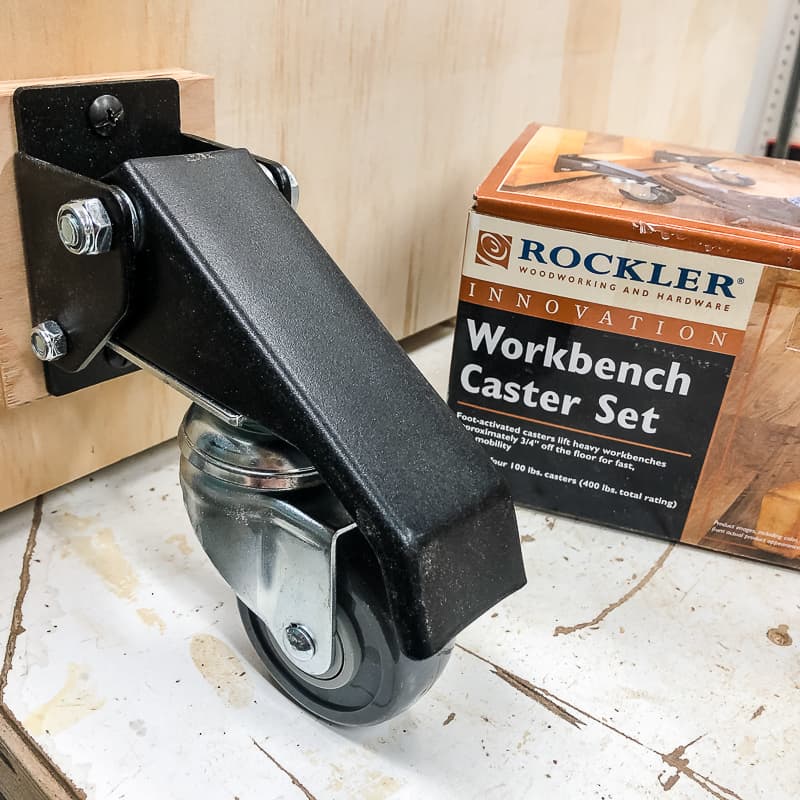
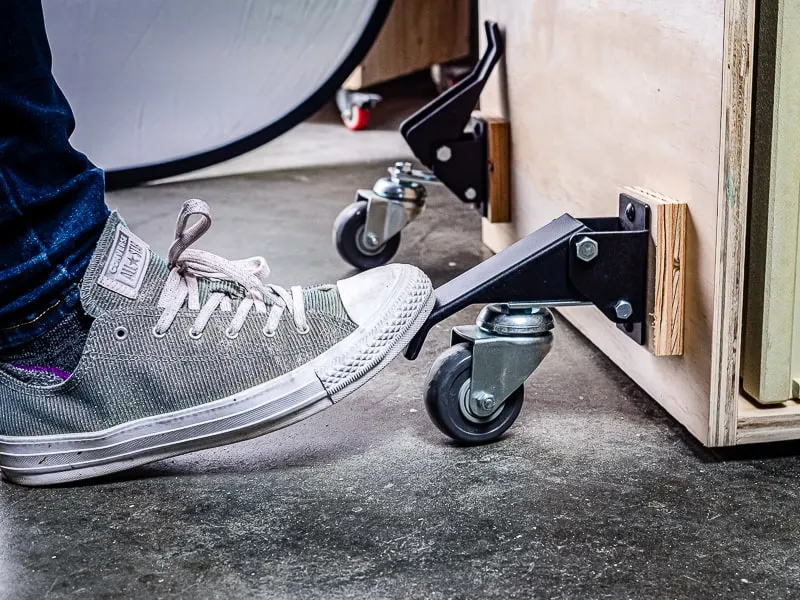
Install the workbench casters
All my big tools are on casters. This is great for mobility, but sometimes I find them a bit too mobile! Even when the wheels are locked, they can still move around when a little force is applied.
This time, I'm using these workbench casters from Rockler. They lift up the entire workbench when you want to move it, but it rests fully on the ground when you want stability. This thing isn't going anywhere!
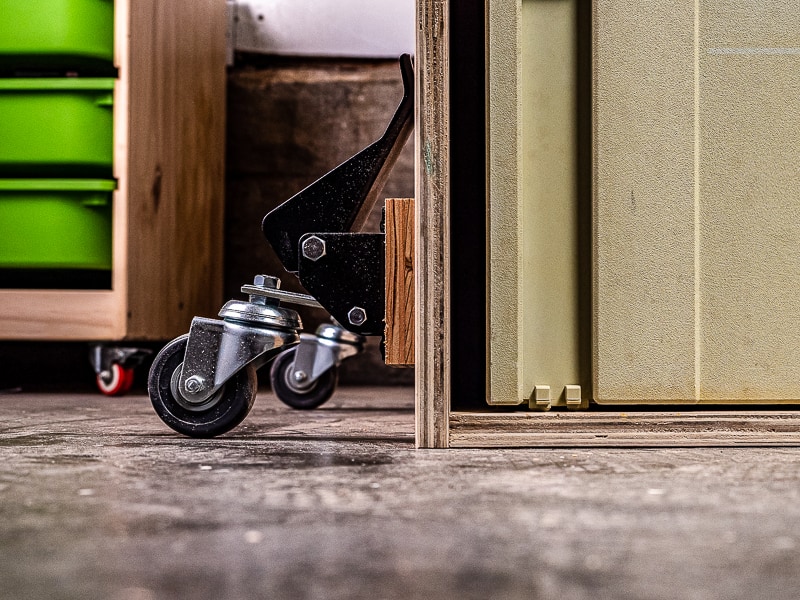

Since the sides of the mobile workbench are only ¾" thick, I doubled it up with scrap plywood under the brackets. Pre-drill holes through the scrap pieces first, then clamp them to the sides at the height indicated in the instructions.

Screw the casters to the side of the workbench through the predrilled holes in the scrap wood.

When it's time to move it out of the way, you can put your workbench on wheels with a press of your toe!

Attach the workbench top
You could make your own top out of plywood or melamine, but I chose to use Rockler's t-track top instead. It's a good size for most projects, it gives you a ton of clamping options anywhere on the surface, and will stay flat.
I had originally planned to screw the T-track top on from underneath, but the shelves were in the way! You could use a right angle drill attachment to get into that tight space, but I had a few of these small L brackets laying around the shop, so I used those on the side instead.


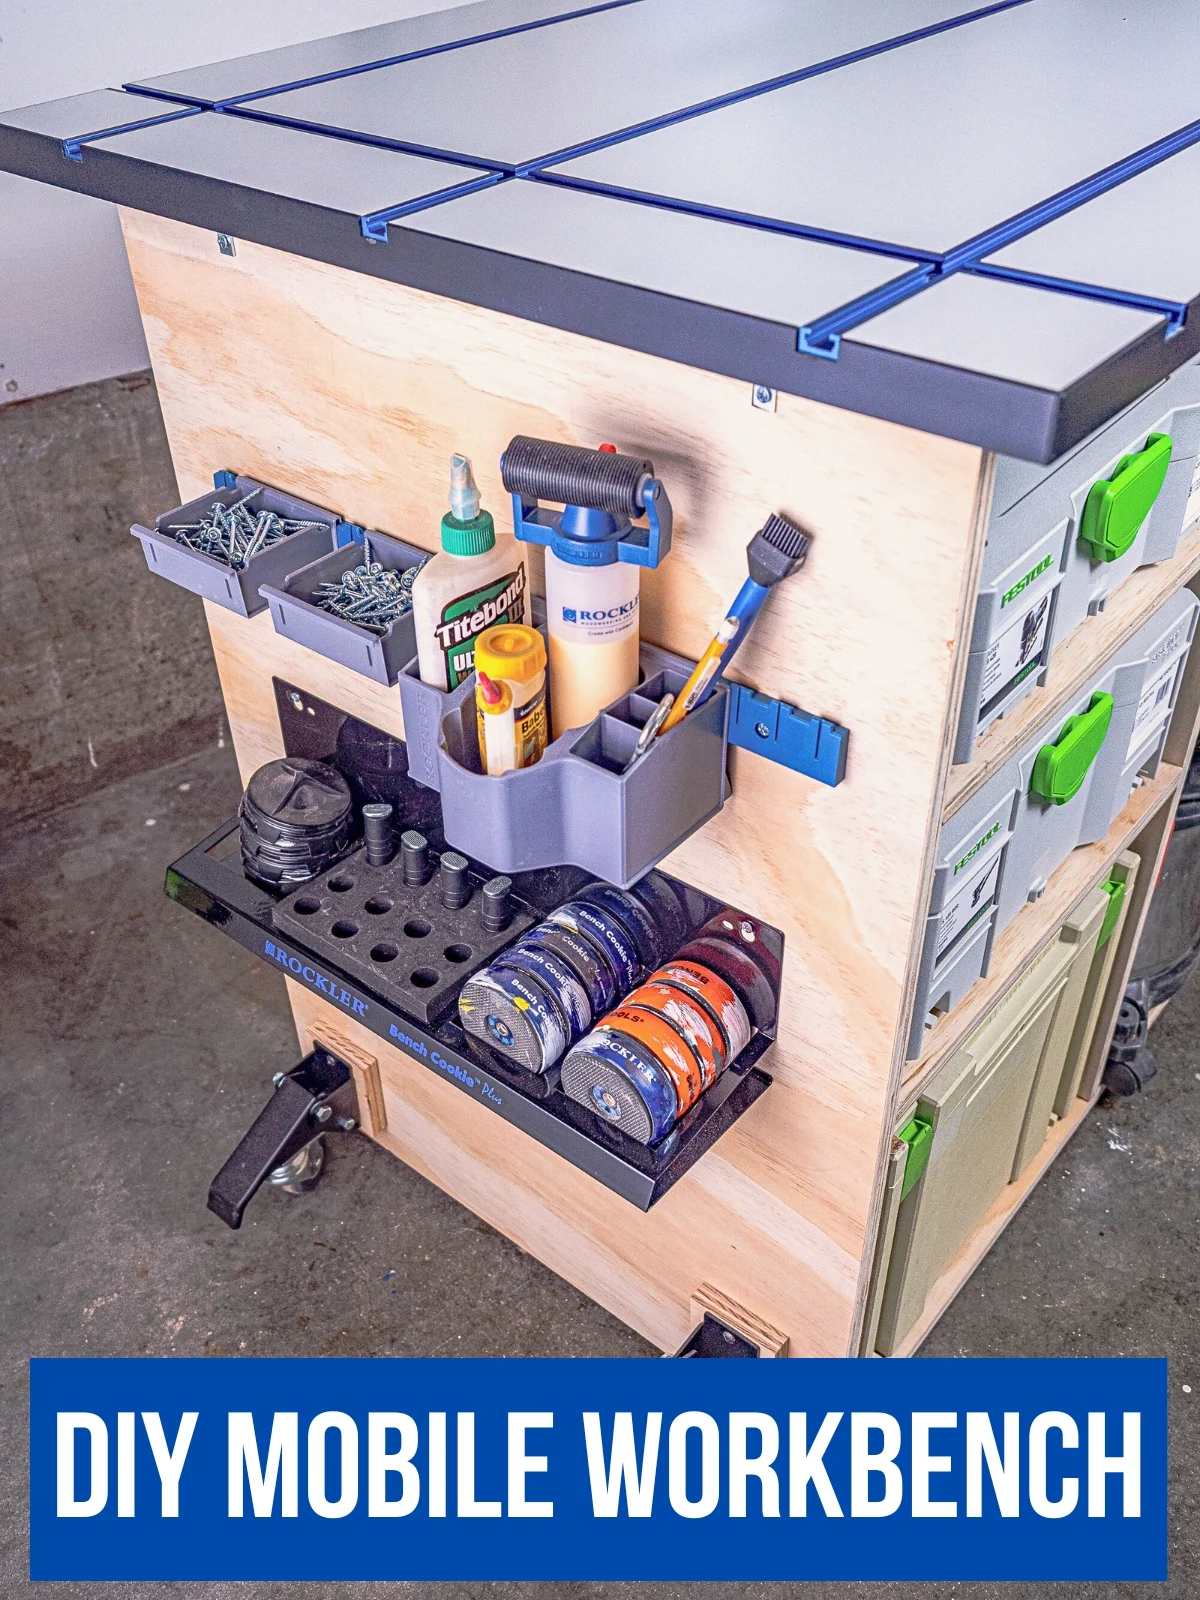
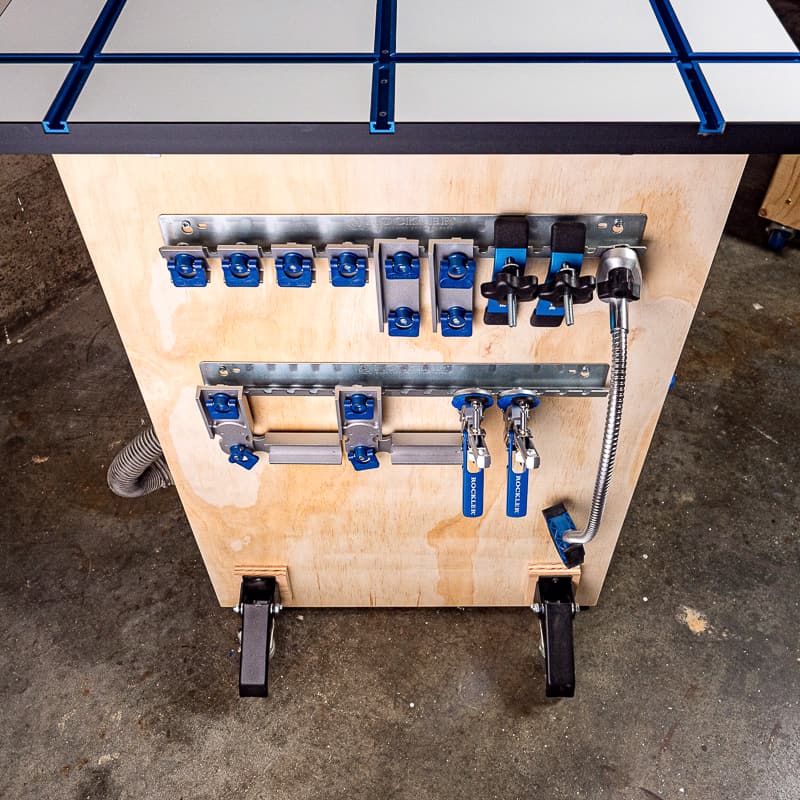
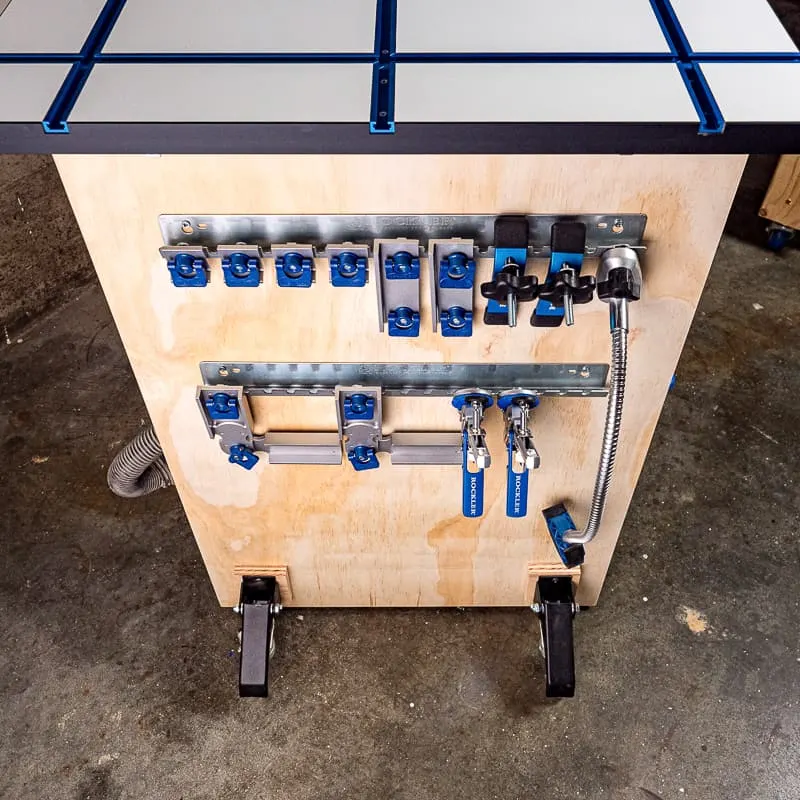
Hang commonly used items on the sides
I really wanted to make this the perfect assembly table for all my builds. That means keeping everything I need close at hand!
One side will hold the "glue and screw" supplies. I'll be using Rockler's Lock-Align storage bins and glue caddy that hook into these wall brackets securely.
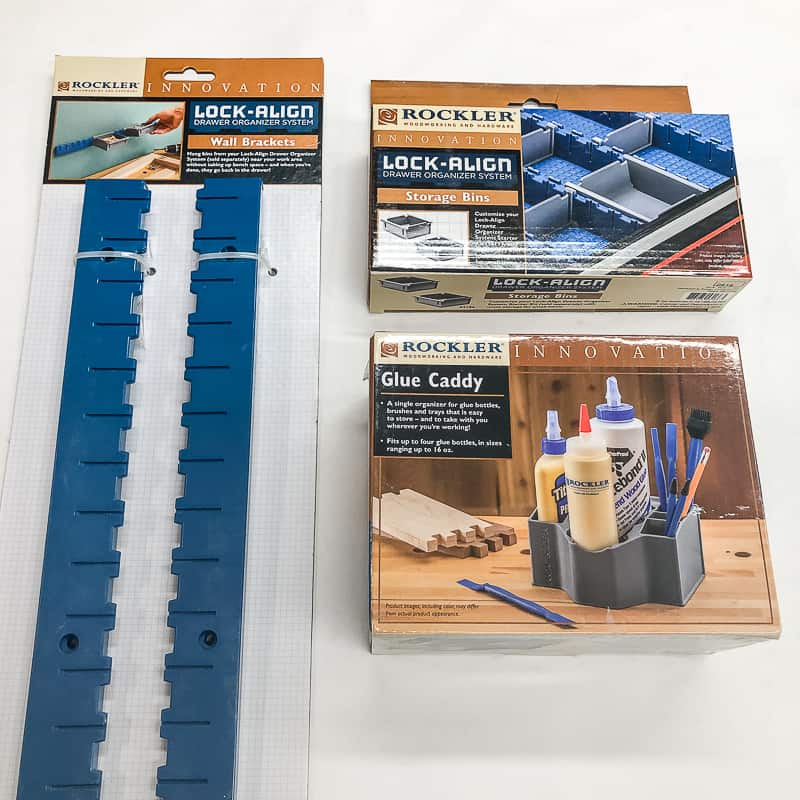

The bracket attaches right to the side of the workbench. I can either grab the glue bottle and screws straight from there, or remove the bins entirely to bring them up to the work surface.
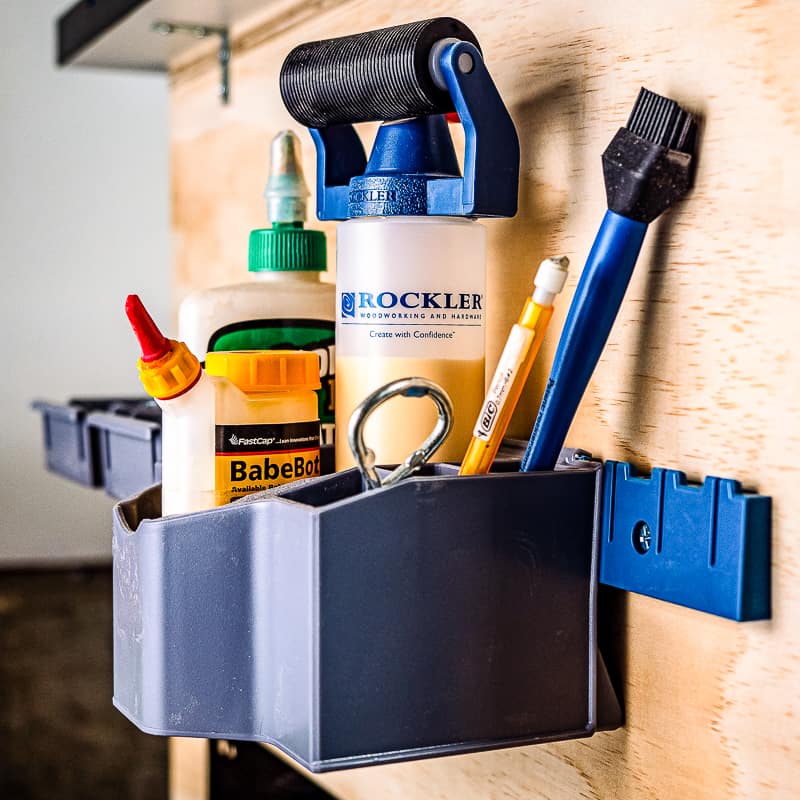
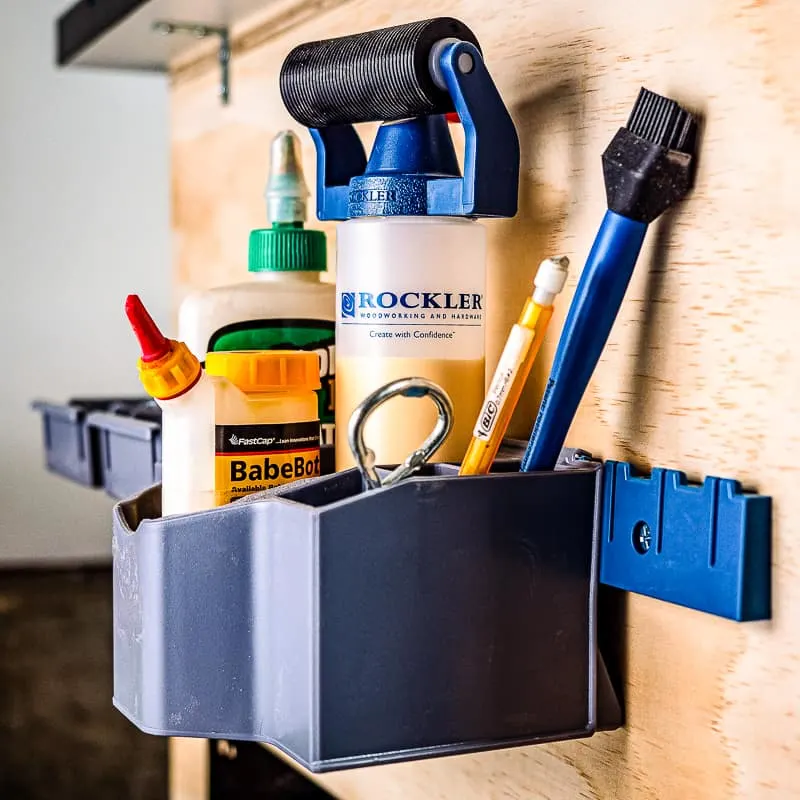
Below that is the bench cookie storage center. I'm ALWAYS losing these, so it will be great to have them all in one spot!
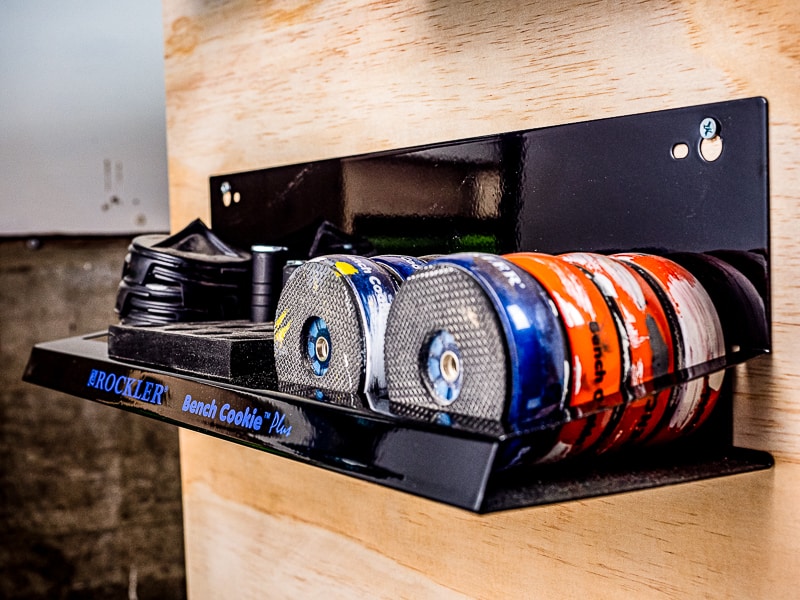

The other side of the mobile workbench will house all the t-track attachments. They easily clip into the slots on these racks.
Load up your new mobile workbench!
I'm amazed at how functional and useful this workbench is, especially compared to my old one. It combines everything I wanted into one compact unit!


The T-track top will keep my work in place while I sand, saw and screw. The laminate surface makes it easy to clean up all those wood glue blobs and drips.

I can clamp anywhere on the top, instead of being limited to the outside edge. Corner stops keep two pieces square, and hold down clamps prevent the parts from moving vertically.
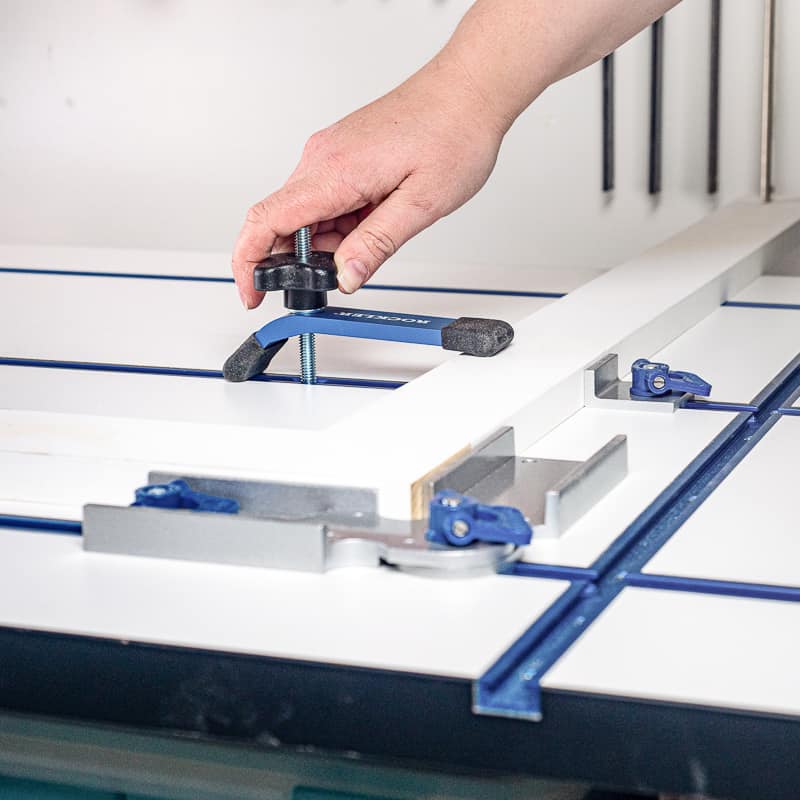
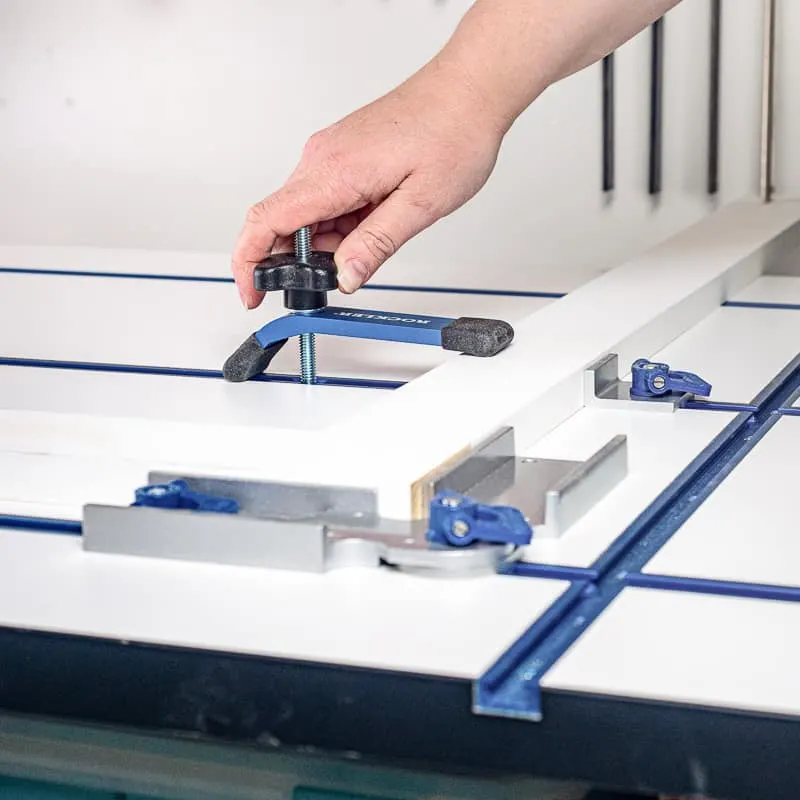
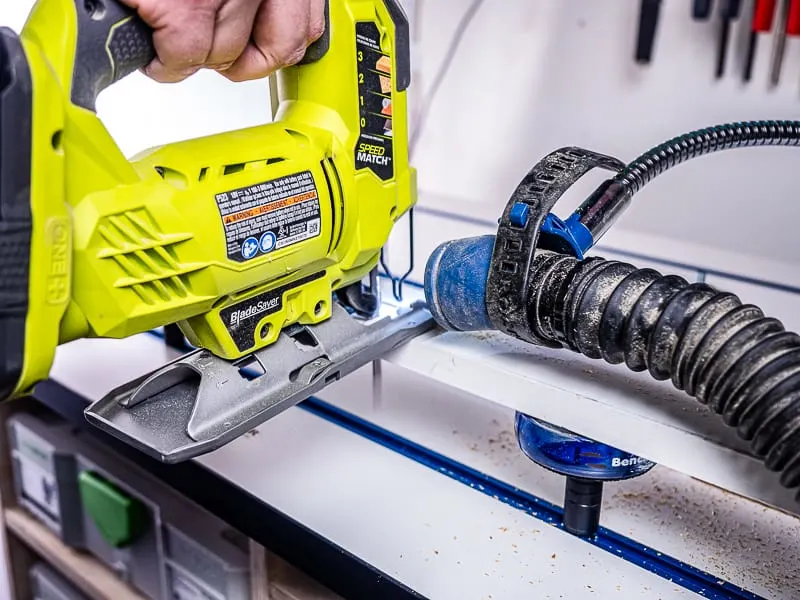
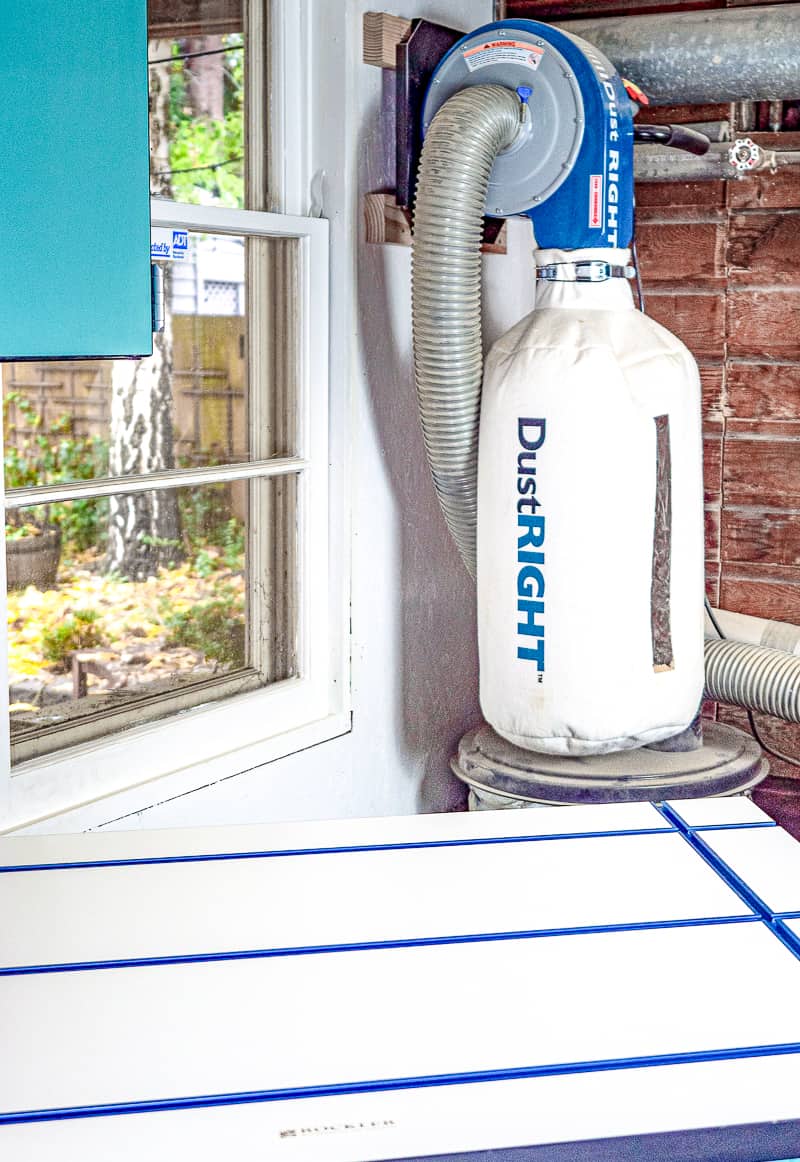
One of my favorite features is the combination of work gripper cookies, t-track risers and the flex hold arm. Now I can use the jigsaw without accidentally cutting into the workbench top, and the Dust Right wall mount dust collector whisks away sawdust at the same time!

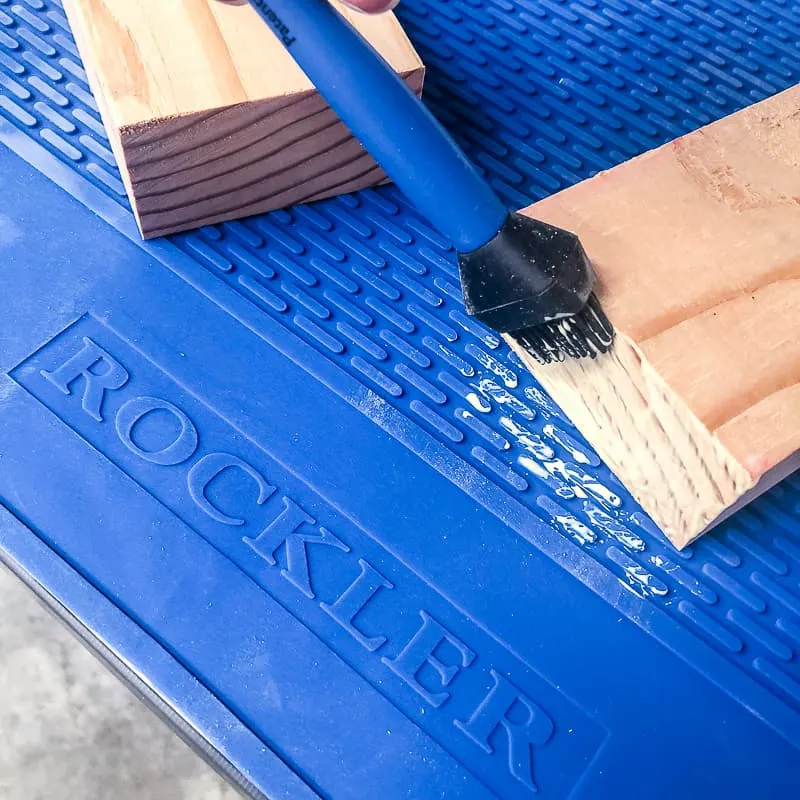
If I'm working on a messy glue up or painting a project, I just roll out the silicone mat to catch any drips before it gets in the tracks.

When I'm done for the day, the whole workbench rolls right next to the window and out of the way!

I'm really happy with how my workshop is shaping up! I still have a couple more shop storage projects planned, but it's getting there! 🙂
Check out these other workshop builds!
Armelda Johnson
Wednesday 30th of October 2019
How much did it cost to make this work bench?
Vineta
Wednesday 30th of October 2019
At a bare minimum, the two sheets of plywood runs about $60 and the screws are less than $10. Adding the t-track top from Rockler is around $200 (if you get it on sale), and the attachments vary in price.