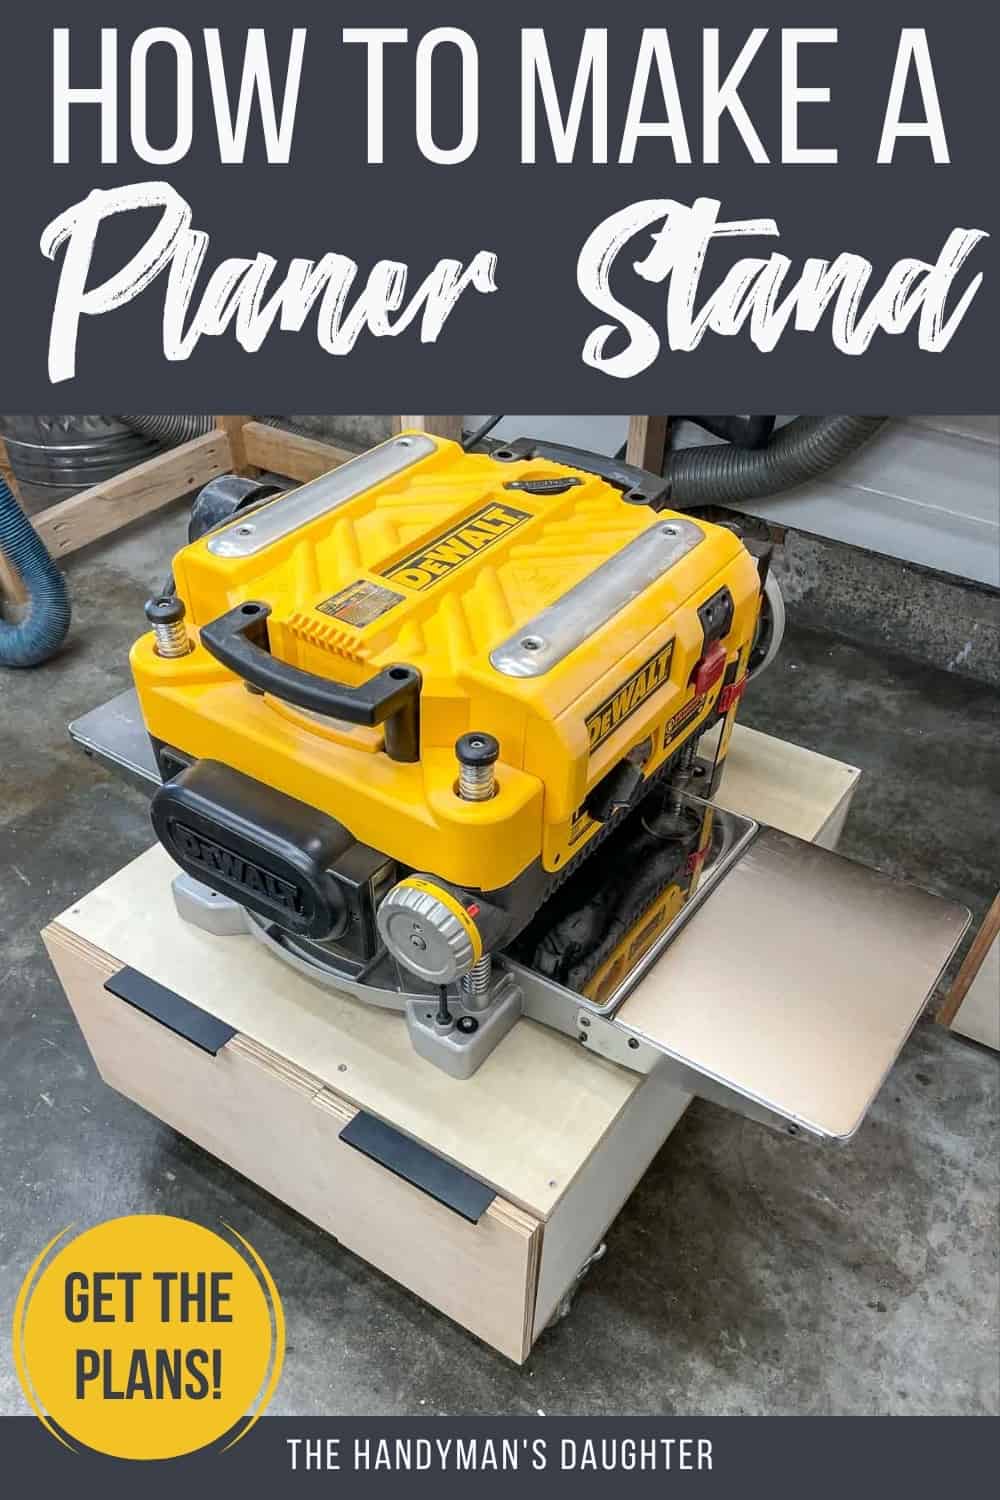
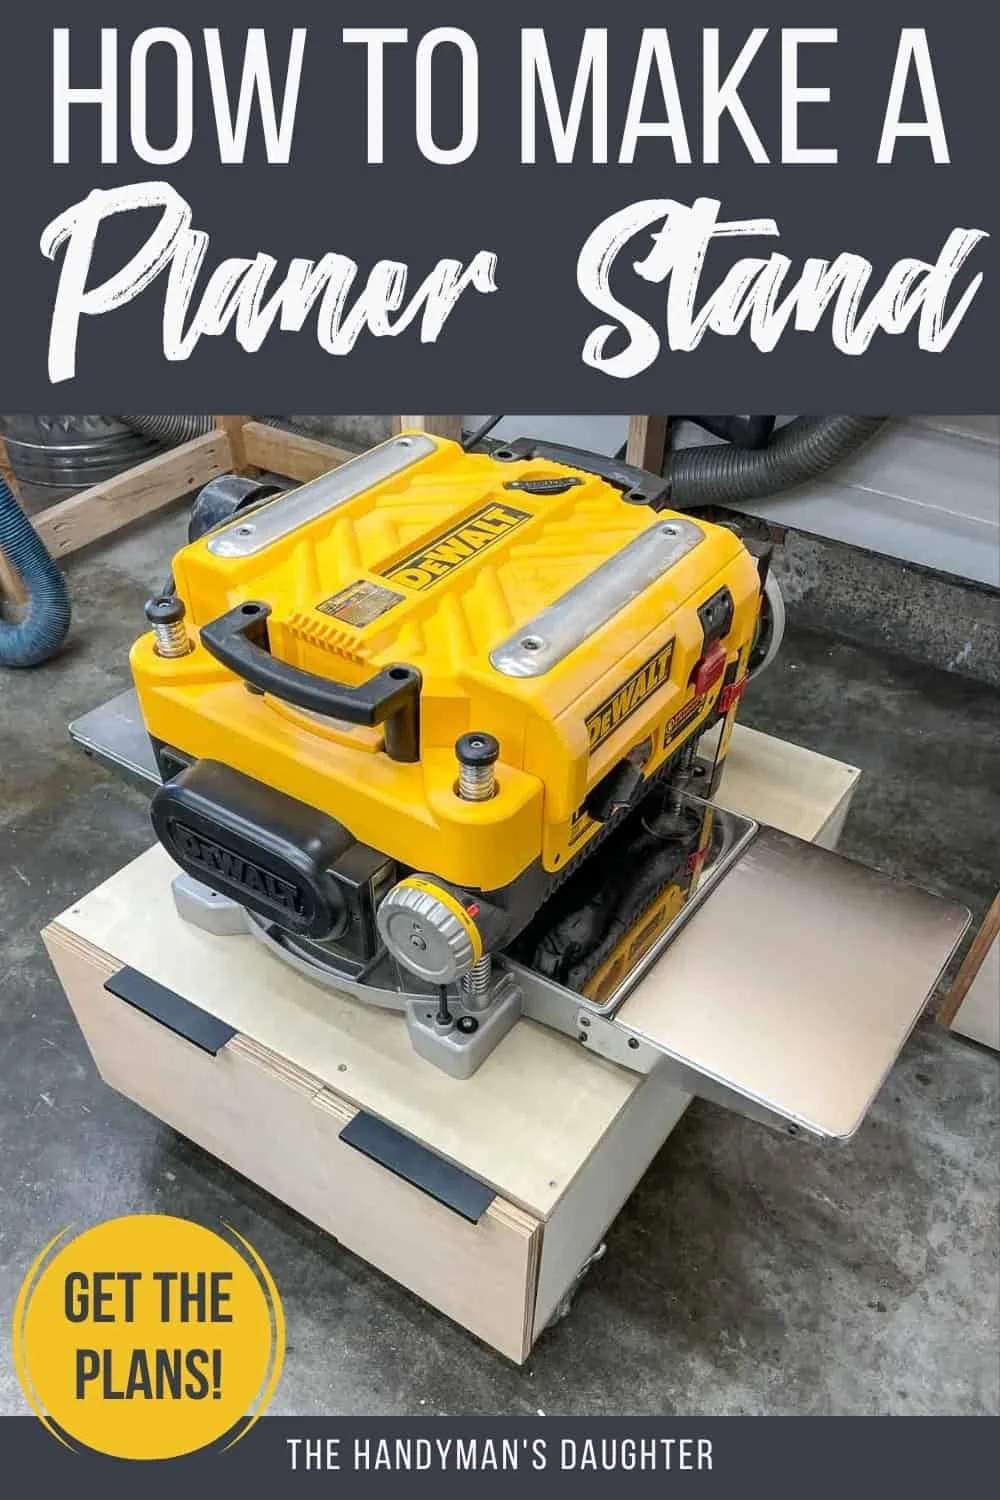
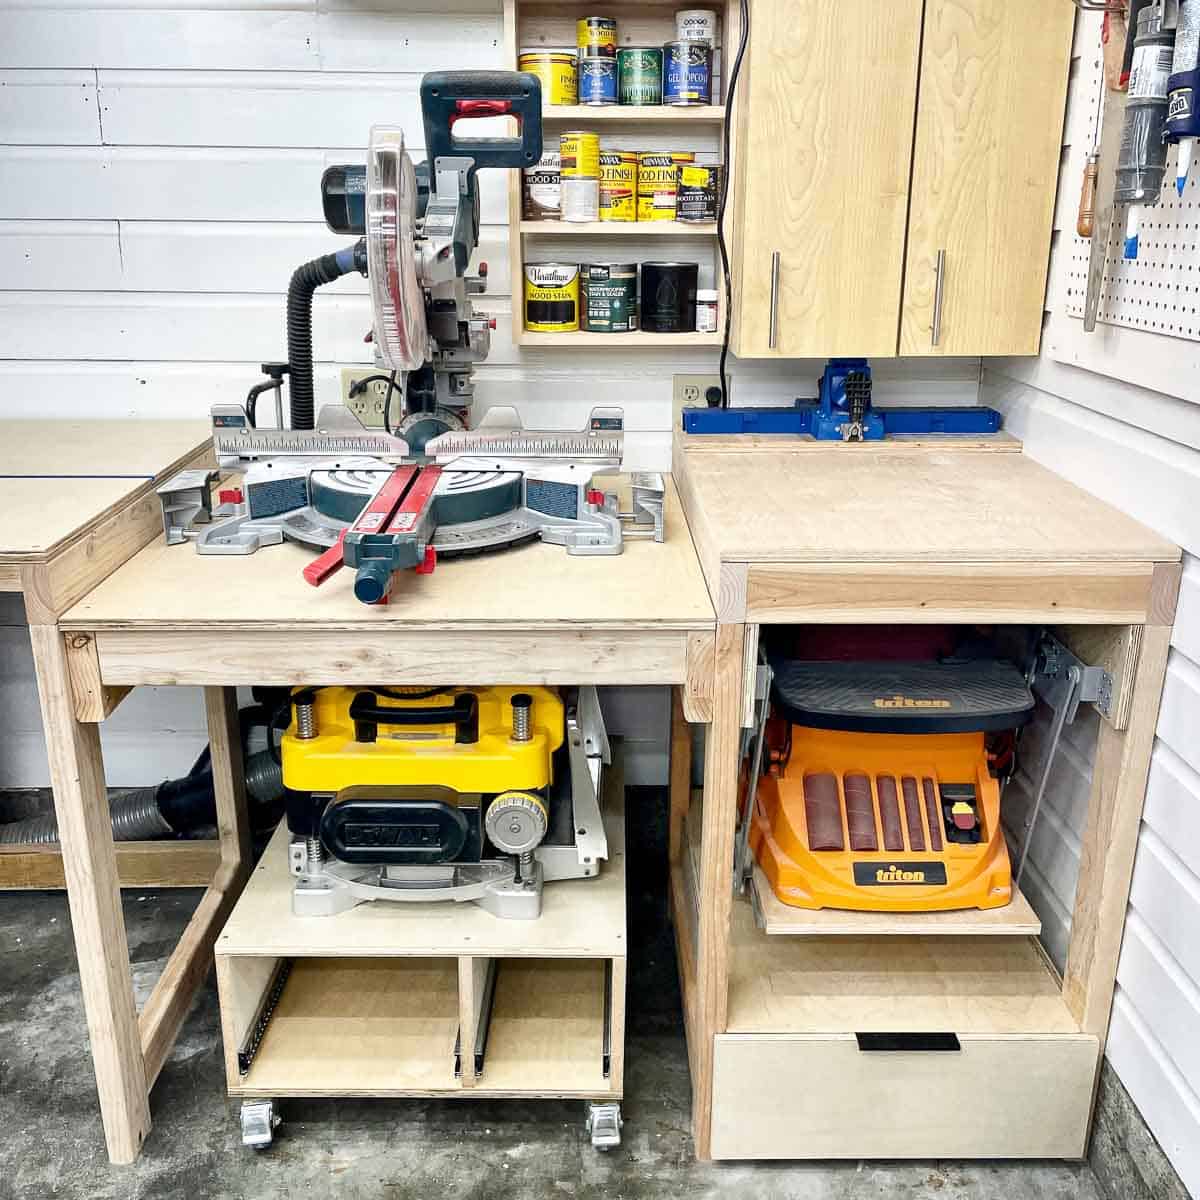
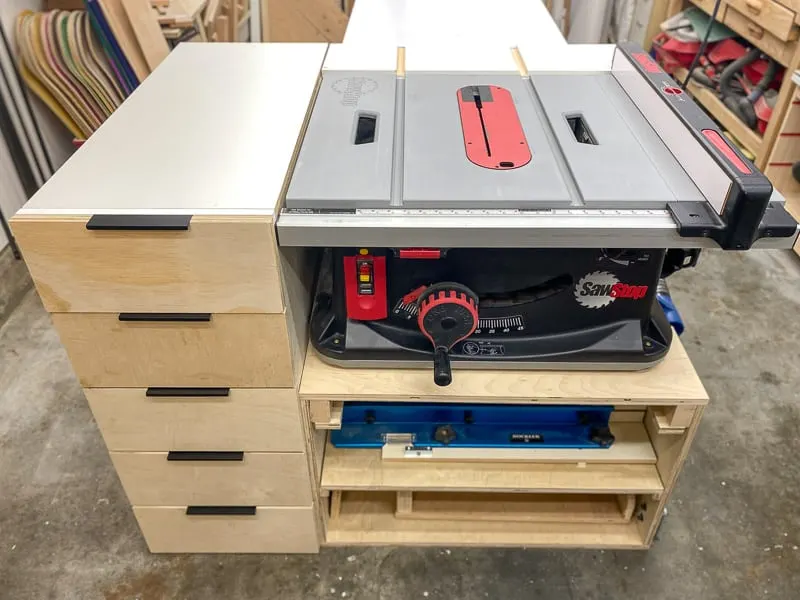
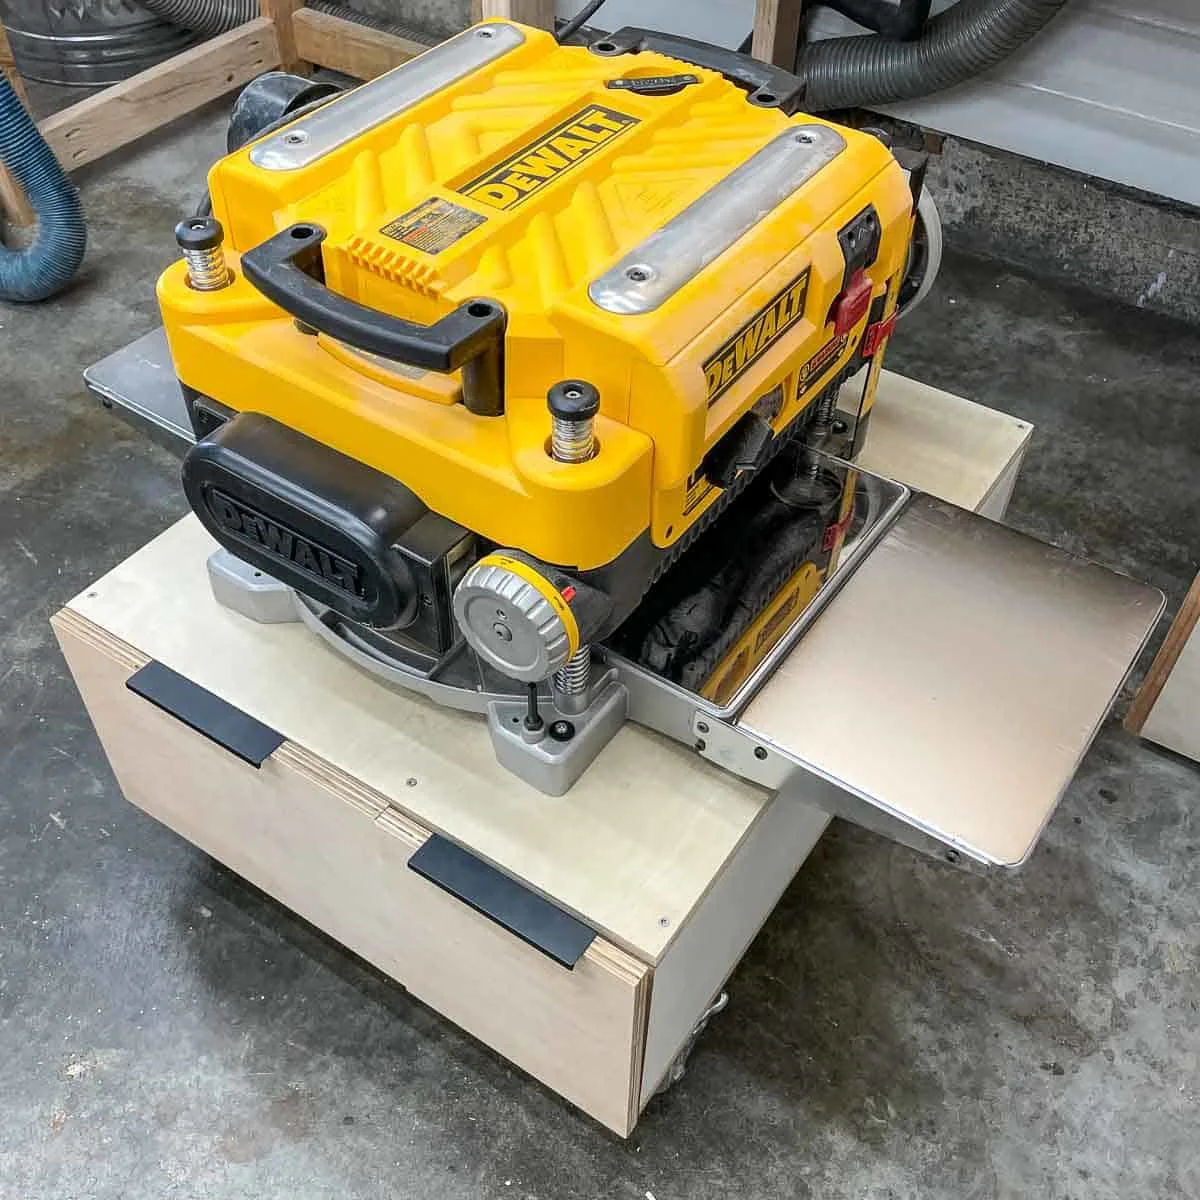
This compact DIY planer stand rolls under the workbench when not in use! It features two drawers for extra storage inside the sturdy base.
A benchtop planer can really step up your woodworking game, but it's such a hassle to use in a tiny workshop. When I bought mine, it came with a free planer stand that seemed like a great idea at the time.
Unfortunately, the fixed wheels in the back make it almost impossible to maneuver without making a tight twelve point turn, while crashing into everything else in the workshop in the process!
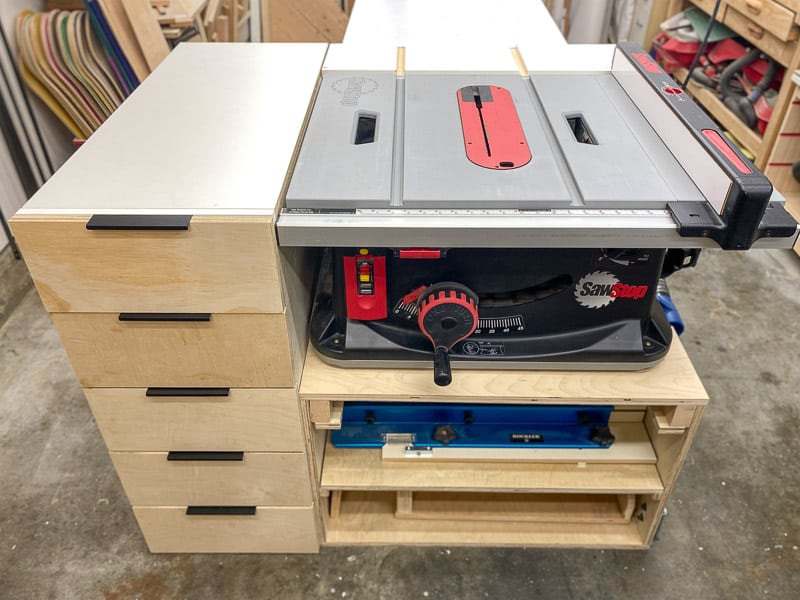
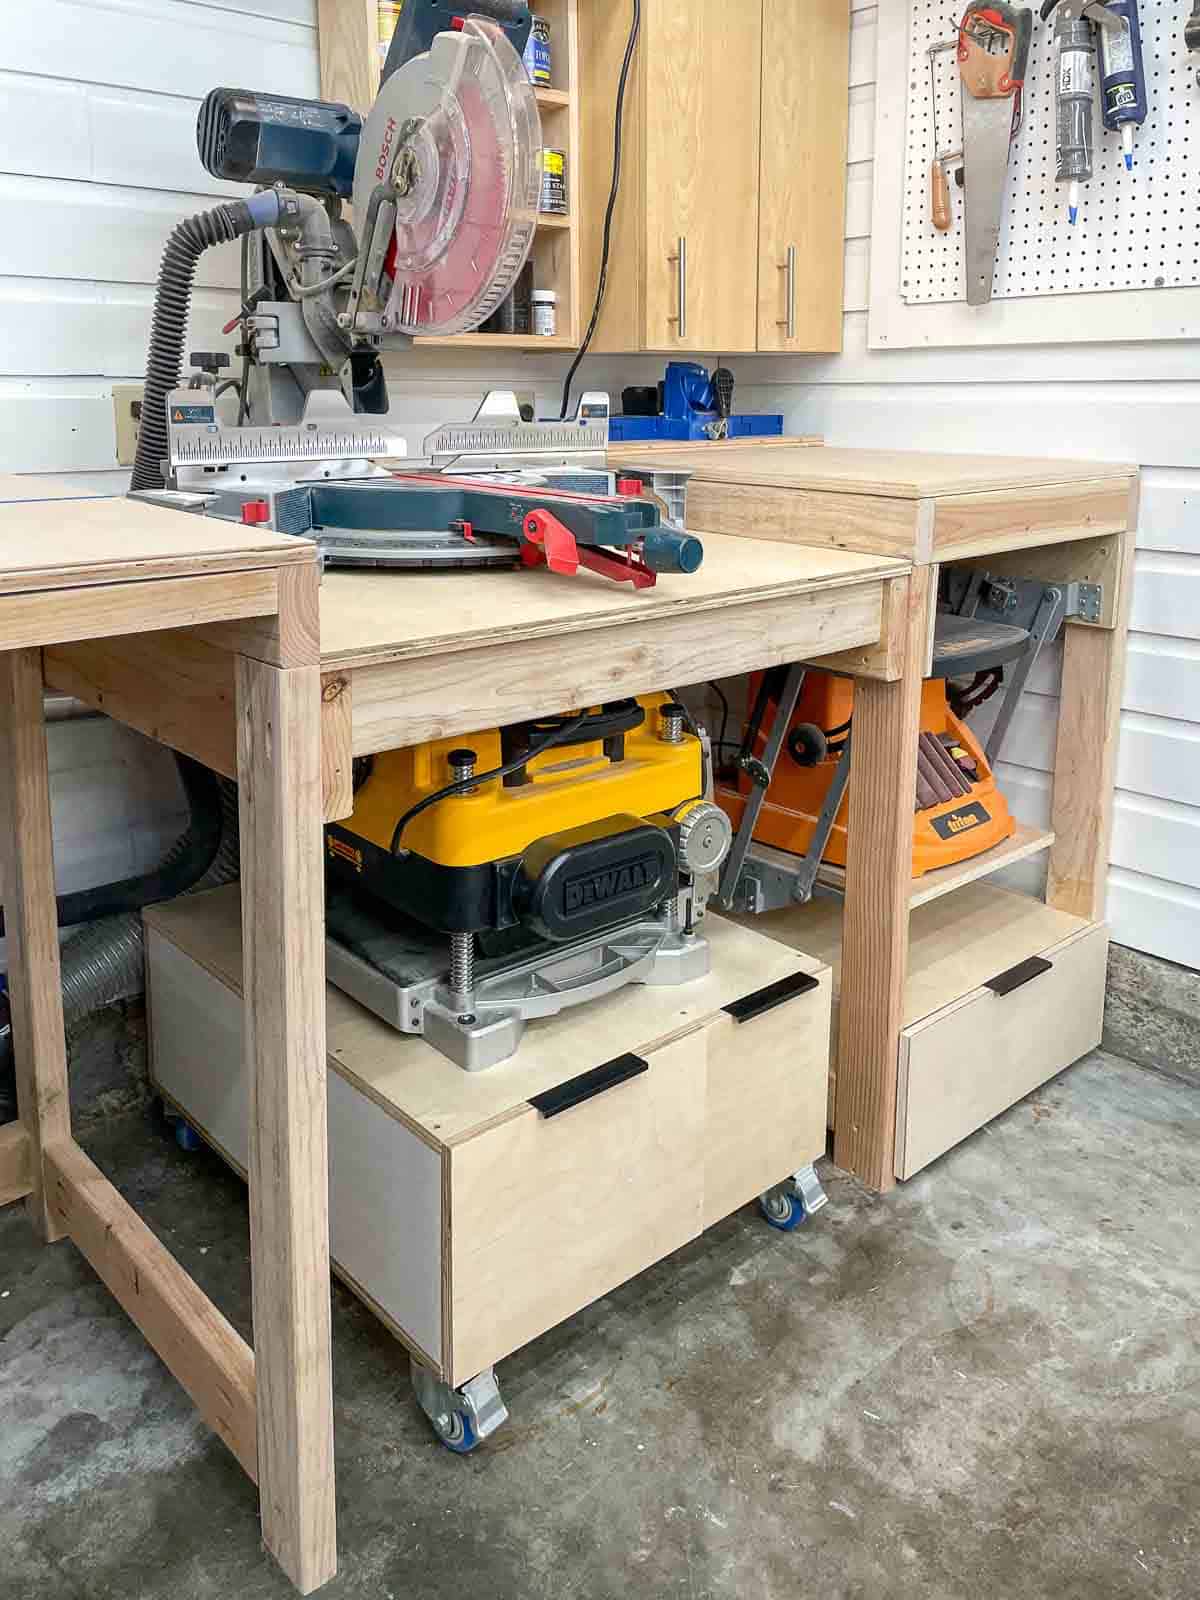
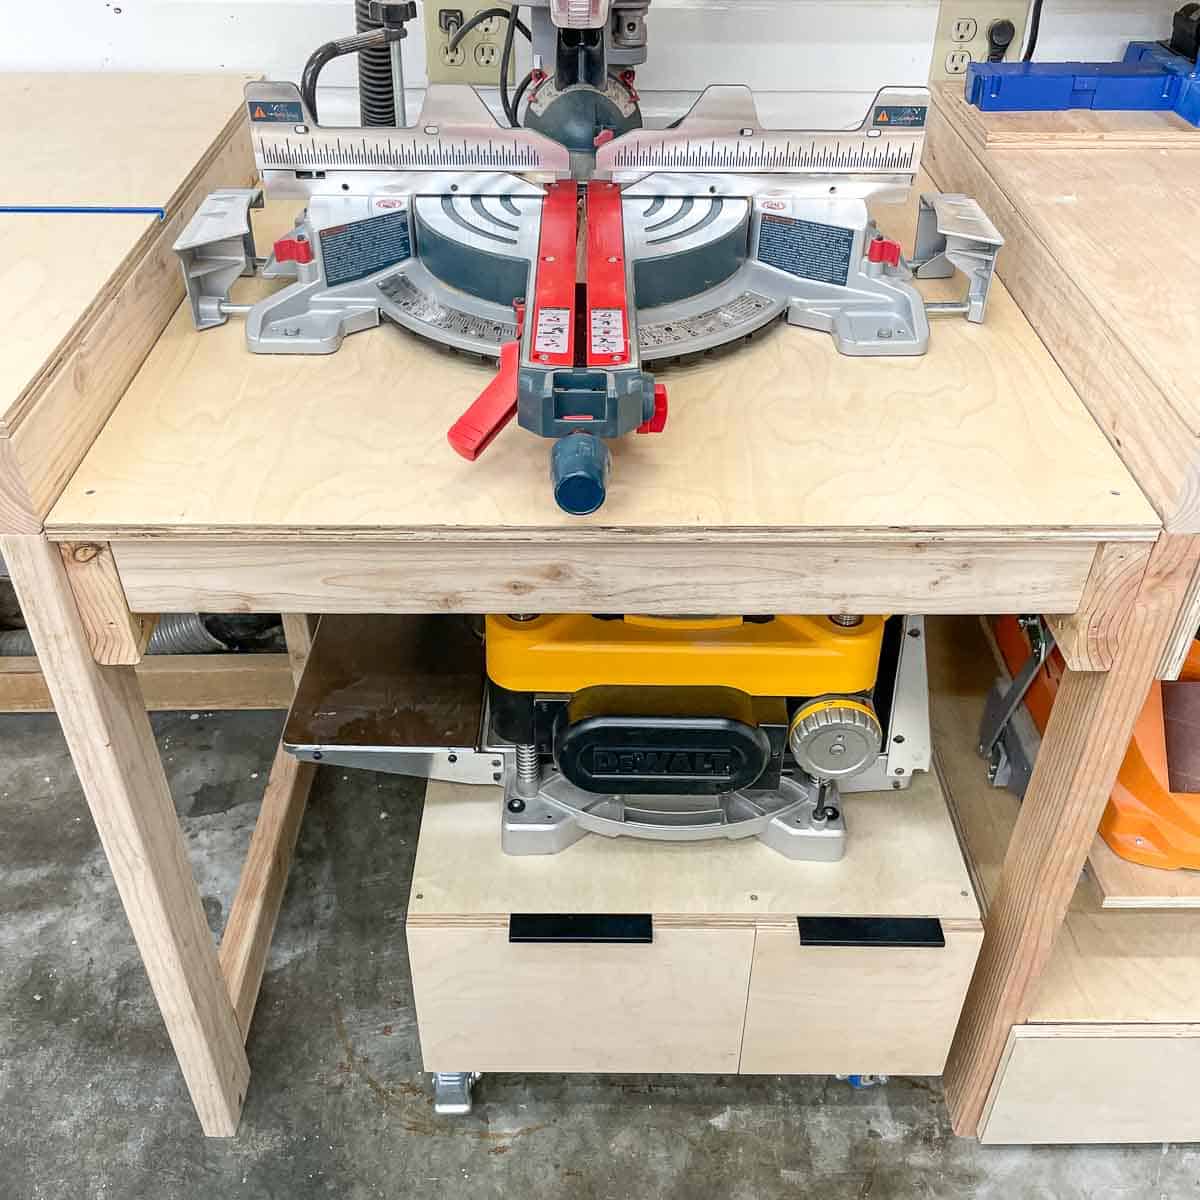
When I started designing my new miter saw station, I wanted to pack as many tools as I could into a single footprint. The tool stand on one end features a lift for the belt sander, so it can be lowered under the workbench when not in use.
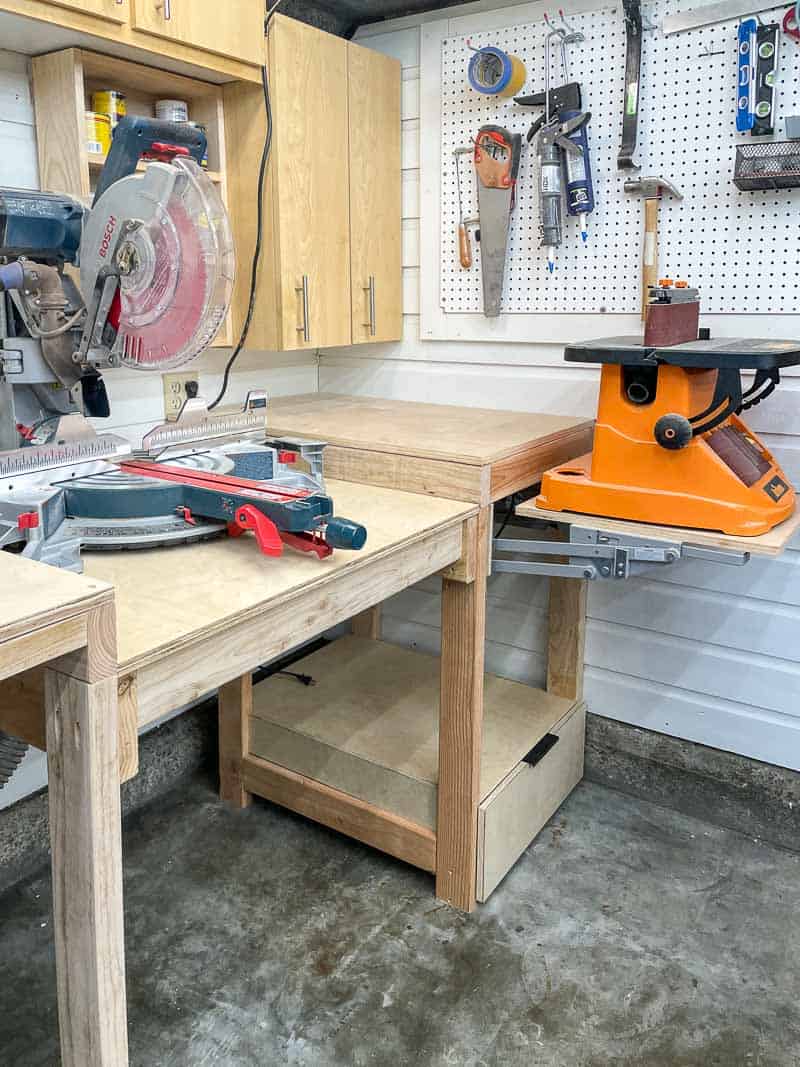
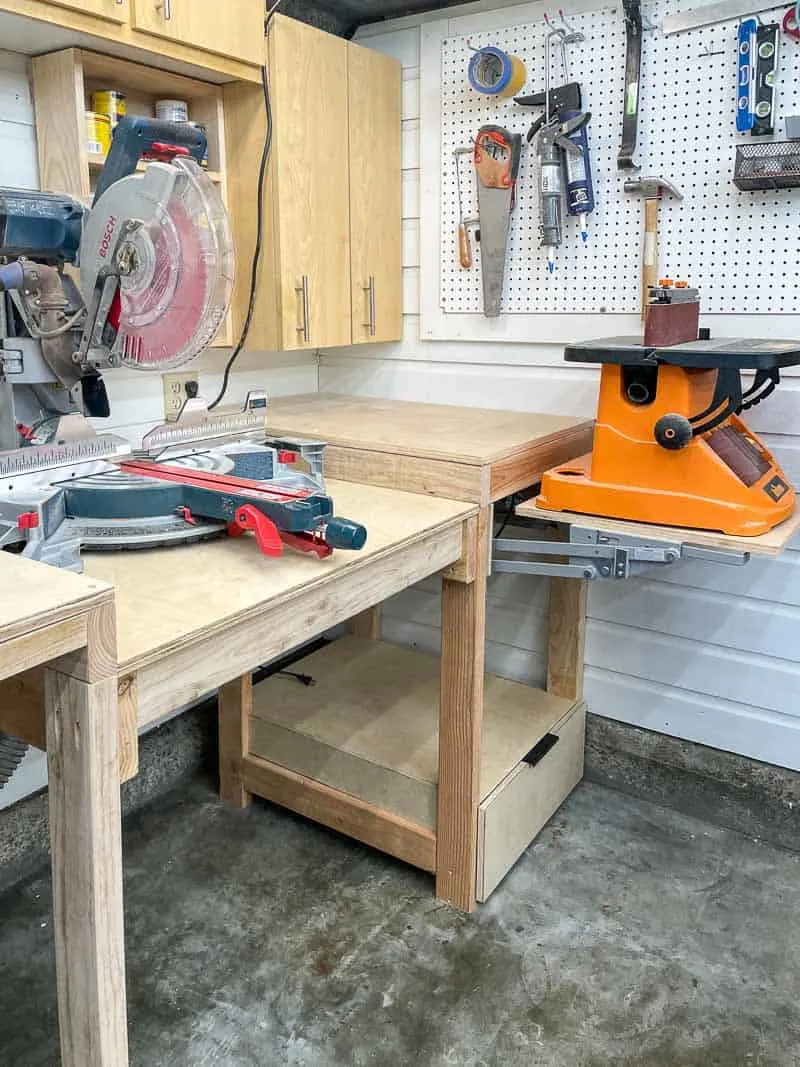
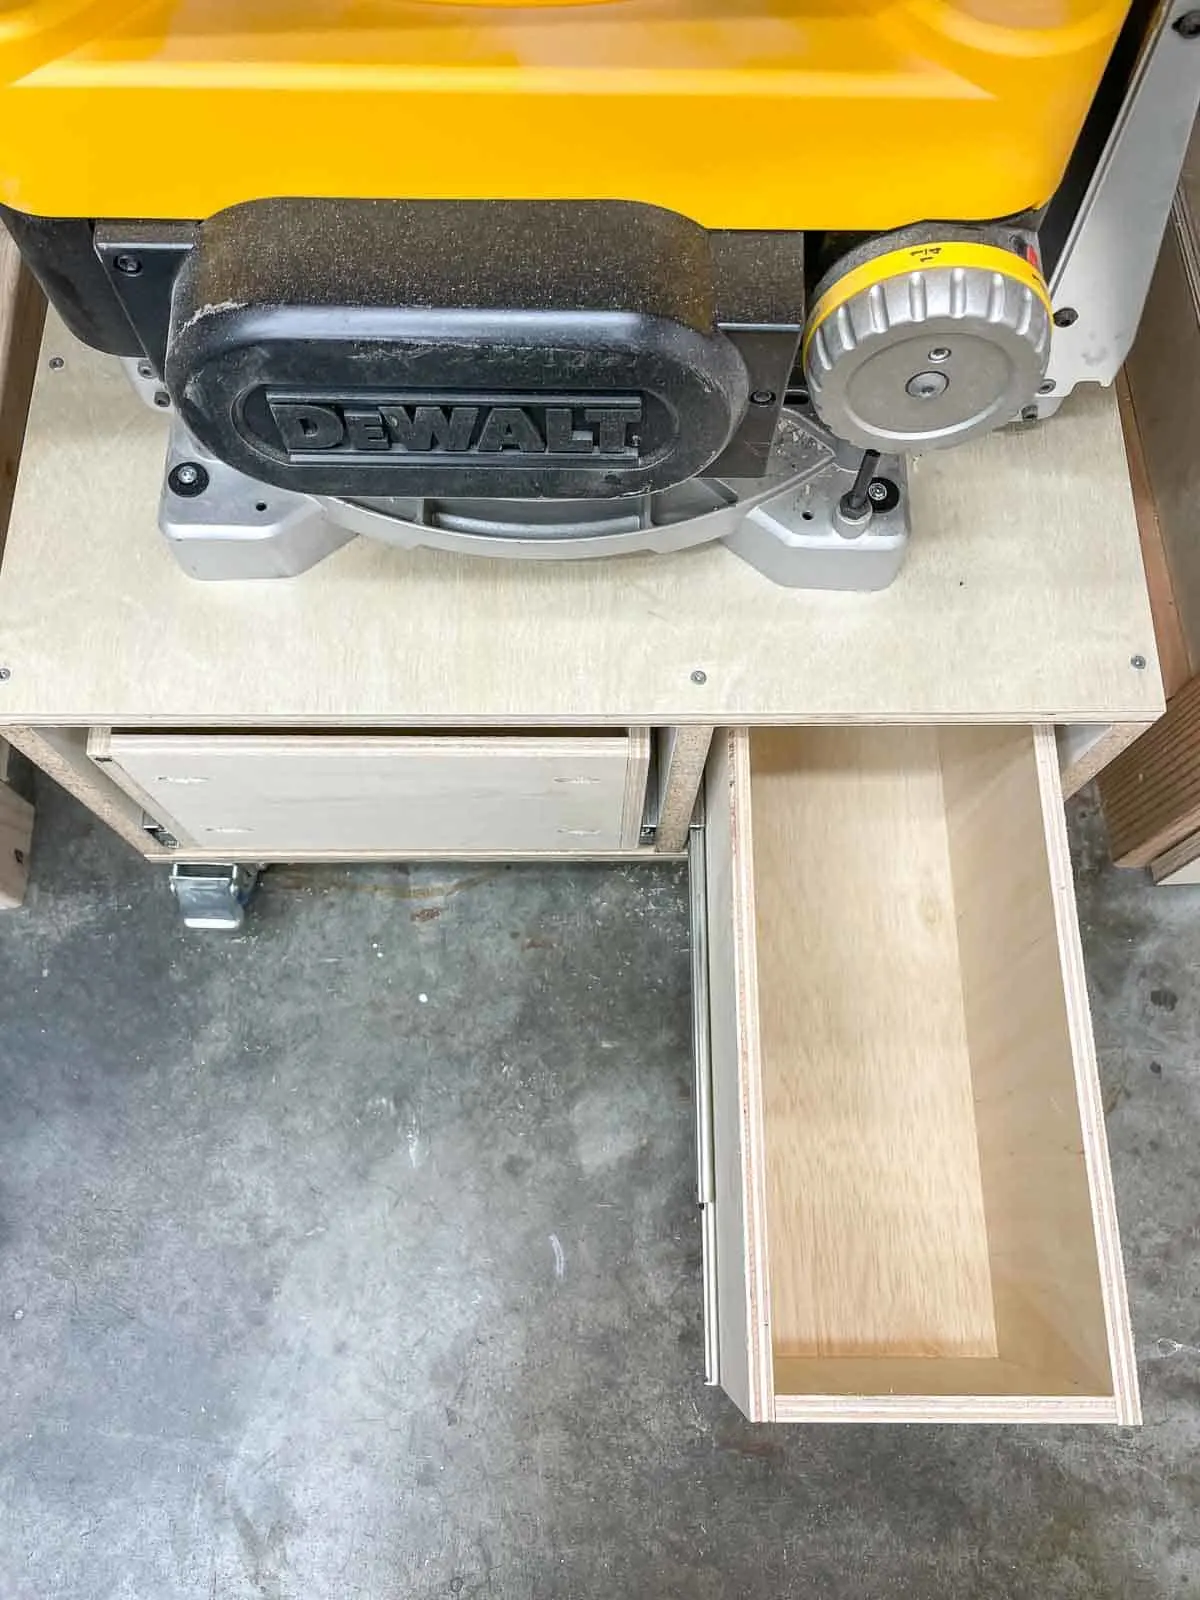
Since the planer doesn't need to be at waist height, this compact planer stand will fit under the miter saw. Four lockable casters will make it easier to roll out, and two drawers underneath will keep all the accessories organized.
Curious to learn more about thickness planers? Check out this tutorial on the difference between a jointer vs planer here!
Let's get building!
This post contains affiliate links for your convenience. Purchases made through these links may earn me a small commission at no additional cost to you. Please visit my disclosures page for more information.
Materials needed
- One sheet of ¾" plywood
- Quarter sheet of ¼" plywood for drawer bottoms
- Pocket hole jig
- 1 ¼" pocket hole screws
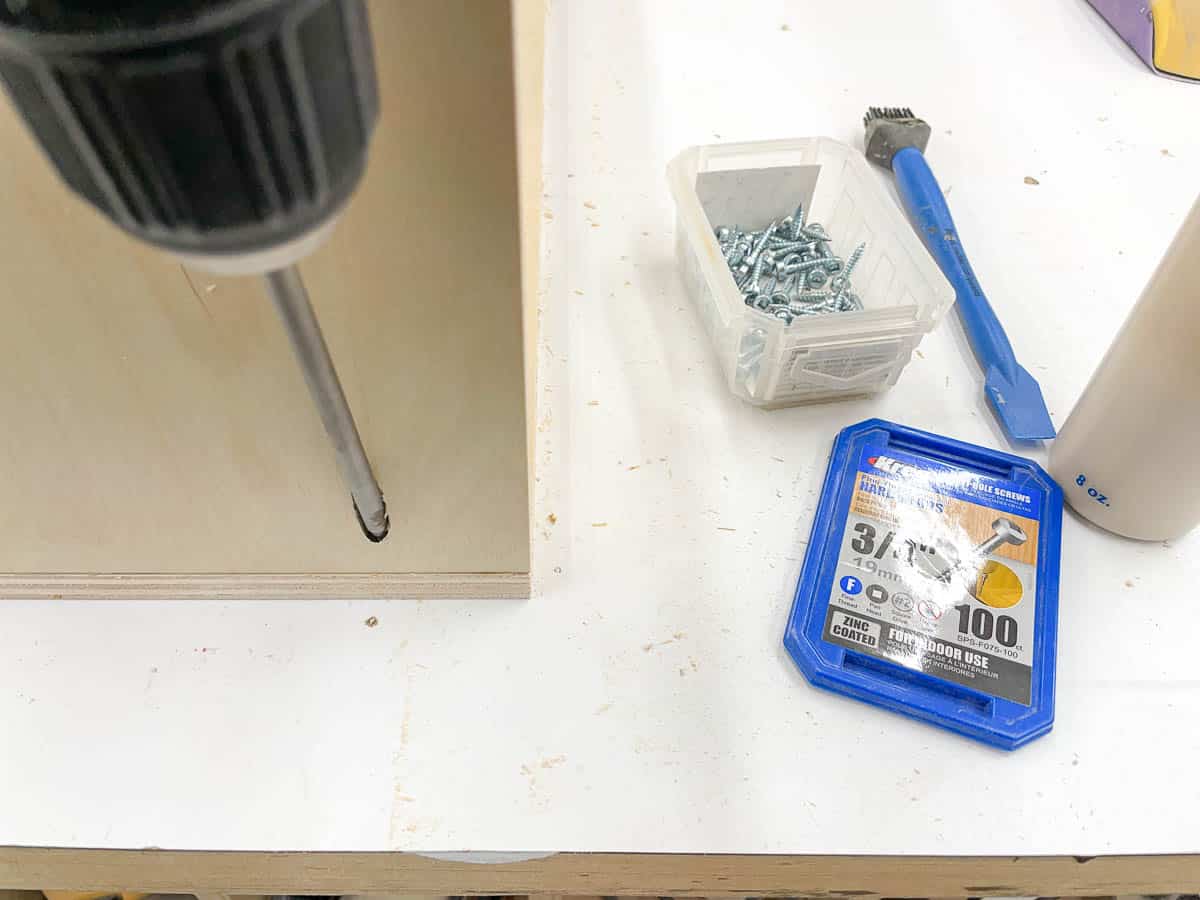
- Countersink bit
- 1 ¼" flat head screws
- Four 3" locking casters
- Two sets of 28" full extension drawer slides
- Drawer pulls
- Drill
- Table saw, track saw or circular saw
- 18" clamps
- Square
How to make a planer cart
Download the woodworking plans
Before you begin, don't forget to download and print off the planer stand plans! You'll get all the dimensions, a cut list and plywood cut diagram, and detailed instructions with 3D models of every step of the build!

Click here to get the full set of four woodworking plans for this entire set up! You'll get the miter saw station, planer cart, router table and tool stand with lift at a special bundle price!
Build the box
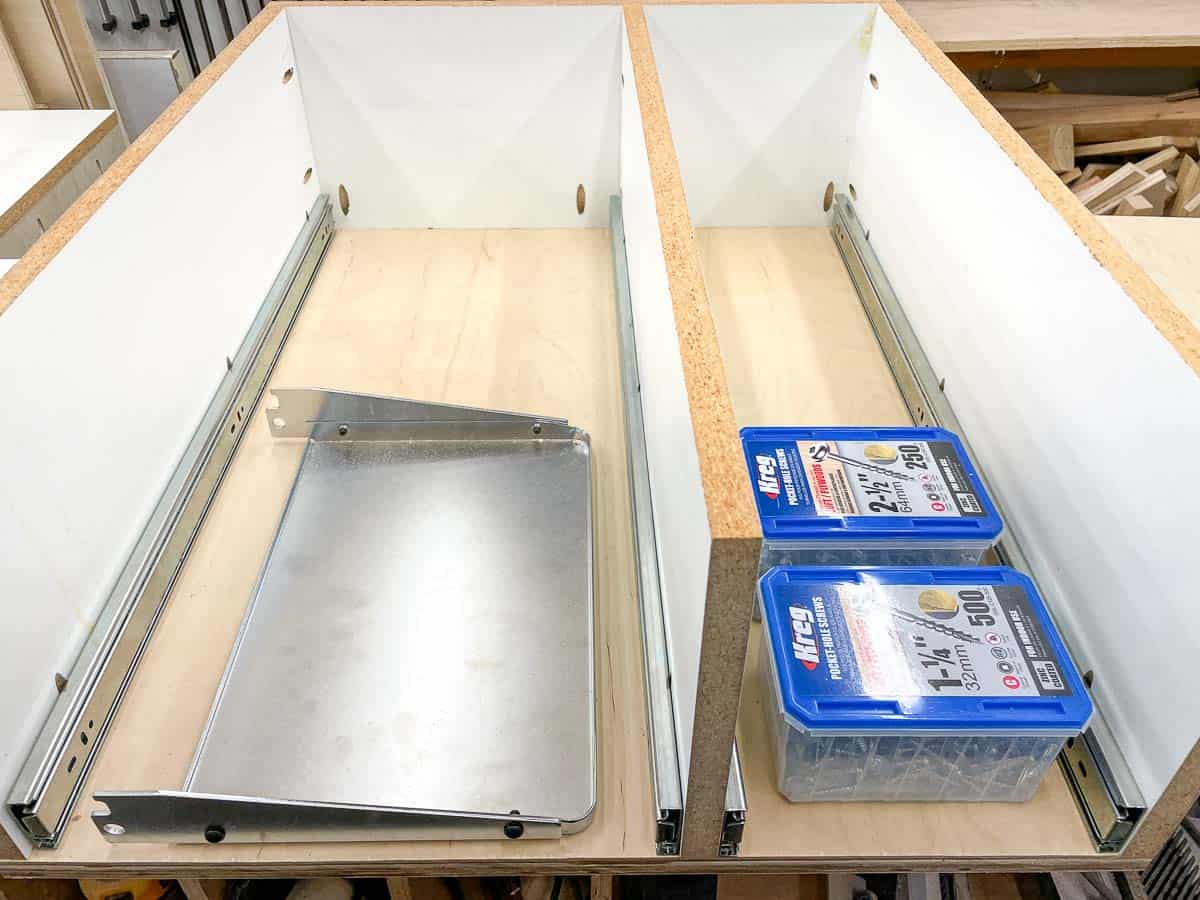
This planer table is basically a drawer box on wheels. A planer is a heavy tool, so I decided to make two drawers instead of one larger one so the center divider can help support the weight and prevent it from sagging.
I cut the top and bottom out of ¾" plywood, but used ¾" melamine boards for the sides. These boards have been sitting on my lumber rack for years, and they were the exact width I needed. I like to use up whatever scrap wood I can for shop projects like this!
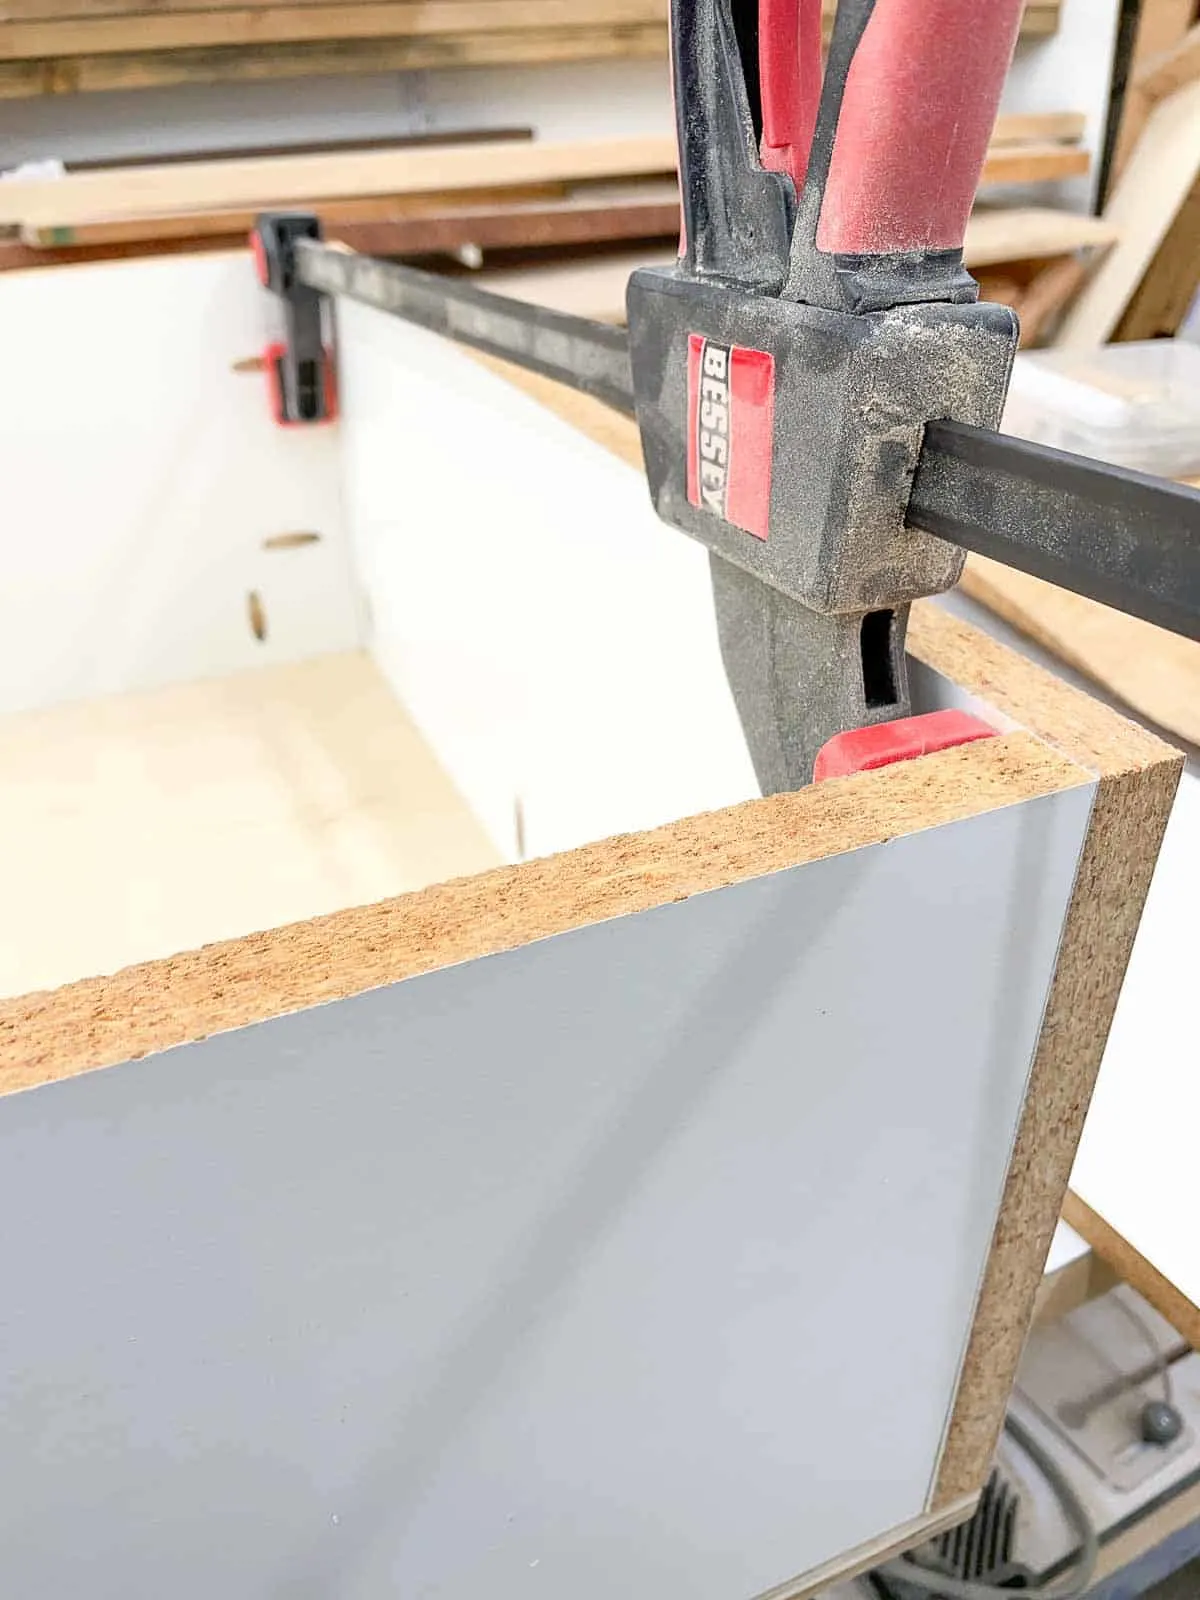
Assemble the three sides of the box and attach it to the bottom with pocket hole screws.

Then decide where you want the center divider to go. I needed enough space to store the outfeed table of the planer on one side, which made the other drawer pretty small. Luckily, it's exactly the right size for these larger Kreg screw boxes!
Make sure to take into account the thickness of the slides and the drawer box when taking your measurements. When everything looks right, attach the center divider to the back and bottom with more pocket hole screws.

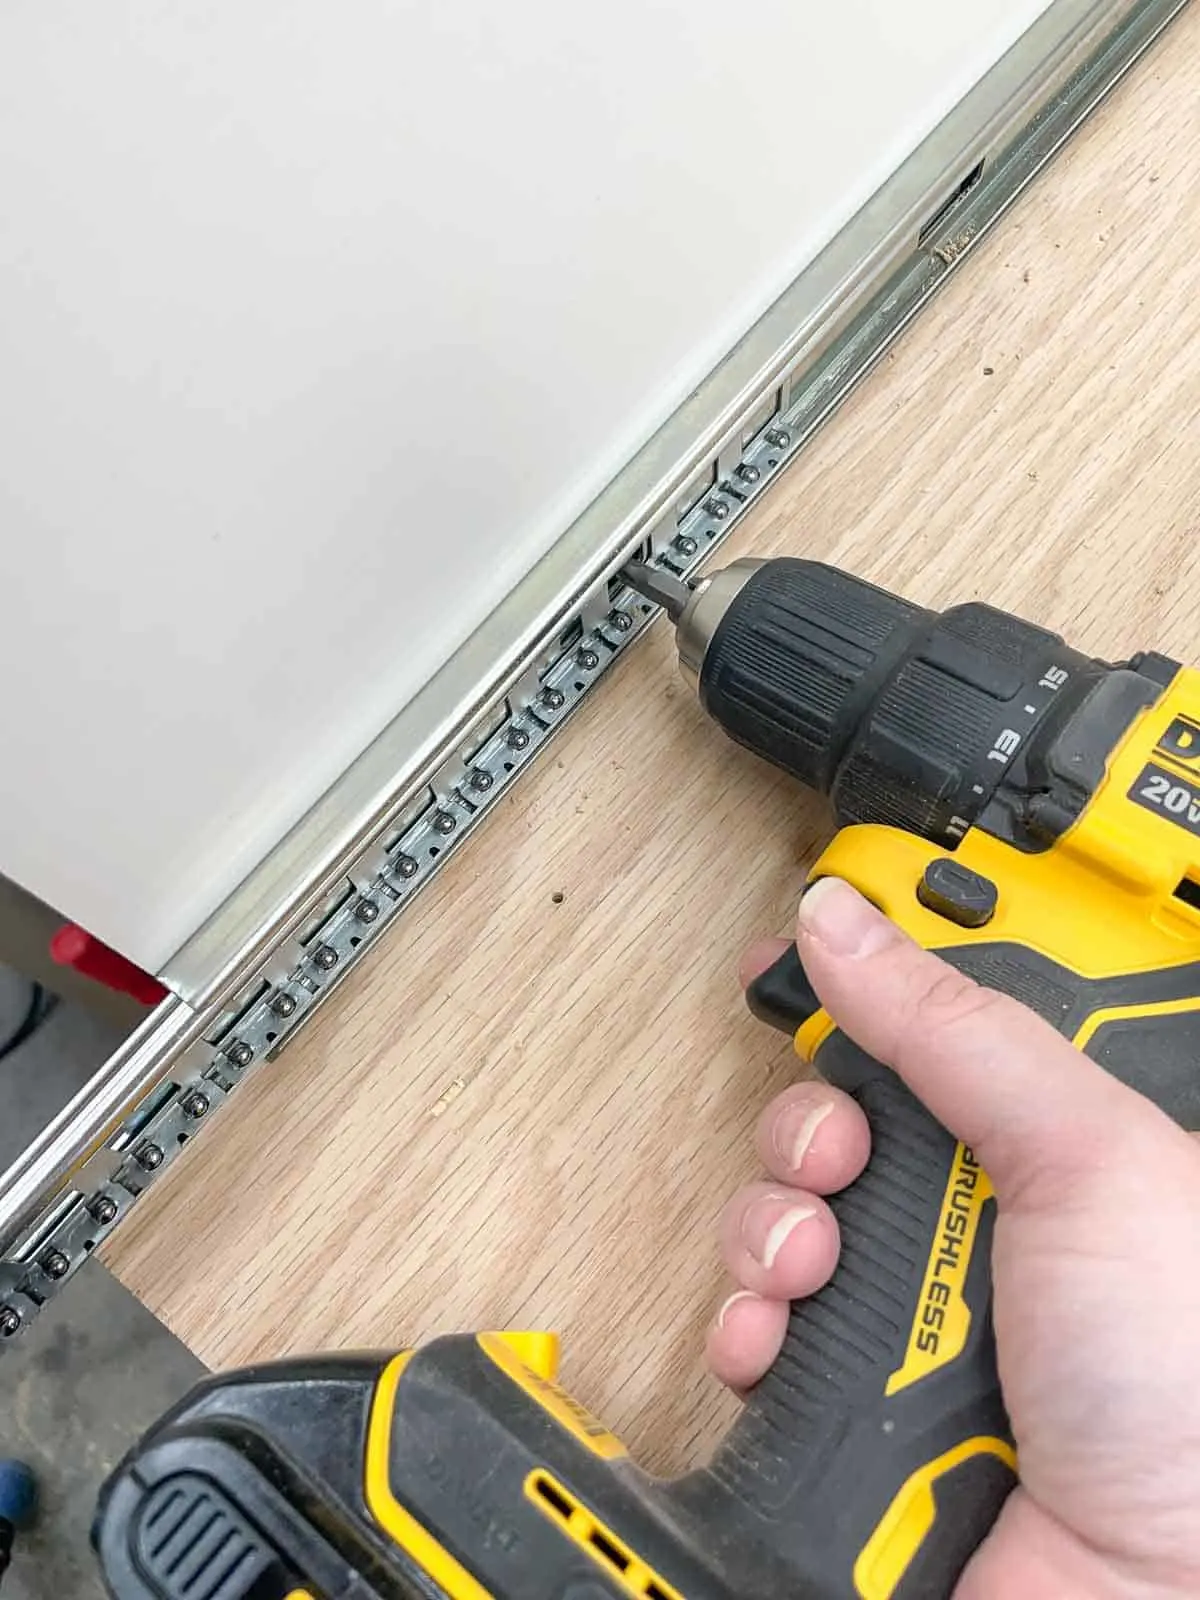
It's much easier to install the drawer slides now, while the top is removed. Separate the two parts, and line up the cabinet side with the front edge of the box. I used scraps of ¾" plywood to raise the slides up off the bottom while I screwed it in place.

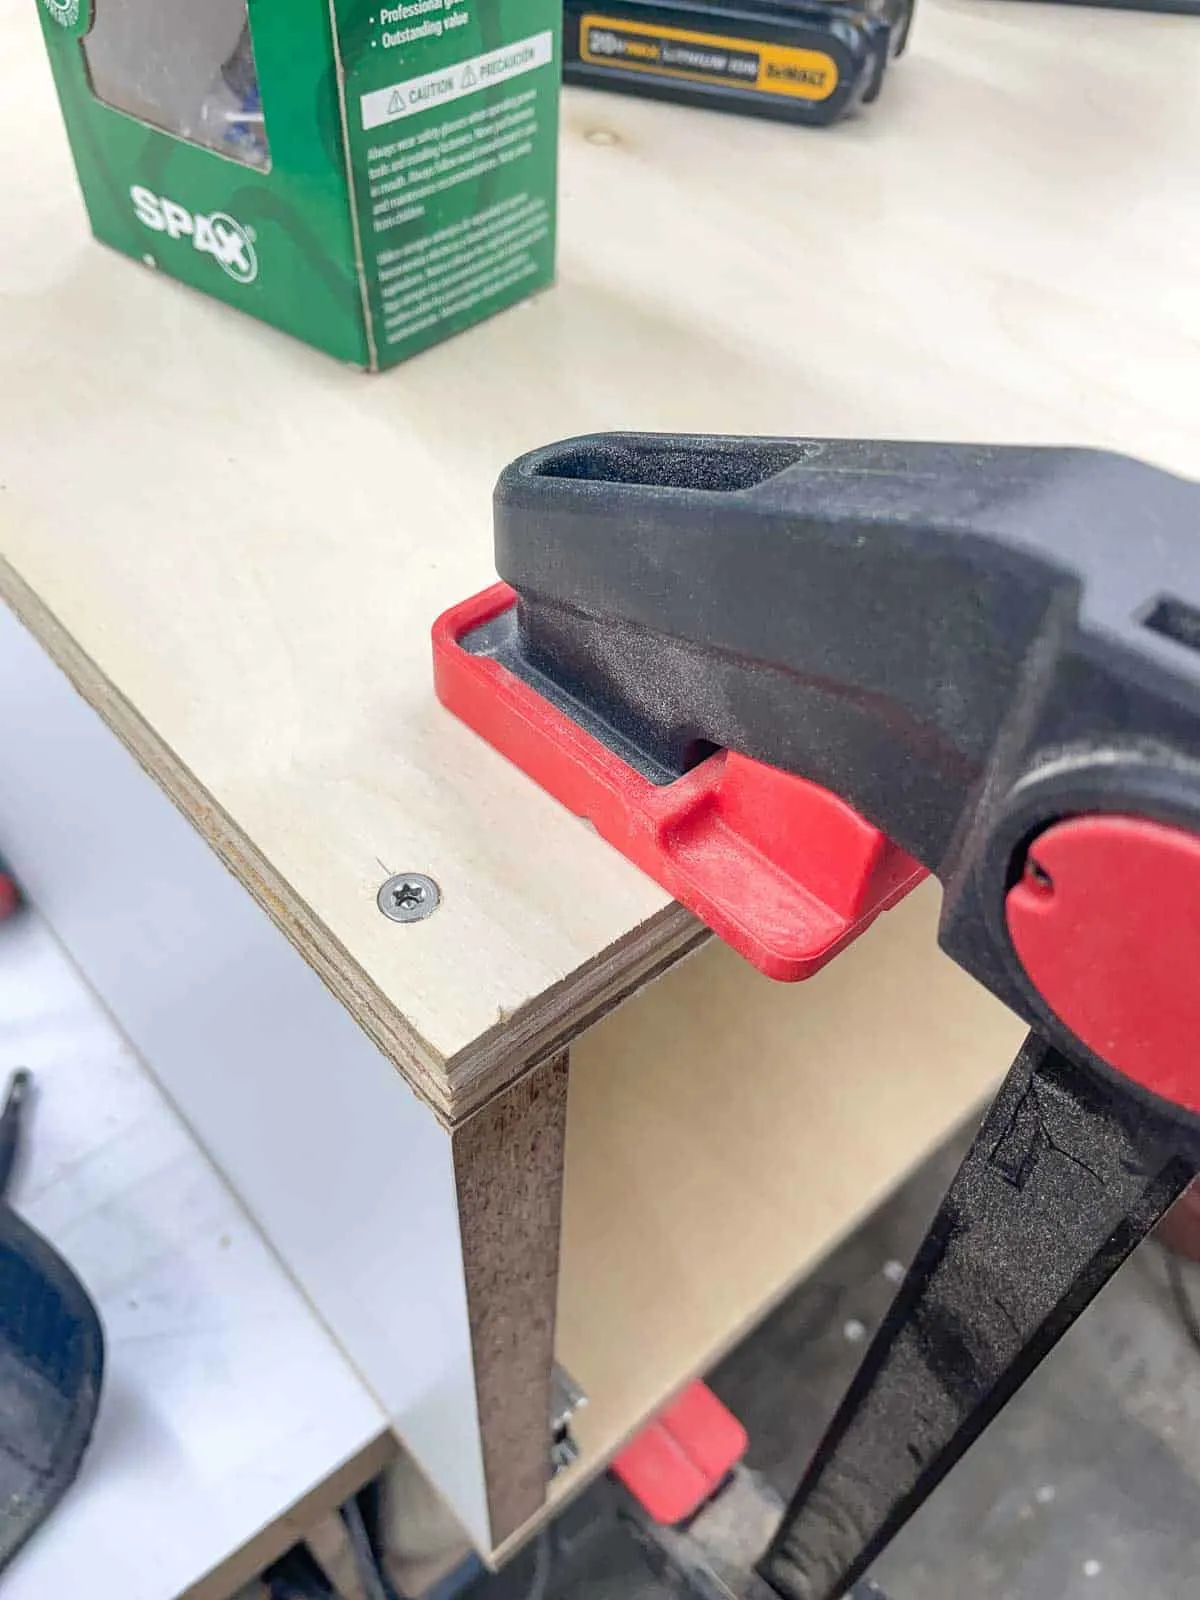
Line up the sides with the top and clamp everything in place. Drill countersink holes around the perimeter of the top, then use 1 ¼" flat head screws to secure it.

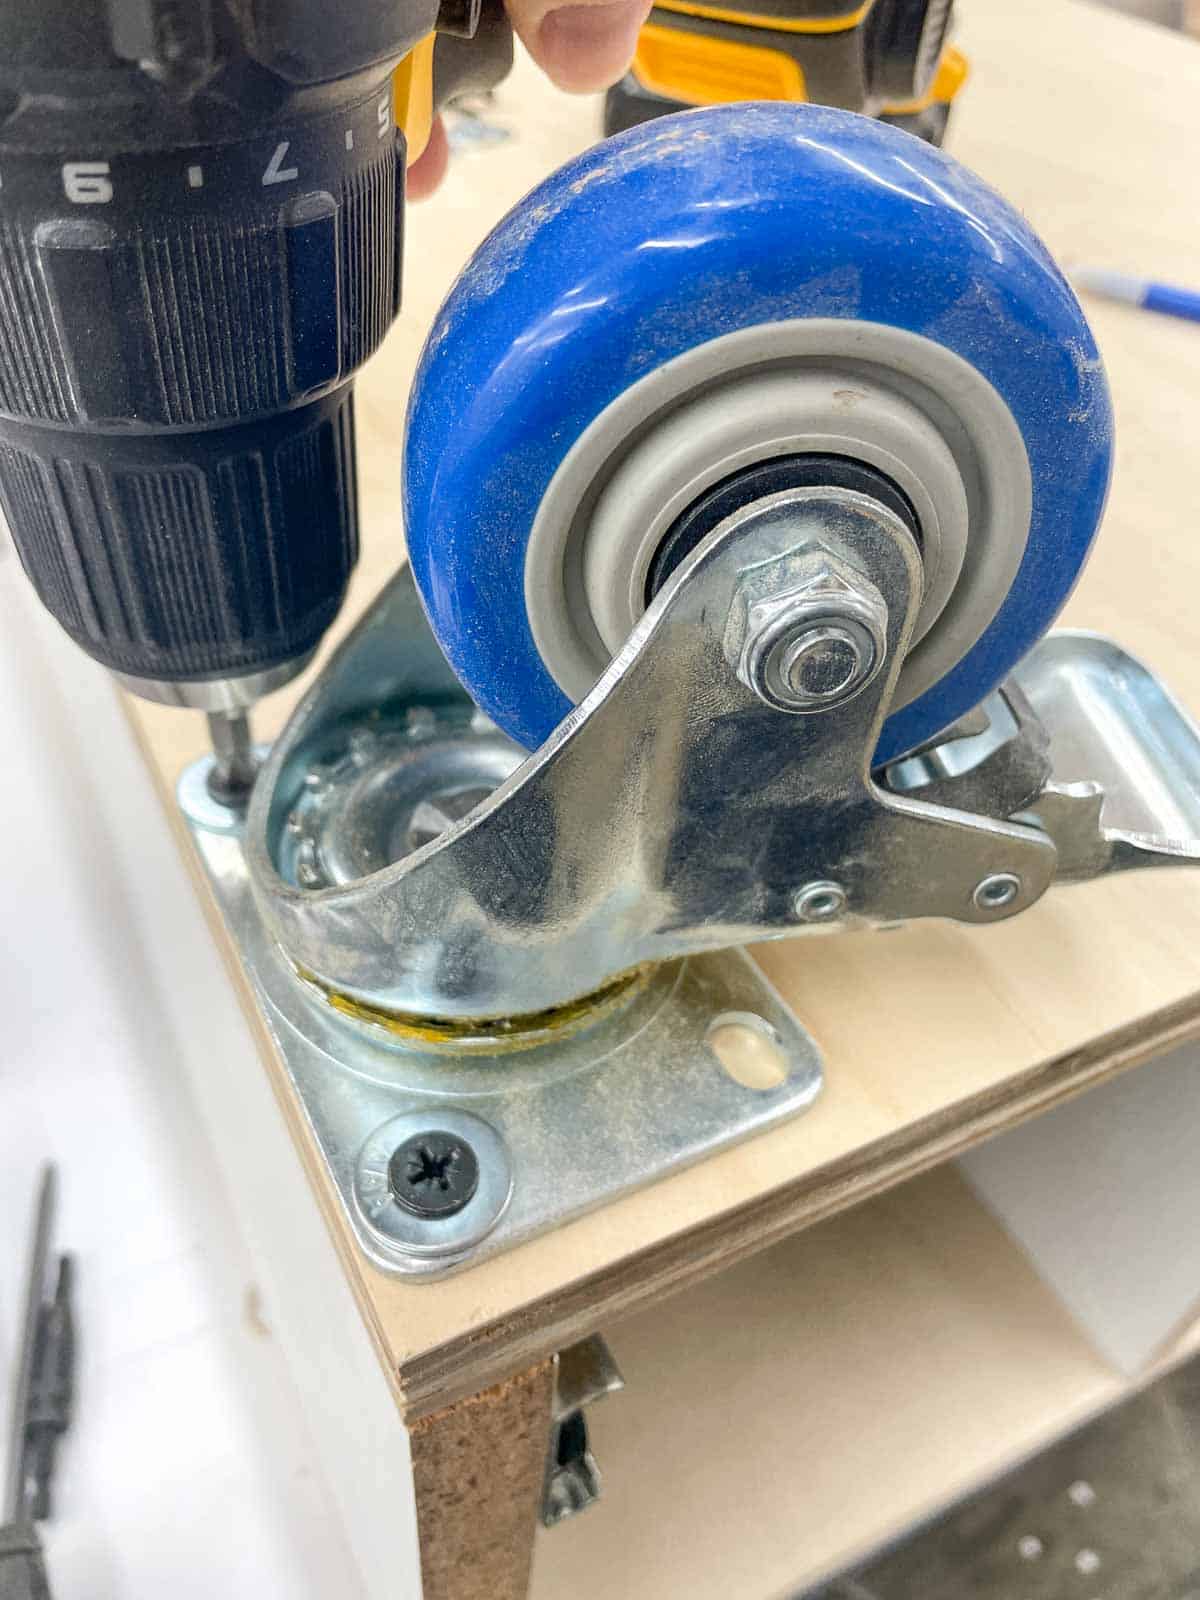
Attach the casters and planer
I had these casters left over from when I disassembled my old miter saw stand, so I reused them for the planer cart. Make sure your casters are rated for the weight of the tool, and that they can lock securely so it doesn't roll away during use!

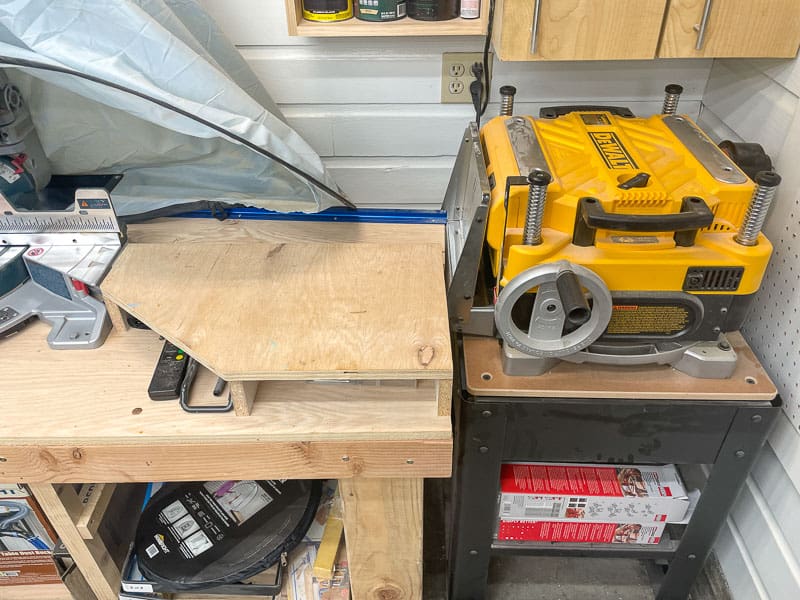
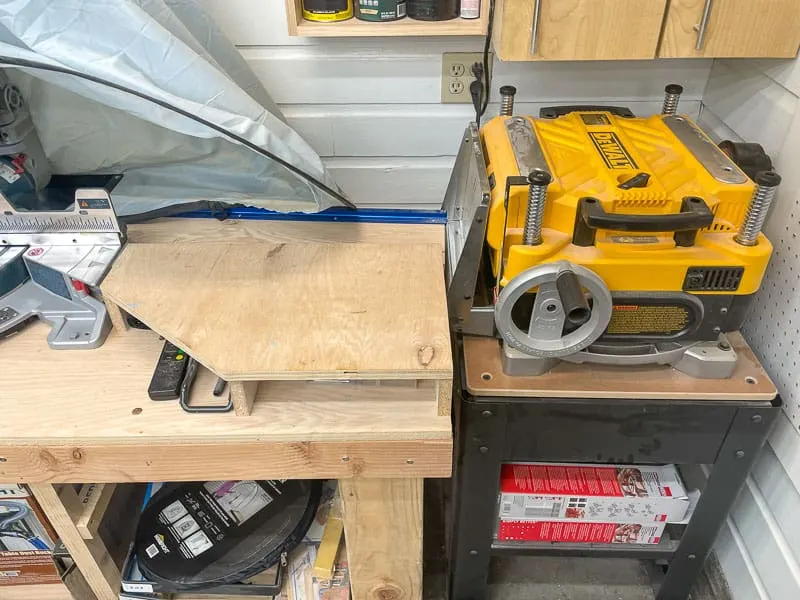
This thing was getting pretty heavy already, so I moved it down to the floor before I started on the drawers. I was a little worried about my measurements after seeing this huge box on my workbench, so I tested it out with the planer on top. Luckily, it fit perfectly under my new miter saw station! Whew!
Secure the thickness planer to the table with bolts or screws. Make sure the ends won't interfere with the drawers on the inside!

Build the drawers
I made the drawers for the planer stand out of ½" plywood, but I adjusted the woodworking plans for ¾" plywood instead. The ½" plywood was a little too flimsy for such a long drawer, and it was difficult to get it square and straight.
To determine the width of the front and back drawer box pieces, first measure the distance between the installed drawer slides. From that measurement, subtract the thickness of both of the side pieces of the drawer box. I have a full tutorial on how to build a drawer three different ways here!
Cut the front and back of the drawer box to that length, and drill pocket holes on two sides. Attach the sides to the front and back with wood glue and pocket hole screws.
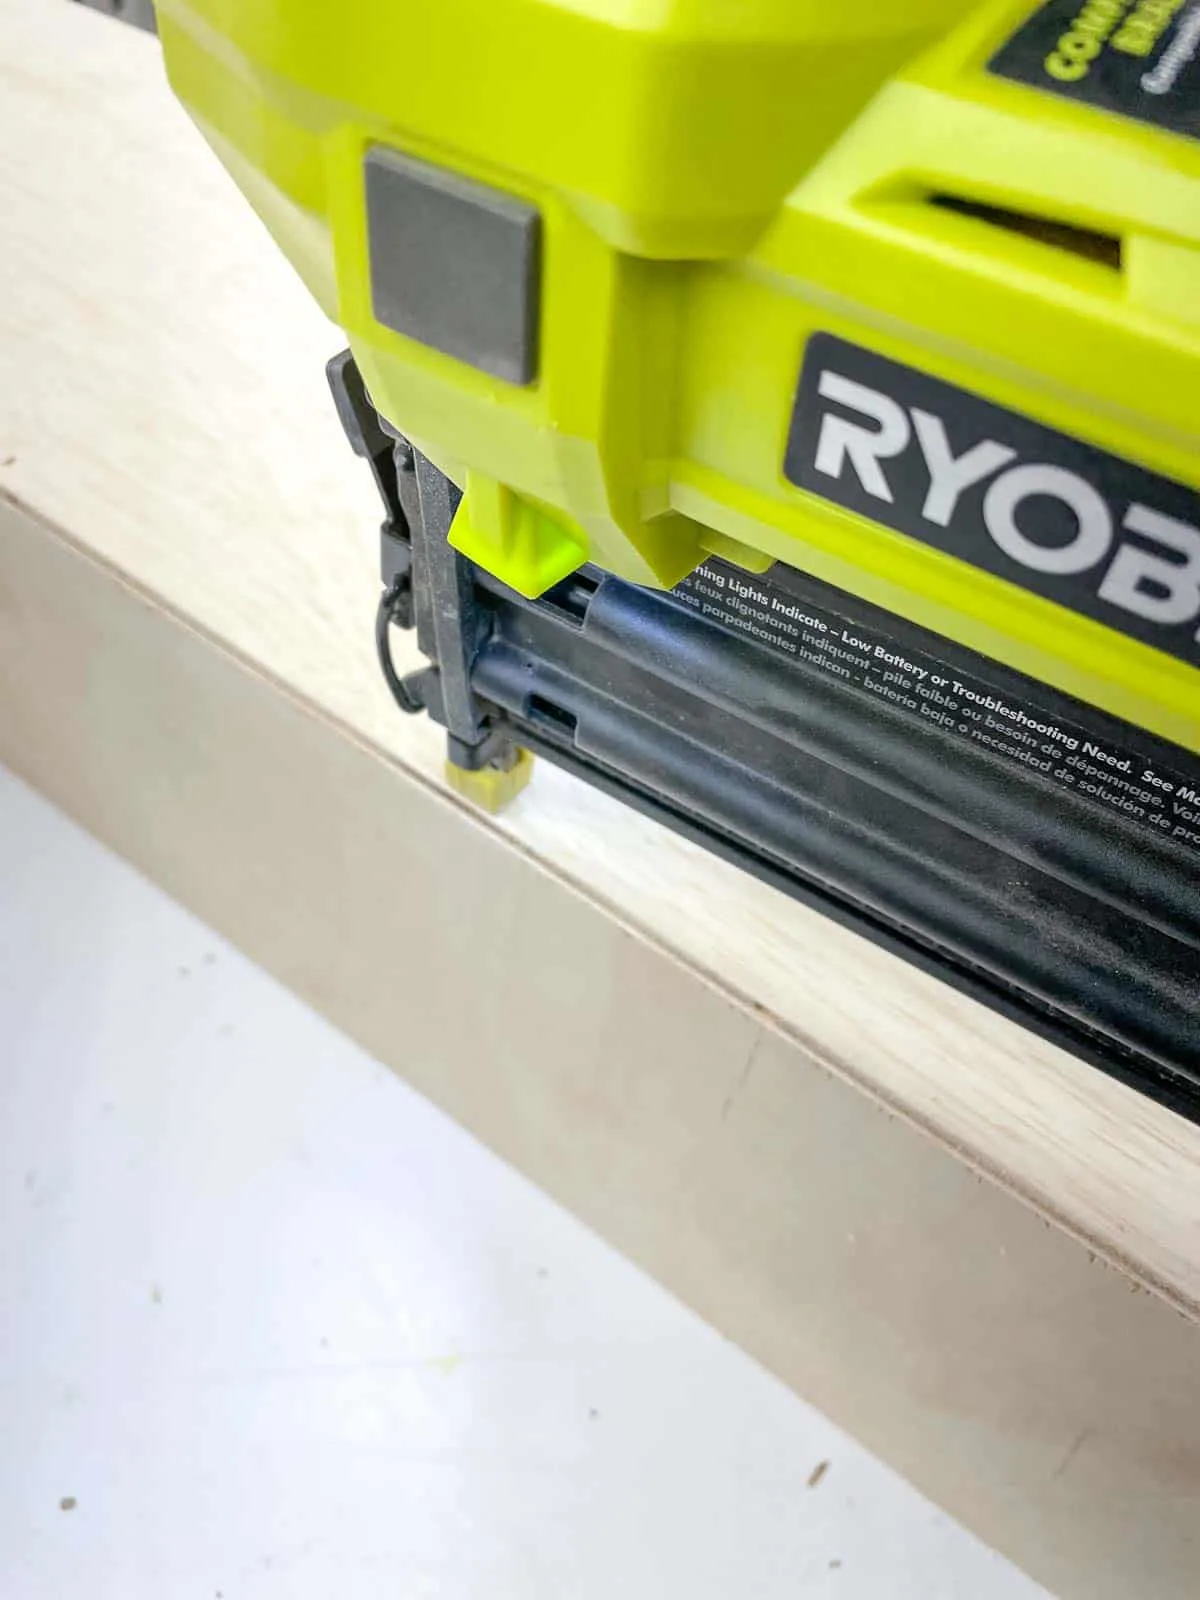
Cut the ¼" plywood to the same size as the bottom of the drawer box, then attach it with wood glue and brad nails.

Install the drawers in the planer stand
I used scraps of ½" plywood to elevate the drawer boxes between the slides. This makes it really easy to install the drawer slides at the right height! Just pull out the drawer slide until the holes are visible, then pull out the drawer box until the ends are flush. Then screw it into place!
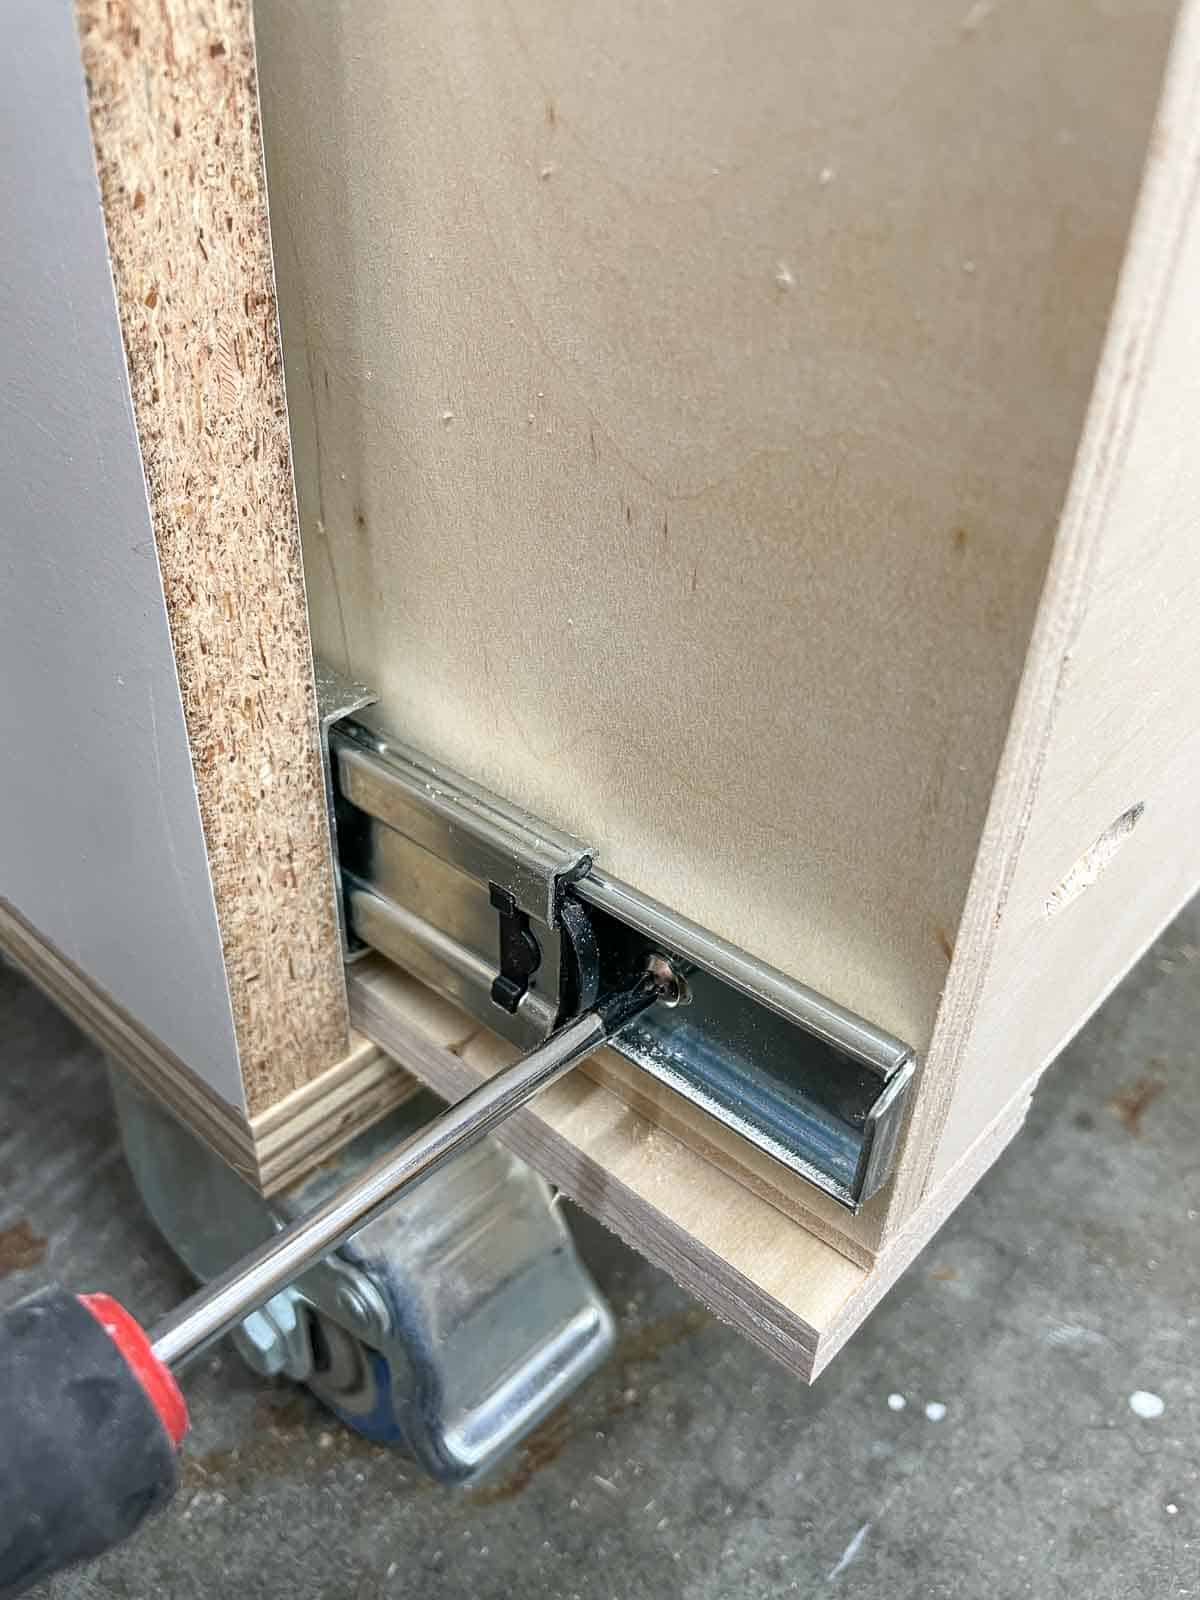
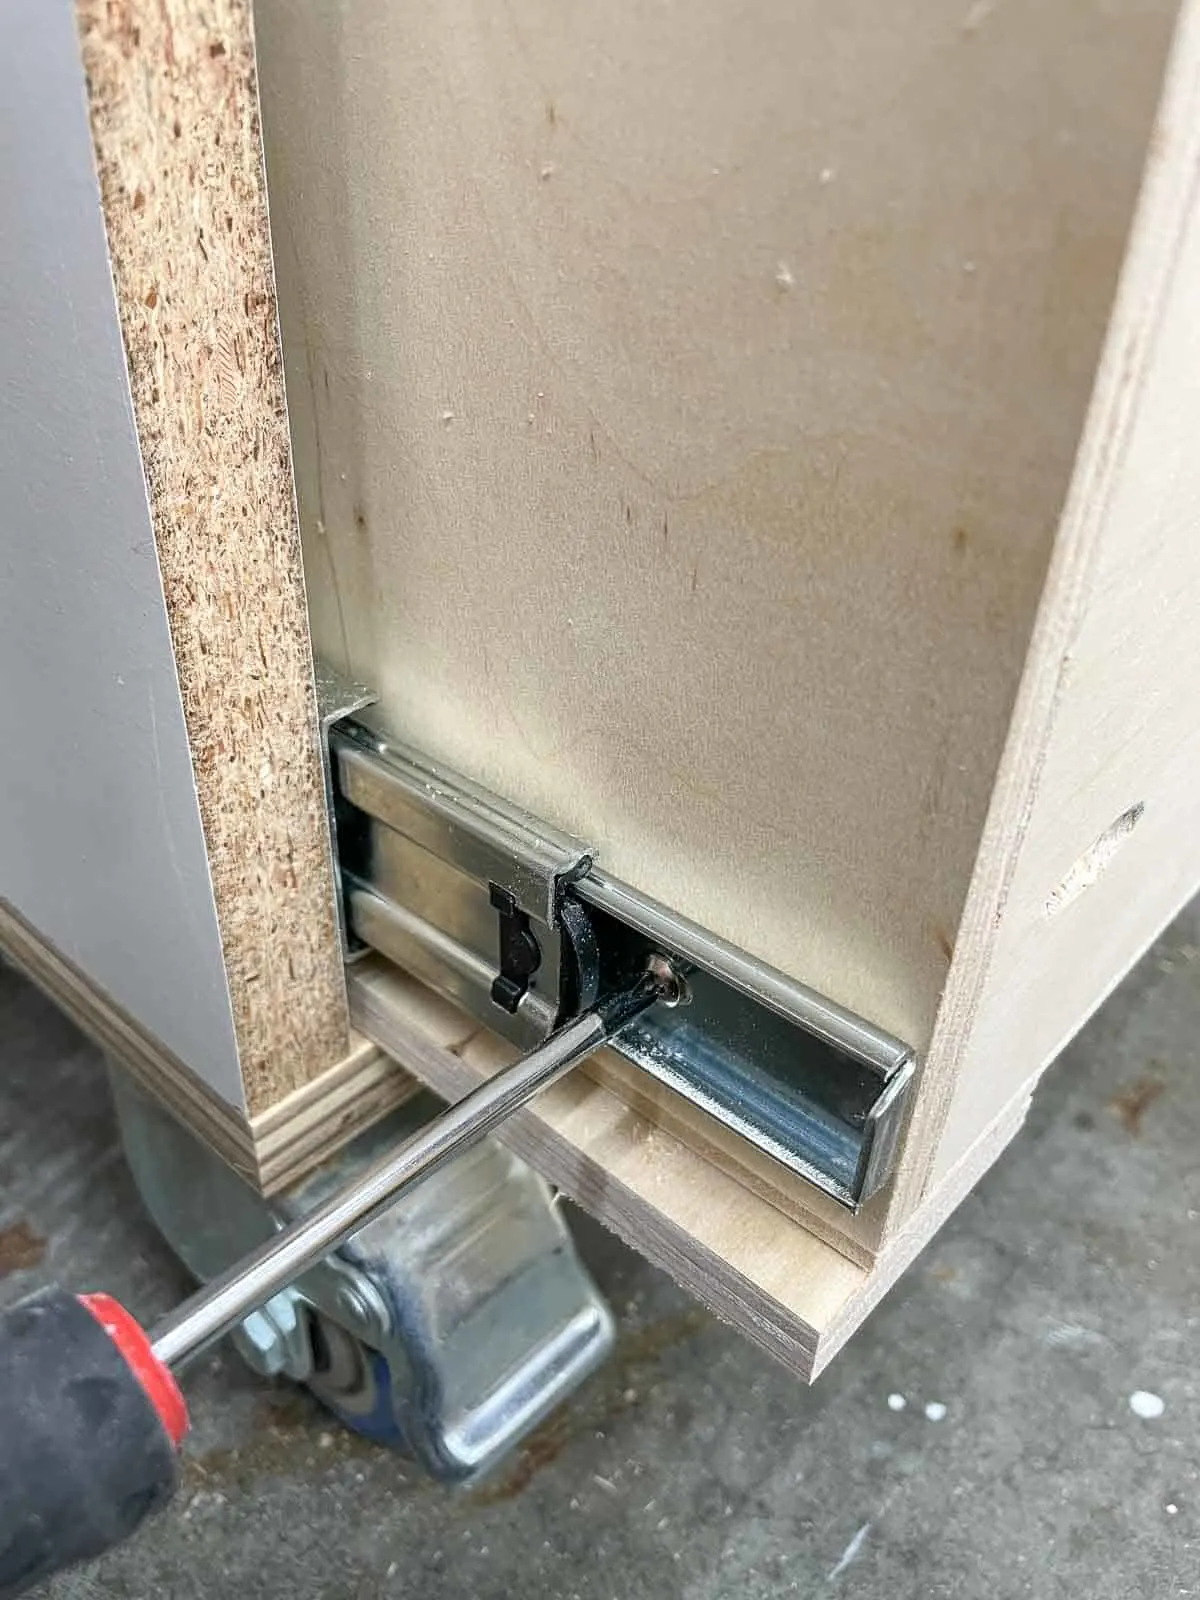
Then pull out the drawer box until the next set of holes is visible, and repeat the process. Once both sides are installed, pull the whole drawer box out and insert a screw into the back holes.
When you first reinstall the drawer box, it might feel a little stiff. Give it a few pulls to loosen it up!

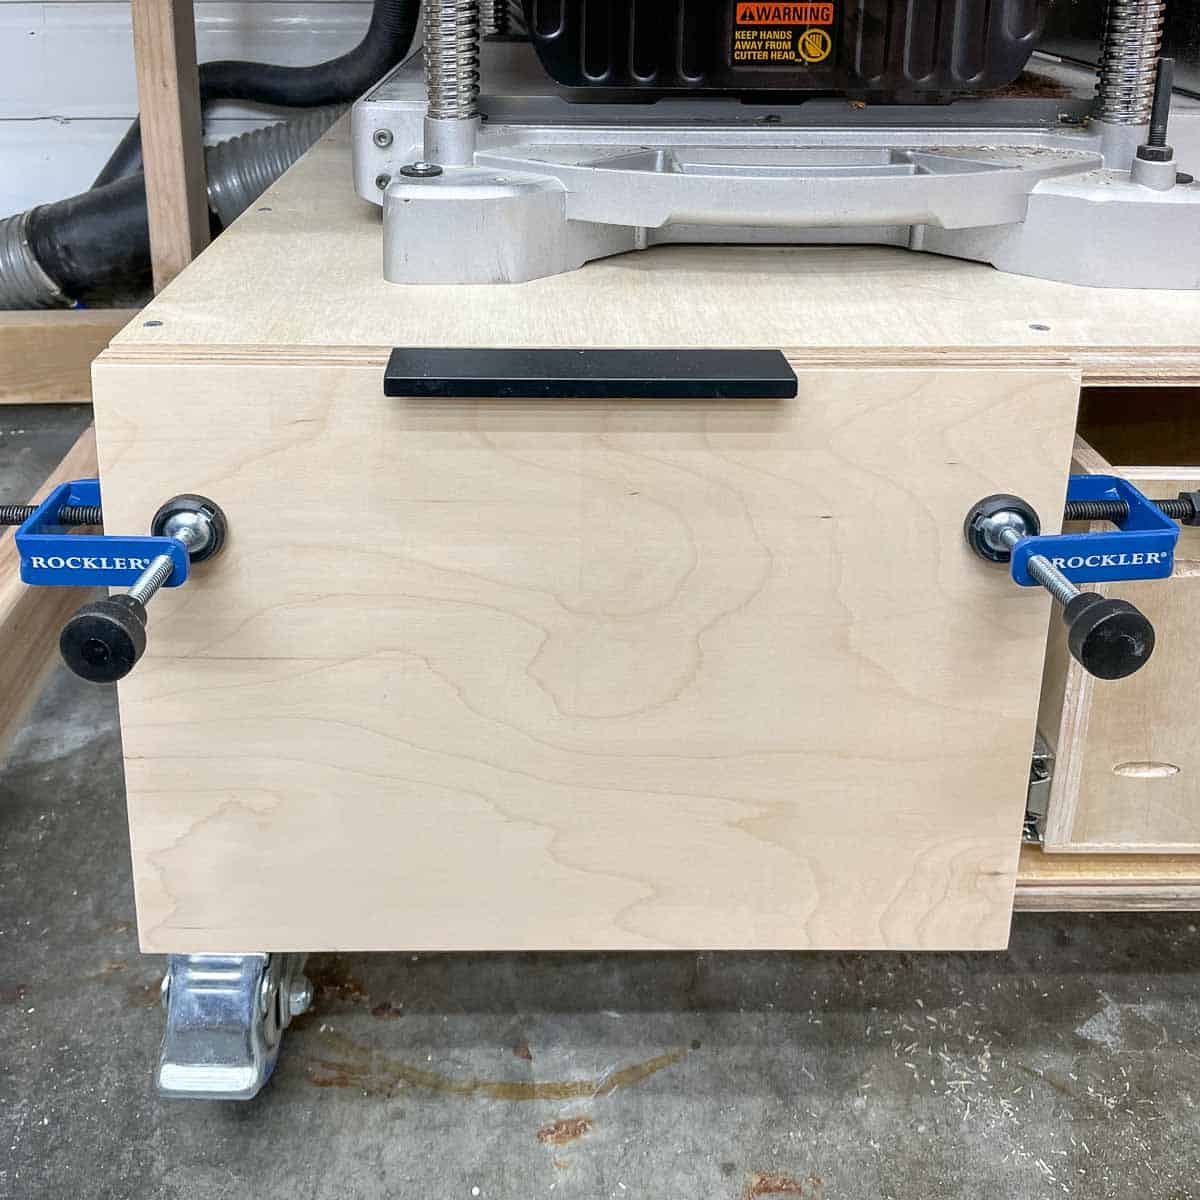
Attach the drawer fronts
I cut the drawer fronts to size, with just a little extra taken off one side so there would be a gap between the two drawers. Then I attached the drawer pull to the top of each drawer front.
These are the same ones I used on my table saw stand, and their low profile means I don't bump into them like other knobs and pulls. Plus, they're super easy to install!
I used these drawer front installation clamps to get the right positioning over the opening. Then I secured the drawer front from the inside.

Load up your new planer stand!
I'm really happy to finally get my planer out of the way, yet more easily accessible at the same time! It feels like the workshop is all starting to come together now.

These ridiculously long drawers can fit a ton of stuff! All my pocket hole screws were scattered in various cabinets and drawers, but now they're all in one spot with room for more. The outfeed table for the thickness planer can be removed and stored in the larger drawer.
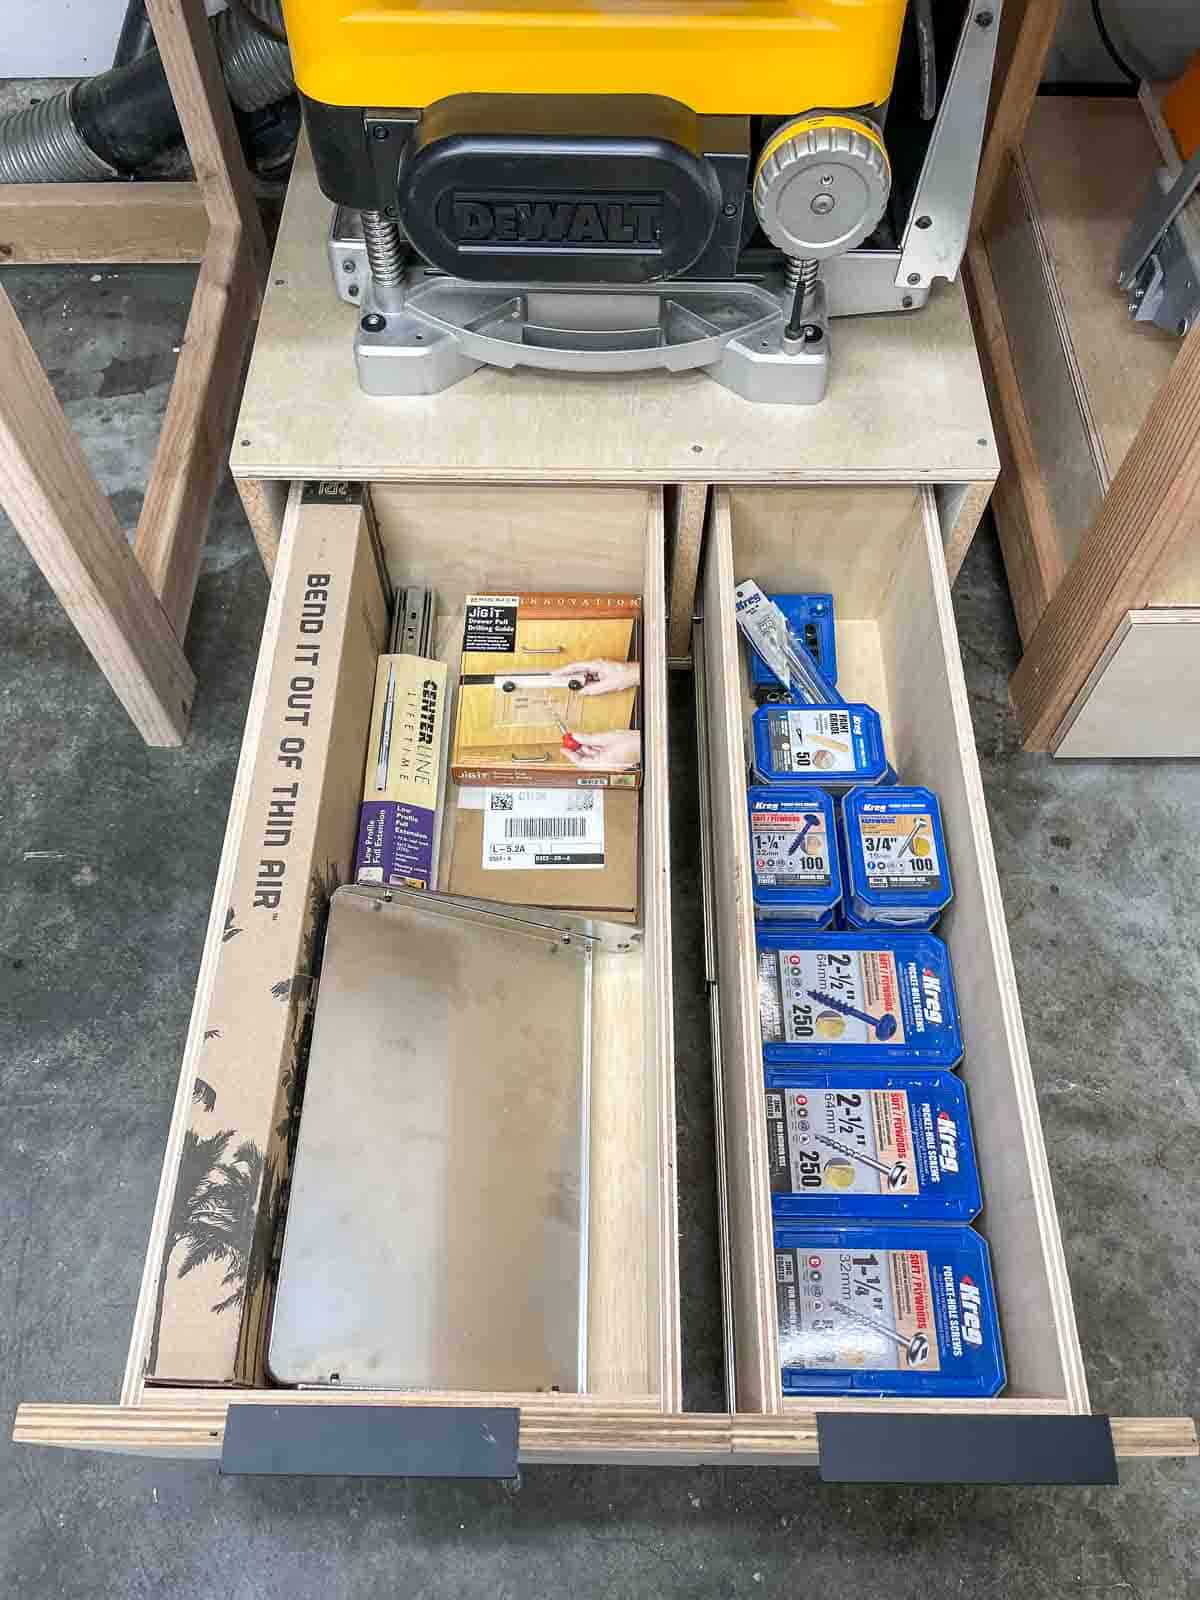

Instead of rolling like a busted shopping cart, my new planer stand glides out easily and locks into place. I can position the outfeed to point out the workshop door when I need to plane longer boards, so I'm not limited to this small space.

I have enough clearance on the side to leave the outfeed table in place, freeing up space in the drawer for other tools! I may use this space for a dedicated shop vac for the miter saw, though, but at least I have options!

I have one last big build for the workshop coming up...the router table! I've always wanted one, but never thought I had the space in this tiny shop. I can't wait to take my woodworking up a notch!
When you buy the planer stand plans, you get a discount on the other plans in the set. Buy the entire bundle of all four woodworking plans for even more savings!
Check out these other workshop projects!
Charlene Lyle
Saturday 23rd of January 2021
I plan to download the planer stand plans as this is my next "dream" purchase, but first I have to make a better stand for my miter saw. I 've noticed in following your other plans, and moving pictures that you had a dust collection hood on your miter saw in your old workshop. I tried one like that, and it didn't do any good at all. Now I see in your new shop that you don't have one. Are you planning to install some kind of dust collection system? I really can't afford much more than my shop vac, and the miter saw is the biggest dust maker for me. Charlene
Vineta
Saturday 23rd of January 2021
I have a dust funnel behind my miter saw in the new stand that's connected to the bigger dust collector, but you could just run a shop vac hose to the dust port on the saw. I'm thinking of making some sort of a hood for it if the sawdust becomes a problem, but so far it hasn't been too bad.