Do you need a jointer AND a planer in your shop? Unsure how they work? Learn everything you need to know about a jointer vs planer in this article!

The jointer and the planer are like salt and pepper - they usually go together! They both make wood flat, but in different ways. Used together, they can create a perfectly square and flat board for your next woodworking project.
This post contains affiliate links for your convenience. Purchases made through these links may earn me a small commission at no additional cost to you. Please visit my disclosures page for more information.
What's the Difference Between a Jointer and a Planer?
The jobs of the jointer and planer can be a bit confusing. So, let's start with a simple list of the differences between these tools.
Functions of the jointer and planer:
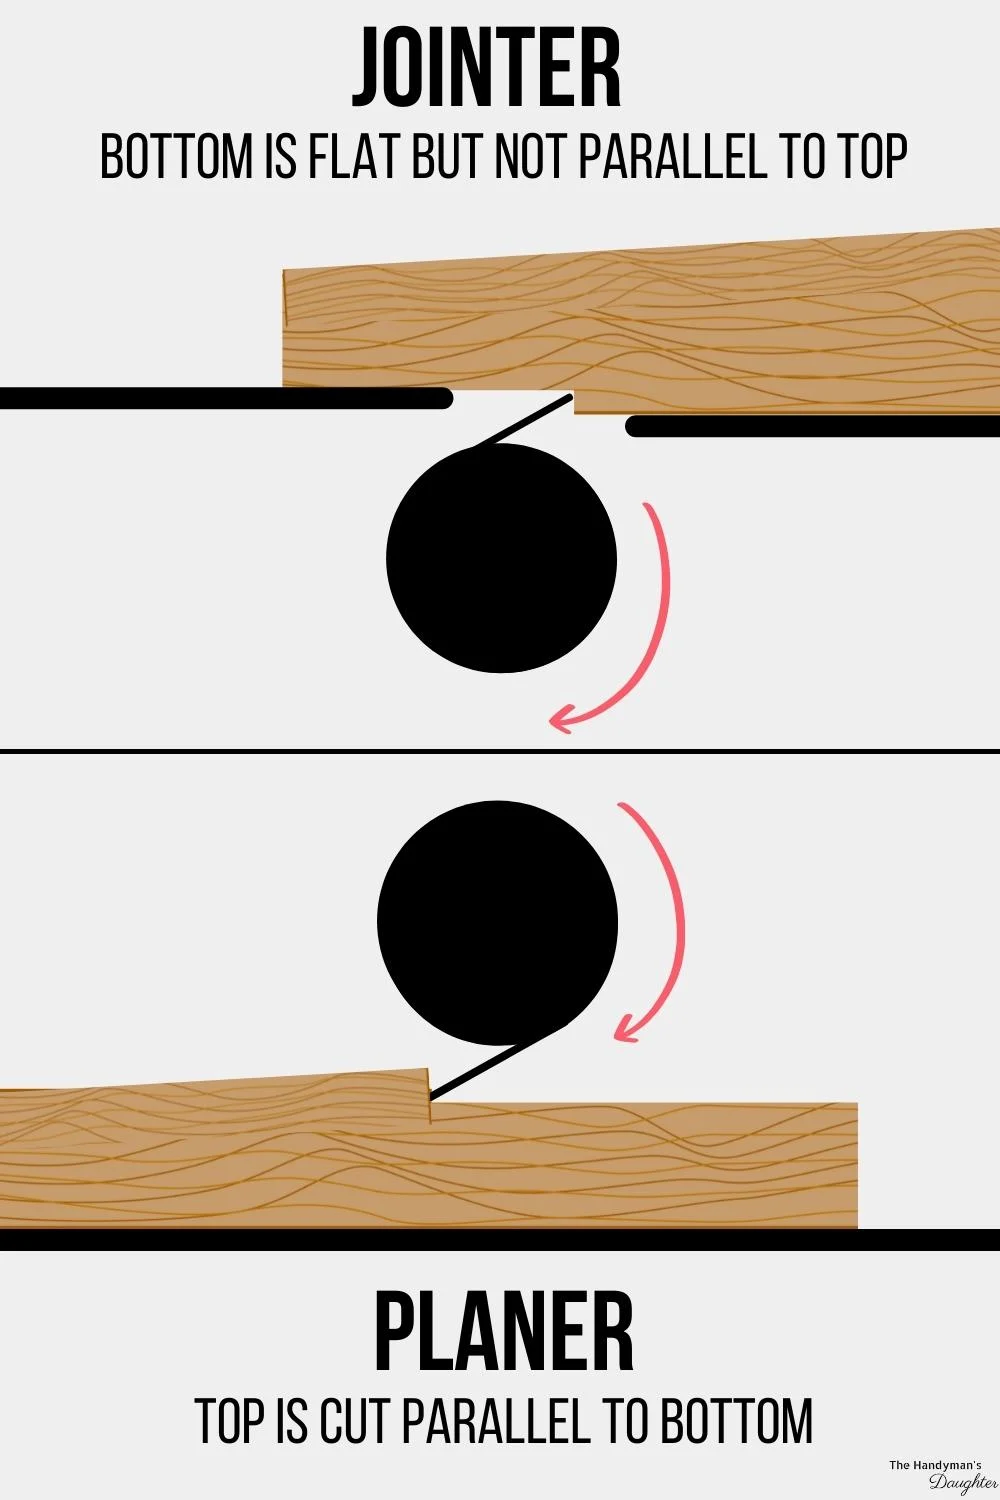
- The jointer will create a perfectly flat surface.
- The planer will create a uniform thickness.
- Jointers have a spinning blade (cutter head) within the table.
- Planers have a flat deck and a blade that spins above the table.
- Jointers cannot effectively shave a board to uniform thickness.
- Planers cannot make a board with perfectly square sides on its own.
There are several exceptions to these rules. In woodworking, there's always more than one way to accomplish the same task. There are several jigs and sleds you can build to make a planer function similar to a jointer. Check out the video below for more details.
What's a Jointer?
A jointer is a woodworking tool used to create a perfectly flat surface on a piece of wood. Often, woodworkers will use the jointer to smooth a surface or fix a warped piece of wood.
I have this little 6" benchtop jointer, which works great for most of the lumber I typically use. Larger floor stand models can handle wider boards with more horsepower, but with a hefty price tag.
Here are the main components of a jointer:
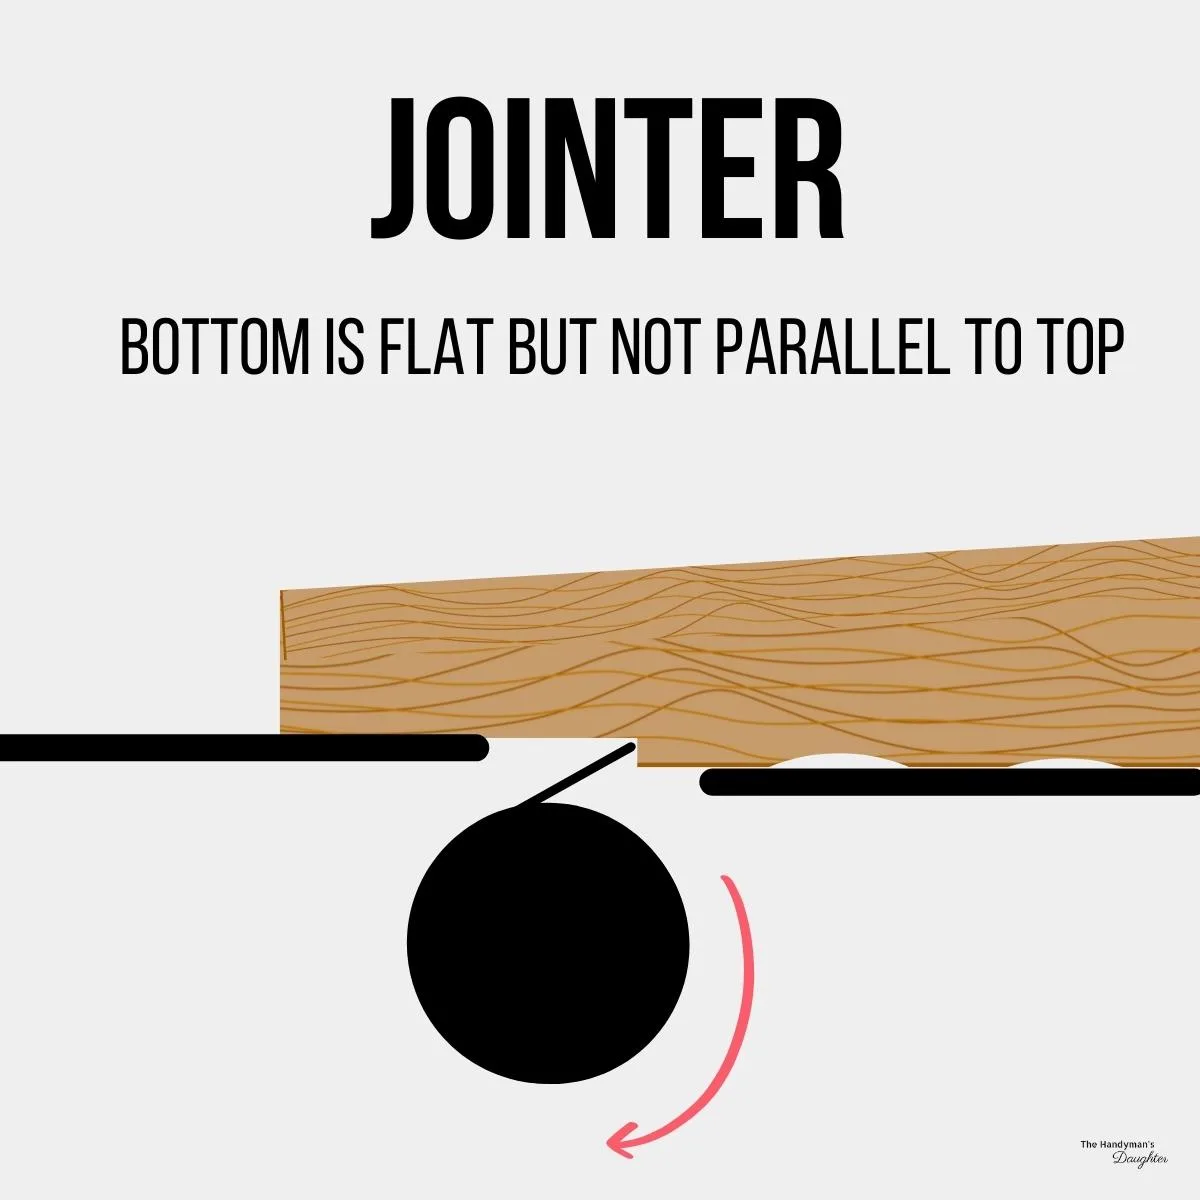
- Table: The deck of a jointer is adjustable, with the right side lower than the left side. The lower you crank down the right side, the more wood will be removed by the blade in a single pass. The left side of the table is even with the top of the cutter head.
- Blade or cutter head: The blade is long and cylindrical, with either several straight blades or many smaller ones arranged in a helix. The blades shave off a small amount of wood across the width of the board face.
- Fence: Similar to a table saw, a jointer has a guide that keeps the board square. You can adjust the fence to different angles, although it's usually set at 90 degrees.
- Swing guard: The blade has a guard, ensuring you don't run your hands over the blade during operation.
- Vacuum port: Jointers should be attached to some form of dust collection to remove the chips from the machine.
What Does a Jointer Do?
A jointer makes one side of a board perfectly flat. It has a spinning blade between two tables positioned at different heights. As the board slides across the lower table, it passes over the blade, which is set to the same height as the higher table. The high spots of the board surface are shaved off by the blade.
It may take several passes to remove all the high spots and create a perfectly flat surface. It's better to take multiple small bites to prevent tear out and preserve as much of the wood as possible.

When you repeat this process for one edge of the board, you create a perfectly square corner that can be used as reference to get the remaining sides parallel.
When Should I Use a Jointer?
Lumber is expensive, especially nicer hardwoods like maple or walnut. You can save a lot of money and ensure that every board is perfectly square if you mill the lumber yourself.

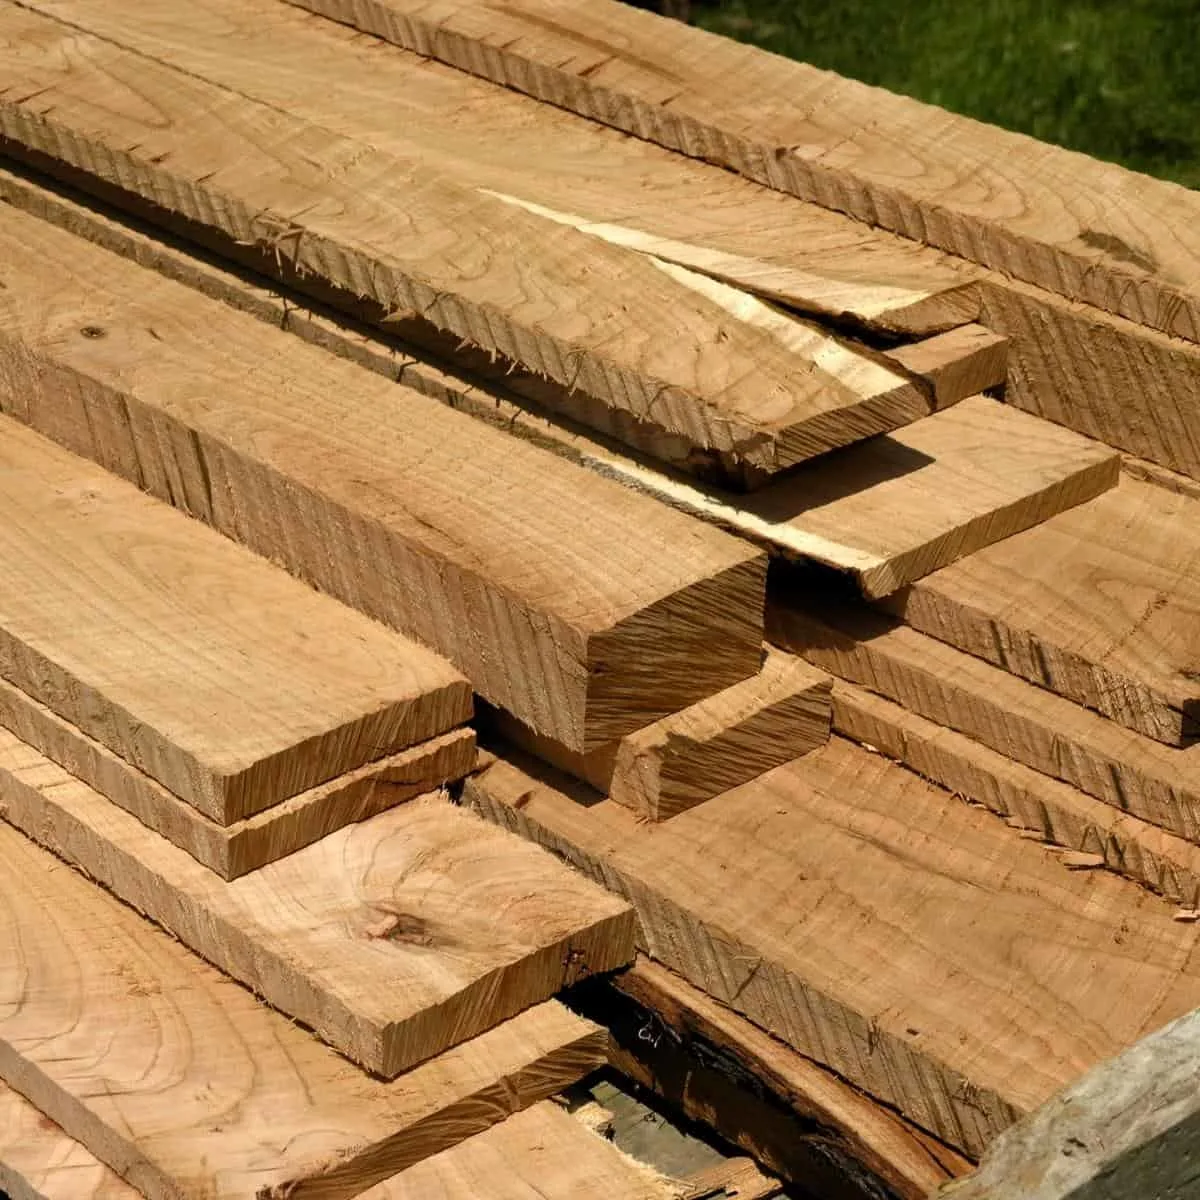
Jointers play a key role in correcting warps and twists in your material. The blade removes the high spots with each pass, so you are eventually left with a smooth, flat surface. Here is an article explaining these types of warps in more depth.
The jointer will give you one edge and one face that are exactly perpendicular to each other. The jointed edge can be used against the table saw fence to cut a parallel edge. The jointed face is placed against the planer table so the top and bottom are cut parallel to each other.
How Do I Use a Jointer?
Check the specifications of your jointer before operation. Each one works a little differently, so familiarize yourself with the parts before you start.
With that said, here are some guidelines for using a jointer:
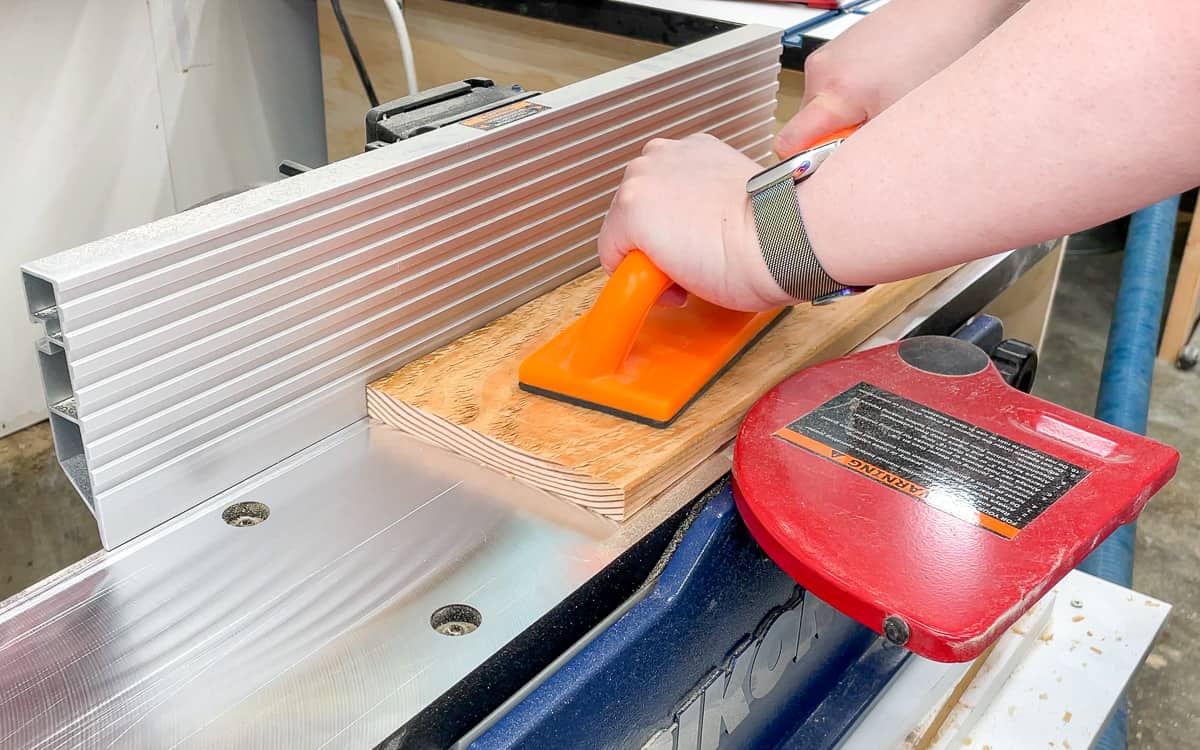
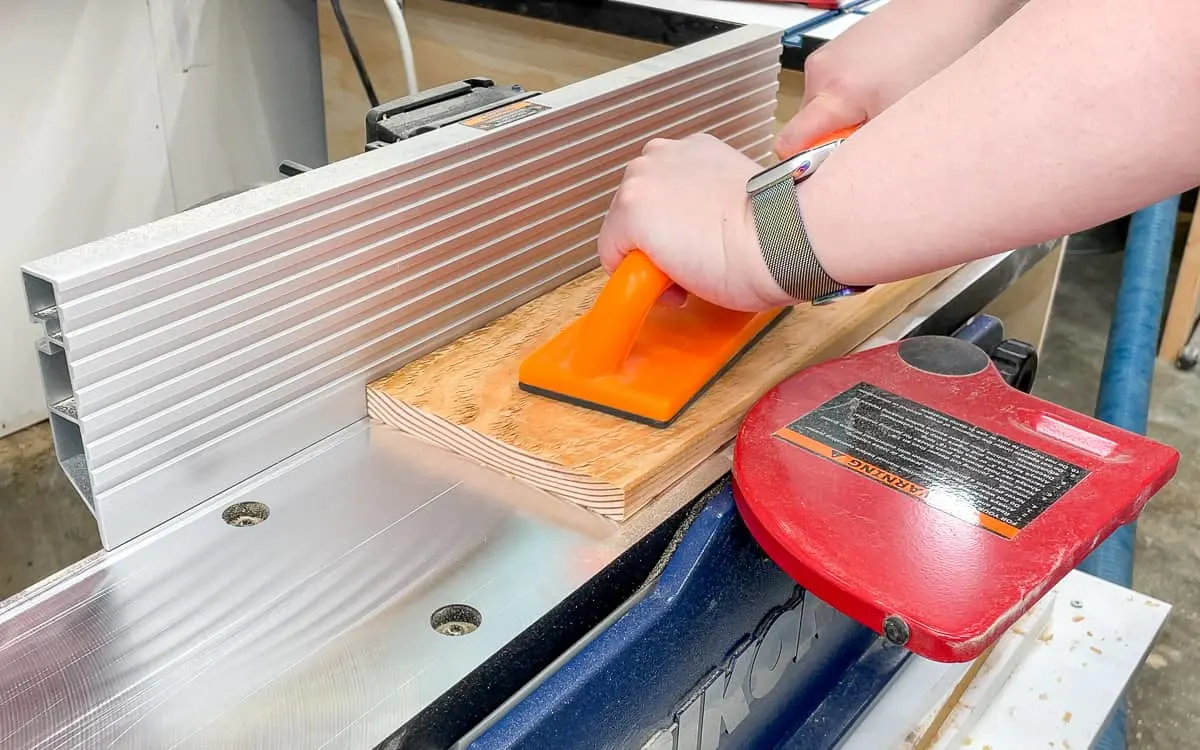
- Safety: Dust collection, eye protection, and earplugs are a good idea. The jointer is a surprisingly dangerous tool - use the jointer with the same caution as a table saw.
- Standard checks: Just like pilots make routine checks of an airplane, check your jointer before use. Ensure the fence is square, the blade is sharp, and the deck is clean and smooth. Waxing the surface will help reduce friction on the board.
- Set the width: The fence will slide similar to a table saw. For a jointer, it's important to match the fence with the width of the board you're jointing - the less blade exposed, the safer you are.
- Use grip paddles: Using grips keeps your hands away from the spinning blade and applies even pressure on the board. Once the board travels across the blade, apply downward pressure on the outfeed side to prevent snipe.
- Use pencil marks: Mark the side you are jointing with some squiggly pencil lines across the surface. These lines will help you keep track of progress, because it shows where the high spots are located. Once the marks are gone, that side is perfectly flat!
Here's a good video explaining how to use a jointer safely with the proper technique.
Frequently Asked Questions about the Jointer
How Wide Does a Jointer Need to Be?
In general, a wider jointer will be more useful. If you buy a jointer with a six-inch width, then you're limited to boards that are under six inches. An 8-inch jointer opens up the possibilities, but at a significantly higher cost.
Can You Get by Without a Jointer?
If you're building simple projects, you don't need a jointer. But as your woodworking skills progress, you'll find that a jointer will take your projects to the next level. There are ways to jig your planer to work more like a jointer, and I recommend trying out those techniques first to see if it works for you.
Why is it called a Jointer?
The jointer gets its name because it flattens one edge of a board before "joining" it with another board. You might use this joining technique for making a tabletop or larger panels.
What is a Planer?
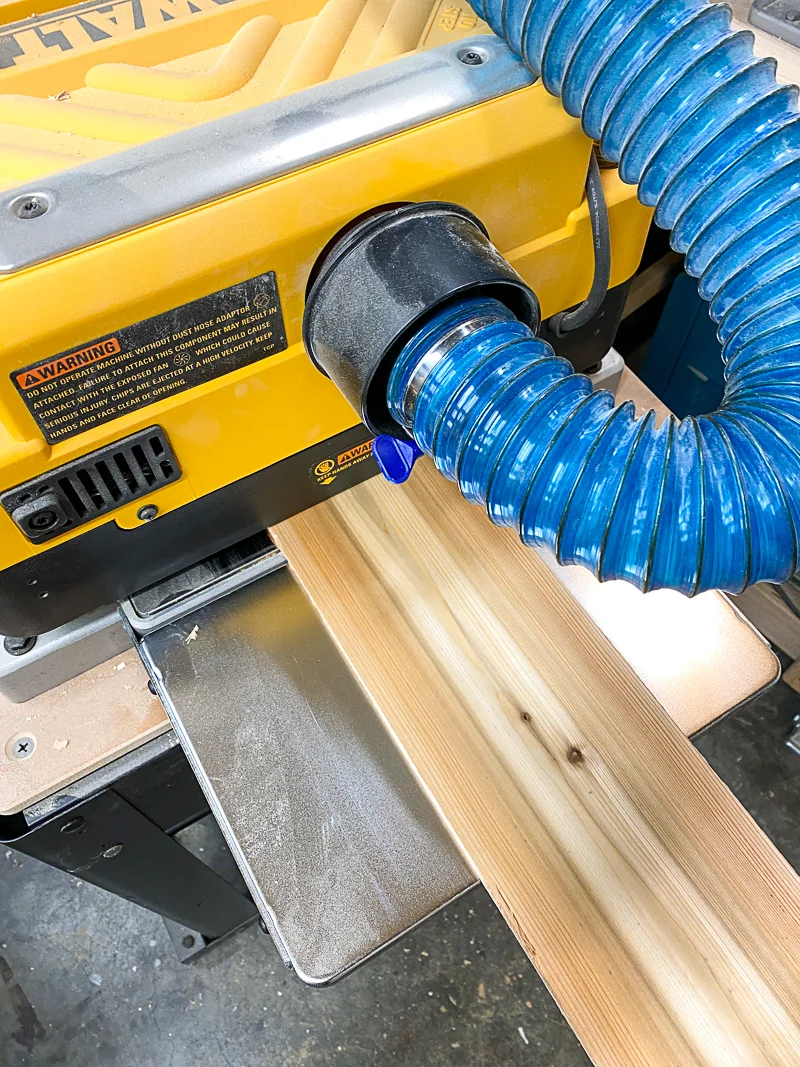
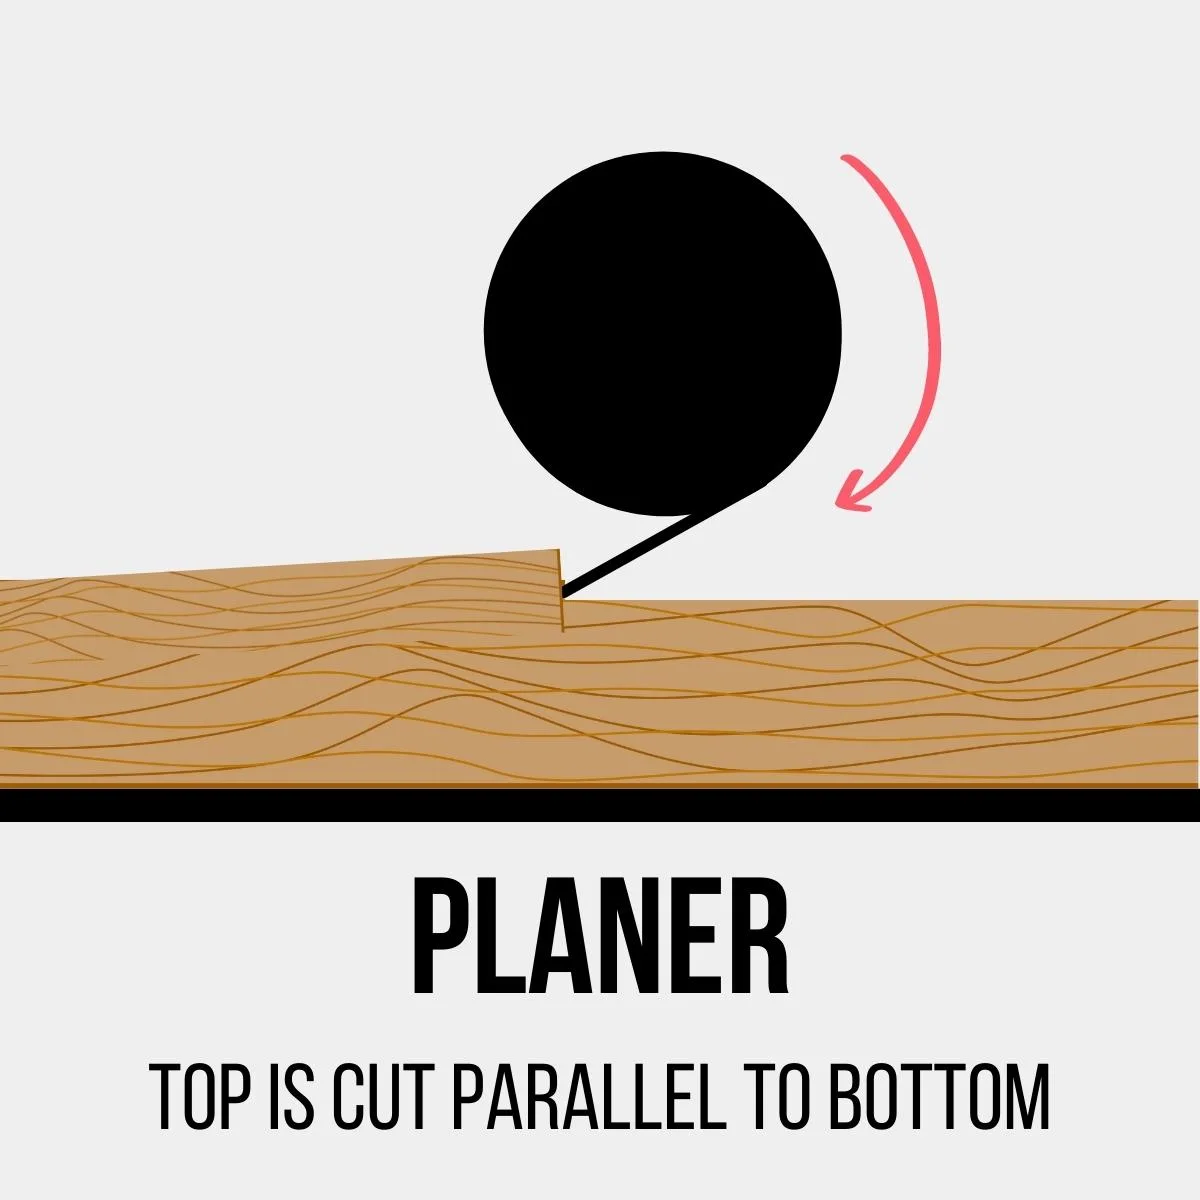
A planer is also referred to as a thicknesser or thickness planer. It has a flat bed on the bottom with a spinning blade and rollers above. You can raise and lower the blade to create the desired thickness of the board.
The rollers pull the board in one side of the planer, pass it under the blade and out the other side. The blade removes the high spots, creating a flat surface on top.

If you have a perfectly flat face on the bed, the opposing face will be perfectly flat too. This is why many woodworkers have both a jointer and a planer!
Here are some of the common parts of a planer:
- Table: Similar to the jointer, the planer has a perfectly flat table. The smooth deck allows the wood to slide across easily.
- Blade or Cutter head: The planer's blade is located within the roof of the planer, unlike a jointer, which has the blade located within the table.
- Rollers: The rollers grab the wood, force it flat against the deck, and push it through the blade.
- Thickness crank: Similar to a table saw, the planer cranks up and down to adjust the thickness of the cut. Also, some planers have a "thickness safety" that prevents you from removing too much material accidentally.
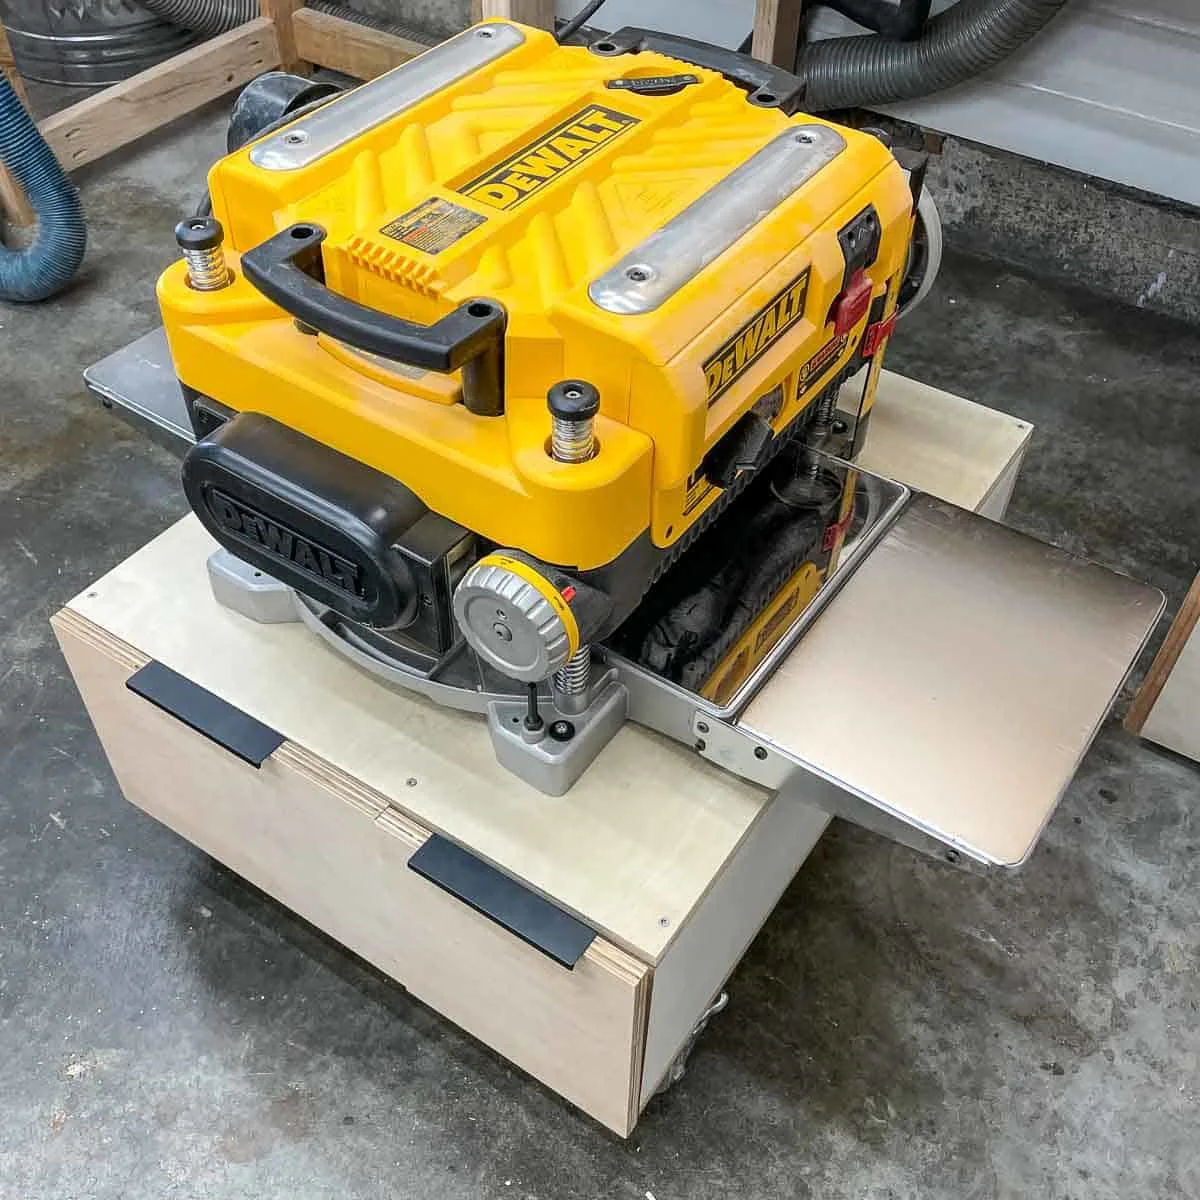
Thickness planers are really heavy, so it's not something you can just pull out of a drawer or off a shelf when you need it. My Dewalt 13" planer (which I LOVE) came with its own stand, but the three wheeled design was cumbersome to move around and it didn't have much storage.
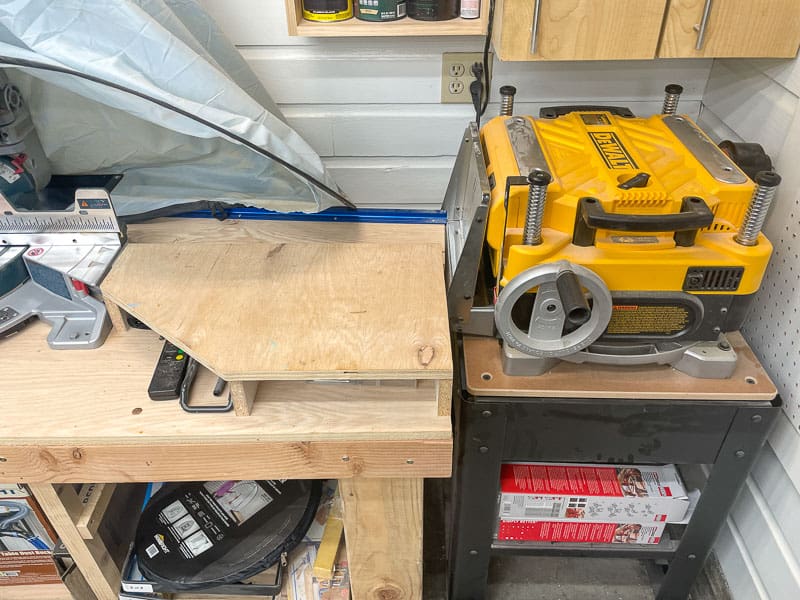
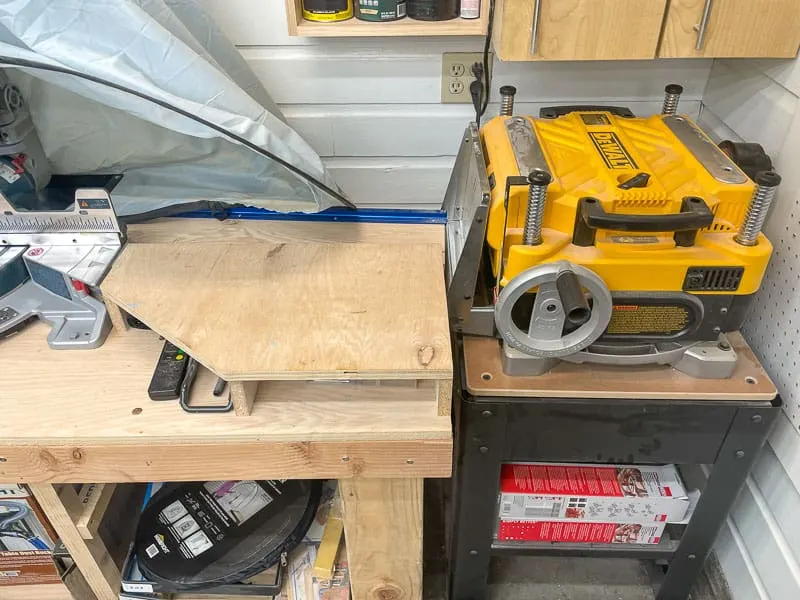
When I rebuilt my miter saw station, I designed a custom DIY planer stand that can be wheeled out when I need it, and tucked away underneath when I don't! Two deep drawers hold lots of odds and ends, including my entire collection of pocket hole screws.

When Should I Use a Planer?
Use a planer when you need to make a board thinner or when you want to make an uneven board a uniform thickness.
For instance, maybe you have a slightly wedge-shaped board, with one end thicker than the other. If the bottom is flat, a planer can easily shave off the thicker end of the top until the entire board equal in thickness.

However, if the bottom of the board isn't flat, those inconsistencies will be replicated by the blade on top. The roller applies pressure to the board, so an uneven board will tilt like a seesaw through the planer.
Using a planer sled with shims placed under the high spots can help prevent tipping and allows the planer to act more like a jointer. This video shows you how to use your planer as a jointer with a few simple shop made jigs.
A planer can also be used to ensure that all your boards are the same thickness. Even store-bought boards that are surfaced on all four sides can vary slightly. Running all your parts through a planer before assembly guarantees that you'll have a consistent thickness in your finished piece.
How Do I Use a Planer?
Planers use a similar principle to the jointer. However, the technique for use is different.
Steps to using the planer:
- Safety: Wear your ear, eye, and facial protection.
- Check the thickness: Start by placing your board inside the planer and lowering the blade down to the wood surface to set the height.
- Jointer: If you have a jointer, don't forget to use the jointer before the planer.
- Feed the wood through: Turn on the machine and slide the board into the planer - allow the machine to do the work and don't force it through. Grab the board before it falls out the other side.
- Use the pencil trick: Similar to using the jointer, scribble pencil lines across the face of the board to track your progress. When the lines are gone, the high spots have been removed.
The video below goes into more detail about how to use a thickness planer.
How to Use a Jointer and Planer Together
Now, let's talk about the steps to using a jointer and planer together to create perfectly milled lumber of any thickness!
- Start with the jointer. You need to create a perfectly flat surface to get a perfectly square board. A jointer will give you one flat face and one flat edge that meet at a 90 degree angle.
- Head over to the planer: Now, run the board through the planer with the flattened side down to make the board equal in thickness. This will give you two sides that are flat and parallel to each other.
- Finally, use the table saw: Now, you have one remaining edge that needs to be squared, and you can use the table saw to finish the process.
Frequently Asked Questions about a Planer
Do I really need a planer?
If you make fine furniture or plan to in the future, it's worth buying a planer. The planer will take even the roughest lumber and turn them into gorgeous boards for your projects. It will also save you money in the long run, because rough lumber is much cheaper than milled lumber.
Can you plane without a planer?
You can use a hand planer to thin your lumber. Also, you could use a belt sander to reduce the thickness of a plank. However, neither the belt sander nor the hand planer will perform the job as consistently a planer.
Can you run 2x4s through a planer?
Yes, most planers will handle 2x4 lumber; however, without a jointer, a planer will struggle to remove warps that are common in construction grade wood.
Hopefully this article helps answer all the questions you might have about a jointer vs planer. They're not crucial tools for every workshop, but they definitely come in handy sometimes! As my woodworking skills improve, I find that I rely on these tools more often for high quality results.
Check out these other woodworking tutorials!