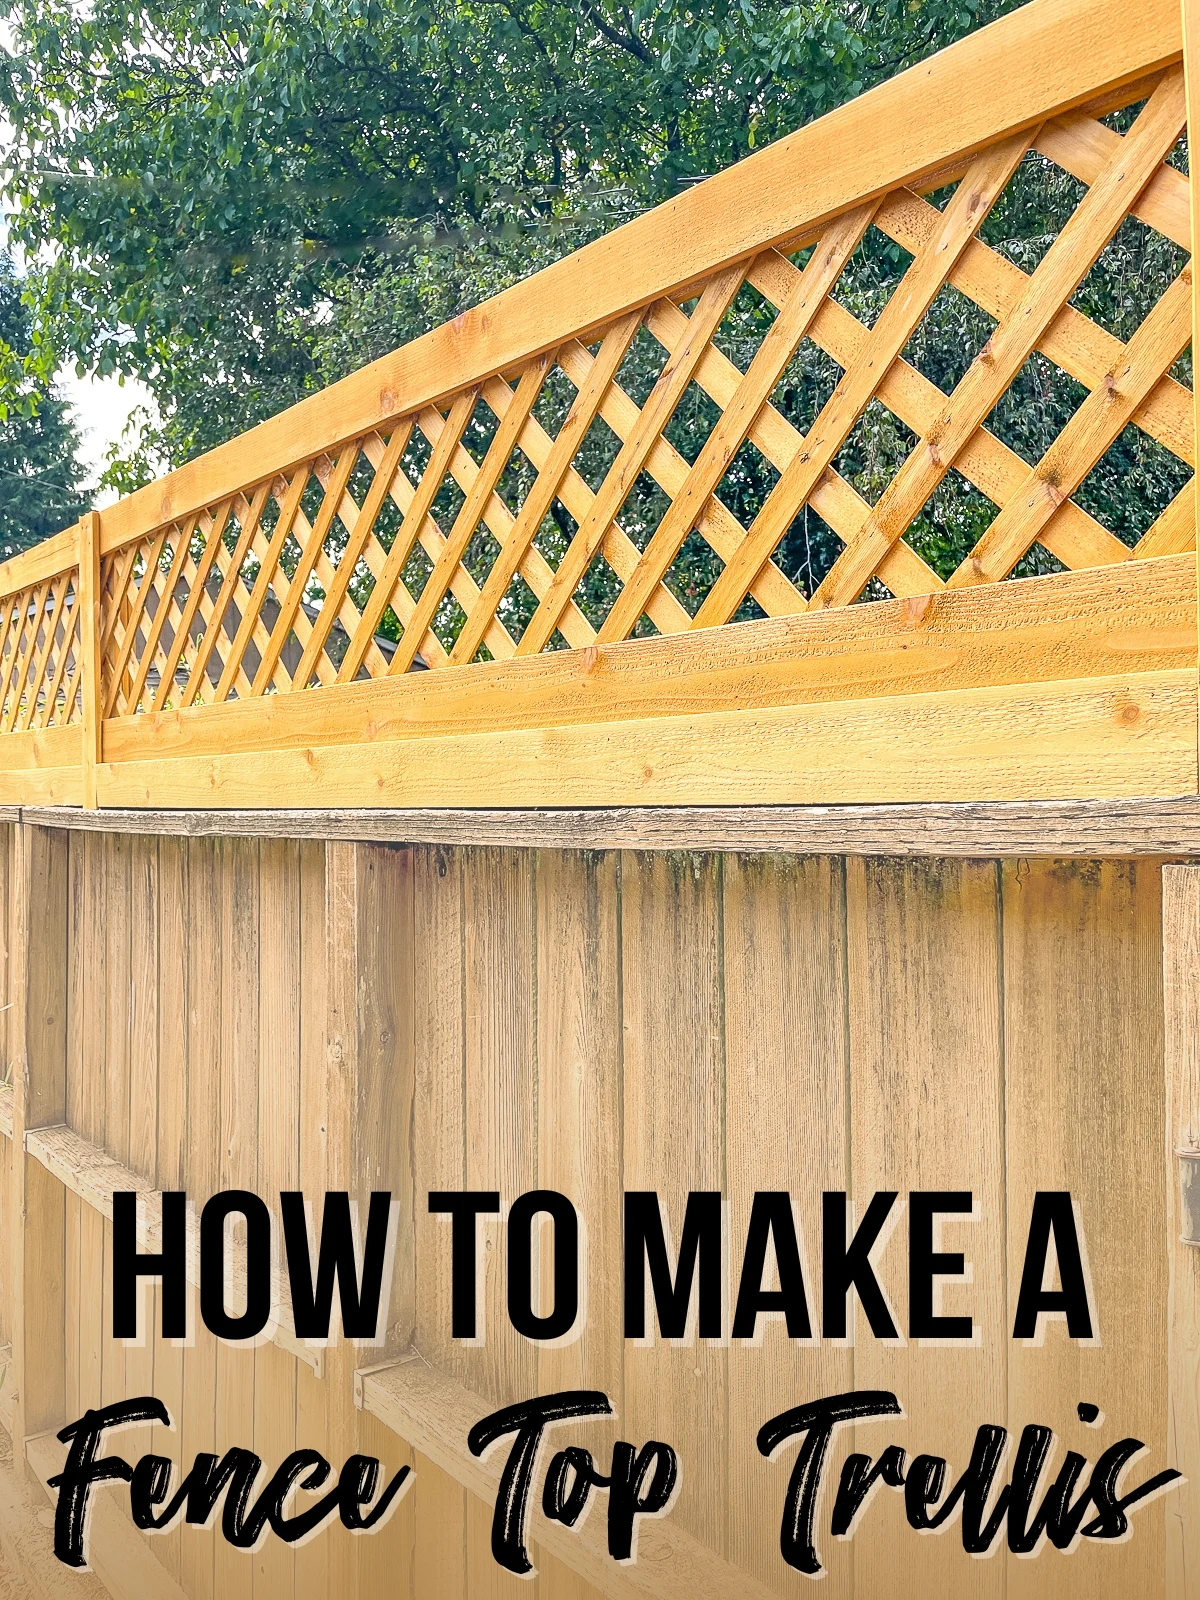
Want to add a trellis to the top of an existing fence? This simple solution creates more privacy and gives vine plants room to grow!

I've always hated our backyard fence. It serves its purpose, but it's boring and showing its age. But we recently replaced a section of fence to the tune of $4,000, so we'll live with this one until it falls down!
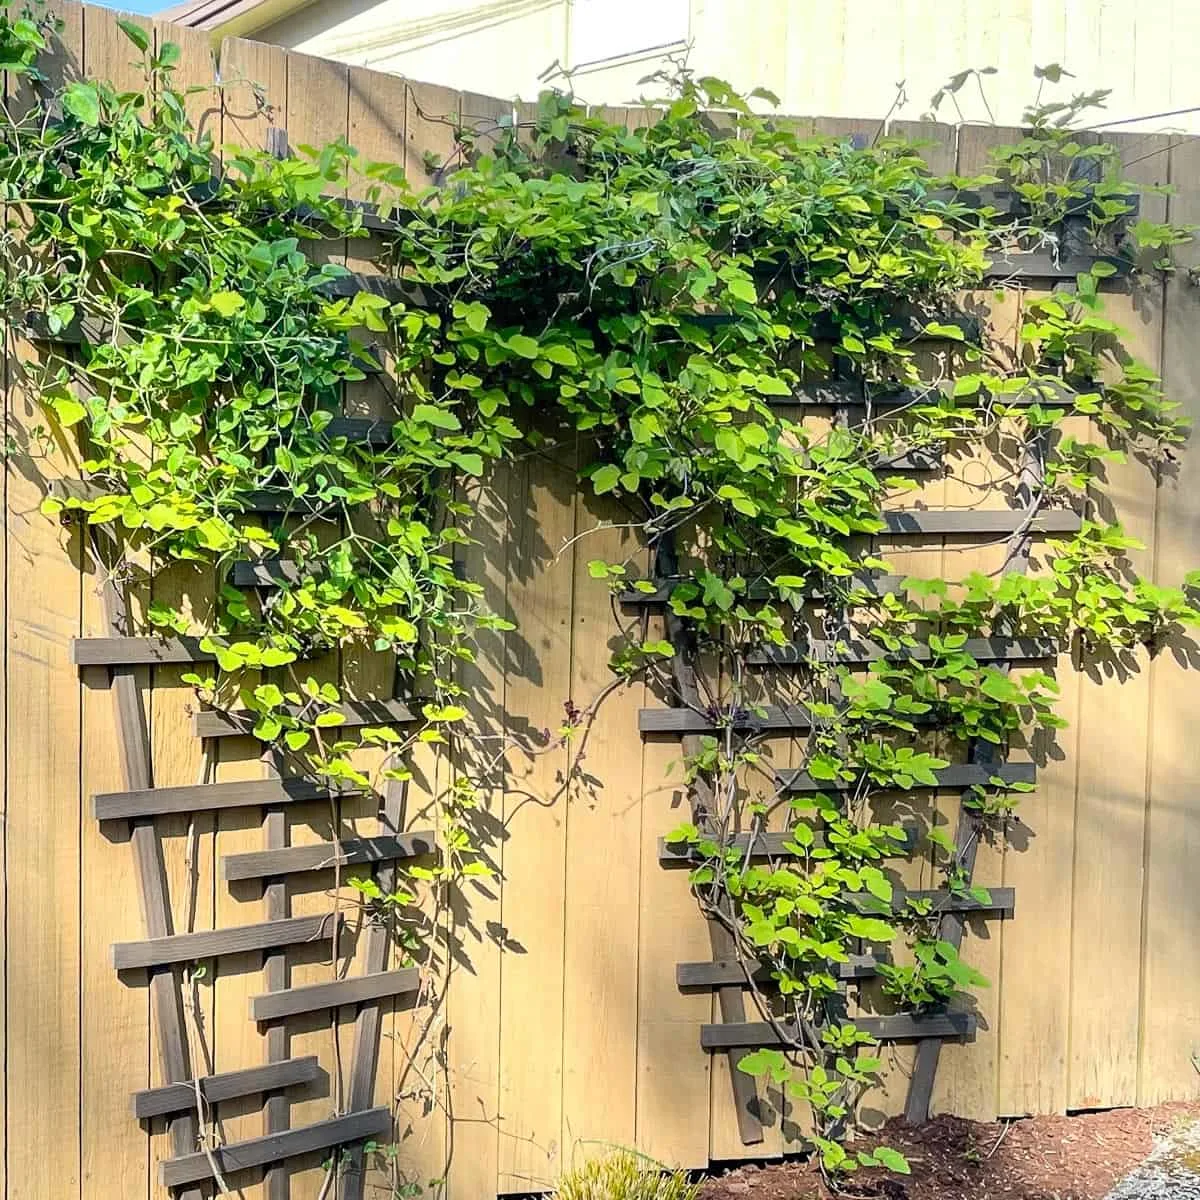
To spruce it up a bit, I added this trio of trellises on the inside a few years ago. It truly transformed that flat expanse of wood into a living wall of vines.

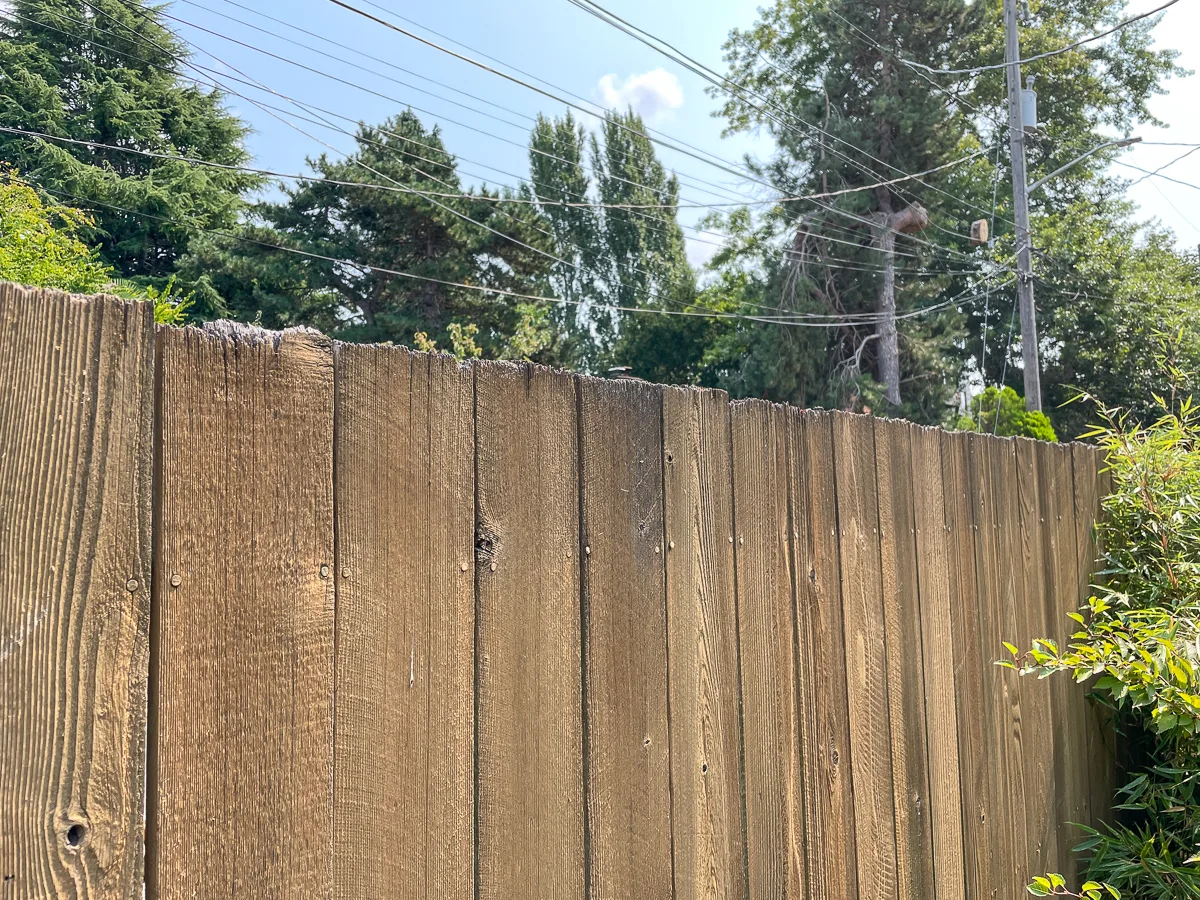
Now I want to tackle the section of fence that runs along the alley on the side of the house. The majority of the wood is still in good shape, except for the deteriorating top edge and some warping. This view is from the alley side, which we don't see very often.
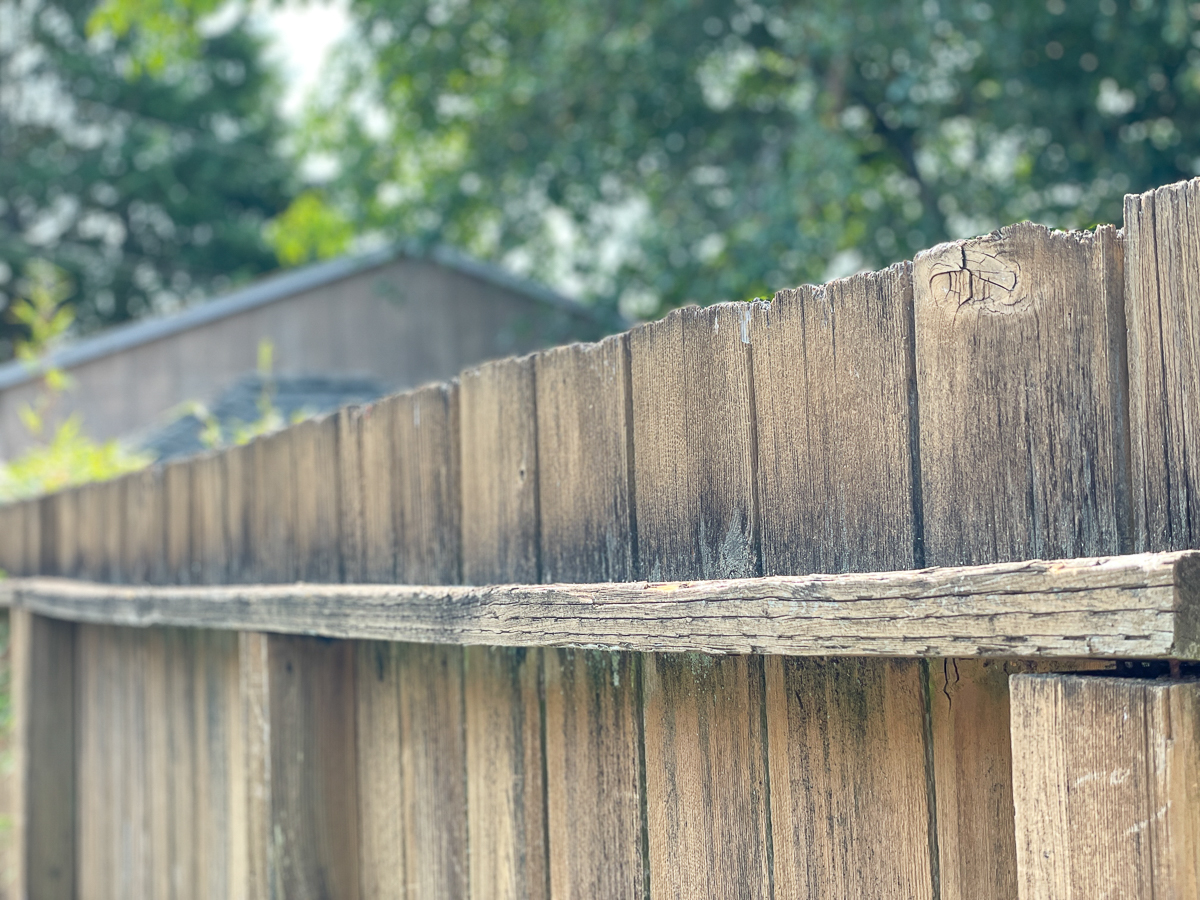
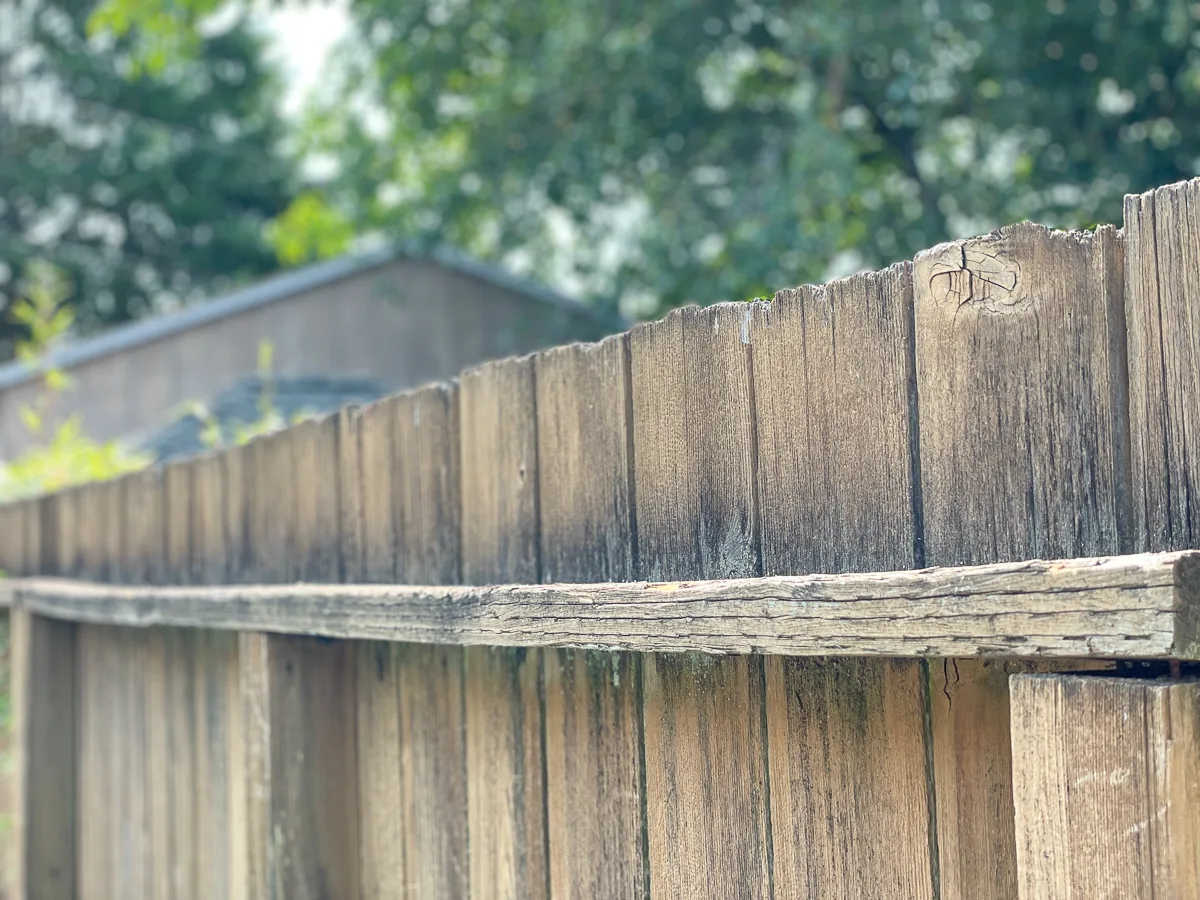
On the inside, it looks a little better. There are a few popped nails to take care of, but the main problem is that top edge that has worn away over time. Squirrels use it as a highway to our walnut tree, and their little claws have chewed it up!

Originally, I was thinking of just sandwiching the top edge between two trim boards, adding a cap and calling it good. But I decided to add lattice to create more privacy in the backyard, and give my vining plants room to grow.
Since you're adding more weight to the top of your fence, you want to make sure the posts are in good shape first. If they're a bit wobbly, you can fix a leaning fence with brackets instead of replacing them or pouring more concrete!
Here's how to add a trellis to the top of an existing fence!
This post contains affiliate links for your convenience. Purchases made through these links may earn me a small commission at no additional cost to you. Please visit my disclosures page for more information.
Check your local building code first
Every city and town has different regulations about how high your fence can be. Here in Seattle, backyard fences are limited to a six foot solid fence with up to two additional feet of open trellis on top.
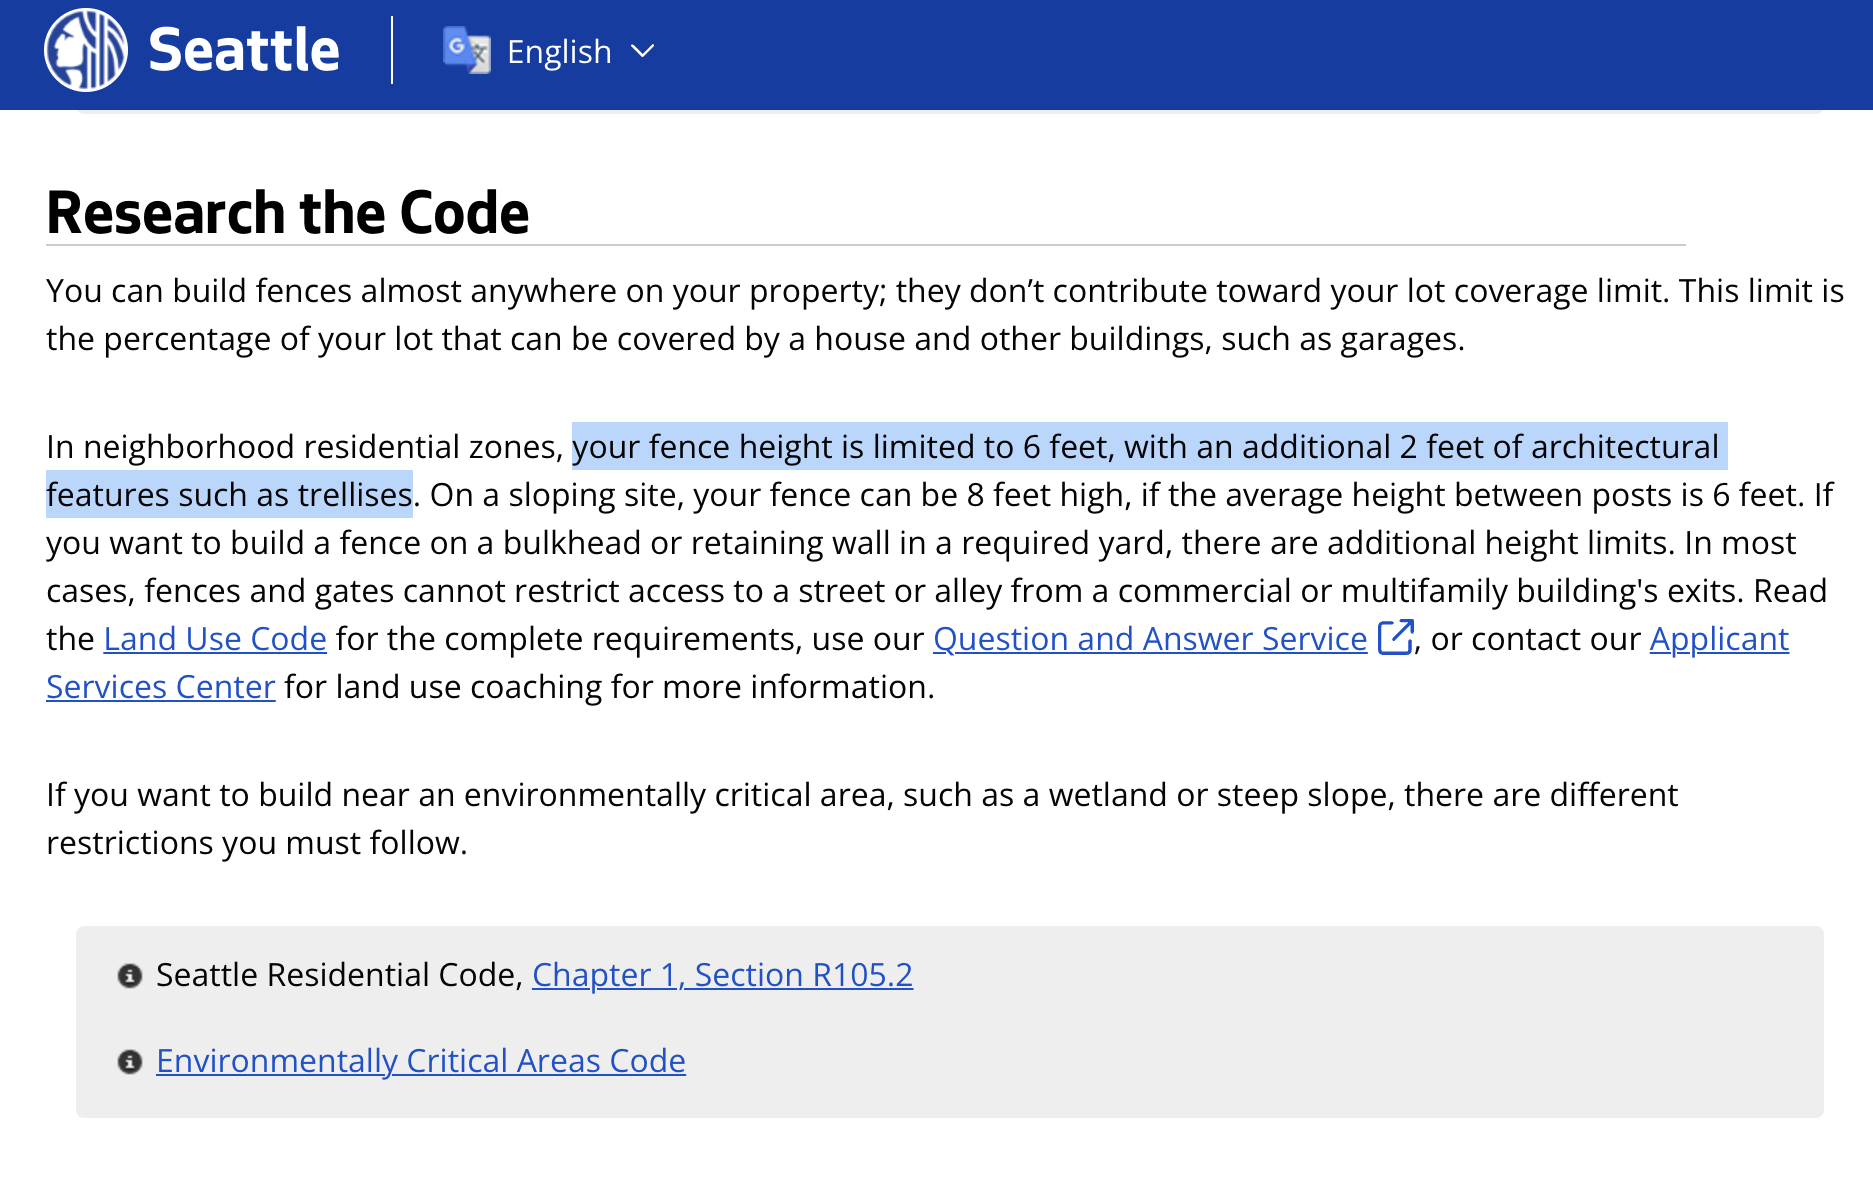
Just do a quick search for your city name and fence height and you should get the applicable building code for your area. You don't want to have to tear out all your hard work because you built it too high!
Try out different configurations
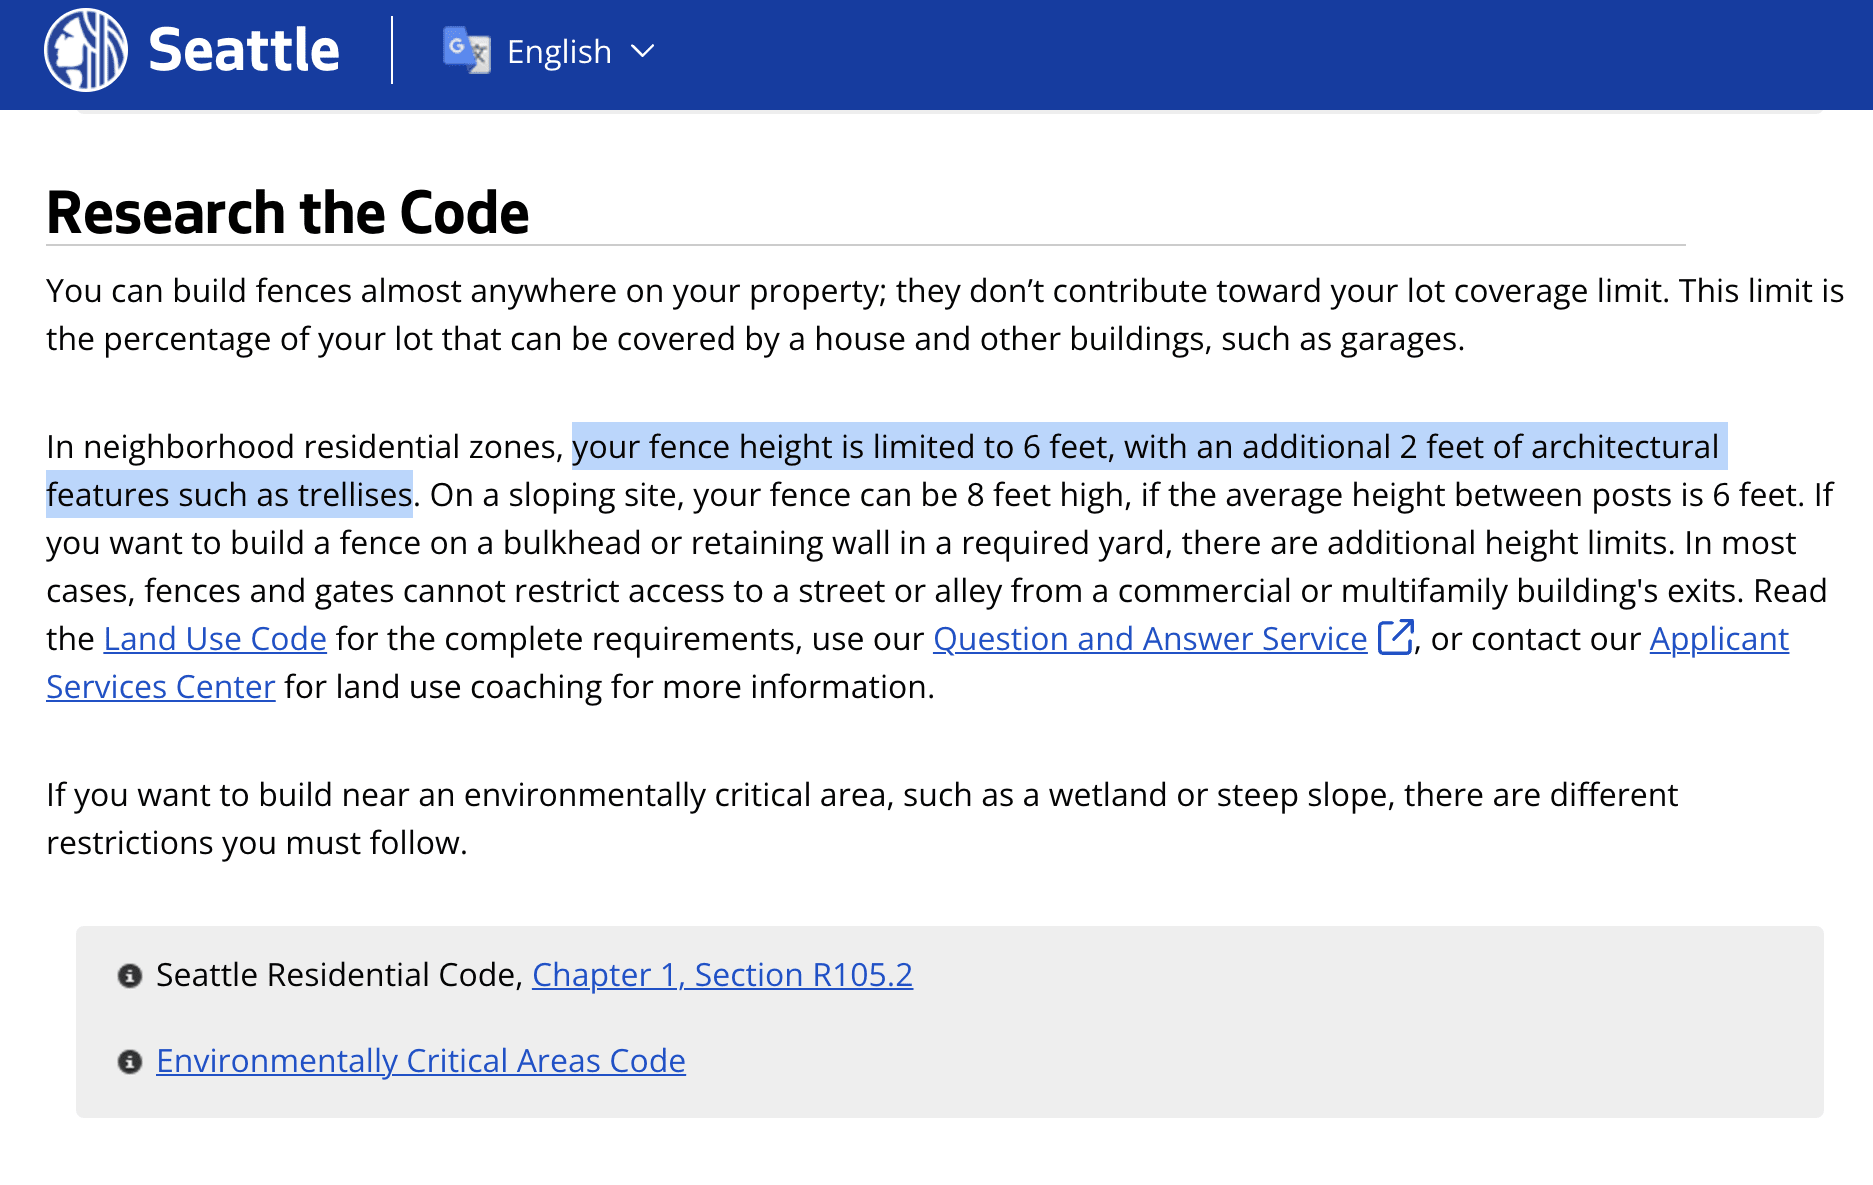
Your fence may be put together differently, so it helps to play around with different options using scrap wood and lattice before committing to a design. I quickly realized that an extra two feet just looked too big and out of scale. 18" was a lot better!
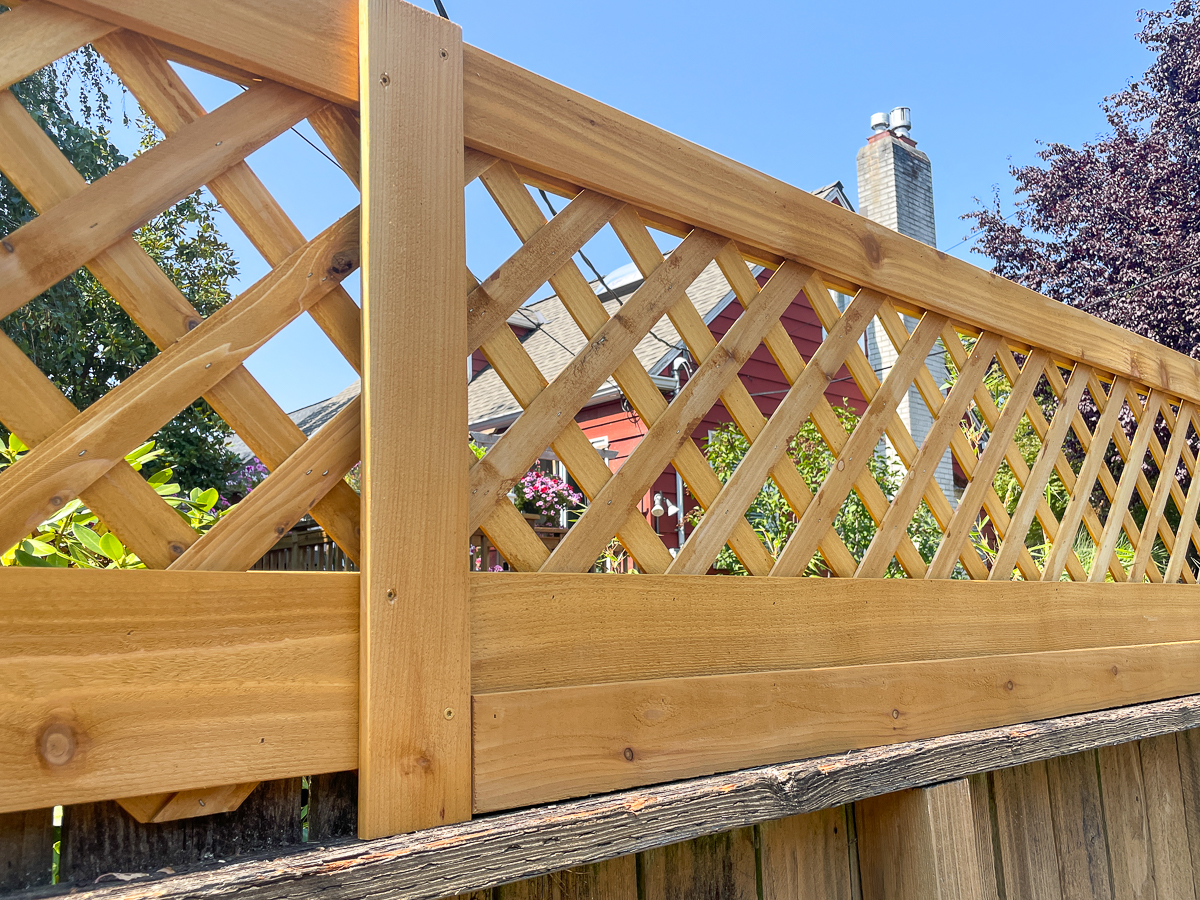
I clamped all the components to the fence to get a feel for how it would look from both sides. The front will just get a strip of cedar across the top to cover up the worn parts.

The back side needed a little more work. The distance from the rail to the top edge isn't the same down the entire length of the fence. Close to the gate, it's 7 inches. But further down, it's closer to 8!
I'll be using trim to make the trellis and fence appear level. The lattice sits on the top rail at the low end and is raised up at the high end so the diamonds are even across the entire fence. This will be screwed to the pickets all along the length.
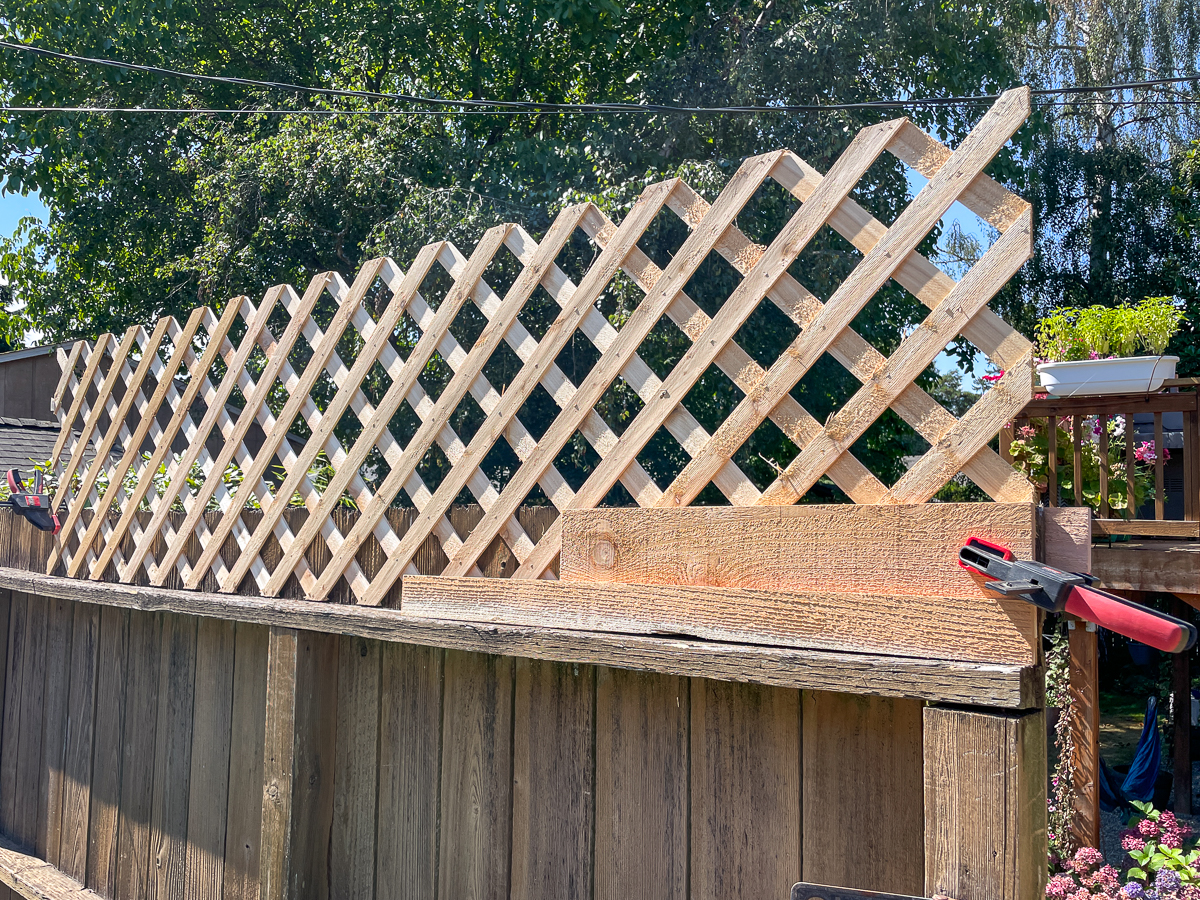

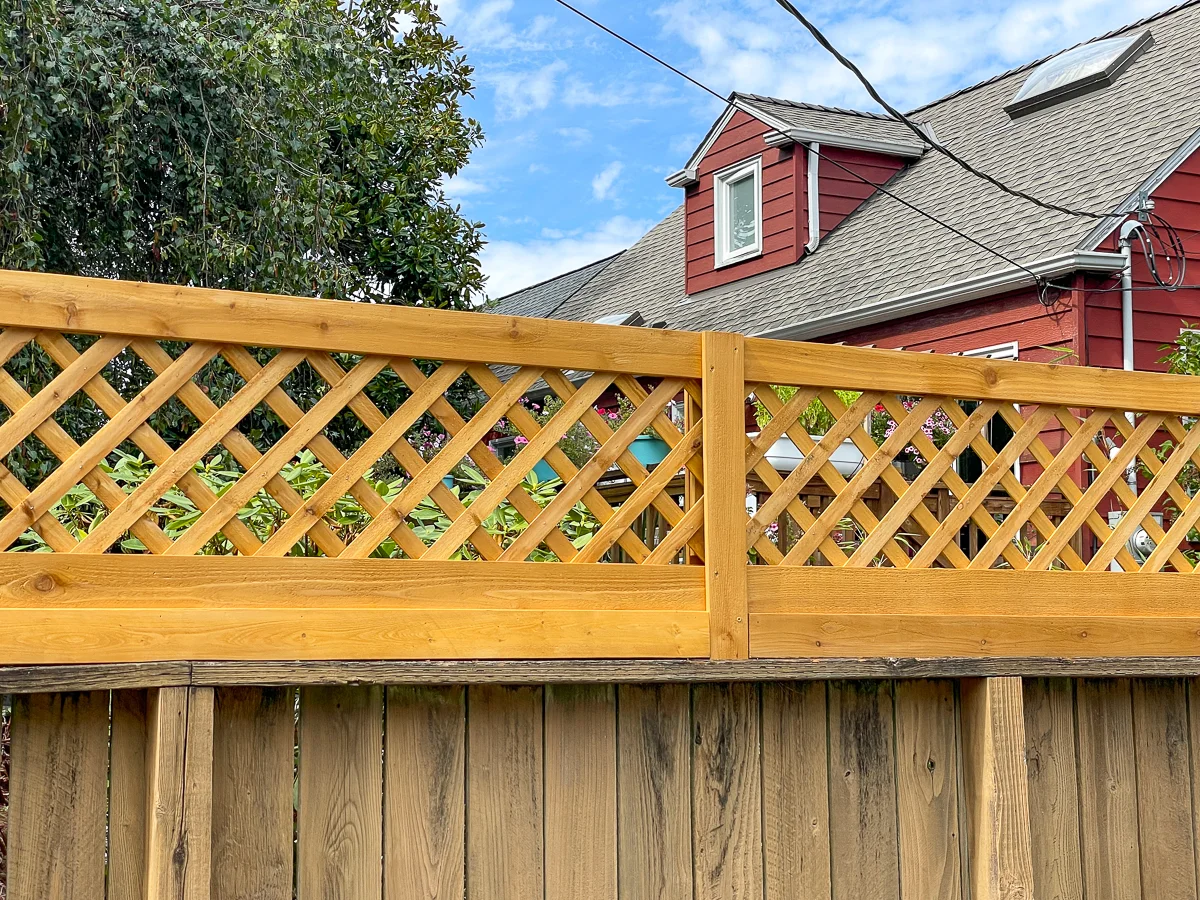
A 1x6 fence picket will cover up the top edge of the fence, at the same height as the trim piece on the front. An additional 1x3 piece along the rail will hide the bottom of the lattice so you can't tell how uneven the fence is!
The top of the trellis will be sandwiched between two more 1x3 cedar fence pickets to finish off the look. I debated adding a cap, but I didn't want to put any more weight on the fence than absolutely necessary.
Stain all the pieces first
Although the fence could use a fresh coat of stain, that's a project for another day. I had some leftover stain from our deck that matches the fence once it fades out a bit, so I used that for the trellis.
It's a LOT easier to stain all the parts and pieces flat on the workbench, instead of getting up on a ladder to do it after the trellis is installed. You could spray on the stain, but it wastes a lot and you'd get tons of overspray all over the garden.
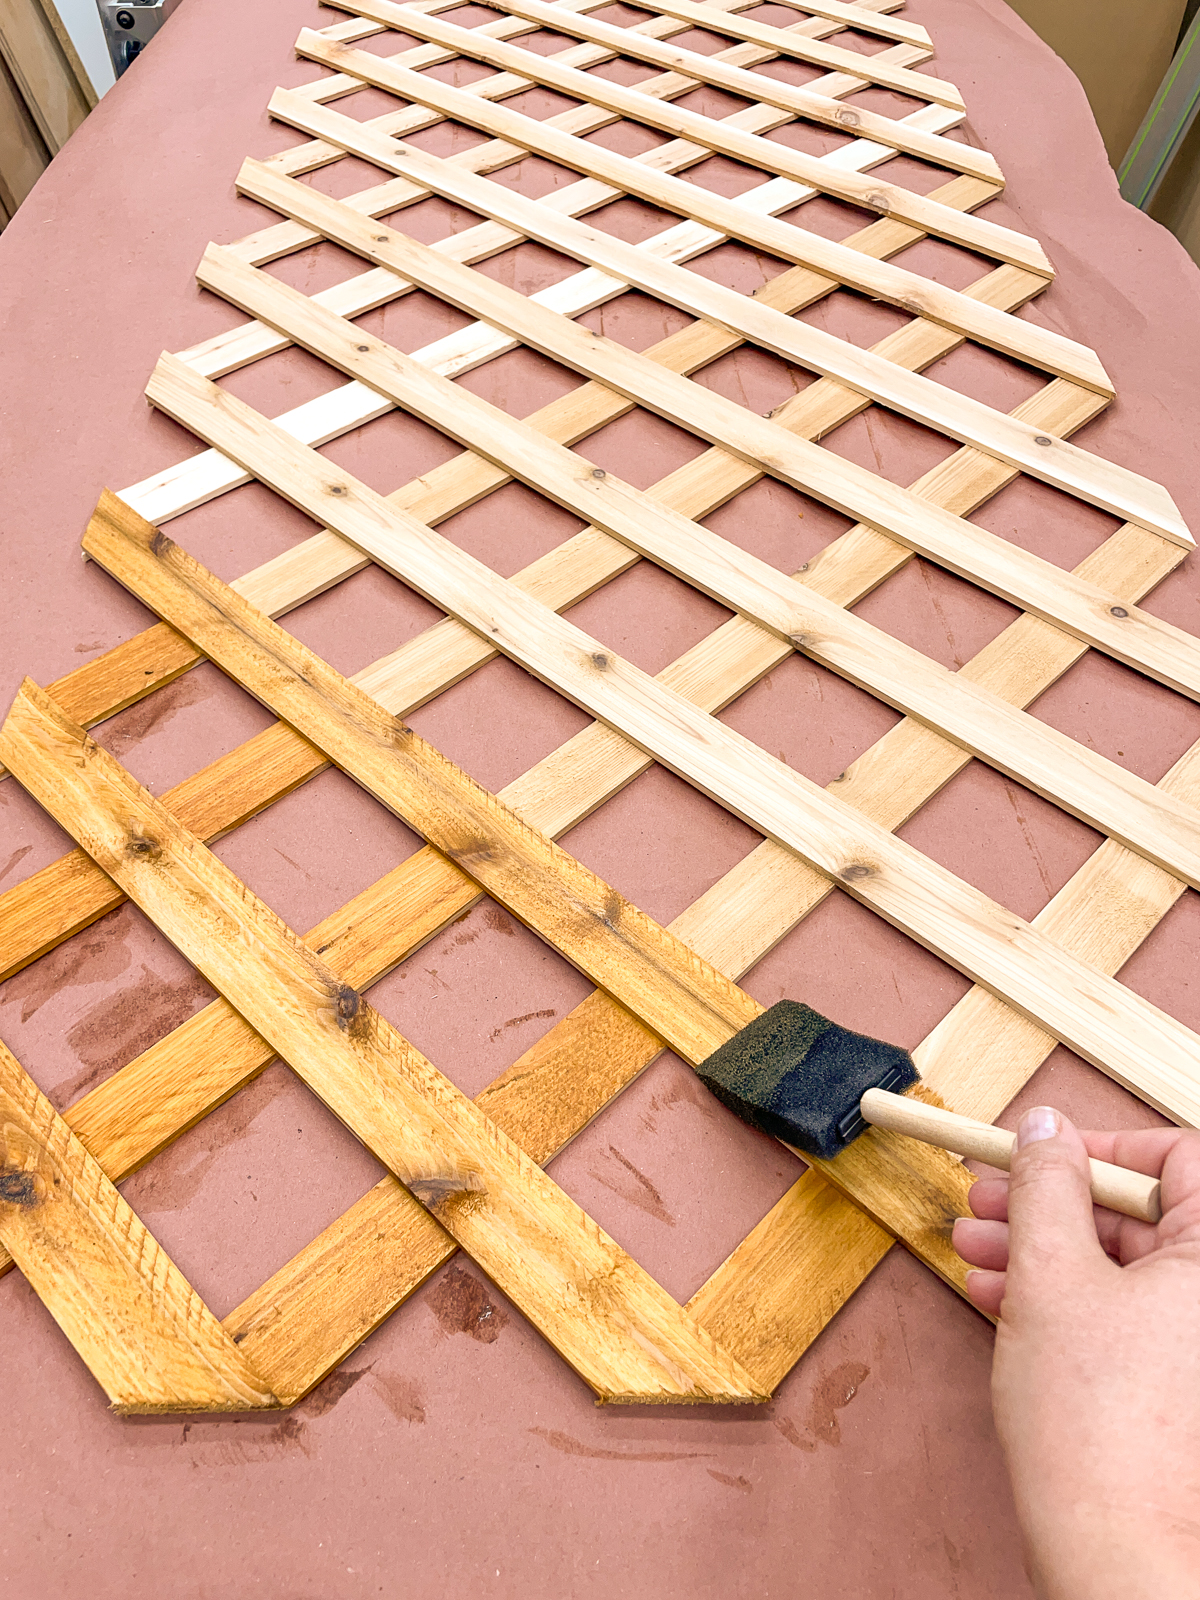

I worked on one eight foot section at a time, sanding and staining everything before assembly. It took a while with the foam brush, but I only had half a jug of stain left and didn't want to buy more! Just put on some music or a podcast and get to work!
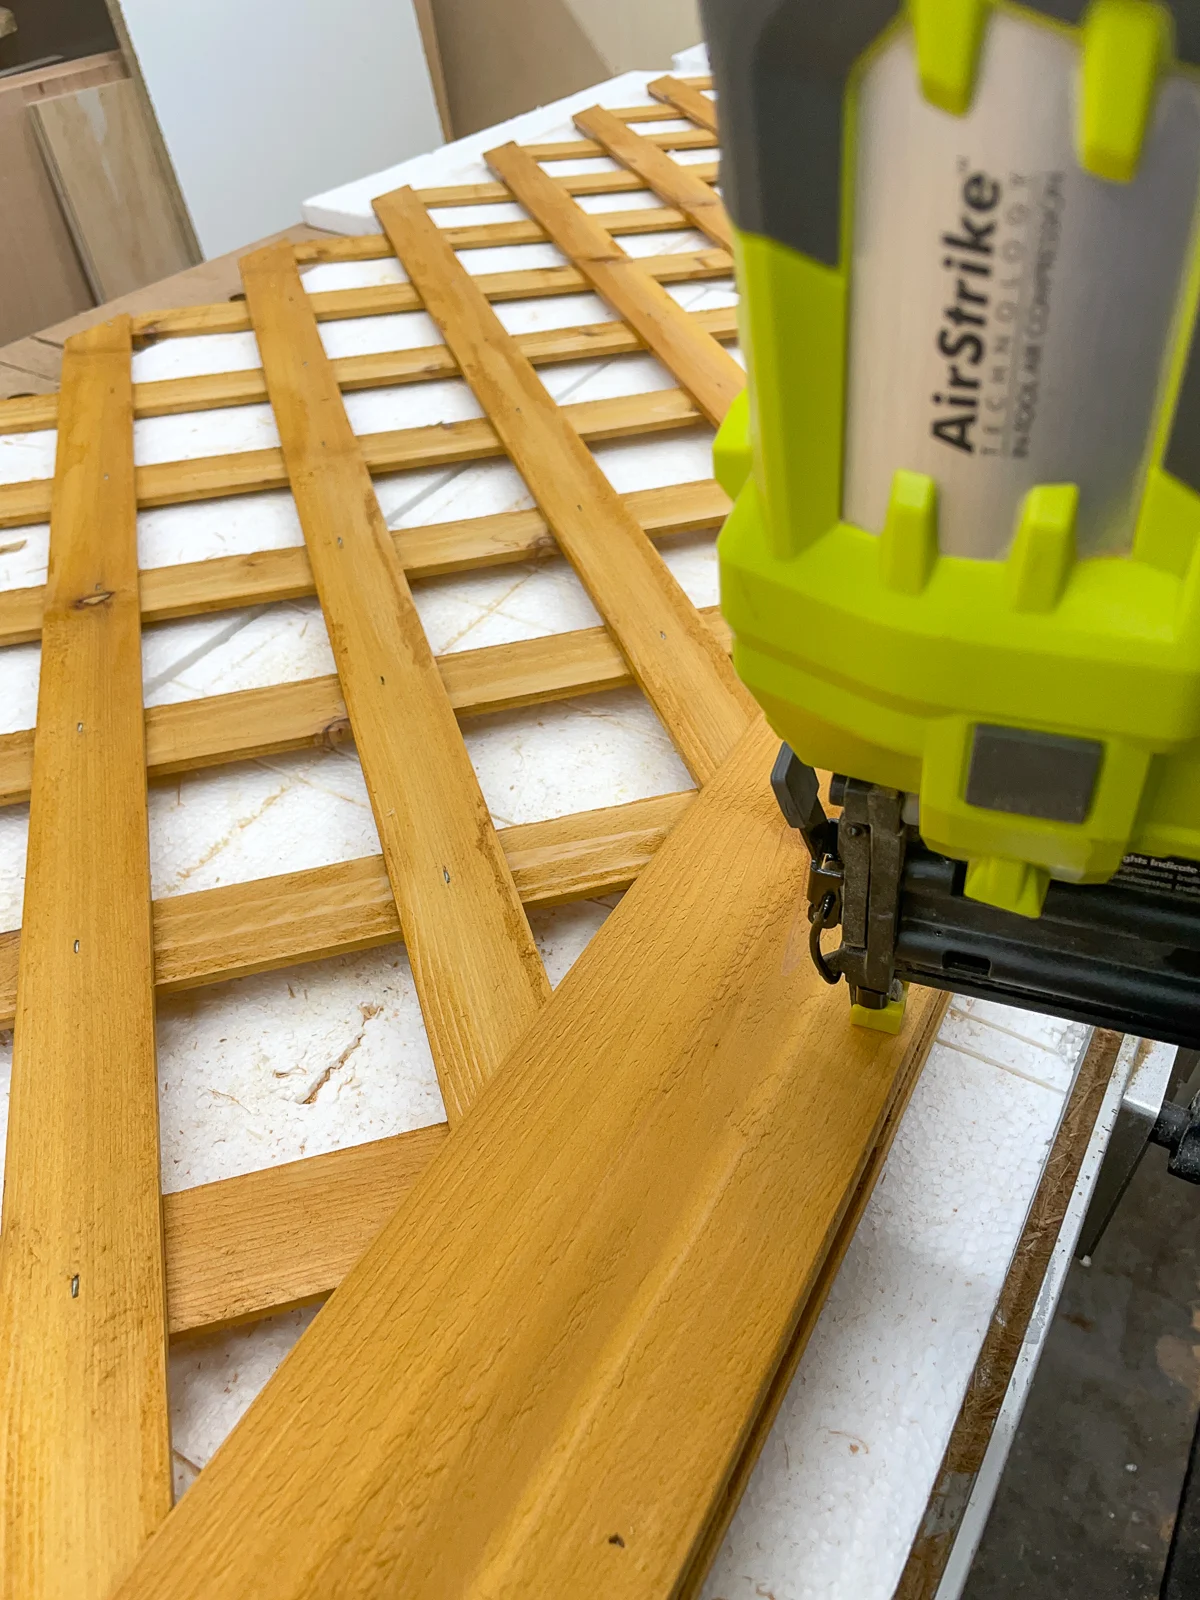
Attach the top trim to the lattice
Just like with the staining, it's a lot easier to assemble the lattice panels flat on the ground rather than up on the fence. I put some styrofoam sheets down just to keep the parts flat across the table saw and workbench.
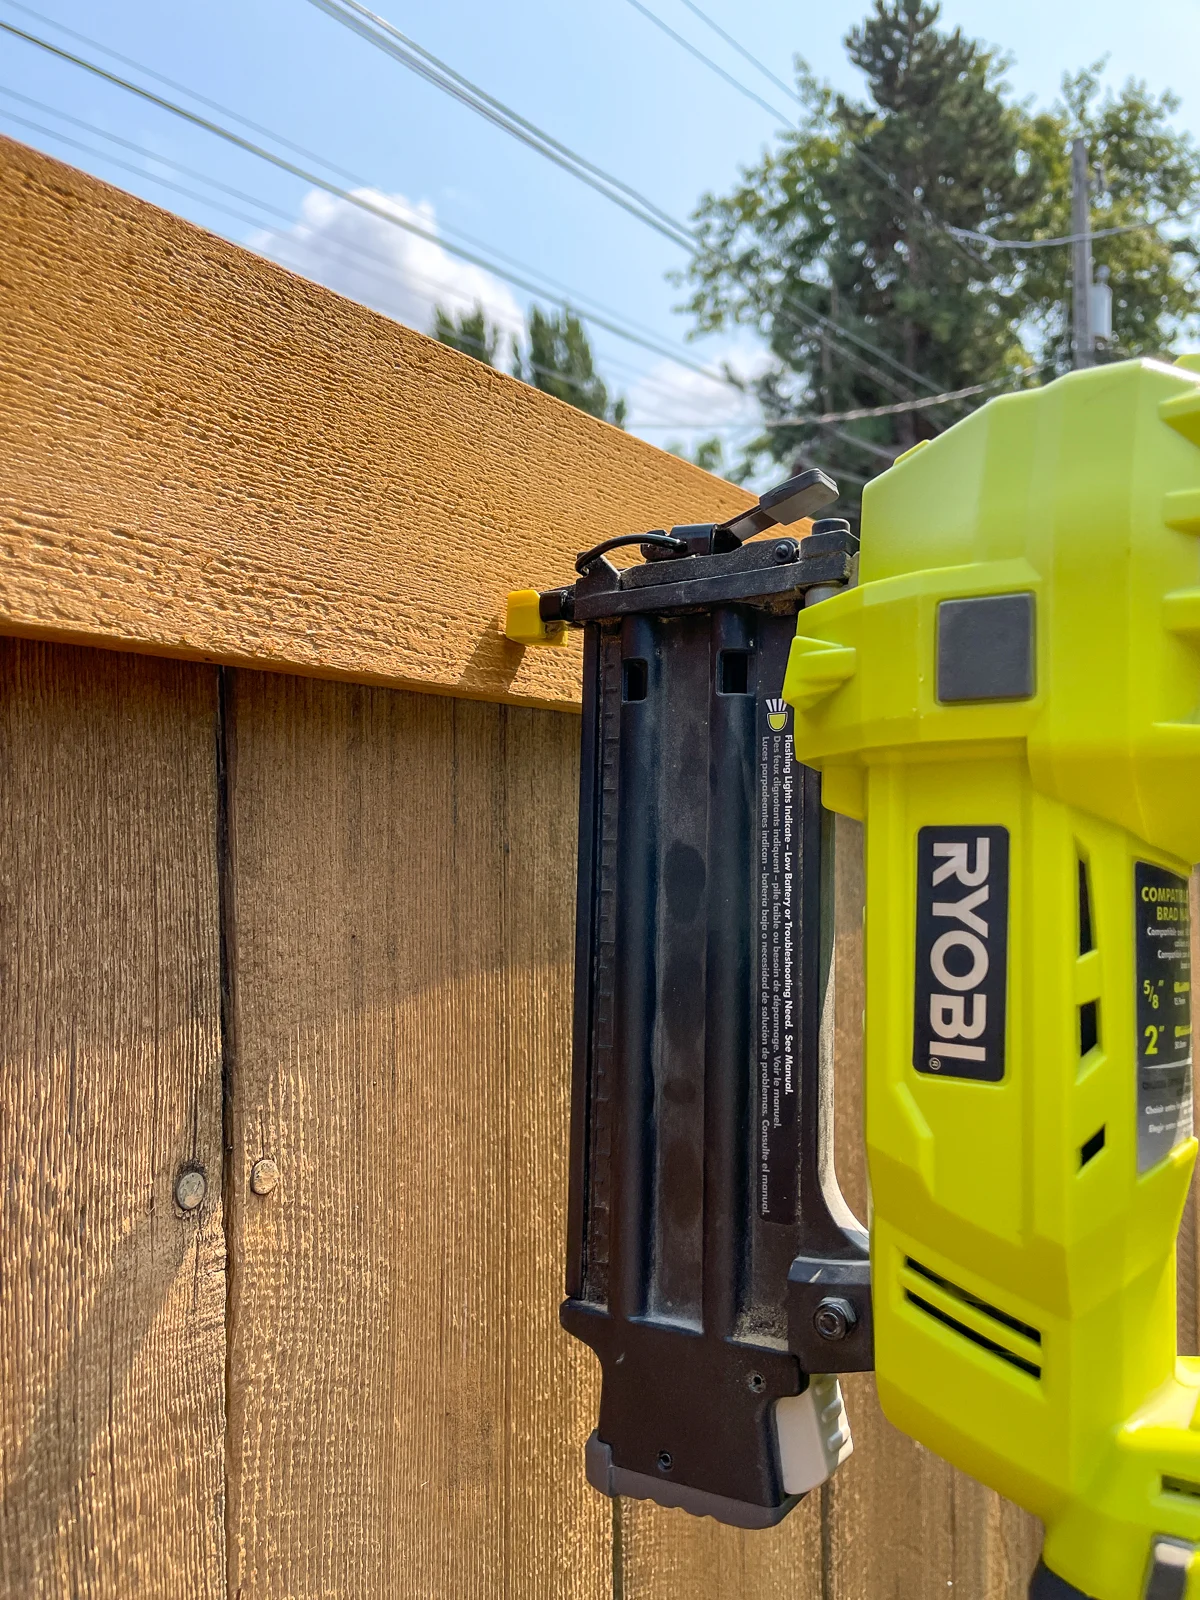
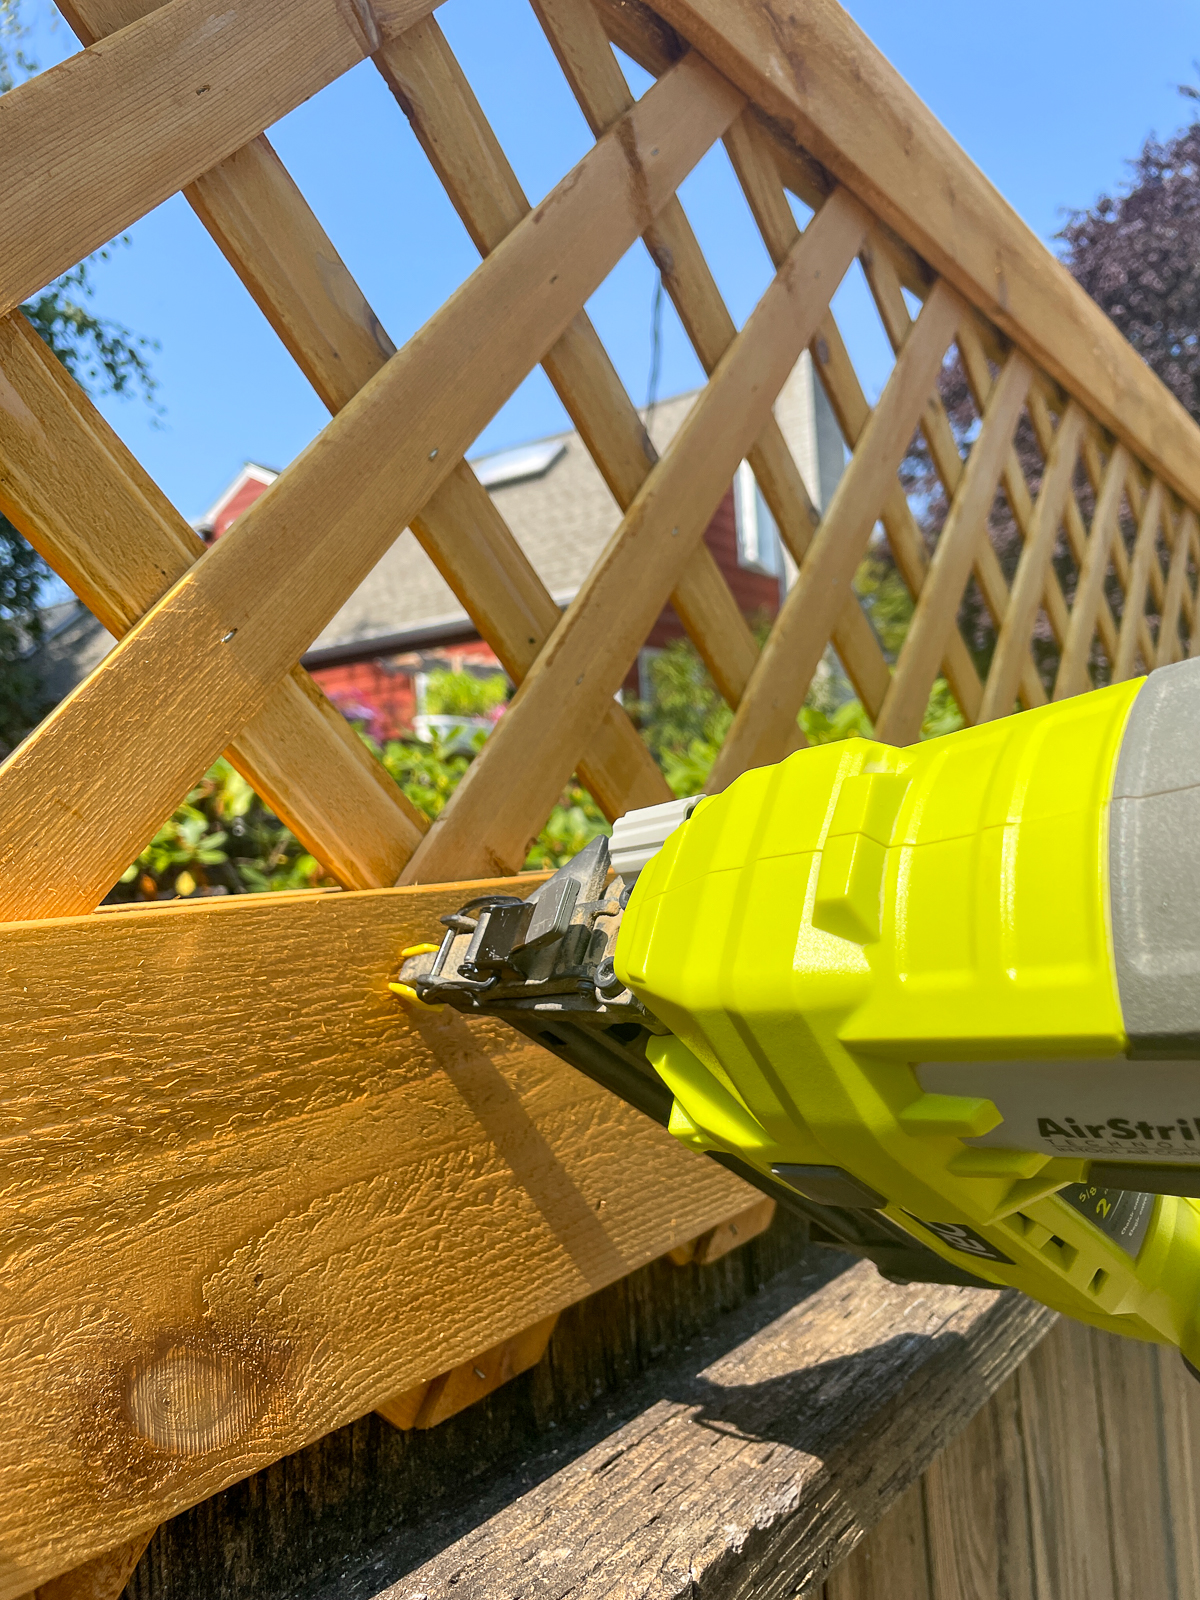
Line up the first piece of trim with the top edge of the lattice. All the trim is attached with ¾" stainless steel brad nails to prevent rust spots. Make sure to hit the point where the lattice crosses at the top.


Now flip it over and attach the other side. Everything else will be assembled in place outside.

Attach the front trim boards
This piece of trim is mainly to hide the ragged edges of the existing fence, but it also creates a frame effect around the trellis panels. You don't necessarily need this piece, especially if you only have access to the back side of the fence.
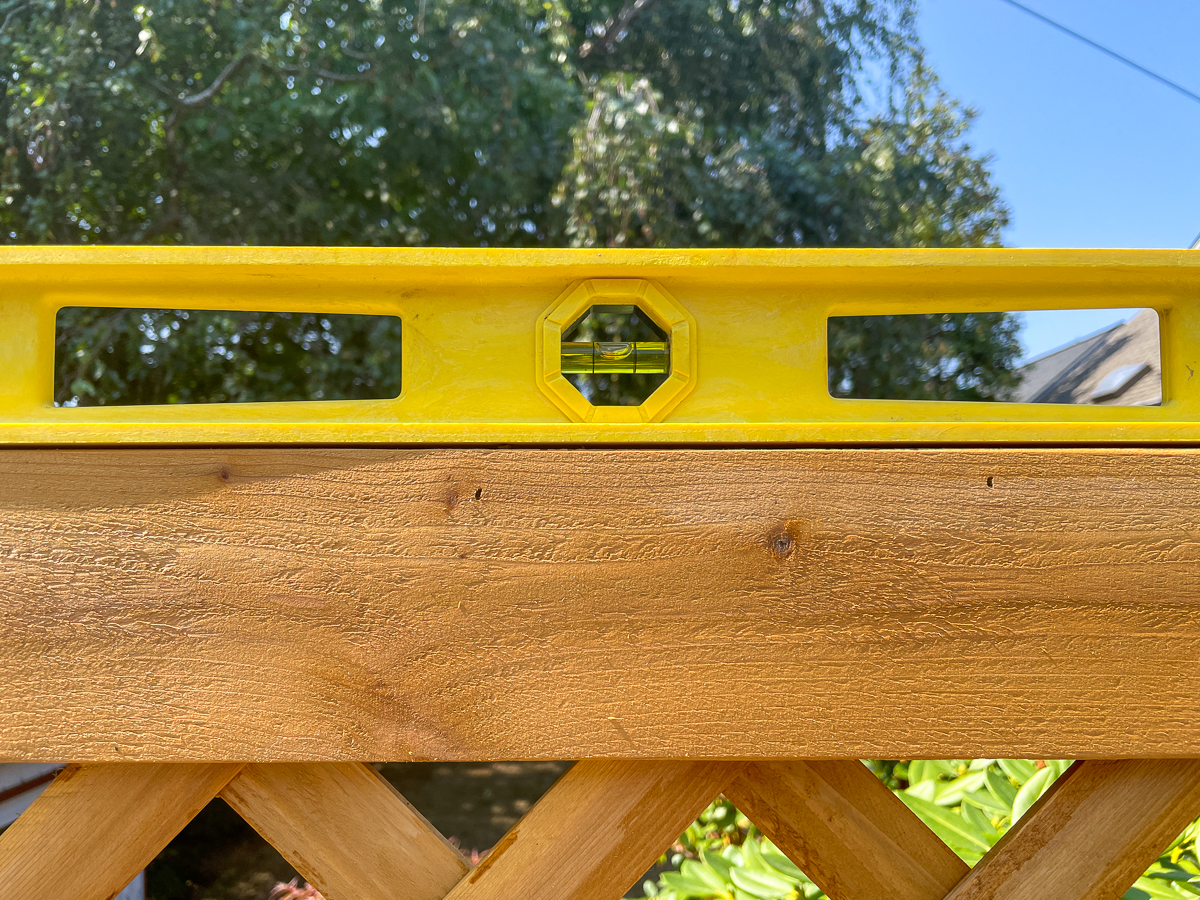
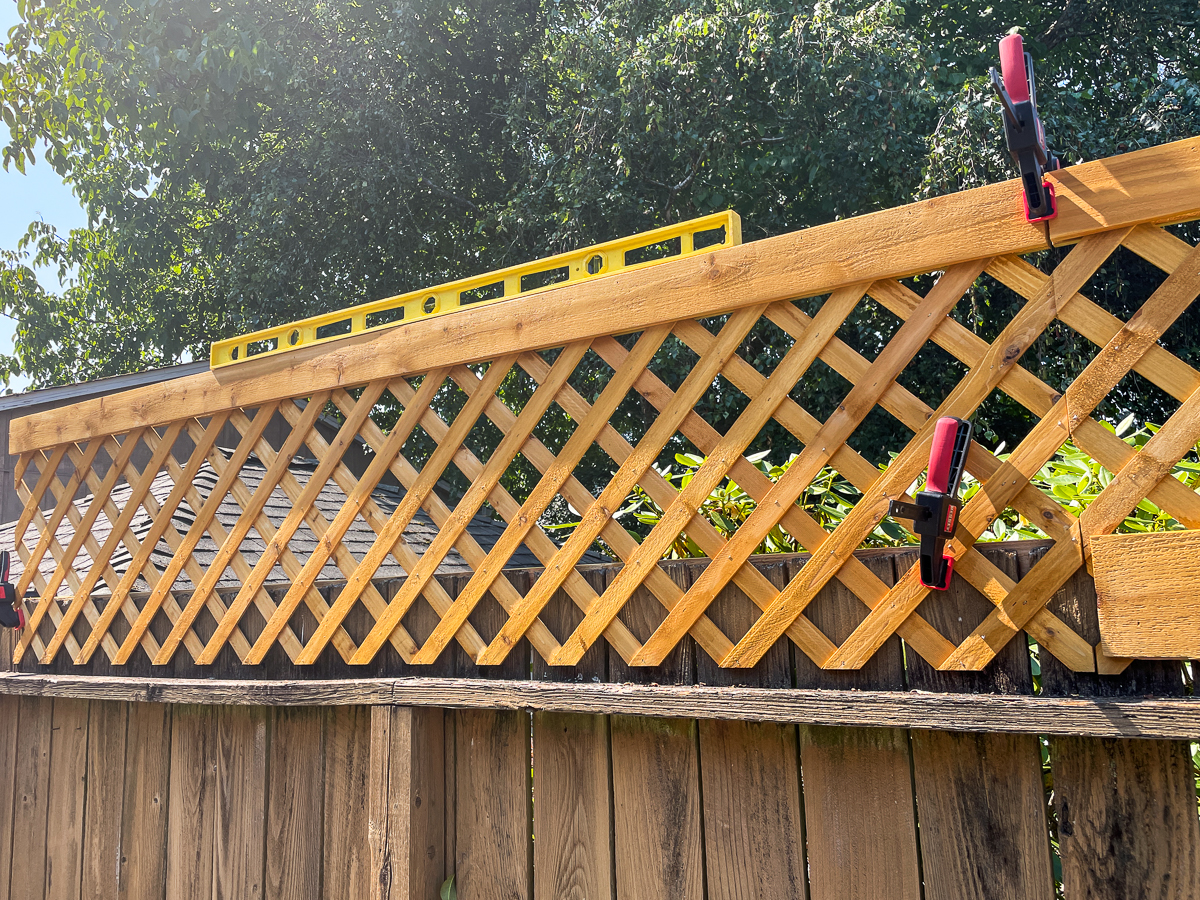
Since the top of my fence isn't level, I used this trim to fix that issue. The highest point was right next to the gate, so I clamped that end flush with the top. Then I put a long level on top of the trim and clamped the other end. You can really see how off it is here!

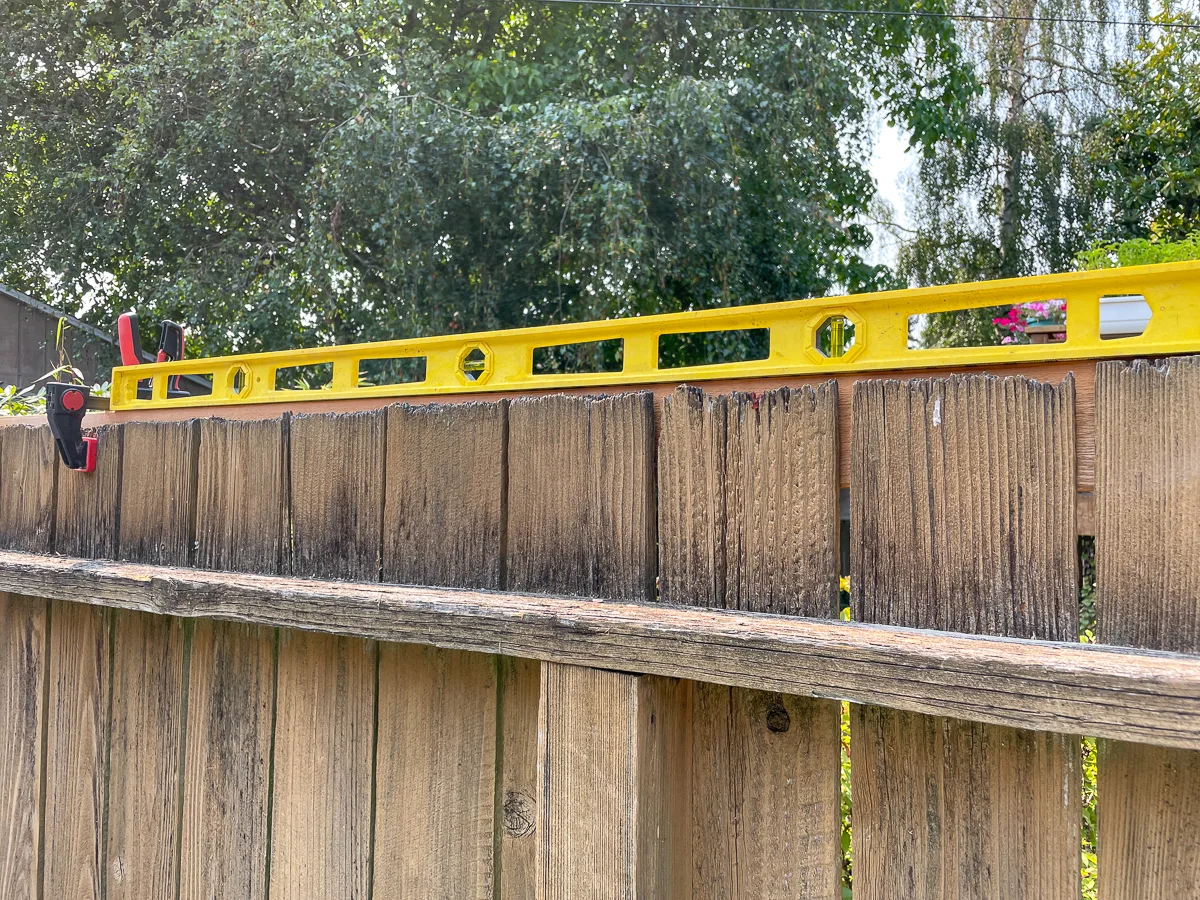
I also double checked to make sure that the trim was perpendicular to the fence pickets with a speed square.
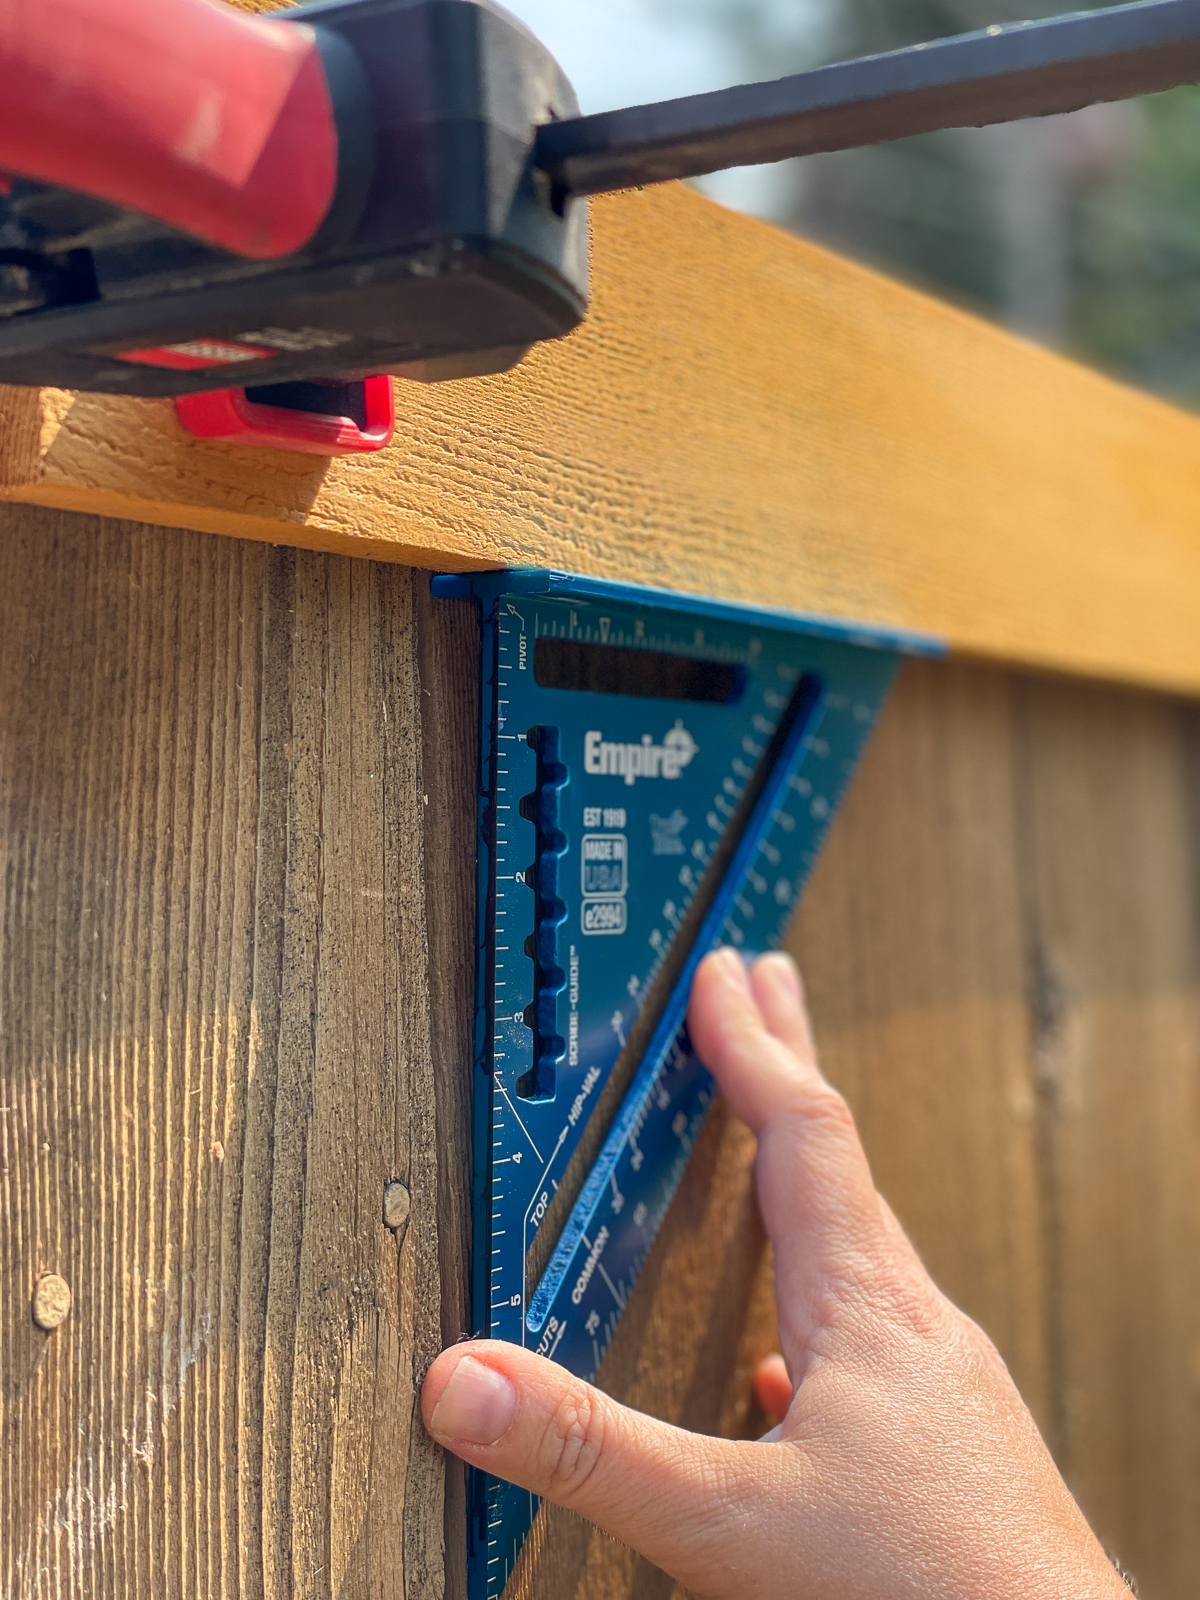

I tacked the trim in place with ¾" stainless steel brad nails, which won't rust like regular brad nails. A cordless brad nailer like this one is great for projects like this because you don't need to drag around a compressor! You could also use screws, but they would be more visible.

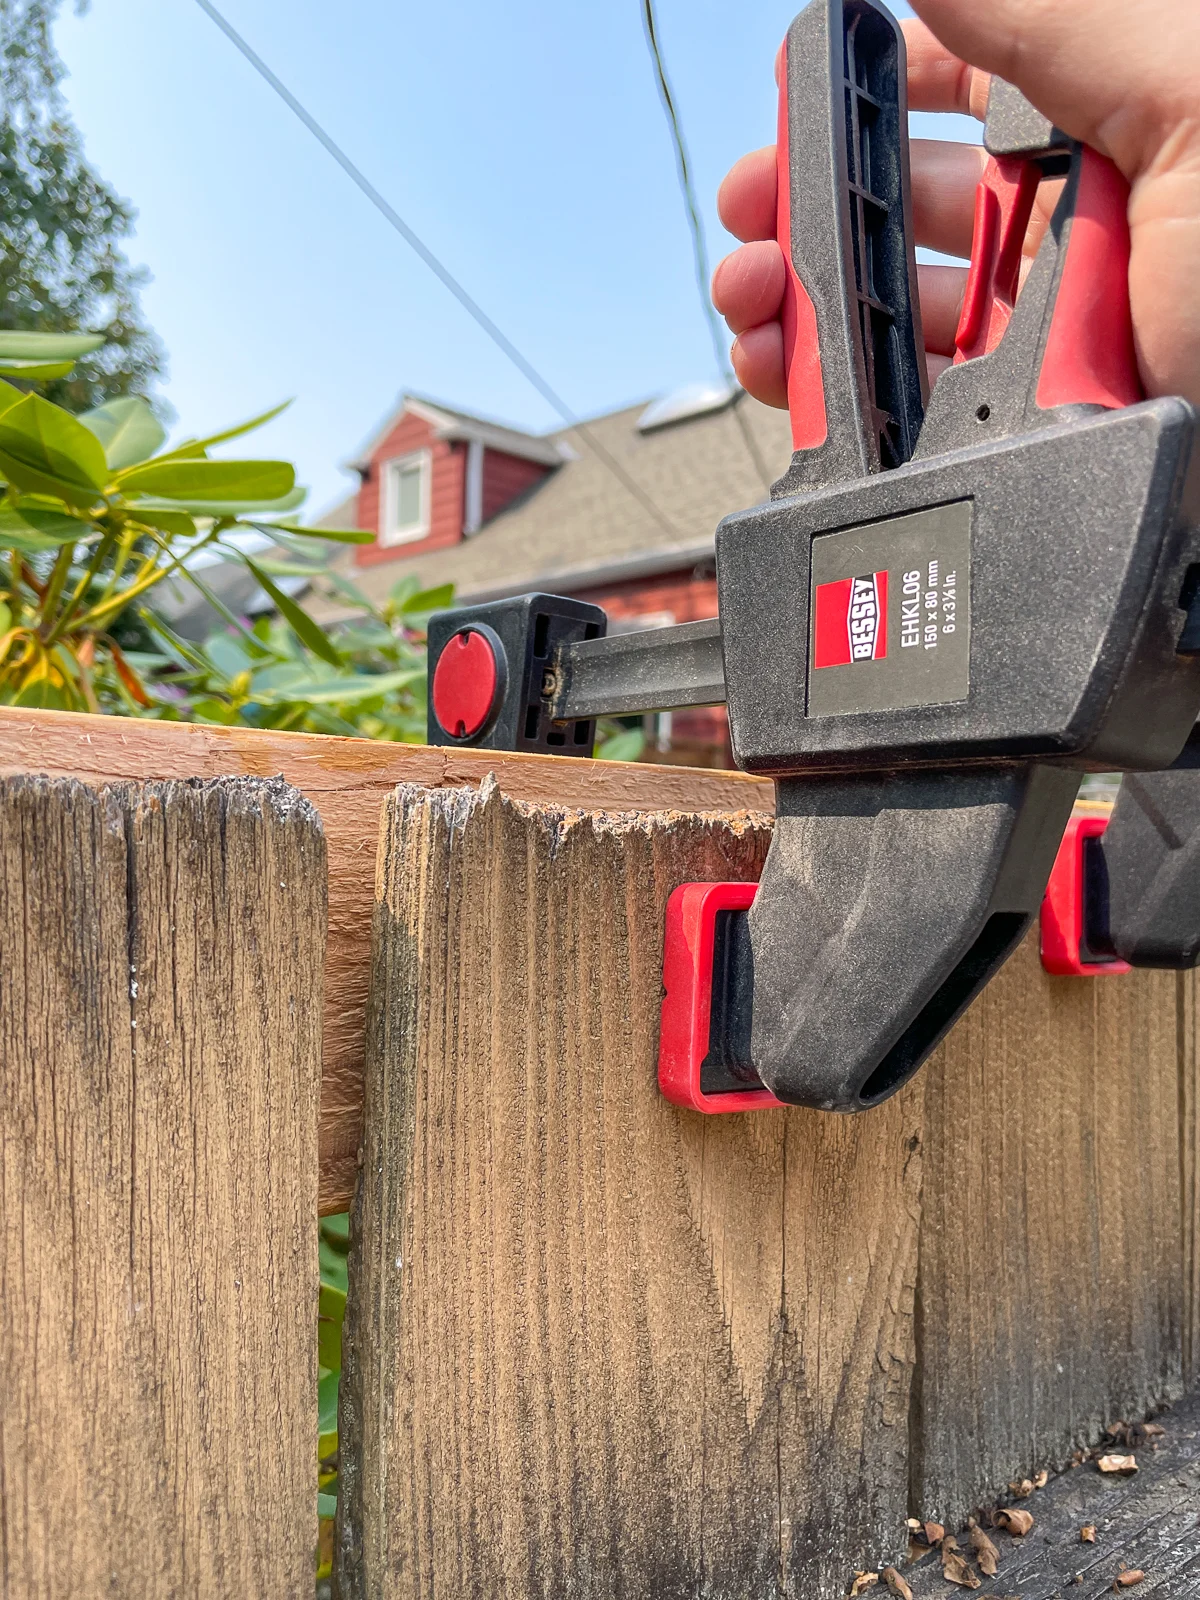
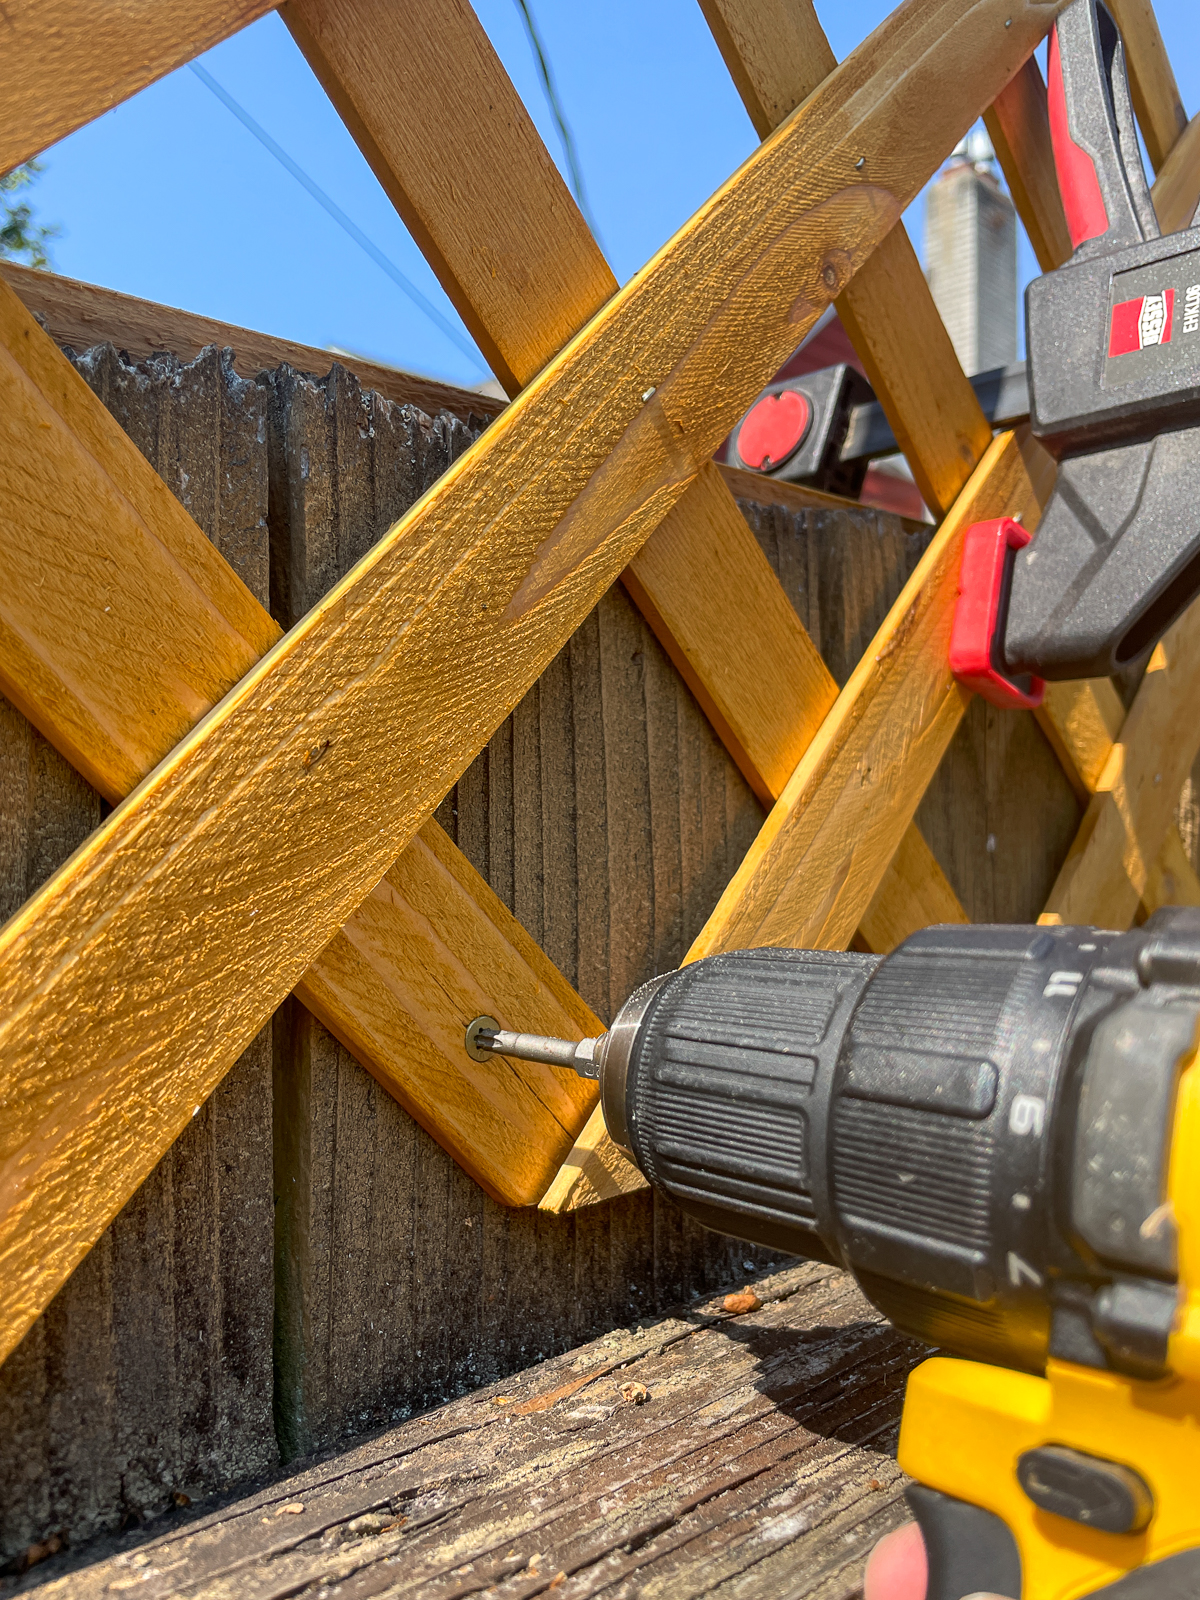
There were a bunch of boards that were warped at the top. I used a clamp to straighten those out, then used ¾" exterior wood screws to pull the trim tight from the back side. Just make sure to countersink the screw heads so they don't interfere with the lattice in the next step!

Attach the lattice to the fence
Clamp the lattice against the top of the back of the fence. Place a level on top and adjust it as necessary.

Use ¾" exterior wood screws to attach the lattice securely. I placed them on the slats that are touching the fence so the screw heads didn't interfere with the trim in the next step.

Attach the back trim boards
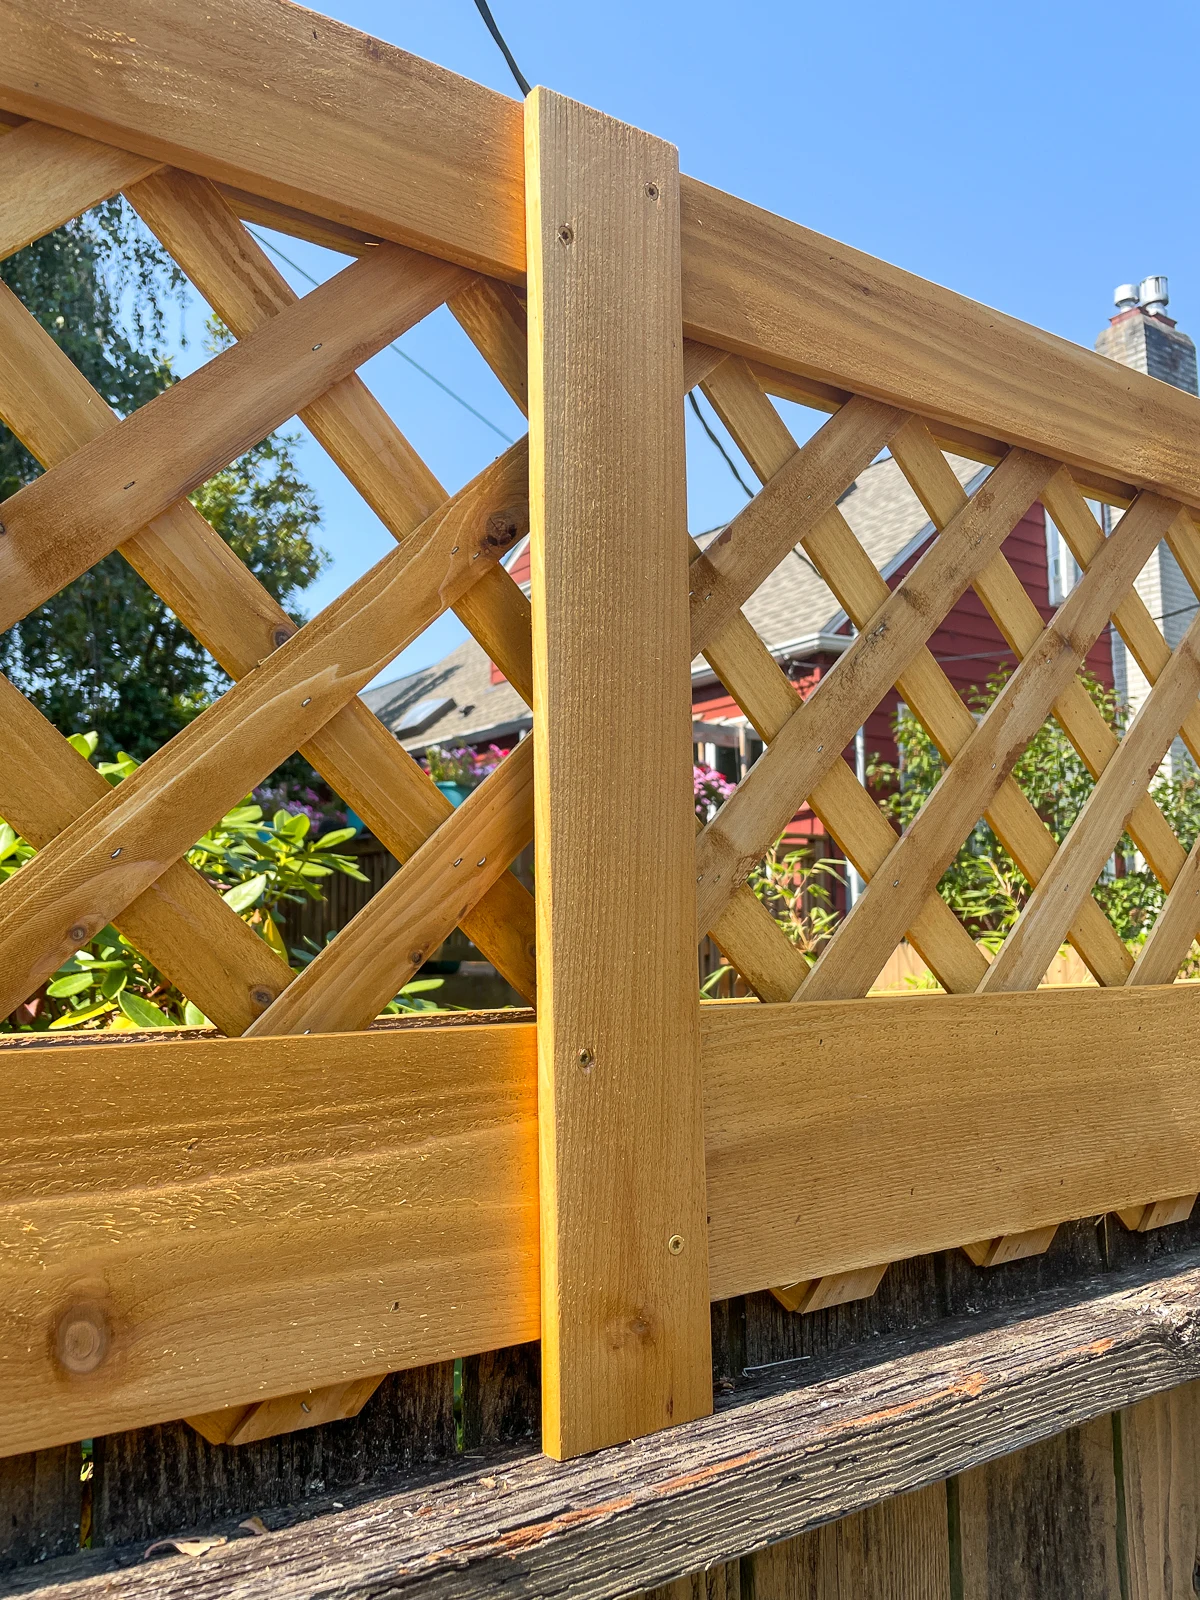
The 1x6 pickets are installed at the same height as the trim on the front of the fence. I just nailed them in place where the trim intersects with the lattice. You can see that it's not quite wide enough to cover the entire lattice bottom.

Before attaching the bottom piece to cover up the gap, I installed the next section of lattice. Make sure that the diamonds all line up at the seams, and that it's level. A clamp at the top helps keep the panels aligned.

Attach the second piece of wide trim. Then measure the distance from the top of the trellis to the rail, and cut a 1x3 trim piece to fit.
This covers up the seam between the panels and adds rigidity. I used 1 ¼" exterior wood screws for these, making sure that the screws grab onto both panels.

Finally, cut the 1x3 for the bottom to fit between the vertical trim boards. I had to scribe a few high points and sand down to my line in order to keep it straight in some areas.

Cover seams on the front with trim
For the finishing touch, add more vertical trim to cover up the seams between the panels on the front side. I had to double up on the top part because it was set back due to the thickness of the fence itself.
Add vining plants (optional)
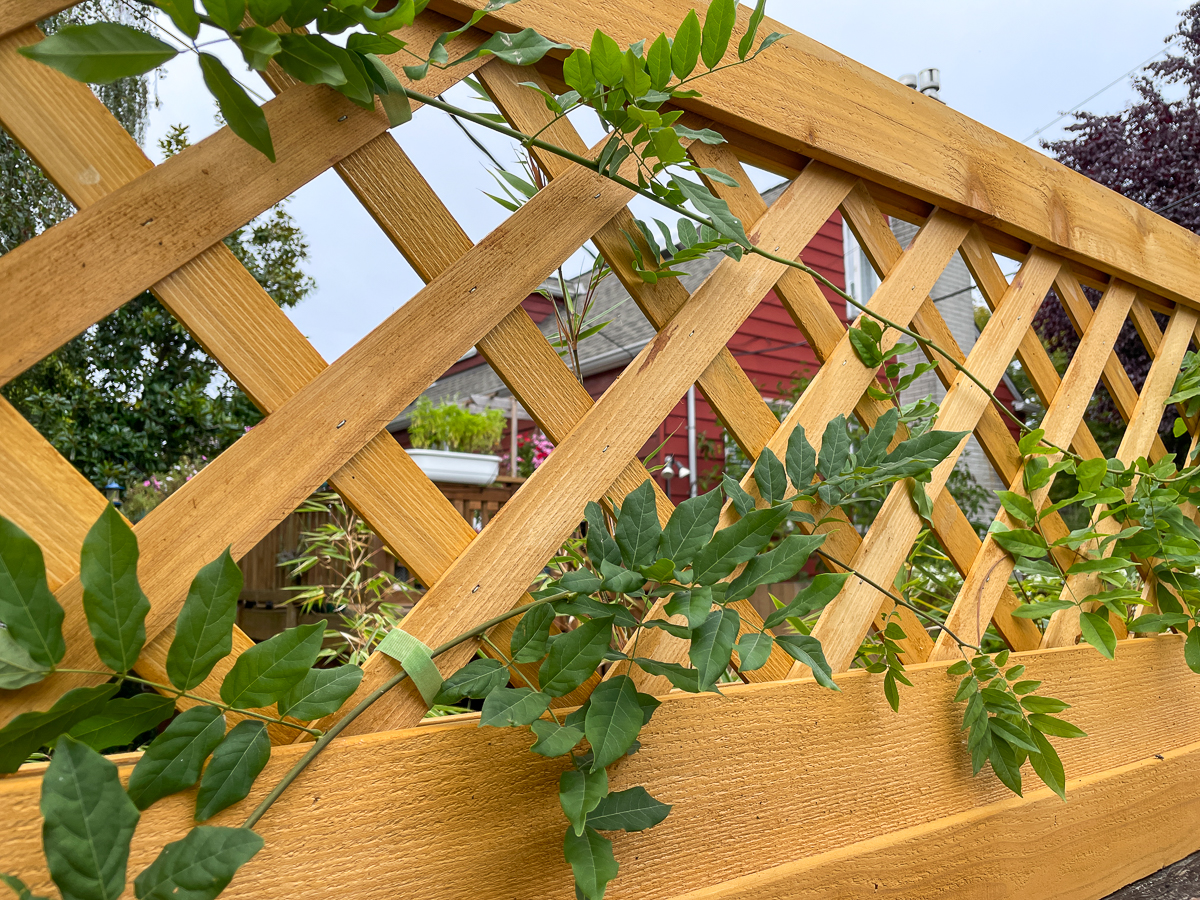
I've had a tree form wisteria growing in a pot all summer, just waiting for this project to be completed! It's been sending out long vines that are desperate for a trellis to climb on.
Wisteria can become invasive if not kept in check, so I'll be keeping it in a pot by itself against the back of the fence. The vines can grow up to 20 feet long, which is perfect for this 40 foot long fence!
I placed it in the middle and trained two long vines to grow on the trellis in each direction. It's hooked up to the drip irrigation in the garden behind the fence, so I don't have to worry about watering it!
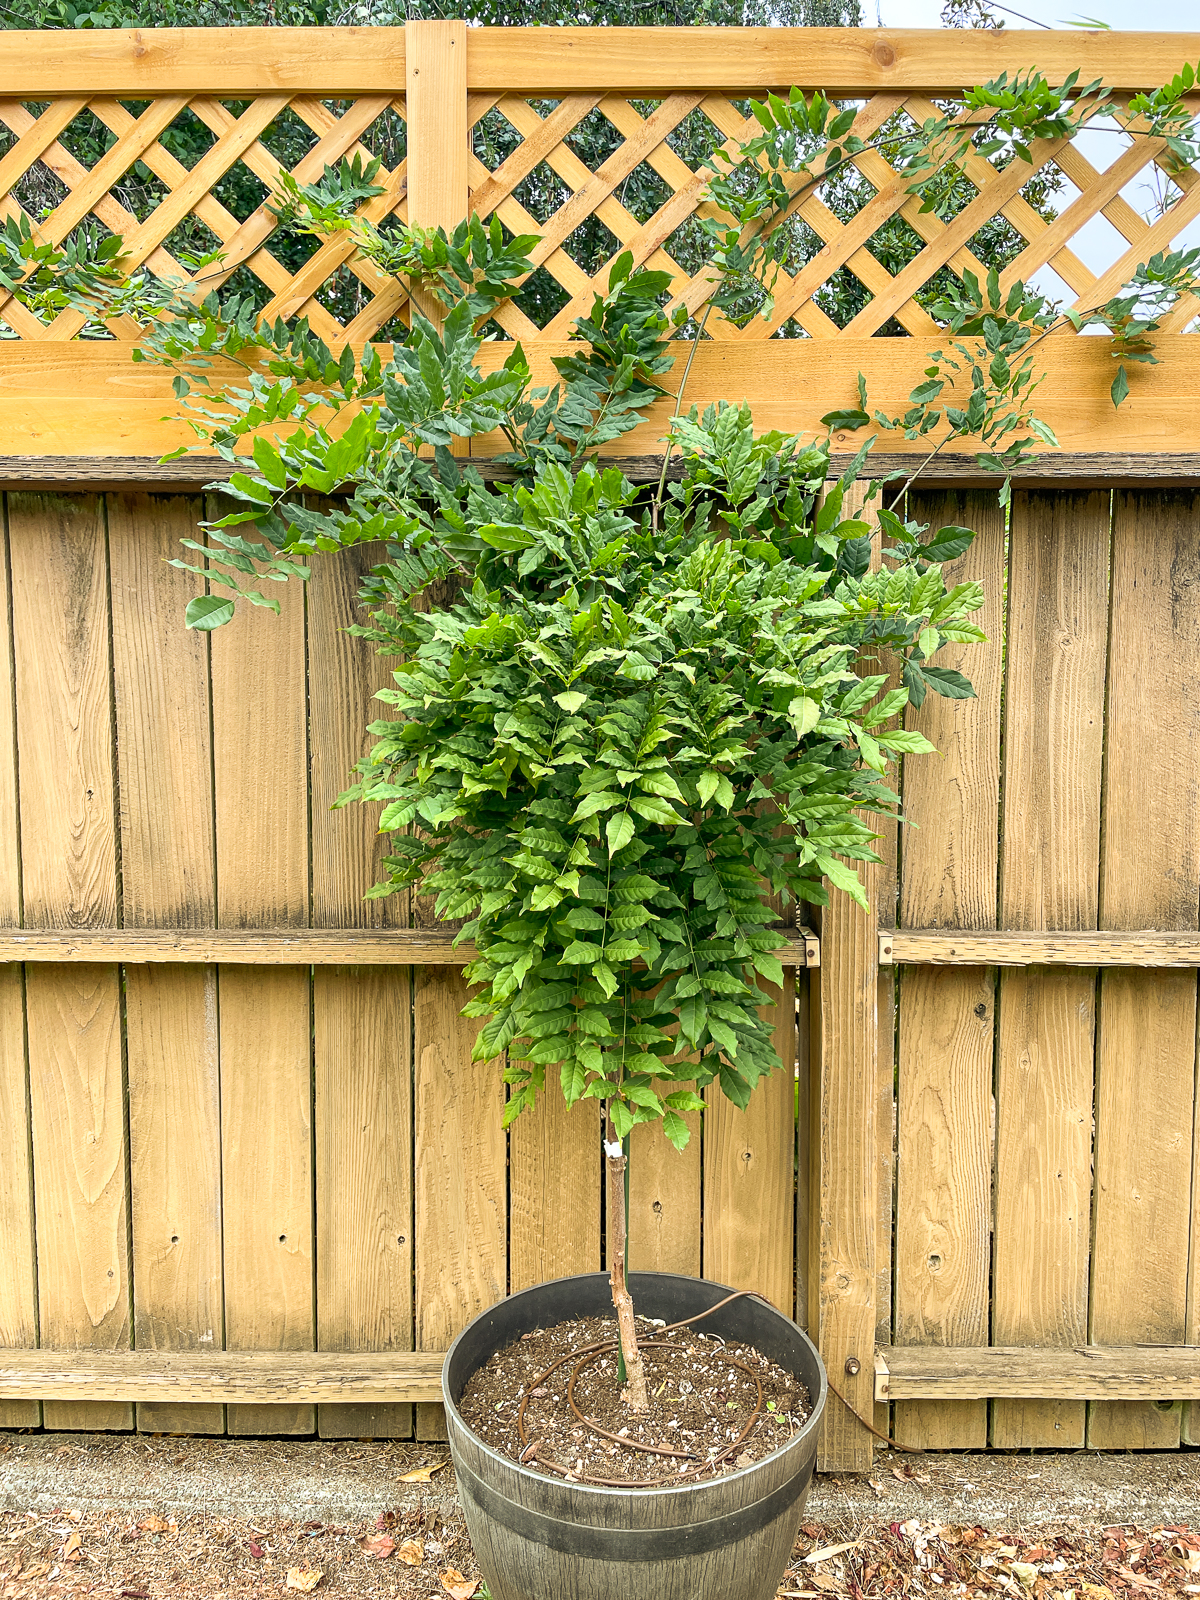

In some spots, I wove the vines through the lattice. In others, I just tied it in place with these Velcro garden ties. Over time, the plant will grab onto the lattice by itself and won't need as much guidance.

I can't wait to see this wisteria in bloom next spring!
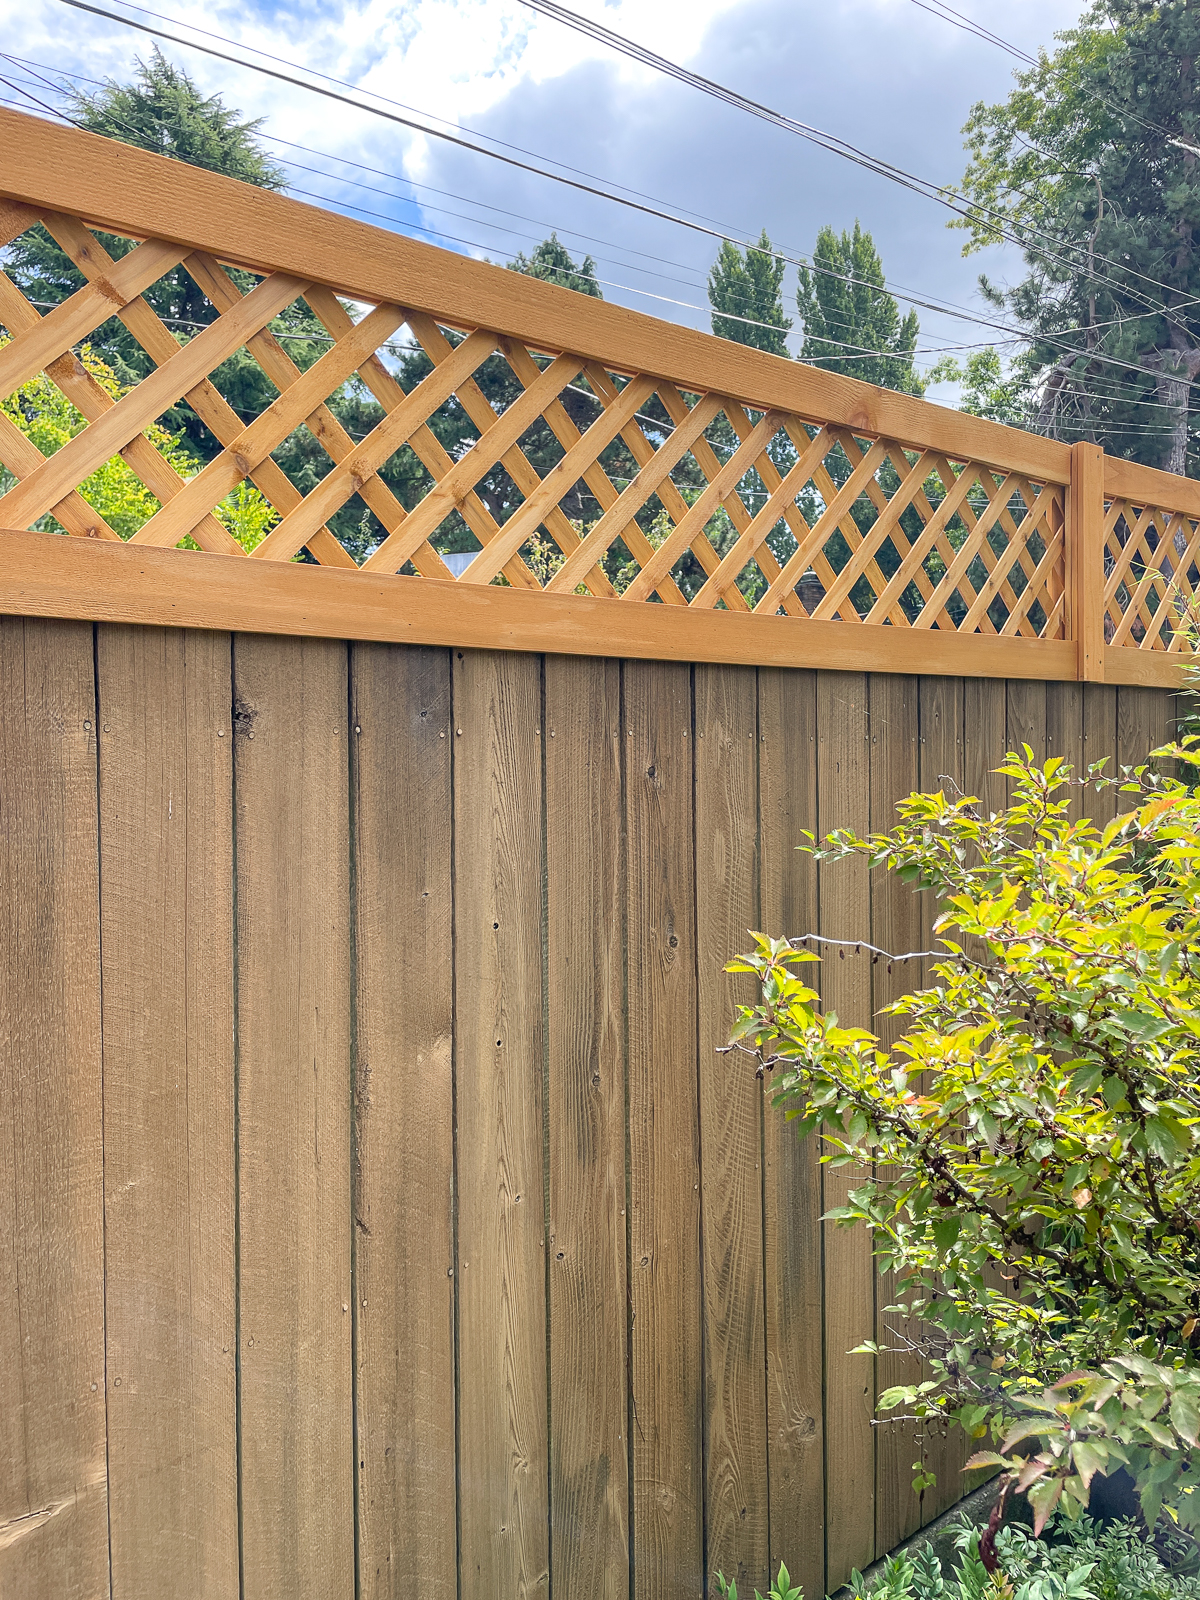
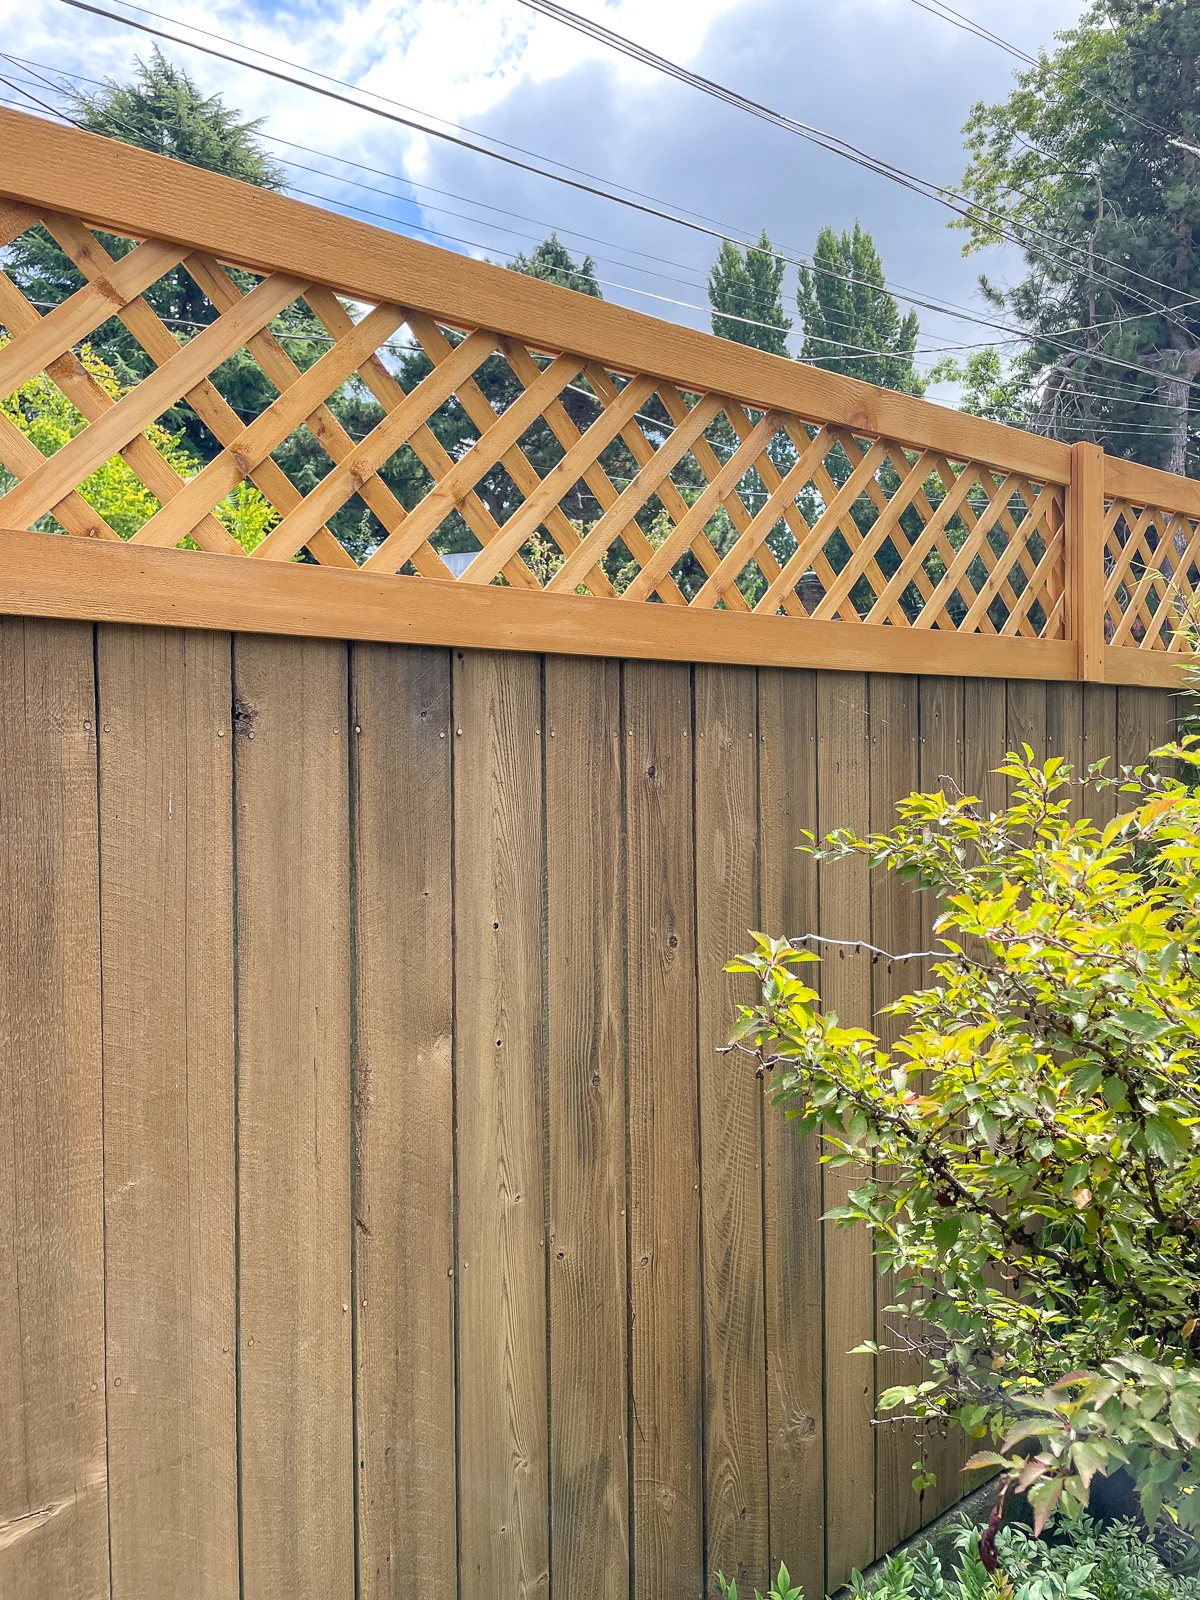
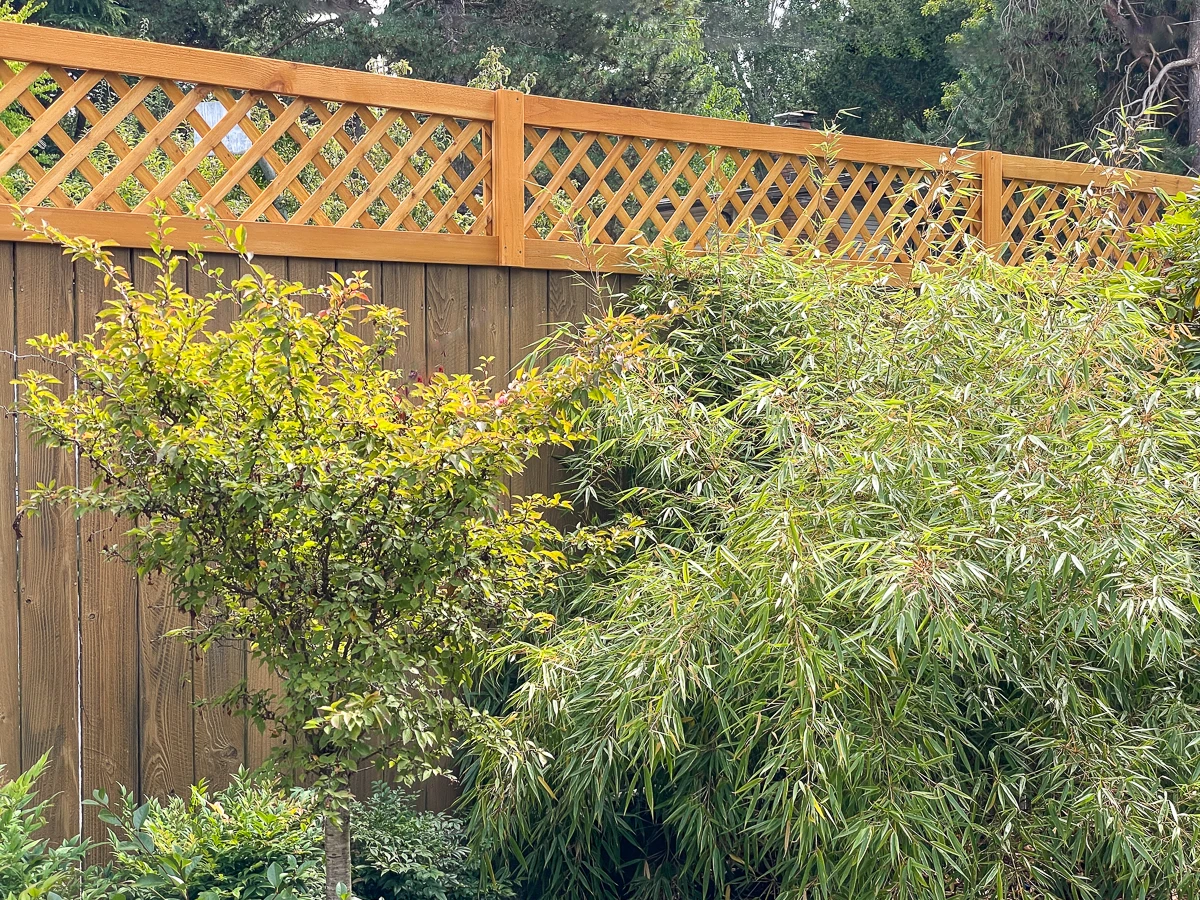
We're enjoying the extra privacy in the backyard that the fence top trellis provides. It always felt like we were on display up on the deck, but now you can barely see it from the alley!

The ragged top edge of the fence is now hidden, as well as the view of the neighbor's basketball hoop. The wood stain will eventually fade to match the fence.

I have big plans for the garden bed right in front of the fence now that this project is complete! It's a challenging space to landscape due to the slope, so I'll be installing a small pond and waterfall to take advantage of the terrain. Stay tuned for that tutorial soon!
Check out these other backyard ideas!
Annika
Friday 9th of February 2024
Love this! Where did you find the trellis? I’m also in Seattle. Good tip about seeing if the 2 feet is too high and just going with 18”!
Vineta Jackson
Saturday 10th of February 2024
It's from Home Depot! The quality can be hit or miss, so I went through the stack and picked out the best looking ones.