Learn how to make a raised garden bed with this step-by-step guide! Each DIY raised garden bed costs less than $50 to build yourself!
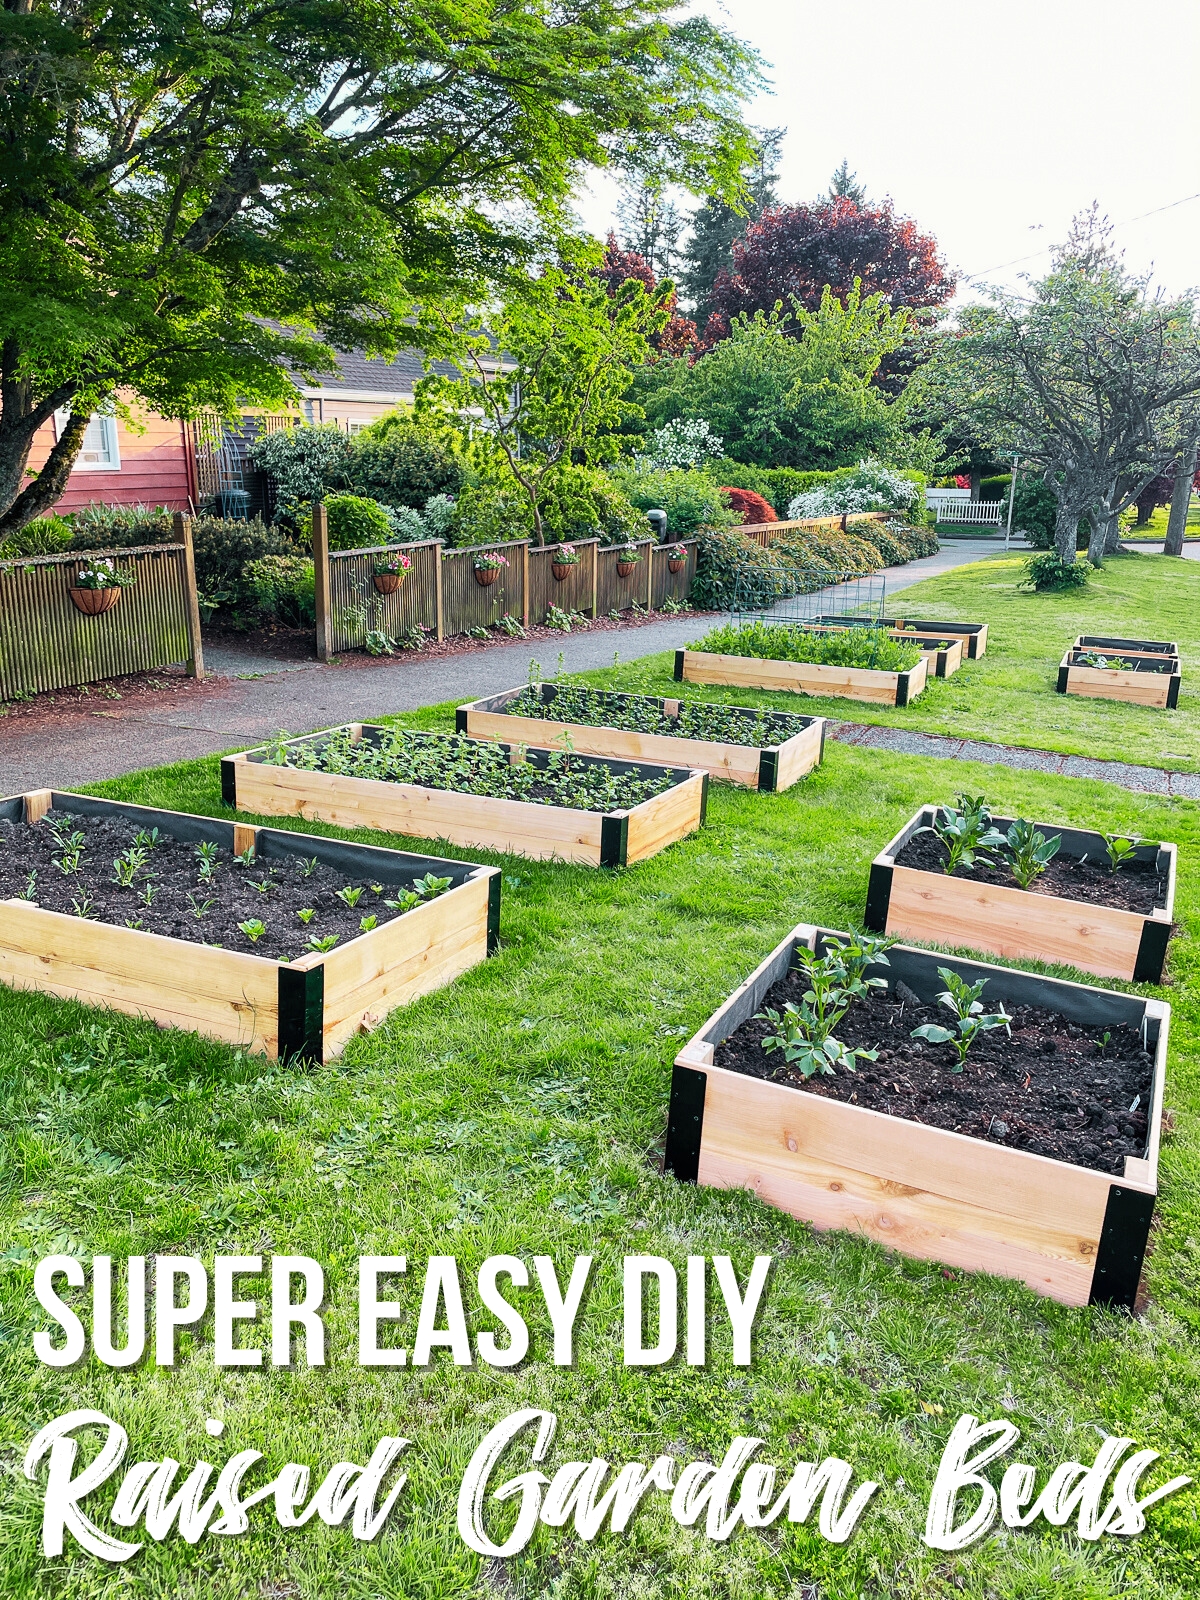
I've been wanting to build my own raised garden beds for years. We have the perfect spot for them, in this ridiculously wide, flat parking strip between the sidewalk and the street in front of our house.
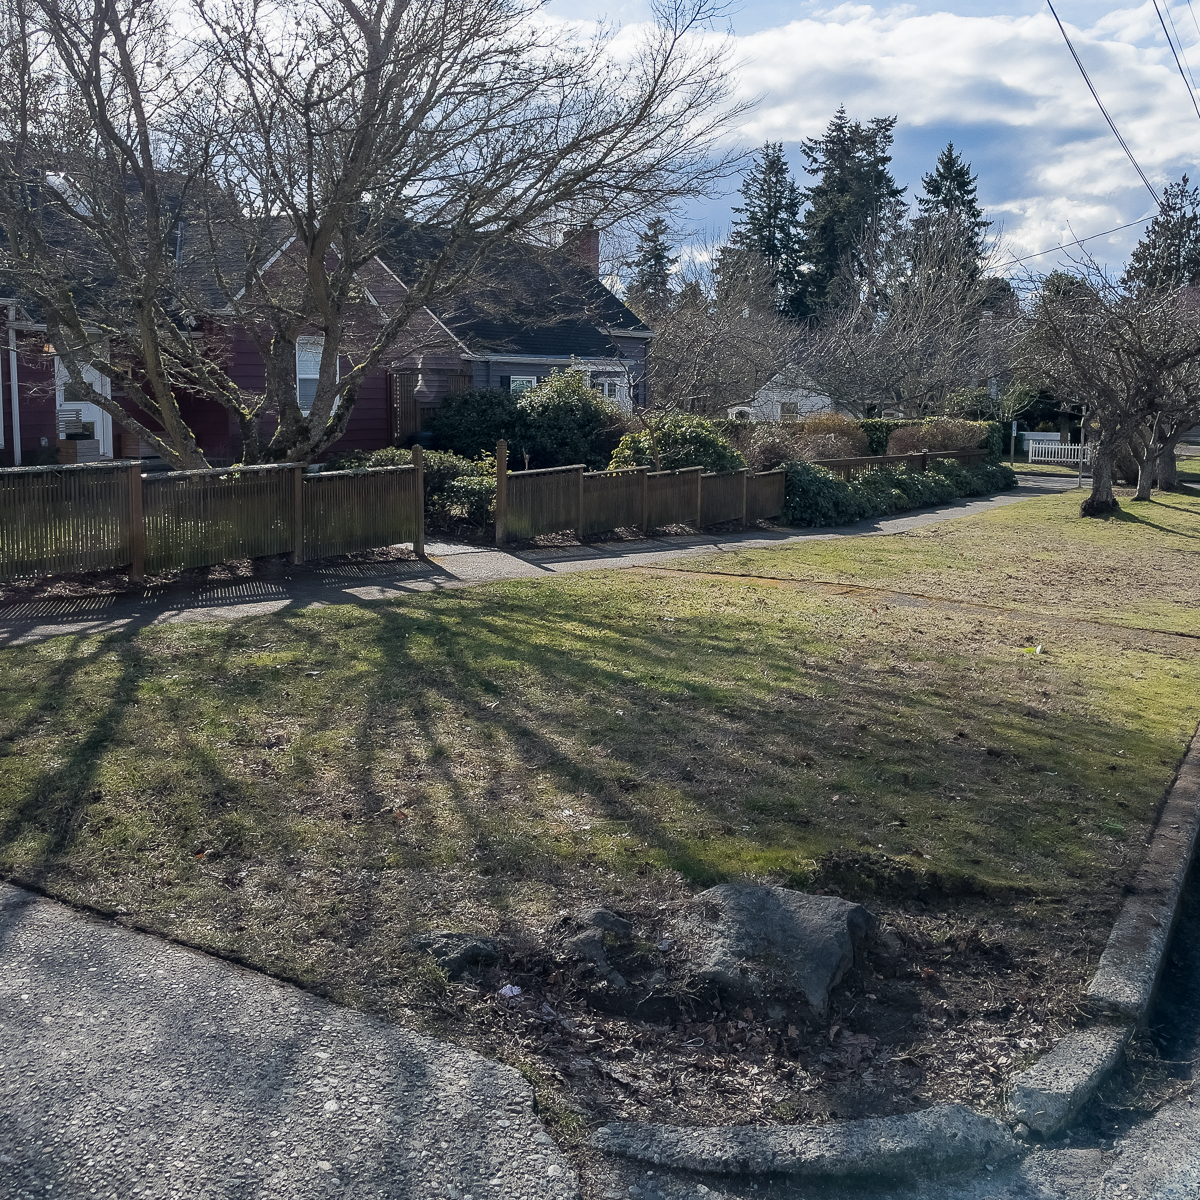
It measures 19 feet deep and over 60 feet wide with a narrow strip of sidewalk down the middle. The grass is mostly weeds that seem to pop up overnight. All the other houses on our street have the same flowering trees, but the previous owner of our house must not have gotten the memo.
Our front yard garden beds are full, but there are so many beautiful things I want to grow! I recently started a new gardening website called Grow Happier Plants, and I needed a place for all my seedlings. These DIY raised garden beds will be the perfect spot!
This post contains affiliate links for your convenience. Purchases made through these links may earn me a small commission at no additional cost to you. Please visit my disclosures page for more information.
The Plan
I drew up the dimensions of the space in SketchUp, and started playing around with configurations. We park on the street, so I wanted to keep the walk from the car doors to the sidewalk clear. I also needed to maintain three feet between the beds for the lawn mower.
I decided to use cedar fence pickets instead of dimensional lumber to save some money. When you're building this many raised beds, it adds up quick! But those thin boards can bow out over time, so I wanted to make sure my design would hold up.
I did a little research on various DIY raised garden bed ideas, and added my own spin on them. Here's what I came up with!
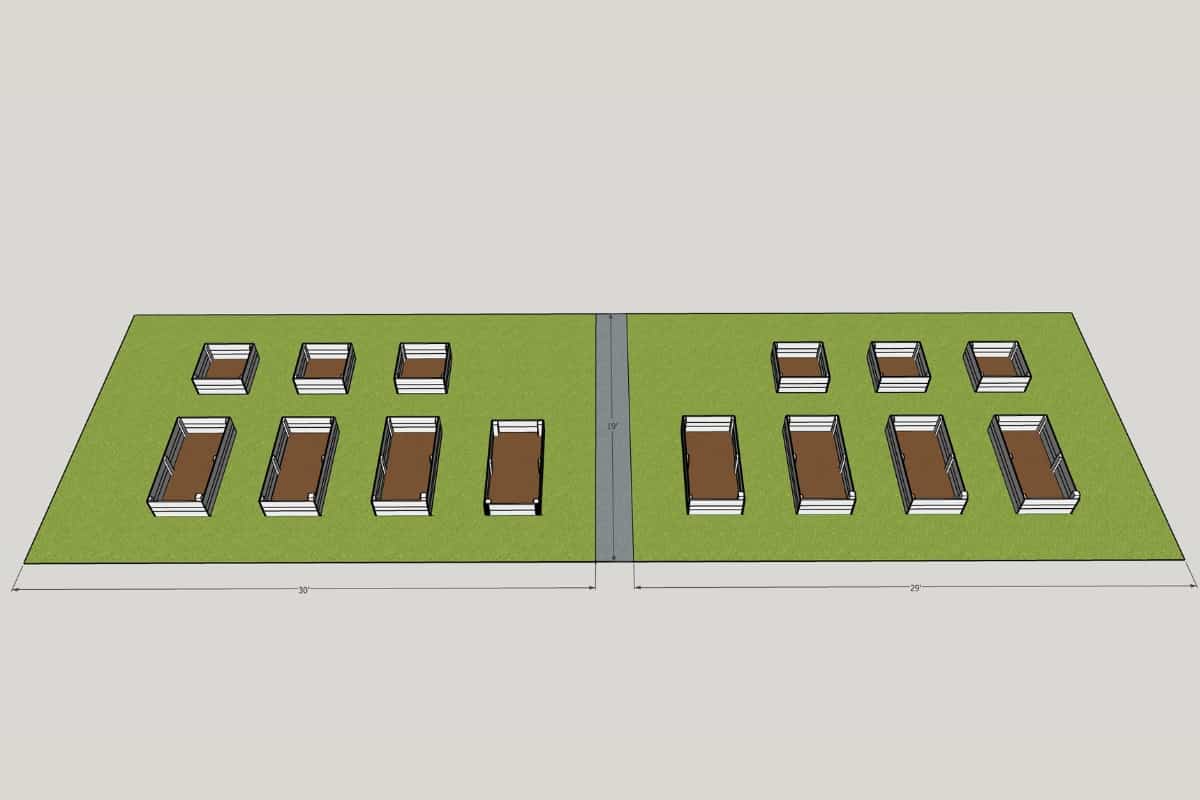
The longer raised beds measure three feet by six feet, to take full advantage of the entire length of the fence pickets. The square frames are three feet by three feet, so I can just chop the pickets in half without any waste.
If you've seen any of my other outdoor furniture projects, you might have noticed a trend in my designs. I like to alternate full width pickets with thinner ones to break up the flat sides of things like planter boxes and storage benches.
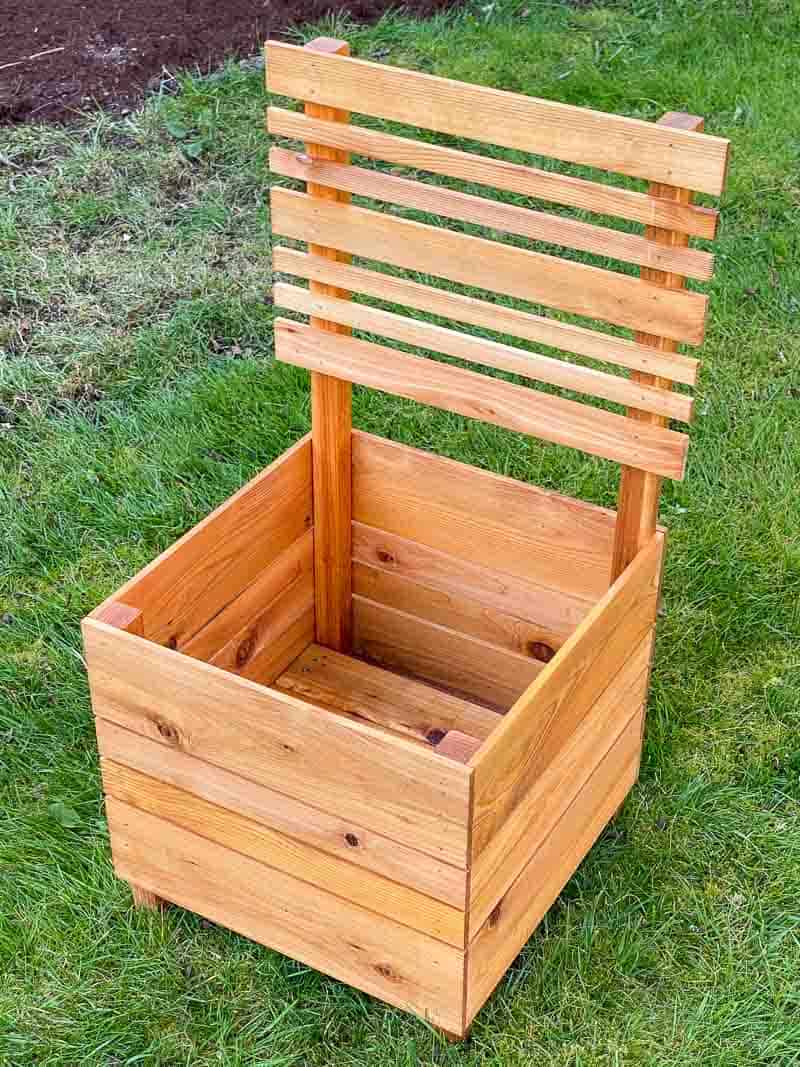
I used a similar pattern for these raised beds, which had the added benefit of making them a little taller. Hopefully those extra inches will save some back ache!
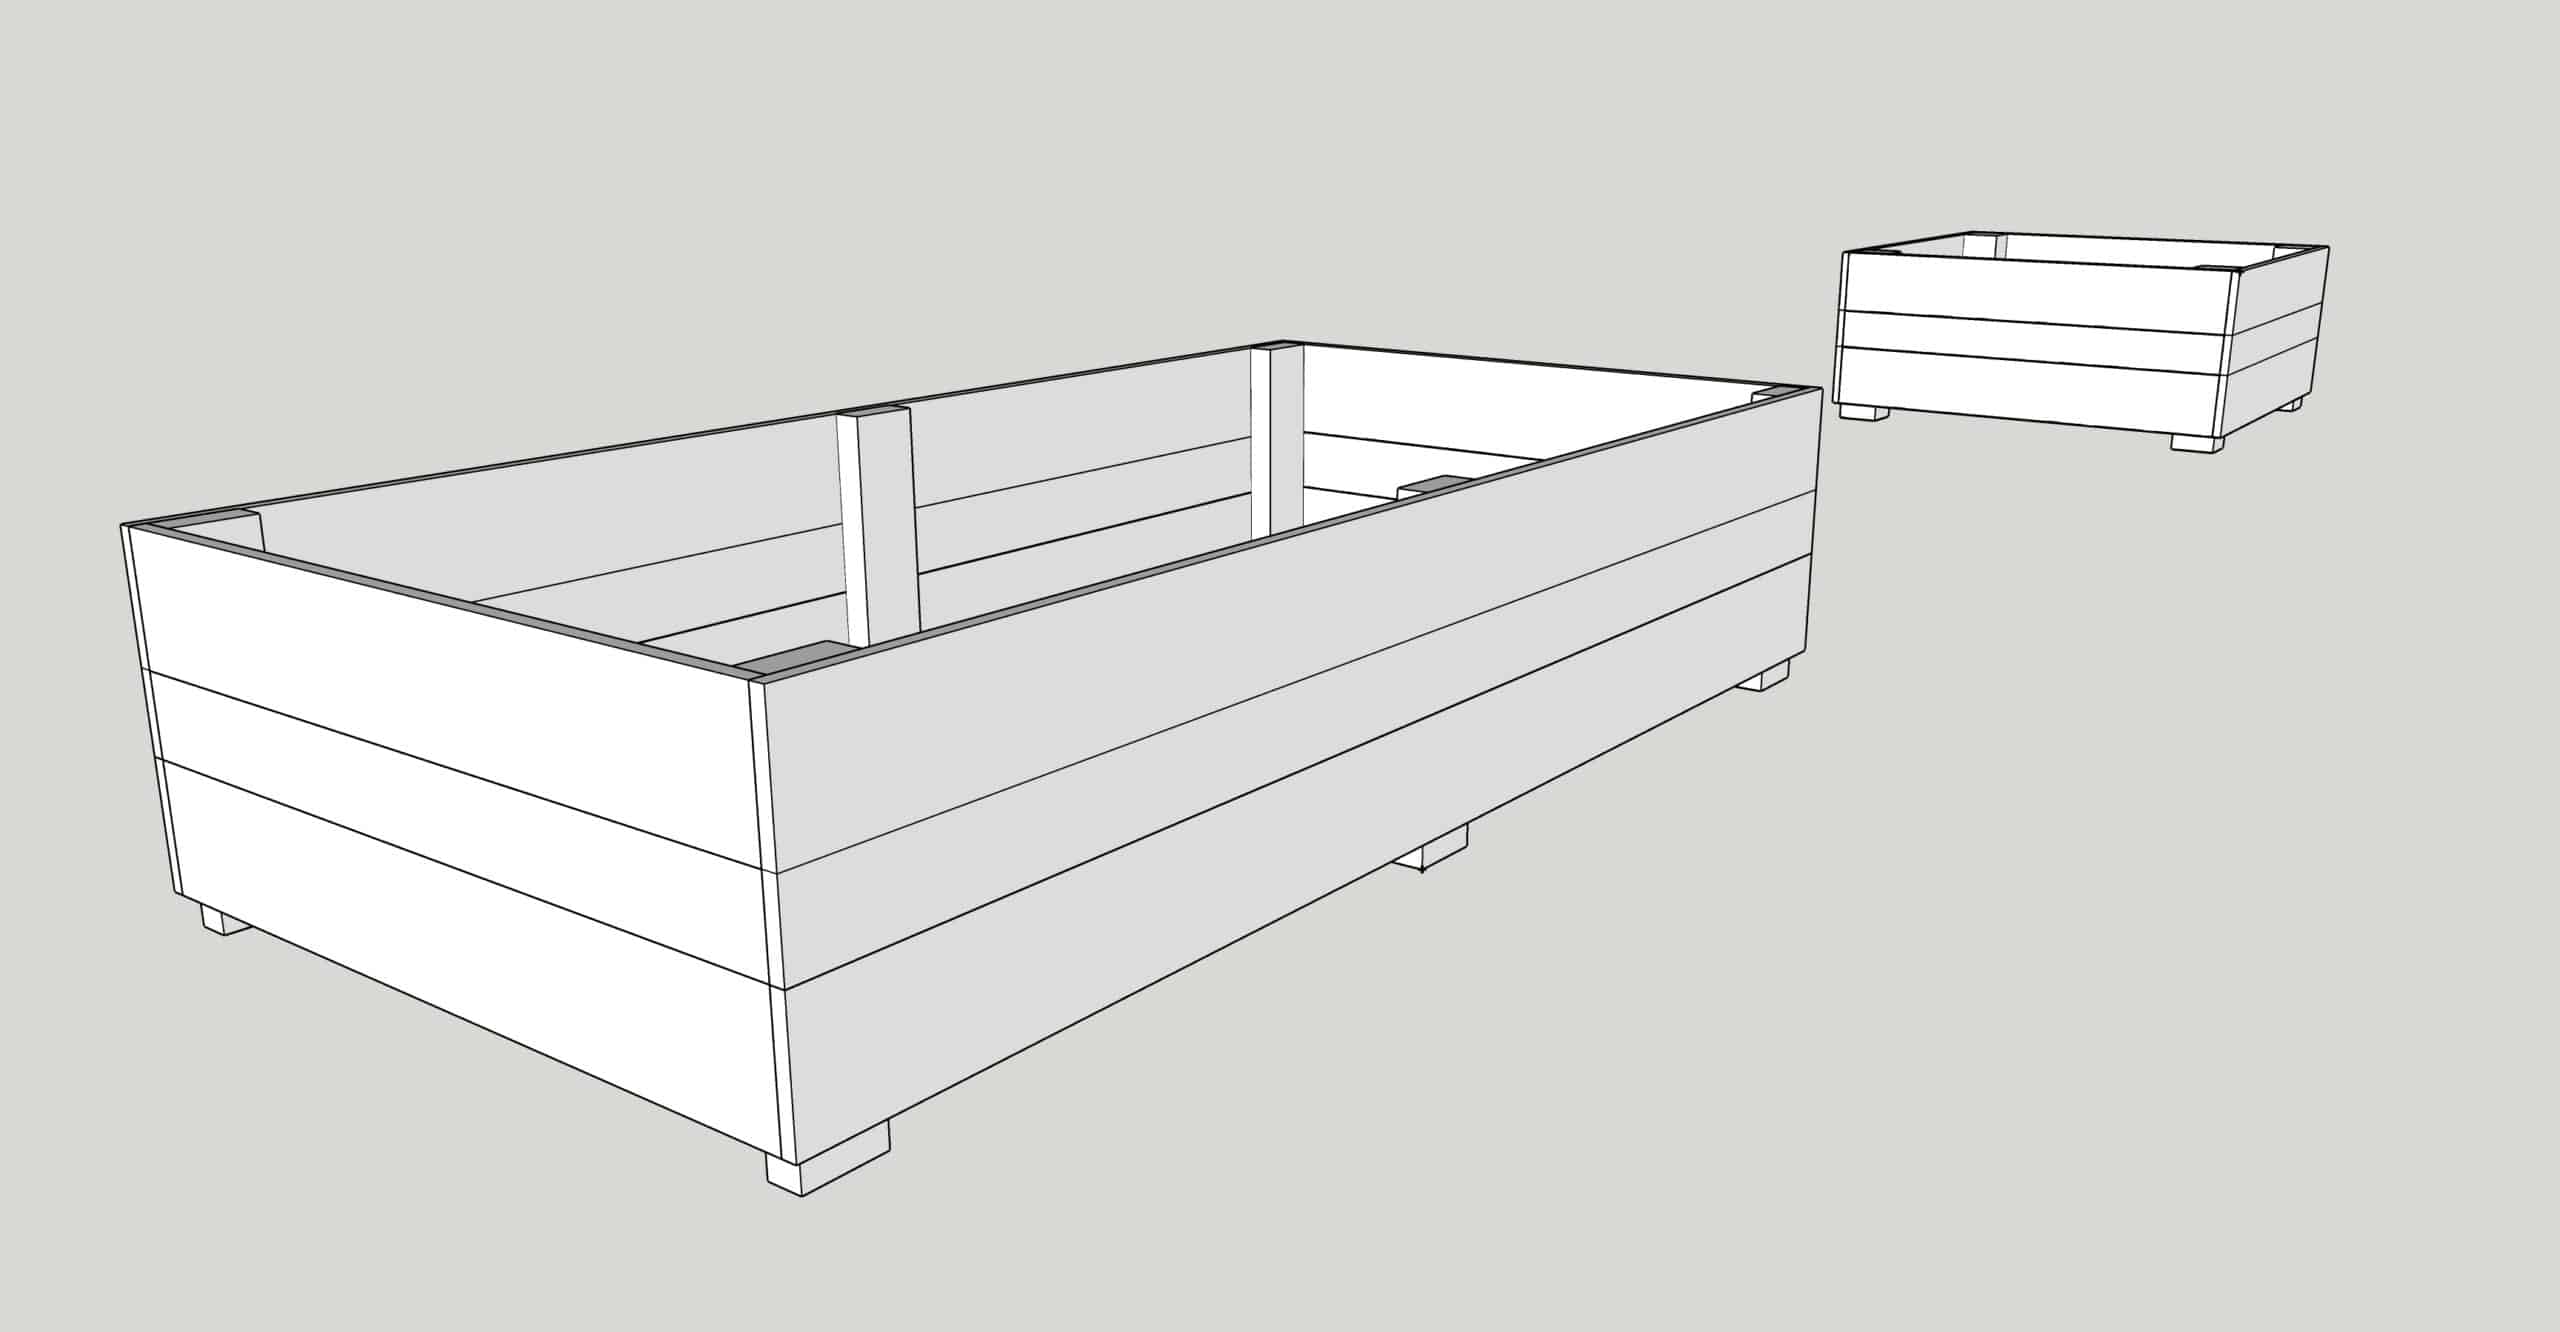

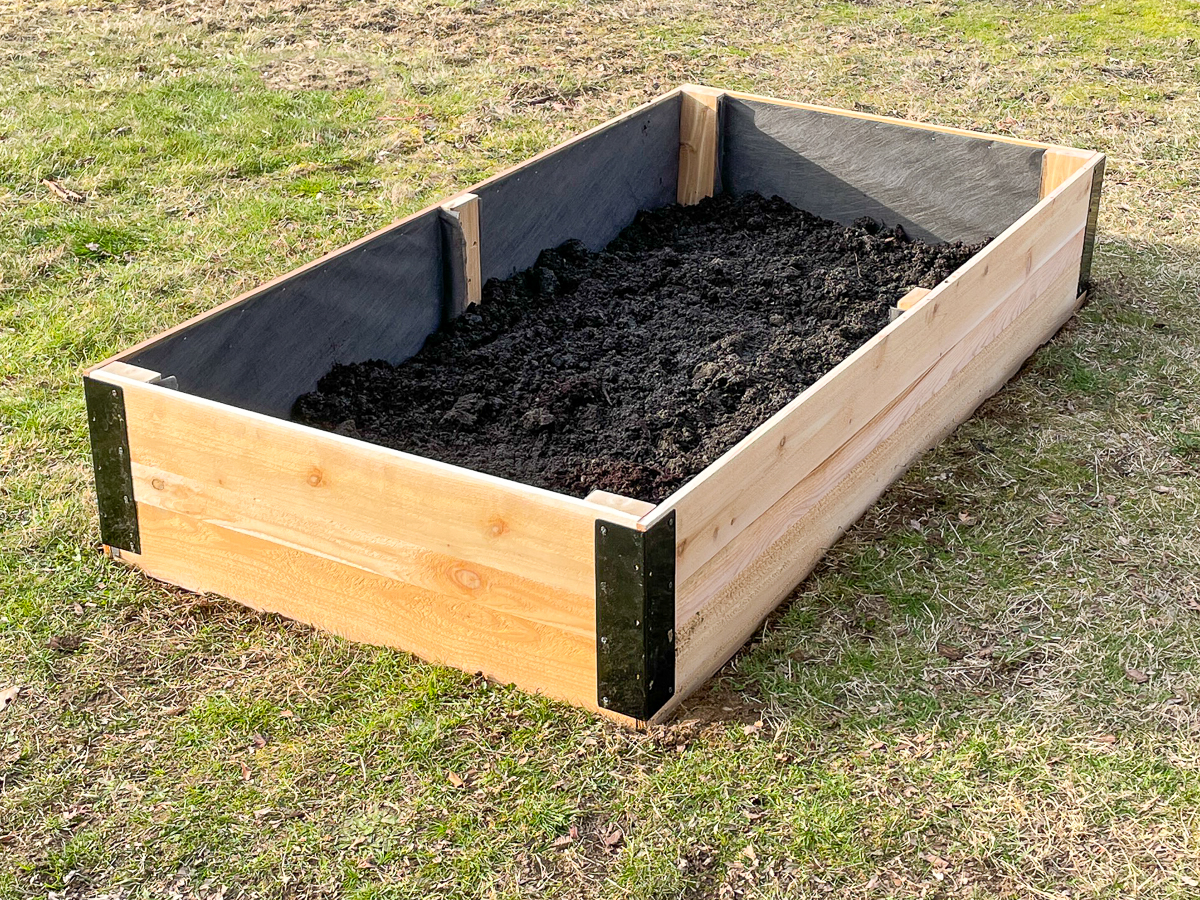
I've noticed that the corners of these fence pickets tends to curl out over time. Moisture expands the wood, causing it to warp when it dries. To prevent this, I'm using metal corner brackets that will keep the corners straight while adding a nice design detail.
Now that we have a plan, let's get building!
Materials Needed
Here's what you'll need to build a 3'x6' raised bed:
- Eight 1x6 6 foot flat top fence pickets
- One 2x4 board (cedar or pressure-treated)
- Four metal corner brackets
- Landscape fabric
The smaller 3'x3' raised beds require just five 1x6 fence pickets. If you don't have a table saw, you can use 3 ½" wide fence boards for the center stripe or just use two boards instead.
You'll also want to find cleaner boards if you're not cutting off all the ragged edges. Straight sides will give you a tighter joint between the stacked boards. I spent a lot of time digging through the stacks at Home Depot looking for the best ones!
If you're building a lot of raised beds, I recommend shopping around for the best price on materials. Cedar is fairly cheap in the Pacific Northwest, but almost impossible to find in other areas. You can use pressure treated lumber if you're not growing edible plants. You can learn more about cedar vs pressure treated wood here!
How to build a raised garden bed
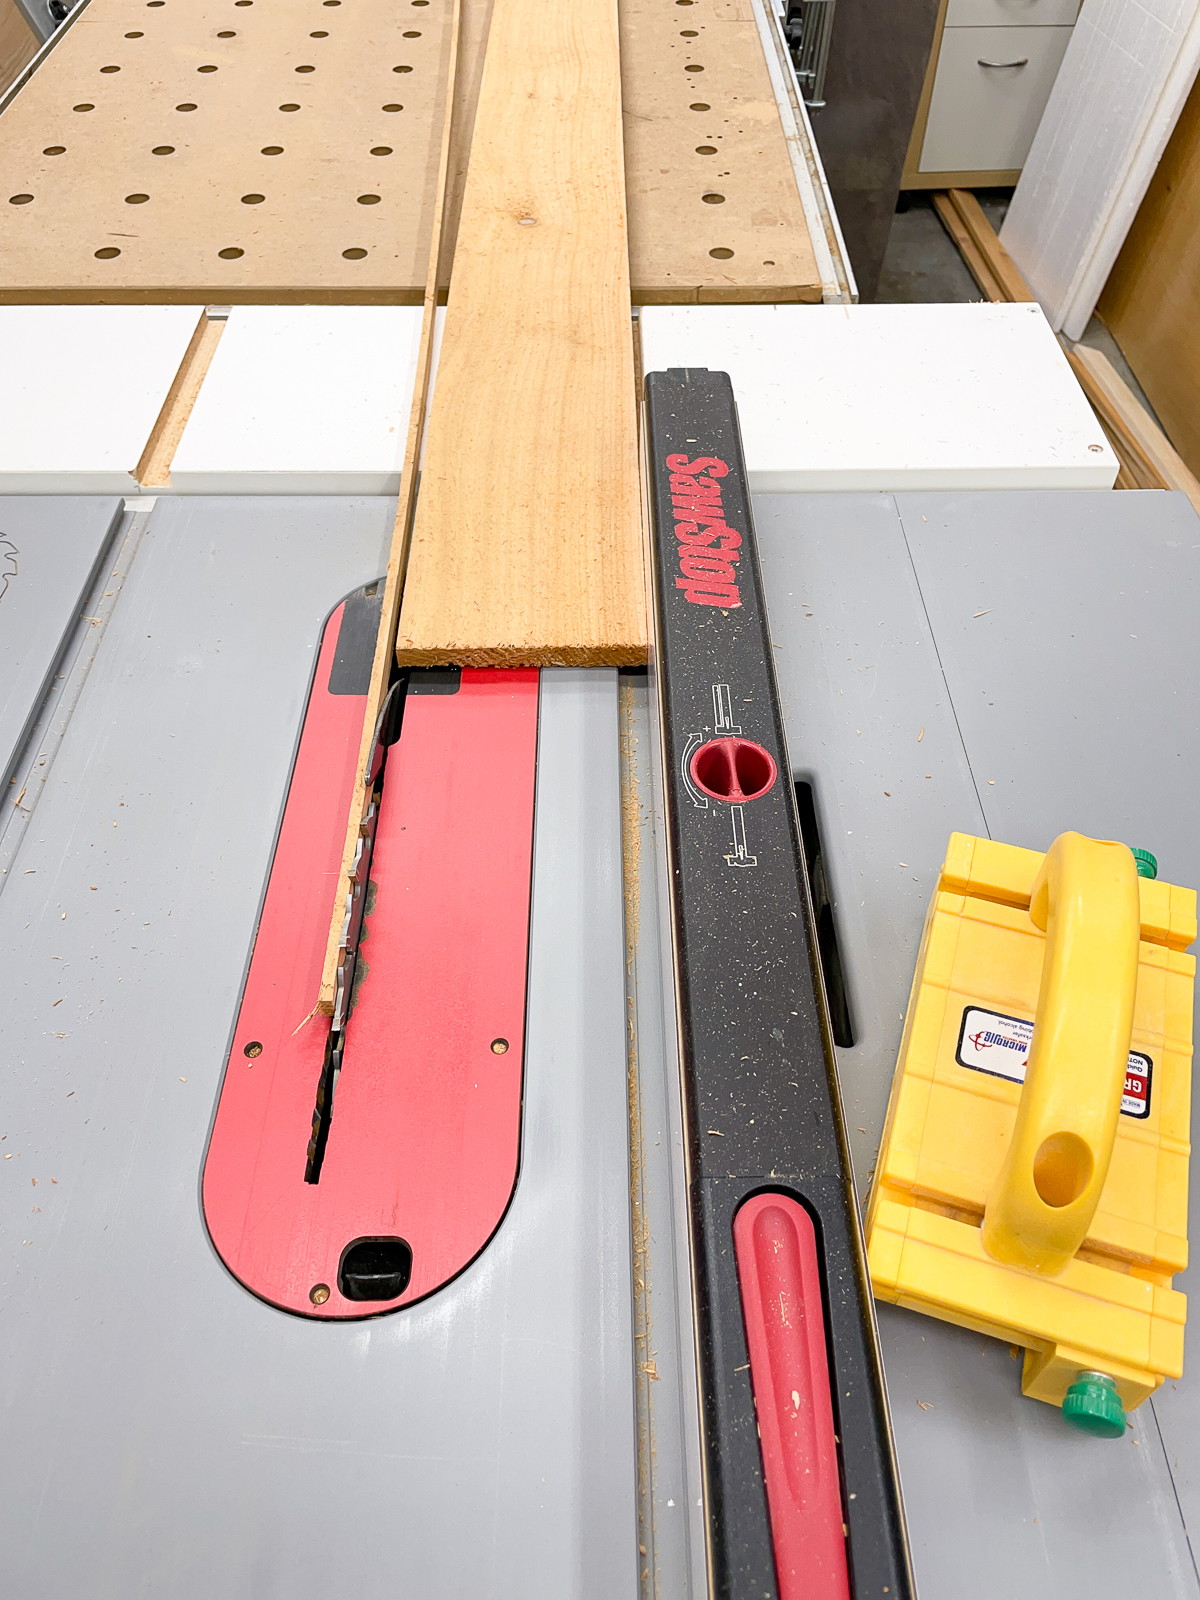
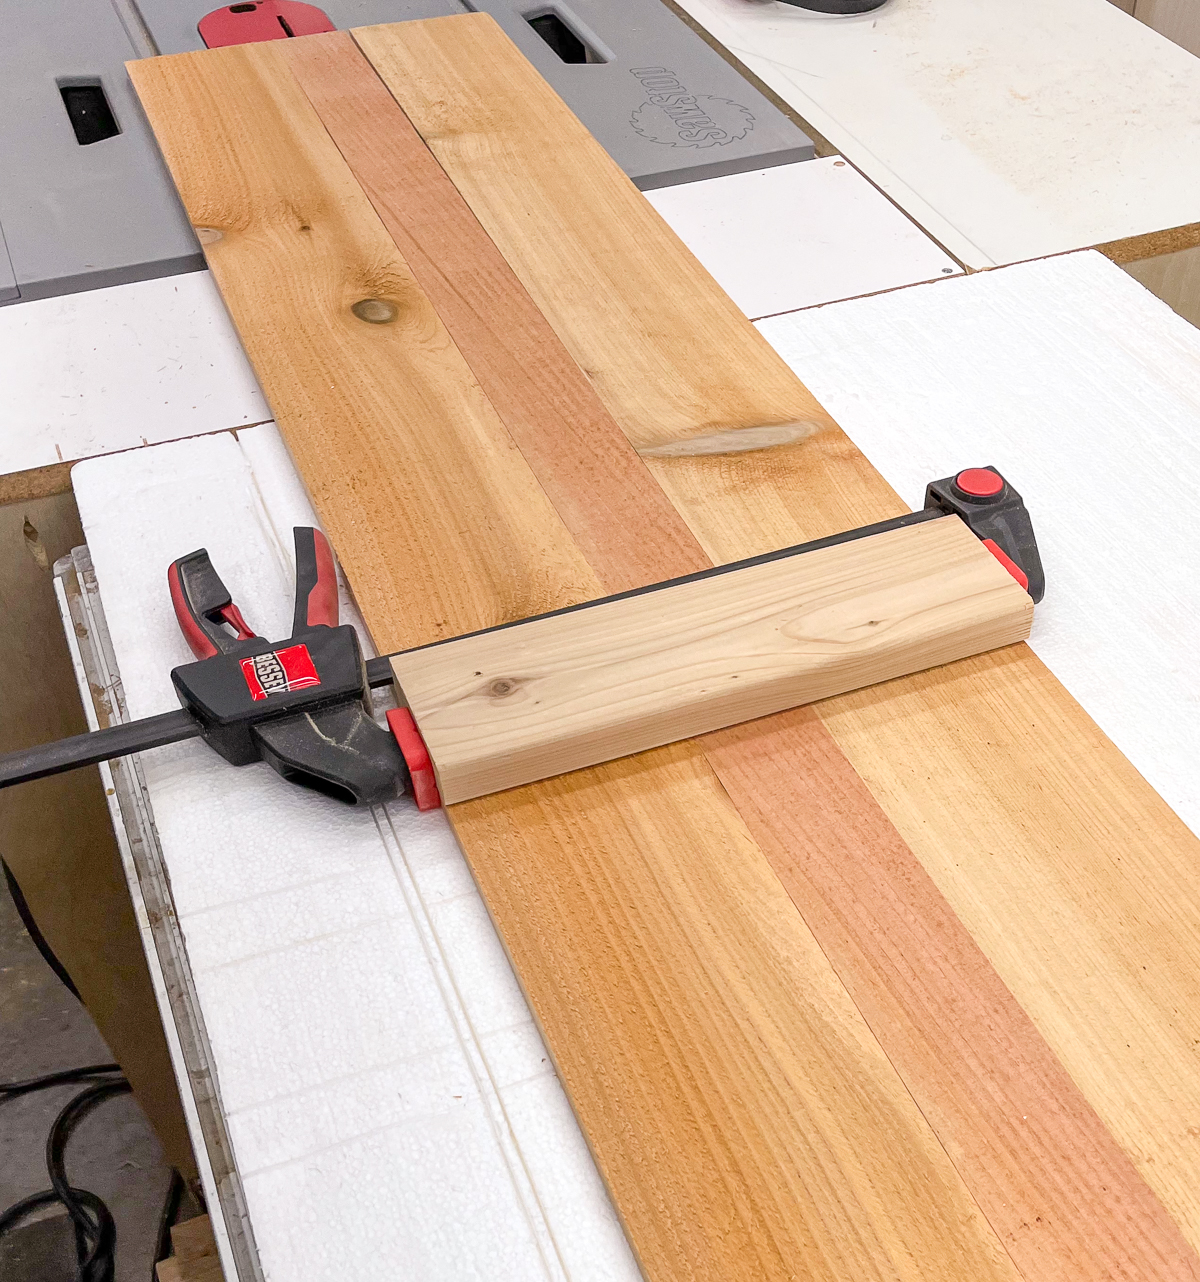
I started by ripping most of the fence boards down to 5" wide at the table saw. Then I picked out the ones with the least amount of knots and cut those ones down to 2 ½" wide for the center strips. This step is totally optional, but I think it looks nicer.

Assemble the short ends
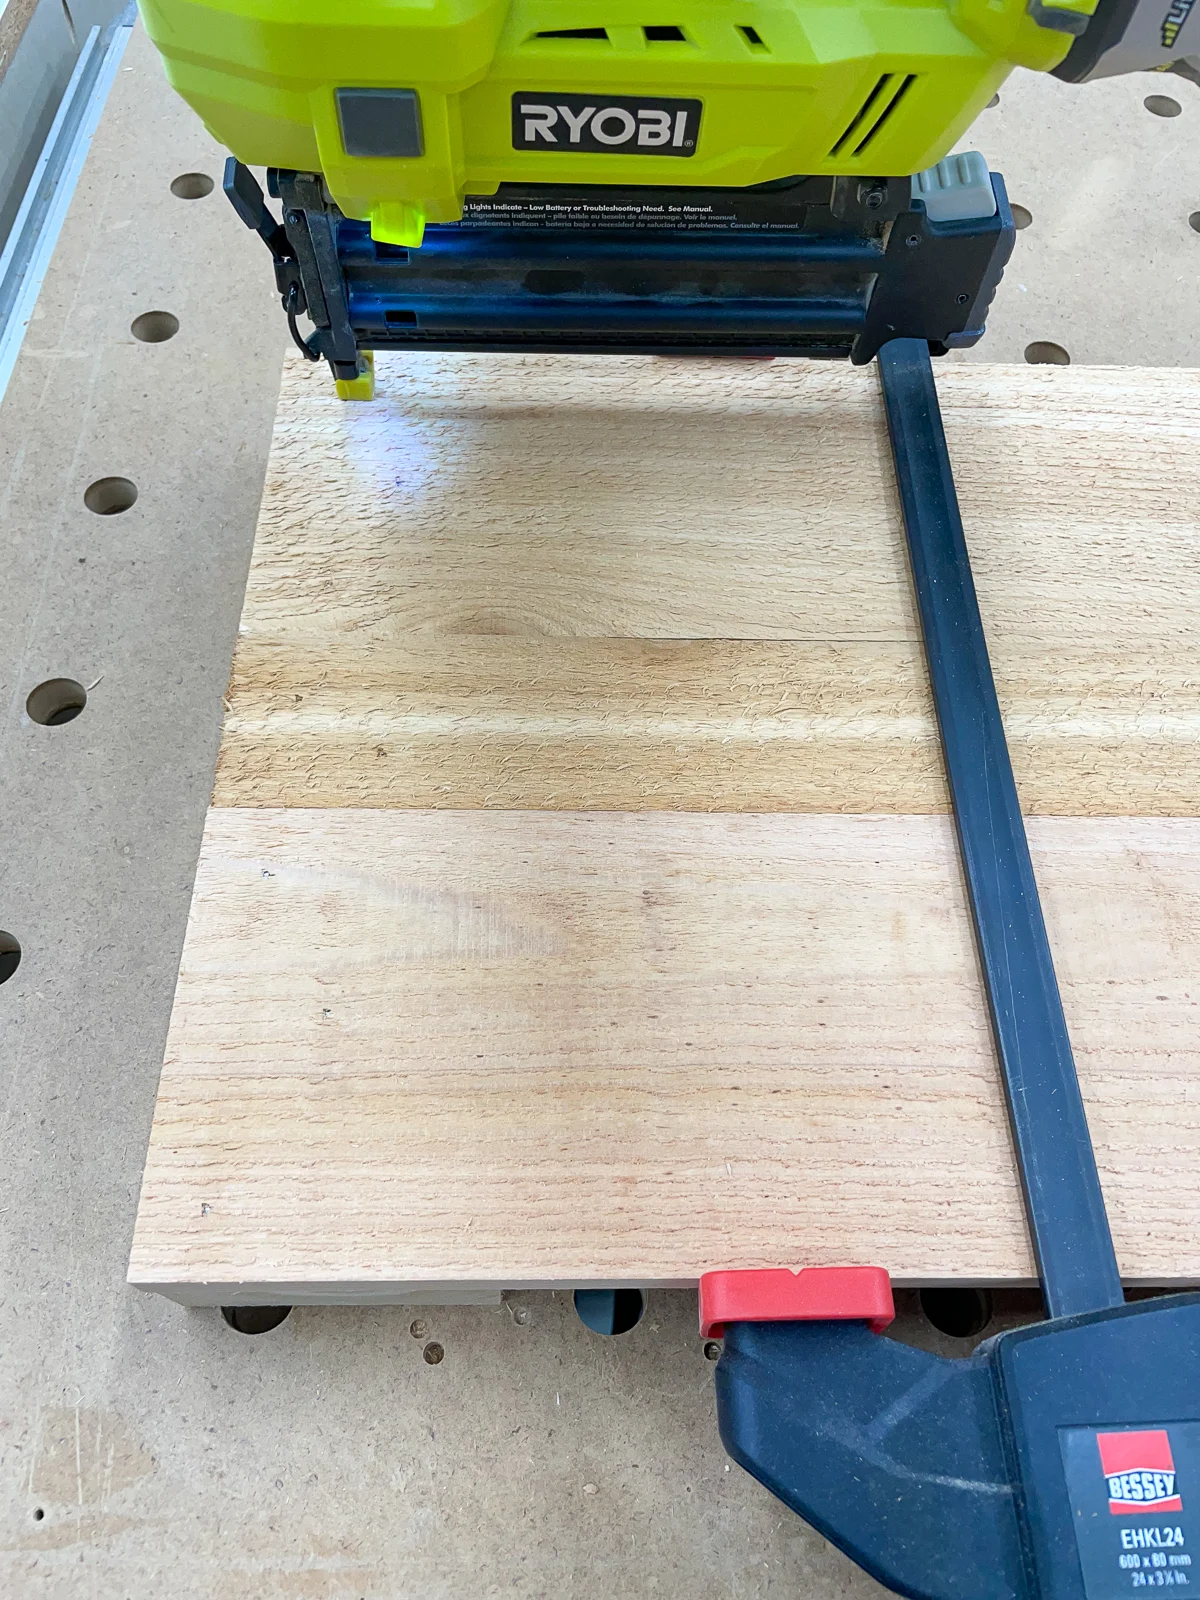
Cut two of the 5" wide fence pickets in half to make four 36" long pieces. Then cut one of the skinnier middle pieces in half as well. I set up my miter saw stop block at the right dimension to make this step quick and easy!

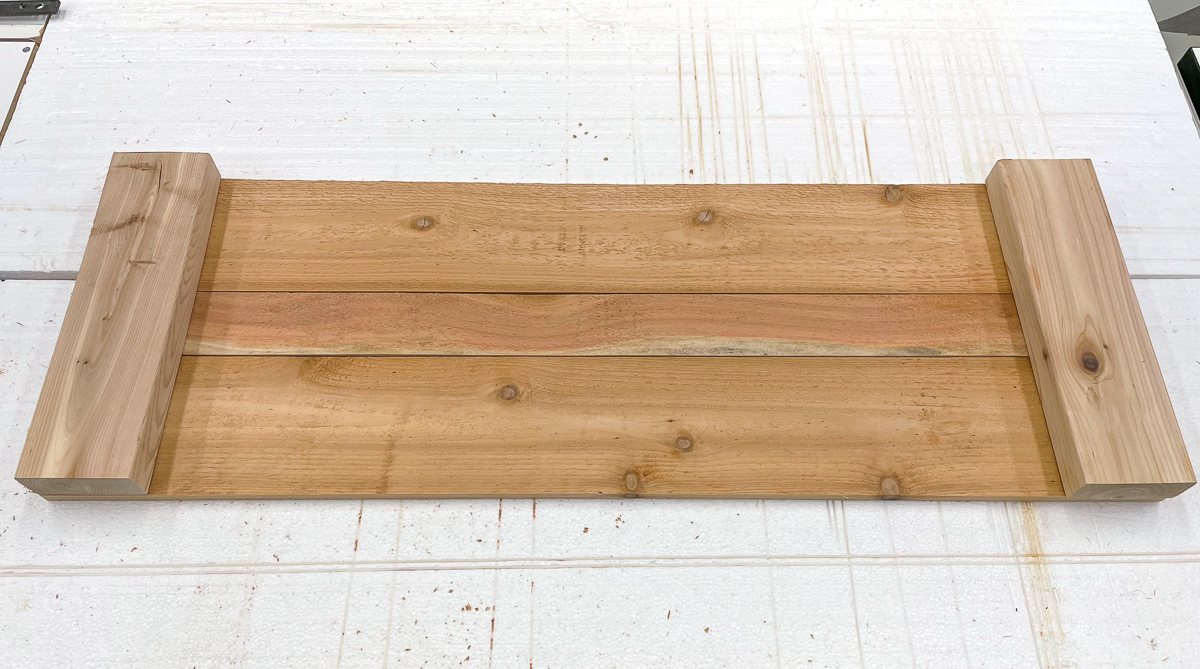
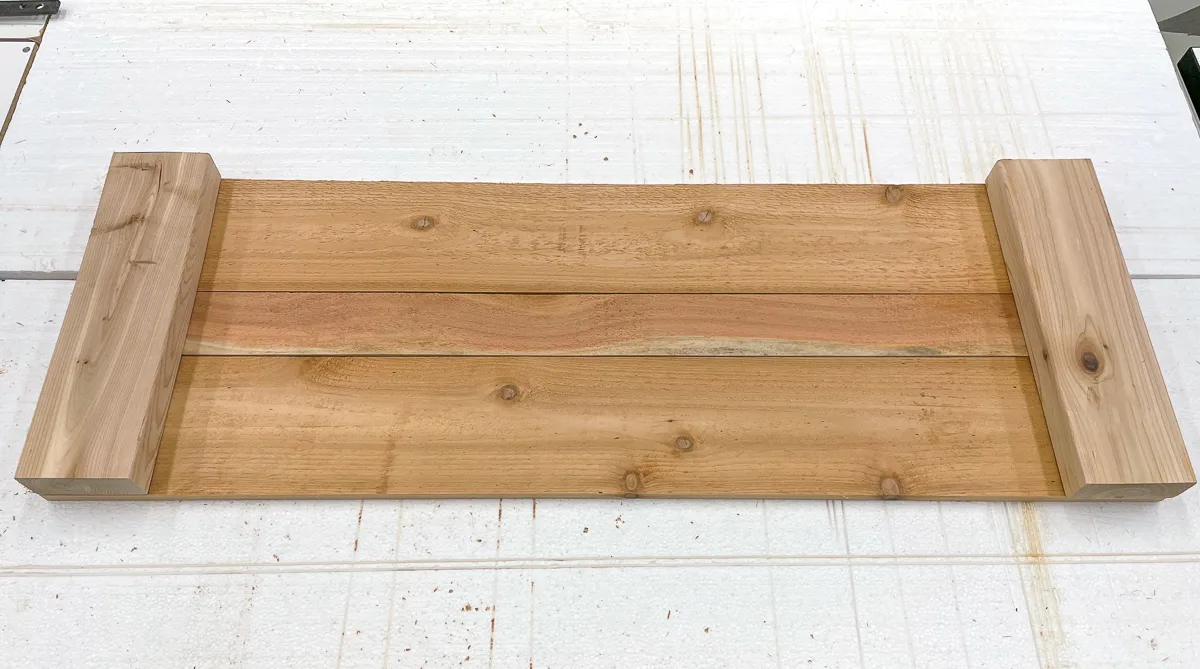
Cut the 2x4 down into four pieces that match the finished height of the raised bed sides. Mine are 12 ½" tall (two 5" pieces and one 2 ½" piece), but yours may vary depending on the boards you used.
Place the 2x4 pieces down on the workbench, and assemble the fence boards on top of them. Make sure the ends are aligned with the edge of the 2x4, then nail or screw them in place. A clamp helps to hold everything together tightly so there's no gap between the boards.

This is what the ends should look like from the inside.
Assemble the longer sides
The longer sides need support in the center to prevent the thin boards from bowing out over time. Cut two more 2x4 pieces to the height of your raised bed, and place one in the middle of a six foot long side. I had some leftover 1x4 boards, so I used those for the center.

Make sure your screws are shorter than the combined thickness of the boards, and position them so each board will be attached. I used a speed square to ensure that it was straight.
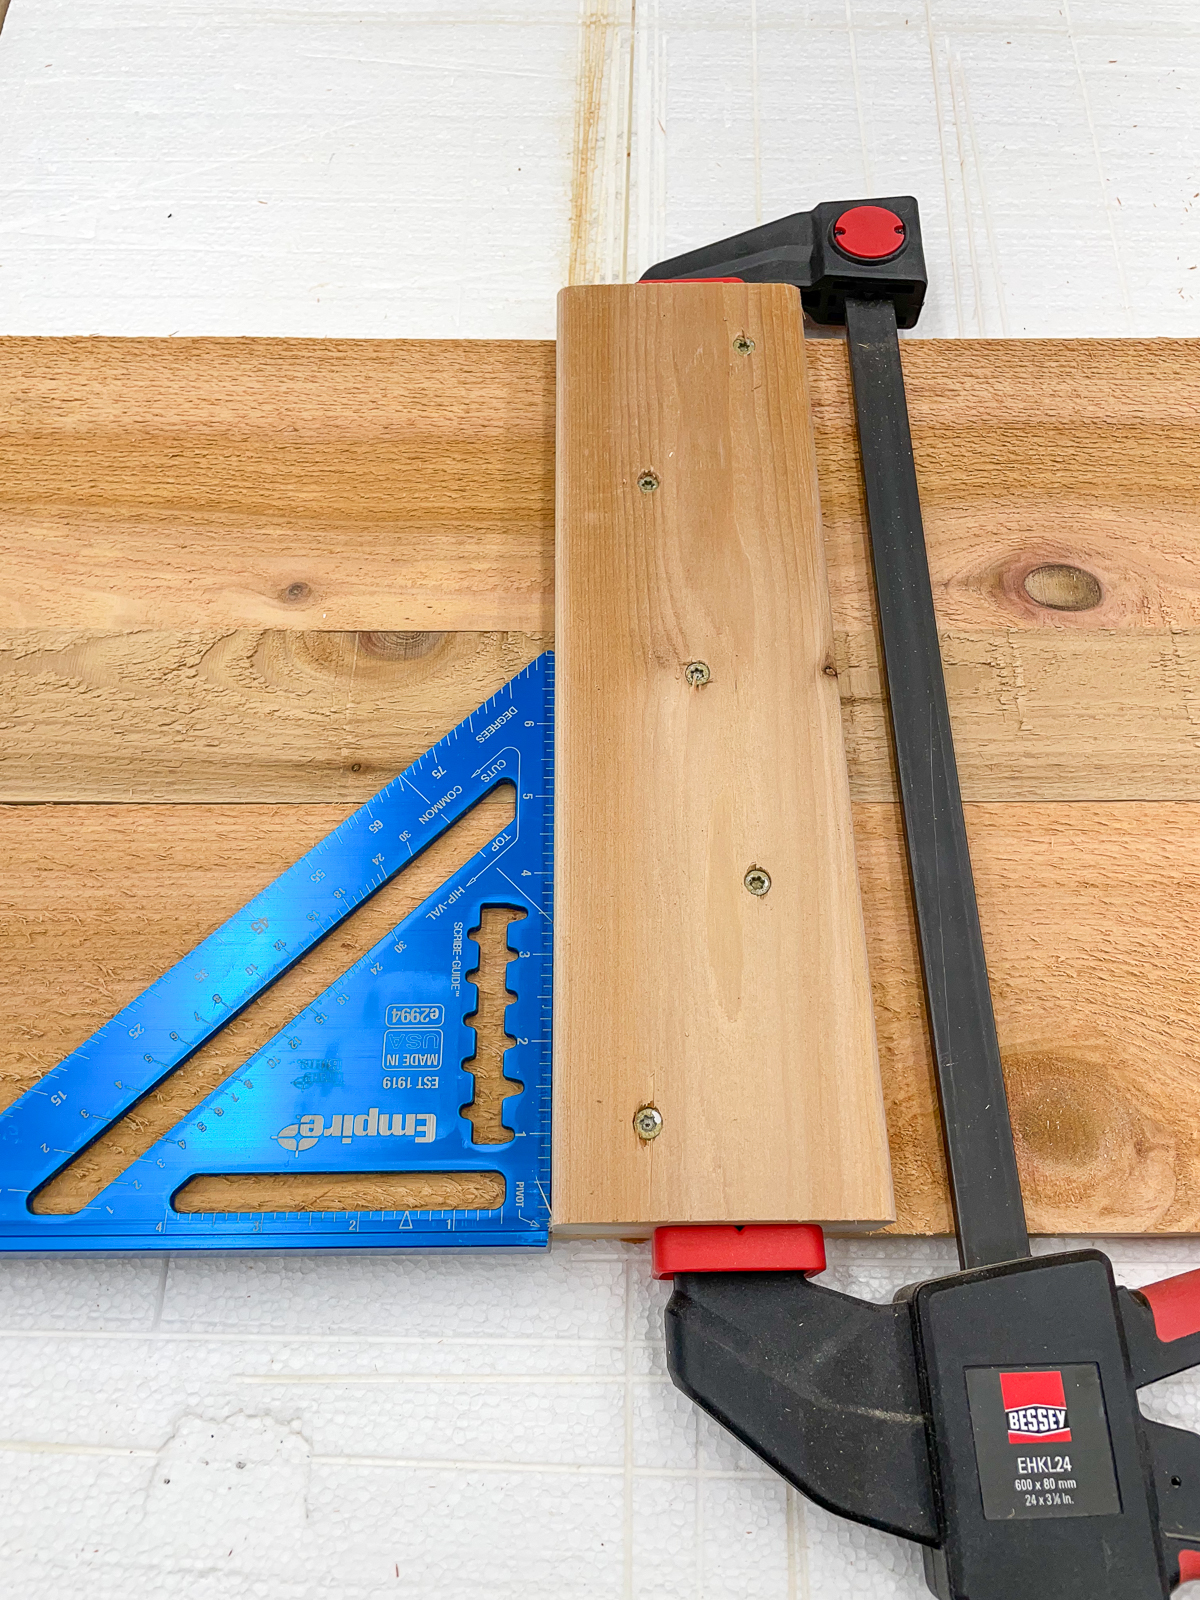

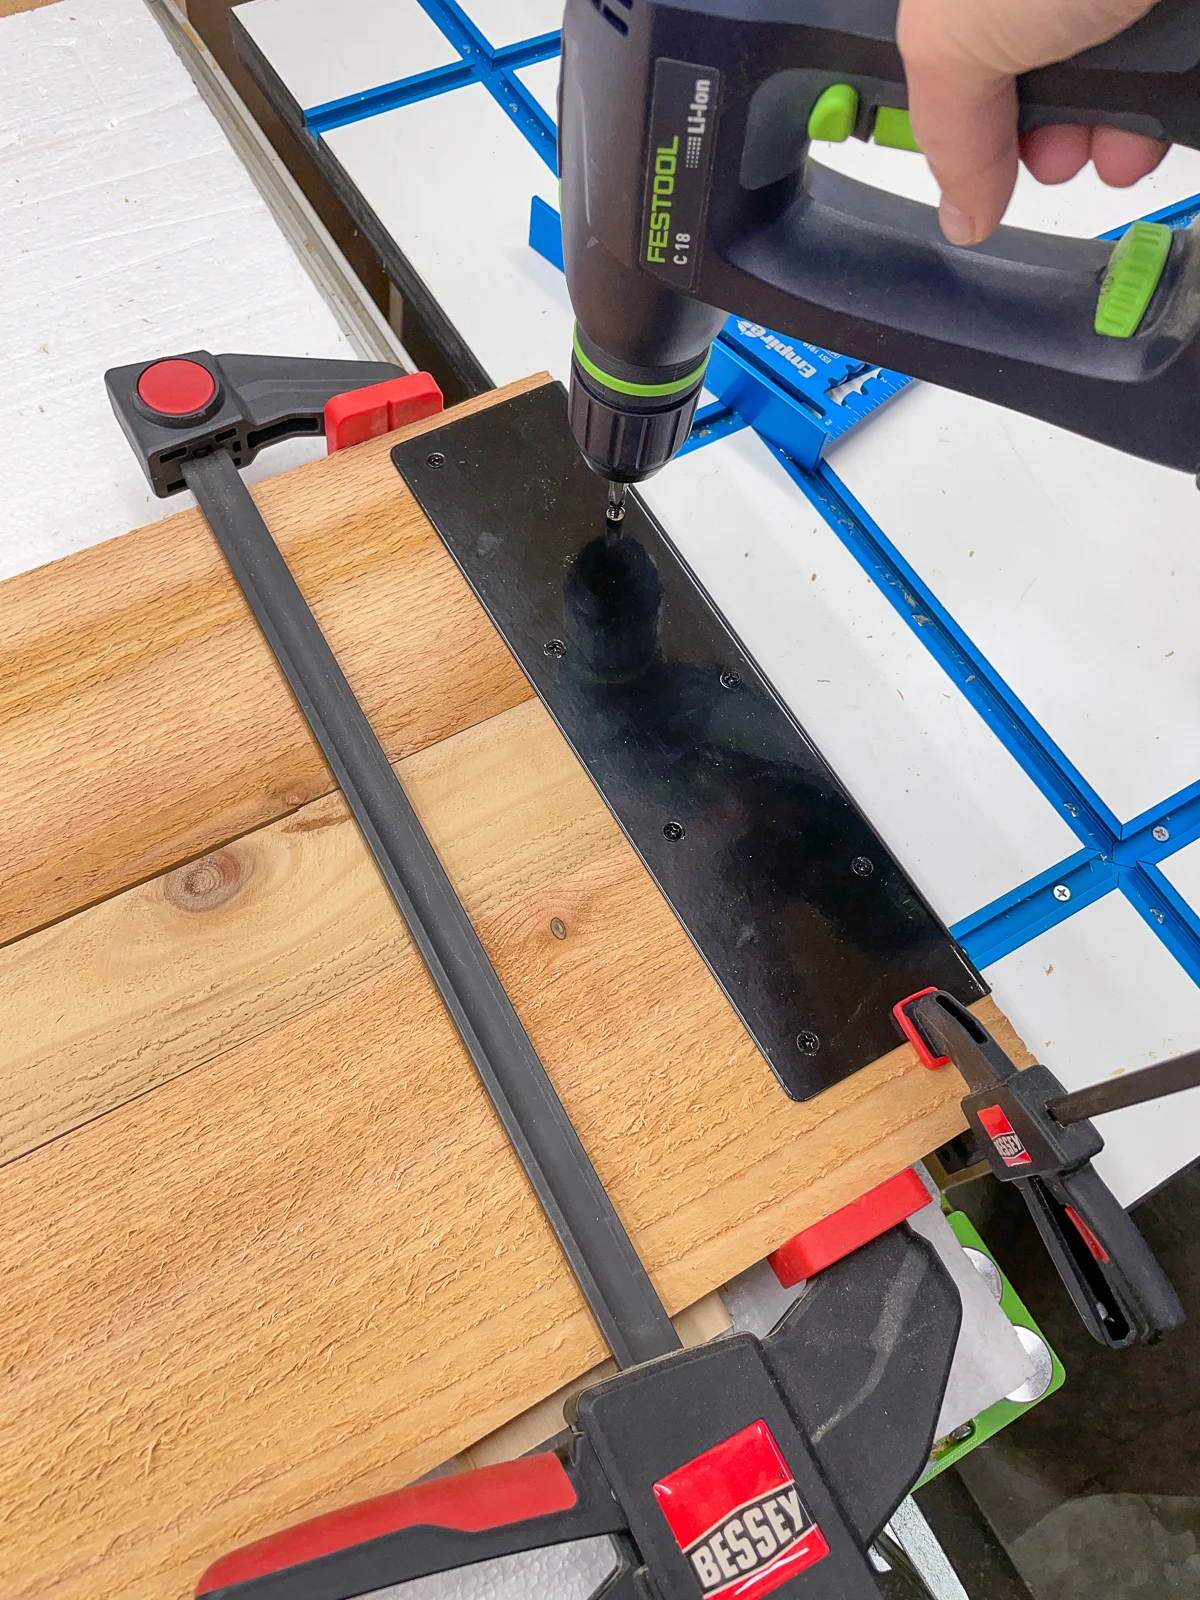
Next, flip it over so the outside is facing up. Move the clamp down to one end and line up the corner bracket. I found it easiest to hang the end over the edge of the workbench so the bracket lies flat on the boards.
The screws included with the brackets were too long for these thin boards. These ½" black screws worked perfectly!

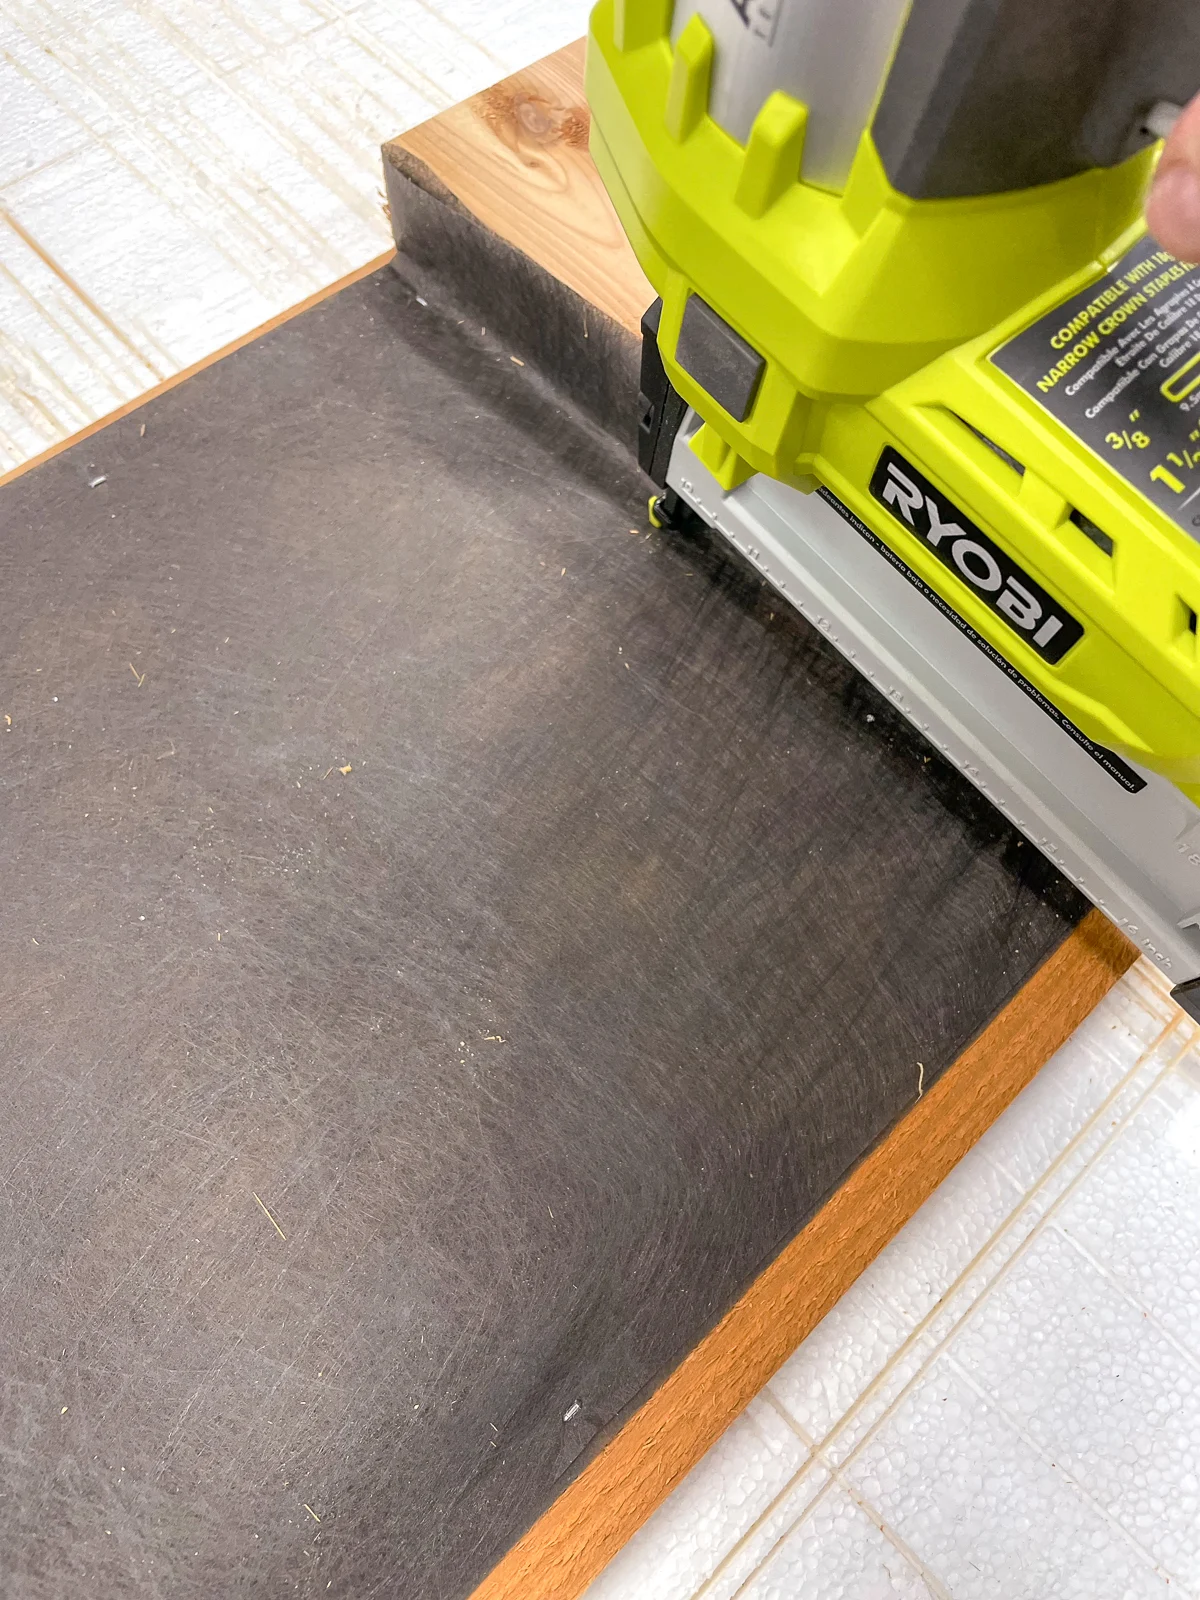
Attach landscape fabric
While this step is completely optional, I recommend it for two reasons. First, it prevents the soil from working its way through the cracks between the boards and staining the outside. Second, it protects the wood so your raised beds last longer.
I bought a huge 4 foot wide roll of landscape fabric from Costco a few years ago, but I don't use it much in the garden anymore. Cutting through the fabric to plant something is such a pain! I was glad to use it all up on this project.
Measure out how much you'll need for each section and cut the fabric to length. I used a double layer for extra protection (and to use up the rest of the roll!) Staple the fabric to the inside of the raised bed sides with ½" staples.

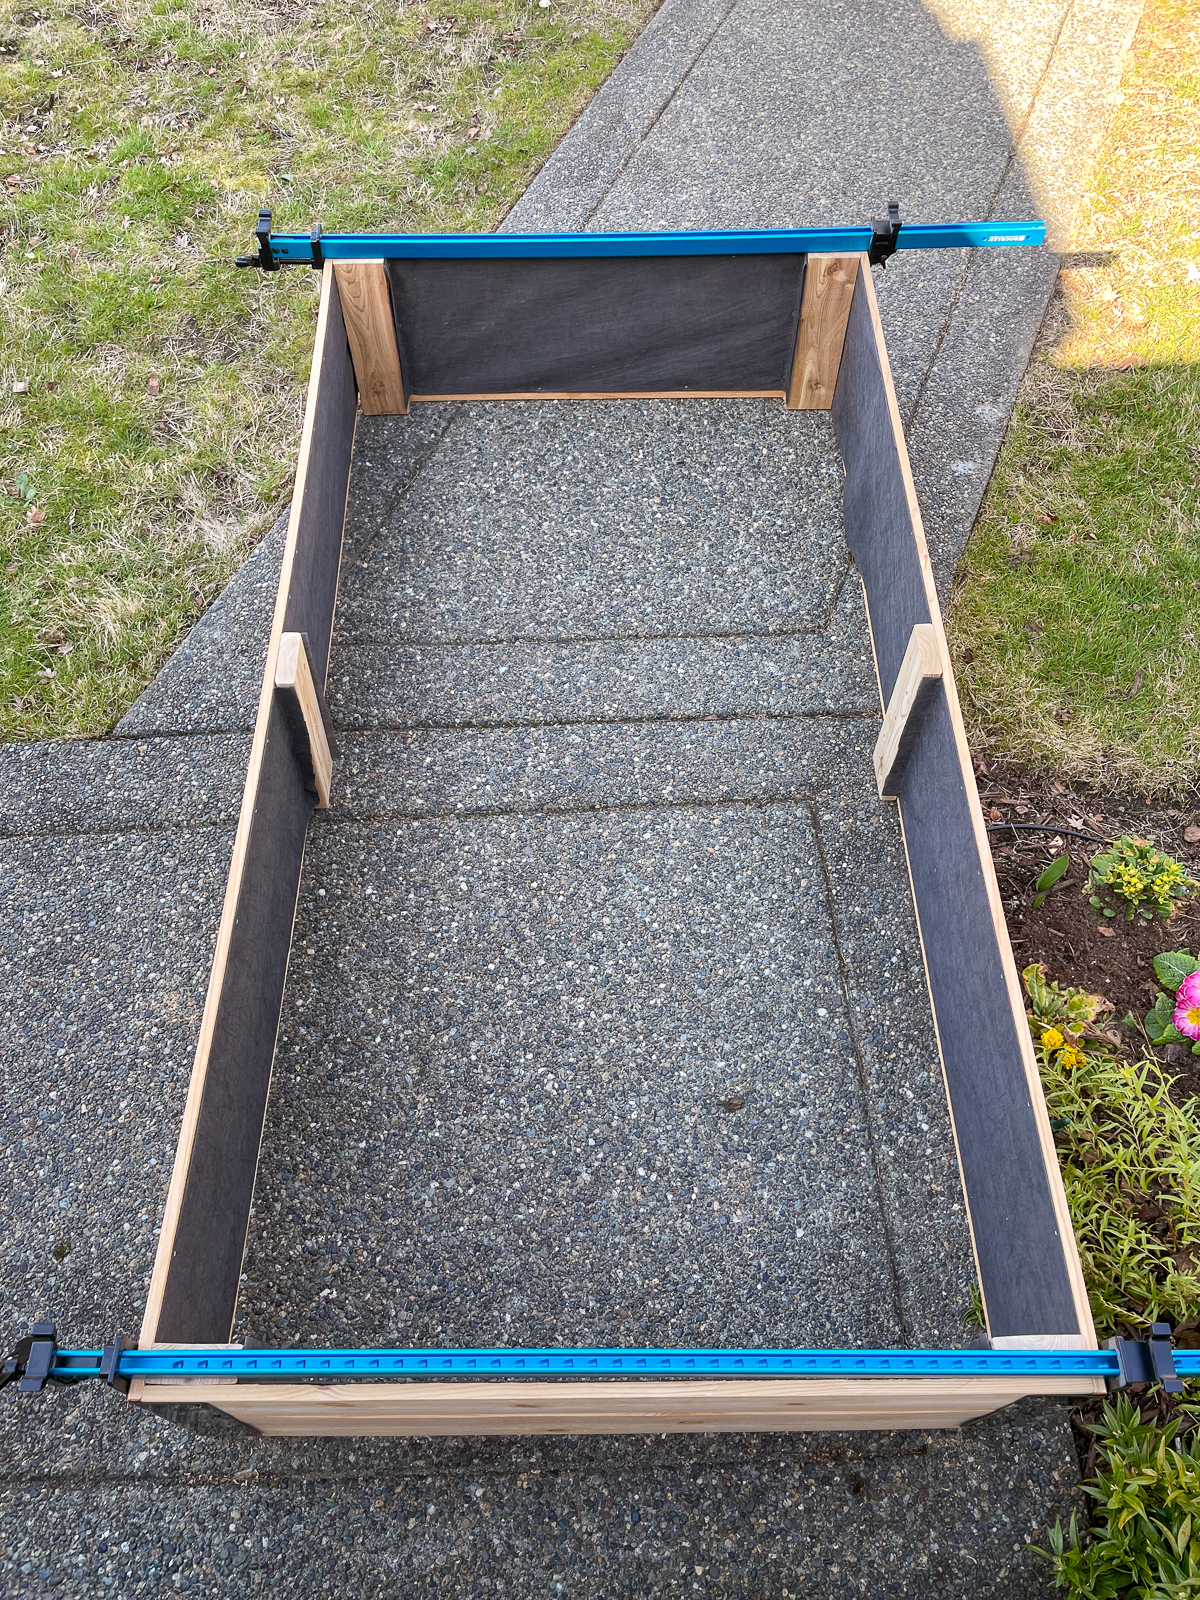
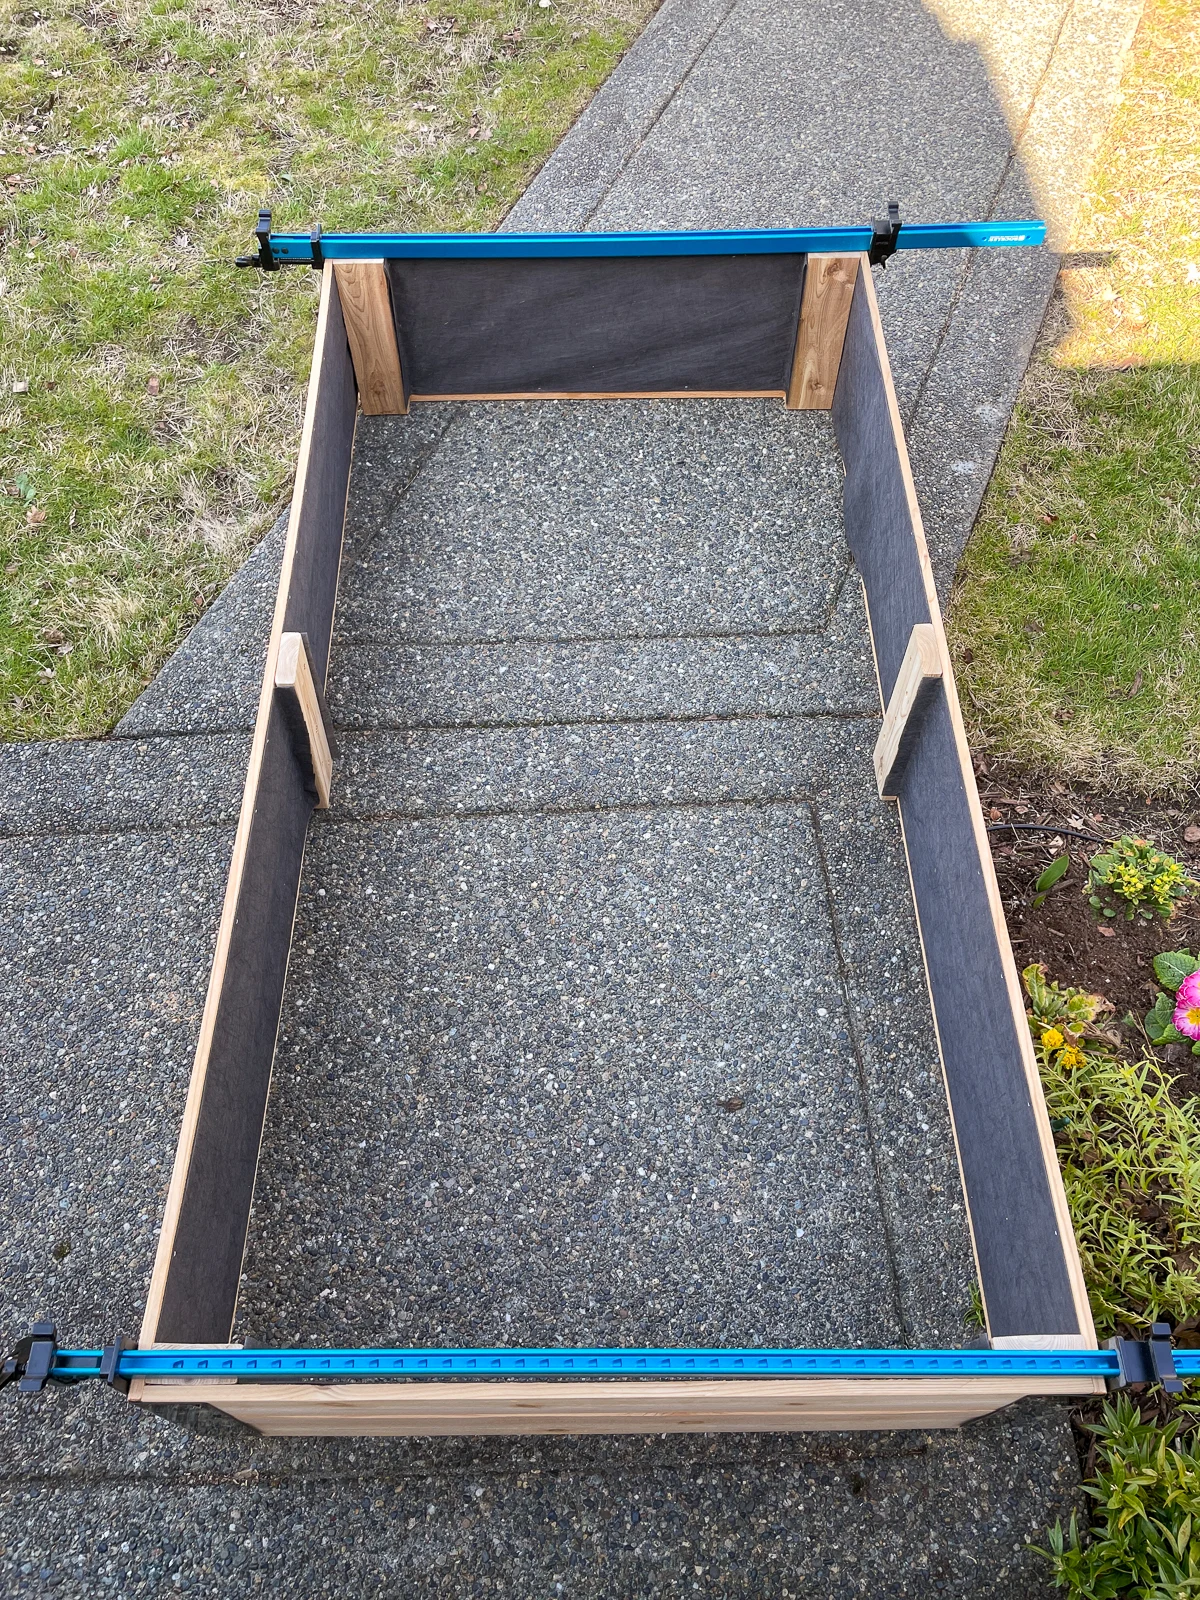
Assemble the raised garden bed box
Now that all the sides are prepared, they can be put together into a box! I recommend doing this outside in a flat area, so you don't have to struggle carrying it around too much.
It helps to have another pair of hands to hold the sides upright, but you can also use long clamps like I did. The brackets on the ends of the long pieces hook over the front of the short pieces.
I recommend drilling pilot holes through the brackets to ensure that the thin boards don't split when you drive in the screws. I only used the holes along the outside edge of the brackets, because the inner ones wouldn't hit the 2x4.


Install the raised garden bed
The area of the yard where the raised beds will be installed is slightly sloped. I dug around the perimeter, removing enough soil from the high side to make the box appear level.

To prevent weeds and grass from growing on the inside, I placed a layer of cardboard on the bottom first. It will smother out the weeds and gradually decompose, as long as you remove all the tape first!
Then I shoveled the raised bed mix over the cardboard. It doesn't go all the way to the top because I'll be adding a fresh layer of soil every year, and I wanted to give myself plenty of space. The ground underneath is pretty compacted, so it won't settle very much.
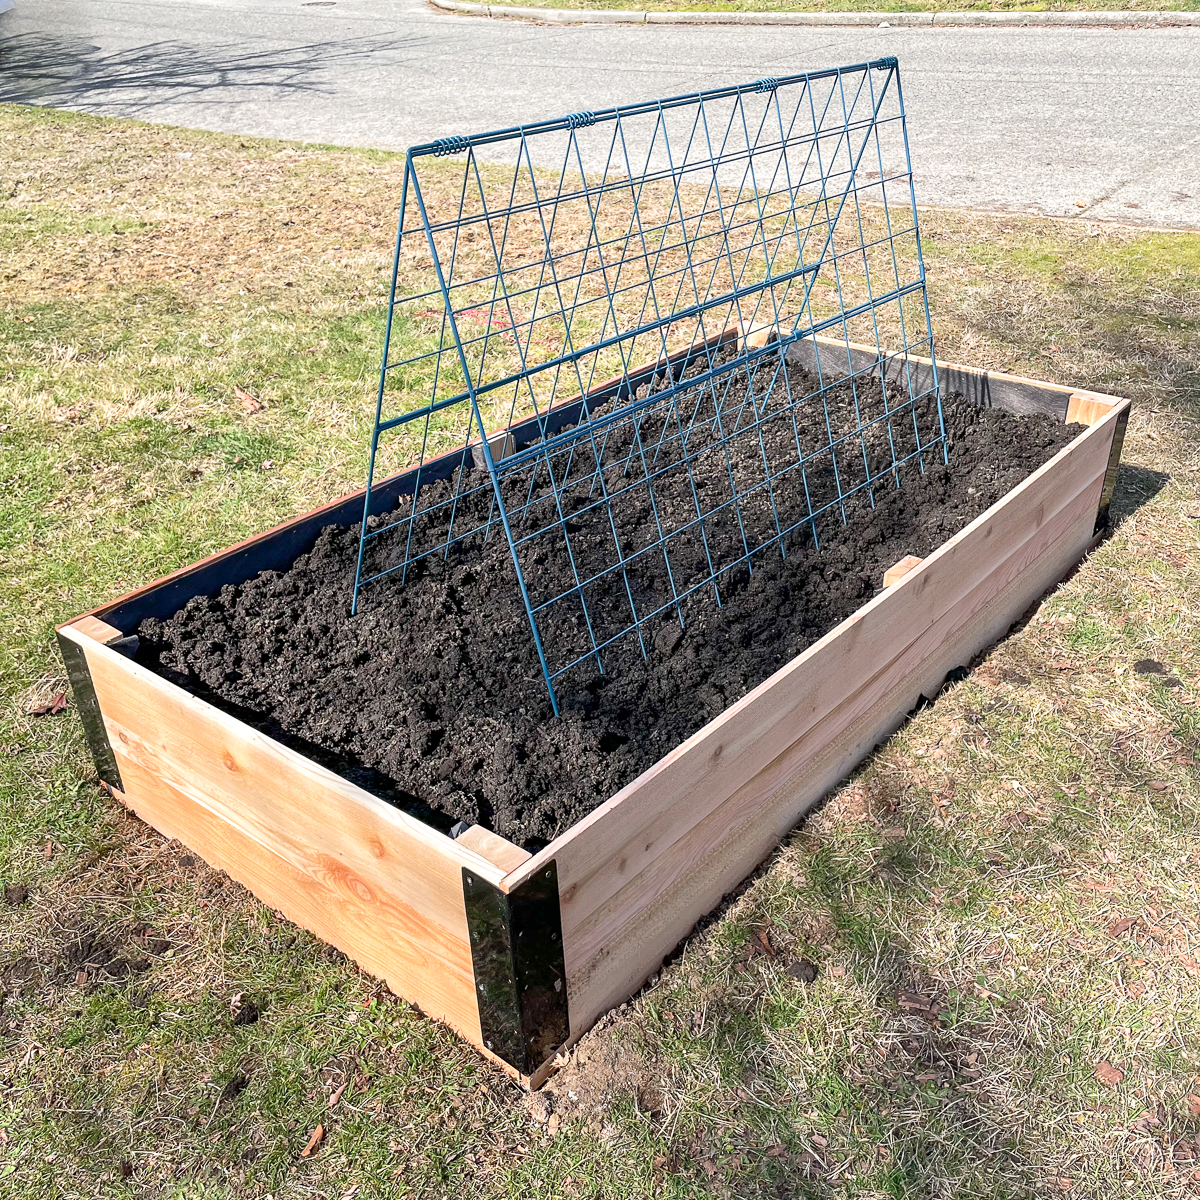

Plant your new raised garden bed
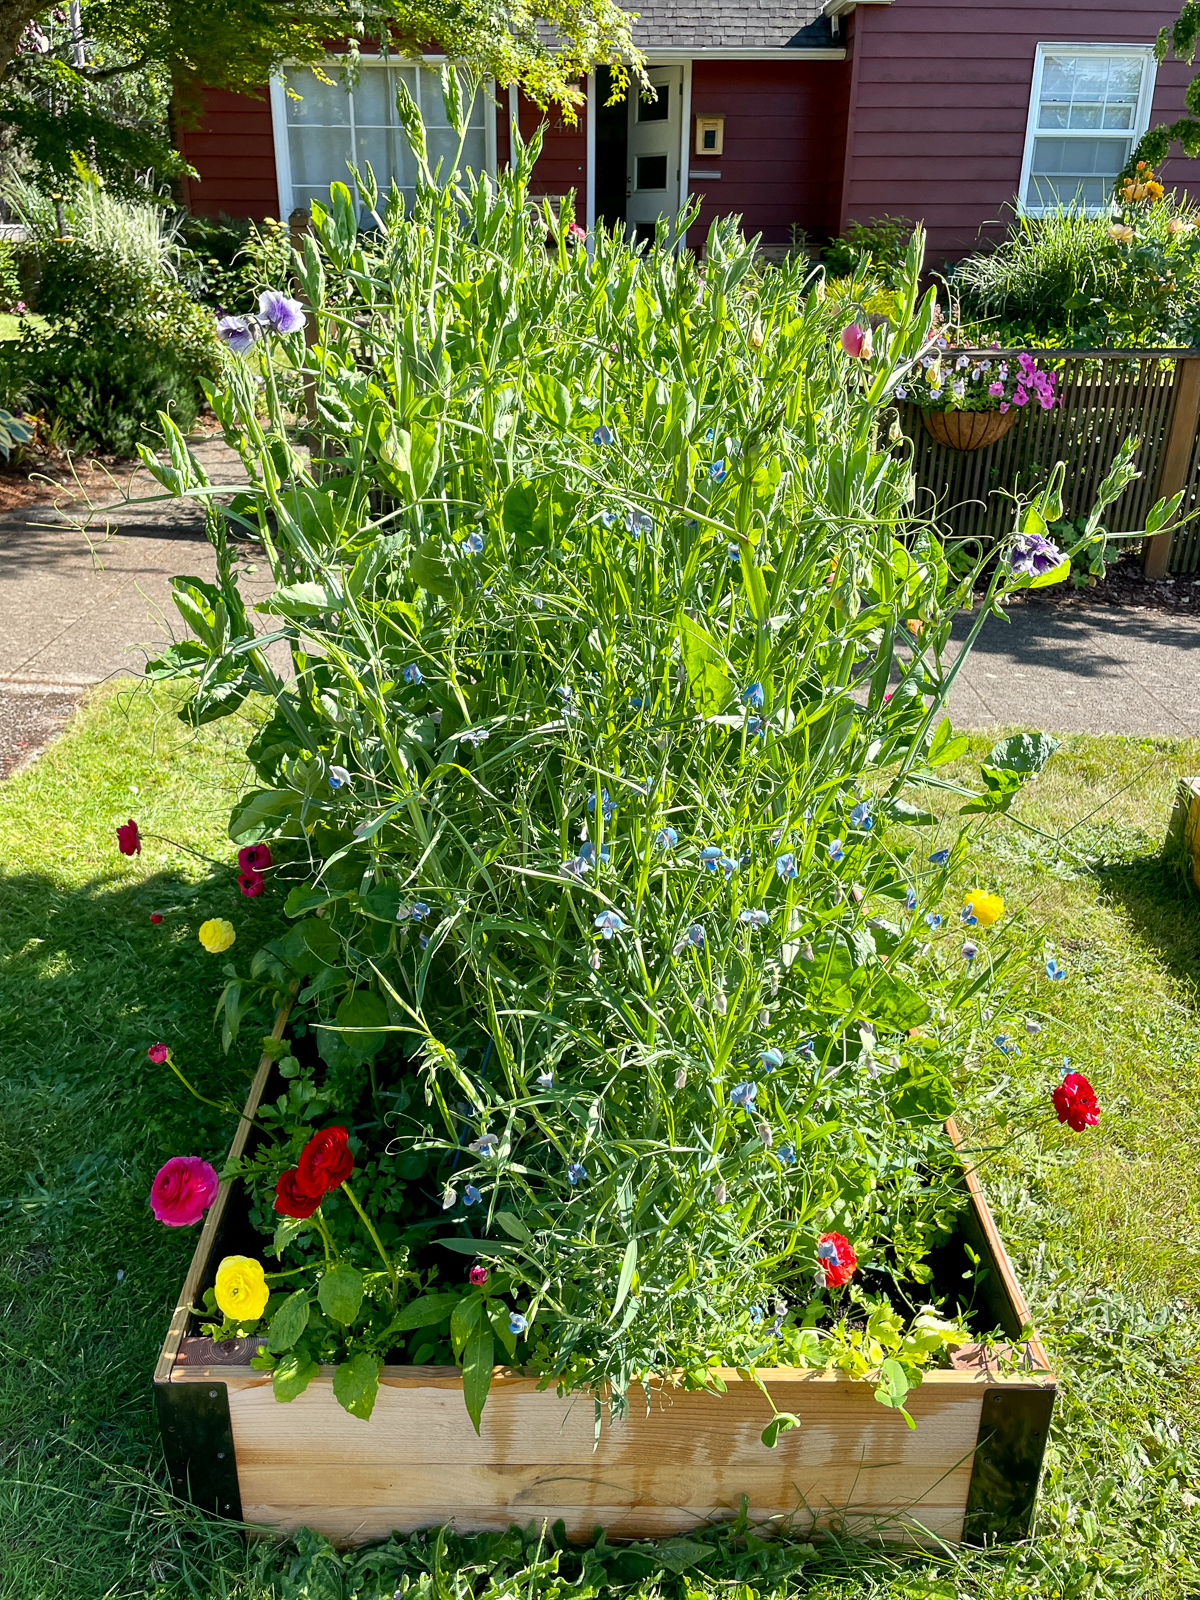
I couldn't wait to get all my seedlings in the ground! The first raised garden bed is for sweet peas I started from seed. This A-frame trellis fits perfectly in the middle and will give the sweet peas plenty of room to climb!
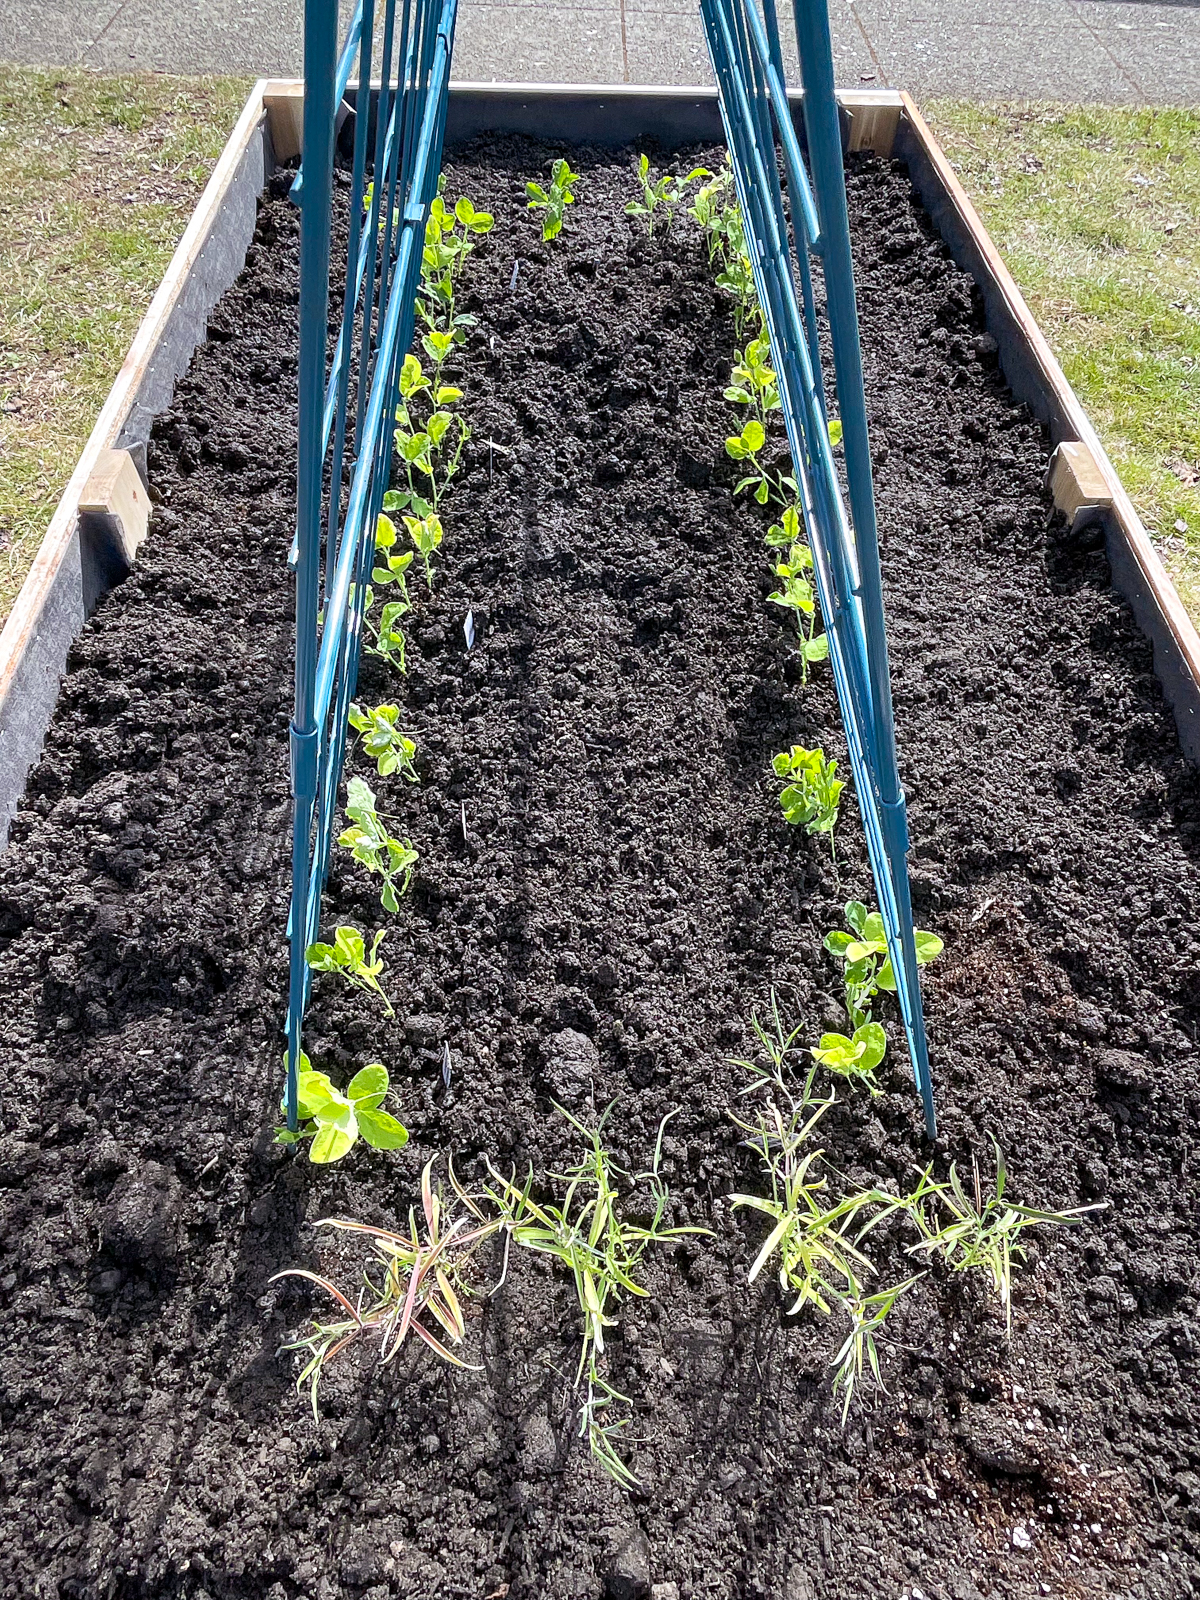
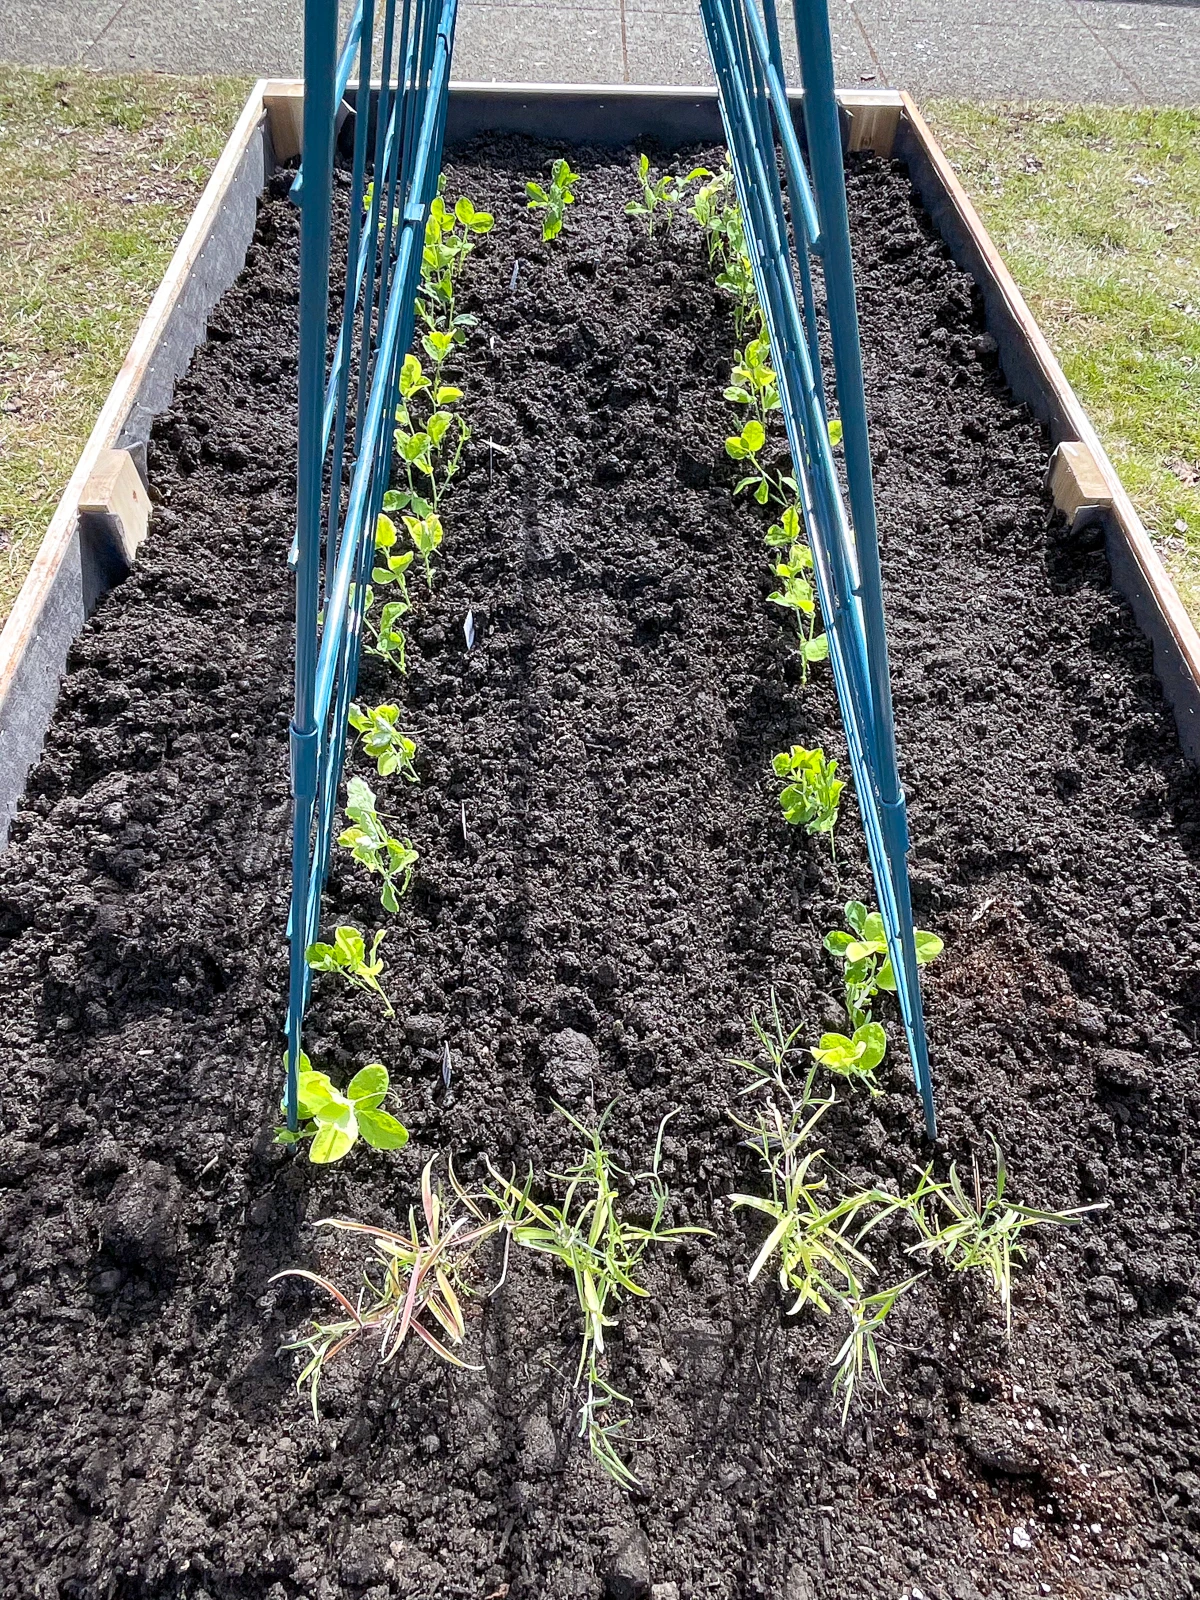
After just a couple months, they took over the entire structure and are blooming like crazy! I also planted ranunculus around the outside edge.

Once I figured out the process, I could crank these out pretty quickly. Soon, I had a second bed filled with snapdragons.

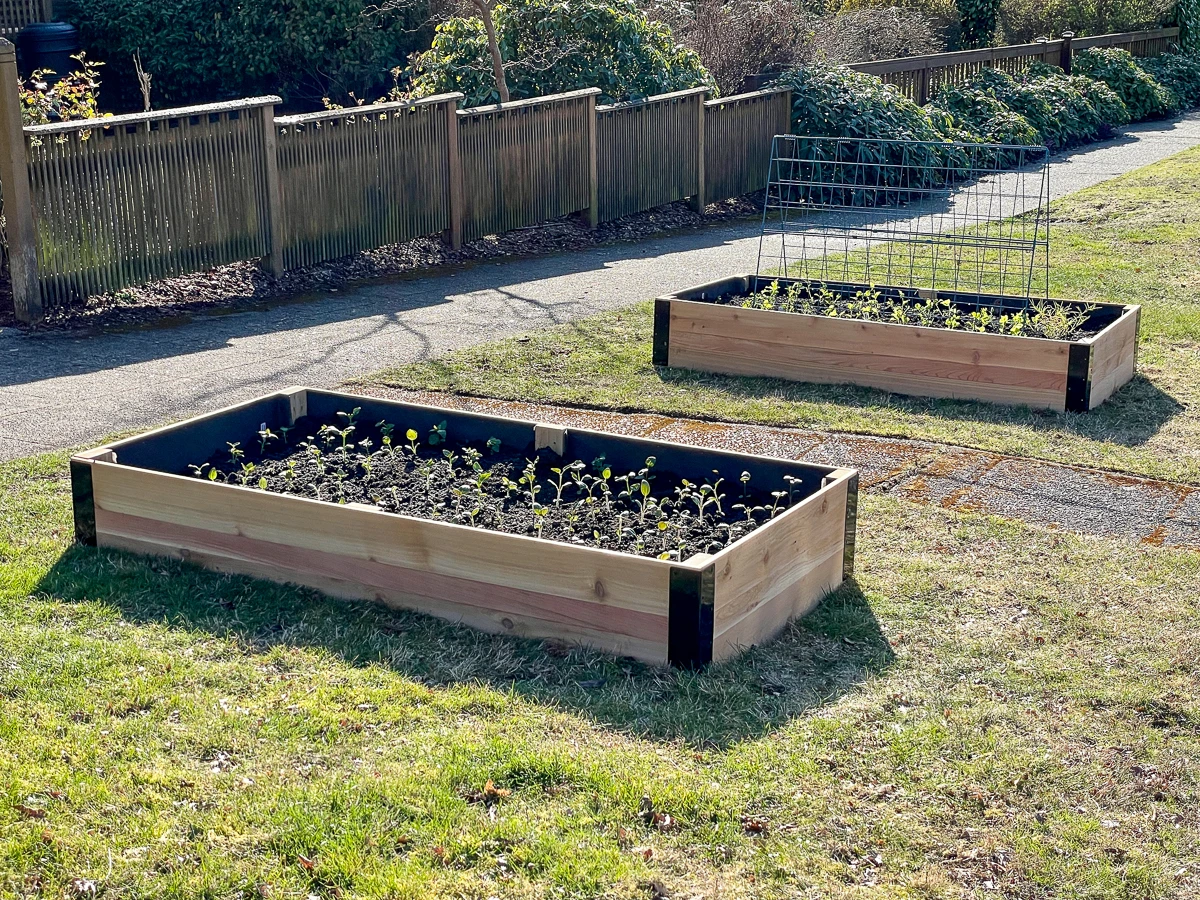
Then a few more...

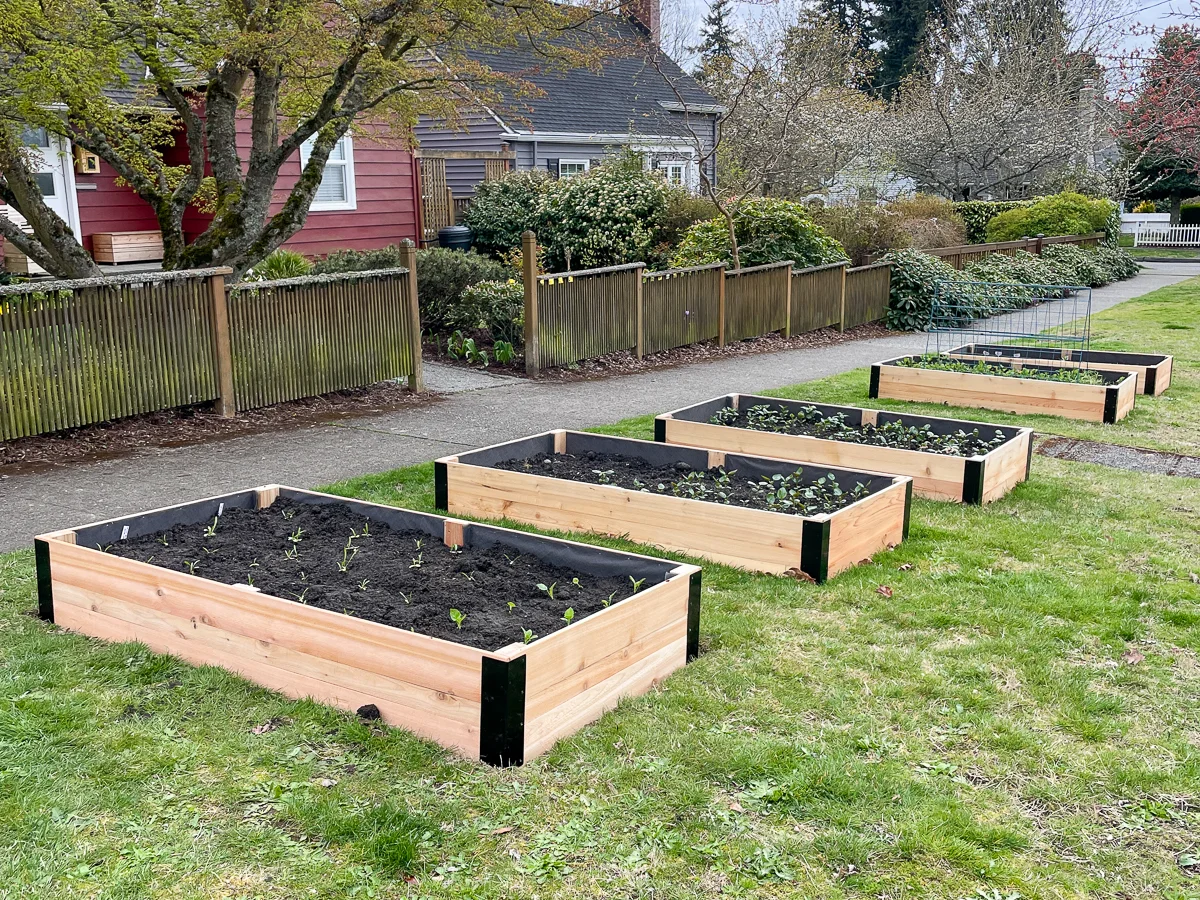
Then I added the square raised garden beds to the ends for all my dahlias...

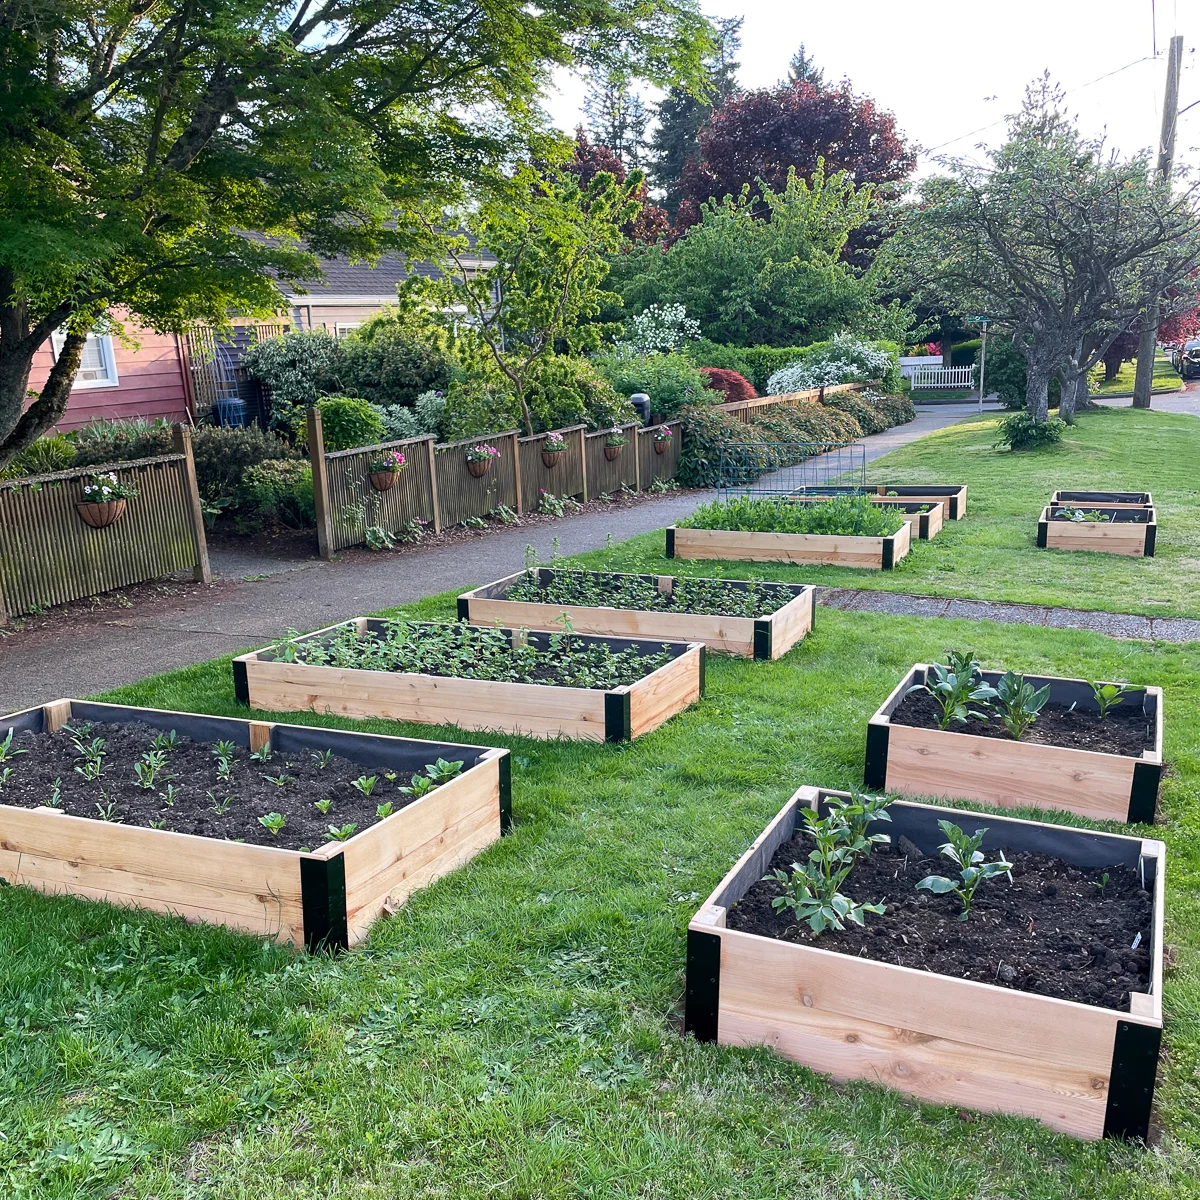
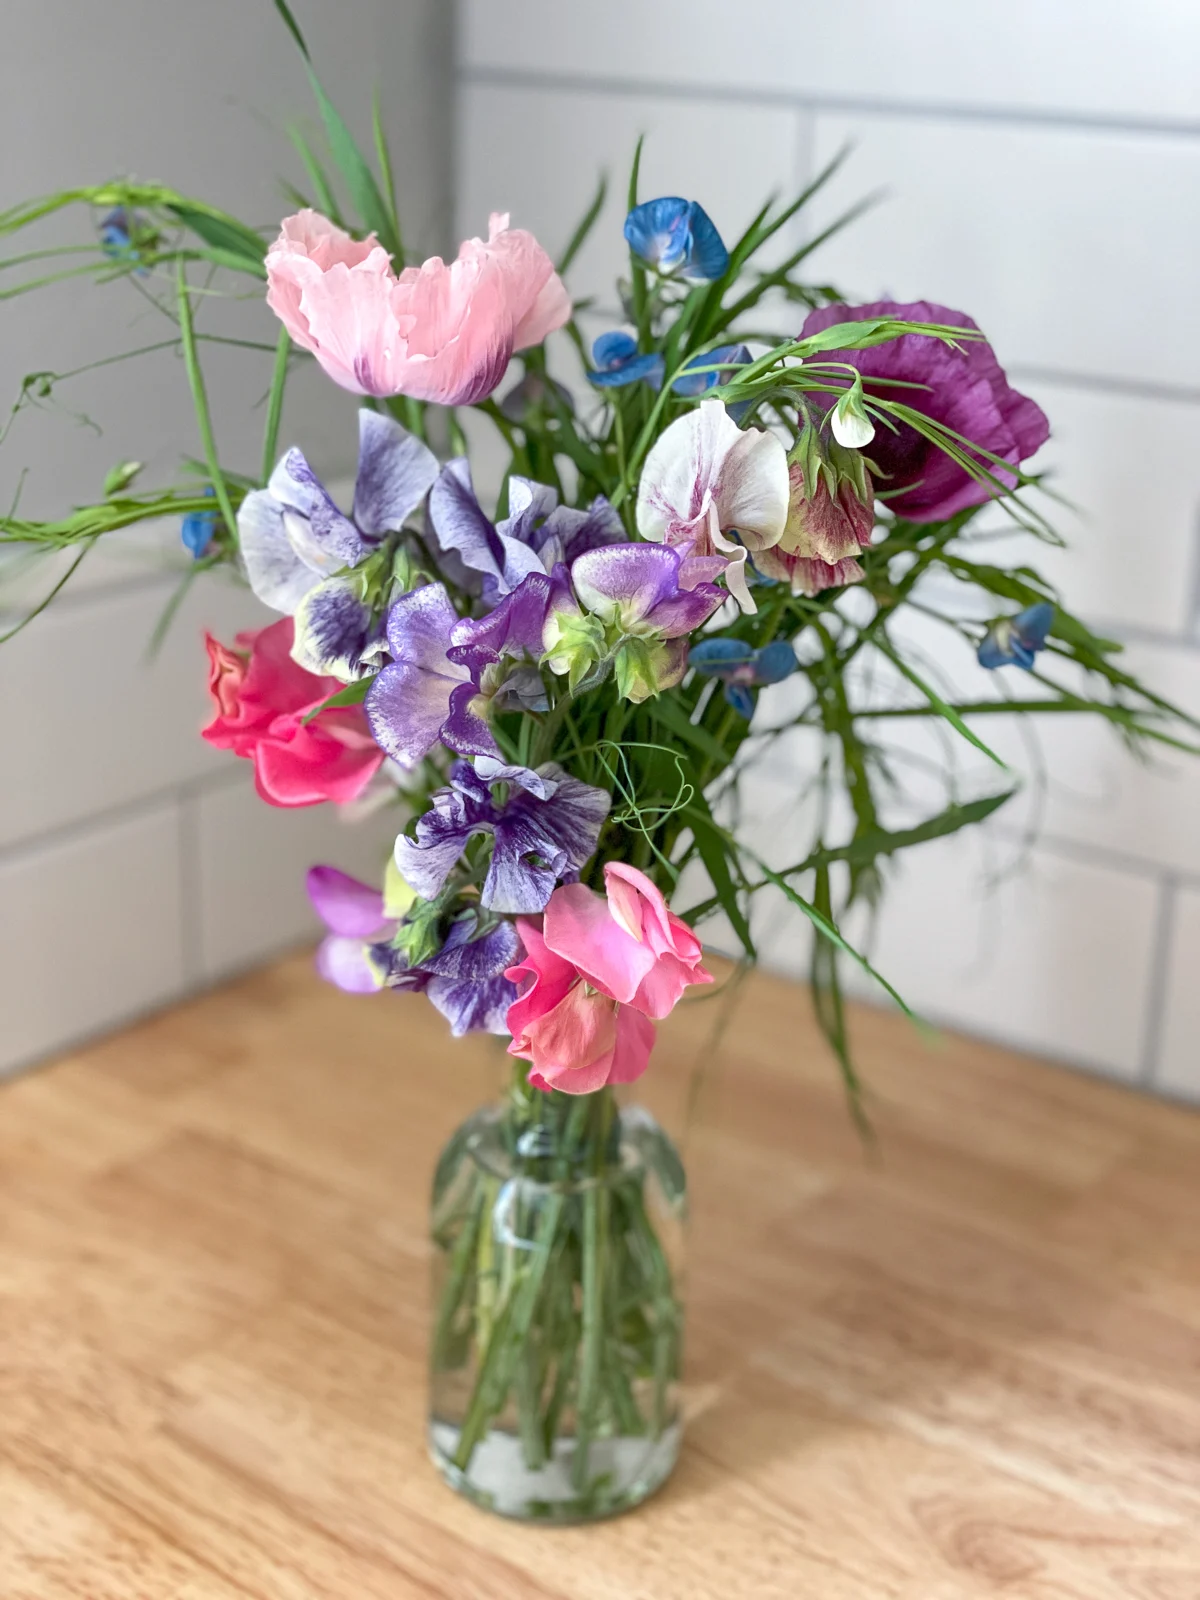
I've never gotten so many comments and complements from random people walking by! These raised beds have totally transformed this flat, boring space into a flourishing cut flower garden!


I love having fresh bouquets in the house, and now I can create my own with beautiful blooms I grew myself.

I get questions about what flowers are growing in each of the beds ALL.THE.TIME. So I made these DIY garden labels with my xTool M1 laser cutter to hang from the end of each one. They're super easy to make, and I can switch them out as I plant new things!

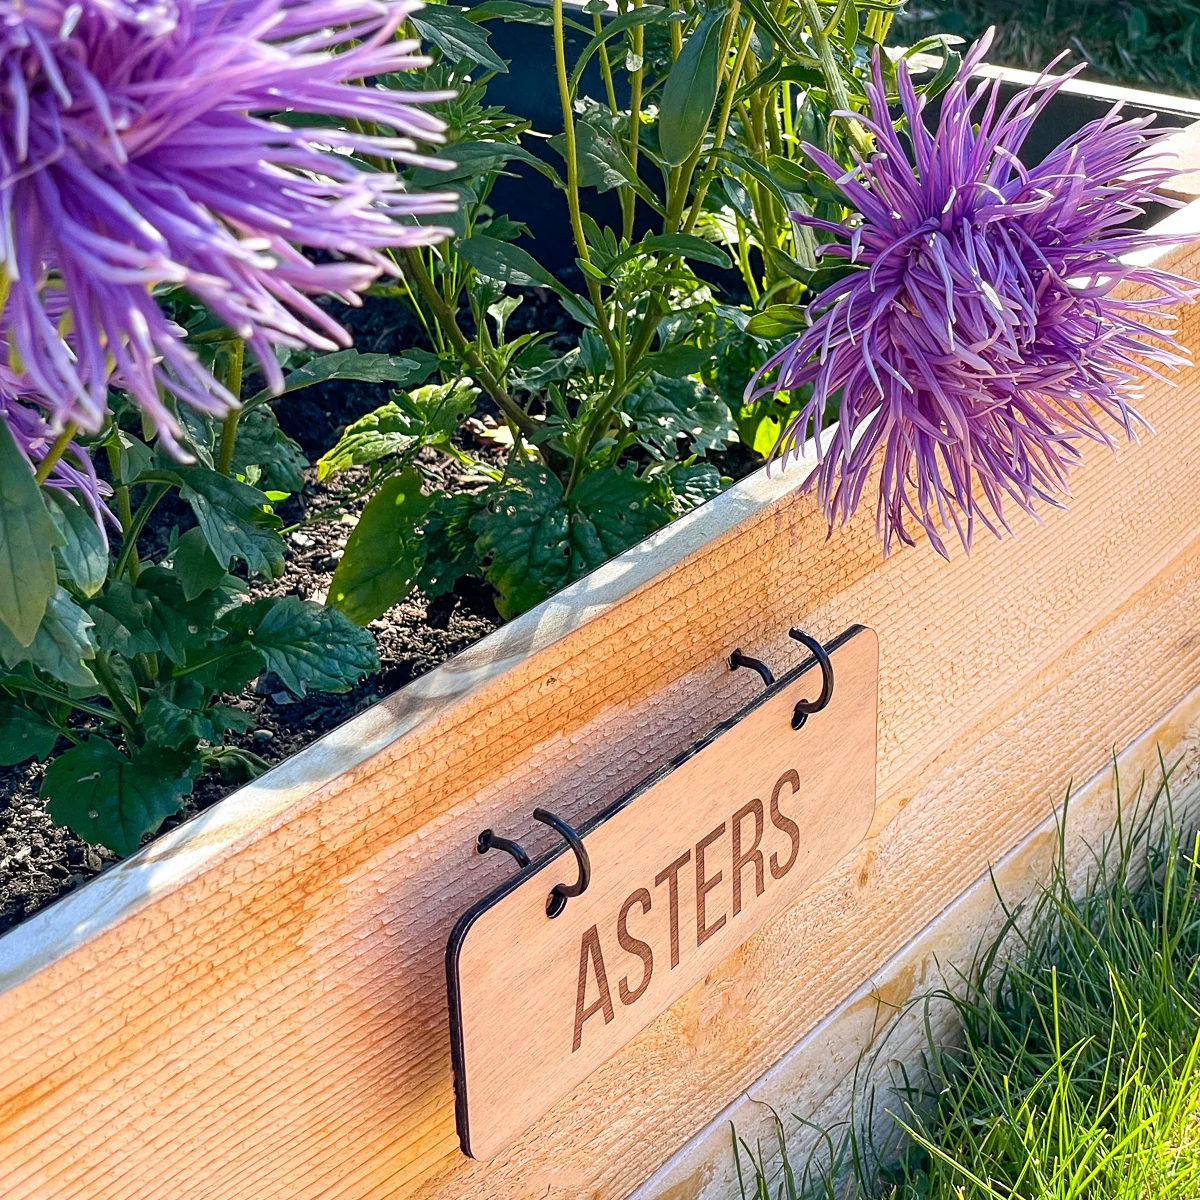
Or try one of these other DIY plant label ideas to keep track of what is planted where!
Check out these other outdoor projects!
Olga
Friday 23rd of June 2023
Are you allowed to build something personal on the land that's not yours? Even if it's rased beds? Those lawns/patches of grass is the park's property? Just wondering.
Vineta Jackson
Friday 23rd of June 2023
Yes, in my city you can install raised beds in the parking strip. There's a permit involved and certain requirements need to be met, but it's easy to get. Homeowners are required to maintain the parking strip area anyway, whether you have a tree, grass or gardens.
Shirlene
Thursday 22nd of June 2023
Thanks for sharing. The beds look great. You are right they really transform the space. They will bring you beauty year after year. The bouquets you get from them will make your home more beautiful and just happier. Enjoy you did a great job.
Scott
Wednesday 21st of June 2023
So cool, we have the same giant space in front of our house in Tacoma. Definitely doing this!
honoria
Wednesday 21st of June 2023
this is delightful!
Lisa
Wednesday 21st of June 2023
Love all of your projects. Thanks for sharing!