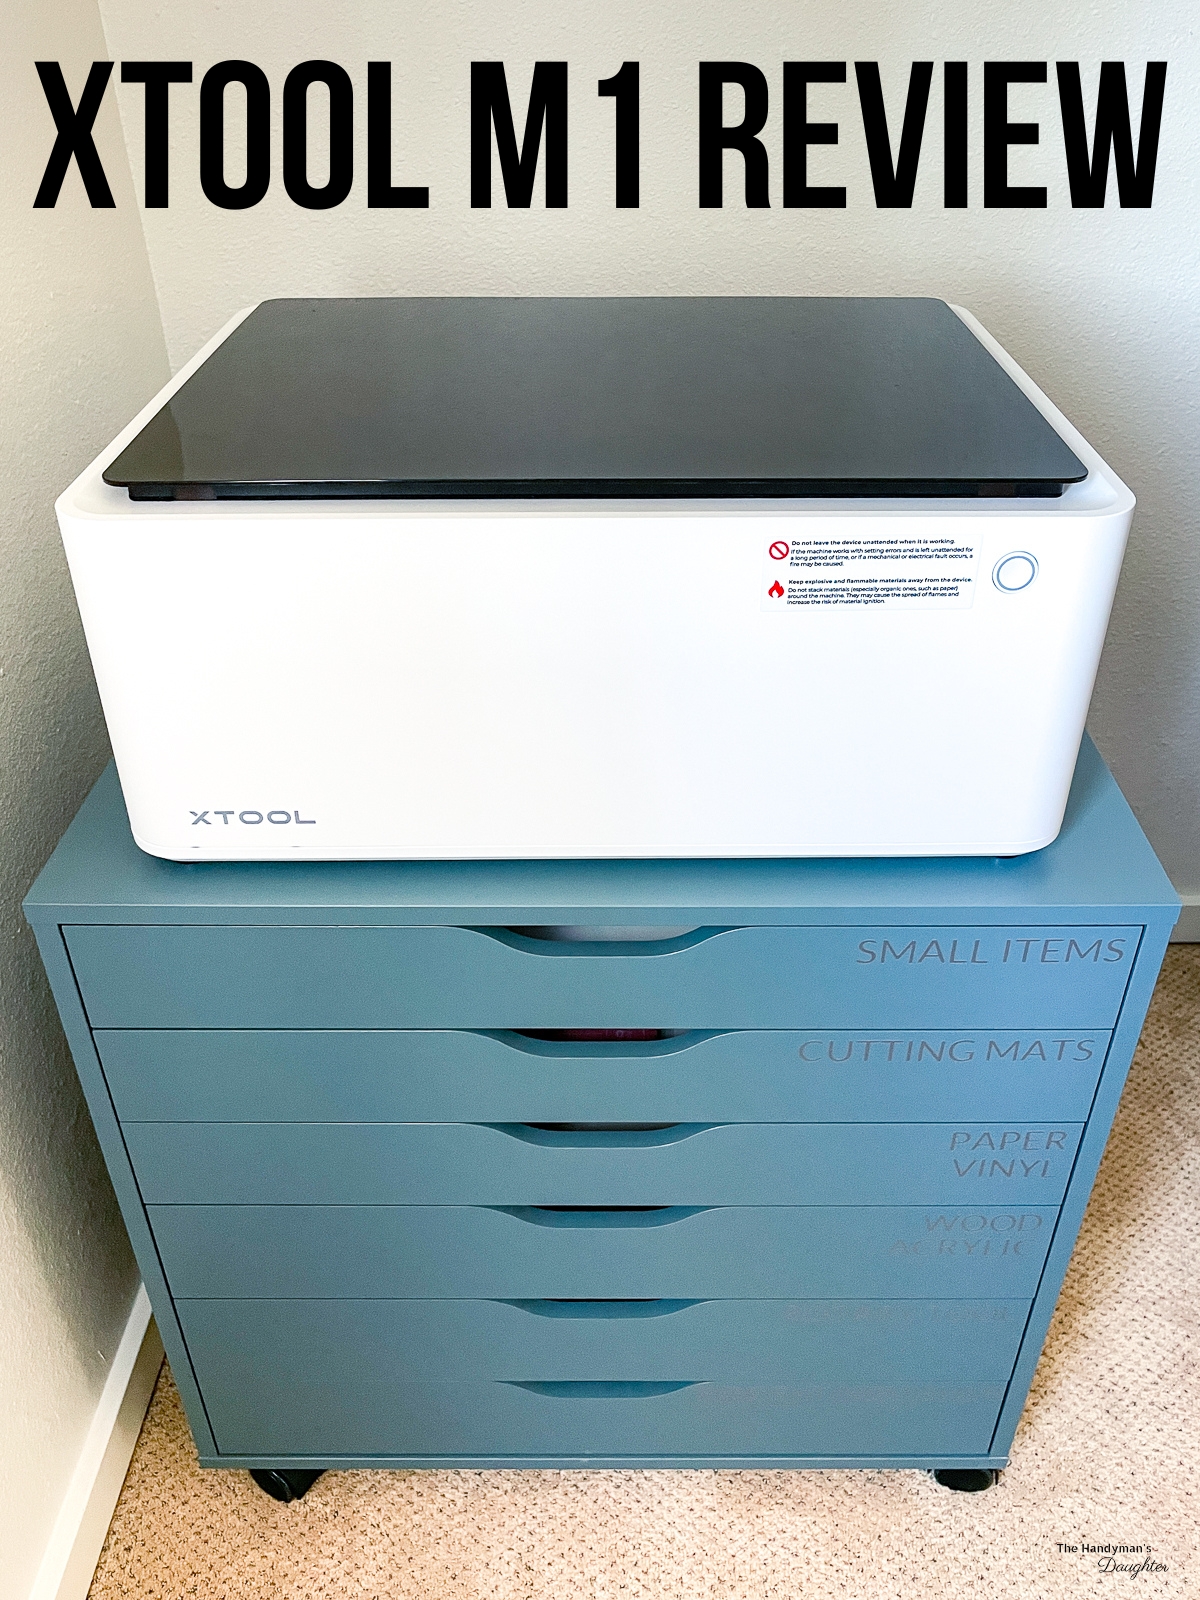
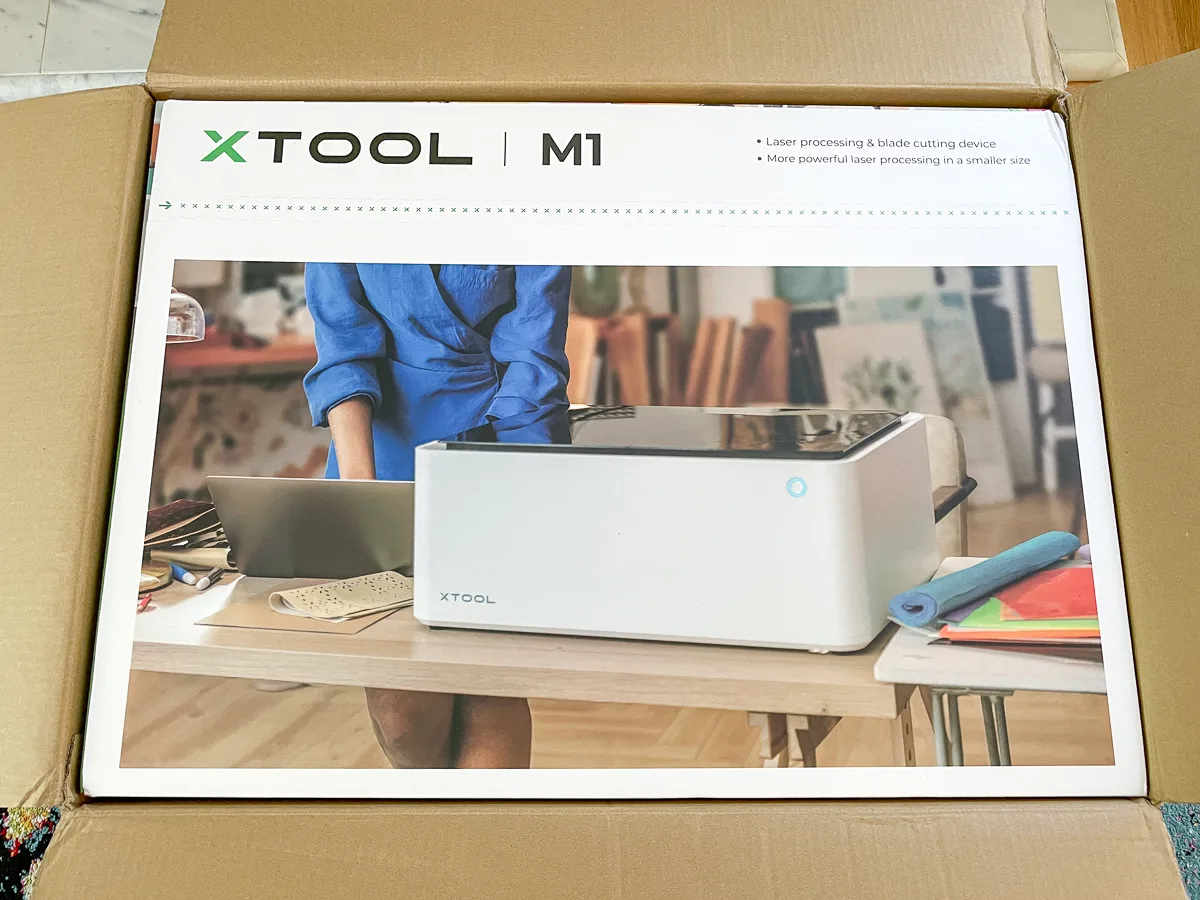
Want to explore the world of laser cutting without the huge price tag? Check out the xTool M1 and all its features in this review!

Woodworkers tend to fall into one of two camps. They either love and embrace new technology like CNC machines and laser cutters, or they consider these tools cheating and not real woodworking.
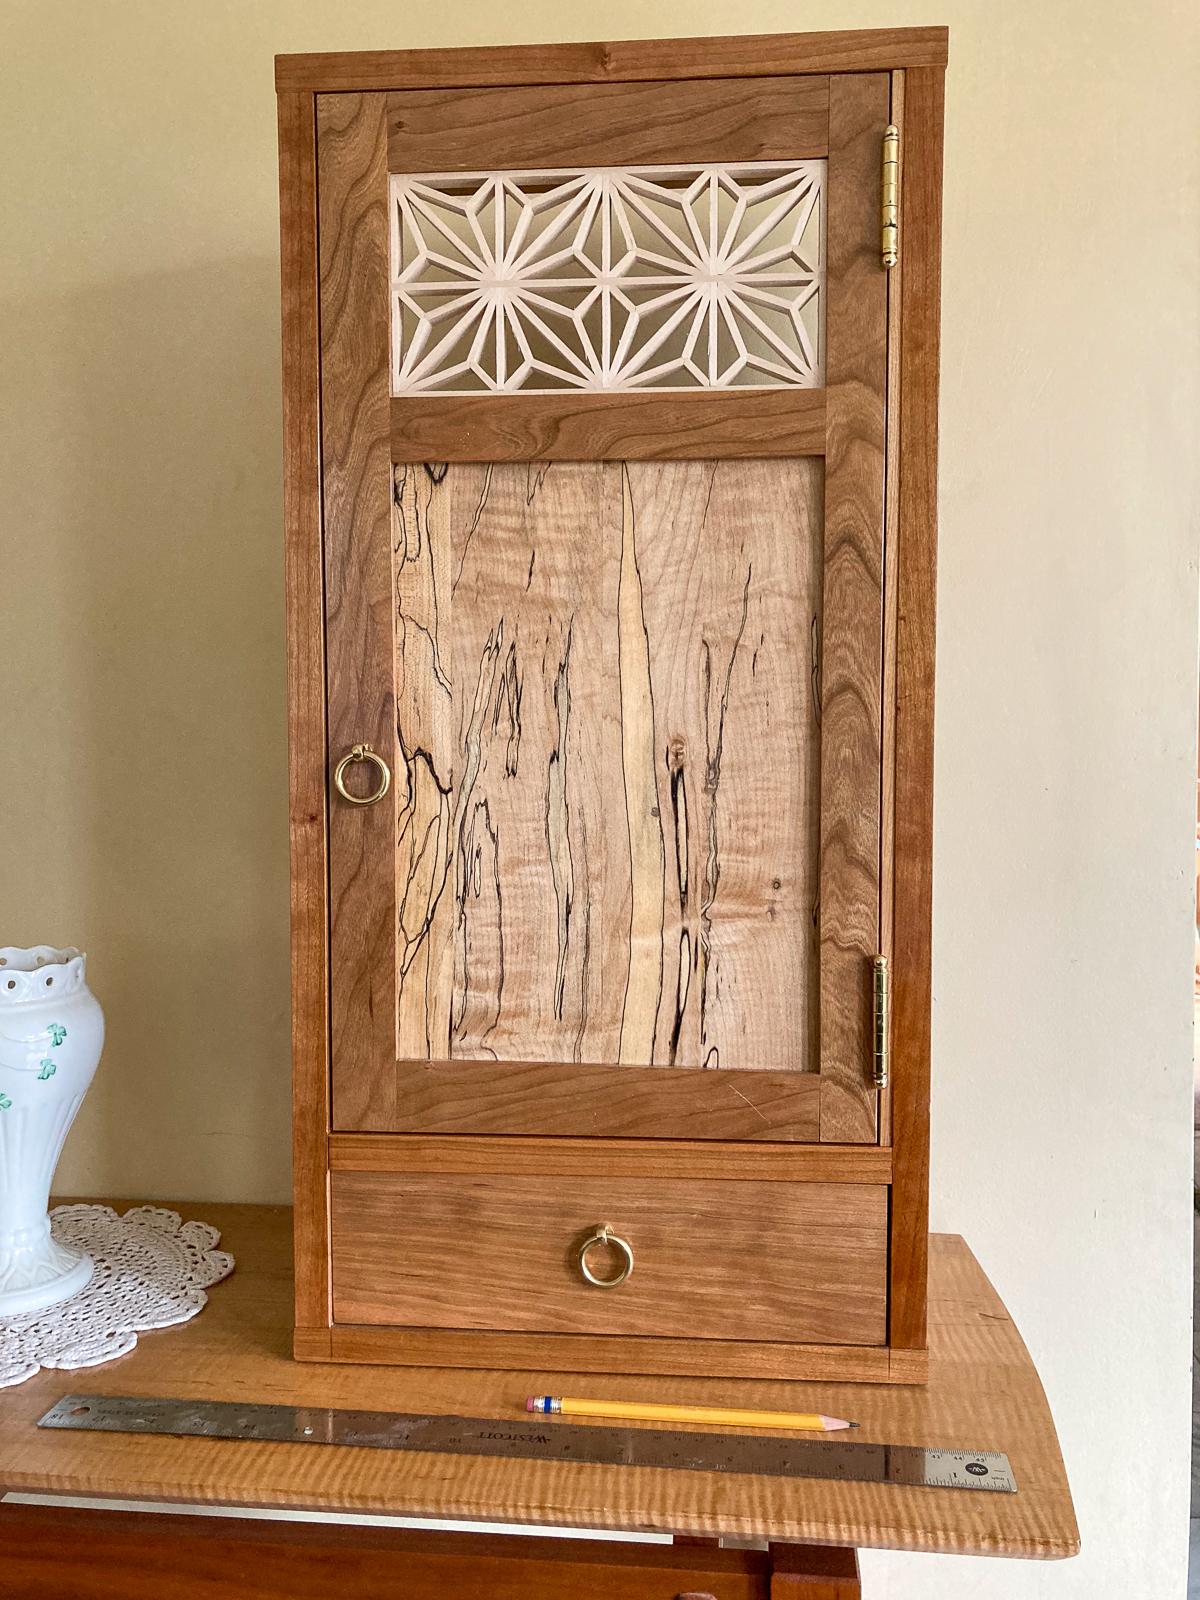
My dad is of the latter camp. He'll spend days cutting notches, shaving off corners, and painstakingly gluing tiny strips of wood together to create gorgeous kumiko panels like the one at the top of this cabinet door.
He's tried teaching me how to do it, but I'm not that patient. I enjoy the designing process in SketchUp and assembling the cut pieces in the workshop, but spending hours over a spinning blade isn't my favorite part of woodworking. I kept thinking that a laser cutter would make this job so much faster!
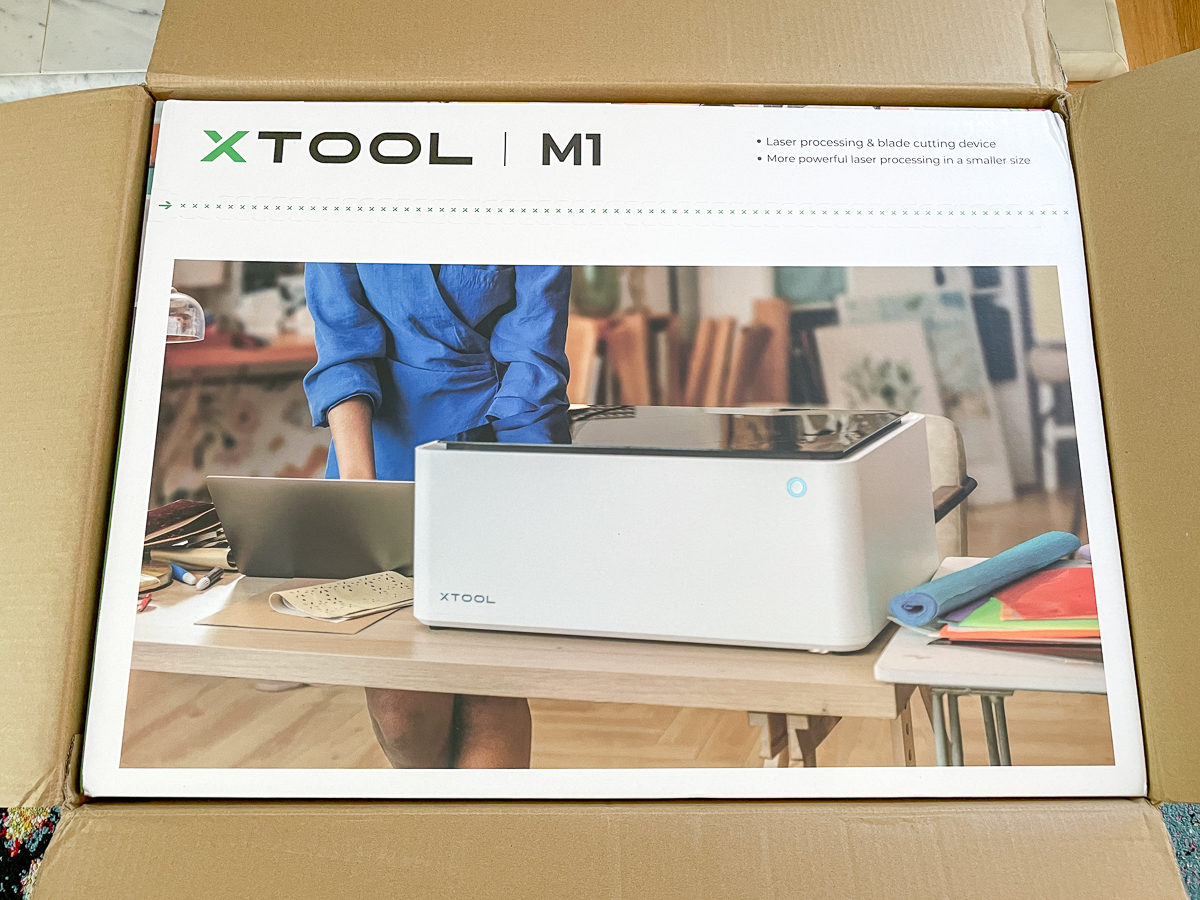
Recently, xTool asked me if I wanted to try out their M1, a hybrid machine that combines a laser cutter and a blade cutting tool similar to a Cricut or Silhouette machine. I was so excited to get my hands on it and put it through its paces!
While xTool provided this machine to me for free, I was not paid to write this review. I'll share my genuine experience using this tool for the first time, and some hiccups that occurred along the way.
Don't have a laser, or looking to upgrade? Use the code VINETA100 for $100 off an xTool laser! Click here to check them out!
Let's get cutting!
This post contains affiliate links for your convenience. Purchases made through these links may earn me a small commission at no additional cost to you. Please visit my disclosures page for more information.
What is the xTool M1?
The xTool M1 has both a laser and a blade in one machine. The 10W diode laser can cut or engrave materials such as wood, opaque acrylic or metal. The removable blade can cut vinyl, paper and leather.
A diode laser can't cut clear, white or blue acrylic. For that, you'll need a CO2 laser. Check out my review of the xTool P2 laser and how a CO2 laser compares to a diode laser.
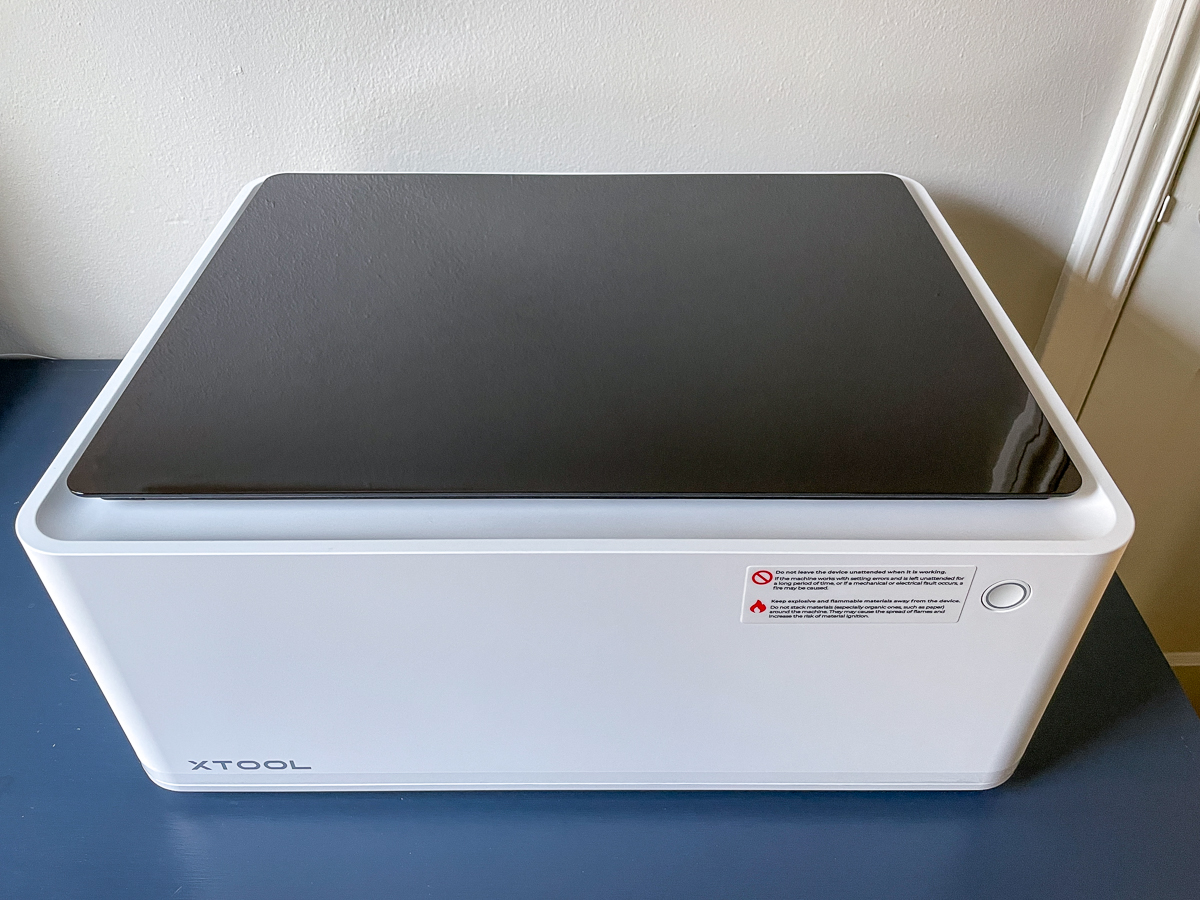

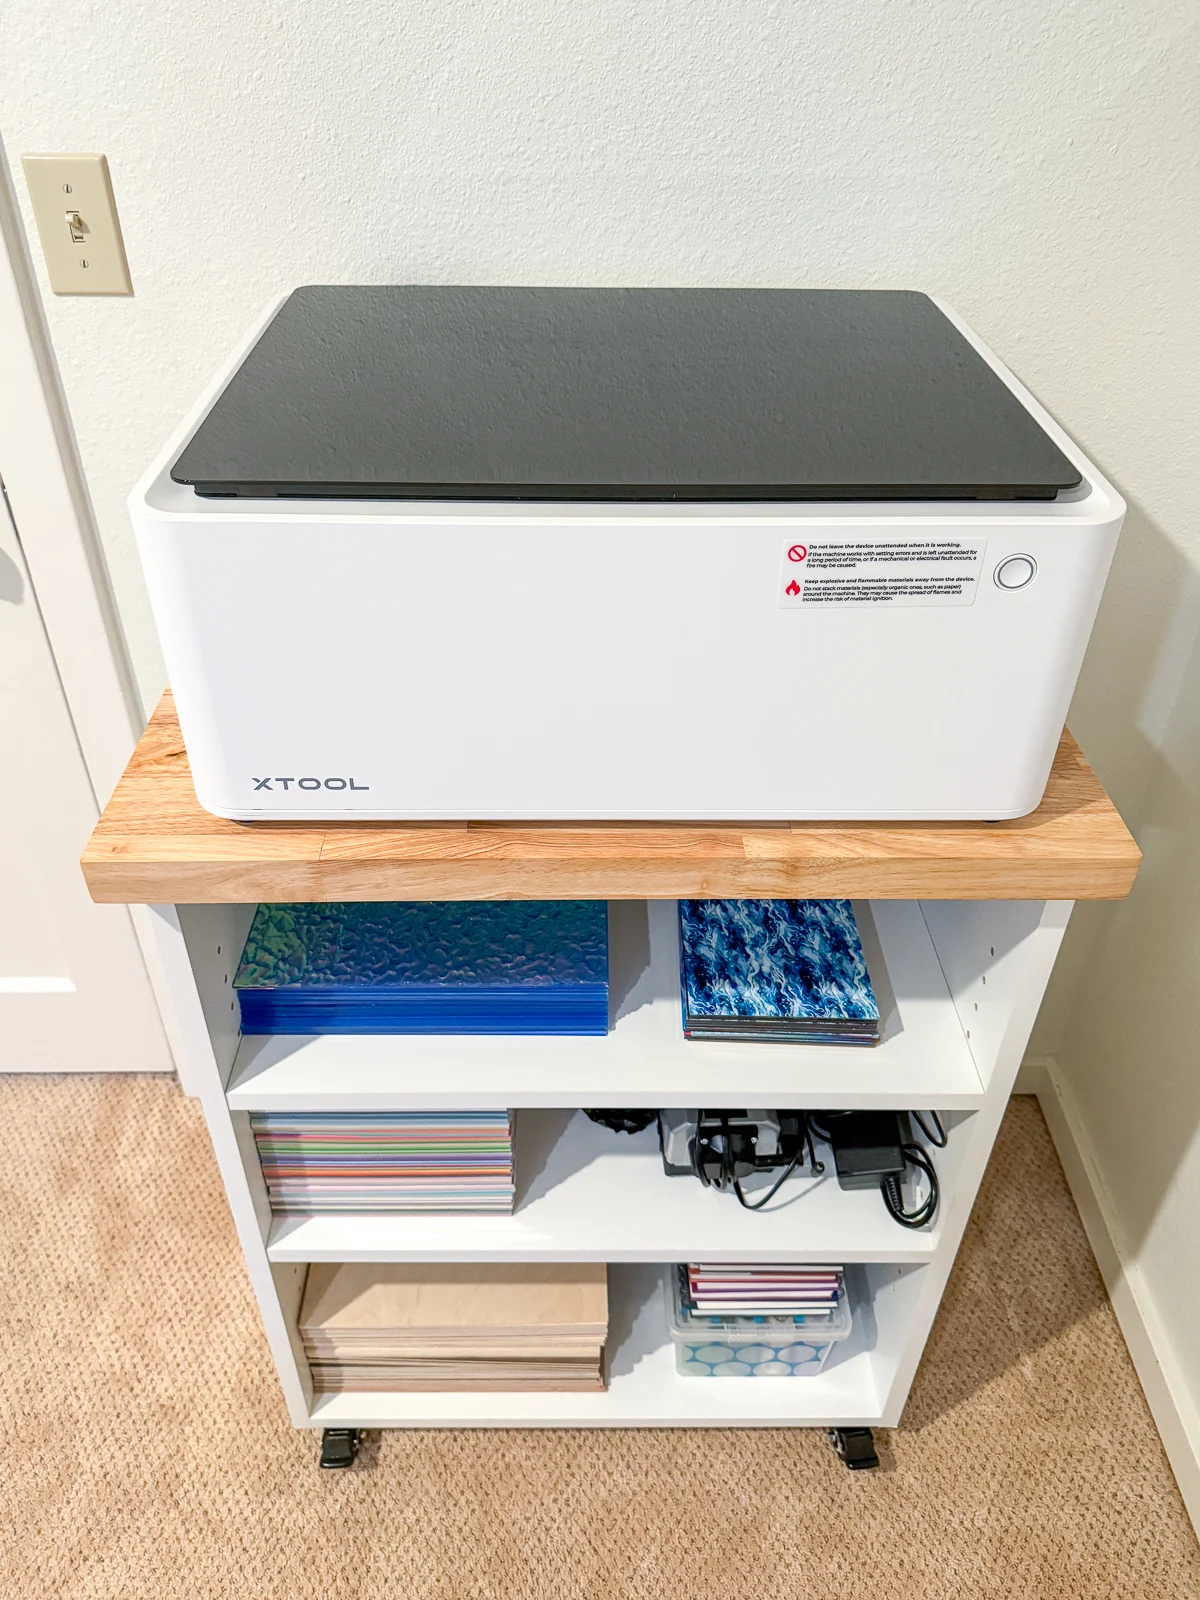
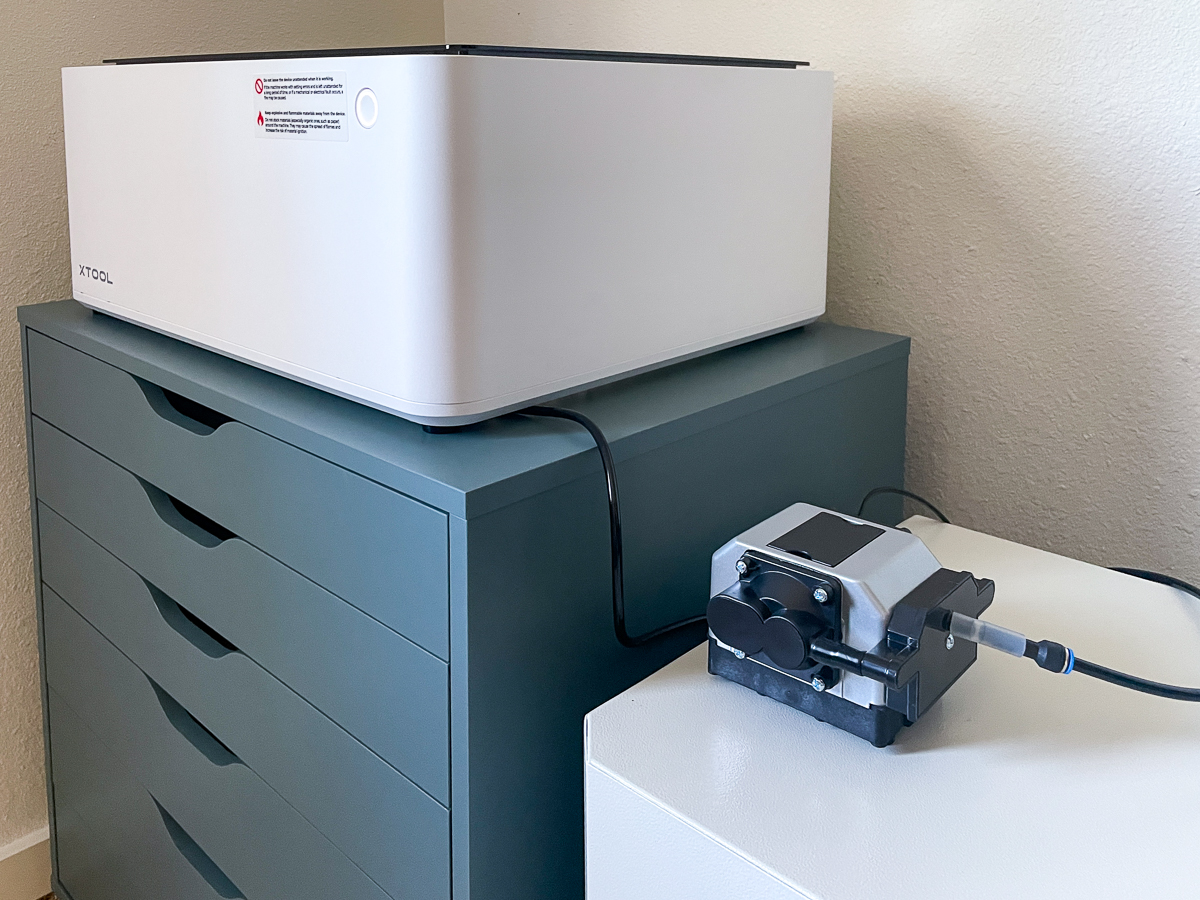
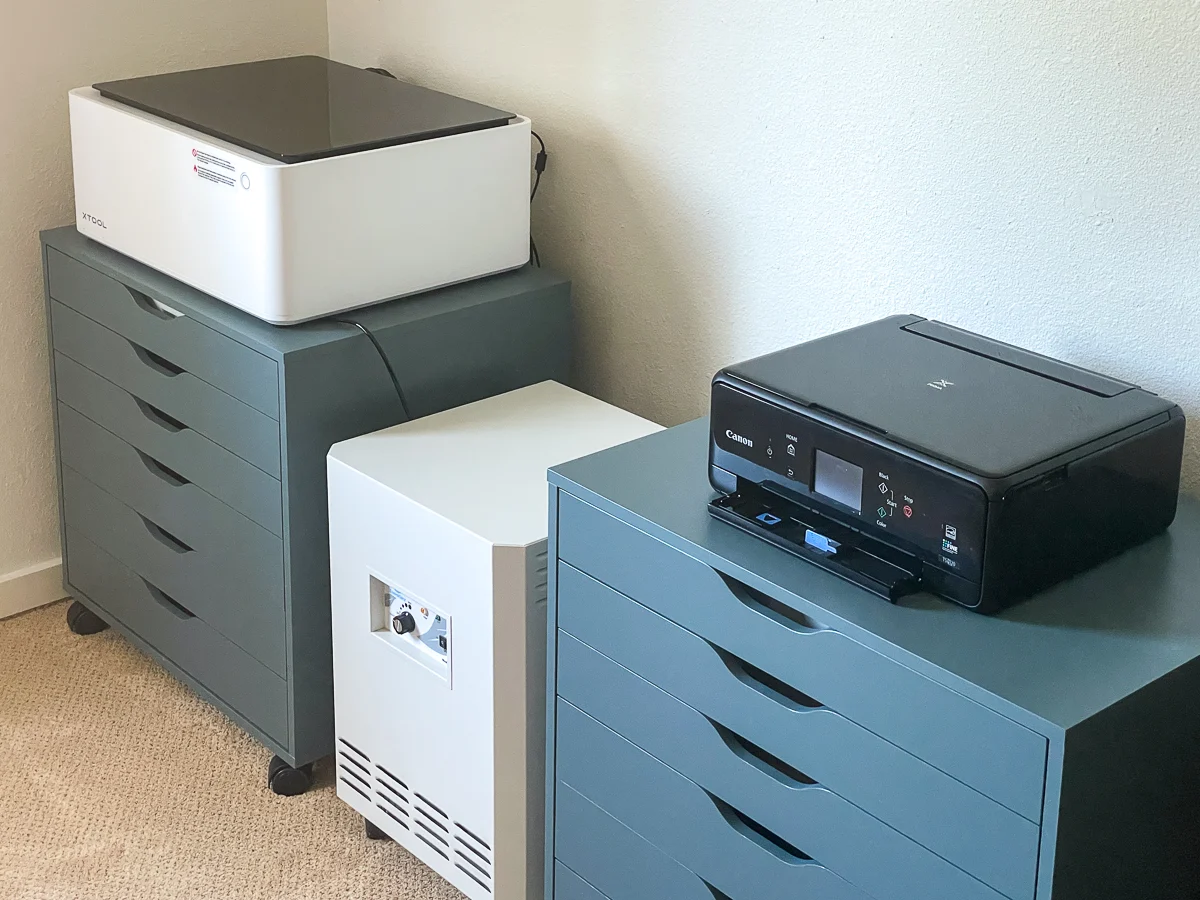
It's a little bigger than a standard printer, making it easy to fit into most craft rooms or workshops. It fits perfectly on the IKEA Alex drawer unit, which provides plenty of flat storage space for all your materials.
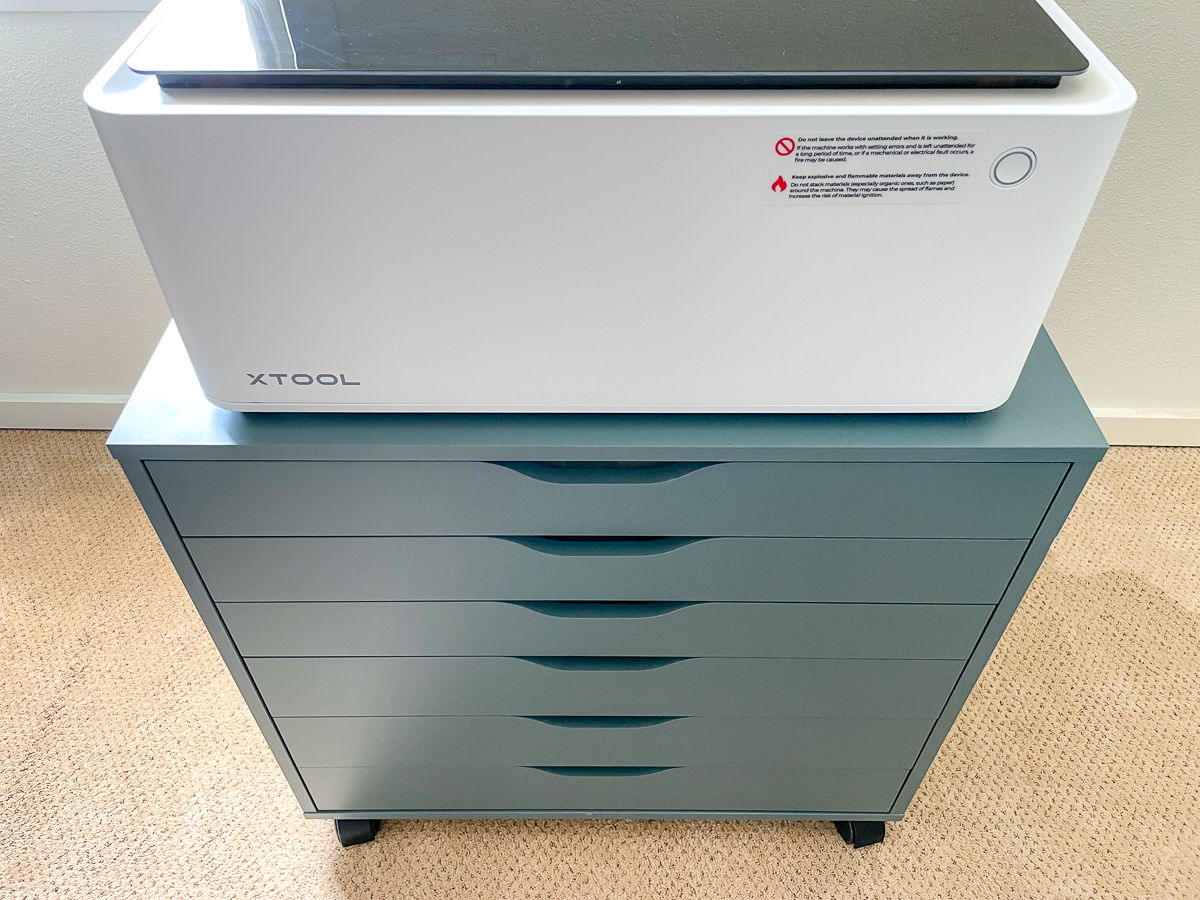
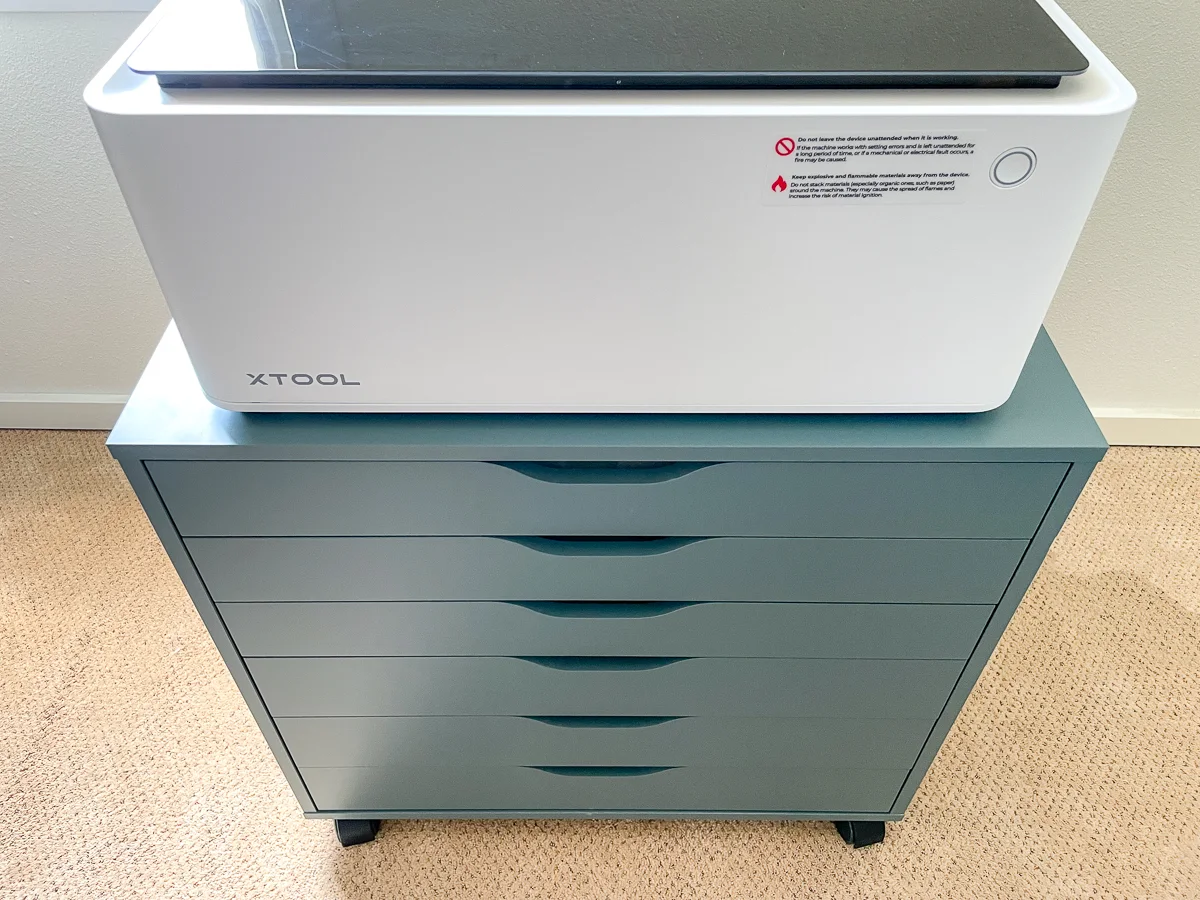
You can also build your own craft cabinet with shelves for all your supplies. I have free woodworking plans for this project in the tutorial!

It has an enclosure to keep smoke contained, with an internal fan and exhaust that vents outside with a six foot long flexible tube. In the summer, we have this casement window air conditioner vent set up in the guest room, so it's easy to swap out the hoses. You can also use their smoke purifier to suck up the fumes if you don't have a window nearby.


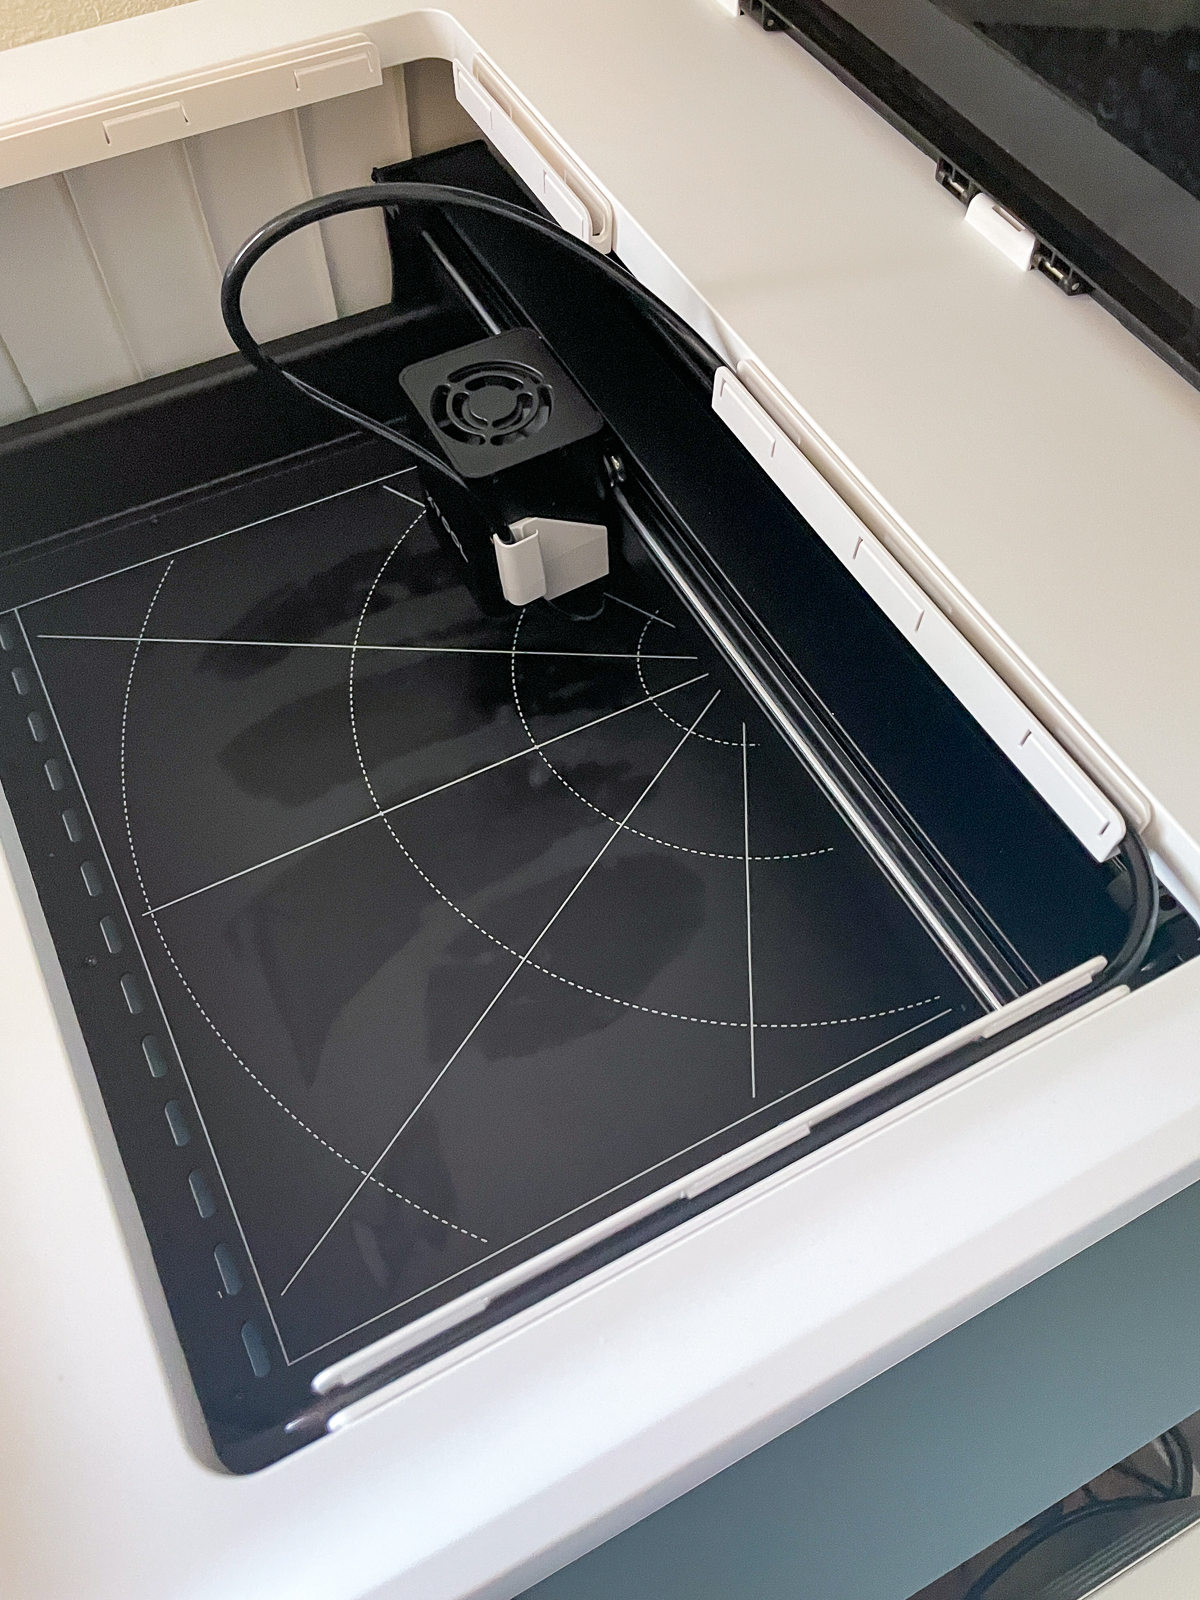
It has a working area of about 12"x15" and can cut 10mm wood or 3mm colored or opaque acrylic. The translucent lid is tinted, so you can watch your project come to life without wearing safety glasses.
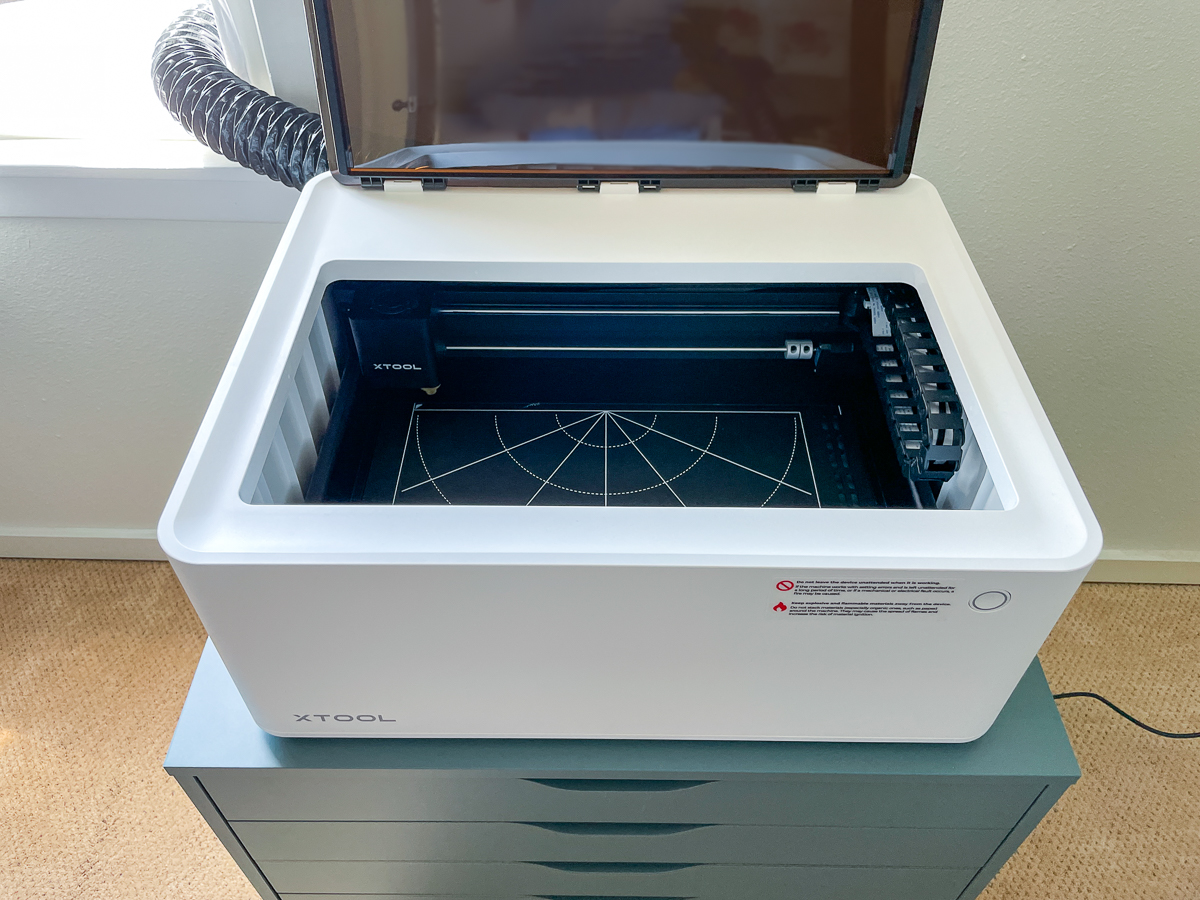
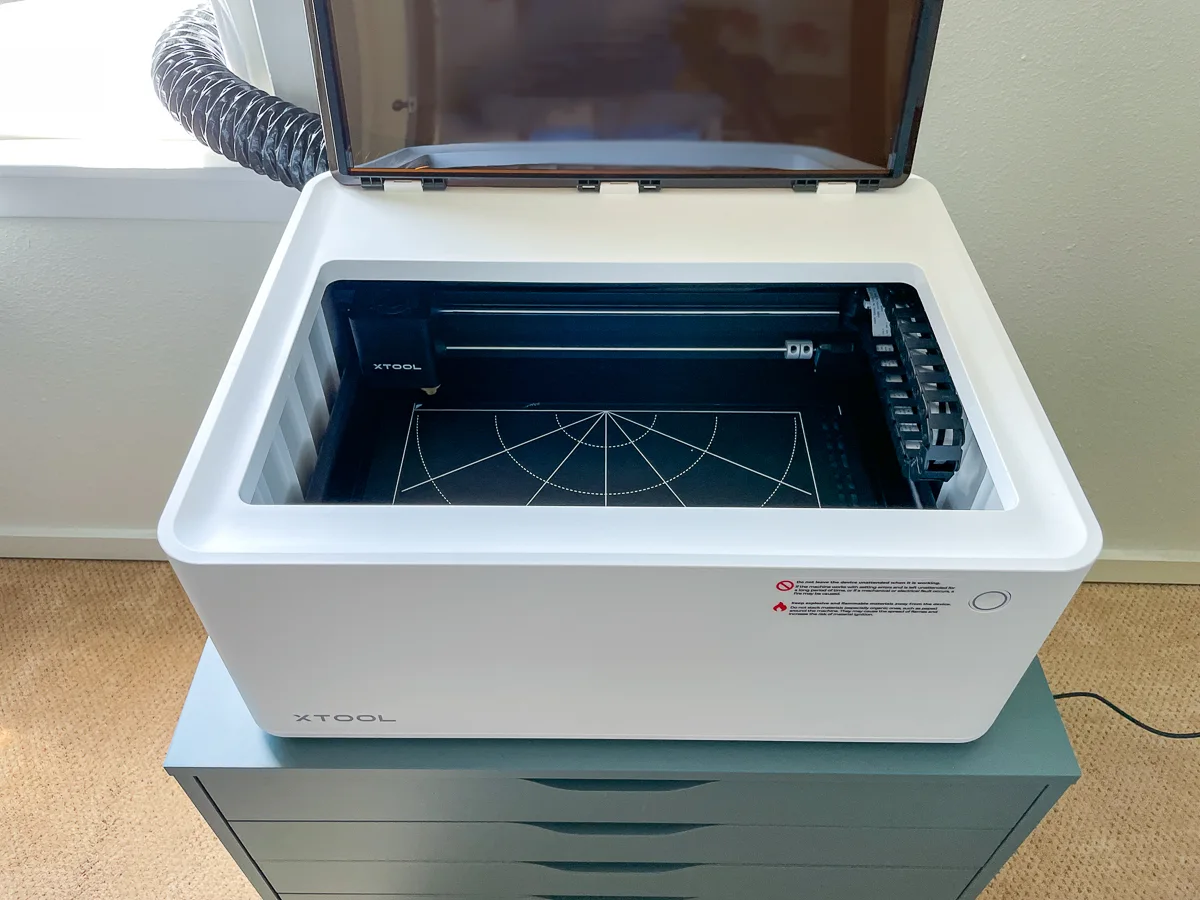
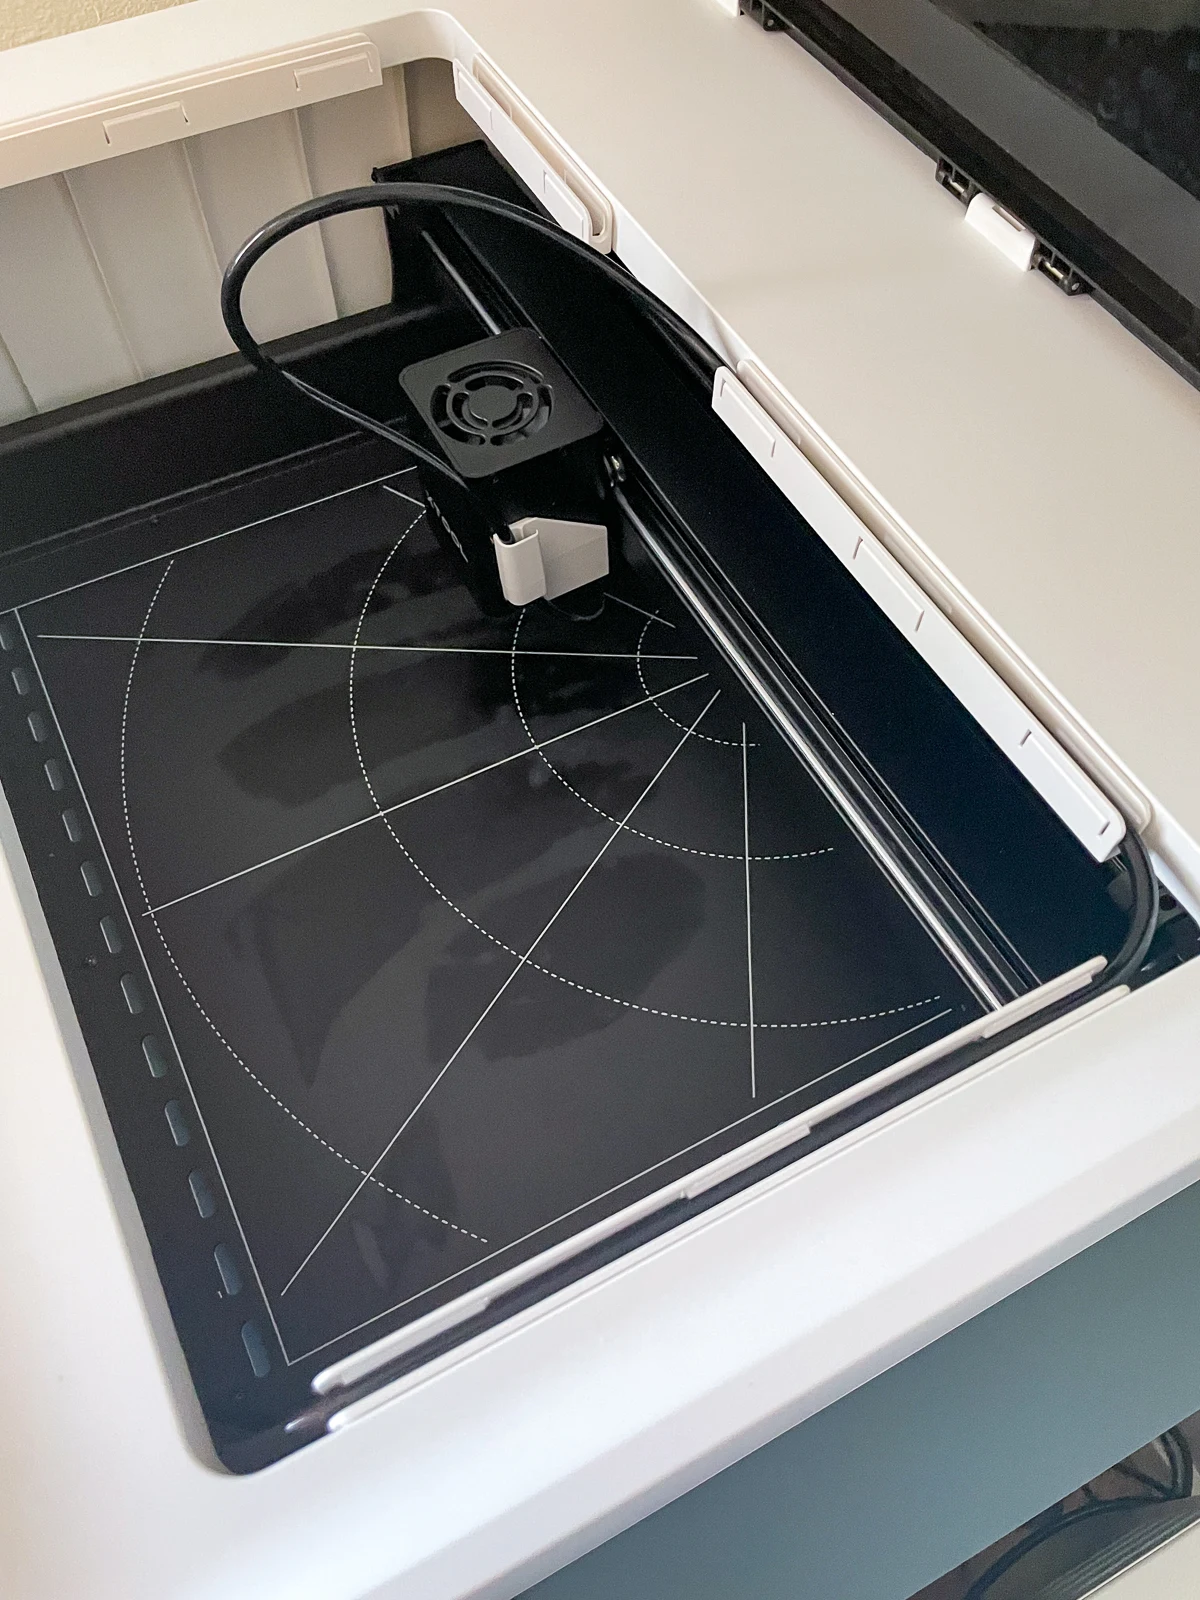
The software, called xTool Creative Space, is basic but user-friendly. The camera inside the machine shows you where your design will be positioned on the material, so you can pinpoint exactly where you want the cut or engraving.
Setting up the xTool M1
I was pleasantly surprised by how easy it was to set up the xTool M1. The components were well packaged and organized within the machine itself.
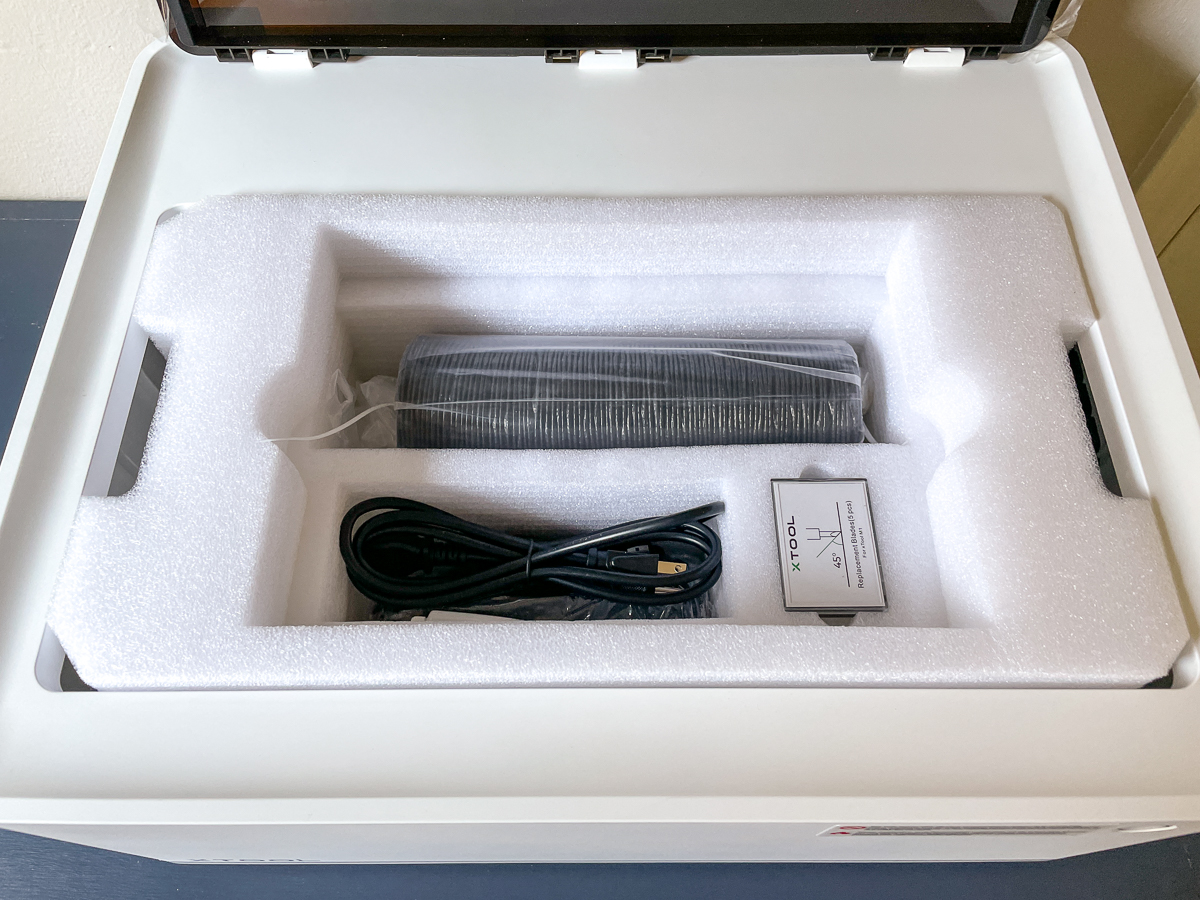

All the steps of the assembly process are shown in both paper and video format. Essentially all you need to do is attach the exhaust tube and you're ready to go!
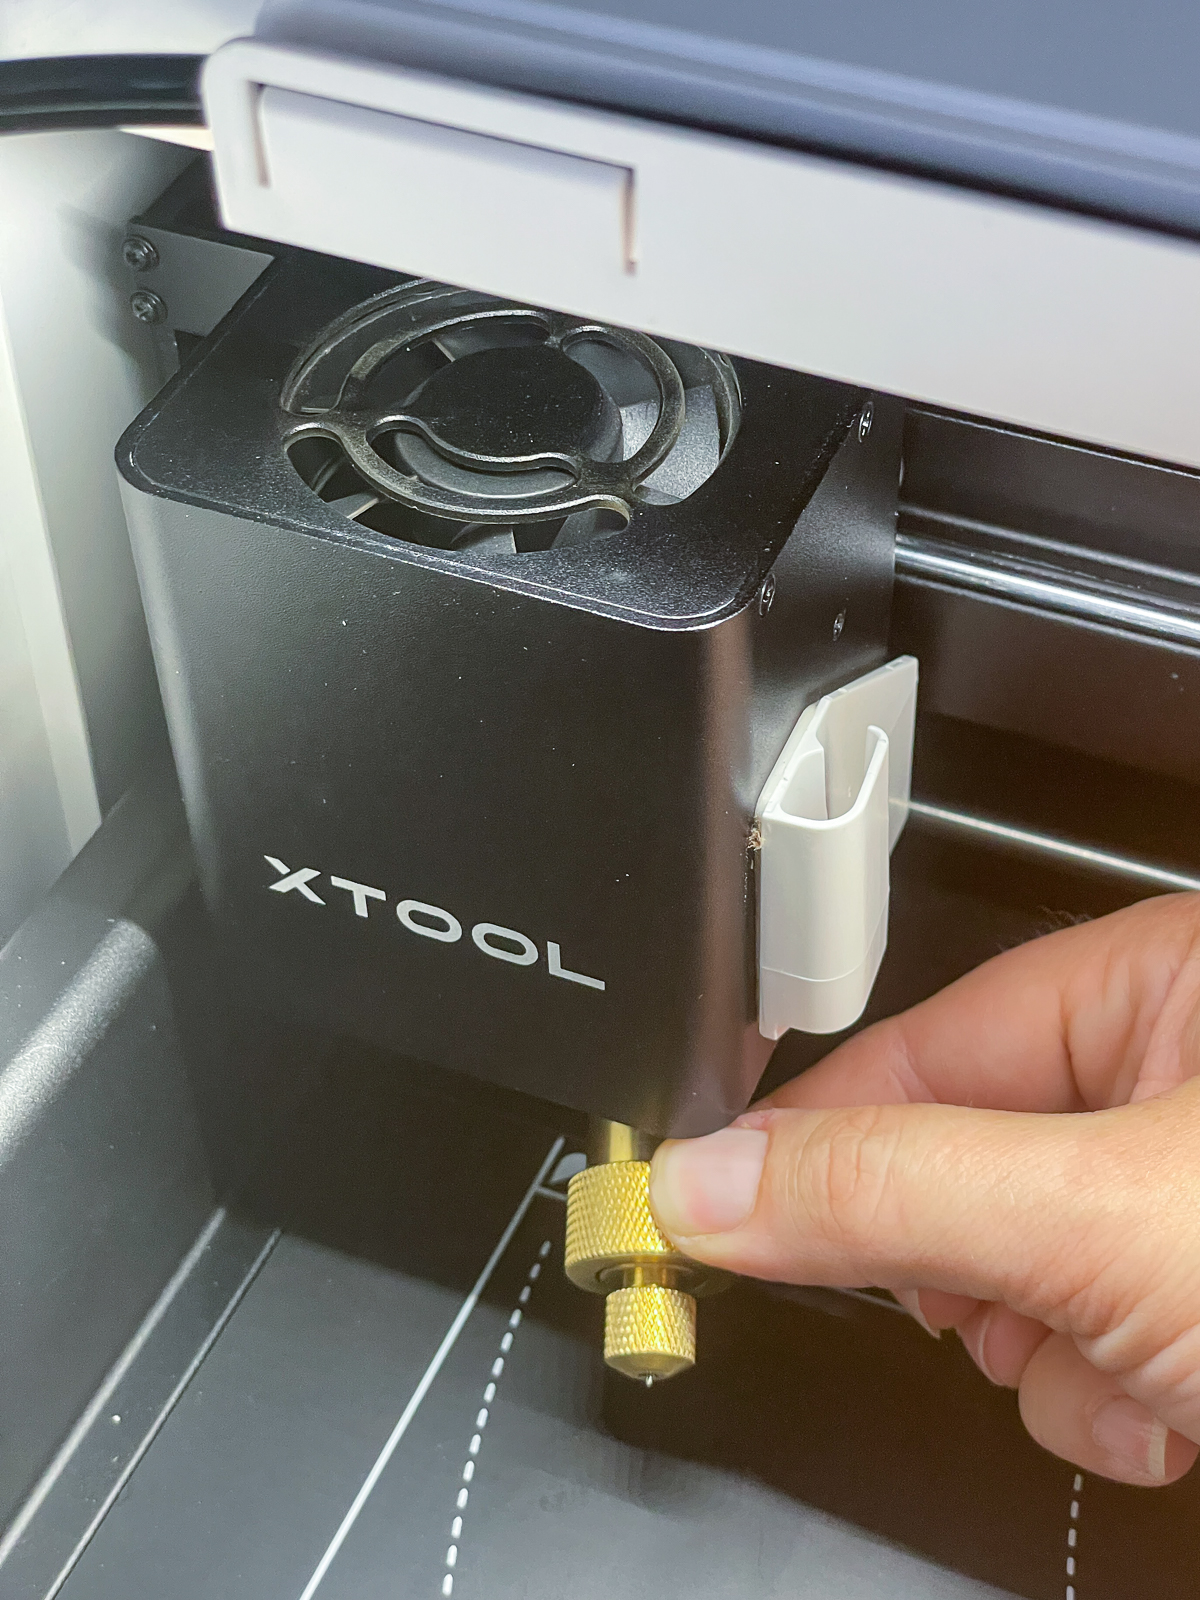
The air assist was a little trickier to assemble. This optional accessory uses an external pump to blow air directly on the area that's being cut, reducing charring and flare ups.

Before I received my machine, I talked to my friend Brittany over at By Brittany Goldwyn, who insisted that the air assist was a game changer. She wrote a great article comparing the results with and without the air assist if you want to check it out!
You need to remove the bottom plate of the machine and flip the whole thing over. There are a few small pieces that are attached to the underside of the laser module, so it's easier to work with it upside down. Then the tubing is held around the inside edge with brackets.
I was a little confused about how the tubing would get out of the machine. I asked a question in the xTool M1 Facebook group, and almost instantly got a response! There's a gap in the bottom plate to poke it through, and small feet under the machine that are just high enough to clear the tubing. Gotta love an engaged Facebook group full of dedicated users who are happy to help!
After assembling the M1, I moved on to connecting the hardware and downloading the required software. I have a MacBook Pro that only has USB-C plugs, but I have an adapter that allows me to use USB-A when needed.

The machine connected to my computer without any issues, and the software installation was also a breeze. After the initial set up, you can connect to the M1 over Wifi.
Design and Build Quality
The xTool M1 seems to be a well-designed machine in terms of aesthetics and build quality. It has a sleek, compact design that easily fits into most workspaces, and doesn't look out of place in our guest room next to the printer and air purifier (which we use for wildfire season, but also helps remove the burning smell from the laser cutter!)

The outer shell is made of metal, providing a durable frame that keeps most of the smoke contained. I wish the exhaust tube was slightly longer, so I didn't have to roll the cabinet closer to the window, but you can buy one at your local hardware store.
The large transparent window allows you to monitor the cutting and engraving process easily. You need to keep an eye on the laser to make sure it's not flaring up or moving the material around accidentally (which happened to me once after I set up the air assist, but it was fine after a quick adjustment).

You can easily switch from laser cutter to the blade with a magnetic holder under the laser module. The air assist nozzle is also magnetic, so I can just pop it off and insert the blade without fiddling with screws or knobs.
Software
The xTool machines work with their own xTool Creative Space software, and aren't compatible with other programs like Lightburn. It works similarly to the Silhouette Studio software, and is pretty easy to use.
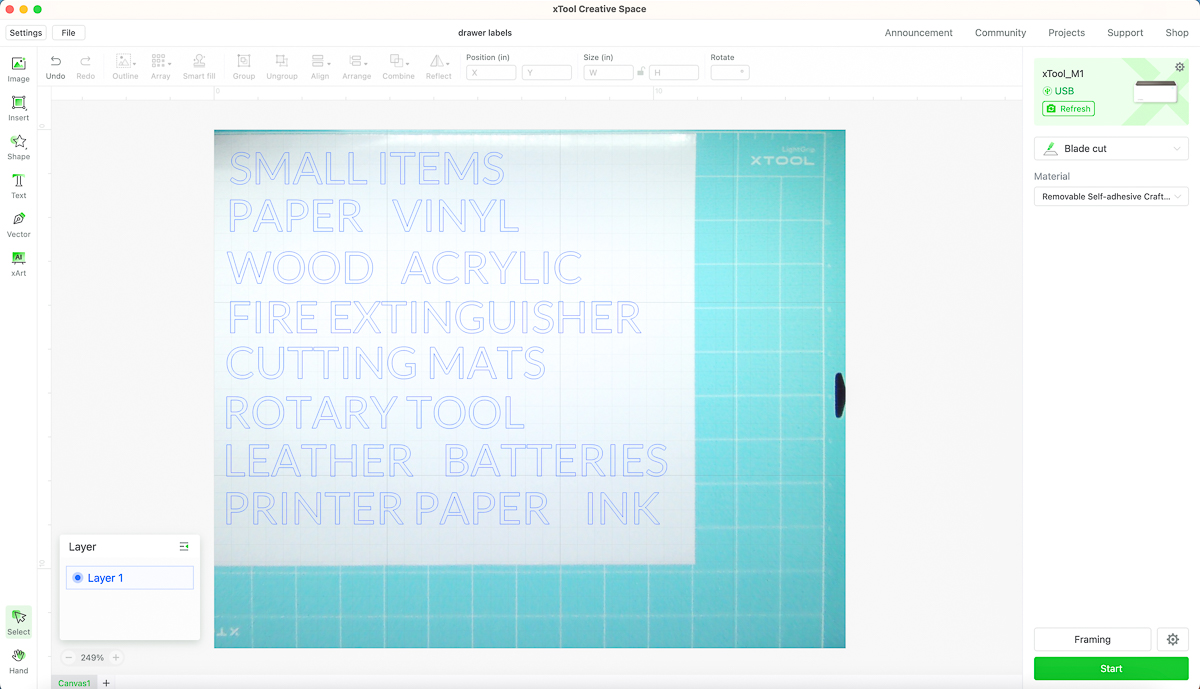
You can insert shapes and text directly in the software for basic projects, like these drawer labels I made for the cabinet under the laser cutter. You can see how these turned out in the blade cutter section below!

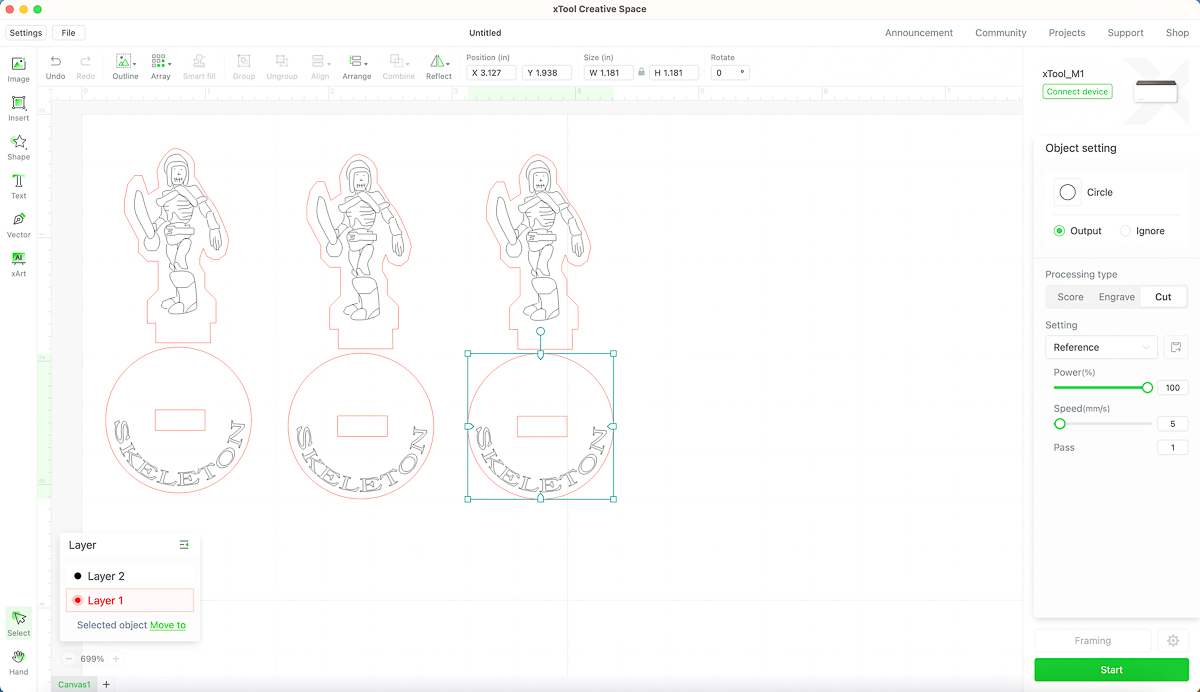
You can also import your own images for engraving or cutting. Etsy is full of amazing designs that people have created for laser cutters. I used images from Canva, saved as an SVG, to create the file you see below. SVG allows you to easily manipulate the lines separately for scoring, engraving or cutting.


The xTool Creative Space software has presets for all the sample materials that were included in the starter kit, so you get great results right out of the box. There's also a project center with lots of really cool pre-made designs that can be made with just a press of a button!
If you buy your materials elsewhere, you should test the engraving and cutting settings first. This helps avoid any surprises, like not cutting all the way through, when you make your project.
Testing out the laser cutter on wood
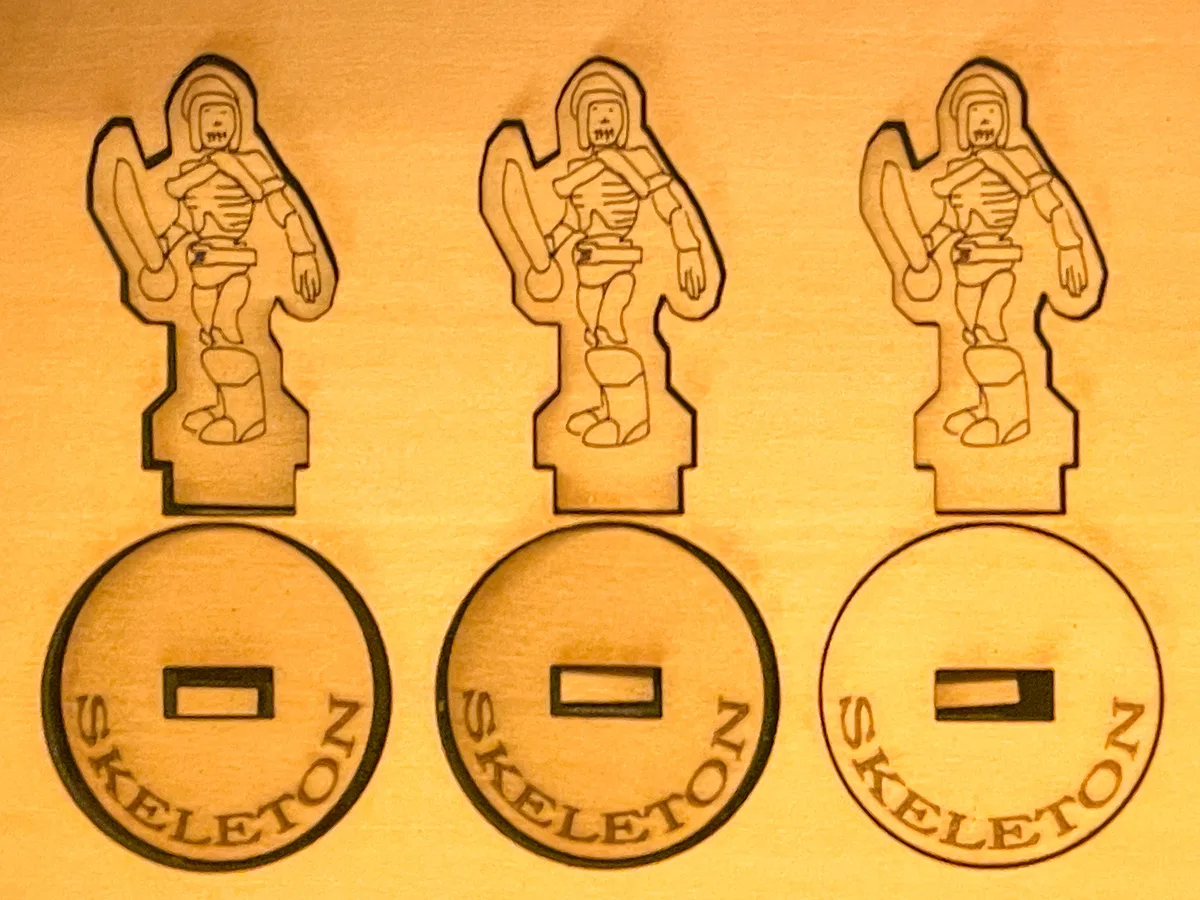
For my first project, I wanted to try something small that incorporated all three features of the laser: scoring, engraving and cutting. This would allow me to test everything out while not wasting too much material if I got something wrong.
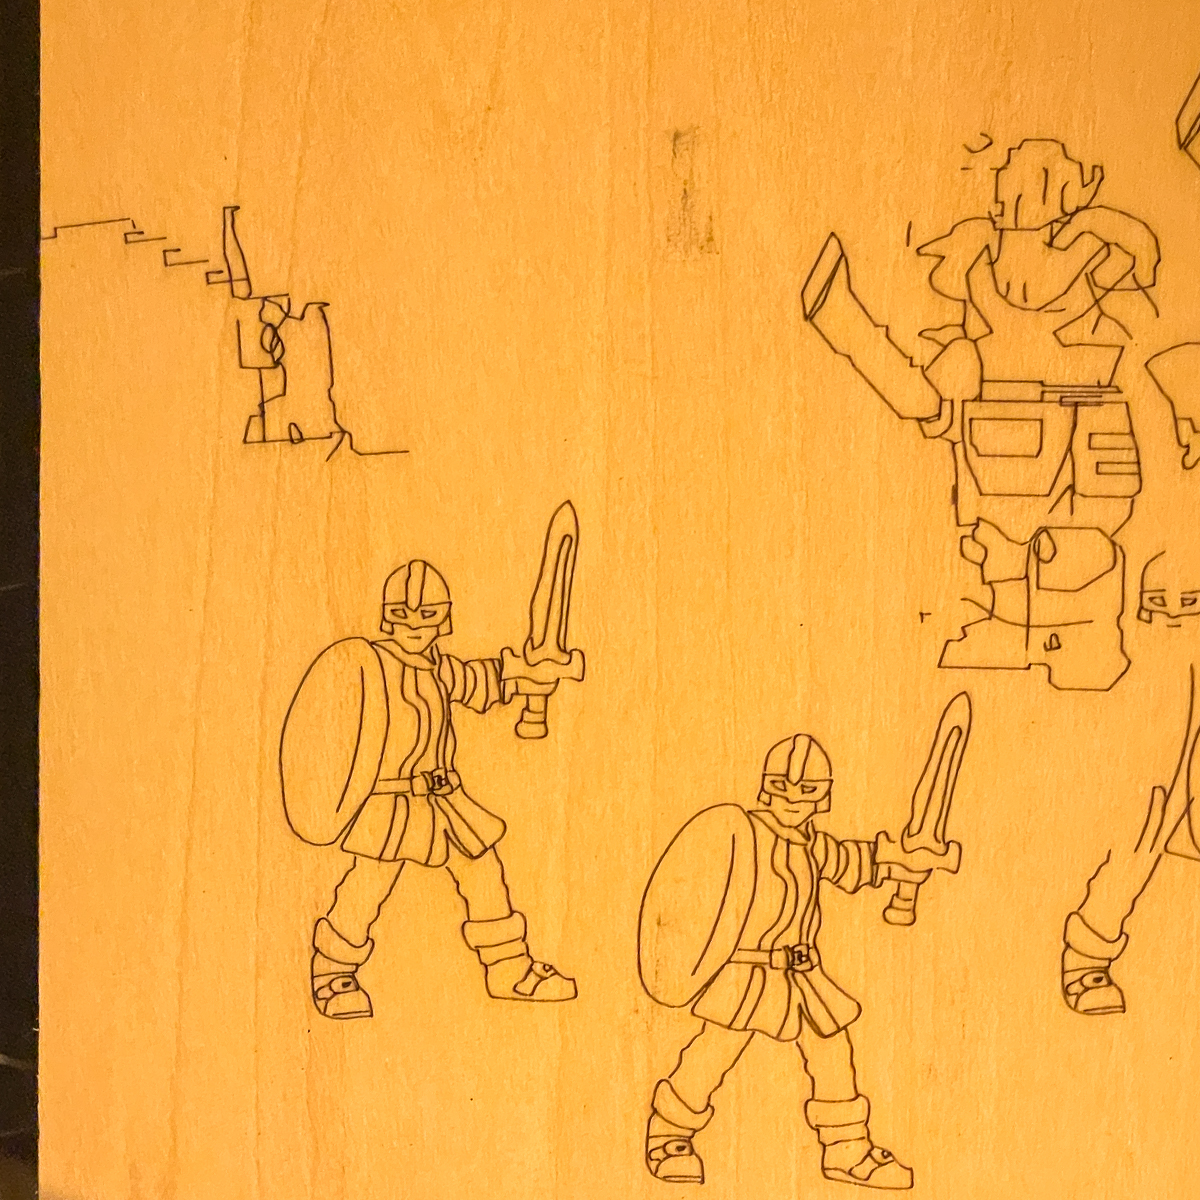
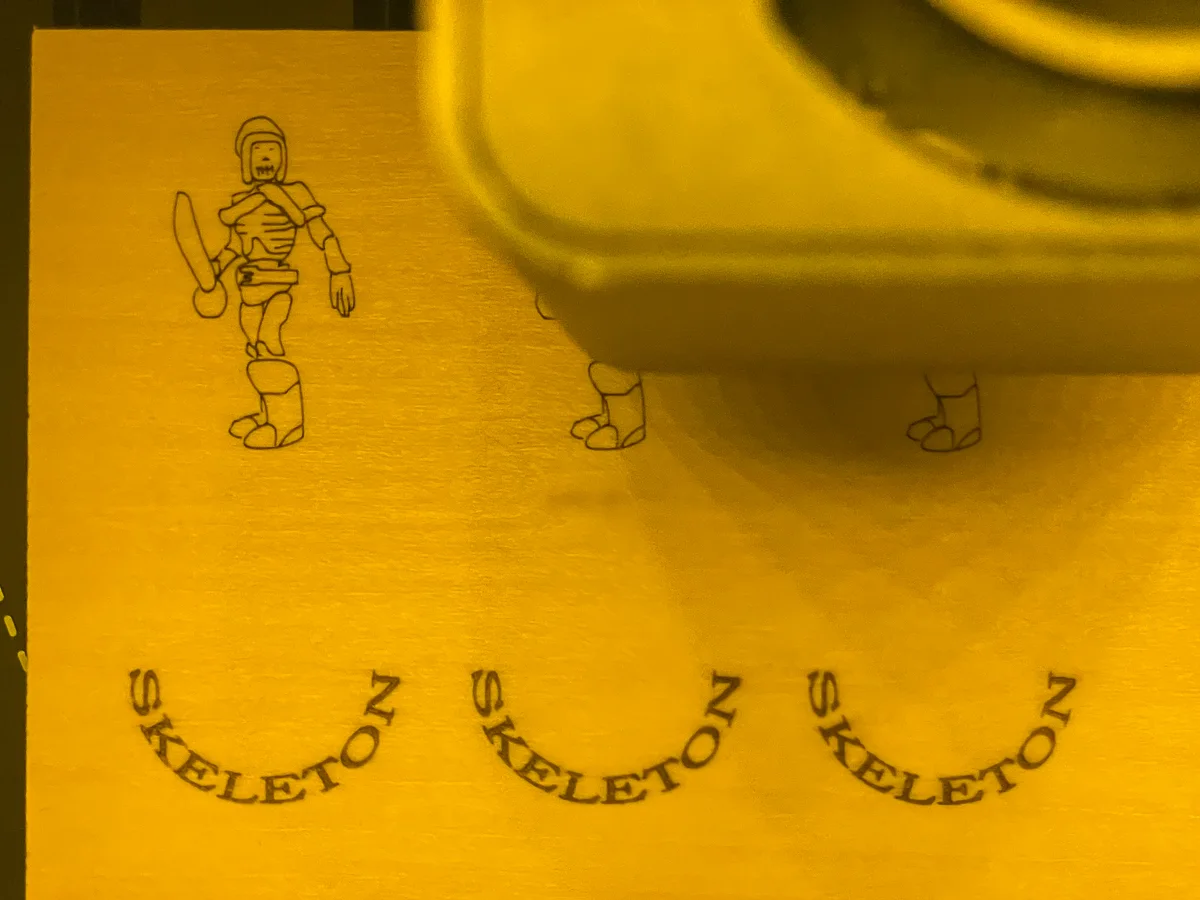
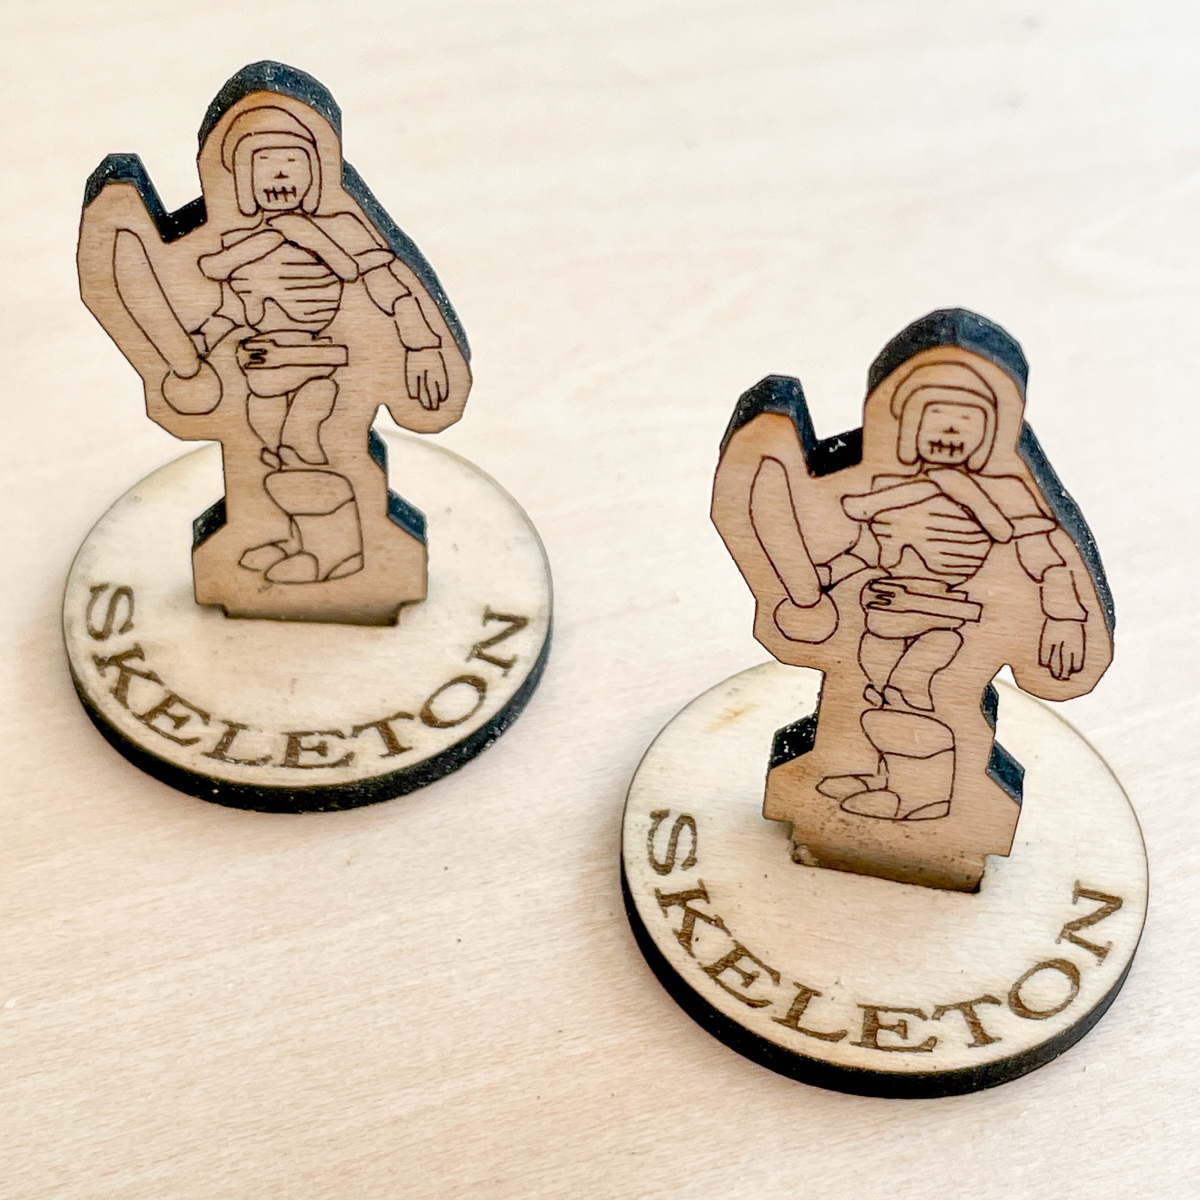
My son runs a Dungeons and Dragons campaign every weekend, and he uses minifigures to visualize the scene. The plastic ones cost at least $5 each, and he wanted an army of skeletons for an upcoming battle! I made these DIY DnD miniatures with the laser cutter for just a few bucks!


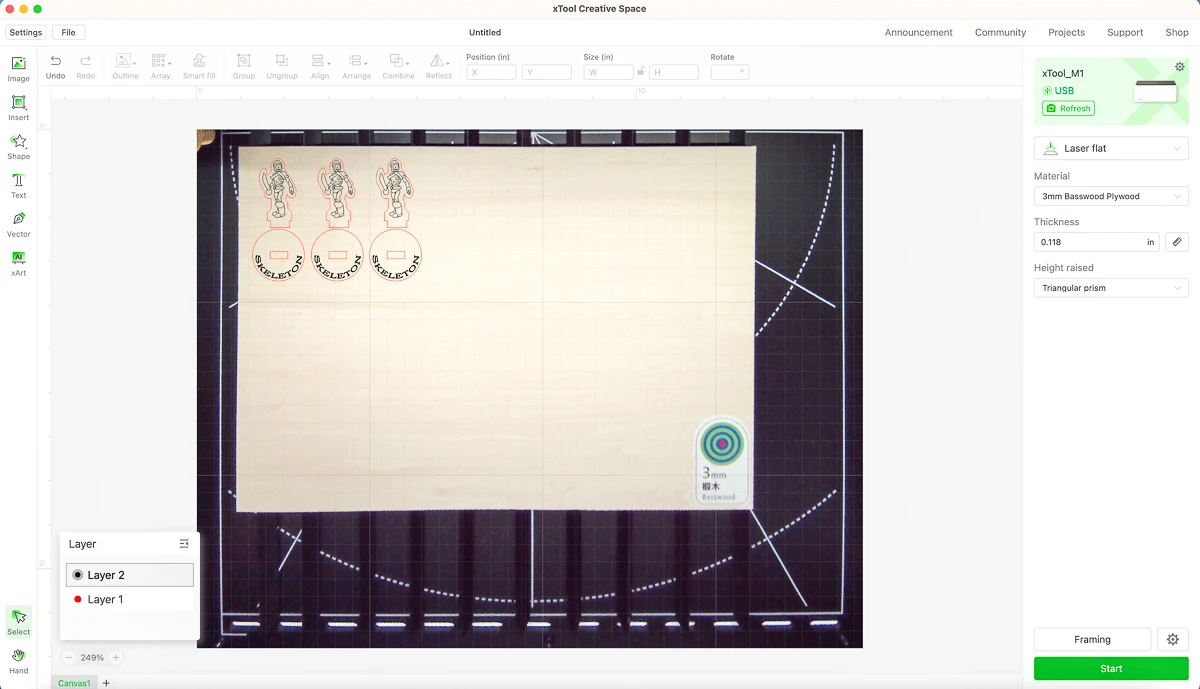
I imported the file into the xTool Creative Space software, then set the processing type for everything you see in red to cut. The drawing of the skeleton is scored, which will leave a finer line. The name on the base is engraved to make it bold. You just select each element and change the laser operation you want.
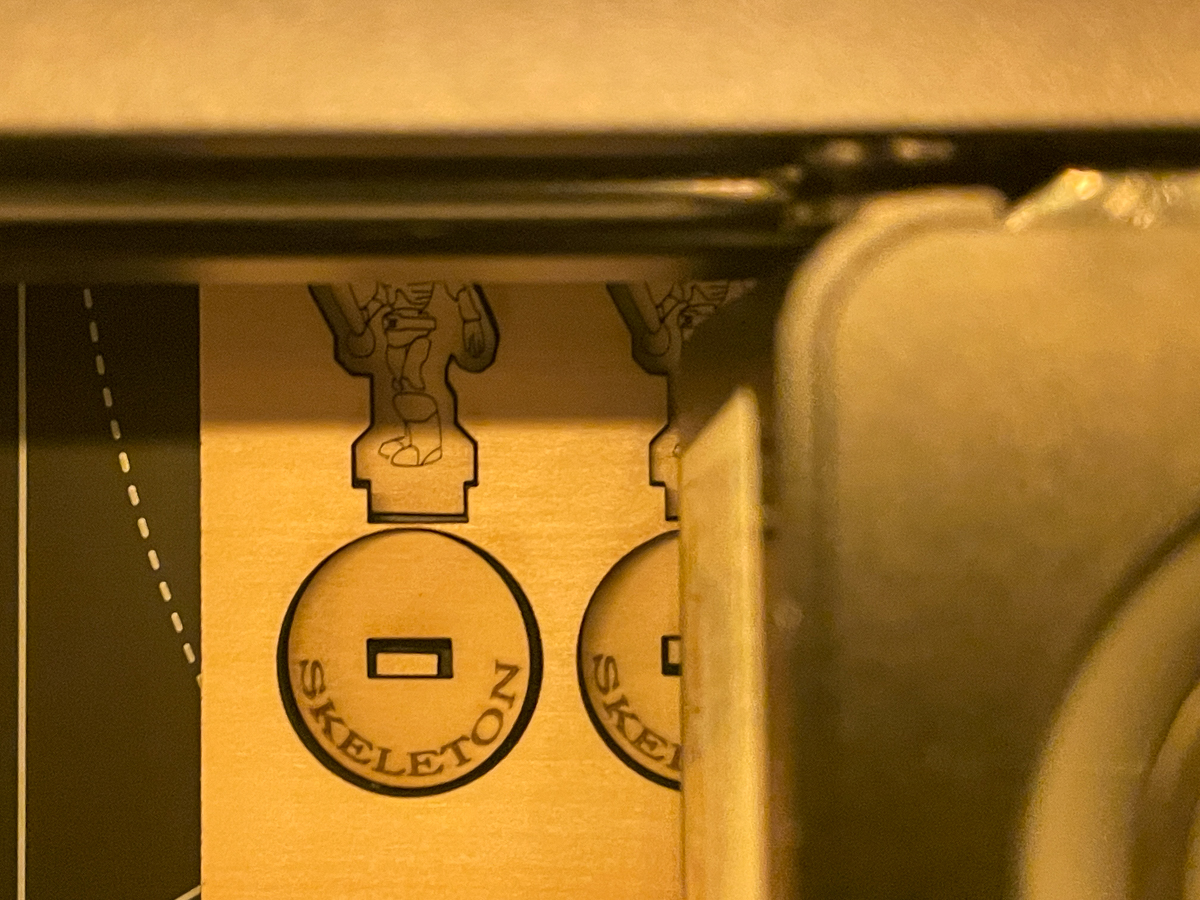
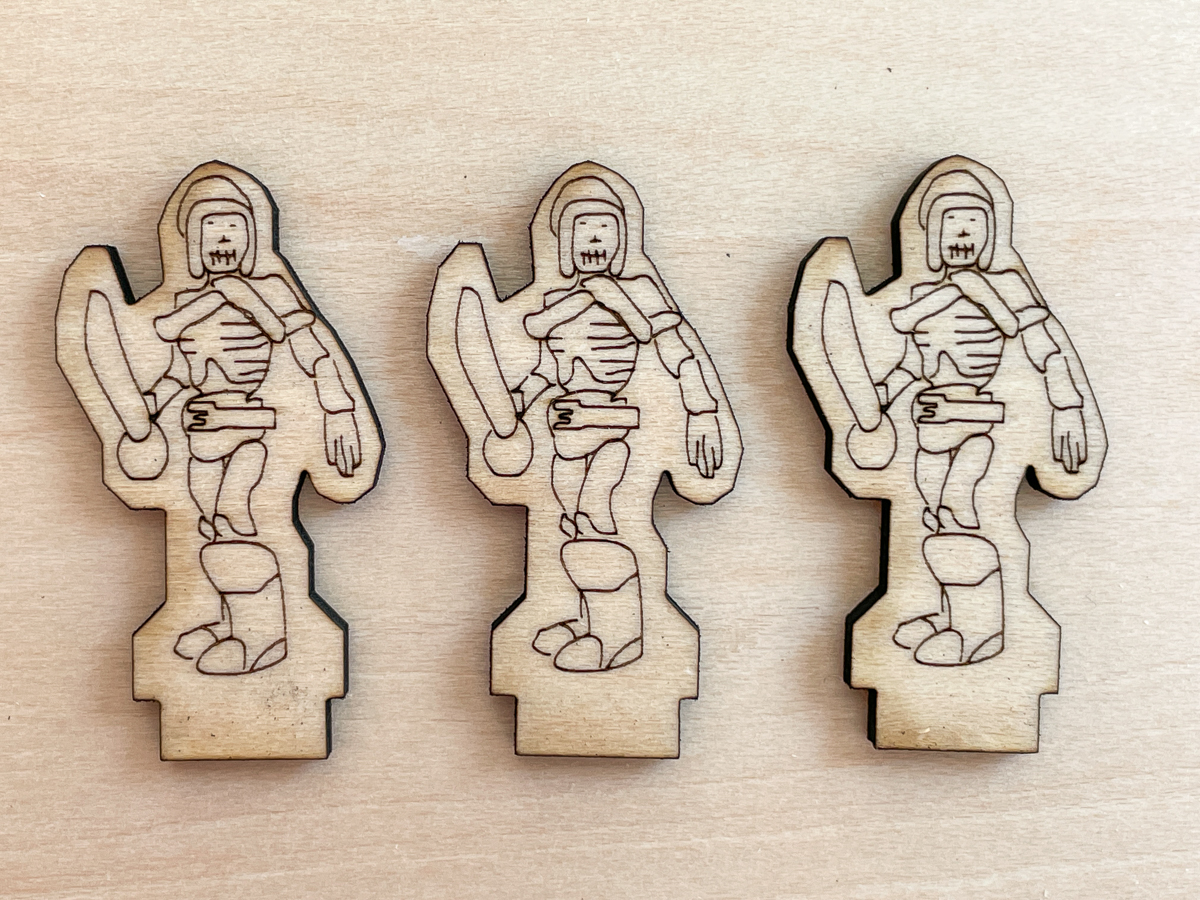
I used the 3mm basswood plywood that was included in my starter materials kit. These little metal pyramids elevate the wood so the laser cuts through it without scorching the bottom. It also allows for air flow underneath so you get less burning on the underside.
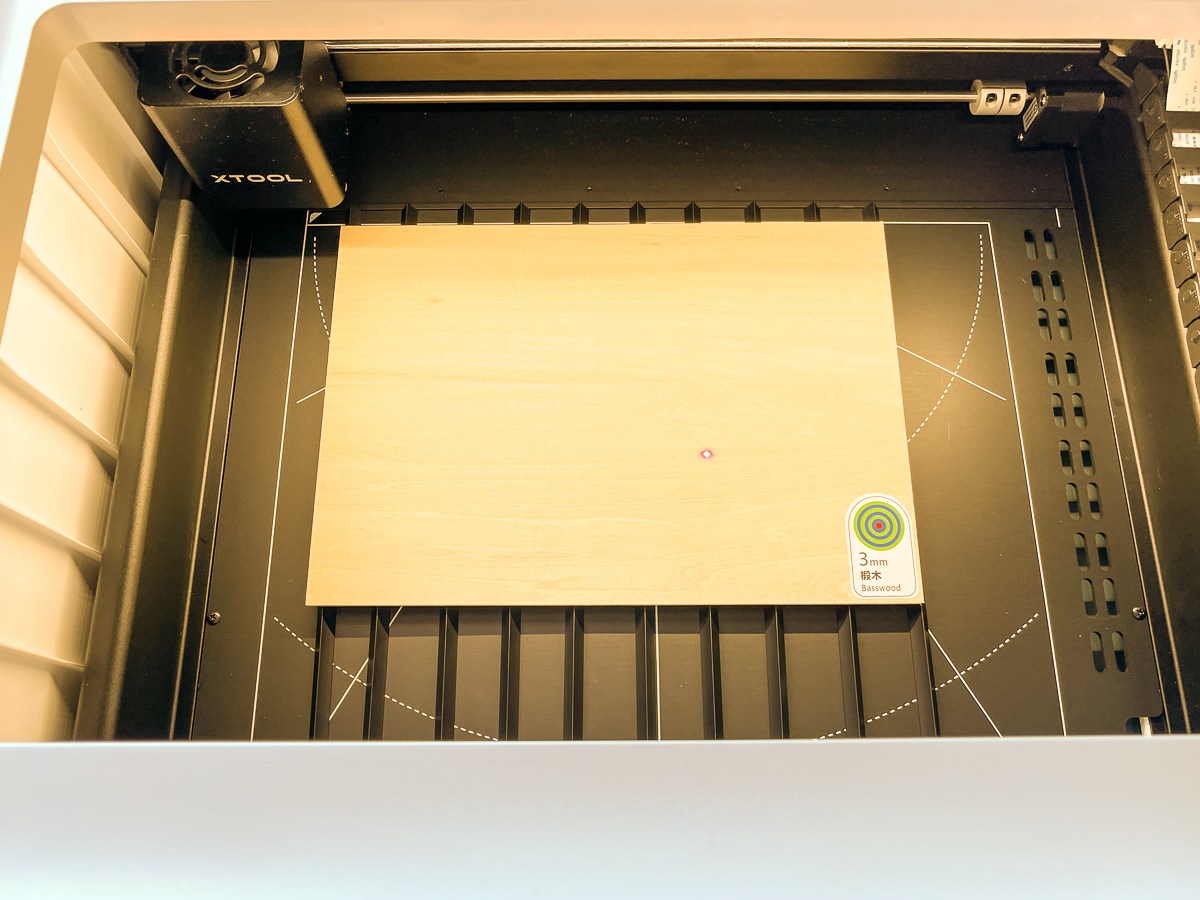
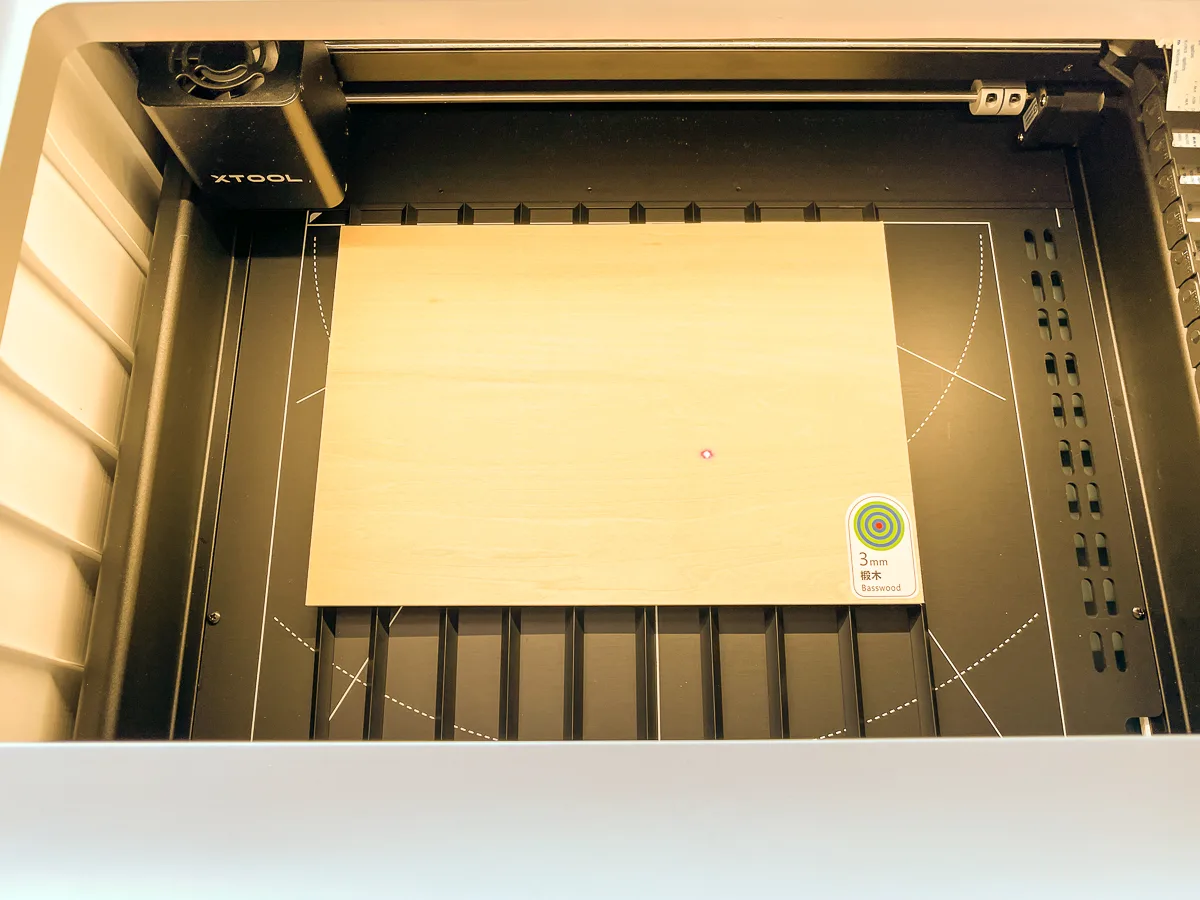
The xTool M1 camera makes it easy to position your project once the material is inside. It captures an image of your material and shows it as the background of your file. Then you can move the images digitally to align them, rather than constantly moving the plywood and taking another picture.

Once everything was aligned, I hit the start button and watched it work! First, it did the engraving of the character names.
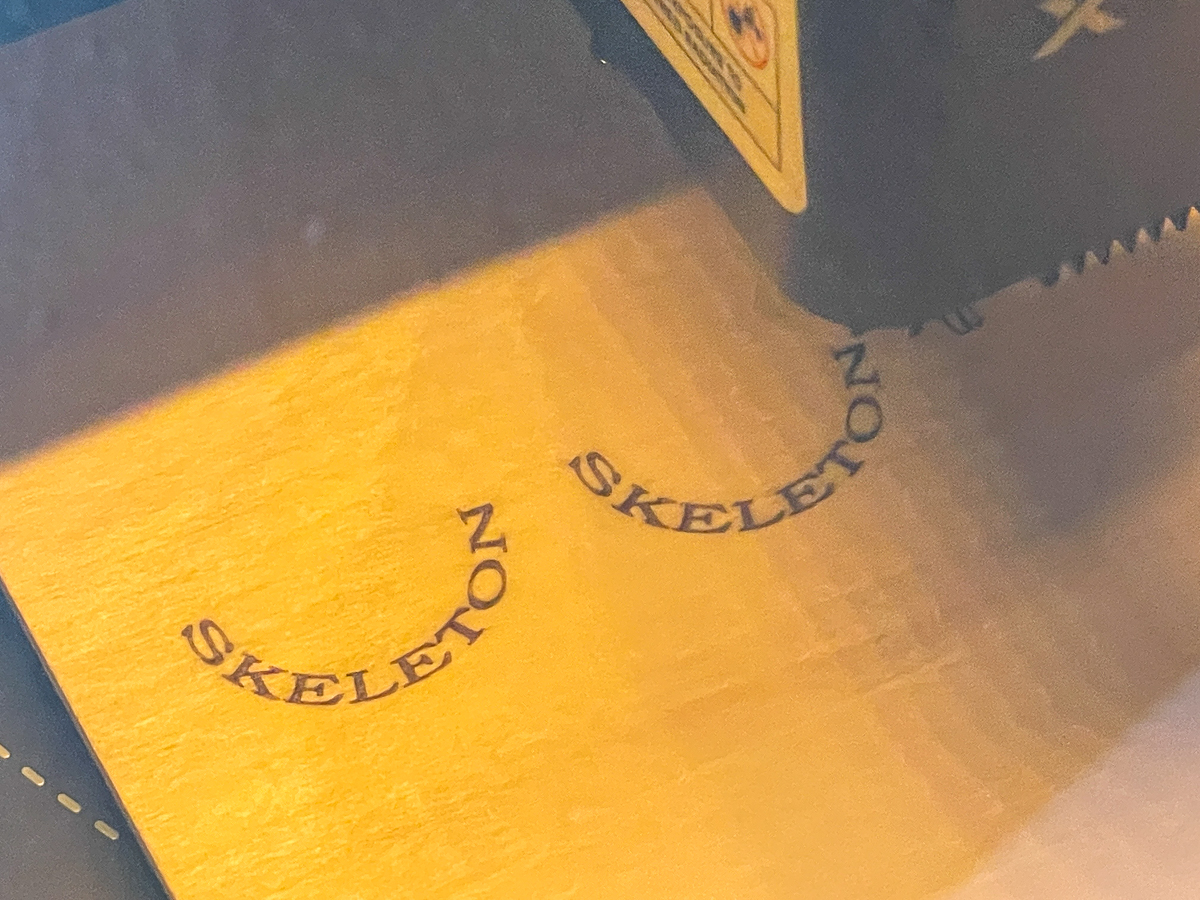

Then it scored the line drawings of the skeletons.
Finally, it cut out each minifigure and base.

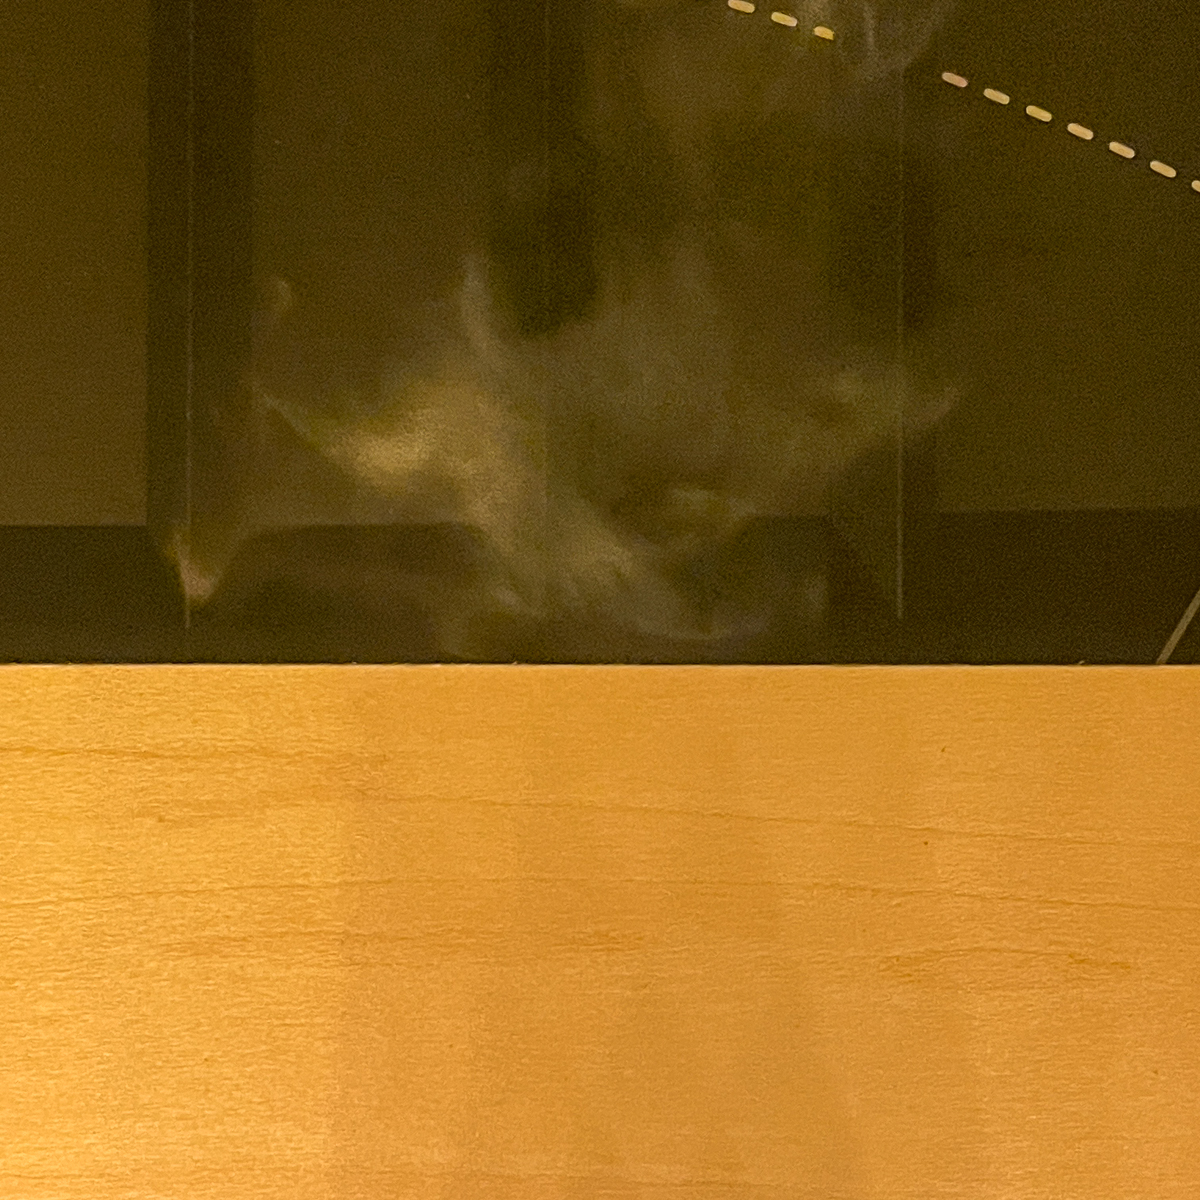
The smoke was pretty light for most of the operations, but really kicked up when it started cutting. You can see how the pyramids underneath really help to improve air flow so the smoke can get sucked up through the fan and out the exhaust. The optional honeycomb panel allows for even more airflow and better support for your materials.

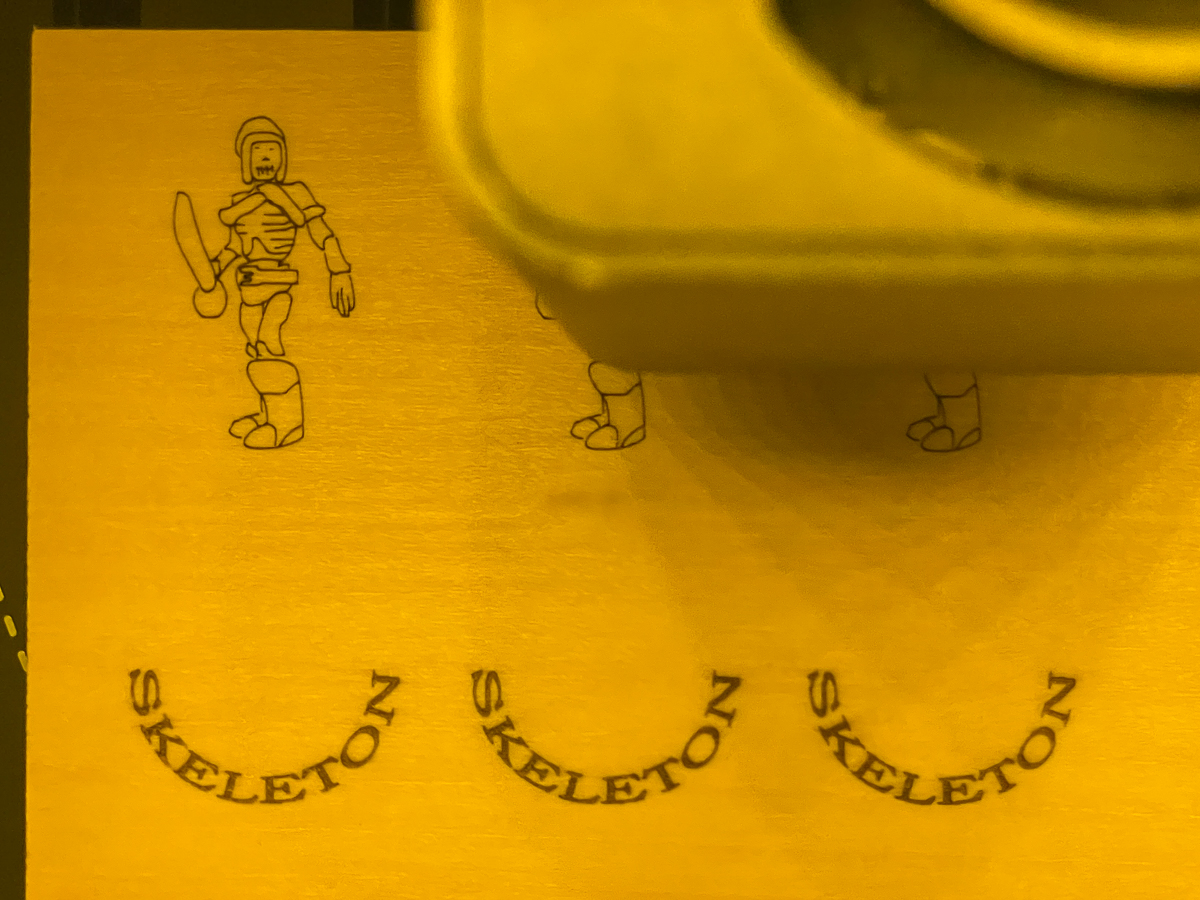
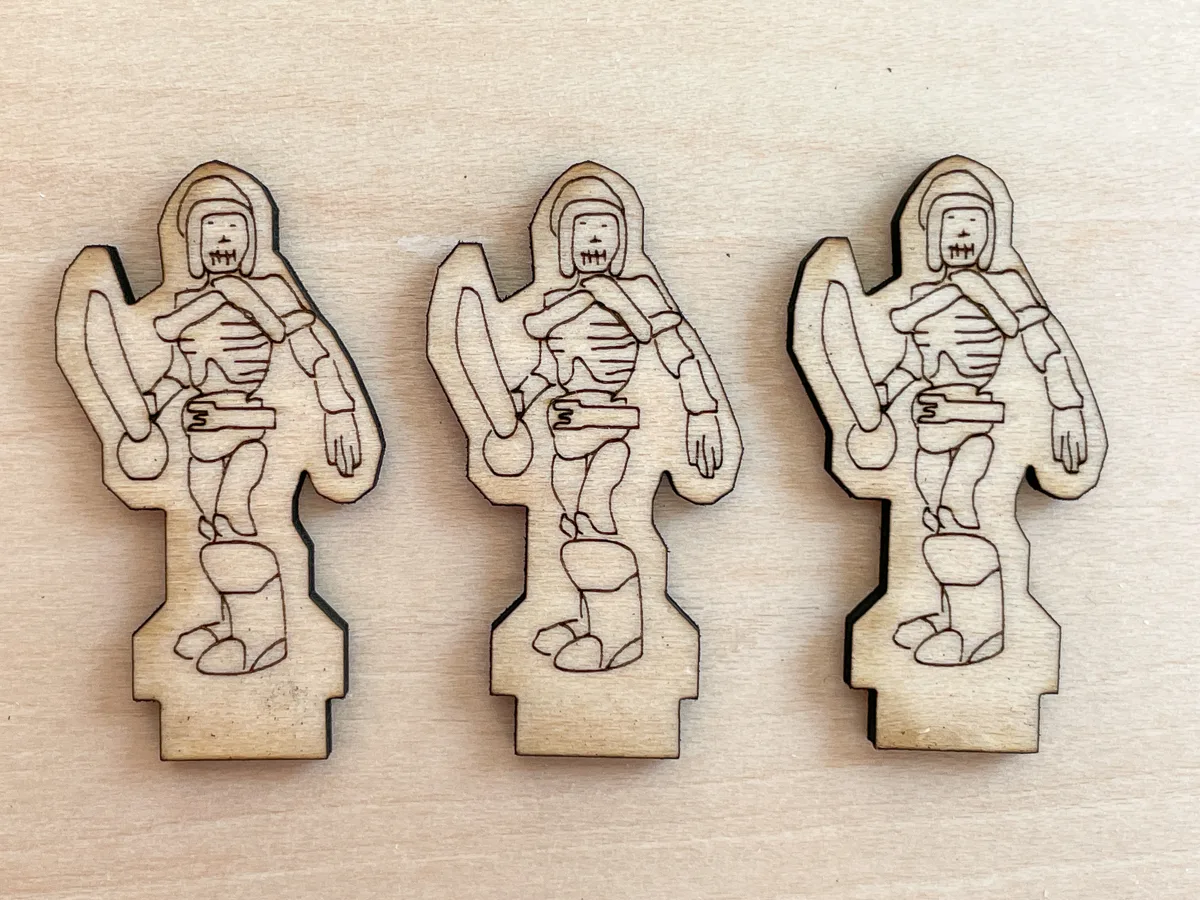
It took about eight minutes to finish these three skeletons. They turned out great!
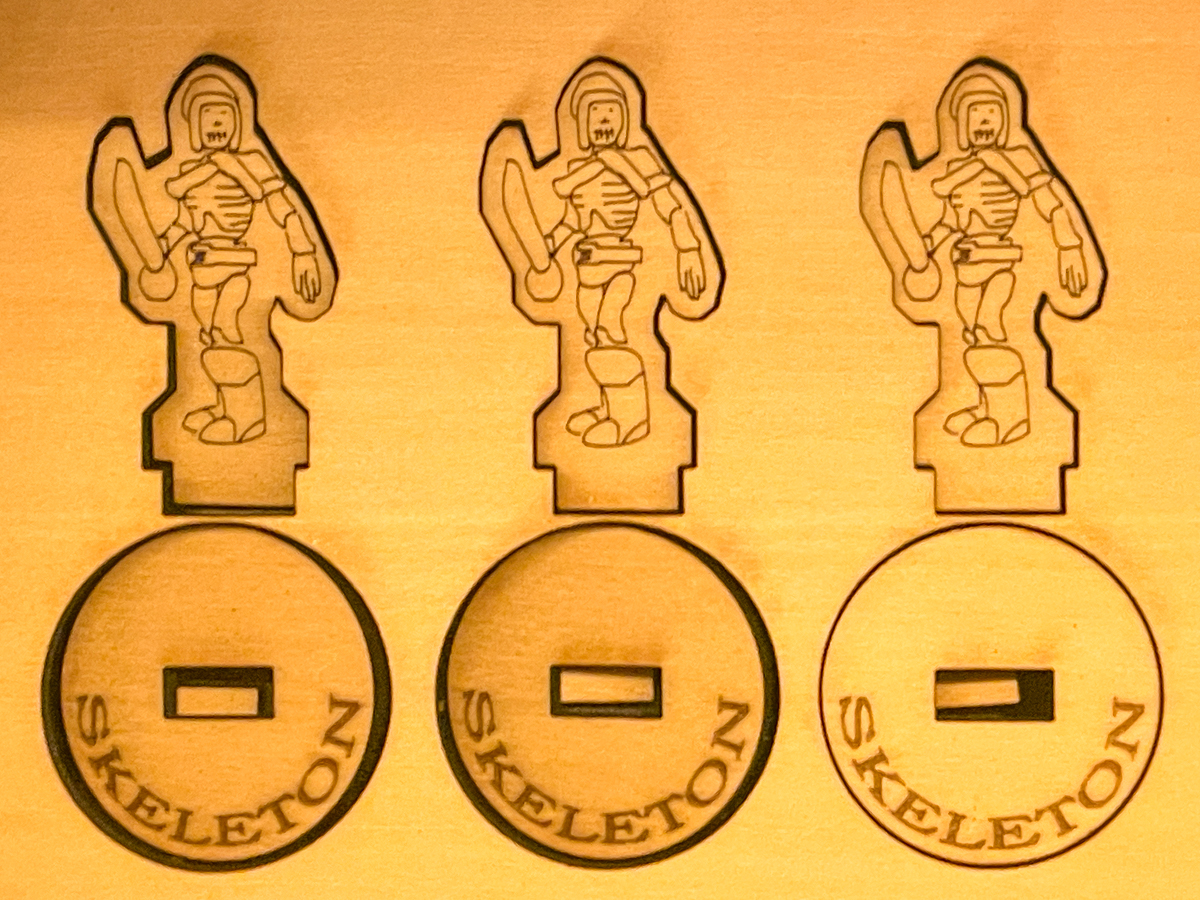
I ran this first batch with the air assist off, so I could compare the results. There's some burning at the bottom of the skeletons and a bit by their heads, but it's not too bad. A light sanding is all you'd need to clean that right up!
My son absolutely loved them! He said they worked great for his D&D session, and immediately requested more characters. You can read the more in-depth tutorial on how I made these and some of my own designs here!

Testing out the blade
I've had a Silhouette Cameo for years, which I use primarily for cutting out stencils for painting signs like this Let it Snow sign or labels for things like this hanging garden tool organizer. But it's been gathering dust in the basement for a while, so I was hoping to get rid of it now that I have this combo machine!
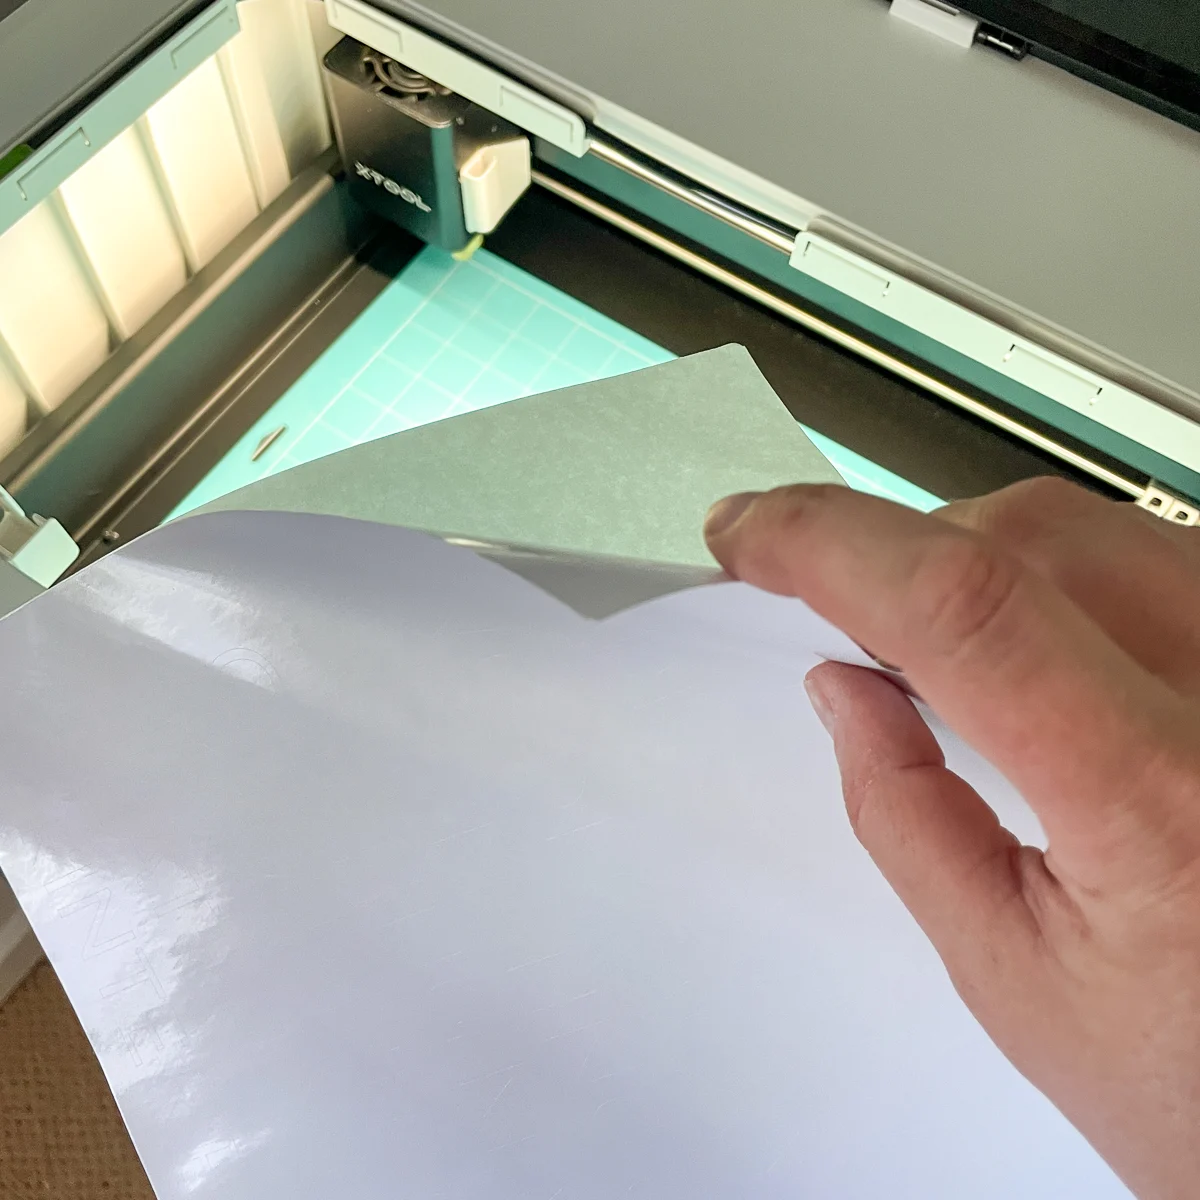
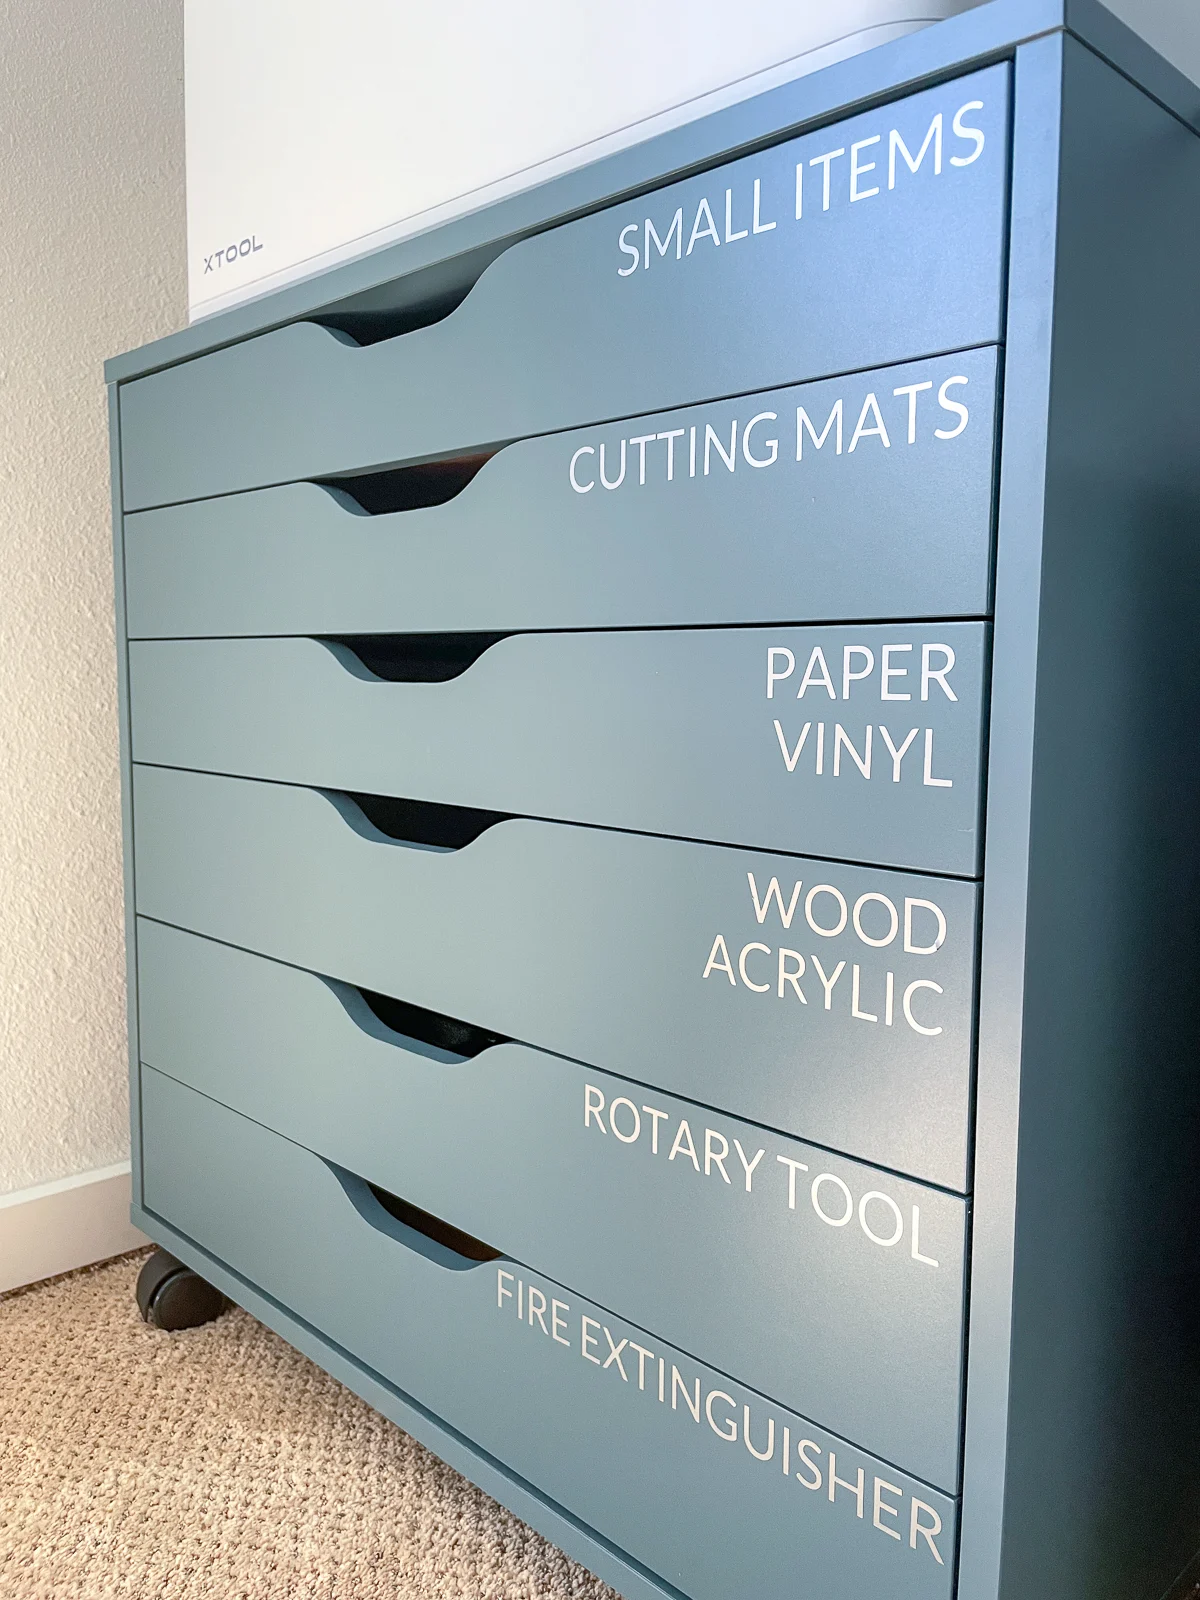
What better way to test out the cutting features of the blade than making labels for the materials! I want to keep all those drawers neat and organized, so I designed some labels to be cut from adhesive vinyl.
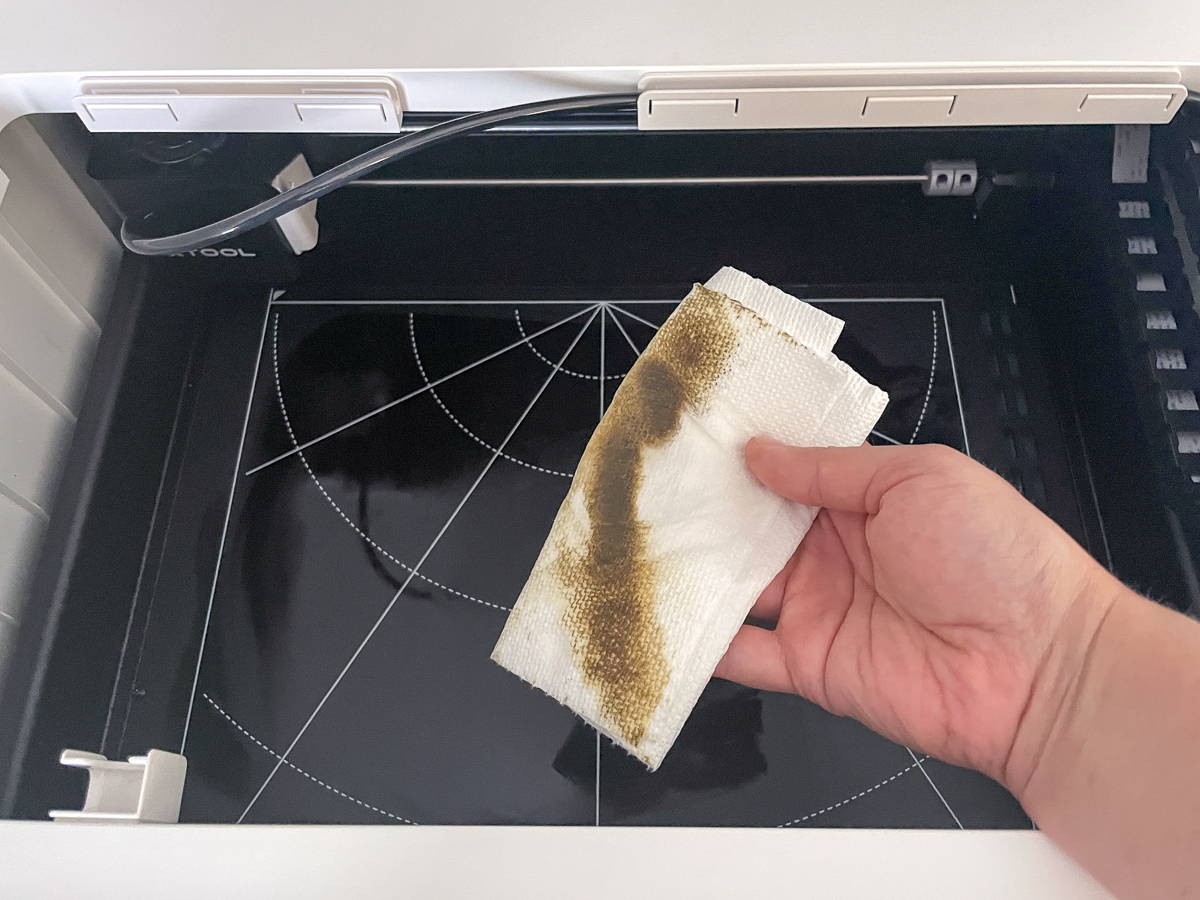
First, I had to clean the bottom of the machine, since it was covered in soot from laser cutting. Then I could remove the air assist nozzle and pop in the blade.

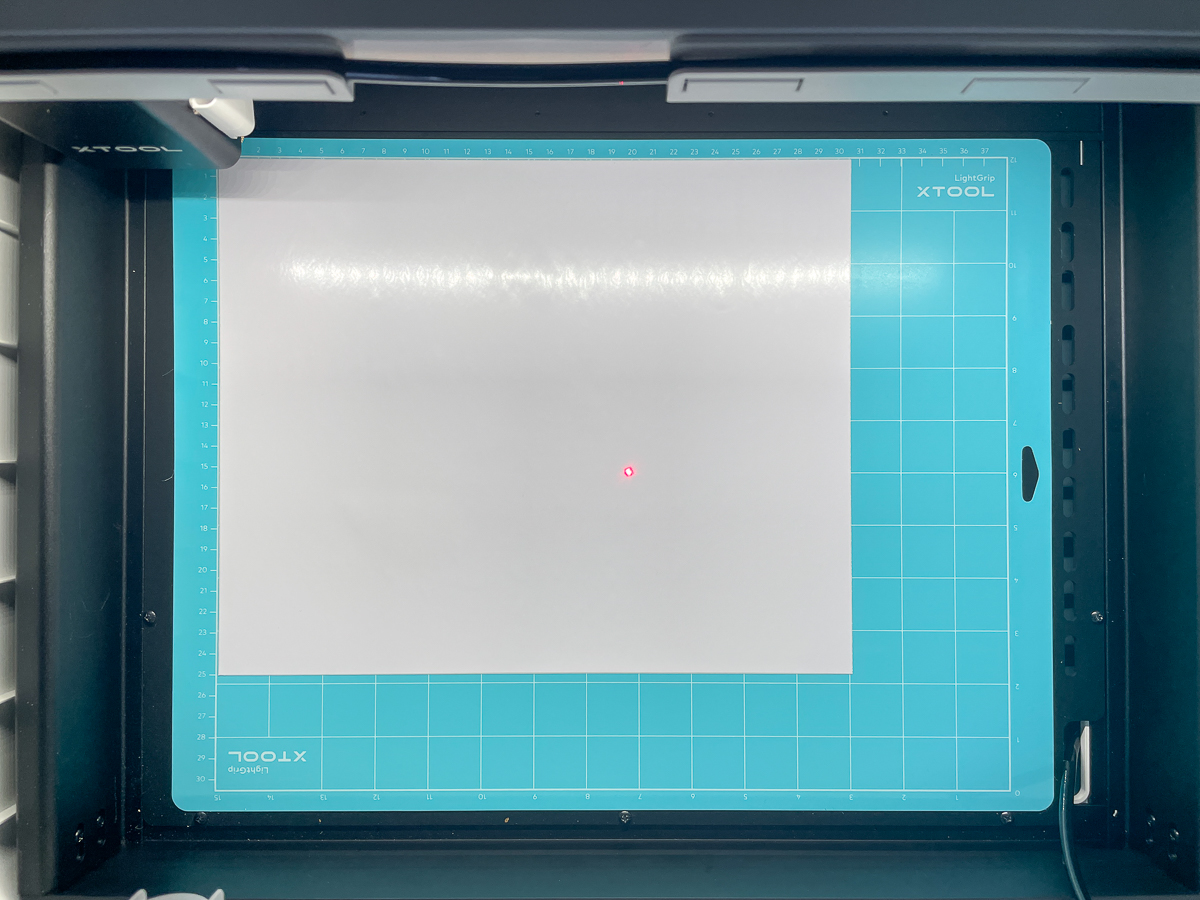
The cutting mats are sticky on both sides, so the mat and the material stay put while the blade cuts. I started off with a test piece of white adhesive vinyl in the machine.
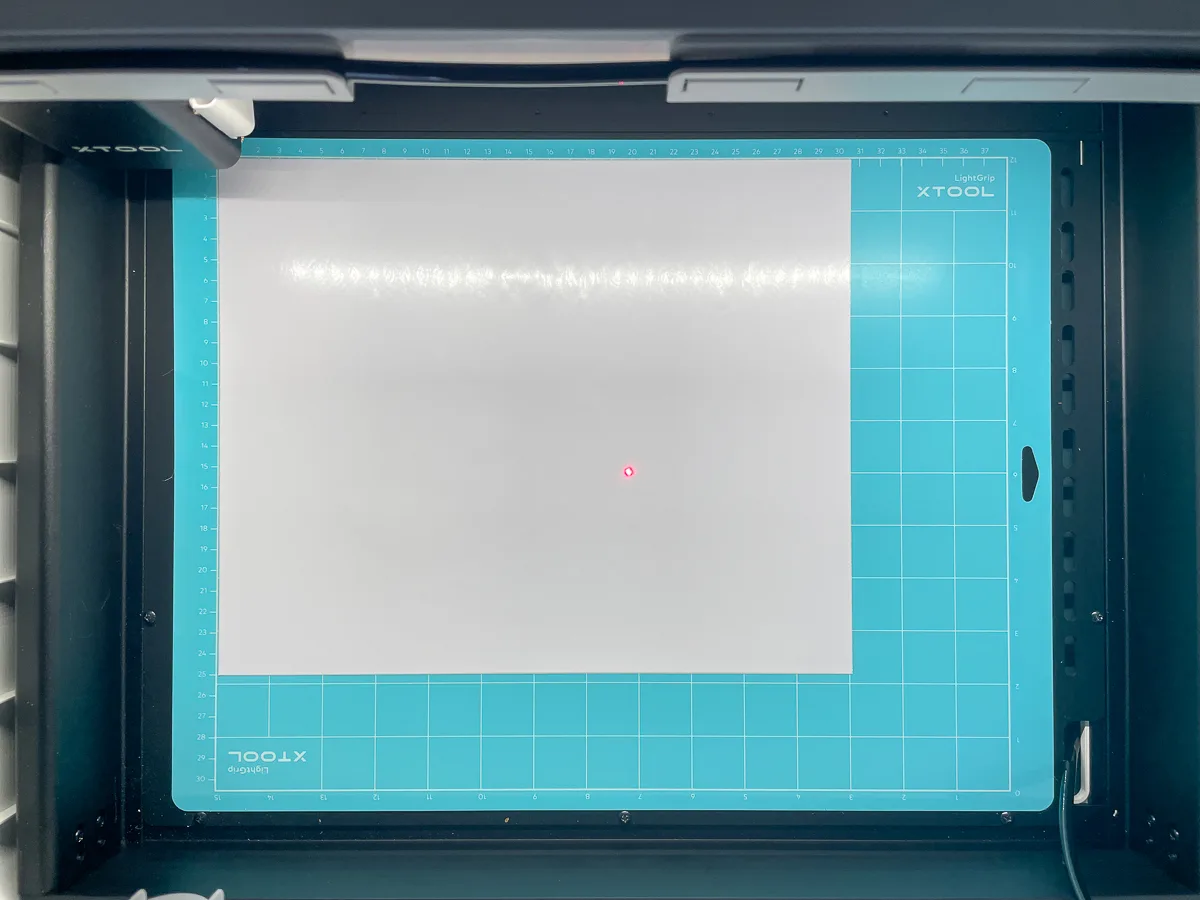
Using the presets for removable self-adhesive craft vinyl, I ran the labels through with the cutter. However, the cut pressure wasn't right and it didn't cut all the way through.
I read that you may need to calibrate your blade when you first get your machine, so I gave that a try next. The software prompts you to place a blank piece of paper in the middle of the cutting mat and run the calibration. Then you select the position that had the lightest cut.

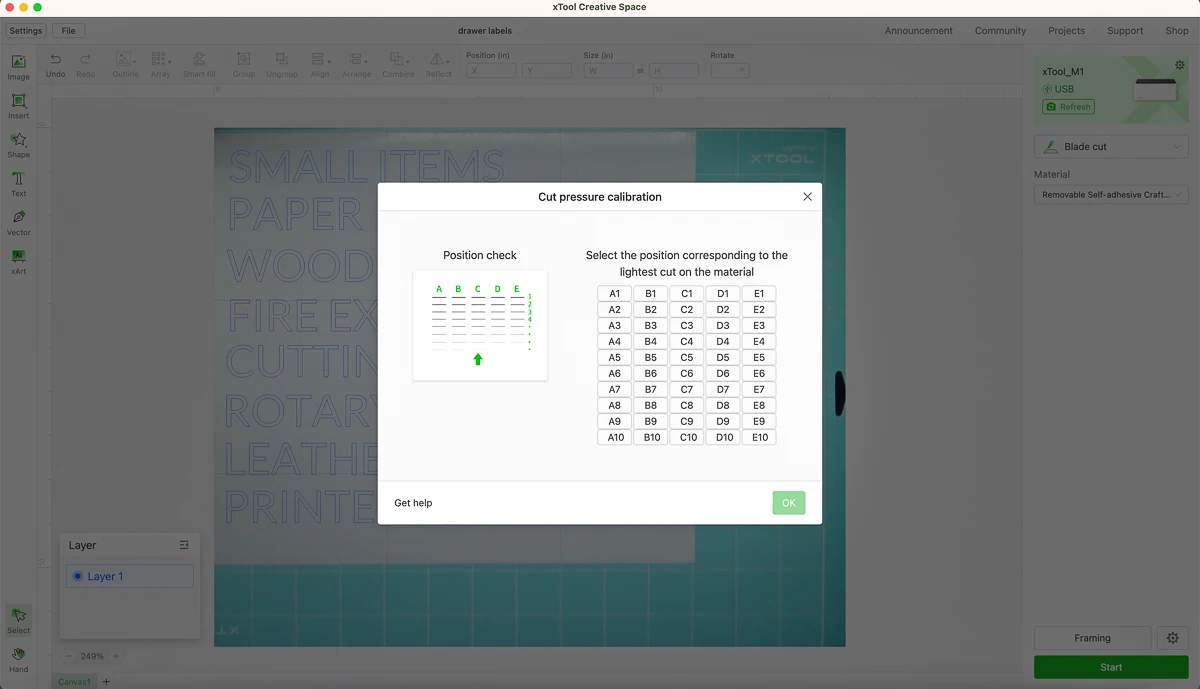
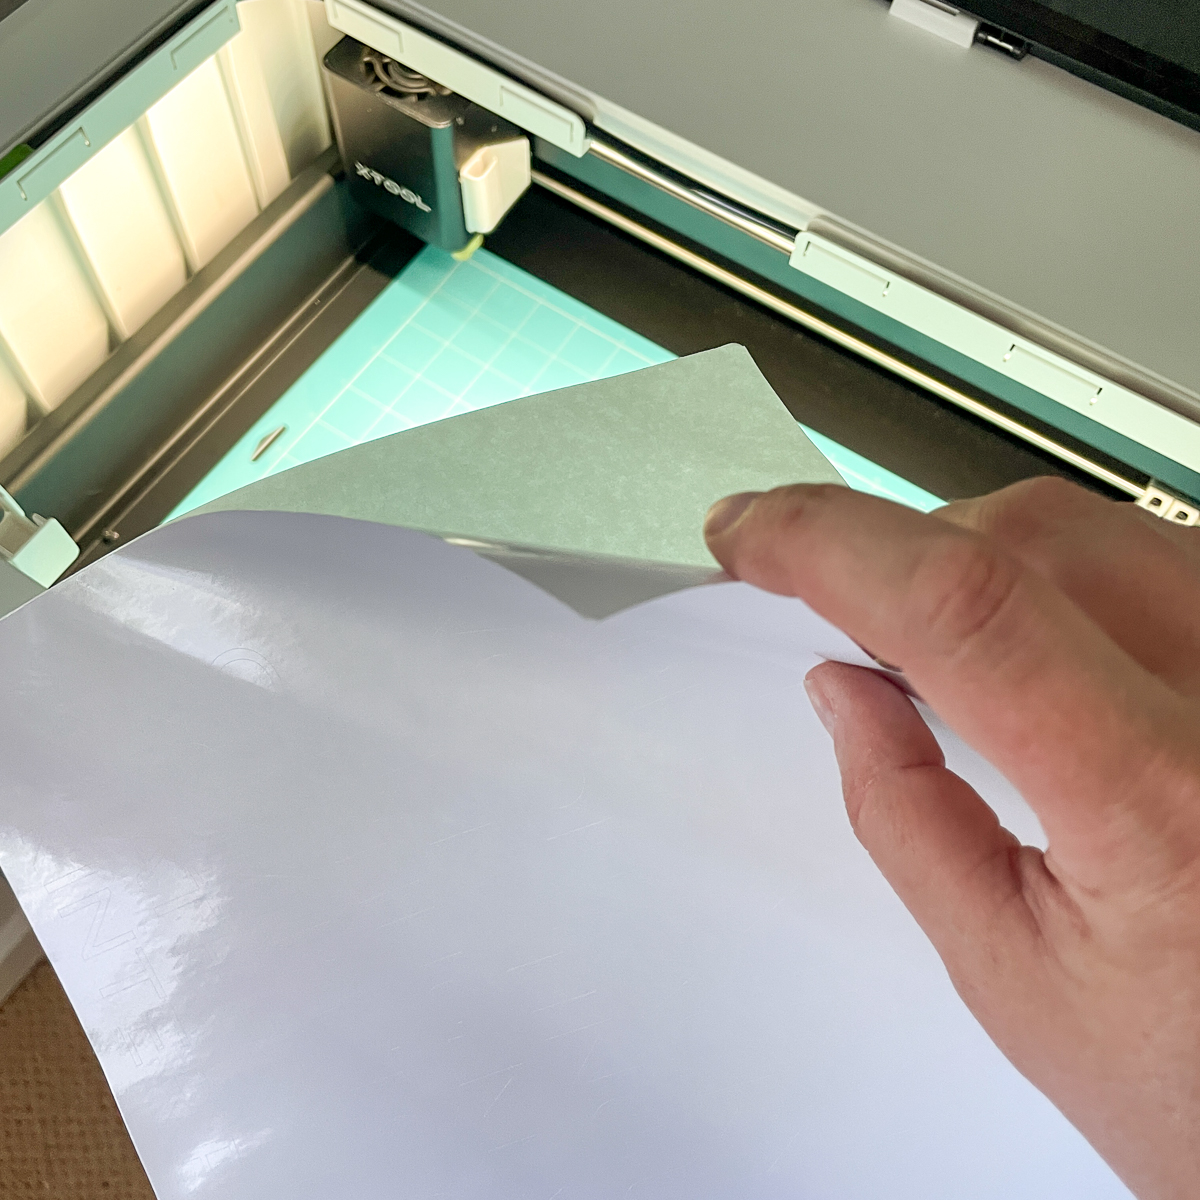
Even after calibration, it took a two more tries to get the labels just right. The next round cut almost all the way through but was stuck at the corners, so I increased the cut pressure slightly, which seemed to do the trick. You want the blade to cut through the vinyl cleanly, while leaving the paper backing intact.
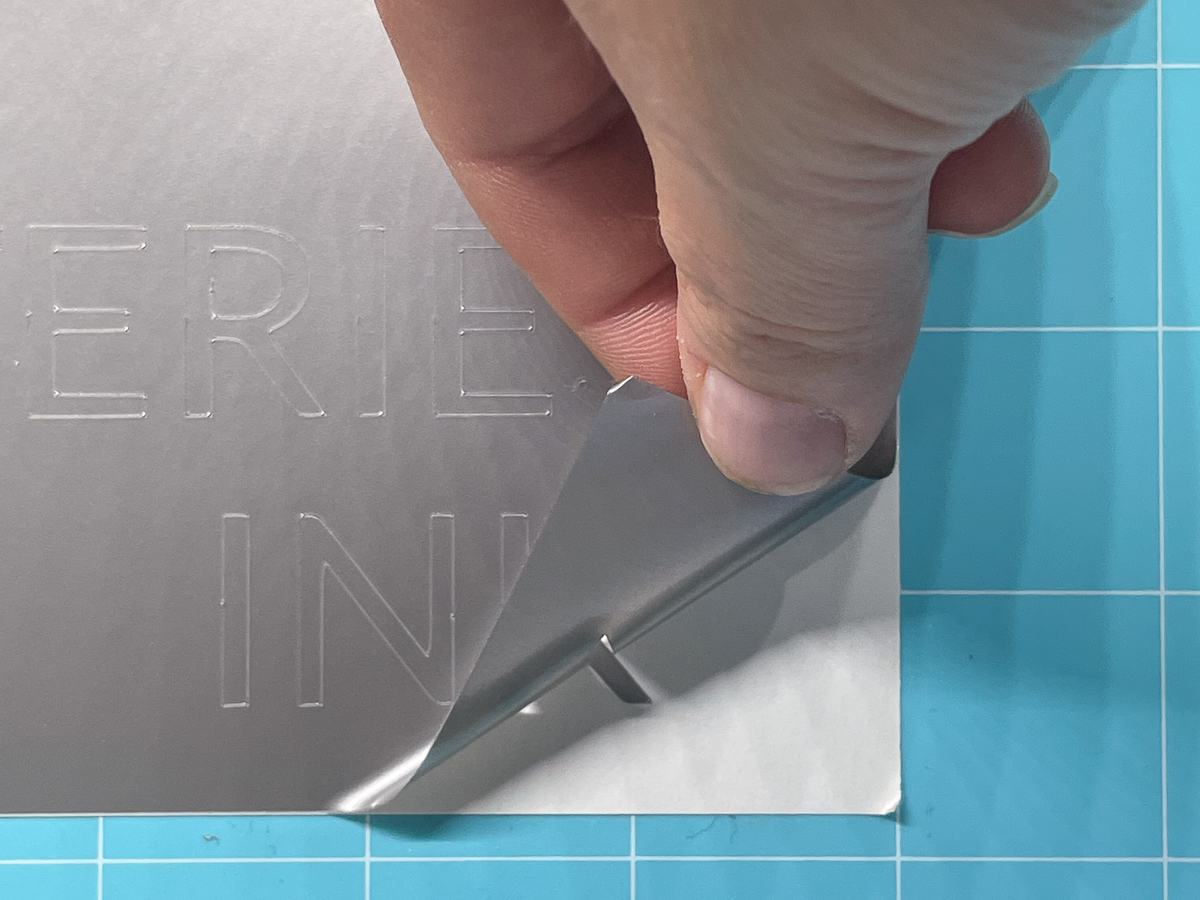

Once all the excess vinyl was weeded out, I used transfer tape to pick up all the letters and stick them on the drawers.


I love how the labels turned out! This will make it so much easier to track down supplies for a laser cutter project, especially that important fire extinguisher!

Final Verdict
I'm really happy with the xTool M1, and I have lots of project ideas that I'll be sharing with you soon! Here are my final thoughts on the product, and whether it's worth buying.
Price
I've wanted a laser cutter for a long time, but the high price always held me back. But you can usually find the basic M1 on sale for around $1,000, compared to the current pricing of $5,000 for the Glowforge.
Combine that with the $400-500 price tag for a Cricut or Silhouette, and the price is even more appealing! If you're short on space, combining a laser cutter and blade cutter in one machine is a great way to enjoy your crafting hobby without taking over an entire room.
Ease of Use
I was surprised by how easy it was to get the laser cutter up and running. I had my first project completed within an hour of setting it up without any issues. I've watched videos of people trying to set up 3D printers or CNC machines, and it can take forever to calibrate everything. The xTool M1 was basically plug and play!
The blade cutter was a little more fiddly, but worked fine once the settings were dialed in. I haven't tested out the engraving function on metal yet, but I'm excited to make my own custom tumblers with the rotary tool!
Cut Quality
I was really impressed with the cut quality of the laser, especially with air assist on. The presets for various materials took all the guesswork out of laser cutting, so you don't waste a lot of material. The recommended settings for 3mm plywood were spot on!
If you're an avid Cricut or Silhouette user who sells products, you may want to hold onto your machine for now. There were a few spots on the letters that weren't quite as crisp as I would like, although that may be fixed by switching to a 60 degree blade. It also took longer to cut, so if you're cranking out a lot of product for sale, it may slow you down.
But if you don't have a cutting tool and were thinking of getting one in addition to a laser cutter, the M1 is a great choice! Since I only used mine occasionally, I'll be selling it to save space and stick with this combo machine for all my cutting projects.
If you're looking to make crafts with various materials as a hobby or even a small business, the xTool M1 can tackle a lot of jobs all in one box! I'm really excited to make more projects with this amazing tool!
Do you have a laser cutter (or are thinking of getting one)? I'd love to hear about what kinds of projects you like to make with it in the comments below!
Check out these projects you can make with the xTool M1!