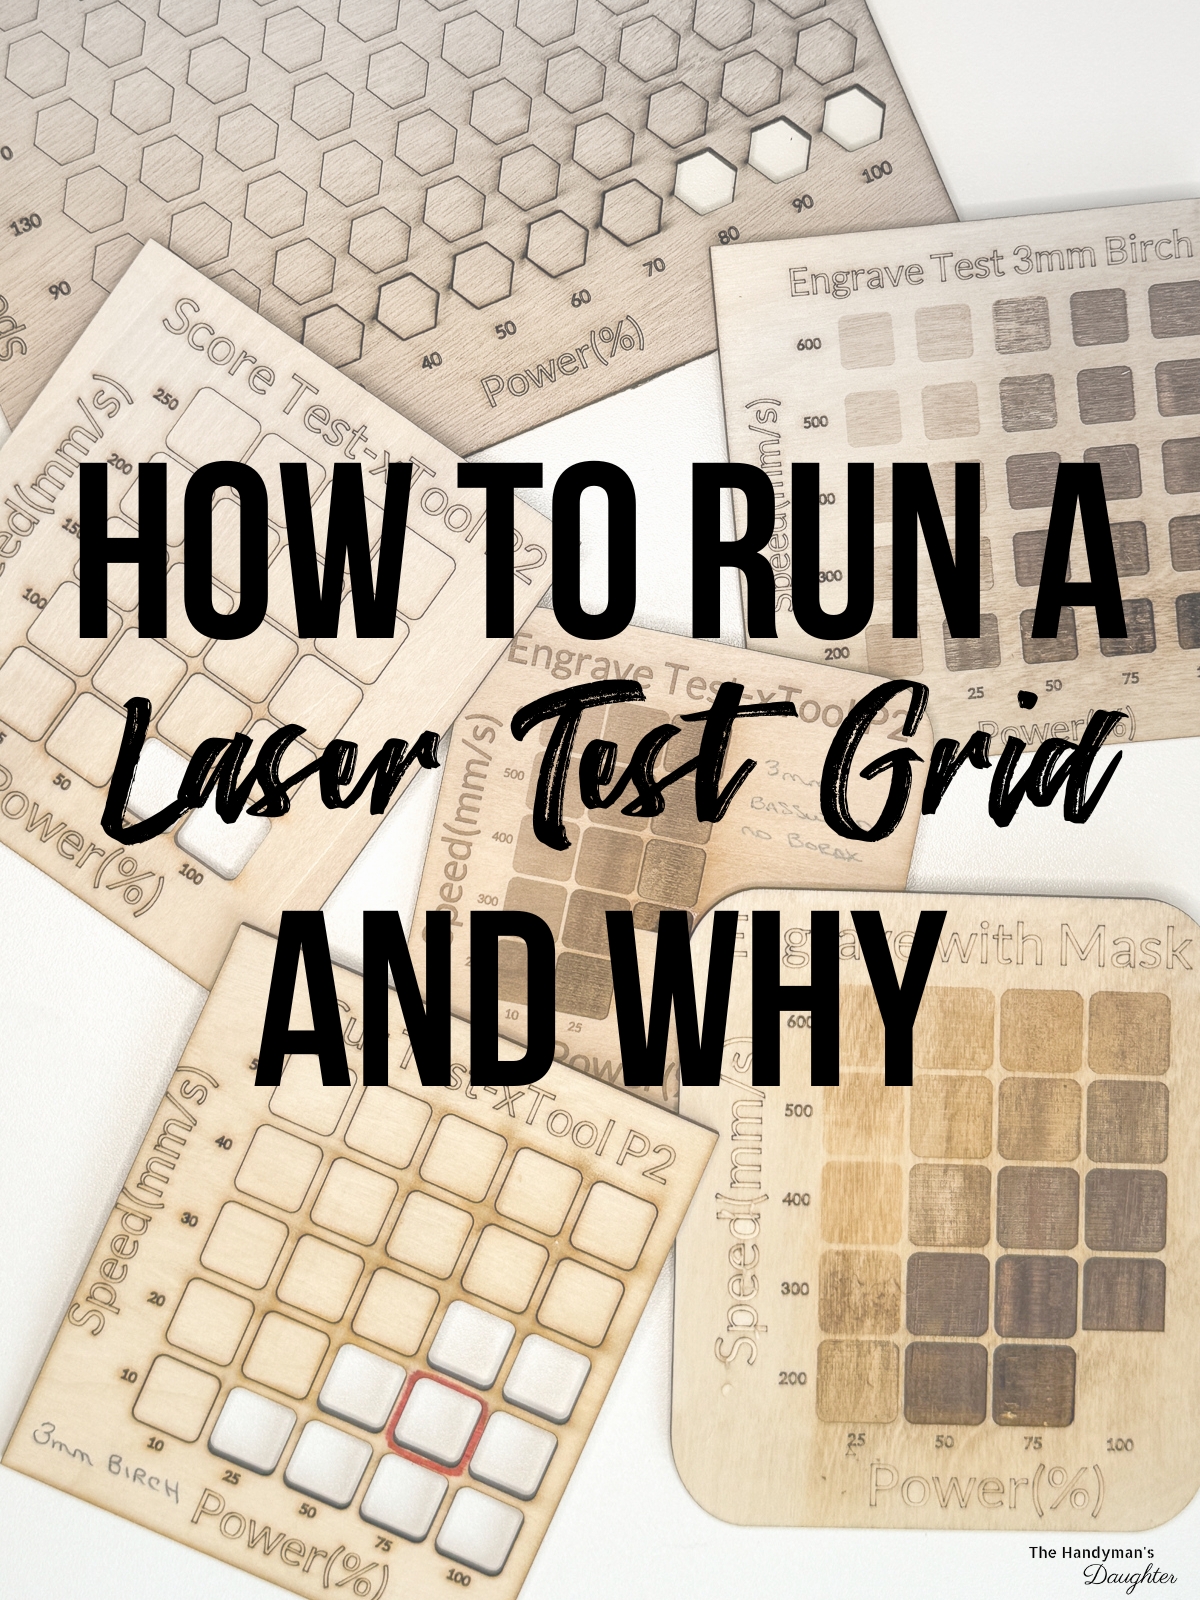
Stop wasting material and learn how to run a laser test file! I'll show you how to dial in your laser for the best results every time!

When I got my first laser machine, the xTool M1, I knew nothing about laser cutting and engraving. But I kept seeing cool projects in my Pinterest feed that I really wanted to make, so I dove in and figured it out as I went.
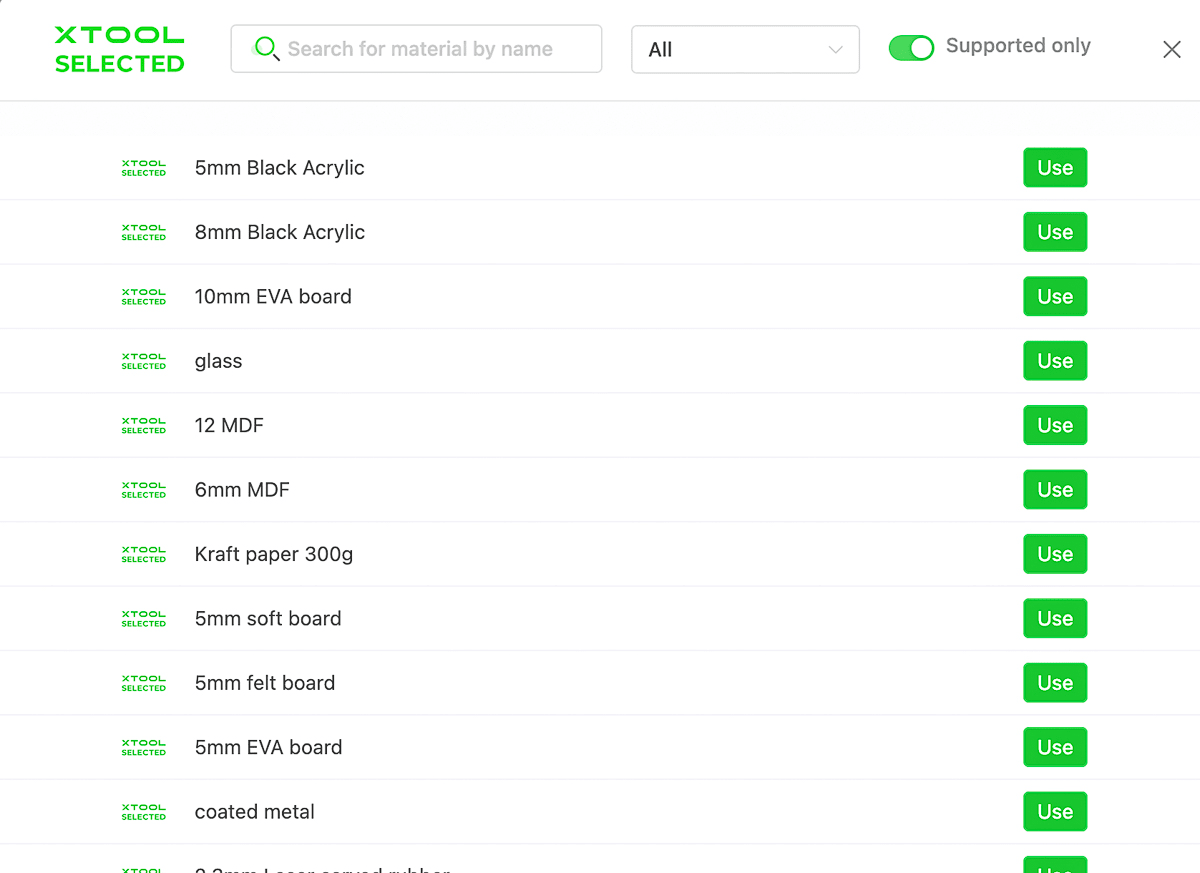
Luckily, xTool makes it easy to get started, with pre-set speed and power configurations for many of the materials you'll want to use.

But all these presets are just suggestions, and every laser is different. A setting that causes charring on one machine might not even cut through on another!
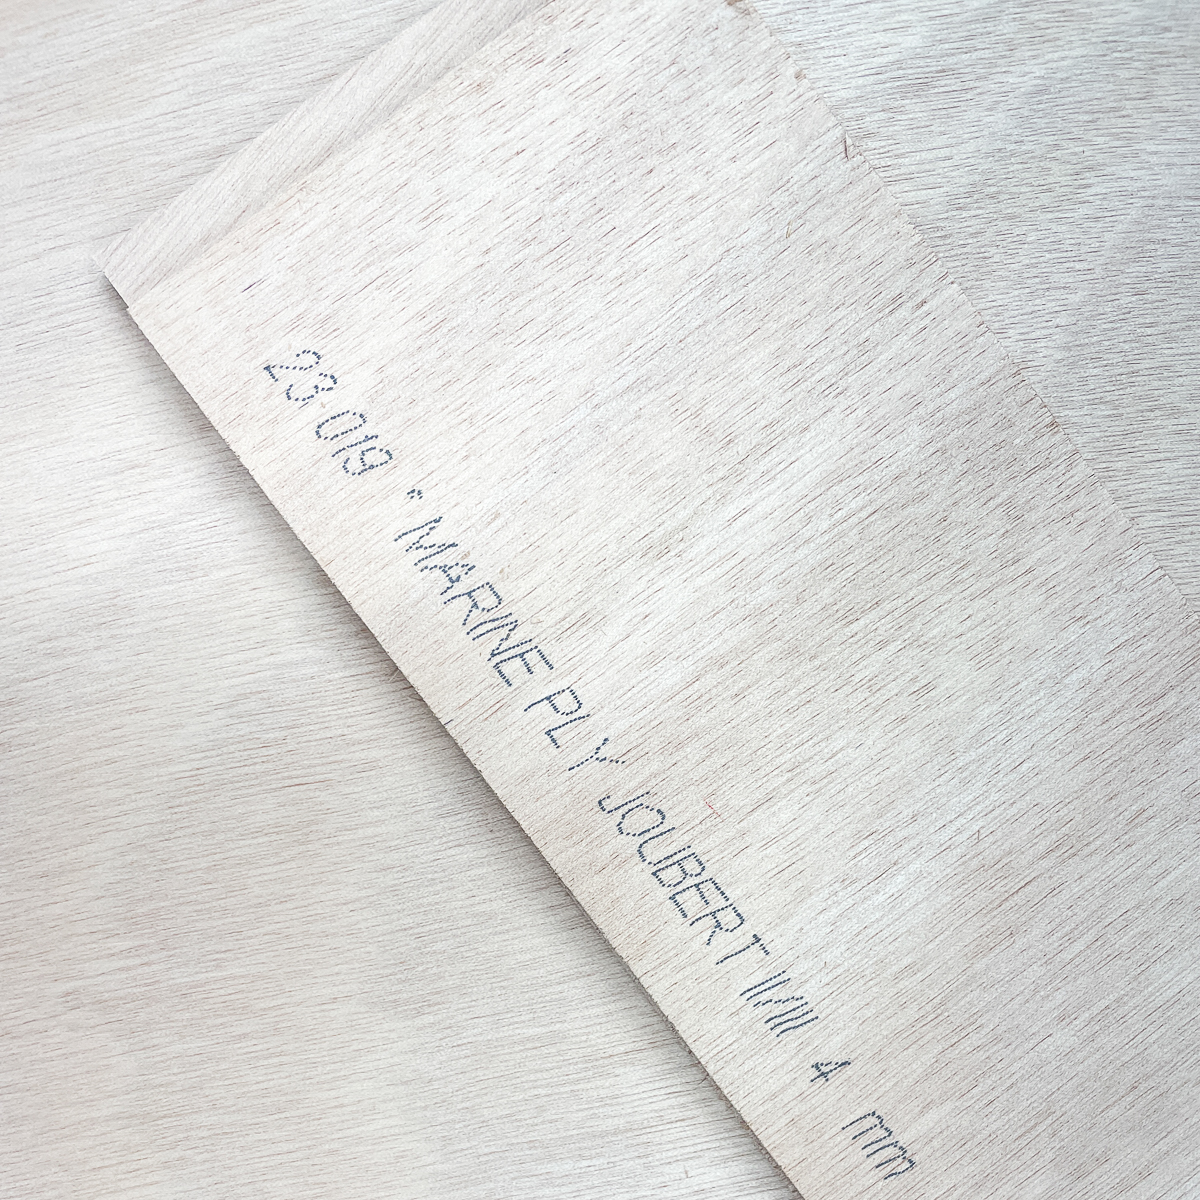
Or maybe you want to try a new material that doesn't have a preset. I bought a sheet of 4mm marine plywood to create these raised bed garden labels, and that thickness isn't anywhere on the list!

Before diving into your next project, consider running a laser test file first. This simple grid will help you determine the optimal settings for your specific machine, ensuring that you get the best results without wasting materials.
Don't have a laser, or looking to upgrade? Use the code VINETA100 for $100 off an xTool laser! Click here to check them out!
This post contains affiliate links for your convenience. Purchases made through these links may earn me a small commission at no additional cost to you. Please visit my disclosures page for more information.
Why you should run a laser cutter test file
To be clear, you don't have to run a test EVERY time you want to use your laser. I'll typically run one if it's a material I've never used before, or if I'm having issues like this.

Here are some things to consider when deciding if it's worth sacrificing some material to test.
Fine tuning the speed, power and time to cut
You control your laser with the speed, power and lines per inch settings. Typically, you want to choose the fastest speed and the lowest power that gets the result you want.
Adjusting the laser's power can dictate the depth and intensity of a cut. Higher power usually means deeper, darker engraving or even cutting all the way through. On thin material, like this translucent flex I used to make bookmarks, higher power leads to unsightly melted edges.

On the flip side, the speed at which the laser moves can influence the precision and clarity of the cut. Fast speeds might lead to lighter marks or incomplete cuts, while slower speeds, especially with high power, can result in burns, charring or even fire.

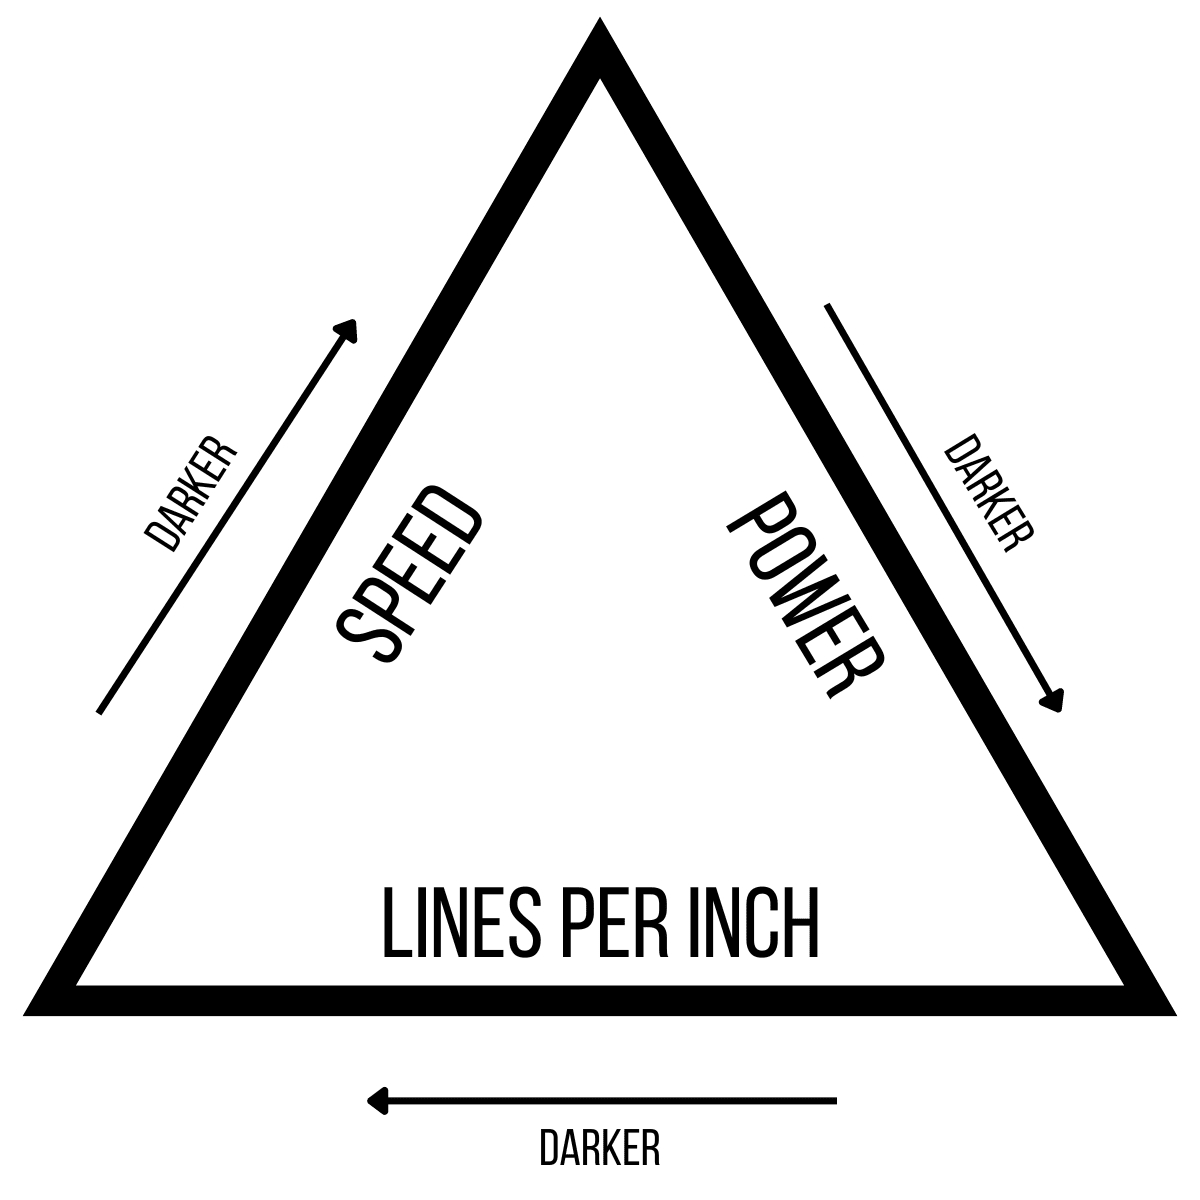
Lines per inch only applies to engraving, and it help get a cleaner, darker image. As the lines get closer together, they become more uniform in color.
Keep in mind that running a CO2 laser like the xTool P2 on 100% power every time can decrease the lifespan of the tube. This isn't an issue for diode lasers like the M1, but full power may not always get you the best results.

Safety precautions
Running a test file is your first line of defense against potential hazards. You can see how your specific material reacts to various speeds and intensities on a very small scale, before you commit to a huge project.
For example, you may find that your cheap plywood is full of glue pockets between the layers that cause flare ups in your laser. By running a test card first, you can spot these issues and avoid bad materials.
Avoids costly mistakes
Picture this: you've got this fancy, expensive material (like acrylic) and you've been working for hours to create your design on the computer. You hit start on your machine and let the laser to do its thing...and find out half an hour later that it only cut halfway through!
If you had done a laser cutter test file on a scrap of the material first, you would know exactly what settings would give you the perfect result. Sometimes you can salvage it by running the same file through again without moving the material, but if it shifted even slightly, you'll need to start over with a new piece.
Consistency in production runs
If you're mass producing items for sale, the goal is uniformity. You don't want one design to be charred around the edges while the others barely cut through.
When you switch suppliers, you can't be sure that their 3mm plywood will turn out exactly like the previous batch. Different plywood grades can have a range of imperfections, such as voids or patches, that can affect the final result.
Running a test file when you change up your material, even if it looks the same, helps eliminate headaches and surprises.
How to create a laser test file
While you can buy files on Etsy with everything you need to run a test, it's really easy to make your own! I'll be using xTool Creative Space for this, but you could also use Lightburn or other laser software.
Select any shape, and make it ¼"-½" big. With the shape selected, choose which operation you want to test: score, engrave or cut. Make sure you select this before you create your grid, or it will default to score.
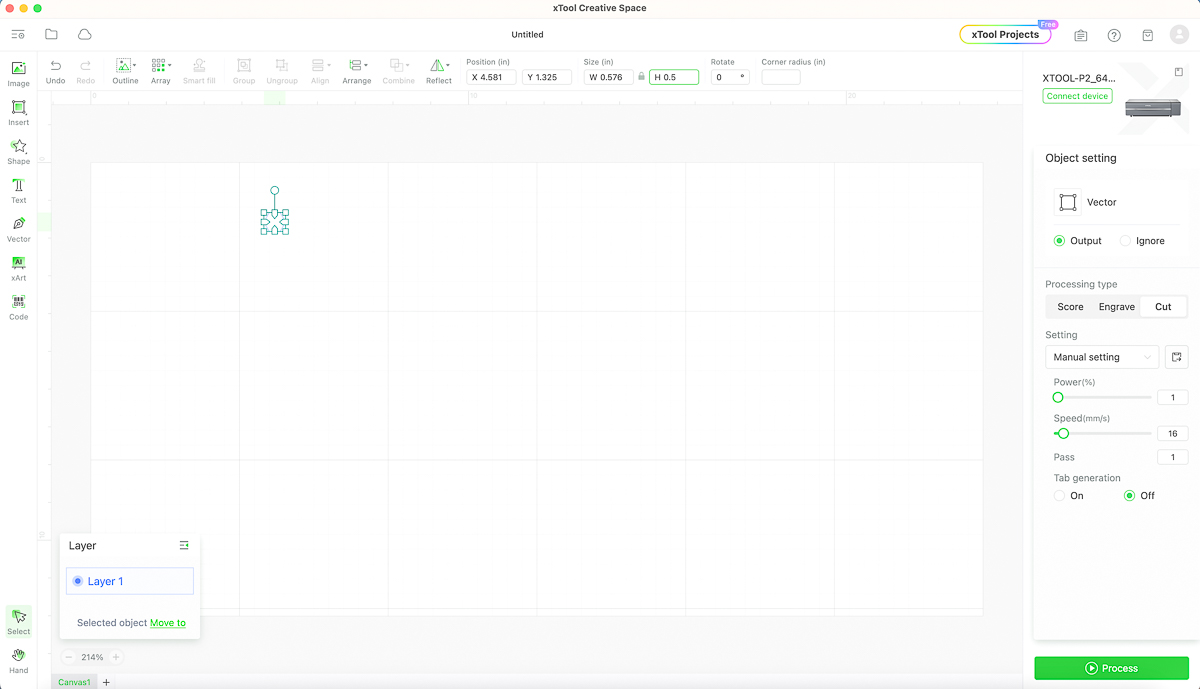

Next, go up to Array in the top tool bar and select "Material Test Array."
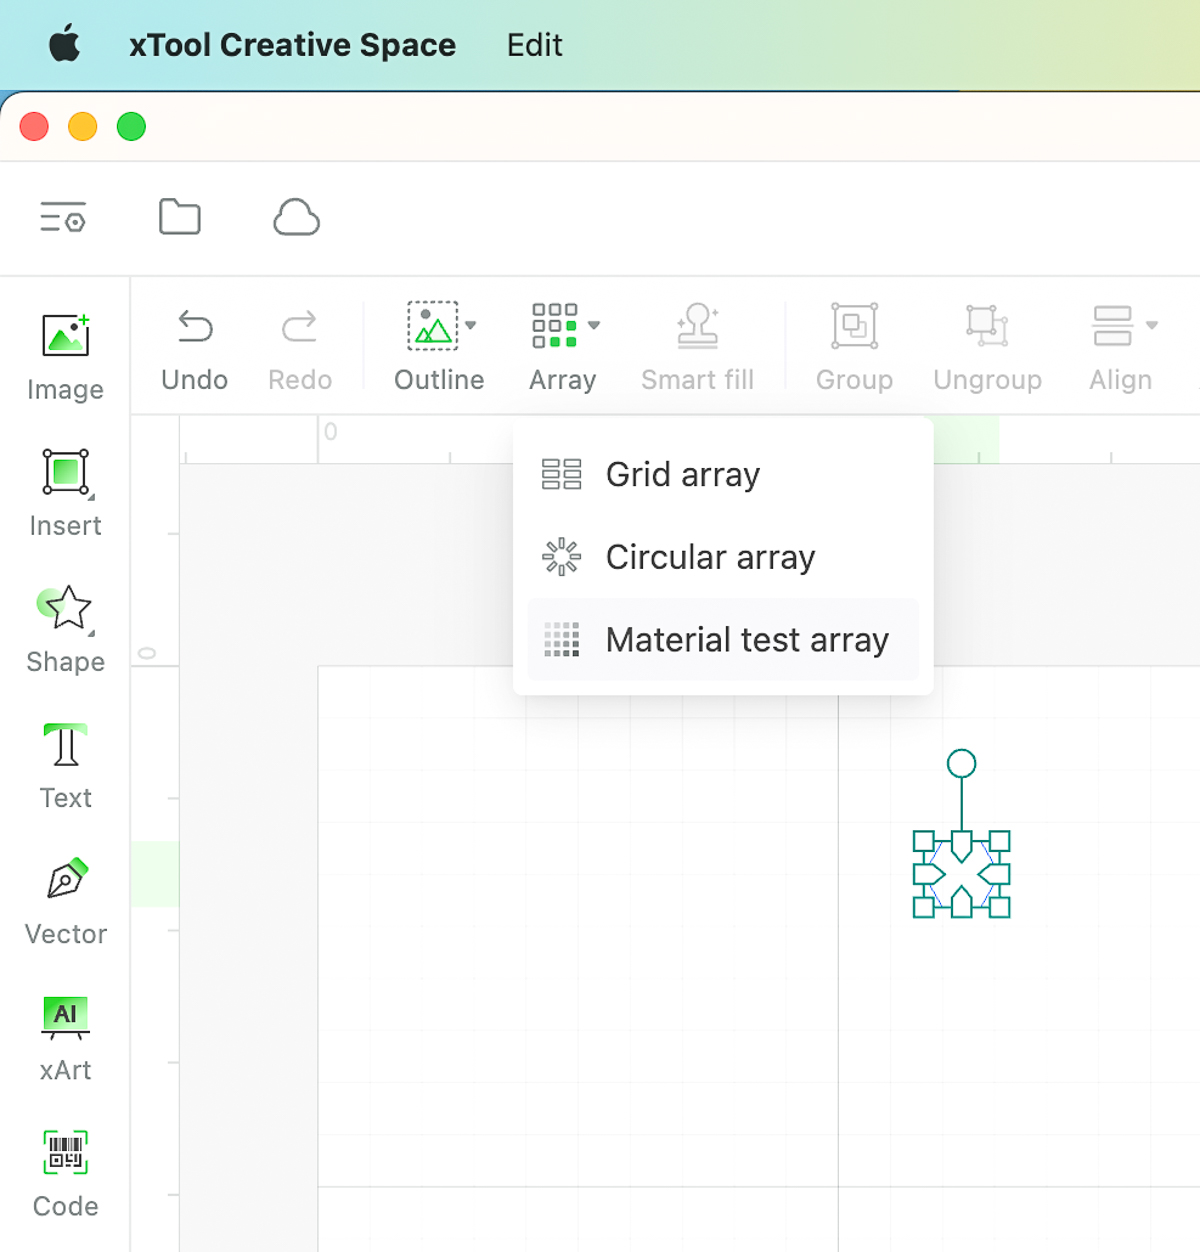

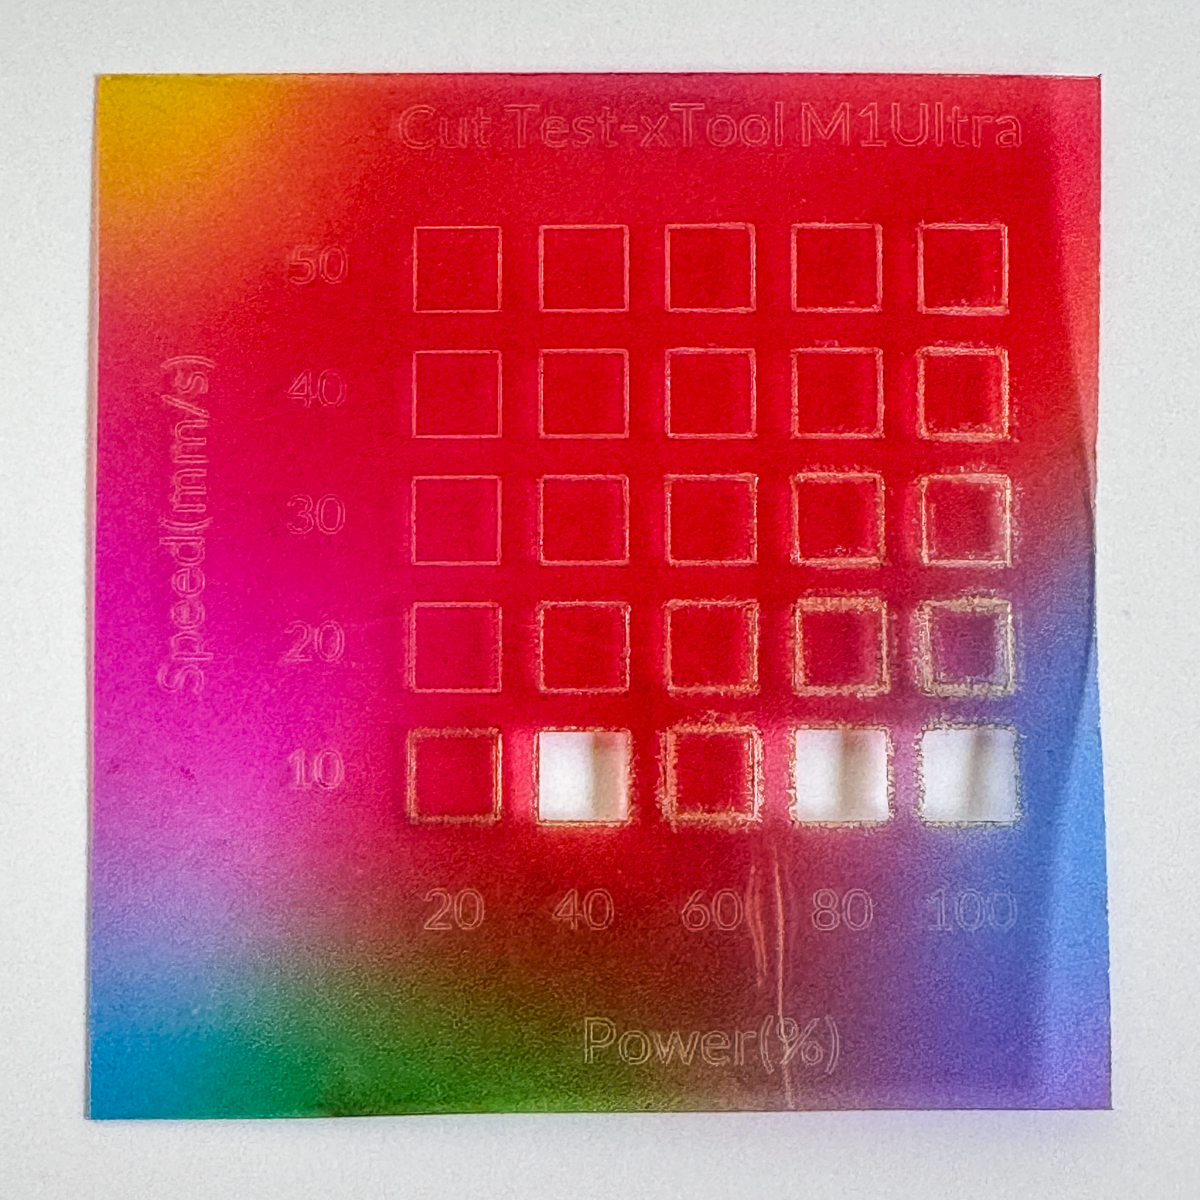
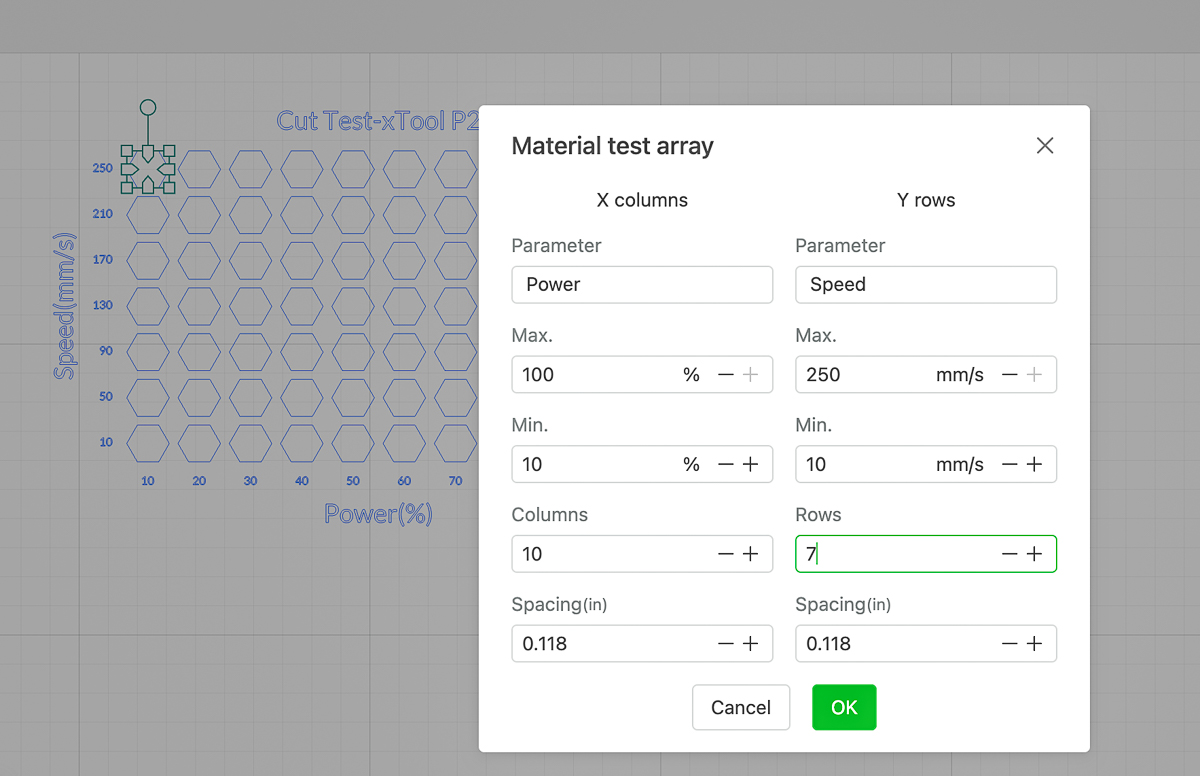
A box will pop up with all the options you need to create your test file. I tend to adjust the power more than the speed, so I chose 10 columns for power and 7 rows for speed. You can see the numbers on the grid change as you adjust the number of columns and rows.
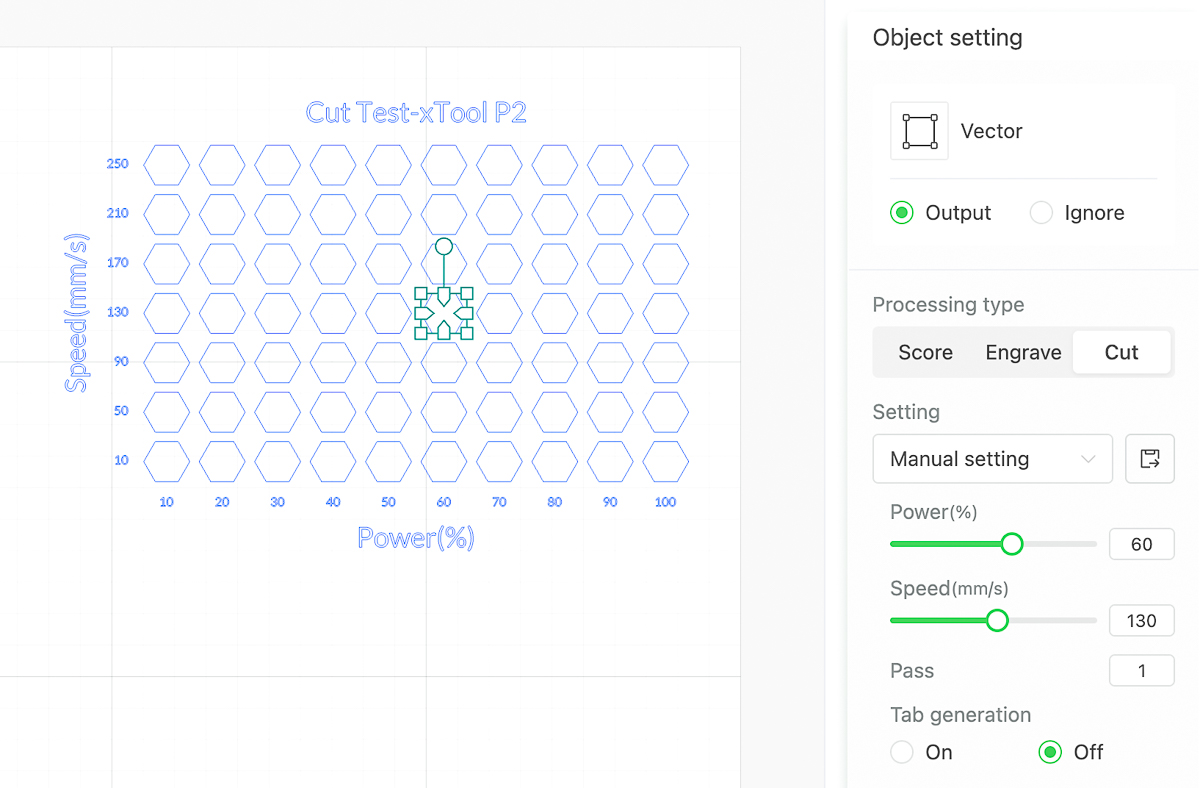
xTool Creative Space automatically selects the max speed for your machine, whether it's the M1, the P2 or any of their other lasers. Ungroup the array and pick one at random to make sure that the numbers in the grid correlate to the correct laser settings. Looks good!
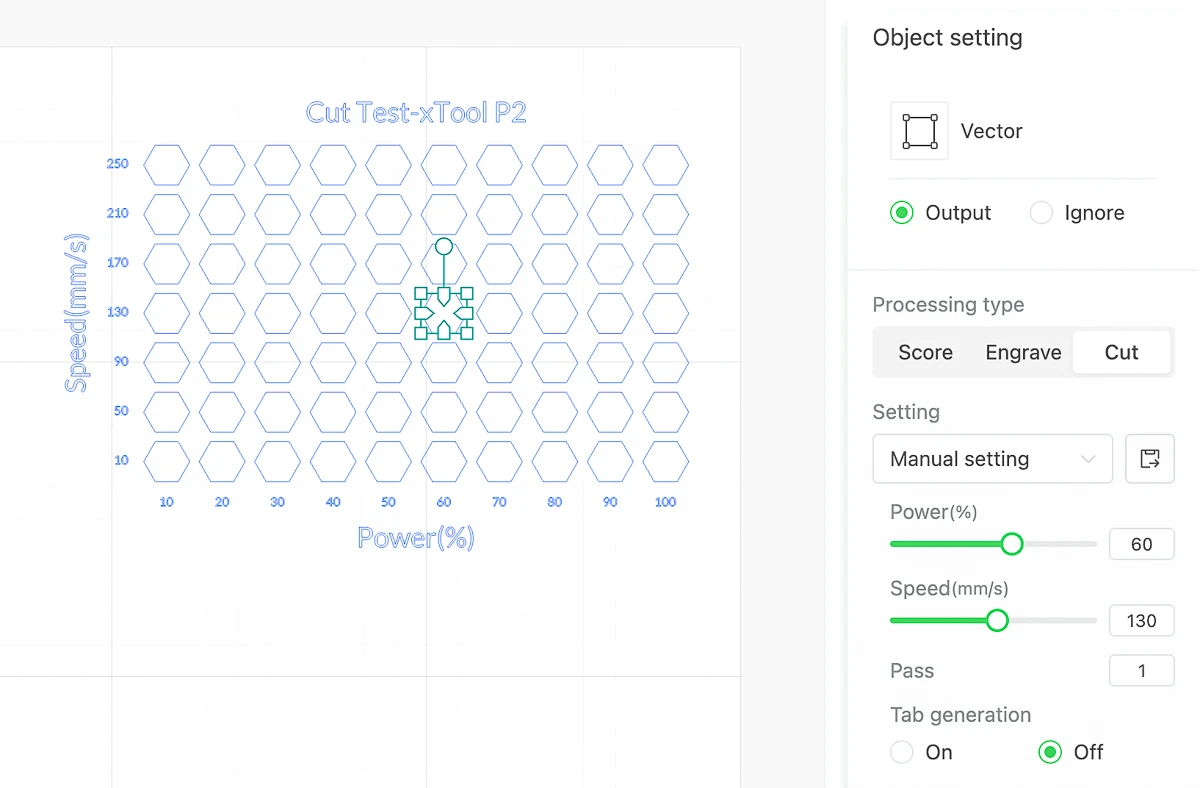
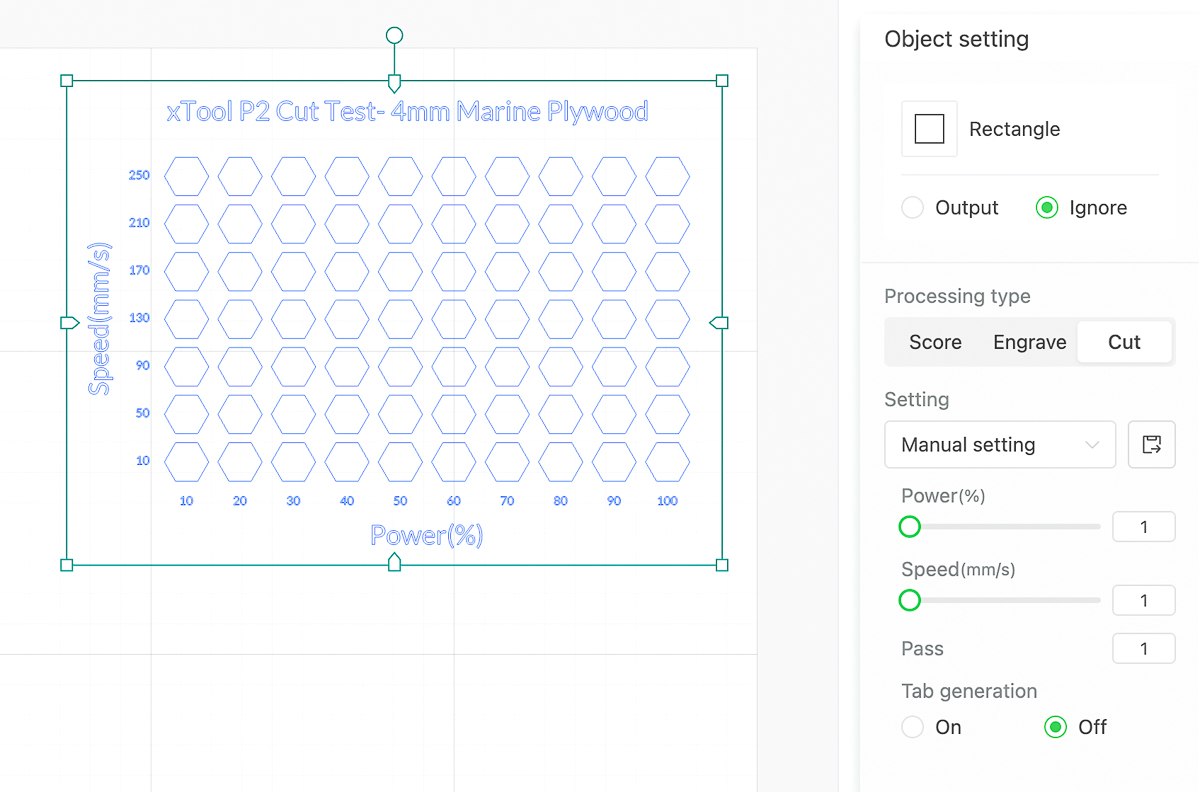
Before you fire up the laser, you may want to change the title at the top to indicate the model and material used in the test. I also add a box around the grid so I can cut it out and save it for later reference. Set that box to ignore for now, because you'll learn which setting to use during your test!
Running the laser test
Time to test! Put the material into the machine and hit process to start it up. Make sure you watch as your laser the whole time, especially at low speed/high power, to stop it in case of fire.

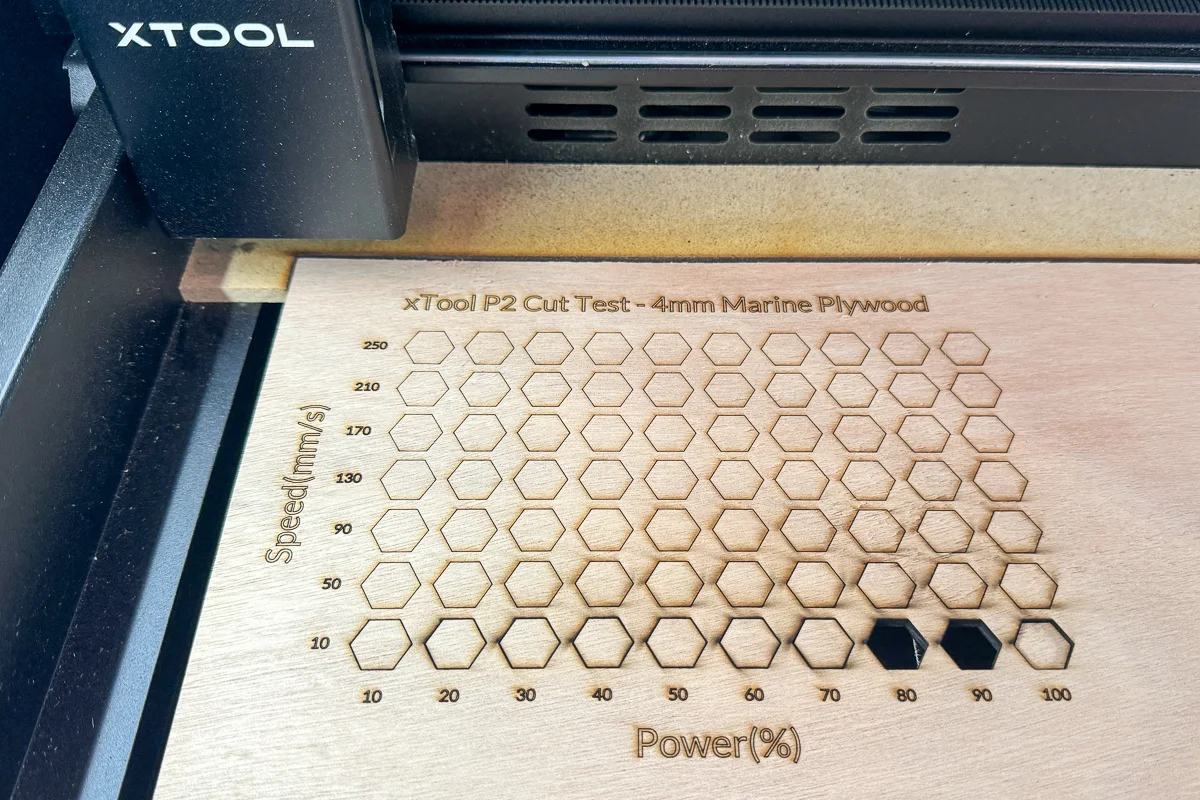
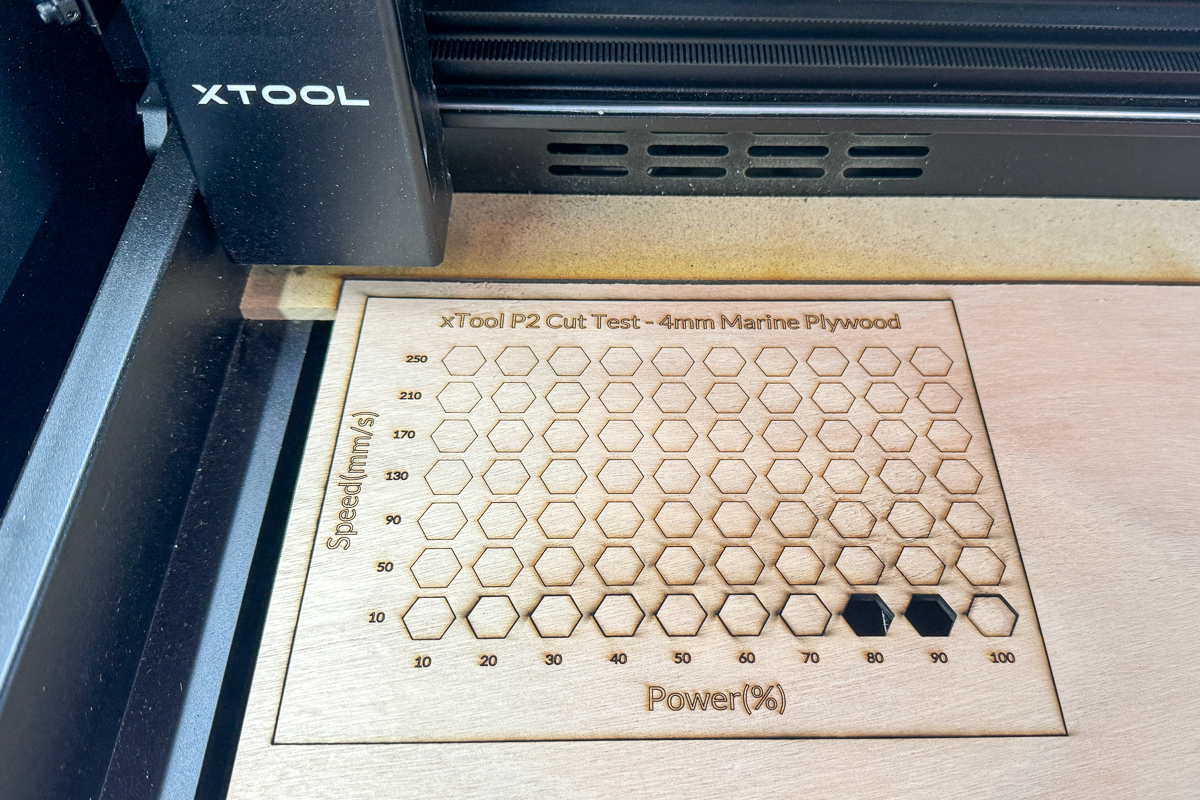
This test cut shows that the thicker 4mm plywood with exterior grade glue between the layers is tough to cut through! It didn't go all the way through until it got to the highest power and lowest speeds.
Without moving the board, I went back to the computer and set the box around the grid to 80% power, 10 speed to cut out the test card. Make sure to set the rest of the grid to ignore, or it will cut it all again!

When you see the test results from the xTool P2 CO2 laser compared to the diode laser, you can really understand the difference in power! The diode laser required two passes at much lower speeds, and I had to stop the test early because it started flaring up.
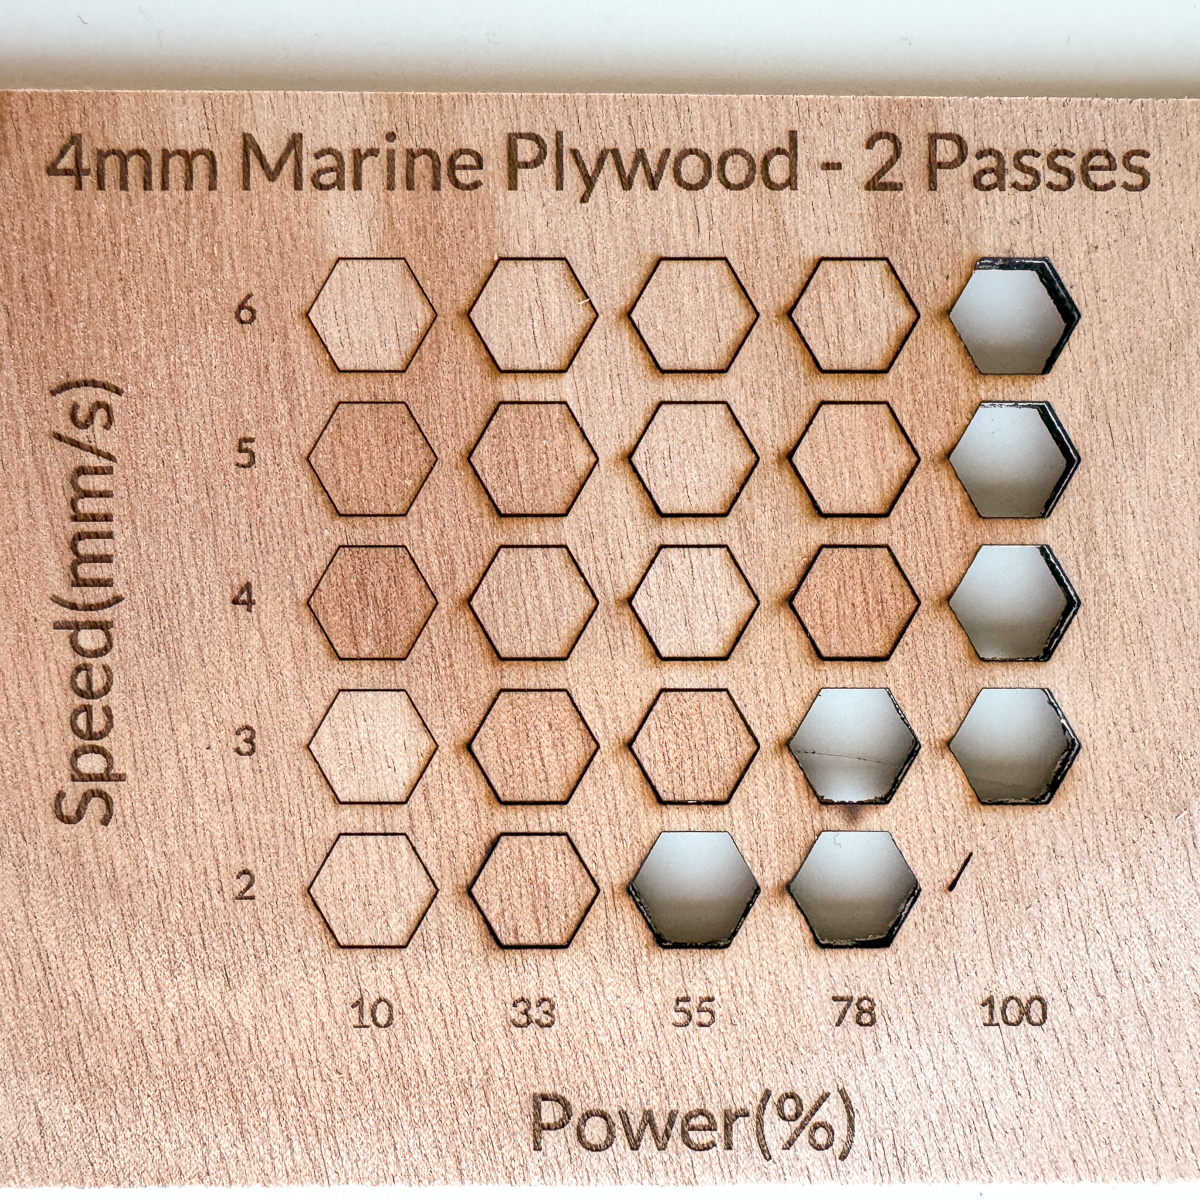
I could run a second test on the P2 to focus on a range of slower speeds to see if I could get it to cut at a lower power, but anything under 100% power is good for me!
Now that you know what power and speed to cut your material, you can run a similar test for engraving. I usually do one with masking over the surface and one with bare wood, so I can determine the right settings for both.


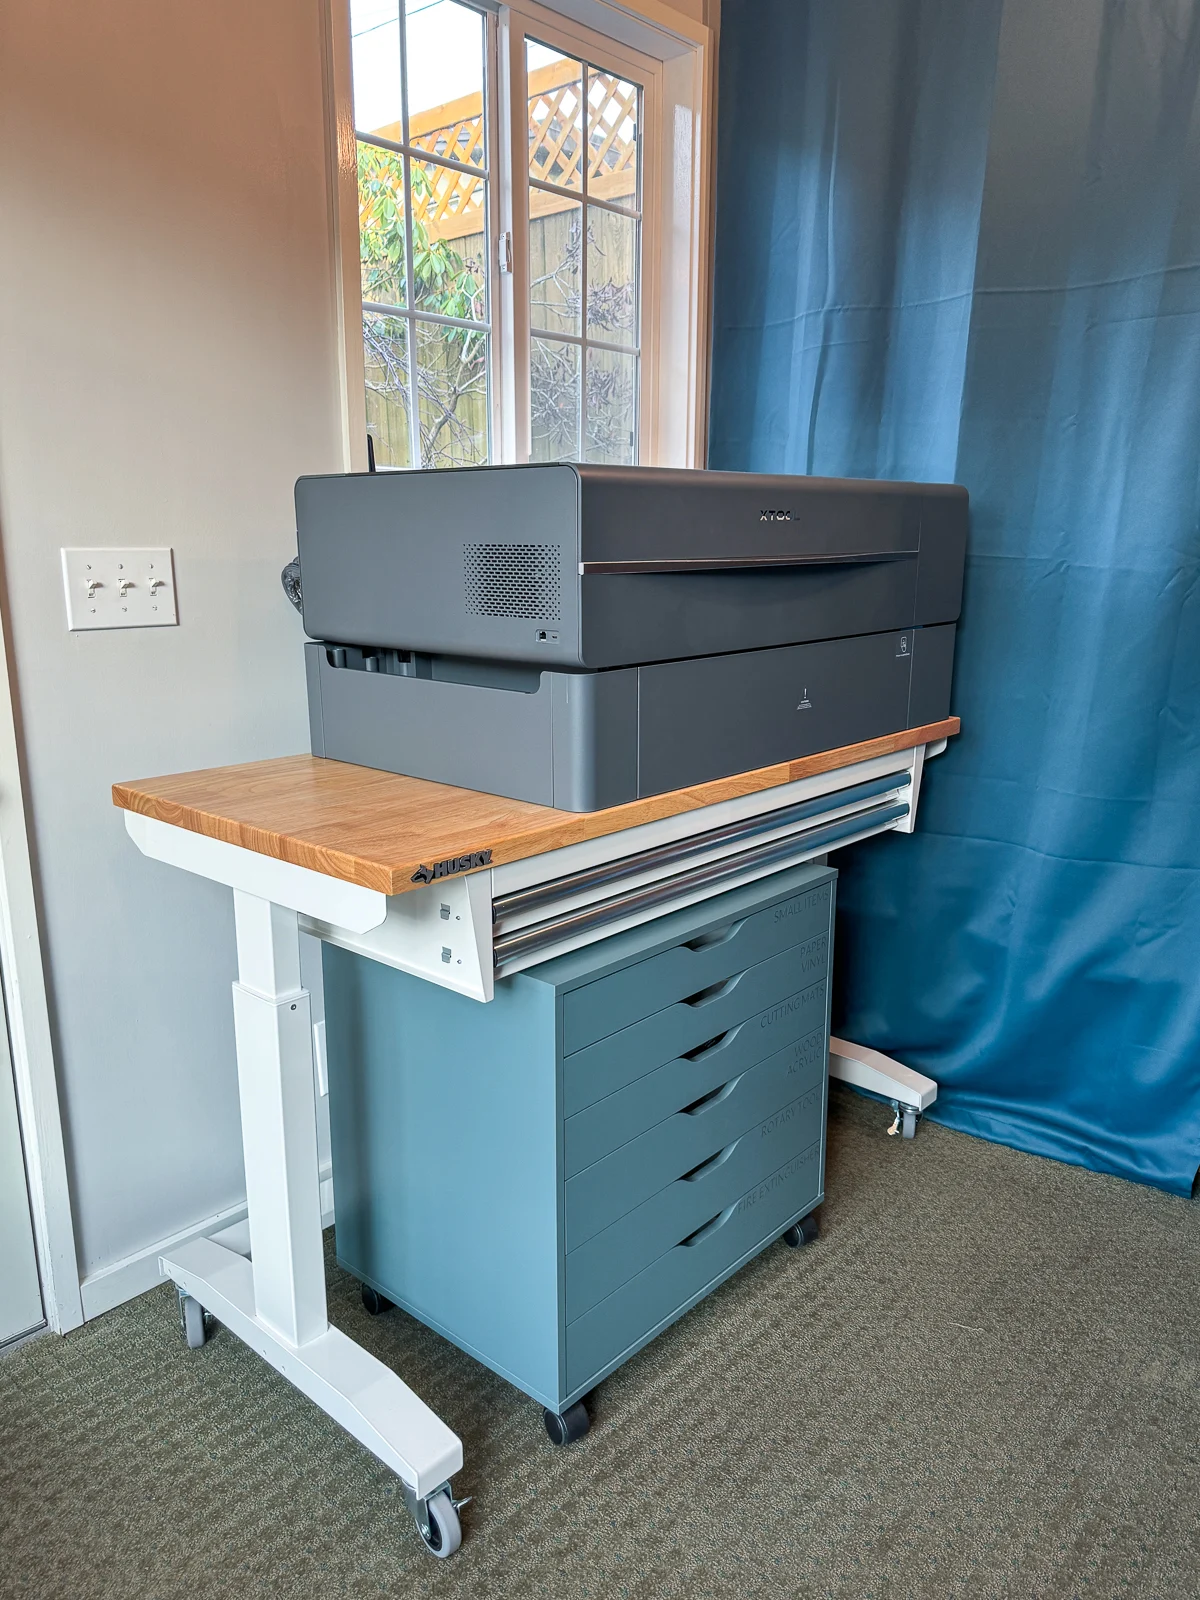
Then I choose my favorite, outline it in red, and stick it in one of the drawers under my laser for future reference.

I hope this article helped you understand how to run a laser test file and why you should go through the effort of making one for each of your materials. Now that you know the perfect settings for your machine, why don't you try out one of these laser projects?