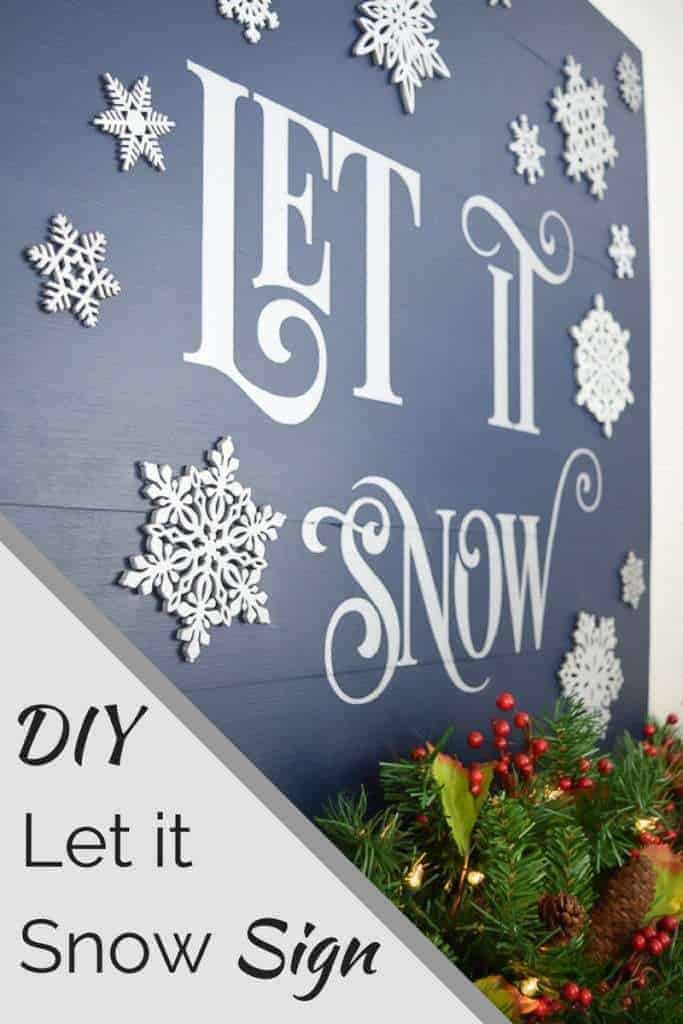
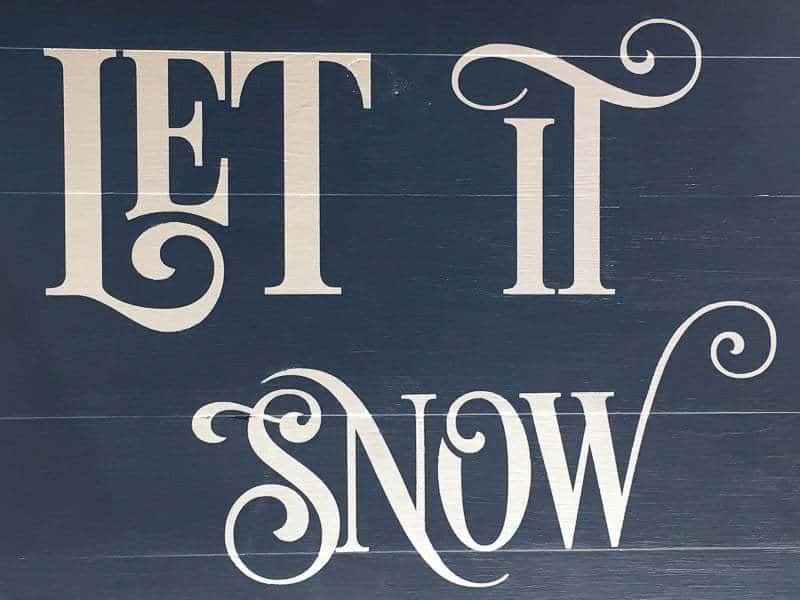
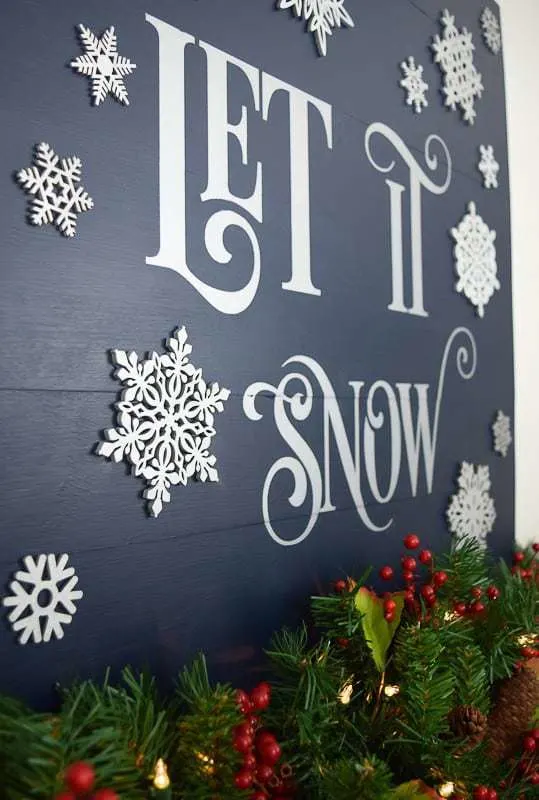
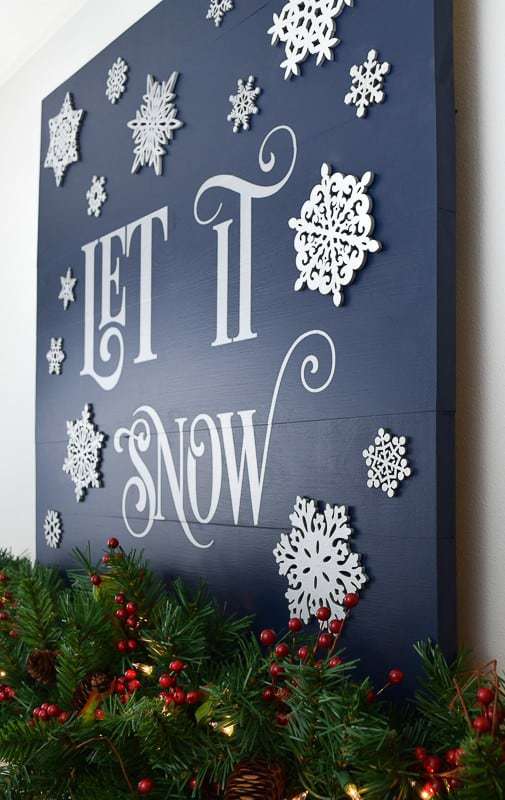
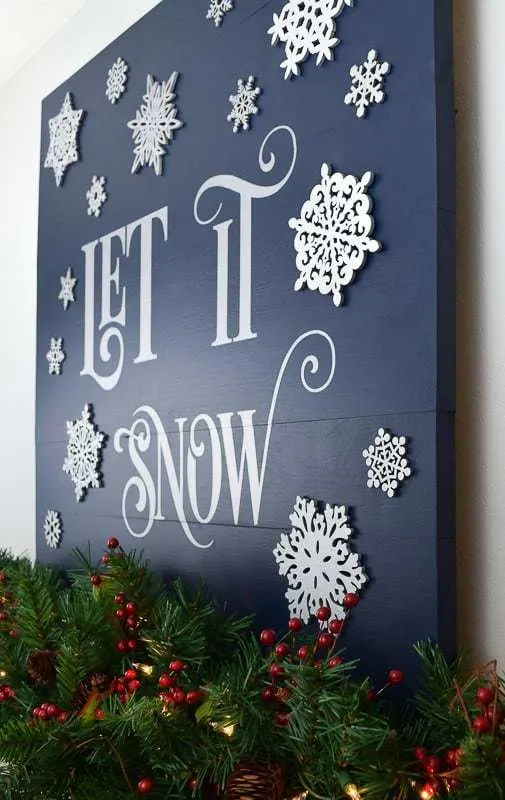
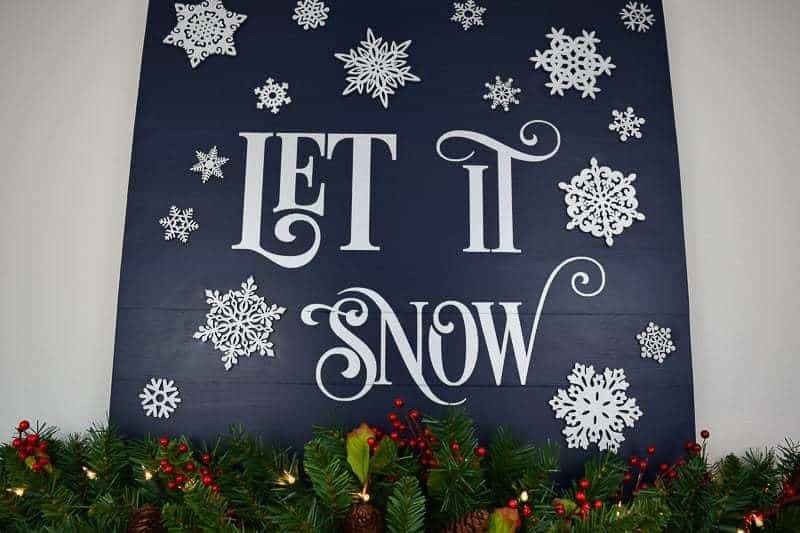
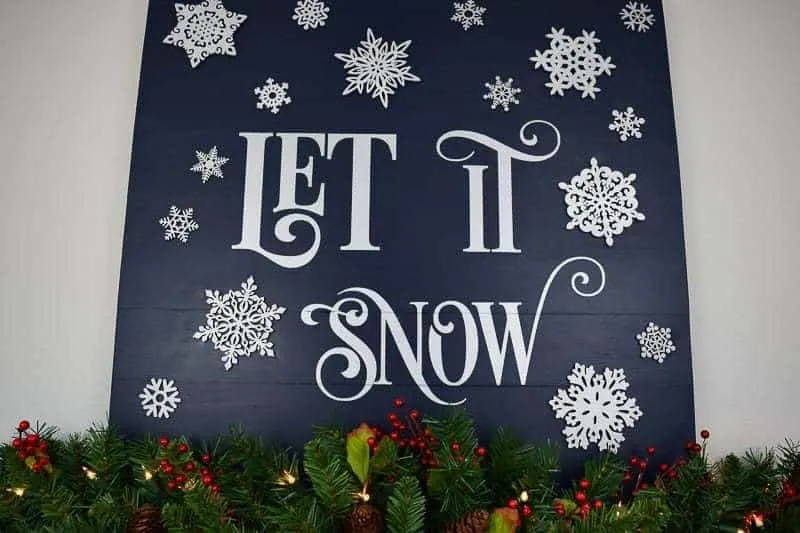
It just isn't Christmas without snow! Encourage the white stuff to fall by making this festive Let it Snow sign. Perfect for your holiday mantle!
I've been scrambling to finish my fireplace remodel before the holidays (you can catch up on my progress here). It was only fitting that I create a piece of Christmas decor to proudly display on our new mantel.
No Christmas is complete without snow, at least to this former Bostonian. So to encourage the white stuff to fall, I created this festive Let it Snow sign.
This post contains affiliate links for your convenience. Purchases made through these links may earn me a small commission at no additional cost to you. Please visit my disclosures page for more information.
How to Make a Let it Snow Sign
Prepare the Wooden Back
I wanted this piece to be about 28" square to cover up the bracket for our wall-mounted TV that usually adorns the fireplace. The big black box will go back up after the holidays. We usually watch TV in our basement media room anyway, so it won't be missed for a month!
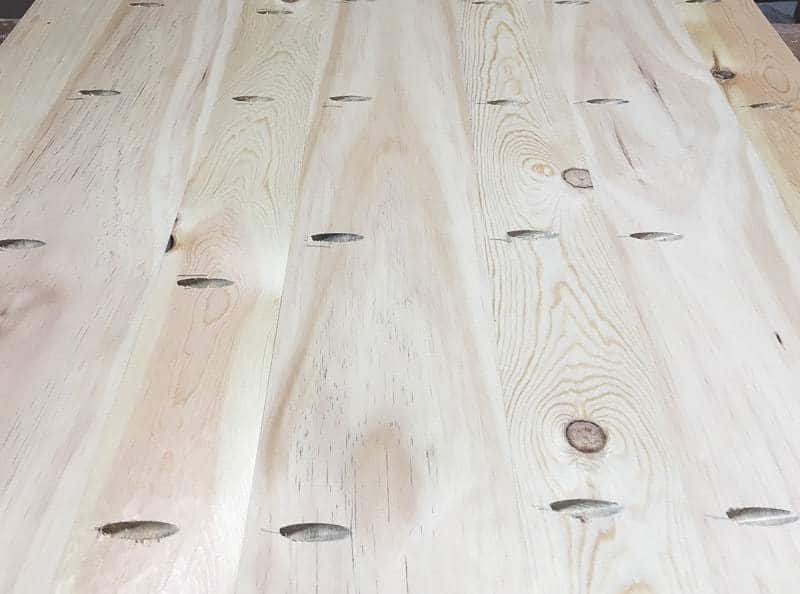
I searched through my wood pile and came up with a 1x6 and a 1x4 board that would be perfect for this project. After cutting the boards down into 28" long pieces, I lined them up in an alternating pattern until it was tall enough to cover the bracket.
I drilled pocket holes to join the boards together, but regular wood glue and a few clamps would work too. You can also use plywood cut to your desired size.
Attach the boards together with 1 ¼" pocket hole screws, then sand the entire surface smooth.

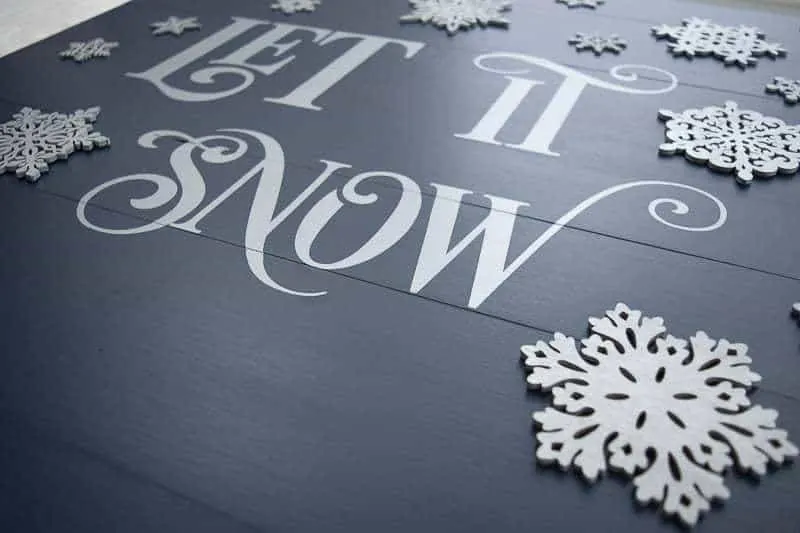
Nothing is prettier than snowflakes falling in the night sky, so I decided to paint the background of my sign midnight blue. I had some paint left over from my TARDIS door, which I mixed with black to create a deep, dark blue.
Create the Let it Snow Sign Stencil
To create the words for the sign, I enlisted the help of a friend who had a Silhouette Cameo I could borrow (I need to get one of my own someday!) We downloaded this design, rearranged it to fit, and cut it out of stencil vinyl.
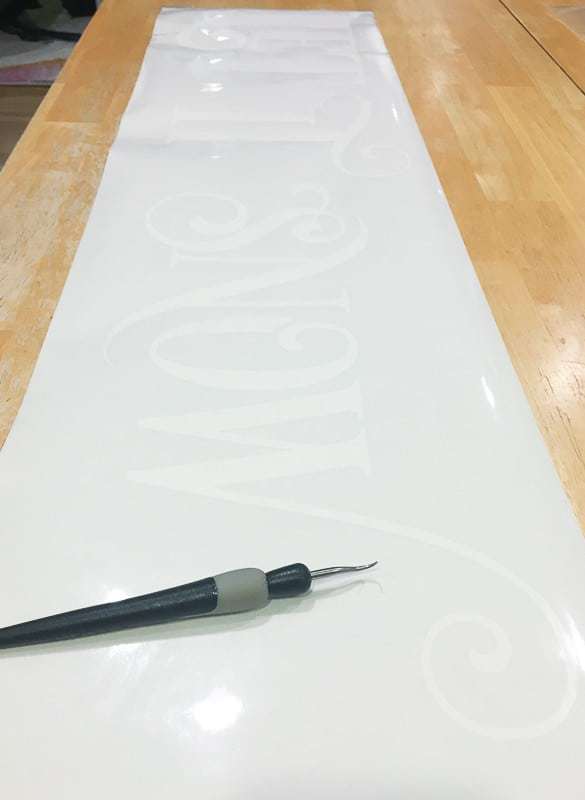
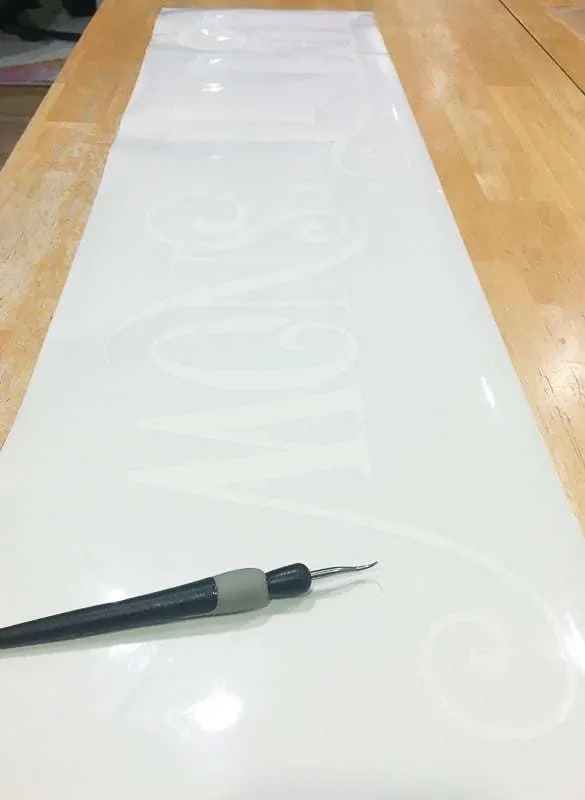
After weeding out the letters, I applied the transfer tape to the top of the vinyl. Get all the air bubbles out with the rubbing tool or the edge of a credit card as you pull it back.
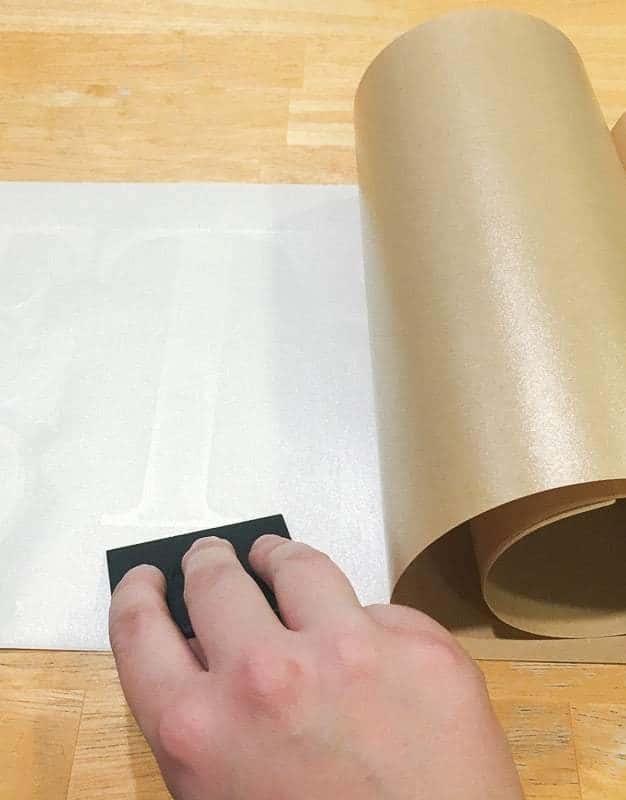

Cut apart the words so you can arrange them independently on the sign. Peel back the paper backing and attach the vinyl to the wood. I used the seams between the boards as a guide to get the letters straight. When you have it just right, rub the surface of the transfer tape again, then peel it off.
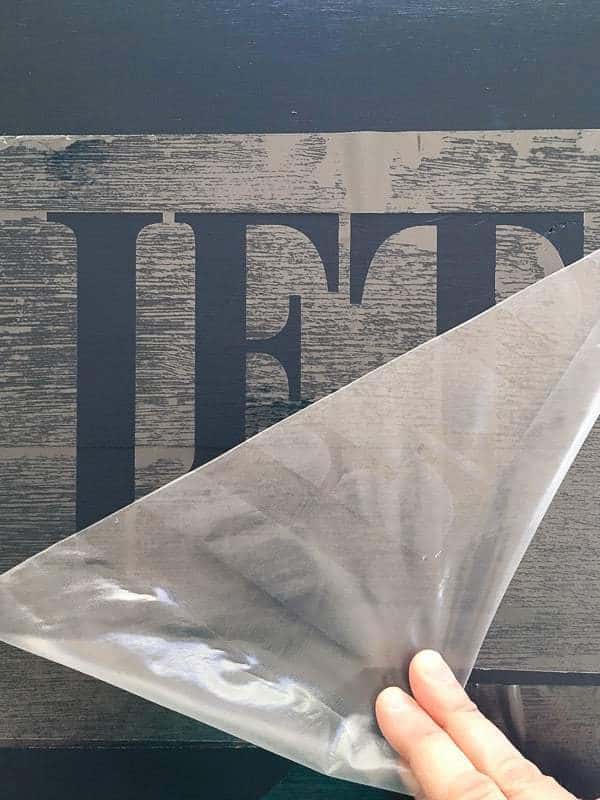
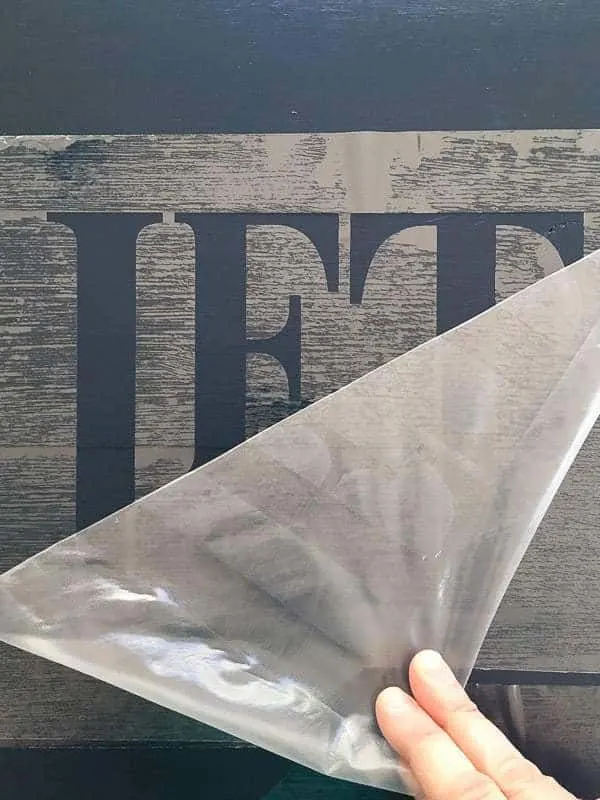
I dug around in my supplies until I found the silver craft paint left over from my faux aged silver picture frame. I used a foam pouncer to apply two coats of silver paint. Once it was dry, I carefully peeled off the stencil. I had to touch up a few places with more navy blue paint, but overall I was really impressed with how it came out!

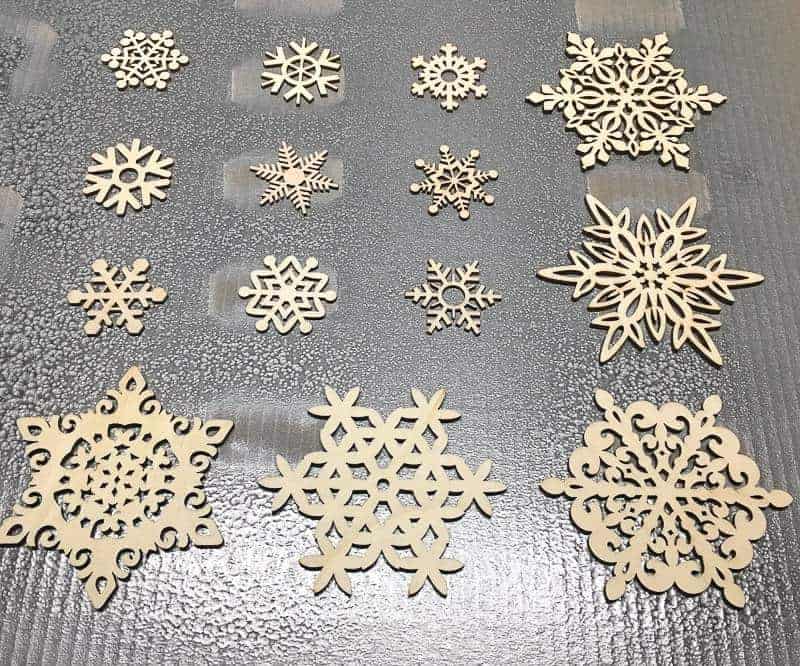
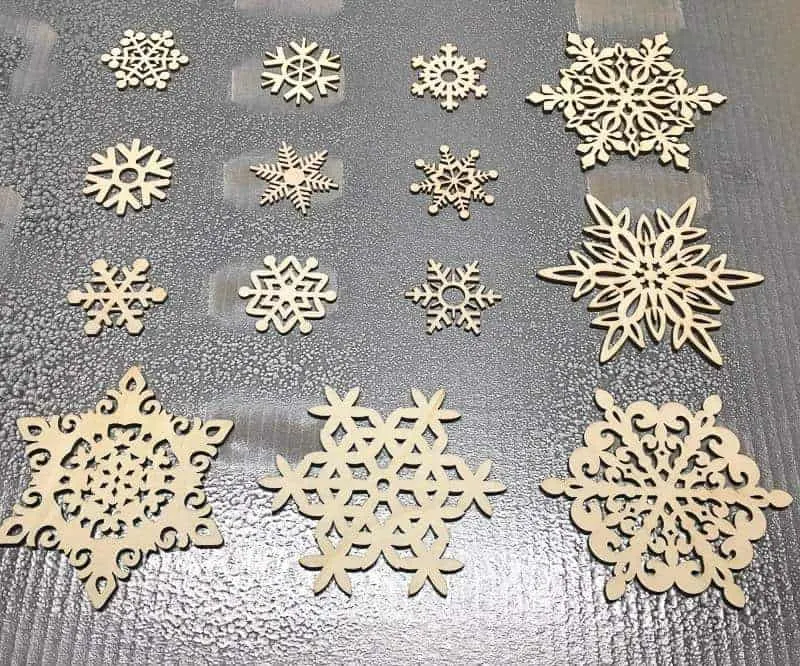
Add Dimension with Wooden Snowflakes
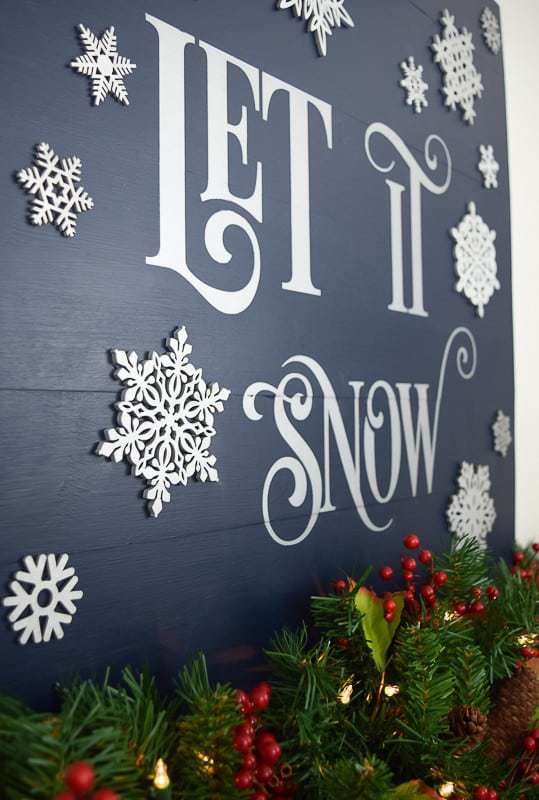
It wouldn't be a Let it Snow sign without some snowflakes! These wooden snowflakes are just perfect for this project. The larger ones are actually meant to be coasters, and the smaller snowflakes are for ornaments.
The best part of these wooden snowflakes is that no two are alike, just like real ones! I lined them up in my spray painting rig (also known as an old IKEA box) and used silver spray paint to give them a shimmering finish.
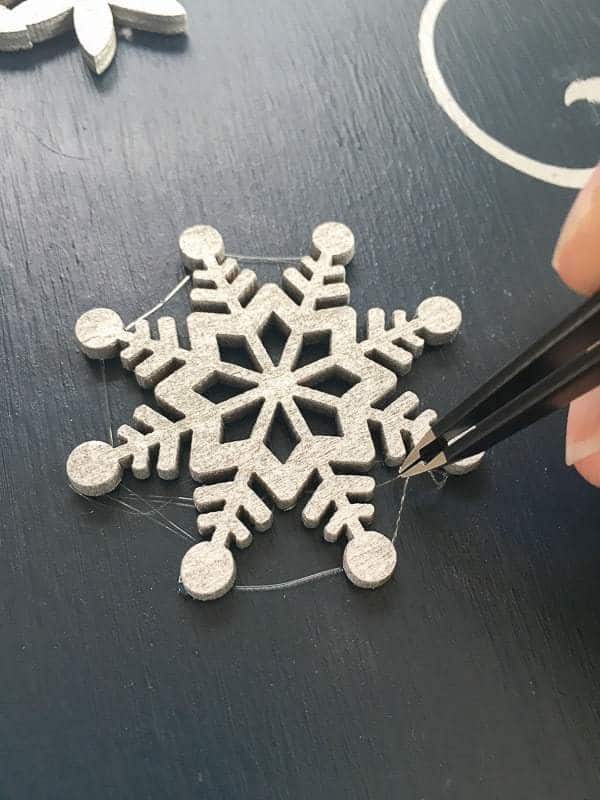
I used hot glue to attach the snowflakes to the sign. Some of the snowflake "arms" were really tiny, so be careful not to let it drip through and burn your fingers! Tweezers were helpful for picking out the webs of glue from between the cutouts.

I left about 8 inches of blank space at the bottom of the sign. This area will be covered up by my gorgeous new garland, and I didn't want to waste any of the snowflakes!

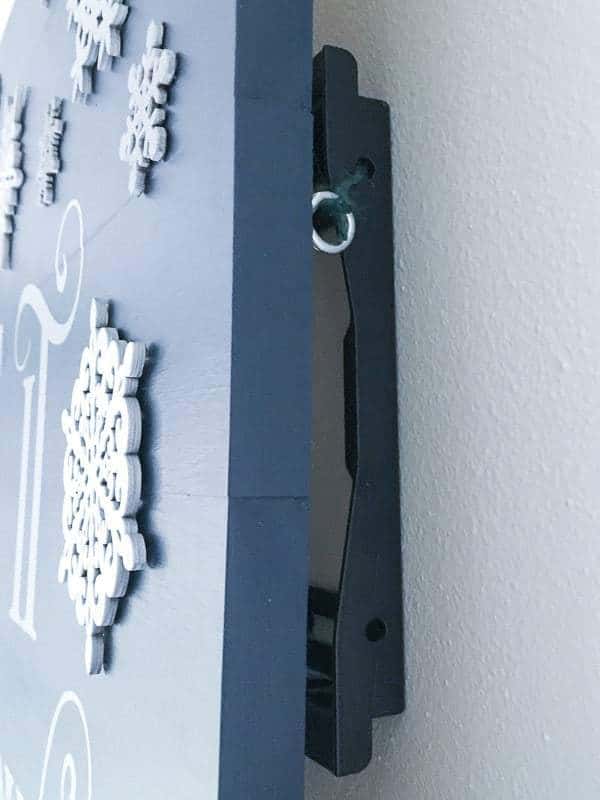
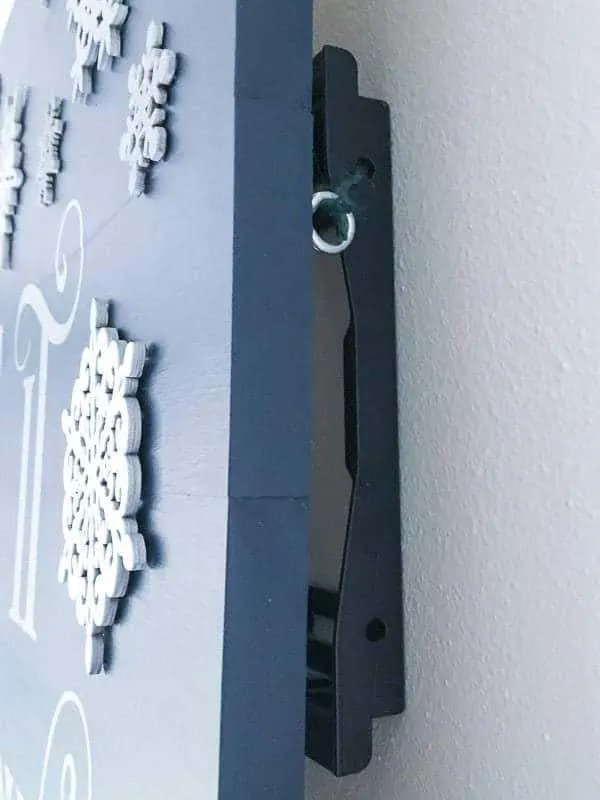
Secure the sign to the wall
If your sign will be in a high traffic area or attract the grasp of a child, it's best to secure the sign to the wall rather than leaning it against something. You can use a French cleat or other mounting hardware to attach it to the wall at the studs.
I added some screw hooks to the back so I could use twine to tie the sign to the TV bracket above the fireplace. Our mantel is pretty narrow, and with the garland and stockings, it's pretty crowded! Tying the sign to the bracket allows it to sit vertically on the mantel and take up less space.
Add a festive garland, and you're ready to watch the snow fall while sitting by the fireplace drinking hot cocoa!
Check out these other DIY Christmas decor ideas!
13 Days of a Woodworker Christmas! - Hazel + Gold Designs
Thursday 18th of May 2017
[…] The Handyman’s Daughter – DIY Let It Snow Sign – […]
Pili
Wednesday 4th of January 2017
I have a Cameo but I haven't tried vinyl yet... I'm a bit scared... but seeing your sign makes me want to give it a try. Love how it looks, great job!
Grandmas House DIY
Tuesday 13th of December 2016
I love that blue color you chose, it turned out lovely! Thank you for sharing with us at the To grandma's house we go link party! Hope to see you there tomorrow when the new party starts!
Mother of 3
Saturday 10th of December 2016
I love this! it is so beautiful! I'm a sucker for blue and snowflakes anyway but this is just gorgeous!
Beverly
Saturday 10th of December 2016
I love your sign,Vineta. Adding the snowflakes was the perfect touch. Thanks for sharing at Snickerdoodle. We'll be featuring your sign at today's party. Hope to see you there!