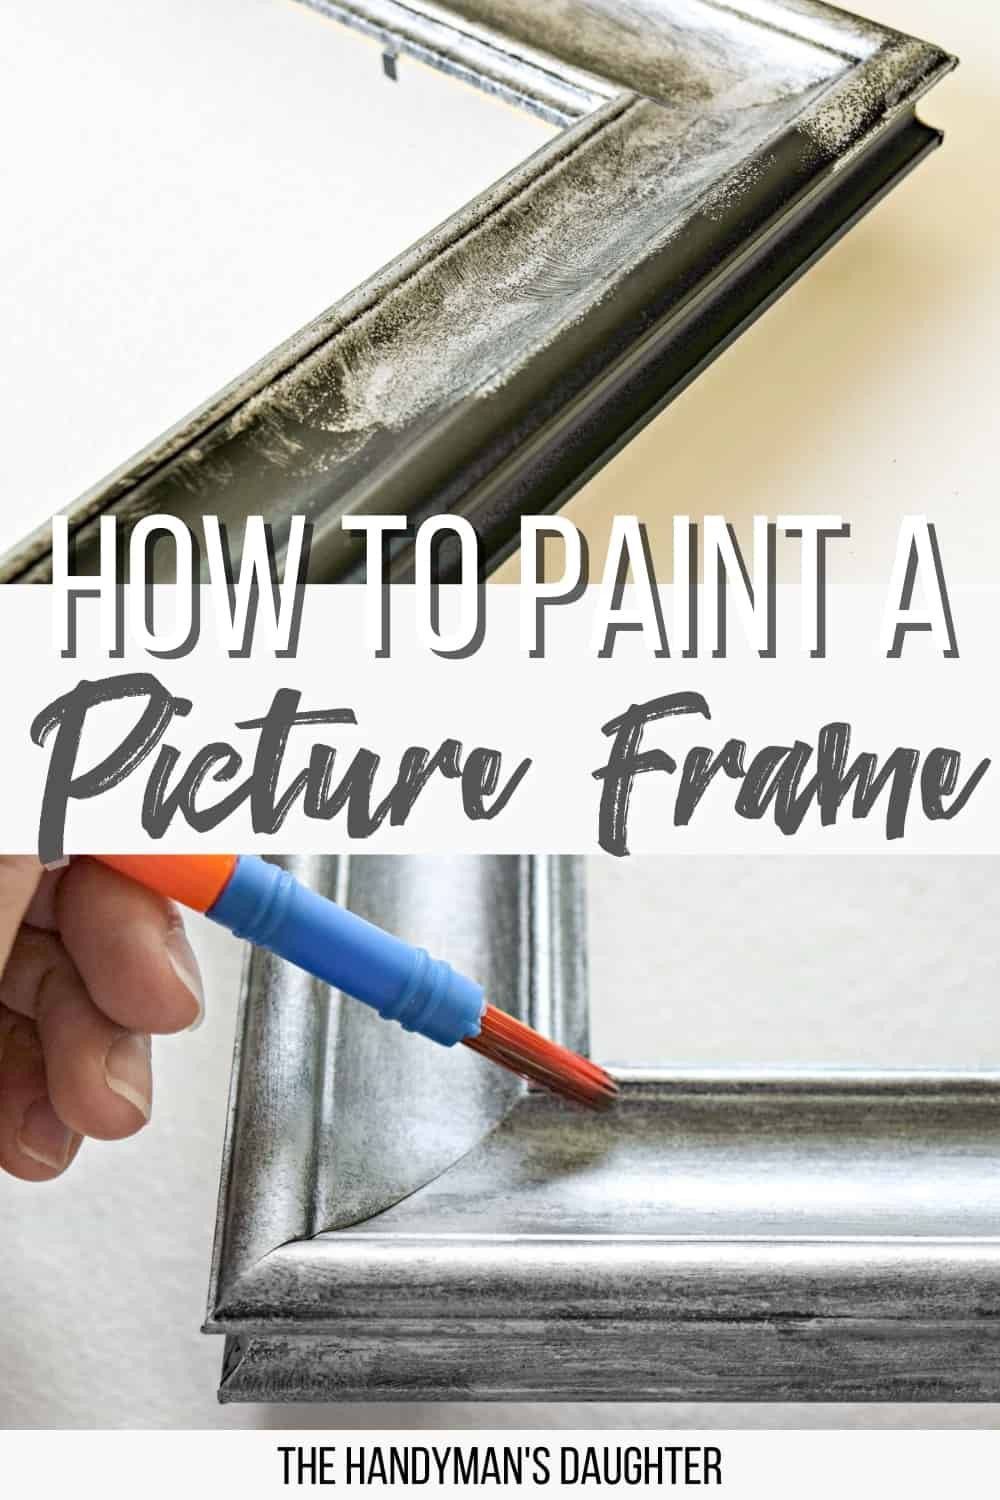
Transform your artwork with the right color frame! I'll show you how to paint a picture frame using spray paint or a brush with great results!
It can be difficult to find a picture frame for your artwork in the right style, size and color without spending a fortune on a custom frame! I'll show you how to get the same result yourself by painting a frame instead!
Want to make your own picture frame? Get inspired by all these DIY picture frame ideas!
When shopping for a cheap frame, pay attention to the size and style. You'll want to look for something that will fit your art piece with plenty of white space around the outside that fits with your decor. But you can ignore the color, since you'll be changing it with paint!
This post contains affiliate links for your convenience. Purchases made through these links may earn me a small commission at no additional cost to you. Please visit my disclosures page for more information.
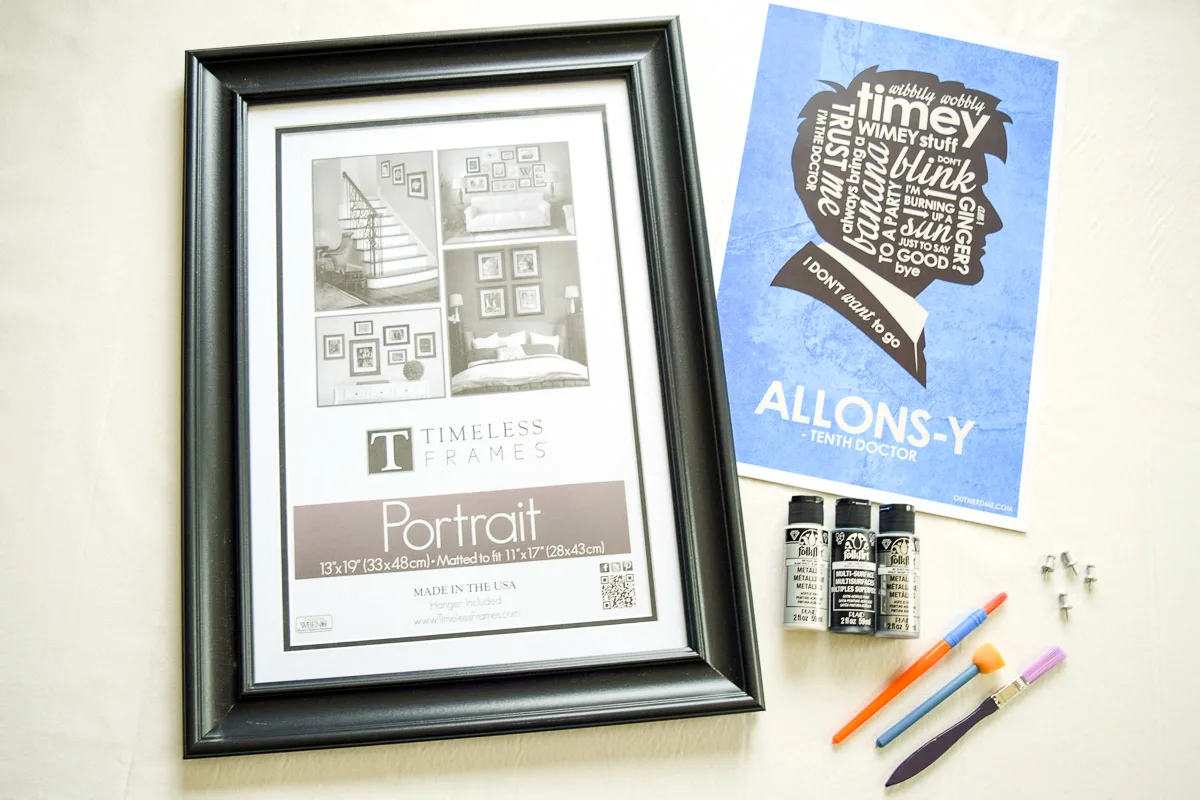
We're a family of geeks, and our basement family room is full of geeky stuff, including a full TARDIS door. Our friends gave us this Doctor Who poster (featuring my favorite Doctor), but it was really difficult to find the right frame for this size of print.
I ended up buying a black one out of desperation, but it wasn't quite the look I was going for. Luckily, I was able to give it an aged silver patina with a little craft paint! If you prefer a solid color, scroll down to the section on how to spray paint picture frames below.
How to paint a picture frame using craft paint
Craft paint is the way to go if you want to paint a picture frame without making a huge mess! You have more control with a brush, so you can create different effects that you couldn't get with a spray can.
Check out these tips and tricks for using metallic furniture paint for picture frames and other projects around the house!
Materials needed
- Picture Frame
- Craft Paint
- I used Sterling Silver, Black and Pearl White
- Assorted Brushes and Pouncers
- Thumbtacks (ones with a flat head)

Prepare the frame for paint
First, remove the glass and backing of the frame. If the glass is stuck to the frame, you can cover it with paper and painter's tape instead.
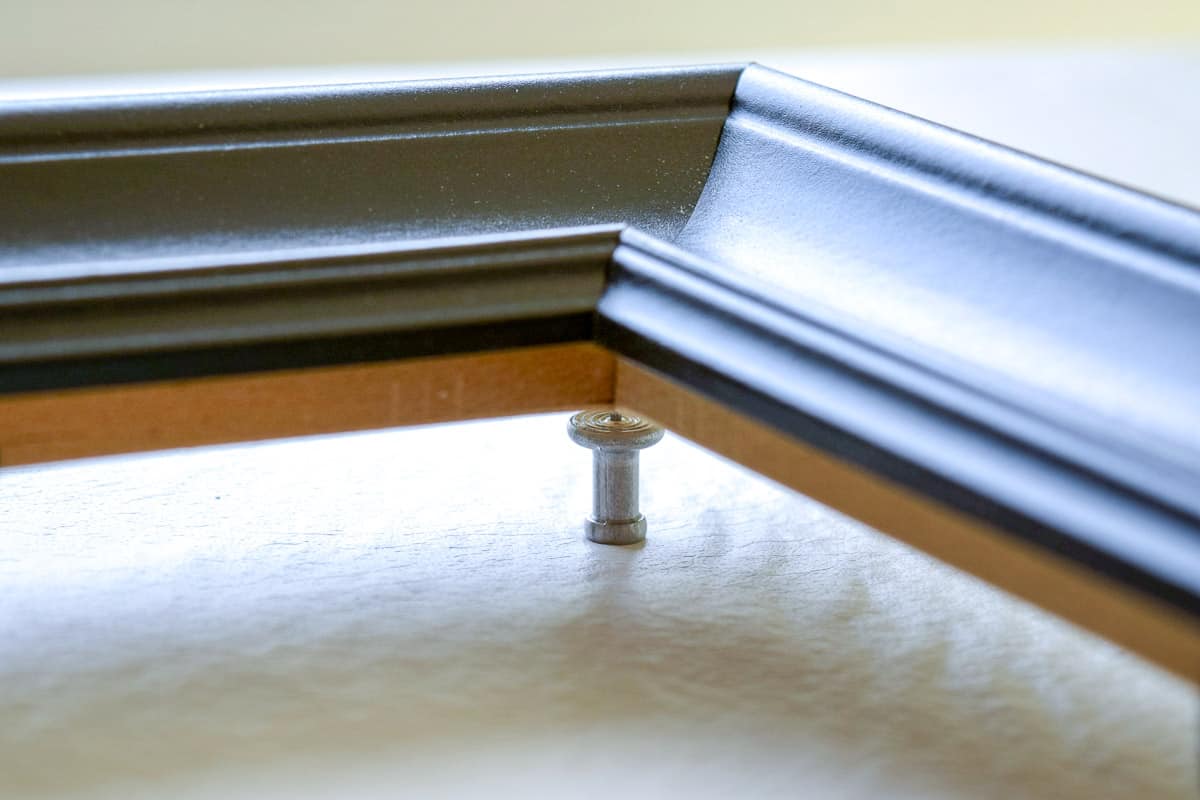
Press thumbtacks into the back side of the frame in each corner. This will elevate the frame off your work surface and let you paint the sides of the frame easily. Make sure your thumbtacks have a flat head and not a curved one, or you'll be rocking your frame back and forth as you paint!

You may want to consider giving your frame a quick sanding to remove the shiny finish. If you have a wooden frame with a clear top coat, check out these tips for painting over polyurethane to make sure the paint will stick.
Apply a base layer of paint to the frame
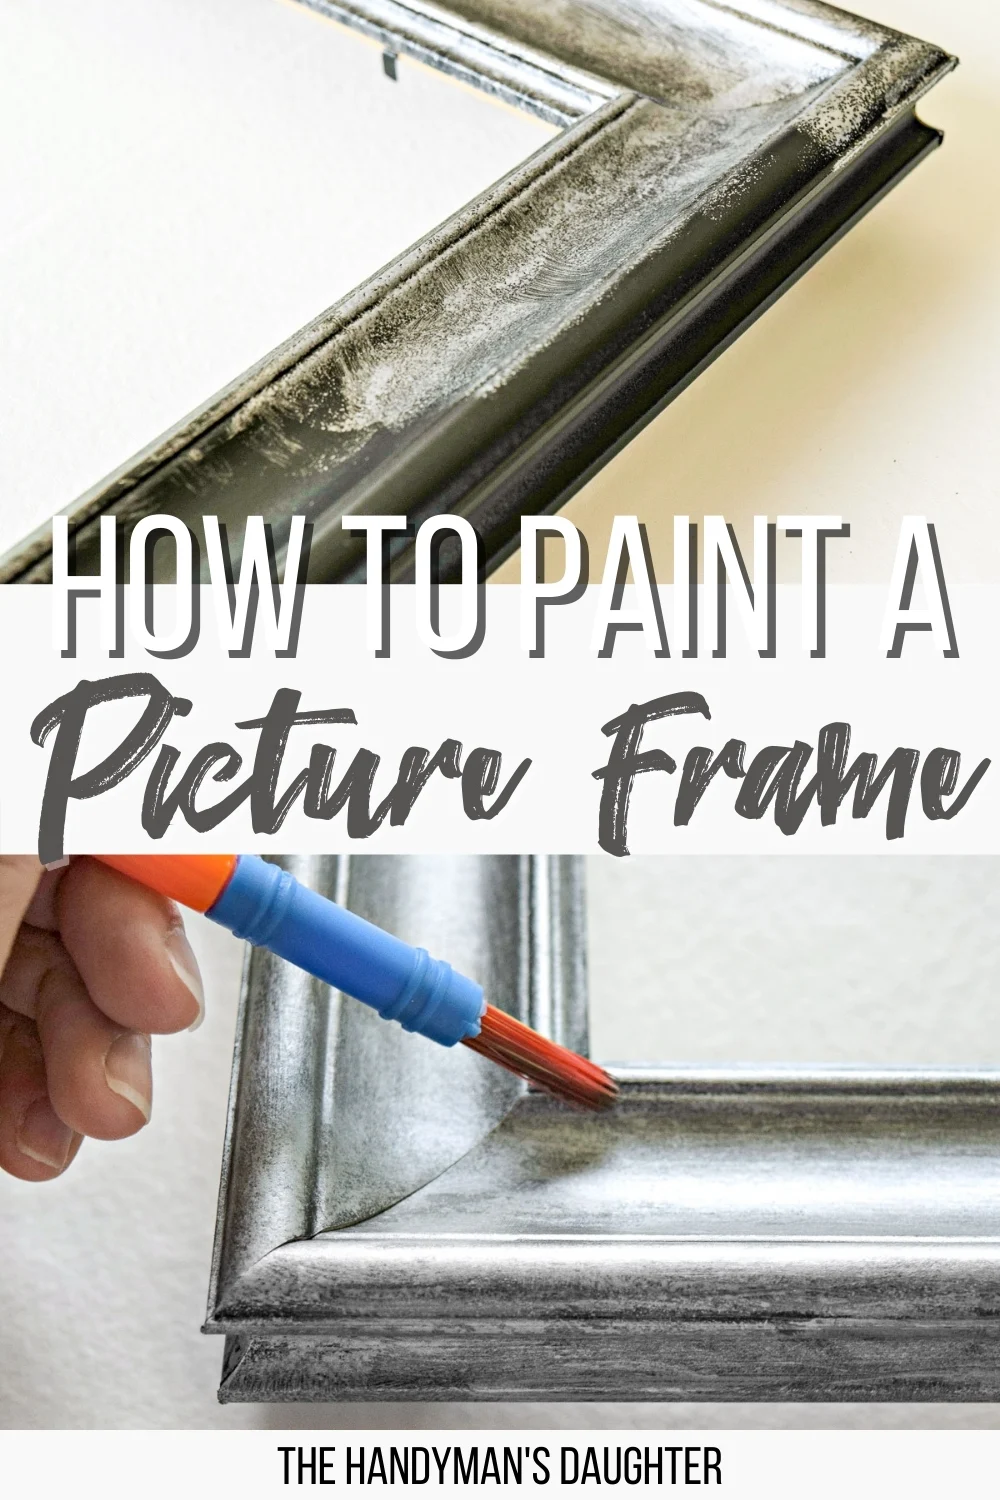
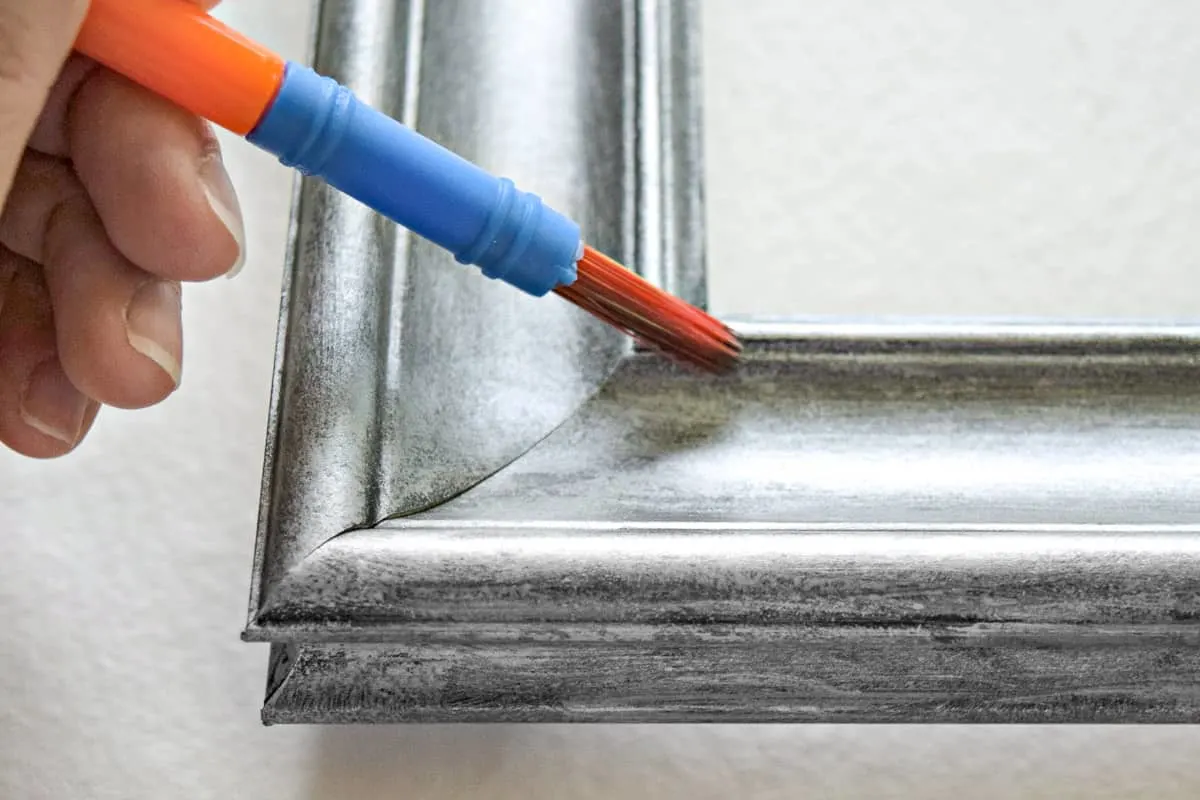
I began with the sterling silver paint and a small round bristle brush. Get a very small amount of paint on the tip of the brush, then dab it on randomly, allowing some of the black to show through.
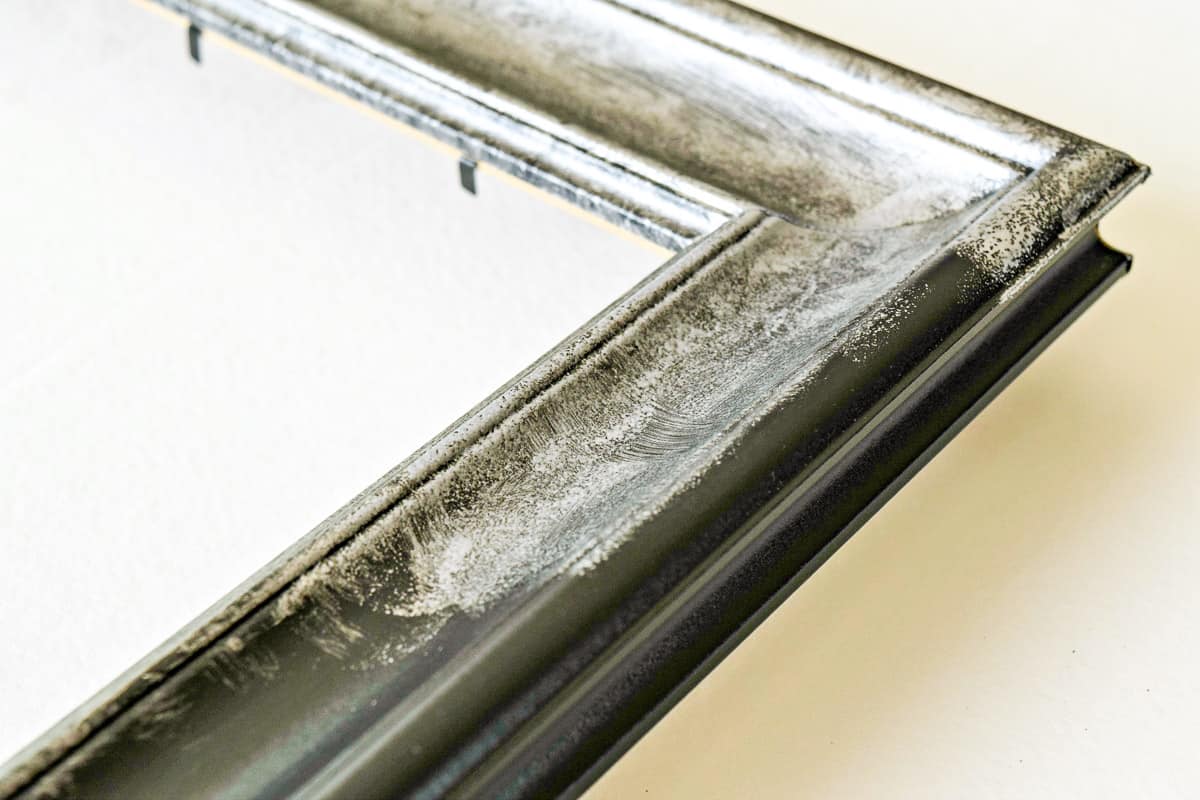

I used the small brush on the inside edges, then moved to the foam pouncer brush for the flat areas. Play around with different brushes and techniques to create a random effect.
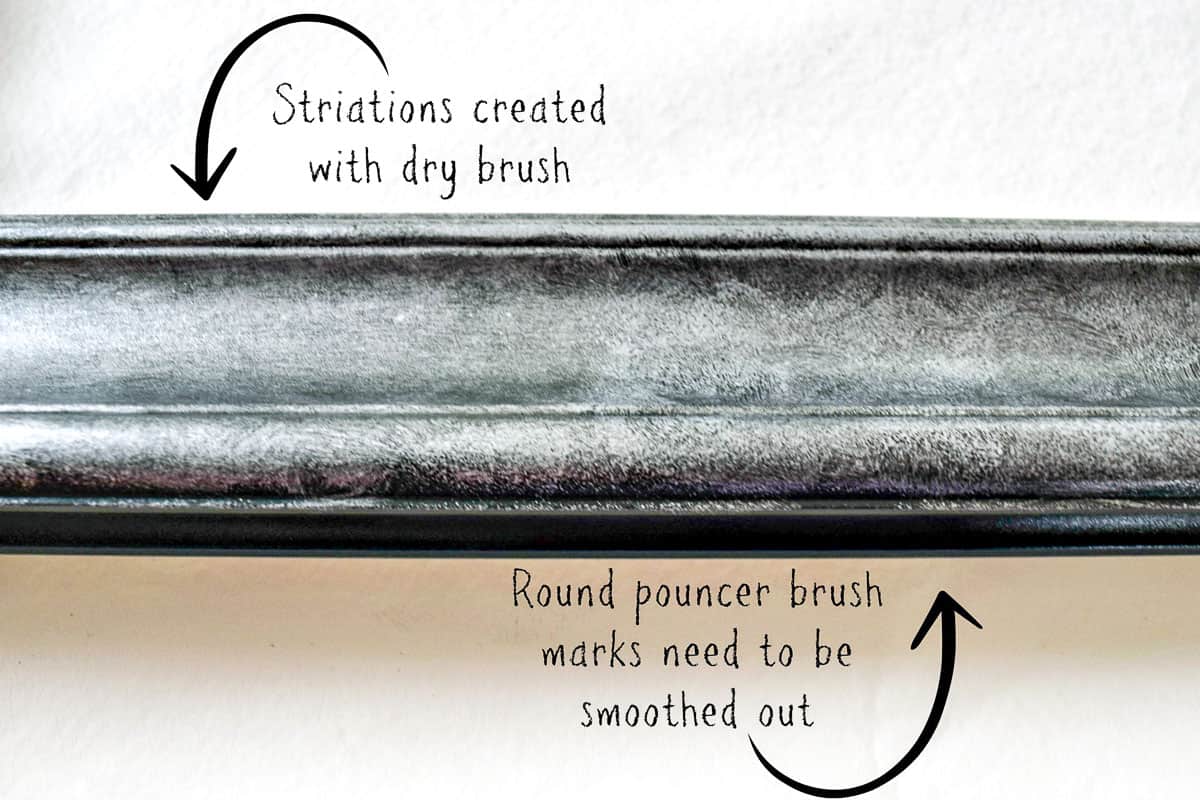
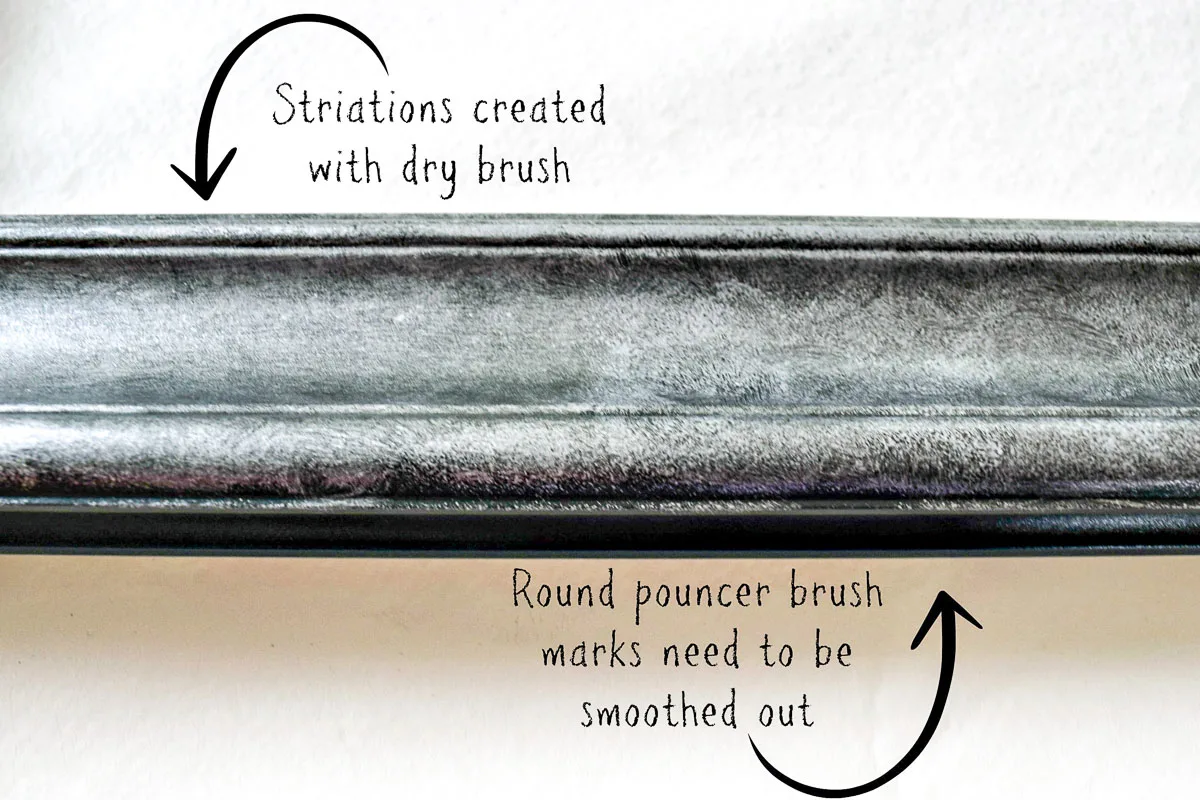
While the first coat of paint is still slightly wet, run a larger dry brush very lightly over the entire area in long strokes. This will give it striations and a metallic "grain" while leaving most of the random variation underneath. This also helps smooth out the paint when you get a little too crazy with the pouncer brush and end up with a bunch of little circles all over the place.
I went over the entire frame with this base color, then allowed the paint to fully dry.
Create contrast with darker and lighter paint
Next, I mixed the sterling silver paint with black, to create a dark gray with a bit of shimmer. This color was applied in the grooves of the frame, to give it some contrast. I used a fairly small brush with looser bristles for this part, and very little paint. You don't want to make a perfect line in the crease, but just enough to make it look like tarnished silver.
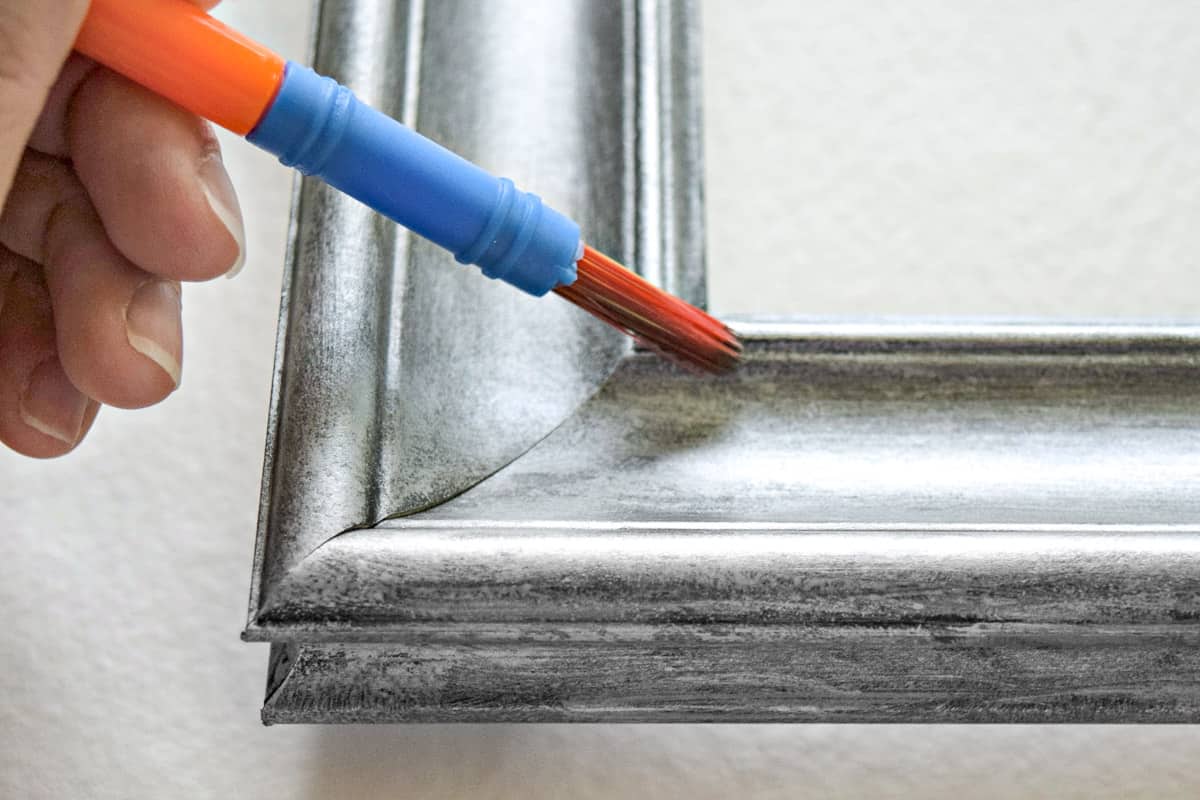
Finally, I used the lighter Pearl White paint to create highlight areas, such as on the top of the ridges. This gives the appearance that these areas have been buffed over time from dusting and cleaning, resulting in a higher sheen than the rest of the frame.

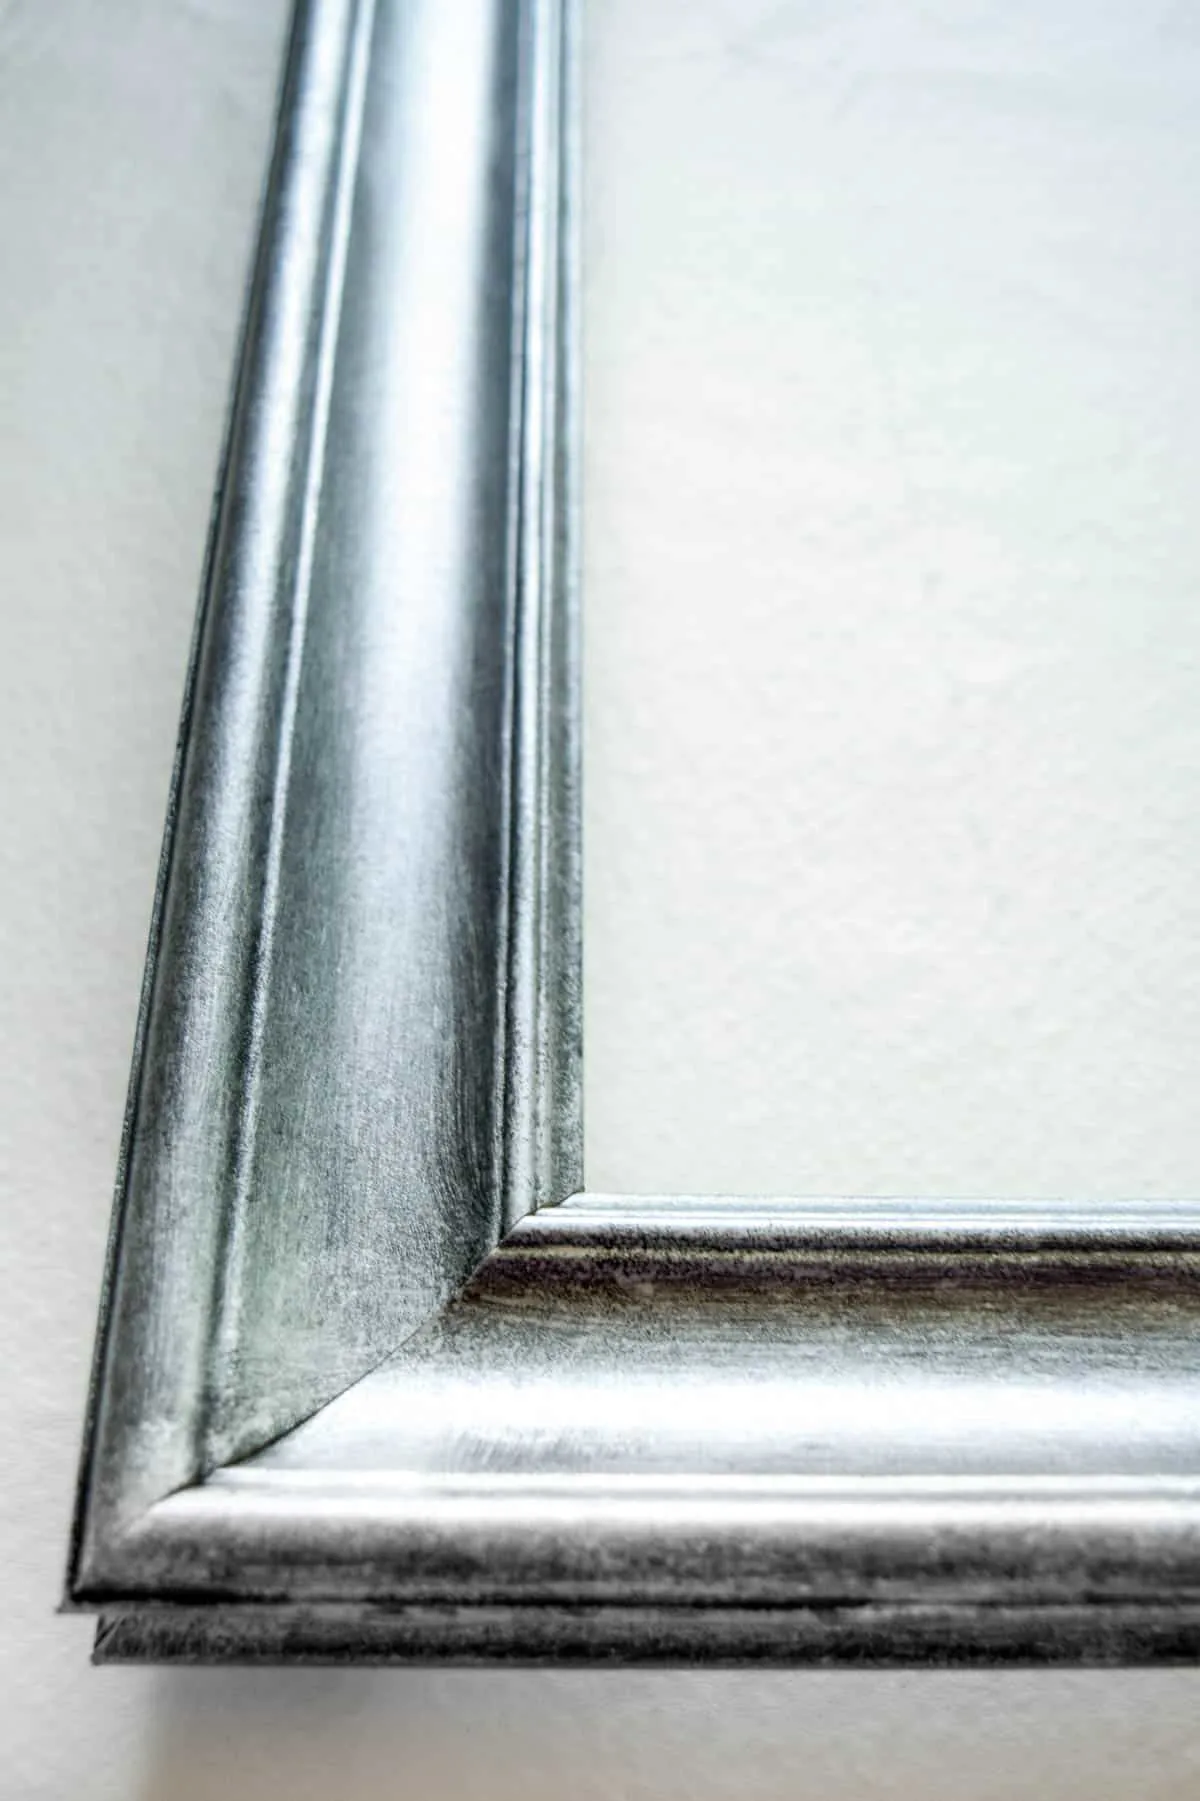
I spent a lot of time going back and forth between the various paint colors, adding a bit more here and taking away a little bit there. The goal is to make it look random and natural, which is harder than it sounds! I'm not artistic by any stretch of the imagination, but I think I was able to achieve a pretty good aged silver look!

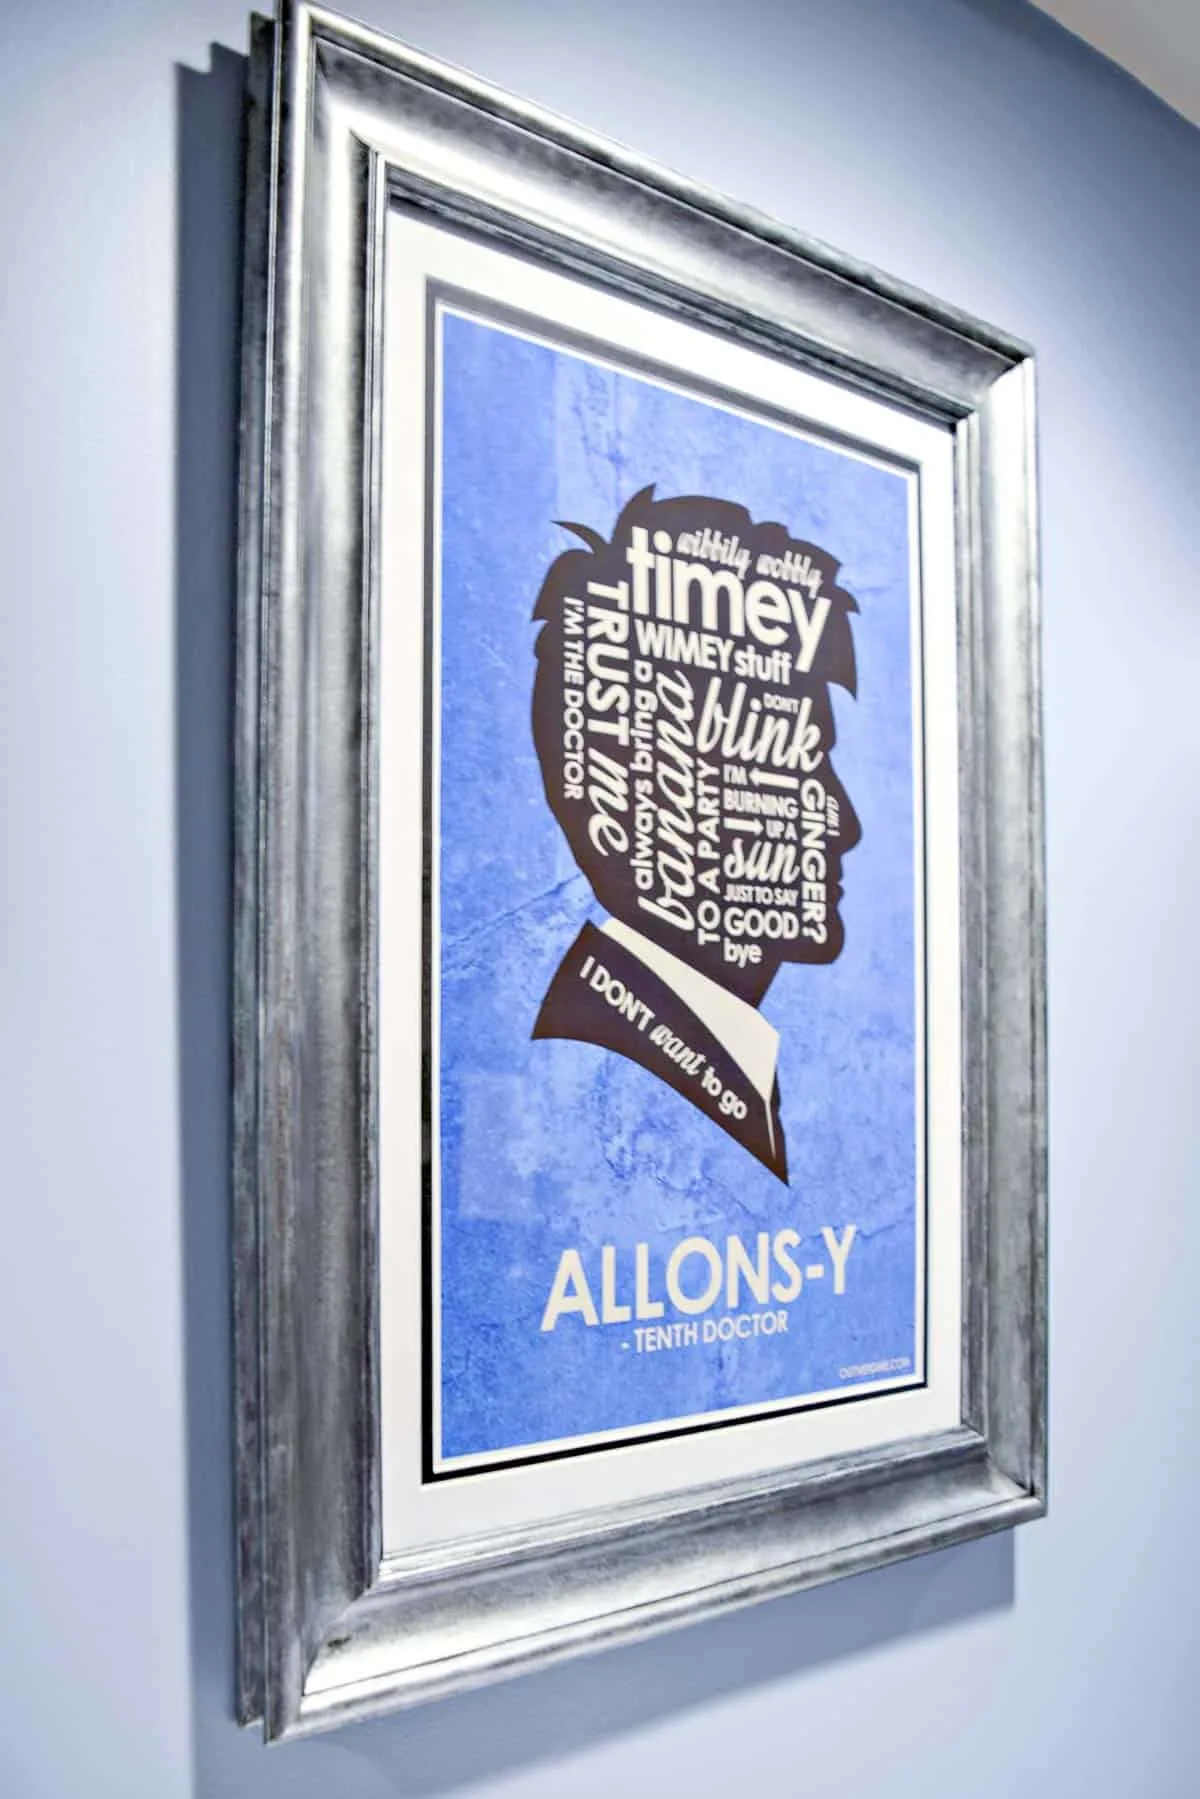
I love how the aged silver frame almost tries to make the poster seem more serious, like it's an old family portrait in silhouette. It's the perfect addition to our geeky media room, and brings the colors of the room together beautifully.
How to spray paint a picture frame
Spray paint is a quick and easy way to give old picture frames new life! You can find wood and metal picture frames at thrift stores for just a few bucks, and update them with spray paint so they match your existing decor.
Check out my guide to spray painting for lots of tips and tricks!
Materials needed
- Picture frame
- Spray paint
- Check the label to be sure the spray paint you're using will stick to the frame material!
- Cardboard or drop cloth to protect the surrounding area
- Spray paint handle (optional)
- 220 grit sanding sponge
- Thumbtacks to elevate the frame off the ground
- Painting respirator mask (if you're spraying indoors)
Prepare the frame for spray paint
The process for prepping the frame is the same as the steps above. You may want to lightly sand the surface first, and remove any dust with a tack cloth or a damp cloth.
Protect the surrounding area from overspray with a drop cloth, cardboard, or a spray shelter like this one. You don't want to paint your wall or floor too!
You can use a turntable inside the spray shelter to move the painted piece without touching it, or just shift the paper underneath to get a better angle. Thumbtacks stuck into the back of the frame keep it elevated so the paint can reach the edges and it won't get stuck to the surface.
Apply light coats
The trick to using spray paint successfully is to apply light coats. Keep the can at least 6-8 inches away from the frame, and use long, slow passes to get even coverage. It's ok if this first coat looks a little splotchy!
Allow the paint to dry completely before applying a second coat. I usually wait at least an hour, but read the back of the can to be sure. Continue applying light coats as needed to get full coverage. You may need more than you think if you're changing the color drastically.
Reassemble your frame and hang it on the wall
I prefer to let the paint dry overnight after the last coat, just to make sure it cured properly. Then pop the glass back in the front, add your artwork and the backing, then hang it on the wall!
Now that you know how to paint a picture frame, I know you'll be painting all.the.things! It's the perfect way to make a gallery wall feel more cohesive, or to transform those thrift store finds!
Check out these other painting tutorials!
Barb
Monday 6th of March 2017
Picture frames can 'change' with every decor change! Even the ones with a few 'dings' can be evenly dinged up to make them 'antique' now. Everyone should have a stock pile of old frames to choose as they are ridiculously expensive to buy. Nice tutorial!
Vineta
Monday 6th of March 2017
I absolutely agree! New frames, especially custom ones, are soooo expensive! With some paint and the right mat, you can transform any old frame into a custom piece.
Vineta
Friday 11th of November 2016
Thanks so much! We love our nerd room! :)
EGAIS
Monday 11th of July 2016
I saw this on pinterest and it is an awesome tutorial. Thanks for taking the time to write that all out and explain with the pictures! I am about to try this on our dresser which has been sitting in transition for about 2 years! ha
LydiaF
Monday 13th of June 2016
Wow! Great project that I think I could manage :) (I'm not much of a painter). Thanks for sharing with us at Creatively Crafty #ccbg
The Handyman's Daughter
Monday 13th of June 2016
I'm certainly not a painter, either! This was much easier than I thought it was going to be. You really can't make a mistake with this technique, because you can just add more of the base color to cover it up!
Debrashoppeno5
Friday 10th of June 2016
I love the technique you useful to get this look.