Yes, you can paint a tile backsplash! With a little prep work and the right paint, you can transform your kitchen in just one weekend!
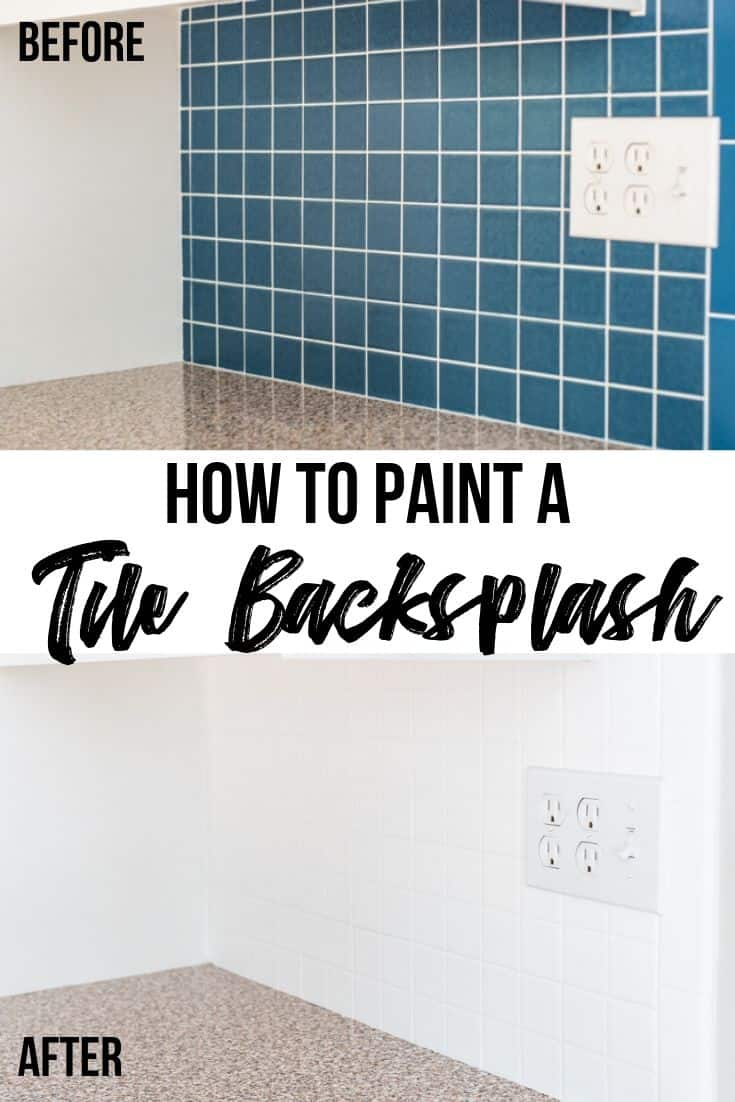

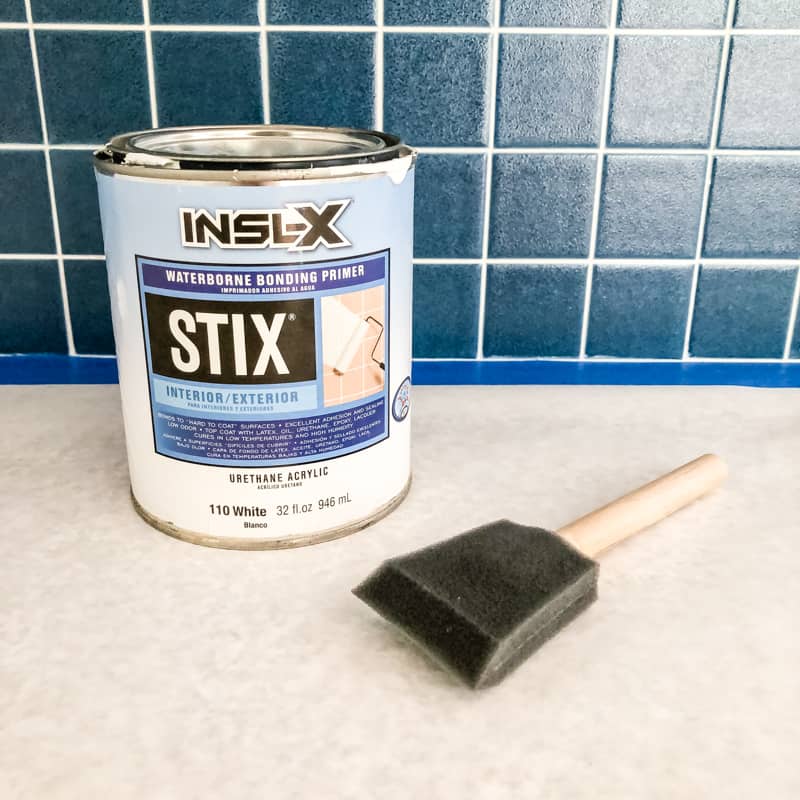
Painting a tile backsplash is a cost-effective way to give your kitchen a makeover in just one weekend. All you need are the right materials like Porch and Patio floor paint, STIX bonding primer, and a few other tools to get the job done.
I've done a lot of projects to make our dated 80's kitchen look more modern. I've painted the cabinets, covered the countertops with contact paper, and changed out the kitchen faucet. But there's one element that still made me cringe . . . the square cobalt blue tile backsplash!
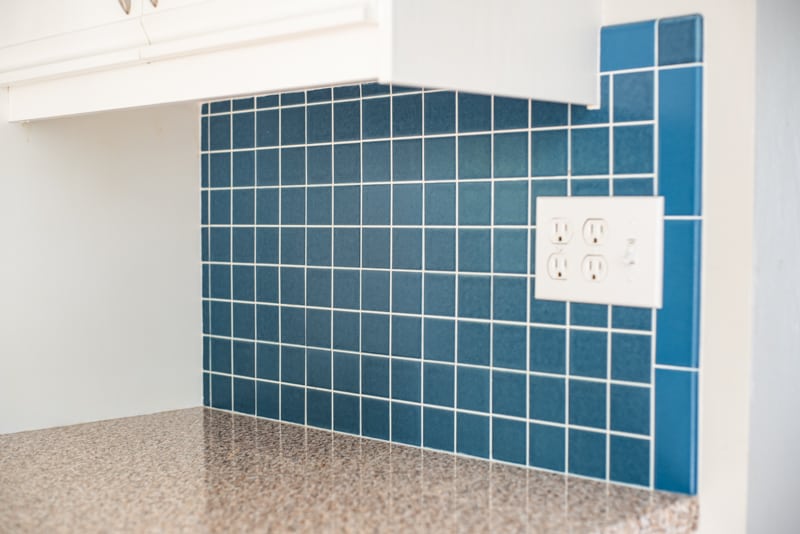

Don't get me wrong. It's a nice color and all. But it doesn't go with anything else in the kitchen and stuck out like a sore thumb! I didn't want to remove the tile backsplash until we do a complete kitchen remodel, but it could use a quick facelift.
Painting a tile backsplash can be an effective way to give your kitchen or bathroom a makeover without the hefty price tag of replacing the tiles. You can go bold with bright colors or tone down a glass mosaic backsplash that's not your style. Best of all, you can tackle this DIY paint project in a single weekend!
Check out how my painted tile floor looks after five years of wear and tear to see how well it holds up!
This post contains affiliate links for your convenience. Purchases made through these links may earn me a small commission at no additional cost to you. Please visit my disclosures page for more information.
Materials needed
Having the right materials and tools on hand is crucial for this backsplash makeover project. Not only will they make the job easier, but they will also ensure the longevity and durability of your painted backsplash.
Here's a comprehensive list of what you'll need:
- Porch and Patio floor paint
- STIX bonding primer
- TSP or other degreasing cleaner
- Latex gloves
- Sandpaper
- Sander or sanding block
- Tack cloth
- Painter's tape and paper to cover countertops
- Paint brush
- 4" foam roller covers and roller
I had a ton of paint left over from painting the tile floor in my half-bath makeover, and it has held up great! If it can handle the foot traffic of a teenage boy, it can handle a few splatters from cooking!
How to paint a tile backsplash
I followed the same technique I used on my ceramic tile floors, so check out this video on painting tile for a quick overview before diving into the tutorial below.
Clean the tile
The key to getting good adhesion on smooth surfaces like tile is to make sure it's clean first. Any debris on the surface will prevent the tile paint from sticking properly.
After years of cooking splatters, our backsplash was pretty icky around the stove. To cut through the grease, I used TSP mixed in a bucket of water. I've used this stuff for everything, from cleaning aluminum siding to wiping down textured walls before painting.
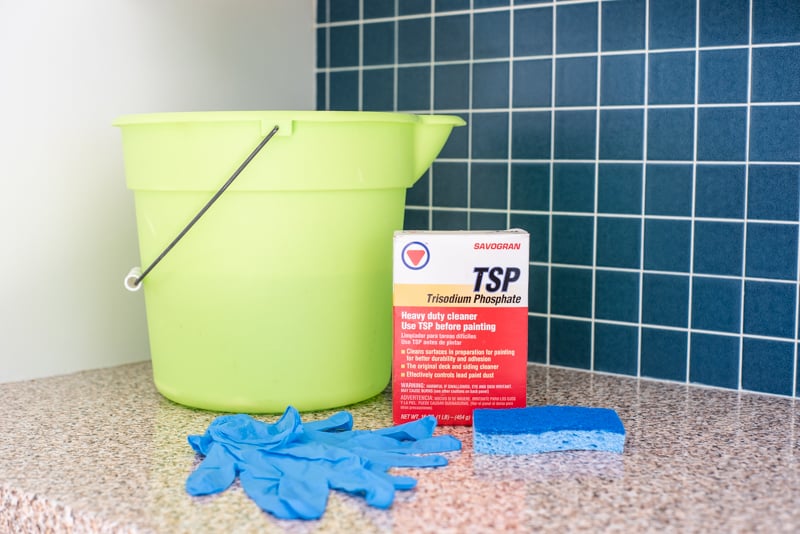
Make sure to use gloves when cleaning with TSP, because it will suck the oils right out of your skin! You can also use products like Krud Kutter that have a degreasing agent.
Give your backsplash tiles a quick scrub, then rinse off the residue with a clean sponge. Allow the surface to dry before moving on to the next step.
Repair any damage
Check for cracked or chipped tiles. It's important to address these before painting. If tiles are severely damaged or loose, consider replacing them. But for hairline cracks or chips, you can patch them up instead.
Clean the damaged area to remove any loose tile or grout. Fill chips or cracks with tile filler or caulk. Smooth out the filler using a putty knife and let it dry according to the manufacturer's instructions.
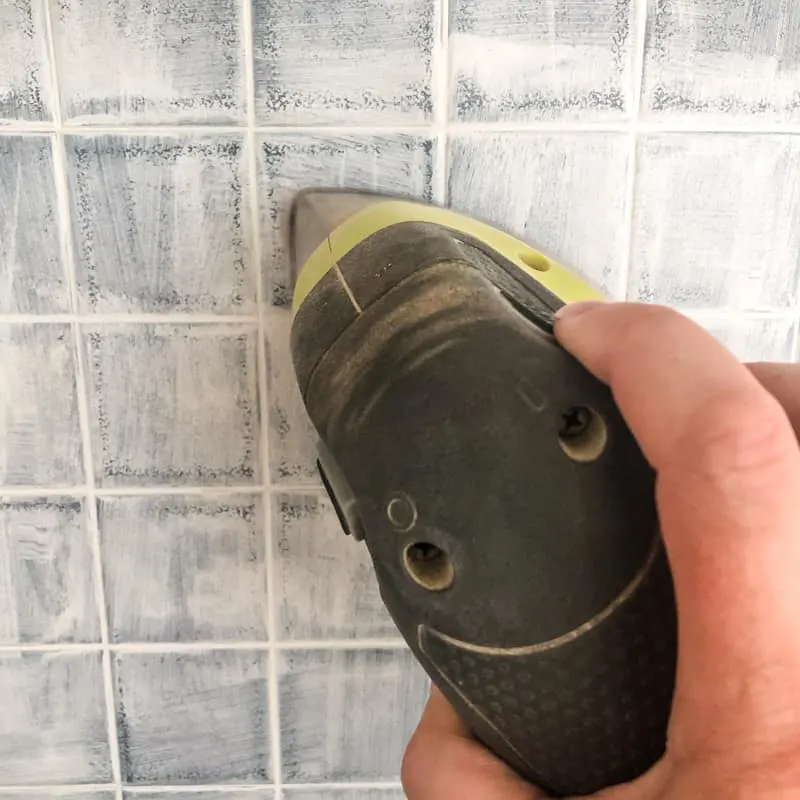
Sand the tile
Sanding will scuff up the slick surface of ceramic or glass tiles and give your paint something to grab onto. Keep in mind that you're not trying to remove the finish. Just a light sanding with 80 grit sandpaper will do!
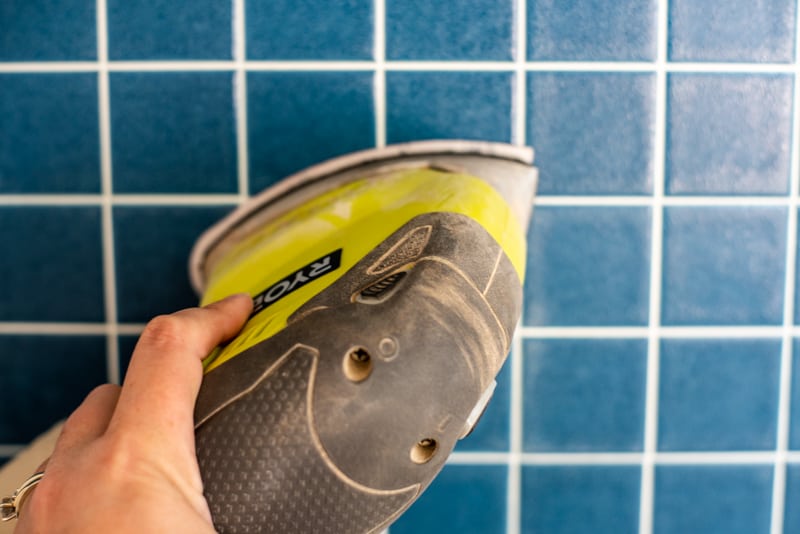

You should notice a thin film of dust forming on the surface. After sanding, wipe down the backsplash tile with a tack cloth. This sticky cloth will grab all those tiny flecks of dust that can ruin your paint job!
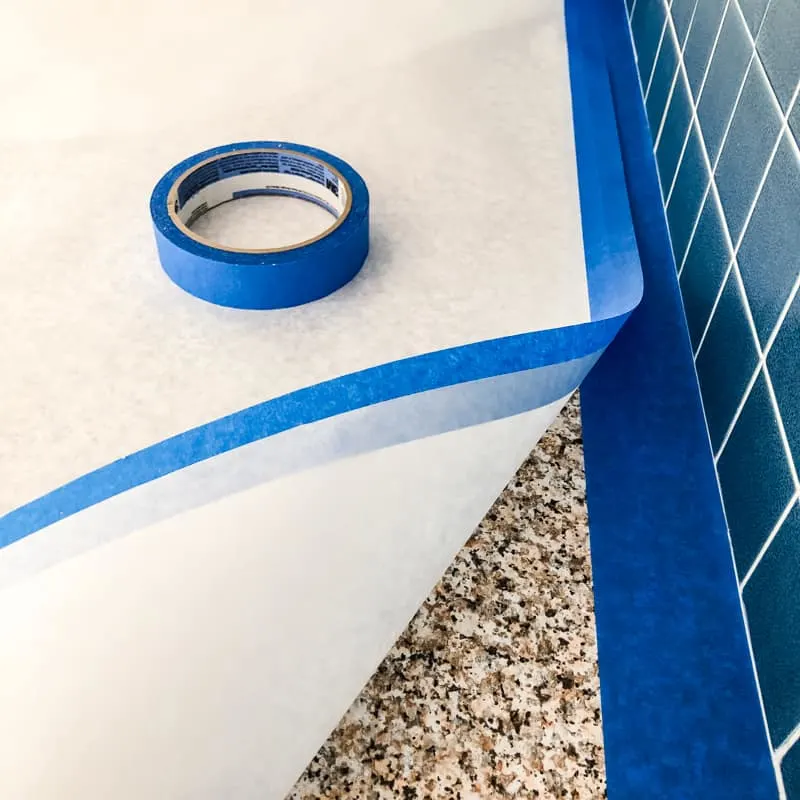
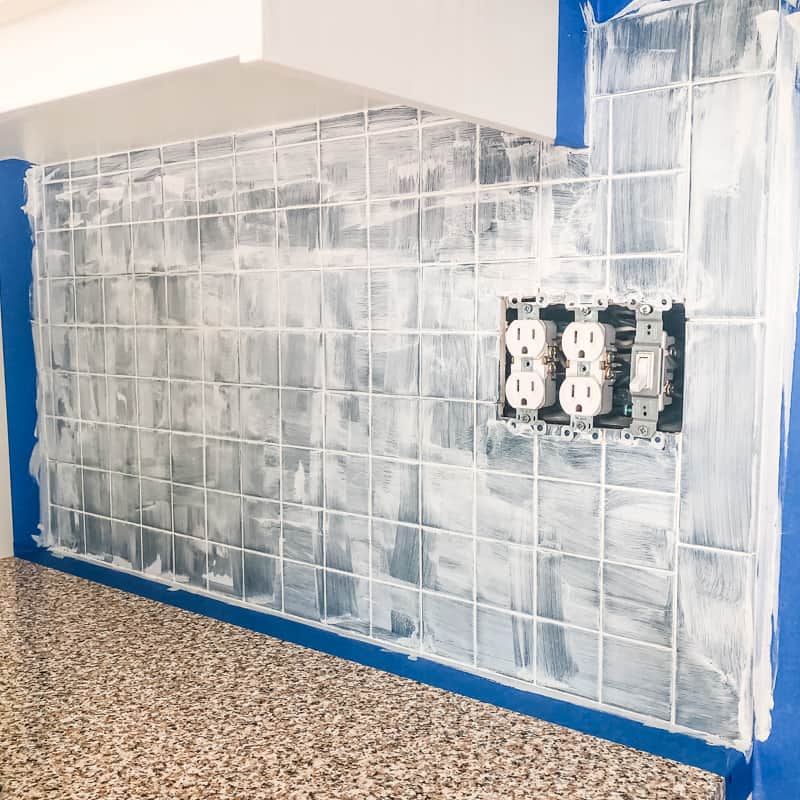
Protect the surrounding area
The bonding primer and paint will be difficult, if not impossible, to remove from the wall and countertop once it cures. Make sure to tape off anything you don't want painted.
For extra protection from drips on the countertop, I rolled out butcher paper (the same kind I use to protect my workbench from paint drips) and taped it down as well. Rollers can sometimes spray a fine mist of paint droplets, so cover anything that might get hit.

You may want to wrap your kitchen faucet in plastic wrap to protect the metal surface when painting that tight spot behind it.
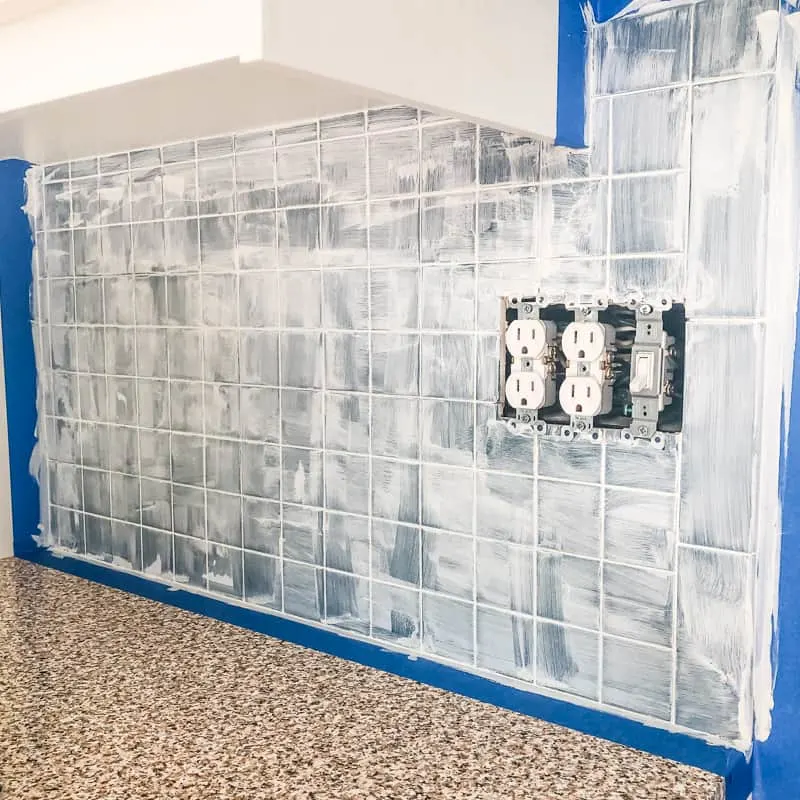
Use a bonding primer first
Before jumping in head first with the tile paint, put down a coat of bonding primer first. INSL-X Stix primer is formulated to stick to any slick surface, including glass, stone, and ceramic! I haven't had any trouble with the tile floor paint peeling up, thanks to this stuff!

I like to use disposable foam brushes for heavy-duty paints like these because it's difficult to clean the brushes afterward. This primer also dries quickly, and can form clumps on the bristles that transfer to the surface and mess up your project!

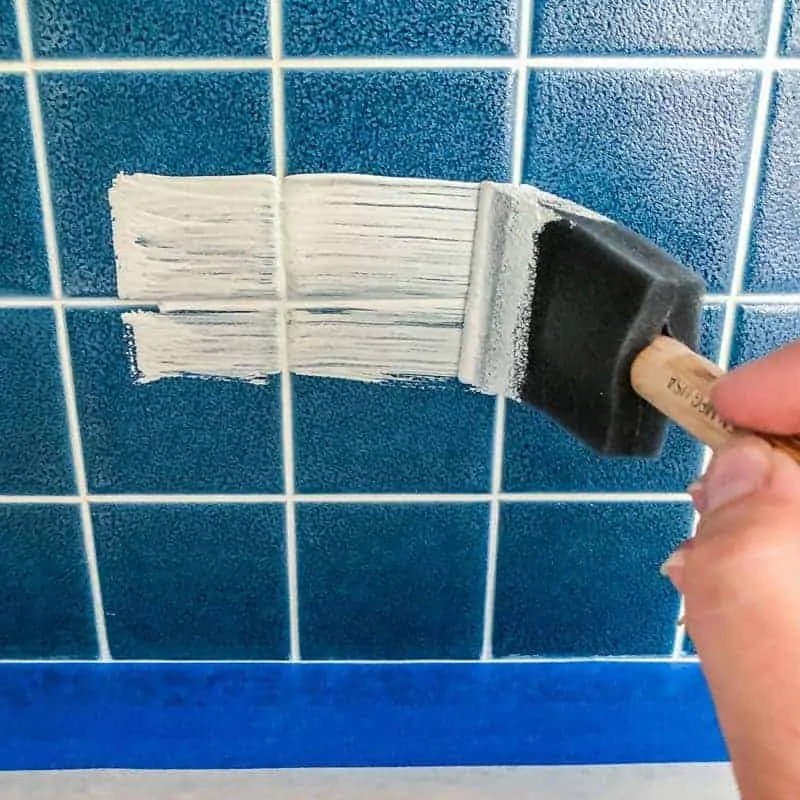
Work in small sections by brushing the primer into the grout lines first, then going over the area with the roller. There were a few times that I tried to do too much at once and pulled up some of the drying primer with the roller.
If you can feel brush stroke lines or have any drips, wait until it dries then sand it down with 220 grit sandpaper. This will smooth out the surface without removing most of the primer.

Remember to remove any dust with a tack cloth before starting the next step. Don't panic if it looks horrible at this point. It gets better, I promise!
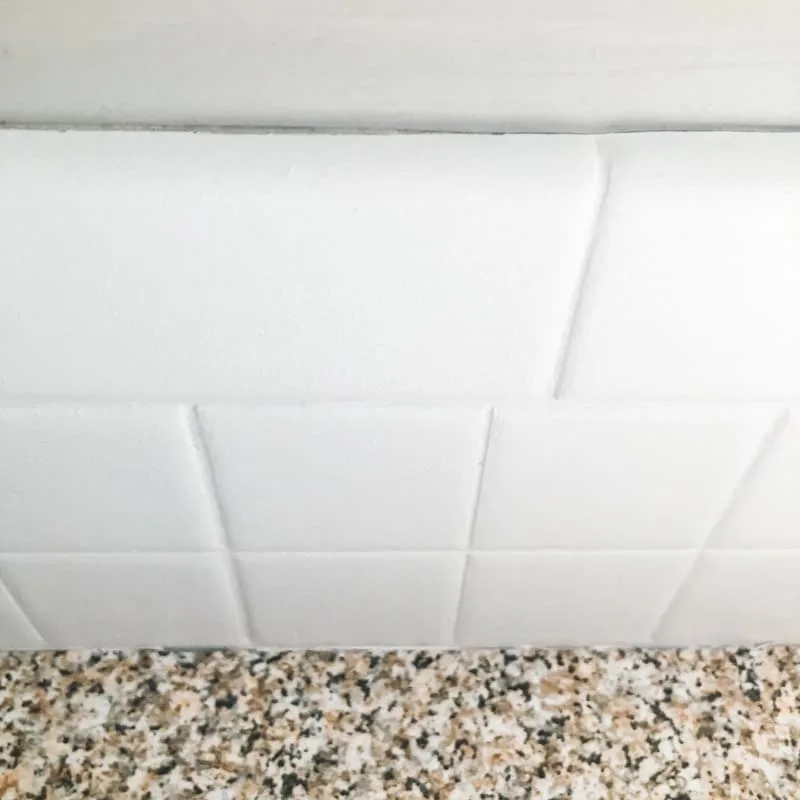
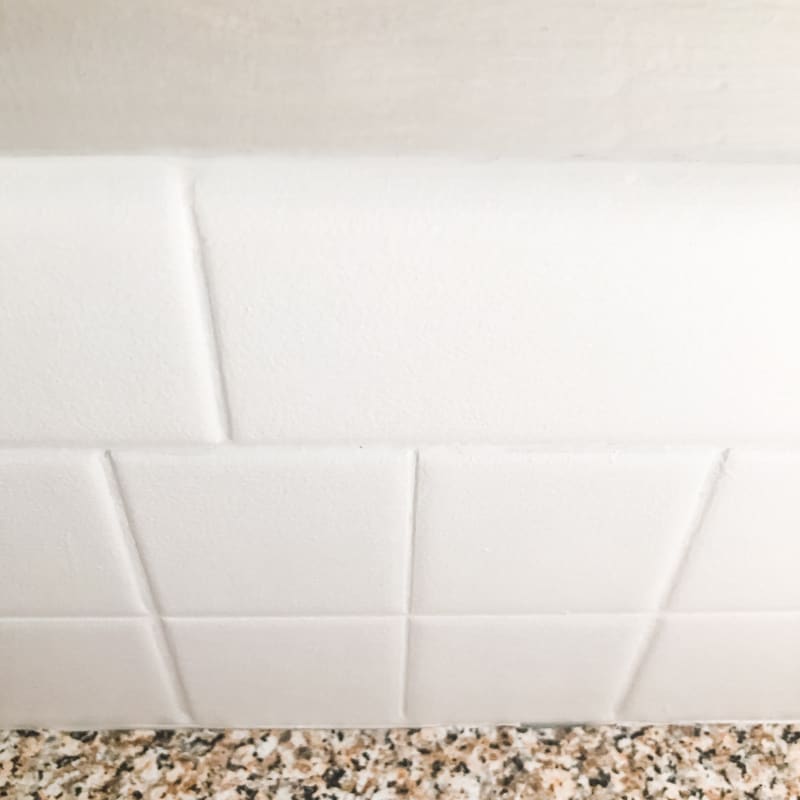
Paint the backsplash tile
Behr Porch and Patio paint is formulated to withstand moisture and foot traffic, and it's perfect for painting backsplash tile too! You can have it tinted to any color at the store, so you're not stuck with plain white. I had the low-luster paint on hand, but I recommend going with a gloss or semi-gloss finish, which will be easier to clean.
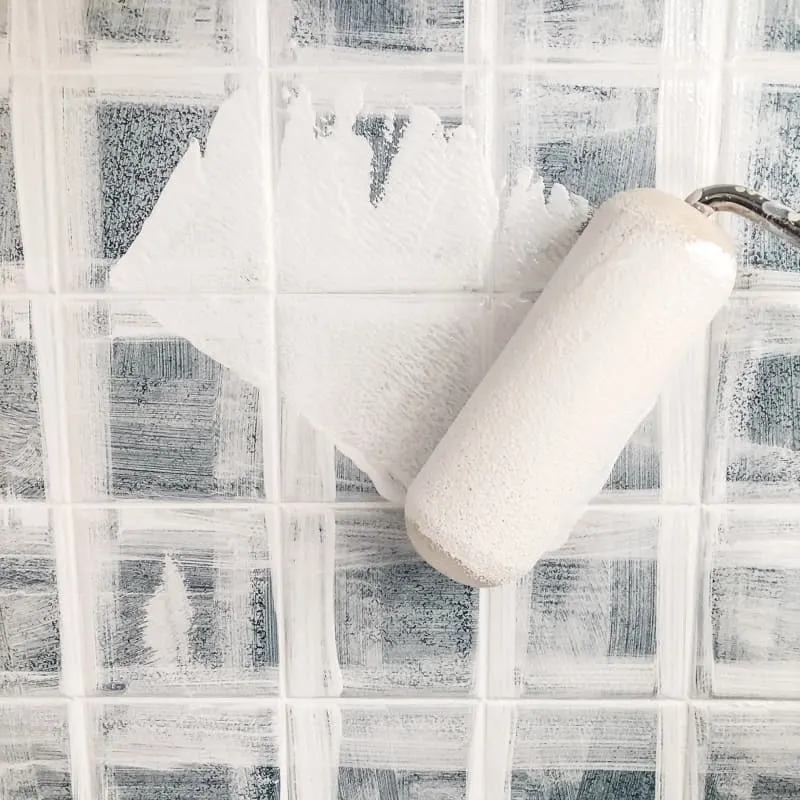
Apply the tile paint the same way you did the primer. Work it into the grout lines and hard-to-reach areas with a brush first...
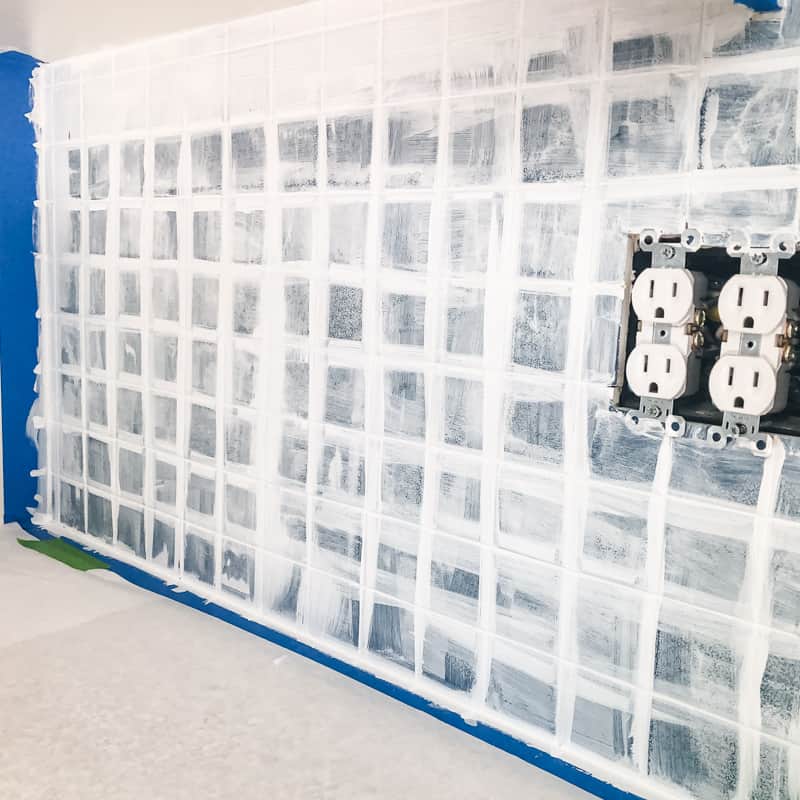

Then use the roller to fill in the rest.

Check the label on the paint can for dry time. The Behr Porch and Patio paint I used has a 4-6 hour recoat time. It took four coats to get full coverage over that dark blue tile! You should be able to do it in two coats if the color change isn't so drastic.
Caulk between the wall and tile
After removing the painter's tape, I noticed a bit of a gap between the painted tile and the wall. The tape did a great job preventing the paint from getting on the wall, but all that paint build-up makes the transition less than perfect.
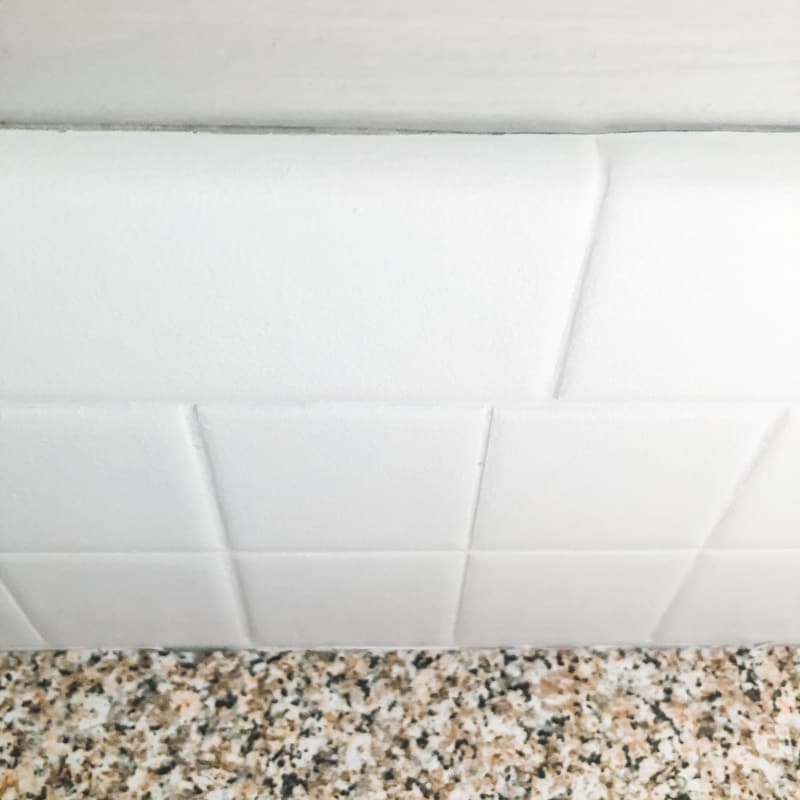
To seal up that gap, just run a bead of paintable, waterproof caulk along the corner between the tile and the wall. If you don't know how to use a caulk gun, I have a tutorial for you! You can touch up the wall paint if necessary once the caulk dries.

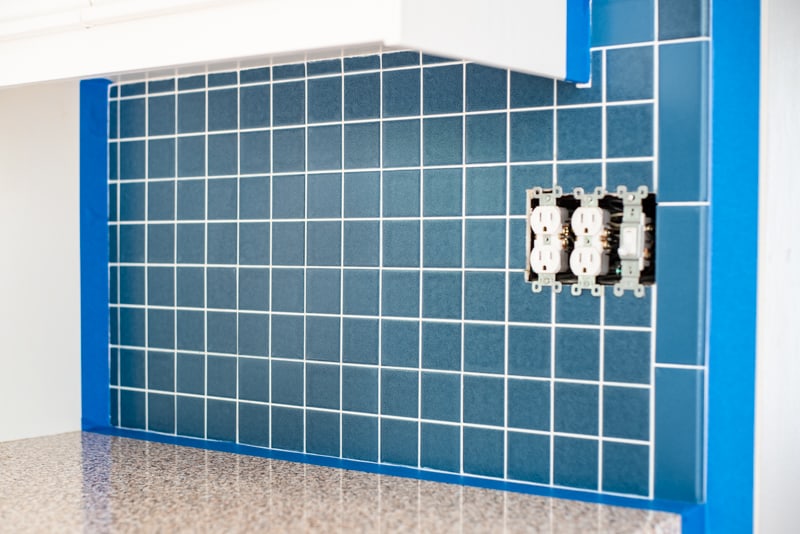
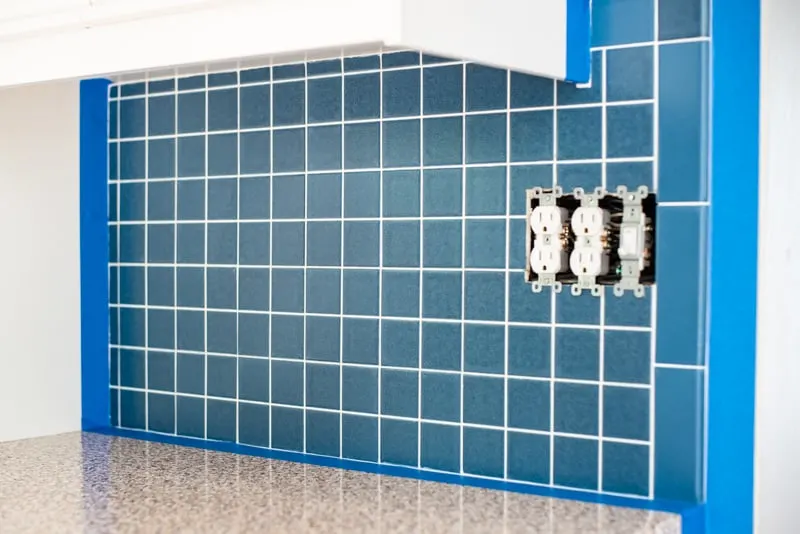
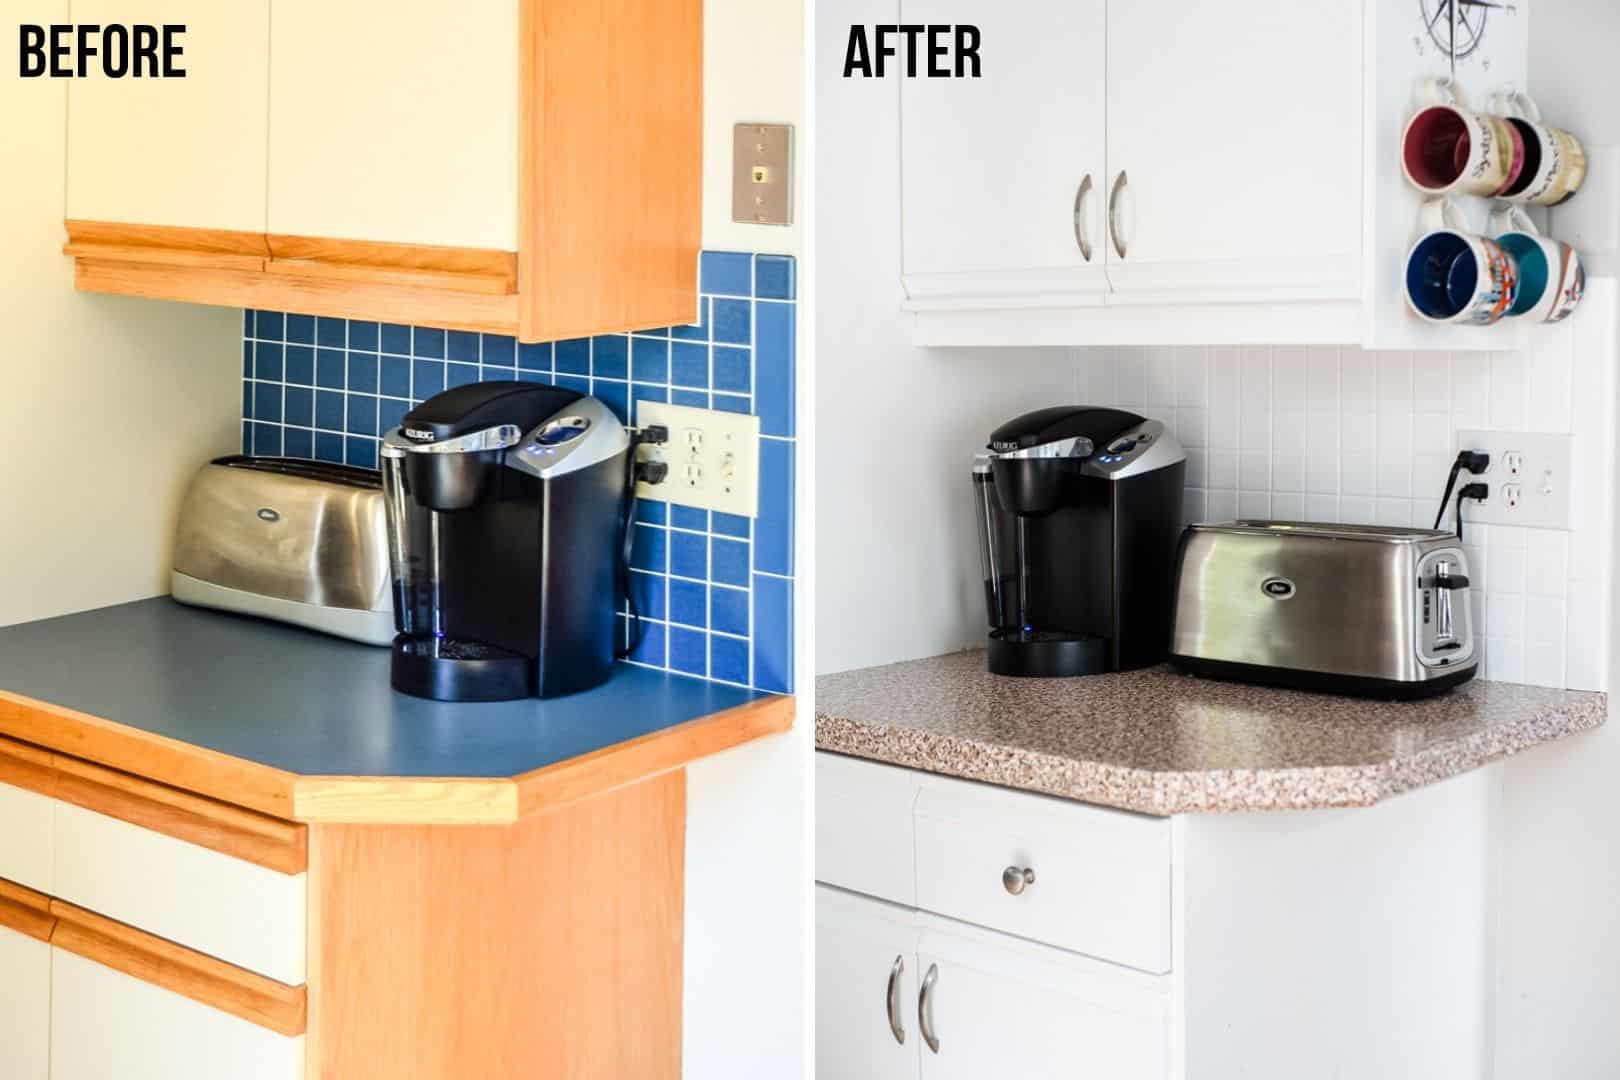
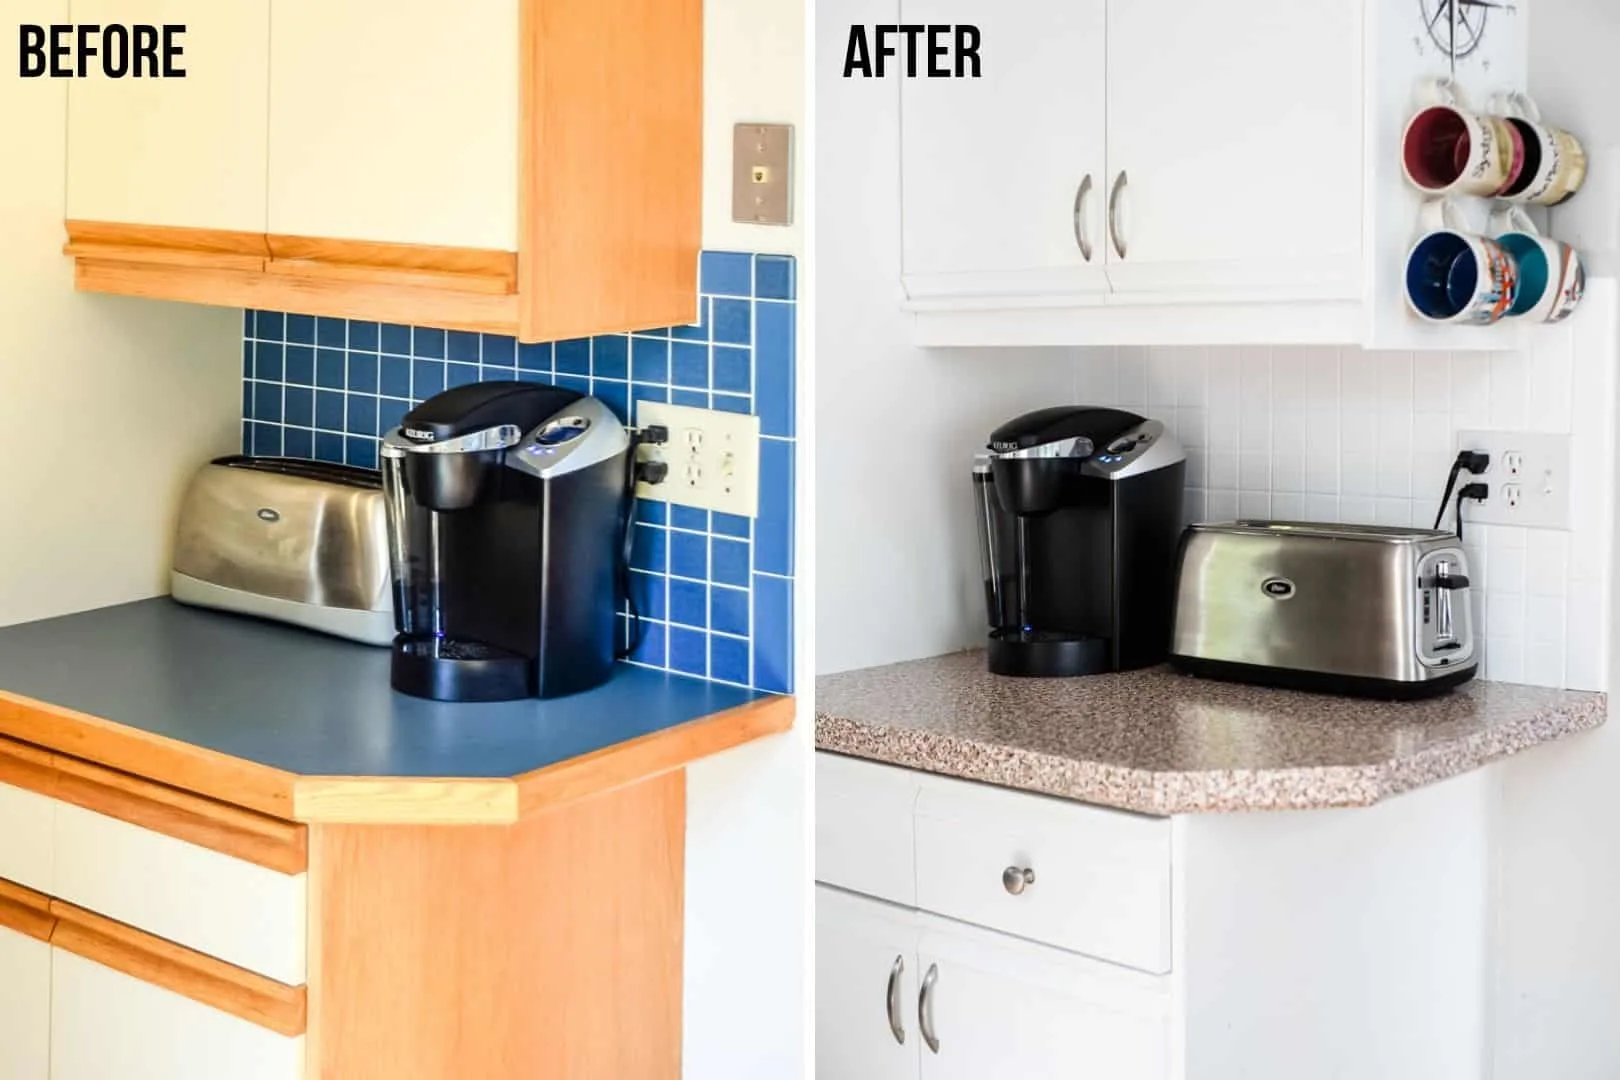
Painted backsplash before and after
I'm soooo happy with how the painted kitchen backsplash turned out! It feels like the walls of the kitchen were pushed back a foot, just from lightening the color of the tile!
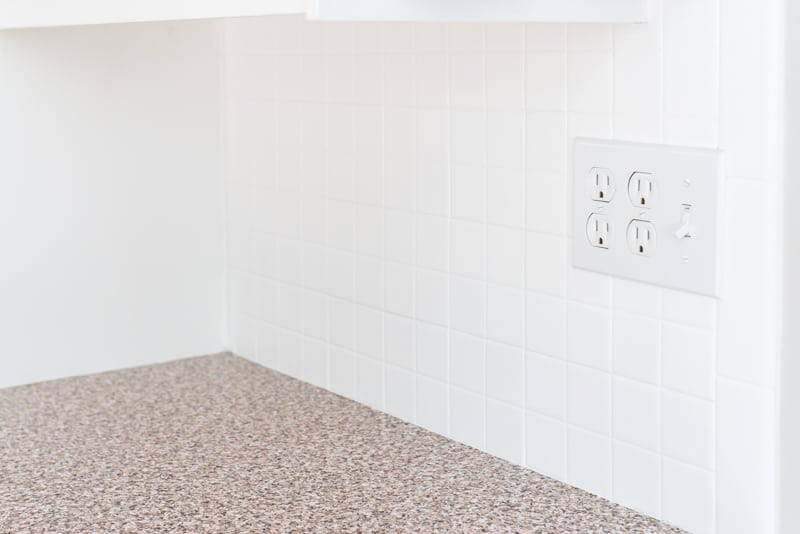
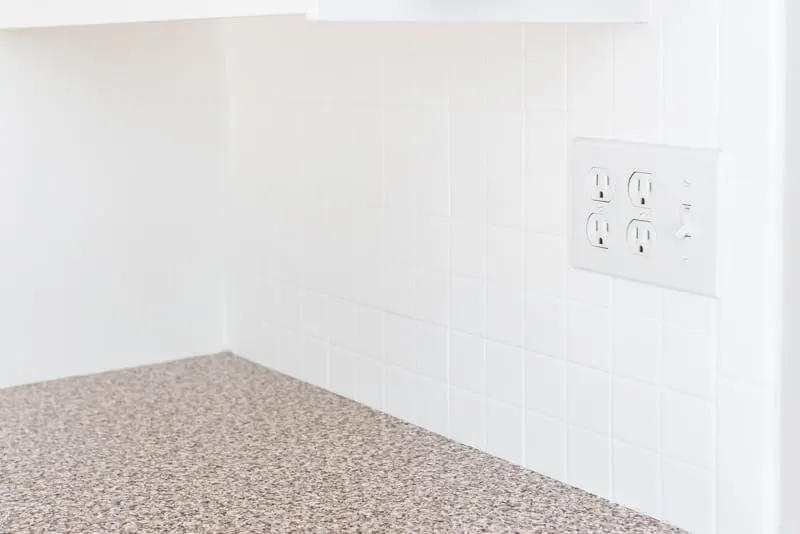
I never quite appreciated the difference until I dug out this old photo and put them side by side. The only things I haven't changed are the toaster and coffee maker!
Post-Painting Care and Maintenance
Your newly painted backsplash will only last with the right care and maintenance. Here's how to keep it looking its best for years:
Wait Before the First Cleaning
There's a difference between drying and curing. Avoid any heavy cleaning until the paint is fully cured, which could be several days to weeks. Check the paint can for exact times.
Regular Cleaning Tips
When it's time for the first cleaning, start gently. Use a soft cloth dampened with water and a mild soap.
Wipe up any splatters or spills immediately to prevent stains and build-up. Avoid abrasive cleaners or scouring pads, which can scratch the paint.
Dealing with Chips or Scratches
One of the realities of a busy kitchen or bathroom is the occasional chip or scratch on your freshly painted backsplash. However, these minor imperfections can be addressed quickly, ensuring your backsplash continues to look pristine.
For light scratches, you may be able to buff out the damage with a Magic Eraser or high-grit sandpaper. You can also try touching up the paint by dabbing a tiny amount of your leftover paint over the sanded area, feathering out the edges to blend with the surrounding area.
For deeper chips or gouges, you might need to apply a layer of filler or caulk to the area before repainting. Apply the filler carefully, smoothing it with a putty knife or your finger. Then apply bonding primer and paint to that area of the tile.
Consider a Sealant
Depending on the location and use of your backsplash, you might consider adding a clear sealant over the painted tiles. This can provide added protection against moisture, stains, and wear.
Opt for a water-based polyurethane or a sealant specifically designed for painted surfaces. Check out my article about polycrylic vs polyurethane for a more detailed comparison of these products.
When to Repaint
With proper care, a painted backsplash can last several years. Ours held up great until I remodeled the entire kitchen in 2022! However, over time, wear and tear are natural.
Repainting can also be a decorative decision. If you decide to change your kitchen or bathroom's color scheme, repainting the backsplash can be a quick way to update the look. You can just paint over the existing color!
Frequently Asked Questions about Backsplash Painting
Can you paint glass tiles?
Yes, you can paint glass tiles, but it requires special preparation and materials like high-adhesion primer and acrylic or enamel paint suitable for glass to ensure good adhesion and durability. Check out this tutorial for more details on how to paint glass!
Can I paint over grout?
Yes, you can paint over grout. Just make sure to use a small brush to get into the grout lines when applying both the primer and the paint.
Can you use chalk paint on tile?
I wouldn't recommend using chalk paint on tile. It's not waterproof, so any moisture from steam or splashes will cause it to peel.
Can you paint marble or stone tile backsplash?
Yes, you can paint over marble or stone tile backsplash using this same technique. If your stone is heavily textured, such as limestone tile, use a roller with a larger nap to get the paint into all the crevices.
How well does a painted tile backsplash hold up?
It's been three years since I painted my ceramic tile backsplash, and it looks just as good as the day it was done! If you notice any scratches or chips, they're easy to touch up with a light sanding around the damaged area and a fresh coat of paint.
Whether you're breathing new life into old tiles or simply seeking a change in decor, painting your backsplash tile can totally change the look and feel of your kitchen or bathroom! Give it a try!
Check out these other painting tutorials!
Chloe
Thursday 8th of August 2019
Beautiful job, Vineta! I’m curious: What sheen of porch paint did u use?
Vineta
Monday 12th of August 2019
I used low luster paint, so it wouldn't be too shiny.
Amy
Thursday 8th of August 2019
That looks fantastic! I love seeing this.
erika wilson
Thursday 8th of August 2019
What a great "before and after". You're doing a wonderful job of updating your kitchen. Nice job.