Learn how to remove tile backsplash like a pro! This guide covers everything you need to know from demolition to drywall repair.

Backsplash tiles protect drywall from splashes and spills while adding a personal touch to the space. But styles change and what was once a beautiful accent now looks tired and dated.
While you can paint tile backsplash for a quick fix, sometimes it's best to rip it out and start fresh!
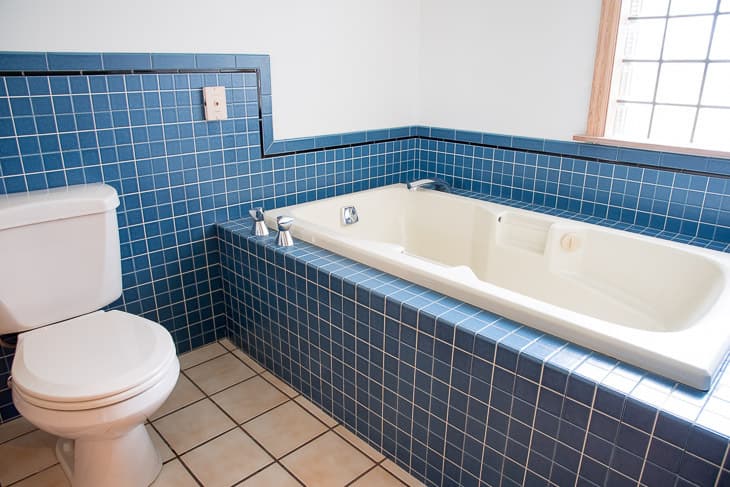
I've removed a LOT of tile in our house. From the peach marble tile of our old fireplace to the beige square tiles in our half bathroom to the cobalt blue tub surround, it was all quite the eyesore!

I try to keep the original drywall intact whenever possible. Some people recommend cutting out the wall with the tiles still attached and installing new sheets. But in my experience, replacing drywall takes way more time, and it can be difficult to get a professional result.
Keep in mind that you can expect some level of wall damage when removing backsplash tile, no matter how careful you are. The goal here is to minimize both the mess and the harm to the wall so you can tile over it. I'll show you a few ways to repair the damage so you can move on to the next step in your project quickly!
Let's get started!
This post contains affiliate links for your convenience. Purchases made through these links may earn me a small commission at no additional cost to you. Please visit my disclosures page for more information.
Tools and Materials Needed
Before you start tearing down those tiles, you'll need the right tools and materials for the job. Trust me, having everything at hand will make the process way smoother. Here's what you'll need:
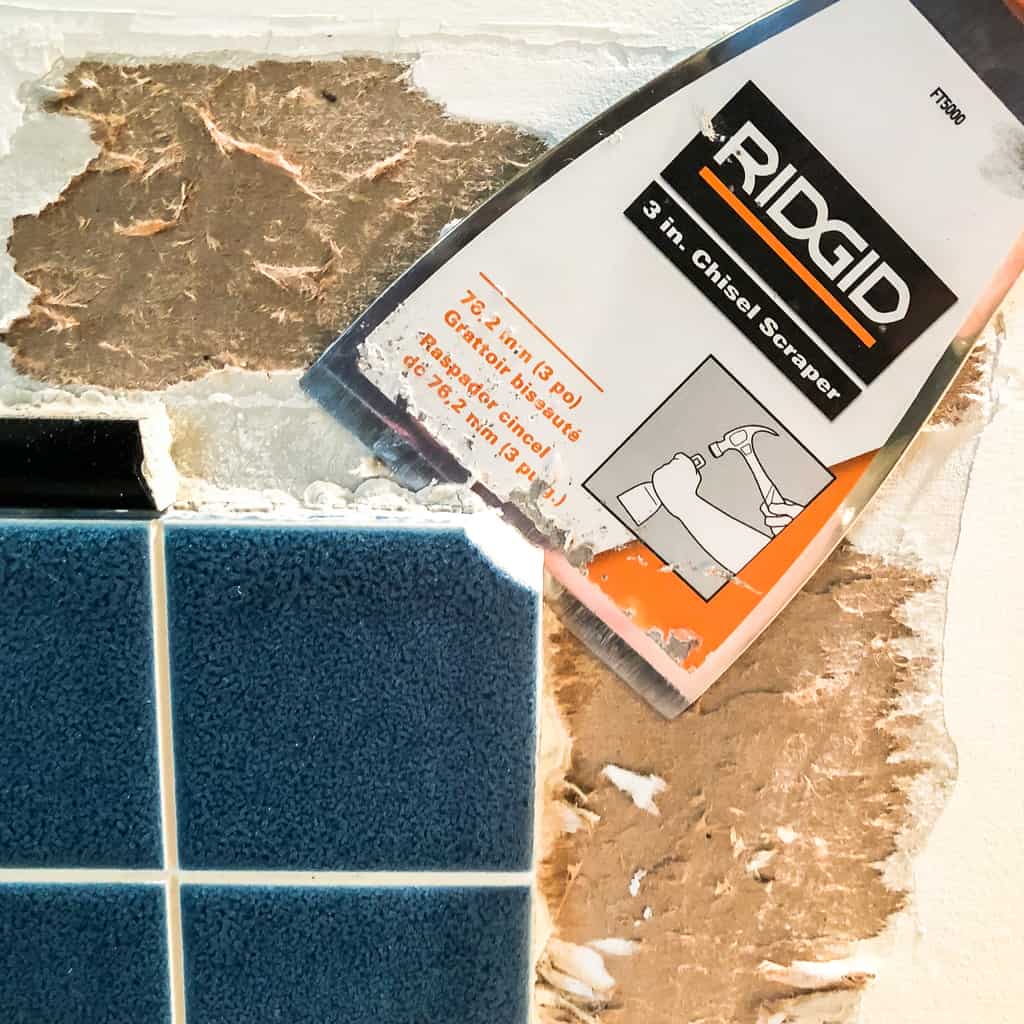
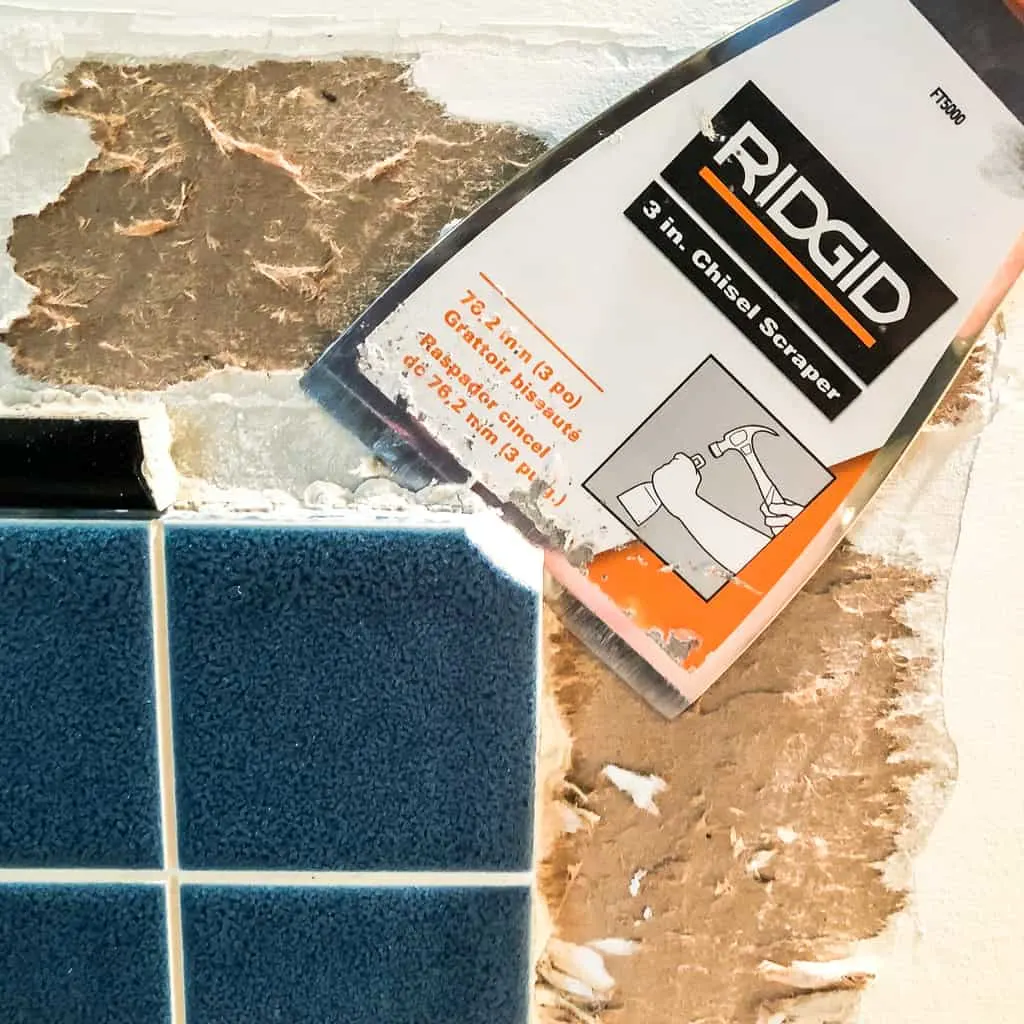
- Chisel with Hand Guard: A flat chisel will help you get under the tiles and pry them off of hard surfaces like cement board.
- Hammer: I recommend this dead blow hammer with a plastic coating on the head to muffle the sound of all that chiseling.
- Utility Knife: This is for cutting through the caulk around the outside edge.
- Flat Pry Bar: For getting under those stubborn tiles that just won't budge. Get a large and a small one for different situations.
- Scraper Tool: This long, flat blade can help remove stuck-on tile adhesive from the wall.
- Gardz Problem Surface Sealer: This stuff works great for torn drywall paper! It creates a hard, sealed surface so you can install new tile over the damaged areas.
- Safety Gear: Don't forget work gloves to protect your hands and safety goggles for your eyes.
- Drop Cloths: Optional, but they make cleanup a lot easier.
Safety Precautions
Before you go swinging that hammer, let's talk safety. I've suffered from my fair share of cuts and bruises from demolition projects involving removing tile, and I don't want you to get hurt!
- Electrical Outlets: First things first, turn off any electrical outlets near the backsplash area. You'll need to remove the cover plates, and you don't want to risk an electrical shock.
- Safety Gear: My hands used to look like I got into a bar fight after removing tile! The sharp shards can go flying and cut your skin, and one miss of the hammer can leave you bruised and cursing. Wear work gloves and safety glasses the entire time!
- Ventilation: Open some windows or set up a fan. Tile removal can kick up a lot of dust, and you don't want to be breathing that in. A dust mask can also help protect your lungs.
Prepare the Work Area
Before you dive into the actual removal, setting up your work area can make a world of difference. A little prep work goes a long way in making the process smoother and cleaner.
- Clear the Countertop: Remove any appliances, dishes, or other items from your countertop. You'll need all the space you can get!
- Protect Your Surfaces: Lay down some drop cloths or cardboard on the floor and over the countertop. This will catch any falling debris and make cleanup easier. If you're not removing your faucet, a few layers of plastic wrap will help protect it from scratches.
- Remove Fixtures: Got any outlet covers, switch plates, or other fixtures on or near the backsplash? Take them off. This gives you unobstructed access to the tiles.
How to Remove Wall Tile
Ready to get smashing? Here's what to do!
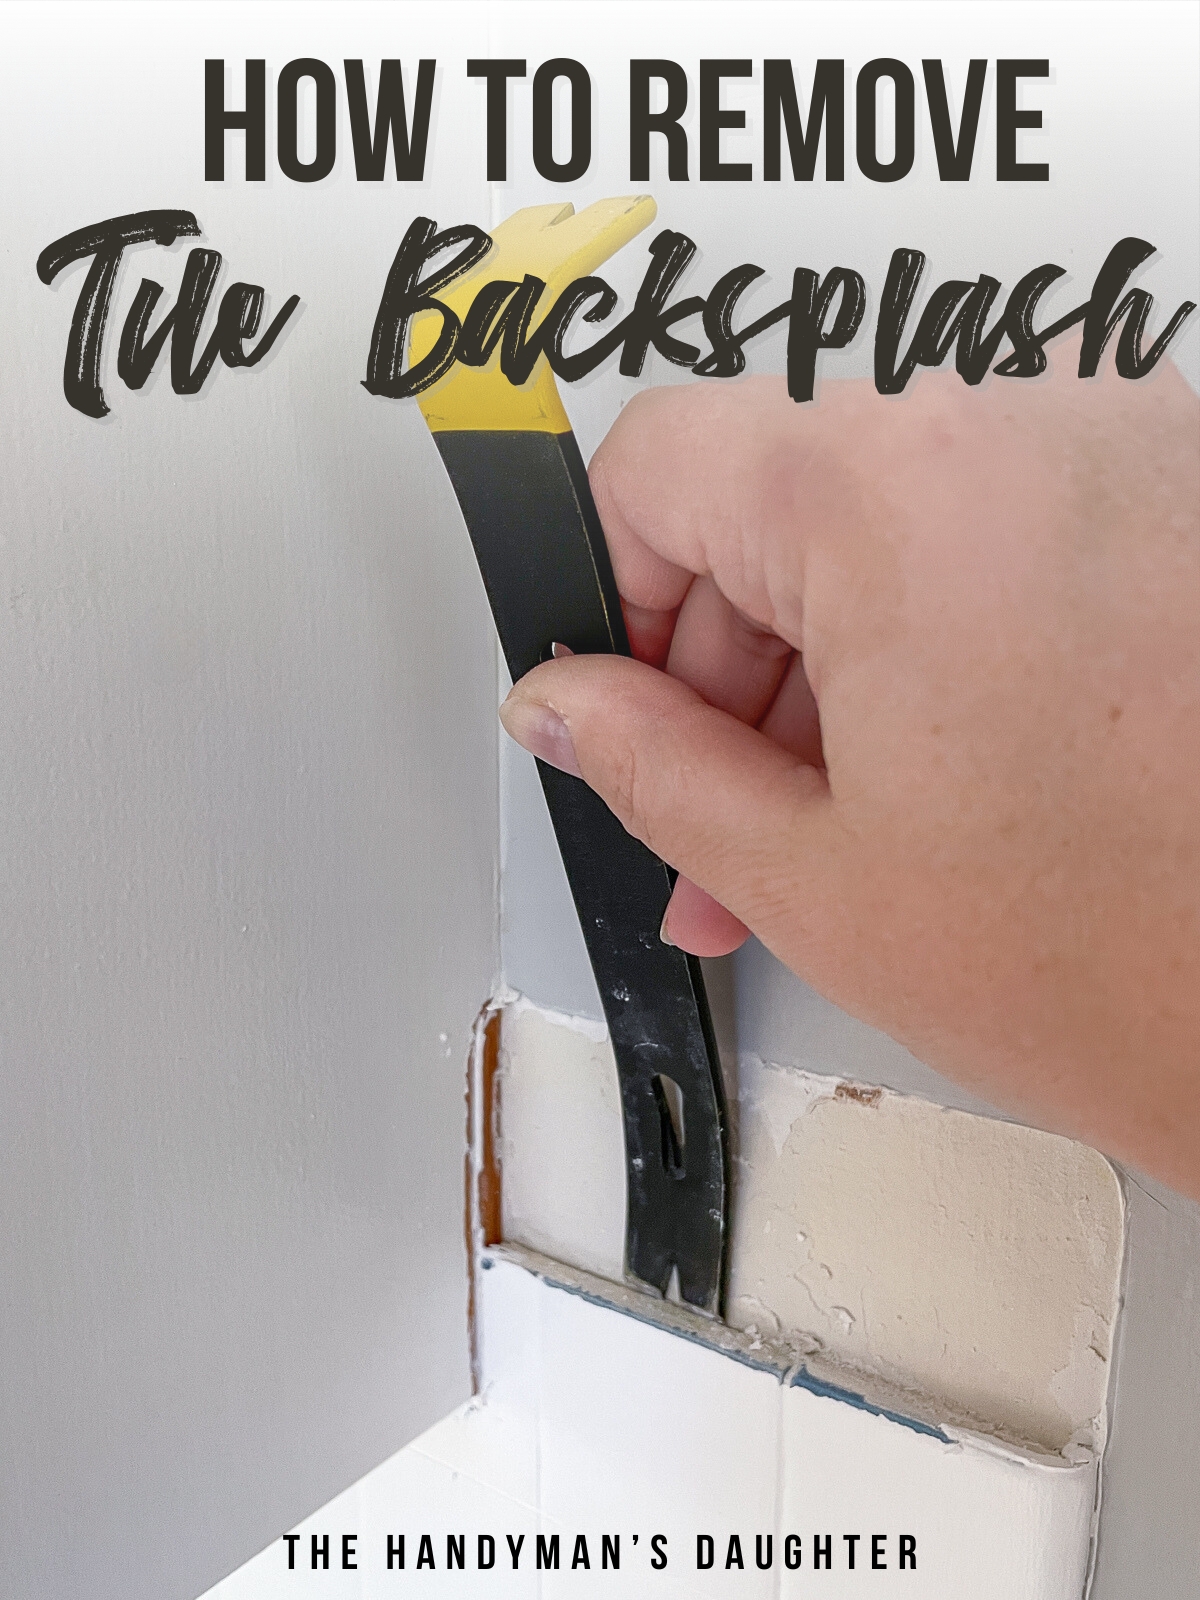
Start at a corner or edge
Usually, there's at least one spot on your wall where you can get your chisel under the edge of the tile. Typically there's either bullnose tile (with a rounded edge) or trim tile that transitions from the tile section to the drywall.
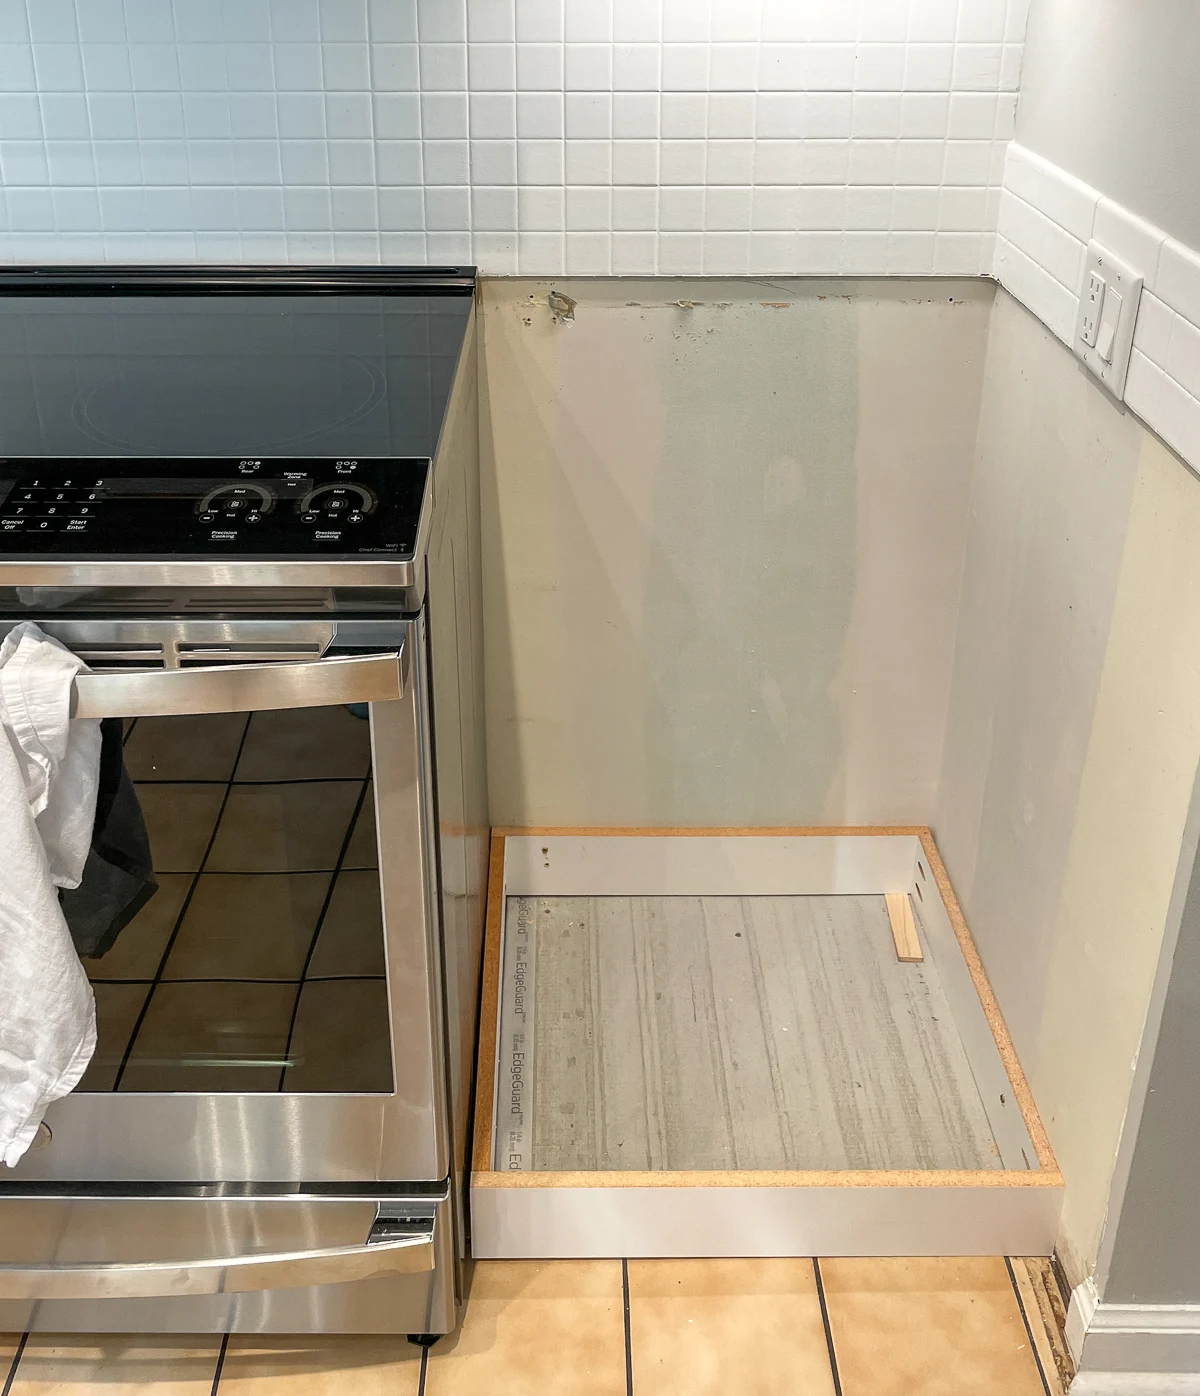
If there's no visible edge, such as when the tile spans wall to wall, you may need to remove a cabinet or appliance to get to an easy spot to start. I was replacing this cabinet anyway, so I pulled it away from the wall so I could access the bottom tile edge.

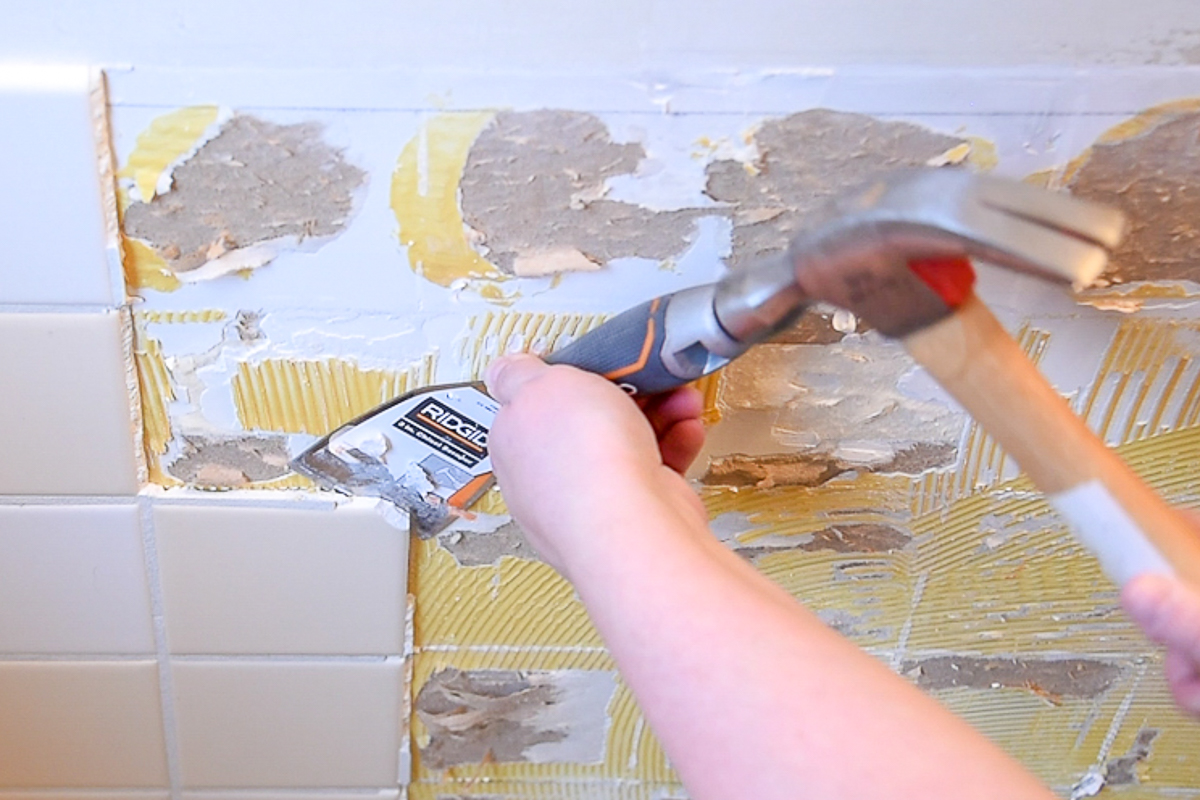
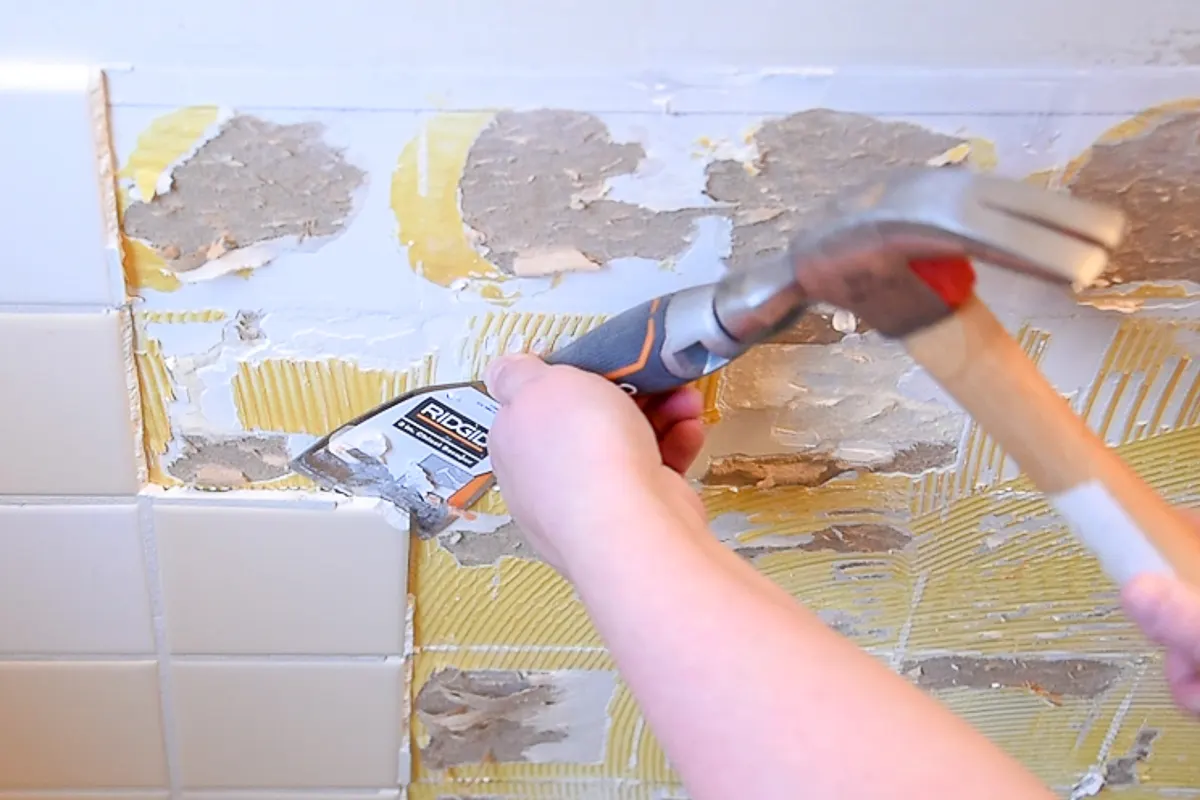
Use a utility knife to score the caulk where the tile meets the wall. Run the blade along the tile side first, then carefully cut along the wall to remove it. If you're having trouble, you can use a caulk remover tool to peel it up.
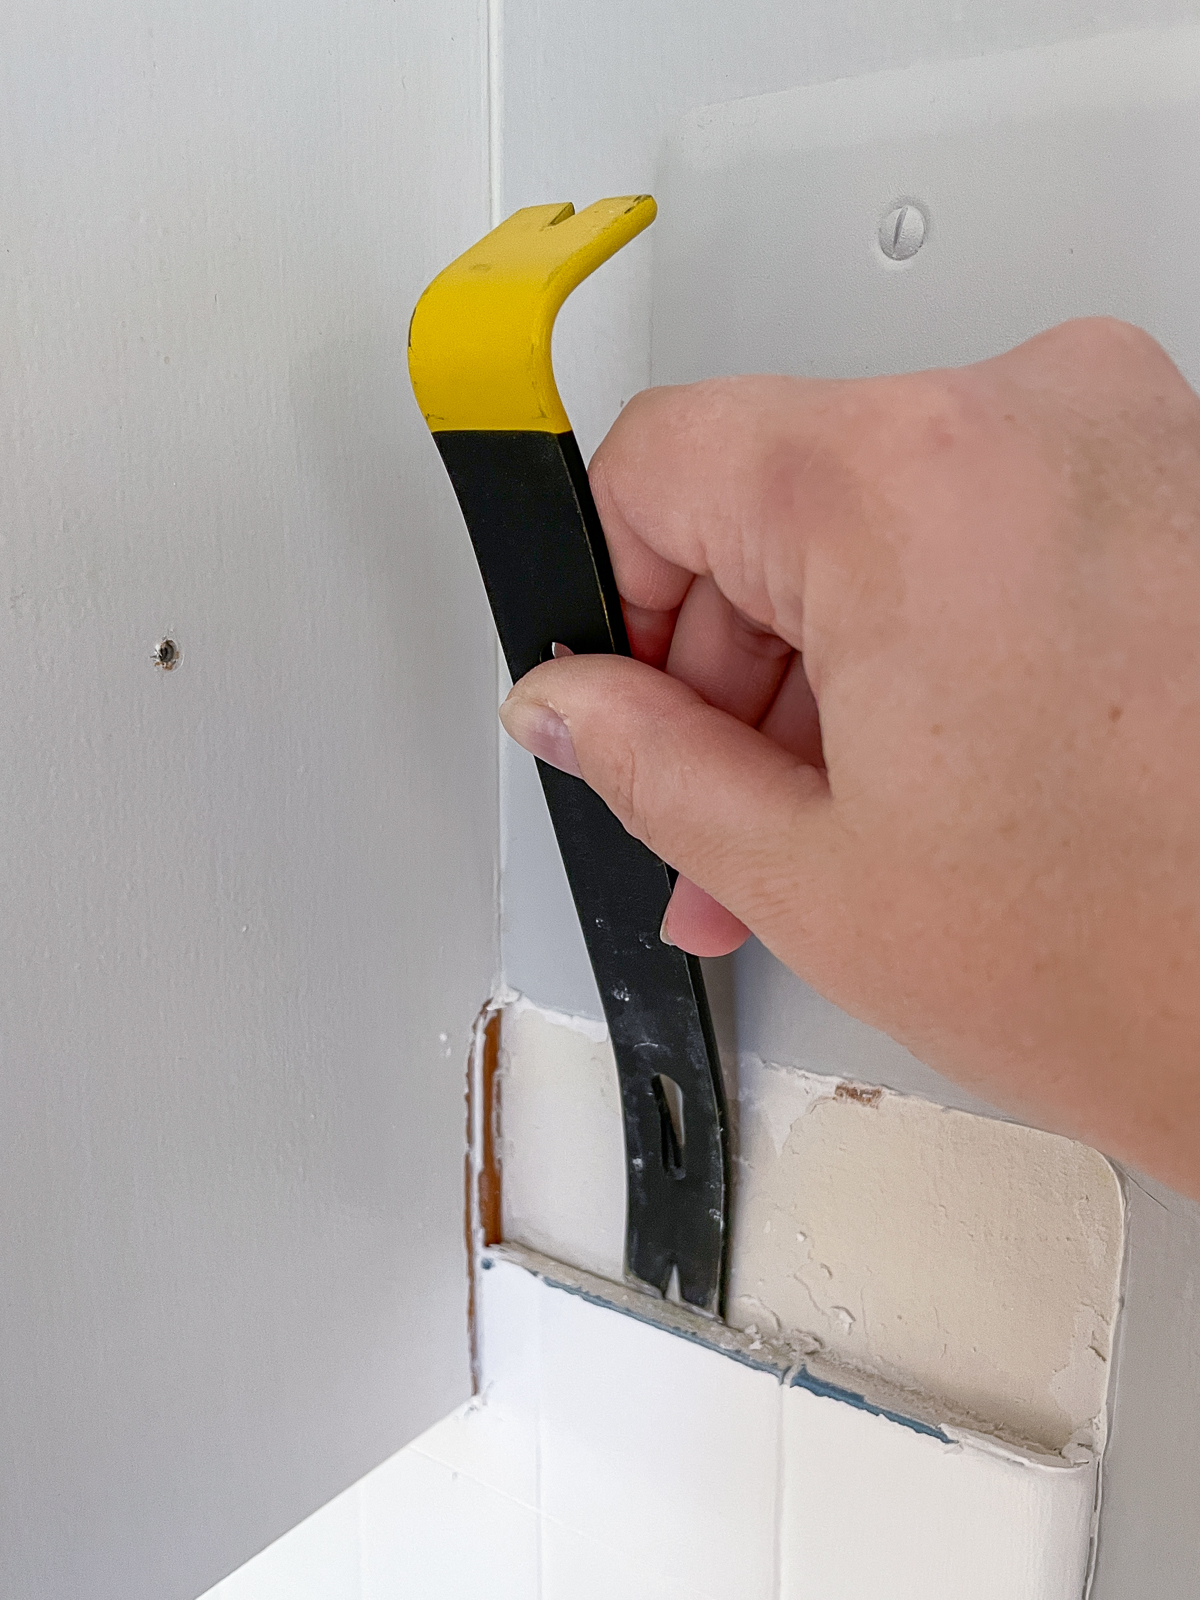

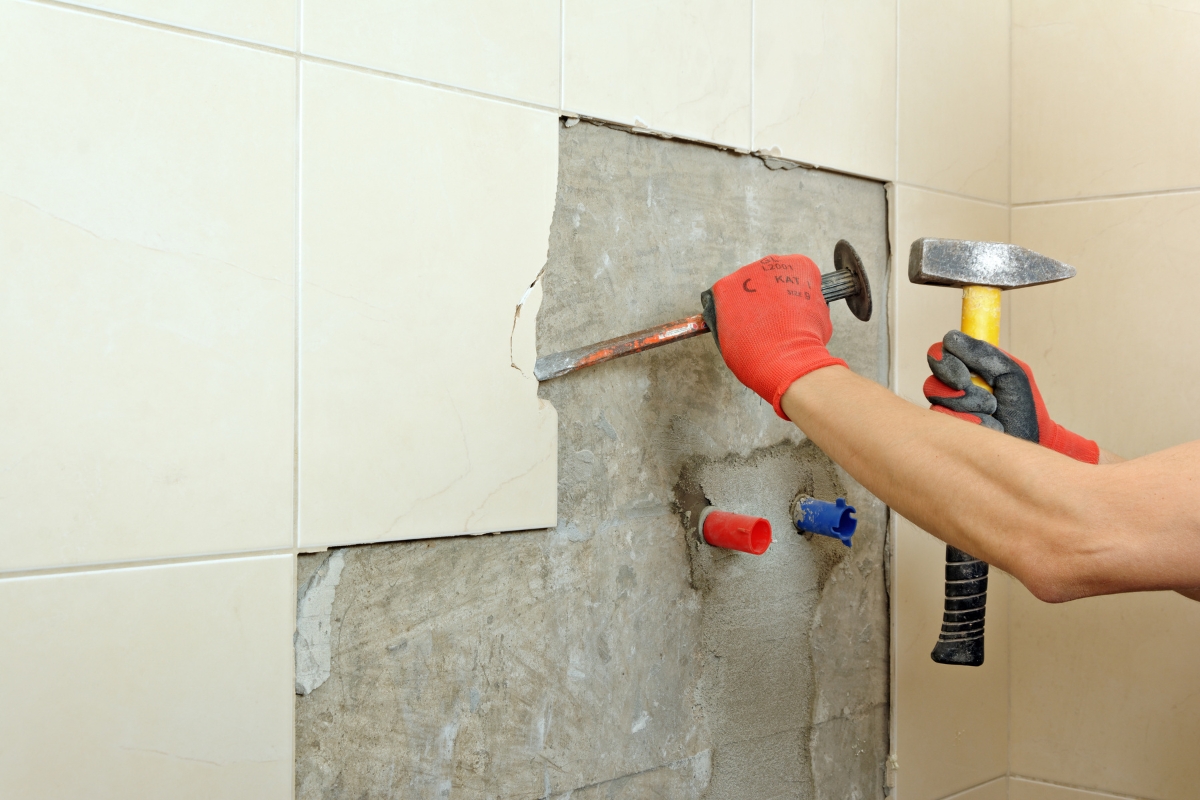
Once the seam is exposed, look for a gap that you can get your small pry bar into. Keep the back of the pry bar flat against the wall, and use the hammer to gently tap the hooked end until the chisel is lodged behind the wall tile.
Use the pry bar as a lever
Sometimes the tile will pop right off as soon as there's a bit of resistance. Other times, it'll need a little more convincing. The curve of the pry bar will help get those stubborn tiles off the wall.
Once you've wedged the flat part all the way in, apply a bit of force against the wall to detach the adhesive. Be careful not to put too much pressure, or it could leave indentations or even holes in the drywall.
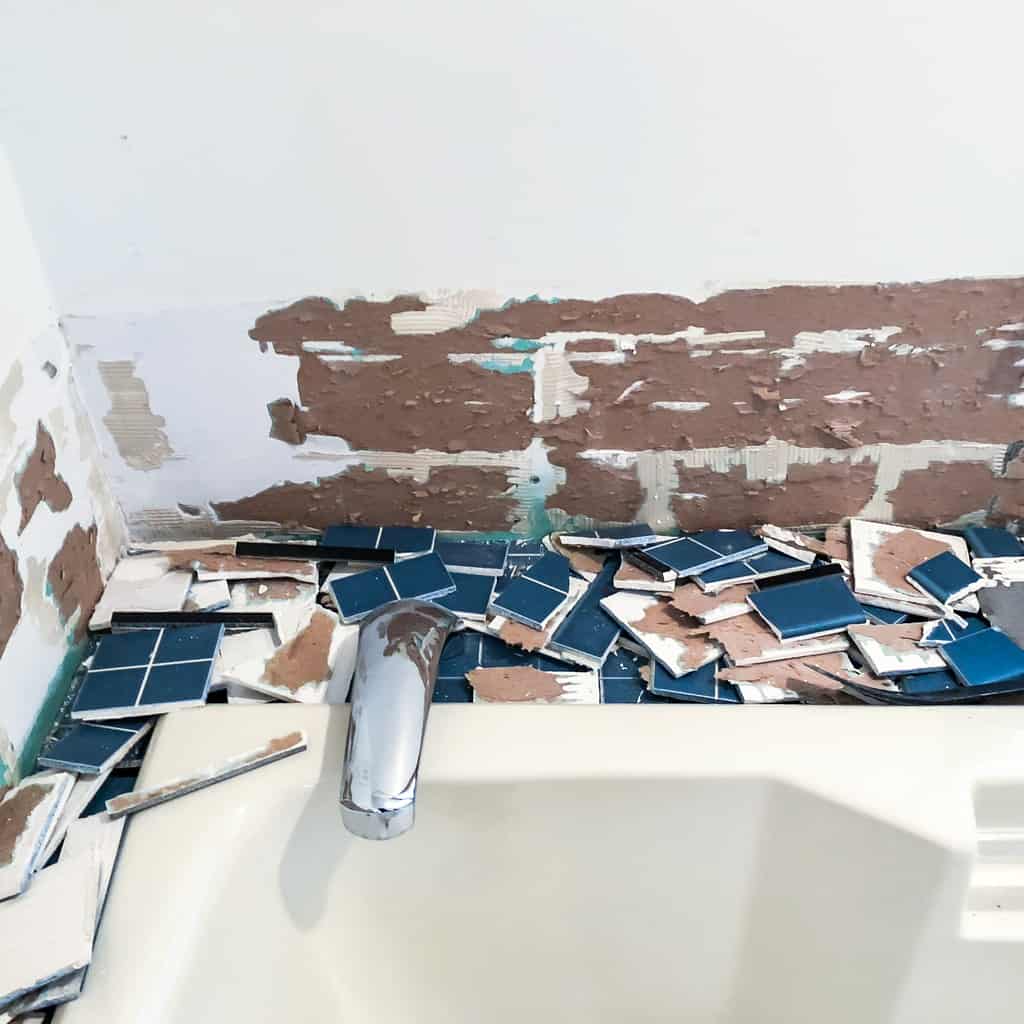

Once you get the first few tiles down, it's just a matter of working your way down the wall. Sometimes they'll come off in big sections, and sometimes you'll just get a tiny corner chipped off! Patience is key when you're trying to preserve the drywall underneath.
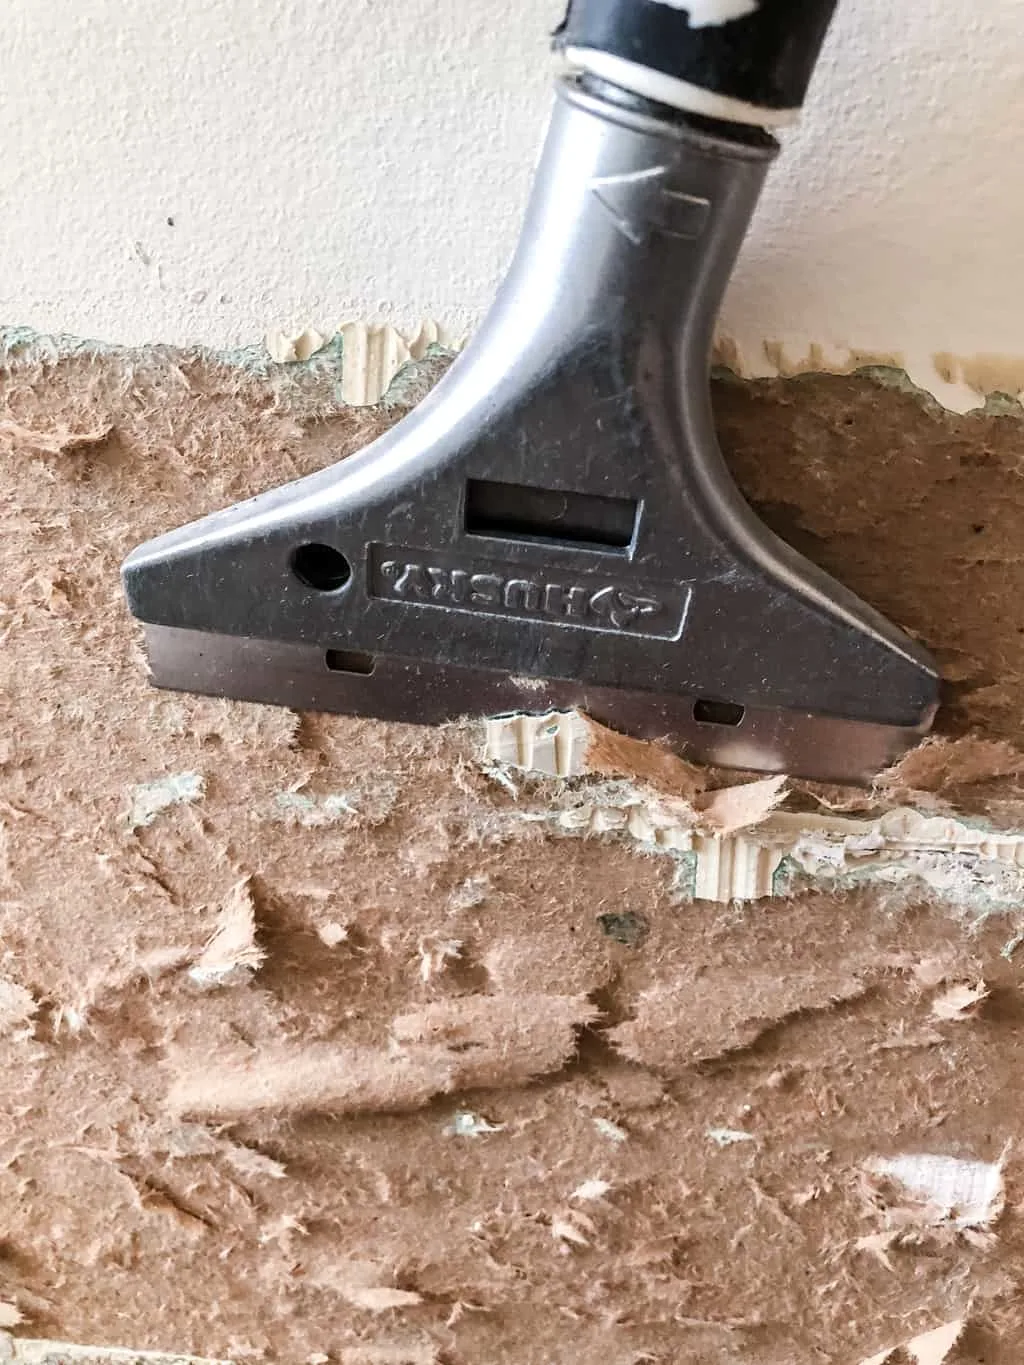
Try different tools
I keep a variety of tools on hand to see which one works better for a particular section. Sometimes a wider, thinner blade like this bent scraper tool can get behind the tile.
If there's cement board behind the tile (which is common around a shower), you can use a masonry chisel to pry it off. The cement board will hold up better to the abuse than drywall.

Dealing with adhesive residue
It's pretty rare to get all the adhesive to come off the wall along with the tile. You'll always end up with some stuck to the drywall.
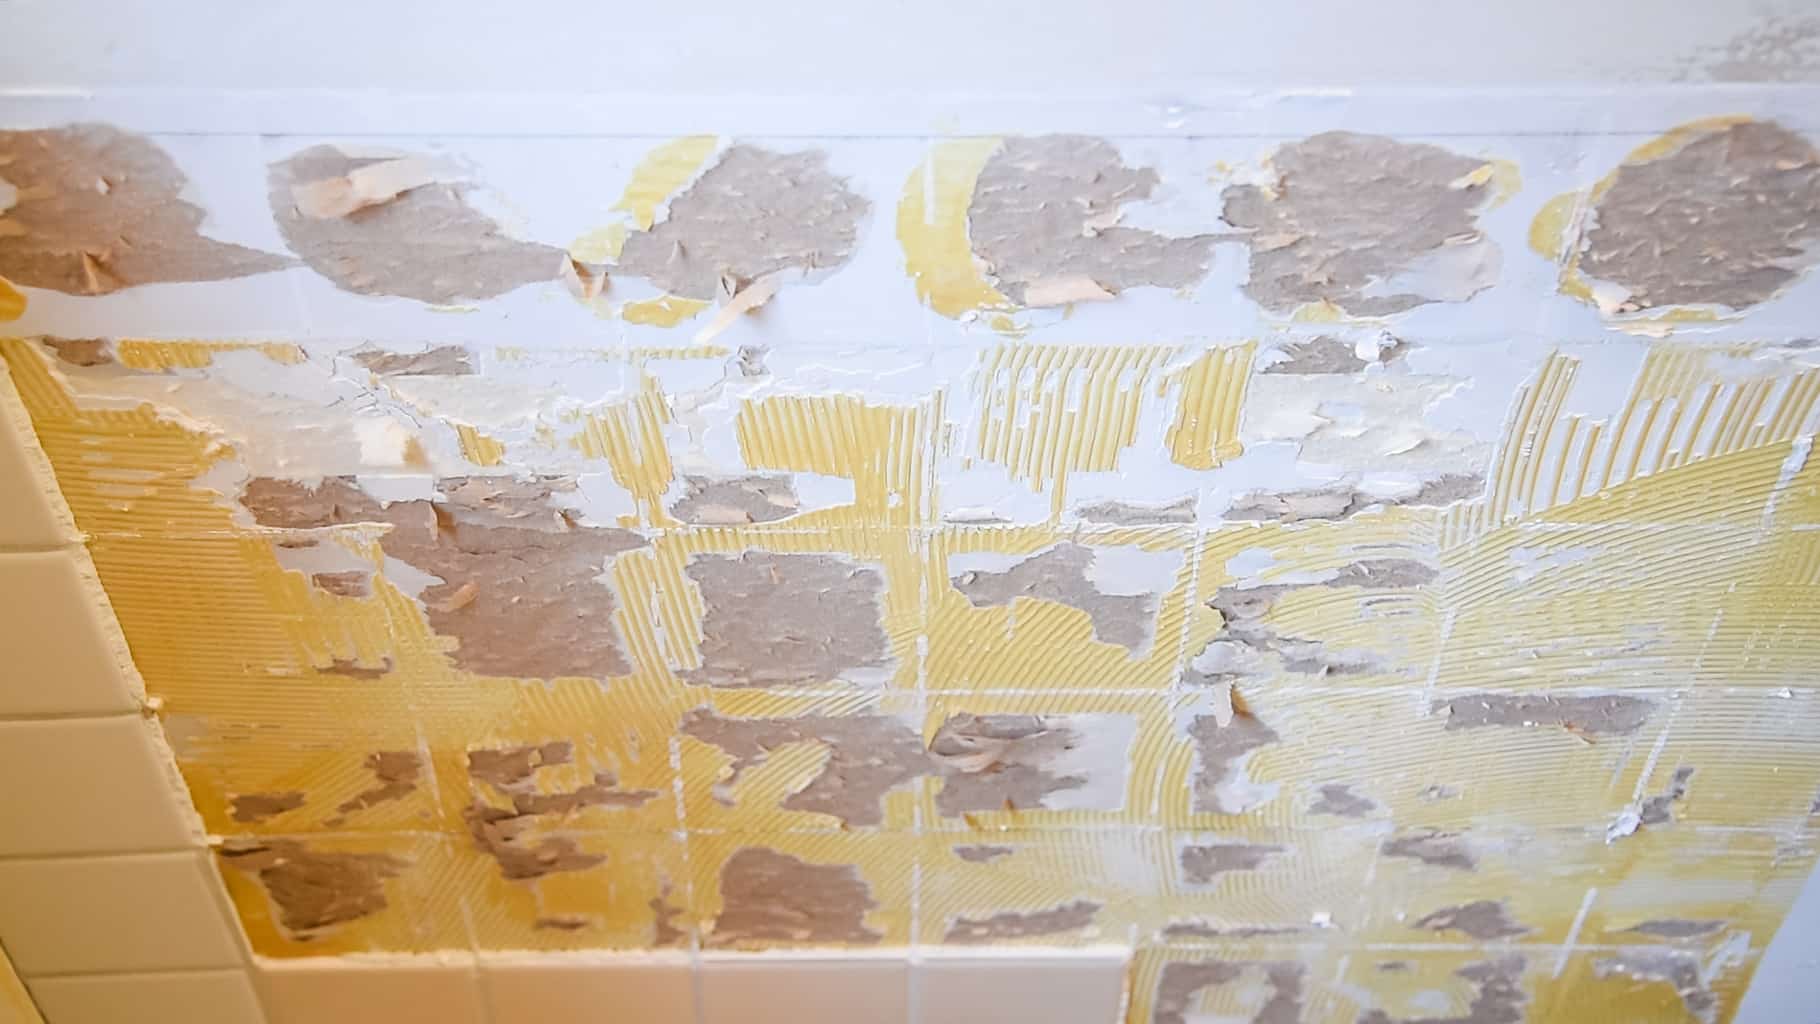

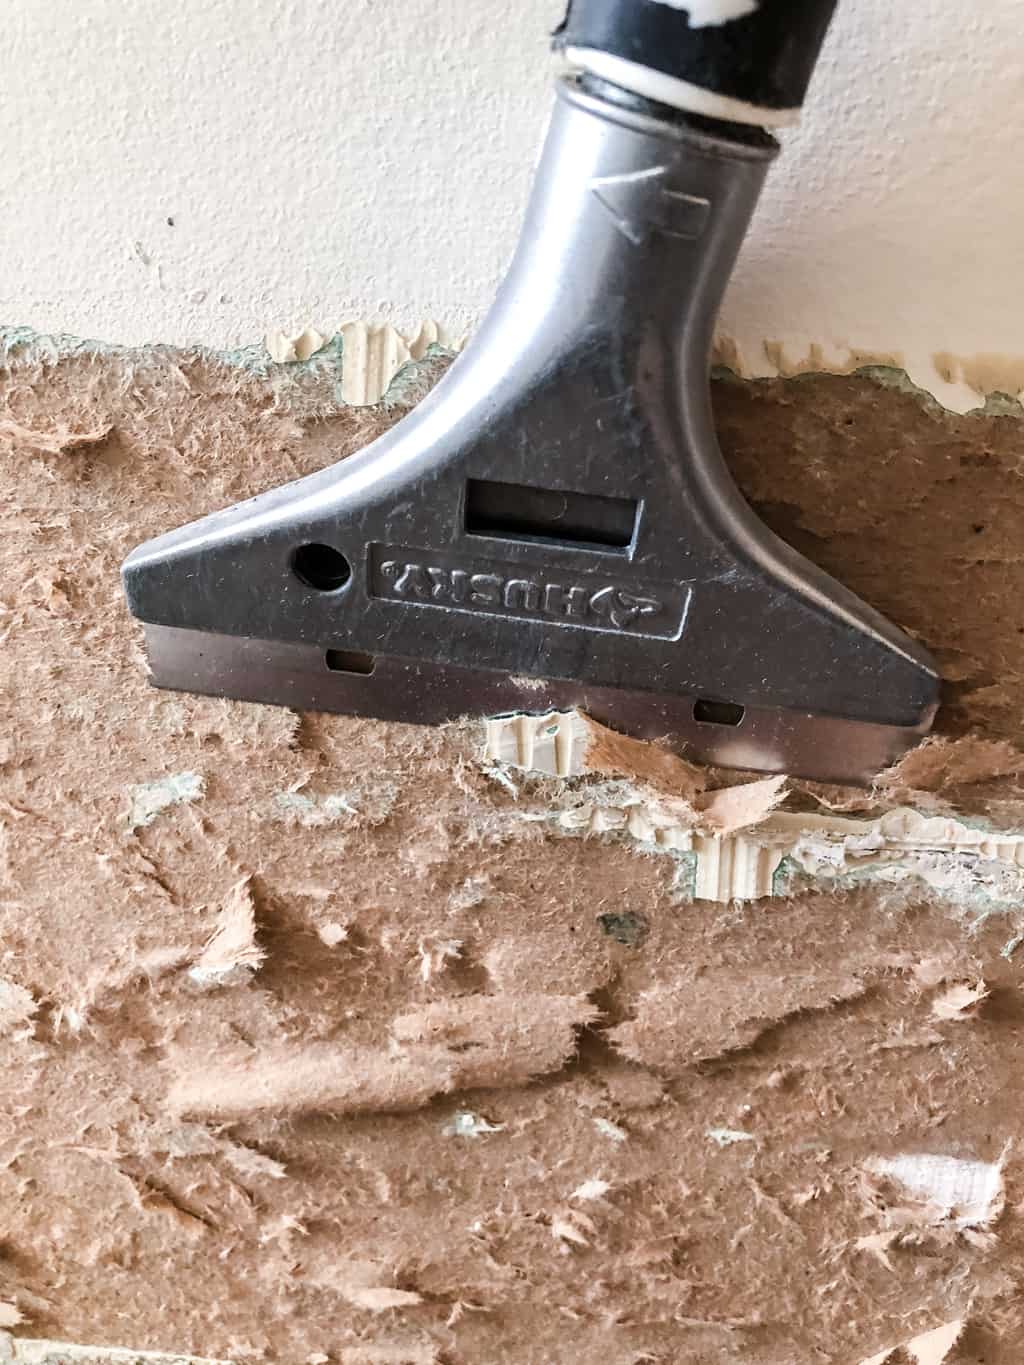
Use a scraper tool like this one to remove as much of the adhesive as you can without gouging the wall. I sand the corners of the blade so they don't leave marks if I accidentally press at an angle. The blade peels away some of the drywall paper, but you'll fix that in the next step.
Repairing the wall
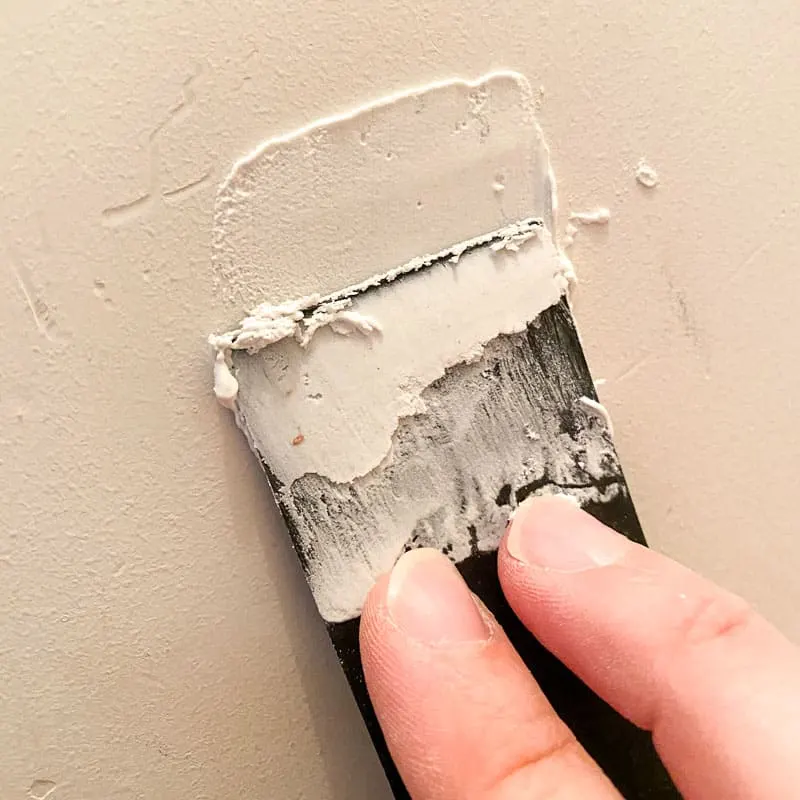
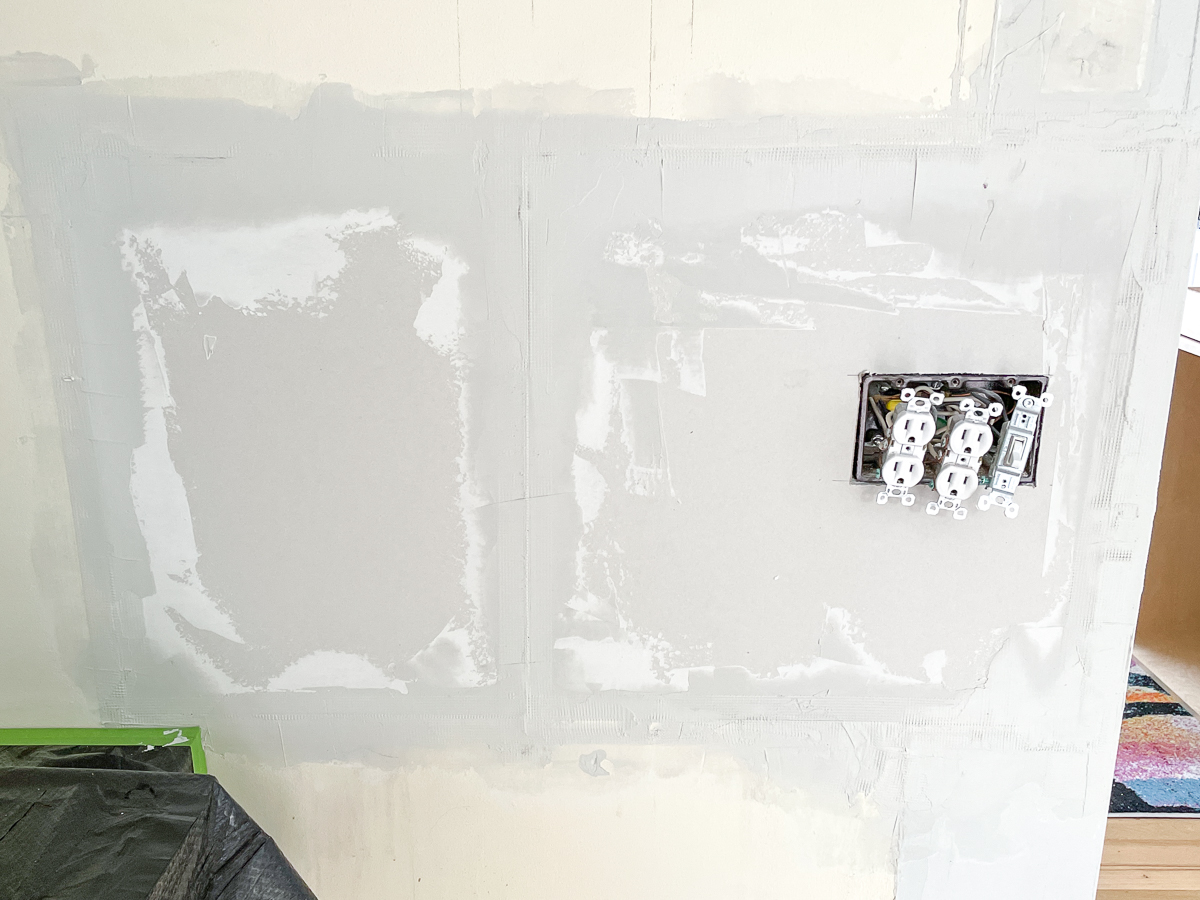
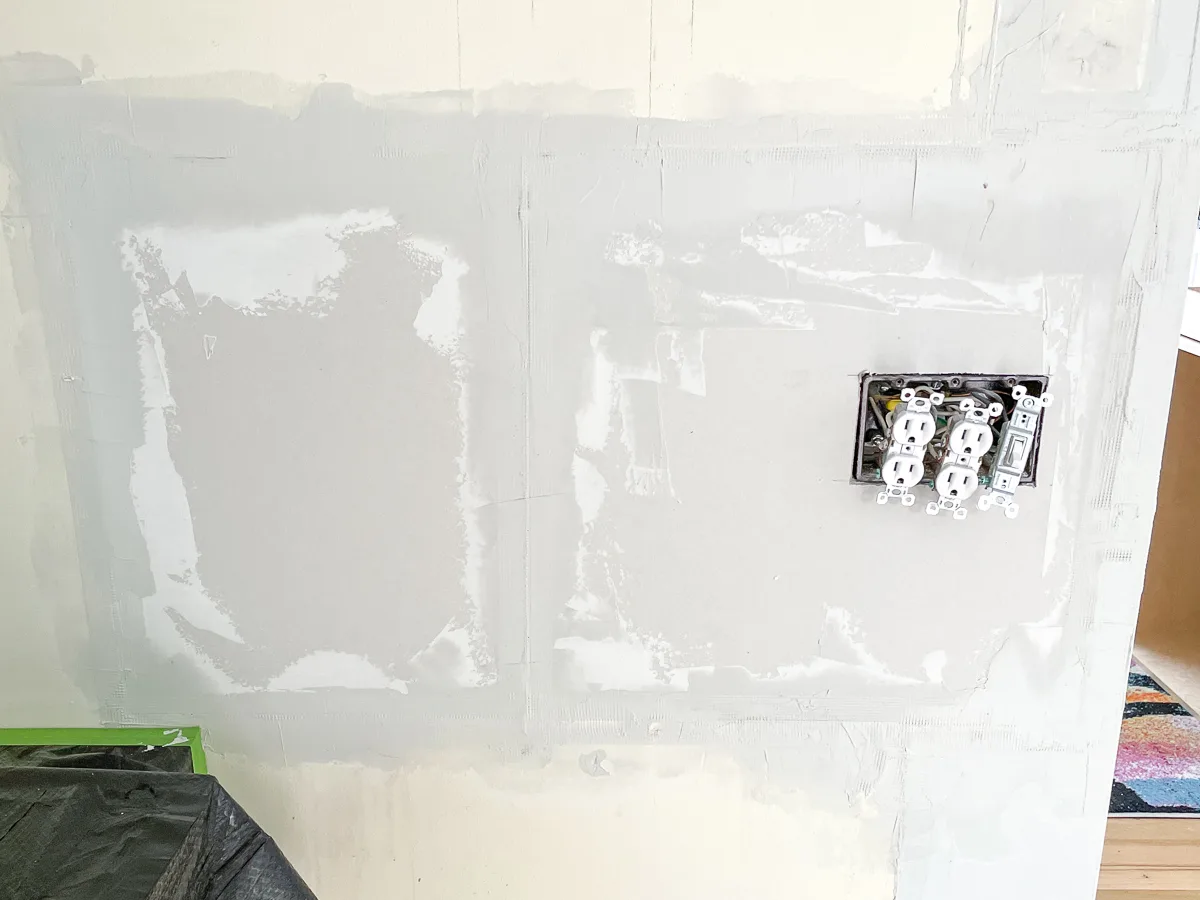
After all that prying and chiseling, the wall behind your old backsplash might look a little worse for wear. You probably have peeling drywall paper, dents, and maybe even a few holes that need to be patched up.
For minor dents, all you need to do is smear joint compound over the area until it's flush with the surrounding wall. Overfill the divot slightly, then let it dry. Then you can sand it smooth.

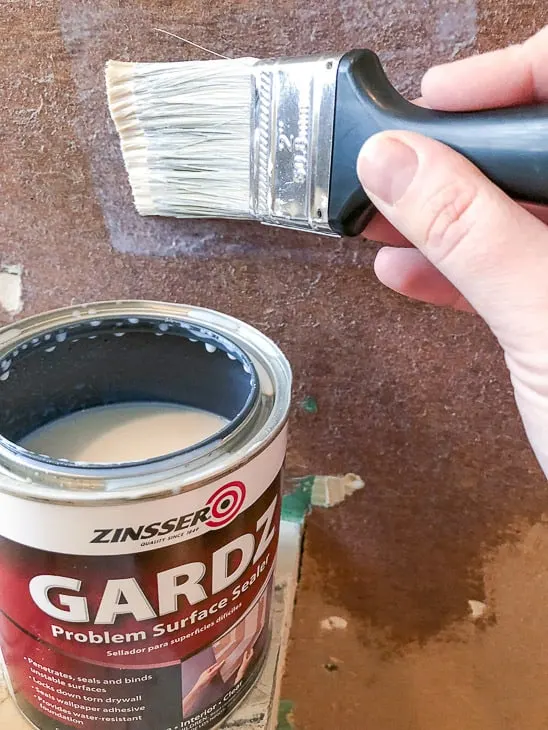
To repair torn drywall paper, I recommend a product called Gardz Problem Surface Sealer. It binds that loose paper into a hard surface that you can paint or apply new tile over. I also use this product over spackle to create a hard top layer that won't absorb moisture from paint or tile adhesive differently from the surrounding area.

For large areas of damage, you'll probably be better off cutting out the drywall and replacing it with a new sheet. This area of backsplash tile was really stubborn and made a big hole when I tried to pry it off.

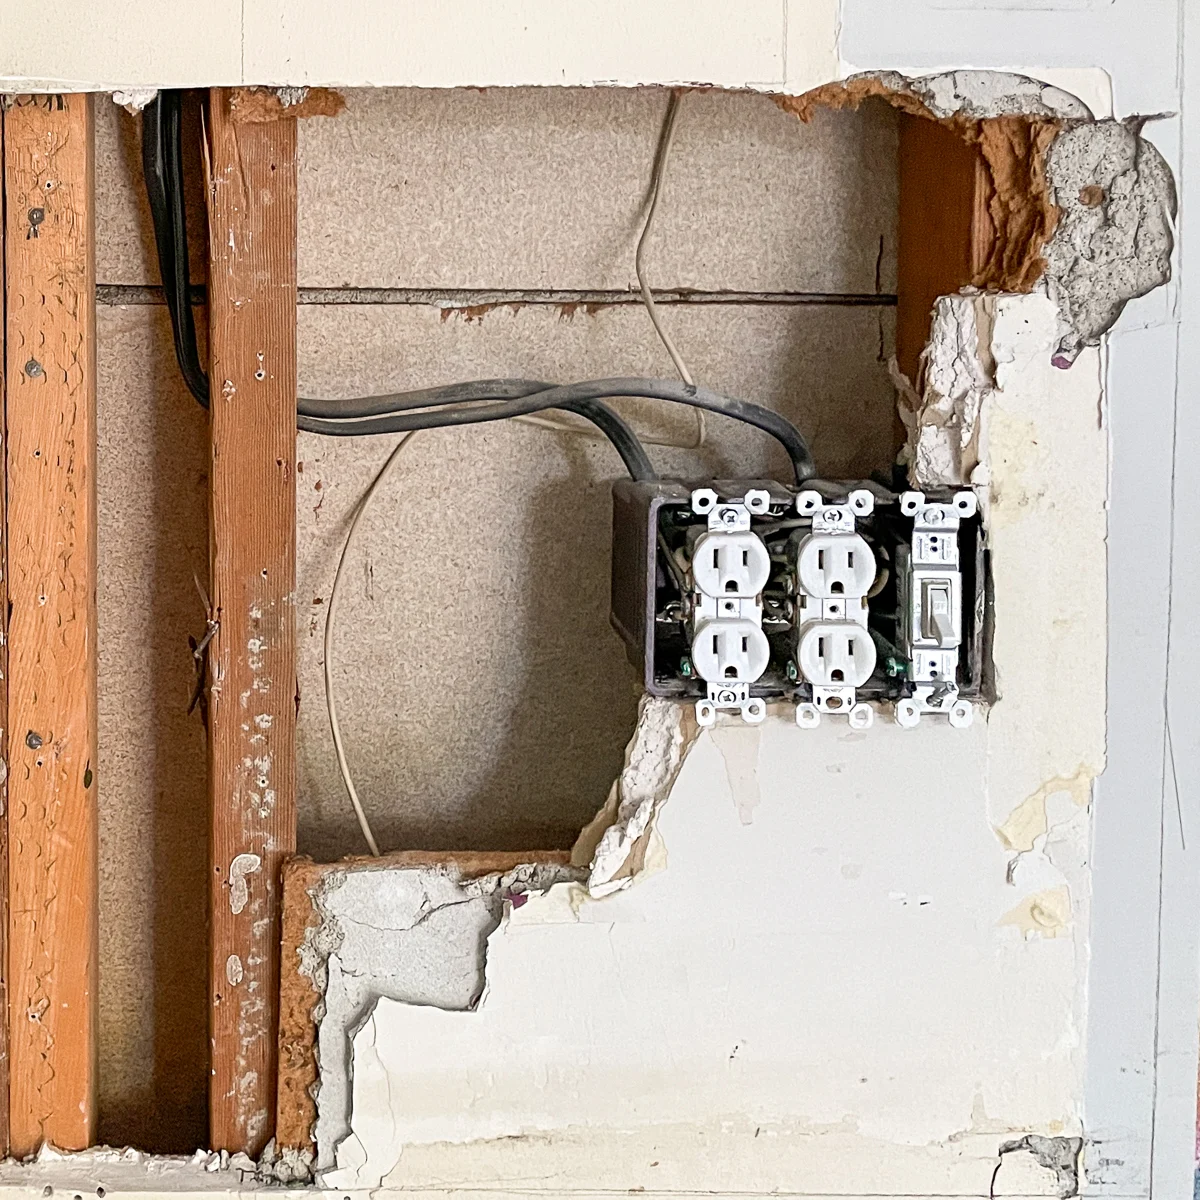
Cut out the damaged drywall into a rectangular shape, preferably with a stud on either side. You can use a stud finder to locate these supports in the wall. Cut a patch of drywall to fit into the hole, and screw it into place on the studs with drywall screws.
Apply mesh tape over all the seams, then cover them with joint compound. Let it dry, then sand the rough spots and apply another coat, feathering out the edges past the patch so it blends in with the surrounding area.
Here's a great video that shows four ways to fix different types of holes in drywall, ranging from just a few inches in diameter to an entire section.
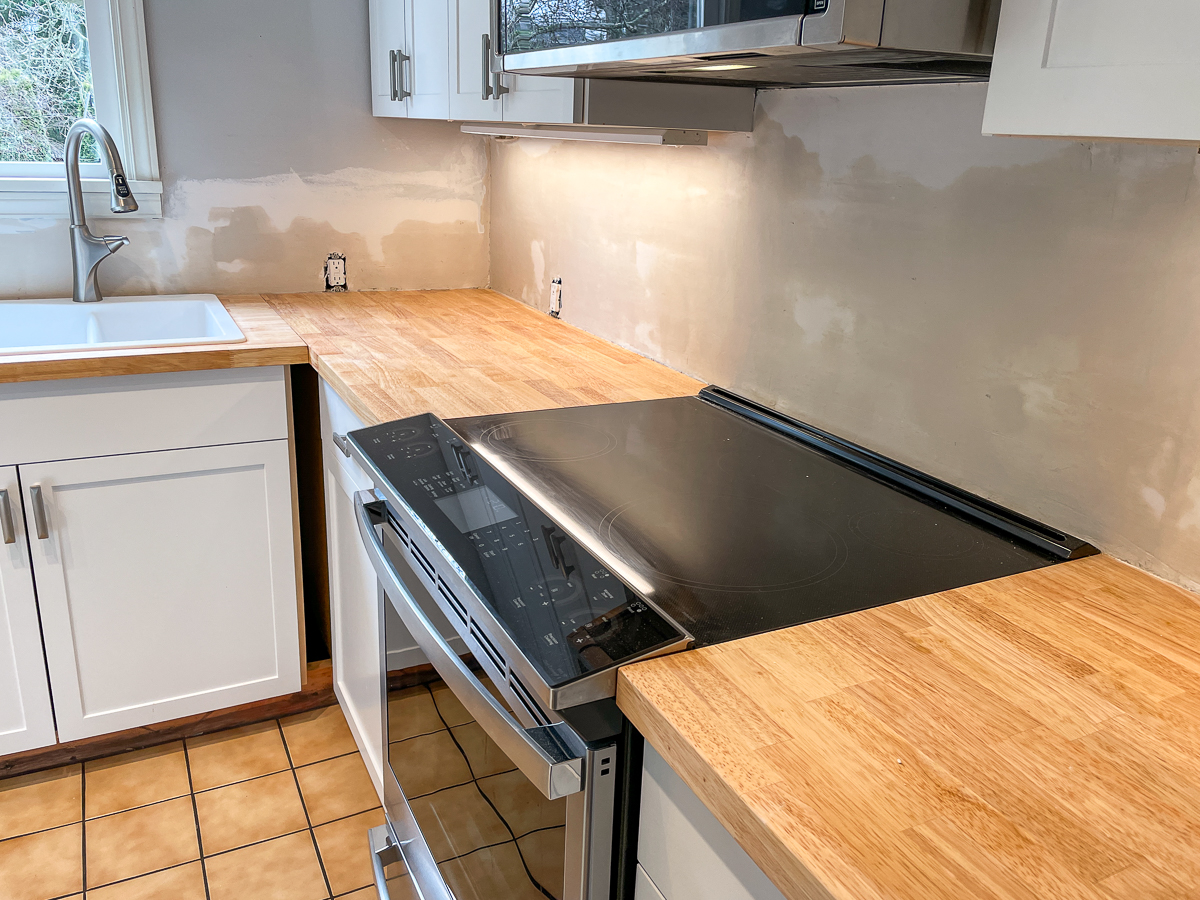
Now that your walls are repaired, you can paint or install new backsplash tile!

Check out these other home improvement projects!