Do you want to update your ugly kitchen, but remodeling isn't in the budget? I'll show you how to paint laminate cabinets successfully!
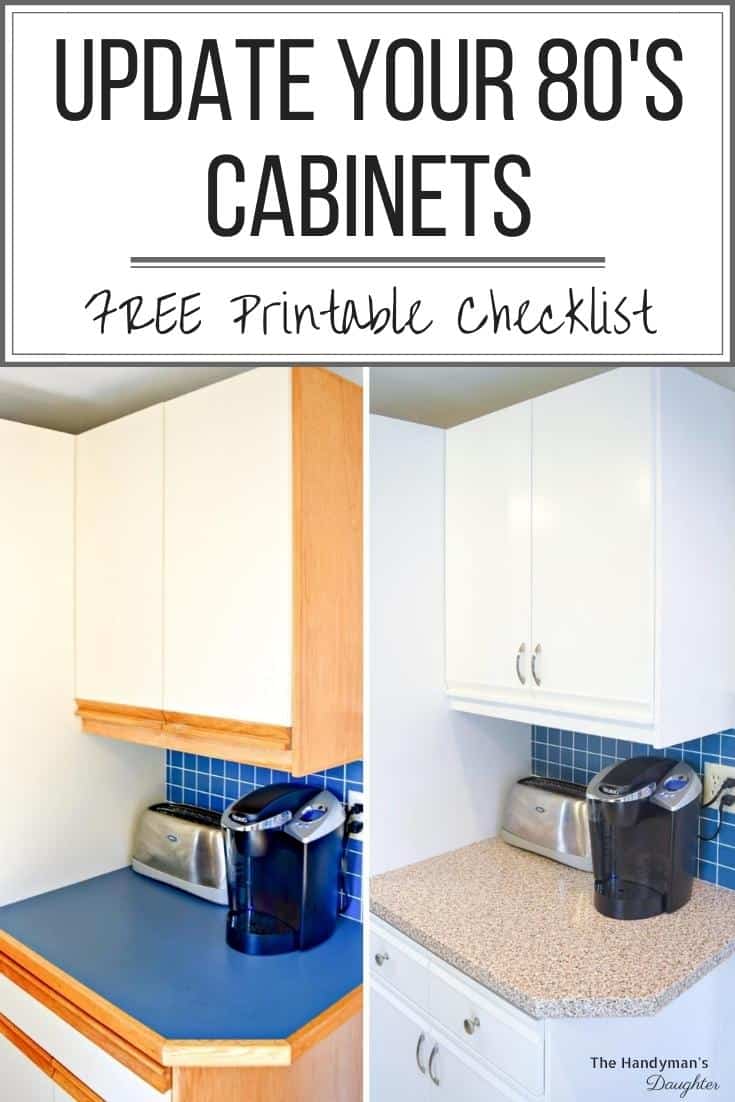
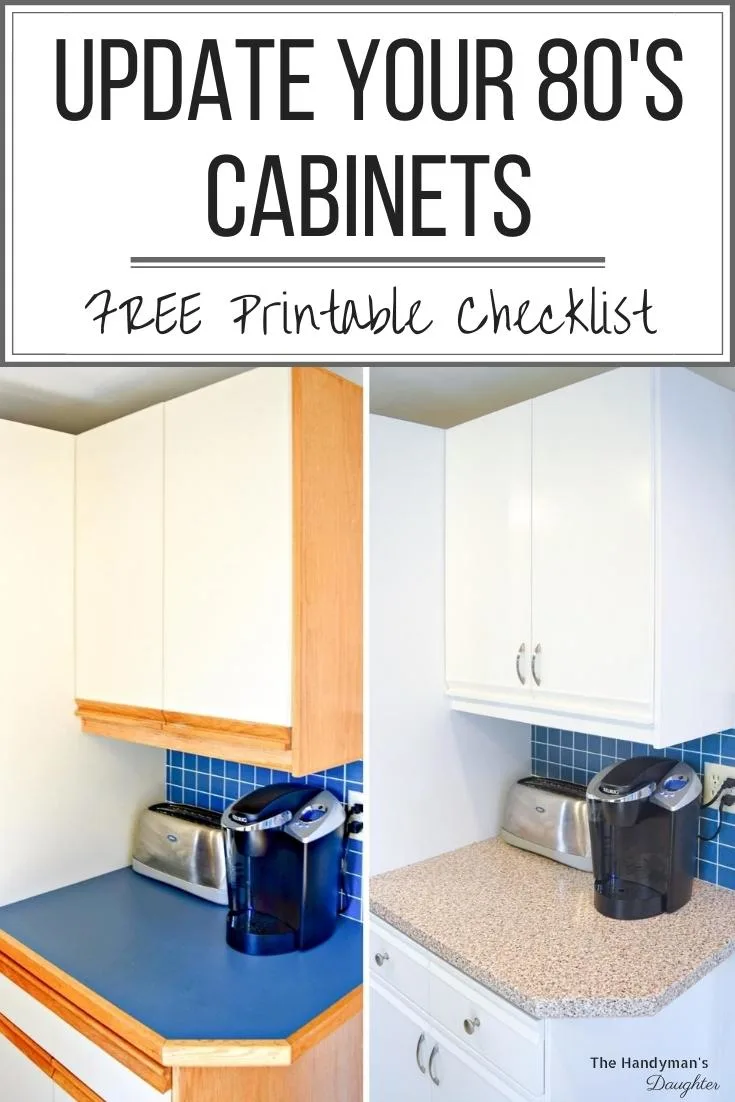
This style of laminate cabinets with oak trim was a popular style back when I was a kid. They were inexpensive yet durable, but now they're just an eyesore!
For the longest time, I thought you couldn't paint that ultra smooth laminate surface, because it wouldn't adhere like real wood. Luckily, I was wrong!
With a little prep work and the right supplies, you can paint laminate cabinets so they look less dated. Just look at the before and after photos of my kitchen!

This post contains affiliate links for your convenience. Purchases made through these links may earn me a small commission at no additional cost to you. Please visit my disclosures page for more information.
My kitchen makeover
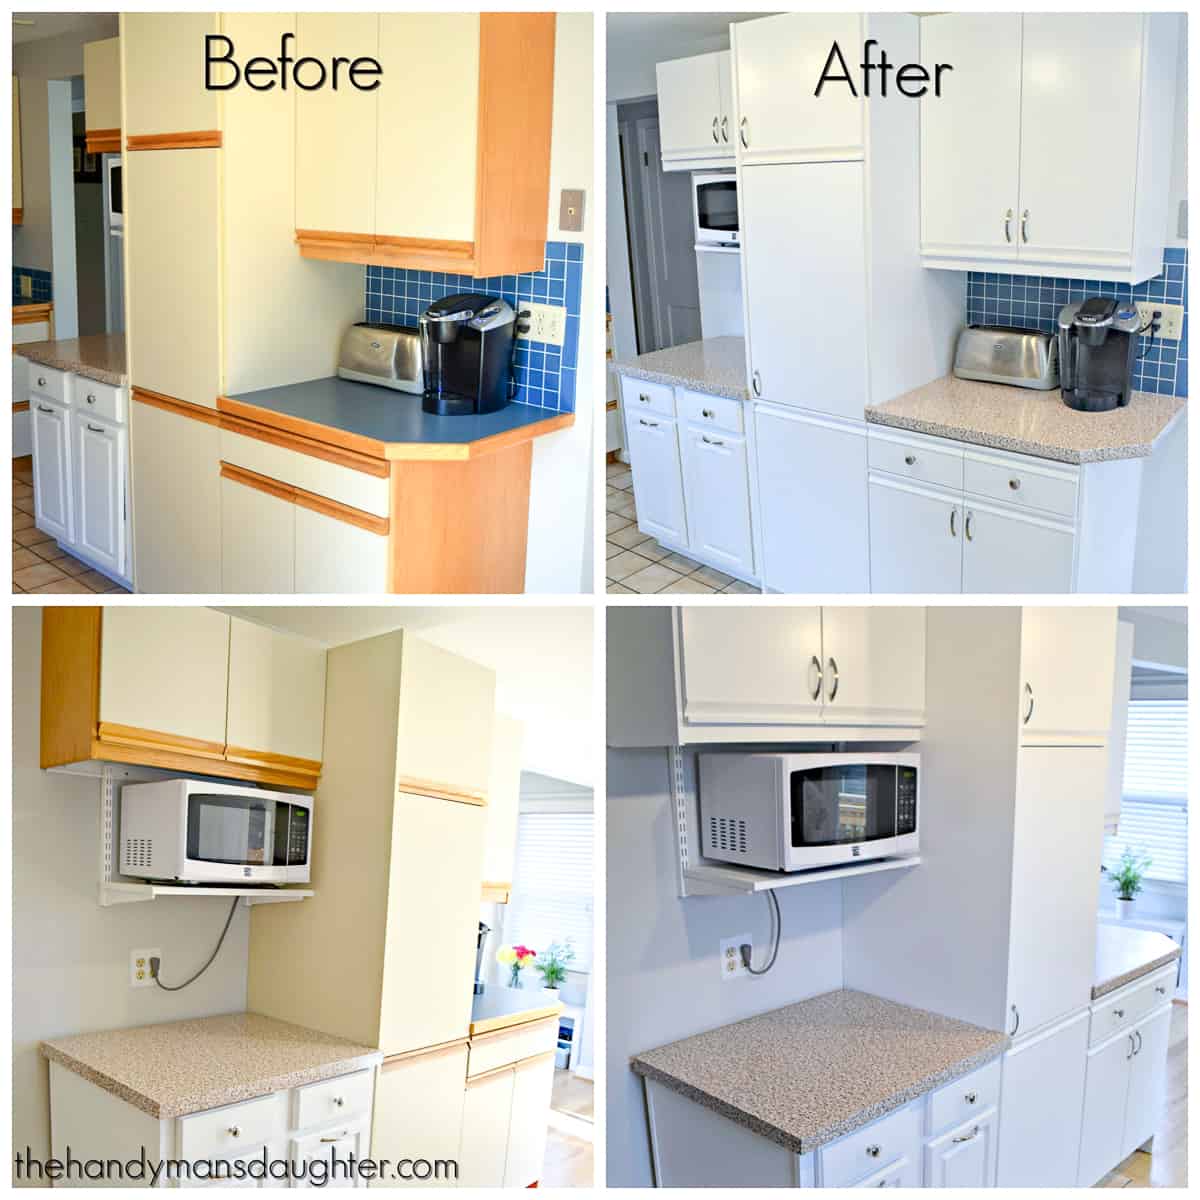
We've made quite a few changes to our kitchen to improve the flow and storage. The fridge moved to where an exterior door once was and I installed a used kitchen cabinet in its place for pull-out trash cans. Even the 80s track lighting was replaced with shiny new kitchen track lighting.
However, all these new things made the rest of the kitchen more drab than ever. The almond laminate cabinets with orange-y oak trim looked so sad next to the bright white and stainless steel.
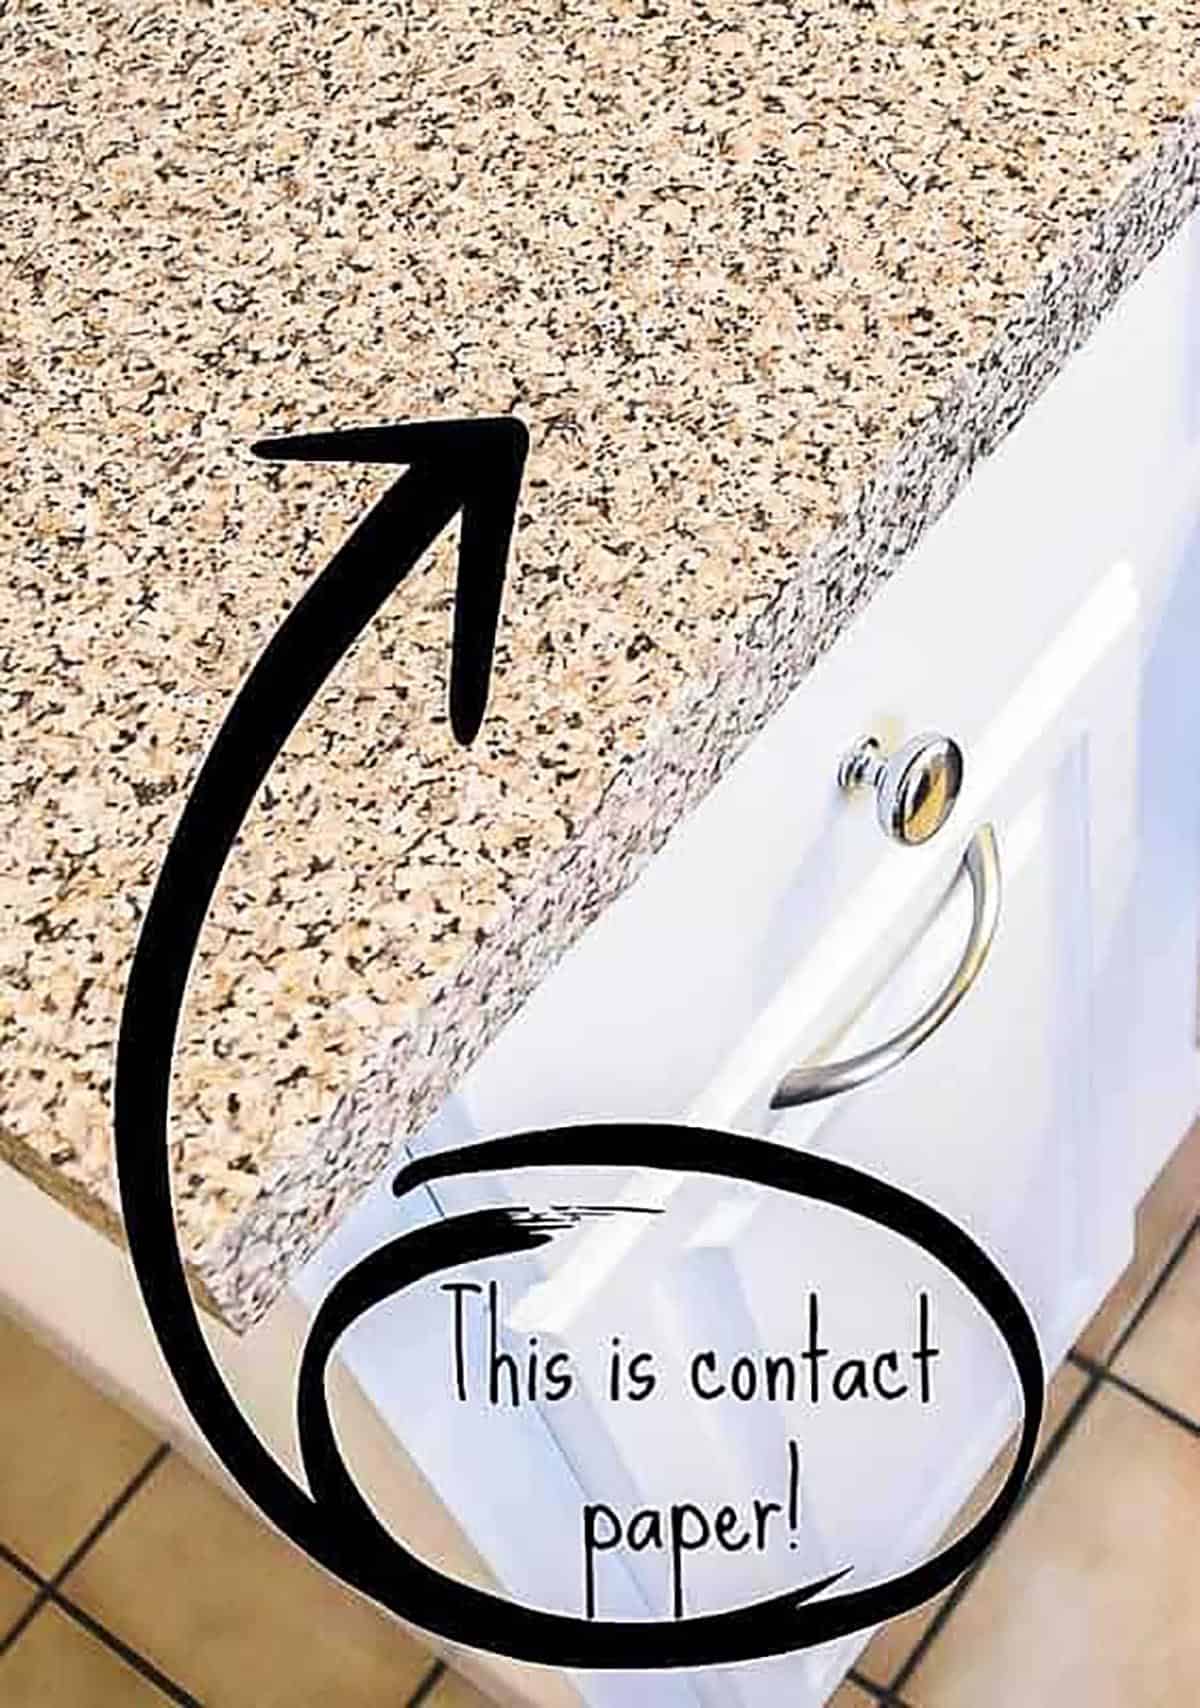
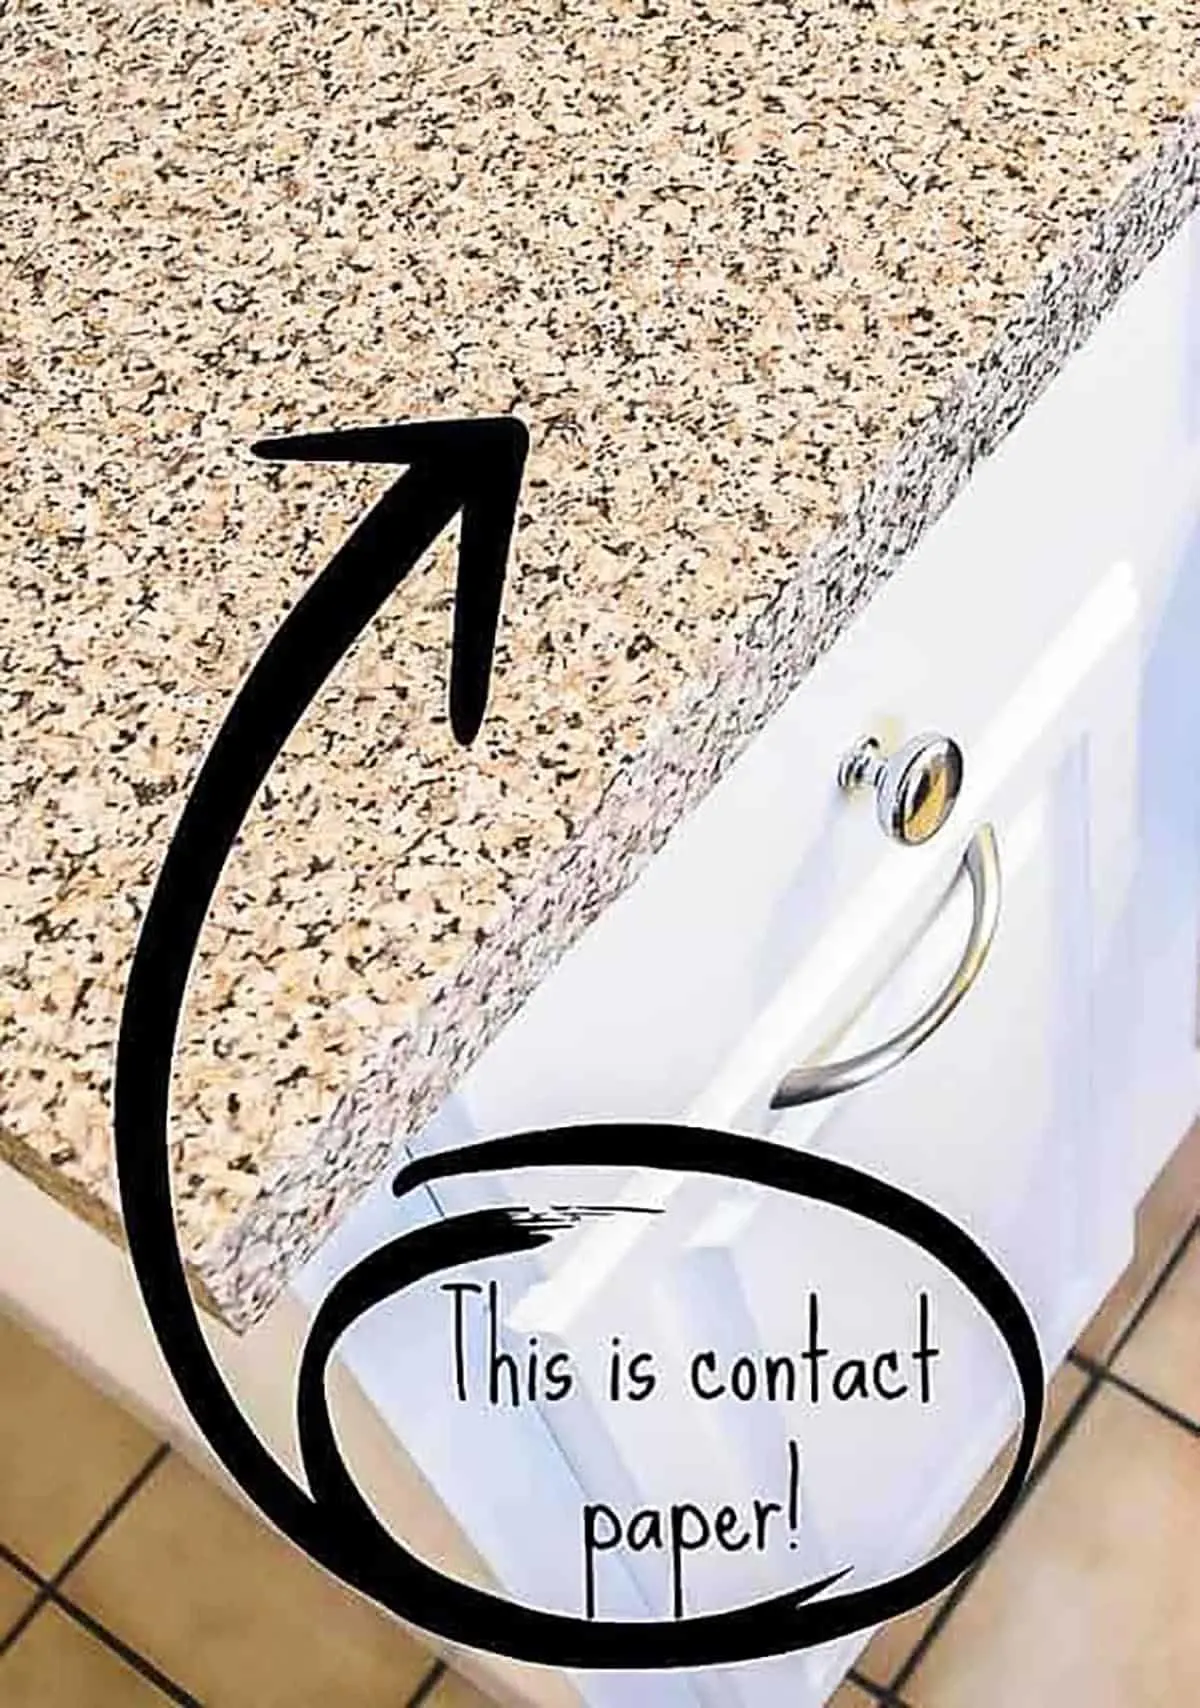
Adding insult to injury, the blue laminate countertops were being upstaged by the contact paper covering the countertop of the new cabinet. I tried it out as an experiment, and it works great!
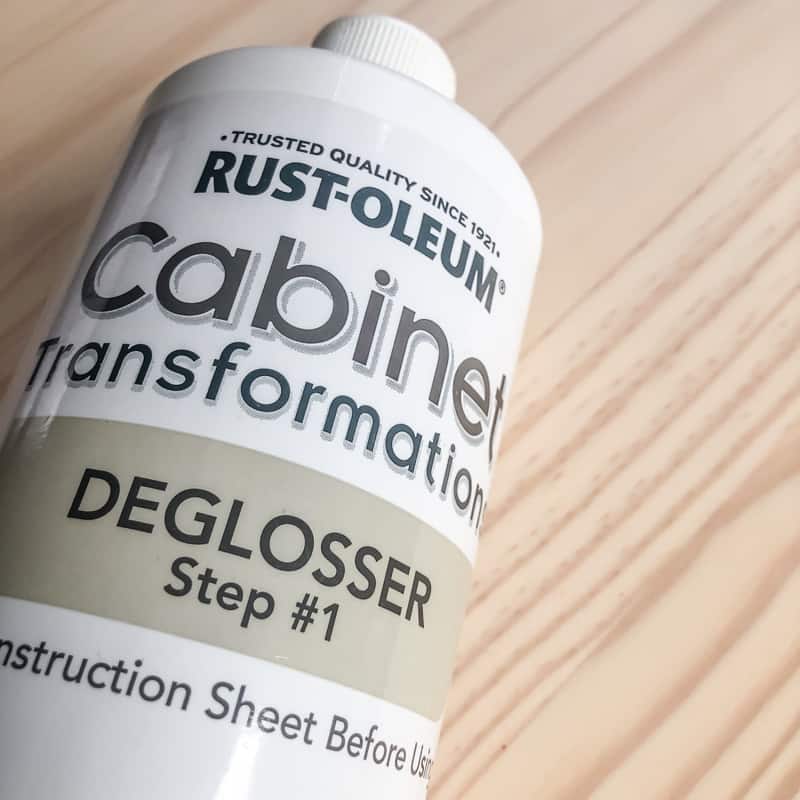
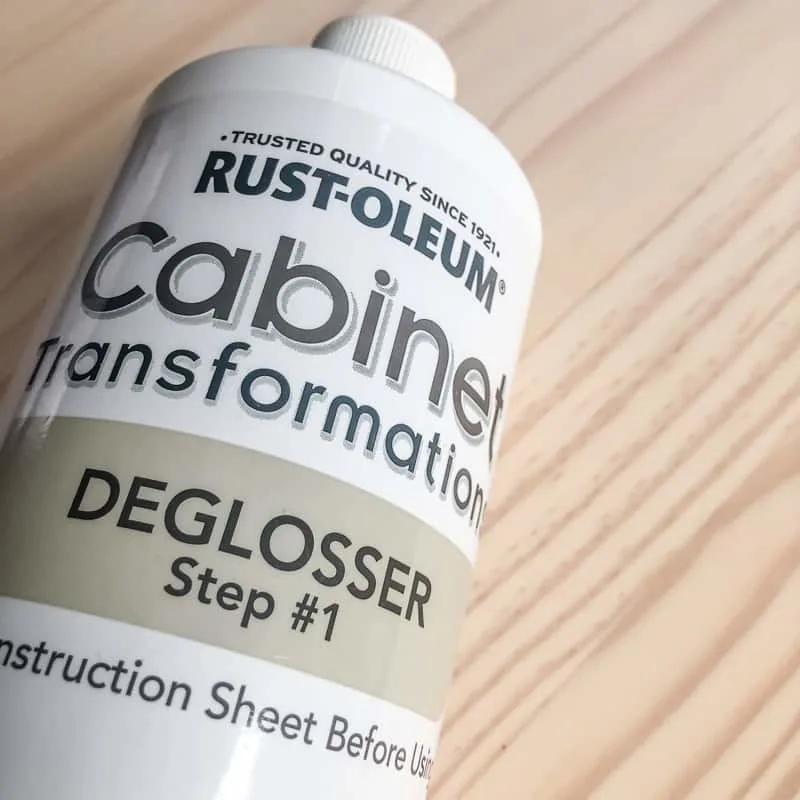
Something had to be done. I really wanted to paint the cabinets white, but I was worried about how well regular paint would stick to melamine. Rustoleum Cabinet Transformations is the perfect paint for melamine and laminate cabinets, and the kit comes with everything you need but the brushes. Perfect!
While these tips are more specific to painting laminate cabinets with oak trim, the steps are pretty much the same for any laminate surfaces.
Clean and lightly sand the laminate surface
While you can get away without sanding the laminate finish, it really helps the paint to stick if you rough it up a bit first. Just give everything a light sanding with 120 grit sandpaper, paying particular attention to the wood trim. Wipe the surface with a tack cloth or damp cloth to remove any dust.
If you really want to skip sanding, try using a deglosser to clean the cabinets instead. It will act like a liquid sander, and remove any grease at the same time.
Consider filling the grain
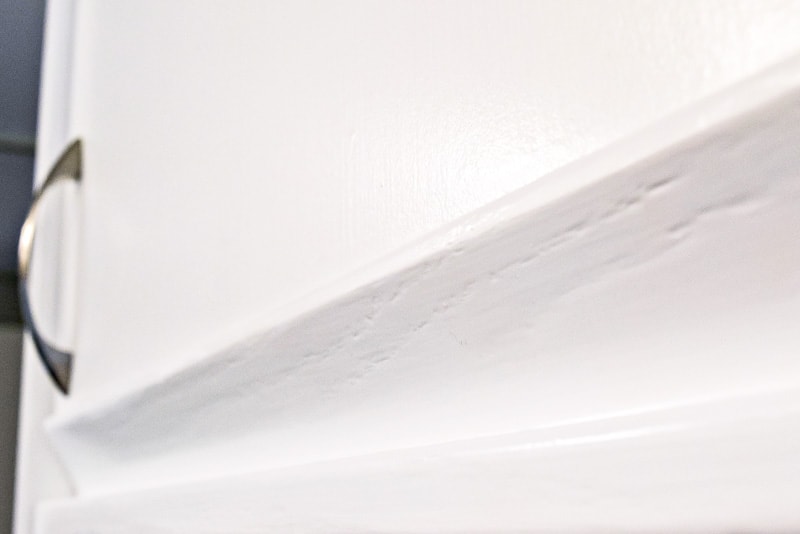
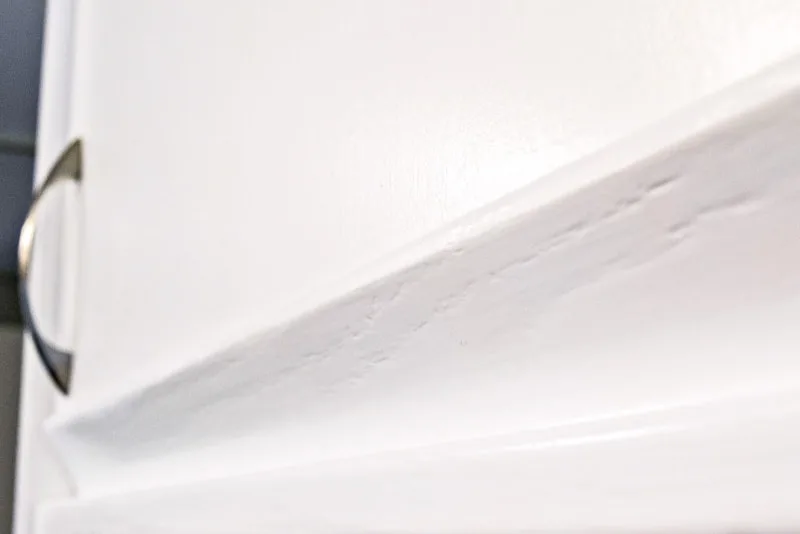
The two materials these 80's kitchen cabinets are made from take paint differently. The laminate is super smooth, but the oak has large pores and open grain. These differences are visible even with many coats of paint.
If you're planning to keep these cabinets around for the long term, using wood grain filler to even out the texture will make a more flawless finish. We're planning to remodel the kitchen in a few years, so I skipped this step. You can see the obvious difference in texture here.
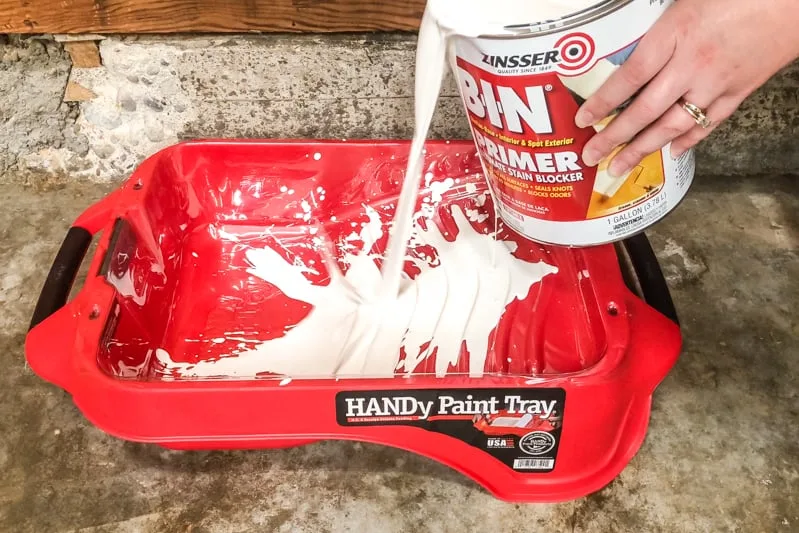
Use a bonding primer
I can't stress this enough! If you don't prime before painting laminate cabinets, it will most likely scratch and peel off the smooth surface. I had this happen when painting over polyurethane in the past, and it's such a pain to fix!

Also, if you don't prime the oak portions of the cabinets, the orange WILL show through. A good bonding primer will prevent the tannins in the oak from seeping to the surface.
Zinsser B-I-N primer, is shellac based instead of oil or water. It's a good primer for painting laminate cabinets, plus it stops tannin bleed from the oak. I used a single primer coat on the laminate surfaces, and two coats on the oak sections.

Use the right brush
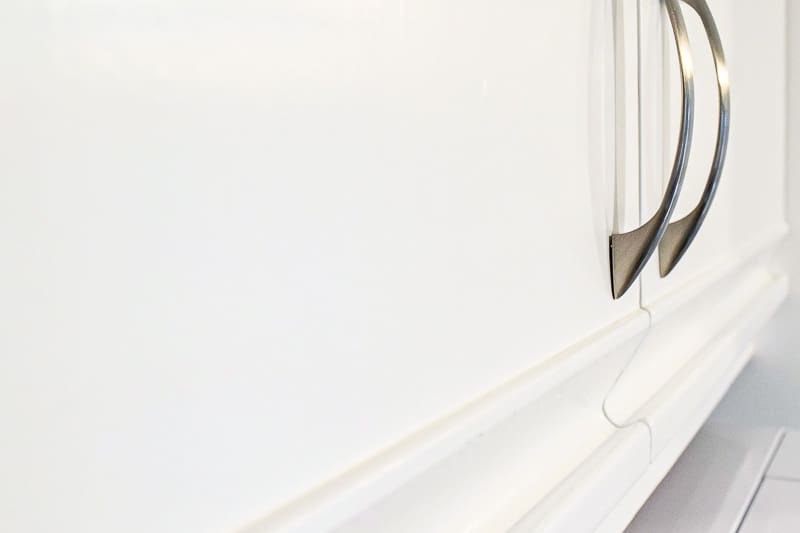
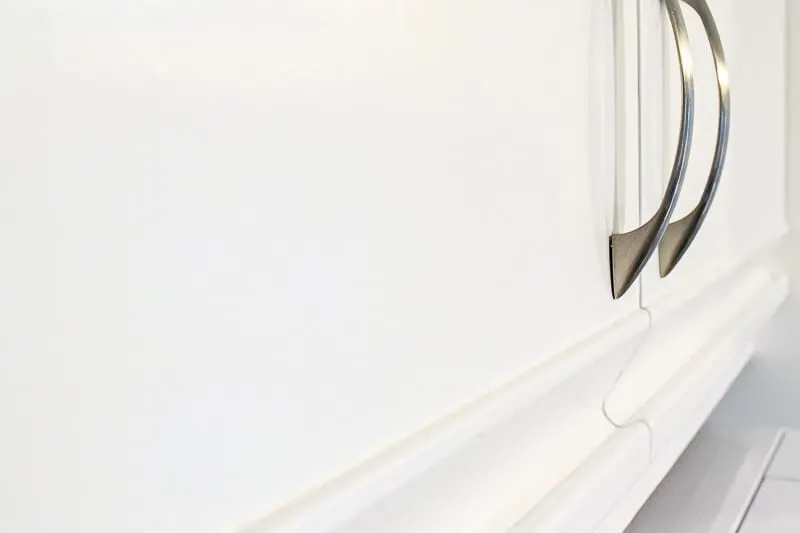
Of course, you should use a high quality brush for the flat parts of the cabinets. You can even get away with a roller or paint sprayer if your laminate cabinet doors are flat. But what about the hooked part of the grab bar, and the thin cabinet frame?
A regular brush slops too much paint in these areas, leaving big blobs that need to be sanded down. I used a ¾" wide artist paint brush to get into the hook and along the edges of the doors and cabinet trim.
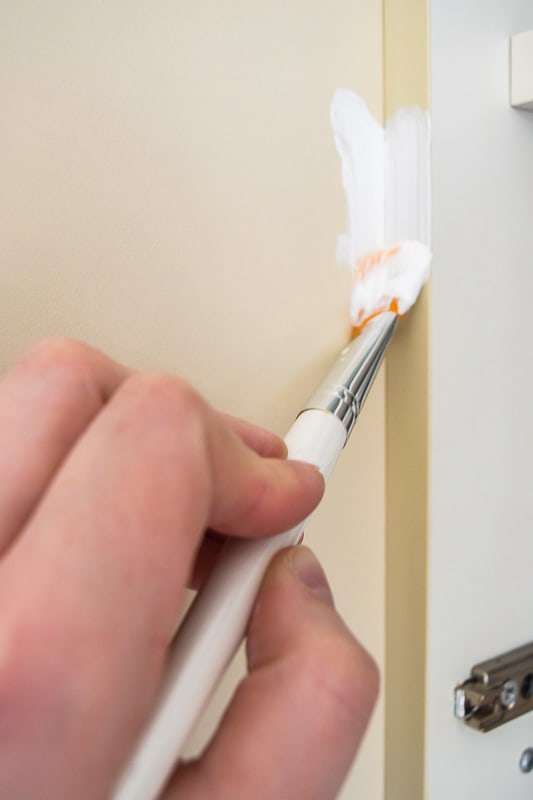

Apply multiple thin coats, rather than one thick one. I found I had a lot less dripping with the smaller brush, even if it meant I went back to the paint can more often. I didn't even need to tape off the inside of the cabinets! You can use a damp cloth to wipe off any excess on the edges.
Consider your painting order
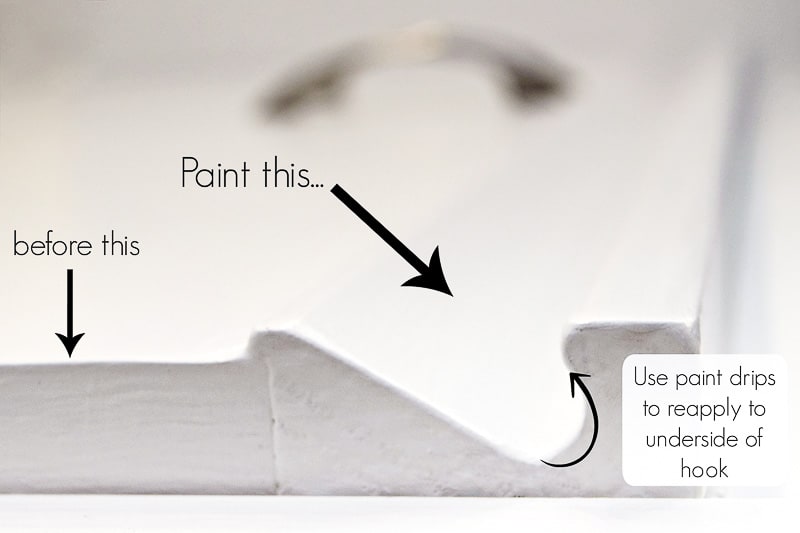
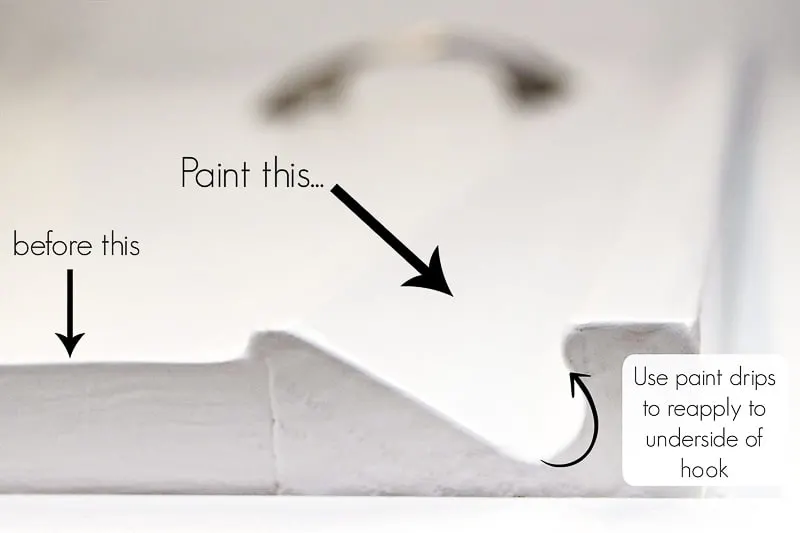
The trademark of these 80s kitchen cabinets is the oak grab bar. But when you paint the grab bar on a flat surface, a lot of that paint is going to drip down before it has a chance to set. Stupid gravity!
Instead, paint the hook first, then move on to the rest of the door. Then go back to the hook area, and run the artist brush over the pooled paint. Use that paint to go over the hook again.
This does two things. First, it removes the pooled paint before it hardens and makes a big blob inside the grab bar. Second, it's more tacky than fresh paint, which makes it easier to stick to the top of the hook.
You should also consider painting the front and edges of the cupboard doors first, then flip them over and paint the back once the front is dry. This will allow any excess paint to drip to the back of the door, where it can be sanded off. Any imperfections will be less noticeable on the back!
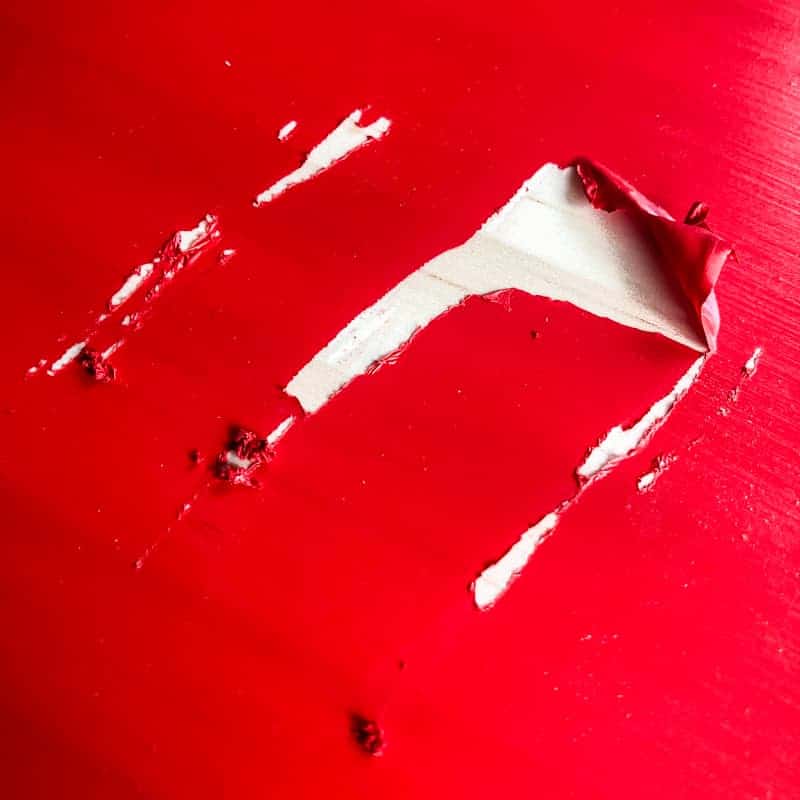
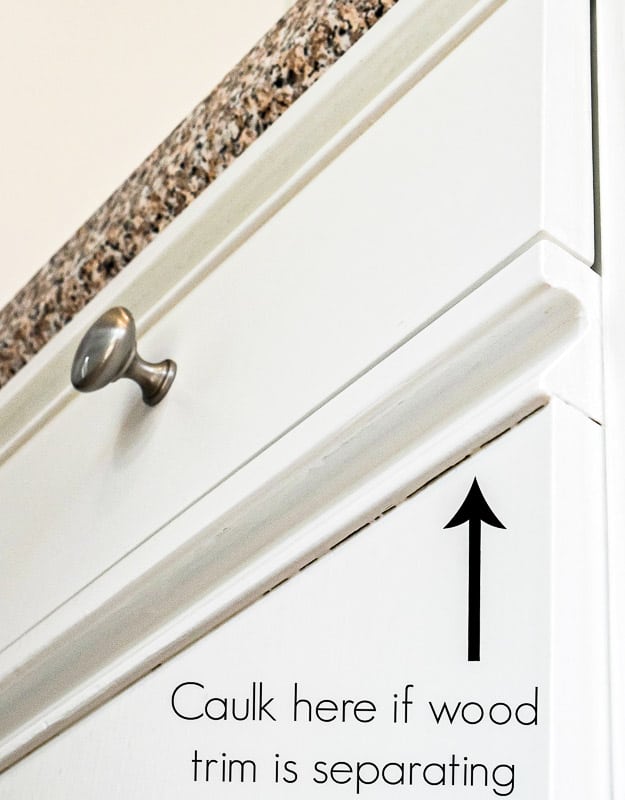
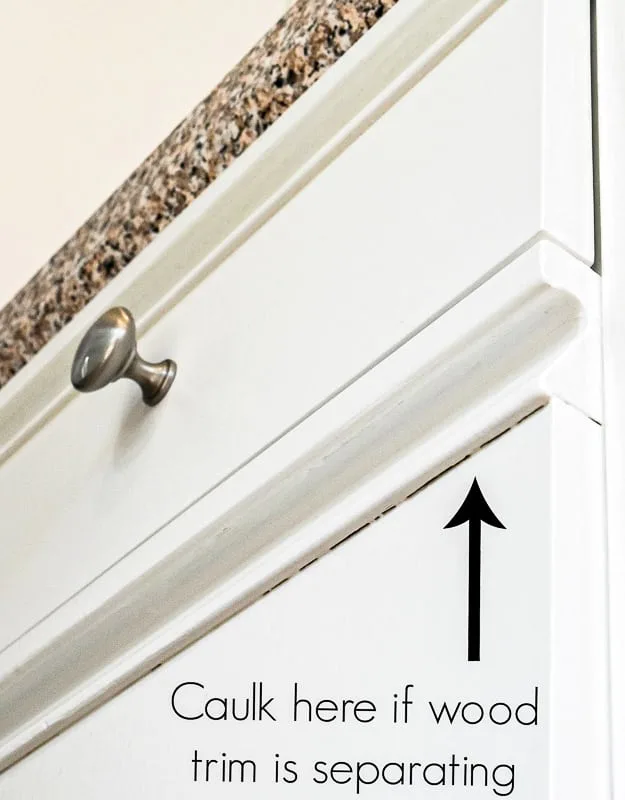
Caulk the gaps
You may want to caulk between the wooden grab bar and the laminate panel for a more seamless finish. You may also see gaps between the frame and the center panel of Shaker style cabinet doors. I recommend caulking after priming but before painting, so you can see exactly where the gaps are.
One of our grab bars was separating a bit from the door, leaving a gap that paint couldn't fill. Luckily, it was a lower cabinet, and you would have to be lying on the floor to see it. Adding a line of caulk in this gap would go a long way to making these doors look like one solid piece.
Brush, then roll the paint
Want to know my secret for a smooth paint finish? I apply the paint with a brush first, then immediately go over the area lightly with a dry foam roller to remove any brush strokes.
This works best with a high quality paint that self levels well. My favorites are Cabinet Coat and Benjamin Moore Advance, both of which are durable and easy to work with. They're water-based enamel finishes, rather than latex, which will hold up better for painted kitchen cabinets that get a lot of wear and tear.
Sand between coats
If your first coat feels rough to the touch, you'll want to lightly sand it with 220 grit sandpaper to knock down the texture before applying a second coat. This only takes a minute or two per door, and really makes a difference in the feel of the final product! Make sure to remove any dust with a tack cloth before applying the next coat.
Apply a clear top coat (optional)
Depending on the type of paint you use, you may need to apply a top coat to seal it and protect it from moisture. This is especially important if you use chalk paint or a decorative glaze to simulate real wood.
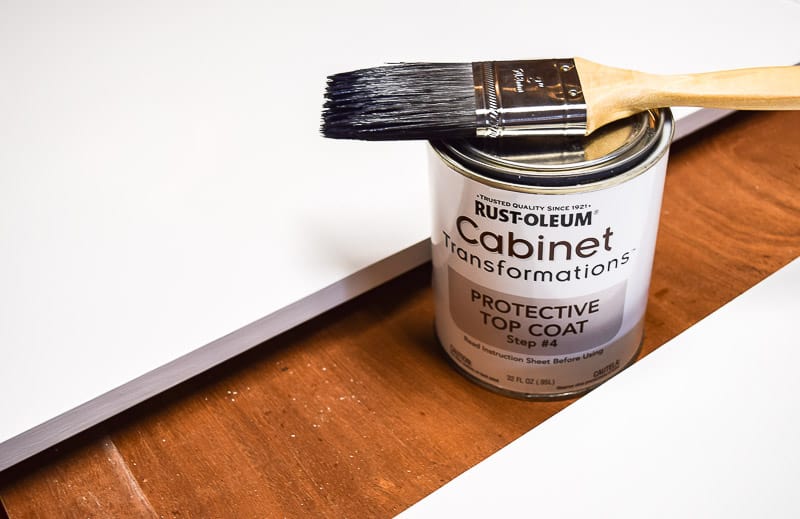

When using a protective top coat, be sure not to back brush over already applied areas. This will create bubbles and brush strokes that will be visible on your laminate cabinets.
Allow the paint to cure before installing
I know it can be tempting to put those cabinet doors back on their hinges as soon as possible, but it pays to be patient! Check the paint can for cure times, and leave them alone until that time has passed.
Trust me, there's nothing worse than spending days painting and then putting a dent or scratch in the finished surface because you didn't wait for the paint to cure. This can take up to a week for some types of paint!
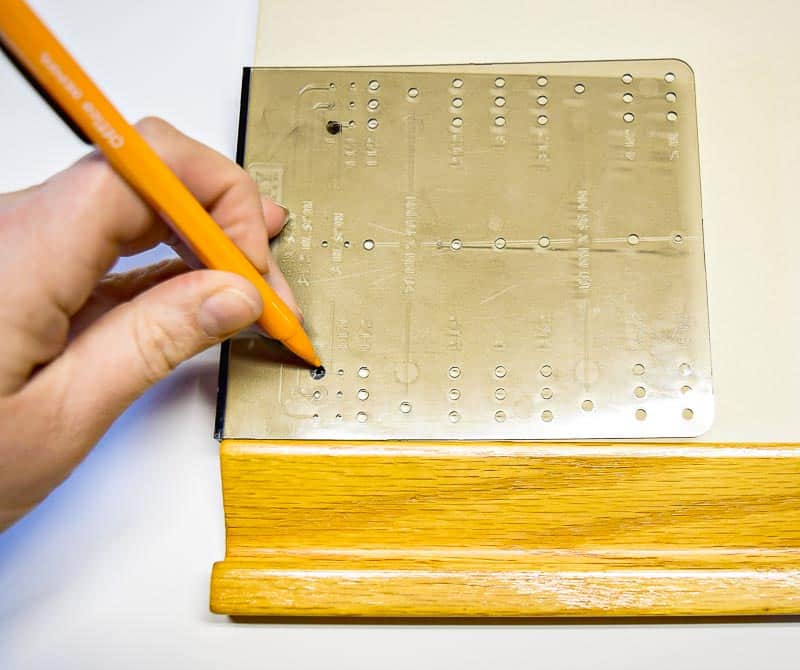
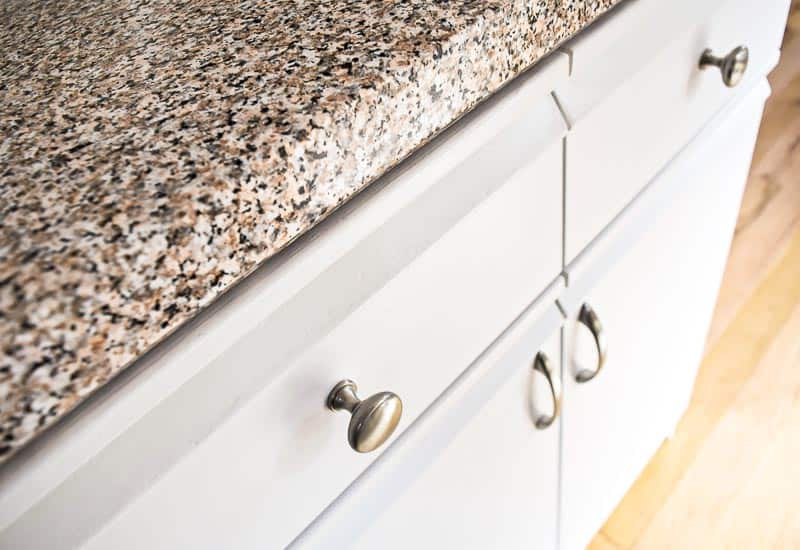
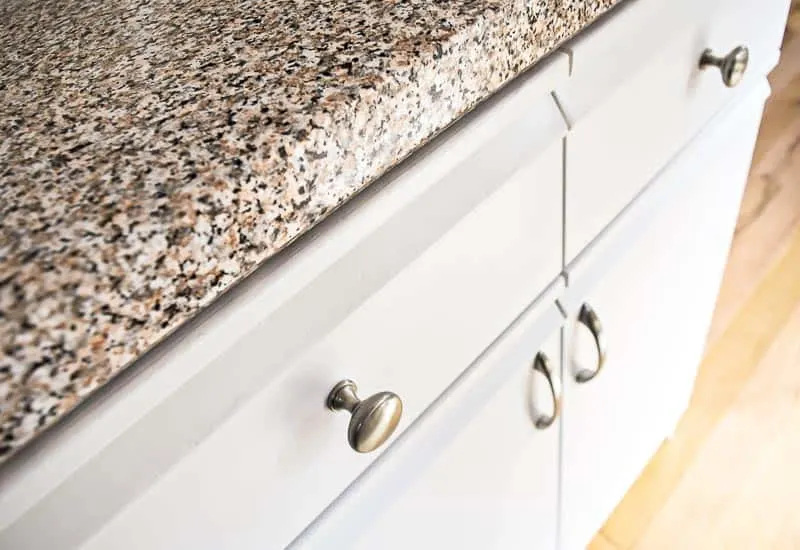
Add new hardware
Adding new door and drawer pulls to these laminate cabinets brings them up to date, and preserves your brand new paint job. This handy cabinet door and drawer template made it simple to mark the holes with proper spacing.
Laminate is prone to chipping when you drill or cut into it, so it's best to use a sacrificial board under the door to drill into. Clamp the door and board down to the work surface so nothing shifts and the board is held tight to the back of the door., then drill your holes. The board will hold the laminate around the hole in place so you get less chipping.

If your doors already had pulls, but you want to change them and the screw holes don't line up, don't worry! Just fill the screw holes in the cabinet doors and drill new ones before painting!
I hope these tips help make the process of painting laminate kitchen cabinets a little easier. The results are totally worth it! Don't forget to check out the complete before and afters of my kitchen update so you can see for yourself what a little lot of paint can do.
Check out these other painting tutorials!
Joan burton
Wednesday 31st of August 2022
Very cool. How do you keep contact paper from getting scraped up?
Vineta Jackson
Thursday 1st of September 2022
The brand of contact paper I used sticks really well, and I've never had a piece peel off accidentally!
Steph
Tuesday 17th of July 2018
This was a great tutorial. I've read on other sites, that the melamine part needs to be slightly sanded to help adhere the coats on top of it? Did you do this?
Vineta
Tuesday 17th of July 2018
Nope, I didn't sand at all, and it's been holding up great! Regular paint may need a sanding, but the Rustoleum Cabinet Transformations paint is formulated to adhere to melamine without sanding.
Mother of 3
Thursday 5th of April 2018
What an amazing update of an older kitchen. I love all these tips. Pinned.
Shirley Wood
Tuesday 3rd of April 2018
Such a fabulous makeover. Love the way the cabinets turned out! It was a lot of work but well worth it. #welcomespring. Sharing on my FB page today.
Jenny
Tuesday 20th of March 2018
These cabinets look fantastic.That is what my apartment kitchen looked like with these type of cabinets. We are also in the middle of updating our kitchen and our removing the laminate from our cabinets and making them shaker style. It's a process, but so worth it. Thanks for sharing at Merry Monday. Hope to see you next week.