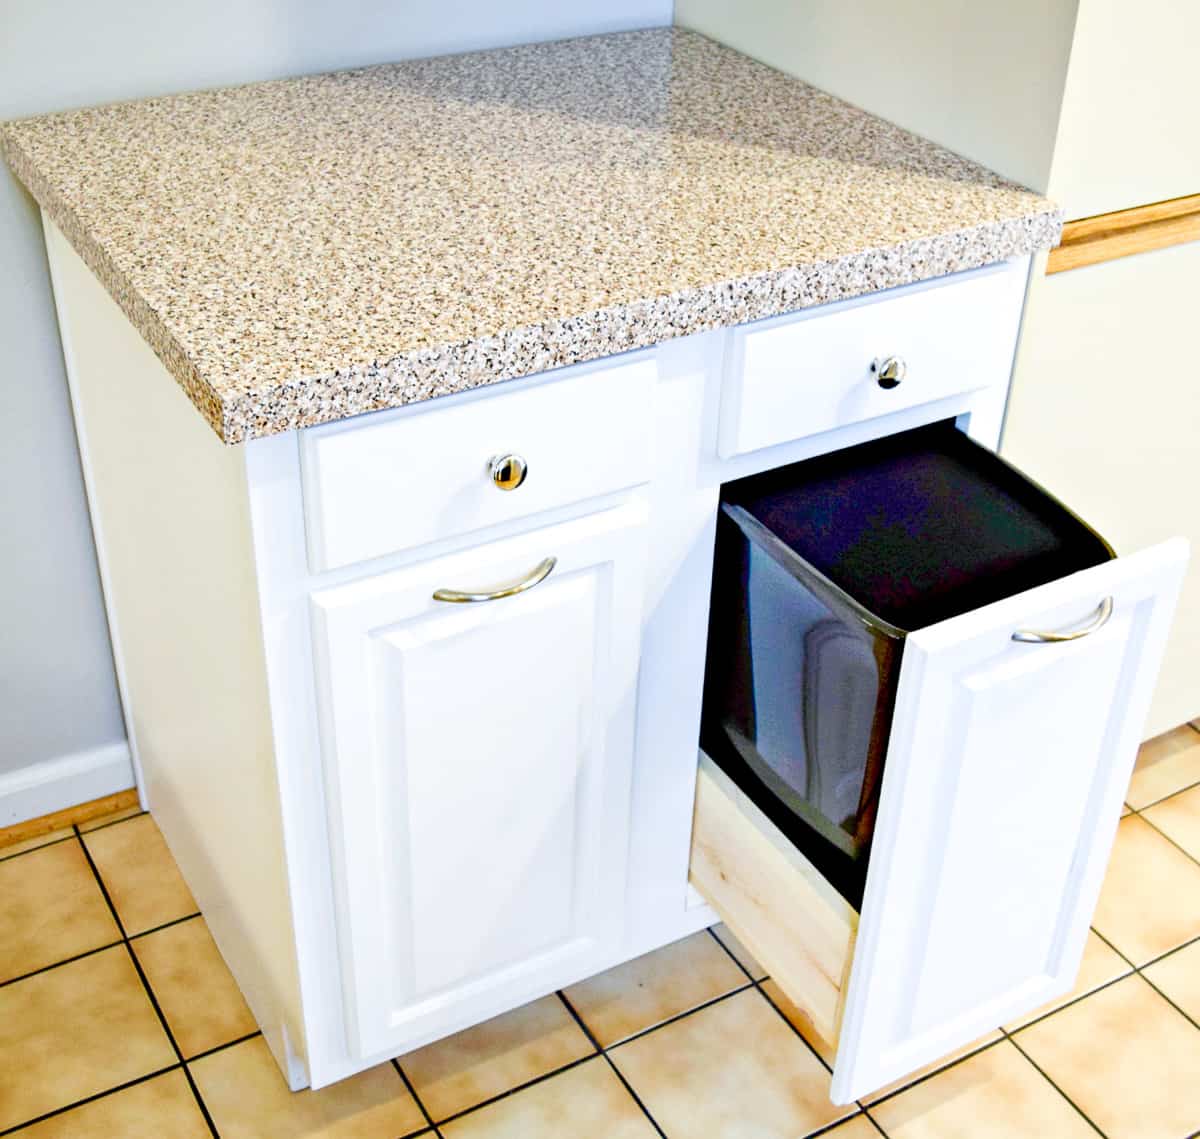
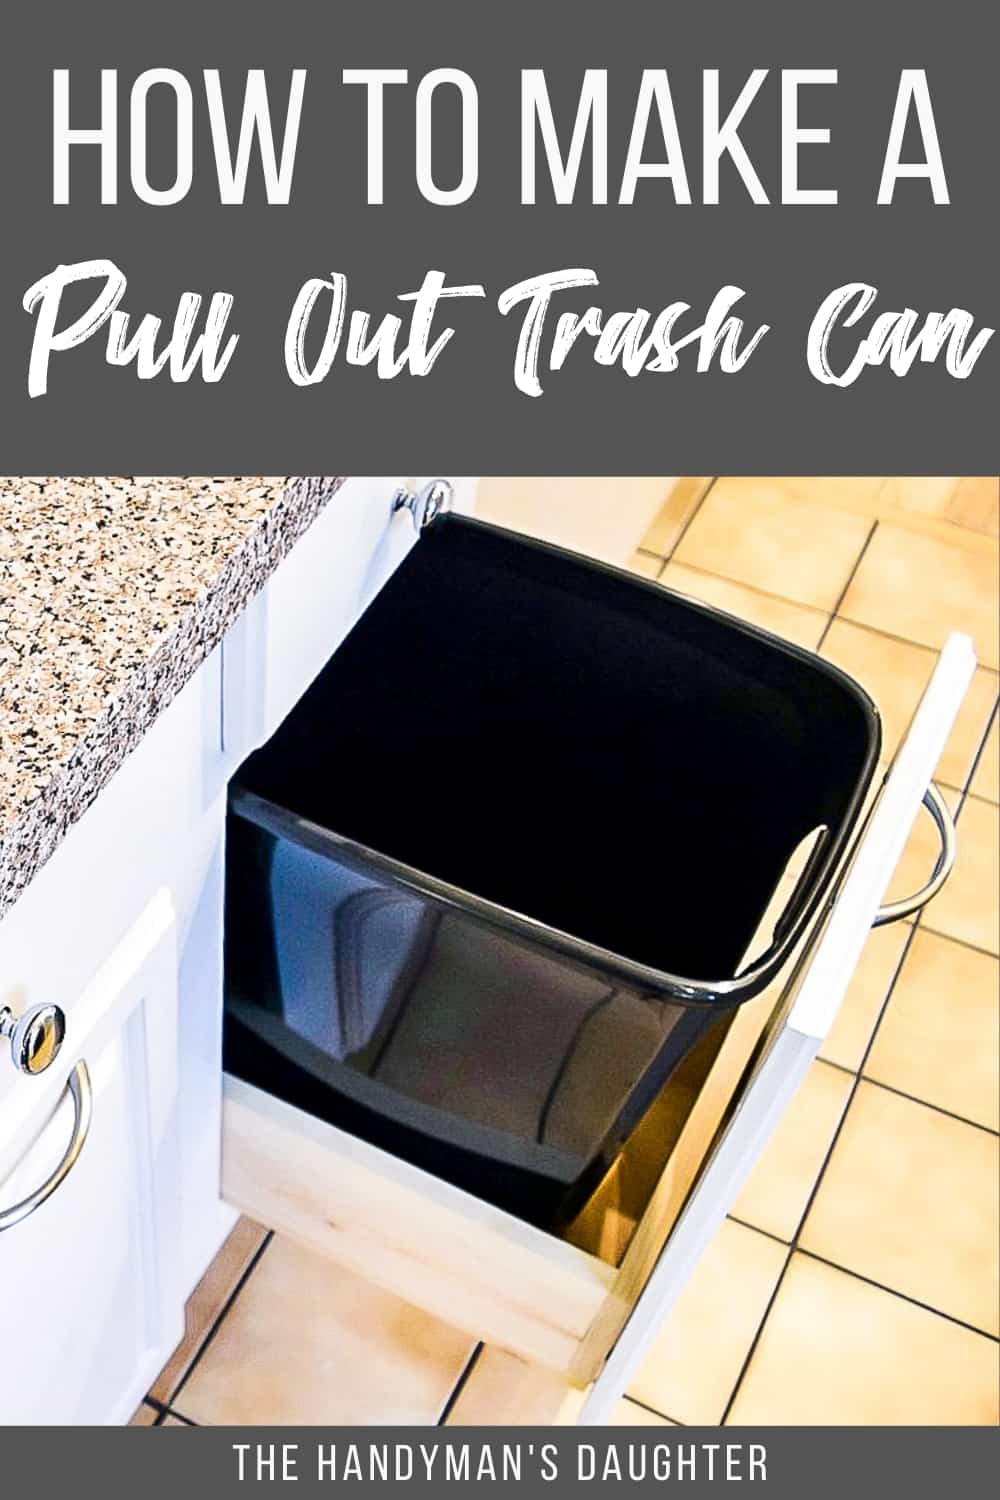
This DIY pull out trash can is just what your kitchen needs! Learn how to convert any lower cabinet into a custom pull out trash can cabinet with just a few tools!
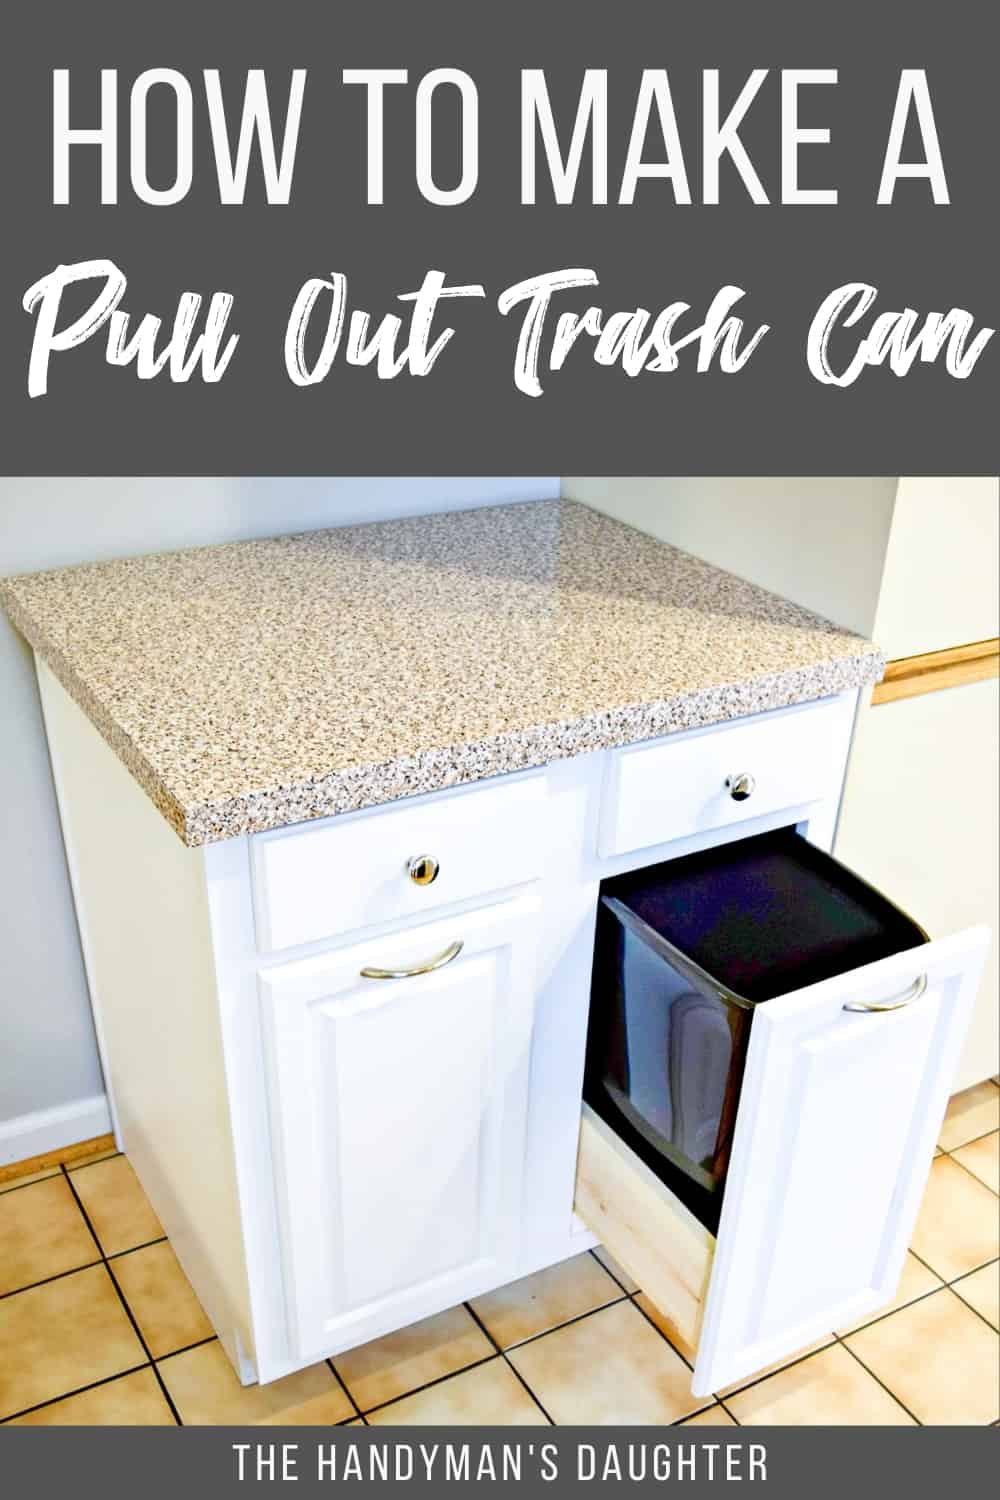

Are you tired of looking at your gross kitchen trash can while you cook? Make this pull out trash can cabinet and hide it away instead! This is a fairly simple project, and is a fraction of the cost of one of those fancy store-bought kits!
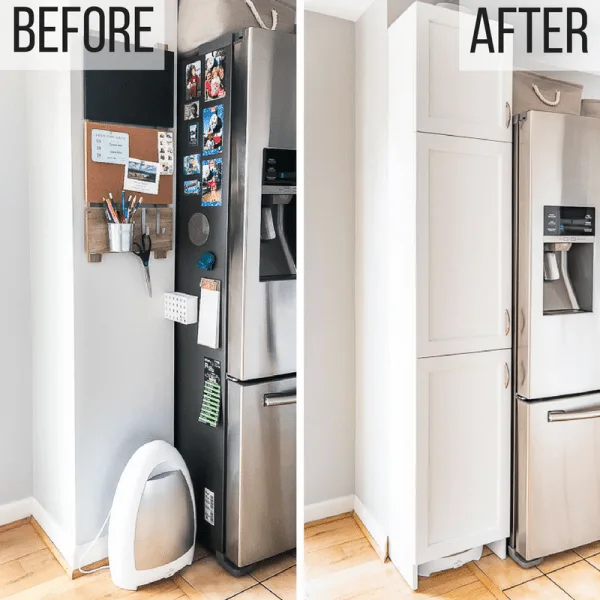
Don't want to sacrifice one of your existing cabinets? I found a used kitchen cabinet that fit into the spot where the trash cans were stored. It gives us a place to hide them away, plus extra counter space!
This post contains affiliate links for your convenience. Purchases made through these links may earn me a small commission at no additional cost to you. Please visit my disclosures page for more information.
Supplies Needed
- One 1 x 6 board
- One 1 x 12 board or 2'x2' sheet of ¾" plywood
- One set of 24" drawer slides
- Check out the different types of drawer slides to see which one is right for your project.
- Kreg Jig and 1 ¼" pocket hole screws
- You can also use regular wood screws and a countersink drill bit.
- Wood glue
- Cordless drill
- 24" clamps
- Trash can that is slightly shorter and narrower than your opening
How to Make a Trash Can Cabinet
Take Measurements First
The size of your cabinet opening and the drawer slides you use will determine how big to make the trash can drawer. Center mount drawer slides give you more flexibility in the size of your box, but aren't as stable as side mount slides. Here are the general guidelines for measuring for each type:
- Center mount drawer slides
- Needs at least 1 / 8" of clearance on both sides of the opening, but can be smaller if you're putting the trash can on one side of a double-door opening.
- Requires 1 ½" of clearance in the back for the bracket that holds the drawer rail in place.
- If you have a cabinet with a face frame that is flush with the bottom shelf, you'll need to elevate the front with a piece of 1x2 board. I go into this process in more detail below!
- Side mount drawer slides
- The box needs to be exactly the width of the opening minus the thickness of the slides.
- The drawer can be the same depth as the cabinet, so you can potentially fit two cans in the same space.
- May require additional blocking if there's a face frame on the front of the cabinet. This will bring the sides even with the opening and give you something to screw the drawer slides to.
My opening is 11 ½" wide, and the center mount drawer slides I used require 1 / 8" of clearance on either side. 1x12 boards are actually 11 ¼" wide, so it was the perfect size for the bottom piece! You could also use ¾" plywood and cut it to the required size.
Once you've figured out the dimensions of the bottom of the box, you need to decide how tall to make the sides. A 1x6 board is actually 5 ½" wide, which is tall enough to keep the trash can from tipping out of the drawer without adding a lot of unnecessary weight.
Cut the Drawer Box Pieces
Cut your lumber to the required dimensions using a miter saw, circular saw, or even a miter box. If you're making two pull out trash cans (one for trash and the other for recycling), you'll need to double the cuts.
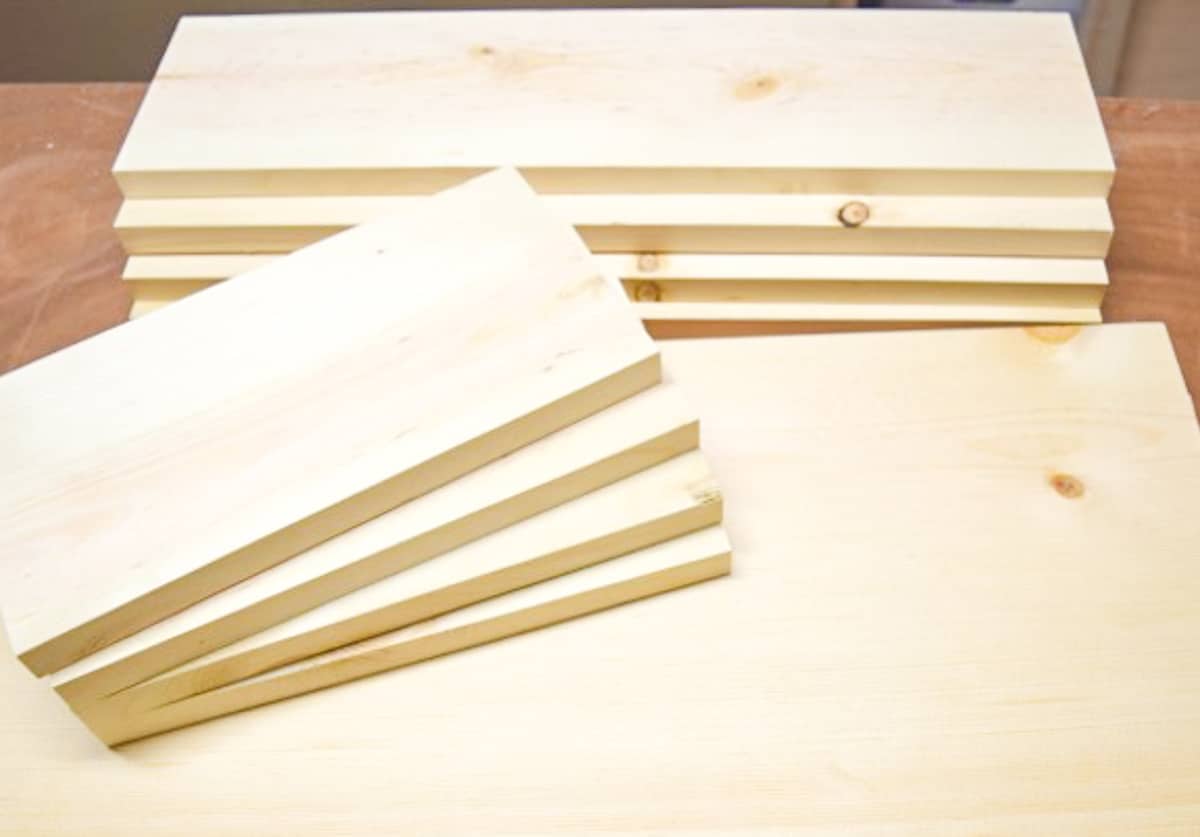

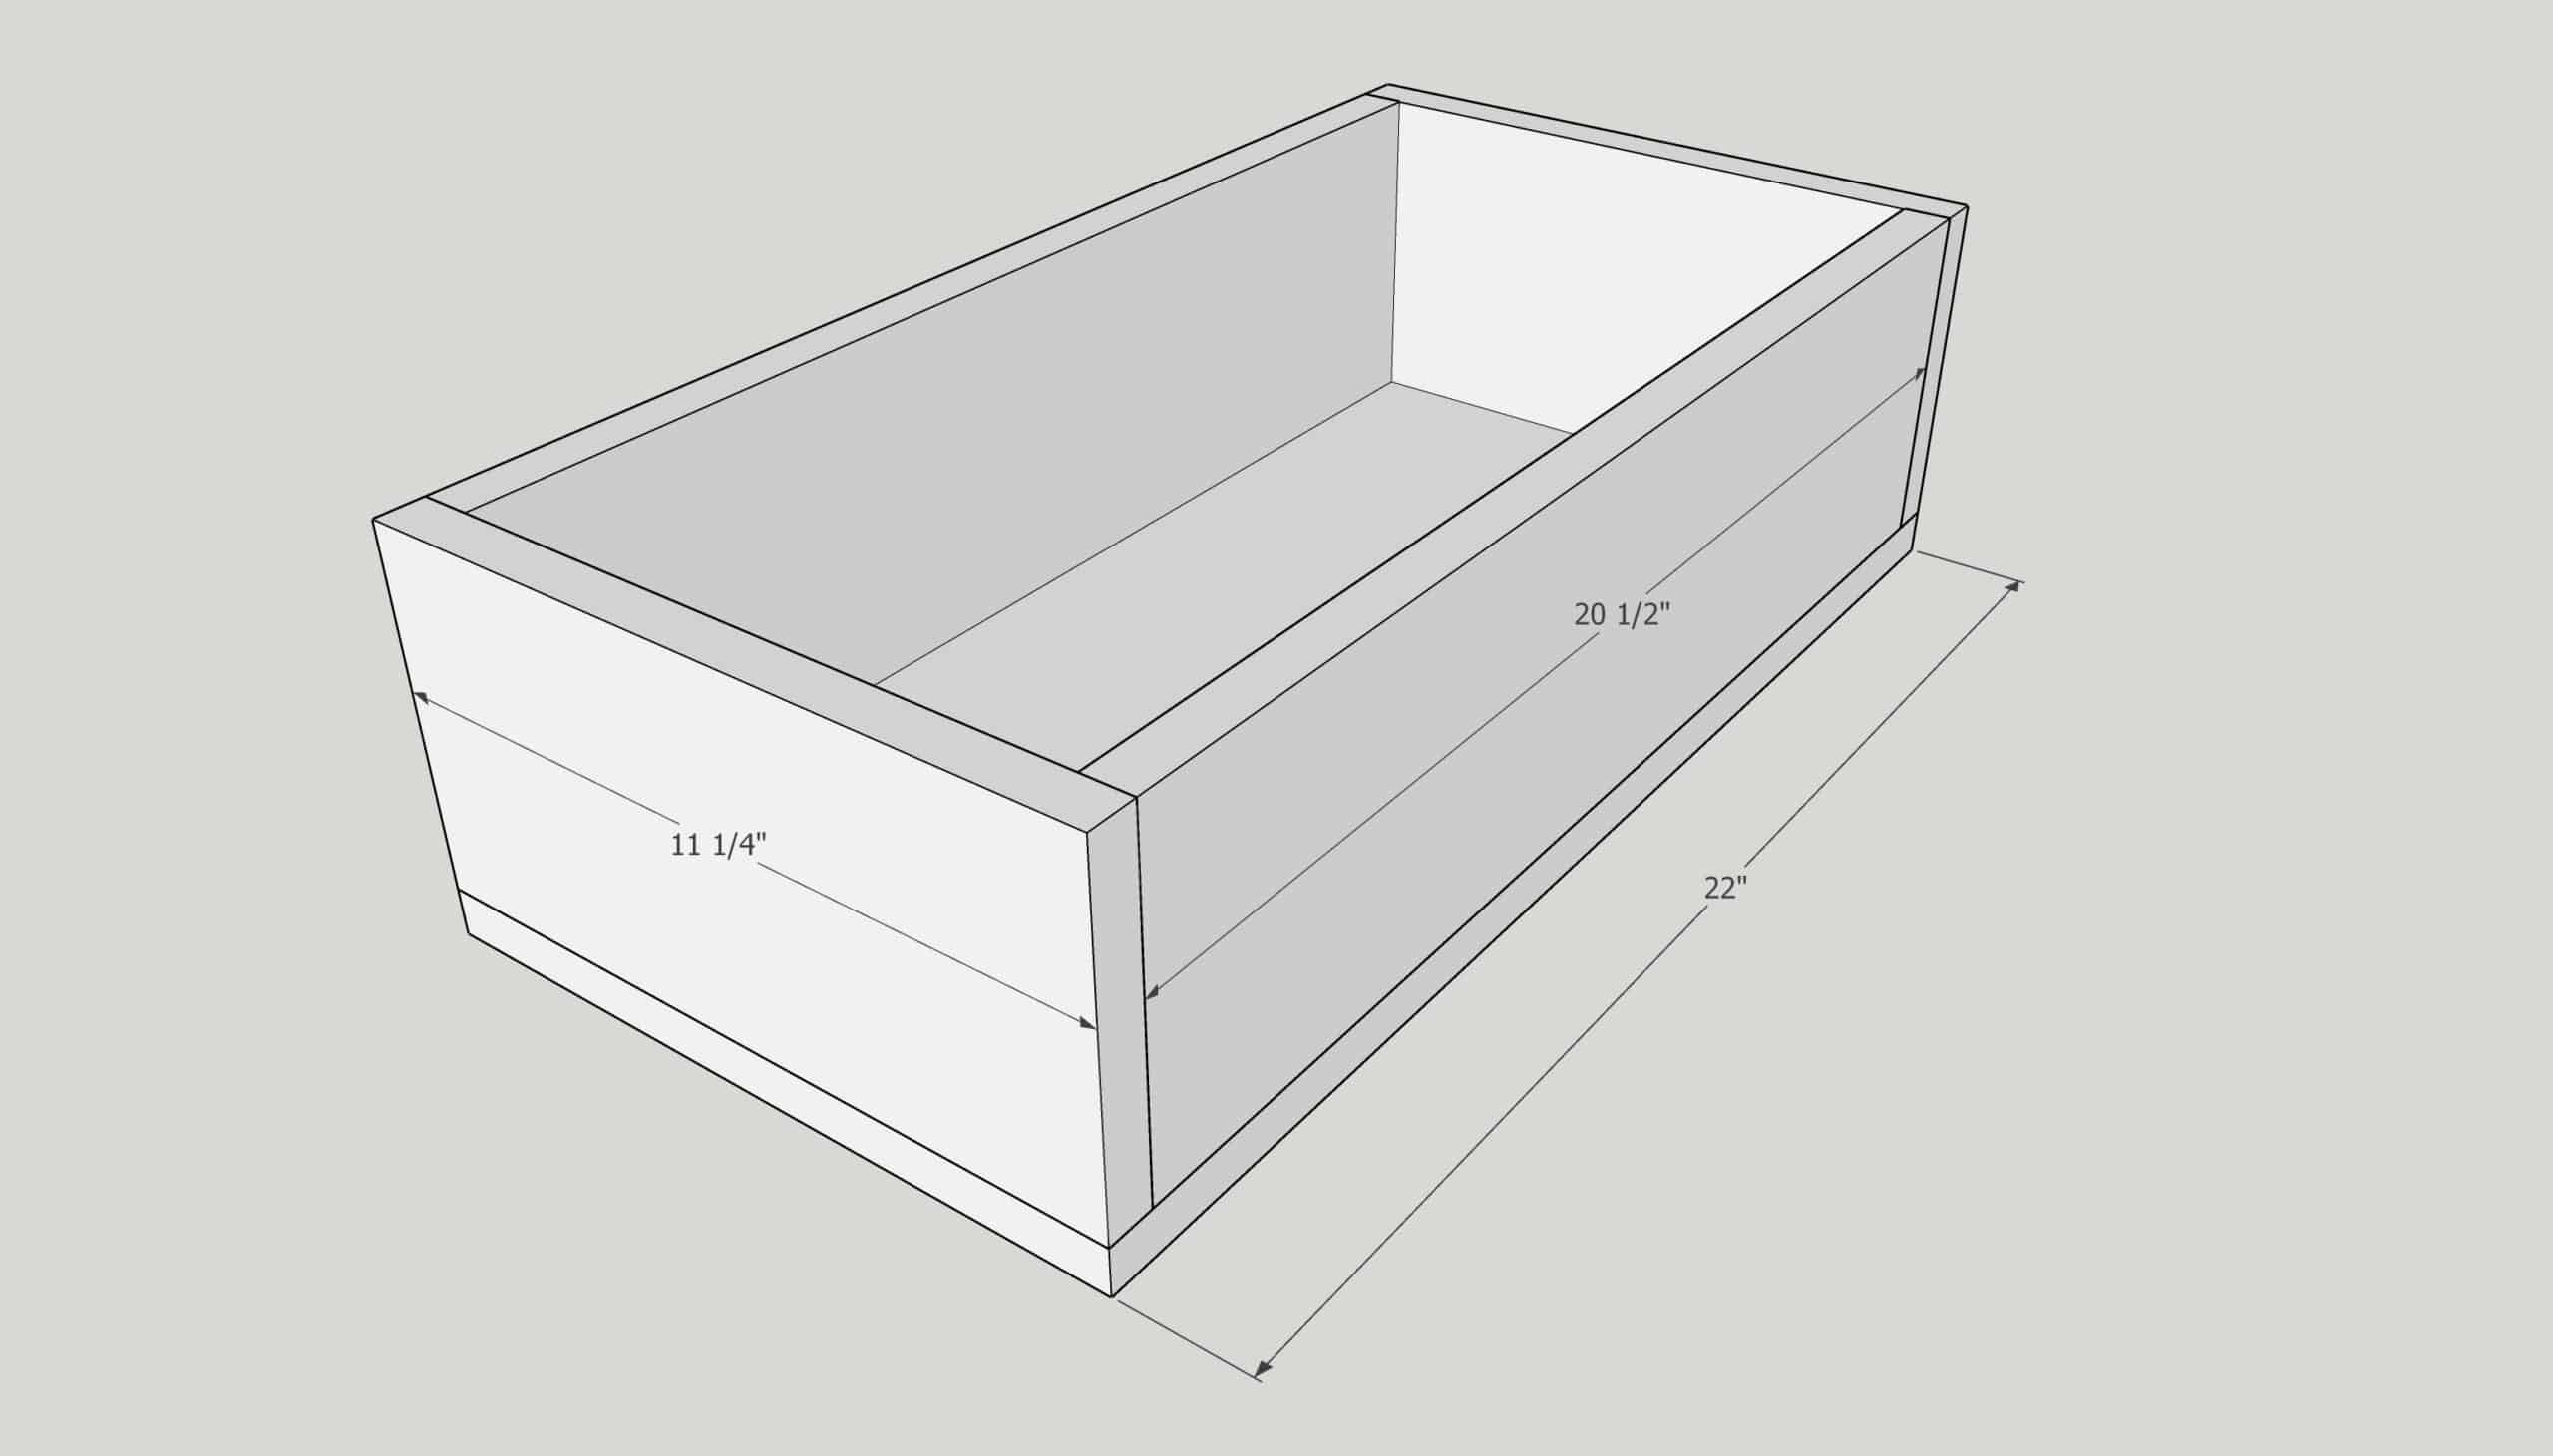
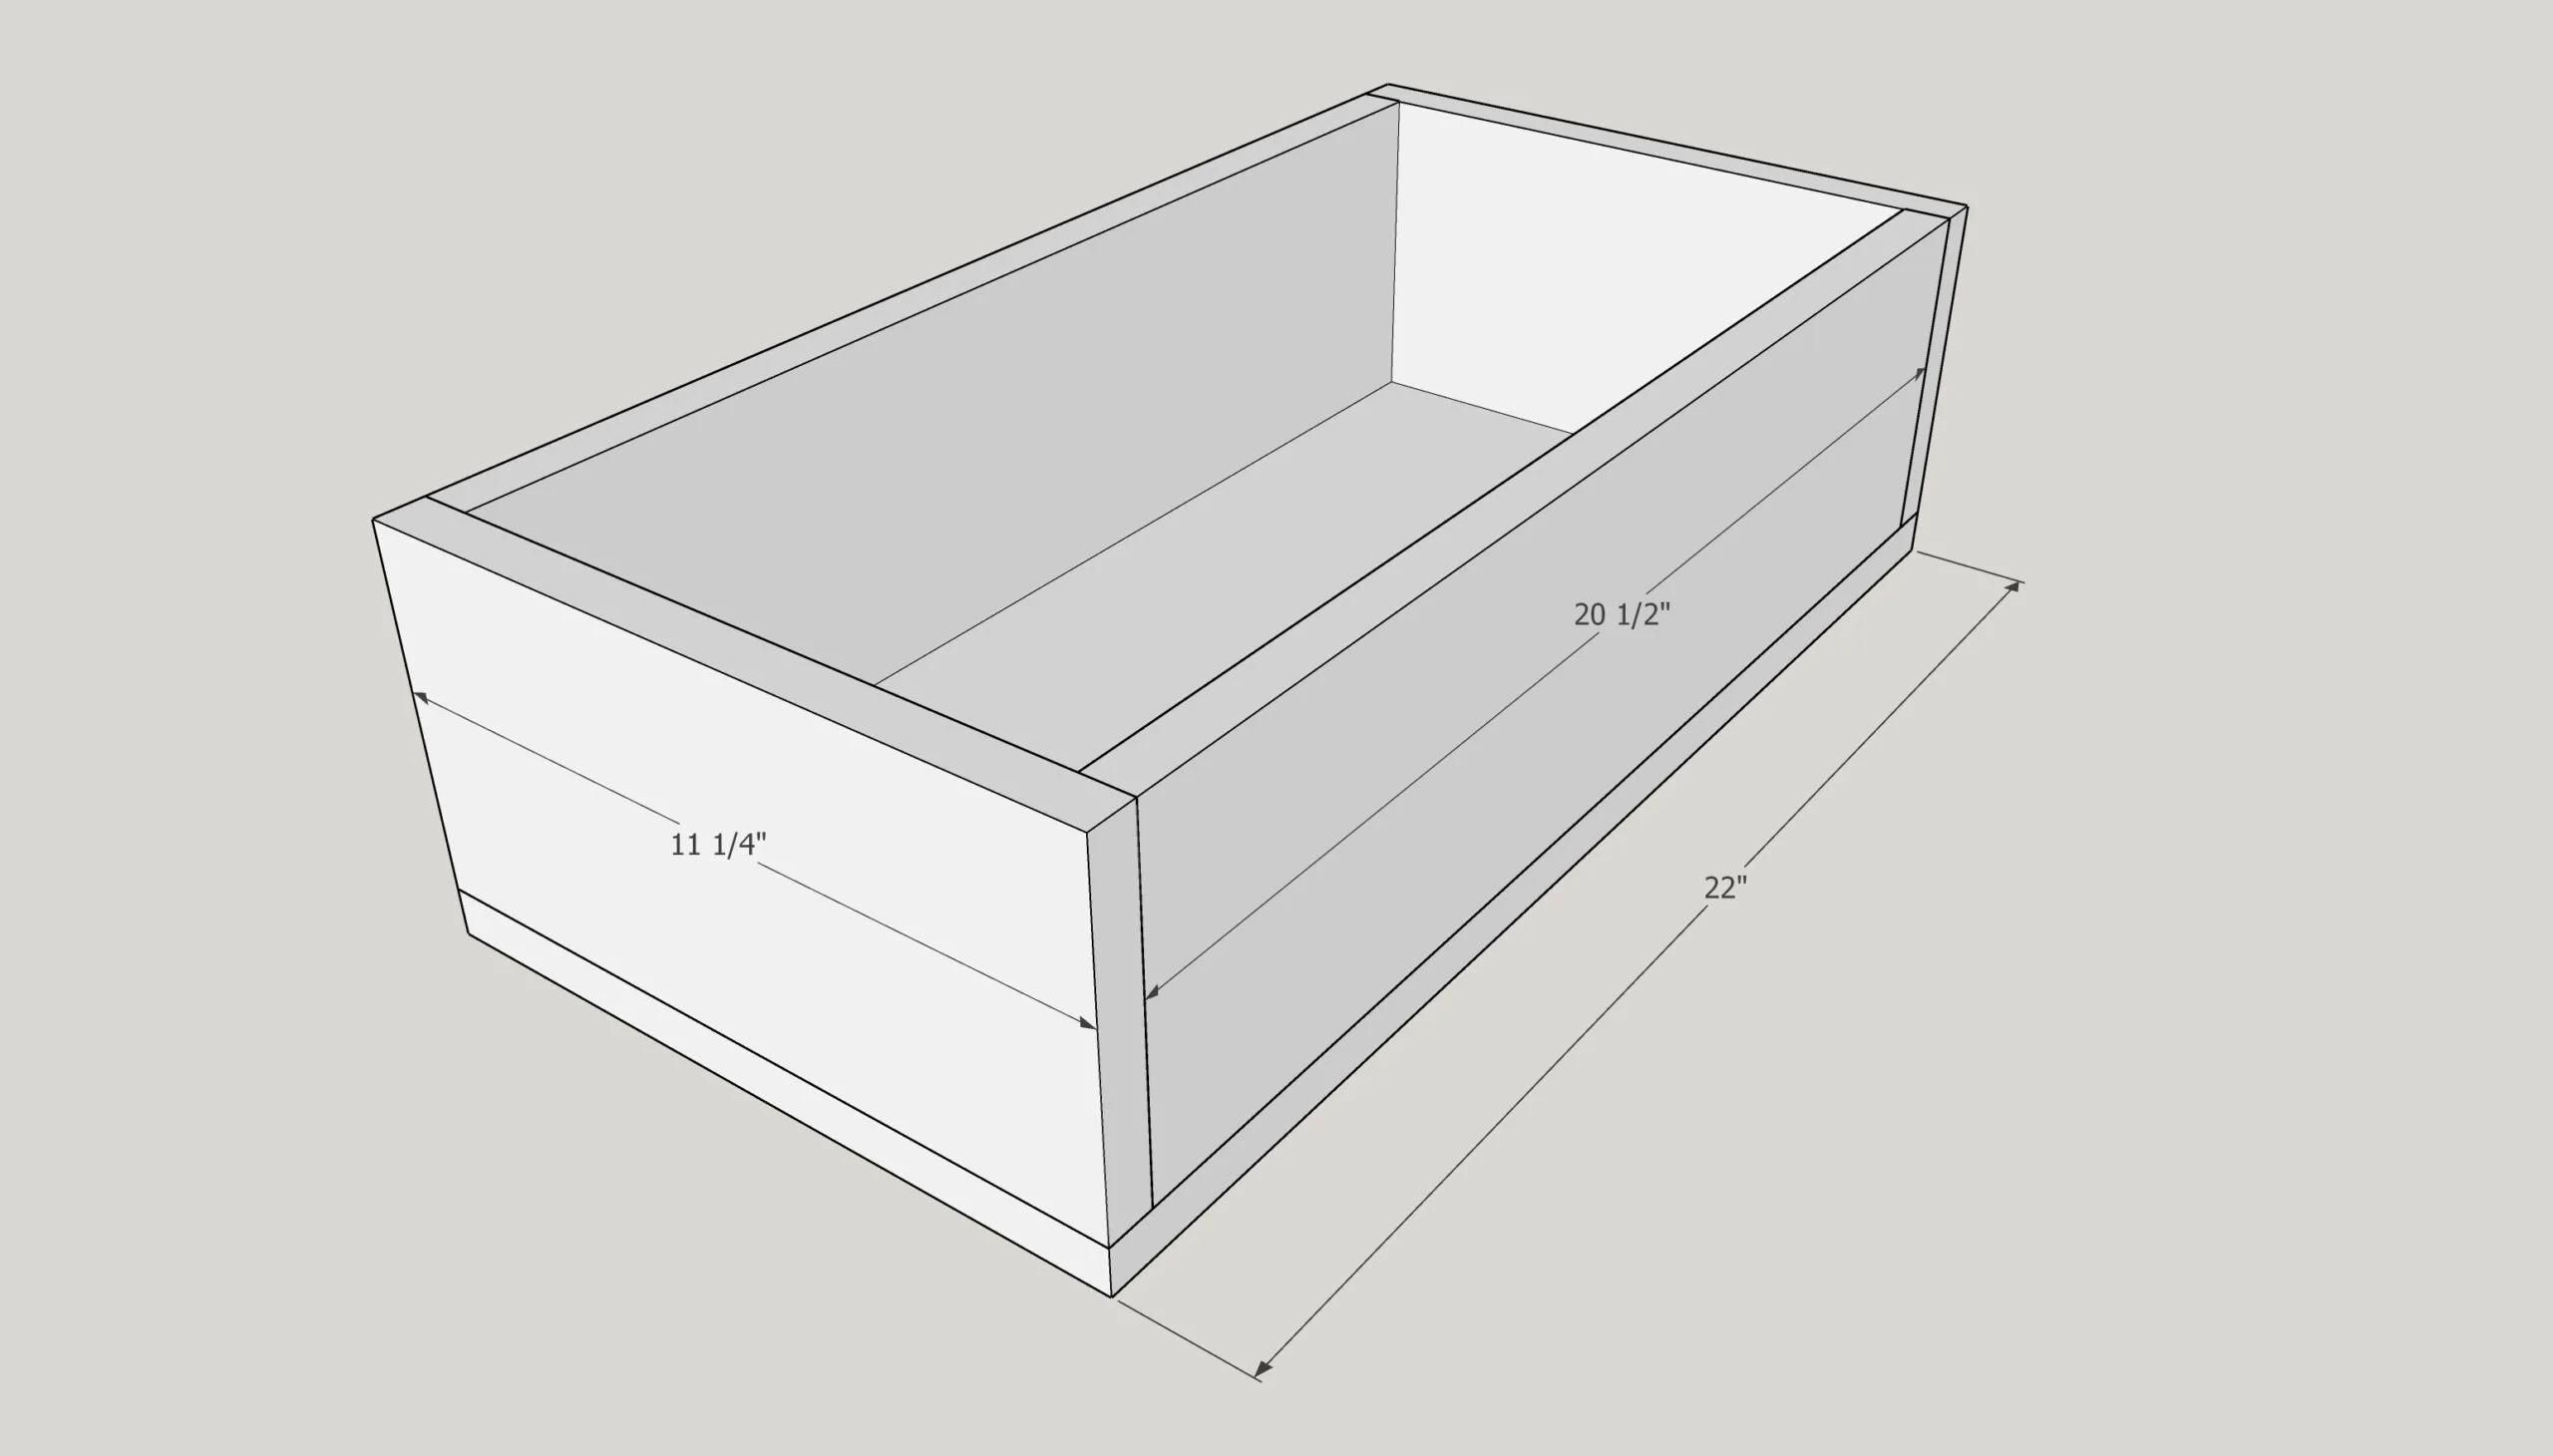
Here are the dimensions I used for one trash can drawer. Keep in mind that your measurements may be different depending on the size of your cabinet opening!
| 1x12 | 1x6 | 1x2 |
| Bottom - Cut 1 @ 22" | Front & Back - Cut 2 @ 11 ¼" | Drawer slide support - Cut 1 at 11 ½" |
| Sides - Cut 2 @ 20 ½" |
Test Fit the Pieces
Test the fit all the pieces together before making any holes. The 1x12 board will serve as the bottom of the drawer, and the 1x6 boards will sit on top of it.
Predrill the Holes
You can assemble the trash cabinet drawer box two different ways: pocket holes or countersink screws.
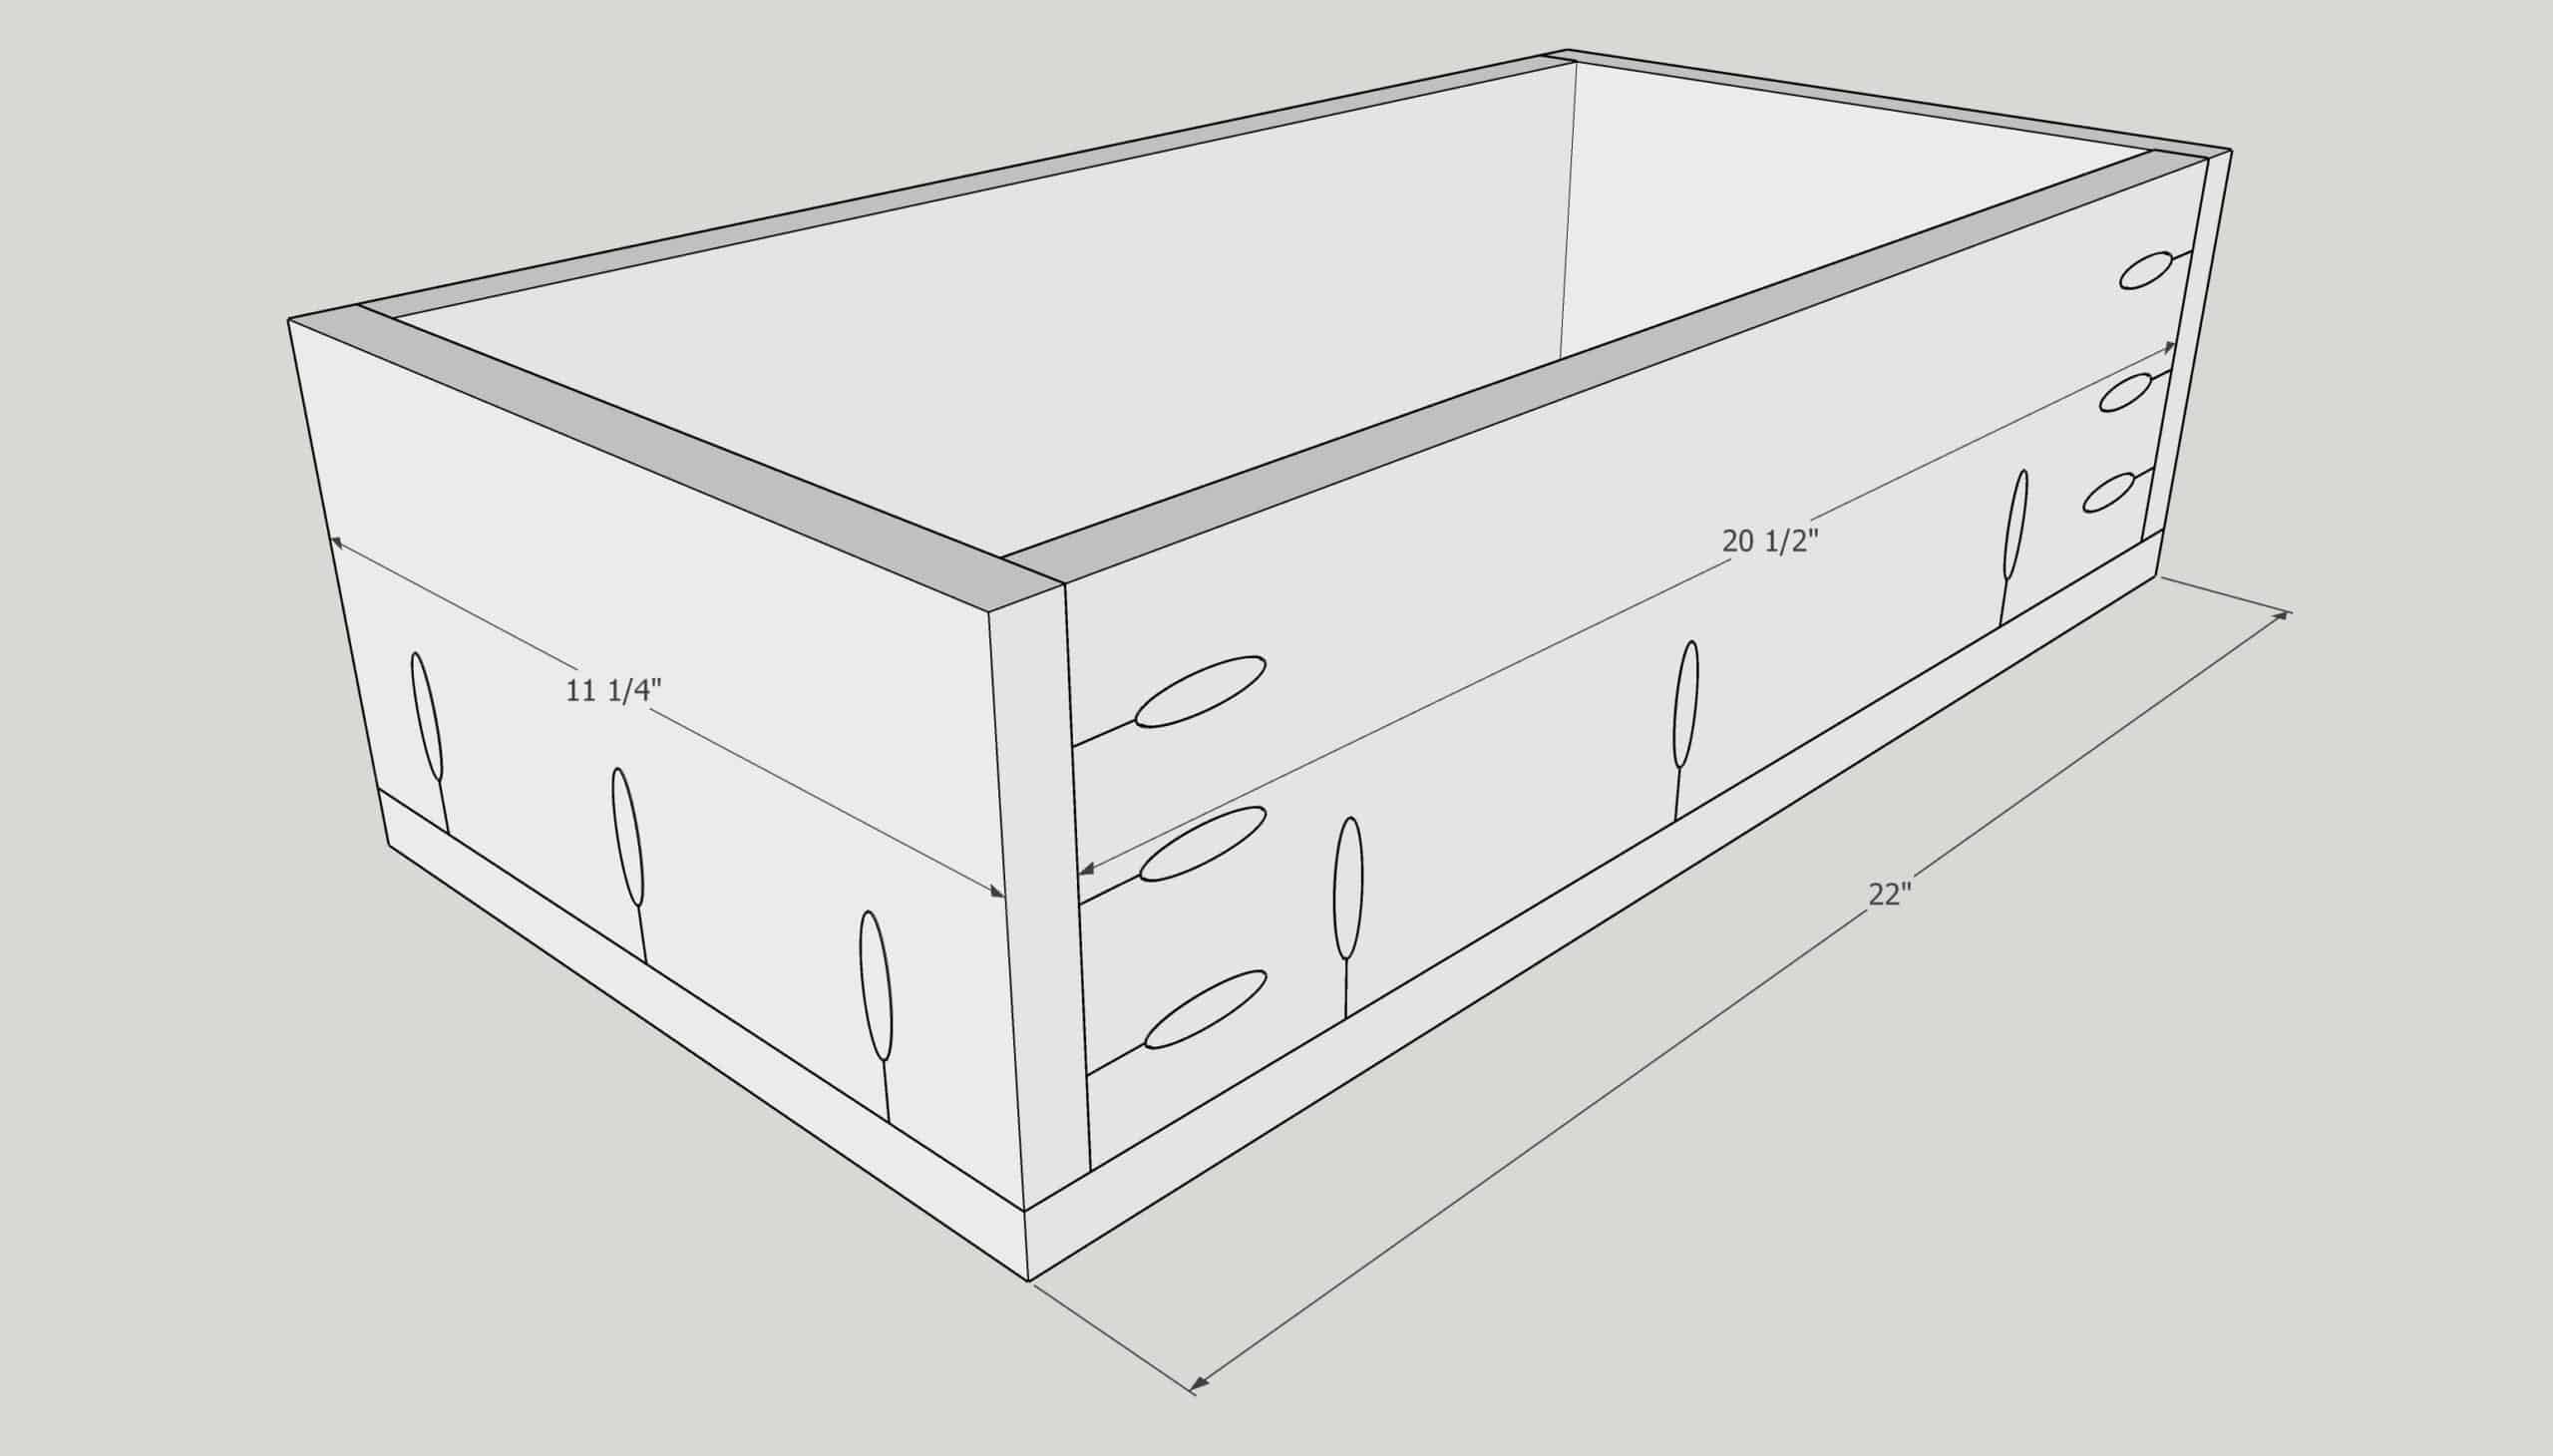
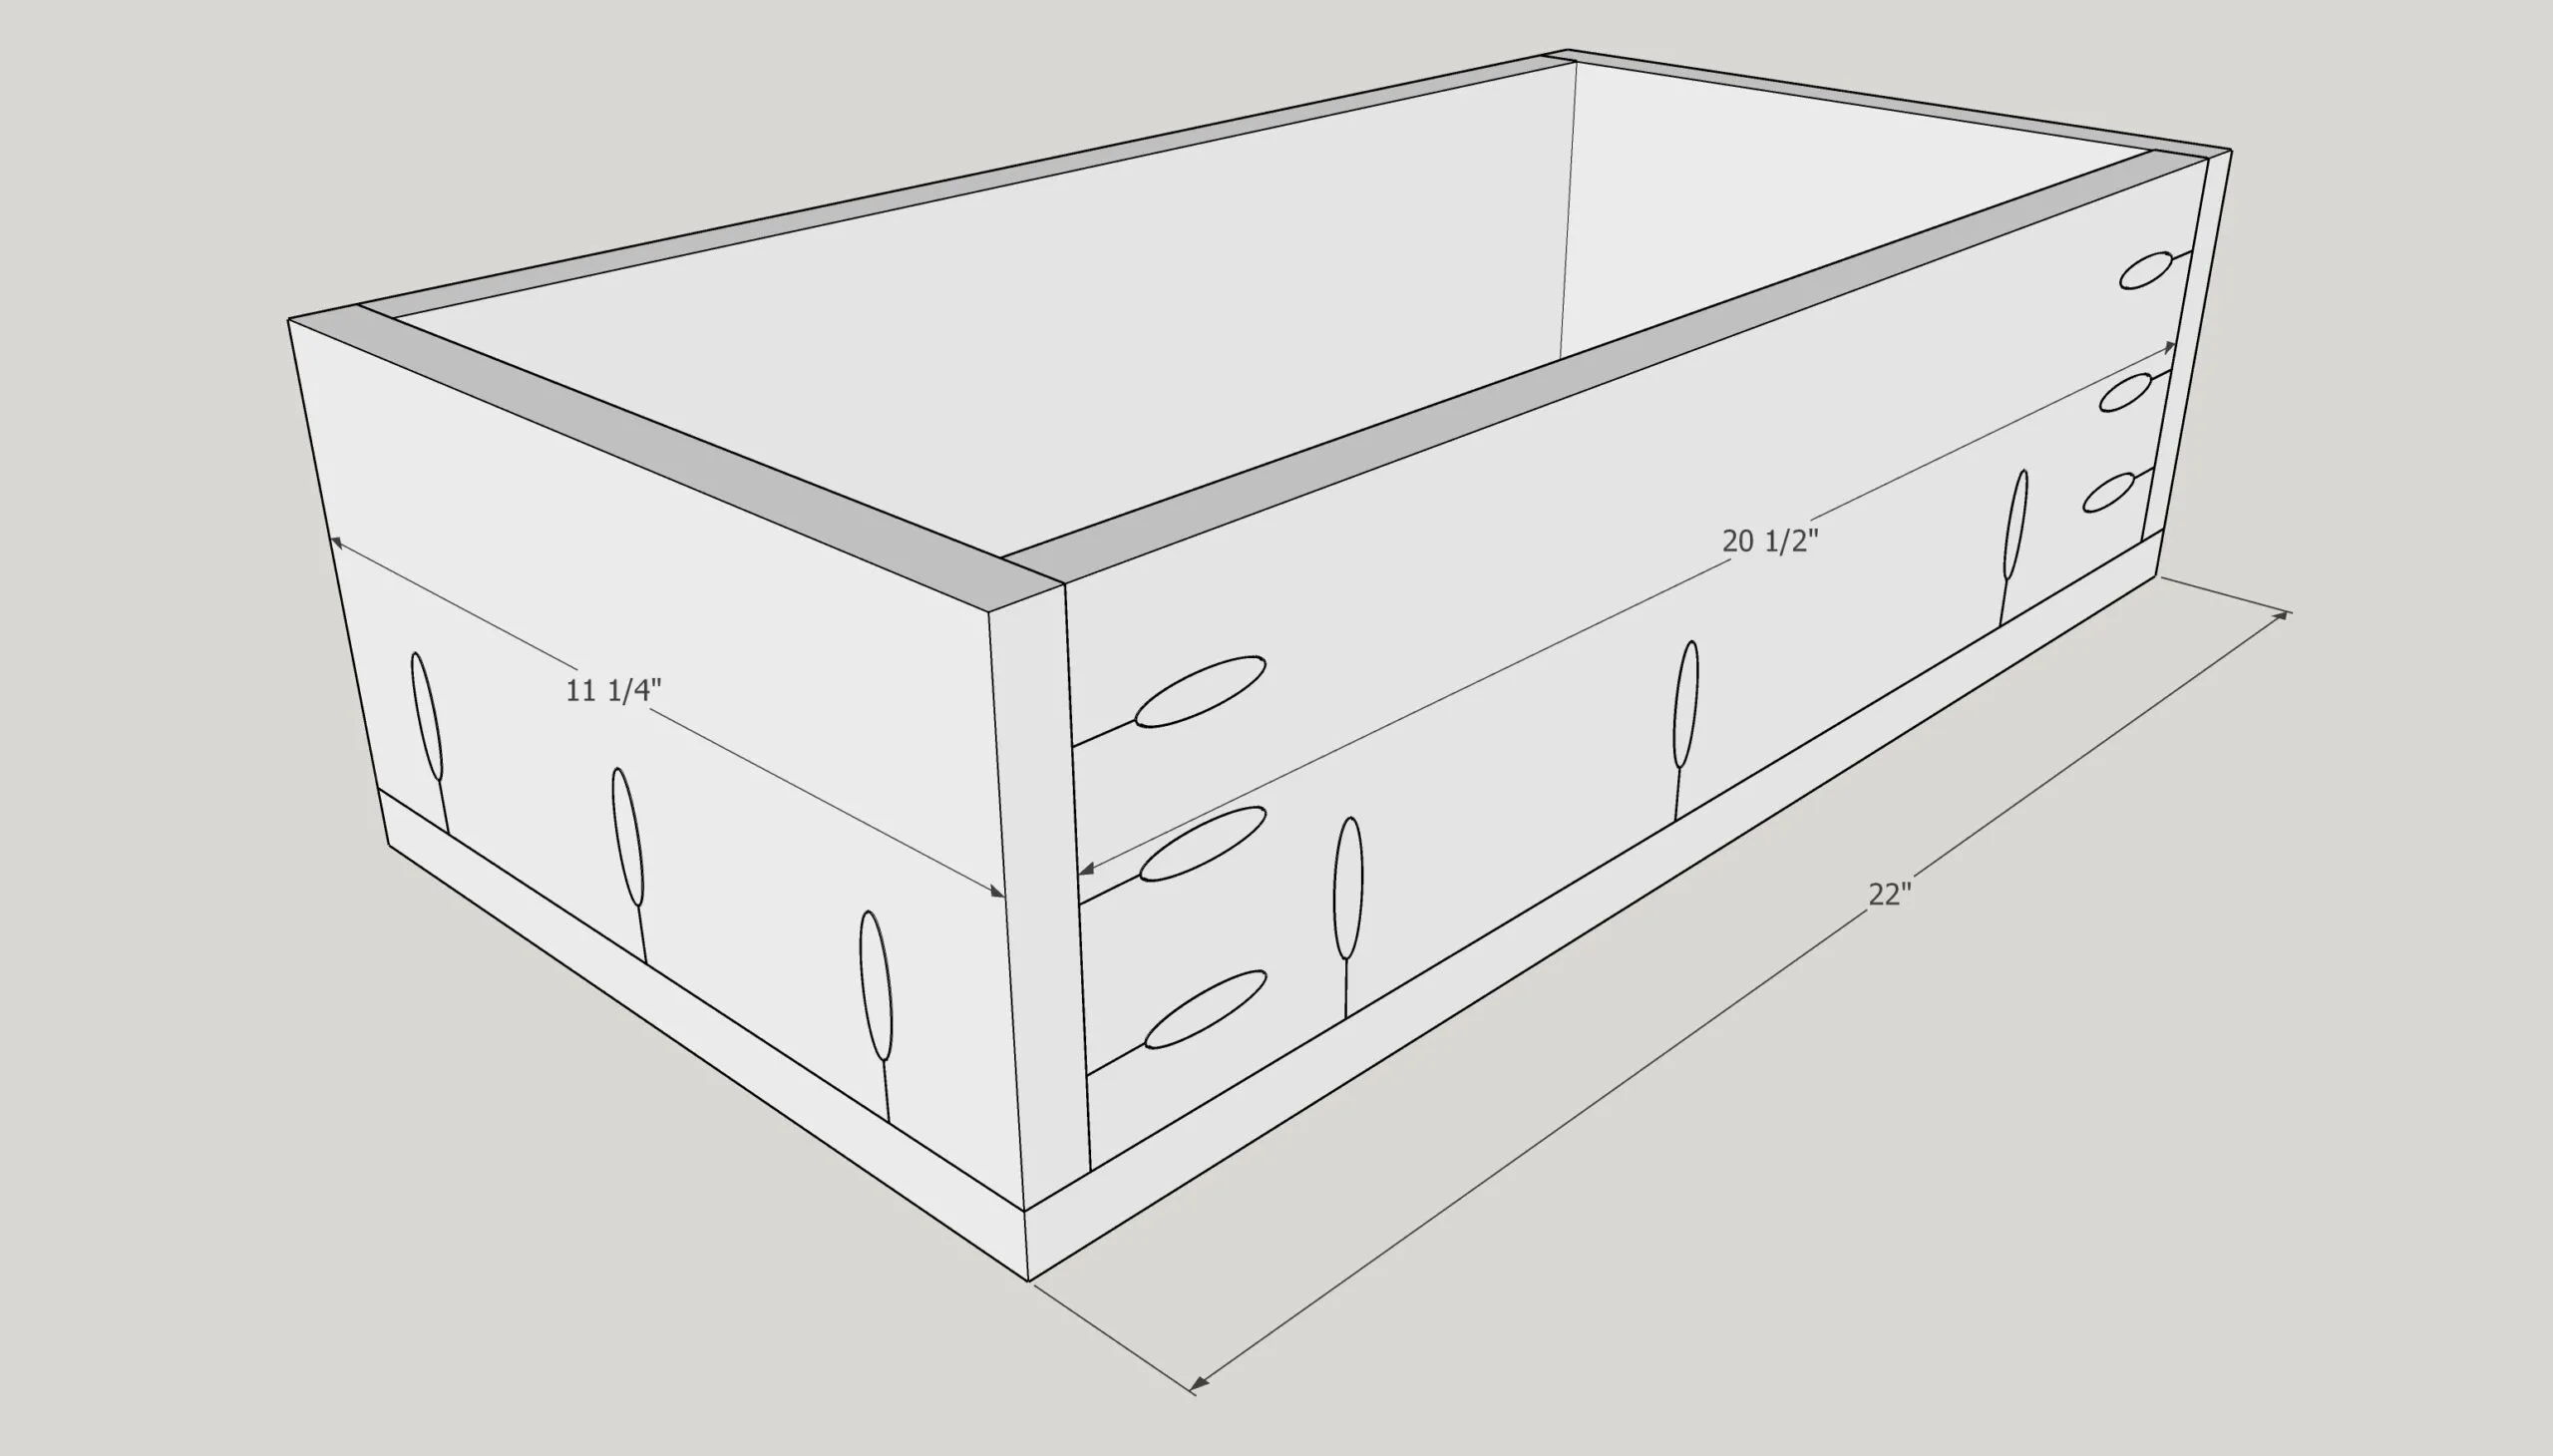
Pocket Holes
Drill pocket holes at the ¾" thickness setting along one long edge of all the 1x6 boards, as well as the two short ends of the 20 ½" side pieces. You can assemble the box with the pocket holes on the inside or the outside. You can learn more about how to use a Kreg Jig here.
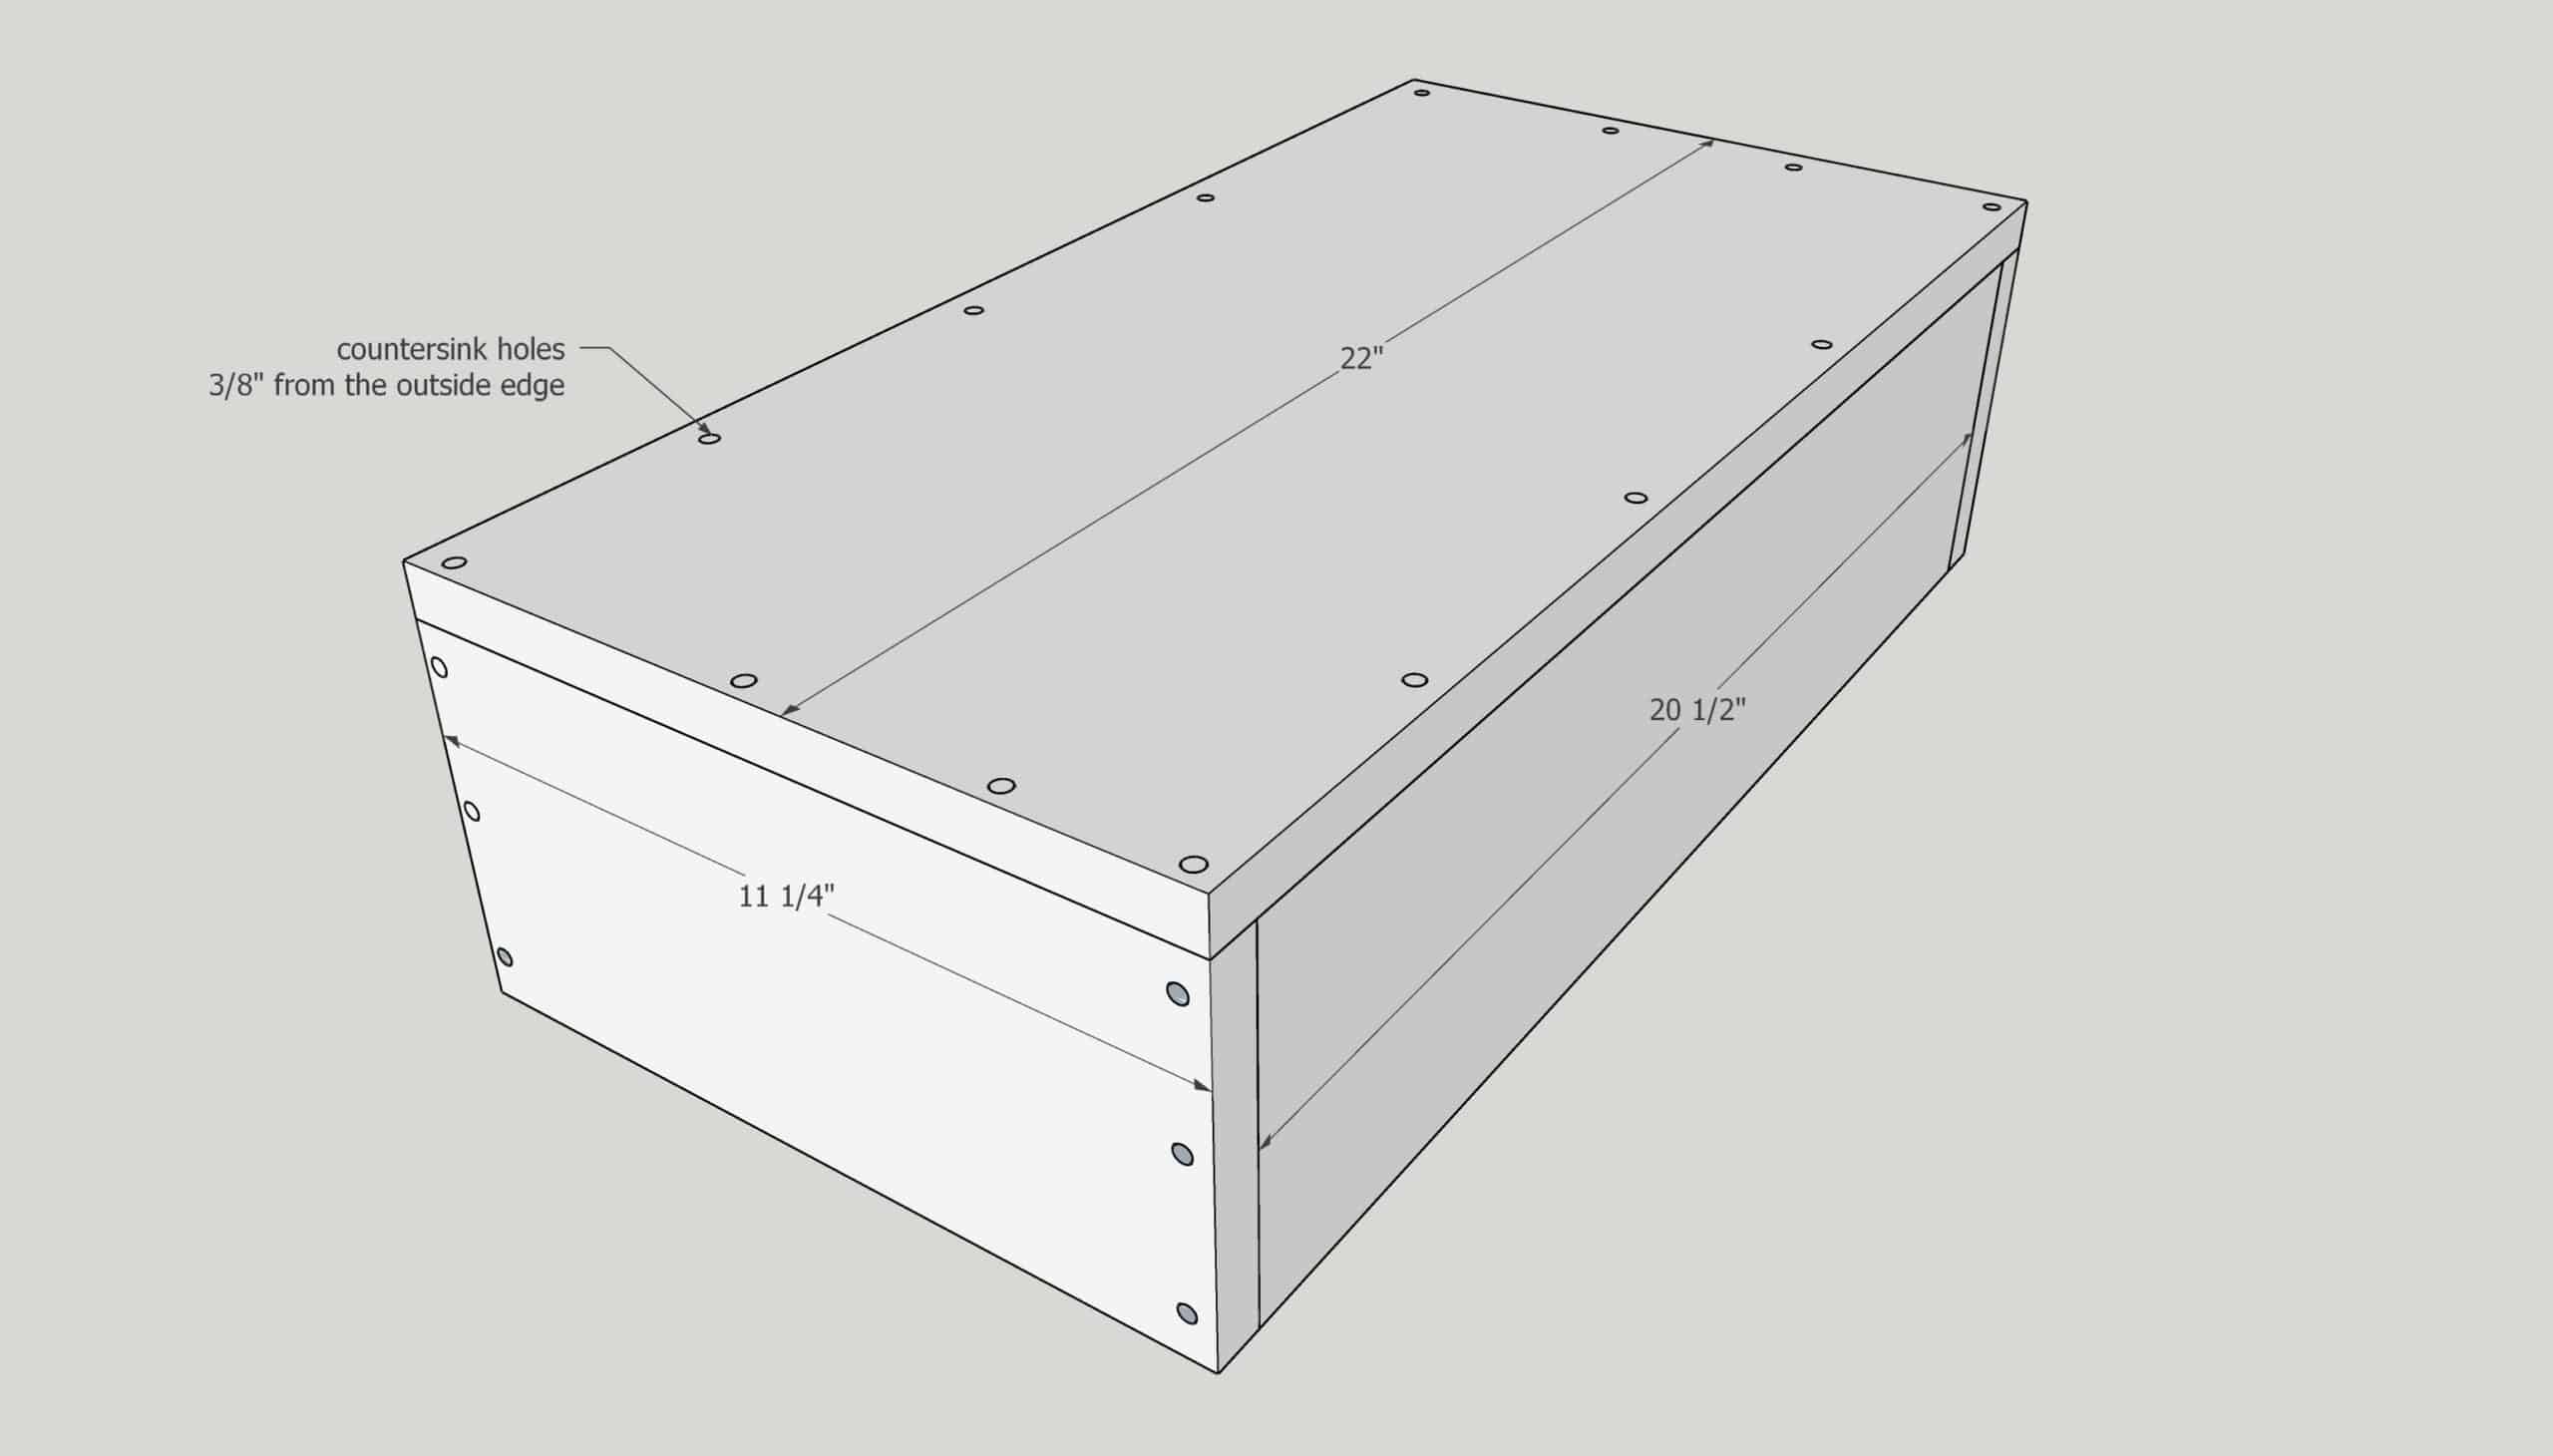
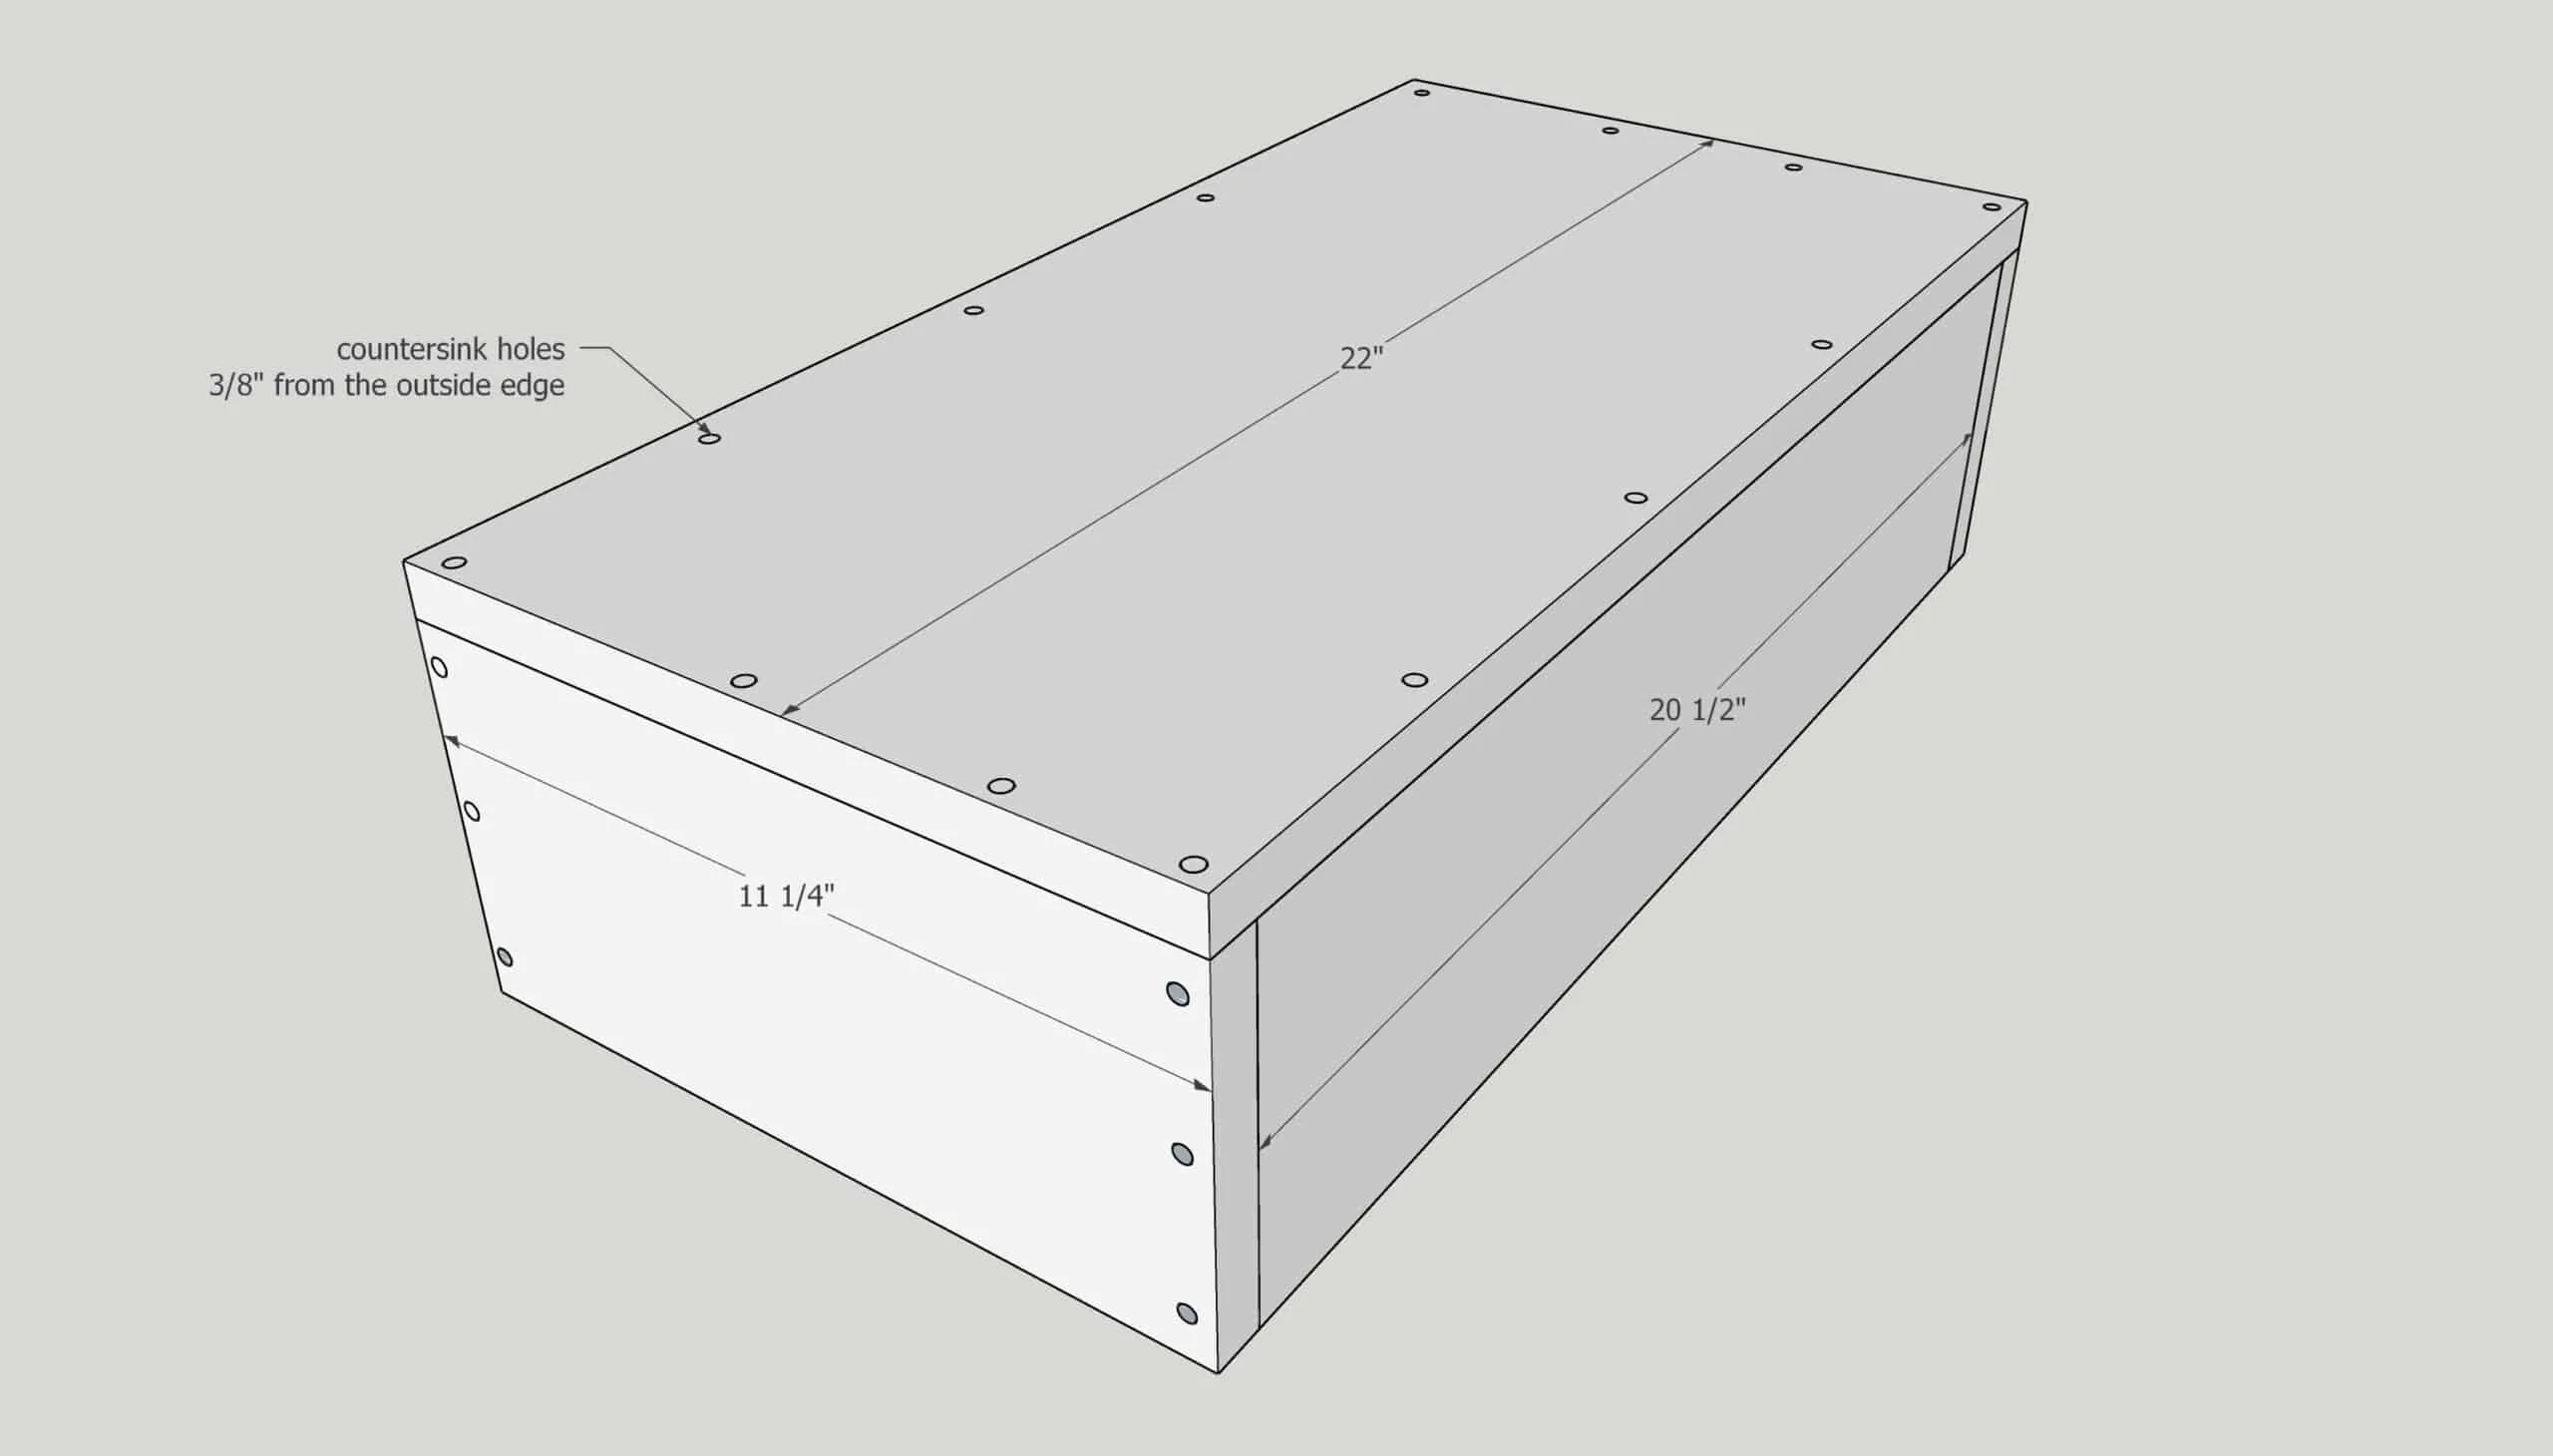
Countersink Screws
It's really important to sink the heads of the screws below the surface of the wood, so they don't interfere with the drawer slides. A countersink bit predrills the screw hole and creates a divot where the screw head will rest, leaving the sides flat.
Drill the countersink holes along the entire perimeter of the bottom piece, as well as the sides of the front and back pieces. I recommend marking a line ⅜" in from the outside edges so you drill the hole smack in the middle of the adjoining boards.
Assemble the Trash Can Drawer Box
Apply wood glue to the adjoining 1x6 pieces, and use clamps to hold everything together. Then assemble the outside of the box with 1 ¼" pocket hole screws or 1 ¼" flat head wood screws.
Then place your rectangle on top of the 1x12 base, and screw it down. Make sure the sides line up with the outside edge of the box, and that everything is square.
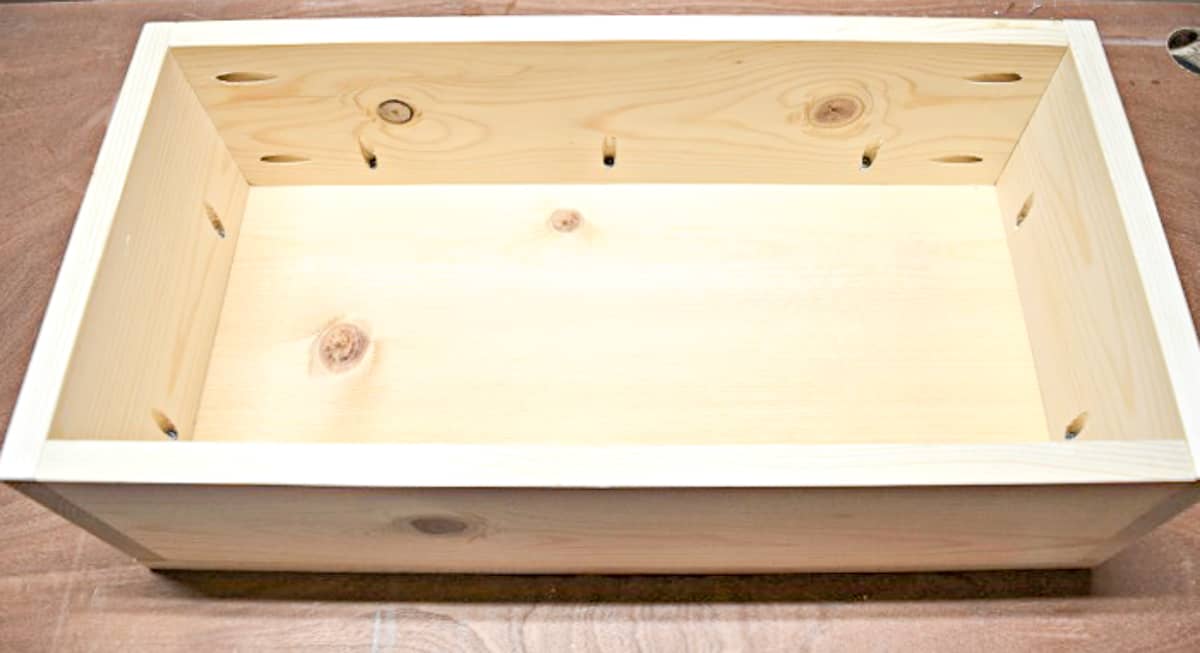
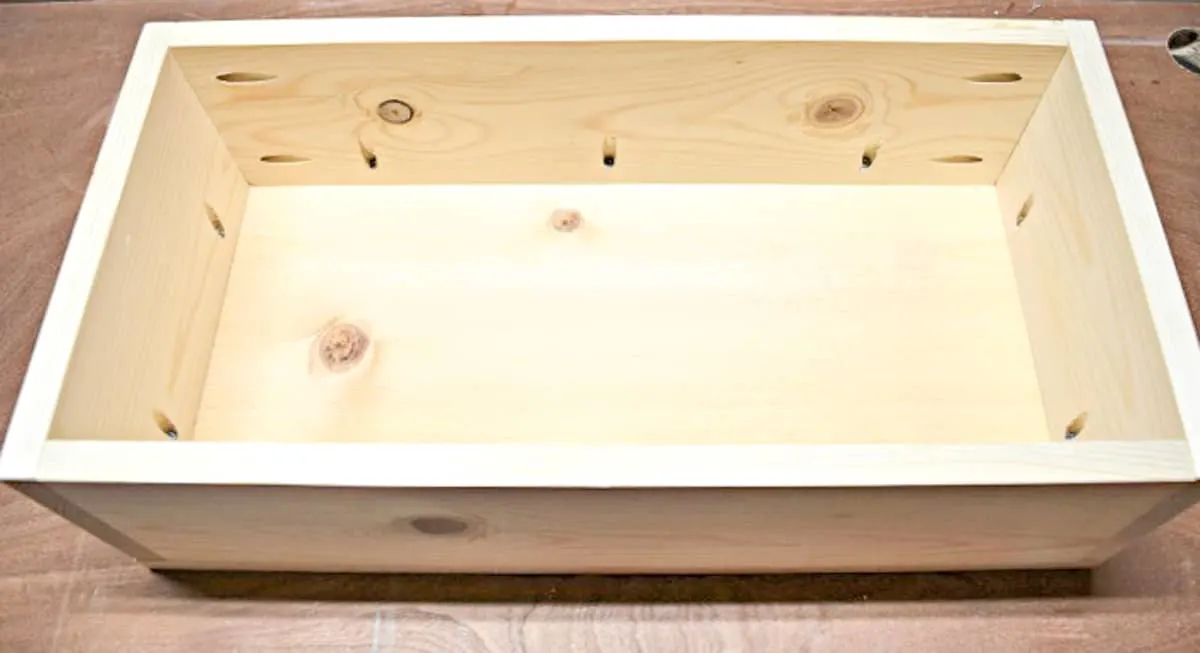
Yay, you have a box! Now we need to make the box move.
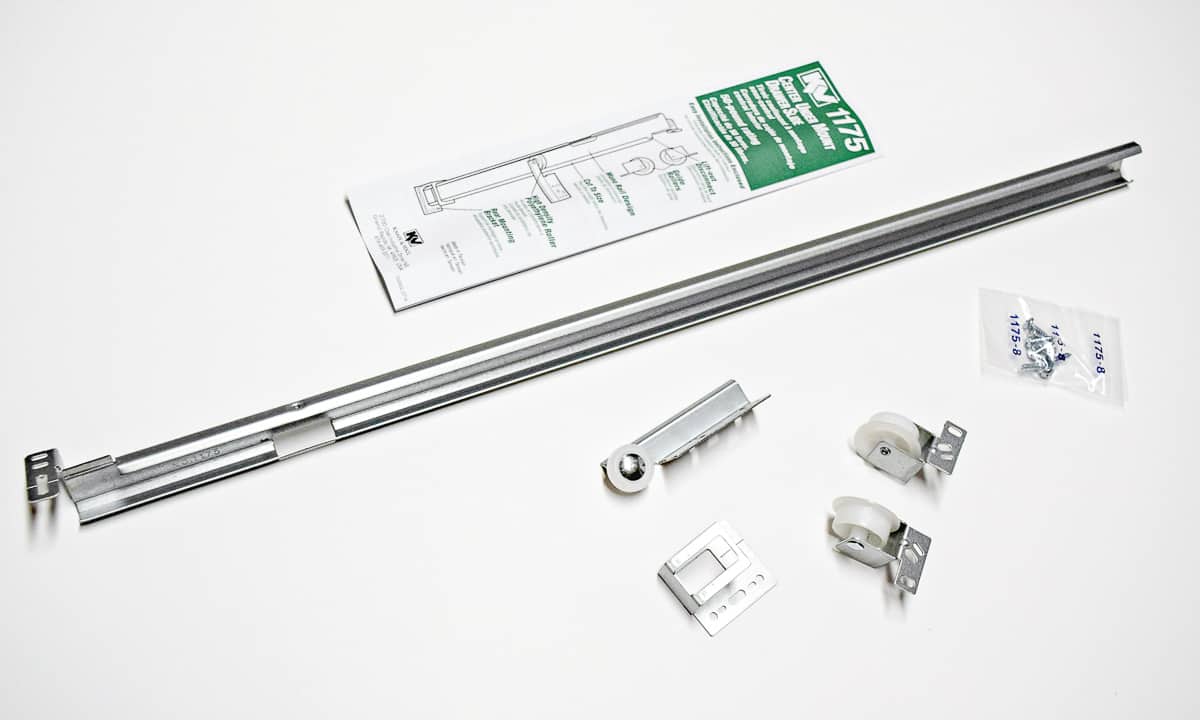
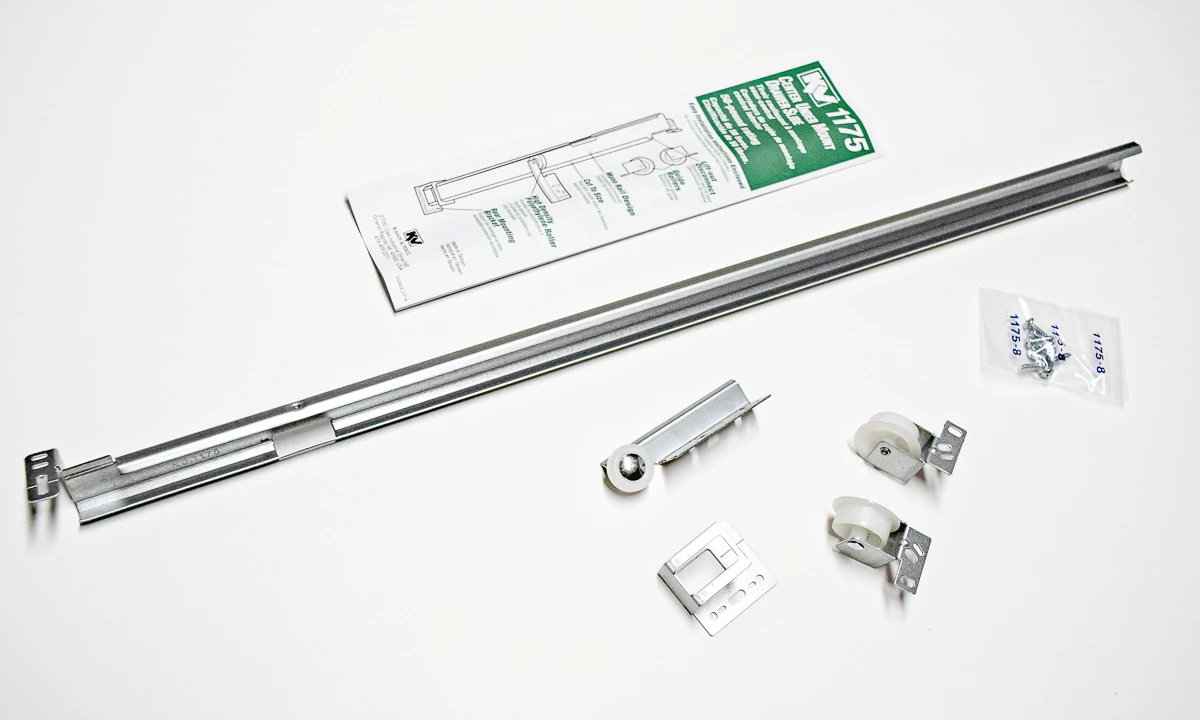
Install the Drawer Slide Hardware
I went back and forth about whether to install regular drawer slides that attach to the sides, or a center mount system that goes on the bottom.
I settled on these center mount drawer slides because it makes removing the drawer from the track super simple. I didn't want trash to get caught under or behind the drawer and not be able to get it out easily. With this system, you simply lift the drawer off the rail to clean out the cabinet.
If you prefer to use side-mount drawer slides, there's a great tutorial on how to make a trash can cabinet with this method in the video below!
Start by installing the bracket in the back of the cabinet. It should be centered in the middle of the cabinet opening and raised up slightly according to the instructions. The long rail rests inside the back bracket.
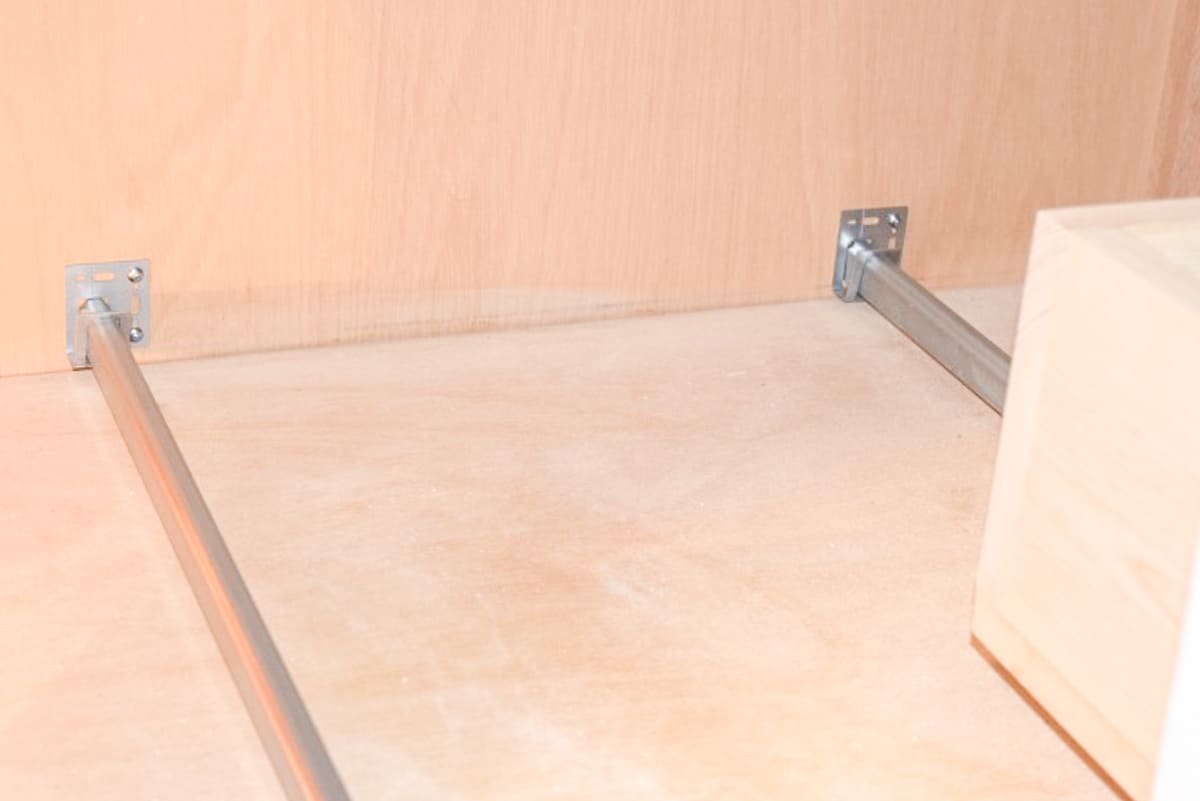

Now you need to attach the front of the rail to the front of cabinet. Cut a piece of 1x2 to the exact width of the opening and attach it to the front of the cabinet. Then screw the other end of the rail to the middle of the board, and the side guide wheels on the ends.

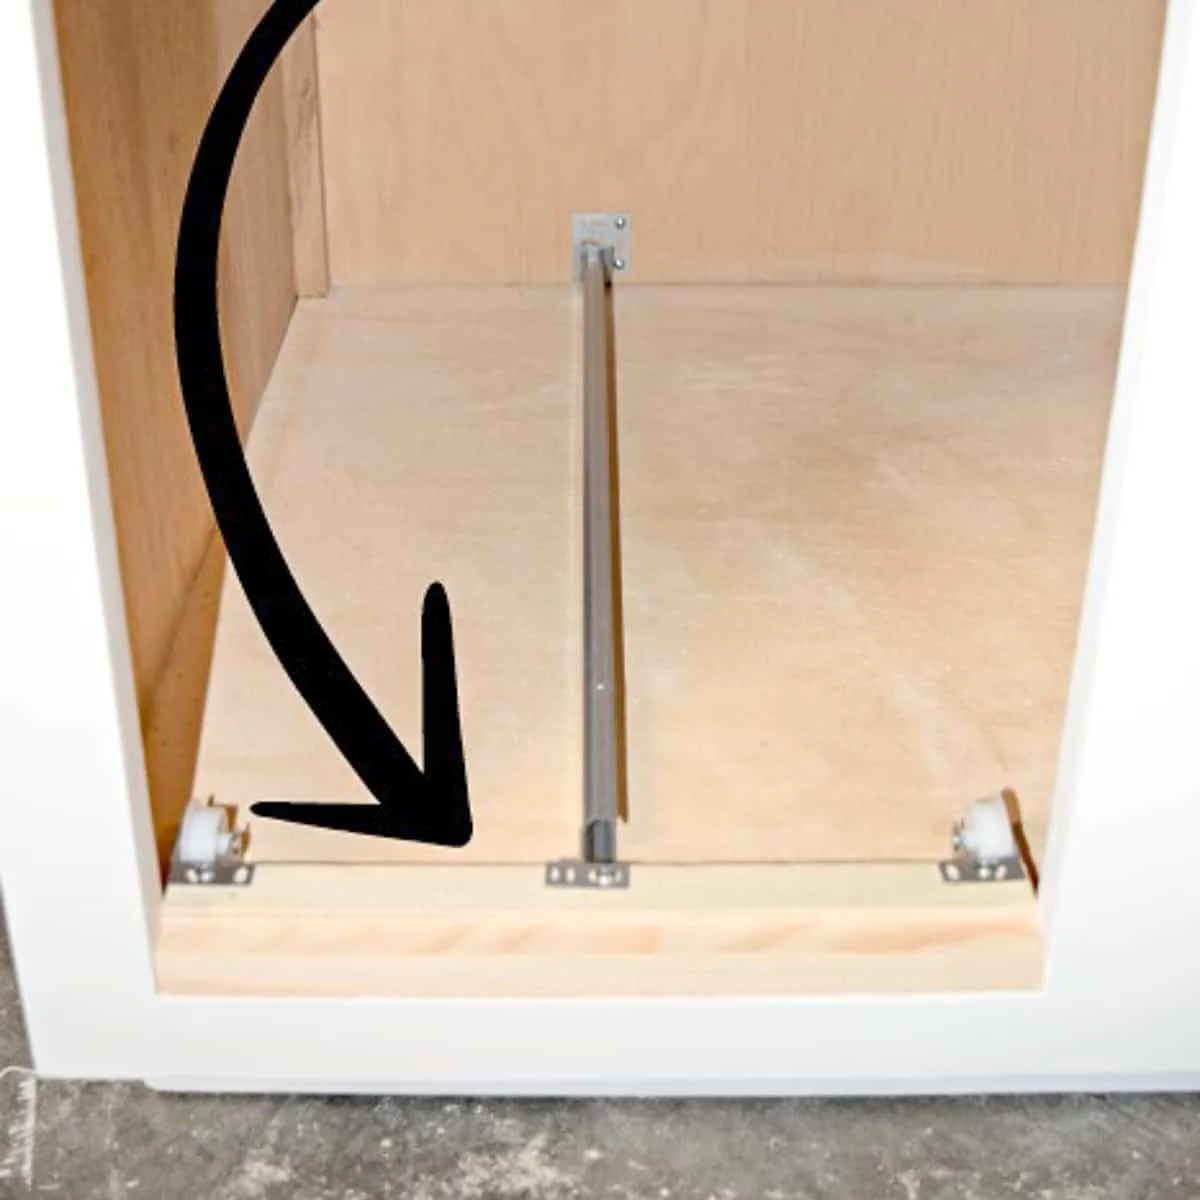
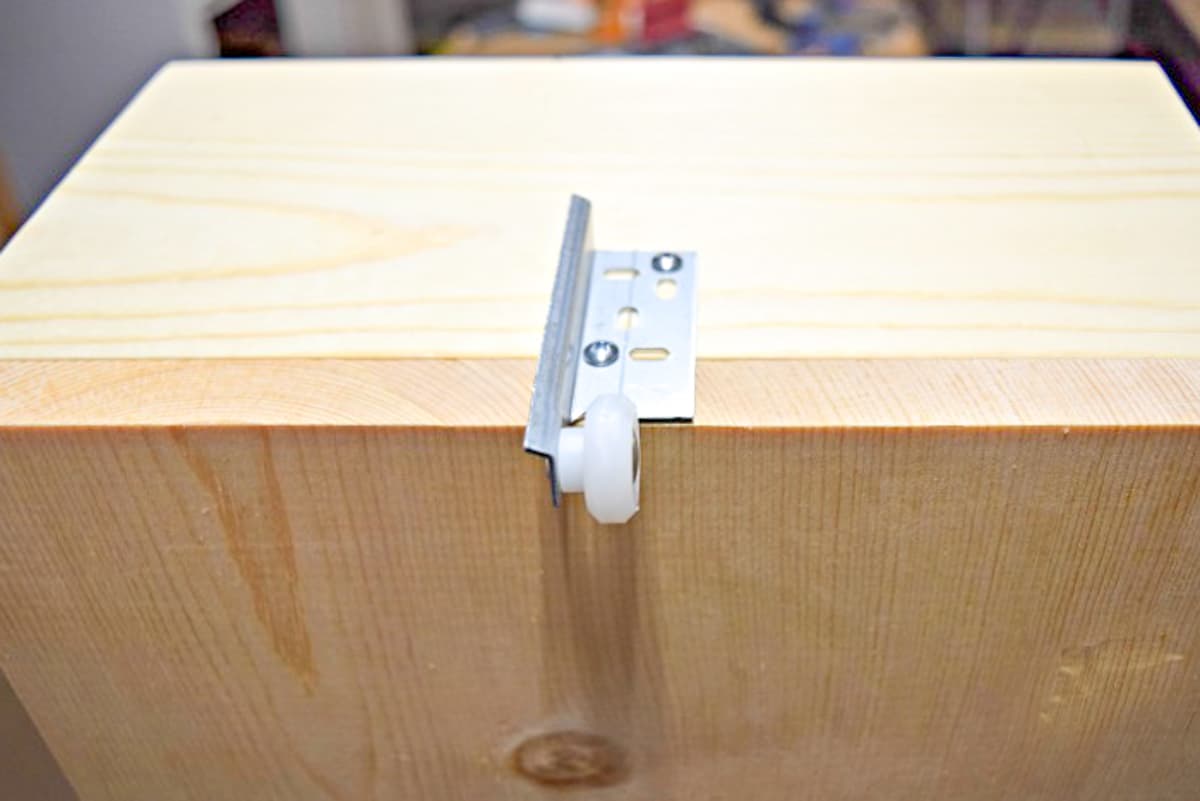
Finally, attach the small wheel to the center of the back of the trash can cabinet drawer. This will sit inside the rail and allow it to roll smoothly.

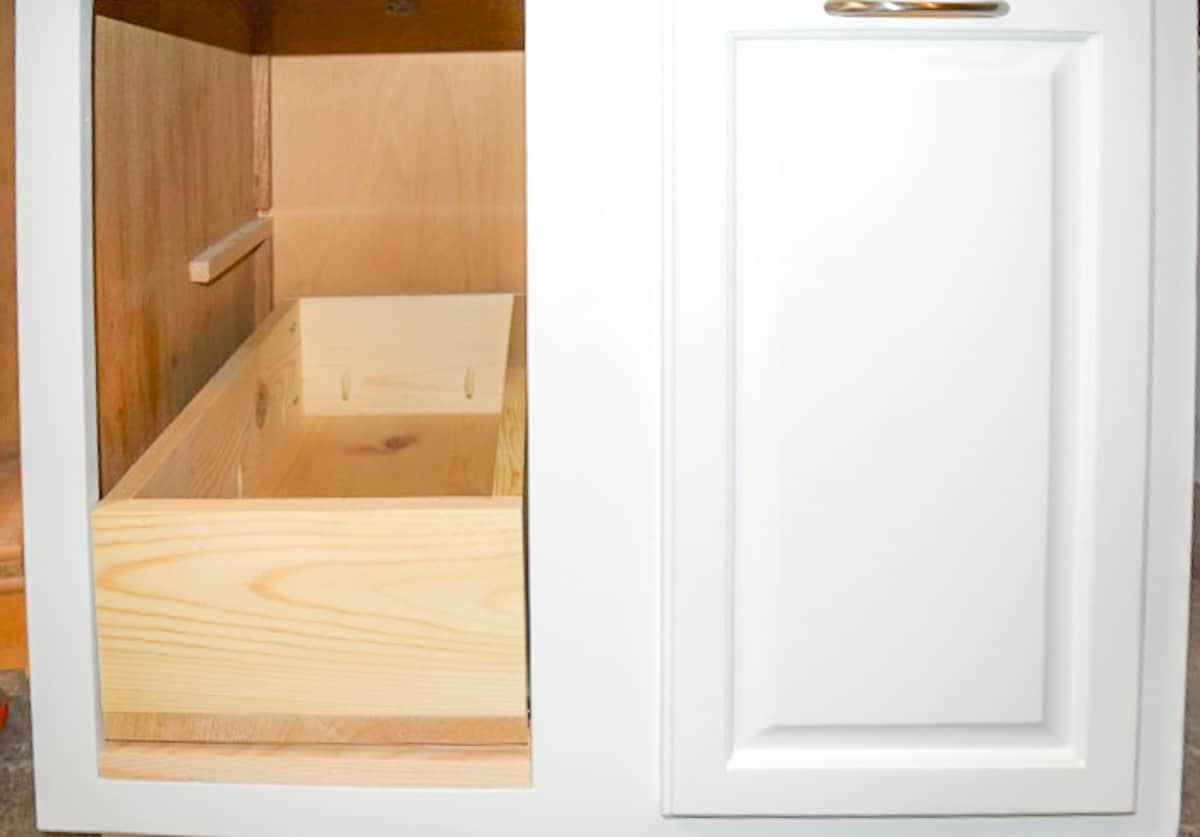
Test Fit the Drawer
Pop the drawer into the rail and see how it works! I needed to adjust the side wheels slightly so that the edges of the drawer slid smoothly against the guides. The front of the drawer should be flush with the outside edge of the trash can cabinet opening.

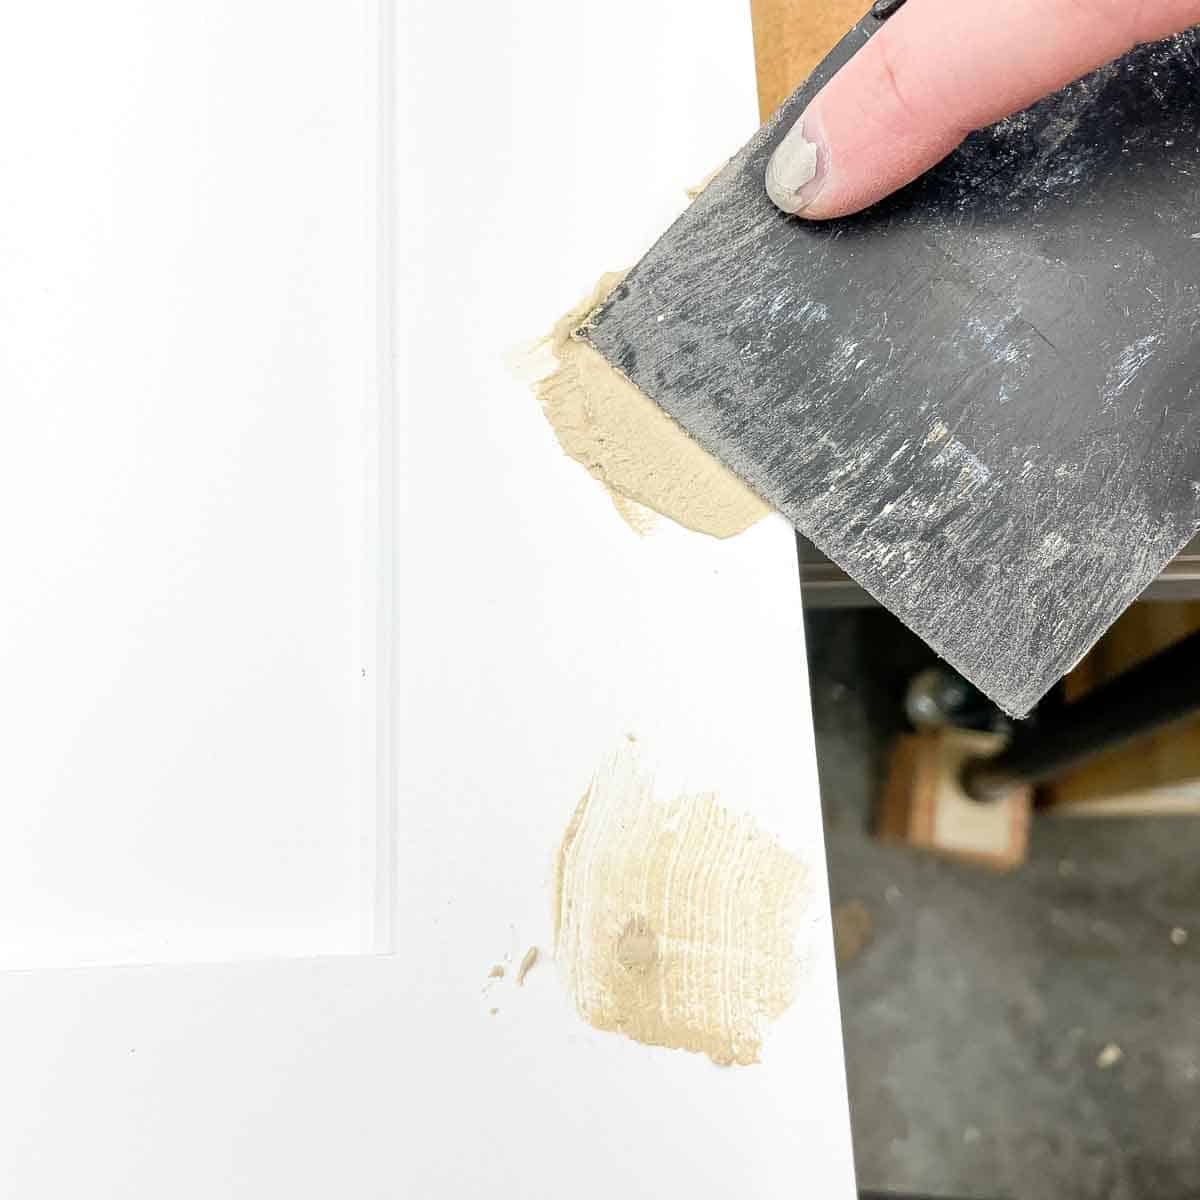
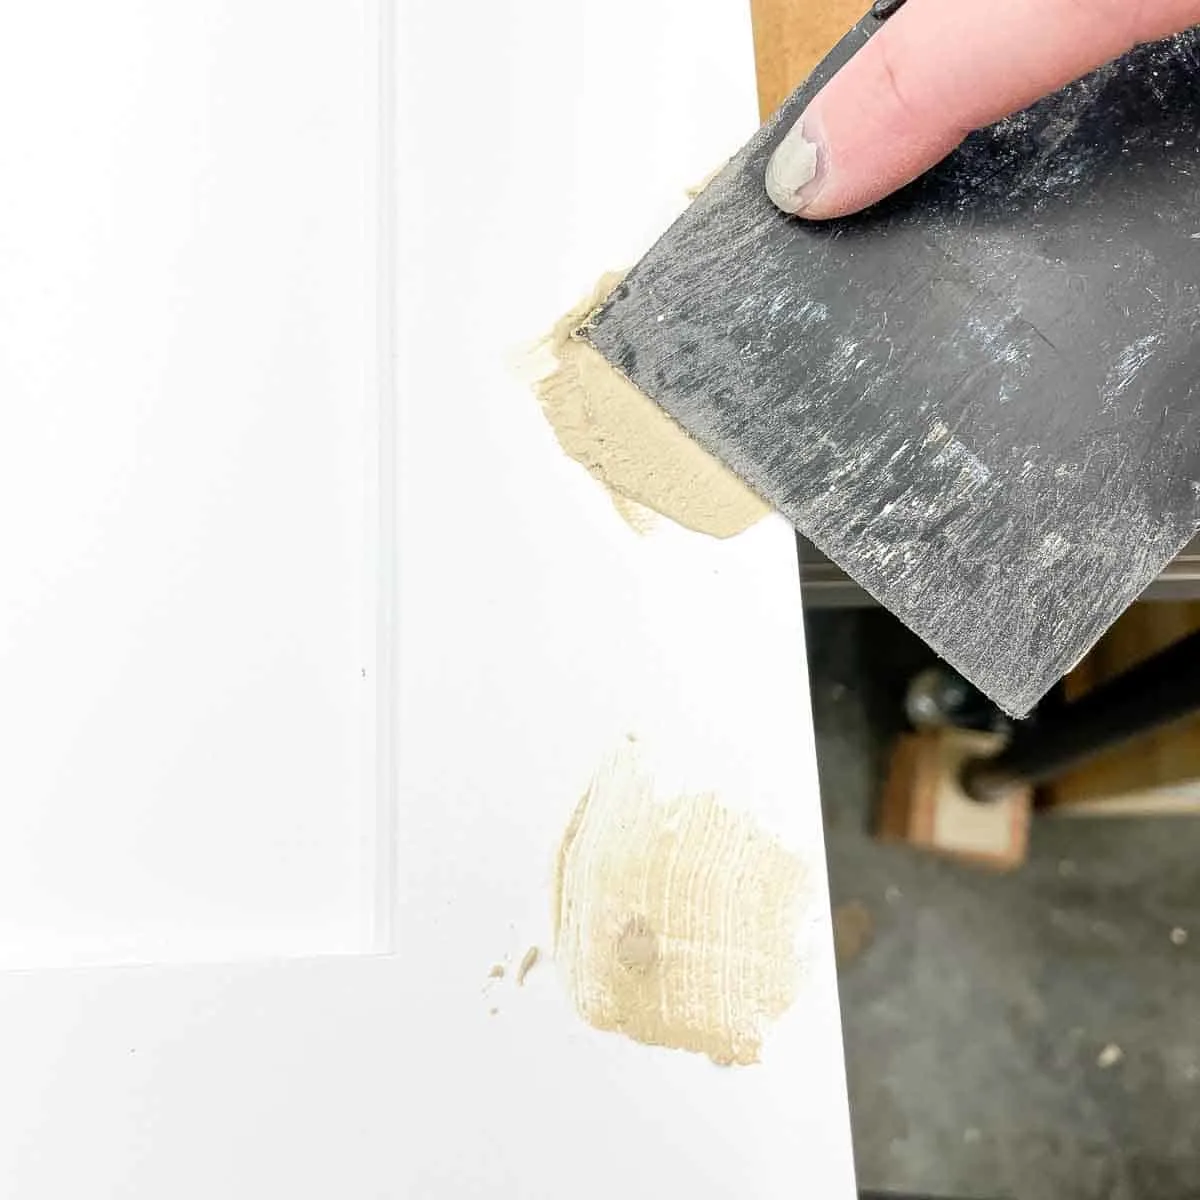
Install the Door Handle at the Top
While you don't have to change the location of the door handle, it will help prevent wear on the drawer slides if it's centered at the top. Otherwise, your drawer will start pulling to the side and the door will be crooked.
Since I was repainting the whole trash cabinet anyway, I filled in the screw holes on the cabinet door and drilled new ones at the top. Once it's painted, the wood filler disappears!
Attach the Cabinet Door to the Drawer
You'll want the cabinet doors on both sides to line up at the top and bottom. The easiest way to do this is with double sided tape! I prefer to use heavy duty carpet tape, because it's extra sticky and works well for this trick.
Stick it to the front of the trash can drawer, and remove the protective backing. Then align cabinet door with the one next to it, and press firmly. The door should stick to the drawer box, so you can gently pull it out and attach it with screws.
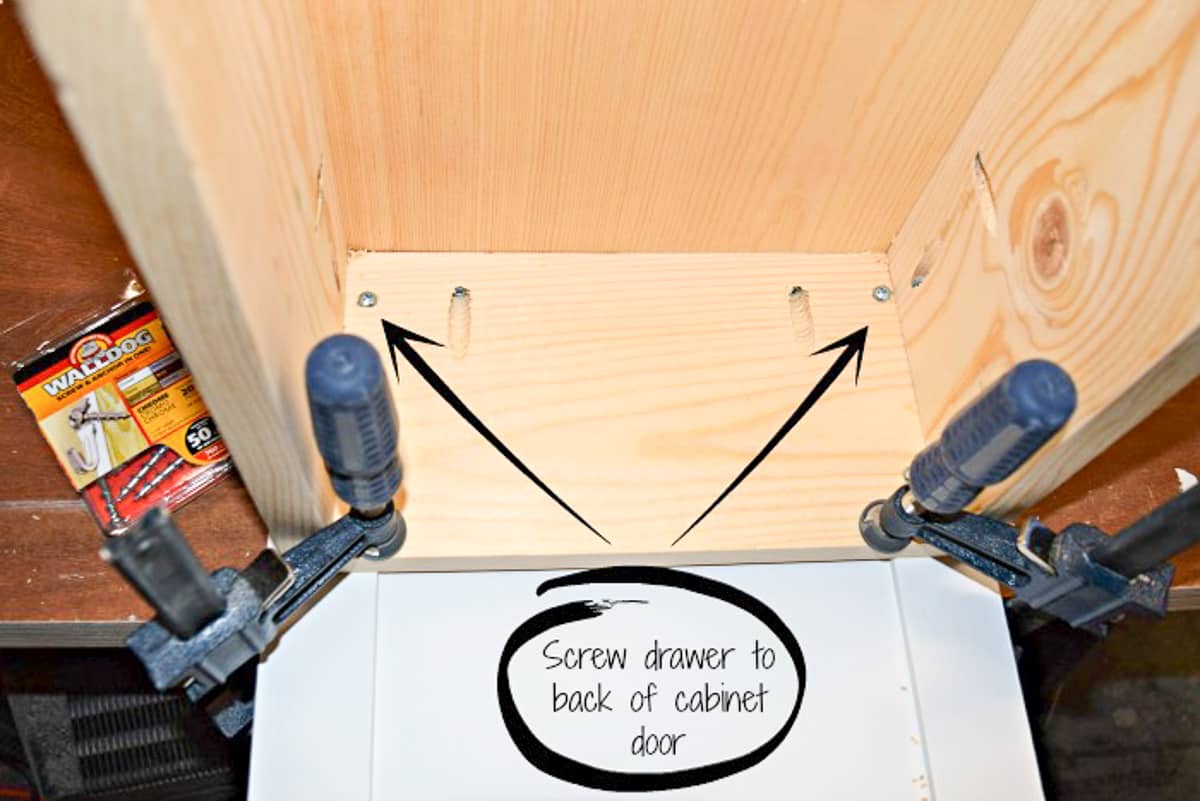
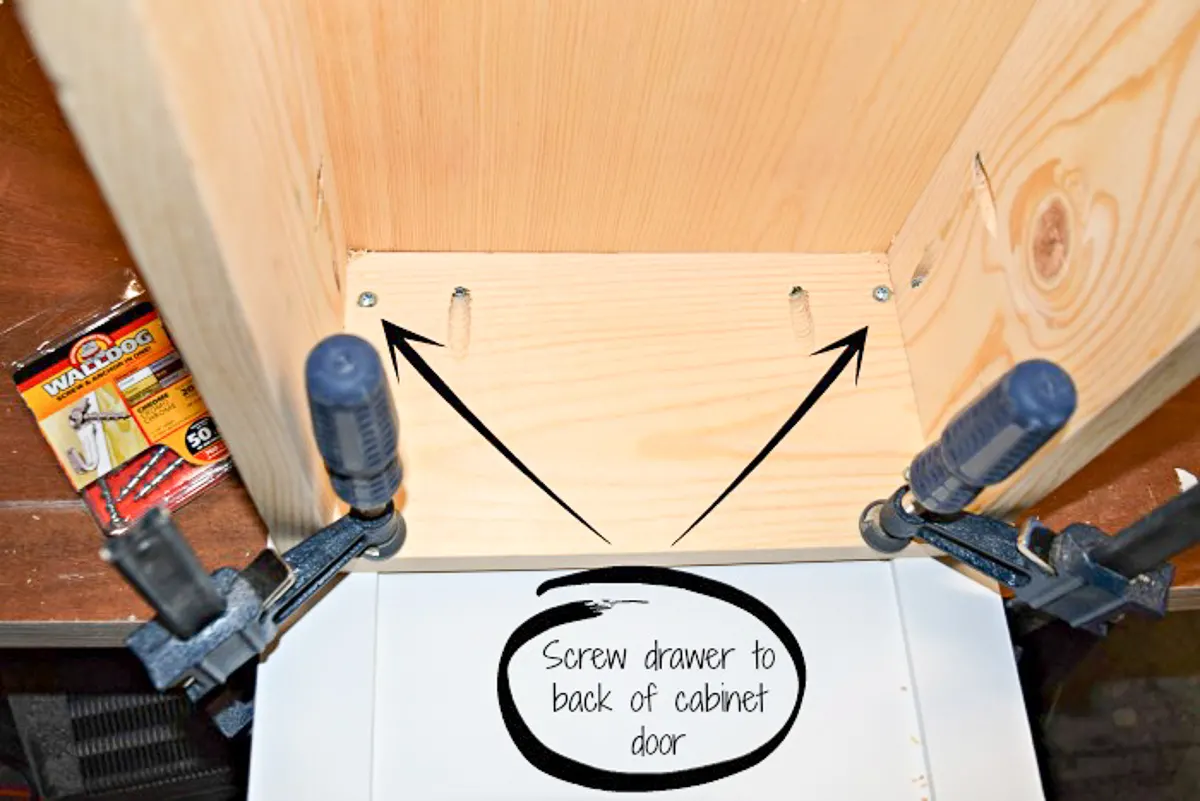
It's important to check the length of the screws you will be using to attach the cabinet door. The last thing you want is to have a screw poking out the front!
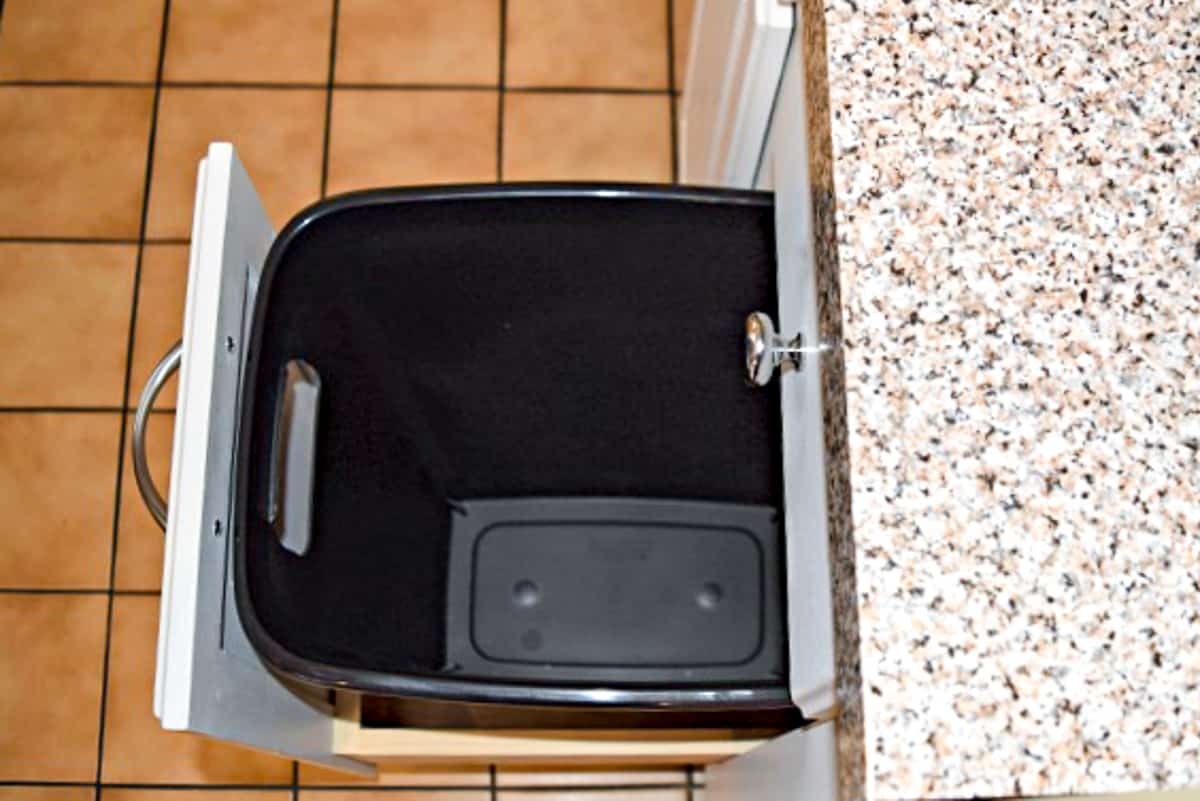
Insert the Trash Can Cabinet Drawer into the Track
Now just insert the drawer wheel into the slot on the rail and slide it into place. I cut some grippy drawer liner to fit inside to prevent the trash can from moving around when the drawer gets slammed.

I saved so much money by making my own pull out trash can cabinet rather than shelling out for an expensive pre-made kit! I'll be building the same trash and recycling pull outs when we remodel the kitchen too.

Check out these other kitchen project ideas!


Andrea
Monday 1st of November 2021
Fantastic tutorial! Thank you so much!!!
Jamie
Monday 7th of January 2019
I just found your tutorial and cannot wait to add this to my kitchen. However, I cannot find a cabinet that is this size. Can you tell me where you purchased this cabinet? Thanks!!
Vineta
Tuesday 8th of January 2019
I bought this cabinet at an architectural salvage store, so it would be difficult to find the exact one. You can easily adjust the dimensions of the "drawer" to match your existing cabinet and find a trash can that will fit the space.
Kim~madeinaday
Tuesday 29th of May 2018
What a great project! Sharing! Thank you for sharing on Merry Monday! Hope to see ya next week! Kim
Amy
Monday 28th of May 2018
Thank you for the great tutorial. I love this idea. Thanks for sharing at whatd you do this weekend.
Matilda
Tuesday 14th of March 2017
Certainly saves some bucks while providing a solution for waste and recycling goods, very creative.
Shawn
Saturday 3rd of March 2018
Just wanted to say "thanks" for posting this! I was looking b/c I couldn't find a 24" cabinet pull-out for a reasonable price. After I read this, I bought the Kreg jig and built a very similar version of yours for a 24" cabinet. Good idea and good tip on the jig - just expanded my horizons in woodworking. God bless.