You can find used kitchen cabinets for a fraction of the price of new. Here's how to fix them up and make them work for your own kitchen!
Want to update your kitchen on a budget? If you can find a bargain on secondhand kitchen cabinets, all it takes is a little elbow grease to give them a second life in your own home.
This post contains affiliate links for your convenience. Purchases made through these links may earn me a small commission at no additional cost to you. Please visit my disclosures page for more information.
Where to Find Salvaged Kitchen Cabinets For Sale
How do you score these cheap reclaimed cabinets? It takes a bit of searching to find the right ones for your space, but when you find them, it's like striking gold! Here's where to look...
Craigslist and Facebook Marketplace
Salvaged cabinets usually come from houses that are having a kitchen renovated. It can be expensive to haul it all to the dump, so many homeowners will put them up on sites like Craigslist and Facebook Marketplace instead. It also reduces waste if the cabinets can go to a good home rather than a landfill.
Keep in mind that you're not the only one looking to score these cheap cabinets, so make it easy for the seller! Take them off their hands quickly (they probably need the space for their new cabinets ASAP) and have a truck ready to go at a moment's notice. Don't leave them hanging, or they'll move on to the next person on the list.
Architectural Salvage Stores
Just wandering around these stores sparks so many project ideas! Places like Habitat for Humanity's Re-Store and other salvage operations have a wide variety of items from reclaimed wood to old doors to kitchen and bathroom cabinets just waiting for their new home.
The salvaged kitchen cabinets they take from contractors and homeowners are typically in better condition than what you might find for free, since they only want items that will sell fast and for a good price. But you can usually get entire kitchen cabinet sets for a fraction of the price of new!
Many of them list their inventory online, so you don't have to go to the store to see what they have in stock. Make a habit of checking their website every morning to see what's new, and call to place a hold on anything that catches your eye!
Cabinet Showrooms
You might think that you only go to a cabinet showroom to buy new cabinets. But when styles change, the showroom needs to get rid of the old ones before they can put the new ones on display! It doesn't hurt to ask to be notified when the store plans to switch out their display cabinetry, so you can nab them for a discount.
This source for cheap kitchen cabinets is a little harder to find, since styles don't change often. But if you're in the right place at the right time, you could score almost new cabinets for the price of used!
Our Kitchen Makeover
We're not ready for a full kitchen remodel yet, but we've been playing musical chairs with the appliances to create a better layout. First, we moved the back door over to the dining room.
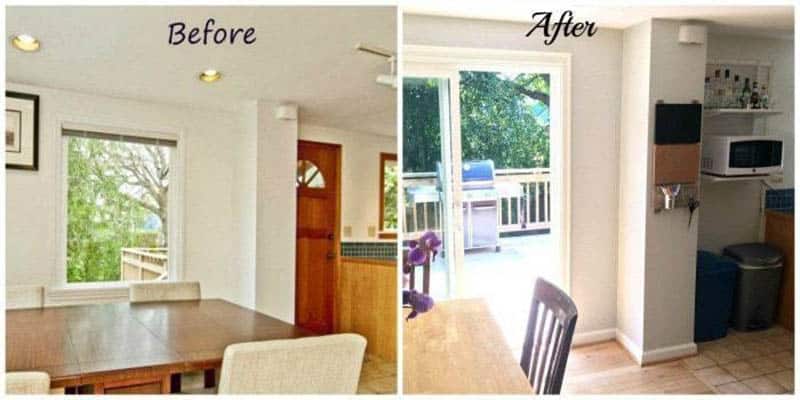
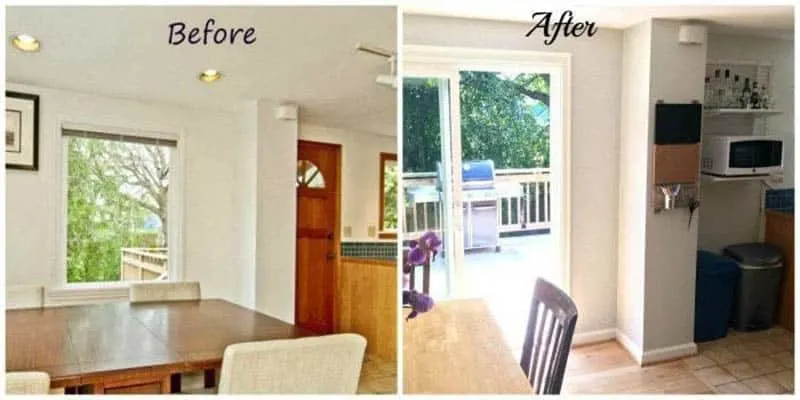
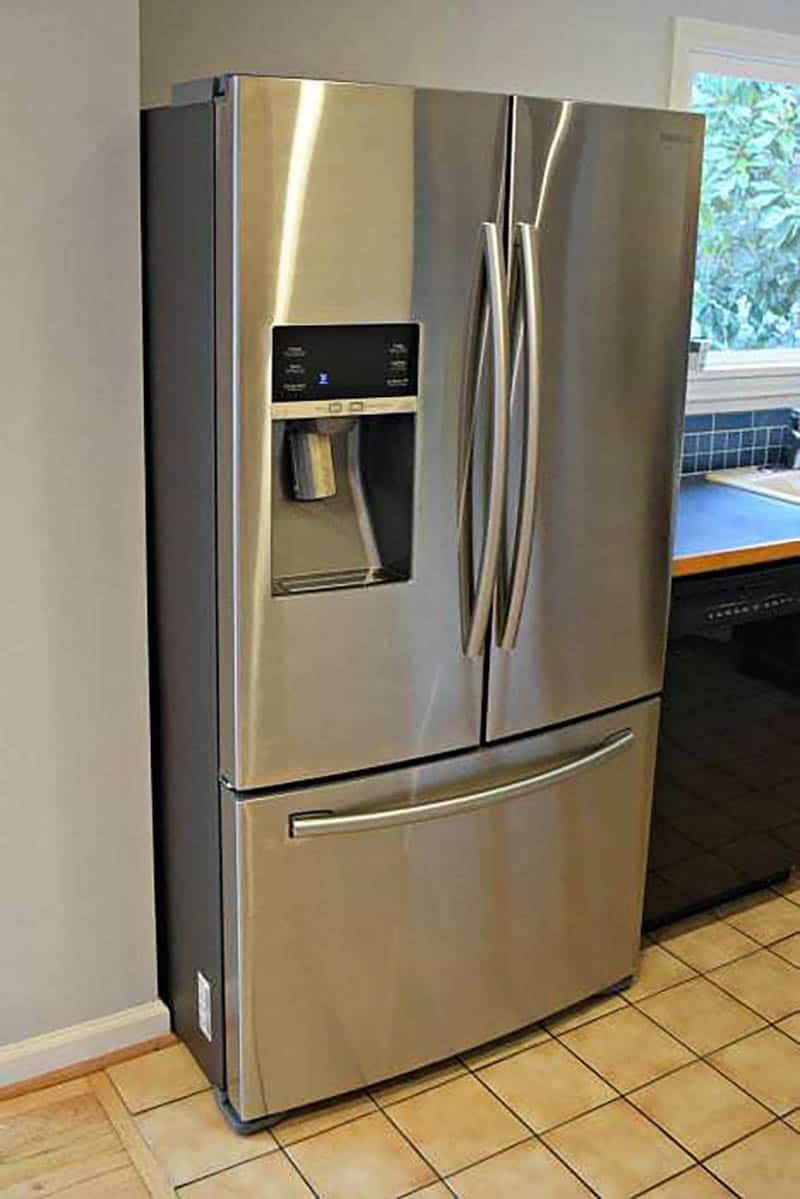
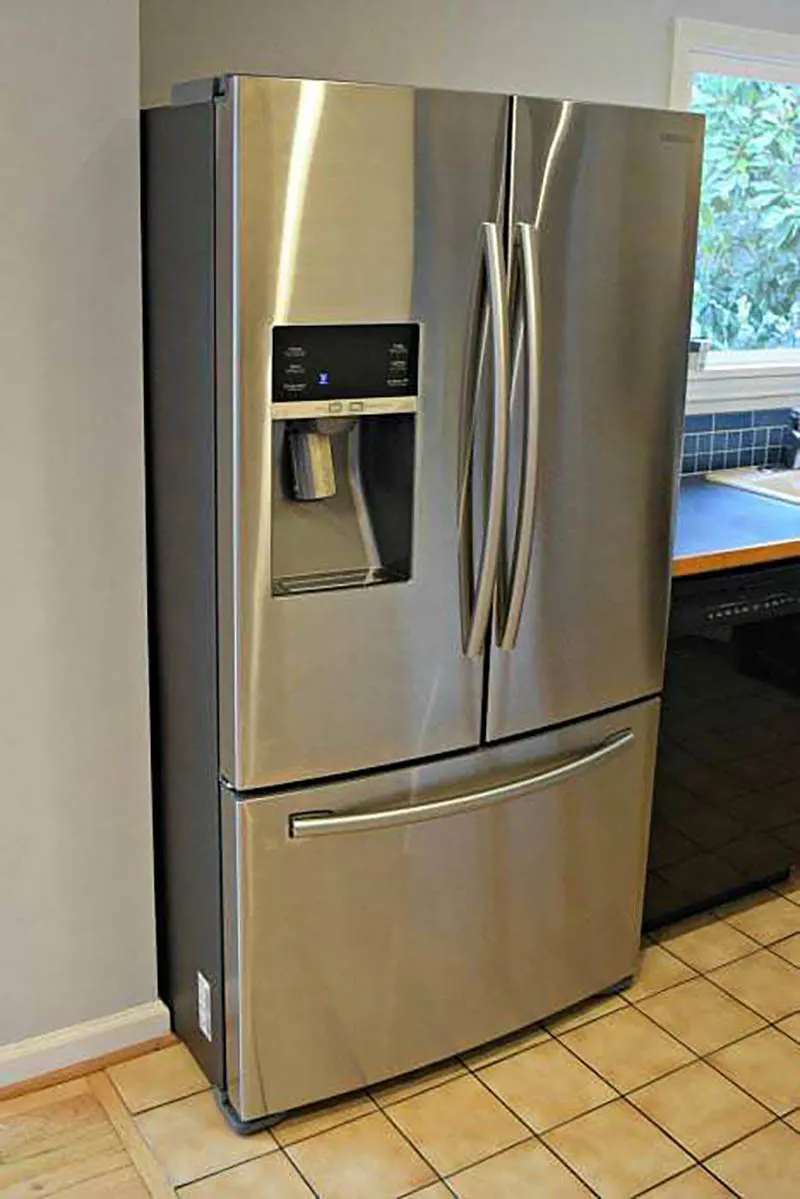
Then we moved a new fridge into the old door space.
The small, awkward space next to the fridge was filled with a pantry cabinet I built myself!


This left us with a huge gap where the fridge once stood. We desperately need more counter space, and that space was perfect for another lower cabinet. But I wanted something that was cheap enough to demo without guilt when we finally renovate the entire kitchen.
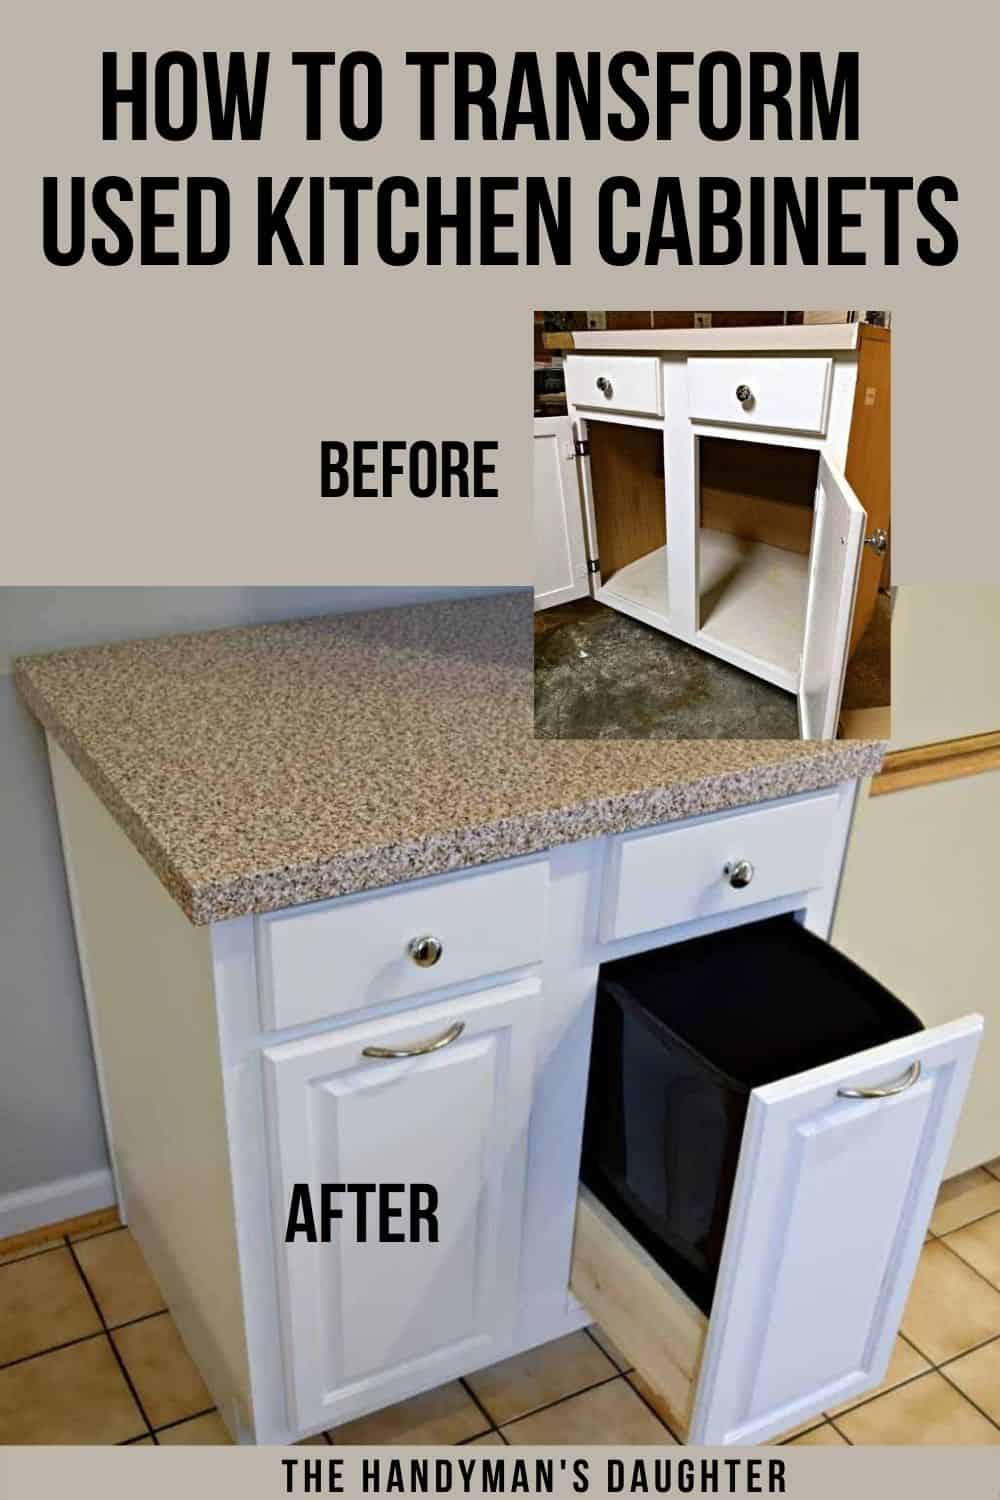
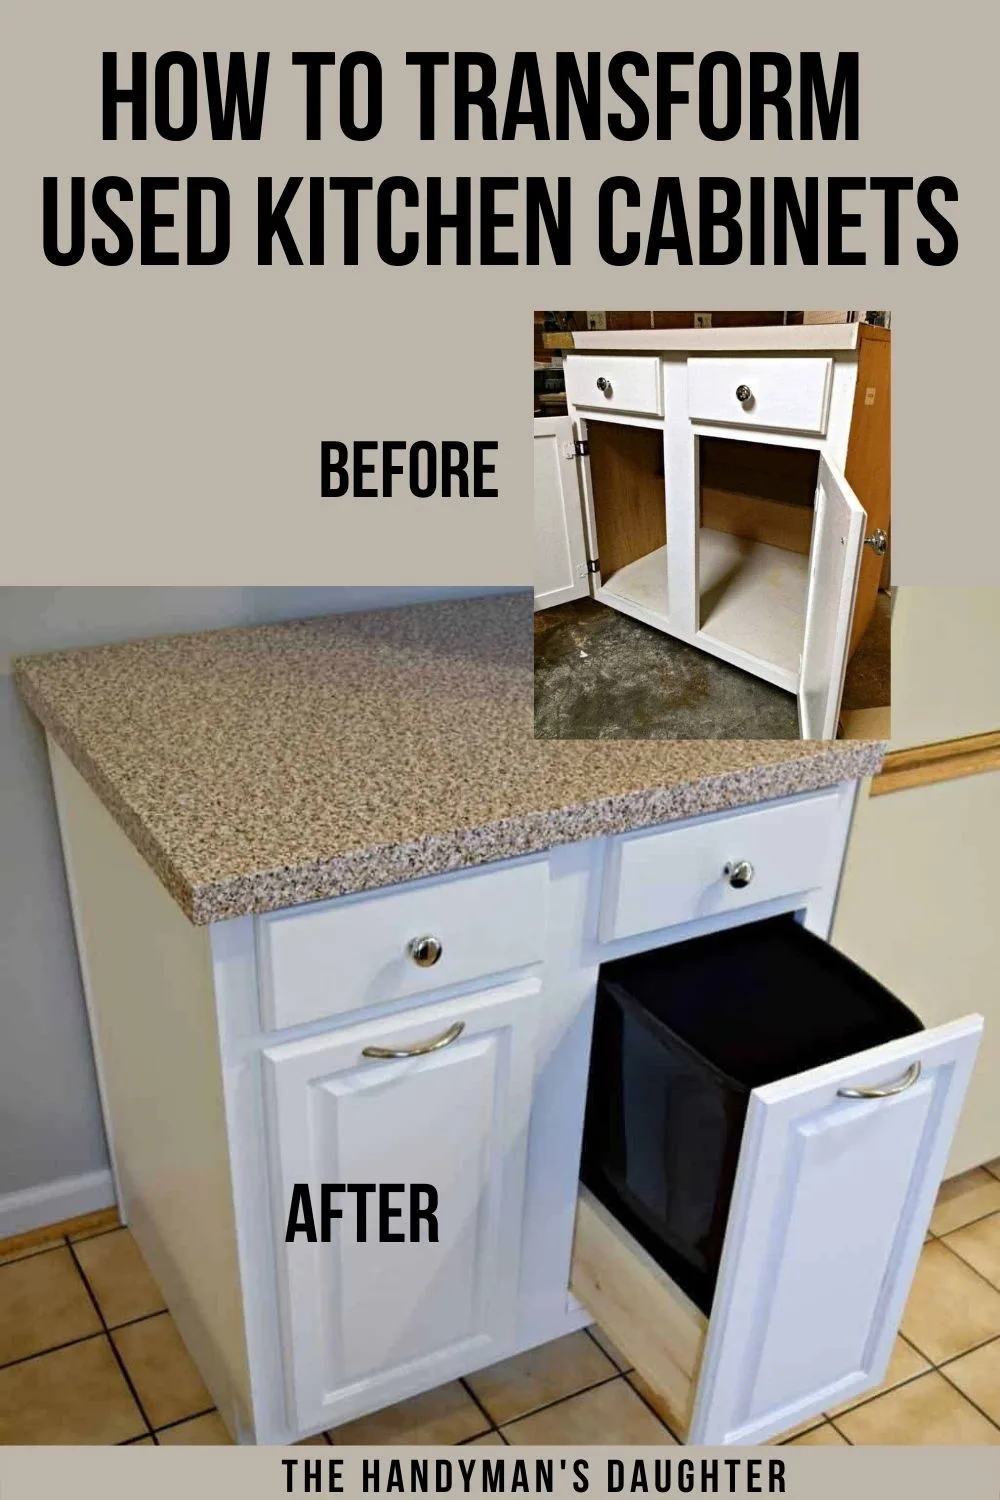
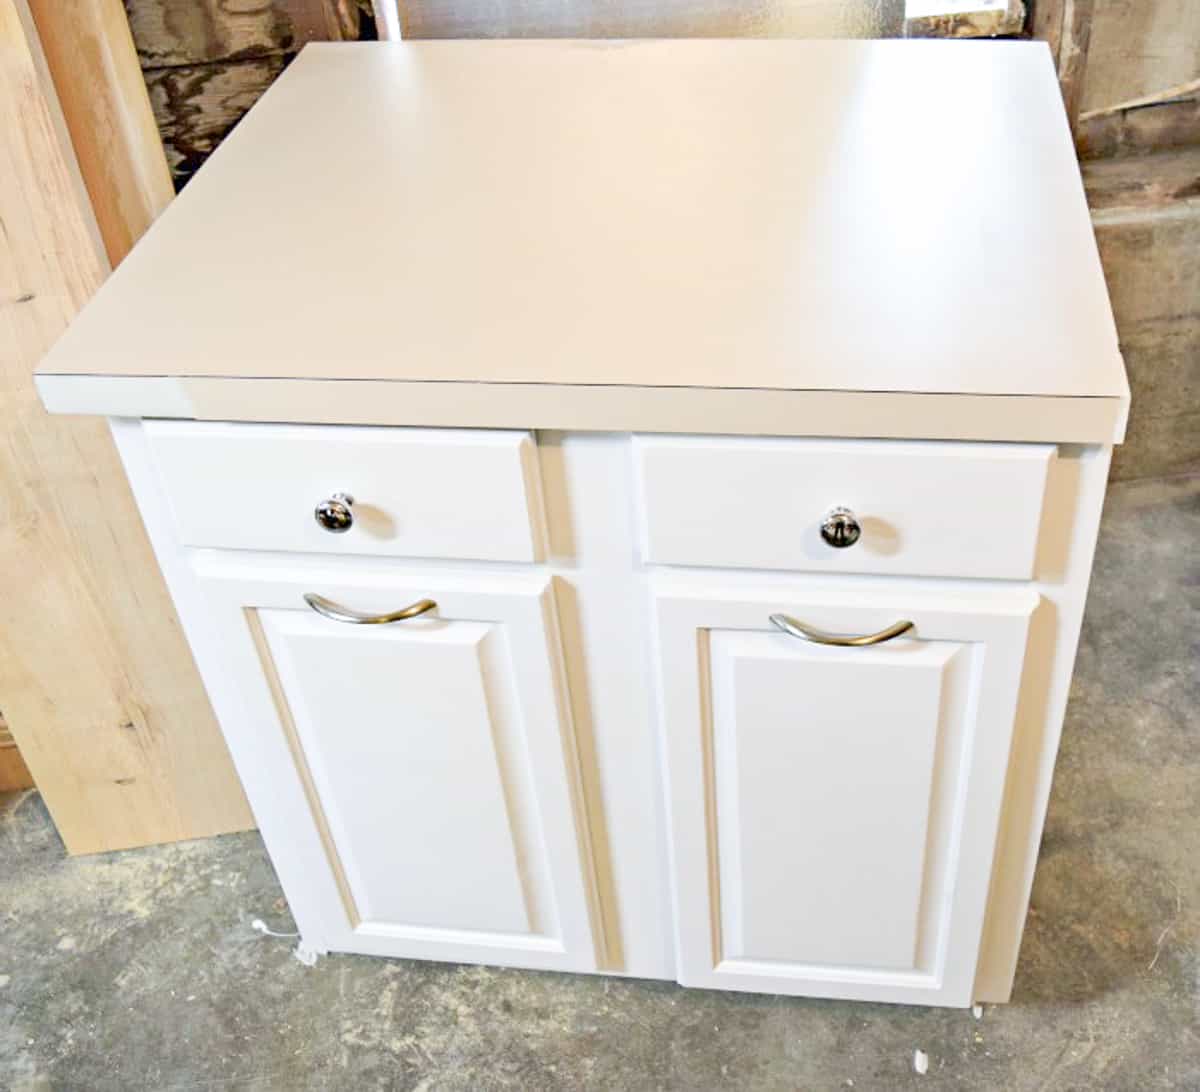
I scoured my local salvage yards for a secondhand cabinet that would fit the space. This one looked like a total piece of junk, with chipped pink Formica countertop, drawers that barely moved, and stained contact paper lining. But the price was right at a measly $10!

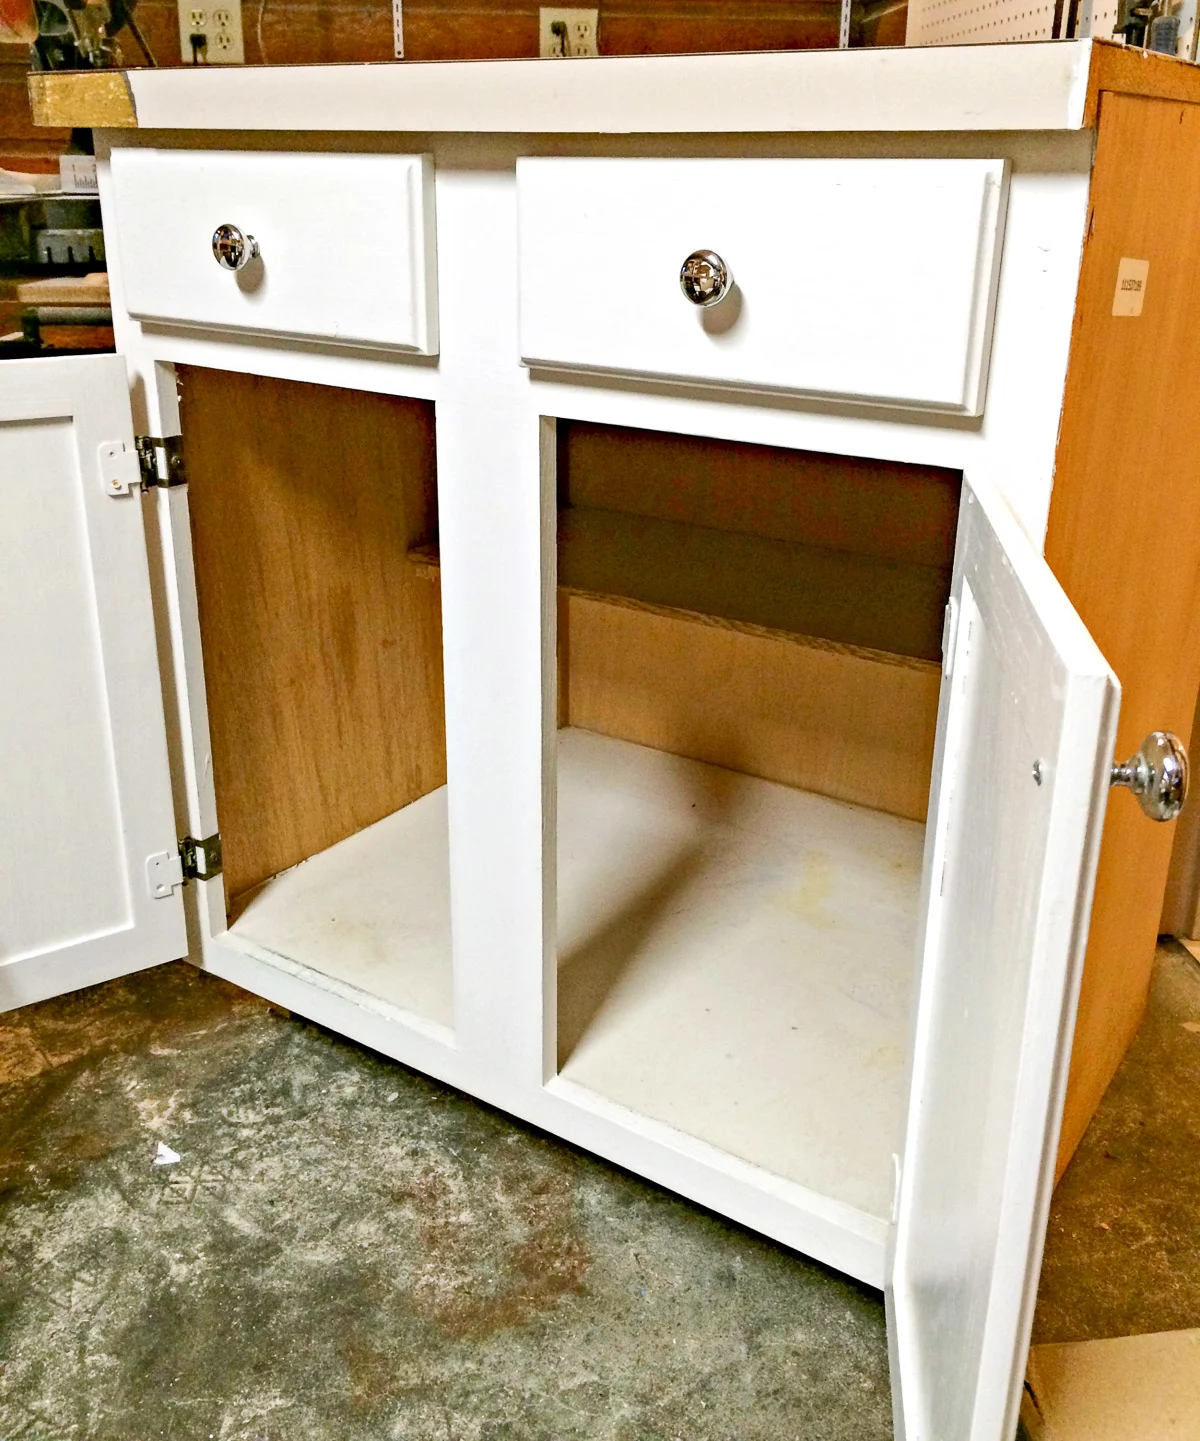
The size was perfect for the space, and I didn't have to make my own countertop for it. It even had a finished panel on the left side, which is exactly what we needed.
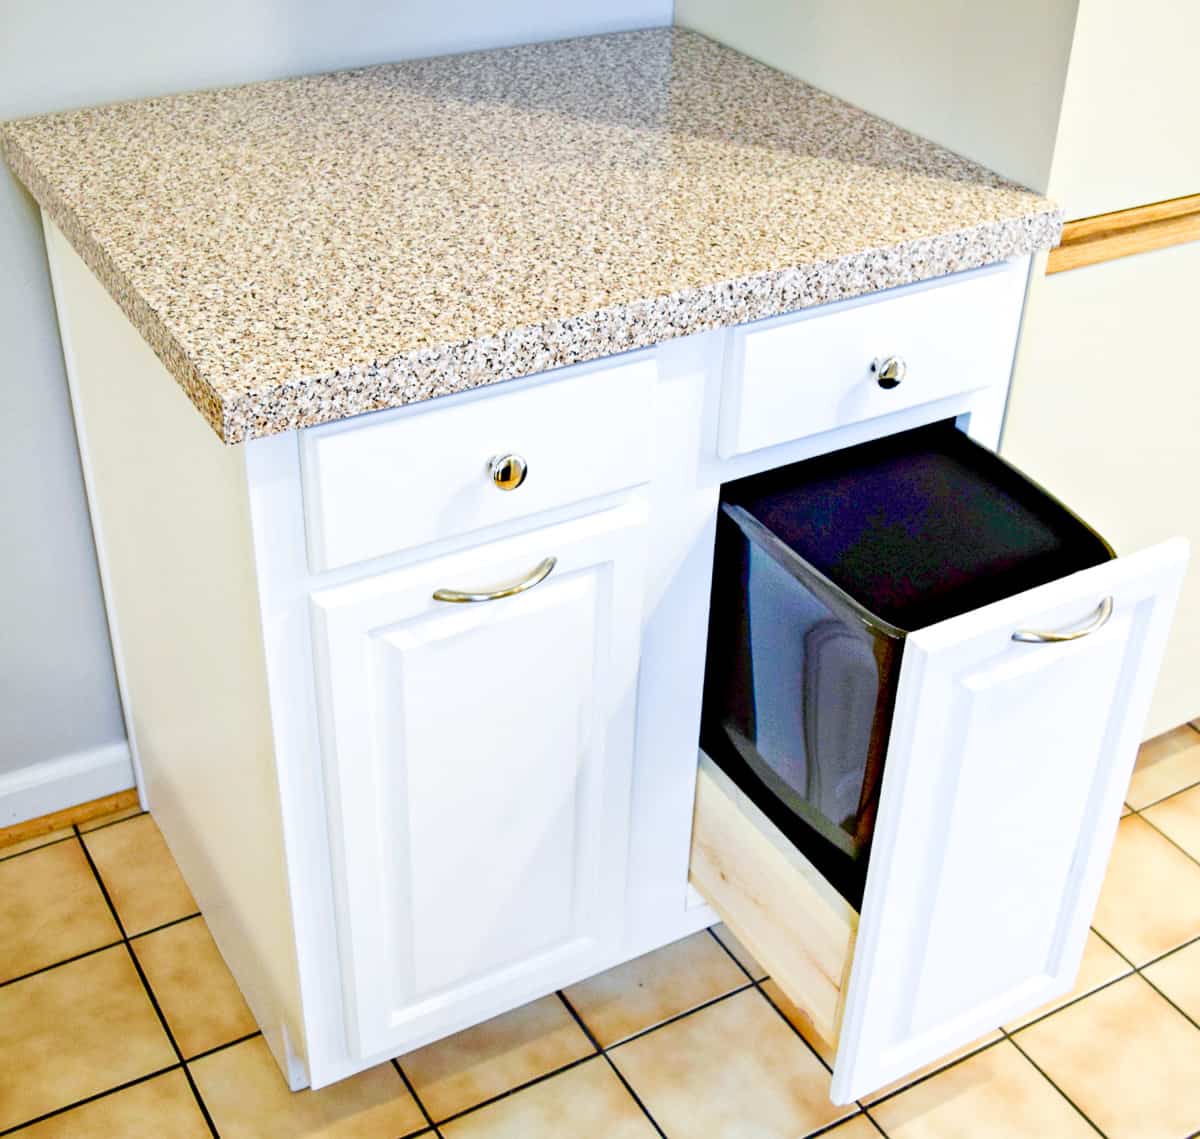
I was excited to turn this sad, damaged old kitchen cabinet into a concealed trash can cabinet. We could hide those ugly plastic bins, add an additional work surface and get two bonus drawers all in one piece!
Materials Needed to Fix Up Used Kitchen Cabinets
- Orbital sander
- Detail sander (for getting into those tricky interior corners)
- Sandpaper
- Wood filler
- New door and drawer hardware
- Contact paper for countertops
- Paint
- Replacement drawer slides and hinges (if necessary)
How to Repair Your Used Kitchen Cabinets
You may only need to do a few of these steps to bring your salvaged cabinets back to their former glory. But usually the cheaper they are, the worse the condition! Take a good look at each cabinet and decide what needs to be done to fix it up before installation.
Remove the Doors and Drawers for Sanding and Repair
Use a screwdriver to remove the hinges from the cabinet doors, and the drawer fronts from the boxes. These parts are more likely to be damaged, and it's easier to fix them when they're flat on the workbench.
Someone had painted this cabinet before, and not very well. I had to sand it down to almost bare wood in some places in order to get rid of blobs of paint and thick brush strokes. A detail sander with a pointed tip can help get into the interior corners easily. You can learn more about the different types of sanding tools here.
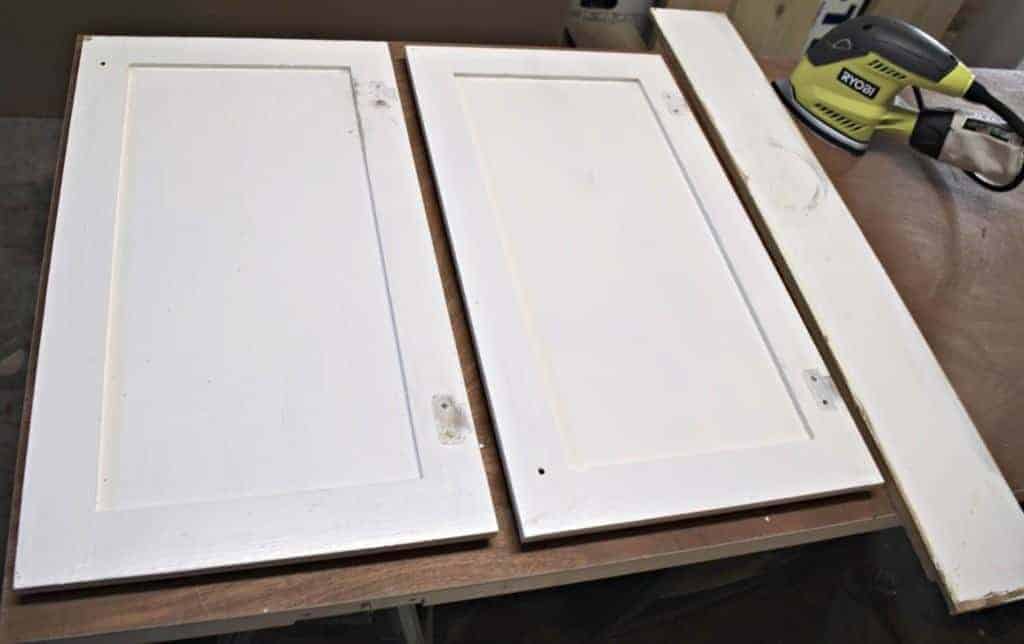
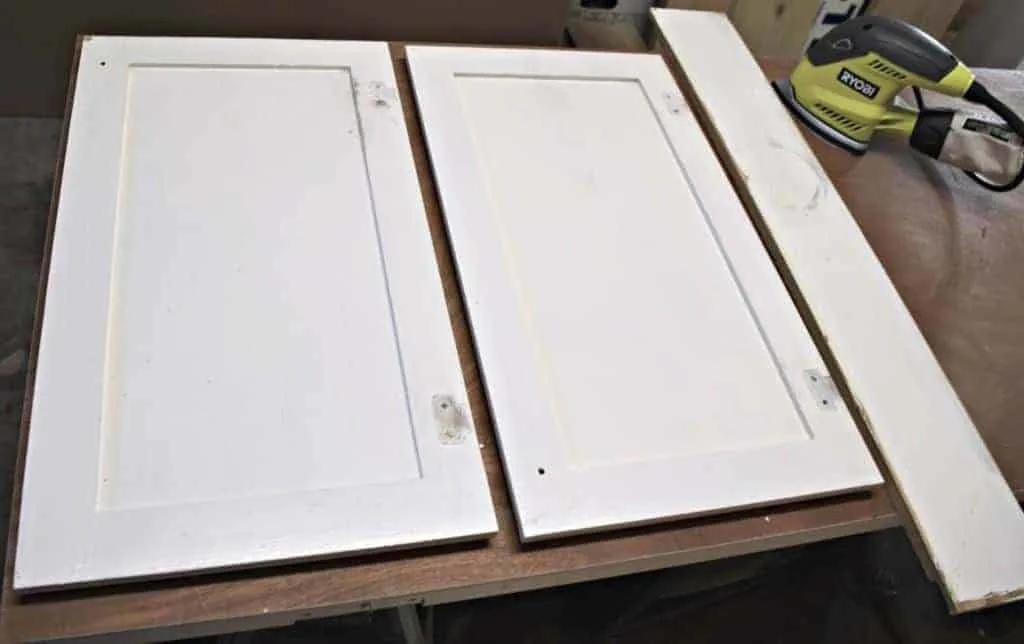
I'm converting the cabinet doors into pull out trash can trays, so I filled the hinge and knob holes with wood filler, then sanded the surface smooth. You can do the same thing with any scratches or dents you find. Learn more about how to use wood filler and how it differs from wood putty here!
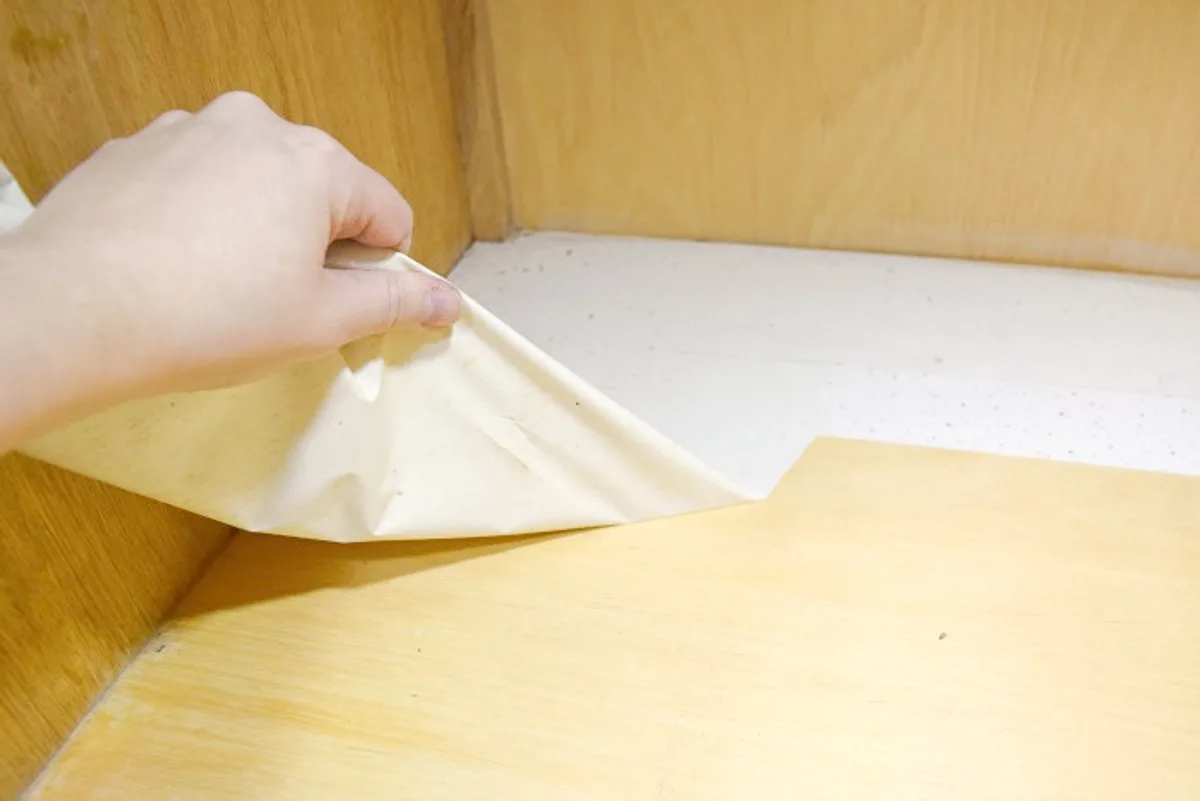
Remove Old Contact Paper and Unwanted Shelves
There was a half shelf in the back of the cabinet that needed to be removed so the trash can would fit. Nothing a few whacks of a mallet can't fix! Be careful with the back of the cabinet, which usually is made of thinner plywood than the rest of the box and can break easily.
The old contact paper had done its job, and left the surface underneath perfectly clean! It peeled up easily without any sticky residue.

Replace Trim
When old cabinets are removed from a kitchen, the trim usually doesn't come out in one piece and is thrown away. You may need to cut new crown moulding or trim pieces to replace it.
On the finished side of this cabinet, there was a bit of damage from when they removed the cabinet from its previous home. I covered it with flat trim that mimicked the look of the front frame edge and caulked the seam.
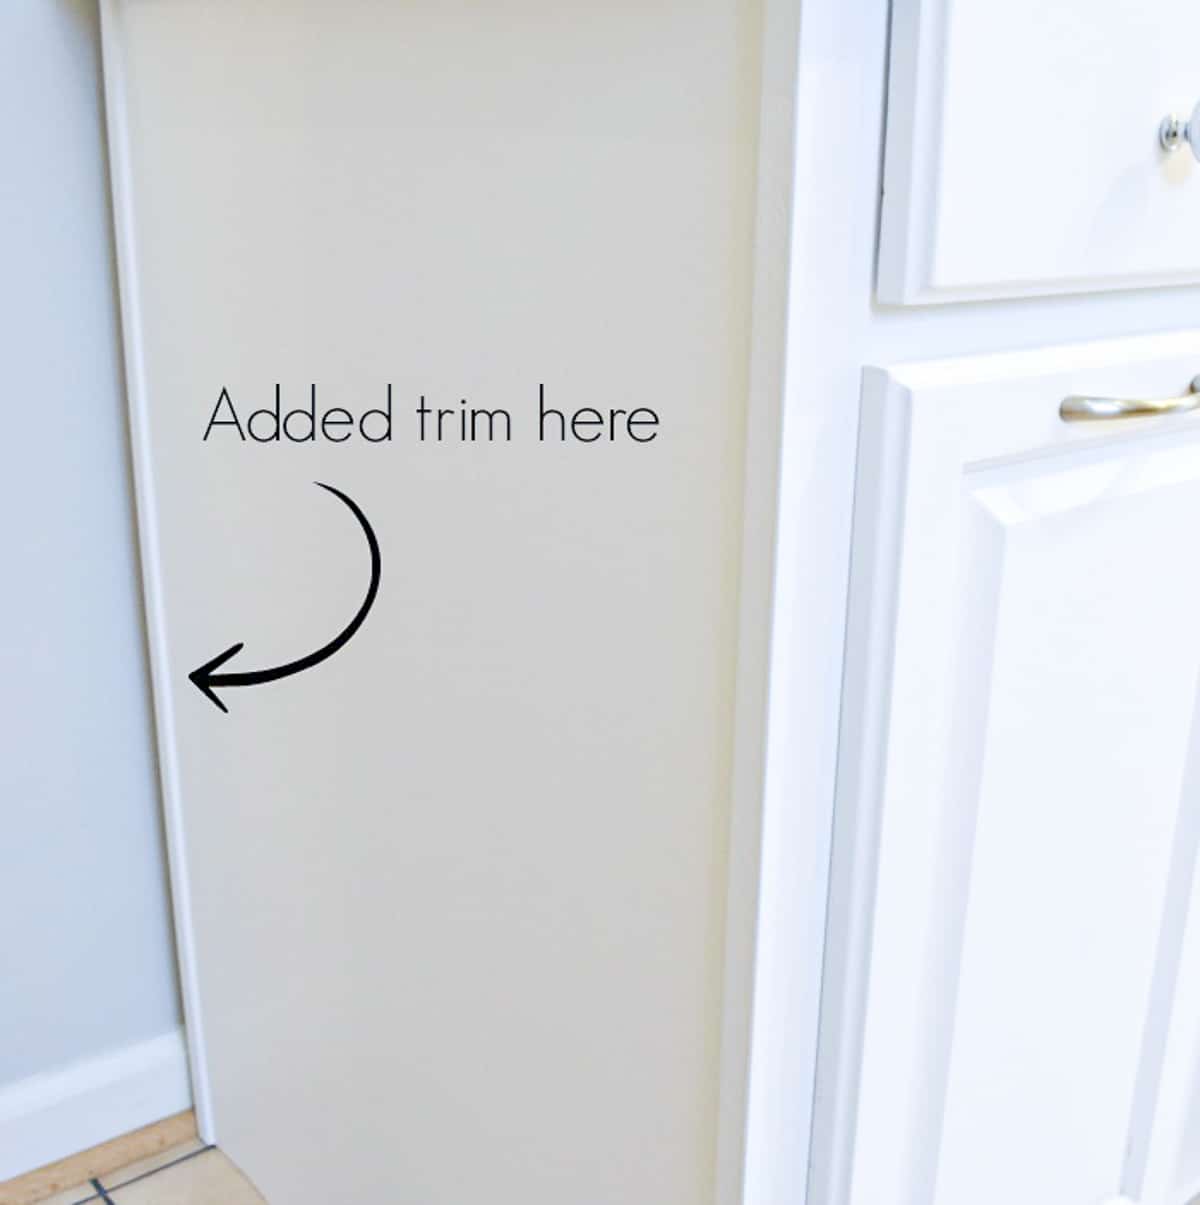

I decided not to cut away the baseboards behind the cabinet, in case we needed it in our future remodel. To prevent the cabinet from tipping forward, I added a spacer the same thickness as the baseboards on the back of the cabinet and screwed it into the studs.
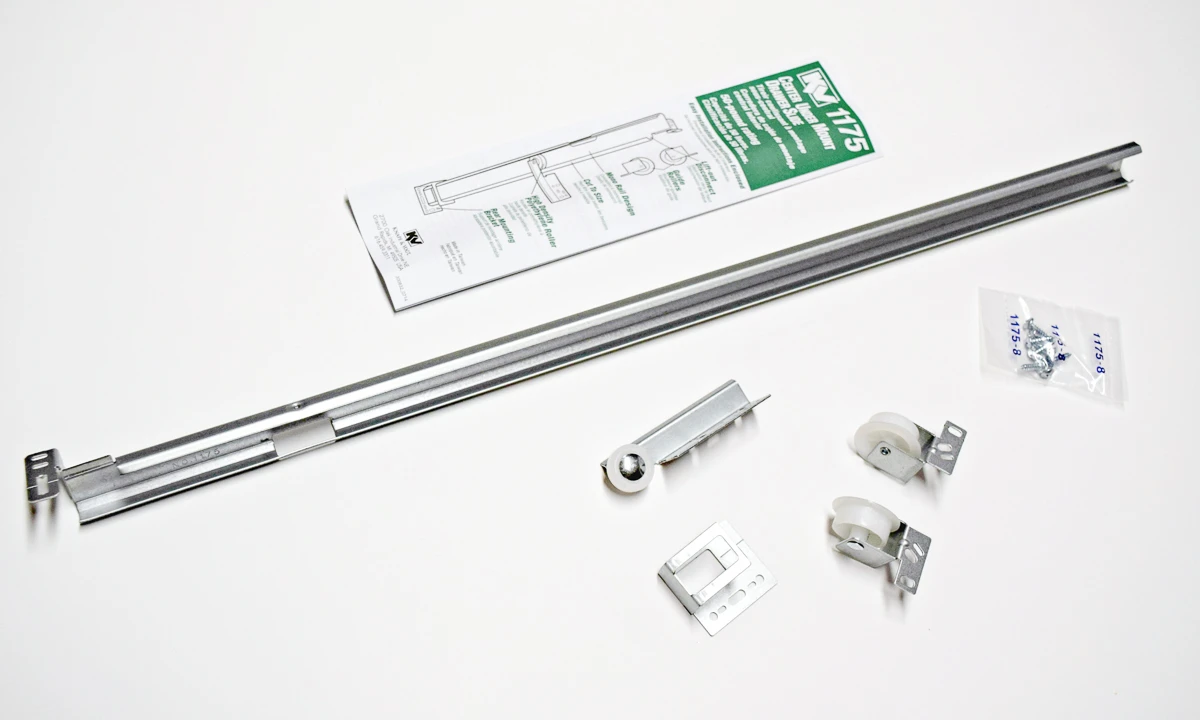
Replace Broken Drawer Slides and Hinges
Over time, hinges and drawer slides can break or get out of alignment. You also may want to switch them out for soft-close versions for an easy upgrade!
The two top drawers of my cabinet didn't open and close smoothly, so I decided to replace them with new ones. I used the same center mount drawer slides as the trash can tray, which are easy to install.

Paint or Refinish Your Used Kitchen Cabinets
It's pretty easy to paint kitchen cabinets if they're not the color you wanted. Even stained cabinets can be transformed using the same methods I used for refinishing a dining table. Do this step before you install them!
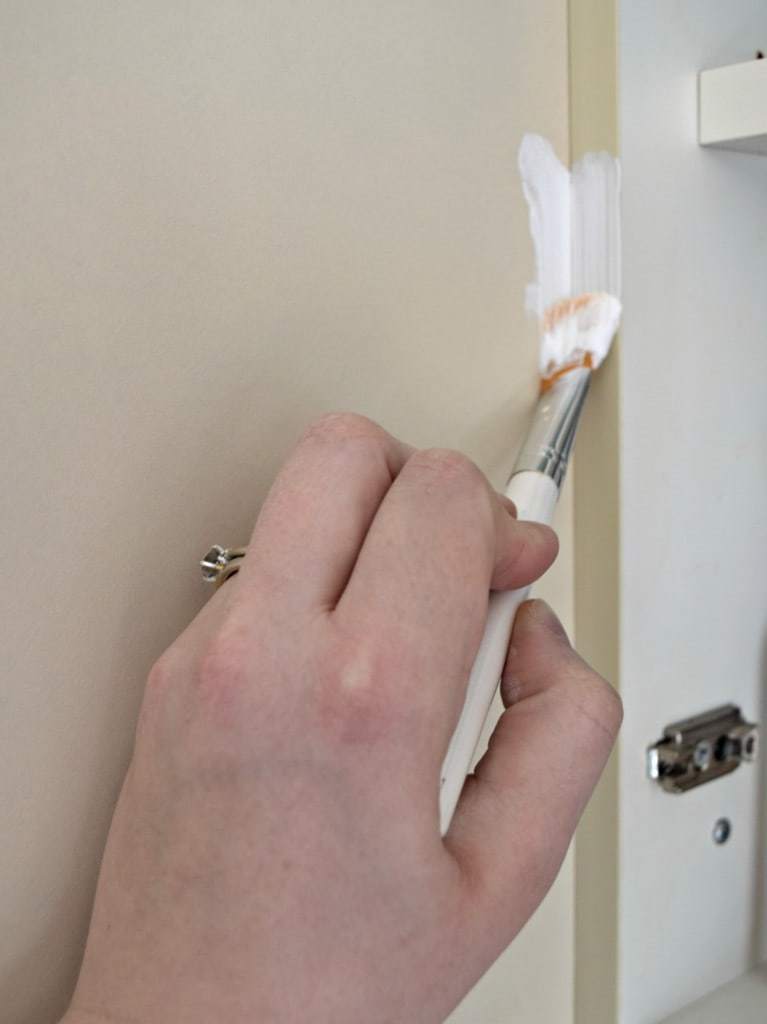
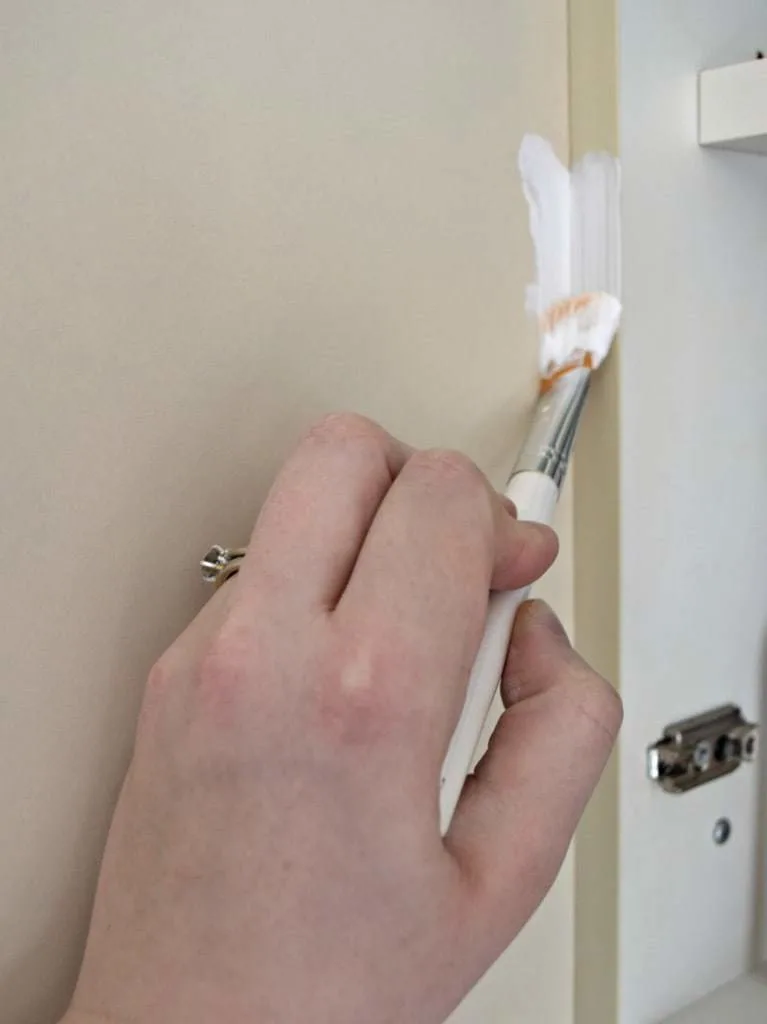
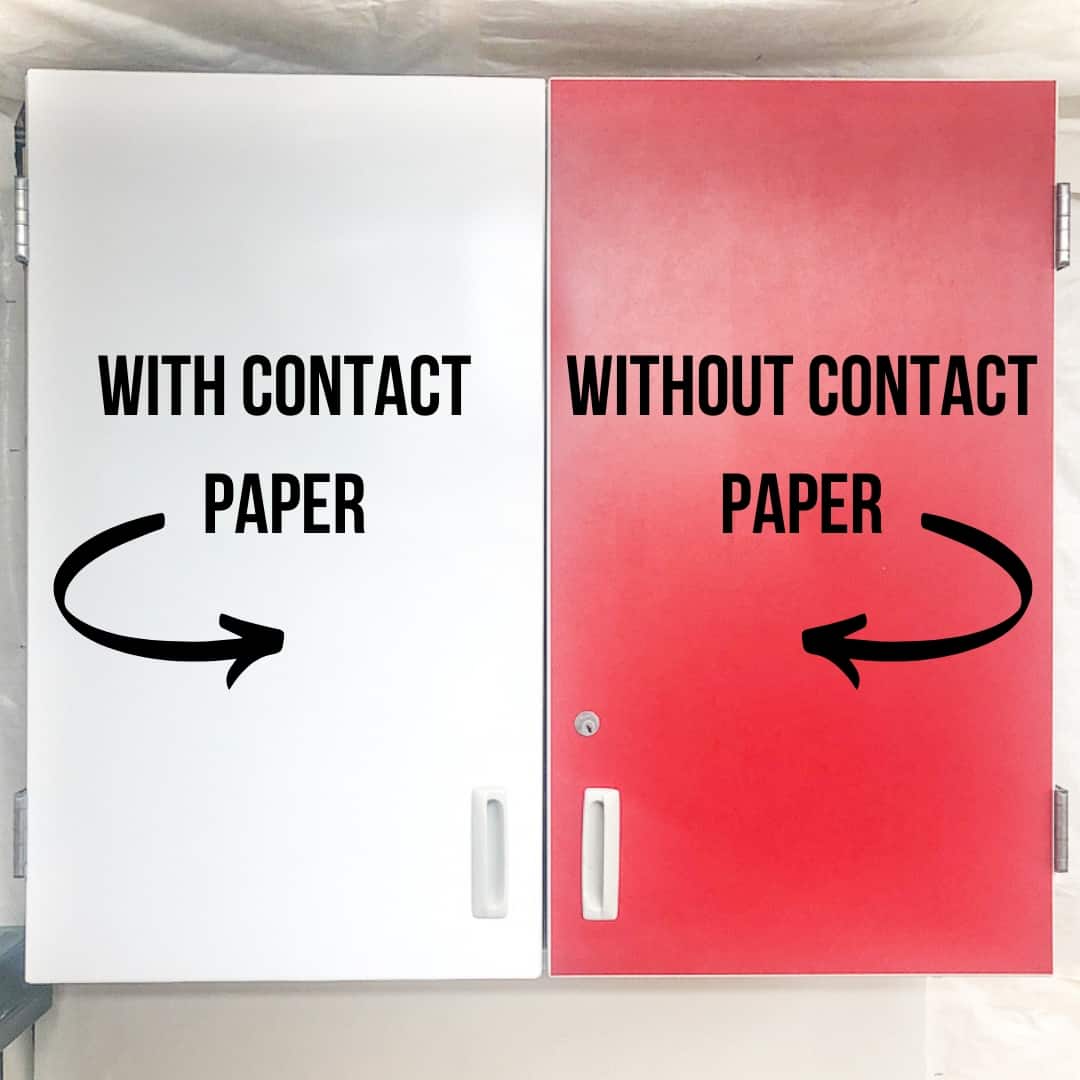
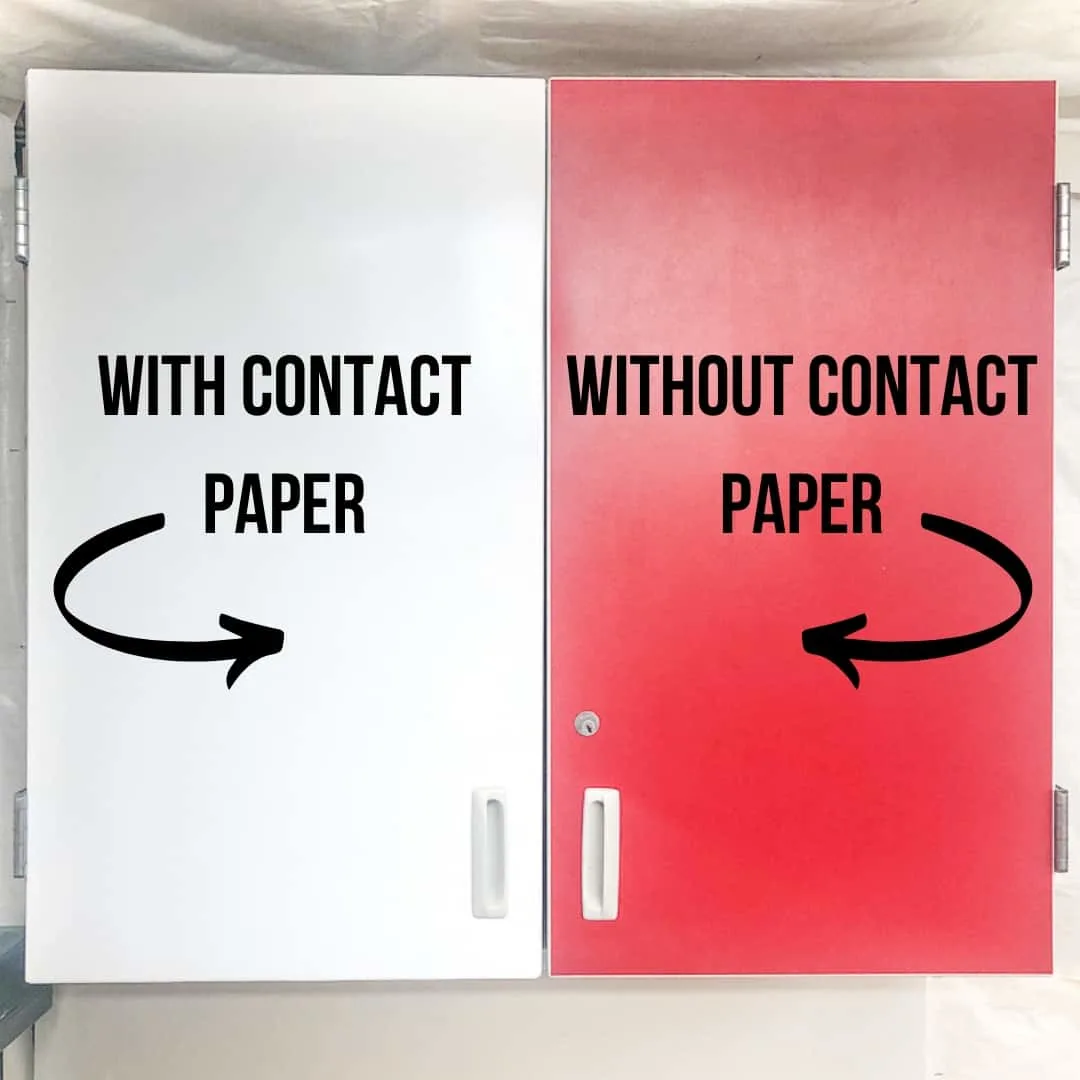
Don't want to paint, but hate the color? For a quick fix, try contact paper for cabinets! This works best on flat front doors and drawer fronts, and for the exposed side panels.
Apply Contact Paper to the Countertop
Most countertops are custom made to fit the space, but sometimes you can find used kitchen cabinets with the countertop still intact. If you don't have the budget to replace it with something new right away, try this quick fix: countertop contact paper!
This countertop was in pretty rough shape, with chunks of Formica missing in the corners and an ugly pale pink color. I applied some spackle to smooth out those areas and bring the surface even with the rest of the countertop.

I thought about tiling the countertop, but that seemed like too much effort and cost for a temporary cabinet. Renters sometimes use contact paper to cover up ugly countertops, so I figured it was worth a shot. This granite contact paper goes well with our existing floor tile, but you can find plenty of other options to suit any kitchen.


This stuff is thicker than regular contact paper, which makes it much more durable. I didn't have any problems re-positioning it or getting air bubbles underneath. And because it's waterproof, you can wipe down your counters like you would with any other countertop!
If you have any doubts, check out the video below to see how my contact paper kitchen counter looks two years later!
Install Your Used Kitchen Cabinets in their New Space!
With the new/used kitchen cabinet in place, the space instantly feels more functional! I was so inspired by this simple project that I decided to give the rest of the kitchen a makeover to match! It completely transformed the entire room, and makes the wait before the full renovation begins much more tolerable!

If you're looking to save some money on your kitchen renovation, keep your eye out for used cabinets like this one! With a little elbow grease, you can transform your space and make it feel like new!
Jann Olson
Wednesday 18th of July 2018
What a clever and wonderful use of old cabinets! Thanks for sharing with SYC. hugs, Jann
Jenny
Sunday 15th of July 2018
That contact paper looks great! I love reusing and find old items to make new again. Great idea to create a recycling and garbage center. Thanks for sharing at #HomeMattersParty
Rebecca | R&R at home
Wednesday 11th of July 2018
This is so awesome! We would love for you to come link up for Wall to Wall DIY Wednesday over at R&R at home!
Maria | passion fruit, paws and peonies
Tuesday 10th of July 2018
You have made it look so simple - thank you so much. I need to tackle my kitchen in the next year and I've been dreading it. This has given me confidence xx
Trenton
Thursday 9th of February 2017
Wow, it's amazing how much upgrading the cabinetry in you're home can change the whole look and field of a room. Thanks for sharing.