Painting textured walls can be tricky! It's hard to get an even coat, and crisp lines seem impossible! Here are my tips for painting textured walls like a pro!

Textured walls are great for hiding a multitude of construction sins, but it's not the easiest to live with!
Painting textured walls can be quite the challenge, with all those peaks and valleys preventing you from getting even coverage and crisp, straight lines.
But I've painted a LOT of textured walls over the years, so today I'm sharing my tips and tricks for getting great results!
This post is sponsored by HANDy Paint Products and contains affiliate links for your convenience. Purchases made with these links may earn me a small commission at no additional cost to you.
For some strange reason, only our upstairs rooms and the main floor bathroom have a crazy heavy texture on the walls. The rest of the house has orange peel texture, which still isn't my favorite, but at least it isn't going to scratch you if you rub against it!
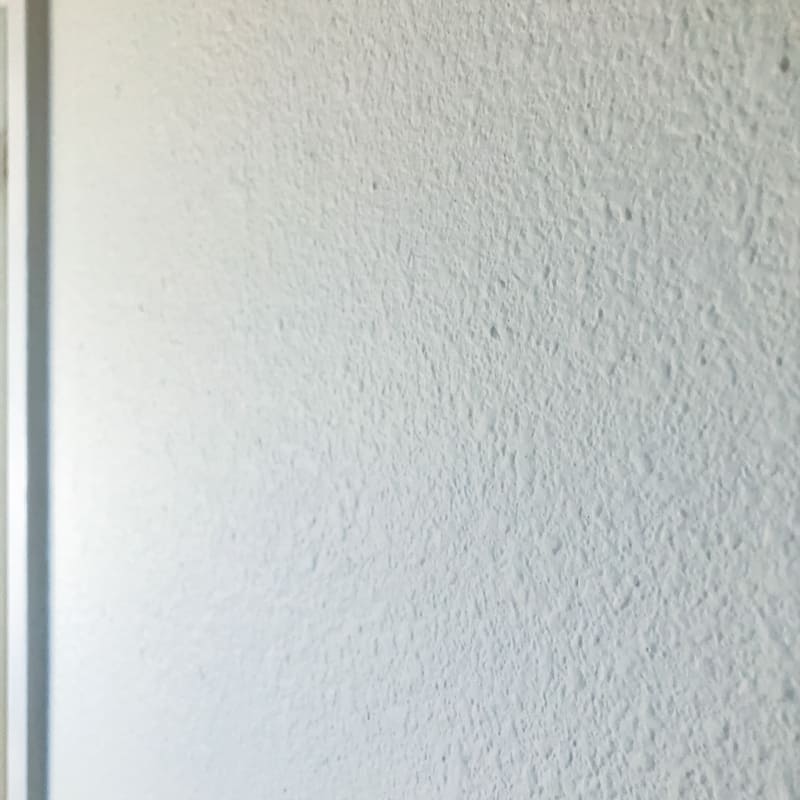
No amount of skim coat is going to level out this mountain range on our walls, and adding a thin sheet of drywall to cover it up will make the small rooms feel even smaller! But a nice coat of paint will go a long way to making these textured walls recede into the background.
Materials Needed to Paint Textured Walls
- Spackle to fill holes and scratches
- Putty knife
- Flat or eggshell sheen paint
- You'll also need some leftover paint from the previous wall color if you still have it.
- Good quality angled paintbrush
- I love this little guy because the handle doesn't get in the way when working in tight spaces!
- 6" paint roller
- I prefer the 6" mini roller over the 9" size because it's easier to work into all the crevices.
- Thick nap paint roller cover
- Look for ones that are labeled for rough surfaces. The longer fibers get into all the texture in fewer passes.
- Edging tool and pad
- HANDy Pro Pail and disposable liners
- Painter's tape
- This one is formulated specifically for textured walls, and includes a bottle of sealant that prevents paint from seeping under the tape!
- Drop cloth
How to Paint Textured Walls
Fill Holes and Scratches
Textured walls hide most imperfections, but any deep scratches or holes from hanging hardware needs to be patched before painting. Use a putty knife to spread spackle over the hole, then allow to dry.
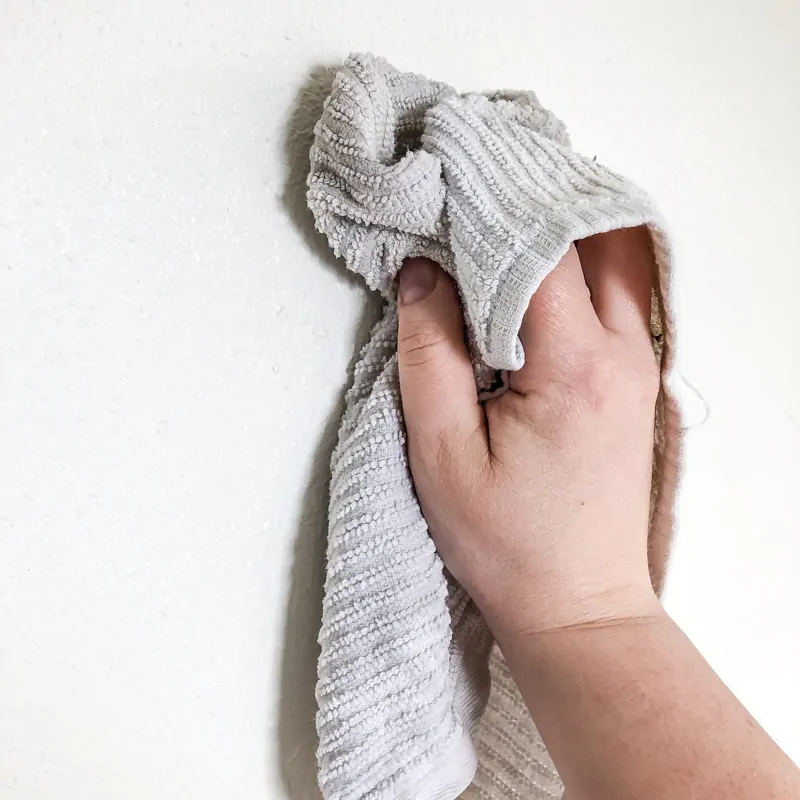
Vacuum and Wipe Down Walls
All that texture traps dust in its crevices over time, which can lead to a less-than-perfect paint job. Take the time to vacuum your walls or wipe them down with a damp cloth before you start painting.

Remove Outlet and Switch Covers
Save yourself some hassle and just remove all the outlet and switch covers. It can be tempting to just tape over them, but it just ends up looking messy in the end! I took this opportunity to get rid of the almond wall plates and switch them out for white.

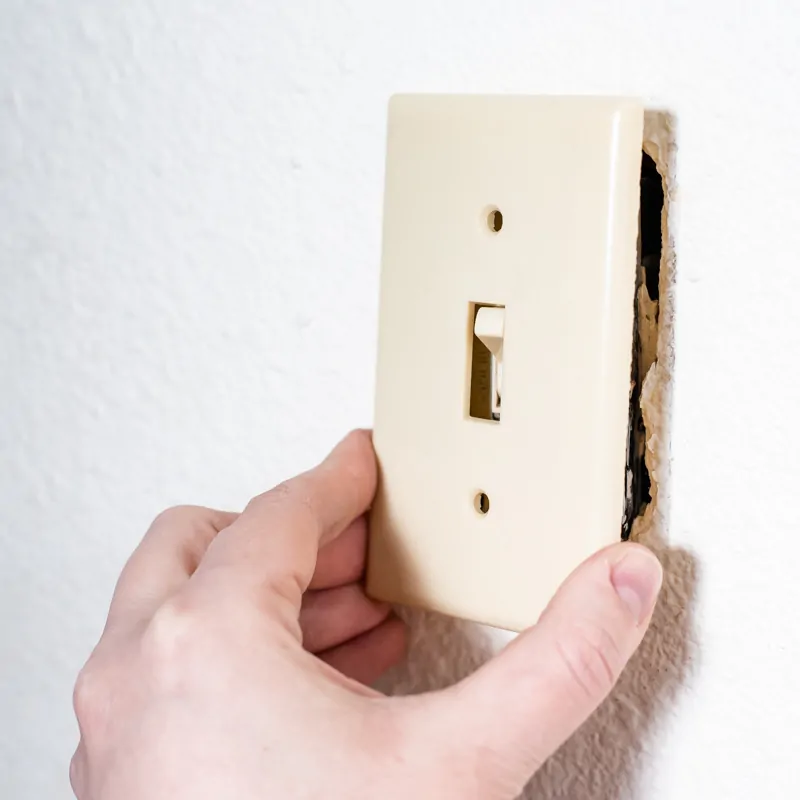
If you have little ones around that might stick their fingers in the unprotected outlet, turn off the breaker for the room while you work.
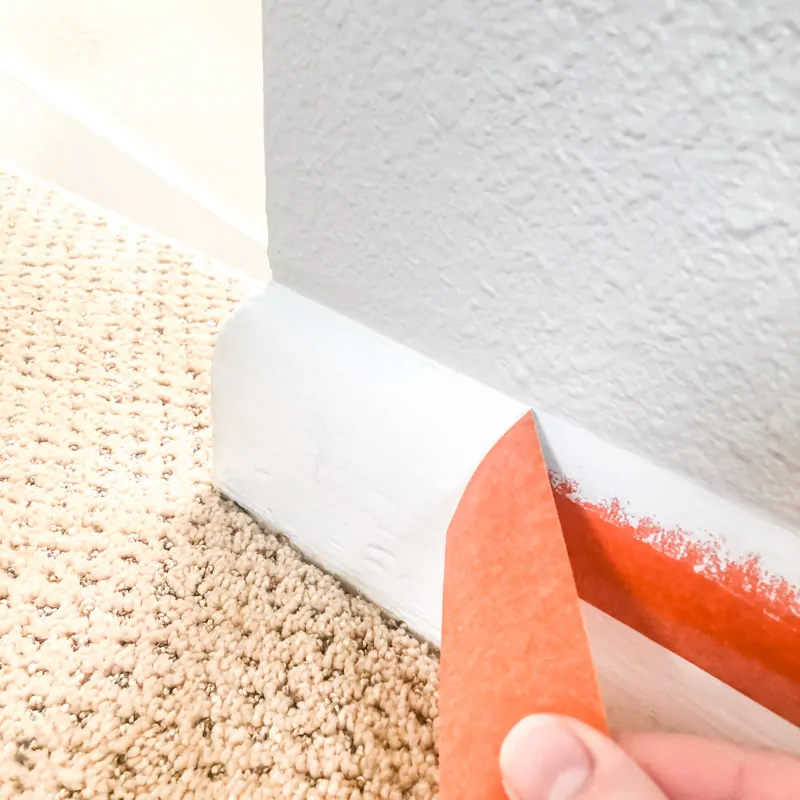
Tape Baseboards and Transition Areas
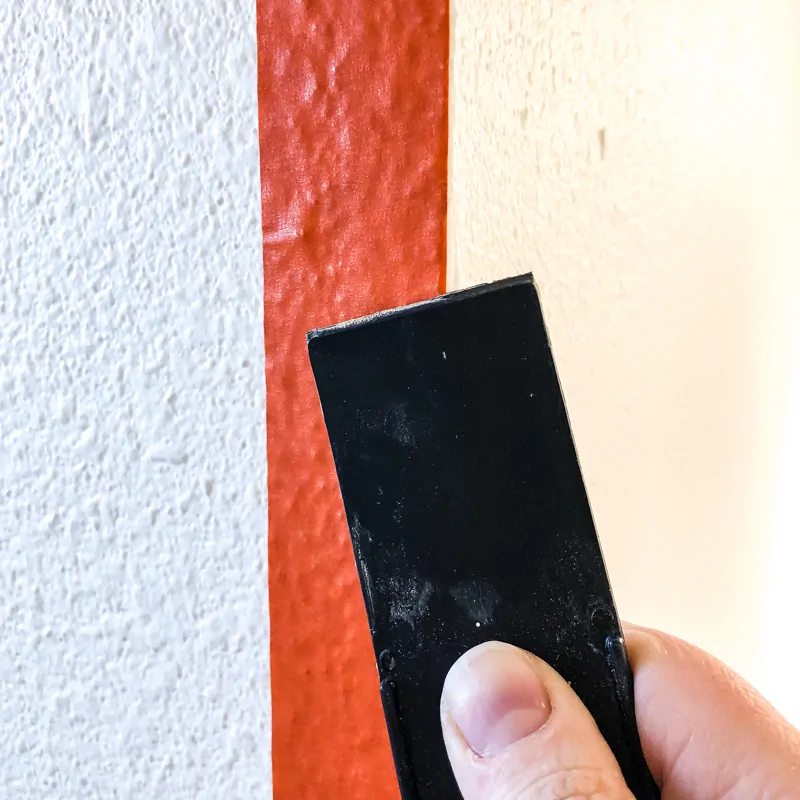
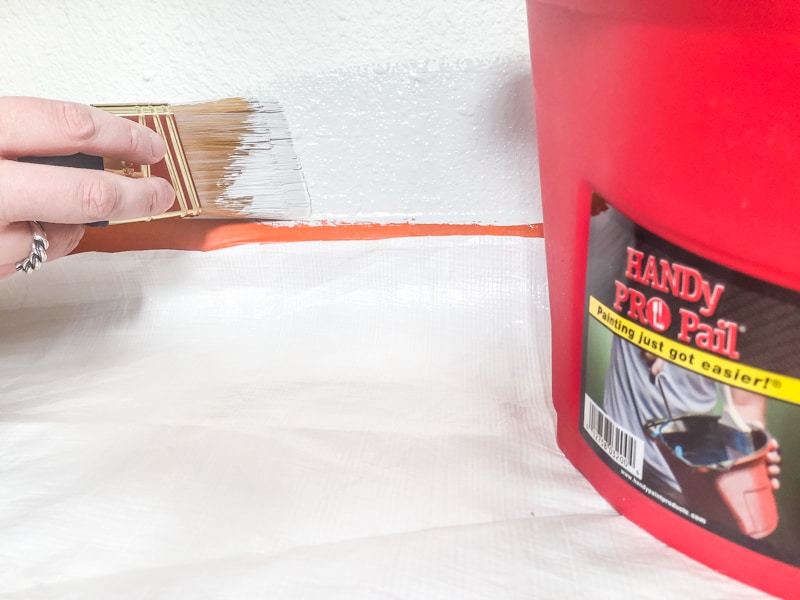
I typically like to edge a room freehand with a paint brush, but textured walls can be so unpredictable! One wrong bump and BAM! You're adding extra time to your project touching up! Using painter's tape and applying it correctly goes a long way to getting clean, crisp lines on textured walls!
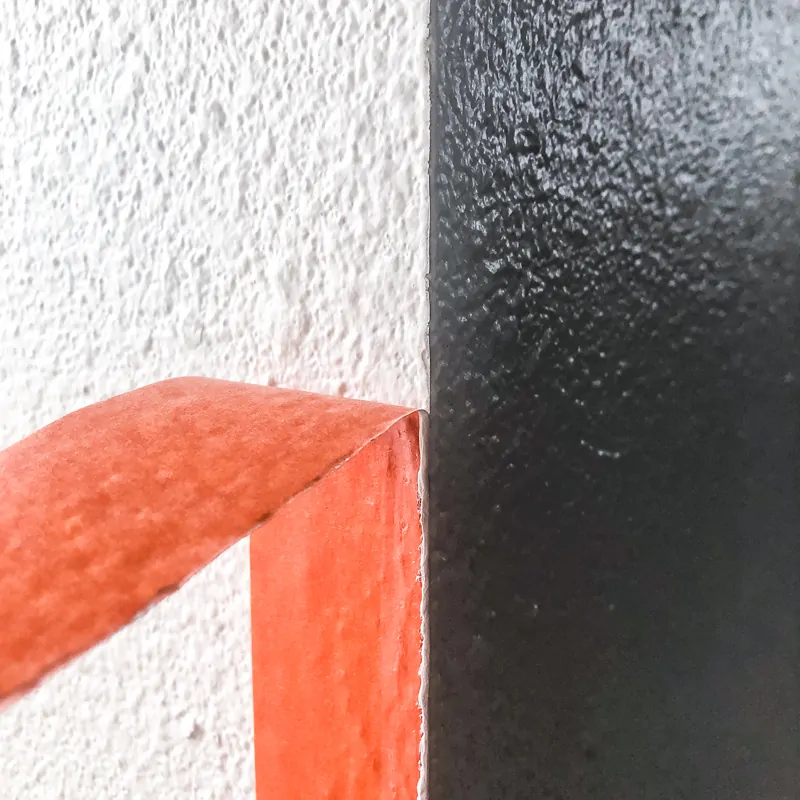
Rub the painter's tape with a putty knife to get a tight seal. At this corner where two walls meet, the right side will be painted gray but the left side will stay white.

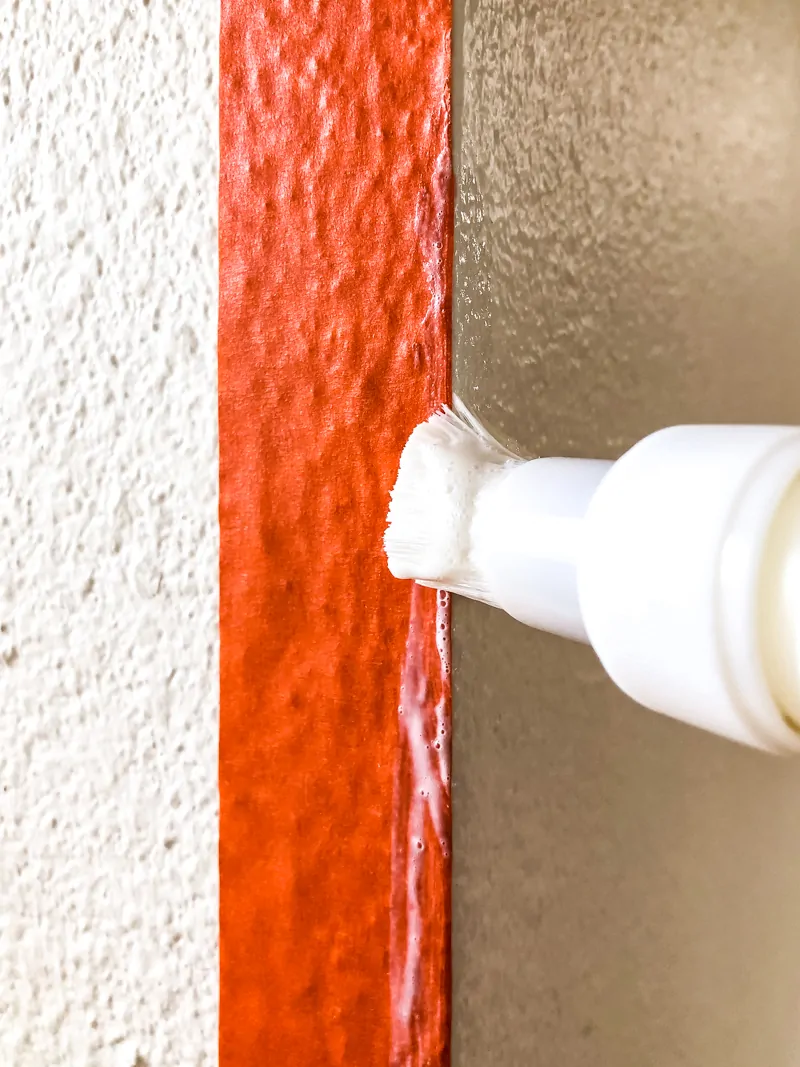
Apply a small amount of the original wall color to the edge of the painter's tape with a brush. This seals the seam, and any bleed through will match the old color and blend in. The new paint color goes on top and any excess will get pulled away when the tape is removed.
If you don't have any of the original paint color on hand (like I did), try clear nail polish or textured wall tape sealant to prevent paint from seeping under the seam.

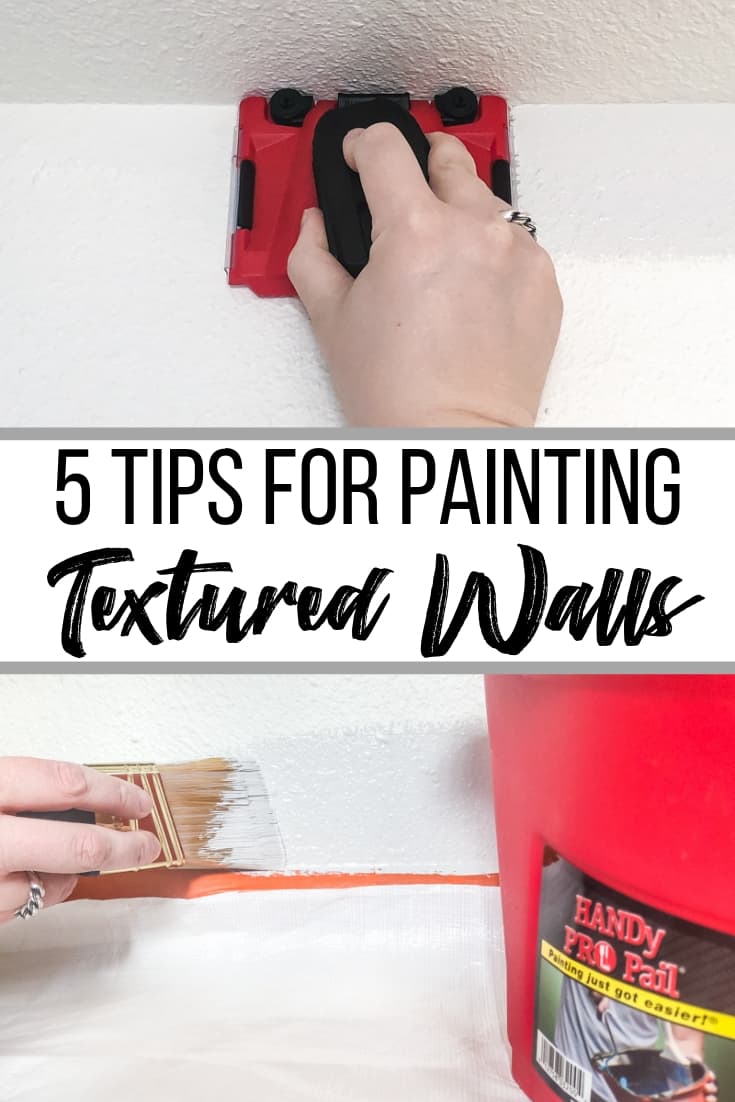
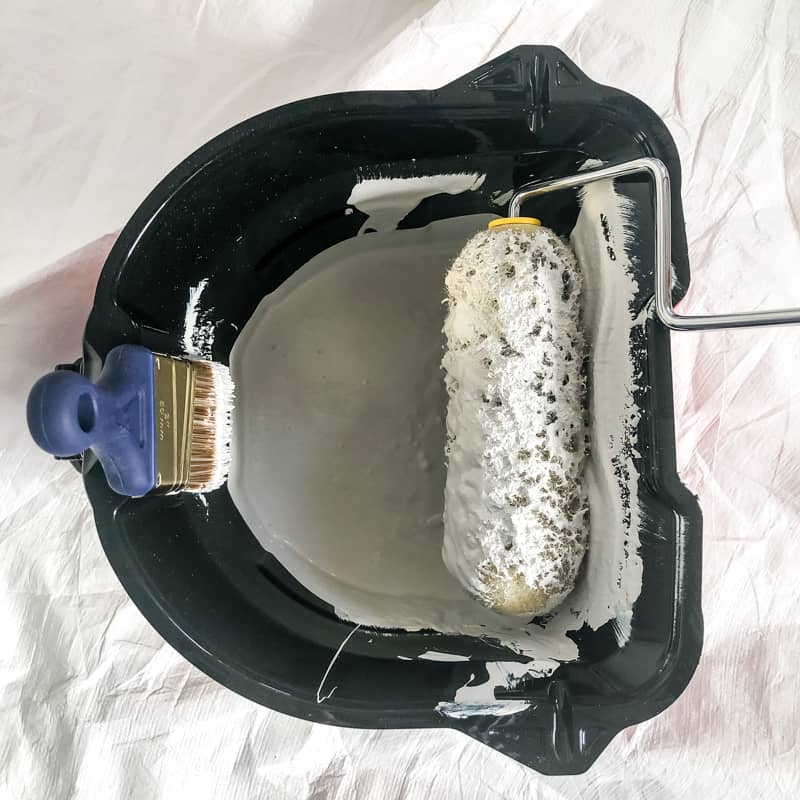
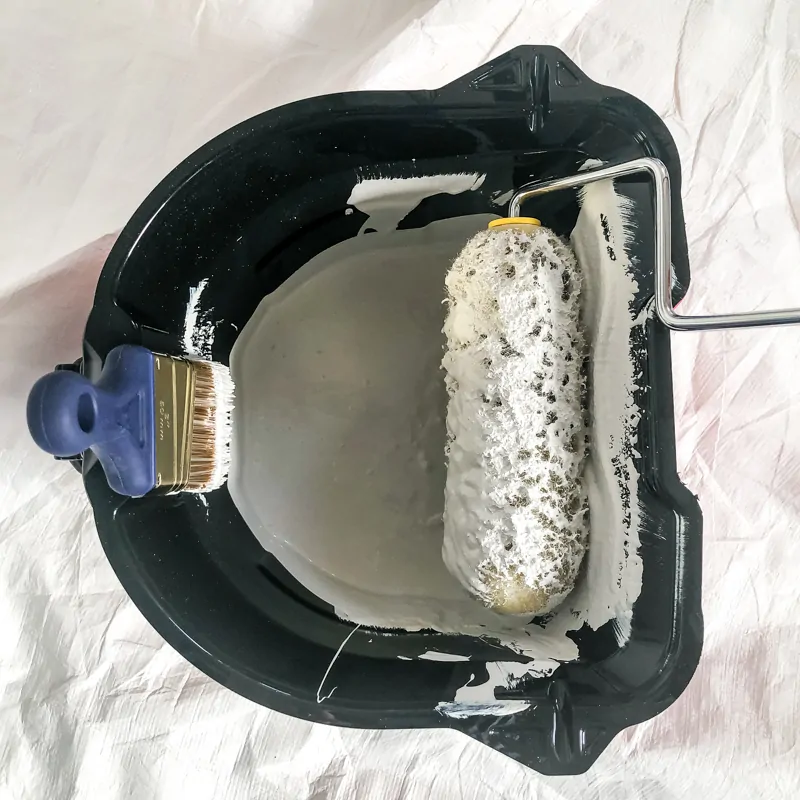
Use the Right Painting Tools
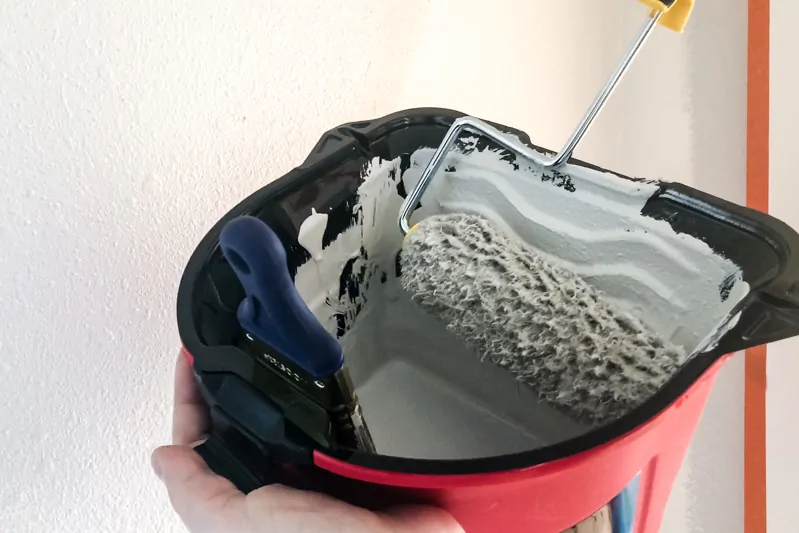
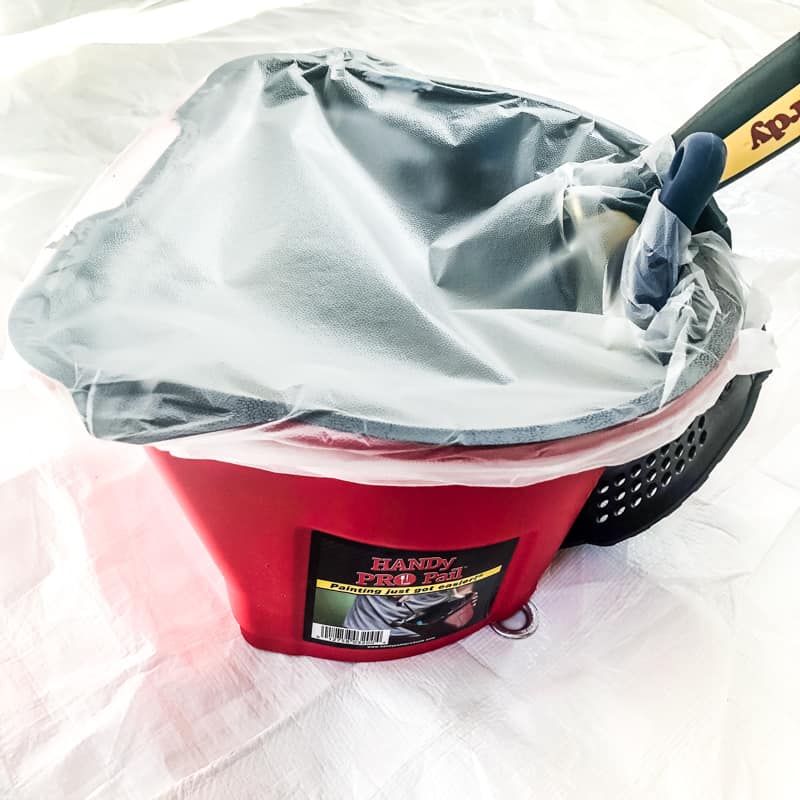
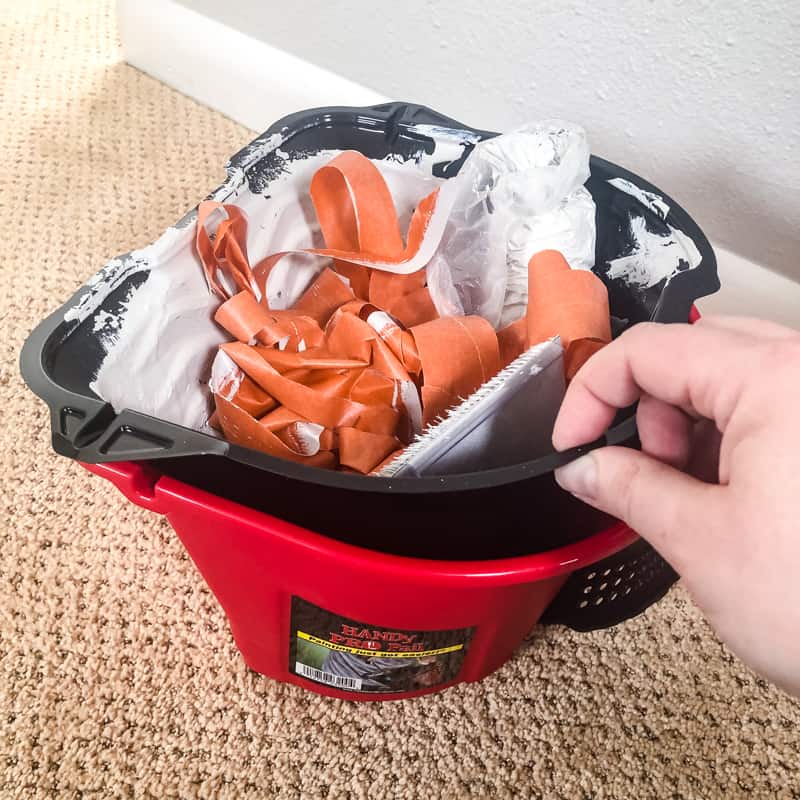
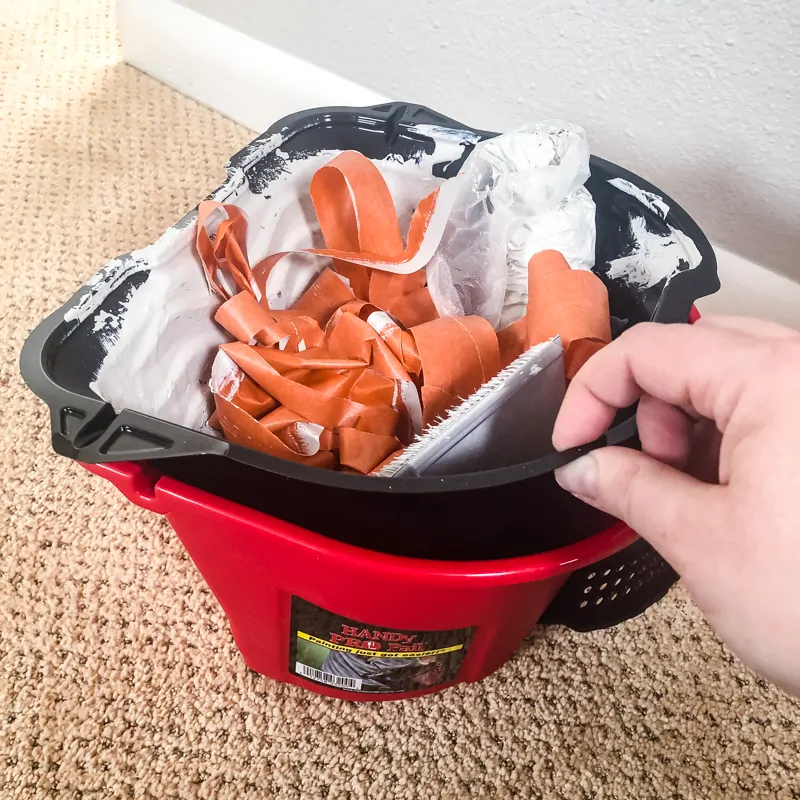
The HANDy Pro Pail is a great tool that makes painting textured walls so much easier! It's a roller tray and paint cup combined into one convenient handled pail!
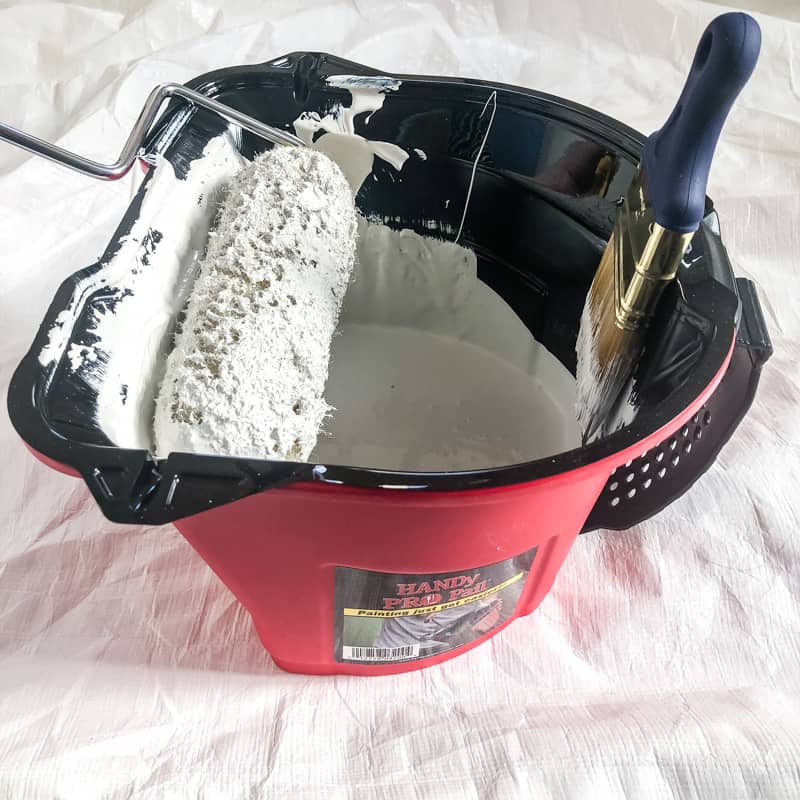

I can go from cutting in baseboards . . .

to rolling an entire wall with all the paint I need in the palm of my hand!

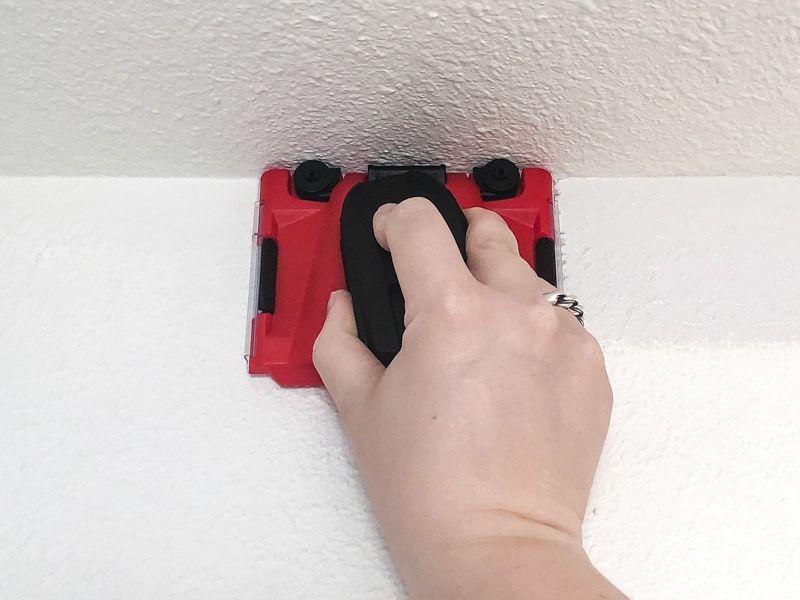
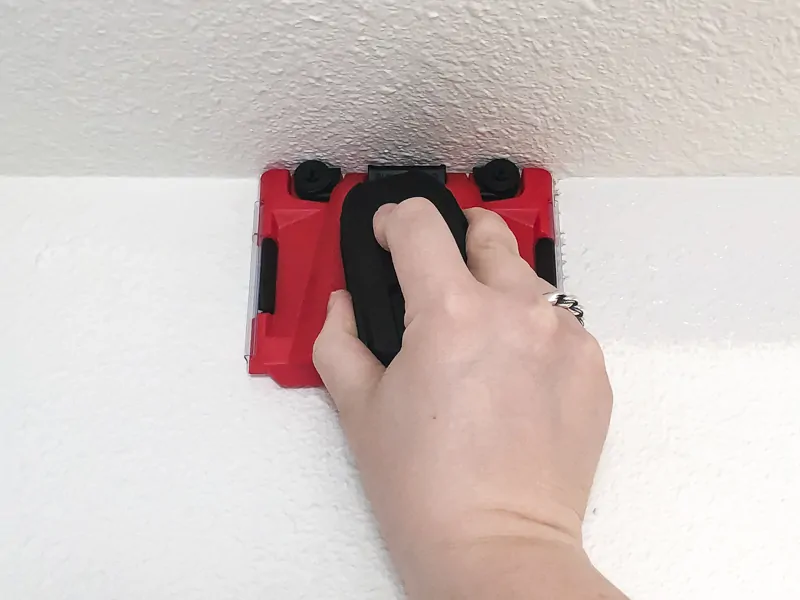
To get a clean line along the ceiling, try using an edging tool. It has little wheels along one side, and as long as you keep those wheels clean, you'll get a crisp line!
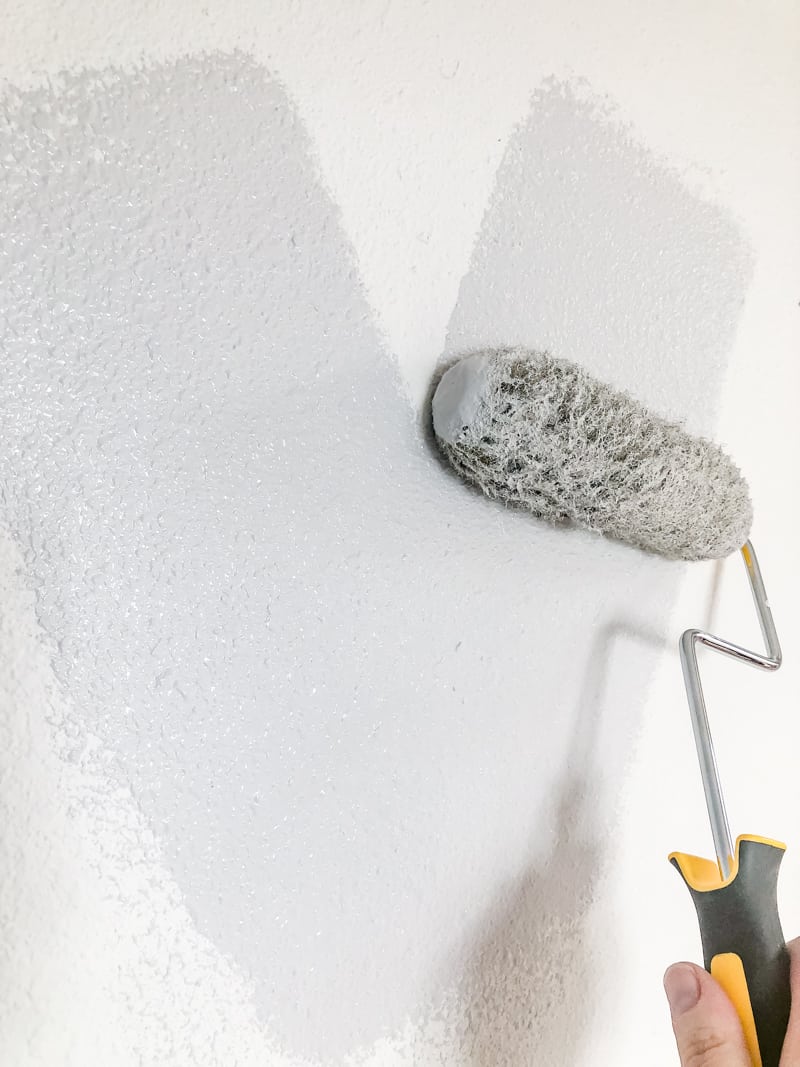
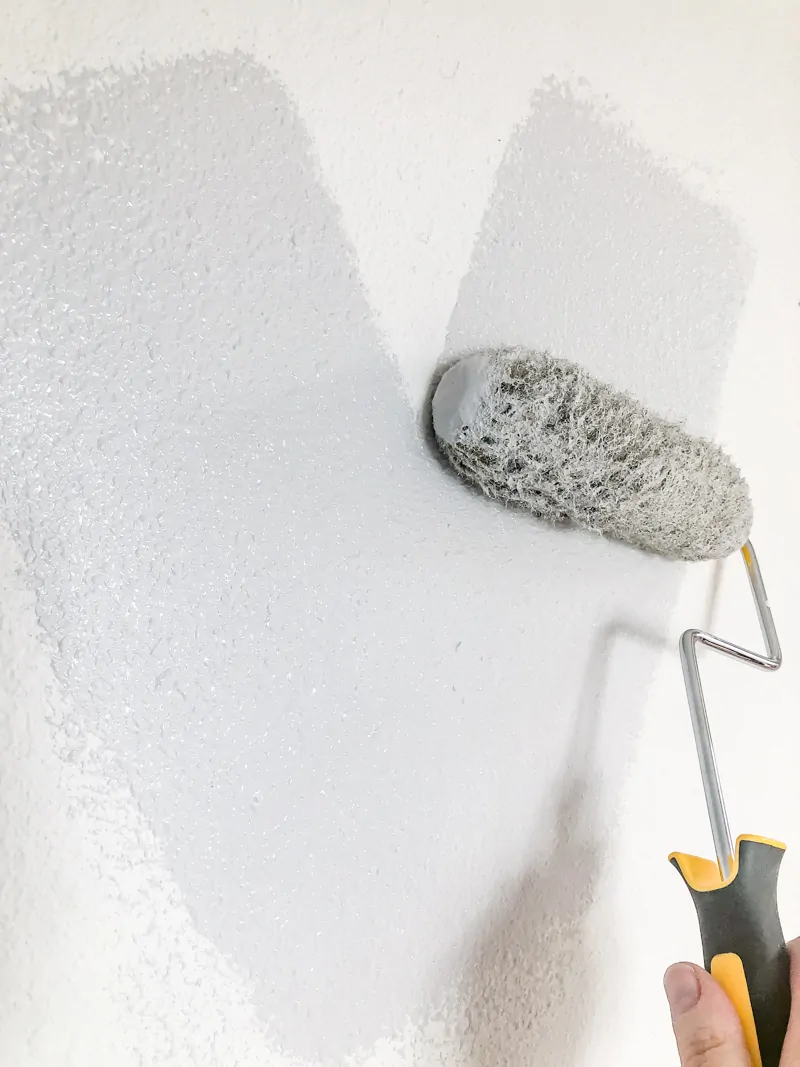
For the rest of the wall, use a thick nap roller (look for ones that are labeled for semi-rough surfaces). This will allow all the fibers to sink down into the grooves in the texture and give you better coverage with fewer passes.
For a small area like this hallway, I prefer to use a smaller 6" roller instead of a big 9" one. It's easier to maneuver in tight spaces, and it fits in the paint tray of the HANDy Pro Pail perfectly!
Load up the roller with paint from the HANDy Pro Pail, then roll it on the wall in a W pattern. Go over the same area from different directions so you don't miss any spots. A lamp or flashlight held against the wall can help you see any areas that are missing paint.
Apply a second coat
While you wait for the first coat to dry, cover the HANDy Pro Pail with the roller and brush inside with plastic wrap (I love using Press n' Seal for this!) This prevents the paint from drying out in between coats.

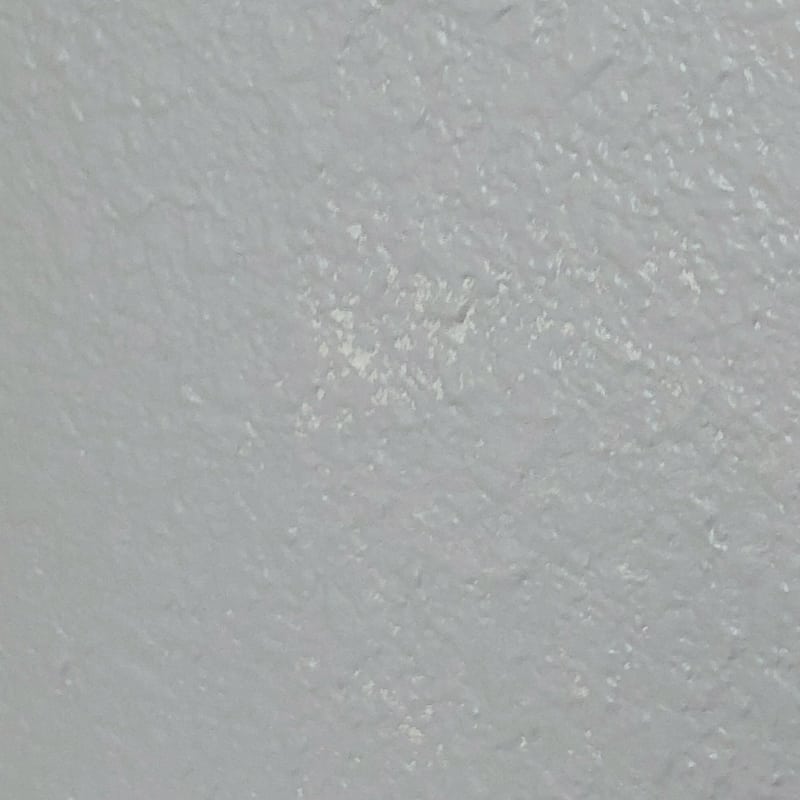
Here you can see a spot that didn't get great coverage. The location of the white spots shows that I didn't roll from high right to low left on this section.
While the direction doesn't really matter on a flat wall, it creates problem spots like this on textured walls! I find it easier to touch up these areas with a brush so I can really work the paint into all the nooks and crannies.
Clean Up
Once the paint is dry, remove the painter's tape. Pull at a steep angle, towards the area you want to keep white. Check out that perfectly clean line at the corner! (The wall isn't that dark, but the camera does funny things sometimes!)

Even the baseboards came out crisp and clean!

Wrap the roller cover in the plastic wrap from earlier, then pull it off the roll cage. I don't bother cleaning them, so I just toss it in the HANDy Pail liner along with the painter's tape and throw the whole thing away.
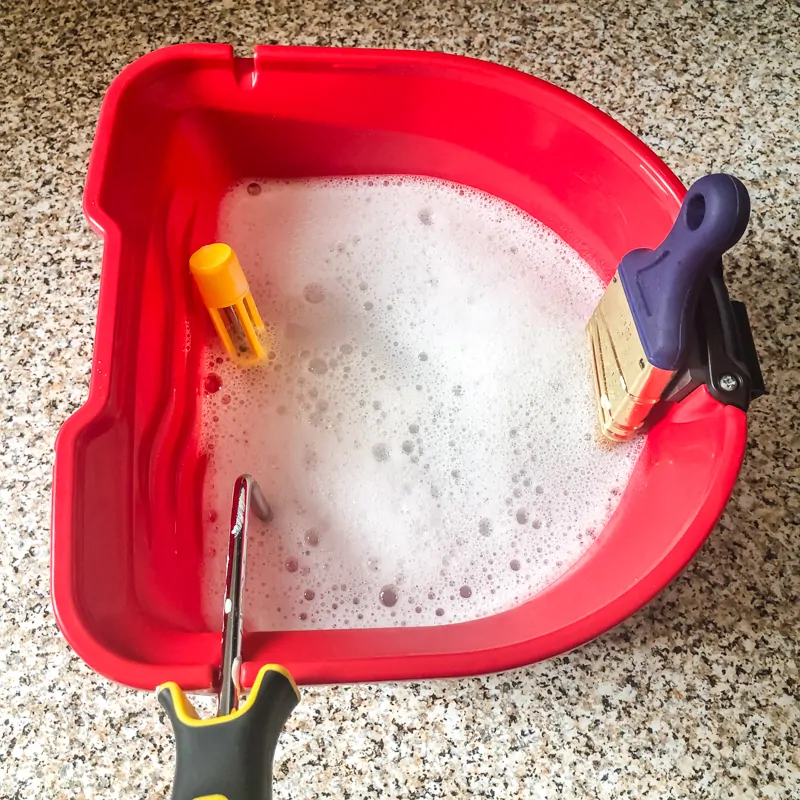
With the liner removed, fill the pail with soapy water and stick the brush to the magnet with only the bristles submerged. The notch on the side holds the handle of the roller in place. Let it soak for a little while to make cleaning your paint brush much easier!

Admire Your Newly Painted Textured Walls!
That wasn't so bad, was it? It may take a bit more work to get clean lines on textured walls, but it can be done! Now the upstairs hallway matches the newly remodeled half bathroom and makes the space feel bigger and more cohesive.
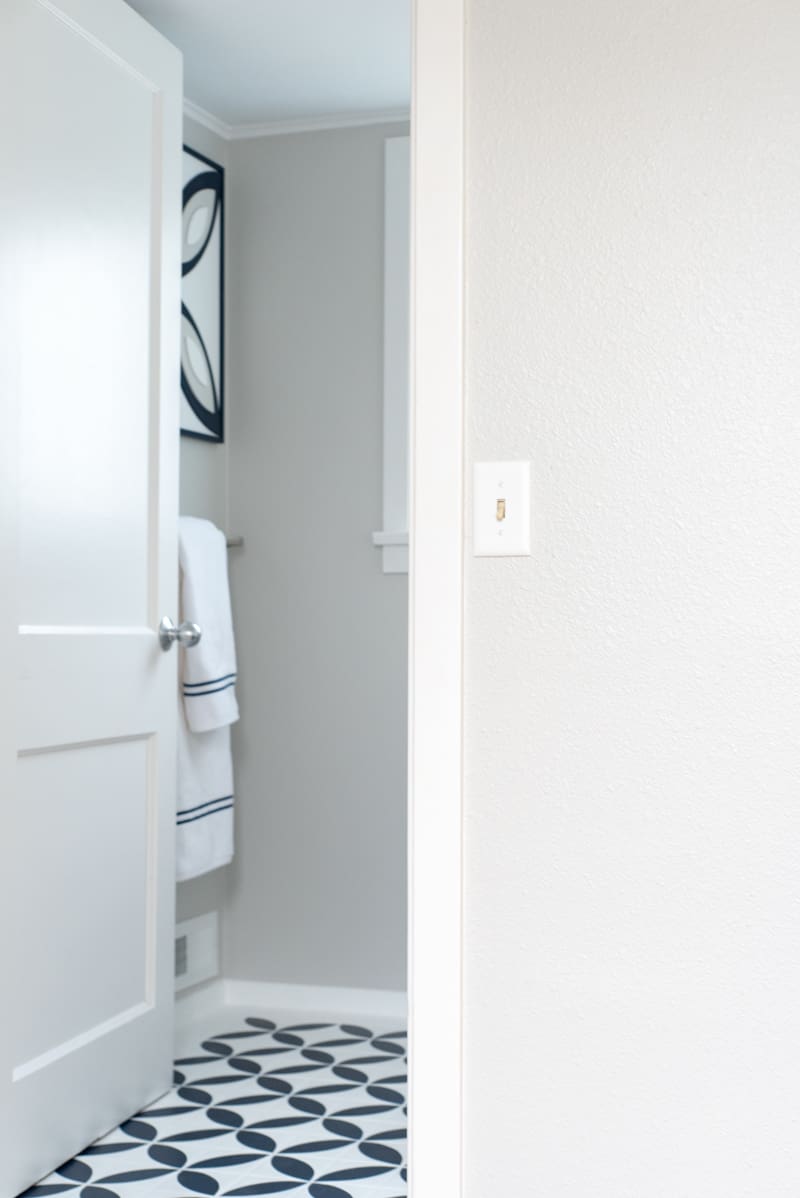

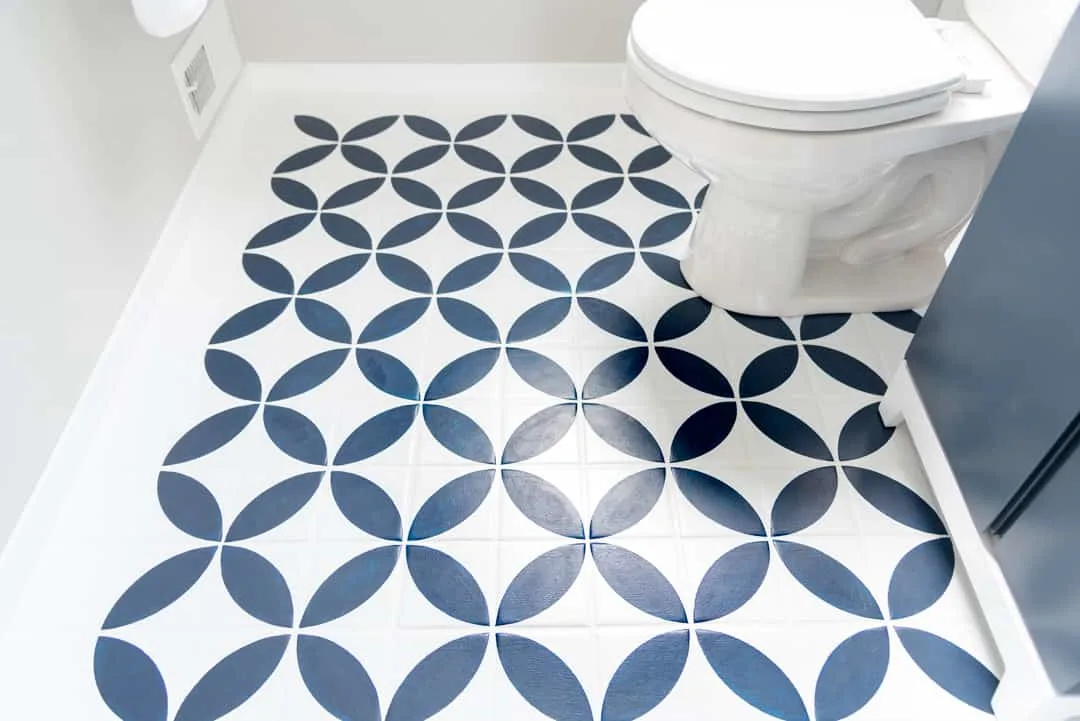
Want more painting tips? Check out how I updated my bathroom floor by painting the tile with a stencil!

Painting over clear finishes like varnish can be a recipe for disaster! Check out my tips for painting over polyurethane, so it adheres properly without scratching off.

Check out these other painting tutorials!