A great paint brush can last for years, if you care for it properly! Learn how to clean paint brushes the right way with this handy tutorial!
Cleaning your paintbrushes can be a real chore. I have more than a few that have become a petrified brick after forgetting to rinse them out. But good brushes are expensive, so learning how to clean paint brushes properly will save you both money and heartache!
This post contains affiliate links for your convenience. Purchases made through these links may earn me a small commission at no additional cost to you. Please visit my disclosures page for more information.
Types of Paint Brushes
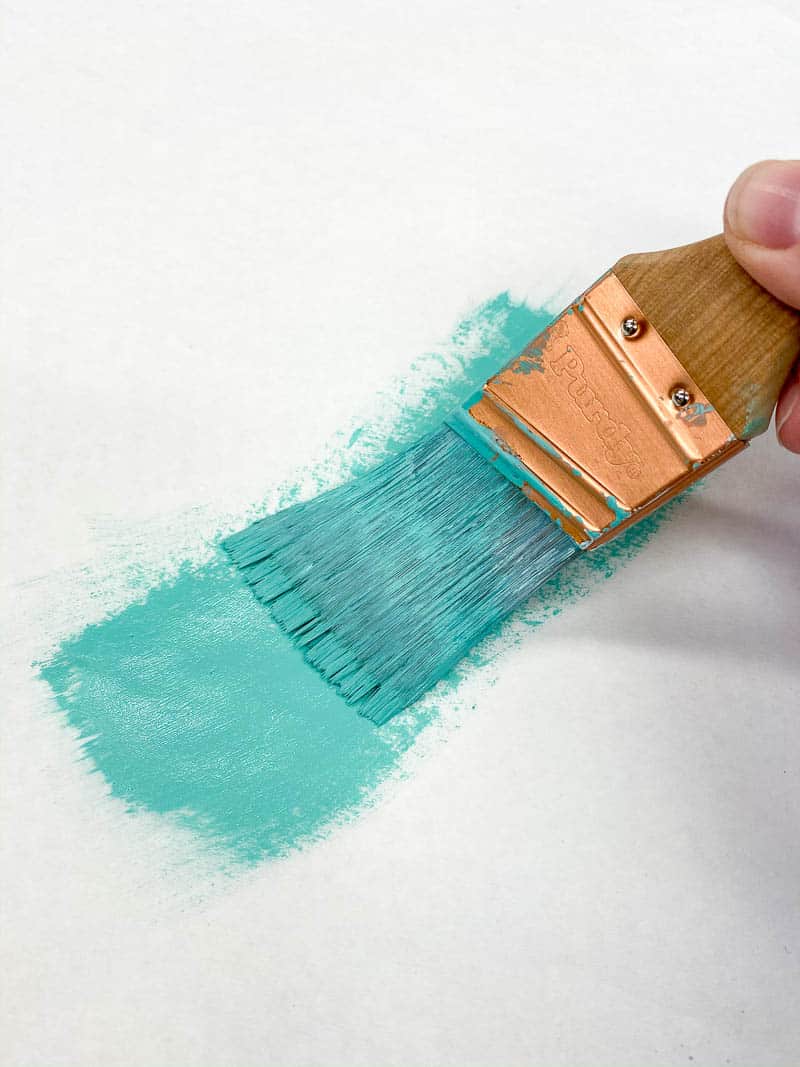
If you want a good coat of paint, you need a good brush. Disposable brushes are convenient, but as the adage says, "you get what you pay for." If you want to avoid brush strokes and paint straight lines, then you need a high quality brush.
Natural Fiber Brushes
Natural fiber brushes are made from animal hairs, and are typically softer than synthetic bristles. They're best for oil-based paint, and are more commonly used in artist brushes.
You should not use a natural brush with latex, because the bristles will absorb the water base and swell up. This can lead to your brush breaking down prematurely, and creating a less than desirable finish.
Synthetic Bristle Brushes
If you are working with latex or any other water-based paint, then you should use a brush made from nylon or polyester. These brushes are more commonly found in home improvement stores for projects such as painting baseboards or furniture.
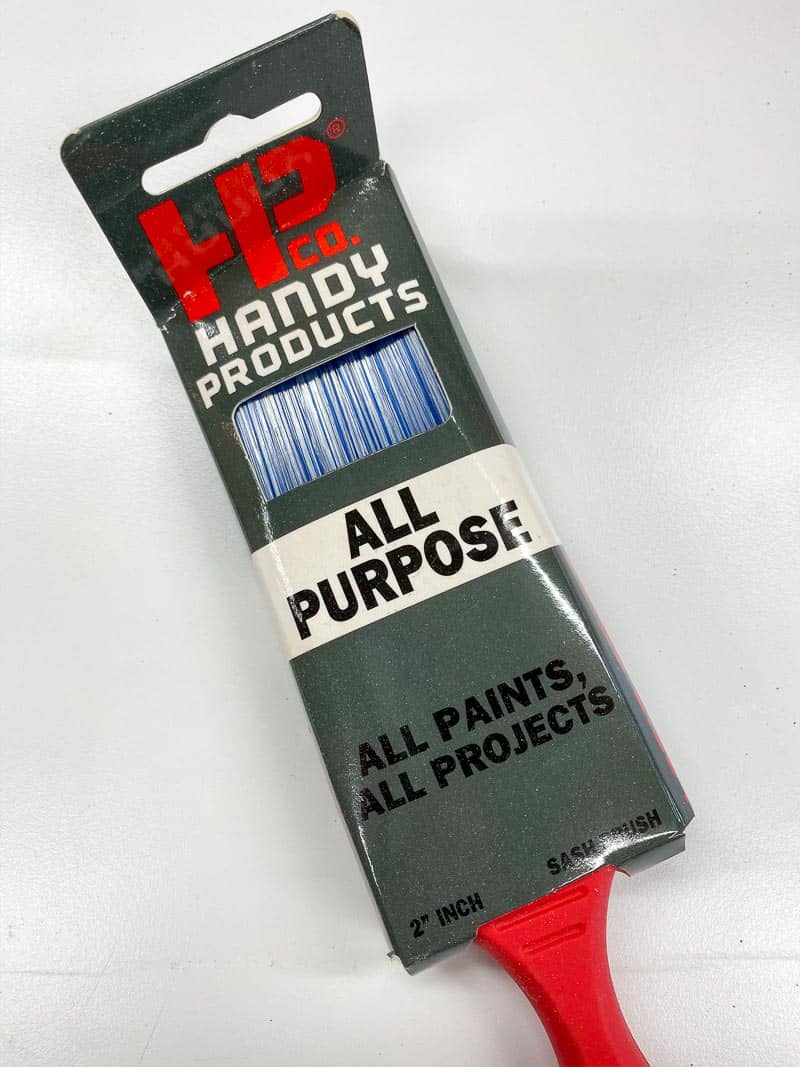
I'm a big fan of Purdy brushes for most projects, although this little Wooster brush is my favorite for getting into the corners of my DIY furniture builds without a long handle getting in the way!
Storing Brushes Between Coats Or Overnight
You don't have to wash paint brushes in between coats, or even overnight. These little tricks will help you avoid yet another trip to the sink!
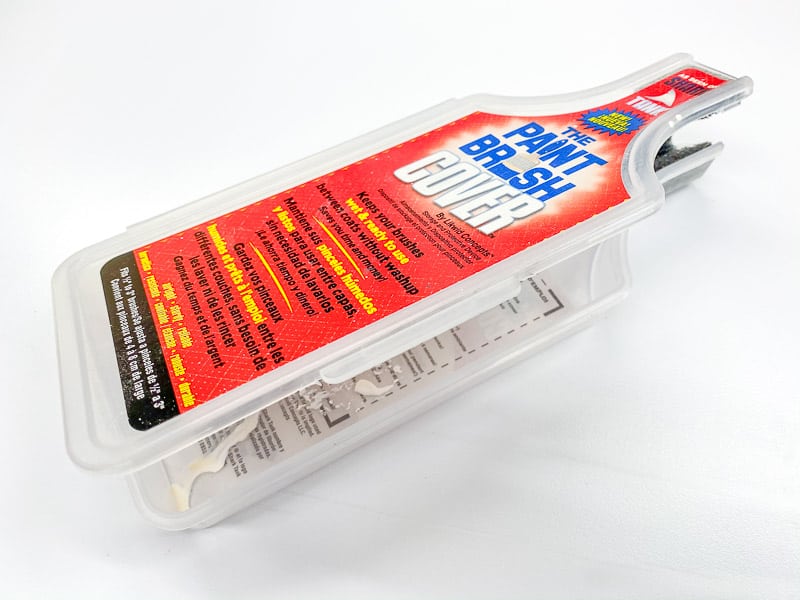
Paint will only dry if it is exposed to the air. If you seal up a wet paint brush in an air-tight container, it will stay fresh in between coats! There are inexpensive storage containers that are specially made for this, with foam seals around the handle to keep air out.

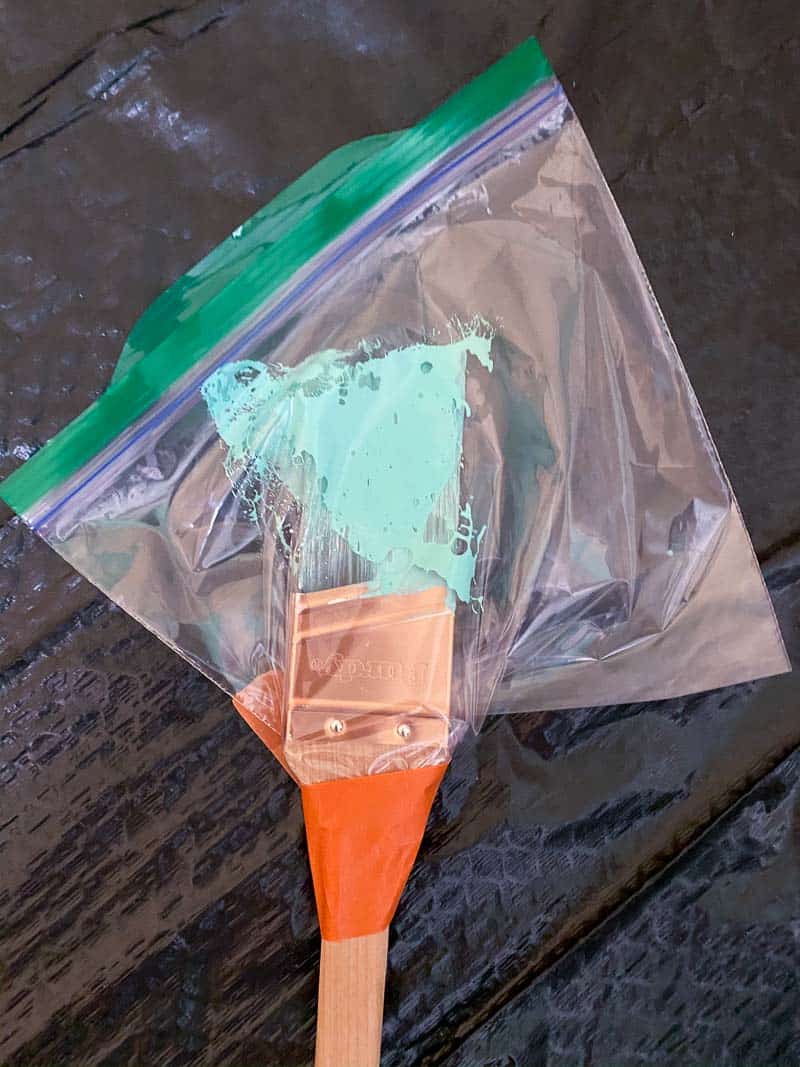
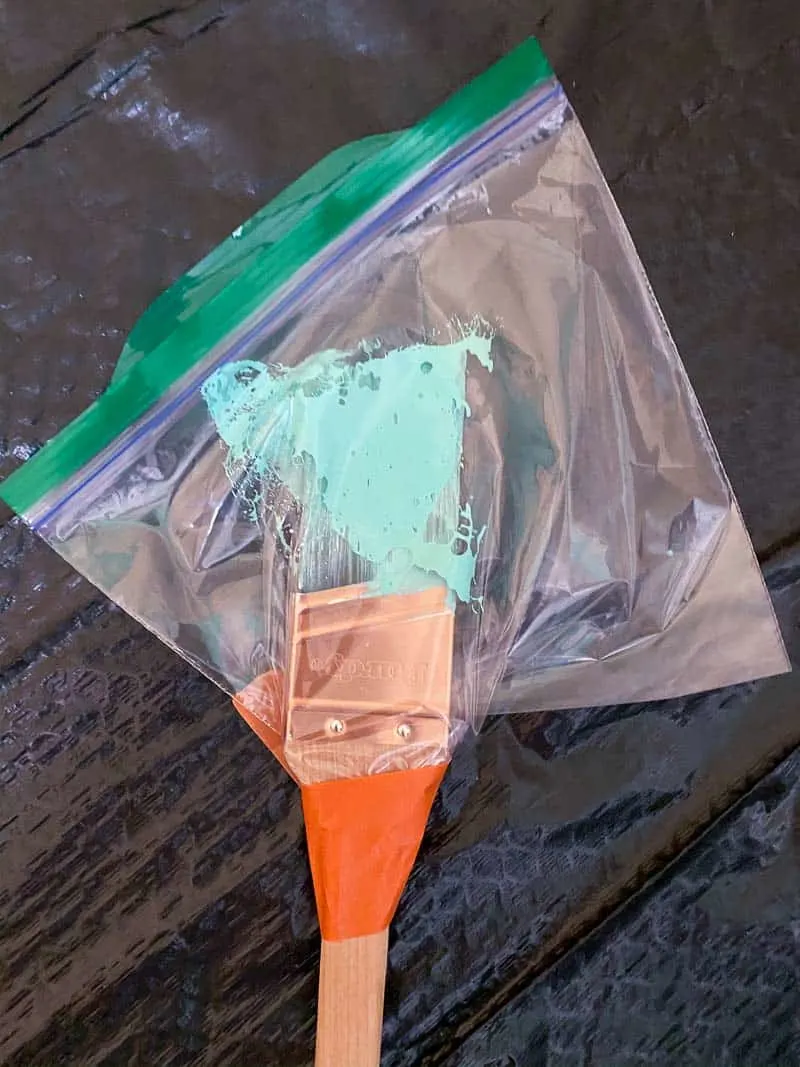
But for an even cheaper solution, get a sandwich bag and snip off one of the bottom corners with scissors. Then, slip the brush into the bag, and stick the handle through the hole. Zip the bag up, and it should be good for a few hours!
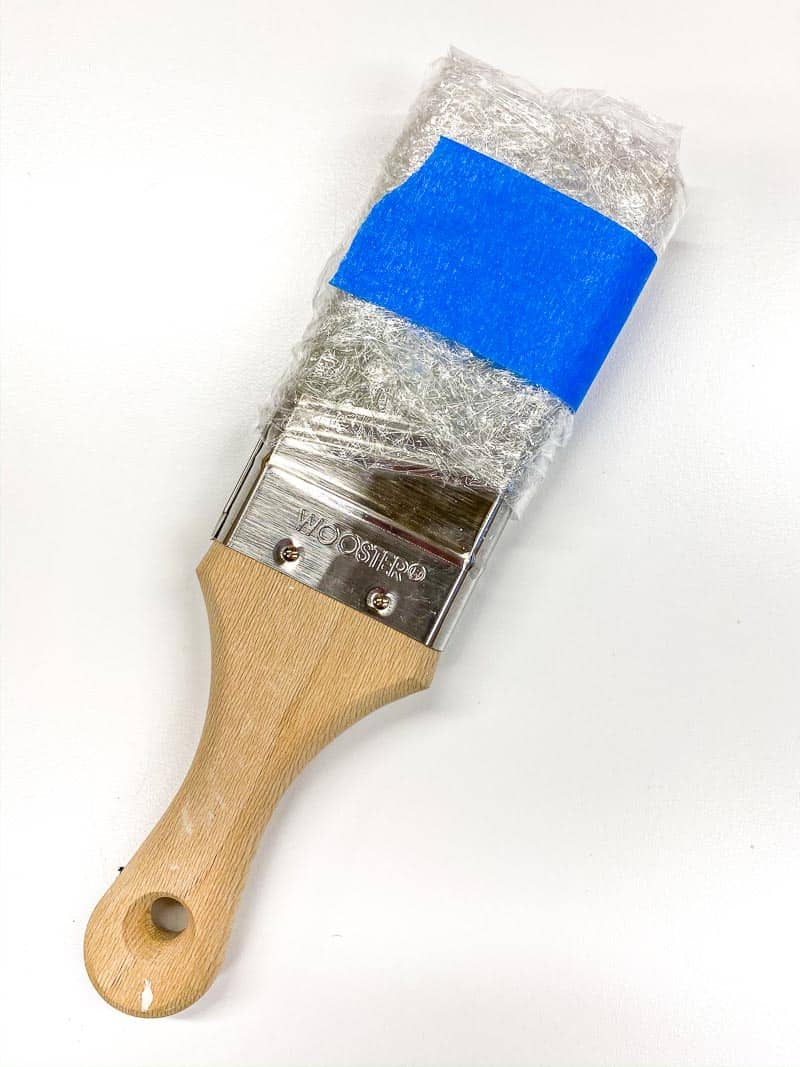
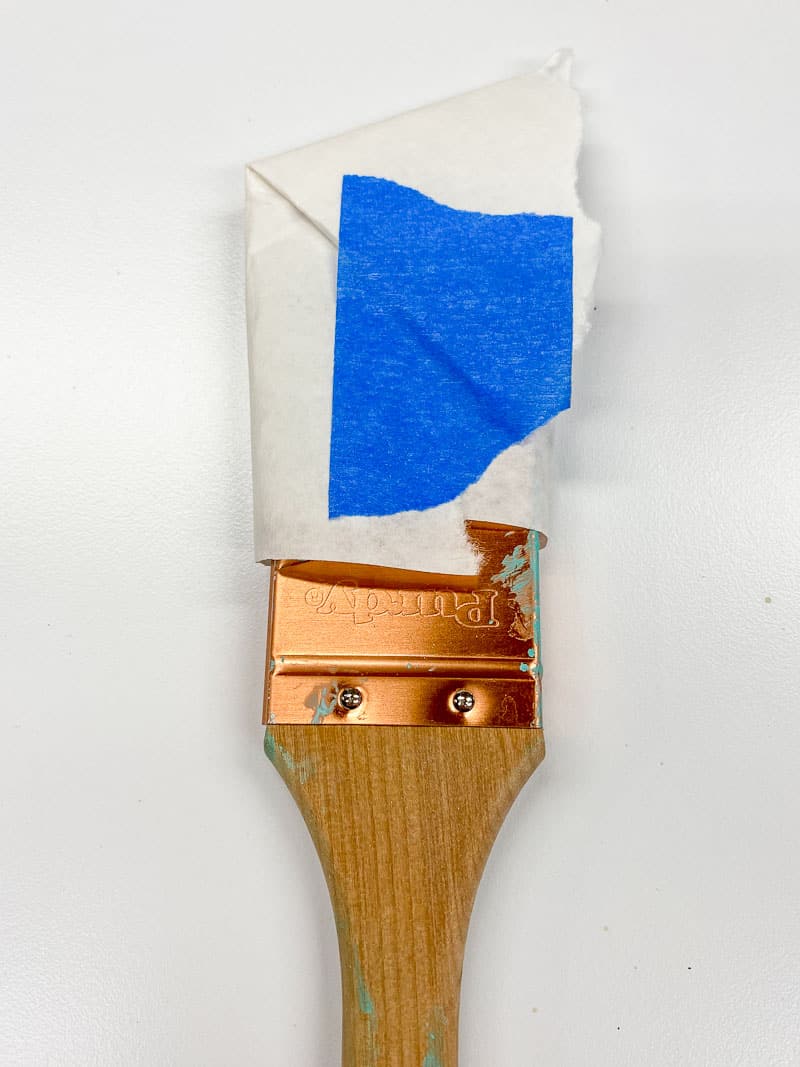
If you are storing your brush overnight, then wrap a bit of painters tape around the handle and stick it in the fridge. Between the air-tight bag and the cold temperature, it should be good for a day or two. Just don't forget it in there, or you'll have a stiff brush next to the milk and butter!
Another way to seal your brush is to wrap plastic wrap around the bristles. Finish off the ends with tape to hold them in place. Be careful not to make your wrap too tight, or you could alter the shape of the bristles.

Once your painting project is complete, wash the brushes immediately to make the job easier. Here's how to do it!
5 Quick Tips for Cleaning Paint Brushes
No matter what types of paint you use, these tips will help keep cleaning time to a minimum and keep your brush in tip top shape!
Work out the Paint before Washing
Gently work out as much of the paint as possible, using the rim of the can or paint pail.

Then use a piece of paper or even the drop cloth under your project to work out even more paint. Don't grind the brush into the paper; this will bend and damage the bristles. Just brush back and forth as you usually would when painting.

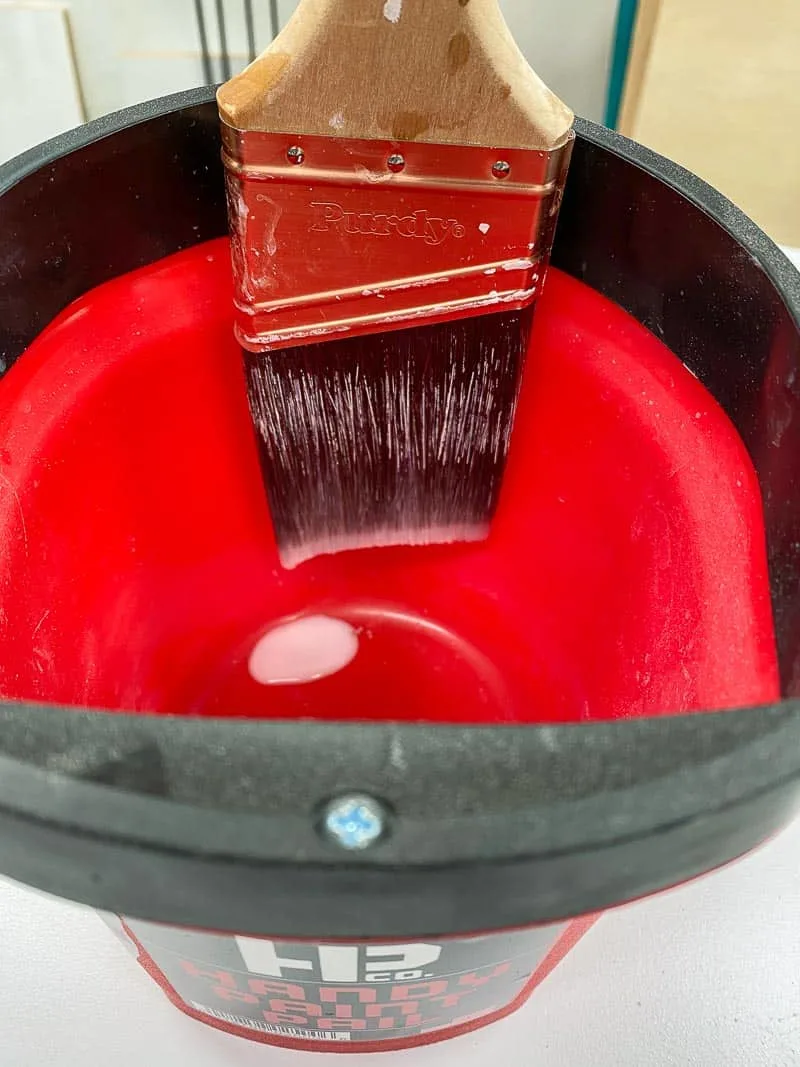
Soak the Bristles only
I typically use water-based paint, which cleans up easily with soap and water. But it can seem like I'm wasting gallons of water washing out a brush, so I prefer to soak them for a bit first.
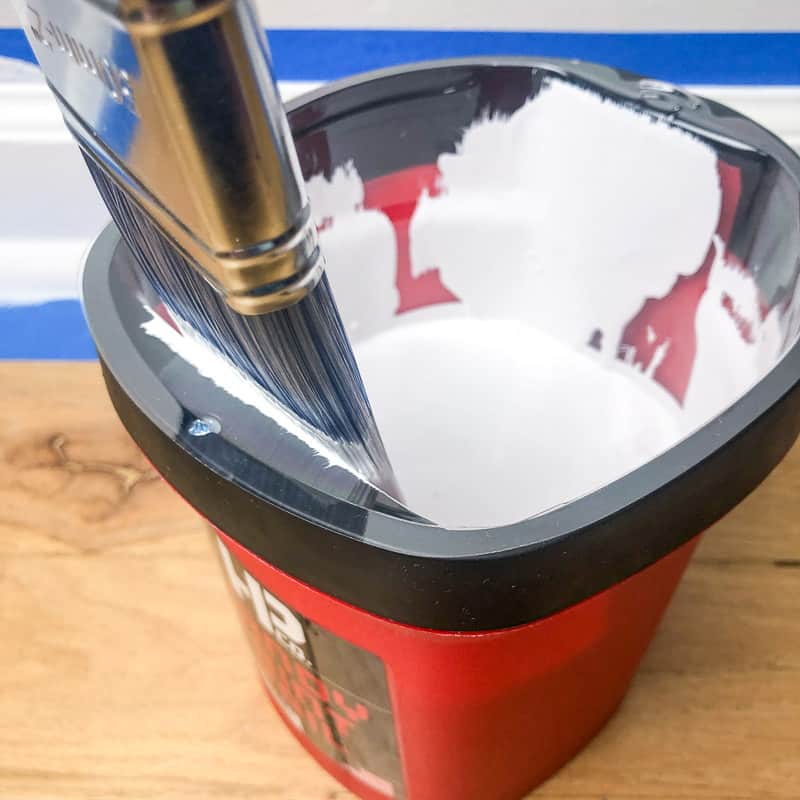
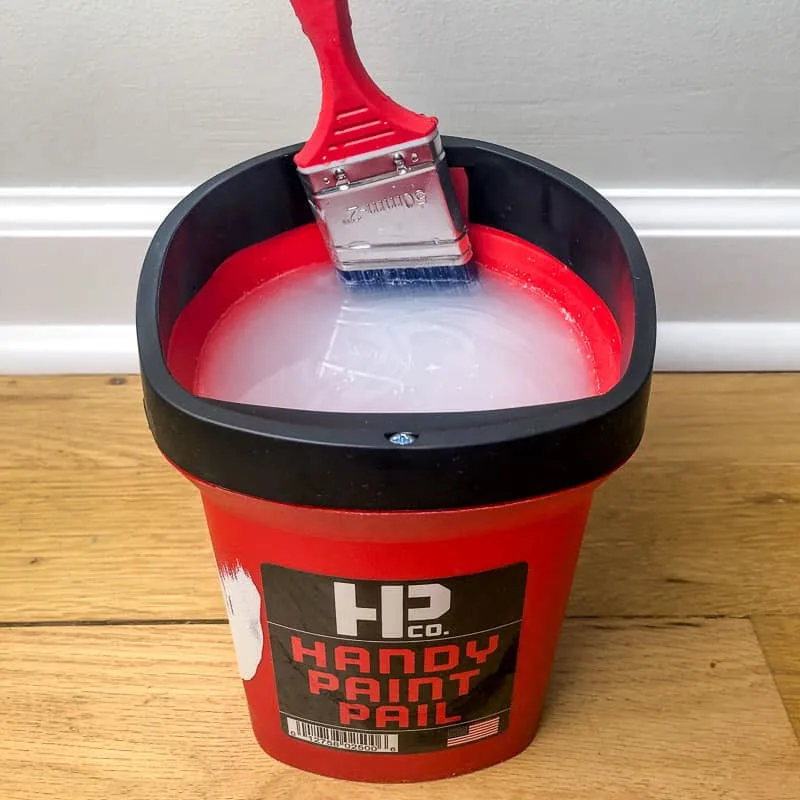
But you can't just dunk the brush in a bucket and leave it there! The ferrule (the metal part that holds the bristles on the handle) will rust and bristles will start to fall out. Paint pails like this have a magnet on the side to hold the bristles at the perfect height for a good soak.

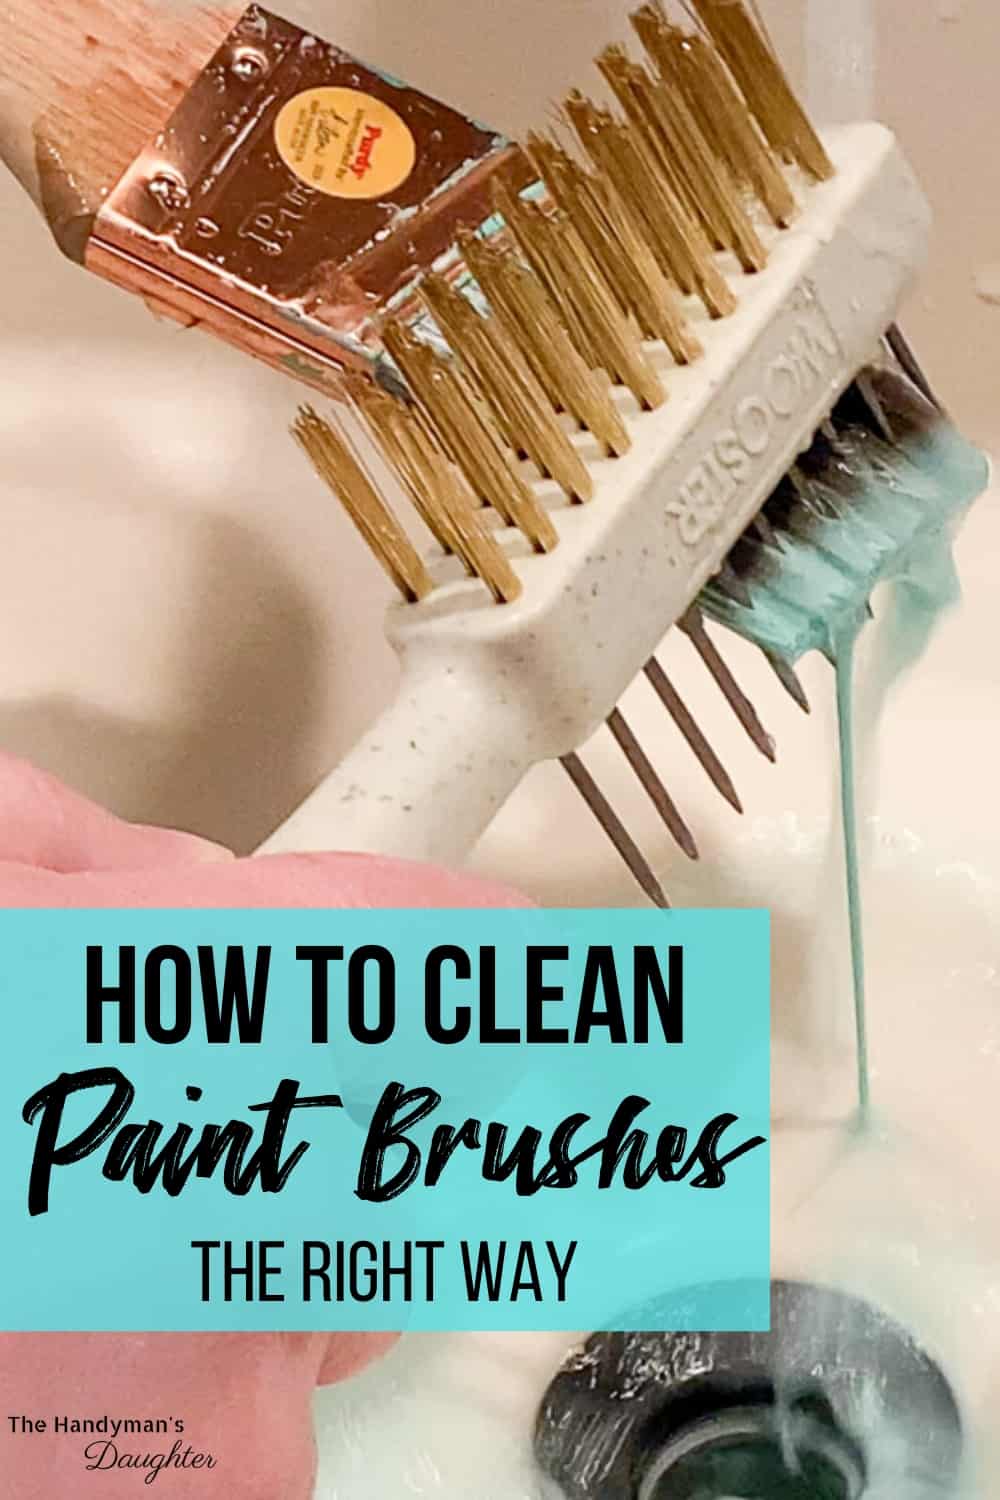
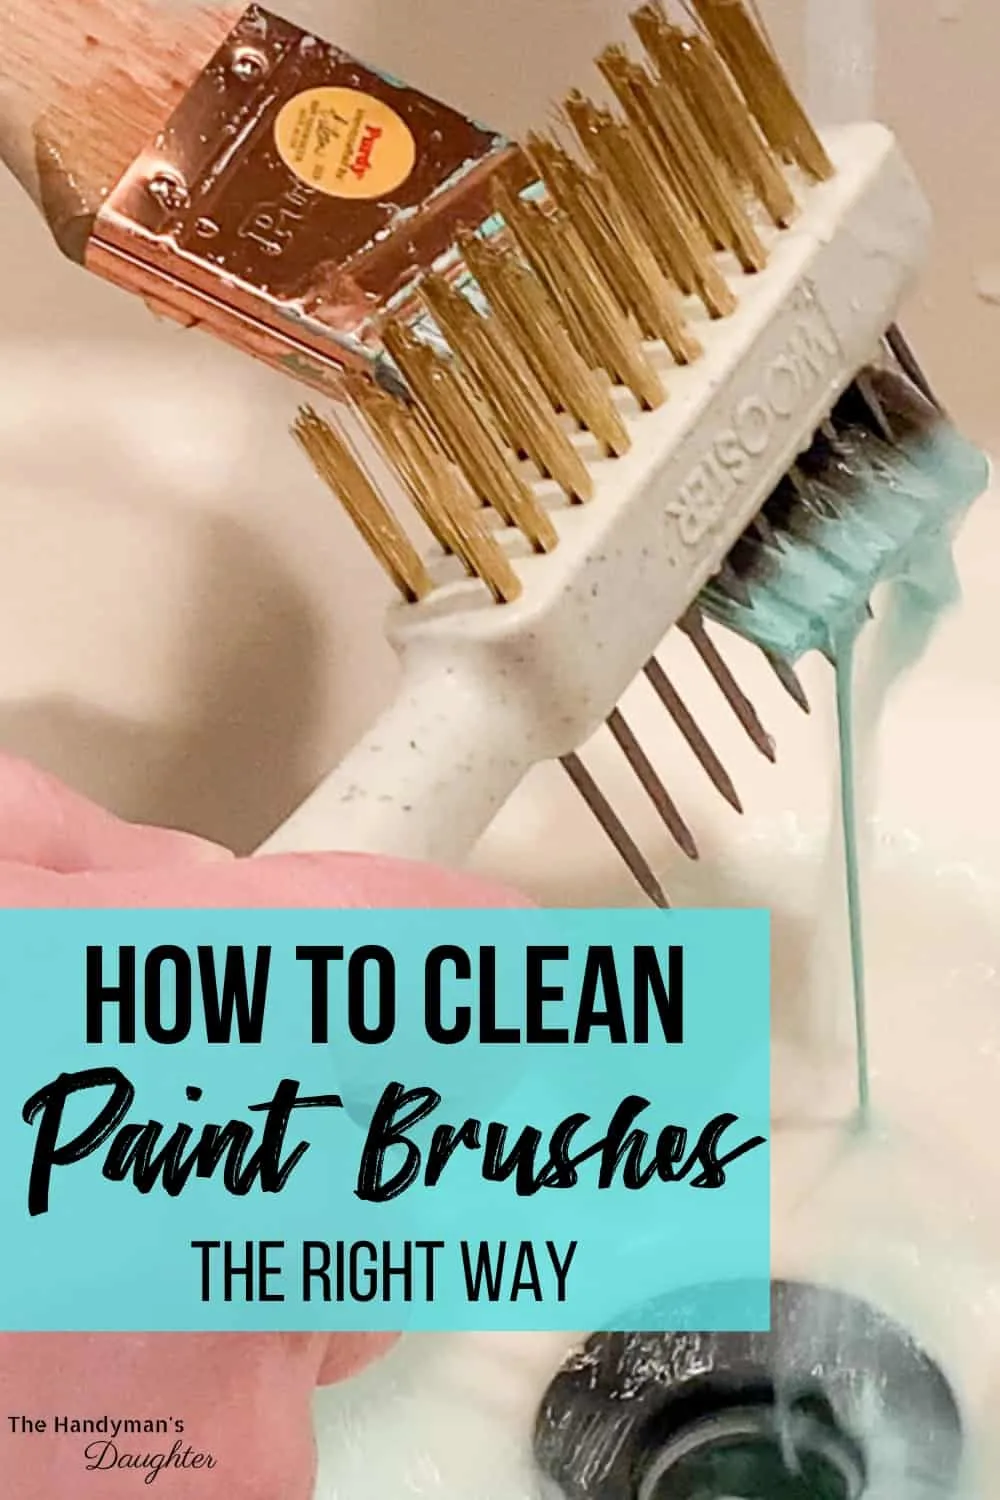
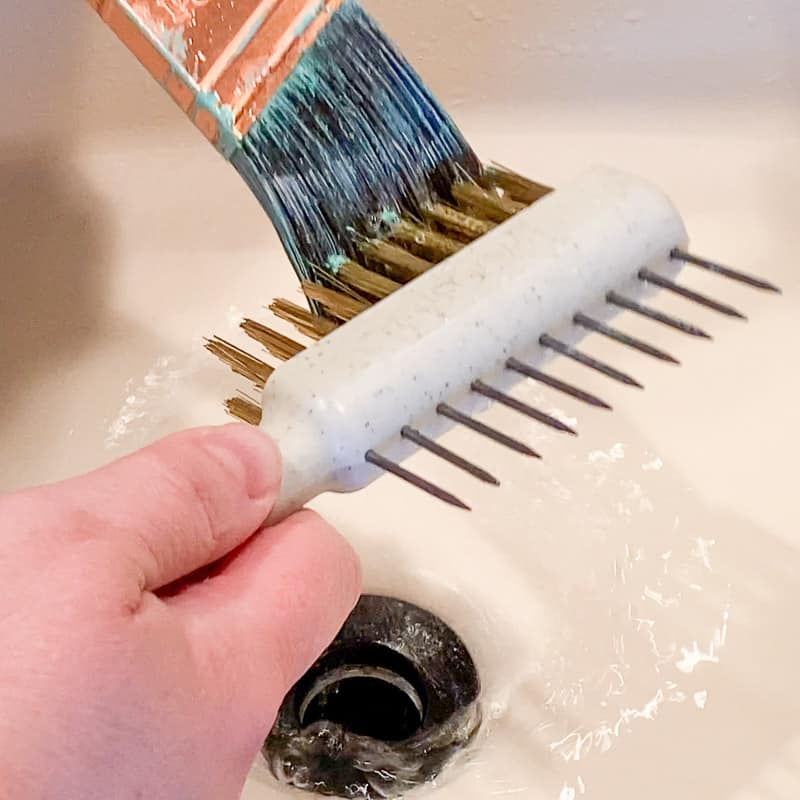
Use a Brush Comb
I was constantly frustrated by those little flecks of dried paint that stubbornly refused to get off my paint brush until I discovered this little tool!
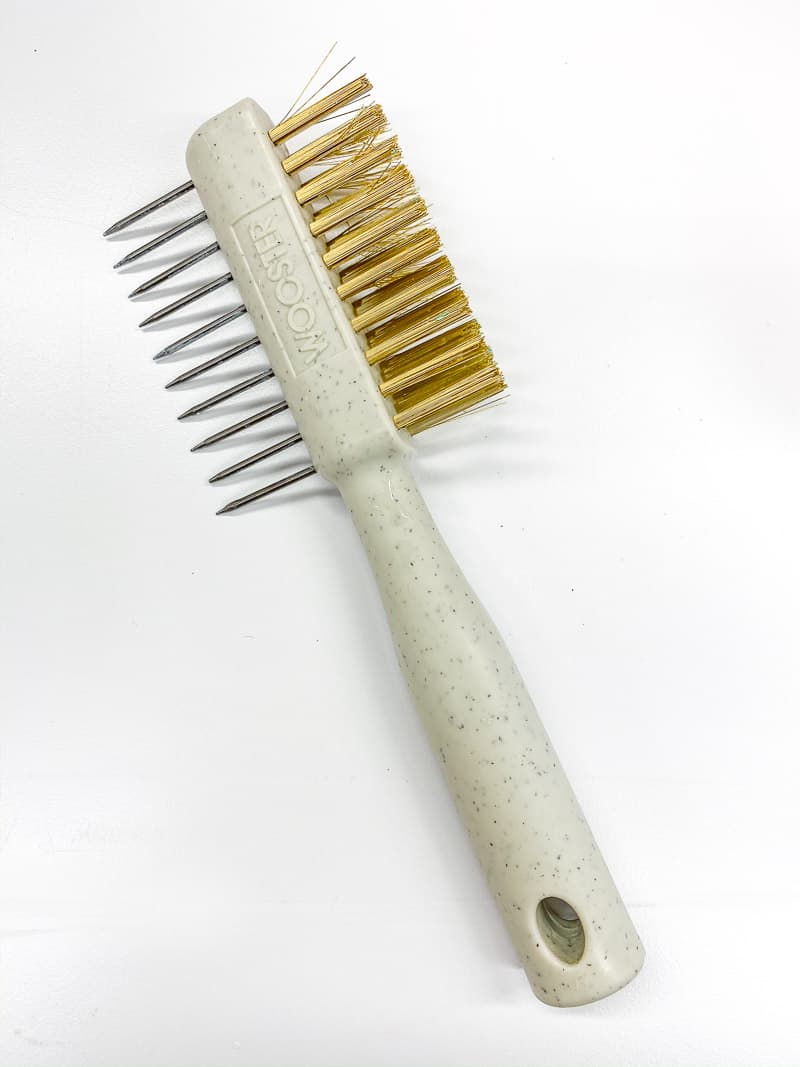

The fine bristles work out those dried blobs of paint, keeping the brush fresh for the next project! You may be tempted to use a wire brush instead, but the harsh wire will most likely fray the ends of the bristles.
The wider comb side pushes paint out of the center of the brush and straightens out the bristles. Those sharp edges are crucial for cutting in, so you need to prevent them from curling.
Dry with a Brush Spinner
High quality brushes are coveted for their ability to soak up paint and distribute it evenly. But that same effect also happens with water when you wash it! The bristles drink up all the water they can, and it takes forever for them to drip dry.
A brush spinner makes drying time much faster, so you can put away your brushes or switch to a new color in a few seconds. Just insert your clean, wet brush into the spinner, lower it into a bucket (so you don't get wet!) and give it a spin!
Here's a quick tutorial on how to use this handy tool! It also works on paint rollers, so you can rinse and reuse the cover.
Use the Brush Wrapper for Storage
Ever wonder why your fancy brush came with a nice wrapper that has a Velcro closure? Don't throw it away! It's actually an important part of the brush!
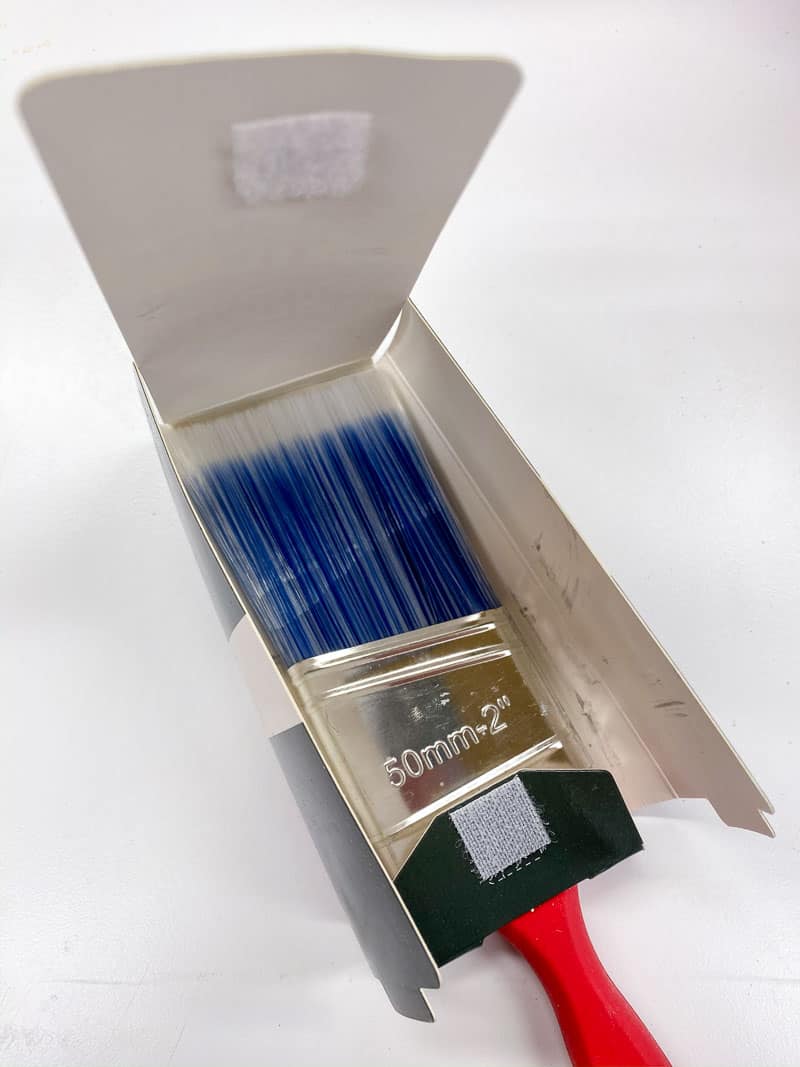

Once the brush is clean and dry, place it back in its wrapper and close it up. The shape of the cardboard will keep the bristles straight and prevent loose pieces from sticking out the sides.
If you've already thrown yours away, you can also use a piece of paper or thin cardboard to wrap the bristles. Fold the paper so that it doesn't bend the bristles, but tight enough to support the shape of the brush as it is drying. Secure the paper with tape, then store it away until your next painting project!

How to Clean Latex Paint Brushes
Most paint you use on the walls of your home is latex paint, which is water soluble. Soap and water is all you need to get your paint brushes clean!
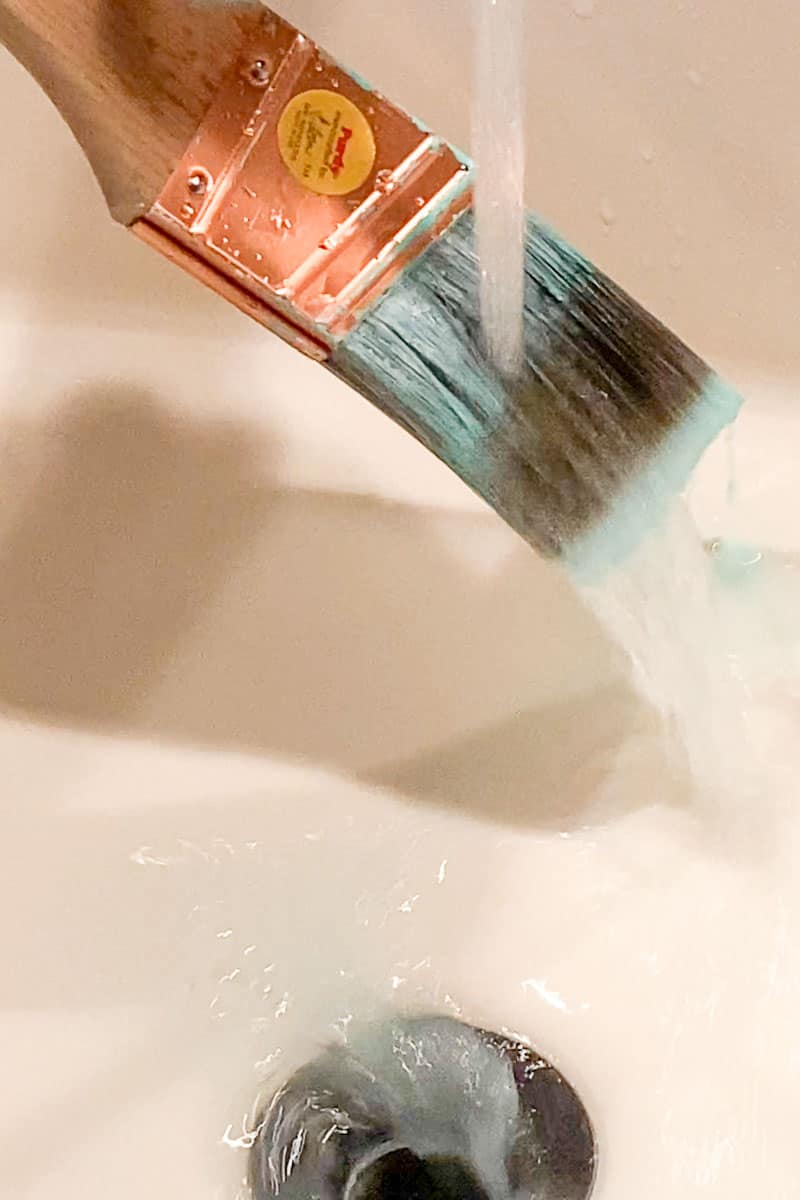
Rinse out the Brush
After working out all the paint and giving it a soak, let the water from the faucet run from the base of the bristles towards the tips. This will prevent the water pressure from bending and tangling the bristles.

Use a Brush Comb
Work the paint free with your hands and the wide side of the brush comb. You want to get the paint out of the middle of the brush, not just the outside bristles.

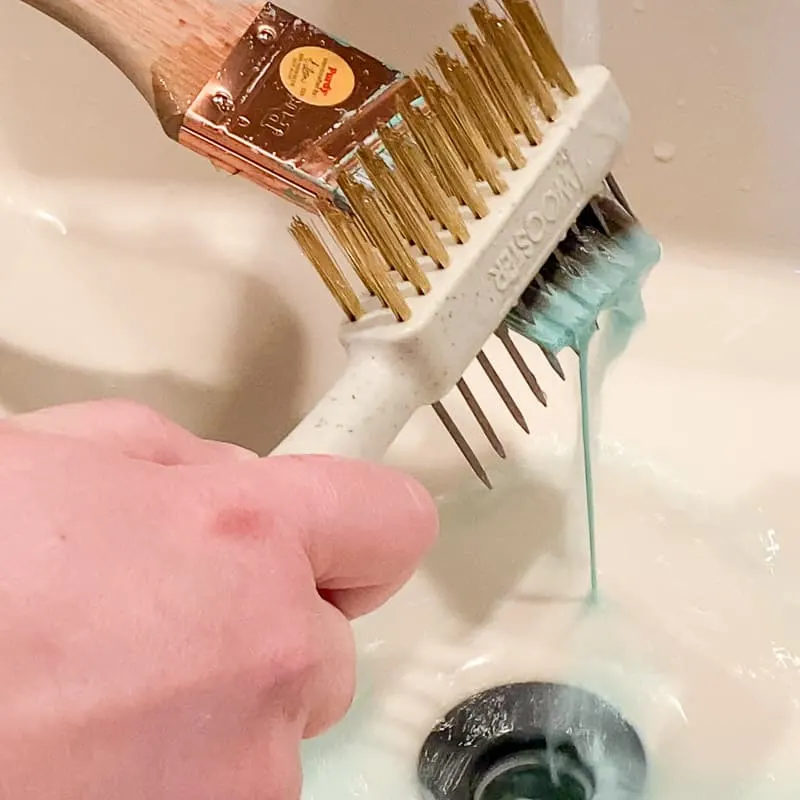
Use the finer bristles of the brush comb to work out bits of dried paint that might have built up on the outside of the paint brush.

Dry the Brush
A brush spinner is the fastest way to get a paint brush dry. But you can also let it drip dry on the edge of the sink, or use the magnet in the Handy Paint Pail to hold it in place.

Store the Brush Properly
Store the paint brush inside the packaging, or wrap it in paper to keep the bristles straight and dust-free.
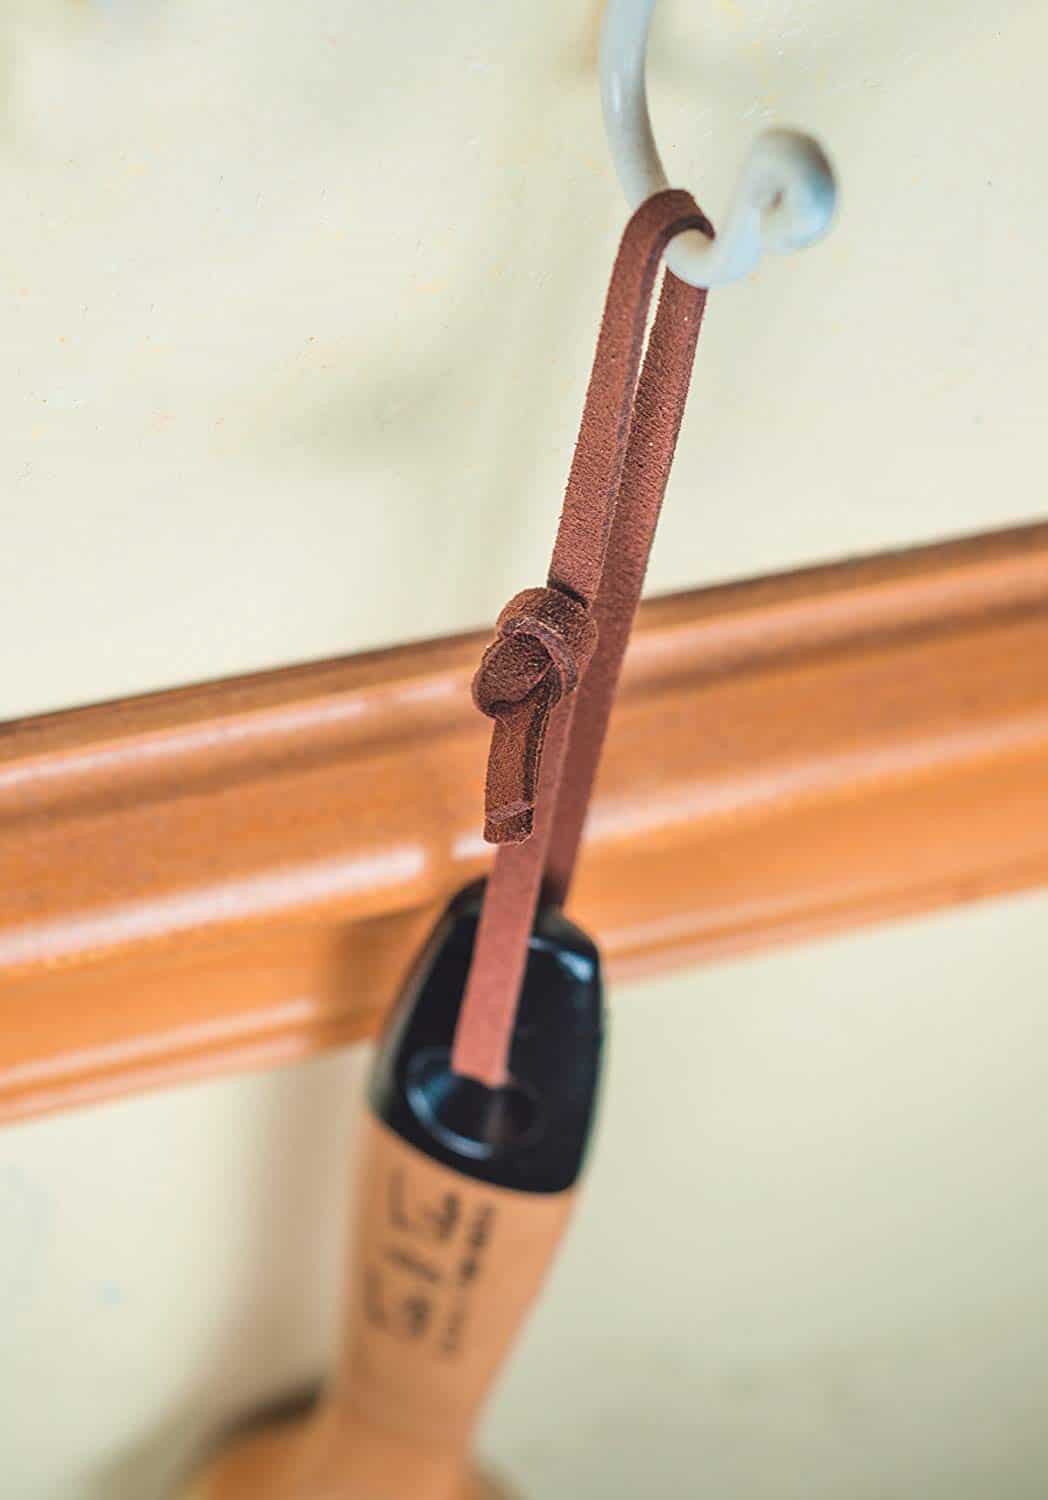
How to Clean Chalk Paint Brushes
Since chalk paint is water-based, the process for cleaning your brushes is very similar to latex (see above). The only difference is the way you should let it dry.
Chalk paint brushes are typically round or oval shaped, so if you were to wrap them, you might harm their natural form. Instead, just hang them from the rope at the end of the handle so the bristles are pointing down.

Go Clean Those Paint Brushes!
As you can tell from these photos, I had a few different paint brushes that were all in need of cleaning! I've been busy with lots of painting projects while stuck indoors, like the wall behind these adjustable wall shelves and the cabinet below them. Writing this article forced me to get them all clean before they turn into bricks!
If you have dried paint brushes that you're hesitant to throw away, have no fear! I have another tutorial for how to save those expensive paint brushes coming soon!
Check out these other painting tutorials!