Learn how to make a home climbing wall for both kids and adults! This tutorial walks you through all the steps for a DIY indoor climbing wall.
My son is on a competitive climbing team (yes, it's a thing!), and usually spends hours every week scaling the walls at his bouldering gym. But at home, his only option was his hangboard. After a while, it just wasn't enough to calm his climbing cravings!

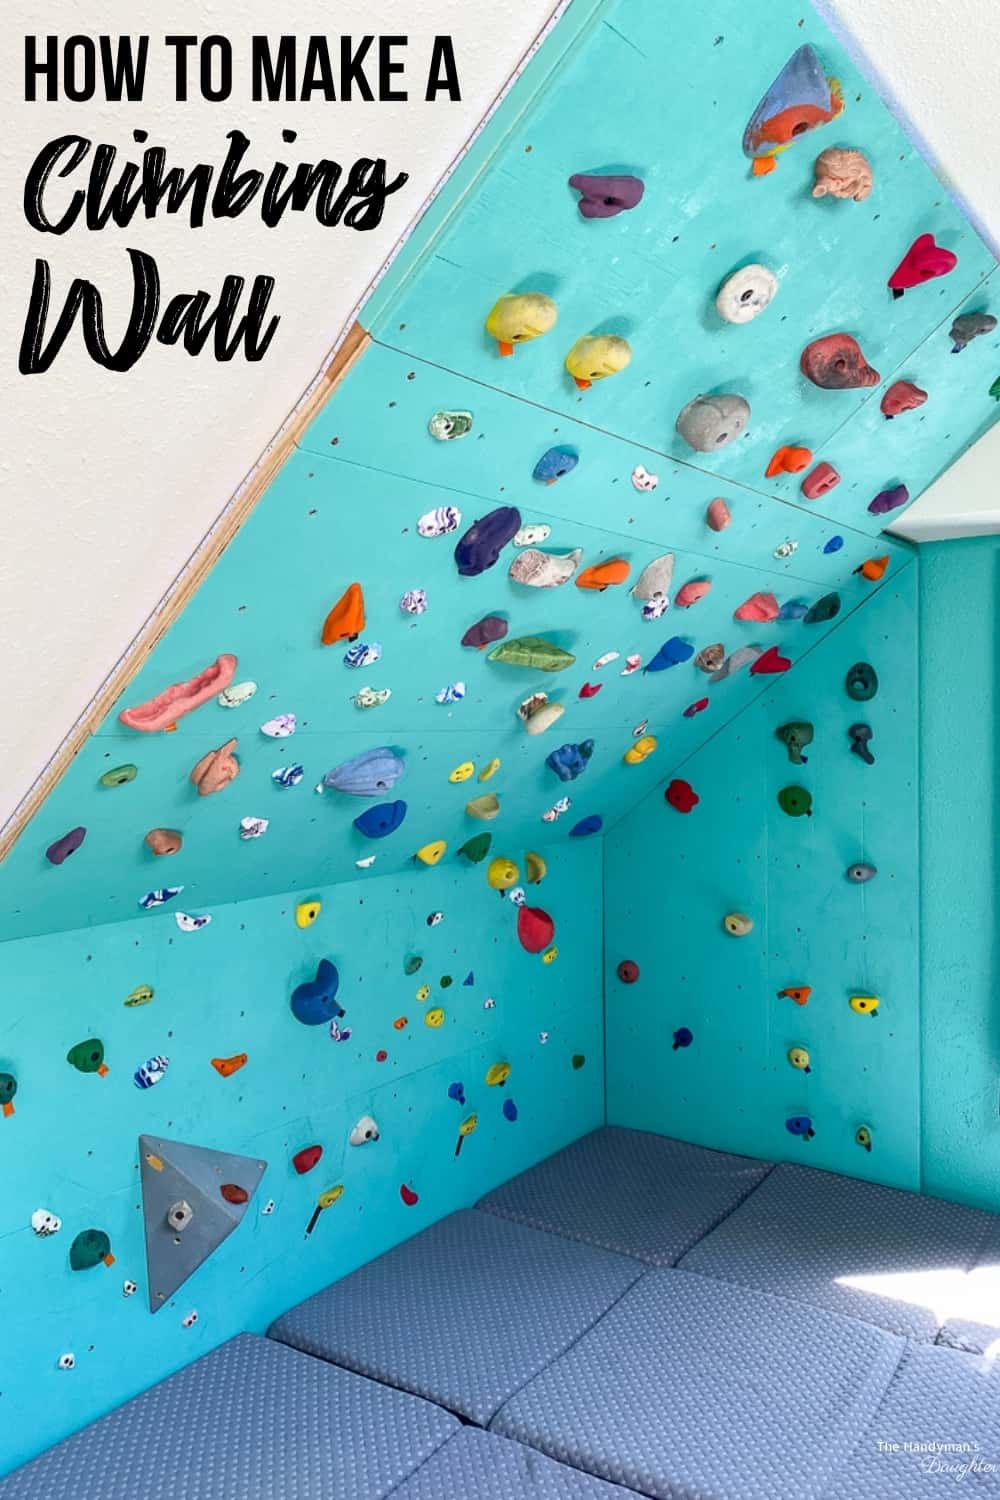
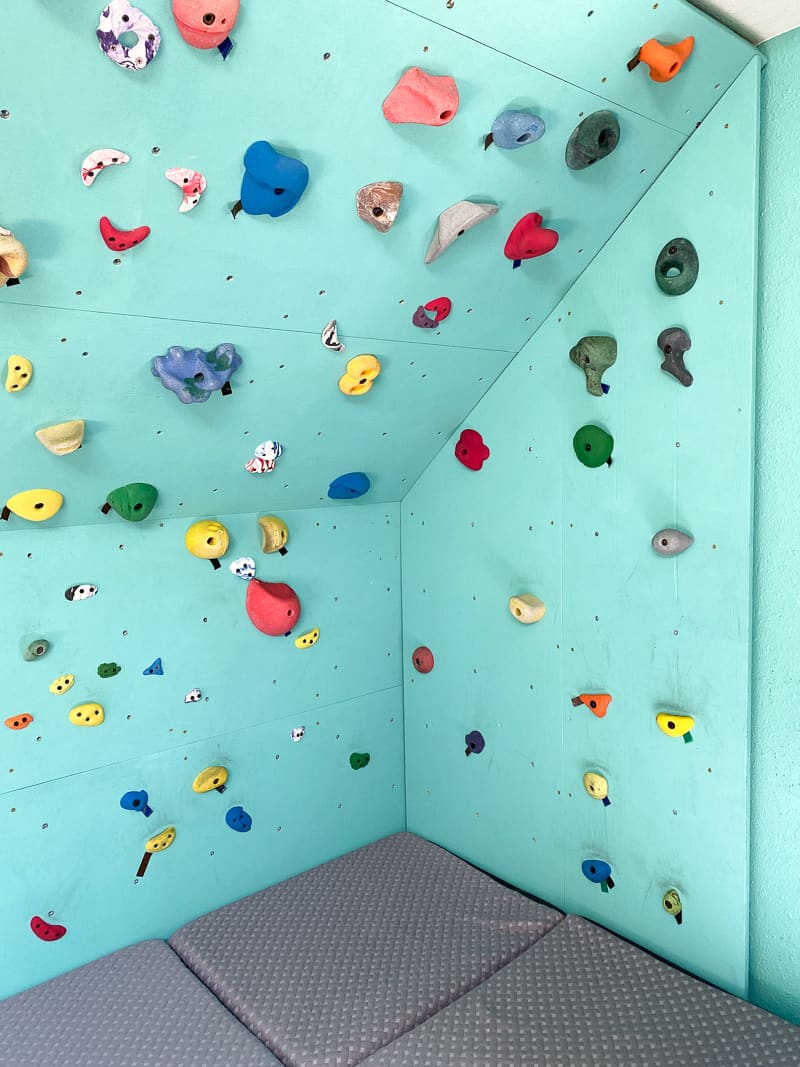
His bedroom has steeply sloped ceilings that follow the roof line. They're just screaming for a challenging climbing wall to be installed! You could easily make an easier version on a vertical wall for kids, or create a frame to simulate the same angle. All you need are some 2x4s and a few sheets of cheap plywood!
This post contains affiliate links for your convenience. Purchases made through these links may earn me a small commission at no additional cost to you. Please visit my disclosures page for more information.
Materials Needed for a Home Climbing Wall
- 2x4 studs
- ¾" plywood sheets
- Stud finder
- Level
- Circular saw
- 3" construction screws
- ⅜" T-nuts
- I prefer these ones that are screwed to the back of the plywood, so they don't loosen over time or fall out.
- Framing square
- ½" drill bit
- Epoxy paint
- My son's climbing gym staff recommended Sherwin-Williams Pre-Catalyzed Water Based Epoxy because it's really durable and won't peel off.
- Play sand
- Paint tray and roller
- Drill
- Lots of climbing holds
- Crash pads
- I used these folding foam mattresses, which are 6" thick and can be stacked up against the wall when he's not using it. They're thicker than the bouldering crash pad he uses for outdoor climbing, and work great for this small wall. Added bonus: He can also use them for sleepovers! 🙂
How to Build a Climbing Wall
I highly recommend that you start by reading this book first! It will give you WAY more information than I can provide in this tutorial, and has lots of tips for how to create angled walls if you don't already have them.
Buy the lumber
My local lumber yard will cut plywood and deliver it straight to our driveway, which is sooooo much easier than trying to shove it all in the car myself! I can't get full sheets of 4'x8' plywood up the stairs due to the tight turning radius, so I had them cut each piece in half to create 2 foot by 8 foot panels.
You don't have to buy expensive, sanded plywood for this project. In fact, the rougher, the better! The knots and cracks, once sealed, will create a more natural texture that simulates real rocks.
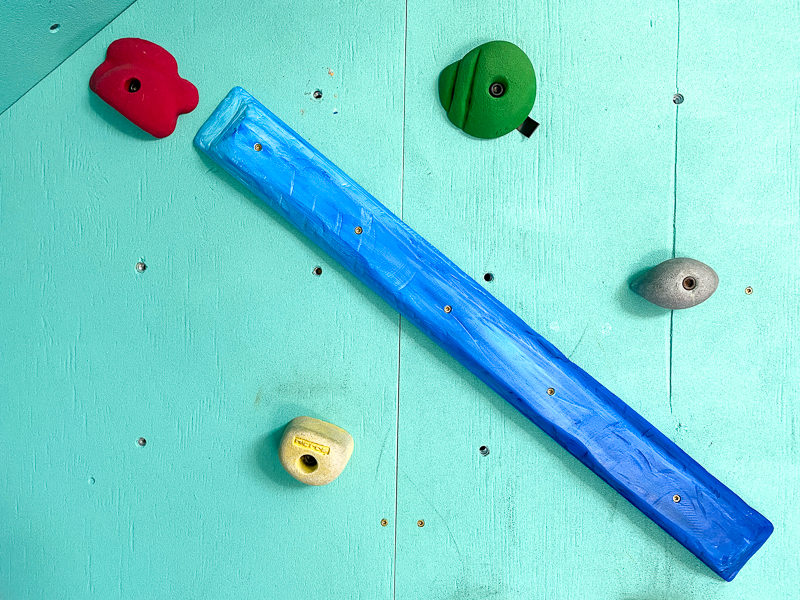
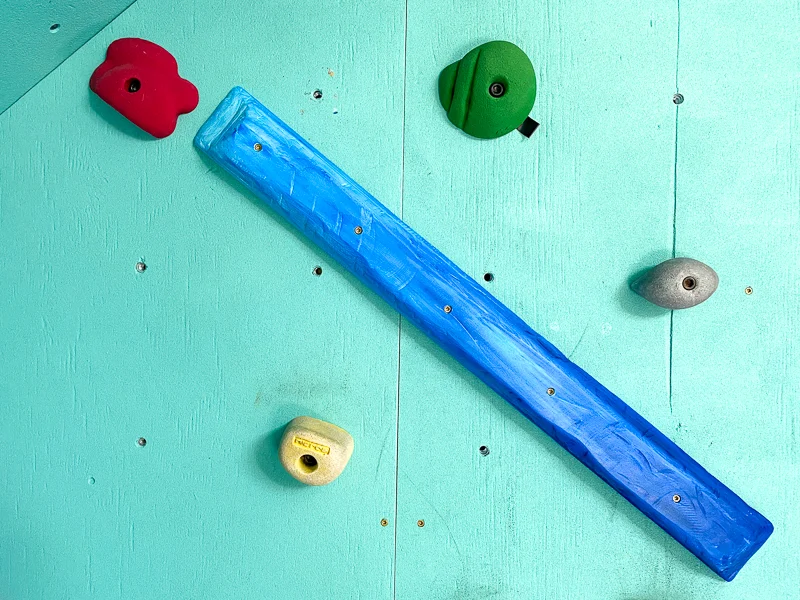
Don't forget to save all your scrap pieces as you go! You can use the plywood to create volumes and to make your own wooden climbing holds like this rail.
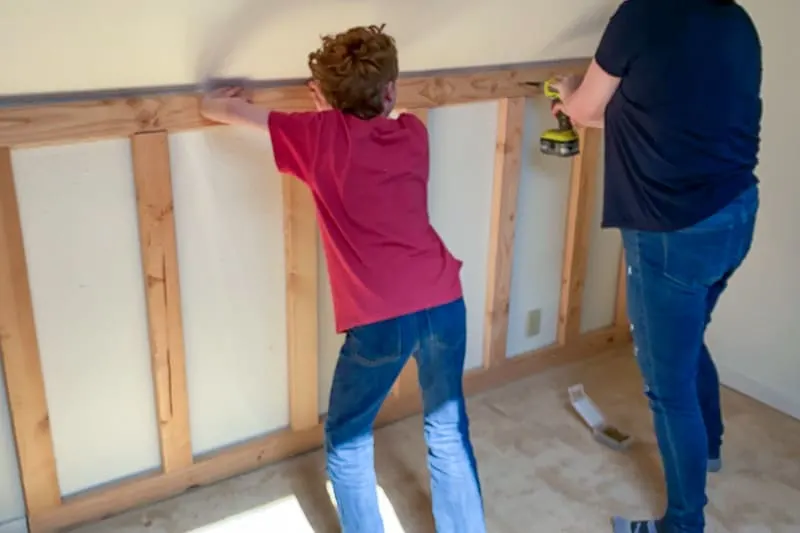
Build the frame
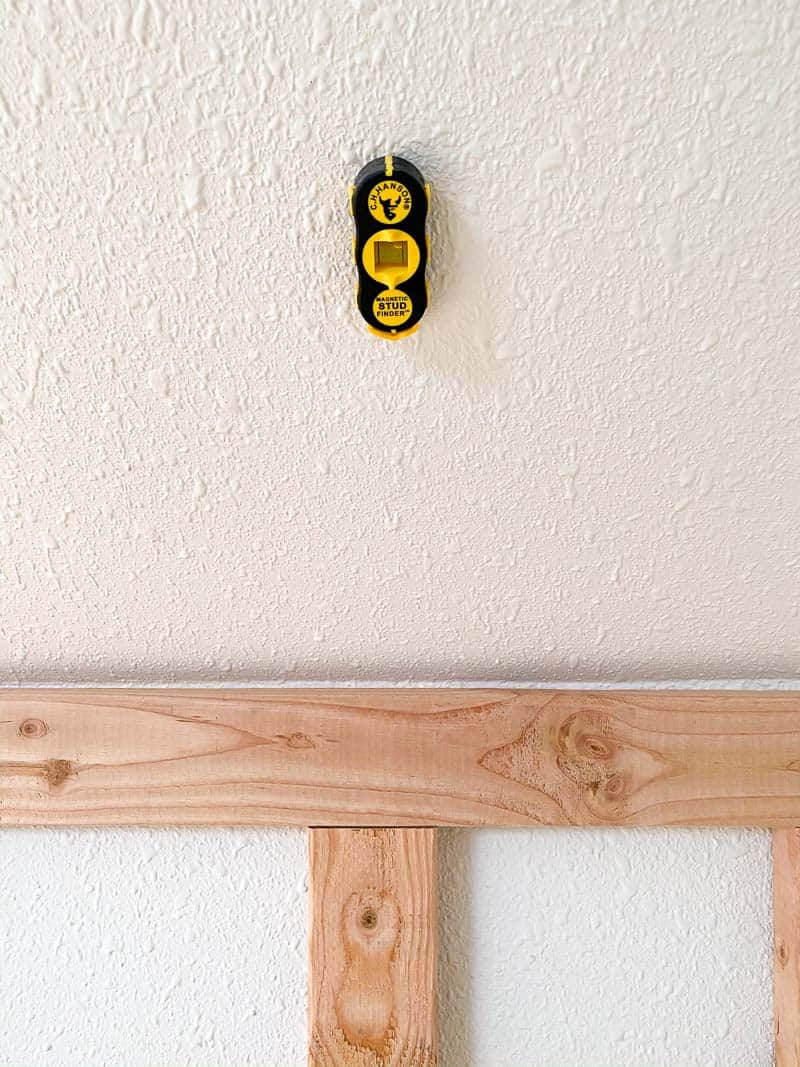
Every 2x4 I used for the frame of the climbing wall is screwed directly into the studs and joists of the house. Use a stud finder to locate each one, and mark its position on the wall. My electronic stud finder was giving me a lot of false readings thanks to my heavily textured walls, but my little magnetic one worked perfectly!

It helps to sketch out the location of the studs in the wall, especially when the spacing is a little off. Your climbing wall frame needs to match the existing studs exactly, so your screws hit them dead center every time.
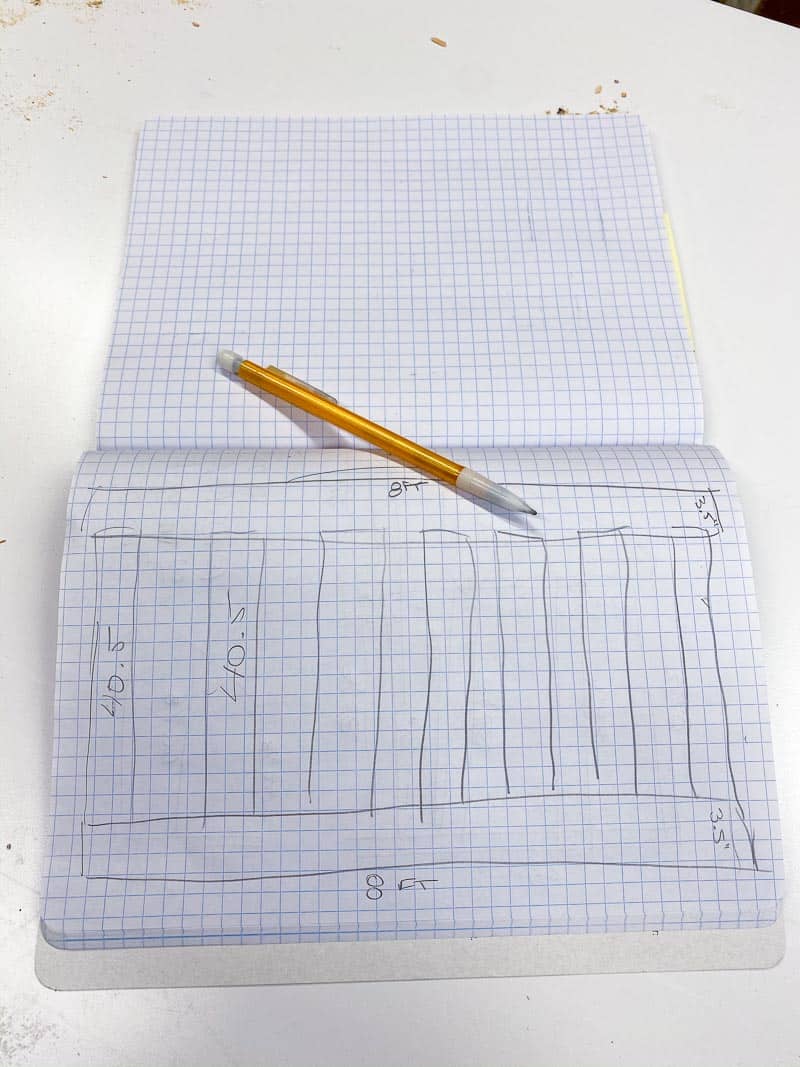
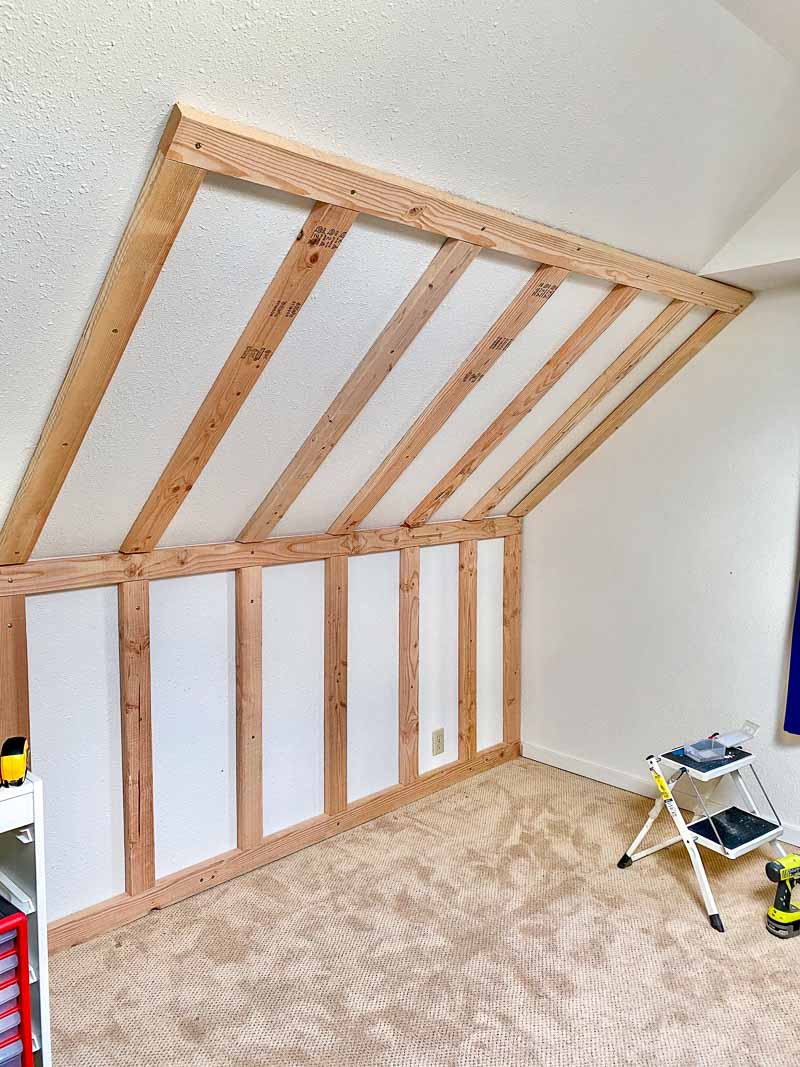
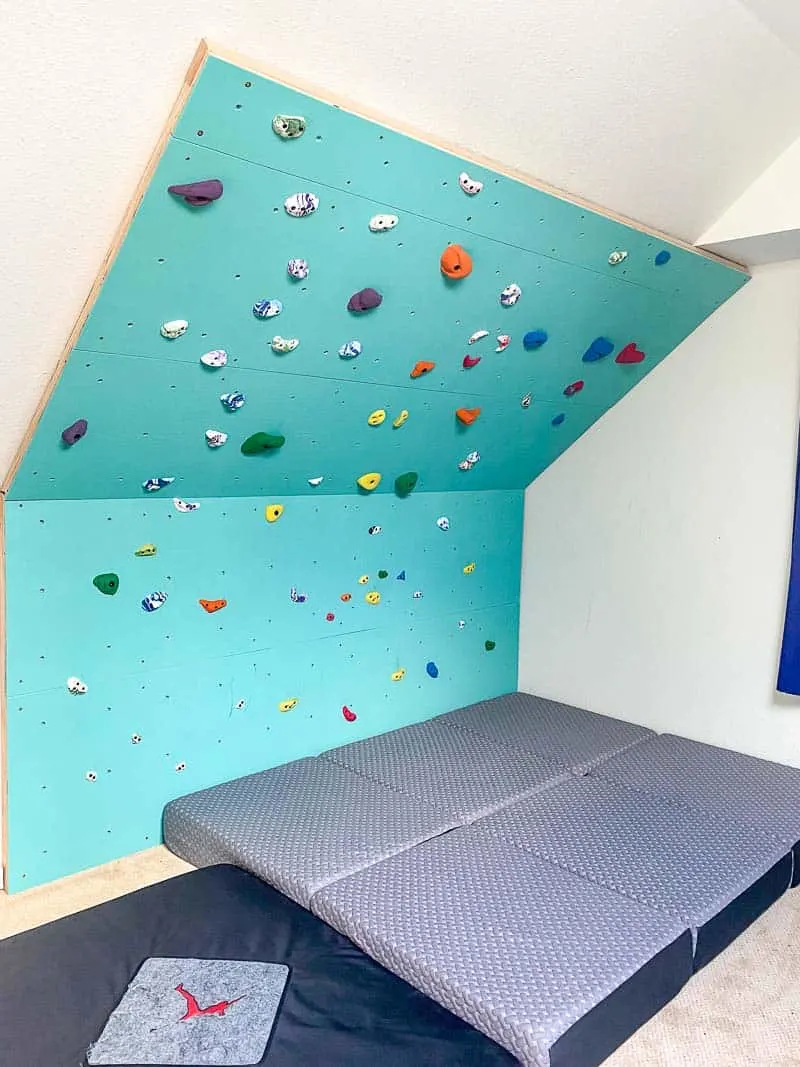
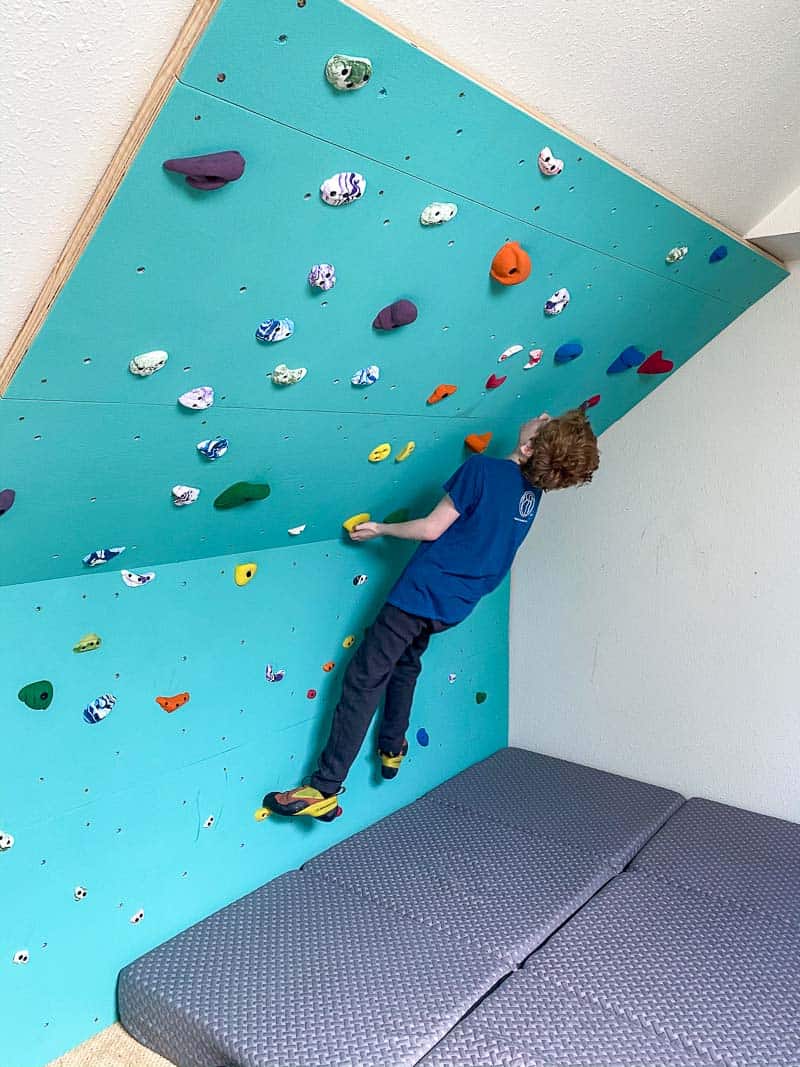
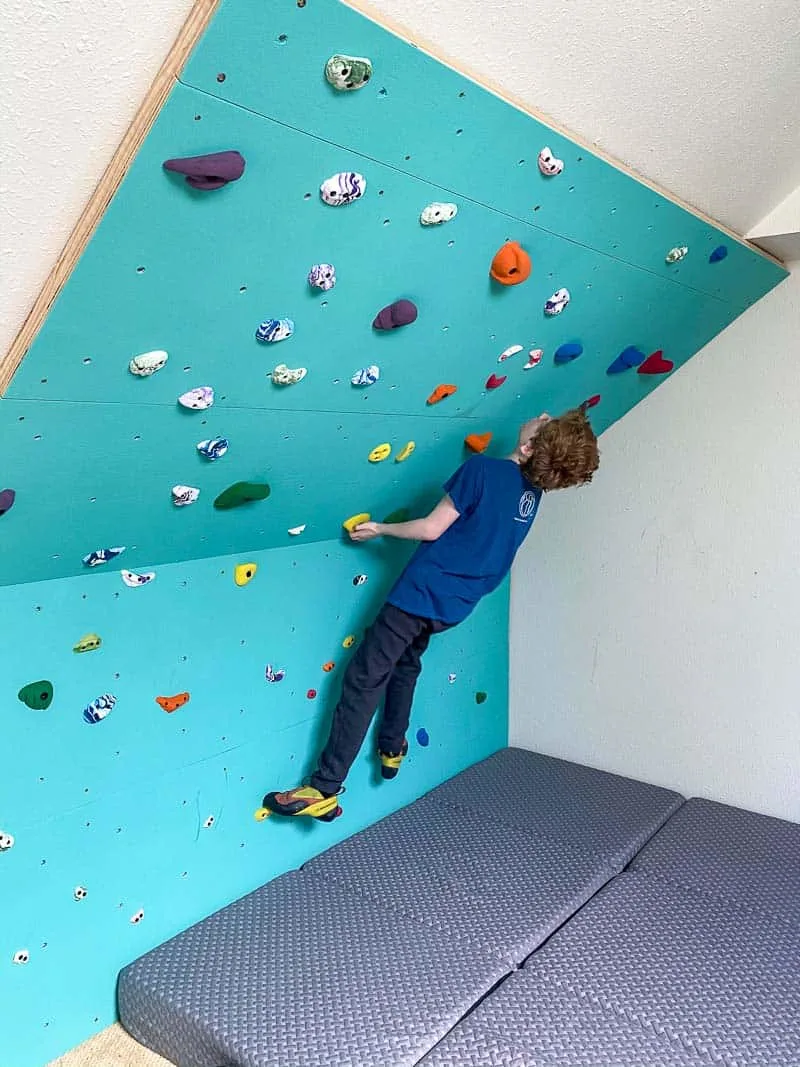
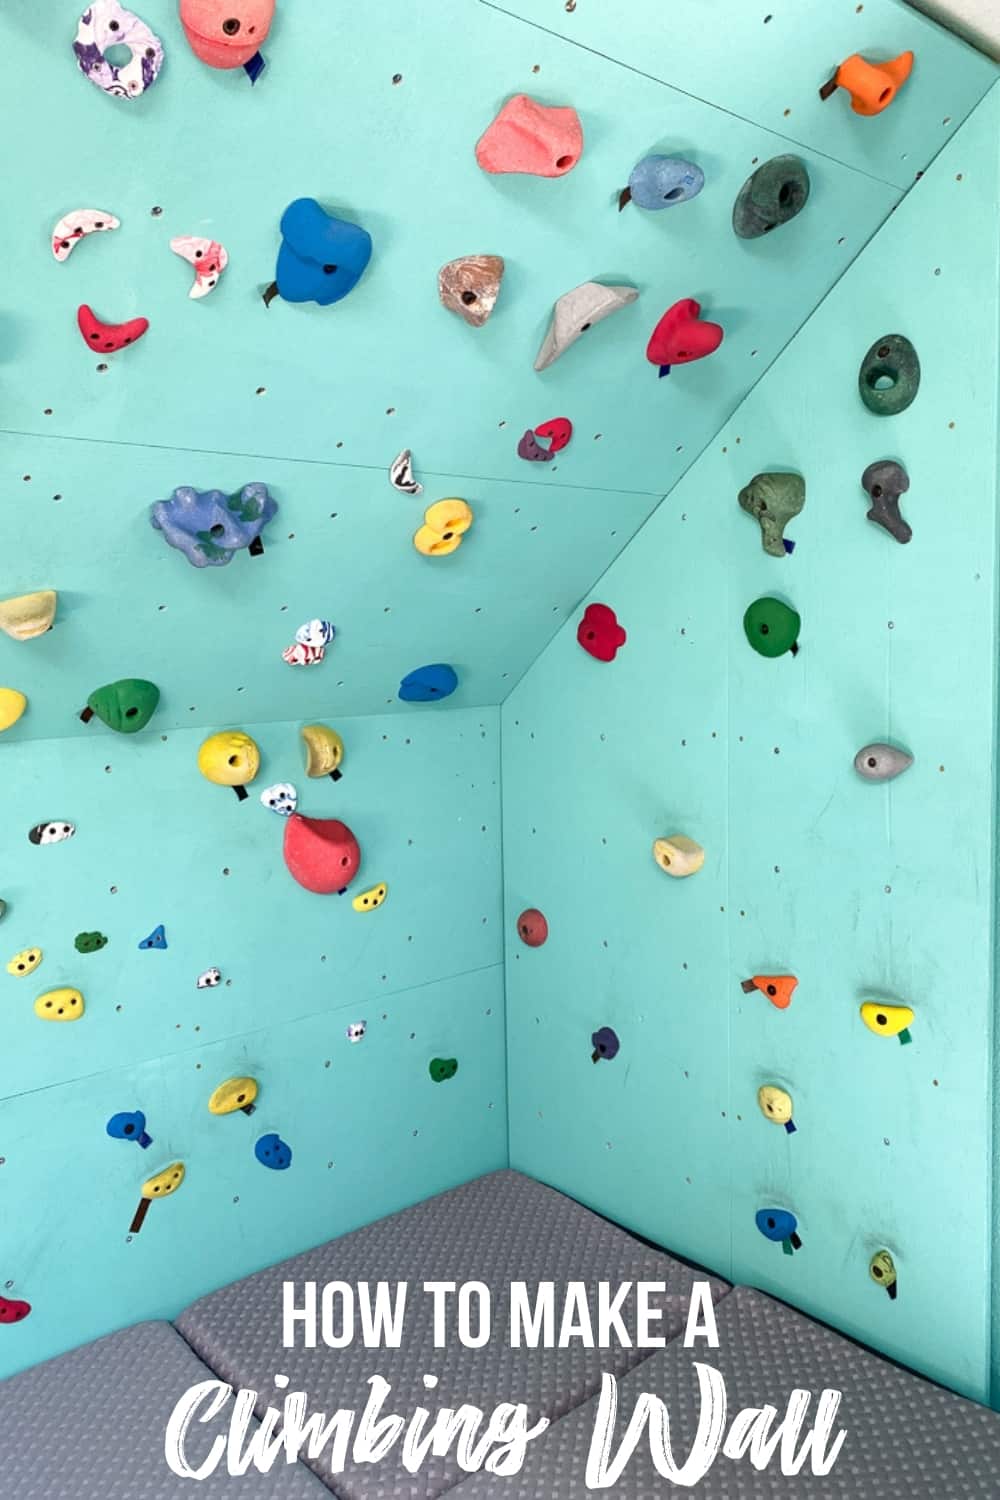
My home bouldering wall is exactly 8 feet wide, to take advantage of the entire length of a 2x4 or a sheet of plywood. I worked in two sections: the shorter vertical part of the wall and the longer angled part.
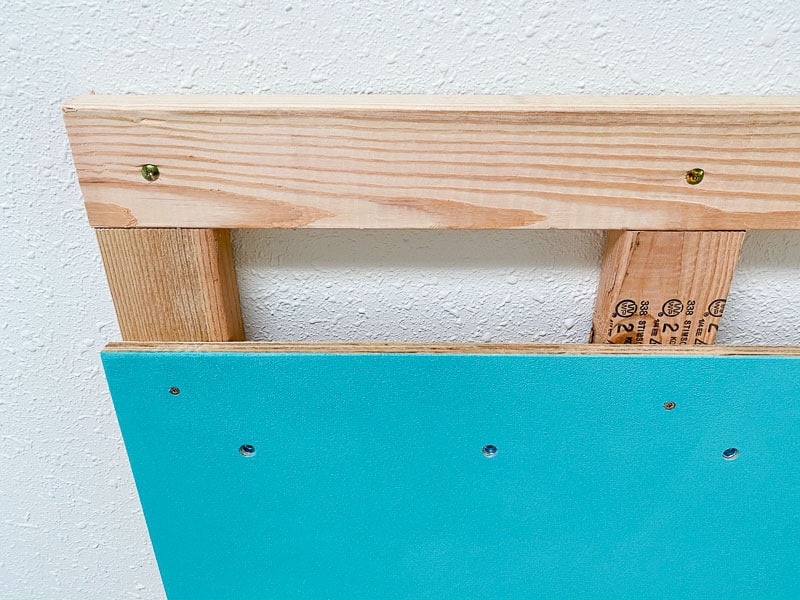
The vertical part is framed just like a regular wall. However, I changed the direction of the studs so they sit flat against the wall instead of sticking out. This helps save space in the room and prevents the screws from splitting the wood when you drill into them.
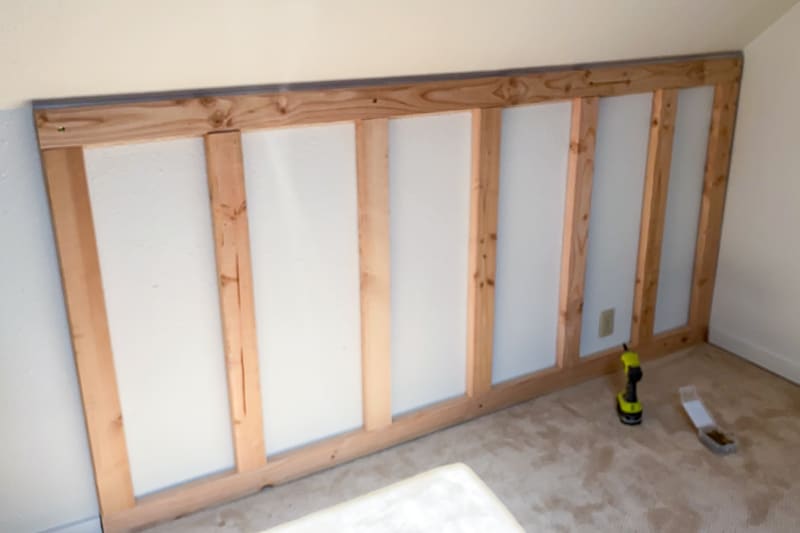
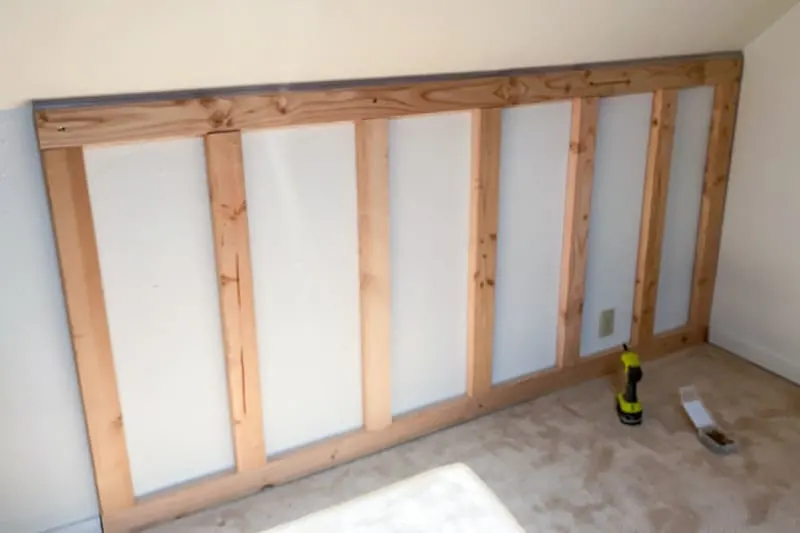
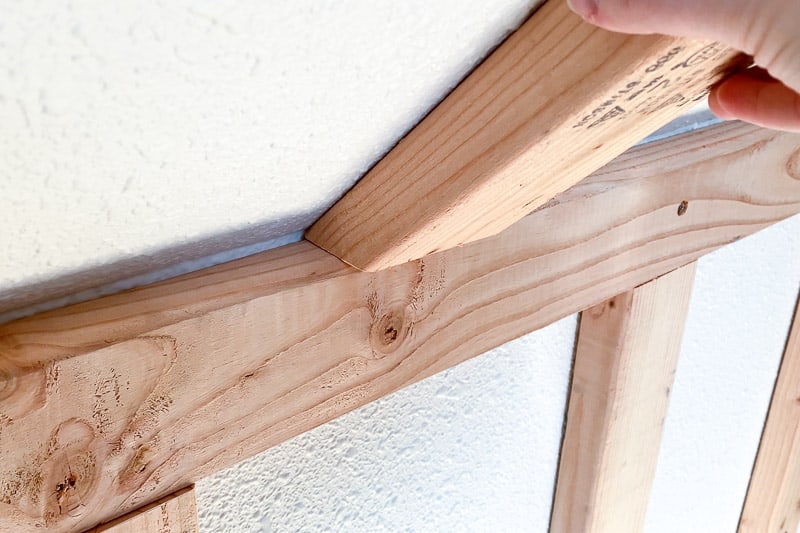
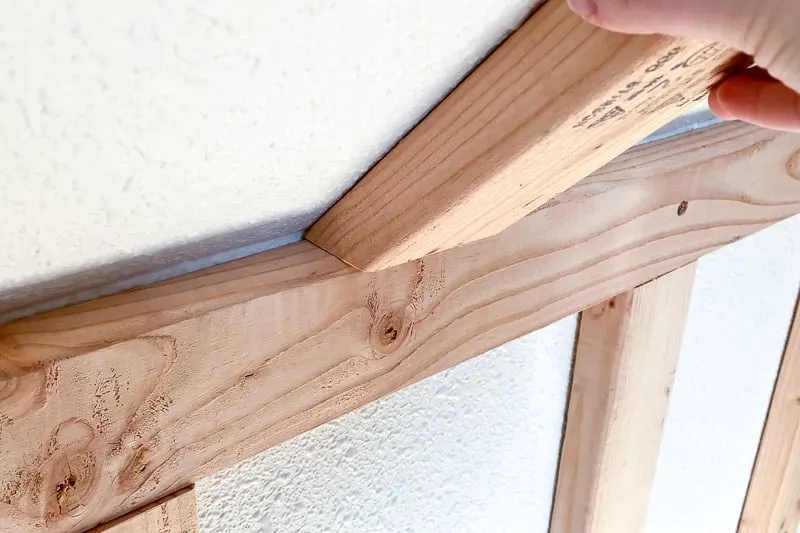
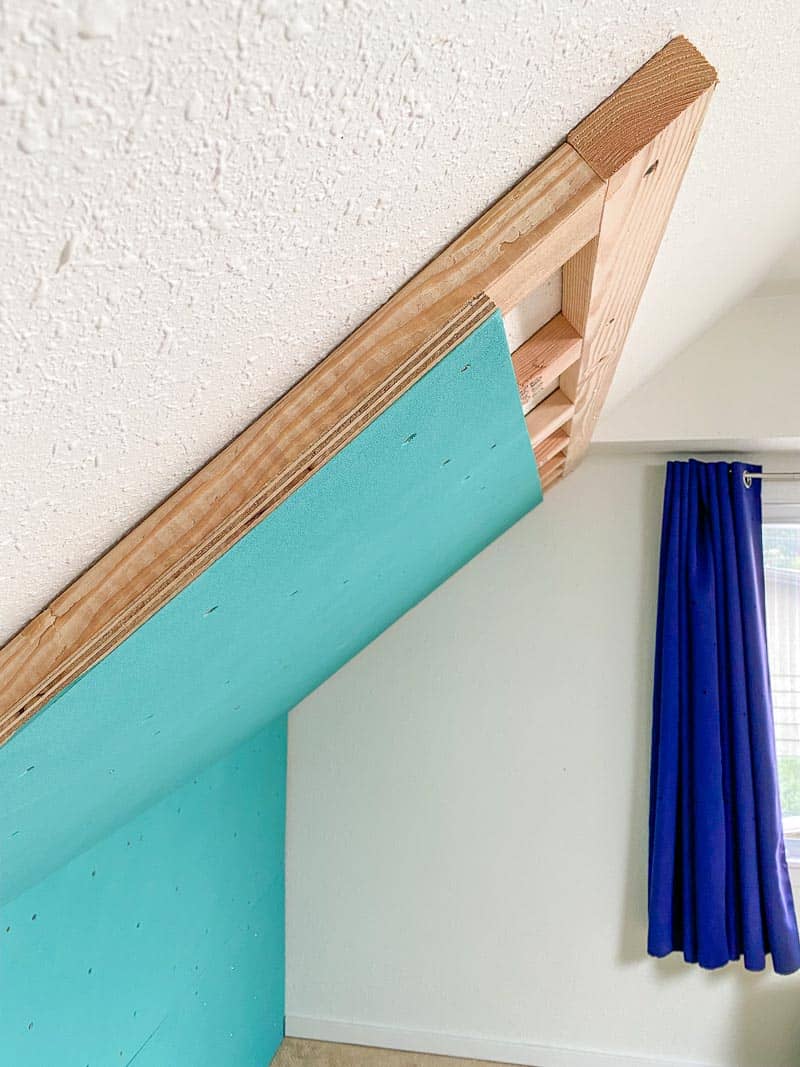
The angled part follows the joists in the roof. The ends of the studs are cut at a 45 degree angle to sit on top of the vertical section, but most of the stability comes from the structure of the house itself. Use a scrap piece of 2x4 to test the angle of the ceiling before cutting the full size pieces.
I drilled pocket holes in the ends of the vertical boards and used 2 ½" pocket hole screws to connect them together. You can use butt joints and regular 3" construction screws instead, but I was running low and didn't want to run out halfway through the project!
Screw the frame to the studs
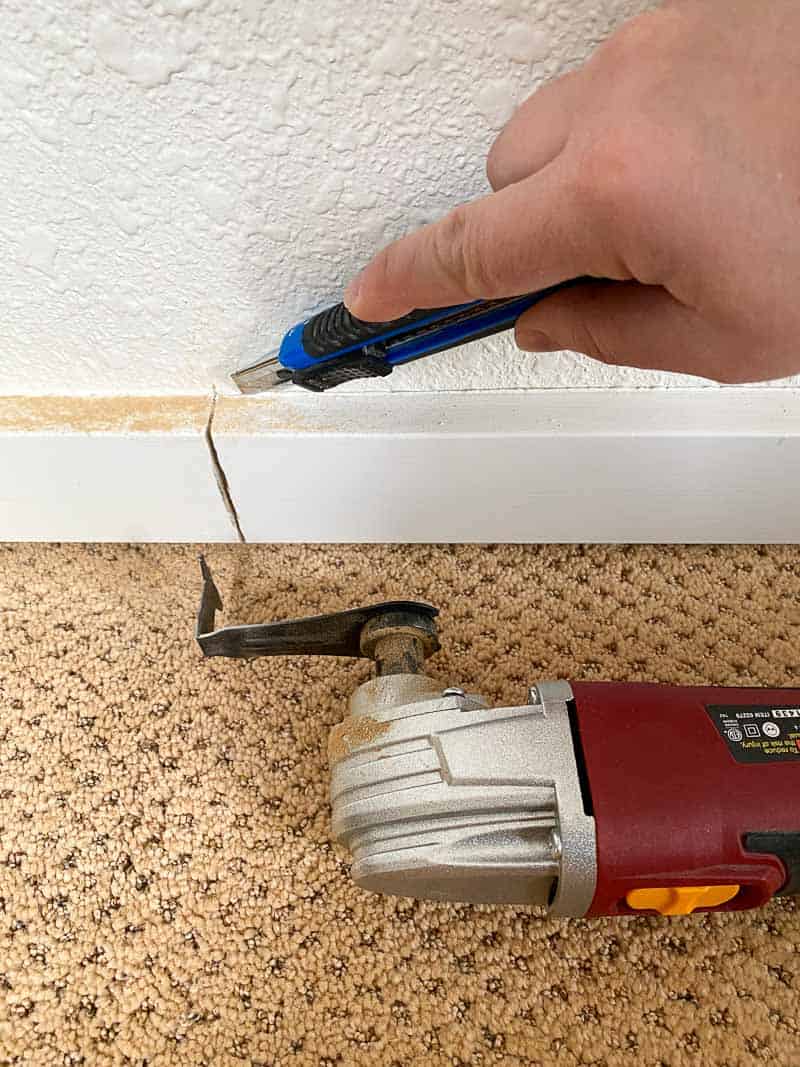
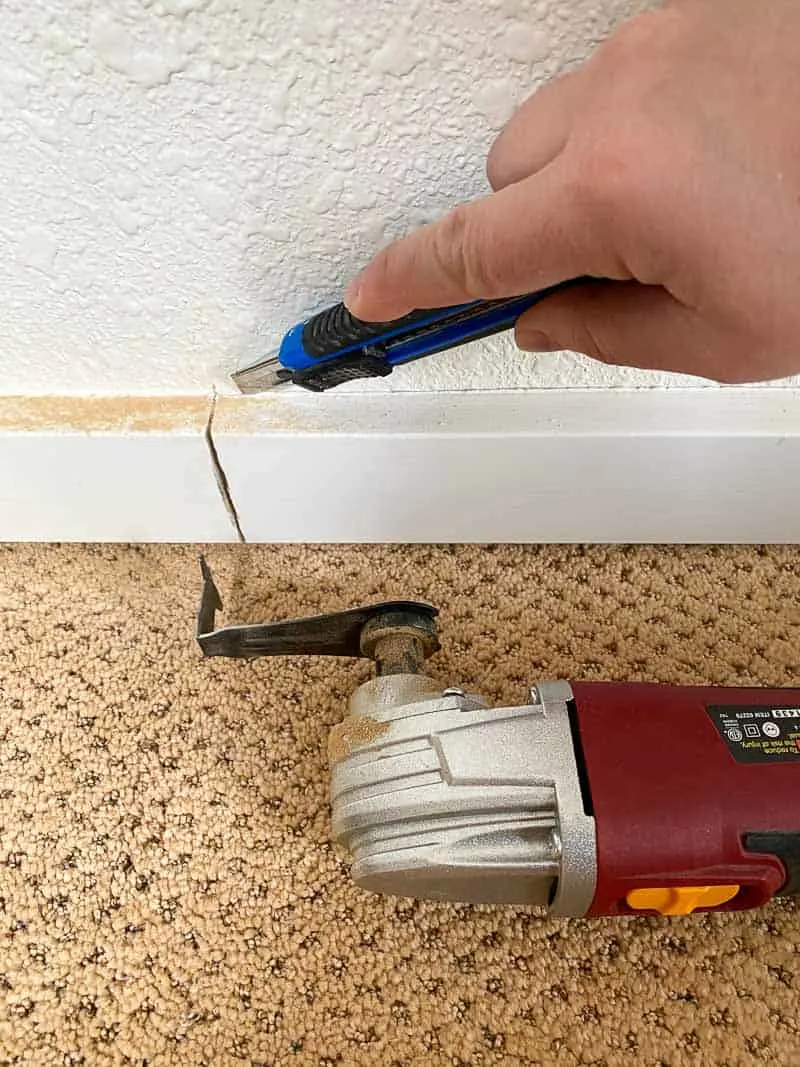
Before attaching the frame to the studs, remove any baseboards or moulding that might be attached to the wall. Use a multi-tool with an oscillating blade to cut the trim, then run a utility knife down the seam to break the caulk line. You can learn more about removing trim in this tutorial.
Hold the frame to the wall, lining it up with the marked studs. Use a drill or impact driver to screw 3" construction screws into the center of each 2x4 and into the studs in the wall. I went a little overboard and used a LOT of screws, but at least I know it's safe! 🙂

I preassembled the angled frame as well, but it was really hard to wrangle onto the wall. I recommend screwing each board in place separately, then attaching the board across the top last.

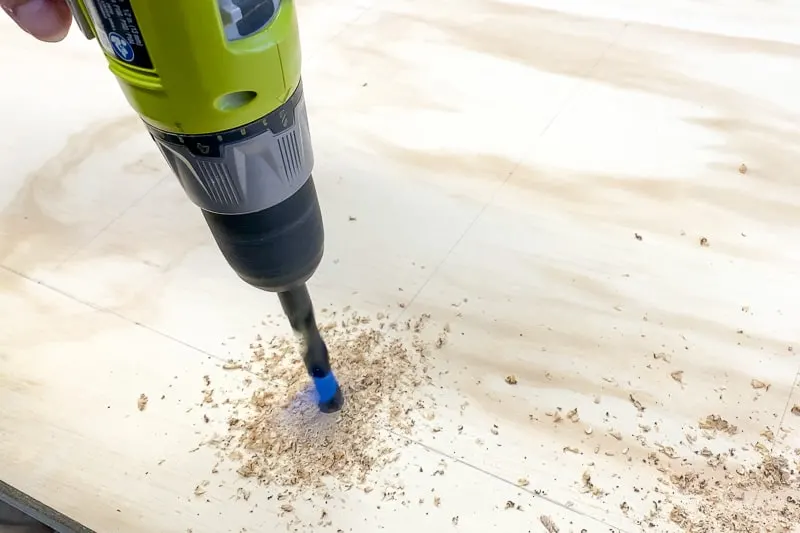
Drill holes for T nuts
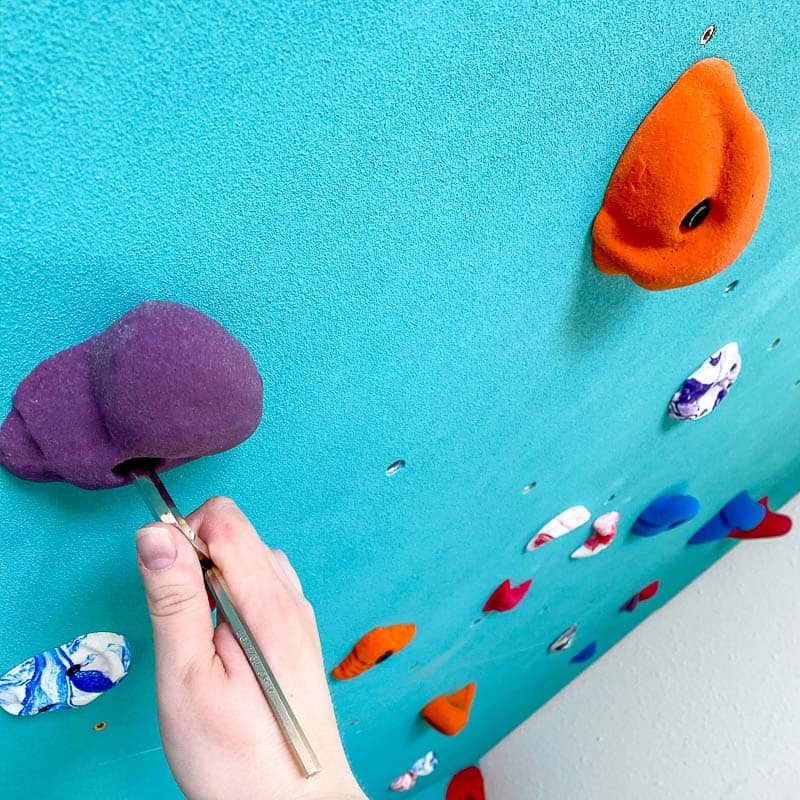
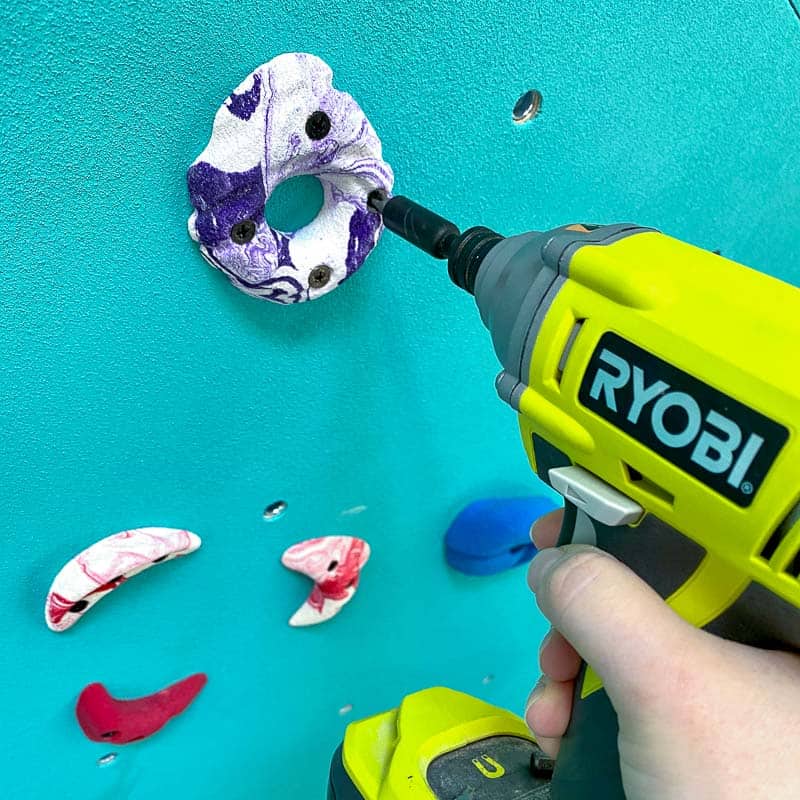
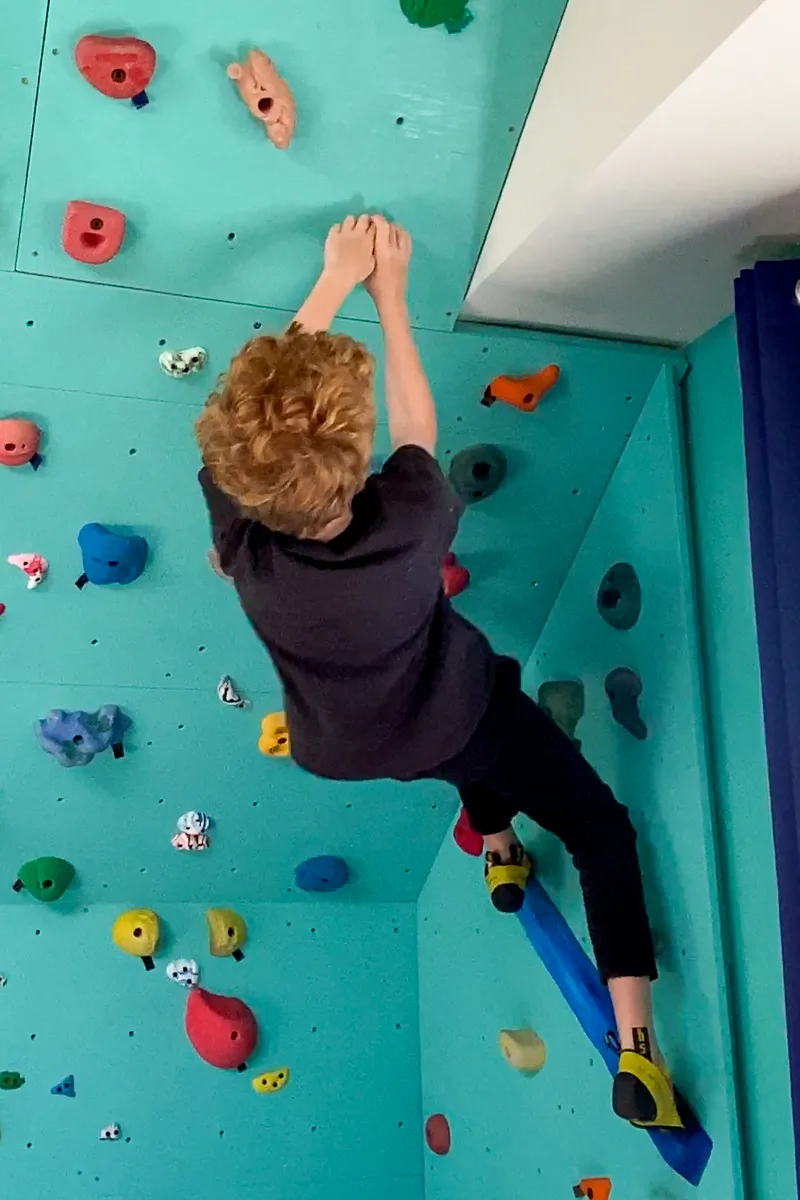
There are two types of climbing holds: screw-on and bolt-on. I prefer bolt-on holds, because they're easier to change out, they don't damage the climbing wall, and they come in a wider variety of shapes and styles.
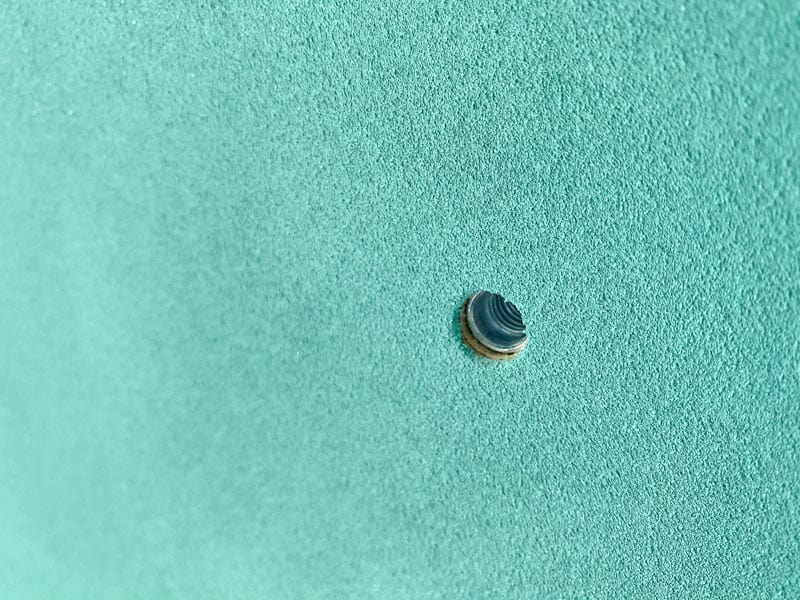
But you have to prepare your plywood panels for bolt-on holds before you install them! Bolt-on holds are screwed into T-nuts, which are installed on the back of the plywood. The threads are recessed into the holes, so the bolts can screw into them easily and securely.
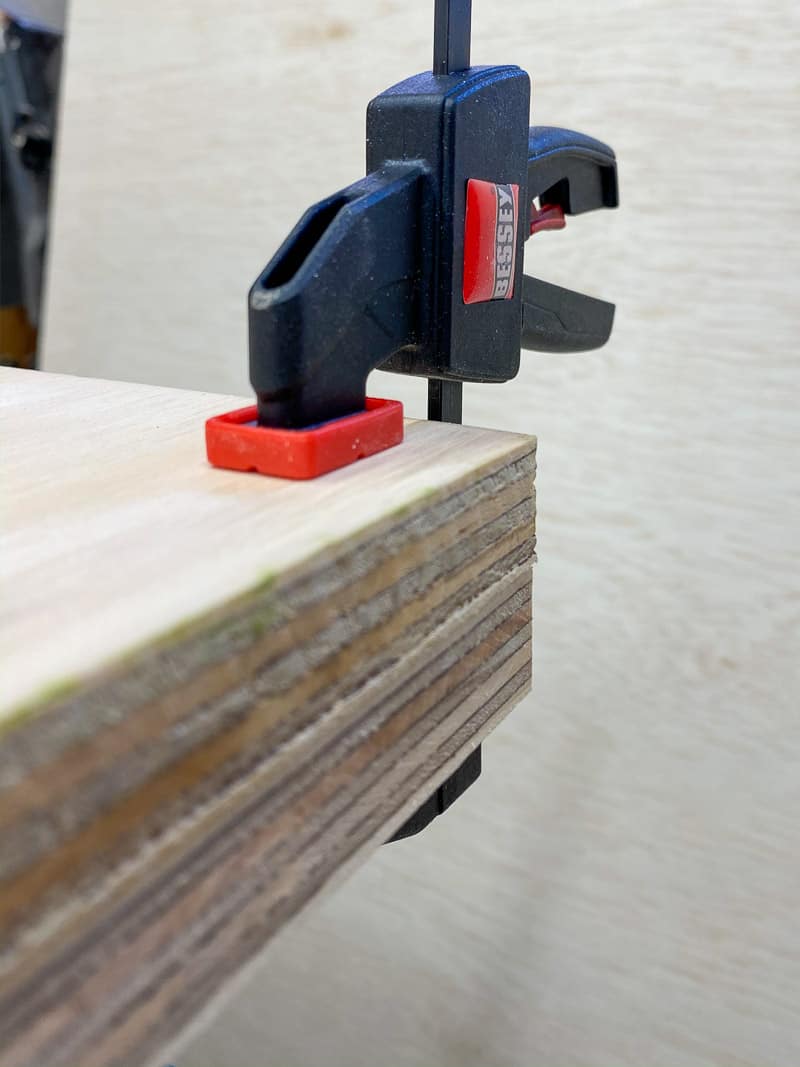
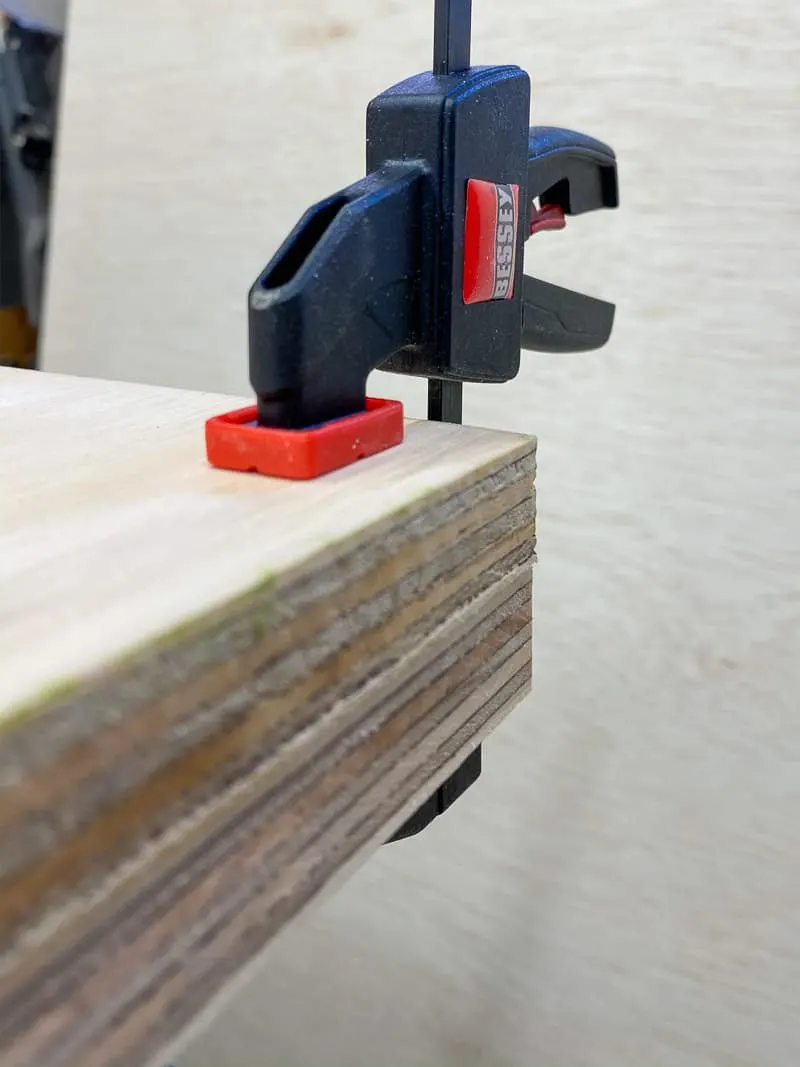
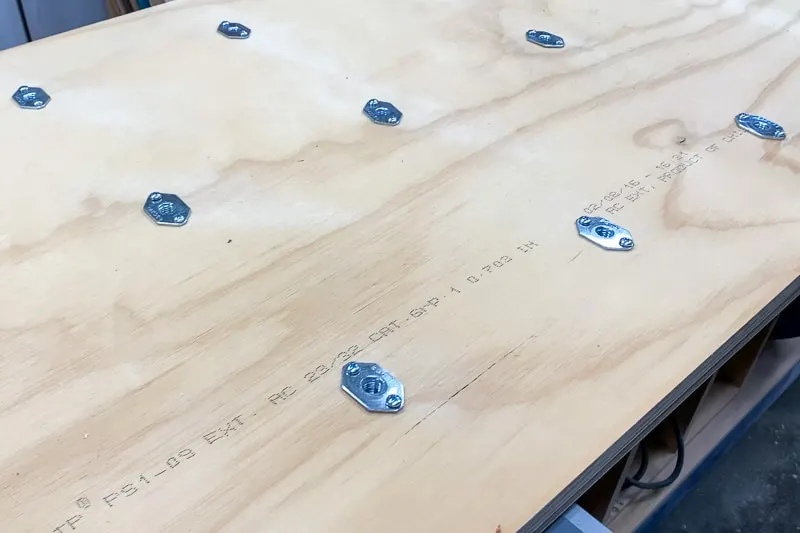
The T-nuts should be installed in a grid pattern, to give yourself a wide variety of climbing hold placement options. To save time, I stacked two pieces together and drilled the holes through both sheets. Clamp them together so they don't shift around.
Mark a 4" perimeter around the outside edge of the plywood first. This will prevent the holes from being blocked by the 2x4 frame underneath.
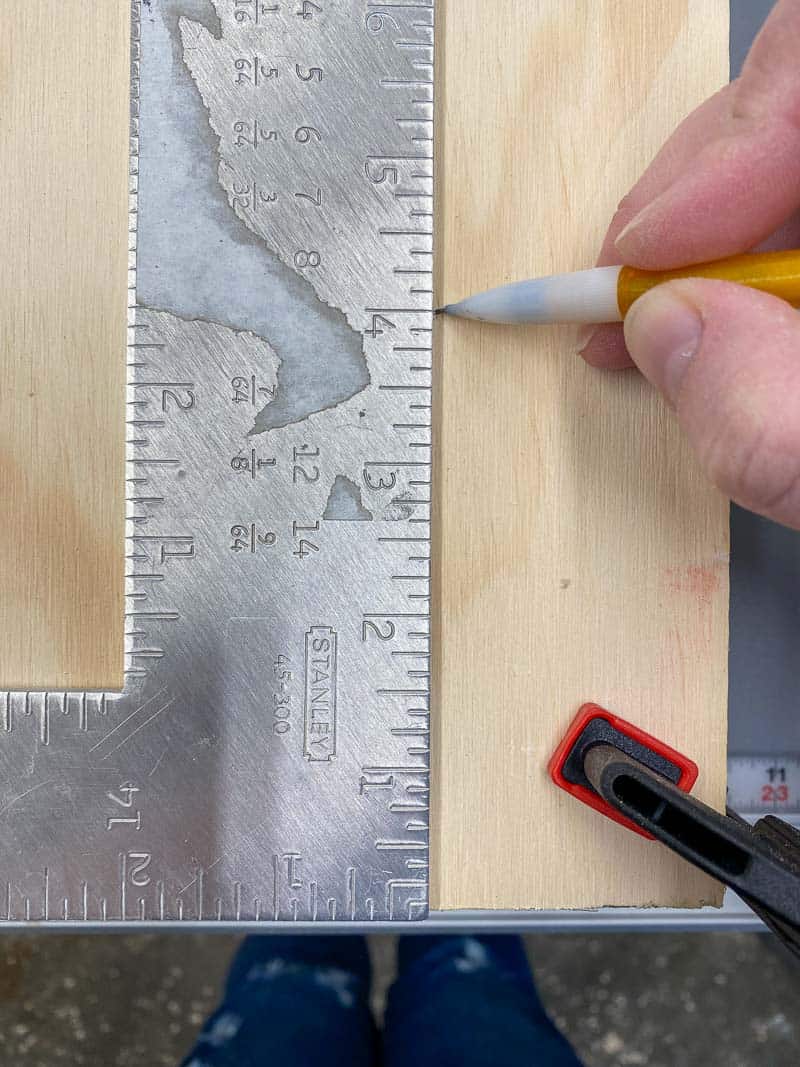

Then create a grid of squares 8" apart inside the perimeter. This will prevent the t-nuts from lining up with the studs (as long as they're 16" on center), and create consistent spacing for the holds throughout the wall.

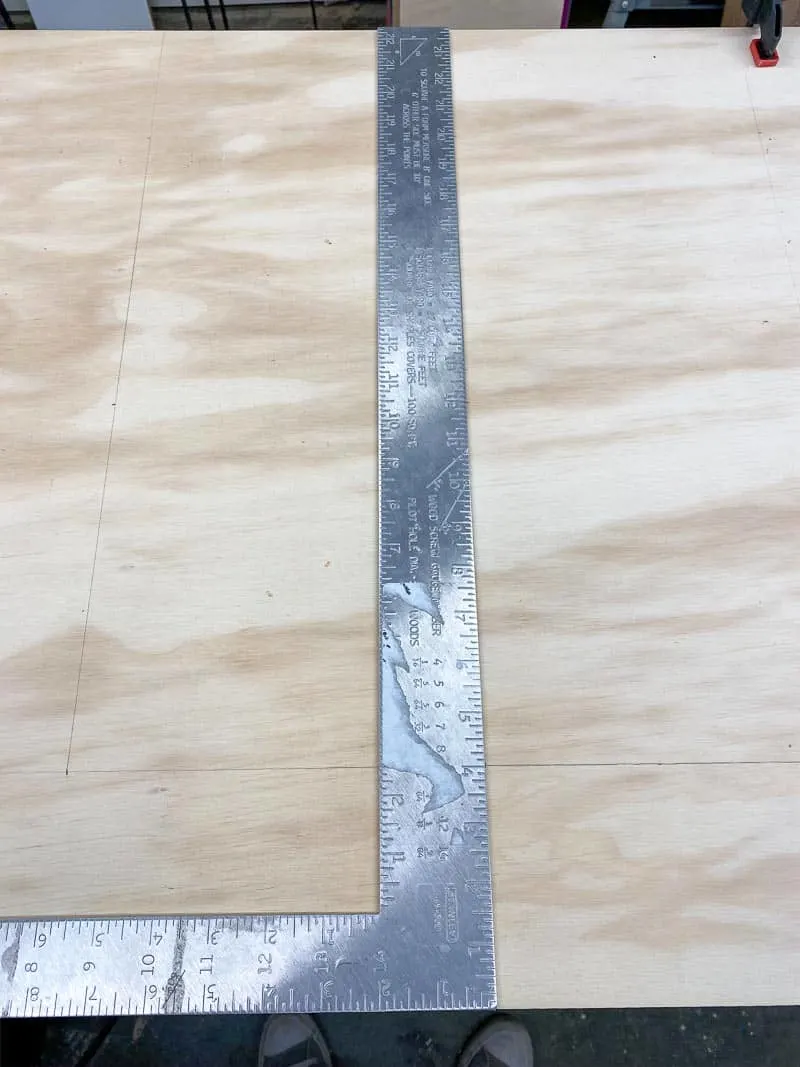
Drill a ½" diameter hole at each point where the grid lines meet.

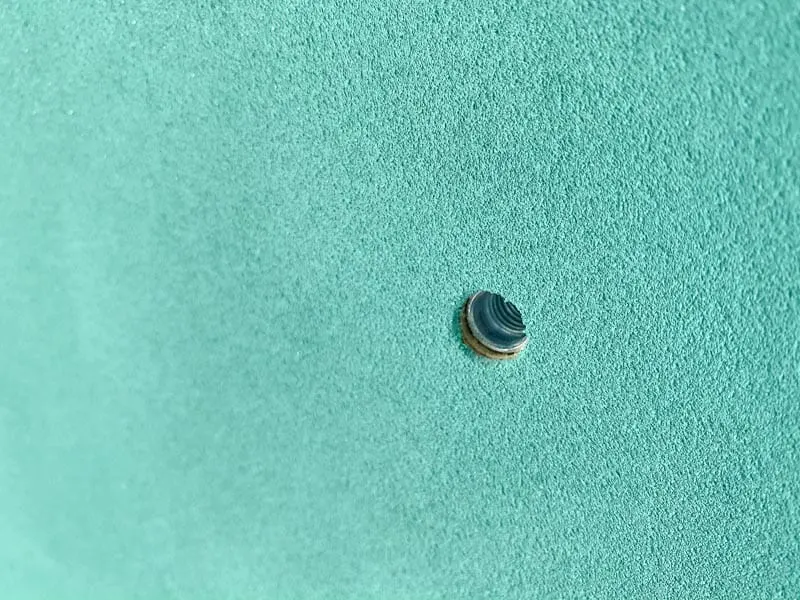
I did a lot of research into the various types of t-nuts available. The cheapest ones use prongs that dig into the wood to hold the nut in place, but they tend to fall out or spin over time. To keep my son safe from rotating climbing holds, I sprung for the more expensive t-nuts that are held in place with screws.
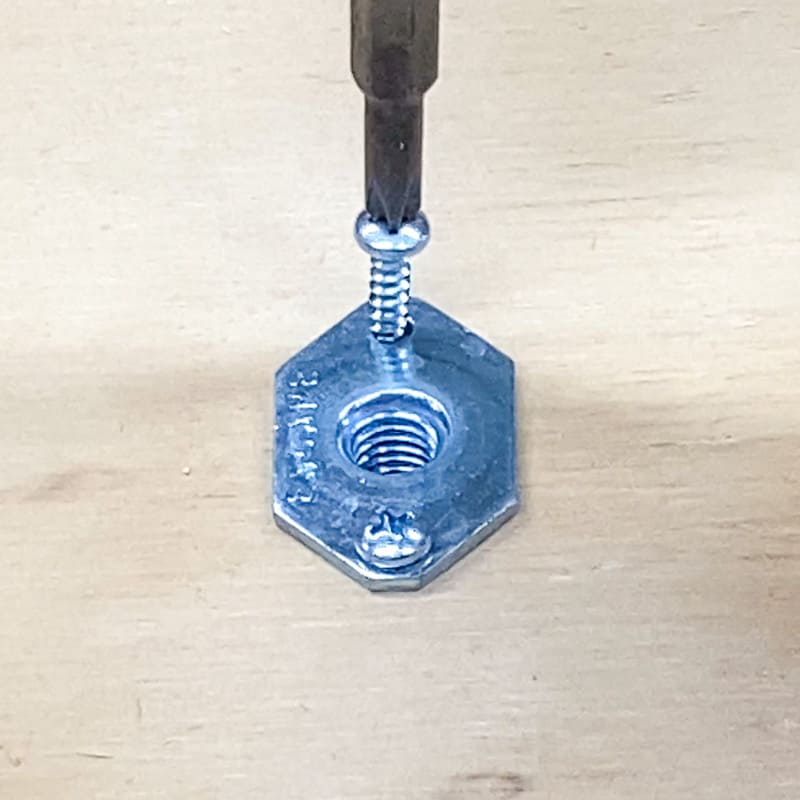

Flip the plywood over so the back side is facing up. Sand off any splinters from drilling the holes first. Then tap each t-nut into a hole in the plywood, and screw them into place.

Add paint and texture
You can skip this step and go straight to installing the plywood panels if you want a plain wood wall. Trust me, bare walls would have been way less time consuming!
But my son wanted his home bouldering wall to match the ones at his gym, so I reached out to the their facilities manager for some tips. He recommended Sherwin-Williams Pre-Catalyzed Water Based Epoxy paint, which is super durable and won't peel or chip even with aggressive climbing. The color they use is called "Cooled Blue," and it really makes his wall pop!
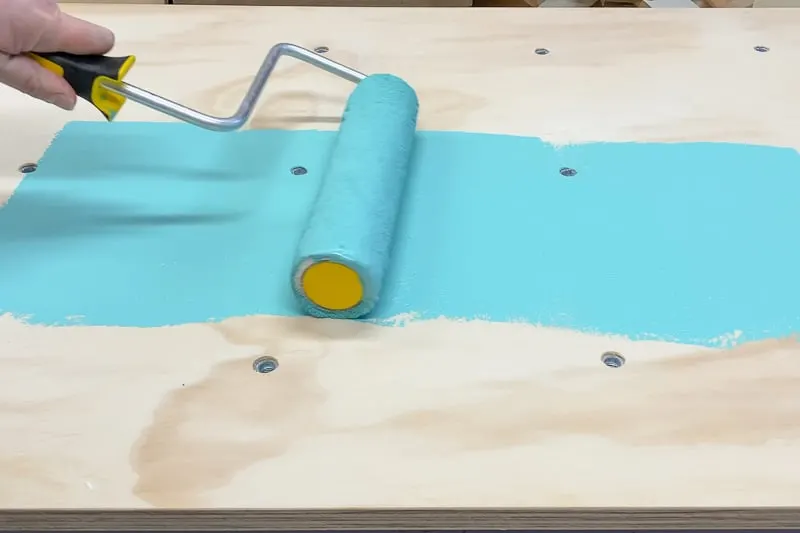
Sand the front surface of plywood with 150 grit sandpaper, and brush off any dust. Then gather up all the supplies you need: a paint tray, roller, and play sand. I also recommend a sieve to sprinkle the sand evenly over the surface.


Roll the paint onto one section of plywood at a time. The epoxy paint is really thick, so it didn't drip into the t-nut holes.
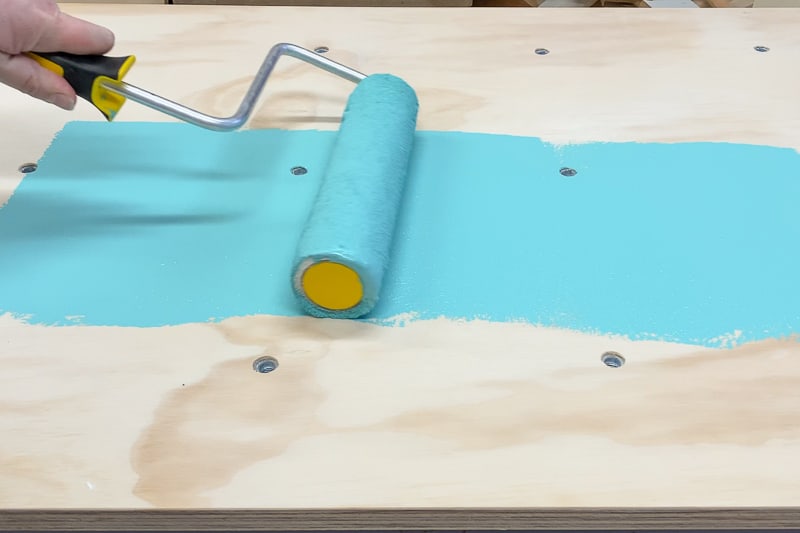
While the paint is still wet, sprinkle a layer of play sand onto the paint. It sets up pretty quickly, so work in small sections so it sticks properly. Repeat down the entire length of plywood.
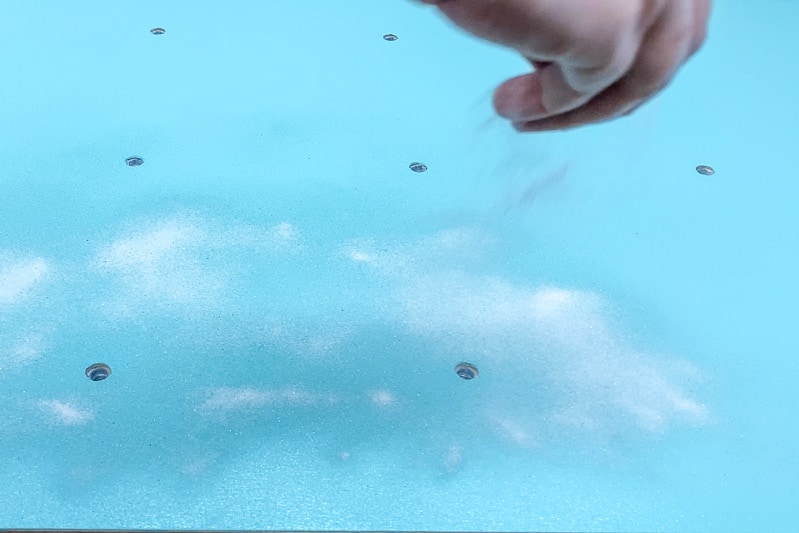
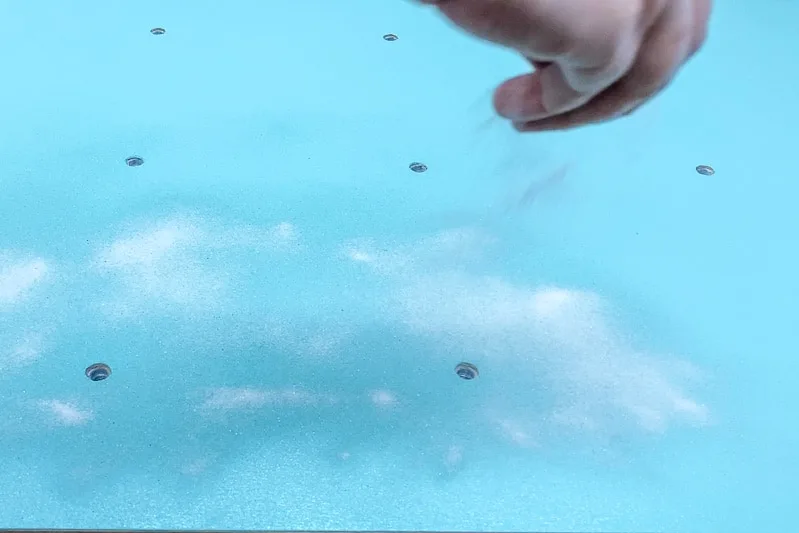
Allow the paint to dry for at least four hours, then brush or vacuum up the excess sand. Then roll a second coat of paint on top to lock in the texture and prevent the sand from rubbing off. Let this coat dry overnight so it has plenty of time to cure.
I worked on one panel a day, so it took me almost a week to do five panels. I was regretting not sticking with bare wood by the end, but the texture is perfect for smearing!
Attach the plywood panels to the frame
This is the easy part! Just line up the plywood with the edges of the frame and screw it into place. Make sure to hit all the "studs" in the frame so the wood doesn't flex when you apply your weight.

I cut the edge of the plywood where the angled wall meets the vertical wall at a 45 degree angle so it sits better and creates a nice, tight seam. You can do this pretty easily with a track saw or circular saw and a straight edge jig.

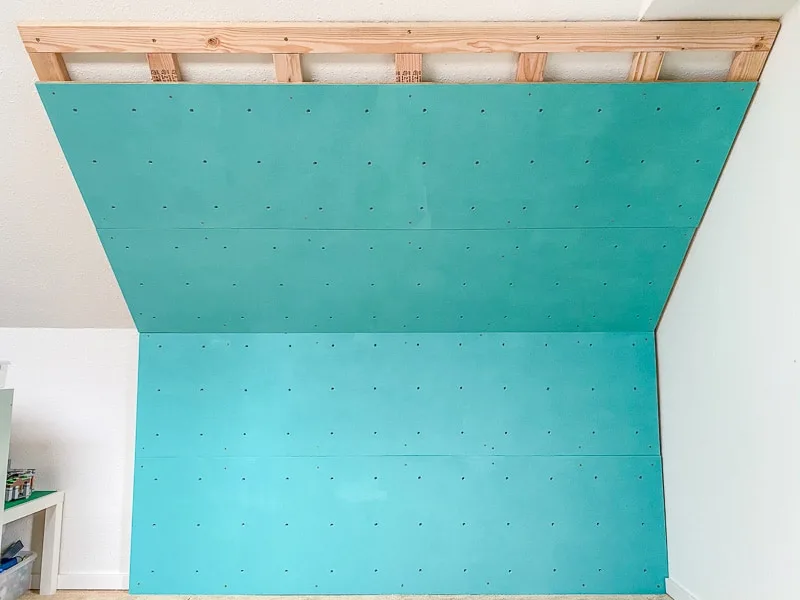
The original frame stopped at that little bump-out on the ceiling, but I added more 2x4s to bring it all the way to the top. I also made a side wall next to the window for more vertical climbing space.

Attach the climbing holds
Climbing holds are expensive! Shop around to find deals on factory seconds, or ask your local climbing gym if they have a bin of holds they're no longer using. I've scored some great bolt-on holds from Atomik by keeping an eye on their Deal of the Day page!

Bolt-on holds are best, because you can use those t-nuts and switch them around or even just spin them to a new direction without ruining the textured surface.

Screw-on holds are cheaper, and are typically smaller. They're great for foot holds and more difficult finger positions.
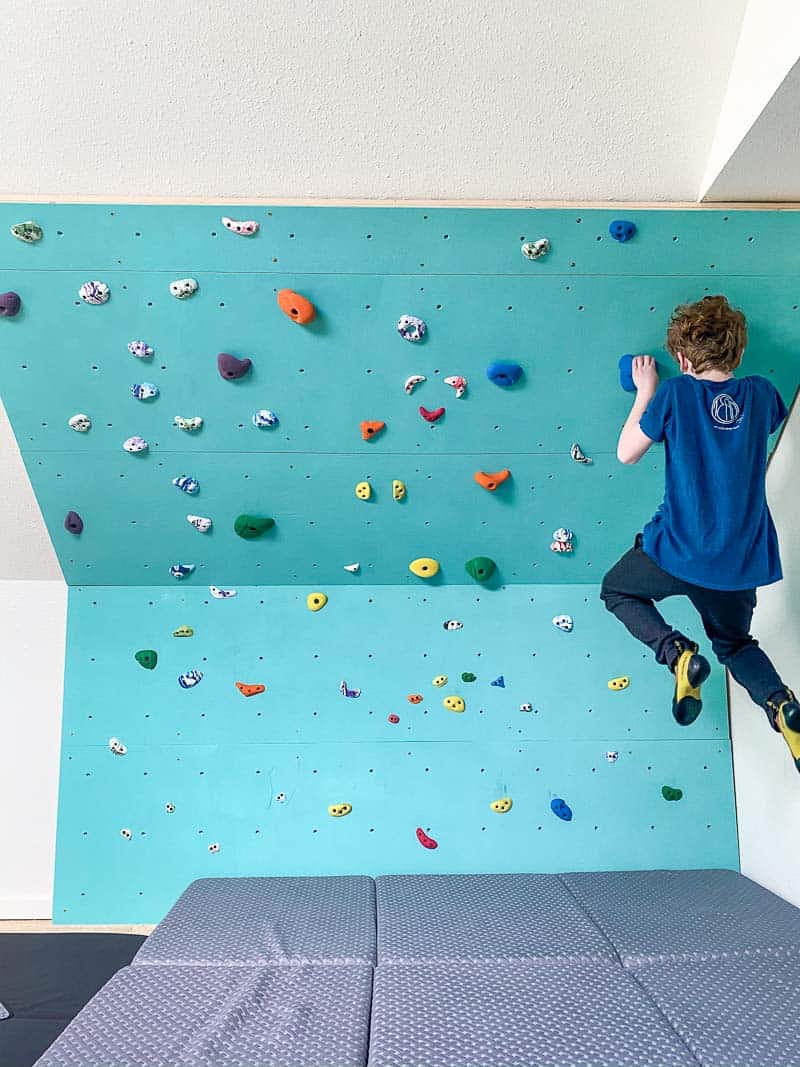
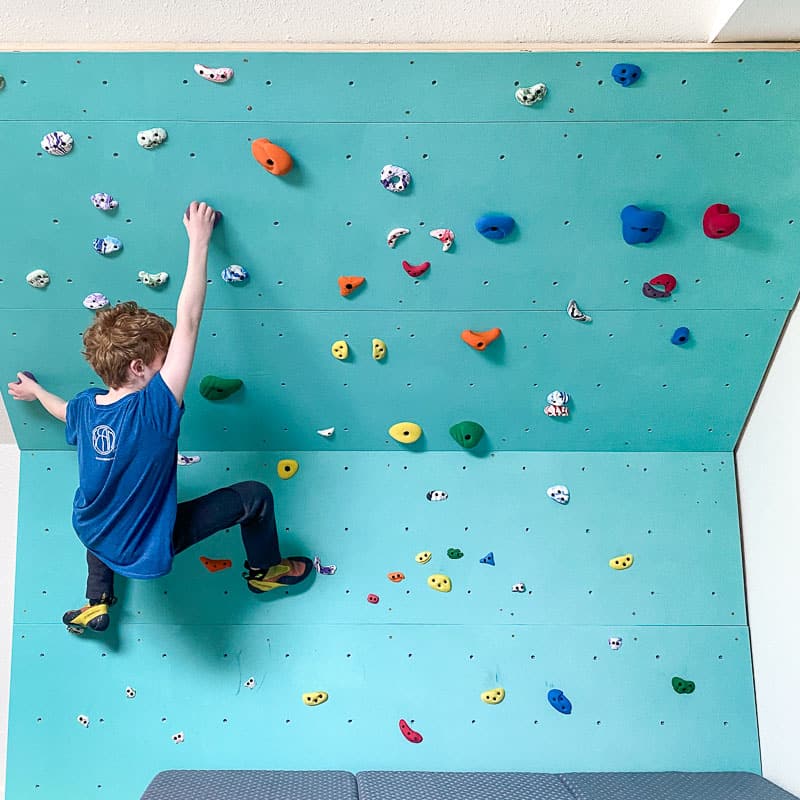
Instead of focusing on individual routes that my son will get bored of quickly, I created a spray wall that will allow him to train different techniques. He can traverse across the length of the wall, or practice moves and strengthen specific muscle groups.
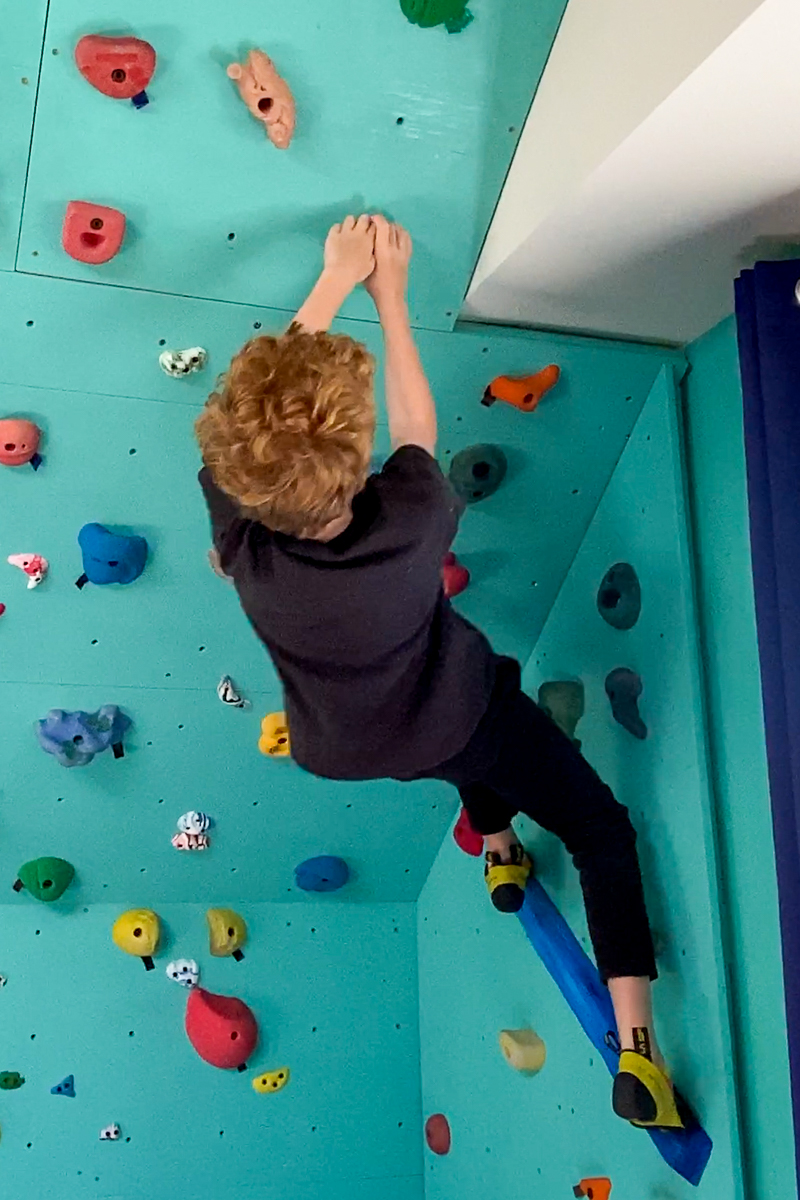
This wall is over 8 feet tall at the top, and could be used by an adult as well as kids. I always set a few good finish holds along the top row, so he can grip it with two hands and swing down easily. Mix up the holds so you have a good combination of slopers, pinches and crimps to keep your workouts fresh!


Place crash mats on the floor
Even though this wall is about eight feet tall, you still need some sort of safety mat on the floor to protect yourself from falls! I found these thick foam mattresses that fold up for easy storage against the wall when it's not in use.
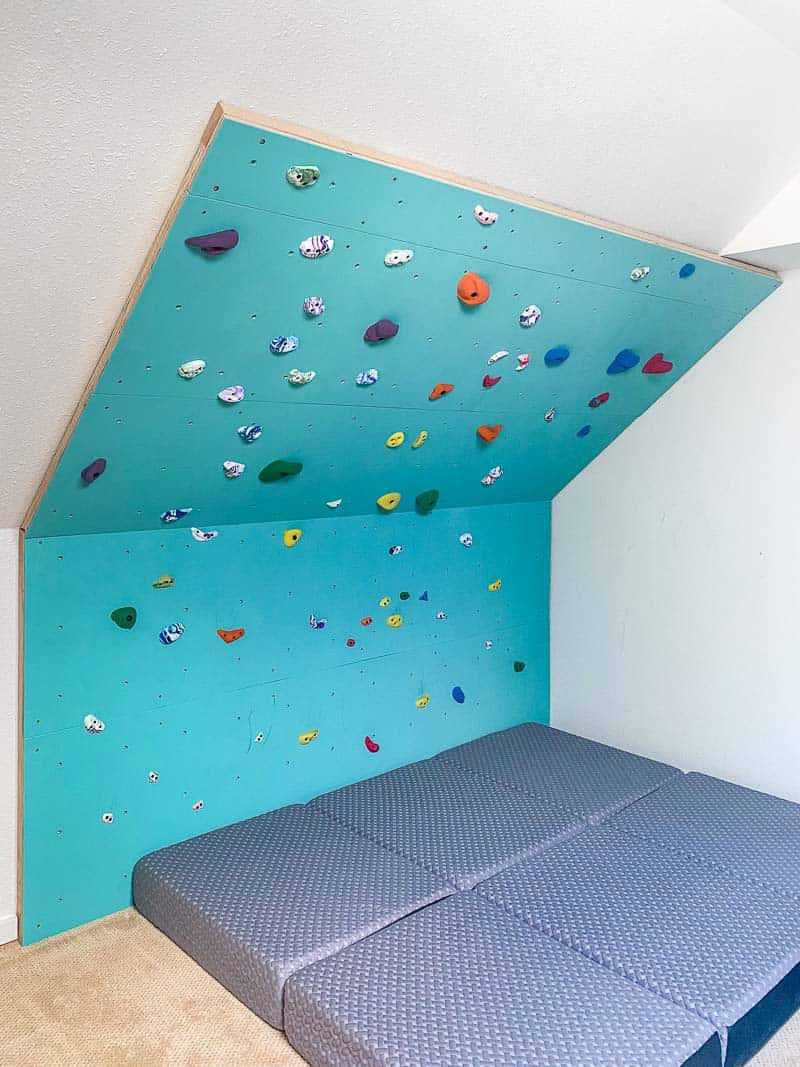

They're thicker than the professional crash mat we take with us when he goes outdoor bouldering (the black one on the left in the photo below), and they cover the entire area well beyond the fall zone. Don't worry, we ordered another one to replace the black mat so the entire floor is covered! It just hadn't arrived by the time I took these photos.

Have fun on your home climbing wall!
I had barely finished putting the last screw in the last hold before my son started climbing! He says the overhang makes it really hard, which is good! He can train for difficult moves at home, so he can crush them easily at competitions.

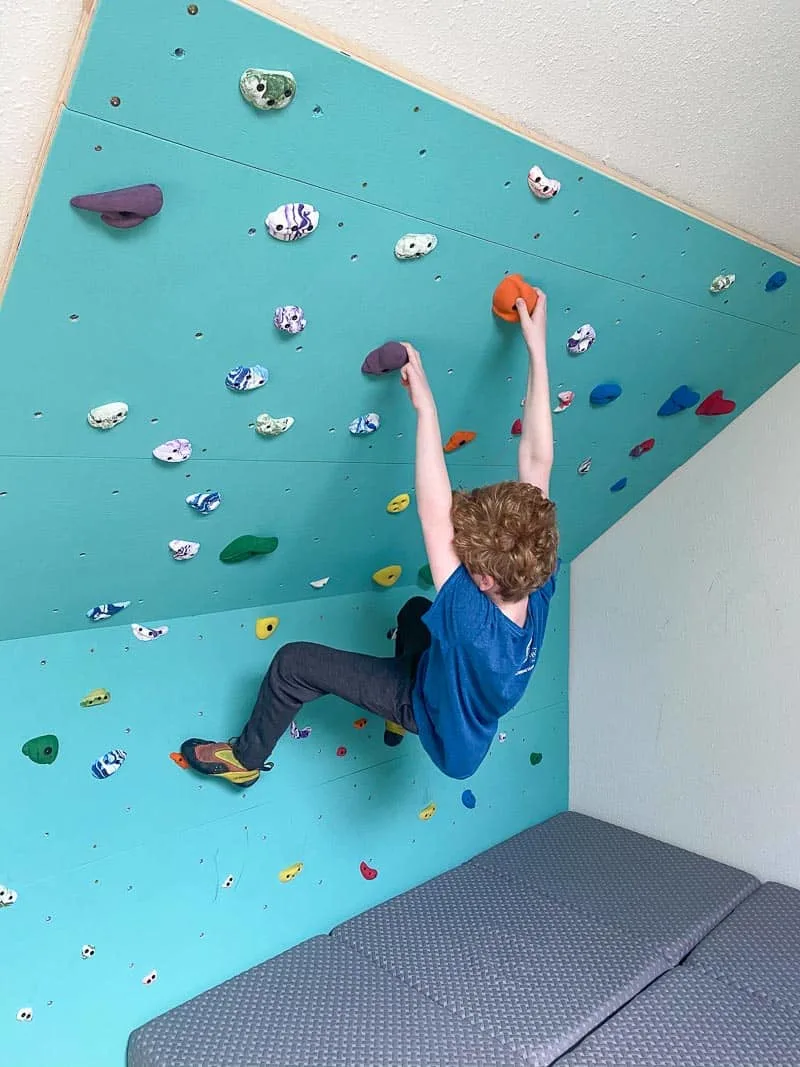
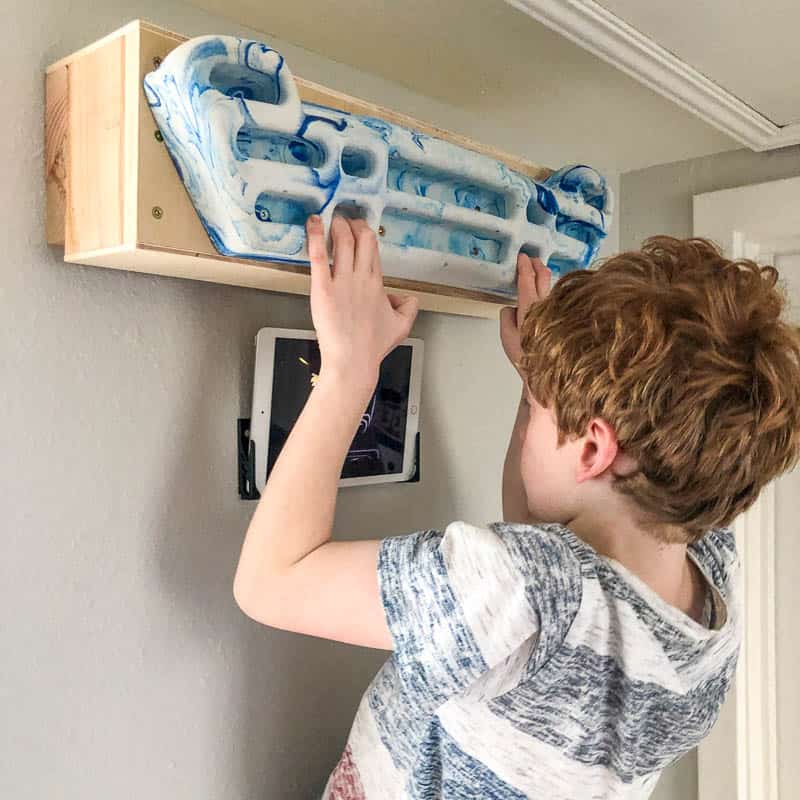
There are jug holds placed at just the right height for pull ups...

And something called a "crimp ladder" that he claims is impossible to complete!

He's struggled with these underhand start holds at competitions, so I made sure to put a set on his own wall to practice.
I've been saving oddly shaped scrap wood pieces to create unique climbing holds for the wall. I started with this long wooden rail that works great as both a long pinch handhold and an angled foothold.
This indoor climbing wall is the perfect addition to my son's bedroom, and it helps get the kid's energy out on rainy days when we can't make it to the gym! It's easy to build and easy to customize to your own skill level.

Chris
Saturday 25th of April 2020
This is awesome! That’s plenty safe. I had a medical condition but when I was young I still climbed trees (to reasonable heights) because my parents wanted my childhood to be as normal as possible. Your setup is creative, strong and well made. Your child is obviously trained and athletic and getting better all the time. That’s great! May he crush ‘em at the competitions as well as you did on this project. :-)
Vineta
Saturday 25th of April 2020
Aw, thank you so much! He's been training on the climbing wall every day since I built it, so it was worth all the effort!
Pamela @ DIY Vibes
Tuesday 7th of April 2020
What a fun idea!! Any kid would LOVE this!
Amy
Friday 3rd of April 2020
I'm so impressed. You did a great job. Thank you for sharing.
Tara
Friday 3rd of April 2020
Best Mom Ever! 🏆