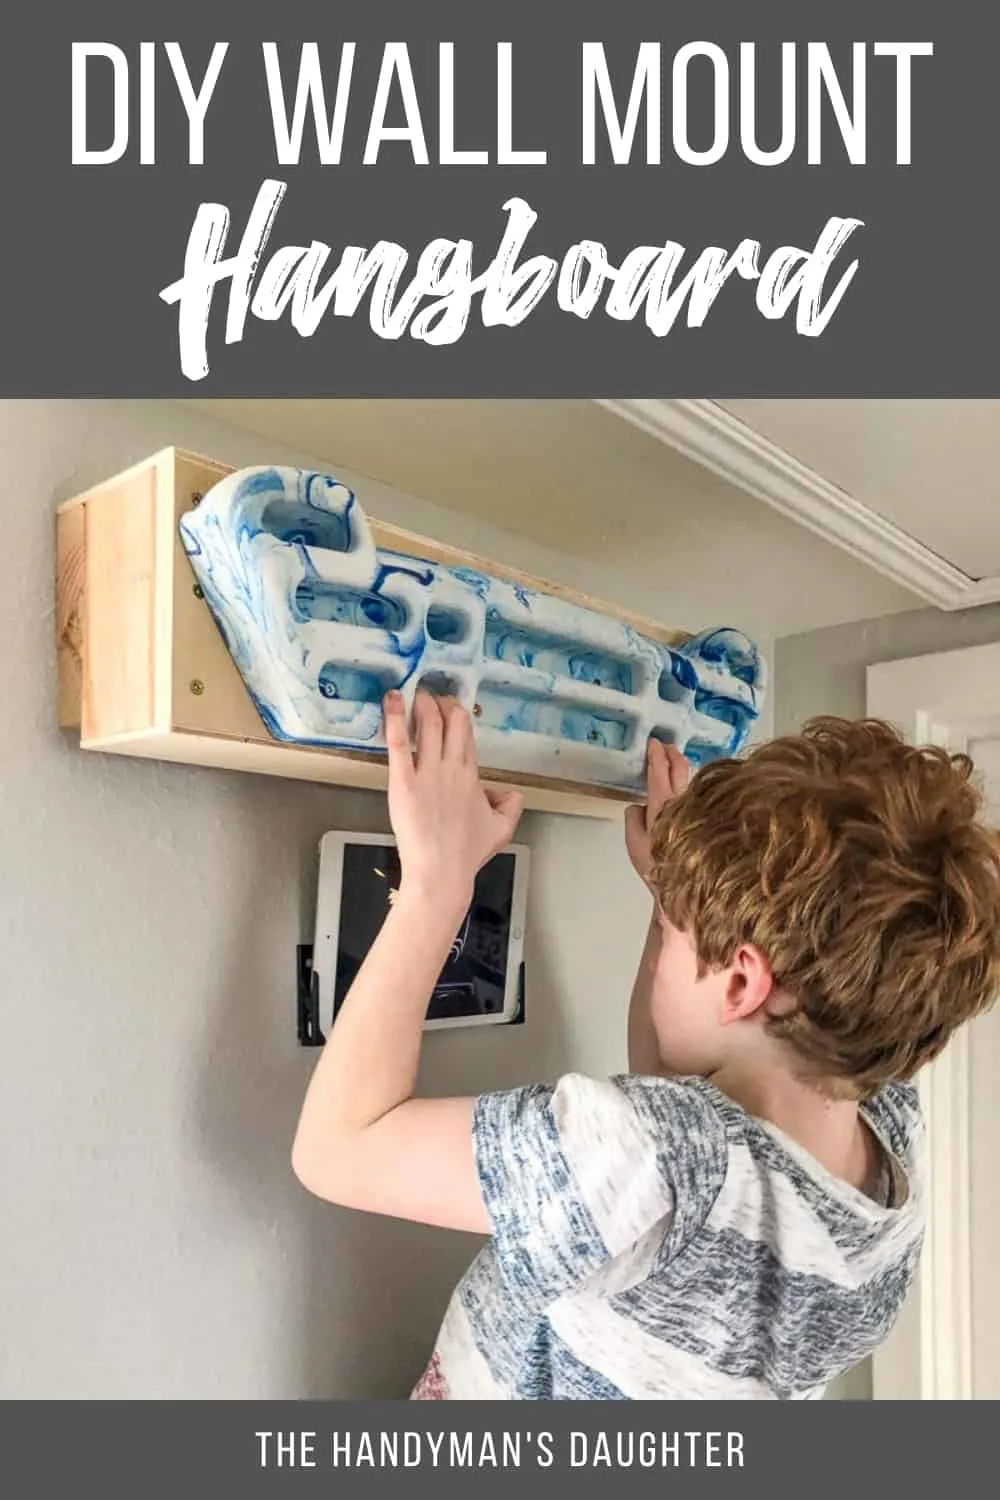
Turn any wall into a hangboard workout spot! This DIY hangboard mount features interchangeable boards to add variety to your climbing training routine!

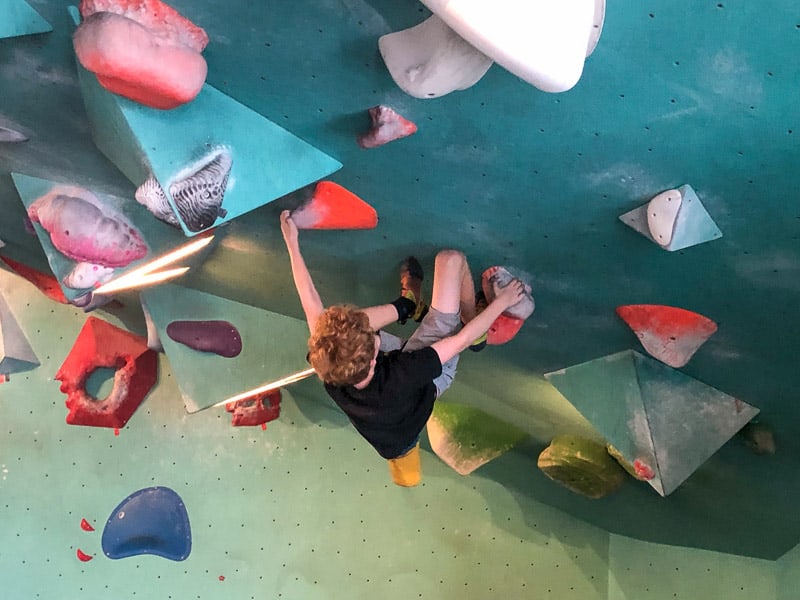
My son is on a competitive climbing team (yes, it's a thing!), and we practically live at the bouldering gym. It took a while to get over that feeling of dread whenever I watched my only child scale a wall without a rope up to 15 feet off the ground, but I'm getting better! 🙂

This post contains affiliate links for your convenience. Purchases made with these links may earn me a small commission at no additional cost to you.
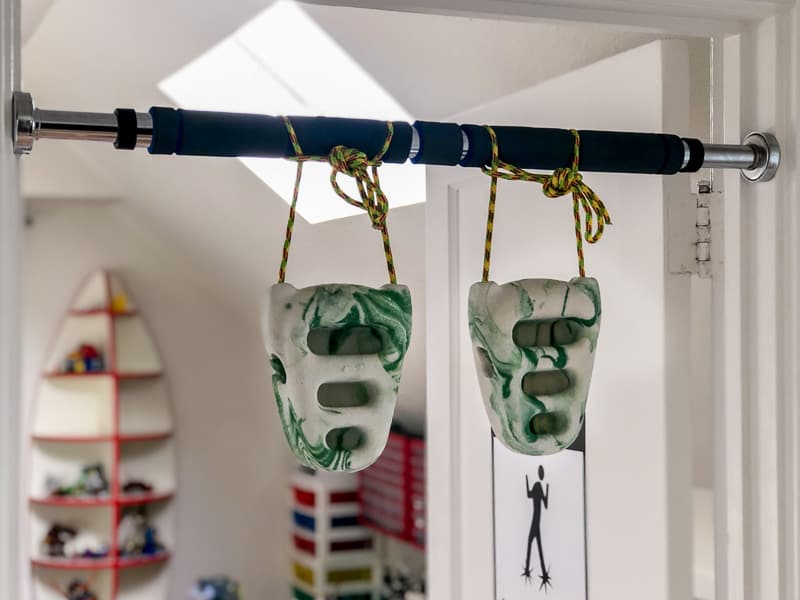
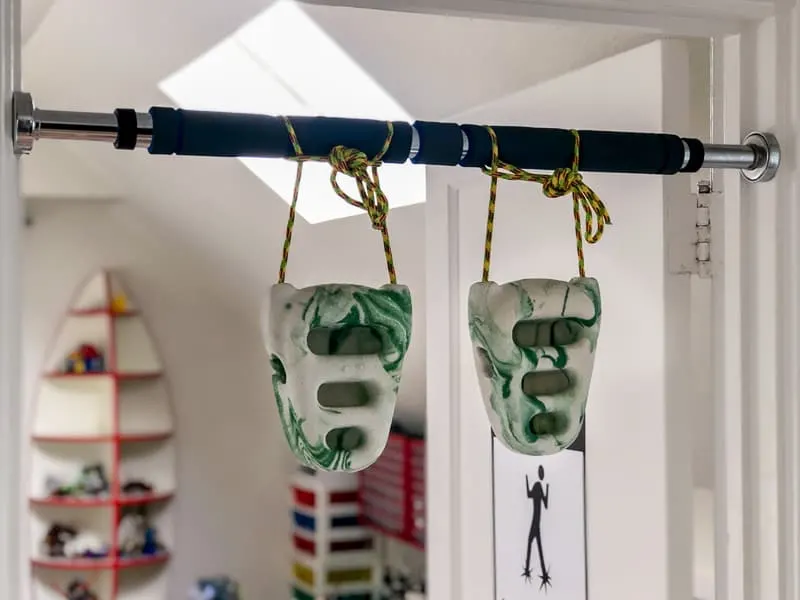
Since he can't climb every day, I've been trying to find ways he can continue training at home. He has an assortment of handheld finger strengtheners that he uses while he's watching tv, and a set of rock rings that dangle from a pull up bar at the entrance to his playroom.
But the gold standard for building finger and arm strength for climbing are hangboards, also known as fingerboards. It simulates the types of holds you can find at a climbing gym, and you can build a lot of strength simply by hanging from them by your fingers.

The problem is, most hangboards are mounted over a doorway, so your body can swing in the opening. But my son can't reach the top of the door! Even if he used a step stool, our ceilings upstairs are really short and there's no space above the door.
Other hangboard ideas I found utilized a corner brace or a big bulky stand, but we don't have the space for those options either.
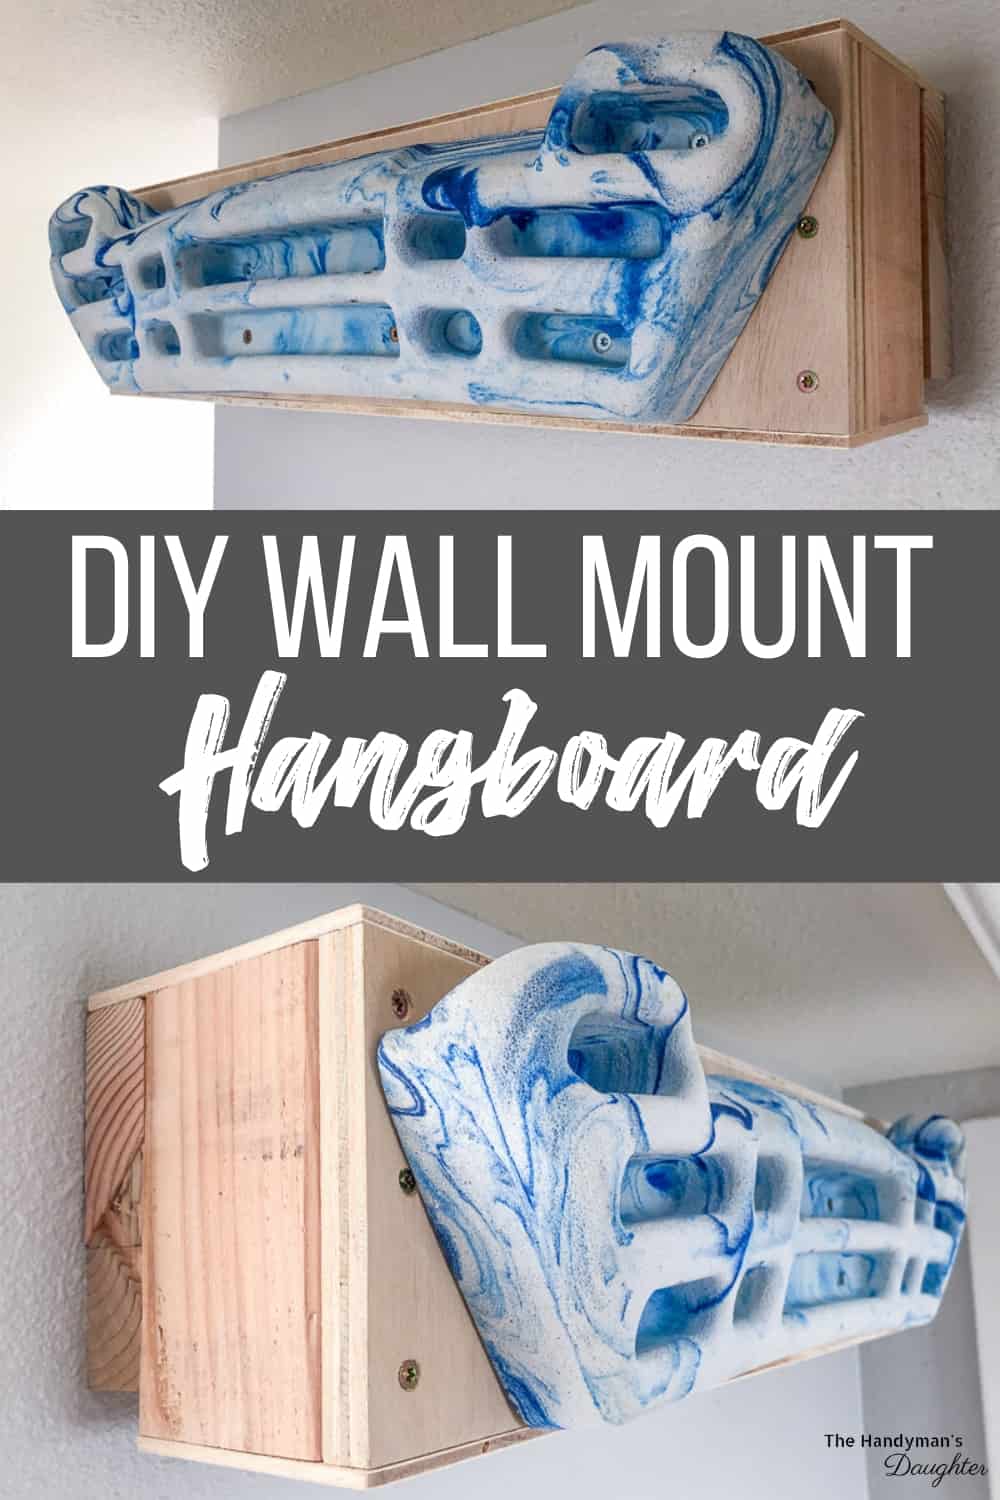
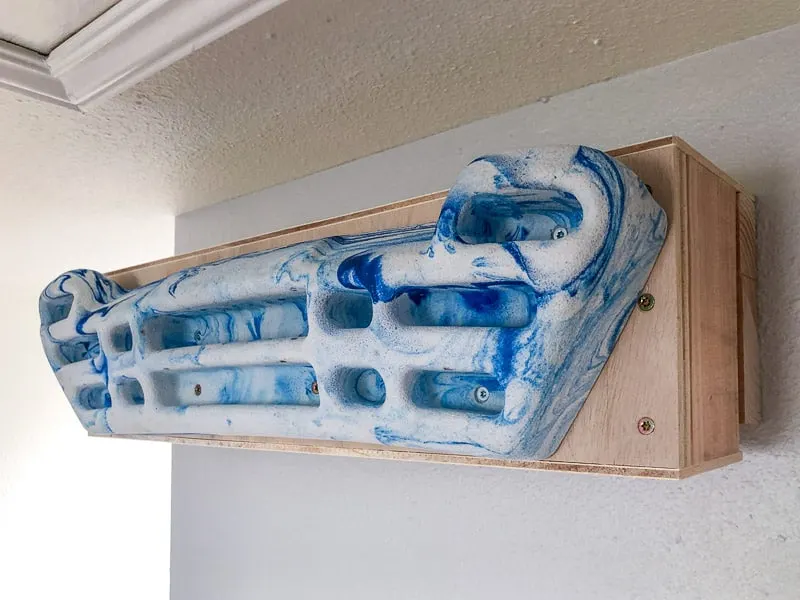
So I decided to build him a hangboard mount for the wall that can be easily adjusted as he grows. The hangboard can also be switched out for other variations easily with this french cleat bracket (I have a DIY hangboard coming soon!)
As an added bonus, he can place his iPad in these brackets at eye level, and watch videos while working out!
Here's how to make it!
Materials Needed for DIY Hangboard Mount
- One small sheet of ¾" plywood
- One 2x4 board
- ¼" plywood scrap for top and bottom (optional)
- 1 ¼" flat head wood screws
- 3" flat head wood screws
- 4" flat head wood screws
- Countersink bit
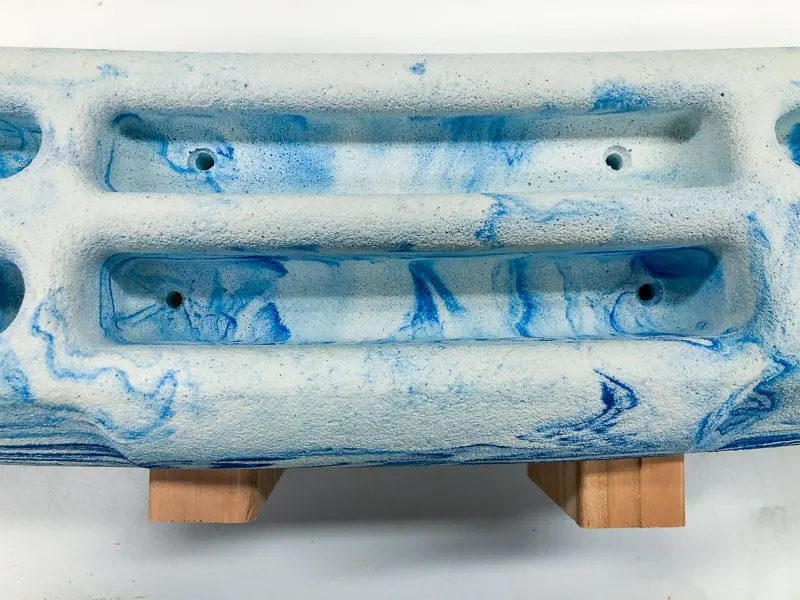
- Hangboard (or just a few random climbing holds)
- Circular saw or table saw
- Drill
- Level
How to Make a Hangboard Mount for the Wall
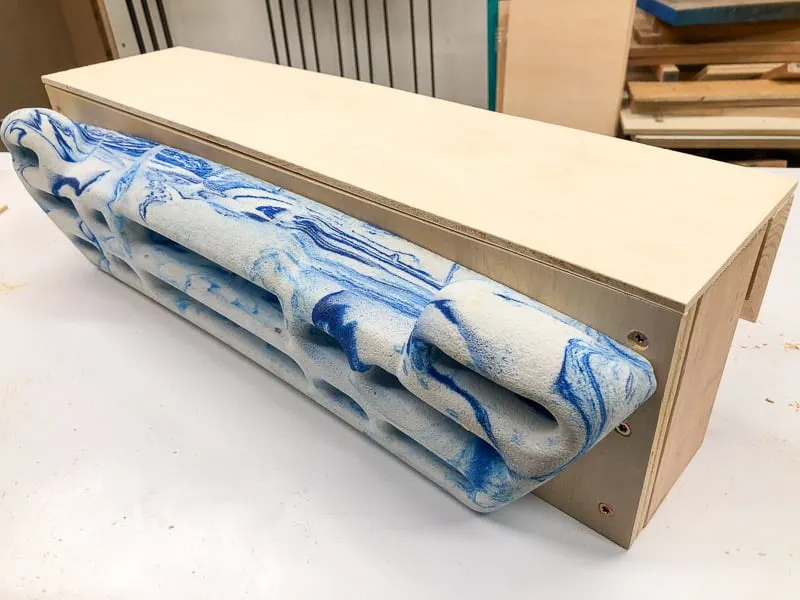
I made this box just deep enough for my skinny little boy to hang comfortably without hitting the wall. Feel free to change the 2x4 to a 2x6 if you need a bit more room. You could even use ¾" plywood for the sides to make it as deep as you want!
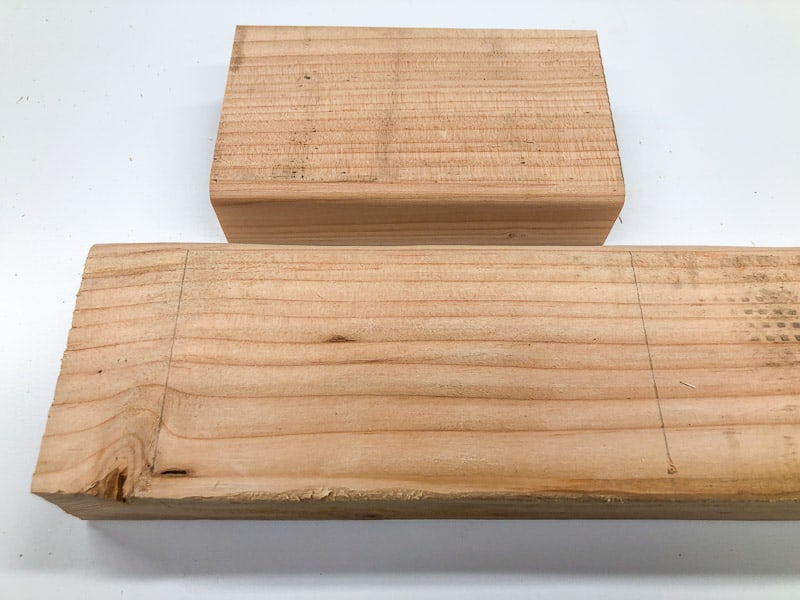
Cut the wood Pieces
Cut the plywood to fit your hangboard first (mine is 6" x 24"). Then cut the 2x4 into four pieces that match the narrow width of the plywood (6"), and two pieces that match the longer length of the plywood (24").
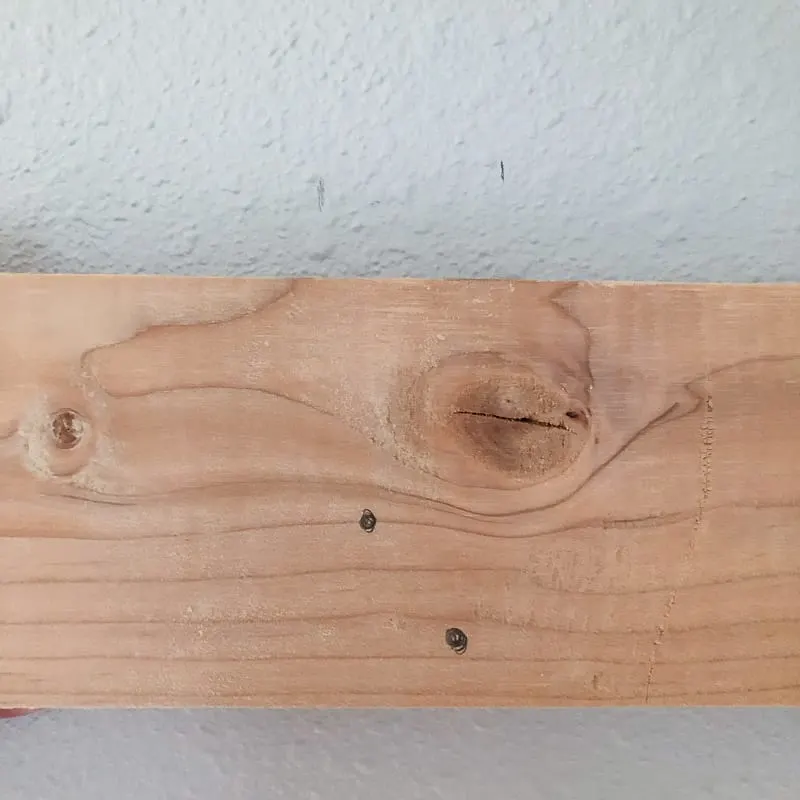
When choosing your 2x4, try to get one without any knots or imperfections (this may seem impossible, but keep digging through the pile!) You'll be screwing into the edge grain, so it's important that those sides are clear. You can usually cut around the worst spots like this funky end piece.

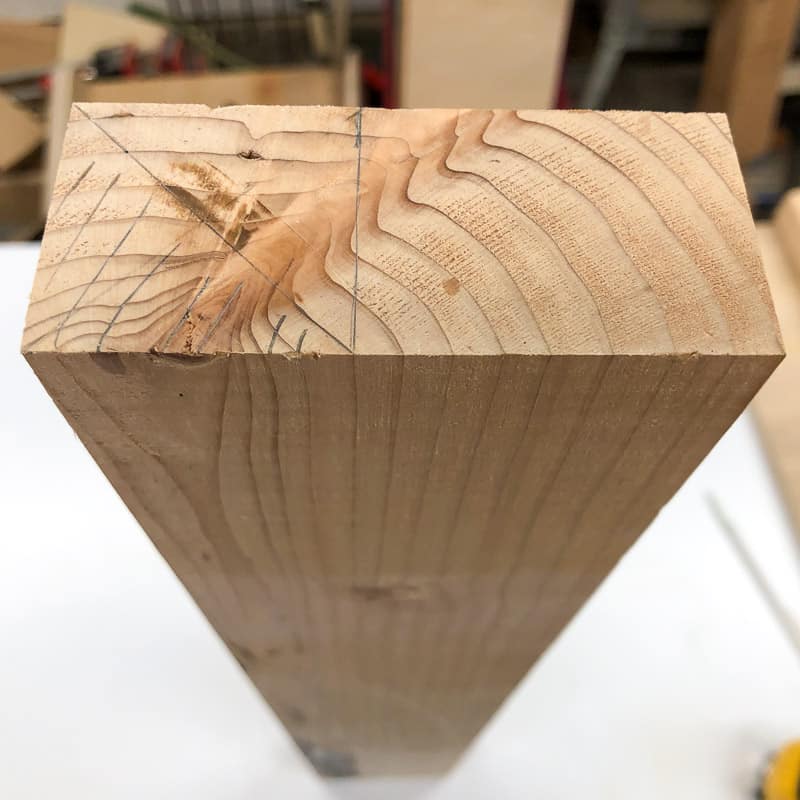
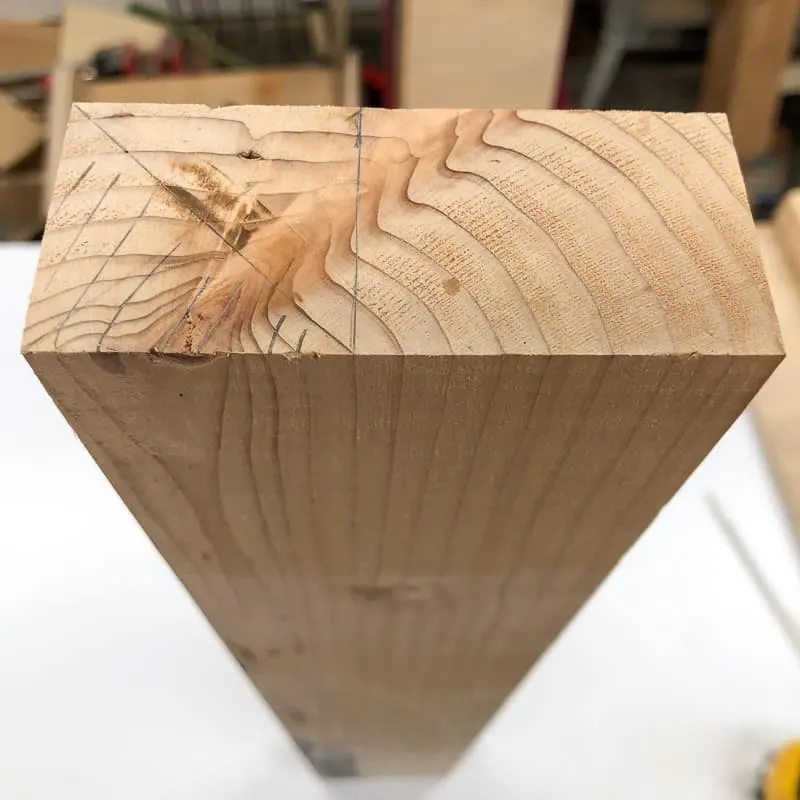
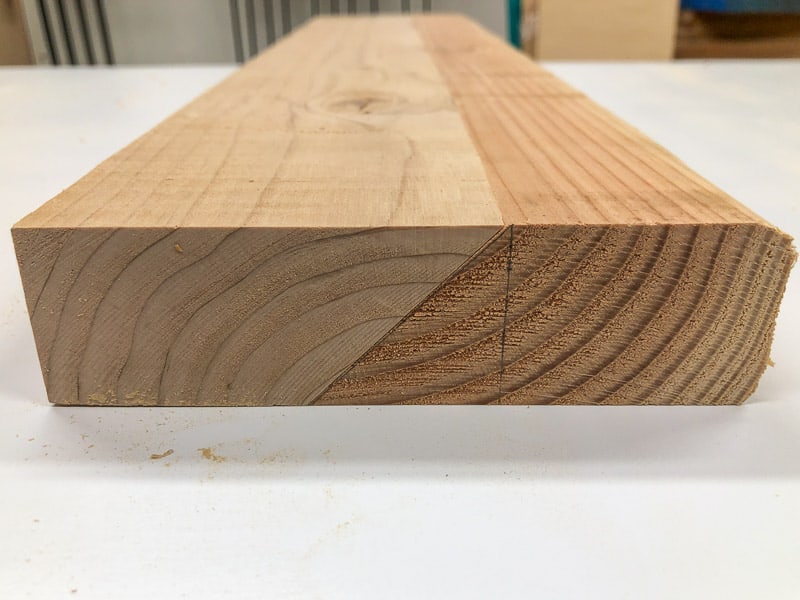
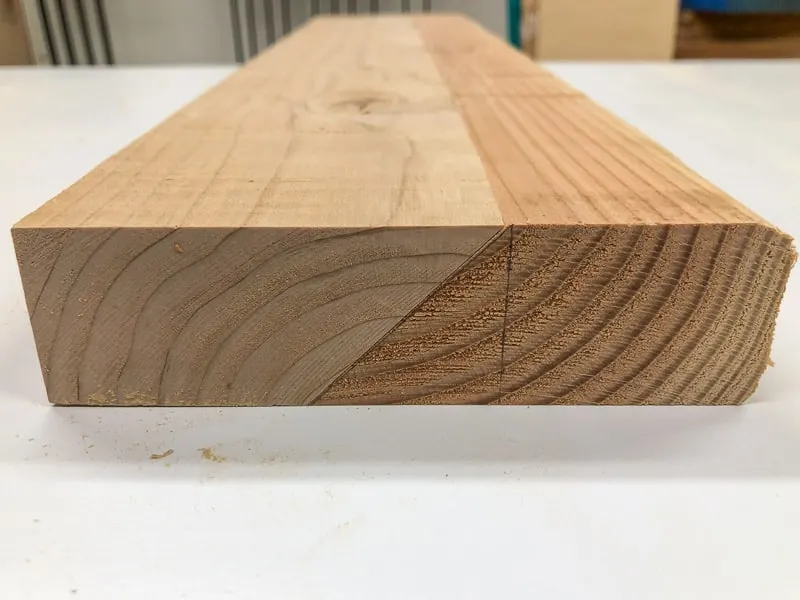
Cut the 2x4 angled pieces
A French cleat is a simple and sturdy way to hang things on the wall. It's simply two opposing 45 degree angle cuts that lock together with gravity. Here's my tutorial on how to make a French cleat if you're not familiar with the technique.
Mark the end of your longer 2x4s so you remember how to make the cut. I measured 1 ½" from the end (matching the thickness of the board), then drew a line corner to corner to mark the cut.
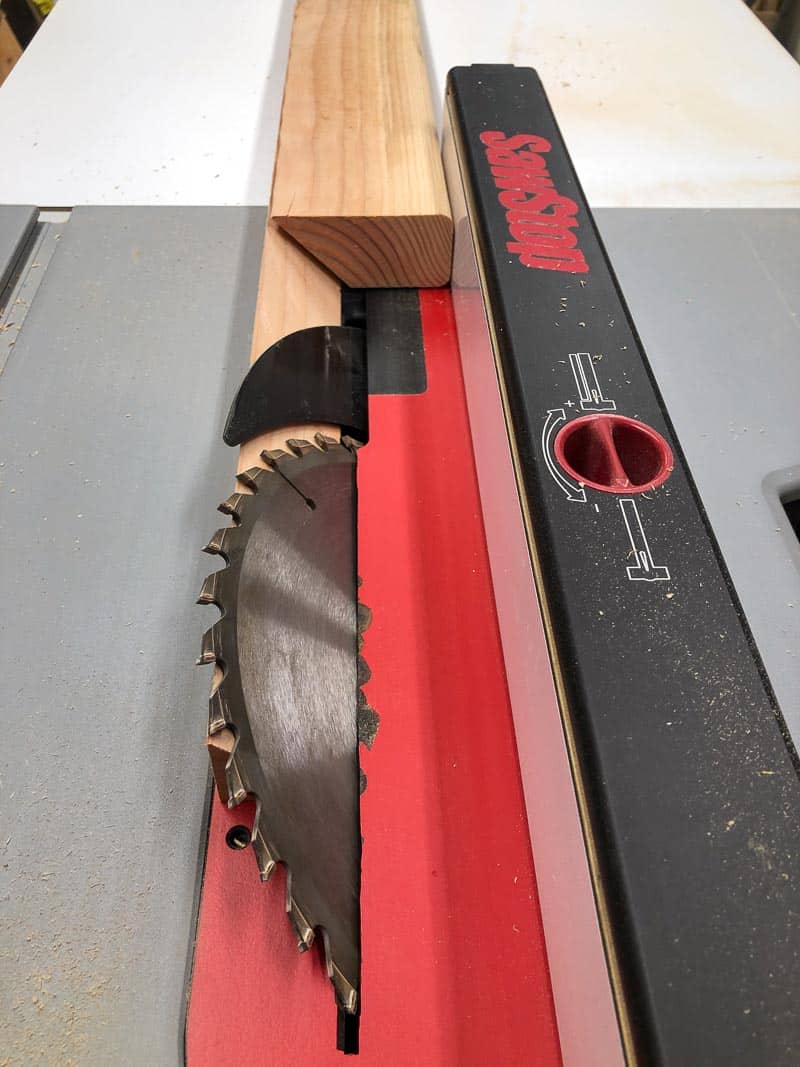
Set your table saw or circular saw to a 45 degree angle. With the saw OFF, slide the marked board end up to the blade and adjust the fence until it matches the diagonal line. You can use a circular saw jig to get the right spacing as well.
Cutting diagonally is a lot harder on the saw blade, so take it slow and use a push stick! You may get a little burning on the cut edge, but it's better to go slow and let the blade do the work rather than force it through.

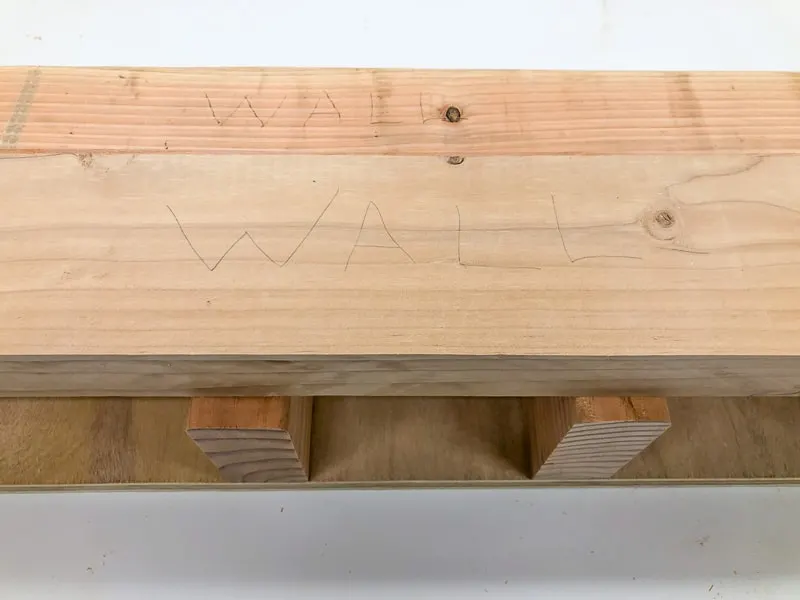
The pointed ends should lock together with the sides even. Test it out on a flat surface, making sure that they slide together easily.
While they're locked together, mark both pieces facing up with a big WALL in pencil. This way you'll know which side is supposed to face the wall, and you don't end up with two top pieces!
Mark the Hangboard Holes
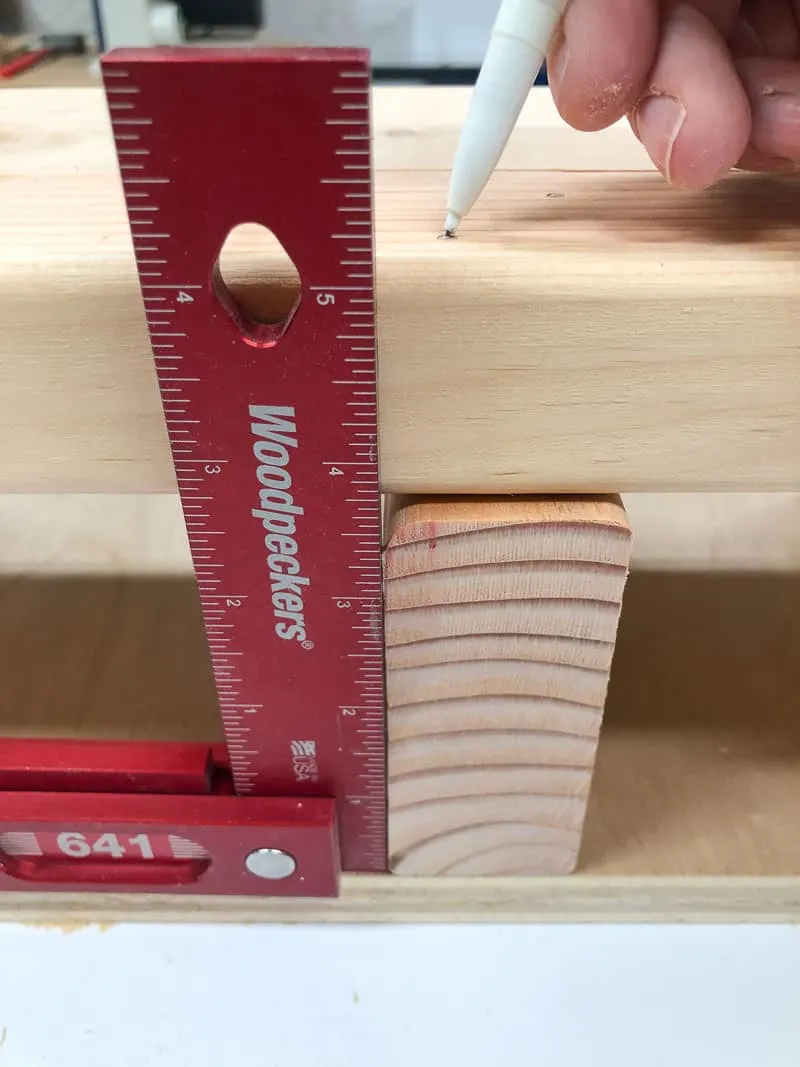
I wanted to make sure that the screws through the hangboard hit at least a couple of the short 2x4 "studs" inside the box. Place the ¾" plywood piece down first, then line up a 2x4 pieces along the length.
Put the hangboard on top of the 2x4s, and move the middle ones around until they line up with the holes in the hangboard. Mark their position on the plywood base.

MARK THE Countersink Holes
In order for the cleat to sit flush against the wall, you'll need to countersink the screws. This will sink the screw heads below the surface of the wood and won't interfere with them locking together.
Remove the hangboard from the tops of the 2x4s, and replace it with the French cleat boards with the WALL markings facing up.
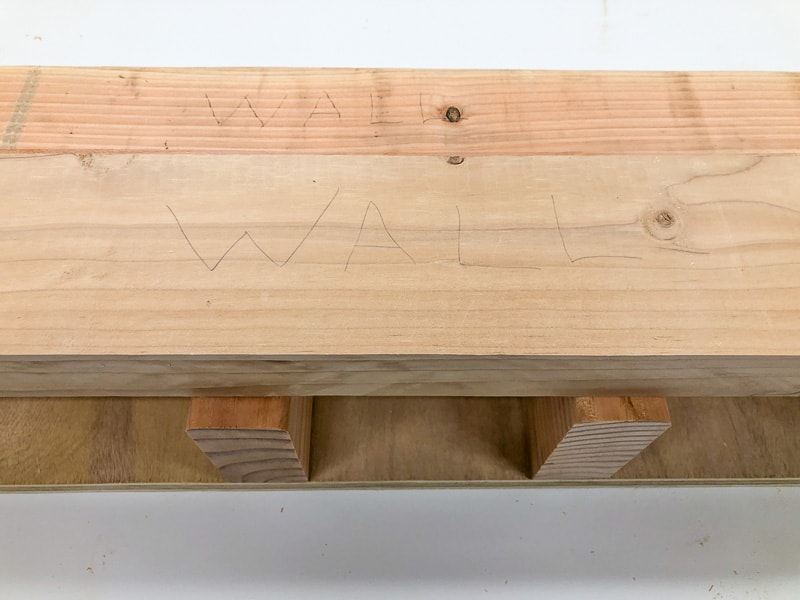
The top board will be screwed into the box, and the bottom board will be attached to the wall. You only want to drill holes in the solid side, not the angled part of the 2x4, so mark a line 2" down along the entire length.

Now mark where the countersink holes will go above each little "stud." I prefer to stagger mine so the screws can't twist, but be careful not to get too close to the edge or the wood will crack!

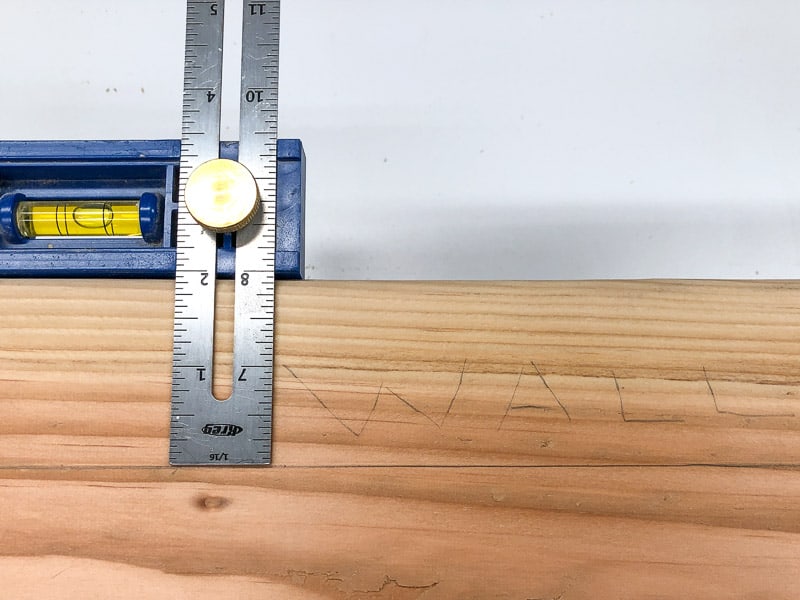
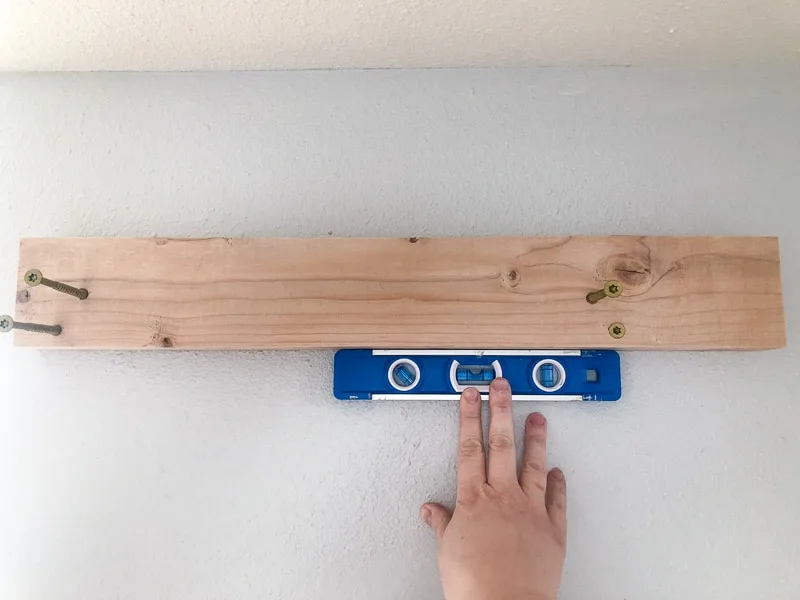
Now take the bottom angled piece that will be attached to the wall, and bring it to the spot where you'll be installing it. Find the studs in the wall, and mark them in pencil.
Then hold the angled piece with the point facing UP and AWAY from the wall (you shouldn't be able to read the "WALL" you wrote on it). Match the board up with the studs in the wall, and mark where to predrill the holes. For safety, you need to attach the hangboard mount to two studs.
Drill the Countersink Holes
Hold each board over the edge of the workbench, and drill the countersink holes at your marked spots. If you've never done this before, you can learn all about the technique here.

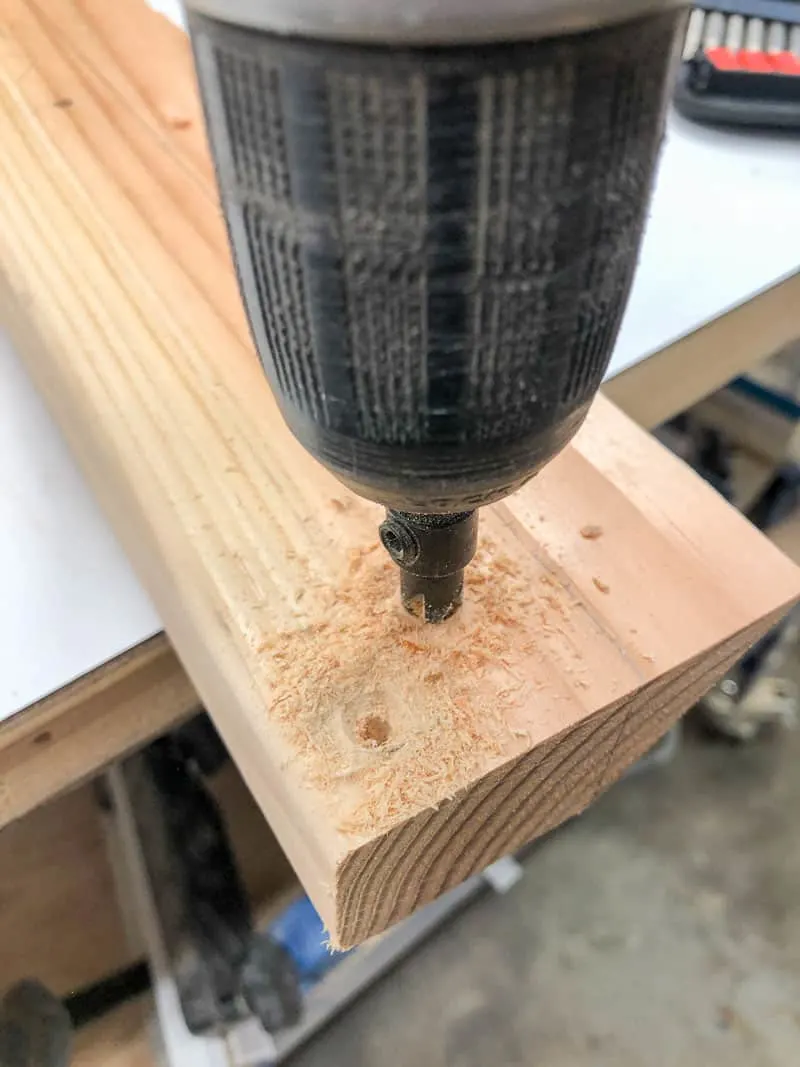
While you're at it, you should also drill countersink holes down the sides of the ¾" plywood piece. It's not required, but it will keep the screw heads out of the way when you attach the hangboard to it later.
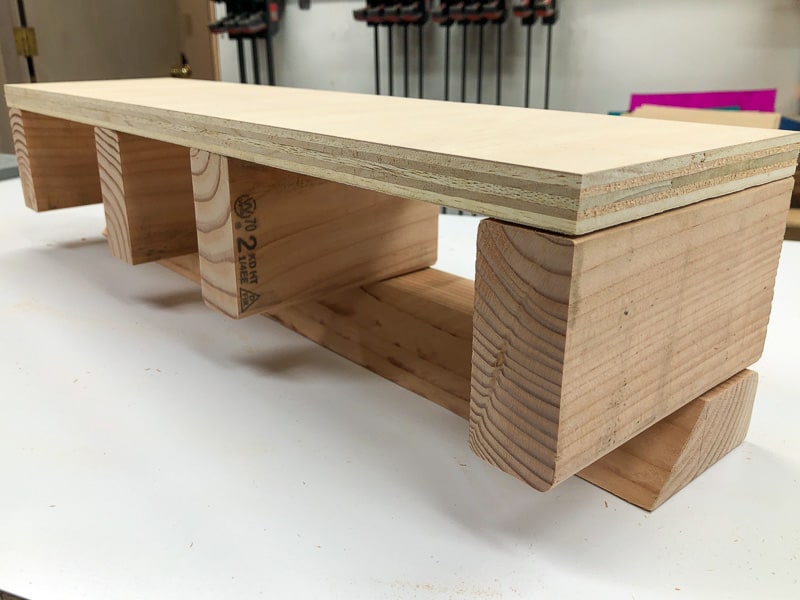
Assemble the Hangboard Mount
After all that prep work, the actual build process is really quick! Set up the little 2x4 boards again, and screw the top French cleat board to each of them with 3" screws.


Now flip it over and attach the ¾" plywood to the front. I used 1 ¼" screws for this part.

Attach the Hangboard
Line up the hangboard holes with the 2x4 mini studs. Use 3" flat head screws to attach the hangboard through the plywood and into those boards. Then use the screws that come with the hangboard for the rest of the holes.


Your completed hangboard mount should look like this.

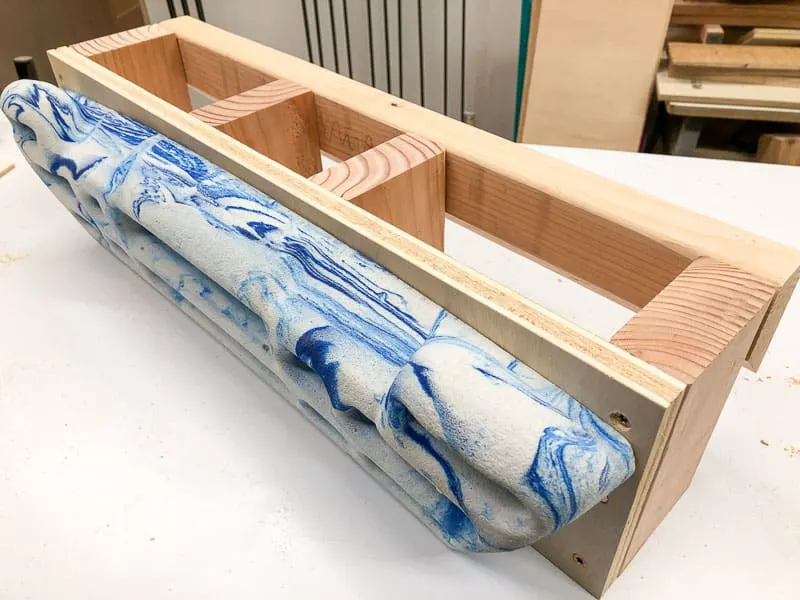
Add ¼" plywood to top and bottom (optional)
Since this hangboard will be installed right outside our guest room, I wanted it to look a little less ... rough. So I cut a scrap of ¼" plywood to fit on the top and bottom to cover up the mini studs and create a nice, neat box.

I just attached the thin plywood with brad nails and a nail gun, but you could use small screws or nails.
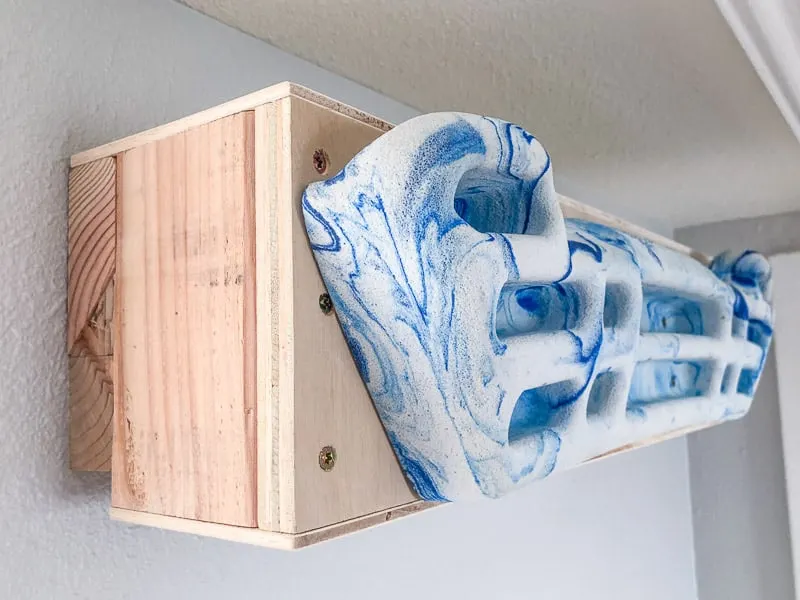
Attach the Bracket to the Wall
Start the 4" wood screws in the countersink holes of the remaining angled 2x4, so you're not fumbling with screws and drills and everything else while you're trying to install the bracket.
Line up the bracket so the screws line up with the marked studs. Make sure you have enough room above the bracket to insert the opposing angled side on top (at least 4 inches from the ceiling). Screw one of the screws into the wall, then check that it's level.

Now you can screw the rest of the screws into the studs. Make sure the heads are completely flush or below the surface of the wood.
Hook the Hangboard Mount onto the Bracket
Now all you need to do is hook the angled parts together! Check that the ends are even on both sides, so it doesn't tip when you put more weight on one side.

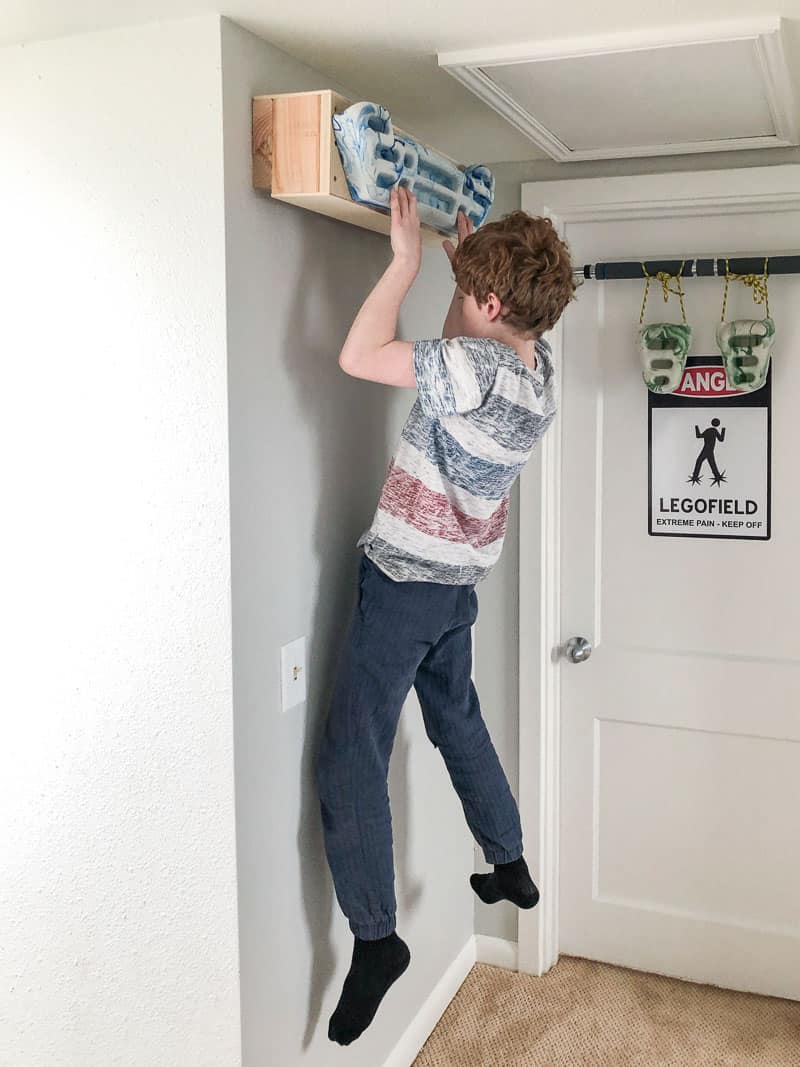
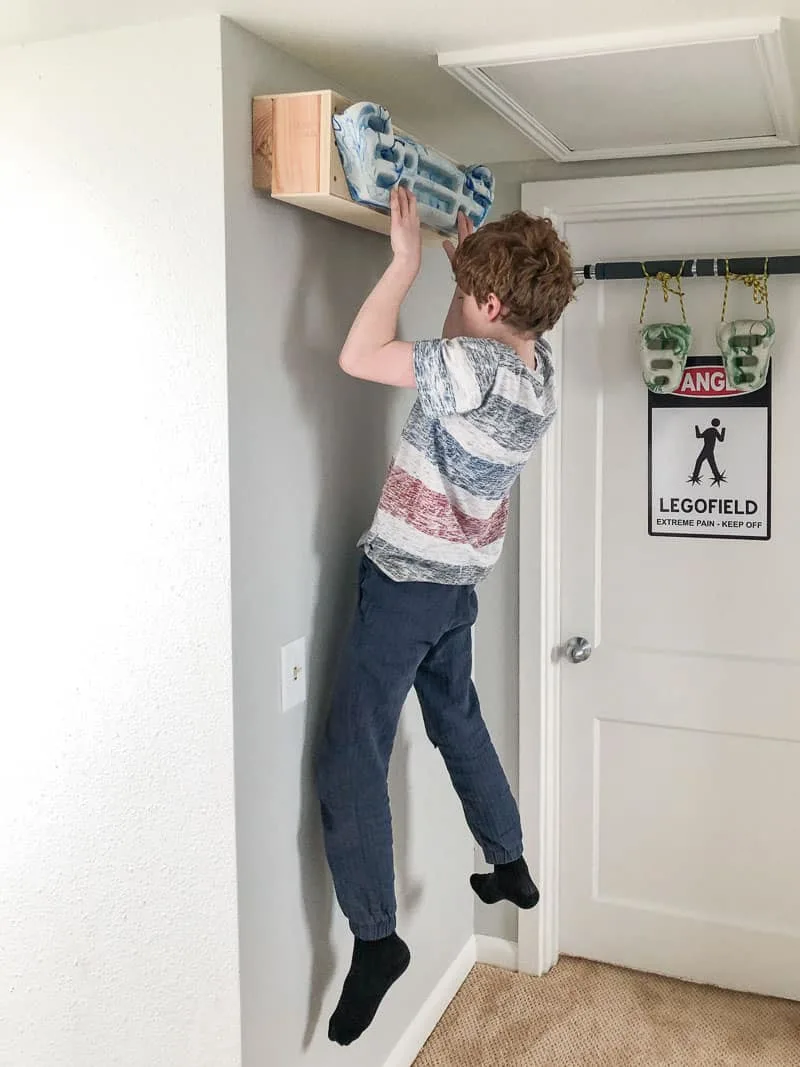
My son barely weighs 70 pounds, but I tested my own weight (which is significantly more than that) and it didn't budge! There's the tiniest bit of give, but that's the nature of wood. His pull up bar has way more flex than this thing!
You should get in the habit of checking out the boards every once in a while to make sure that the screws are still tight and nothing is pulling away or cracking.
The beauty of the French cleat system is that it's super easy to switch out the hangboard for another style, or remove it entirely if you don't want a box on the wall all the time!
Enjoy your Hangboard Workout!
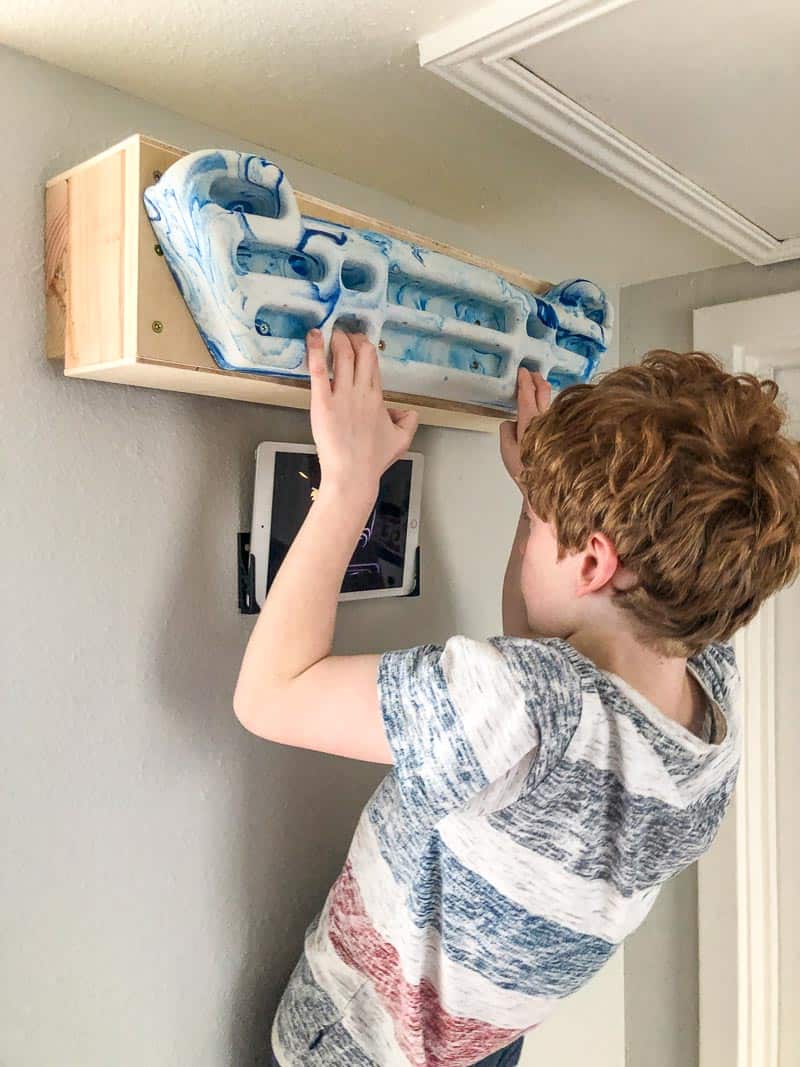
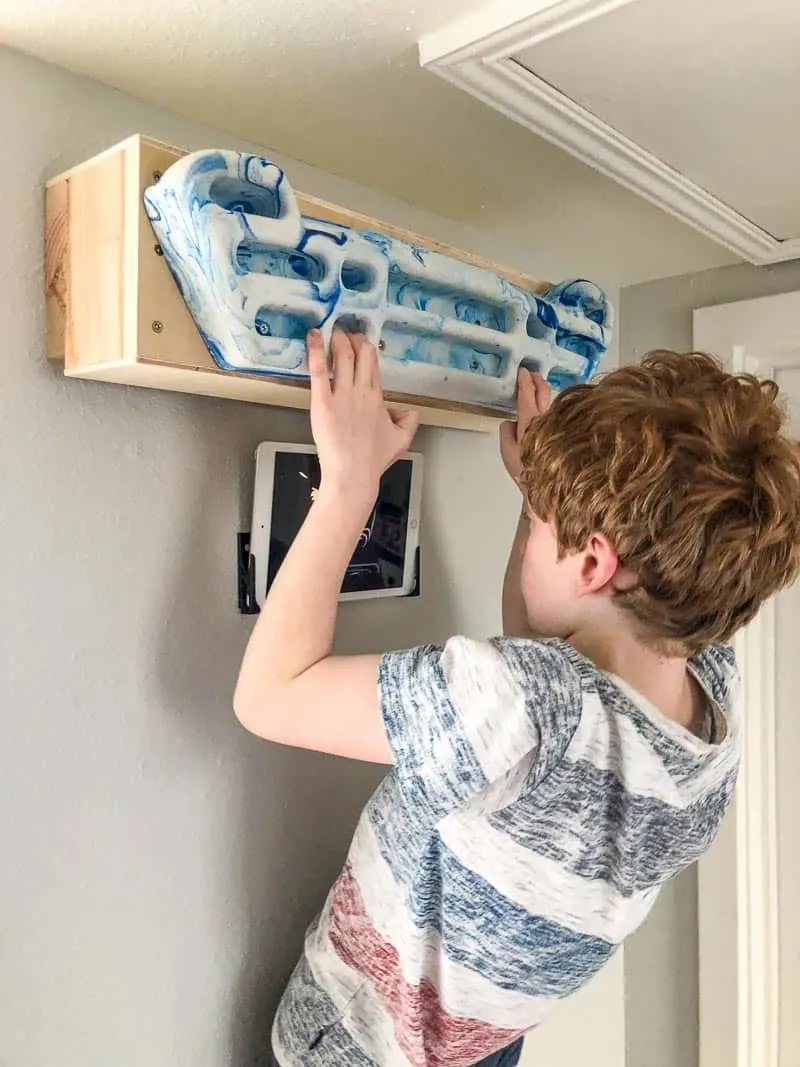
My son was thrilled to try out his new hangboard mount as soon as he got home from school. He can just barely reach the bottom holds when he stands on his tiptoes, so he has plenty of room to grow! (Can I just brag for a minute about the fact that he's holding his entire body up by four fingers? I can't do that!)
Once he got used to hanging closer to the wall, I installed the wall mount for his iPad right at eye level. It's really boring to just dangle while your arms and fingers are screaming at you to stop, so hopefully this will make it a little easier! 😉
Hopefully this hangboard mount will help solve the same problem we had! It's great for mounting lower to the ground for shorties like my son, and you can hide it away in a discrete corner if you don't want to mount a big plastic thing over the door.
We've been talking for YEARS about turning the sloped ceiling of our upstairs playroom into the ultimate overhang training area. But before I put all that effort into building it, I wanted to see if he'll use this little one first. I have a feeling I'll be stocking up on plastic holds pretty soon, though!