Learning how to spray paint properly is essential for a flawless finish. I'm sharing all my spray paint tips and tricks so you can get great results on your next DIY project!

This post contains affiliate links for your convenience. Purchases made through these links may earn me a small commission at no additional cost to you. Please visit my disclosures page for more information.
Why choose spray paint?
With so many options for paint nowadays, why choose a rattle can of spray paint over a quart of latex paint?
Ease
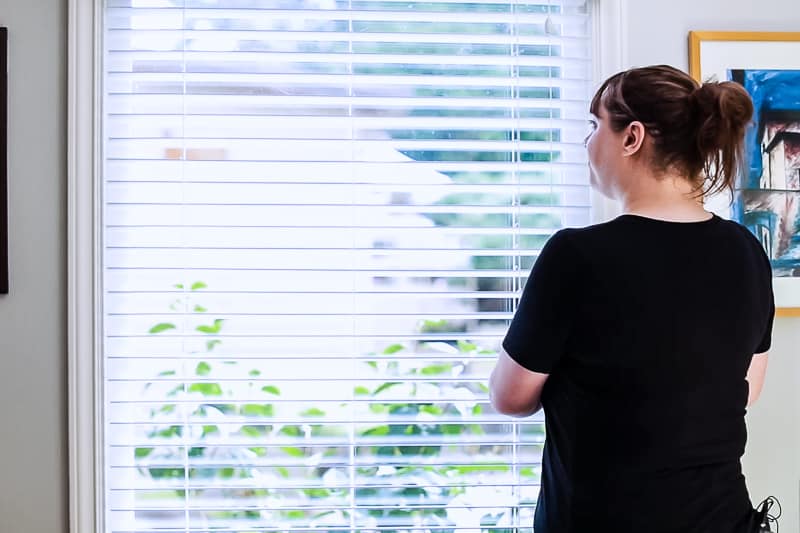
Spray paint is fast, easy, and will stick to almost anything! I've spray painted everything from window blinds to glass crystal to picture frames with great results. You don't have to worry about brush strokes showing up in your finished piece, and it dries really fast so you can finish up your project quickly.
Selection
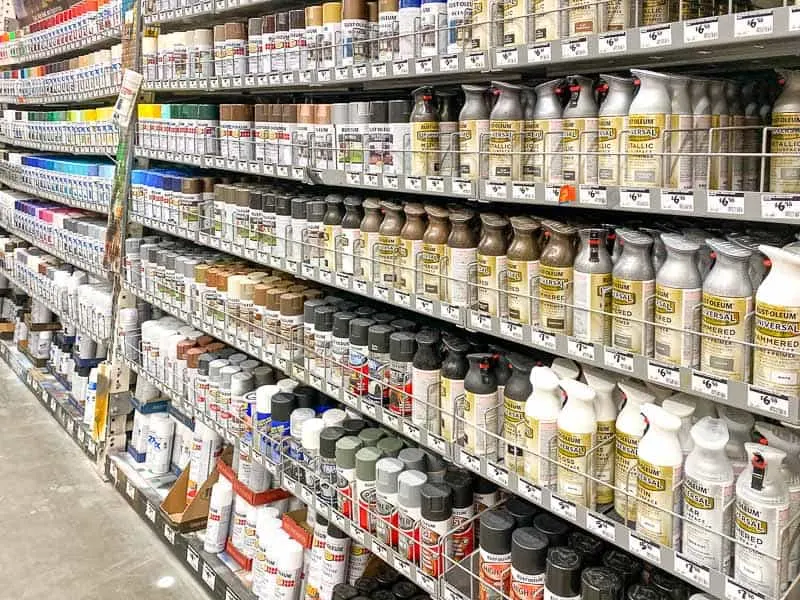
Other paints were once favored because you had a better selection of colors. Now the spray paint aisle has a huge assortment of colors and finishes! You can even find specialty finishes that you can't get elsewhere, like metallic, stone or glitter.

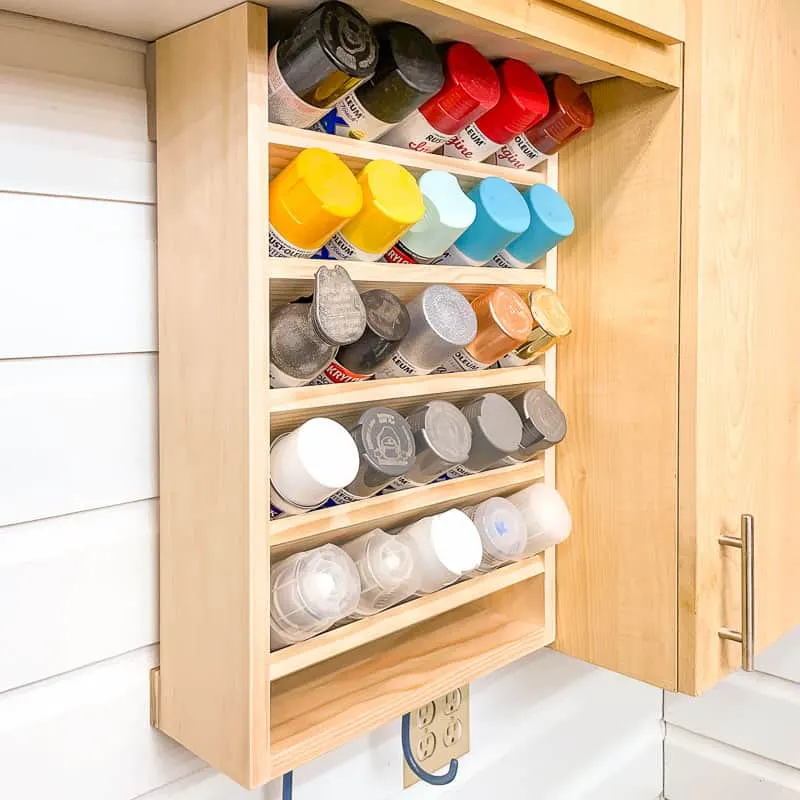
Once you've started collecting spray paint colors and finishes, you'll need to store them all somewhere! This DIY spray paint rack holds up to 25 cans in one spot, so you can easily see what you have.

Durability
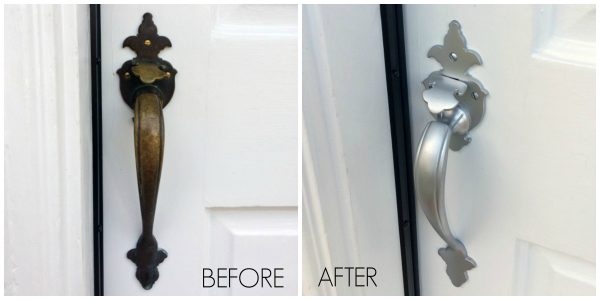
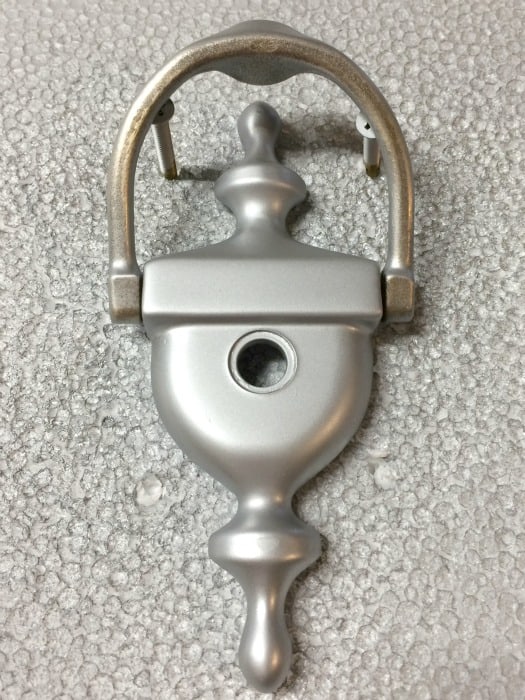
Choose the right spray paint for your material for maximum durability. Plastic won't bond to regular latex or acrylic paint, but specially formulated spray paint sticks really well! Try giving your plastic outdoor planters a makeover with a fun color, or changing the metallic hue of your front door hardware!

What surfaces can I spray paint?
Versatility is where spray paint really shines. There's a spray paint that will stick almost anything!
Here's a list of the most common surfaces you can spray paint:
You can be confident that your average can of spray paint will stick to any porous surface, like wood or cardboard. Other surfaces, such as metal, plastic, and glass, have special spray paints that are designed to adhere properly. Check the label on the can to see what surfaces the product will adhere to.
One factor to keep in mind is the conditions of the finished project. For instance, when I spray painted the brass frame of my fireplace insert, I used a spray paint specifically designed to withstand high heat. If your project will live outside, look for a spray paint that is waterproof and UV-resistant.
Preparing your piece for spray paint
A little prep work goes a long way in getting a flawless spray paint finish! The better you prepare your piece, the better your results will be.
Disassemble (when possible)
If you can take your project apart, it may be easier to paint the individual pieces. Make sure to label the parts for reassembly later! Don't forget to paint the heads of screws and other small items that will be visible in the finished piece. I like to stick these parts in styrofoam so they don't have to be handled during the painting process.

Clean thoroughly
Make sure that the piece you are working on is clean and free of other finishes. Spray paint is often seen as the superglue of paints. But just like every other kind of paint, if you don't prep properly, it will start to wear off and bubble prematurely.
Nonporous surfaces like plastic and metal should be scrubbed with soap and water, then allowed to dry thoroughly before painting. A bucket of soapy water and the garden hose can make quick work of this task.
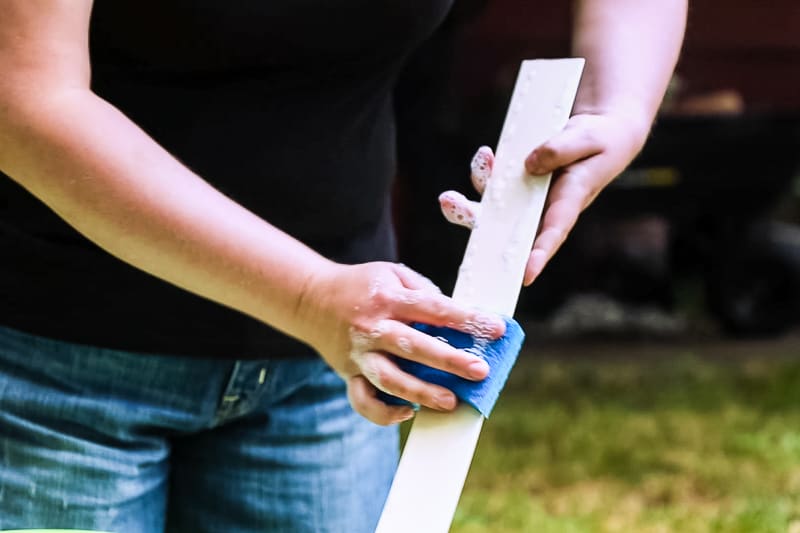
Lightly sand the surface
In most cases, the best way to go about removing other finishes is to sand the piece thoroughly. This will scuff up the surface and give the paint something to adhere to. For irregular shapes, a sanding sponge works great for getting into all the nooks and crannies that a power sander may miss.
After sanding up to 150 grit, remove any dust with a microfiber cloth or tack cloth. Any dust remaining on the surface will show up in your finished product, so make sure everything is clean!
Tape off areas you don't want to paint
Last of all, you should tape off any part of your project you don't want to paint, as well as the surrounding area. When you are painting with a brush, you have much more control over where the paint goes. When you are spraying, you have to be much more diligent about taping because the spray goes all over the place.
If you need to cover a large area, you can tape down old newspapers or paper. Press down the edges of the painter's tape for a tight seal.
Preparing your work area for spray paint
Now you know how important it is to prep your work before you paint so you get a high-quality finish. However, when it comes to spray paint, it is almost as important to carefully set up your workspace.
Just like all aerosol products, spray paint gets everywhere. Containing this overspray and preventing dust and bugs from landing in the wet paint are both important things to consider.
Containing overspray
A surprising amount of spray paint will never end up on the project! Some of it falls to the ground, but a large part of it floats through the air and can end up in all kinds of unfortunate places before it has a chance to dry. Luckily, there are a few easy ways to contain overspray.
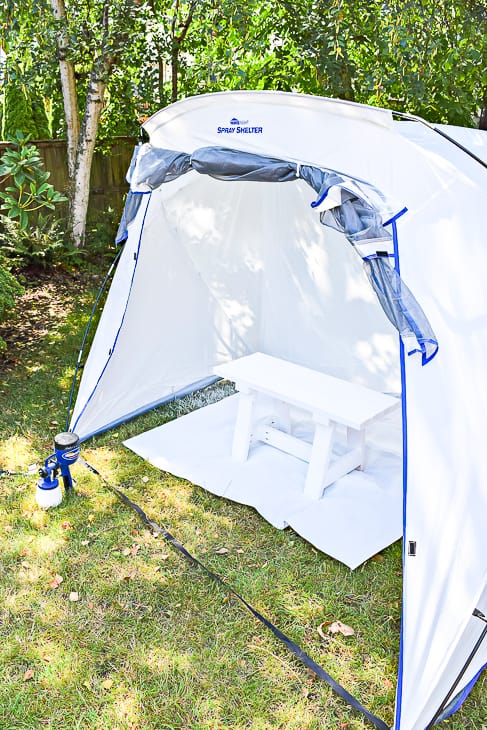
If your piece is small enough, simply spray it inside of a cardboard box. If you're an avid DIY-er who plans to paint everything in sight, I recommend one of these pop-up spray shelters. It folds up flat, but pops up instantly when it's time to paint. You can see that mine has been put to good use over the years!
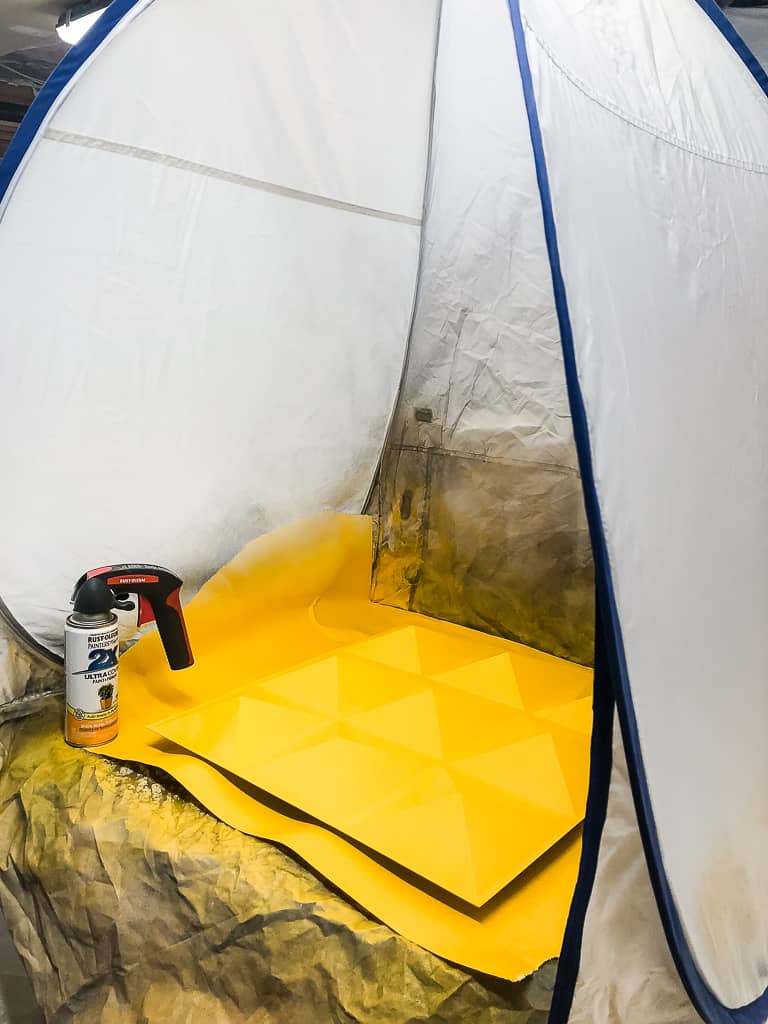

For larger pieces, there are larger spray tents! I use this one whenever I'm painting in the backyard to keep the paint in and the leaves and bugs out! The front flap can be rolled down while the paint dries to prevent anything from landing in the wet paint and ruining the project.

Use a turntable
The difficult thing about using a spray tent is that it's difficult to reach the spots on the back of the piece without walking into a cloud of paint inside! You can't pick up and move it while it's still wet, so what do you do?
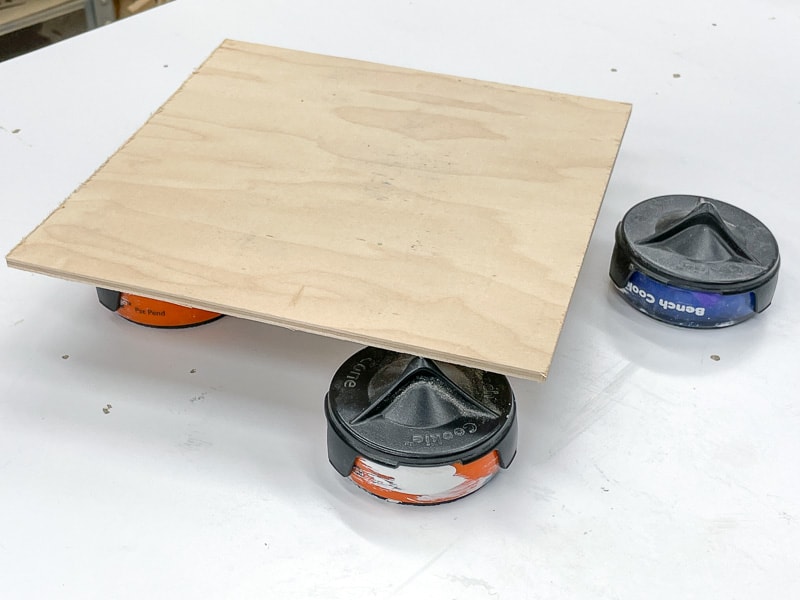
I store a wooden turntable right next to the small spray tent just for this purpose! It's super easy to spin the item to be painted without getting fingerprints all over the surface. For larger items, set your project on a piece of plywood so you can grab a corner of the board and spin it on the ground.

Elevate your project
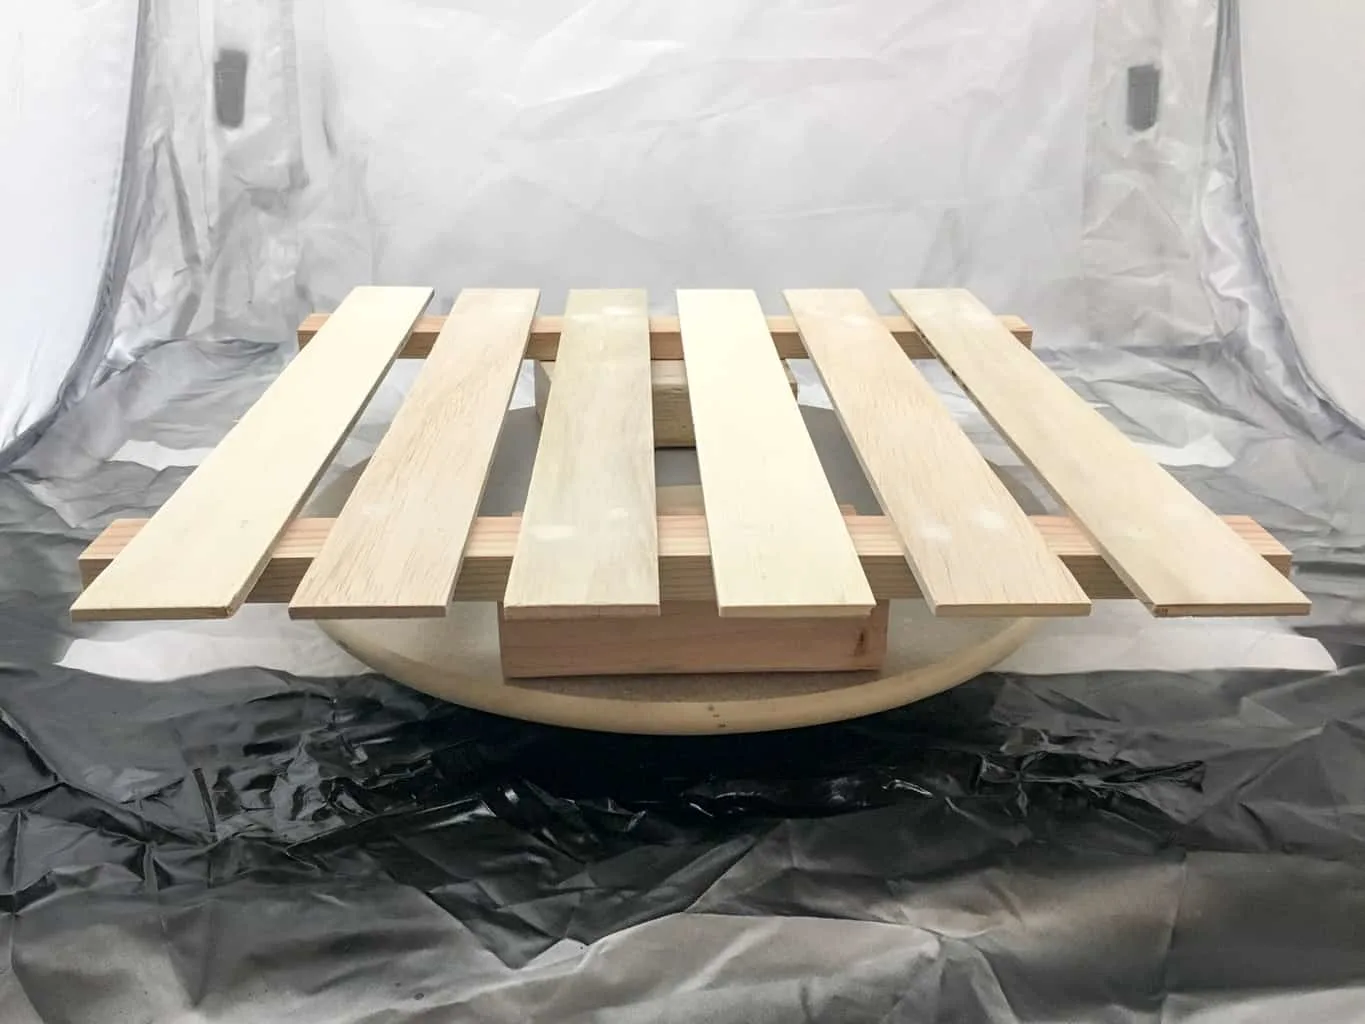
It can be hard to spray paint the edges of your project if they're flat against the ground. Prop it up with scrap wood or painter's pyramids to make it easier to reach these areas.

The pyramids are especially great because you can paint the underside of your project first, then flip it over and rest it on top of the points to paint the front. The points won't pull off the paint before it dries, so you can finish faster!
Spray paint safety
This is not just some empty disclaimer. Spray paint can be truly dangerous if it is not used carefully. We all know the general warning on the can "WARNING: USE IN WELL VENTILATED AREA." Many people think this is only there to keep people from breathing the fumes from the paint. However, this is not the only reason!
Ventilate the room
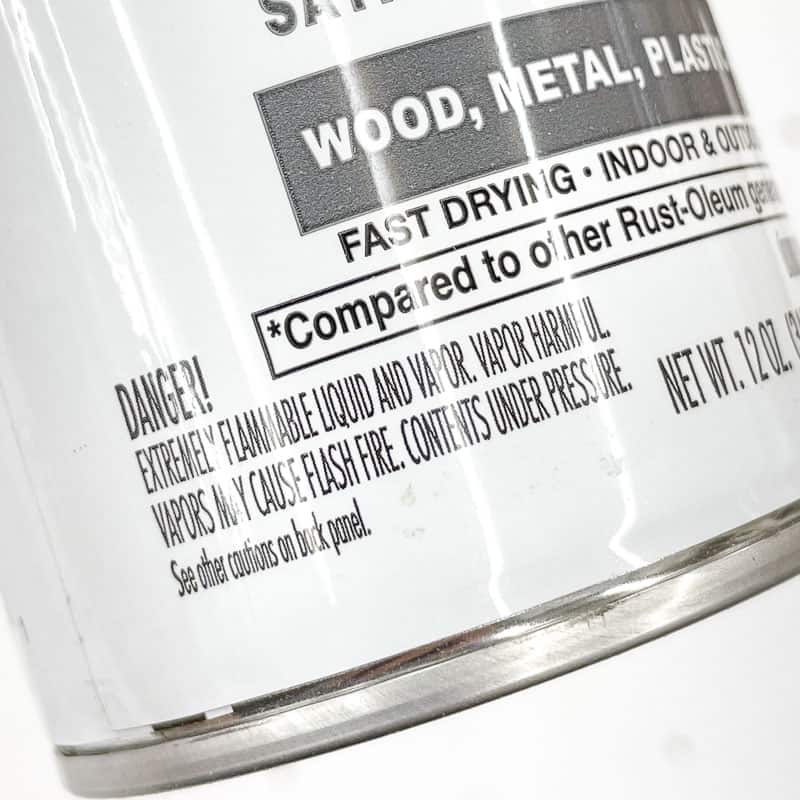
Spray paint fumes are combustible. It's not too common, but spray paint fumes can actually ignite and cause explosions or fires. Usually, the cause of these accidents is the pilot lights on gas-powered furnaces and water heaters. But don't worry, this can easily be prevented by ventilating the room. Just make sure to have a couple of windows open or a fan in the door.

Protect your lungs
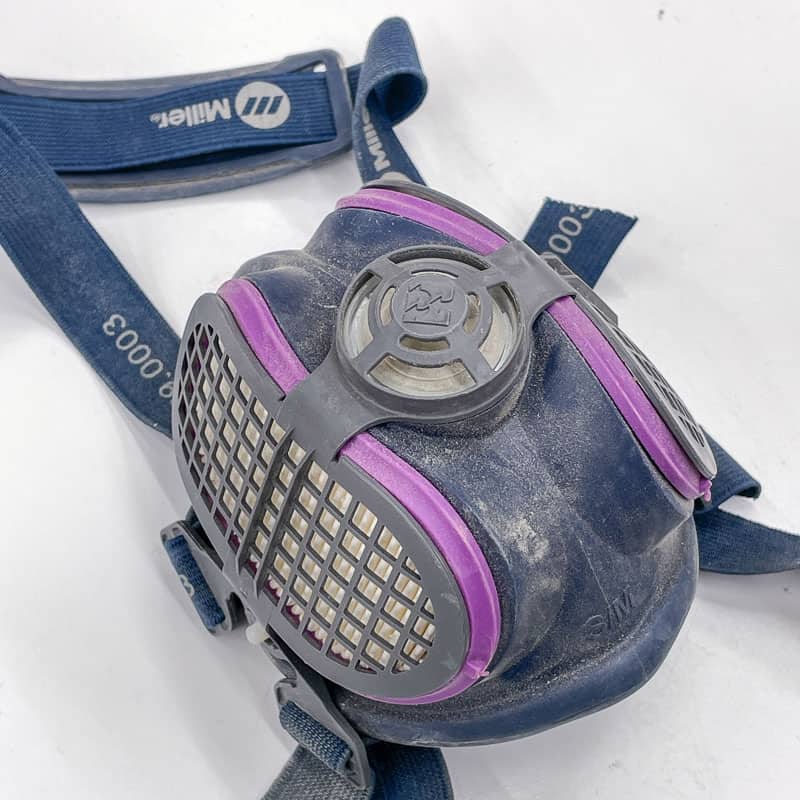
Protecting your lungs when using spray paint is also very important. Proper ventilation will help a lot with this, but you should also wear a respirator while painting indoors. If you're outside, you can probably get away with wearing a paper dust mask instead.
Wear gloves and safety glasses
Lastly, it is good to wear gloves and safety glasses while using spray paint, especially when you are using oil based finishes. They are extremely difficult to get off of your hands, and can burn your eyes. At the very least, it'll keep your hands and face paint-free!
To prime or not to prime
It might feel like a bunch of extra work, but it's usually a good idea to prime before painting. Priming improves the finished product, and helps your paint stick to troublesome surfaces.
Priming is especially useful when you are trying to paint a dark-colored surface with lighter paint. Instead of wasting your good paint on countless coats trying to keep the base from showing through, use a coat or two of cheaper primer to give yourself a lighter color that your paint will cover well.
There are also the two-in-one primer/paint combos. These work well if you are worried about your paint adhering properly. However, if the problem you are worried about is the bottom color showing through, you should use a separate primer.
Check the weather
Make sure that you check the weather before you start painting outside. The ideal range to paint is between 50 and 90 degrees Fahrenheit, and it shouldn't be raining or windy.
The bigger concern is the humidity level. The dryer the air is, the better. Water in the air can cause problems with your paint adhering and drying properly. This is the biggest challenge for me, since I live in the rainy Pacific Northwest! Shoot for humidity levels in the 40% to 50% range if possible.
How to spray paint the right way
If you set up everything properly, you've already done the bulk of the hard work! Once you have prepared your piece and set up your painting station, you are about 80% done! However, there are a few things to remember so you can get that professional finish.
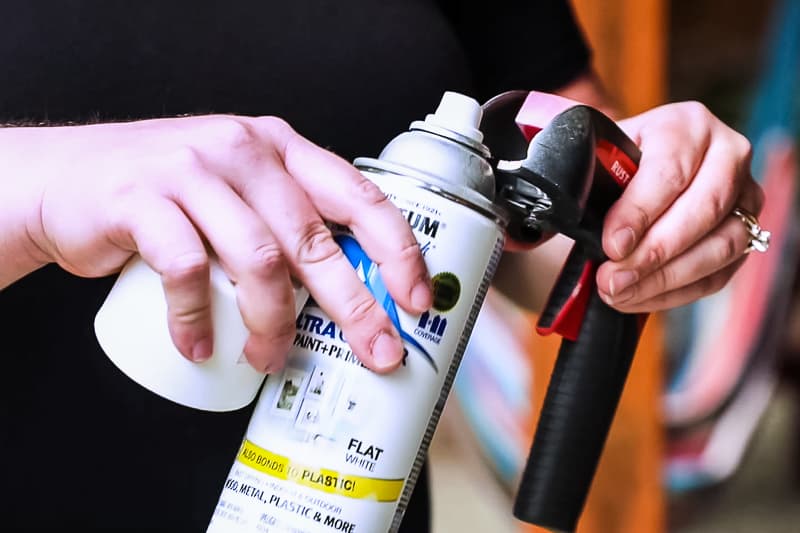
Shake the can for 2 minutes
Before you start, make sure to shake your can for about 2 minutes. Shaking spray paint is even more important than stirring regular paint. It not only mixes the paint, but disperses the aerosol propellent throughout the paint. Otherwise, you might end up simply spraying propellent while paint sits in the can.
Use a handle
This spray paint can handle is a game changer! It gives you better control of the spray, and it's much more comfortable than pressing that tiny button. Just clip it onto the top of the can after you shake up the paint.

Test spray first
Always test your spray paint on a piece of paper or cardboard first. Hold the can about 8-12 inches from the surface and apply a light even coat. Pay close attention to how the paint is sticking. It should be going on in a light, even mist. If the paint starts to pool or you see ripples or thick dots, you're too close!


Each brand of paint has a nozzle with a different kind of spray pattern. Some spray in a cone shape, others spray in a flat line or you can adjust between the two. It helps to become familiar with the spray pattern before you start on your project.
If you used the can before, there may be a little bit of dried paint in the nozzle which could throw off your spray pattern. If it seems to be concentrating in one spot, use a paper clip or a needle to clear out any blockage.
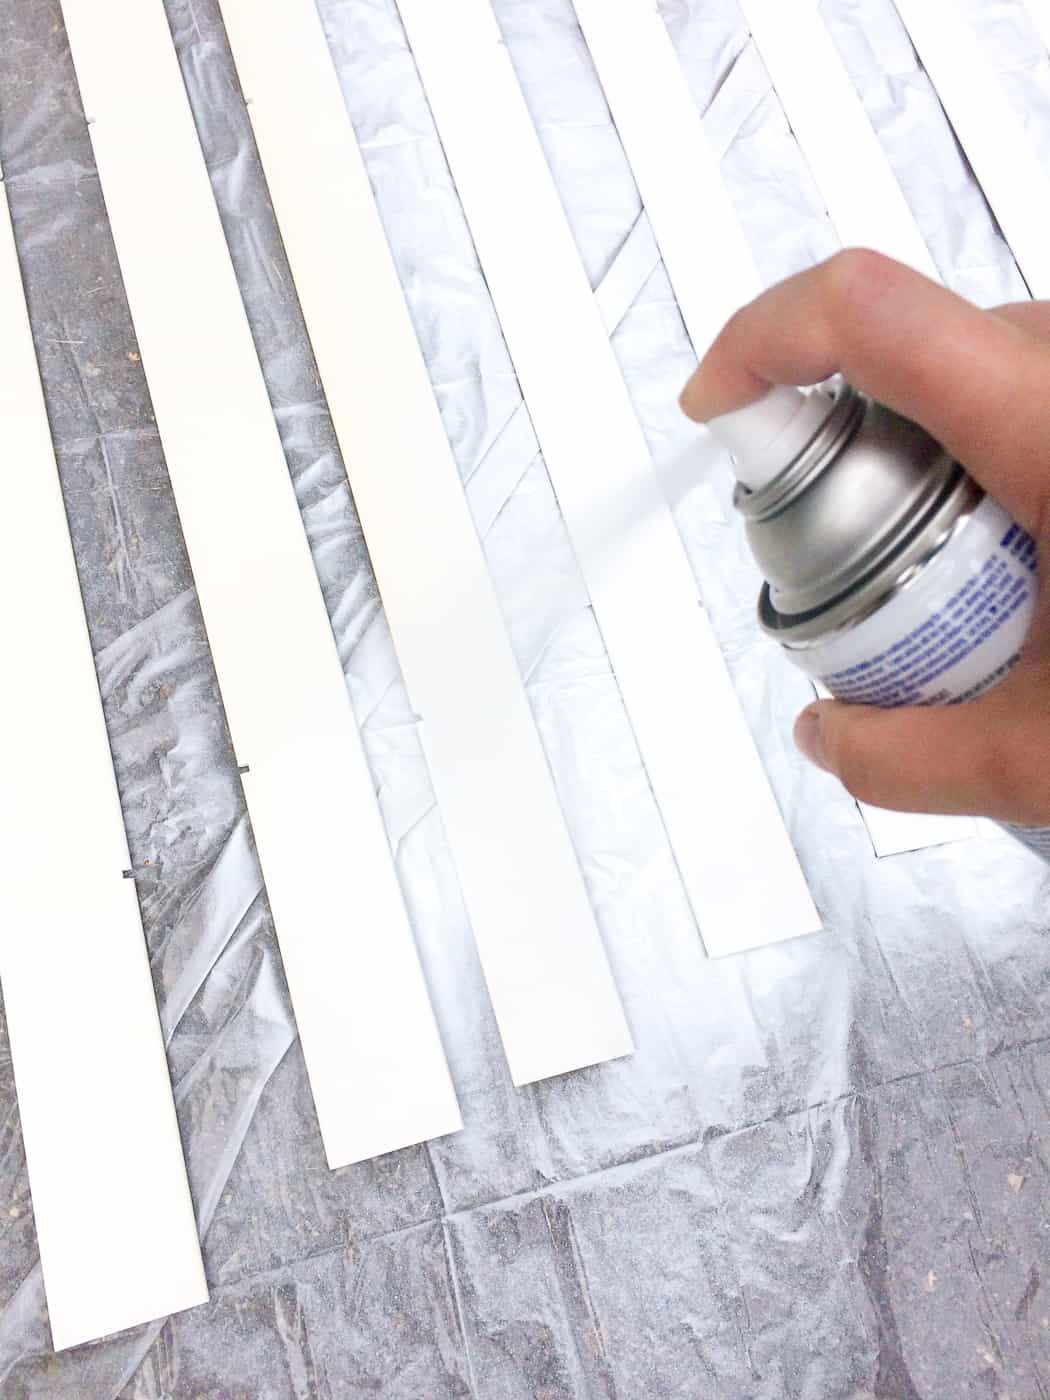
Apply light, even coats
Once you are comfortable, move on to your actual project. Apply a light first coat, and don't worry if some of the surfaces underneath show through. Many light coats are always better than a few heavy coats!
Start the spray off to the side, then move in a level line across the surface until you pass the opposite edge. Don't make an arc with your arm, which will bring the can closer to the project in the middle and further away at the sides. Use your feet to move back and forth on the same vertical plane.
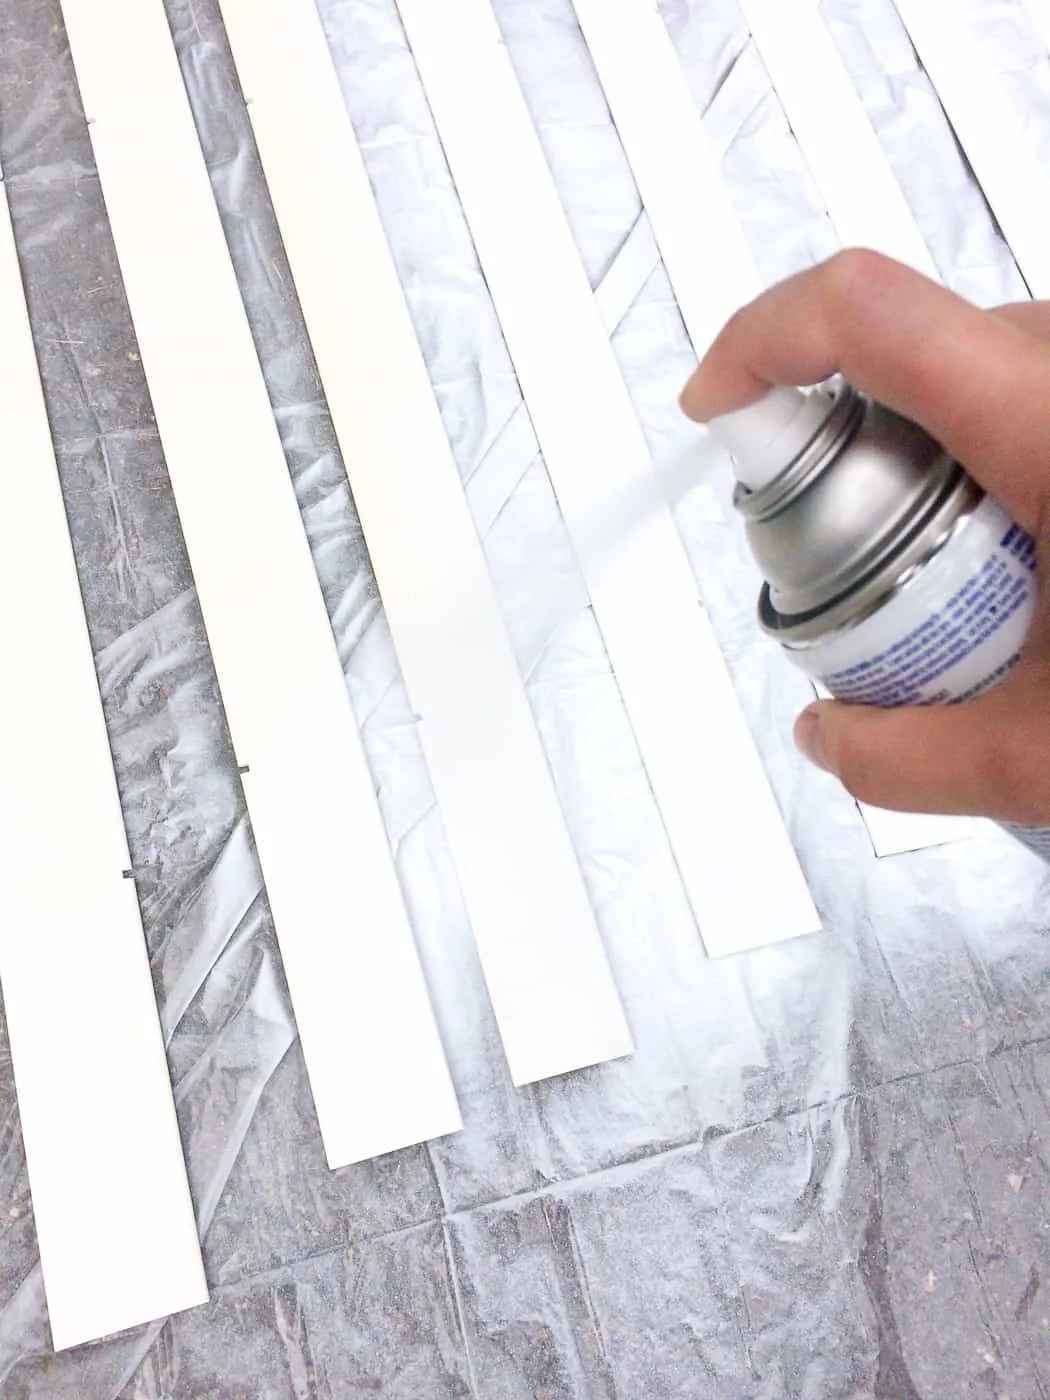
Never start or stop spraying in the middle of your piece, or change direction halfway through. This may cause you to pass over some areas more than others, resulting in a pool of wet paint. But it can be helpful to start the second coat in the opposite direction of the first, to even out any inconsistencies.
Apply a tack coat to vertical surfaces
No matter how careful you are, it's difficult to keep your paint from running on vertical surfaces. One handy trick to make this a little easier is to apply a "tack" coat.
Hold the can further back from the surface than you normally would, and very lightly mist the vertical parts. Let this coat dry for about 5 minutes, then return and spray as normal.
The texture of the tack coat will help the rest of the paint stick instead of dripping. This is similar to when you rough up a smooth surface with sandpaper so that the paint will adhere.
Wait for the paint to dry between coats
After the first coat is on, take a look at the back of the paint can and see how long you should wait before applying the second coat. It usually takes about an hour for spray paint to dry between coats, but it can vary depending on temperature, humidity and brand.
Don't rush and spray again too soon, or you'll end up with a mess! Depending on the color and texture of the surface you are painting, you will probably have to apply 2-4 coats to get full, even coverage.
As a general rule, do one more coat after it looks like you have full coverage. In different lighting, you may notice a spot that you missed! One last coat will help prevent this problem and give you a better finish.
Sand off any dust
Keep an eye out for dust in your paint between coats. This will be evident if your paint has a rough surface that feels like sandpaper. This can be very frustrating, especially after spending so much effort setting up a workstation to prevent dust!
To get rid of the roughness, use some ultrafine sandpaper to very lightly sand your piece in between coats. Use a microfiber or tack cloth to wipe everything down after sanding so that the dust does not become a problem for the next coat.
Spray paint can care
If you still have some paint left in the can after the final coat, you can save it for touch ups or another project if you take care of the can properly. The main thing we are concerned about is the nozzle. If you are not careful, it can easily get clogged, which will make the entire can completely useless.
Clear the nozzle after use
Clear the nozzle after each use by turning the can upside down and spraying until no paint is coming out. Then wipe the tip of the nozzle to clean off any paint that has gathered there. In most cases, this is enough to keep the nozzle clean. If you do end up clogging one of your nozzles, there are a couple of things that you can do.
How to clean a clogged nozzle
Most spray paint tips have a universal fitting so you can switch them between cans. Just grab a working nozzle off one of your other cans and swap it for the clogged one. Or, you can pop the clogged nozzle off of the can and soak it in a small jar of mineral spirits or even nail polish remover to loosen things up. Then use compressed air to blow the gunk out.
If that does not work and there is still some stubborn paint in the nozzle, use a thin piece of wire to try and clear out the heavy bits. Some extra time soaking in the paint thinner will help as well.
Cleaning up spray paint
As you might expect from a paint which will stick to almost anything, it can be a pain to unstick it. Cleaning up spray paint, whether it be washing your hands after a project or trying to save a car hood or sidewalk that has been a casualty of overspray, can be difficult.
How to clean spray paint off hands
To clean spray paint off your hands, you will want to use some sort of degreaser such as Fast Orange. The citrus degreaser, combined with pumice as an abrasive, works really well! I've heard that regular cooking oil will work too, but I've never tried it myself.
If this is not enough, you can use acetone or nail polish remover to break down the dried paint. Nail polish remover also works well to get spray paint out of clothes.
How to clean spray paint off cars
If the wind changed direction and you accidentally spray painted the side of your car, don't worry! The best way to get spray paint off of a car is to use Butter Wet Carnauba Wax. Carnauba wax is a natural oil that breaks down spray paint while also preserving your car's shine.
How to remove spray paint from glass
For glass, it's easiest to just scrape it away with a razor blade scraper. It's not worth trying to dissolve the paint. All you will need is water, dish soap, and your razor. It is really handy to have a spray bottle to dispense your solution, but a rag works fine too.
Mix soap into the water until it feels slippery between your fingers. The solution's purpose is not to clean the glass, but to prevent the razor blade from scratching. Wet the glass and slowly scrape the paint away with your razor, being careful not to apply too much pressure.
I hope this article answers all your questions about spray paint! If I missed anything, feel free to comment below or email me for more info!
Check out these other painting tutorials!
Bond Corp
Monday 30th of November 2020
Such an informative blog! One thing I would like to say that before start working on our project we should use tack cloth for removing small dust particles from the surface, it will give you a perfect finishing. Everyone should follow the tips provided by you, it will make their work easier. Thank you for sharing! I will share it to all my friends and relatives. Keep Posting! Keep Sharing!
Patty
Wednesday 11th of November 2020
Awesome details on how to spray paint. As usual, you are clear and precise. I was just thinking about spray painting an old patio table and chairs, and here was your post! I would have just “winged it” and I’m sure had regrets. Thank you so much for all the helpful tips and knowledge you share. I love your site!
Vineta
Wednesday 11th of November 2020
So glad I could help! Good luck with patio furniture project!
Janet Huey
Wednesday 11th of November 2020
Thank you for this. It is one of those posts to print out and keep. The tack layer tip was particularly helpful.
Vineta
Wednesday 11th of November 2020
I just added the ability to print the entire article to the top of the page, so print away! :) I'm glad you found it helpful!