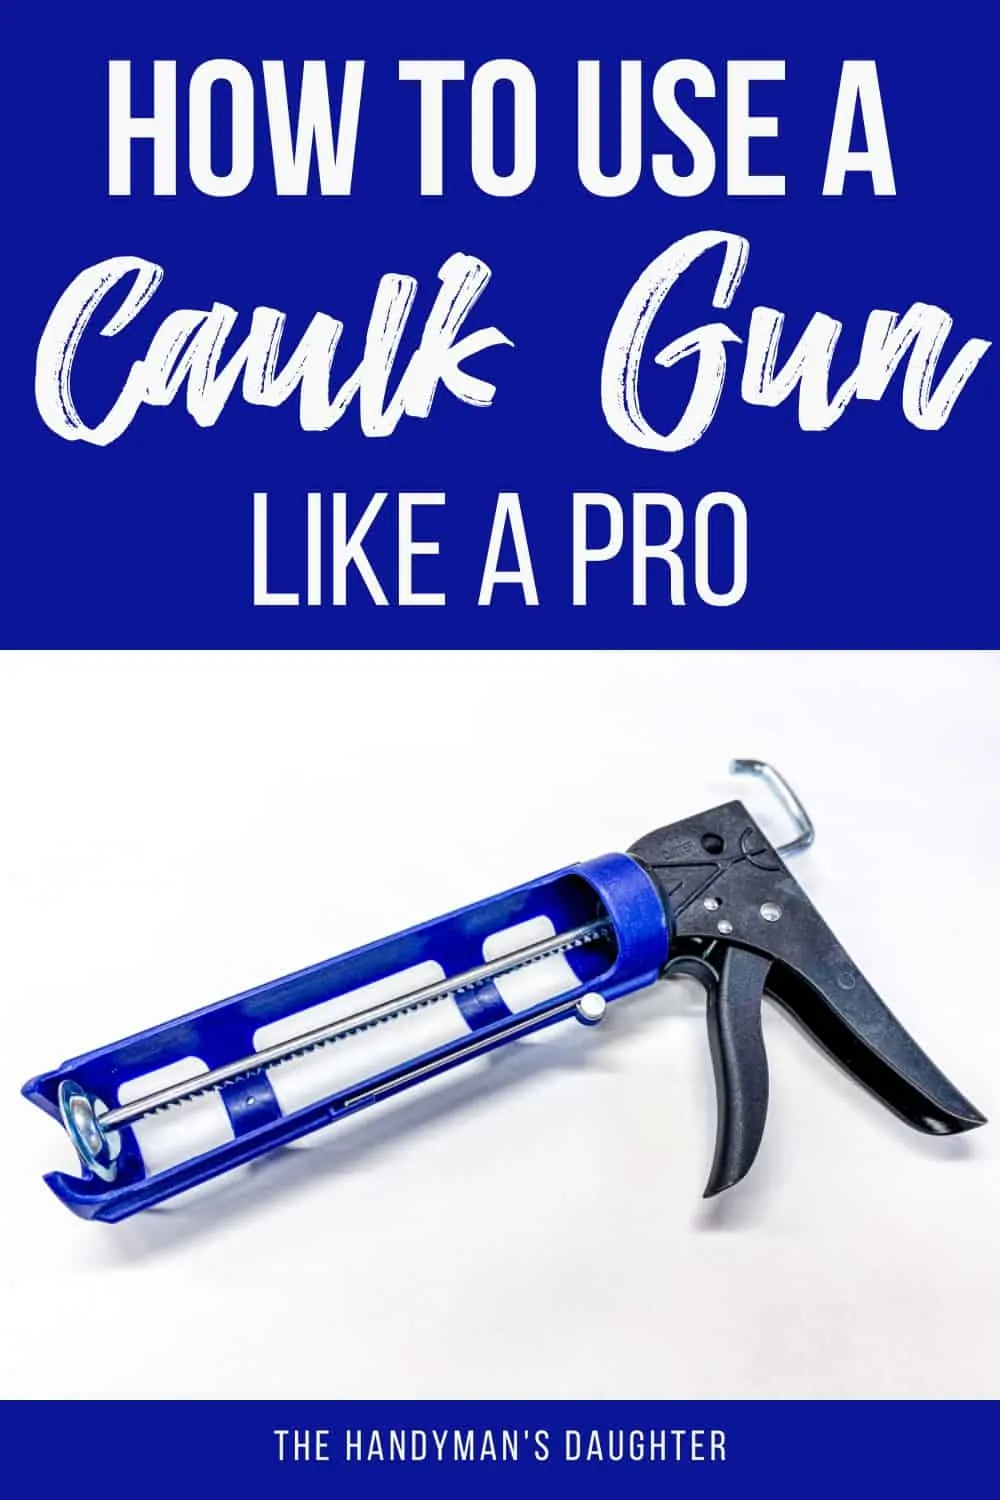
Learning how to use a caulk gun is an essential skill for any homeowner. Get all my tips and tricks for how to caulk everything in your home!

You'd be surprised how important caulk is around the house. A good caulking job around the joints of windows and doors improves insulation and lowers energy costs. Caulk seals up gaps around sinks and bathtubs to prevent water damage. It also gives a finished look to baseboards, trim and painted furniture projects.
This post contains affiliate links for your convenience. Purchases made through these links may earn me a small commission at no additional cost to you. Please visit my disclosures page for more information.
The easiest way to caulk is with a caulking gun. You can get squeeze tubes of caulk, but the selection is more limited, and they are harder to use. Also, if you have a big job, like all your baseboards after a renovation, trying to use squeeze tubes will take forever and leave your hands cramping.
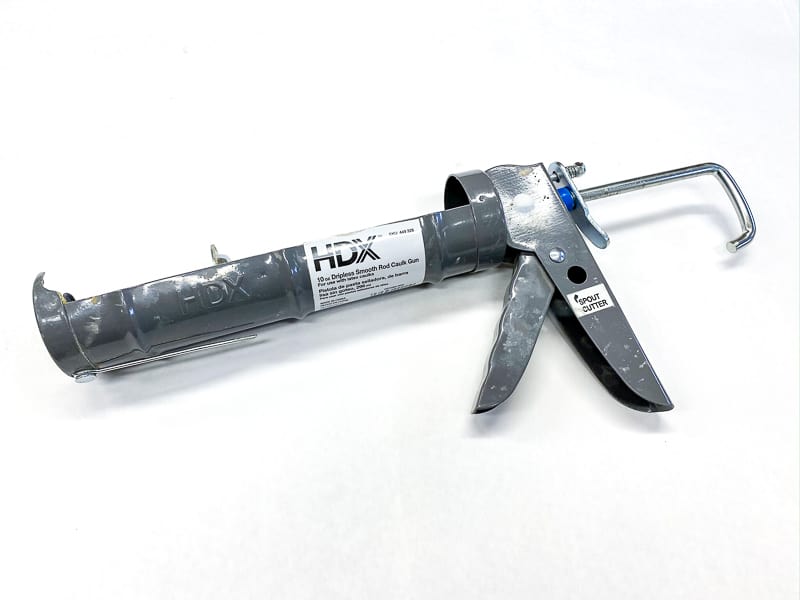
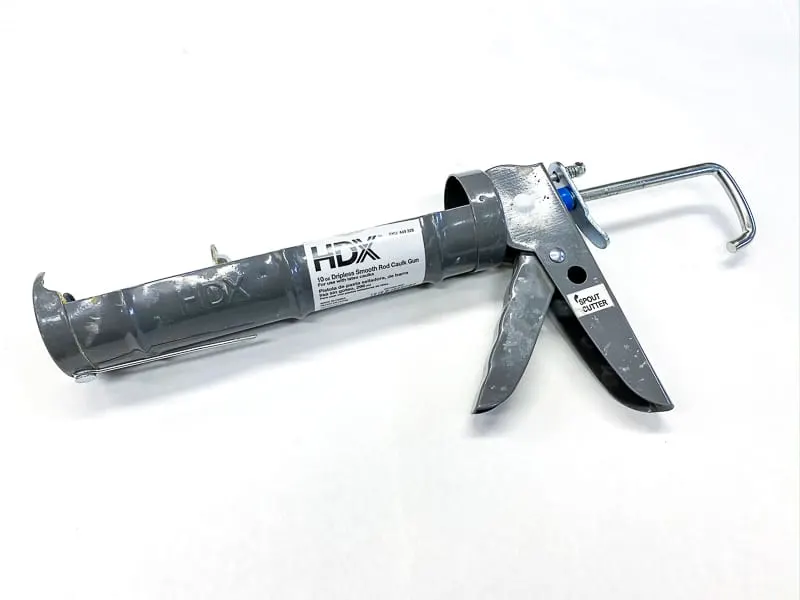
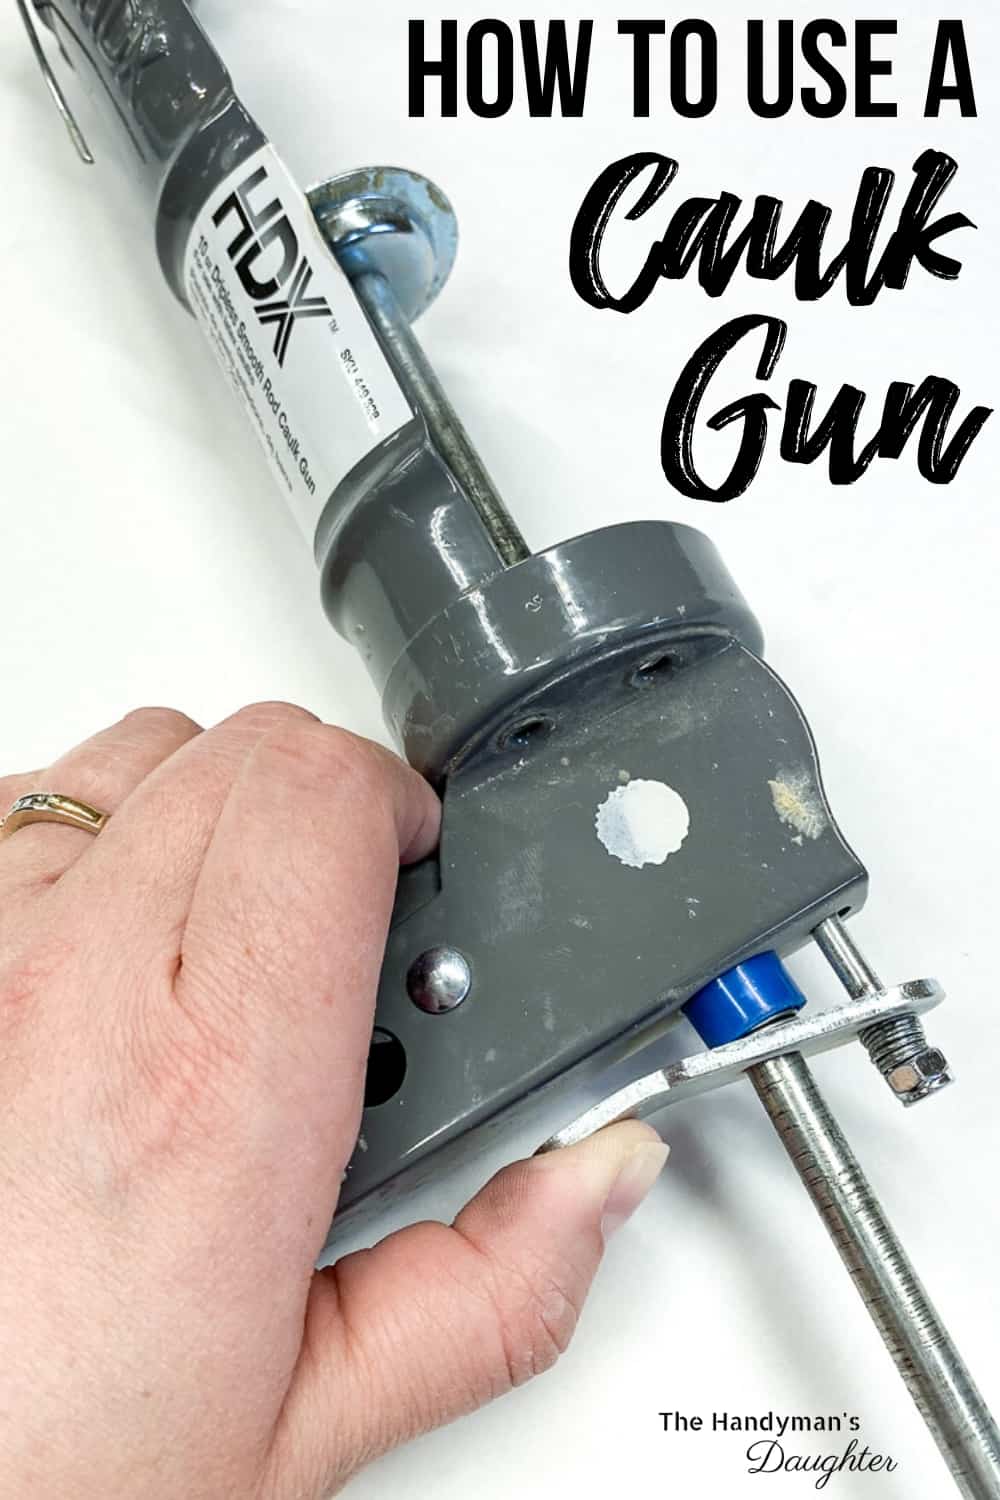
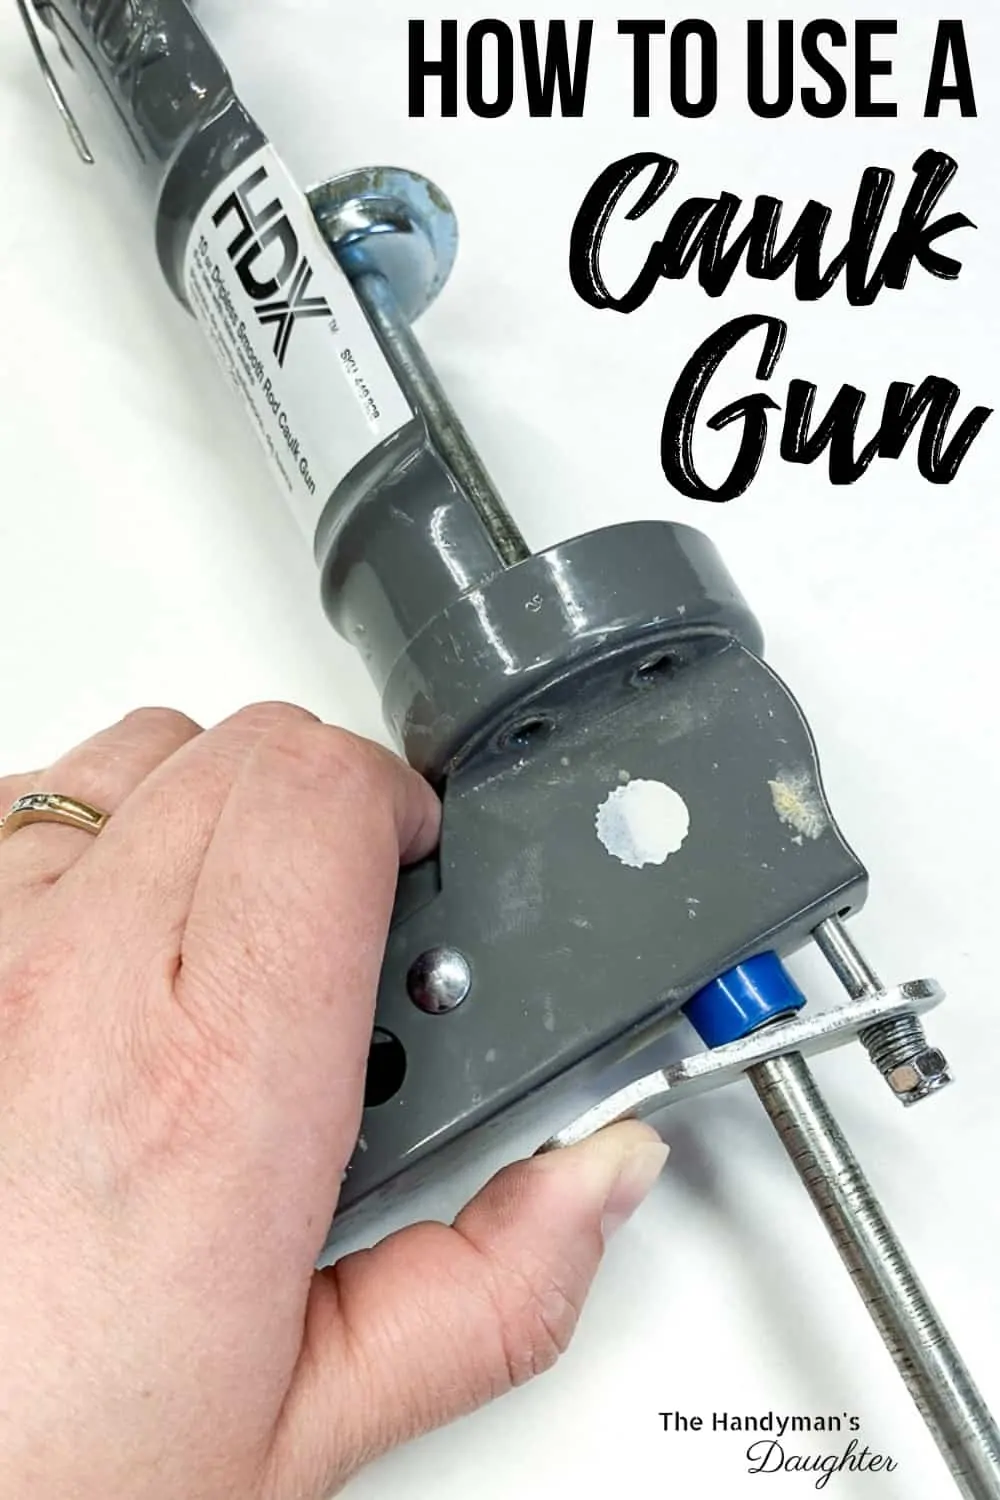
Parts of a Caulk Gun
There are a few different types of caulk guns on the market, but the differences are mostly mechanical. It will be easier to understand and decide which one is right for you if we go over the basic parts first.

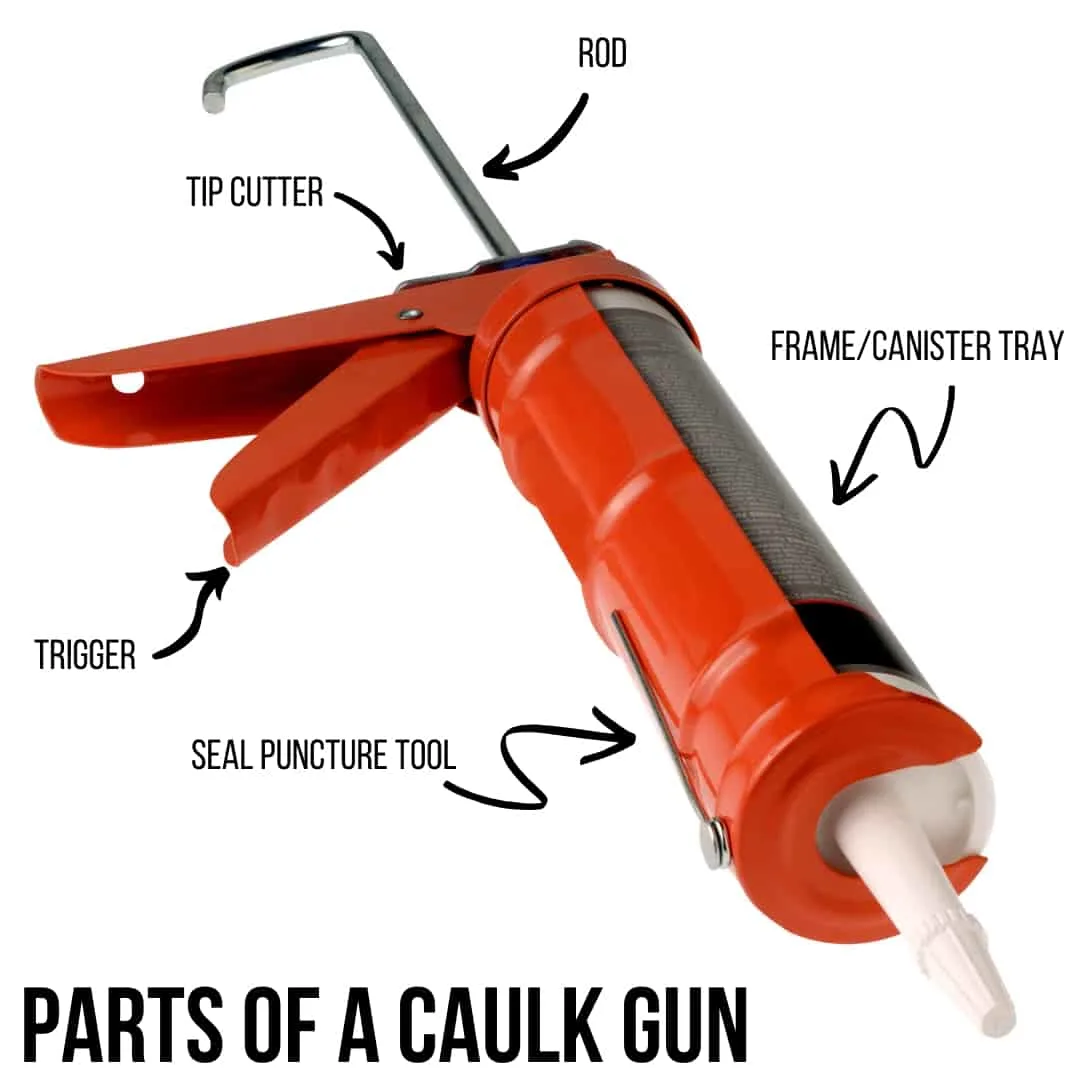
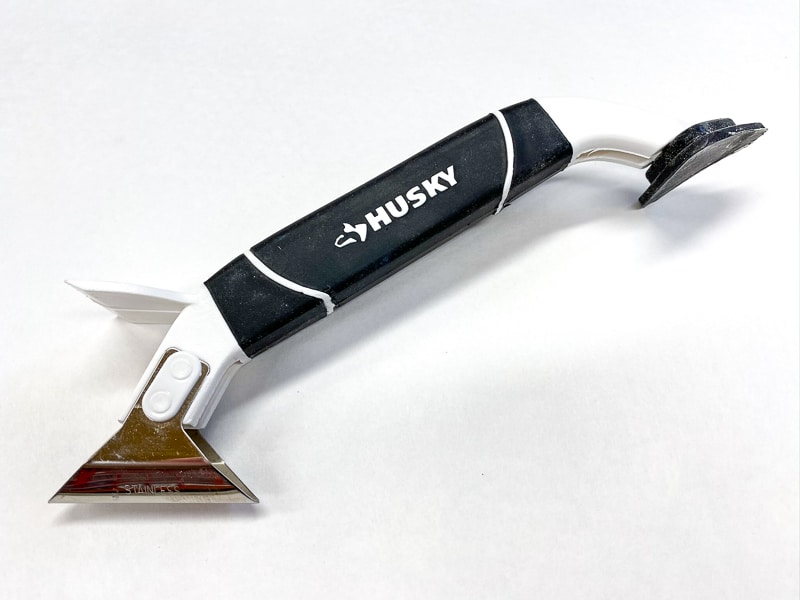
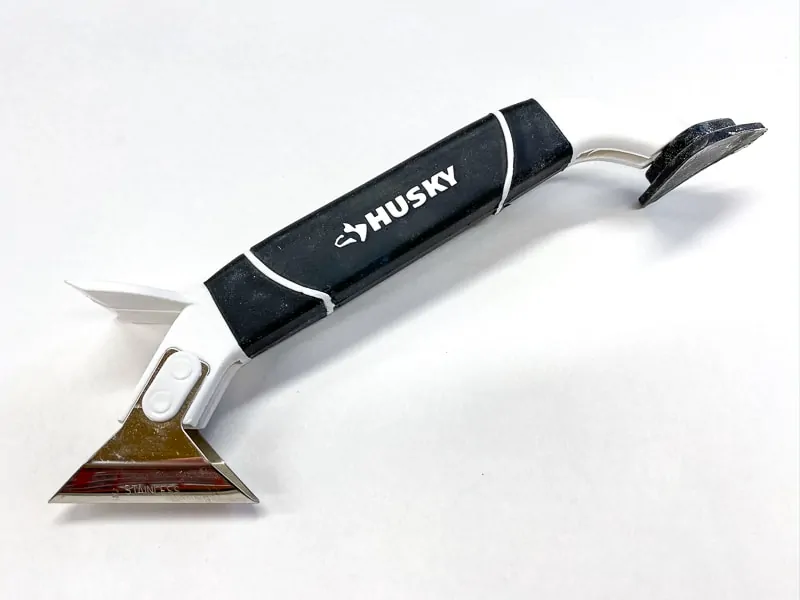
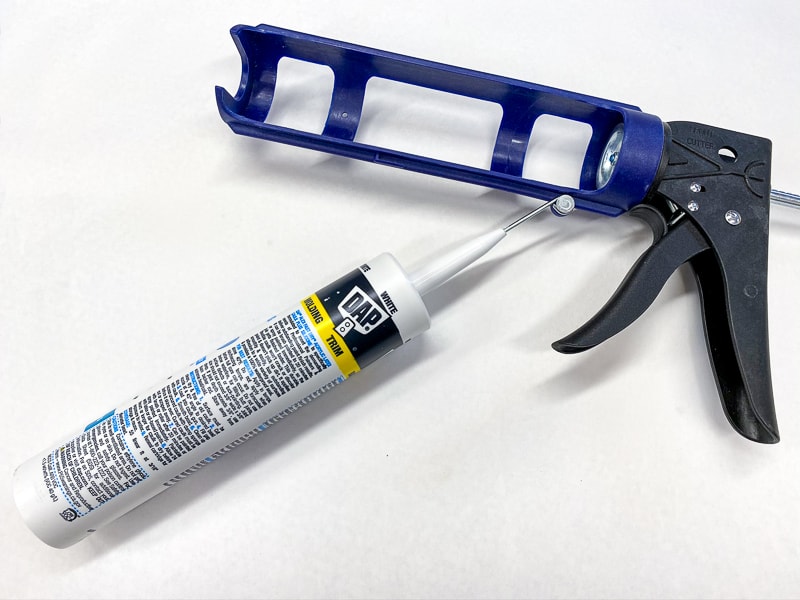
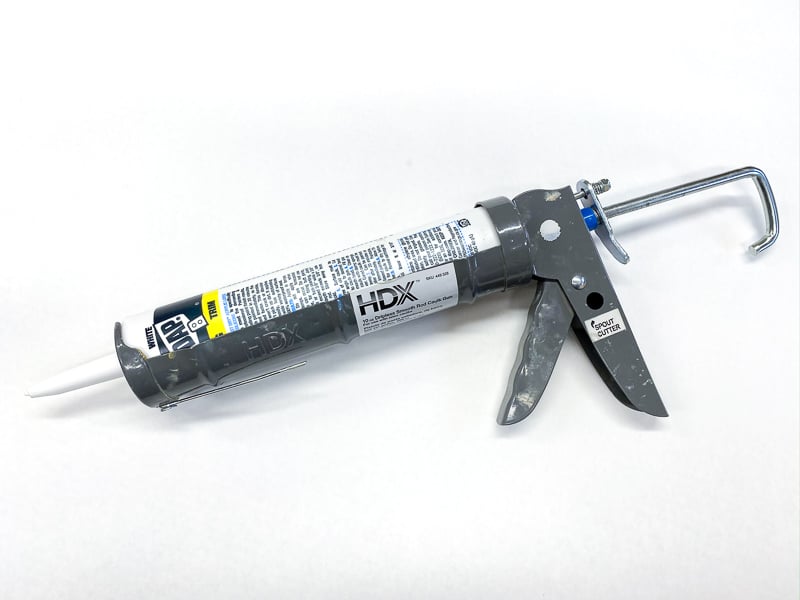
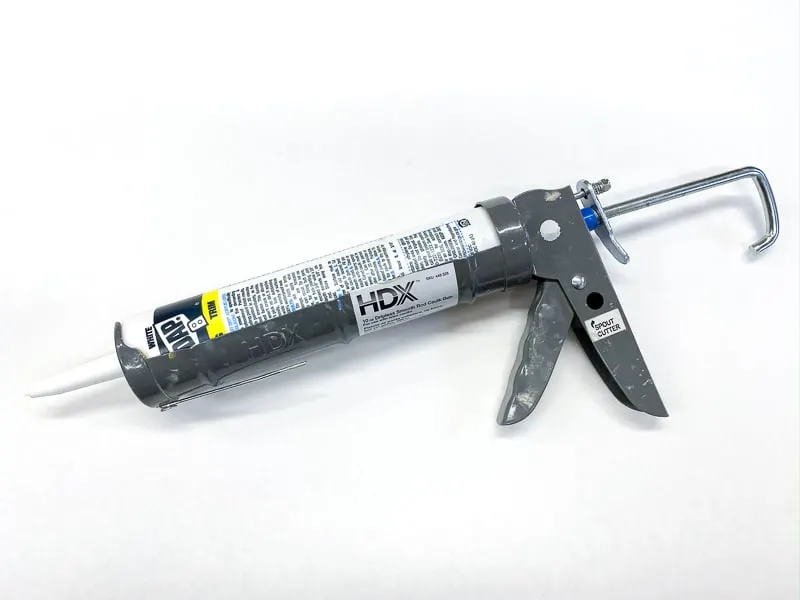
Frame/Canister Tray - This is the long piece that protrudes from the handle to hold the tube of caulk.
Rod - The rod on your gun is the long metal bar that runs the length of the canister tray.
Plunger - This is the flange at the end of the rod that pushes the bottom of the tube up to dispense the caulk.
Trigger - The trigger is the part of the handle which you squeeze to force the rod down the canister tray.
Tip Cutter - This is a convenient addition, although you won't find it on every model. If yours has one, it will be on the handle. It is a little hole in the handle with a clipper inside of it for snipping off the tip of your caulk canister.
Seal Puncture Tool - This is another add on feature you might have. It's a long stiff piece of wire, usually attached to the handle or the bottom of the canister tray. After you snip the tip off, sometimes there's a second seal between the nozzle and the caulk. You can use this wire to break this seal.
Types of Caulk Guns
There are a few different types of caulk guns. The difference between them is in the mechanism that drives the plunger to dispense the caulk.
Ratchet style
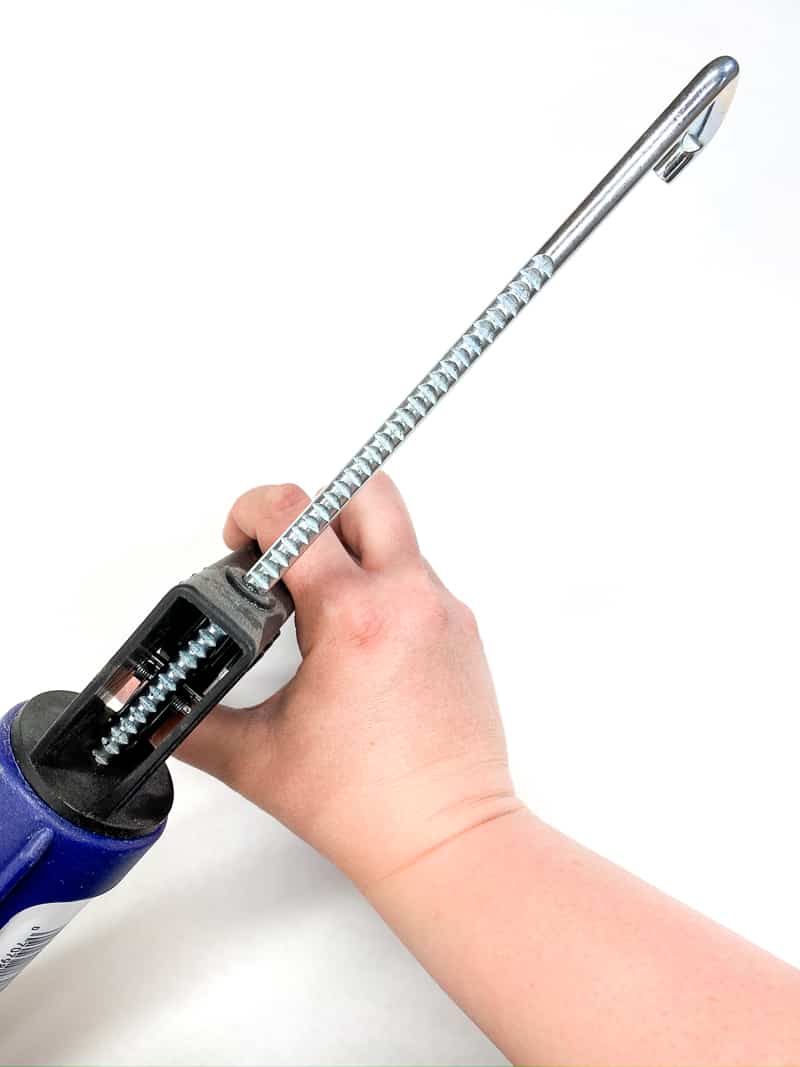
Ratchet style caulk guns are the older style, but they're harder to find now. There are teeth along one side of the metal rod. When you pump the trigger, there is a little ratchet mechanism inside the handle that grabs onto the teeth and pushes the rod along.
If you keep pressing the trigger and nothing happens, you may have the rod in the wrong position. Make sure the teeth are engaged with the ratchet mechanism if plunger isn't moving.
Dripless Caulk Guns
Dripless caulk guns work much the same as ratchet guns in that you still have to pump the handle, but the metal rod has no teeth. Instead, the mechanism clamps onto the rod when you squeeze the handle.
The benefit of this style is there is no minimum amount of caulk you have to dispense with each squeeze. On the ratchet style, the mechanism has to engage with the teeth, so you're not able to control how much caulk leaves the nozzle.
Battery Powered or Pneumatic
The only difference with powered caulking guns is that you don't have to pump the handle. Simply pull the trigger, and it will dispense caulk automatically. This style is powered with either a battery or pressurized air.
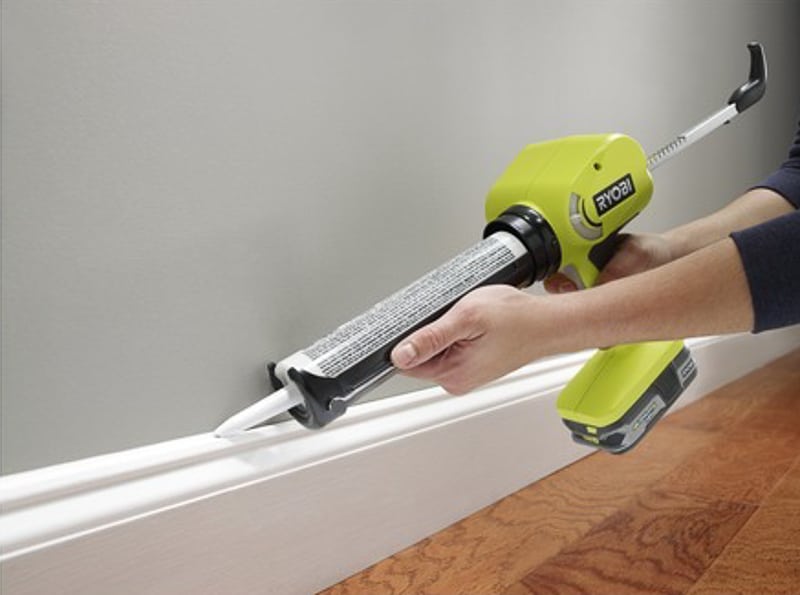
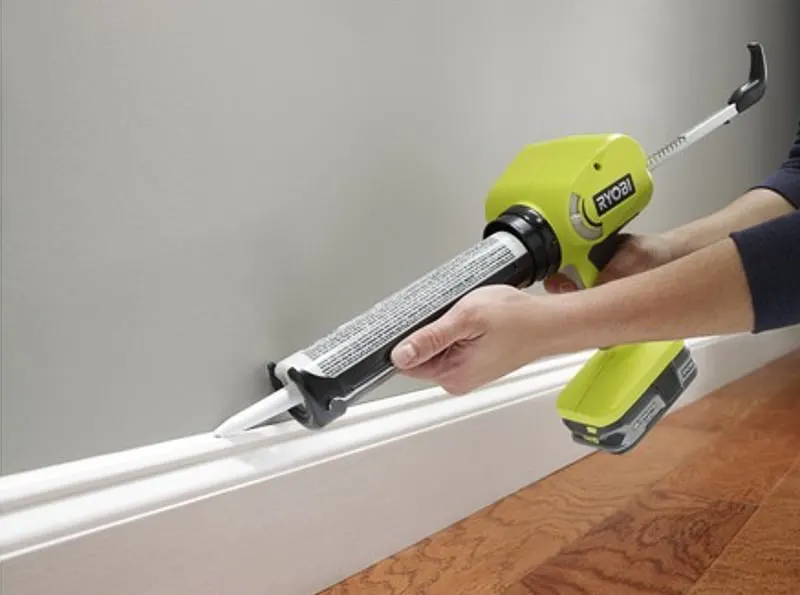
These are especially useful when dealing with thicker materials like silicone caulk or construction adhesive. It can be difficult to force these types of sealants through a tiny hole by hand!
I picked up the Ryobi cordless power caulk gun during one of their buy-one-tool-get-one-free sales. I don't use it as much as I should, but it's great for thicker products like construction adhesive. If you get hand cramps from using a caulk gun all day, this might be a good choice for you.
Preparing your project for caulk
The secret to getting an excellent result is in the prep work. If you don't properly prepare your space, then the caulk won't adhere well and will start to peel and crack prematurely.
Clean the Surface
First, thoroughly clean the crack that you are going to fill. Use a utility knife or some other sharp tool to scrape away all the old caulk. Solvents like liquid caulk remover can soften up tough spots and make it easier to remove.
If you have a lot of old caulk to clean up, buying a special sealant scraper like this one might be a good investment. This style has a smoothing tool as well.
Use a vacuum to clear away all of the debris, then thoroughly clean the area to remove mold or mildew. Make sure you let the space dry completely before you move on. If you caulk the gap too soon, it will trap moisture underneath, and create more mold problems.
Tape the Caulk Line (optional)
Painter's tape can help to isolate the area and create straight, clean lines. Set the tape back a little bit from the crack to give the caulk some surface to bond to.
I prefer not to use tape because it tends to make a little ridge along the edge when the tape is pulled up. If you smooth the caulk line properly, it'll turn out nicely without all that extra work!
Prepare the caulk tube
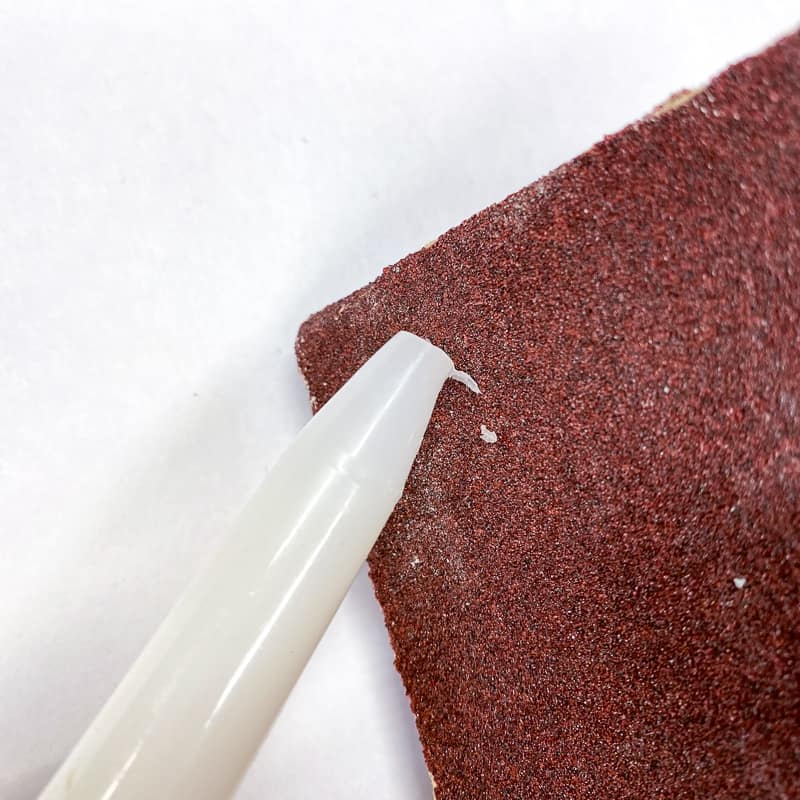
First, you will need to snip the tip off the nozzle of the tube. The size of your gap determines how you should cut the tip.
If you are doing a job that requires precision and really thin caulk lines, cut the very tip off at a 45-degree angle. For jobs that require filling a bigger gap, you can cut further down the nozzle. It's always better to make the hole smaller at first, then make it larger if necessary!
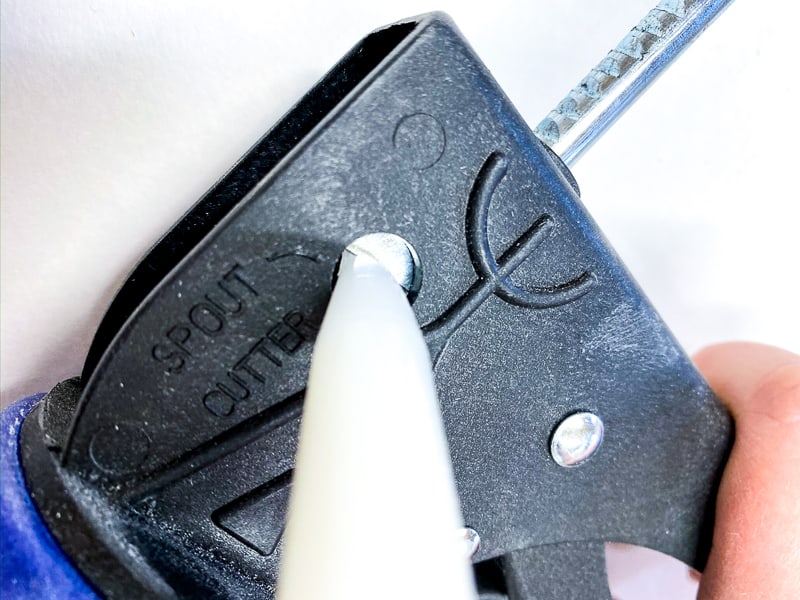

If your caulk gun doesn't have a spout cutter like this one, you can accomplish the same thing with a utility knife or even sharp scissors. For the best results, sand any jagged edges off to create a smooth surface.

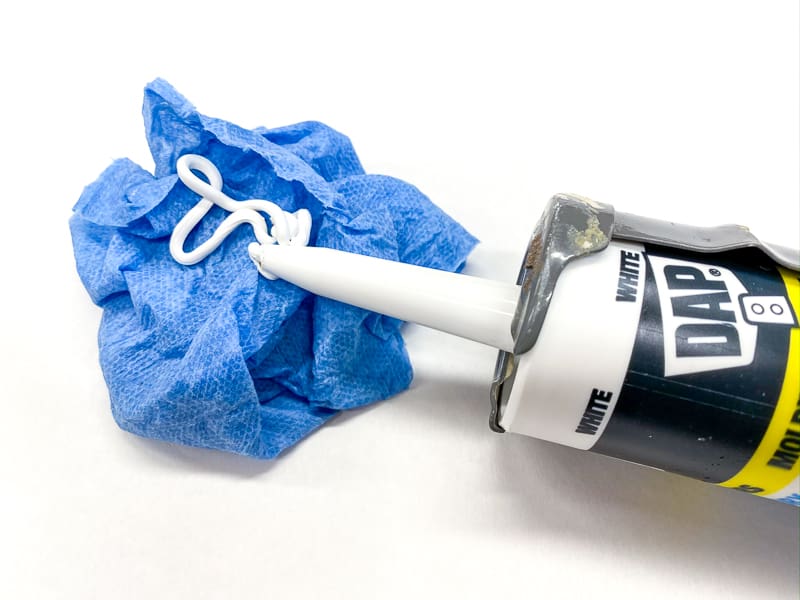
If the caulk won't come out of the tube even with the spout tip cut off, there's probably an additional seal inside. Use the puncture seal tool to pierce the membrane inside the nozzle.
How to load a caulk gun
Pull the rod on your caulk gun all the way back. On a dripless caulk gun, there will be a little release tab above the handle. Press on the tab while pulling on the rod, which should now move back and forth freely.

If you are using a ratchet rod model that does not have a release trigger, then spin the rod 180 degrees to disengage the teeth.

With the rod pulled back, place your canister of caulk in the tray, nozzle pointed away from the handle. Then, slide the rod until the plunger is touching the base of the canister. Don't pump the handle when loading your gun because you might squirt out some caulk by mistake!
How to Use a Caulking Gun
Once you have the tube loaded into the caulking gun, you're ready to start! Make sure you have a smoothing tool and damp paper towels nearby, so you can quickly switch between them as you work.
Squeeze the trigger
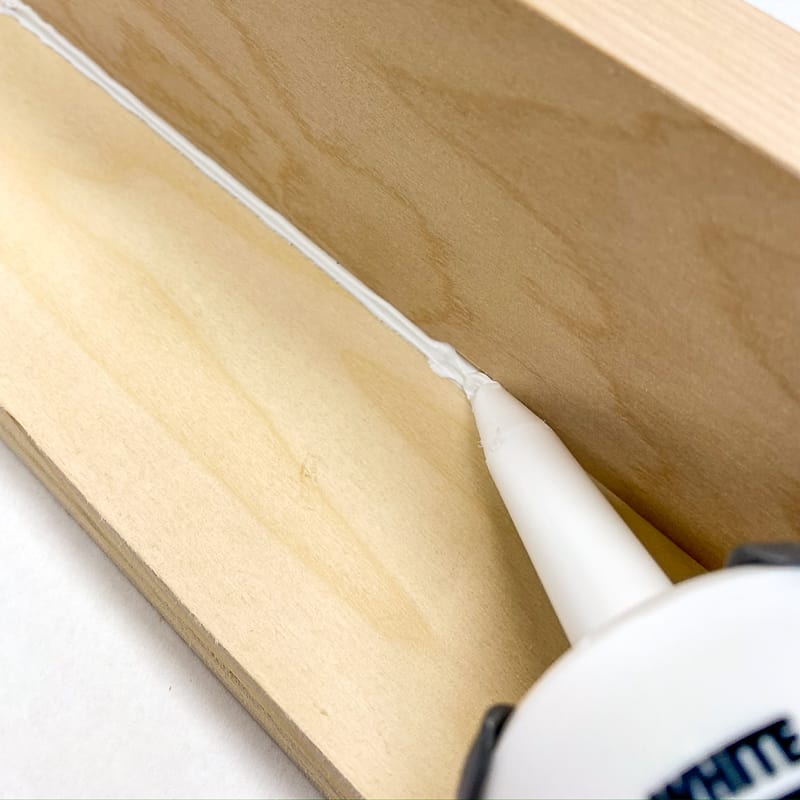
If this is your first time using a caulking gun, practice a little bit on a piece of paper, cardboard or scrap wood before you approach your actual project. The goal is to maintain a consistent caulk bead. Squeeze too hard, and it will come out in globs and ribbons instead!
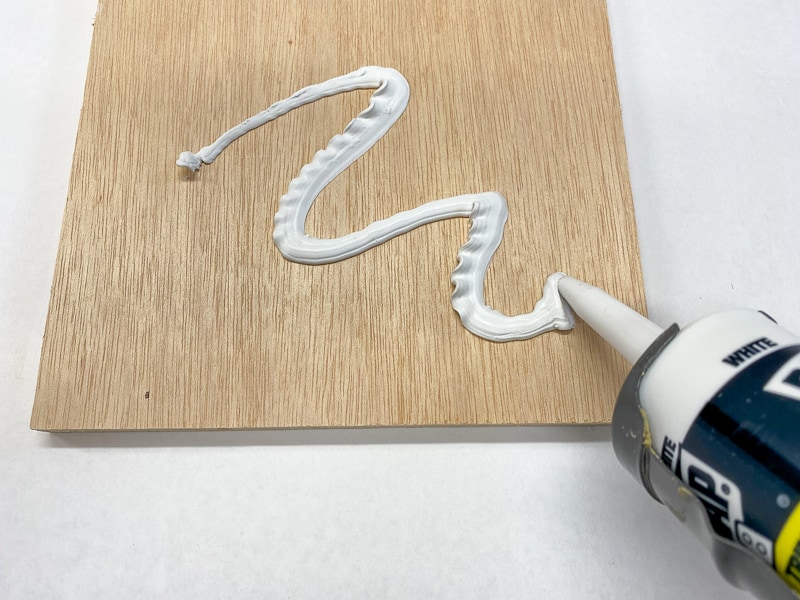
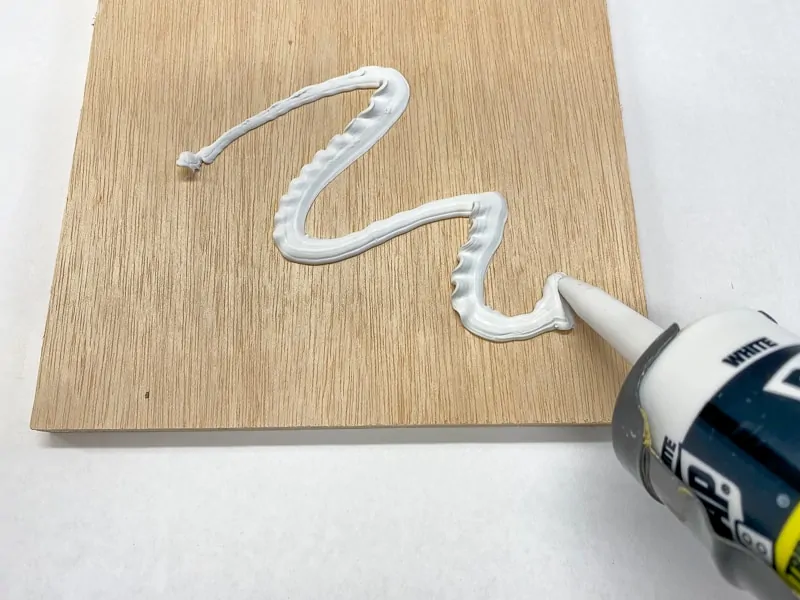
Hold the tube at about 45 degrees with the pointed end on top. The point will help push the caulk into the gap and smooth the line as you go (like the line on the left). If you have the pointed end underneath, it creates a thicker line that sits on top of the crack instead (line on the right).

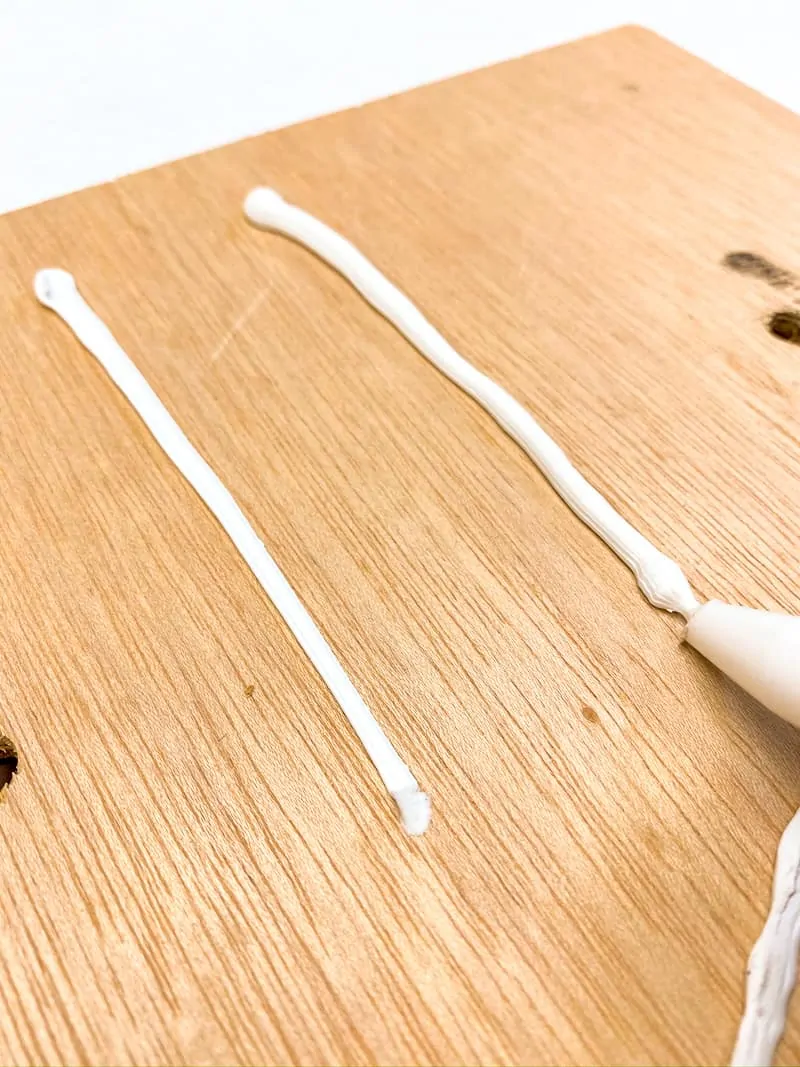
Pull the tube towards you while squeezing the trigger. If you go too fast, then your line will break. If you go too slow, it will be lumpy and uneven. As you work, you'll learn the right speed by watching for those signs. Don't worry if you have gaps or blobs. You can clean it up in the next step!

Sometimes, even after you have released the trigger, caulk will continue to flow out of the nozzle. To prevent this, simply pull the rod back a bit to relieve the pressure in the canister. I always leave a wet rag or paper towel nearby to rest the tip on, just in case! Even a dripless caulk gun can drip sometimes!

If you're working on a large project, stop periodically to go back and smooth your work. If you wait too long, then the caulk will dry, and you'll have to scrape it all up and start over.
Smooth the line
Once you have laid down a line of caulk, you will need to go back and smooth it out. This achieves two things. First, it makes it look better, and second, it pushes down into the crack you are sealing.
There are a number of different tools and methods for smoothing a caulk line. You can use a special tool like the one above made just for this task, but there's also ways to use things you already have around the house!
If you are filling a large crack, then a spoon dipped in water or sprayed with Windex can work quite well. I've heard that you can also use an ice cube! If you are using a latex (water-based) caulk, then you can also use a wet rag or sponge.
But my preferred method is just using a damp paper towel wrapped around my finger! Grab a few sheets and get them wet, then wring out any excess water. Use a different section of the towel for each pass, then just throw it away when you're done! Blue shop towels work even better, because they're stronger and don't leave as much lint behind.

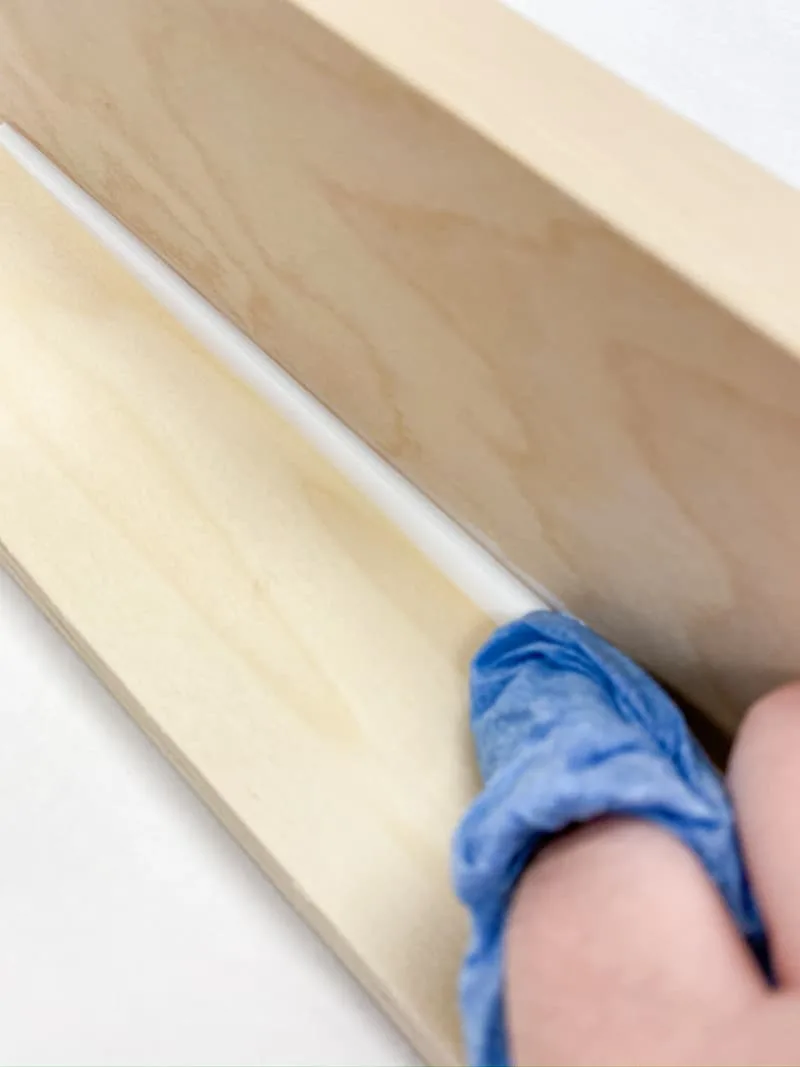
Slide your finger or tool along your caulk bead. If you are using tape to shield the edges of your project, then you will want to pull it off as soon as you are done smoothing so the caulk doesn't seal it in place.
How to Fill Large Gaps with Caulk
If the crack you are trying to fill is a ⅛" or smaller, then it can be filled with a single line of caulk. If it's larger, you'll need to apply two coats. First, lay down a bead deeper in the crack, then add a finish layer after the first one has dried.
If you are trying to fill a significantly larger gap (typically ⅜" or more), you may need to fill it with something else. Foam backer rods come in a variety of diameters, and are simply shoved into the gaps and covered with a finish layer of caulk.
How to Remove a Caulk Tube
As the plunger dispenses the caulk, it recessed further and further into the tube. When you're done with your project, how do you get the tube out of the caulking gun?
Simply press the release lever while pulling back on the rod at the same time. This will slide the plunger all the way out of the tube, so you can tilt the bottom of the tube out of the frame and pull the nozzle out of the hole.
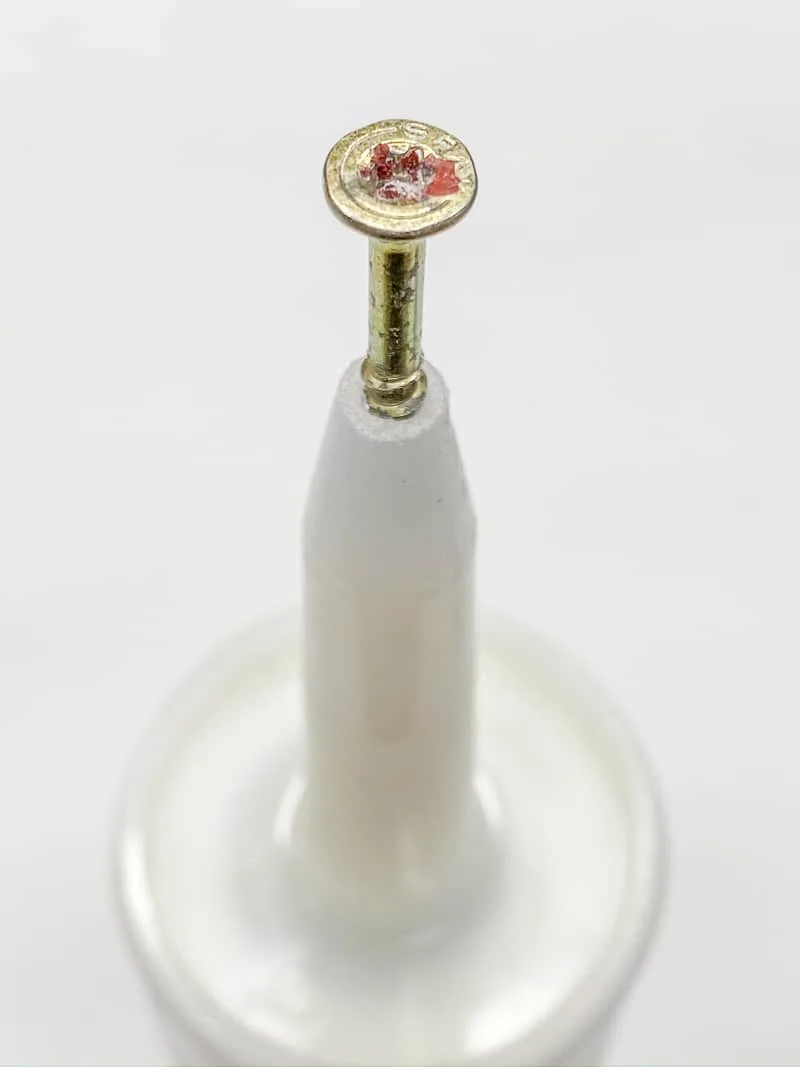
How to Store Caulk
Chances are, you will probably finish your project and have some caulk left over. I have a whole drawer filled with different varieties! So how do you seal up the tube so you can use it again later?
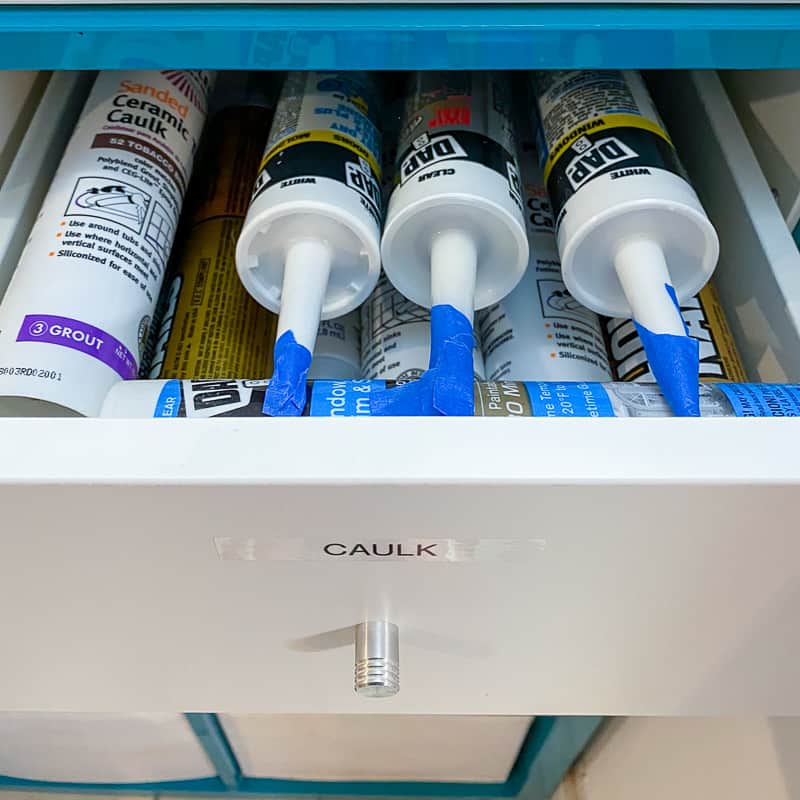
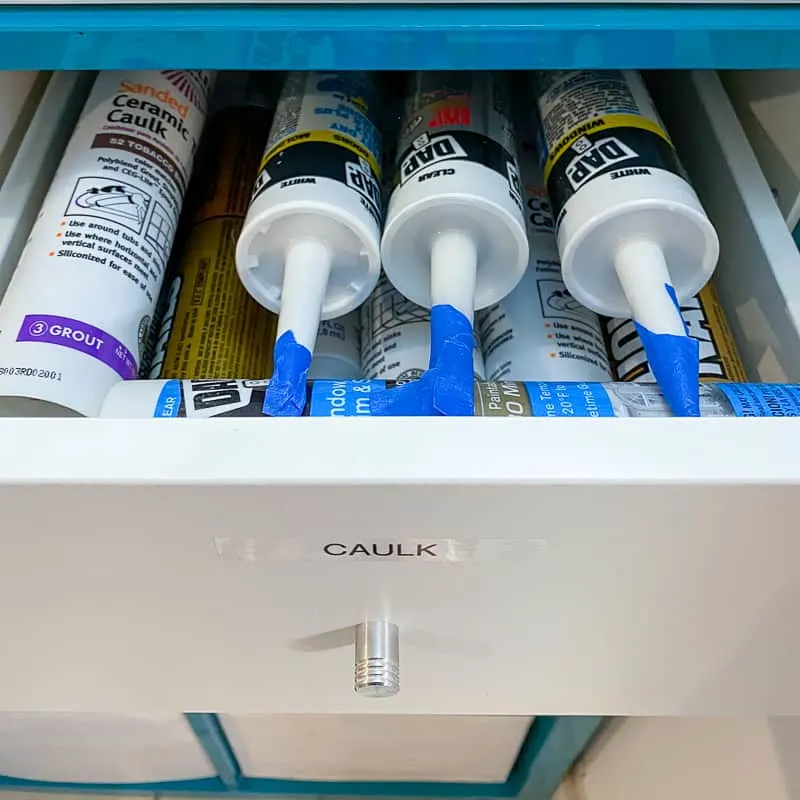
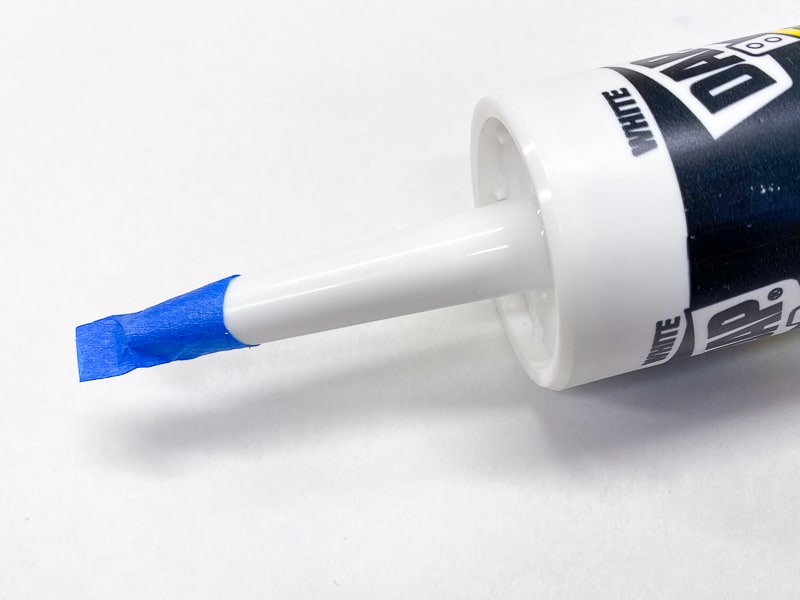
Some canisters come with a little cap for storage. Don't fall for that trap! It typically doesn't provide a very good seal. I like to just wrap the end in painter's tape and pinch it closed at the top. I've never had a problem with the caulk drying out, even months later!

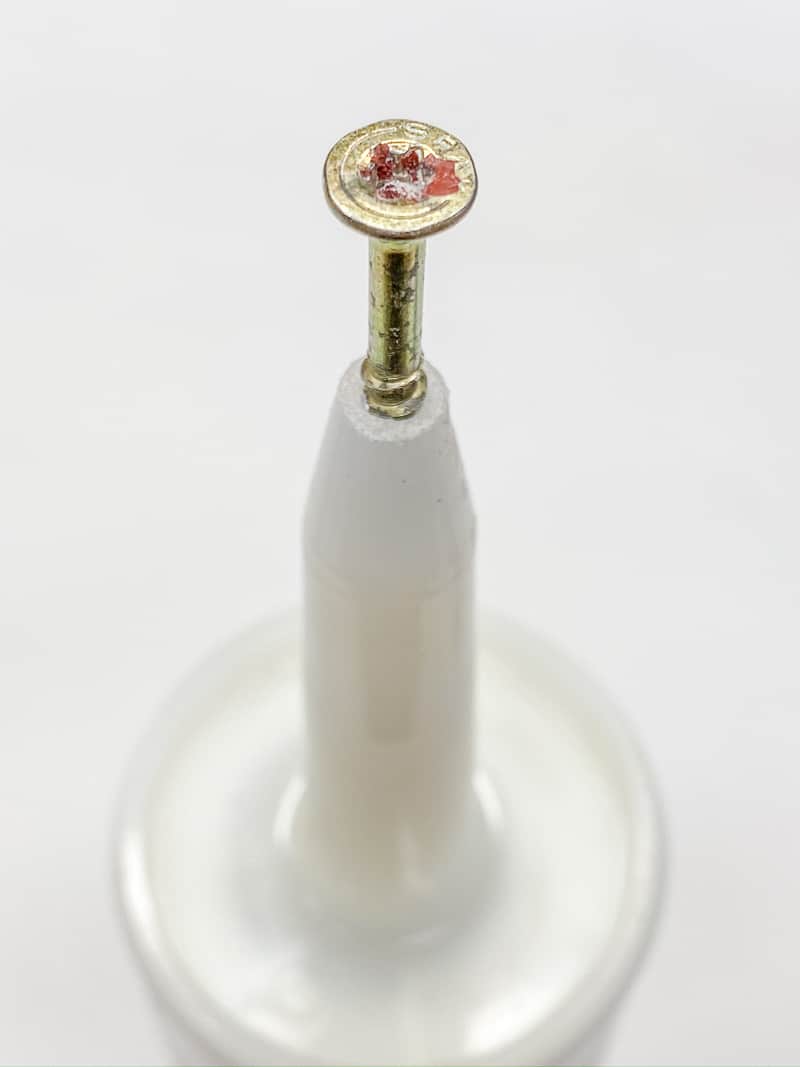
For another solution, take a screw and twist it into the hole at the tip of the nozzle. I usually rummage around in my loose parts bin until I find one that will fit.
The only problem with this method is that sometimes it stretches out the tip and creates a bigger hole than you'd normally want. Plus, it wastes a perfectly good screw! 🙂
Unfortunately, there is no perfect way to store opened caulk. It WILL dry up eventually. Even new sealed canisters have an expiration date. For this reason, do not buy caulk in bulk if you aren't planning on using it immediately. Just buy as much as you need for the project you are working on.
Frequently Asked Questions
Can I add a second layer of caulk?
Yes! If your caulk line shrunk or got sucked into the crack as it dried, you'll want to add a second layer to fill it correctly. Allow the first layer to dry completely before adding more, so you don't accidentally pull up the partially dried caulk when you smooth out the line.
Can I apply caulk without a gun?
Yes, you can buy squeeze tubes of caulk that do not require a caulk gun. However, they're not recommended for large jobs, like an entire room's worth of trim. The squeeze tubes are like toothpaste, so you'll want to roll the bottom up and apply constant pressure to get a consistent bead of caulk.
Why won't the caulk come out of the tube?
The most common reason why caulk won't come out of the tube is because there's a seal on the inside that needs to be punctured first. Many caulk guns come with a long metal stick attached to the side just for this purpose. Poke the stick into the nozzle to break the seal and start the caulk flowing.
Another issue may be that the caulk is too old. Many manufacturers put an expiration date on the side of the tube. After a few years on the shelf, the caulk will harden even if it's not opened. Check the date, and buy a new tube if it's past its prime.
Finally, you may be using a thicker material that is having difficulty coming out of the narrow spout. Some construction adhesive is really hard to push through without a power caulking gun. You may want to cut a larger hole on the end of the nozzle to make it easier for the caulk to flow.
Now that you know how to use a caulking gun, you'll be ready to tackle all kinds of home improvement tasks! Here are a few of the projects I've done that require caulk...
Jackie Root
Thursday 14th of May 2020
Tip! My experience has been kitchen and bathroom caulk can turn into a drippy runny mess. The previous time I had to use it was a big job on a hot miserable day in a bathroom without a window or air conditioning. The caulk was going everywhere but I eventually finished. The next time I had to caulk a bathroom, I was dreading it. Imagine my surprise when the job turned out to be quick and easy. The difference? The caulk had been left in the car overnight, and it was chilly out. The cold caulk was much easier to work with! Next time I have a caulk project, I'm going to make sure to put it in the fridge for a couple hours if the job isn't going well.
Vineta
Thursday 14th of May 2020
That's a great tip! I never would have thought of that!