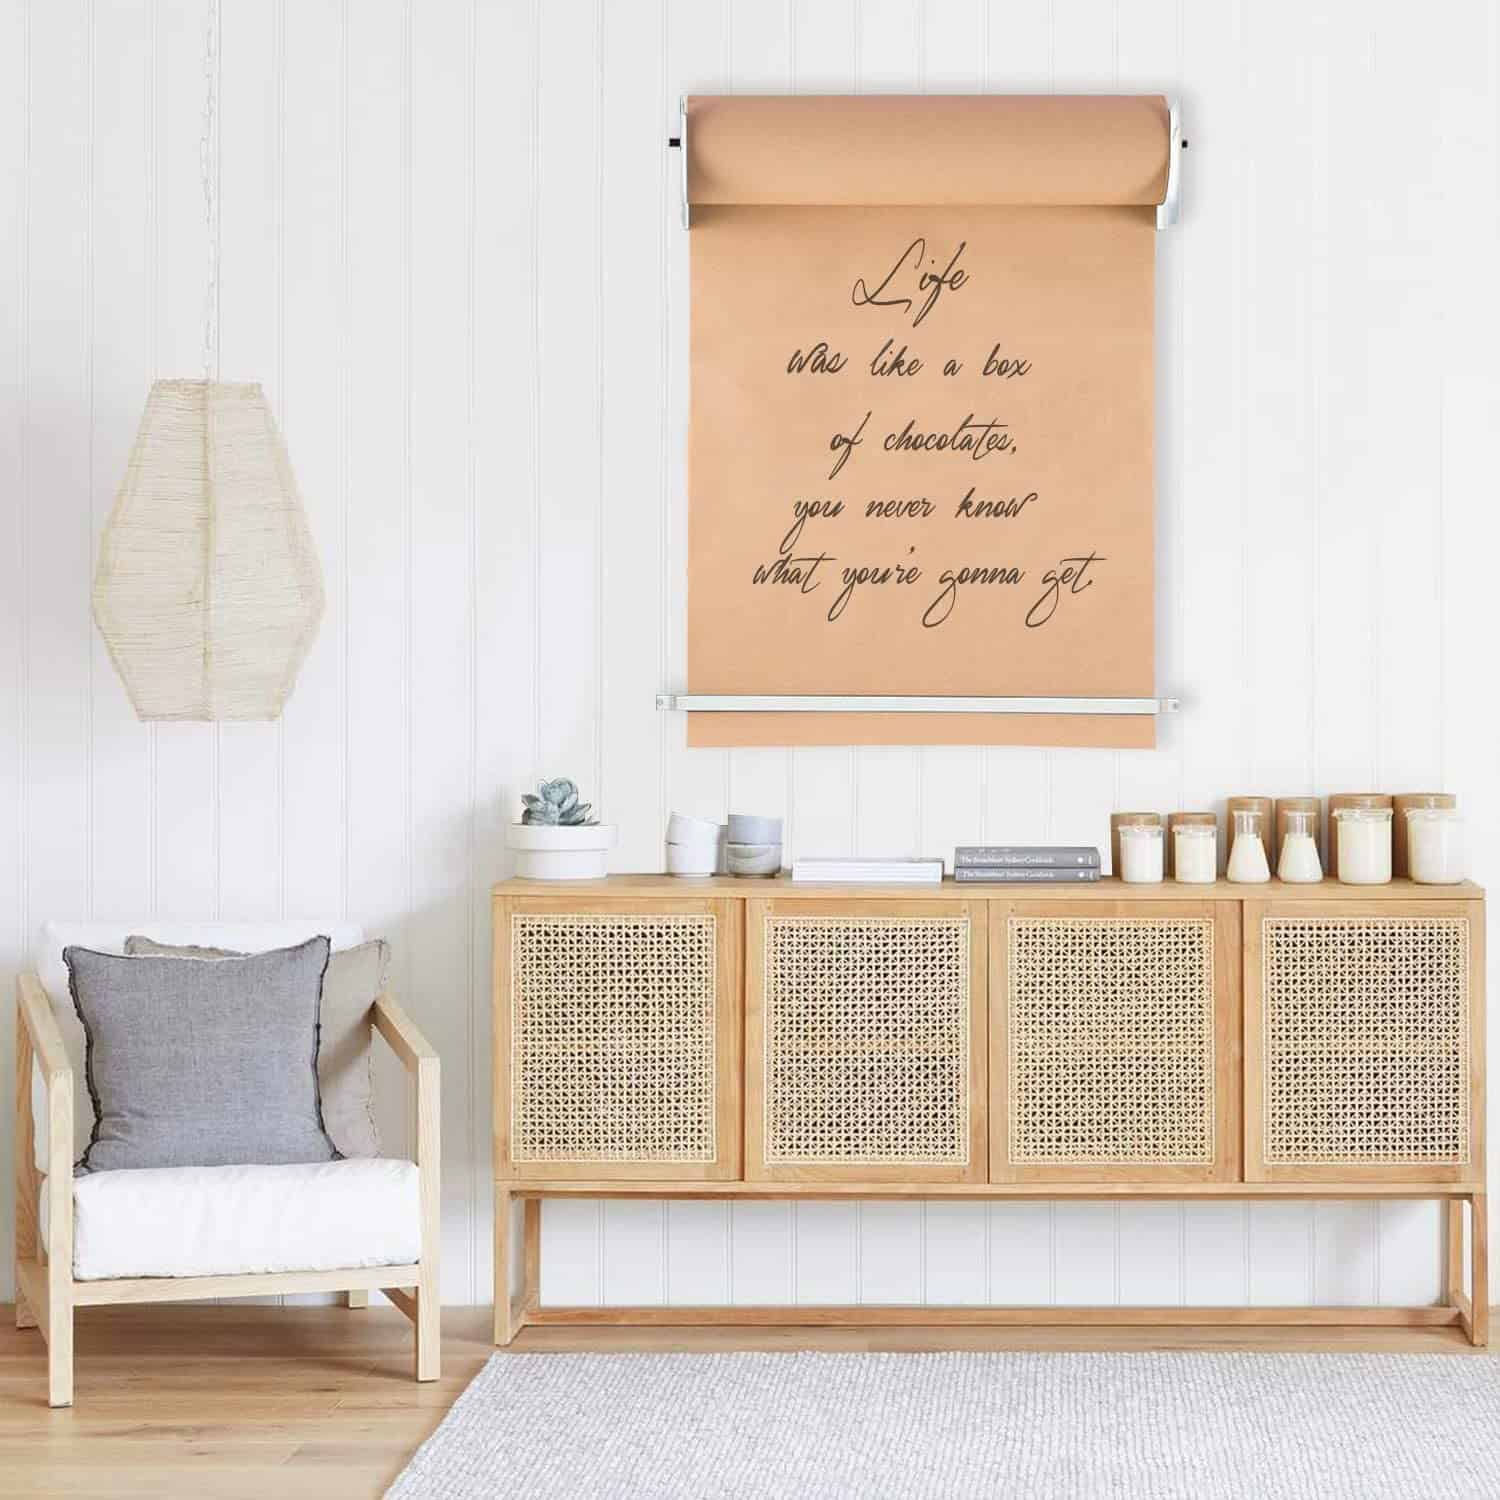
Keep your work surface free of drips with this DIY butcher paper roll holder! Mount it on the wall to keep track of shopping or to do lists!

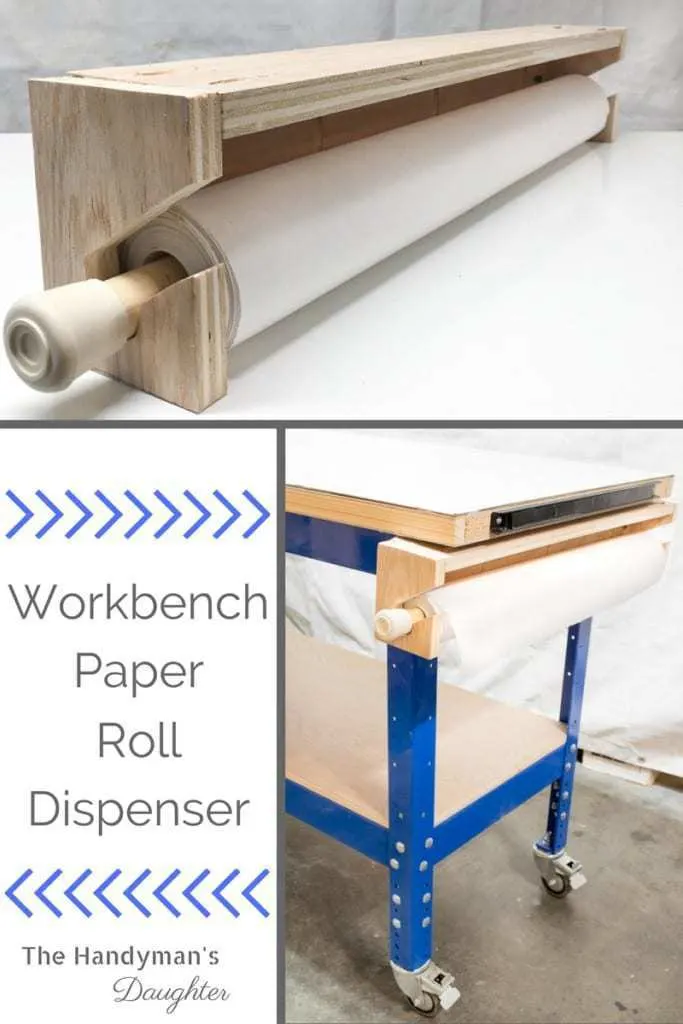
Recently, I showed off my amazing new Kreg workbench. This week, I'm protecting that new workbench surface from paint and stain splatters with a convenient butcher paper roll dispenser!
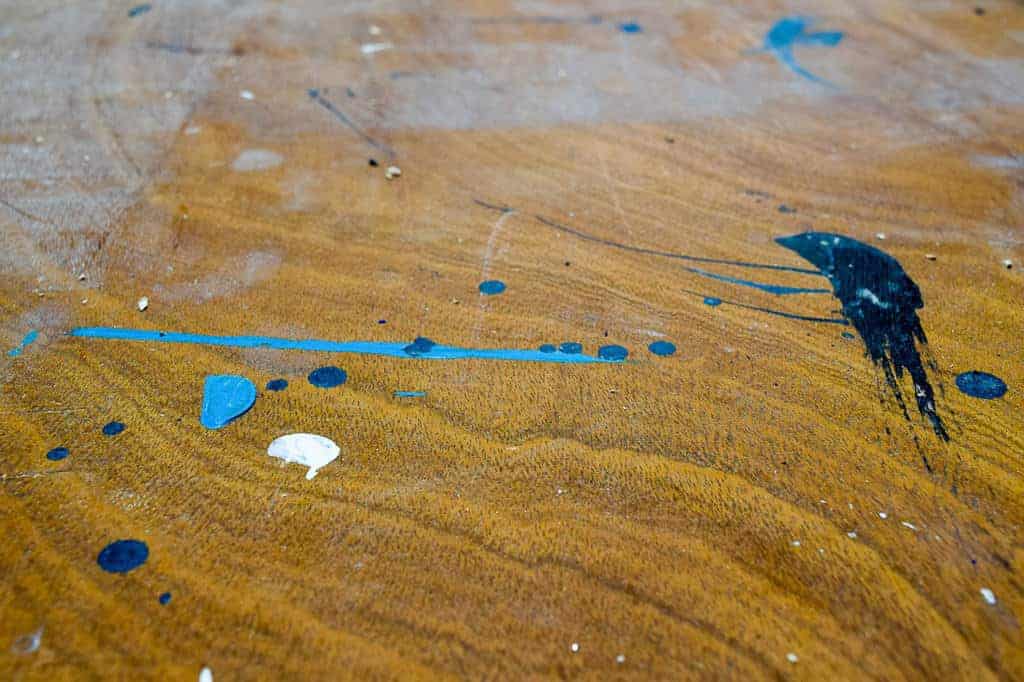
My old workbench surface was full of "character." If you can call all those drips, scratches and spills character. Sometimes those blobs of paint would transfer onto a new project, resulting in much swearing when it shows up on a freshly painted surface!

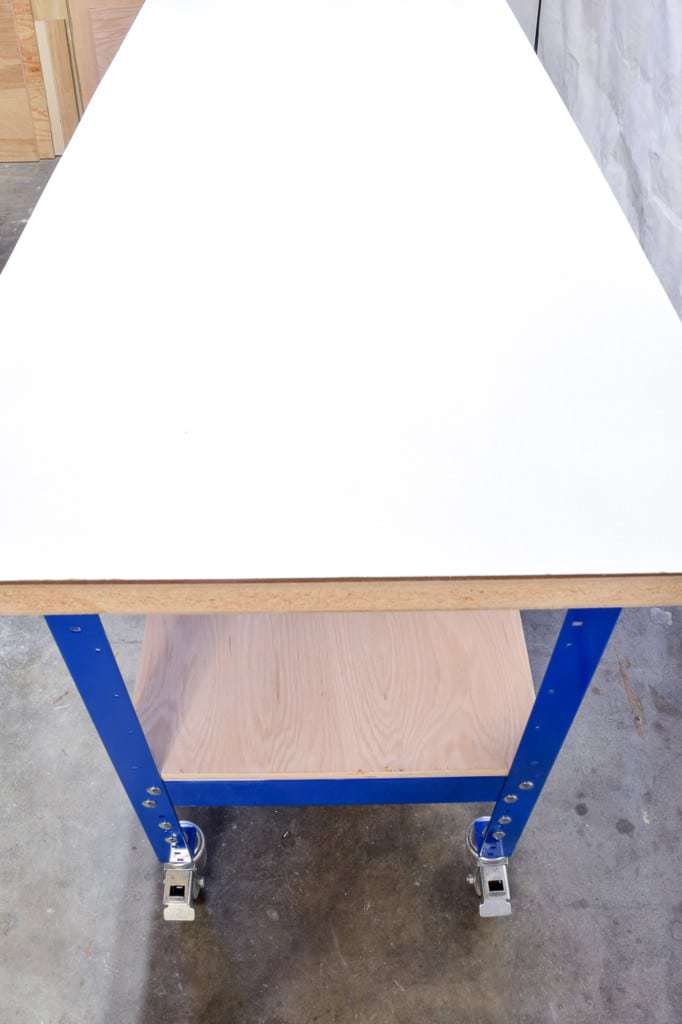
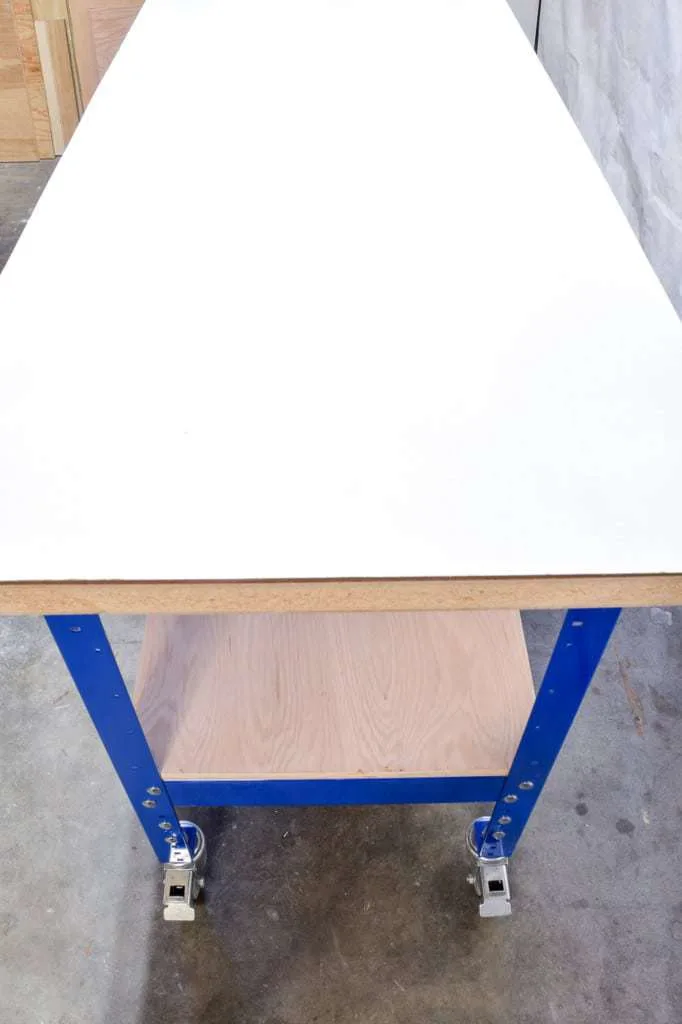
When I built my new workbench, I used the same old door, but flipped it over so I could start with a clean surface. Then I attached a whiteboard panel to the top with Liquid Nails.
I want to protect that nice, white surface from paint, stain and glue, but I'm also lazy! I'll never remember to pull out a drop cloth to cover the workbench when I'm all excited to get a project finished. But if there was a roll of paper conveniently located at the end of the workbench, I might be more inclined to use it!
This post contains affiliate links for your convenience. Purchases made through these links may earn me a small commission at no additional cost to you. Please visit my disclosures page for more information.
This kraft paper roll holder would also be great in a kitchen or by the front door to keep track of grocery shopping lists or important reminders. MY DIY version is much cheaper than this metal one, and as an added bonus, you can use the top of the holder as a small shelf to hold a jar of markers and scissors!

How to make a butcher paper dispenser
Measure your paper roll first
The dimensions of your butcher paper roll dispenser will depend on both the width of your paper and the diameter of the roll. I searched high and low for 24" wide rosin paper to no avail, so I went with white butcher paper.
However, I was NOT prepared for how big a 900 foot roll is! This thing weighs 25 pounds, and would stick out from the end of my workbench by almost 5 inches!

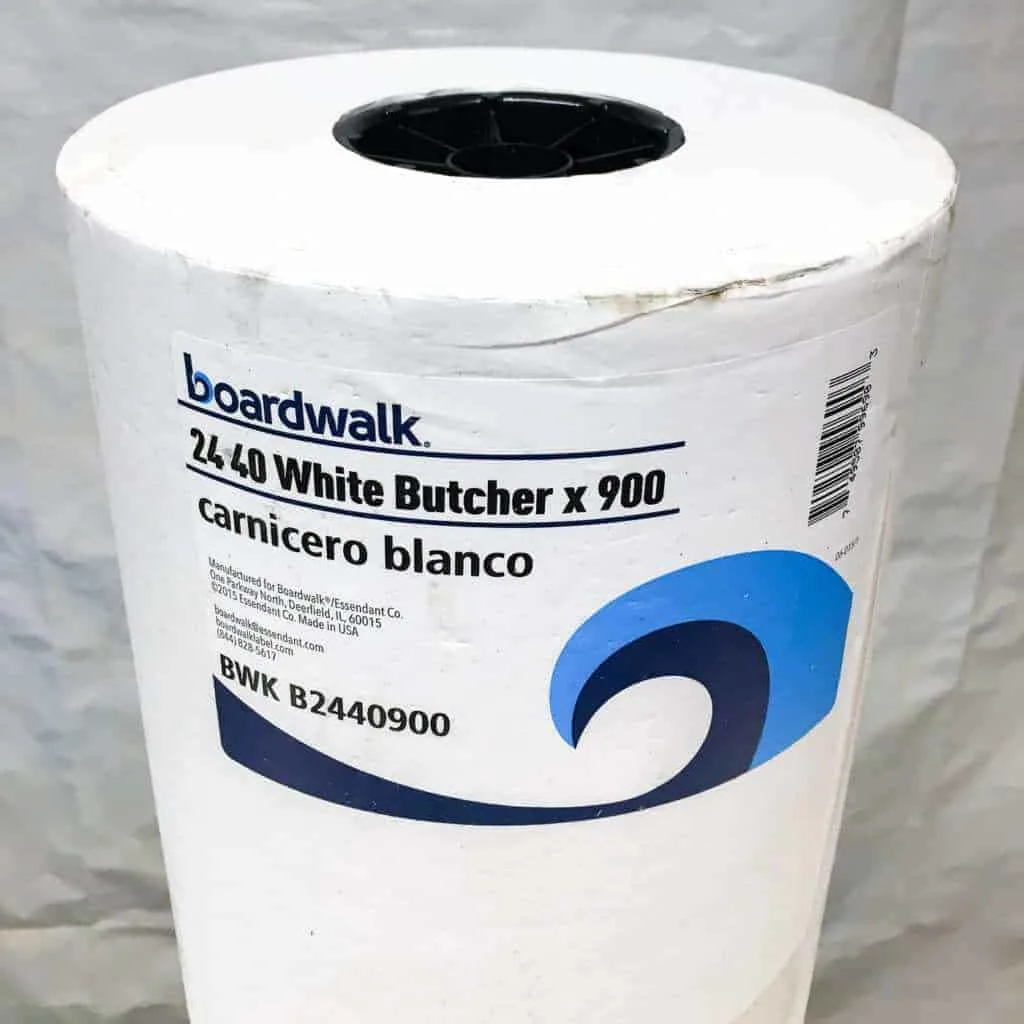
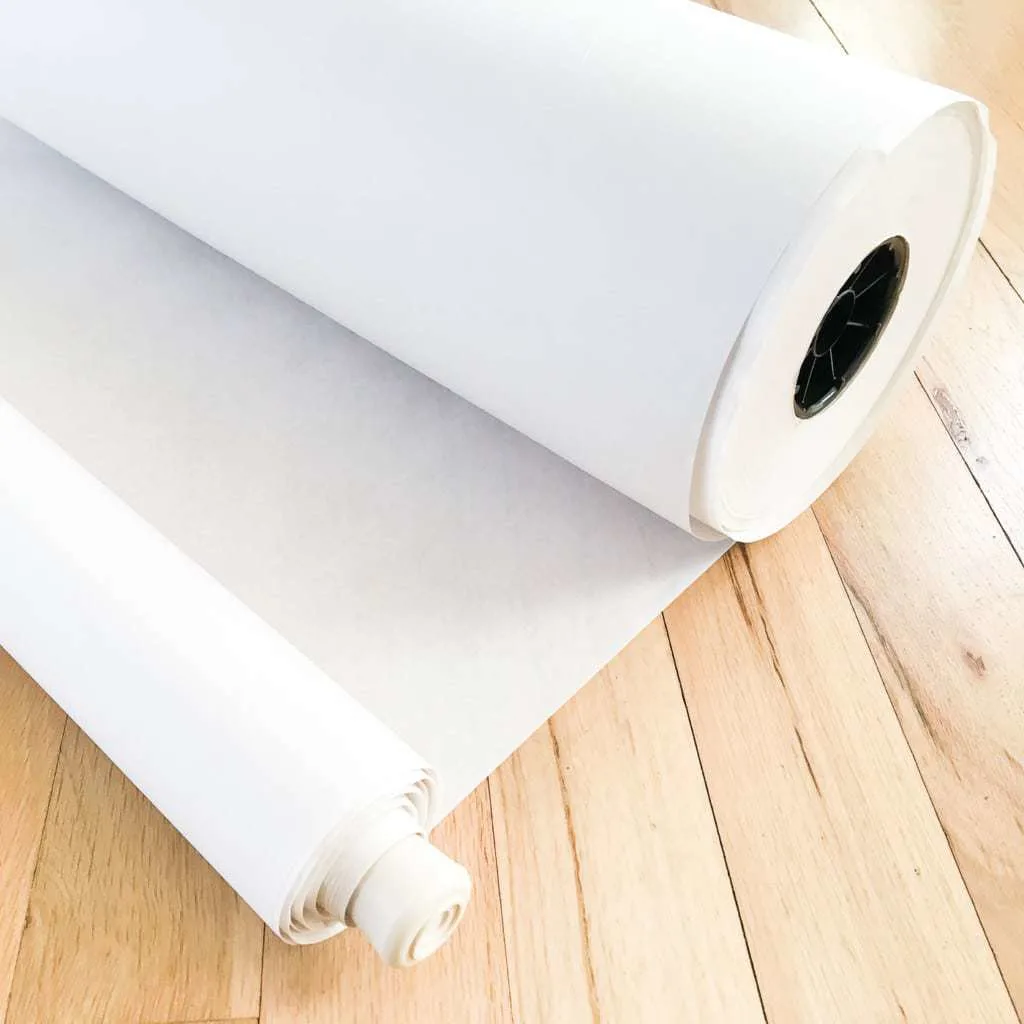
To break it down to a more manageable size, I rolled the paper onto a 1" dowel until it was about three inches in diameter. I still have more than enough on the big roll to last quite a while!

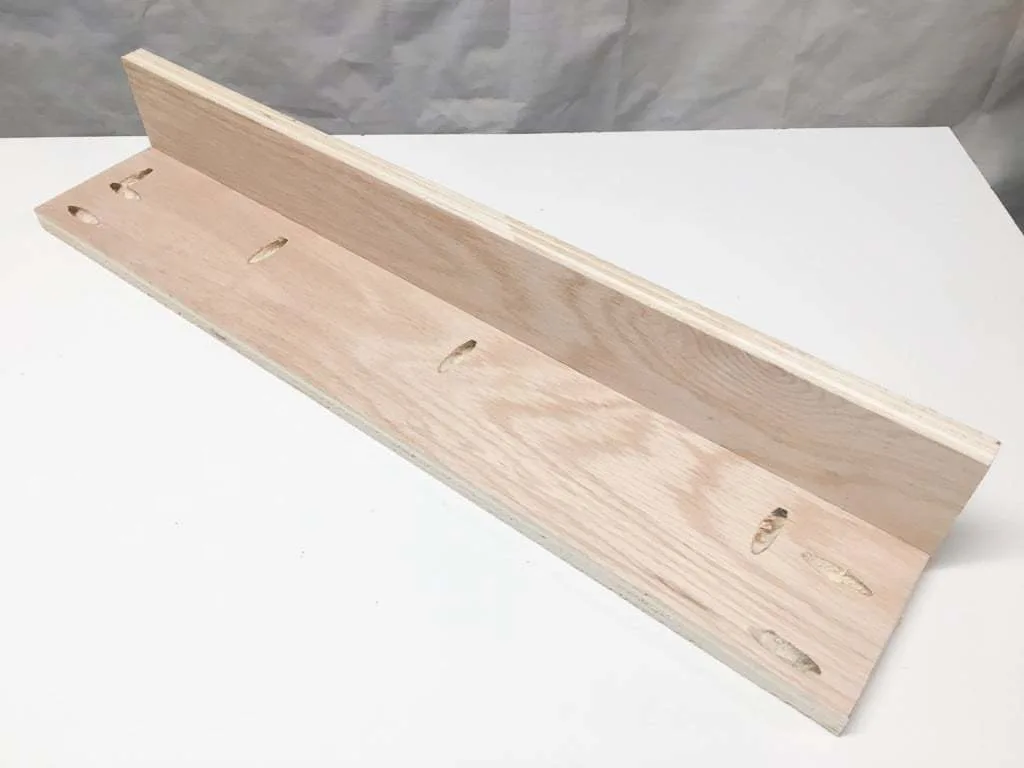
Build an L shaped bracket
To build the bracket that will hold the roll in place, I used some scrap ¾" plywood left over from my workbench shelf. You can cover up the exposed plywood with edge banding, or use a solid wood like pine instead.
Cut two pieces to match the width and depth of your paper roll, plus ½" for wiggle room. Join these two pieces together to make an L shape. I used my Kreg Jig to make pocket holes for this step, but you could just countersink screws through the top instead.

Make the end brackets
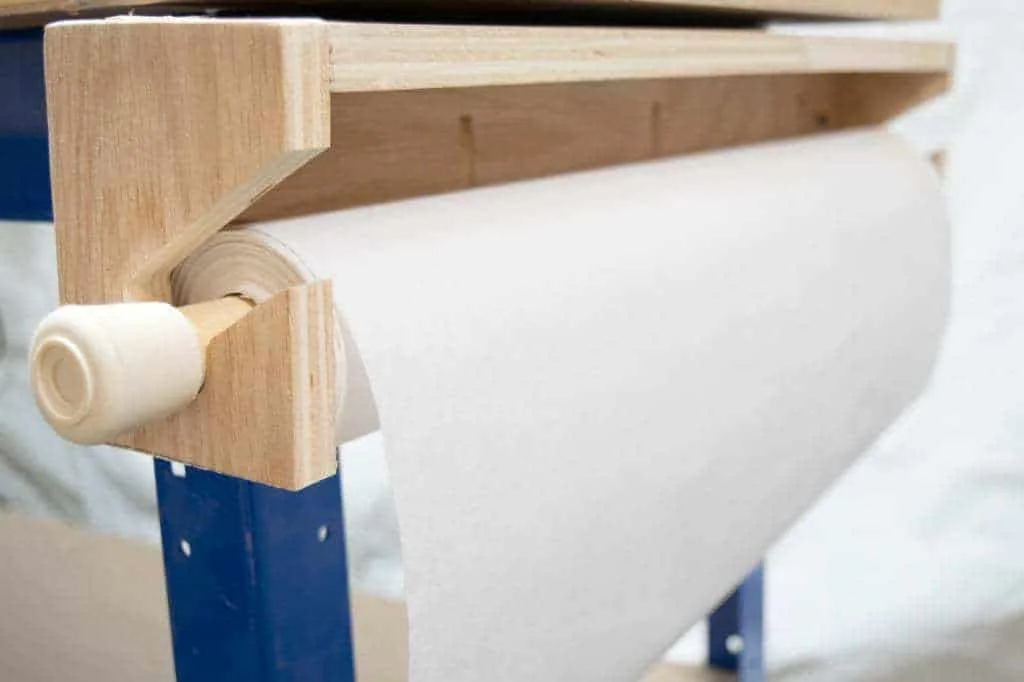
The end pieces will hold the paper roll rod in place. Cut them to fit onto the ends of the bracket you just made.
You could just use a hole saw to drill a hole big enough for the dowel to pass through. But I wanted a quicker way to replace the roll when the paper runs out, without having to remove the end caps and pull out the rod from the side.
Use a jigsaw to cut a notch for the dowel to rest in. The bottom of the notch should be in the center of the bracket so the paper is in the middle of the holder. It should also be slightly wider than the dowel, so it can spin freely.
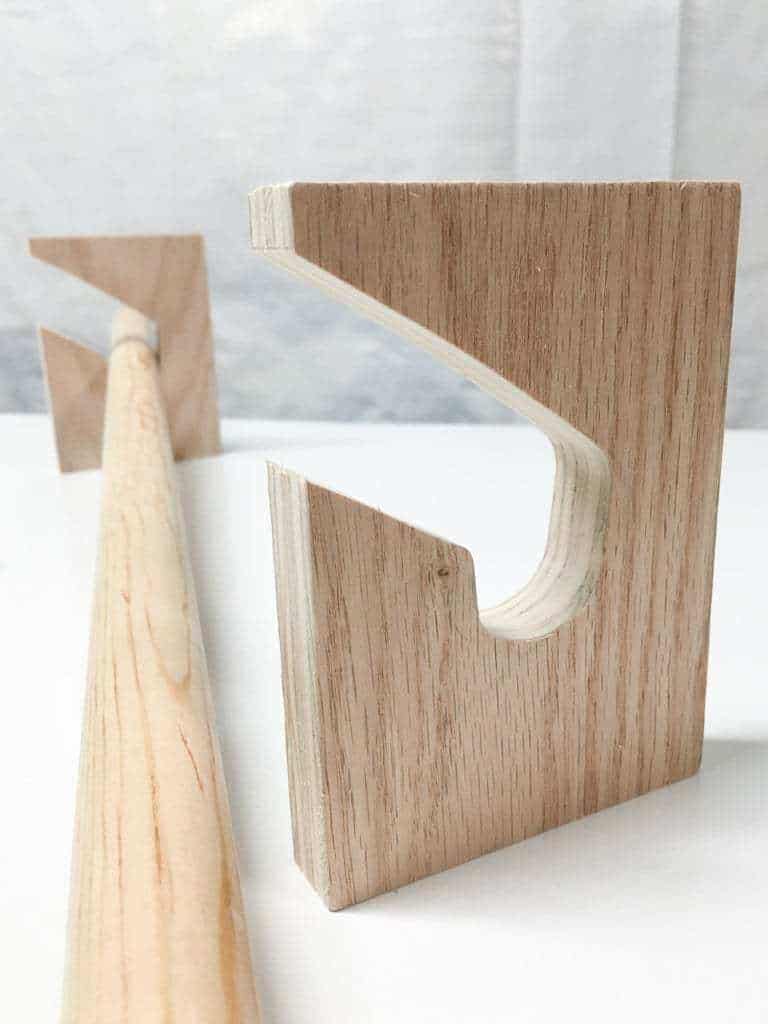
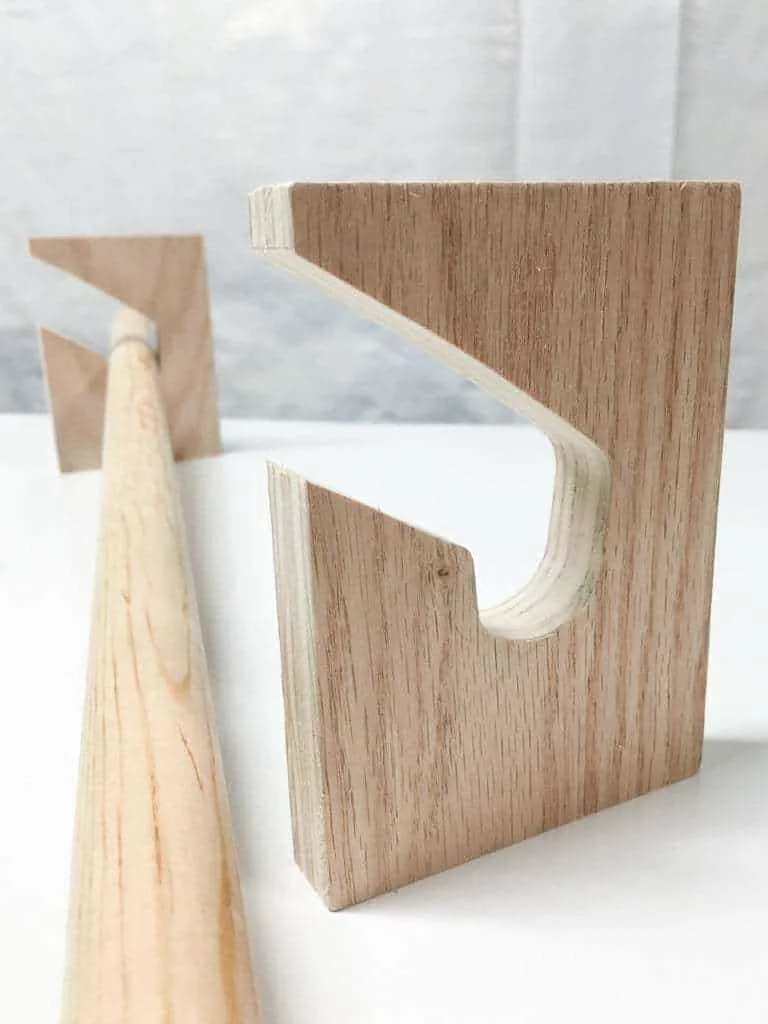
This will allow you to easily slip the paper roll into place, but won't fall out when you pull out the paper. Clamp the two ends together when you're cutting so they'll be symmetrical.
Attach the end brackets and test the fit
Attach the end brackets with 1 ¼" pocket hole screws. You could also drill countersink holes around the perimeter and attach the end brackets that way. Test to make sure you can get your paper roll in and out easily.
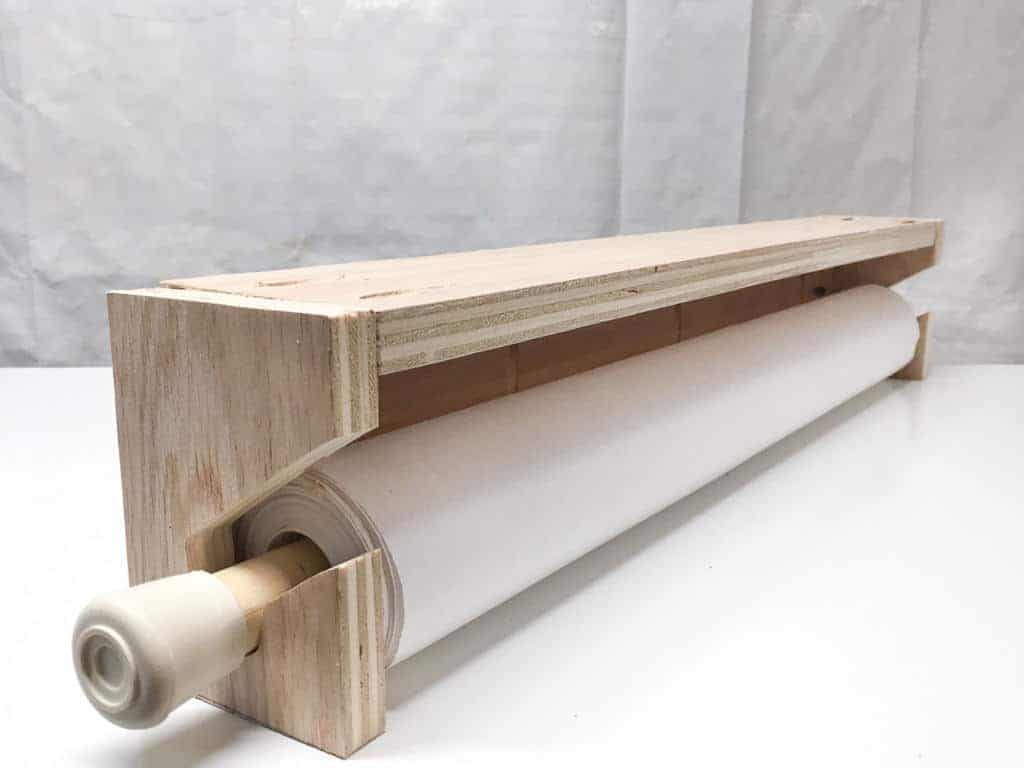
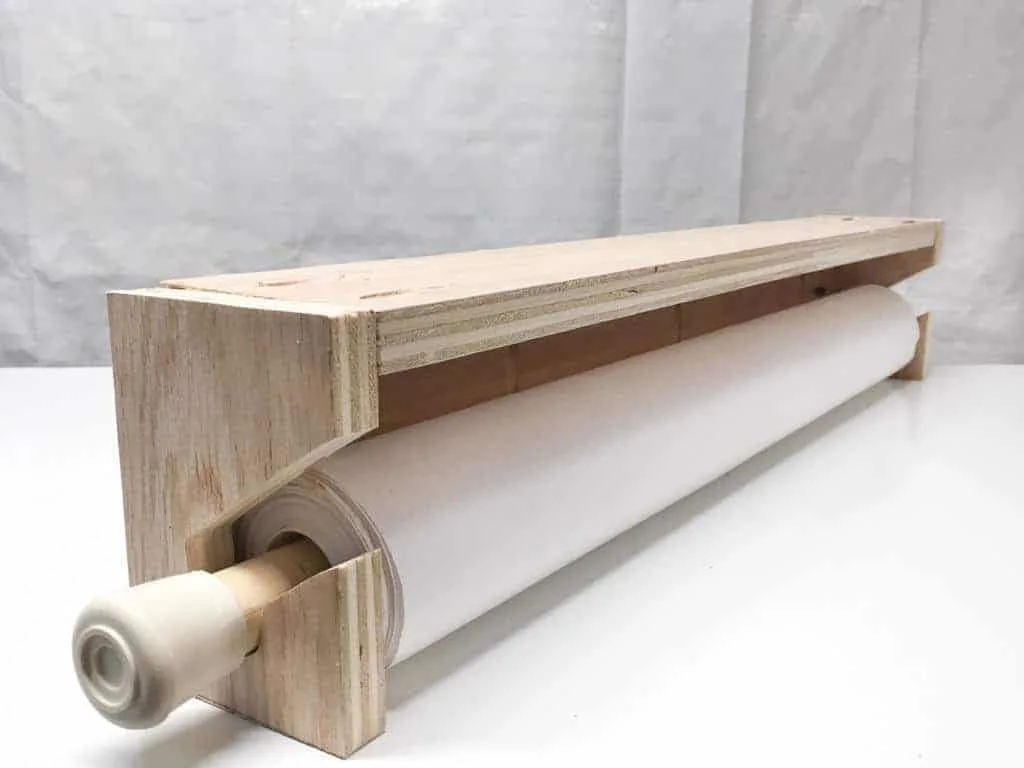
Trim the dowel so that there's about an inch sticking out on either end, then attach rubber chair tips. This will keep the dowel in place and also pad it for the inevitable bumps as I walk by.
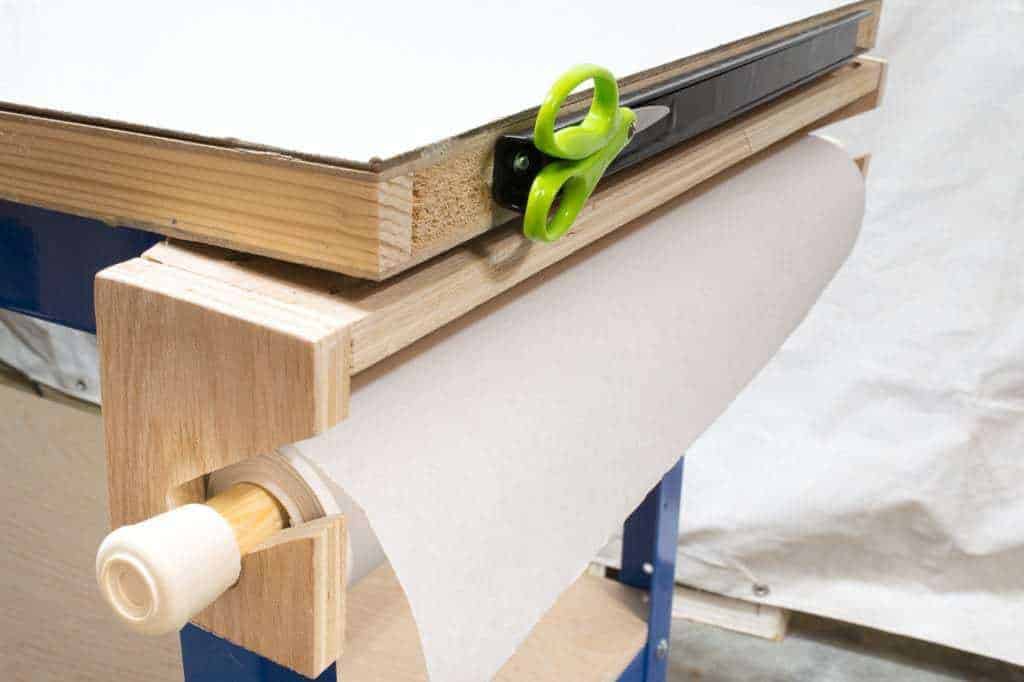
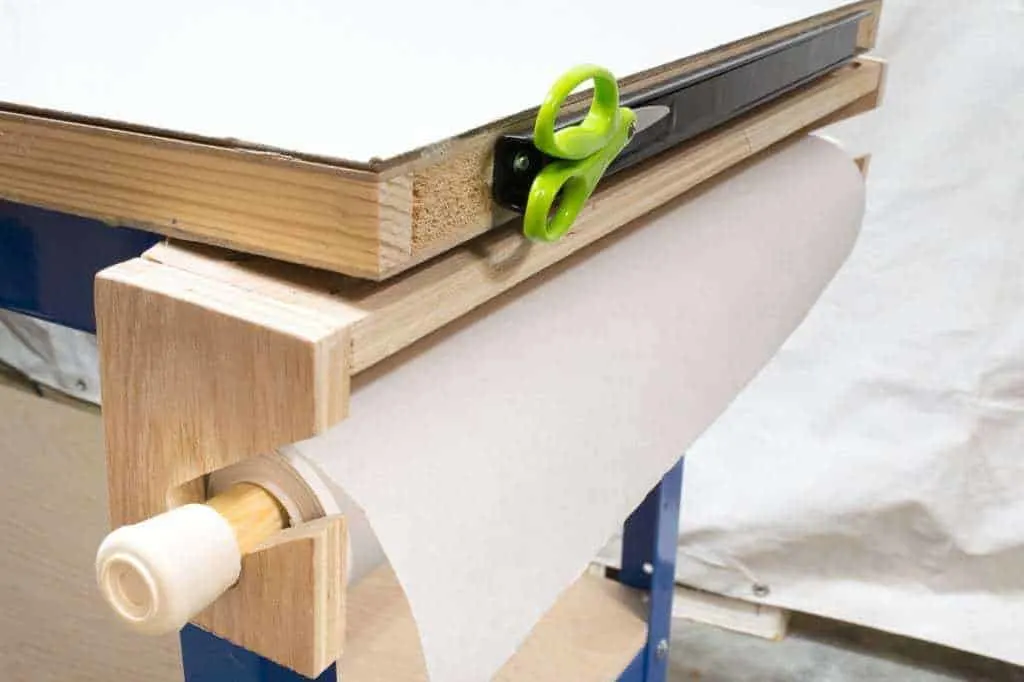
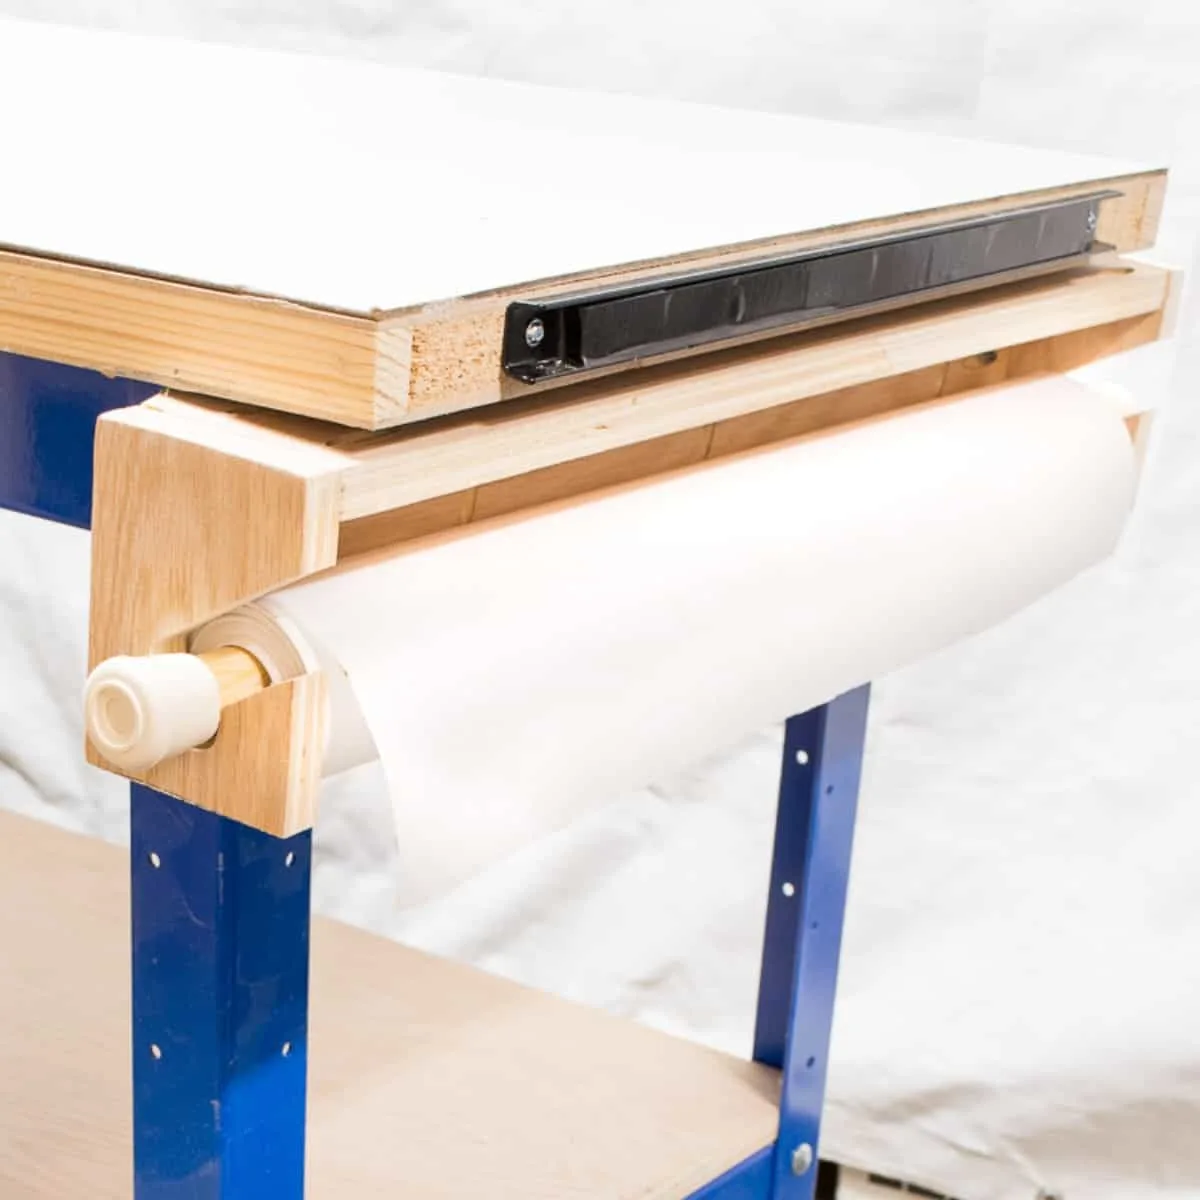
Mount the paper roll bracket
Remove the paper roll from the bracket before mounting. If you're hanging it on the wall, make sure to attach it at the studs or use drywall anchors rated for the weight of the holder plus the paper.
Mine will be attached to my metal workbench legs, which have convenient holes along their length. I marked the hole location on the back of the bracket with a pencil, then drilled a hole big enough for a 5/16" bolt.

I added a magnetic strip to the end of the work surface for scissors to cut the paper to the desired length. My bracket is at a slight angle because the bolt heads holding the workbench together stick out from the legs. I might add some washers behind the bracket to even it out eventually, but for now I'm not too worried about it!
Now I can just pull out a sheet of paper to protect my work surface every time I paint a new project! No more blobs on my white worktable!

Check out these other workshop storage ideas!
Kippi
Tuesday 11th of September 2018
Really smart idea. I love the paper holder and magnetic scissor holder.
Oli
Thursday 2nd of February 2017
Love this, Vineta.
I'm a sucker for DIY projects--you just inspired me to do something similar :-)
Cheers Oliver
Toni | Small Home Soul
Saturday 28th of January 2017
Vineta, I love this idea. It kind of reminds me of a little kid's paper roll. We're like big kids playing with paints and stuff :D Seriously though, this is so smart to build and mount it right on your work table. And the magnetic strip is fantastic.
I bought a roll of white wrapping paper that's thick that I've been on my breakfast bar for small projects. It makes it easier to photograph and keeps hot glue off the counter.
Vineta
Sunday 29th of January 2017
We are like big kids, playing with big blocks and paint. :) I got the white butcher paper for the same reason: better for photographs. I haven't tested it to see how it holds up to paint, but I have so much paper, I could easily do a double layer and still have plenty left over for years to come!