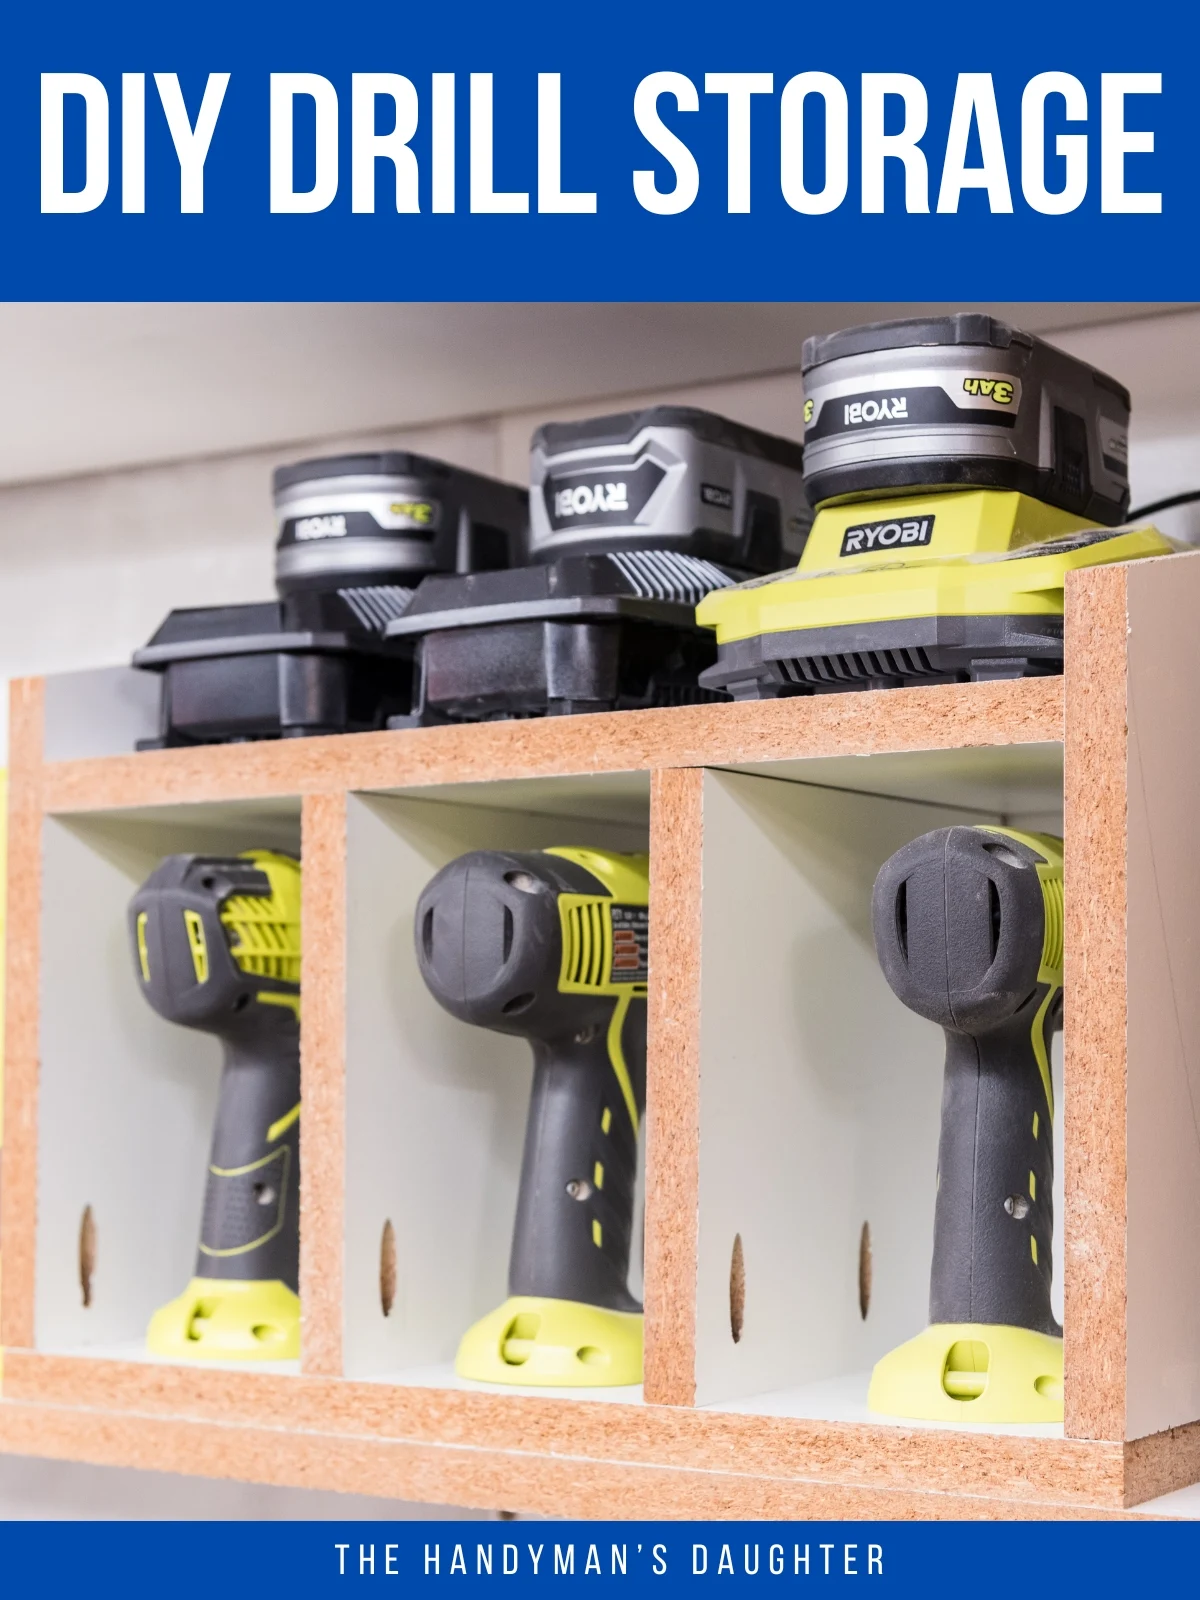
Keep your drills, batteries and chargers all in one place with this DIY cordless drill holder! Get the free woodworking plans and get your shop organized!

I'm always searching for my drills in the workshop (I swear, they get up and walk away when I'm not looking!) And the chargers were a jumble of cords that added to the visual clutter and made the whole space feel messy.
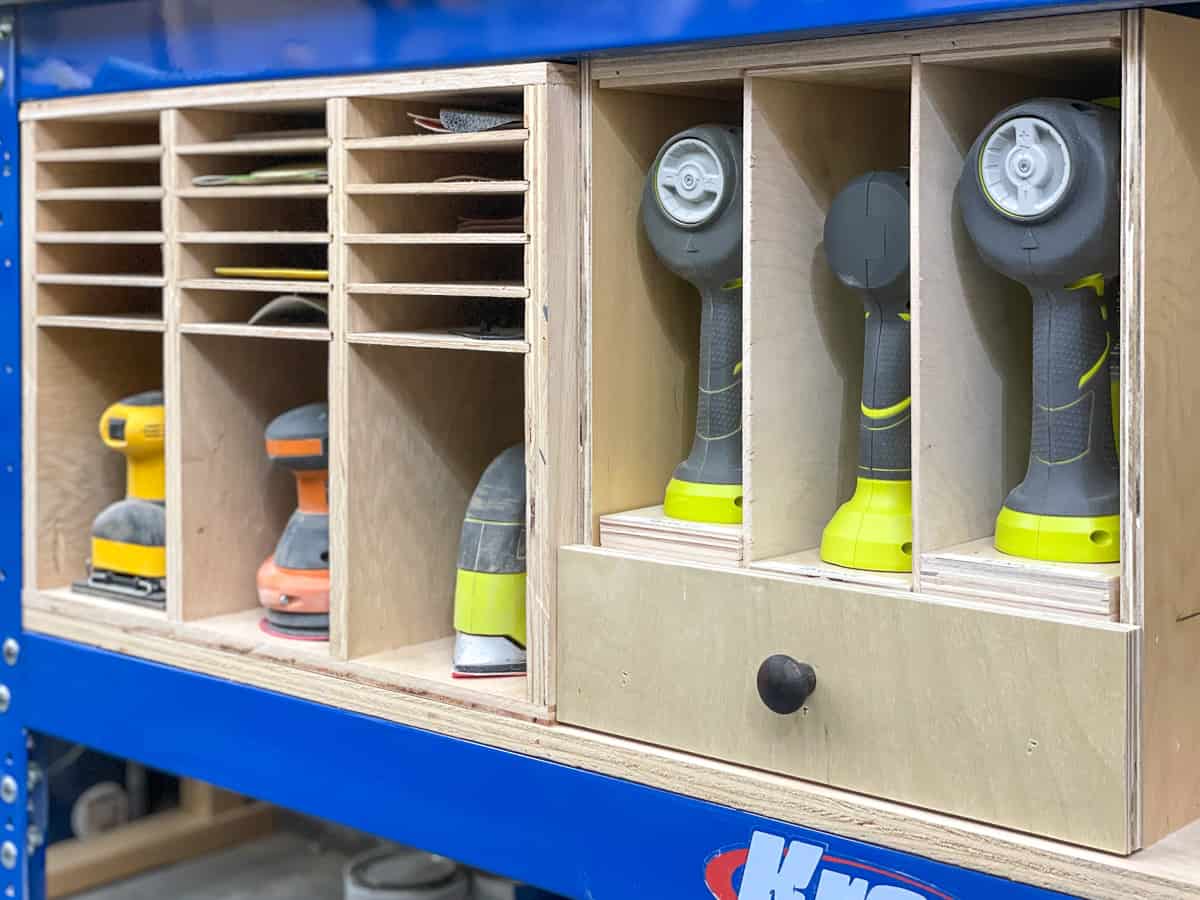
I spend more time building and less time searching for tools by giving each one a dedicated spot, like this sander and sandpaper storage, circular saw stand or nail gun organizer.

I had some scrap wood left over from another project that turned out to be the perfect size for this cordless drill storage rack. Now I can keep everything together with their batteries powered up and ready to go too!
This project would be perfect for any homeowner who is tired of hunting down their drill or charged batteries! Best of all, it's a really quick and easy project that can be completed with just a few cuts!
This post contains affiliate links for your convenience. Purchases made through these links may earn me a small commission at no additional cost to you. Please visit my disclosures page for more information.
Materials Needed
- ¾" thick plywood, MDF, melamine or 1 x 10 board
- Small piece of ¼" plywood for the back
- Kreg Jig
- 1 ¼" pocket hole screws
- ½" brad nails and brad nailer (or staple gun and staples)
- Speed square or combination square
Cut the 1x10 board into pieces
I had a 1x10 melamine shelf that was previously used as a garage shelf, so it was covered with paint drips and stains. Workshop storage doesn't need to be pretty, so use up those scraps!
The easiest way to cut down the pieces is with a miter saw, but you could also use a circular saw or track saw. Cut your 1x10 board into the following parts:
- 1 @ 17 ¾" long
- 1 @ 16 ¼" long
- 2 @ 12" long (I cut one end at a 30 degree angle for easier access at the top, but it's not necessary)
- 2 @ 8" long
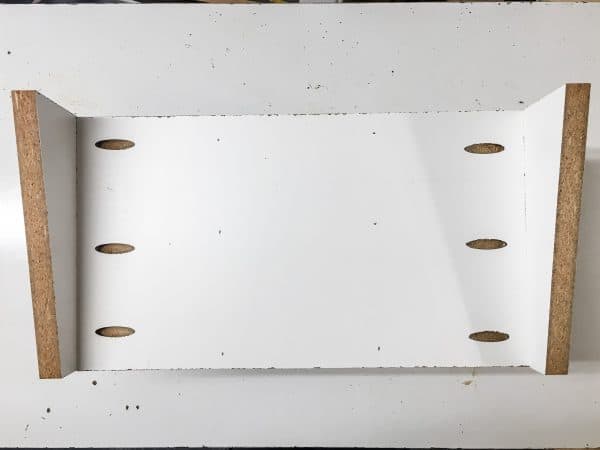
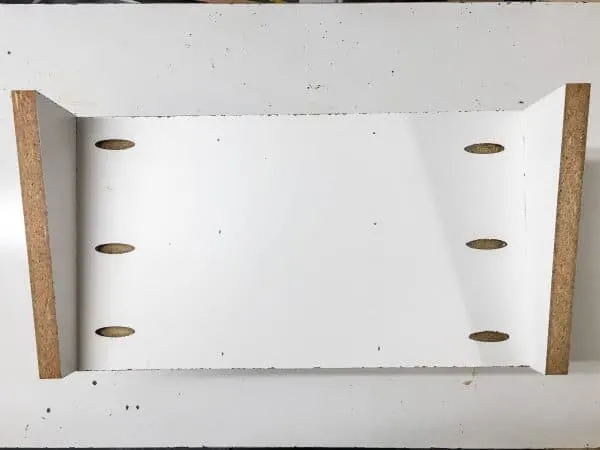
- Cut the ¼" plywood to 17 ¾" x 12 ¾" for the back.
Download the free plans here to get step by step instructions on how all these pieces go together!
Assemble the Drill Rack with Pocket Holes
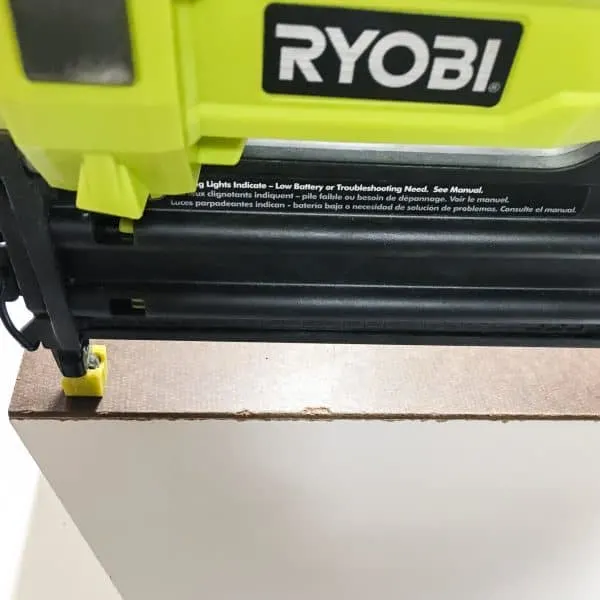
Drill pocket holes along one short end of all the 8" and 12" pieces. Check out my guide to pocket holes for tips on how to do this.

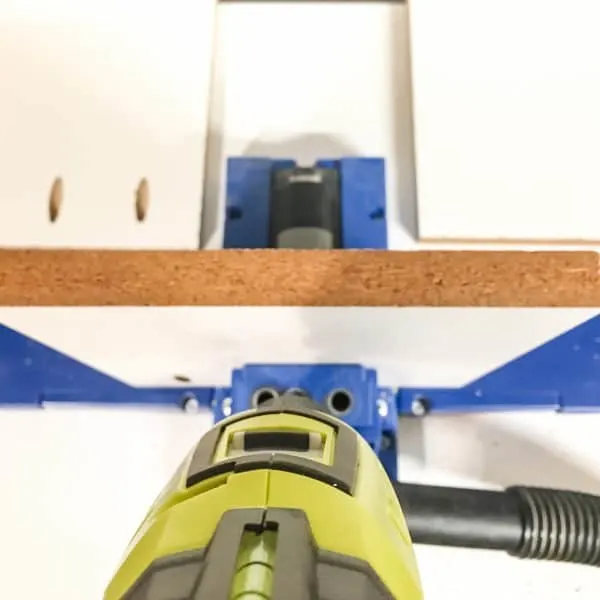
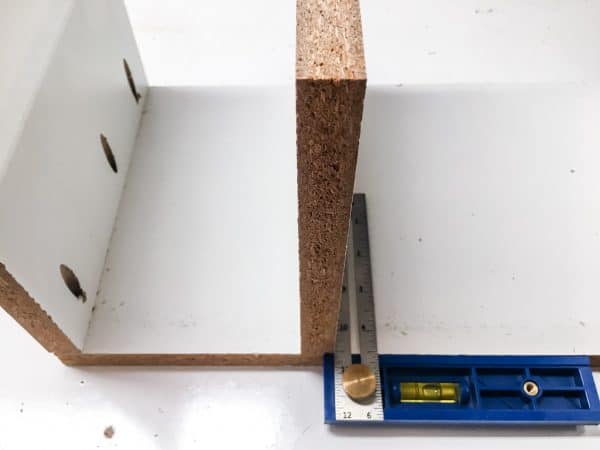
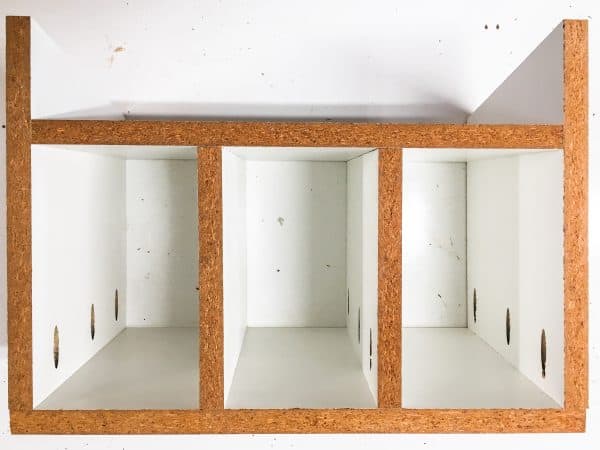
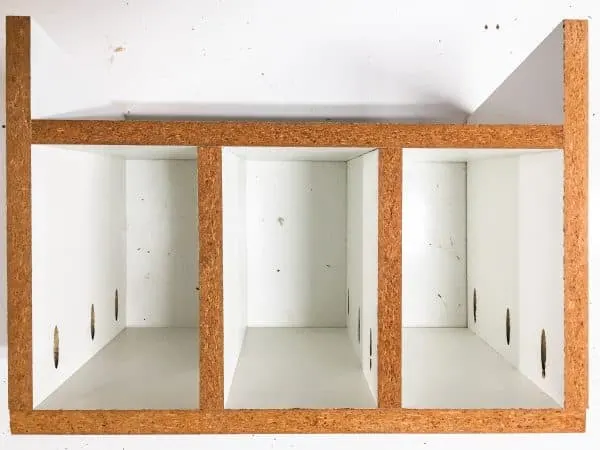
Attach the sides to the base with 1 ¼" pocket hole screws. Add the two divider pieces about 5" apart in between. Insert the center screw first, then use a square to make sure they're straight before driving in the side screws.

Drill three pocket holes into both ends of the top piece. Rest it on top of the center dividers in between the sides with the pocket holes facing up, then screw it into place. Normally you would fill the pocket holes, but they'll be hidden under the chargers.
Attach the Back
At this point, you can call it finished! But I didn't want to gouge my walls with drill bits, so I decided to add a back piece to close it off.
Attach the ¼" plywood backing (mine is actually a scrap of whiteboard) to the frame with ½" brad nails.

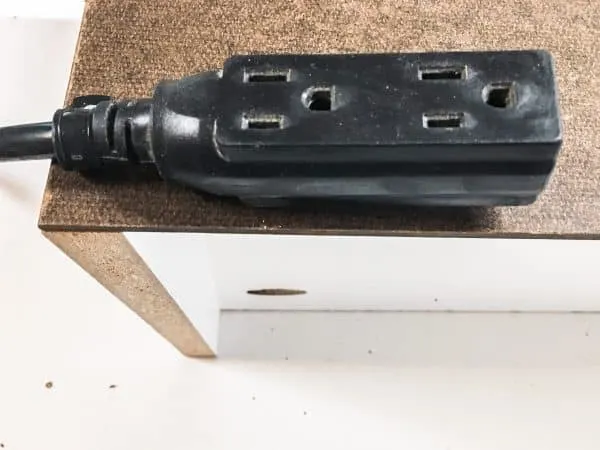
Add Power Strip and Drill Bit Storage
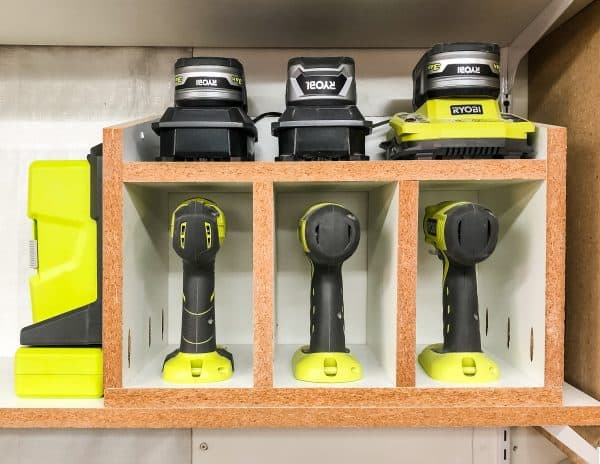
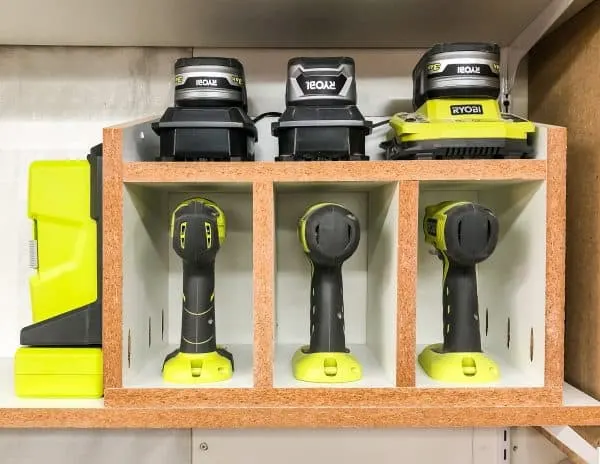
I have three cordless tool battery chargers, but only two plugs. I attached a short extension cord to the back for two of the chargers, and the third goes in the other socket. It's held in place with a cable clamp on the raised back section.

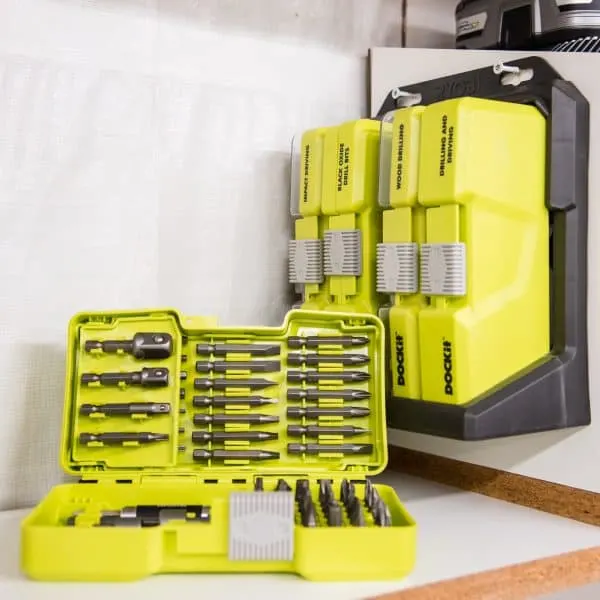
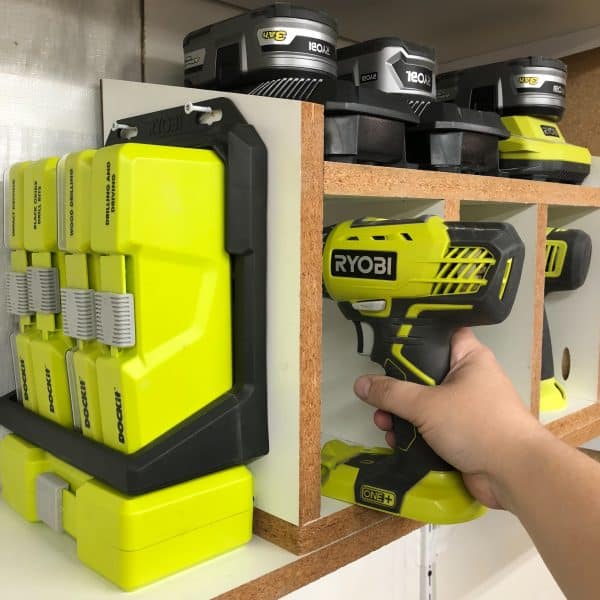
I attached the Ryobi Dock-it tray to the side of the box to store all my drill bits. They don't make this little storage thing anymore, but you can find cases like these with holes at the top to hang them vertically.
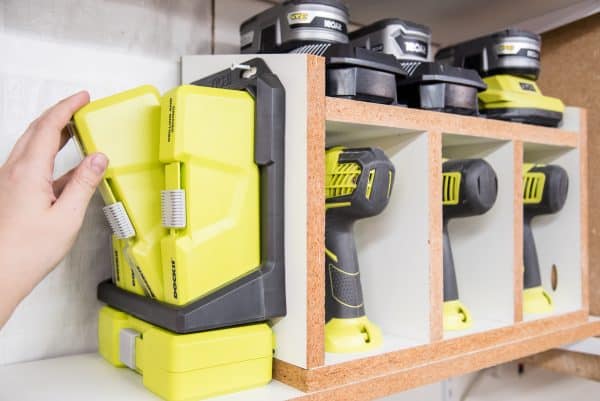

An additional box of bits underneath slides out for easy access.

The drill organizer fits perfectly on the shelf, and creates a dedicated space for my impact driver and two drills. The shelf on top has room for all three of my Ryobi battery chargers, so I never run out of power!
I love being able to grab whatever drill I need and get back to building. No more hunting for that missing battery or bit!

Check out these other workshop storage ideas!
Sam - Raggedy Bits
Tuesday 18th of September 2018
This is such a neat way to keep everything so organised!! Now that I have almost taken over my hubby's shed I think I might have to make him some LOL!
Thank you so much for sharing your awesome project with us over at Waste Not Wednesday!
Amy
Monday 17th of September 2018
I love anything that keeps me more organized, and you have a lot of those things. Thank you for all of your wonderful posts.
Chas Greener
Wednesday 12th of September 2018
Great tutorial. Thanks for sharing on To Grandma's House We Go!
Amanda
Monday 10th of September 2018
Looks so good! I am forever misplacing the bits and do das that don't fit into those tiny part drawers: hole saw bits, forstner bits, loos router bits; I guess I have a 'bit' of a problem:)
Jenny
Monday 10th of September 2018
Thanks for a great tutorial! Thanks for sharing at Merry Monday