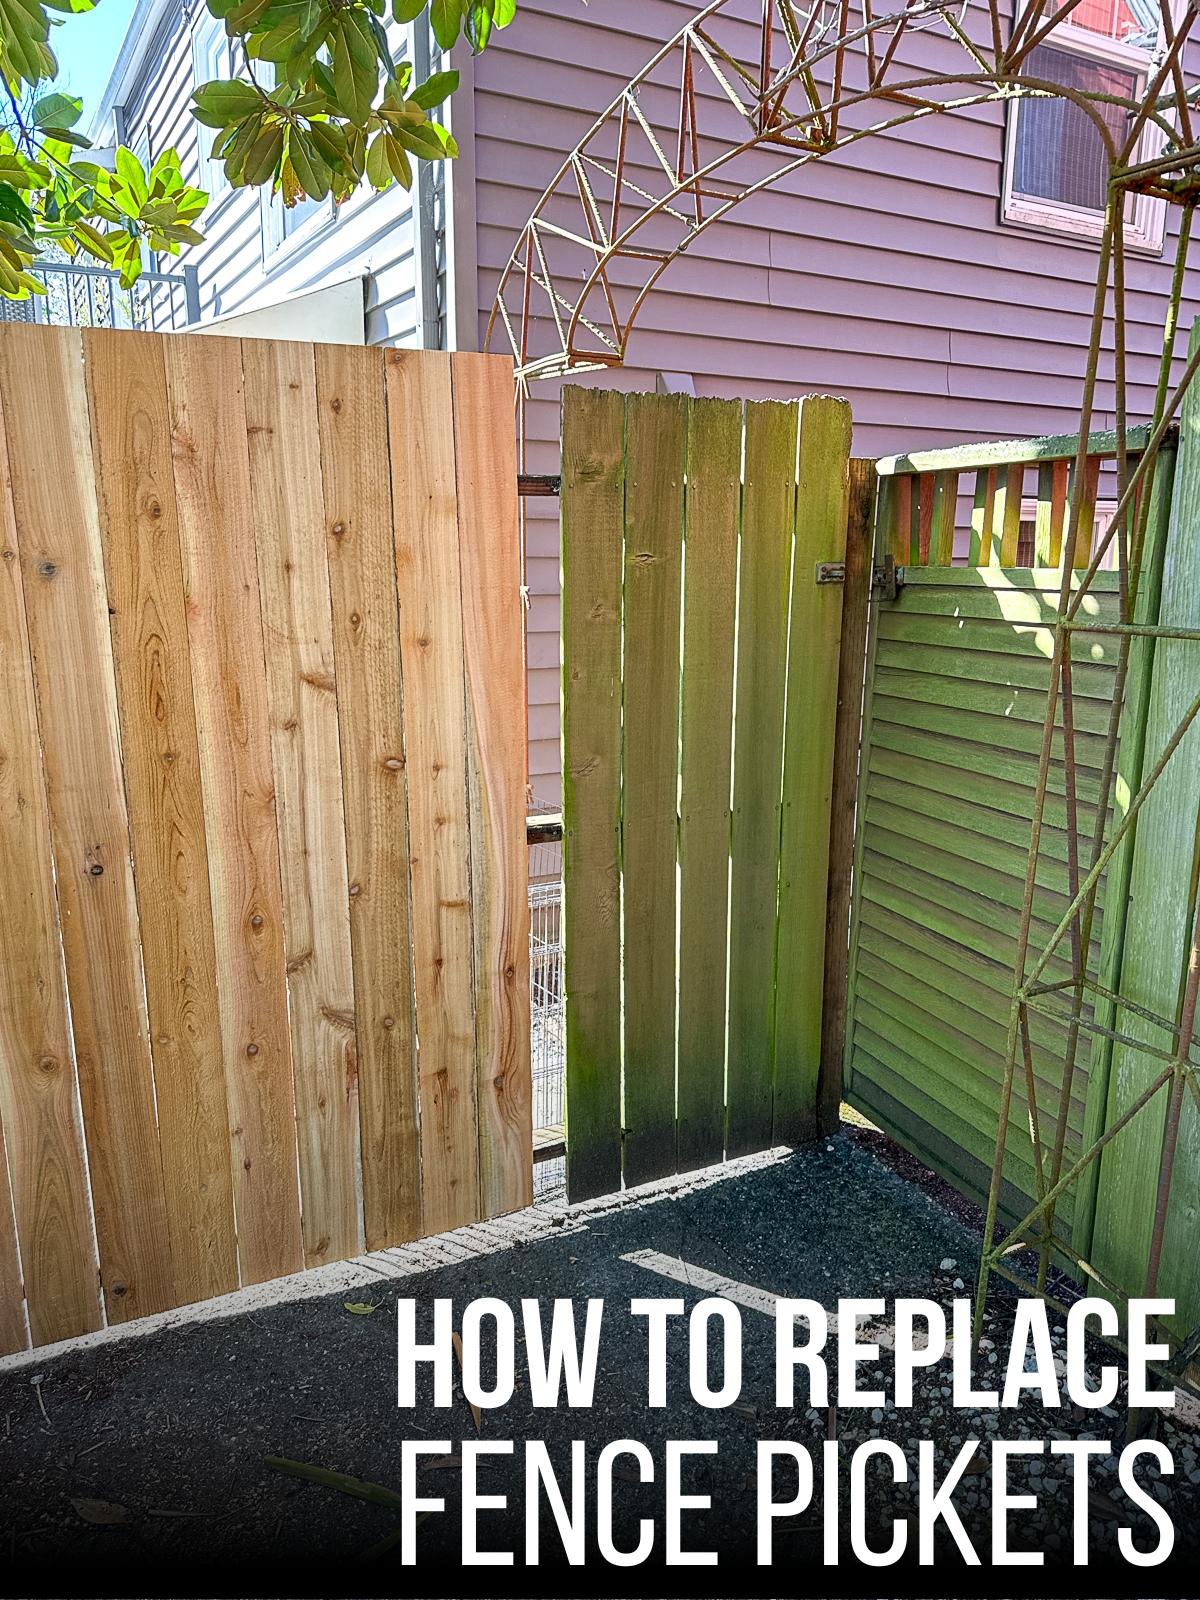
Learn how to replace fence panels without replacing the entire fence! I'll show you how to remove the pickets and install new ones easily!

Last summer, we replaced a section of our back fence that was literally falling into the neighbor's yard. Normally I'd do it myself, but it involved custom made metal post brackets to avoid the stone retaining wall. It cost a small fortune just for this small section, but it turned out great!

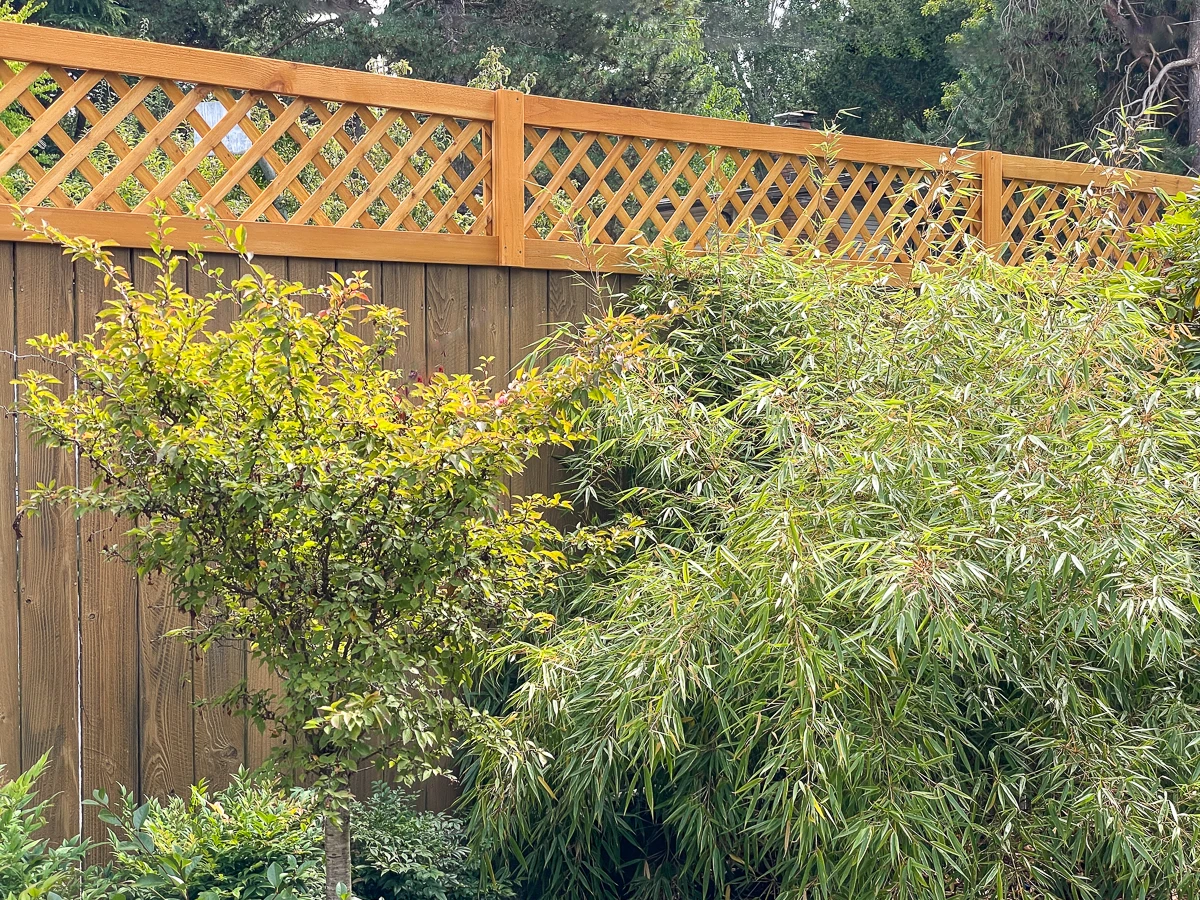
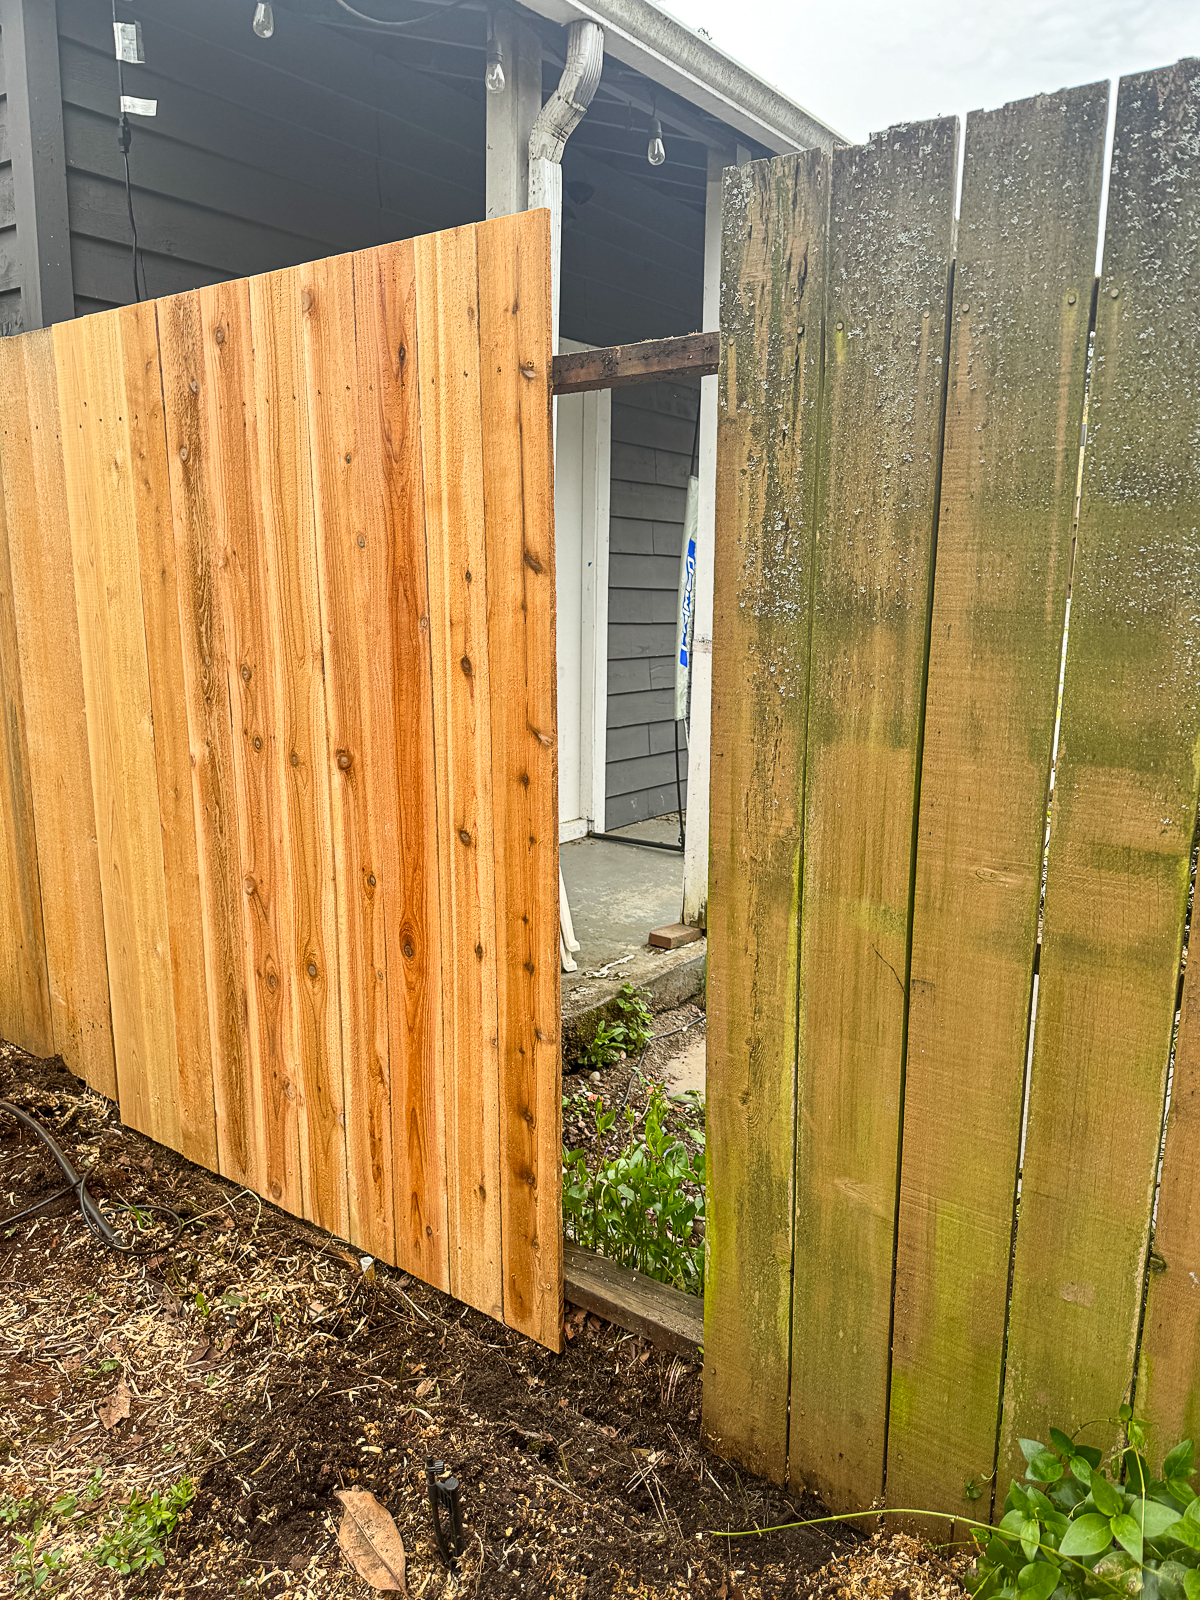
To save money, we opted not to replace the rest of the side fence at the same time. It was in better structural shape, but the panels were old and ugly.
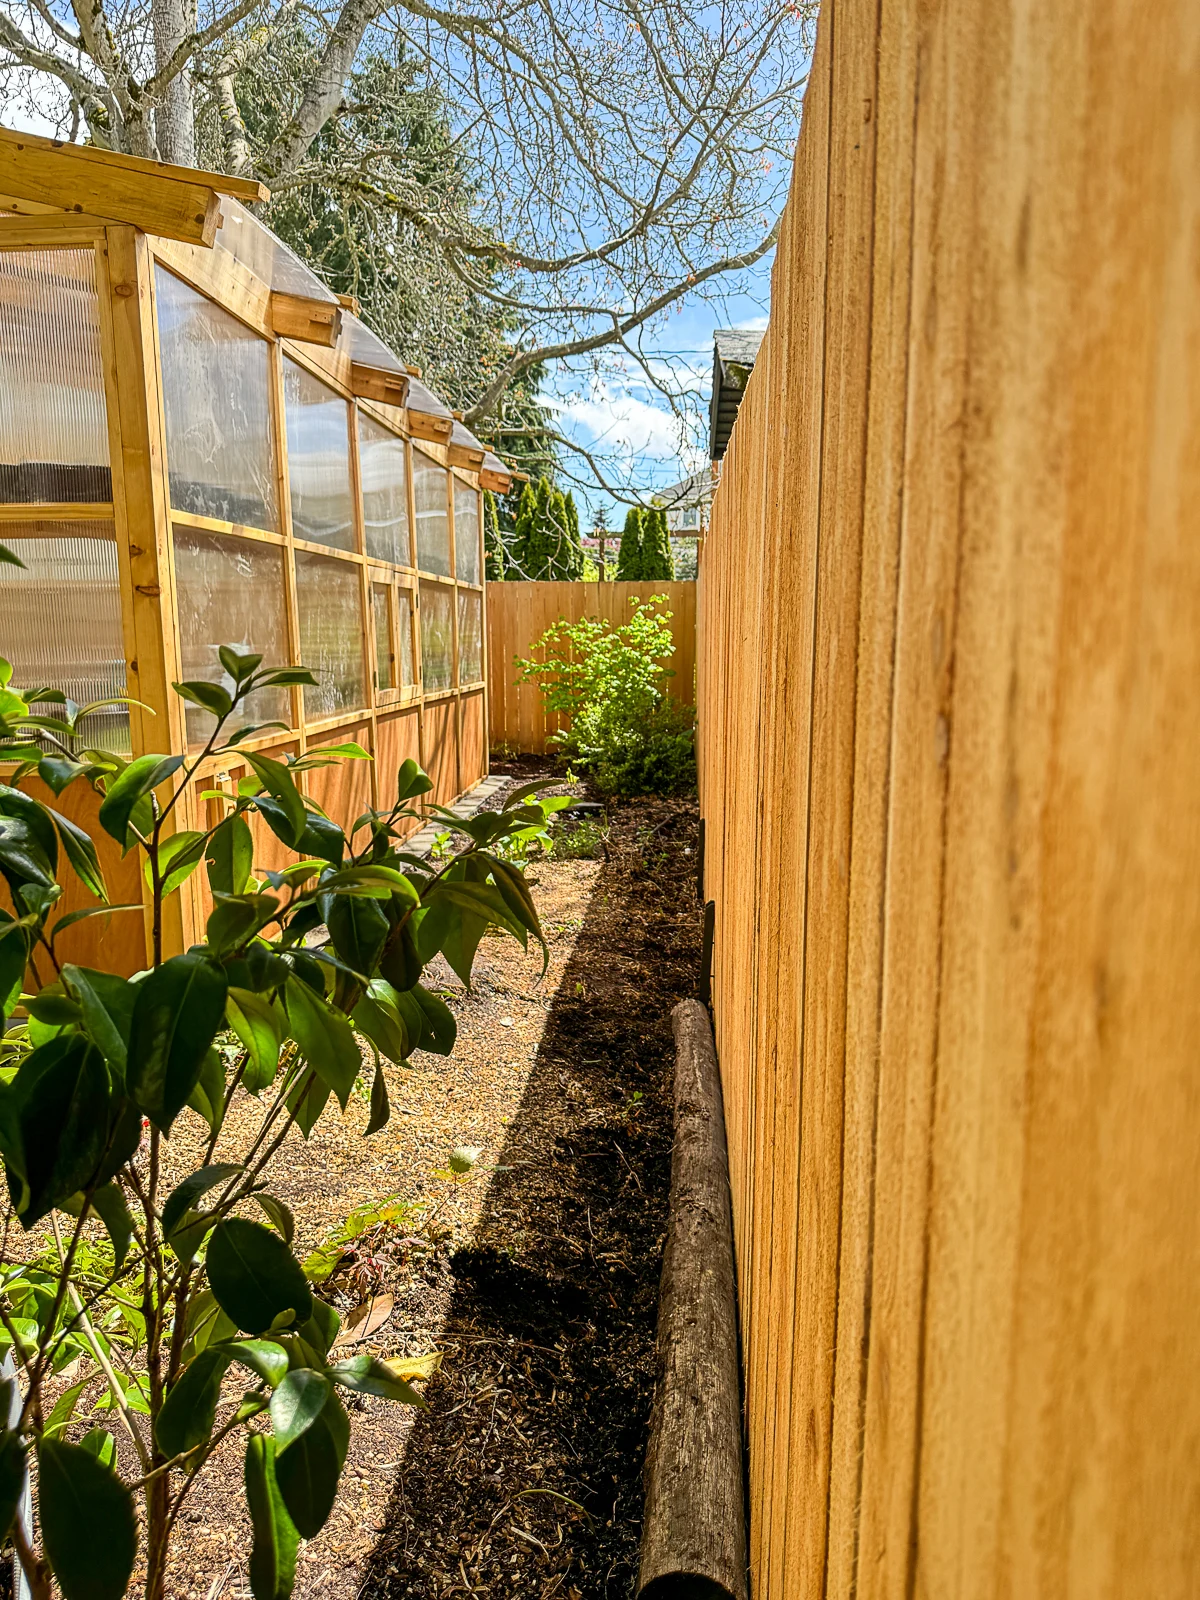
But this spring, we're having a greenhouse built in the backyard! The base is complete, and I had just a few days to do something about that section of fence before the greenhouse was installed. It'll be much harder when there's a building in the way!

Instead of paying a contractor thousands of dollars more, I decided to replace the fence panels myself for just a couple hundred bucks! Here's how I did it!

This post contains affiliate links for your convenience. Purchases made through these links may earn me a small commission at no additional cost to you. Please visit my disclosures page for more information.
Assess the fence posts and rails
If one of your fence posts are leaning or rotting, you should repair or replace it before you start adding the new pickets. You may need to remove the fence post concrete or add repair stakes, depending on the extent of the damage.
Here's a great video showing you how to replace a single post without having to rip out the whole fence.
If you're going to add a trellis to the top of your fence after replacing the pickets, you'll definitely want to make sure the posts are stable. The added weight can cause loose posts to lean even more, and can even fall over in a storm!

Our fence structure was in decent shape, although one of the posts was loose in the ground. Here's how to fix a leaning fence without replacing the posts!
Move everything away from the fence
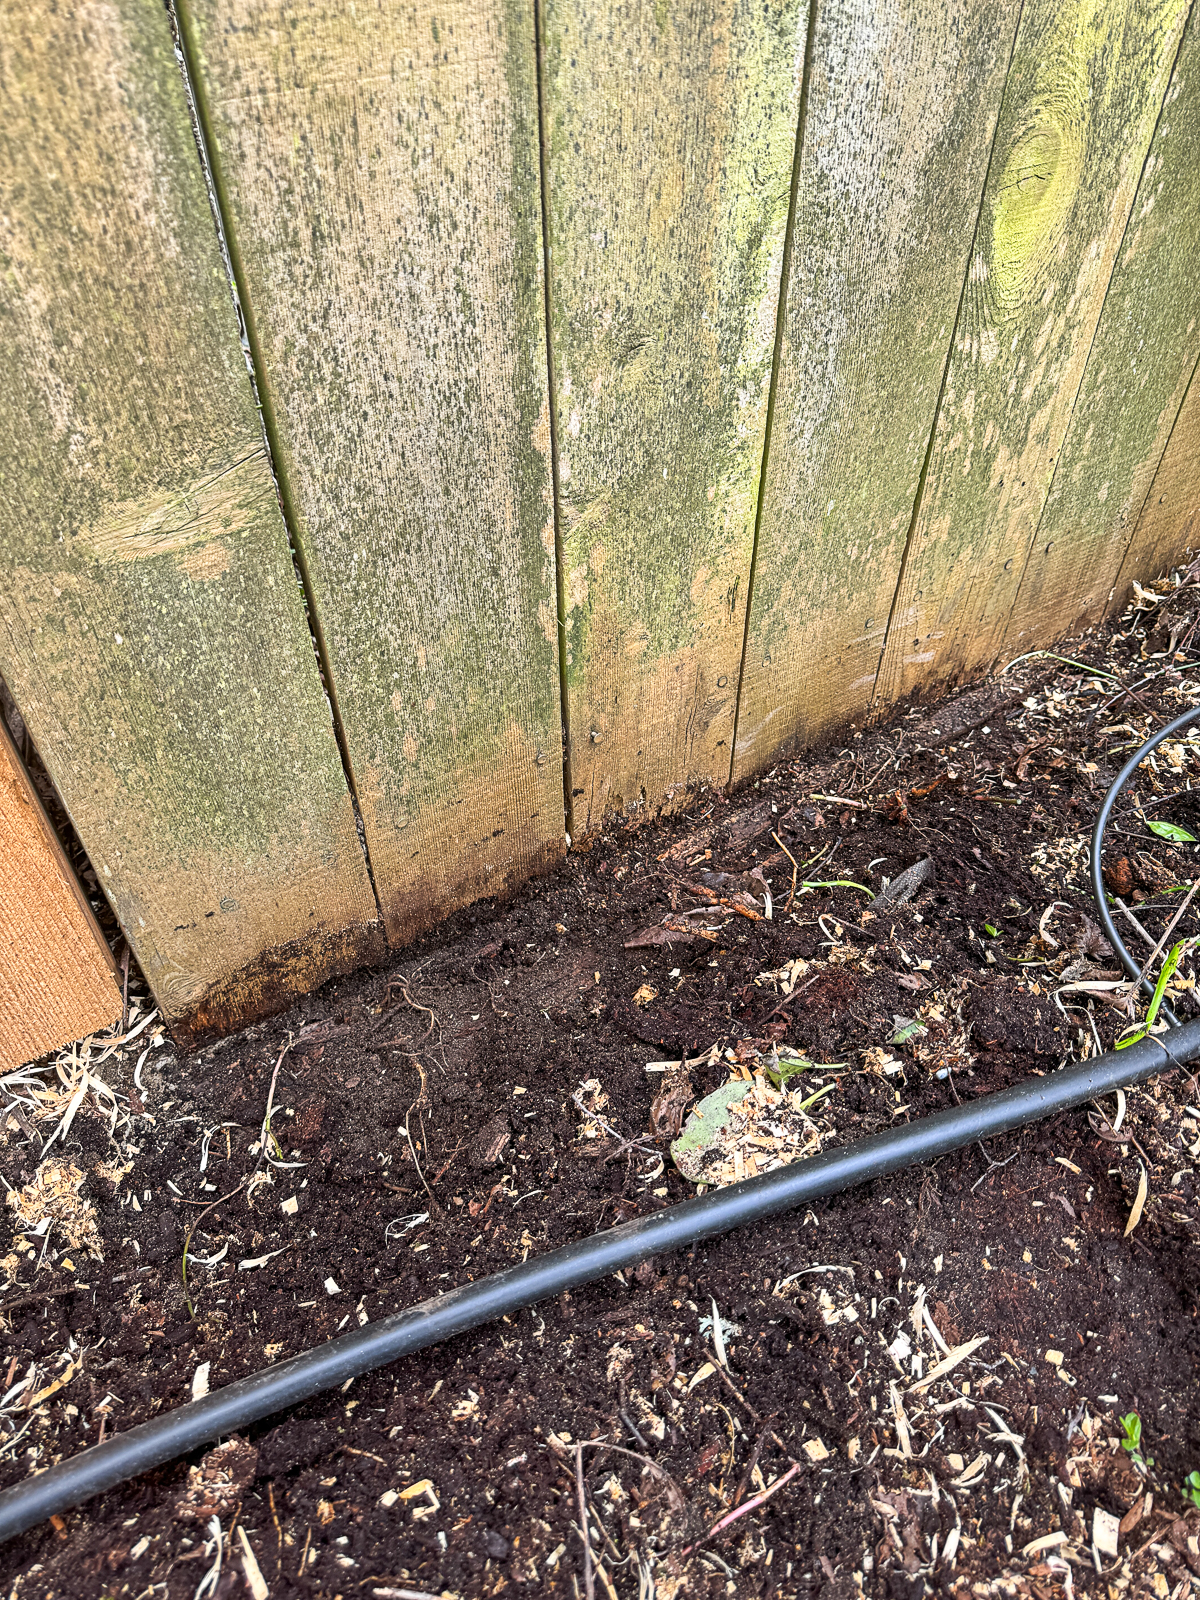
Over the years, mulch had built up along the base of the fence. I just went through with a shovel and pushed it out of the way, so the pickets could come out easily.

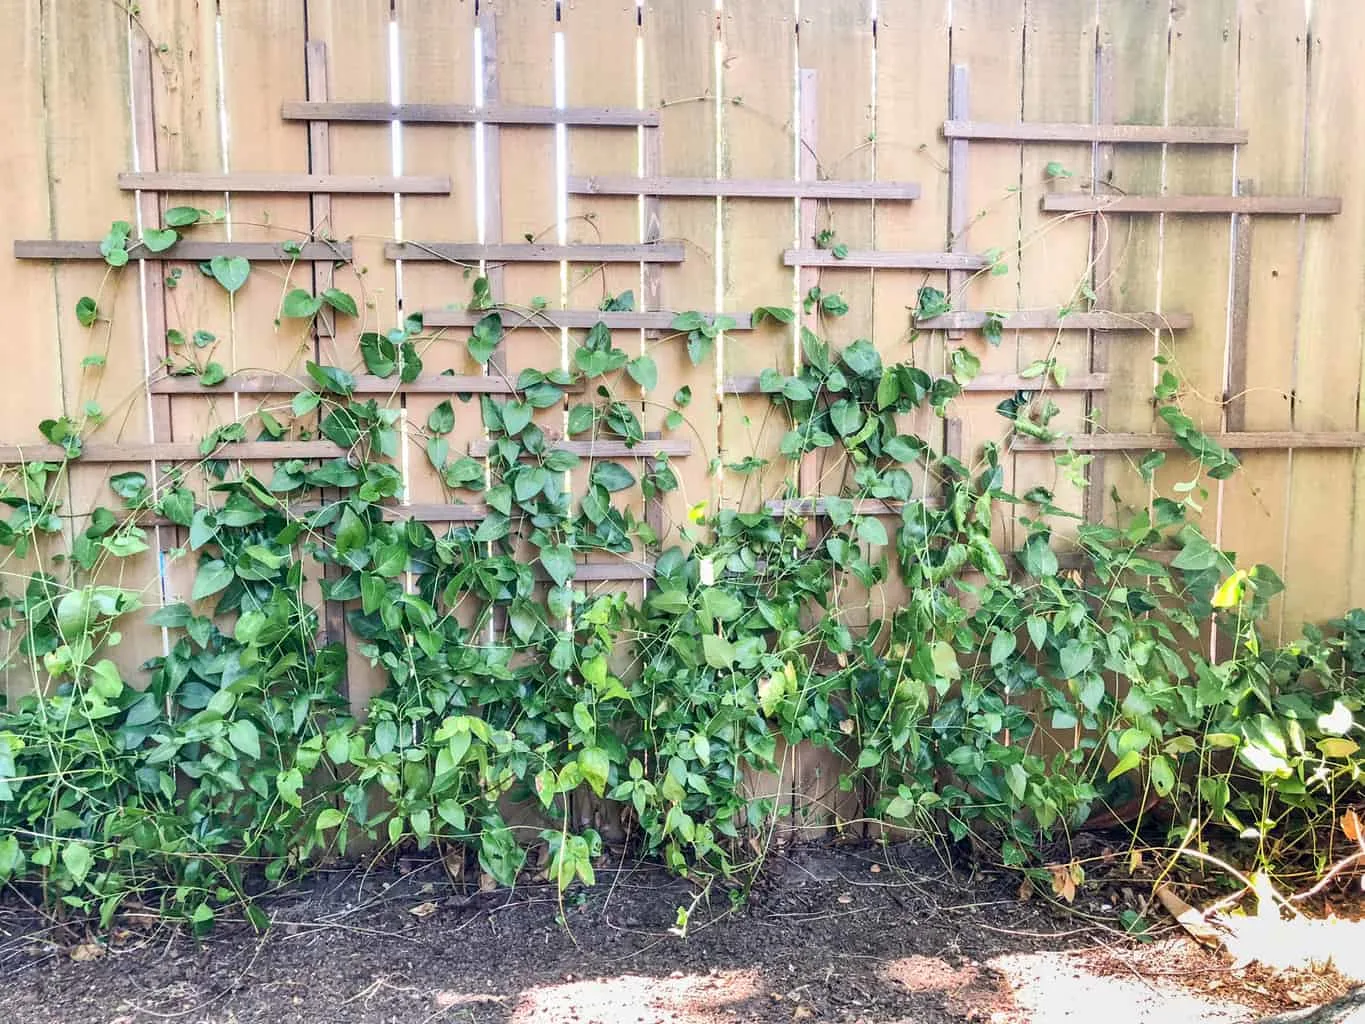
I decided to pull out the clematis vine that once grew on this fence trellis. It hasn't bloomed in the last few years, so it was time to plant something new in this space!

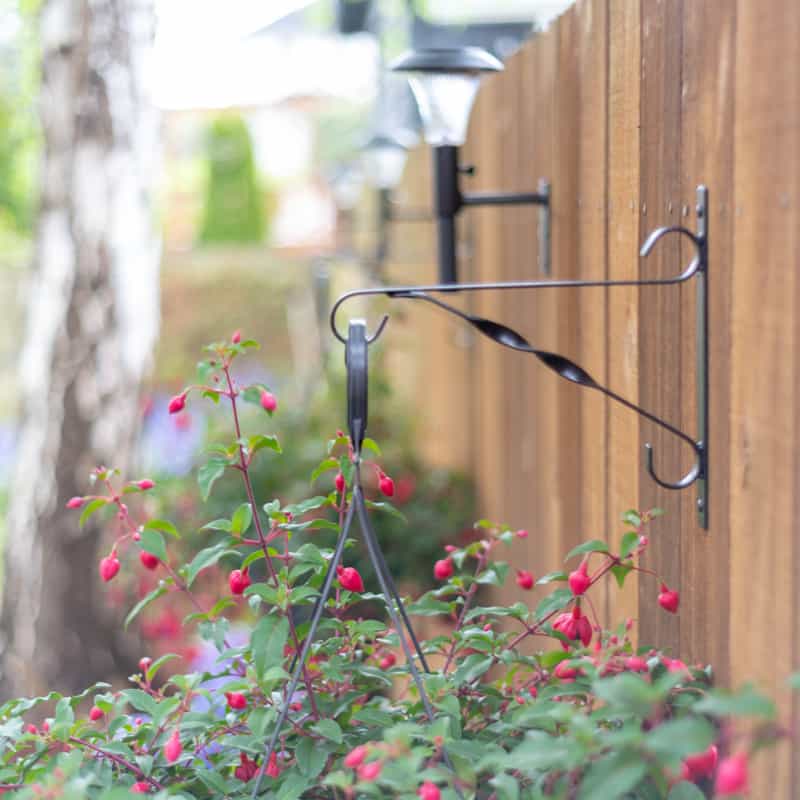
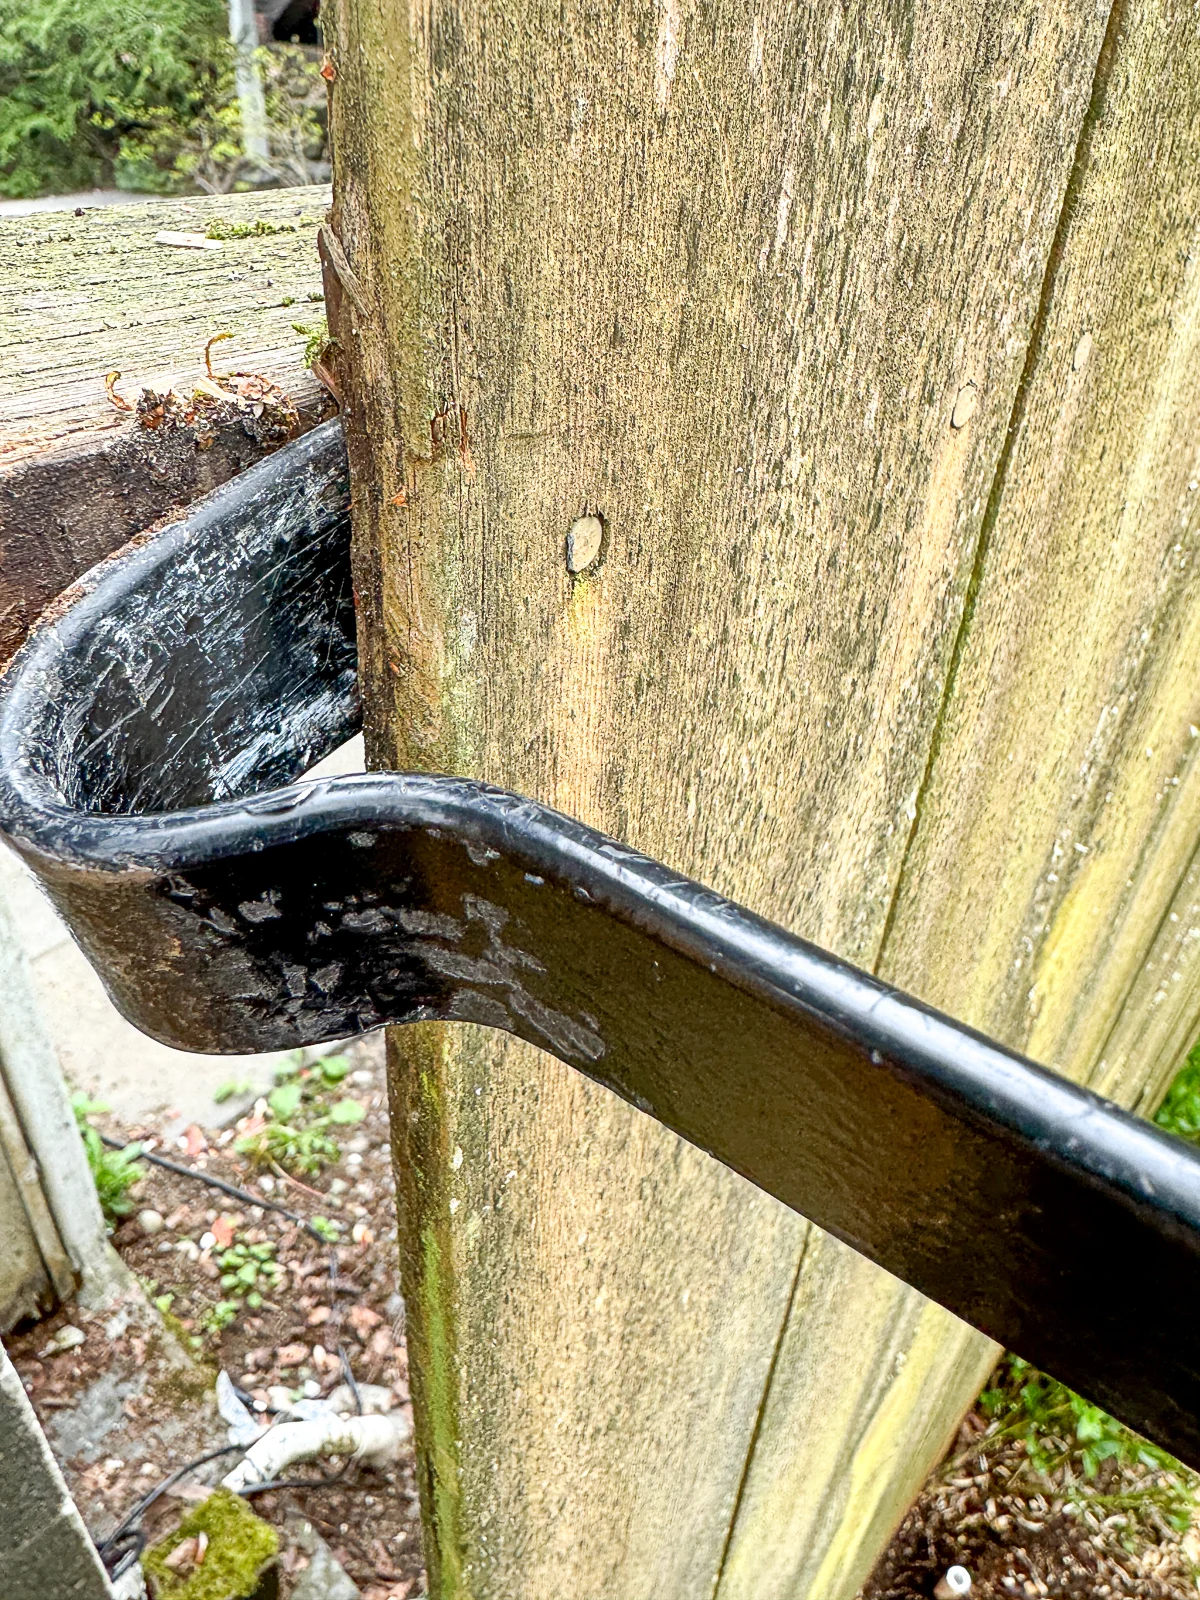
Then I unscrewed the solar lights and hanging basket brackets from the end of the fence. I originally installed these as part of my backyard makeover years ago, and the solar panels on the lights have stopped working.

I also moved the drip irrigation tubing off to the side so I didn't accidentally damage the lines while I worked. Once the new panels are installed, I'll run the tubing right in front of the fence where it will be hidden behind the plants.

Pry off the old pickets or panel
Look for nails or screws holding your old fence to the posts. If it was assembled as pre-made panels, it may be attached to the sides.
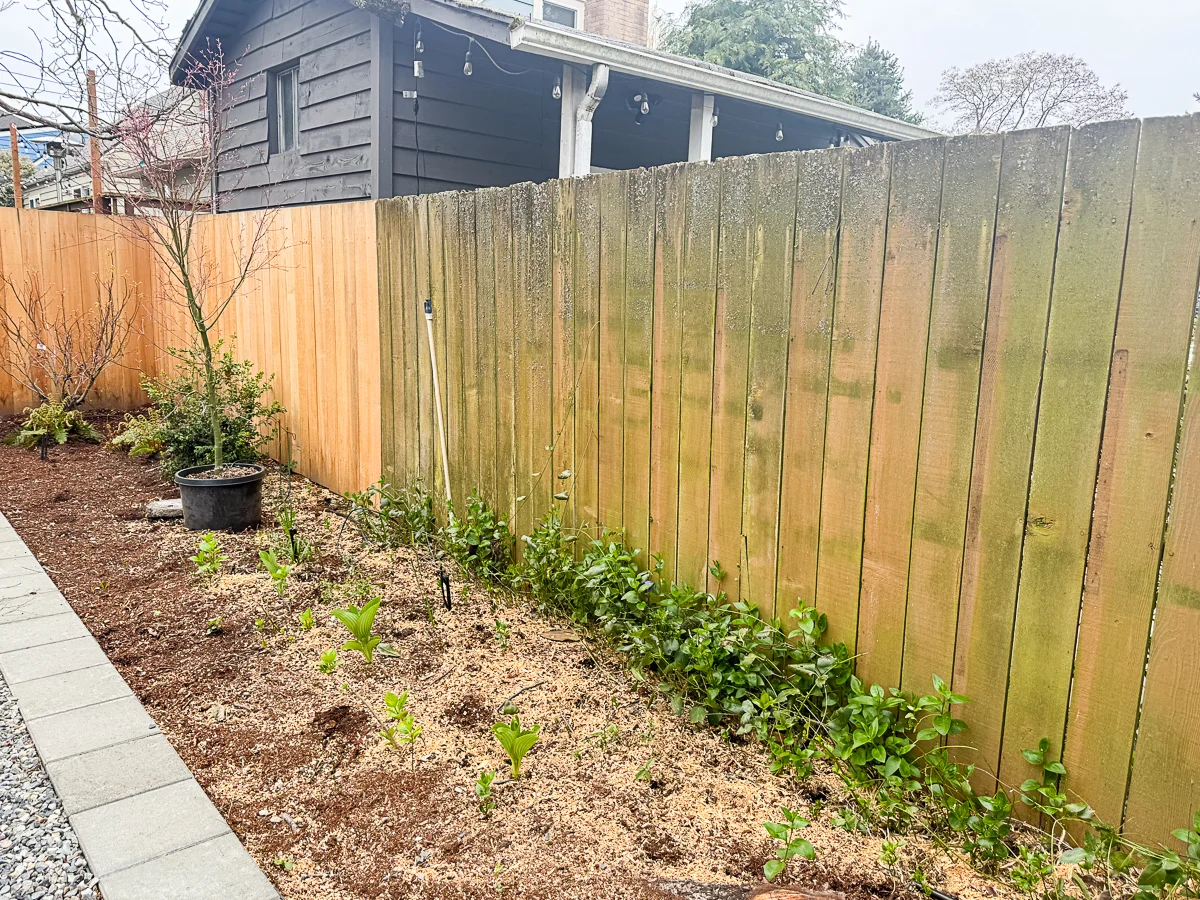
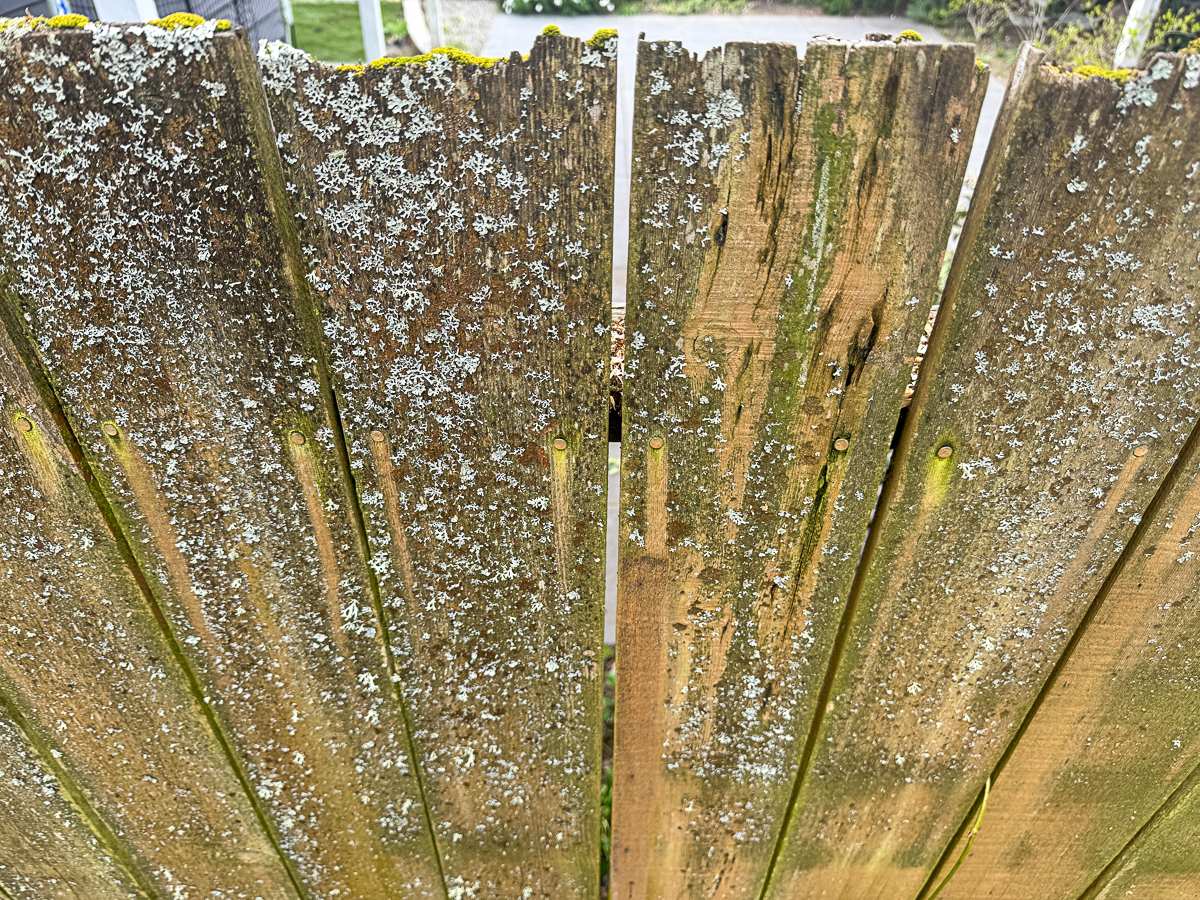
Mine were nailed directly to the front, hidden behind all that mildew and lichen. Gotta love living in the wet Pacific Northwest...

I started at the end where the new section meets the old so the transition would be seamless. Wedge the short end of the pry bar between the picket and the rail. Use a hammer or mallet to get it firmly seated behind the board.

Then pull back on the pry bar, using the fence rail as leverage. Work your way down the picket on both sides, loosening the nails and pulling the board away.
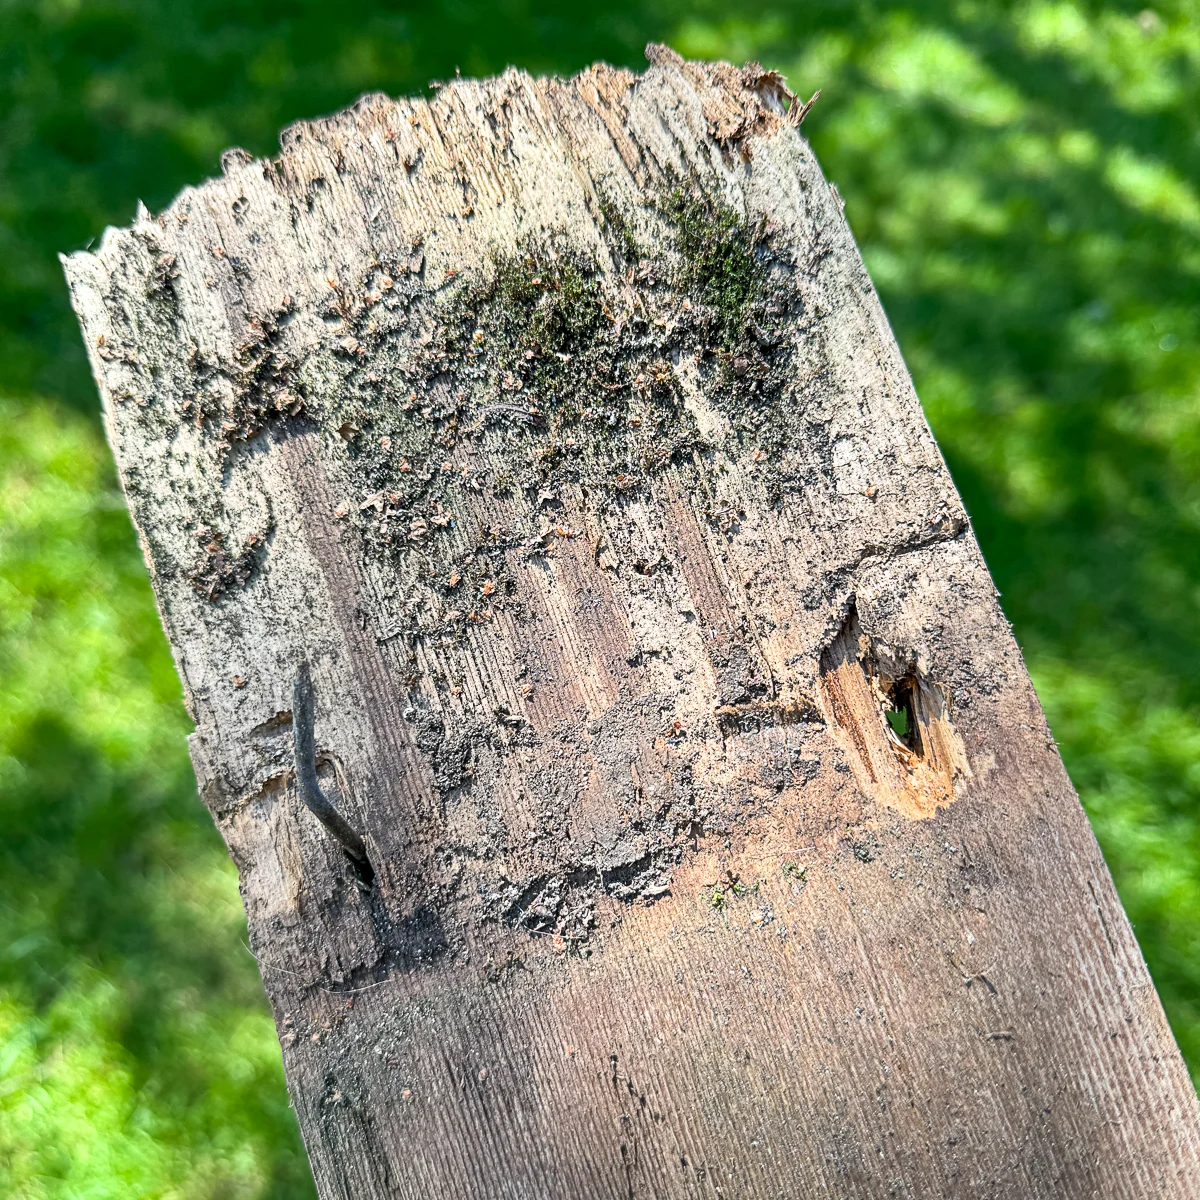
In some areas, the wood was so worn and rotted that the nails pulled straight through! You can either pull them out with the claw part of a hammer, or drive them back into the fence rail.

It took a bit of elbow grease, but eventually I was able to remove the first few pickets. I'm trying to avoid leaving a big gap in the fence, so our neighbor's dog doesn't pop through for a visit!

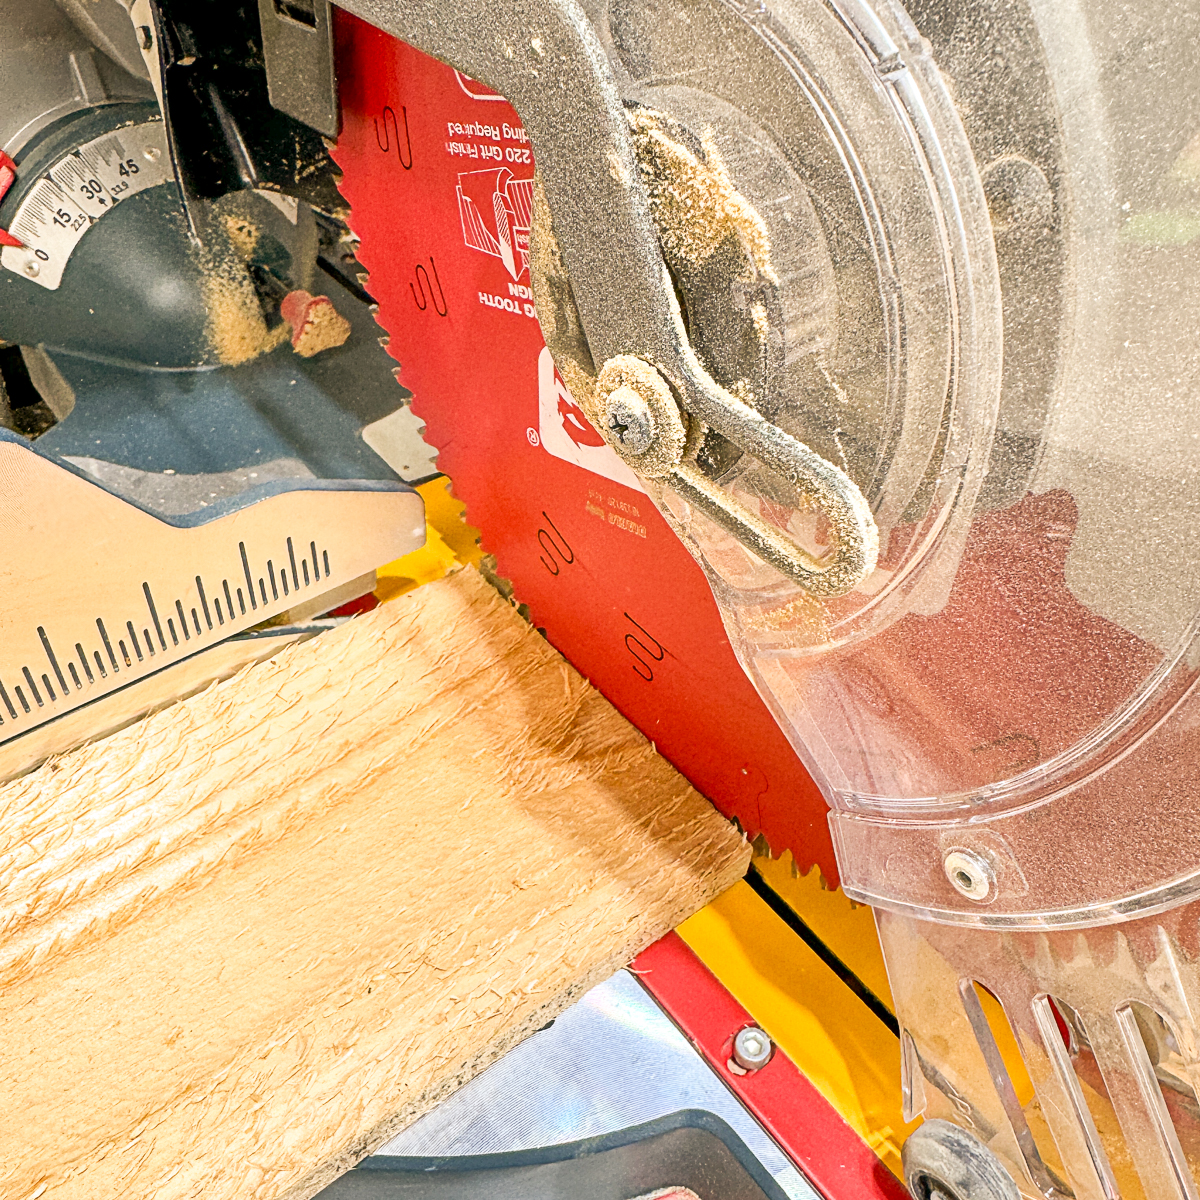
Cut the new fence pickets to size
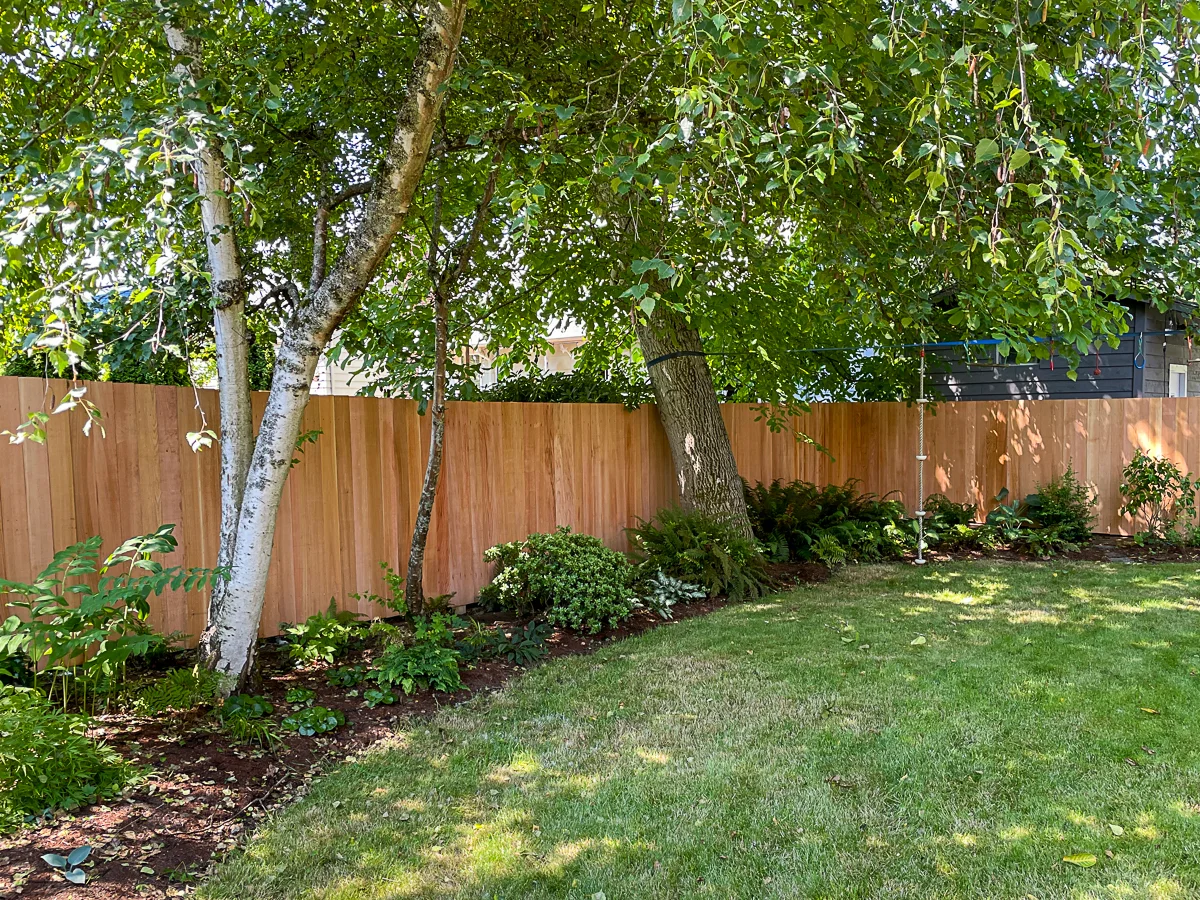
These new fence pickets are 6' tall, but the ground slopes down slightly from this end of the fence to the other. The pickets will gradually get longer in order for tops to stay level.
I cut one end off at the miter saw, but you could use a circular saw instead. The clean cut goes at the top of the fence.

Attach the new fence panels
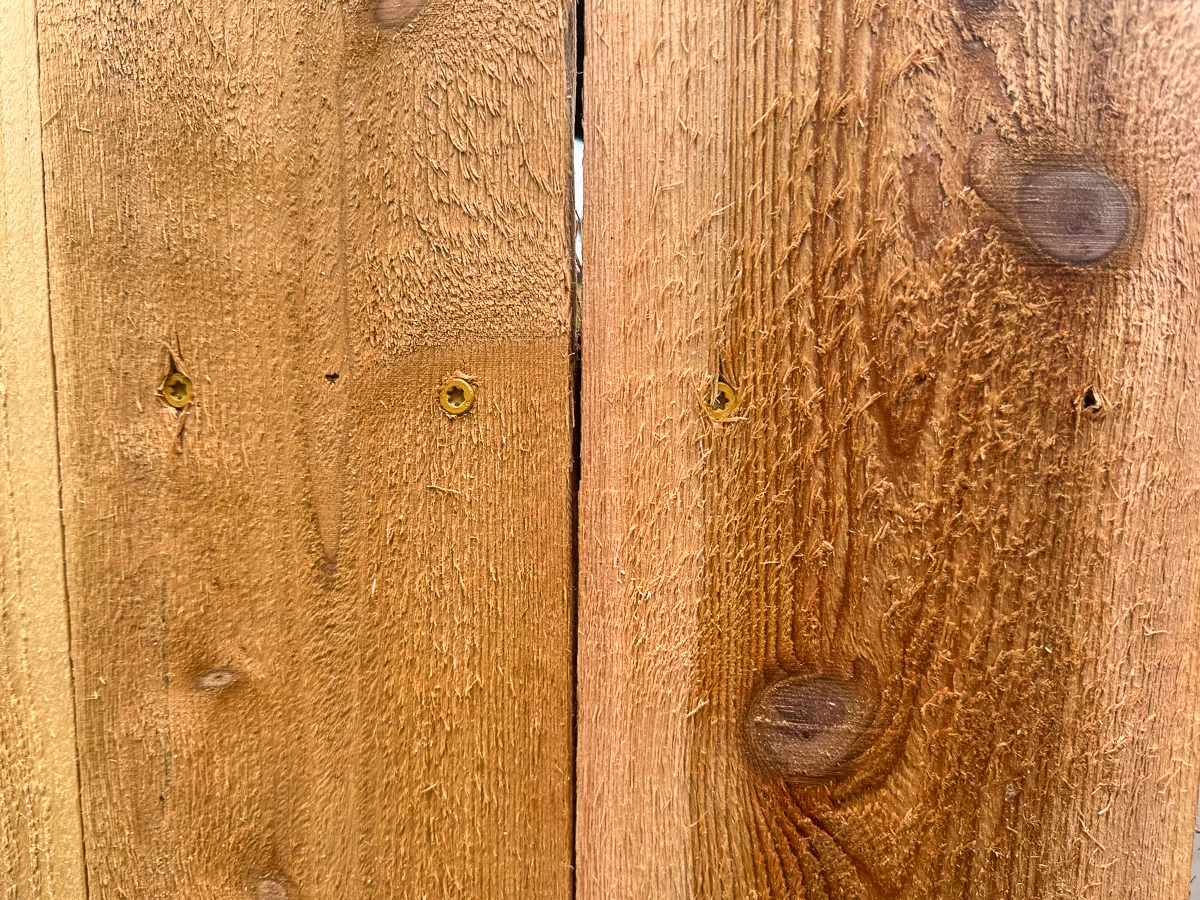
I decided to use screws instead of nails for these new fence panels. They're more secure than nails, and much easier to remove if I need to replace one in the future.
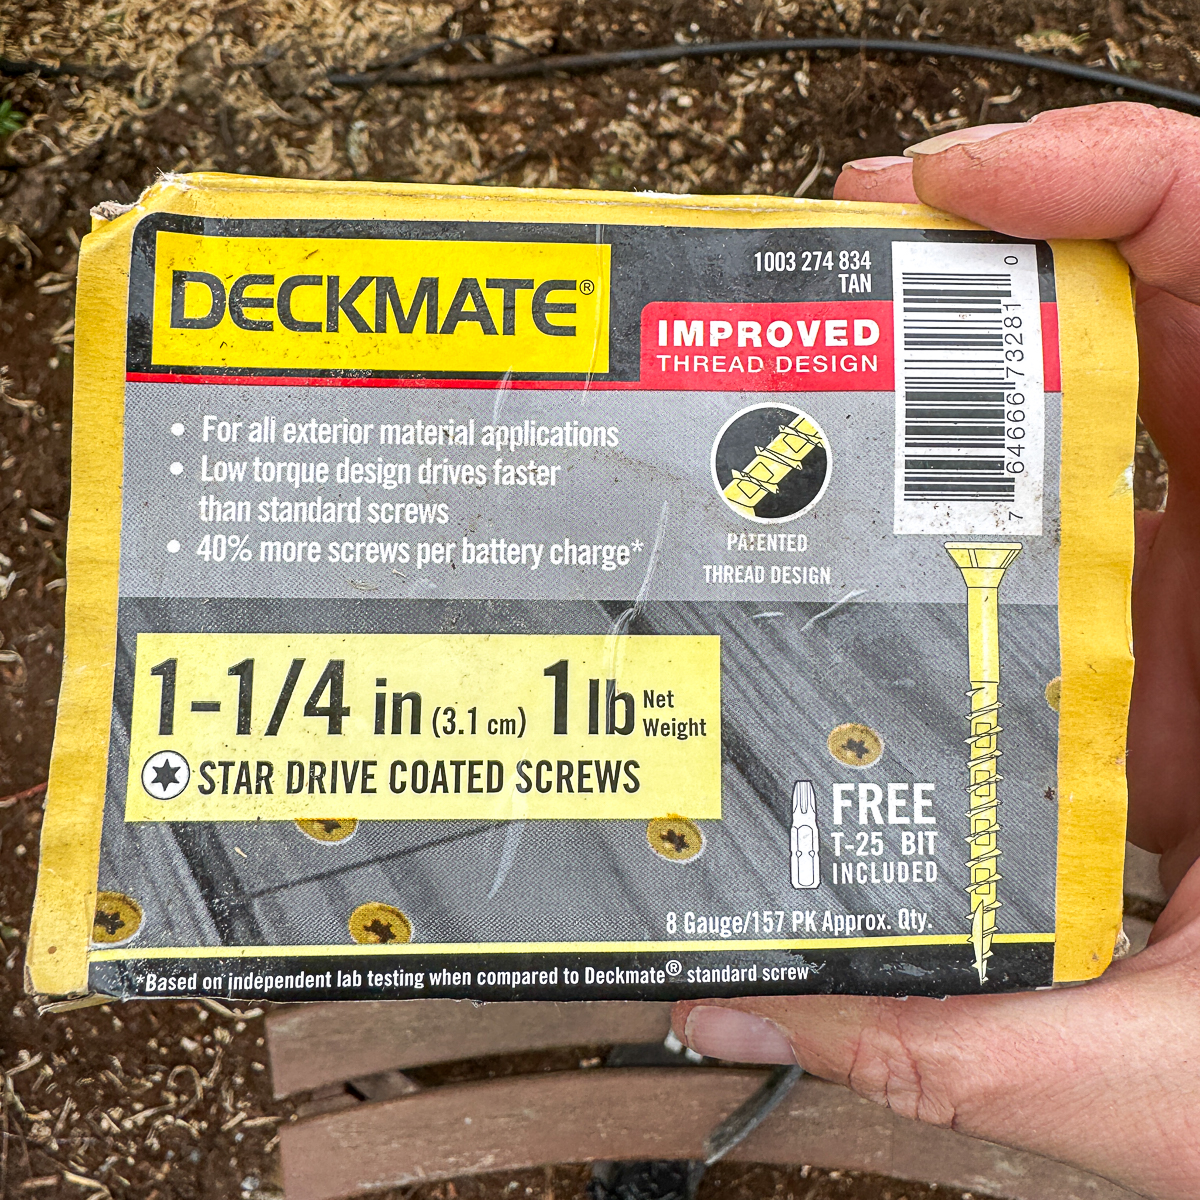

However, I did use 1 ¼" stainless steel brad nails and my trusty cordless brad nailer to tack each board in place first. This allowed me to line up the top end with one hand while I nailed it with the other. Then I could screw in the boards without having to hold it in place.
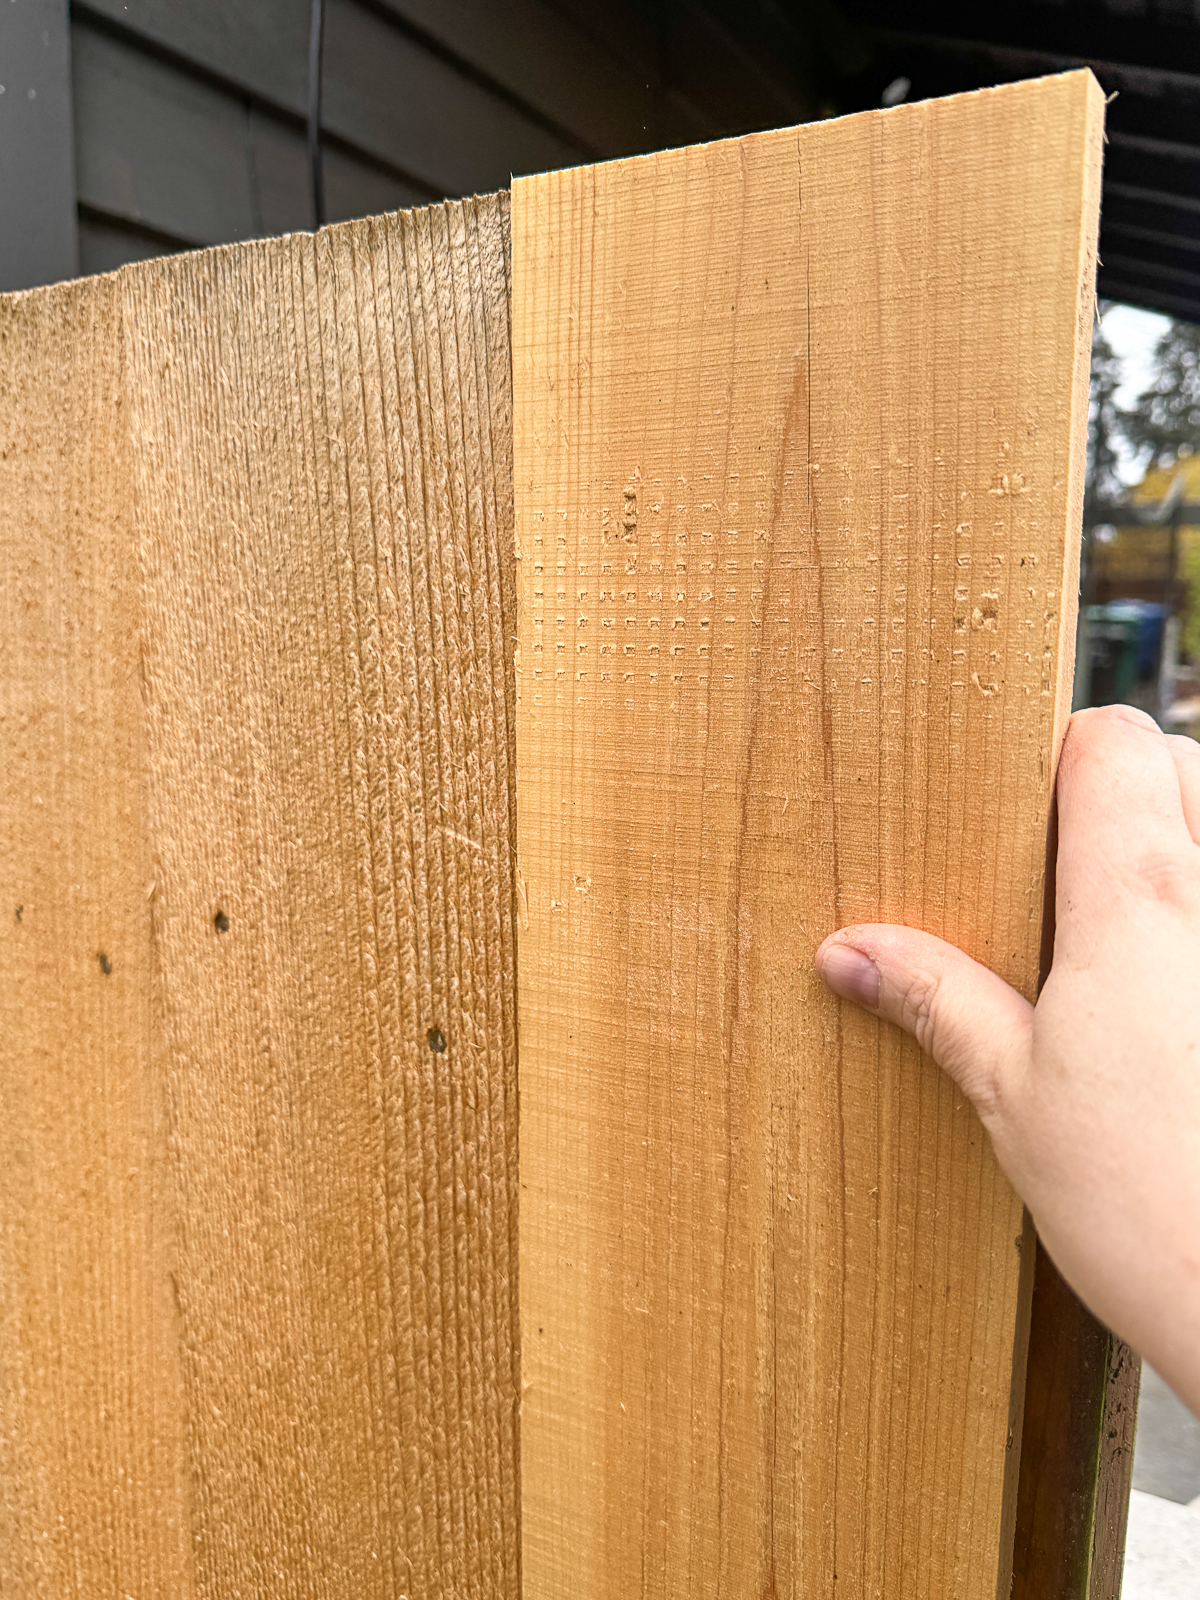
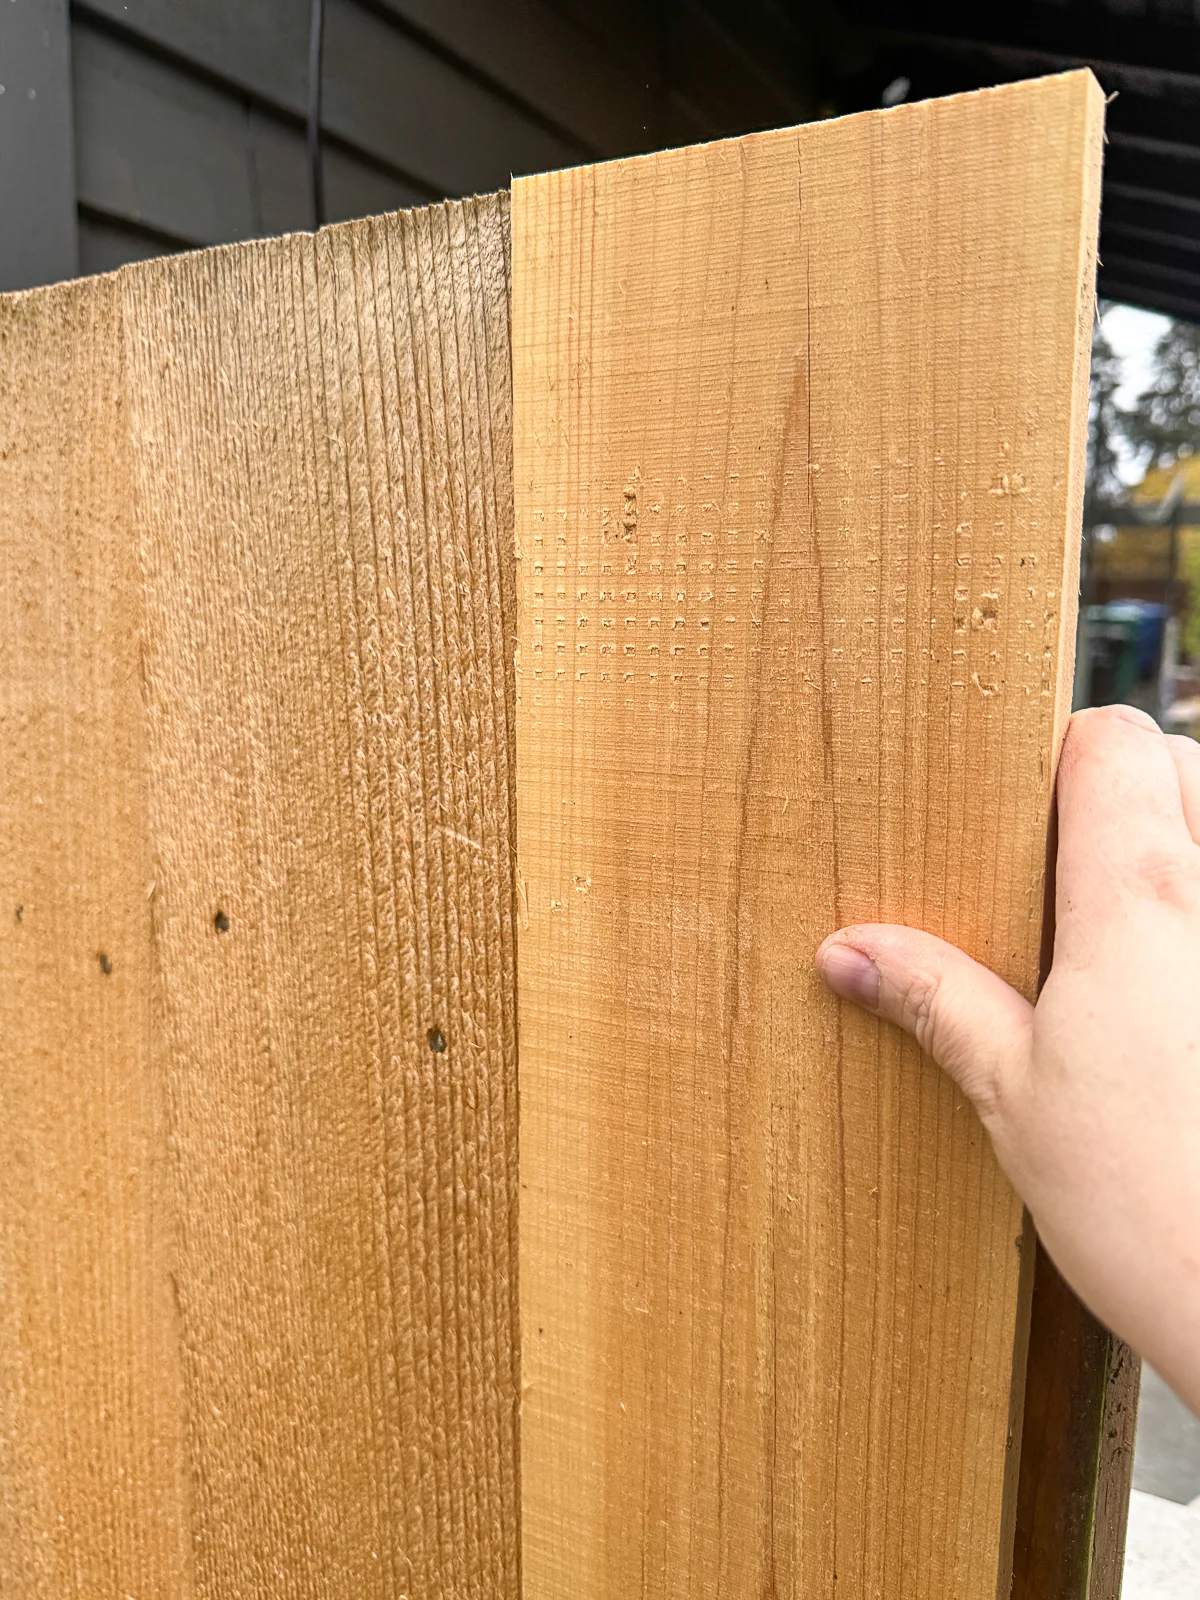
As you work your way down the fence, make sure to check to make sure your pickets are level and plumb with a 4' level. Don't count on the edge of the board to be perfectly straight!
For example, these two boards are touching at the bottom, but have a slight gap at the top. If I tilt the right board to close the gap, it wouldn't be straight anymore. Compound that error over a long length of fencing and it will start to look crooked!

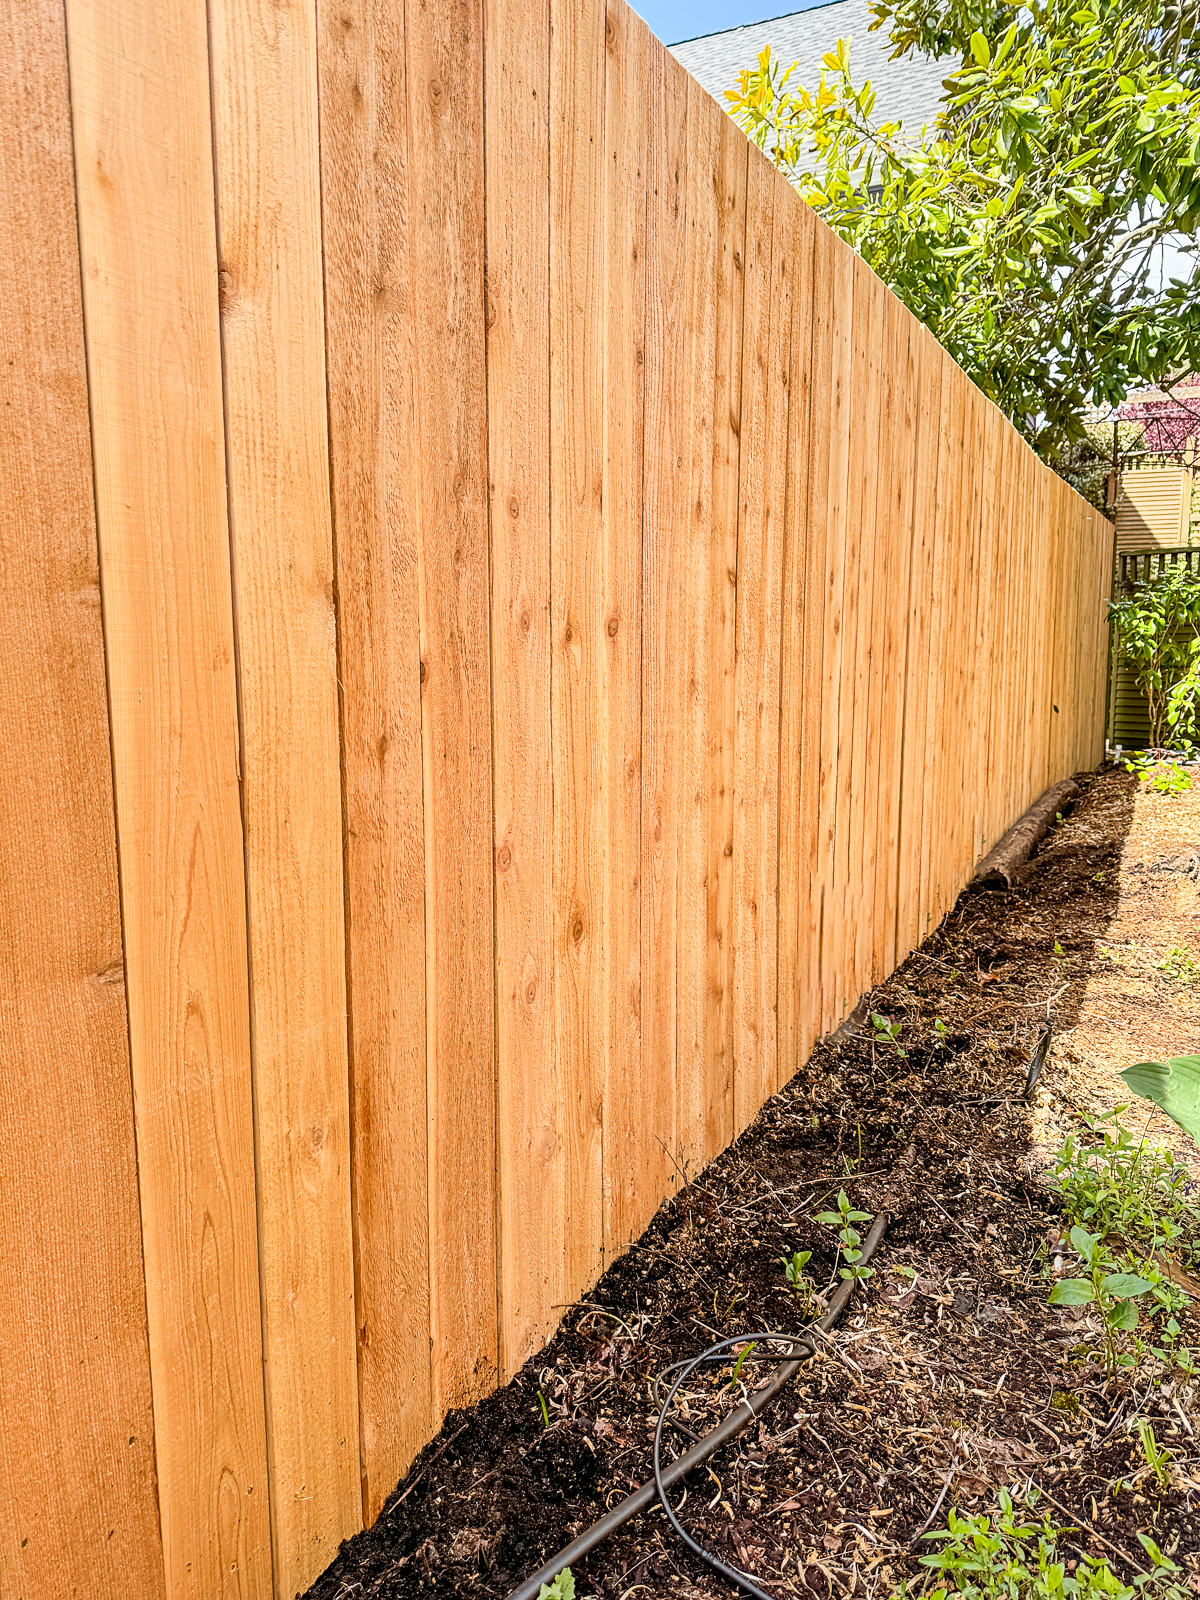
It took a full day to replace all these pickets by myself, but eventually I got to the end!


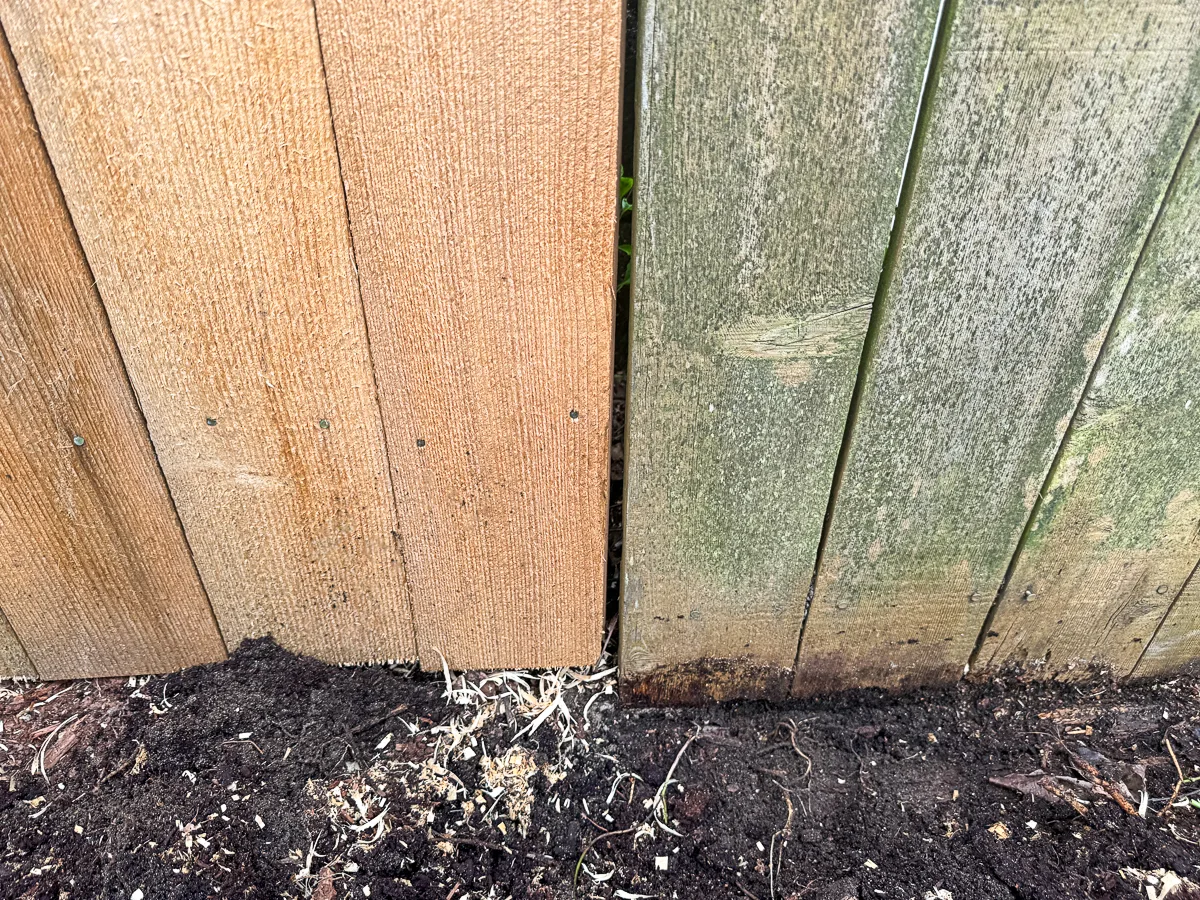
I was pretty happy with how this section of fence turned out! It looks soooo much better now that the old boards are gone, and it didn't cost a fortune.

I finished up this project just in time for our greenhouse to be installed the next day! Whew!

Check out these other outdoor home improvement tutorials!
Randy Glantz
Thursday 2nd of May 2024
Just curious if you applied any preservative to the ends of the pickets that touch the ground?
Thanks so much for a great blog. I already built a raised bed planter following your plans, and it turned out wonderfully.
Vineta Jackson
Thursday 2nd of May 2024
I didn't apply any preservative. These fence pickets are cedar, so they're naturally rot resistant. The old pickets that I was taking out were also cedar, and were probably at least 30 years old and only had some rot where they were fully buried in the ground.