Learn how to make a round wood box with a lid using a laser! This fun DIY project can be customized for a unique jewelry box or gift box.
In woodworking, circles and curves are kinda hard to make. You either have to bend steamed wood around a form, or make tricky cuts with a band saw or jigsaw.
But technology like laser cutters makes this process so much easier!
In this tutorial, I'll show you how to make a round wooden box with a lid that you can personalize to fit any theme. I'll be using the xTool P2 for this project, but a diode laser like the M1 would also work.
This post contains affiliate links for your convenience. Purchases made through these links may earn me a small commission at no additional cost to you. Please visit my disclosures page for more information.
Create the file
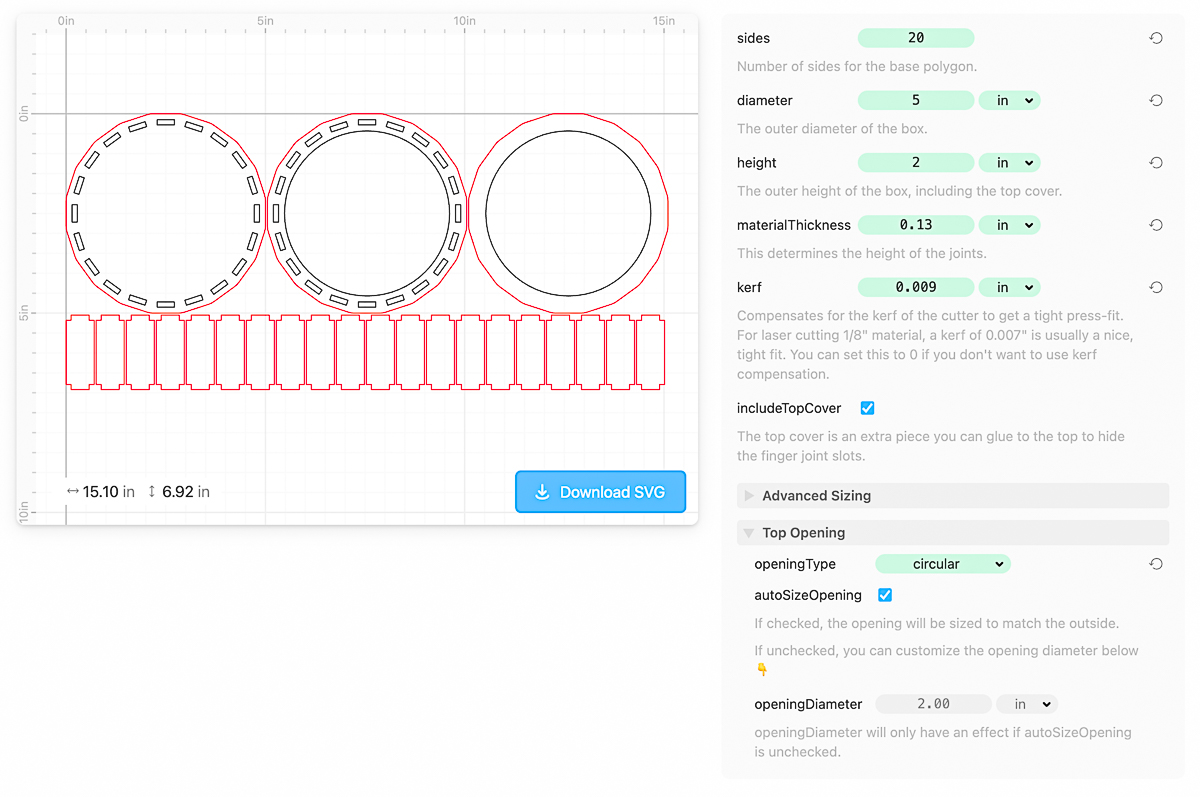
Rather than figuring out the math for a 20 sided box, I headed over to Cuttle's website and used their Polygon Box template to do it for me! This is one of their Pro templates, but you can save 10% off your first month or year with the code THD at checkout!
First, you'll need to measure the thickness of your material. I'm using ⅛" double sided white MDF from Smokey Hill Designs, which has a thickness of 0.13" according to my calipers.
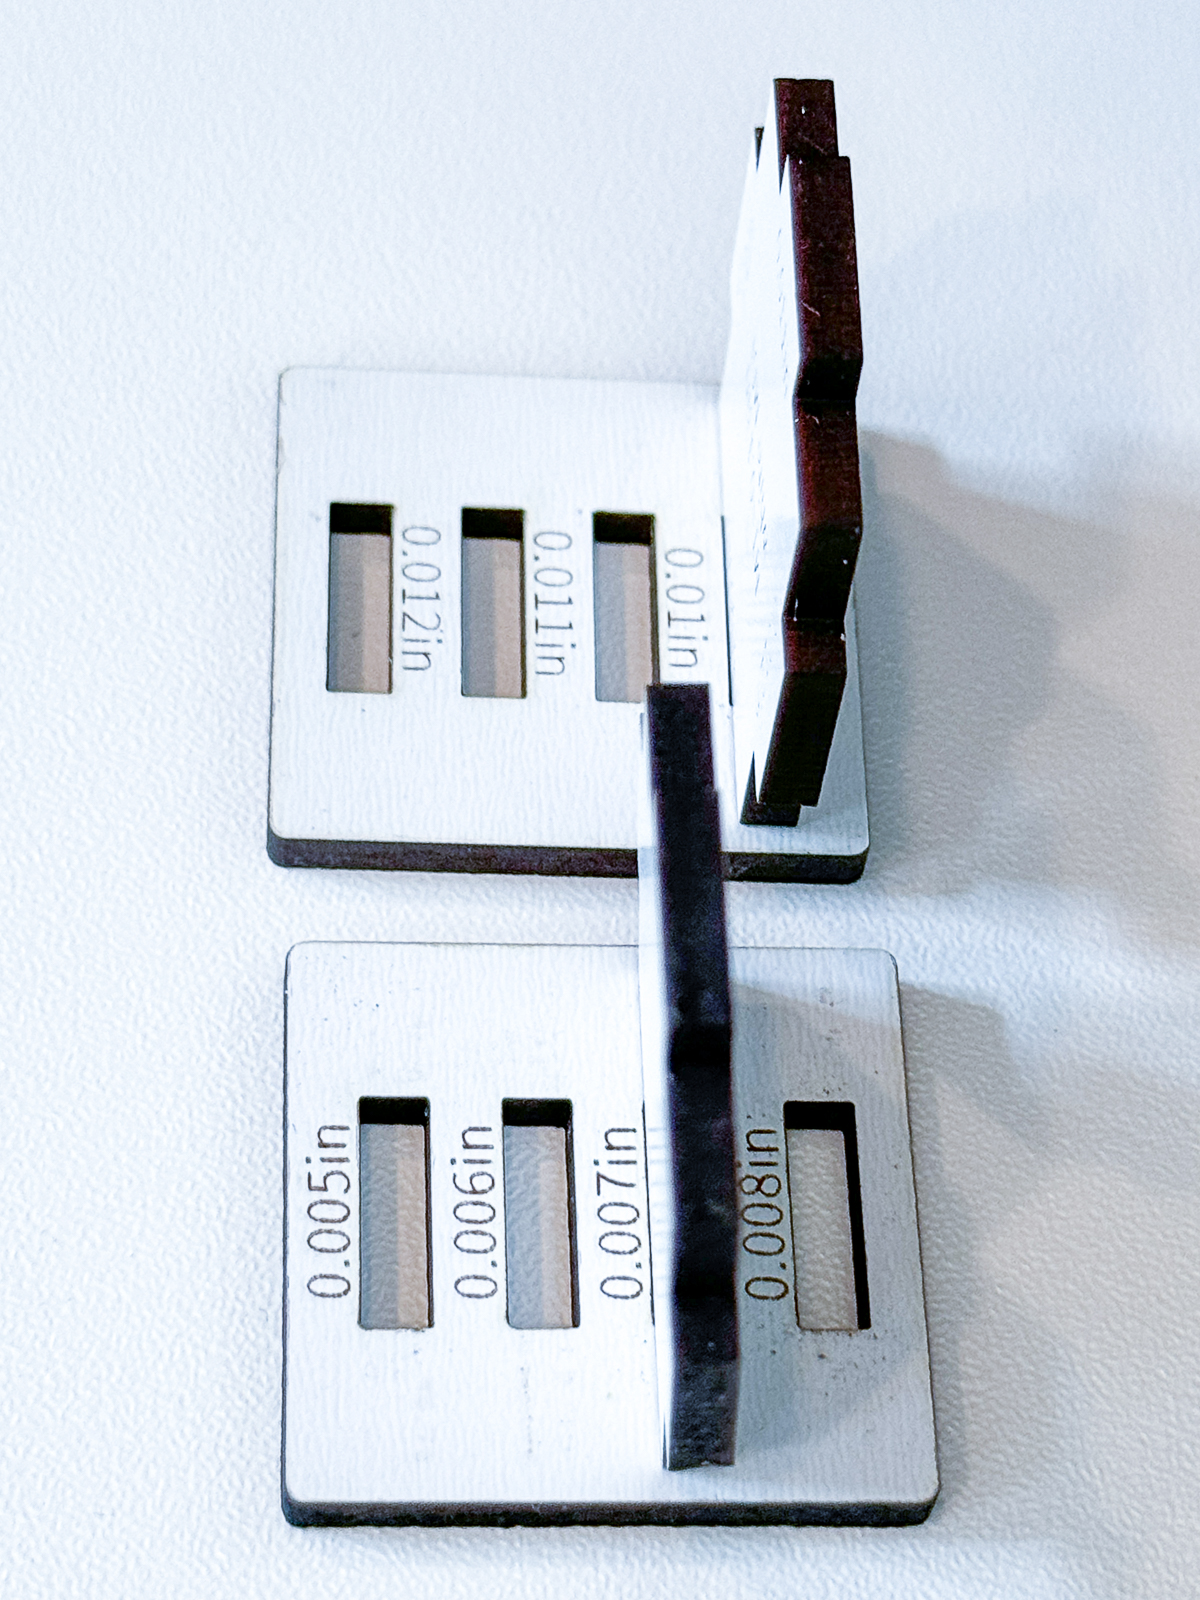
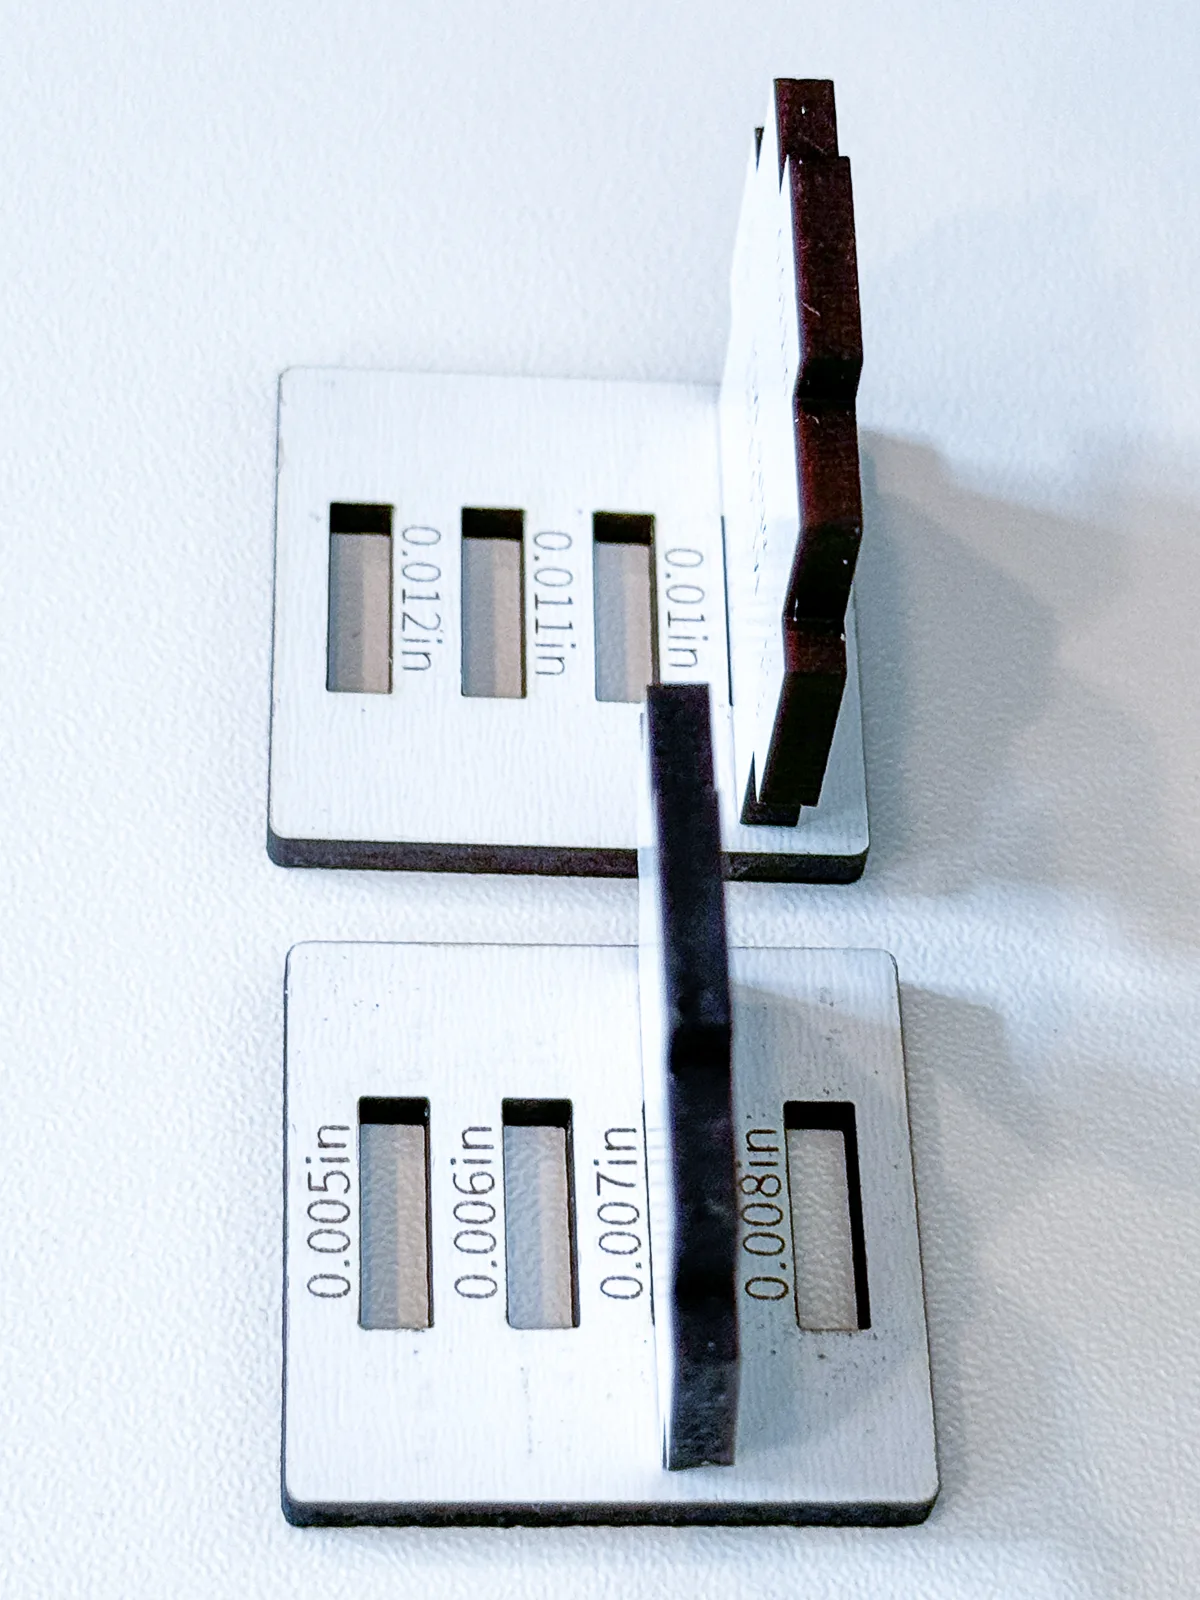
To get the best fit, you'll also want to adjust for the kerf. This is the amount of material that is burned away by the laser. The number will change depending on the thickness of your material and your particular laser, so it's always a good idea to test it first.
I used Cuttle's free Tab and Slot tester tool on this double sided white MDF, and found that 0.009" fit in the slot snugly. Their recommended setting of 0.007" was too floppy.
Now you can adjust the number of sides, the height and the diameter of the box. The more sides you have, the smoother the circle will be. I went with 20 sides on a box that's 5" in diameter and 2" tall, which seemed like a good jewelry box size.

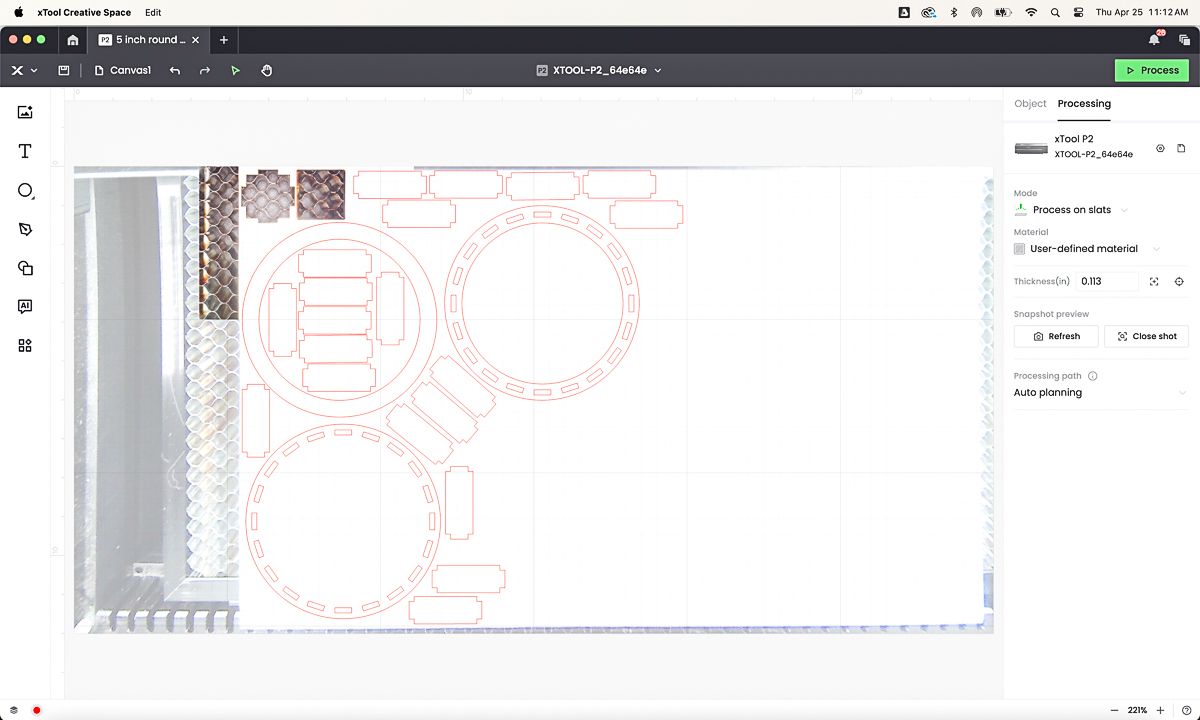
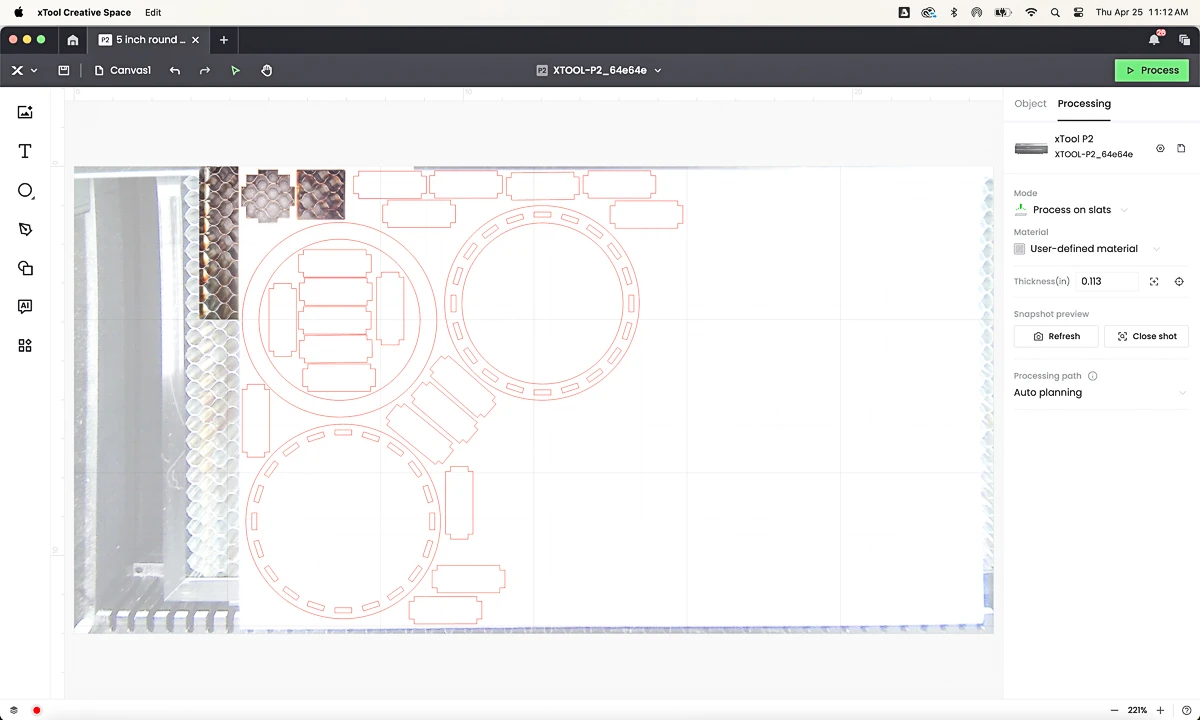
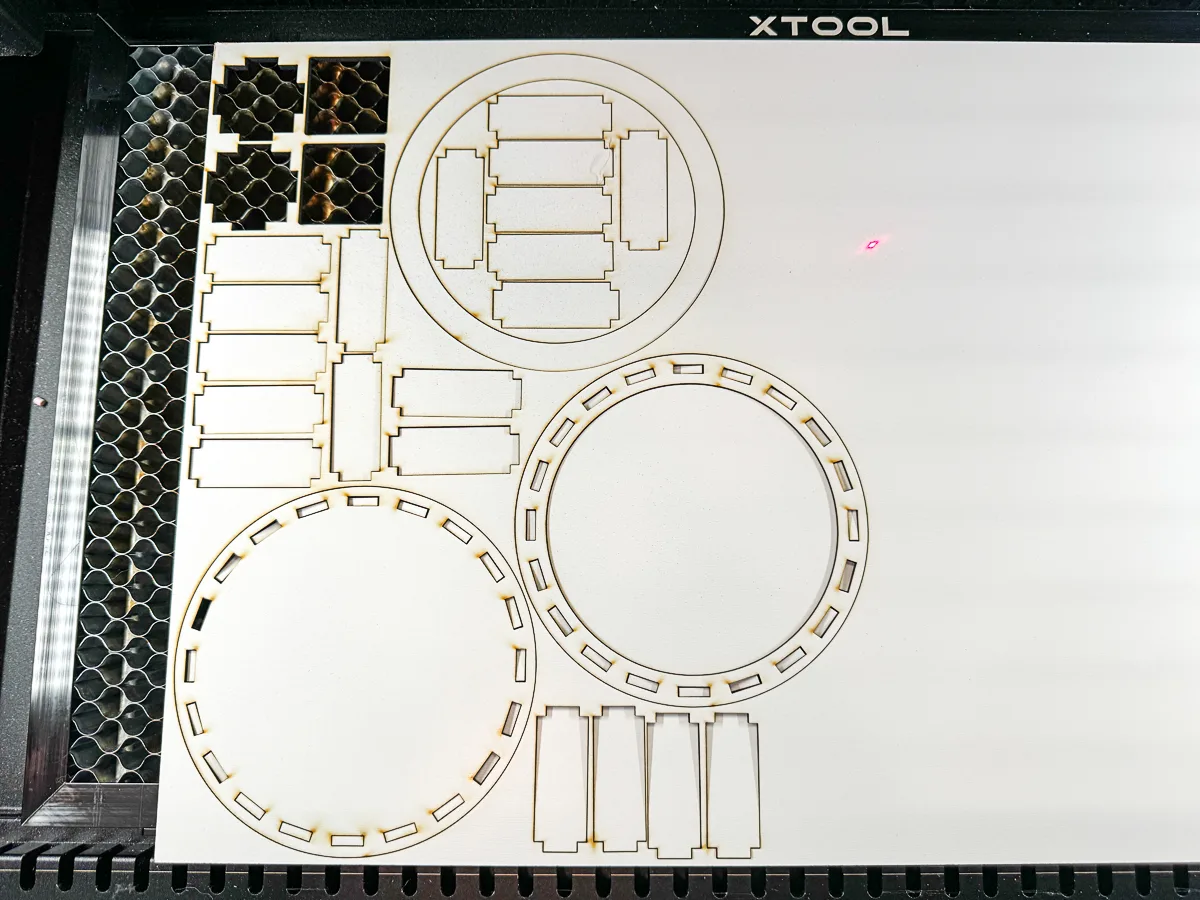
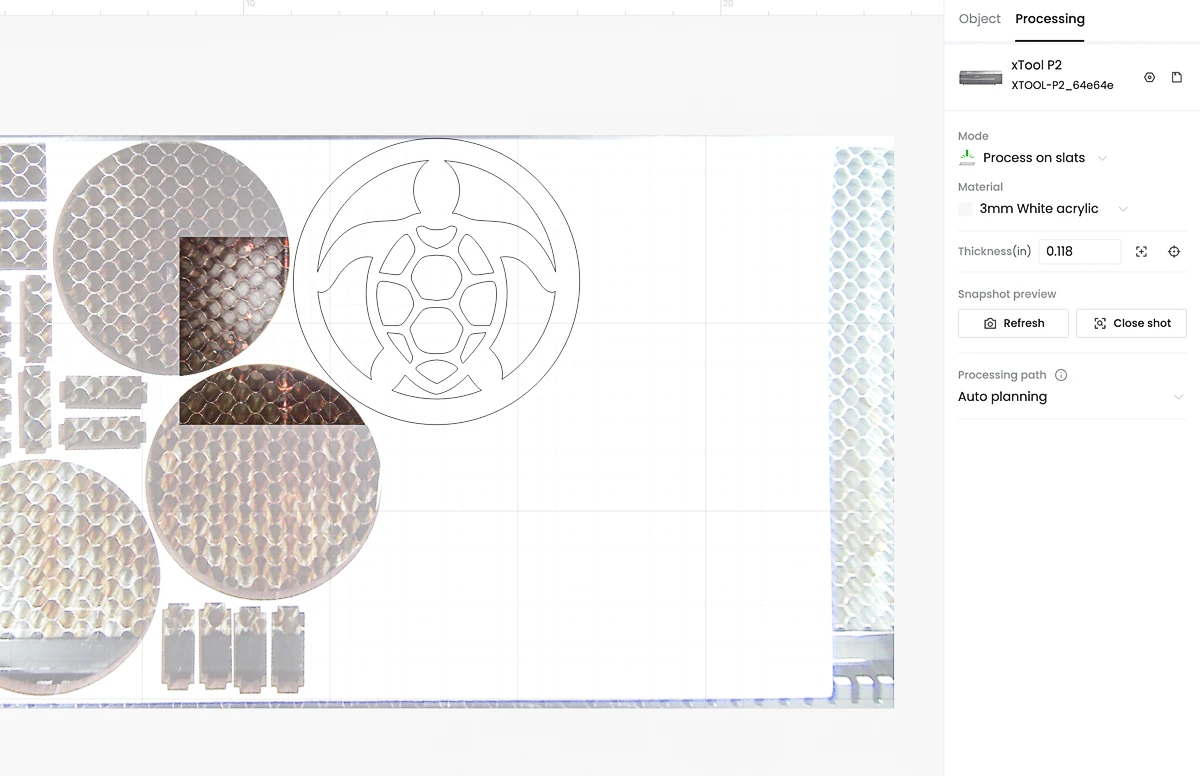
Download the SVG and open it in your laser software, such as xTool Creative Space. I rearranged the pieces on the board to get the best use out of every inch of my material.
One thing I love about the xTool P2 is the close up camera feature. You can see the corner where I cut out the tab and slot test earlier. I was able to zoom in on that corner and make sure that all my pieces fit on the board without going over!
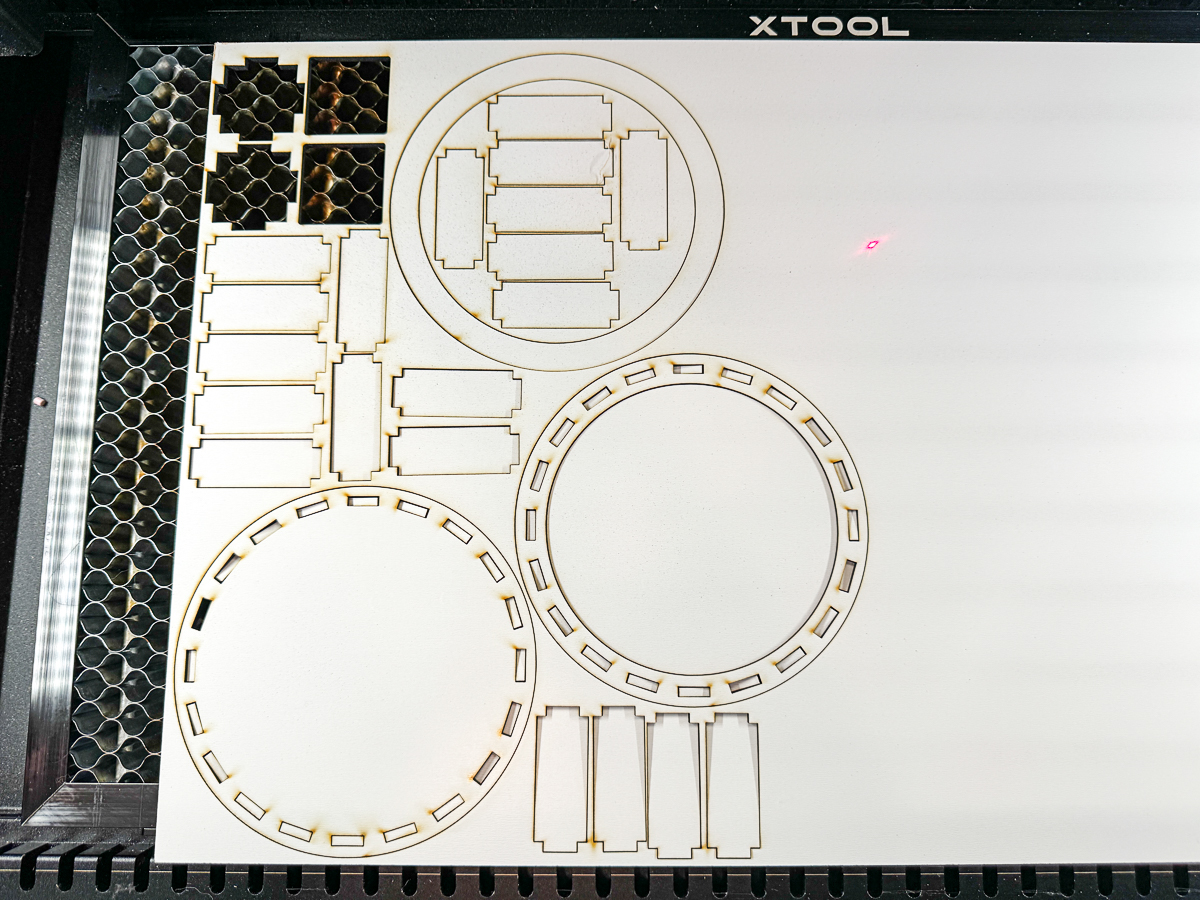
Set all the lines to be cut. If you're not sure of your power and speed settings, consider running a laser test grid first. This will help avoid charring or uncut pieces.
Once everything was ready, I sent the file over to the laser to cut it out!
Assemble the round box
One of the best parts about this double sided white MDF from Smokey Hill is that it cleans up so easily! Just wipe down both sides with a baby wipe or damp paper towel to remove any soot or char before assembly.
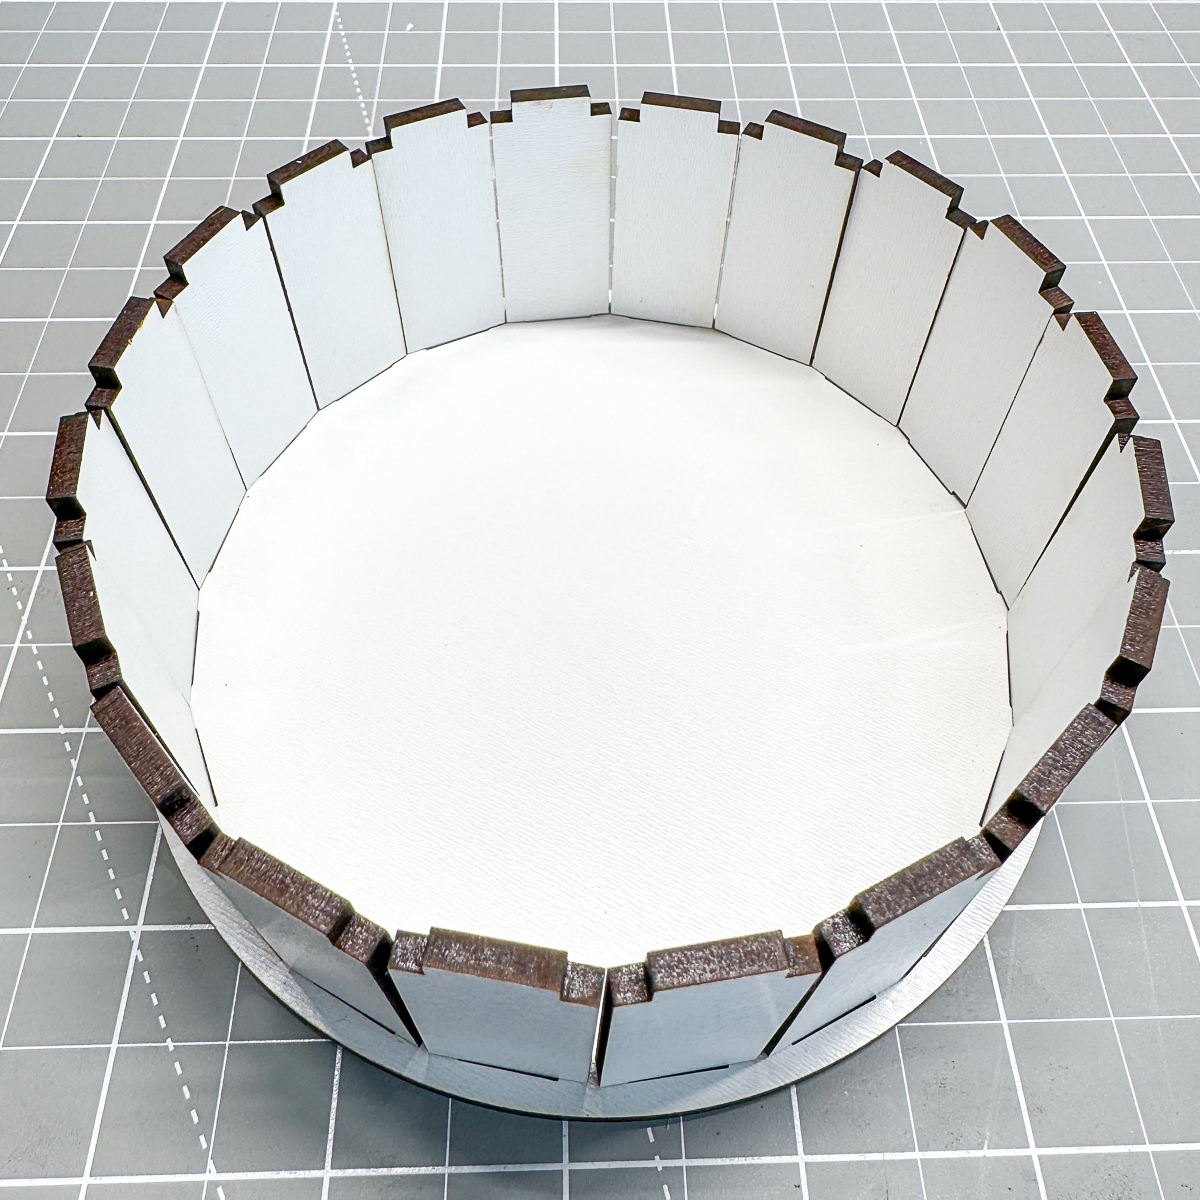
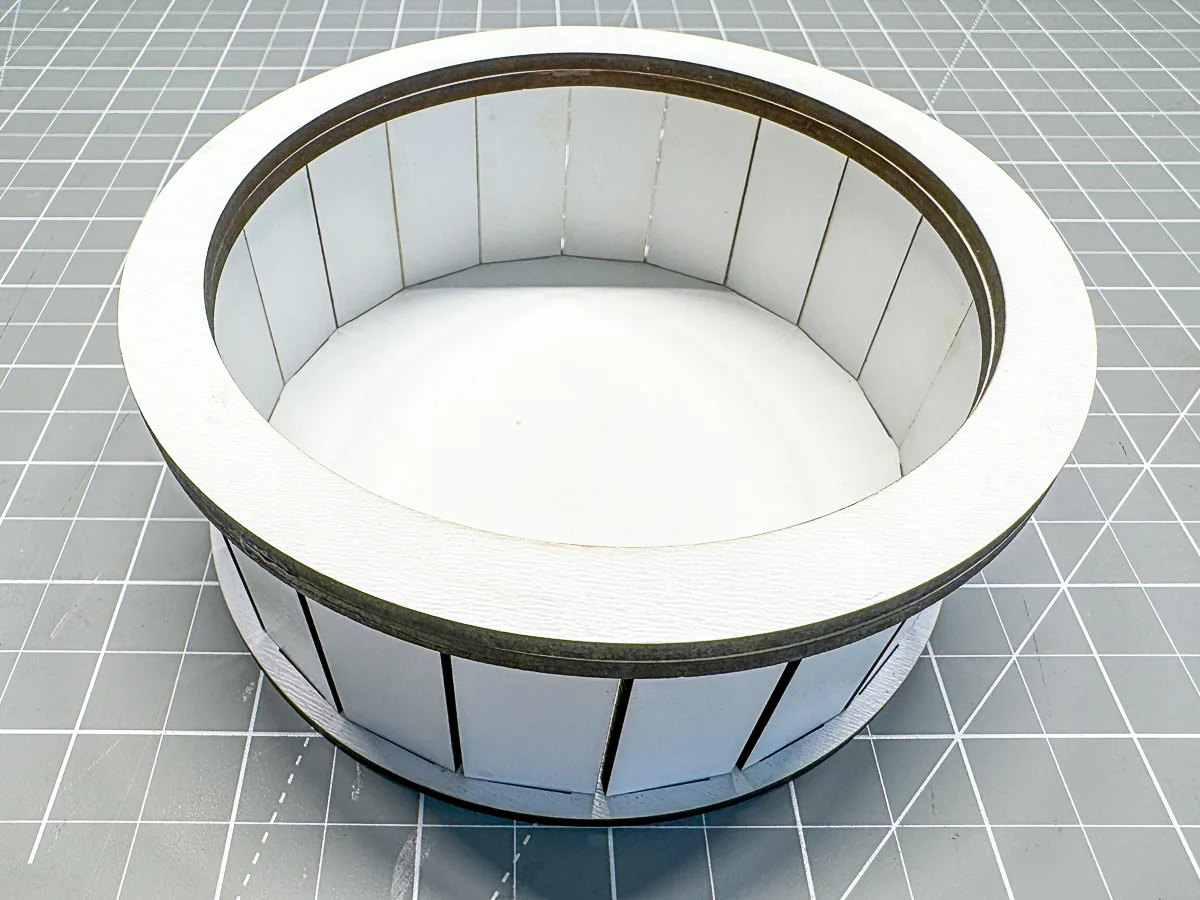
Each of the side pieces fits snugly in the slots in the bottom piece. I used a small rubber mallet to tap them gently into place.
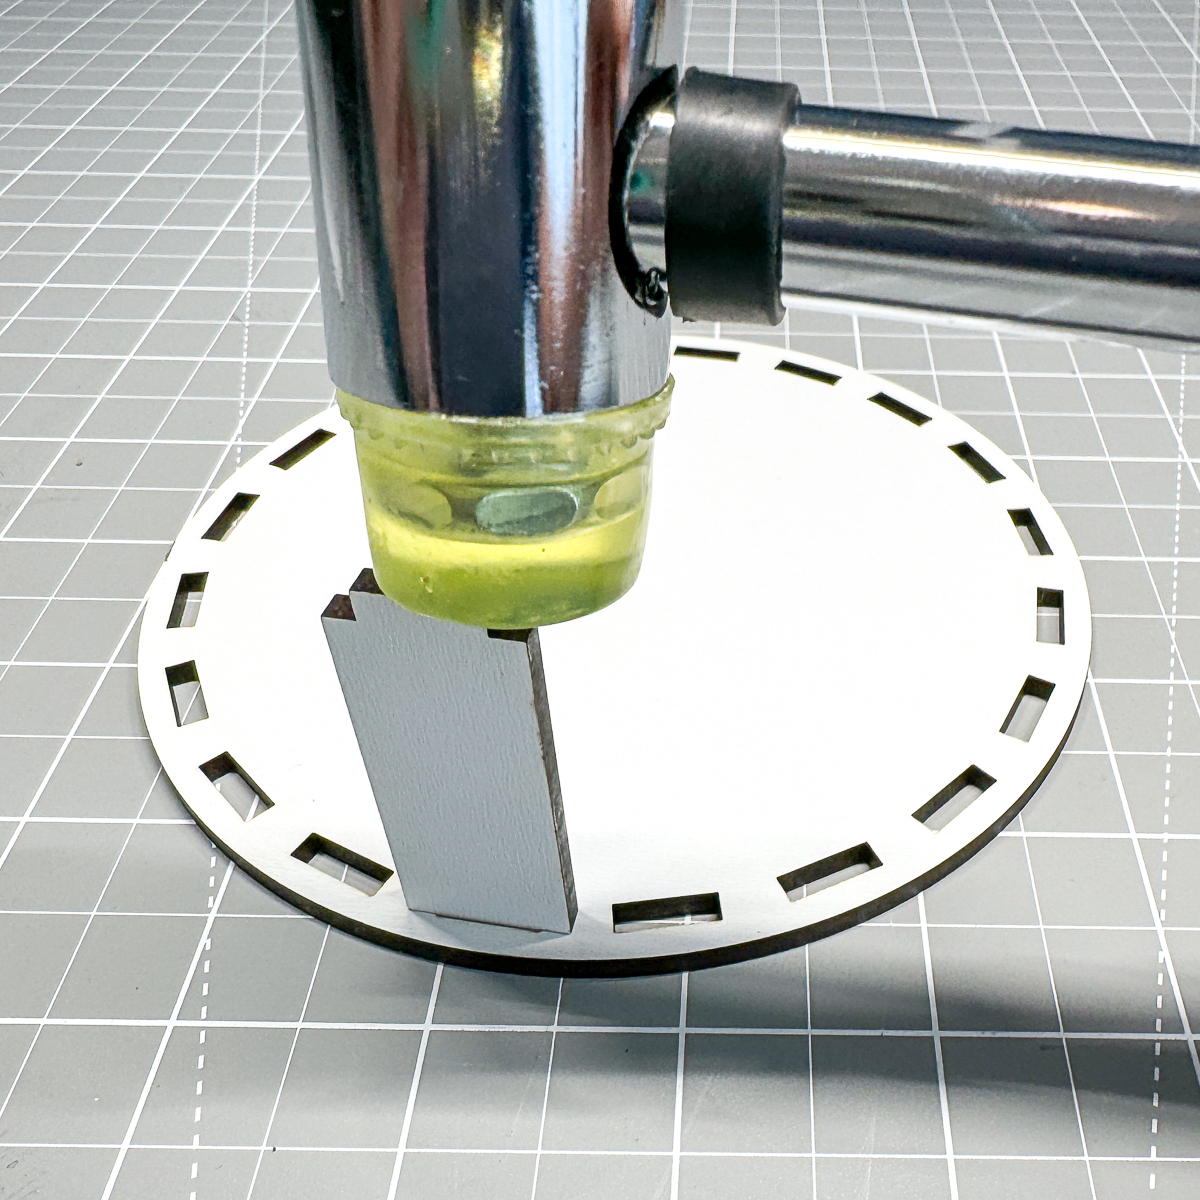
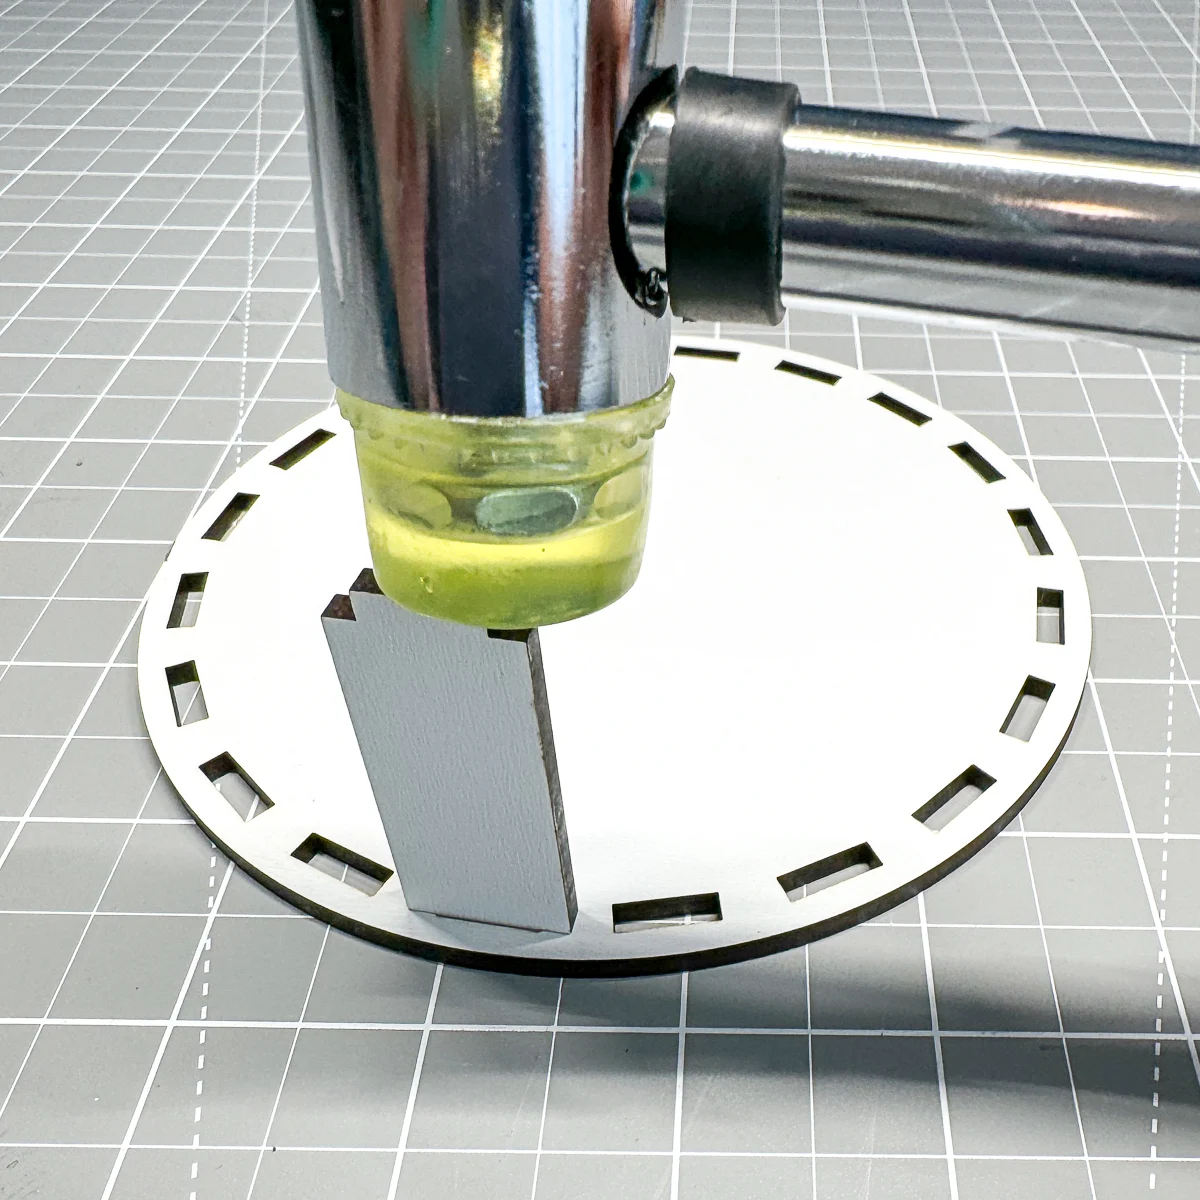
The tight kerf setting keeps all the pieces upright, rather than flopping around. That will make adding the top much easier!
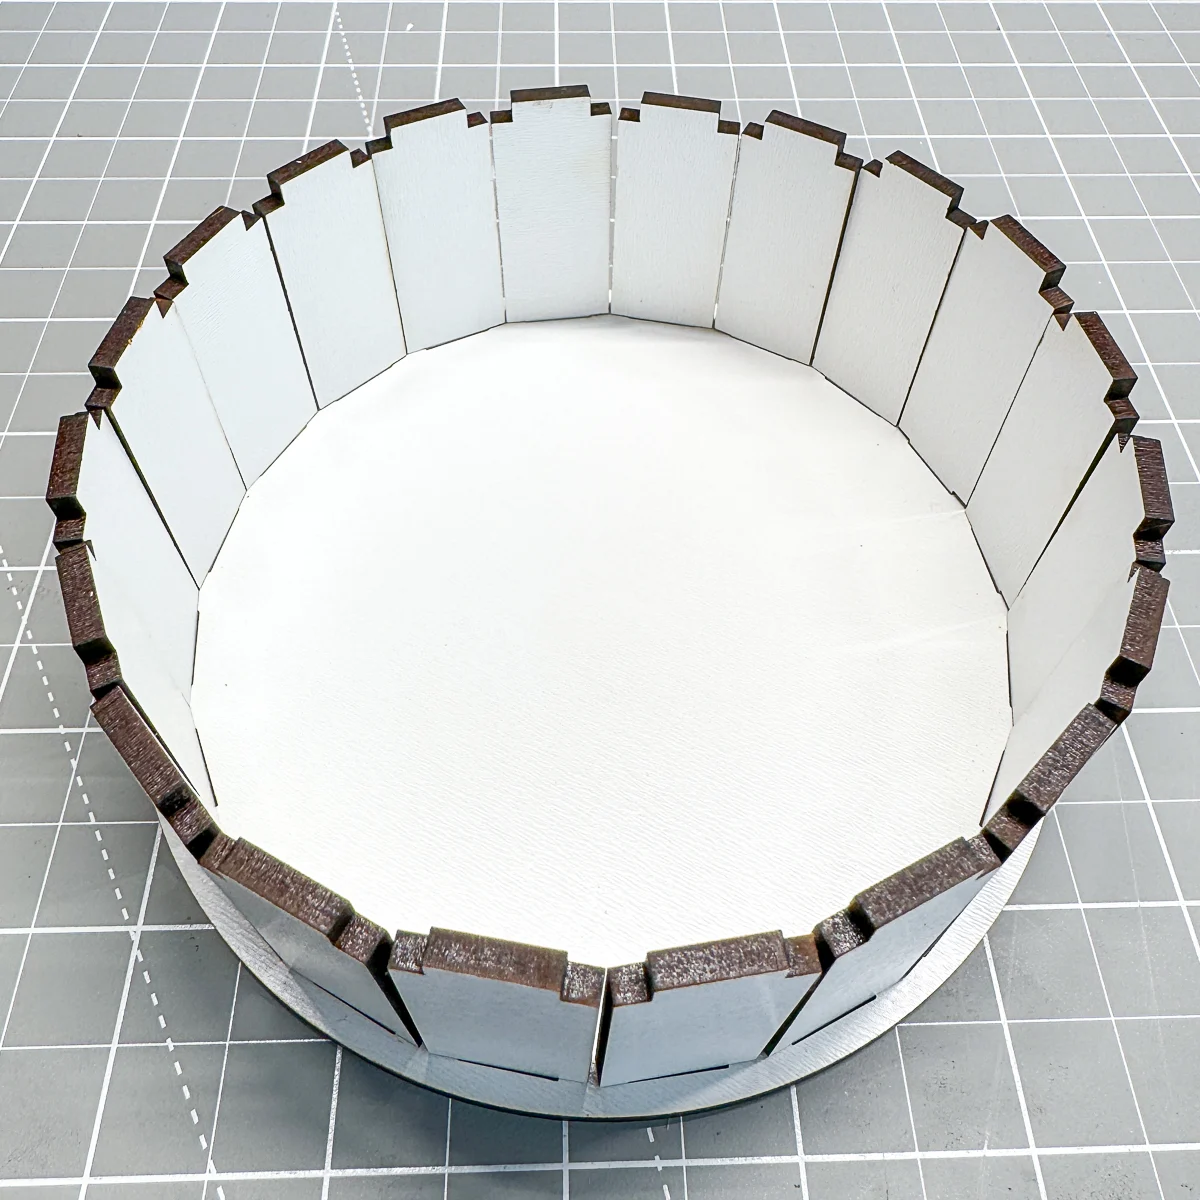
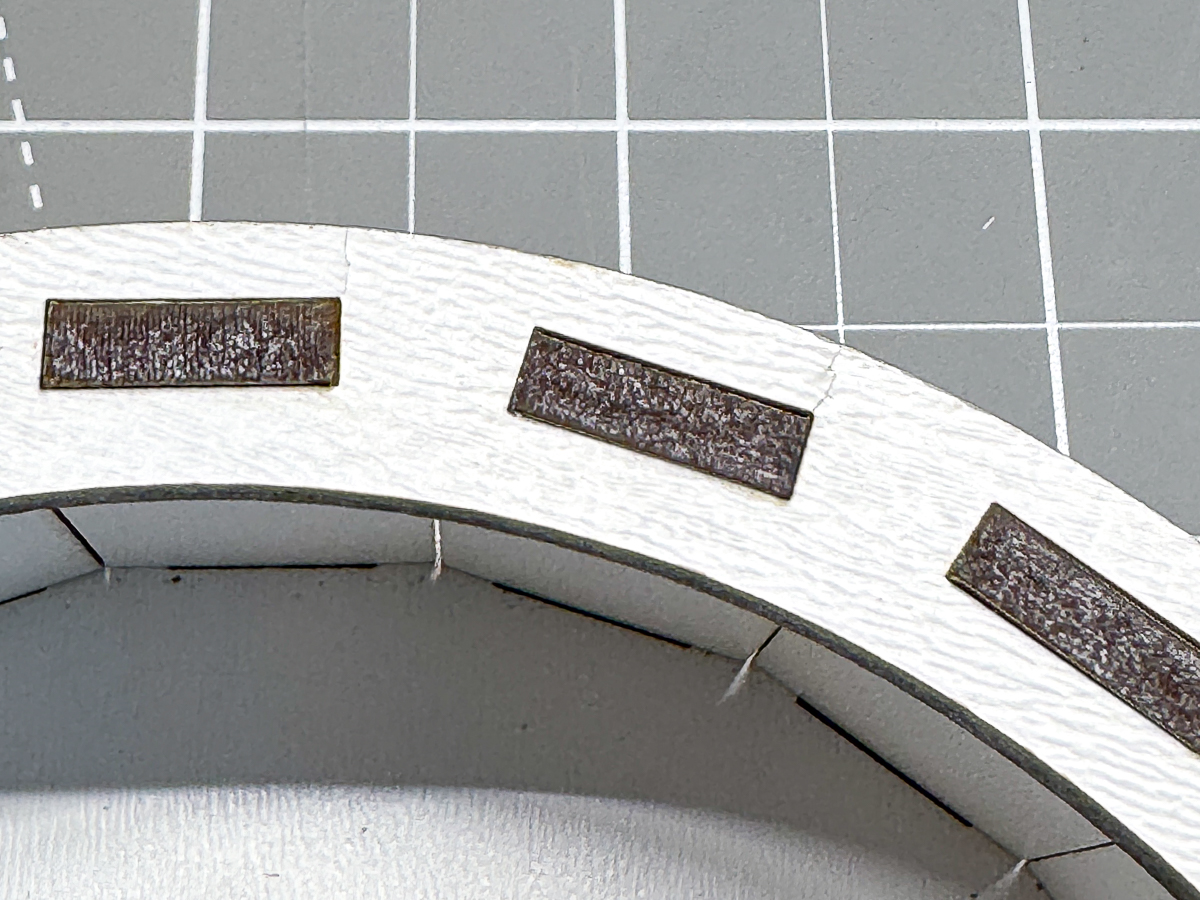
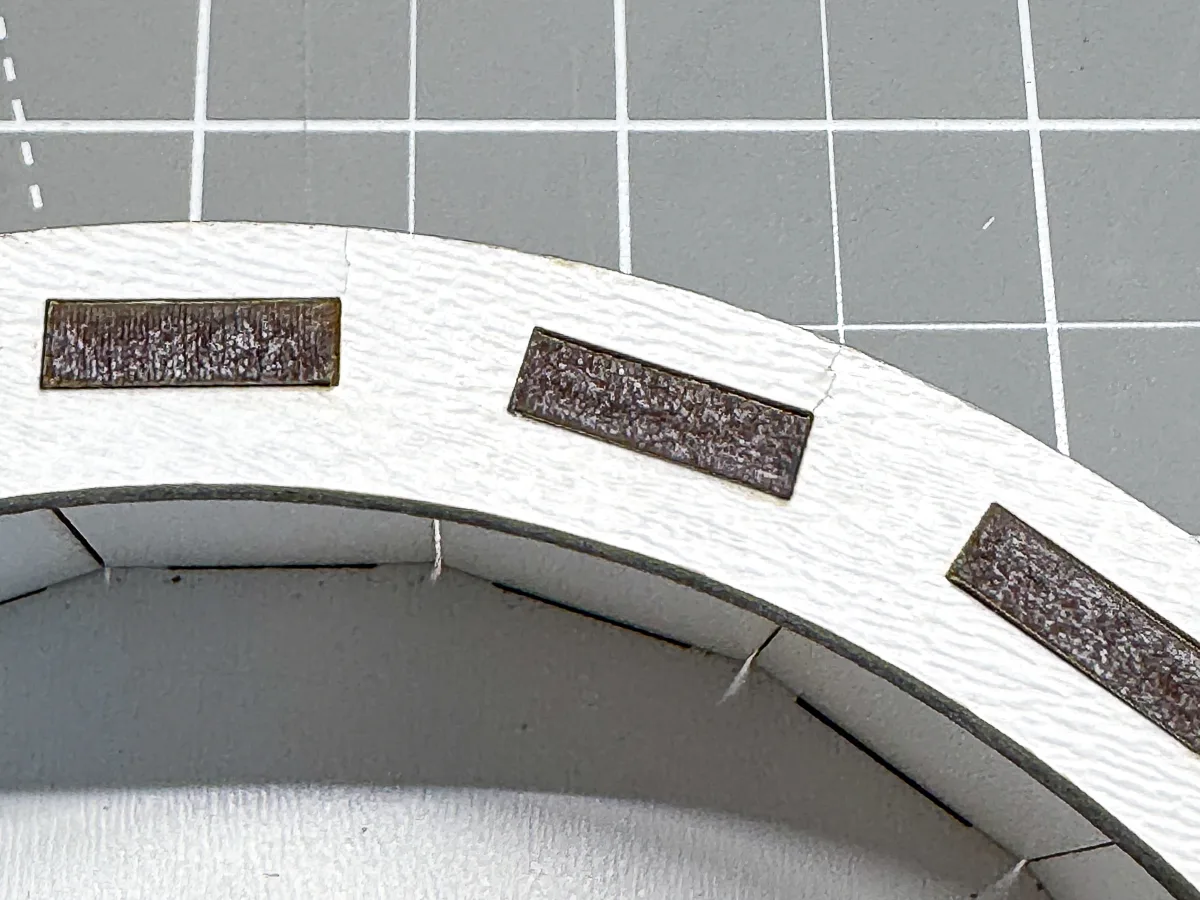
It takes a bit of fiddling to get the first few holes lined up with the tabs. The pieces have a bit of wiggle room, so you can adjust them until they line up with the slots.


Use the mallet to tap them together, but don't press the top down all the way yet! I found that causes flexes the material and can crack.
There's an option in the Cuttle template to cut out a top cover to hide the joints. Just dab CA glue around the top and stick it into place.
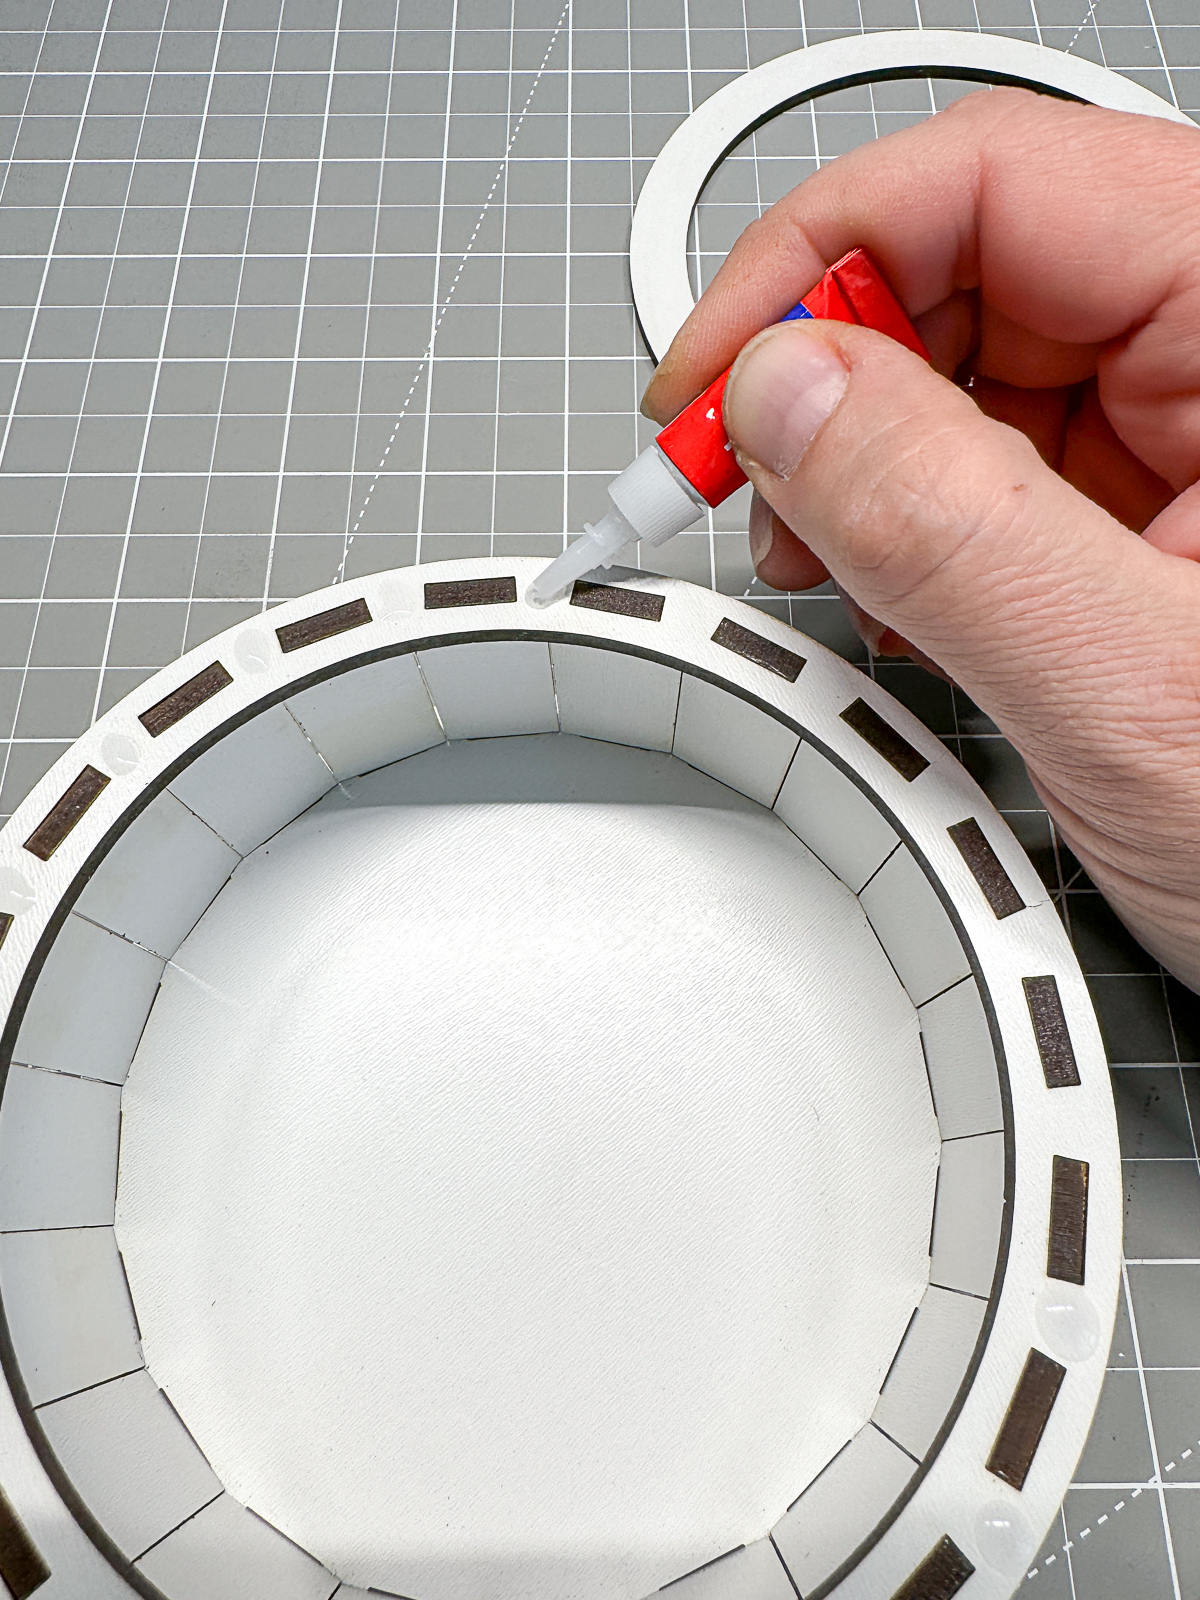
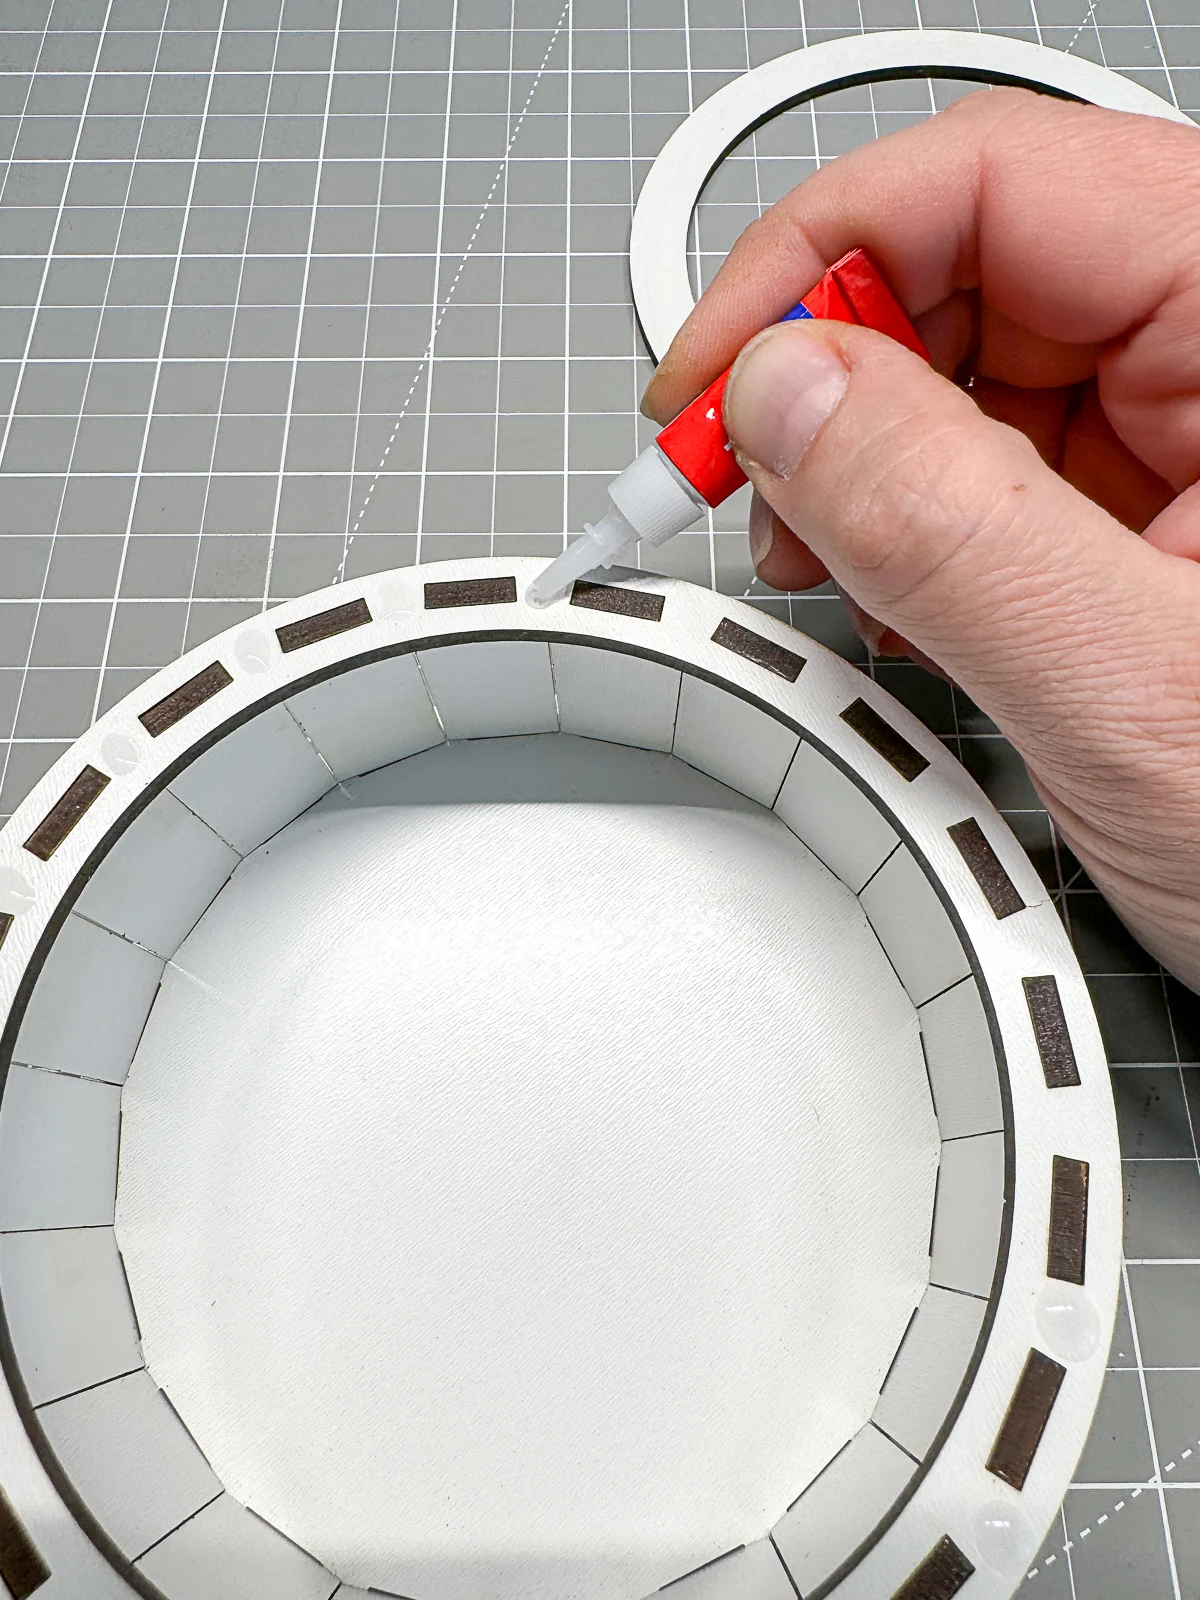
I was pretty impressed with how sturdy this little box is, especially with minimal glue! Now it just needs a lid!

Make the decorative lid
Now comes the fun part...designing the lid! You can cut or engrave images or text to personalize the box and make it unique.
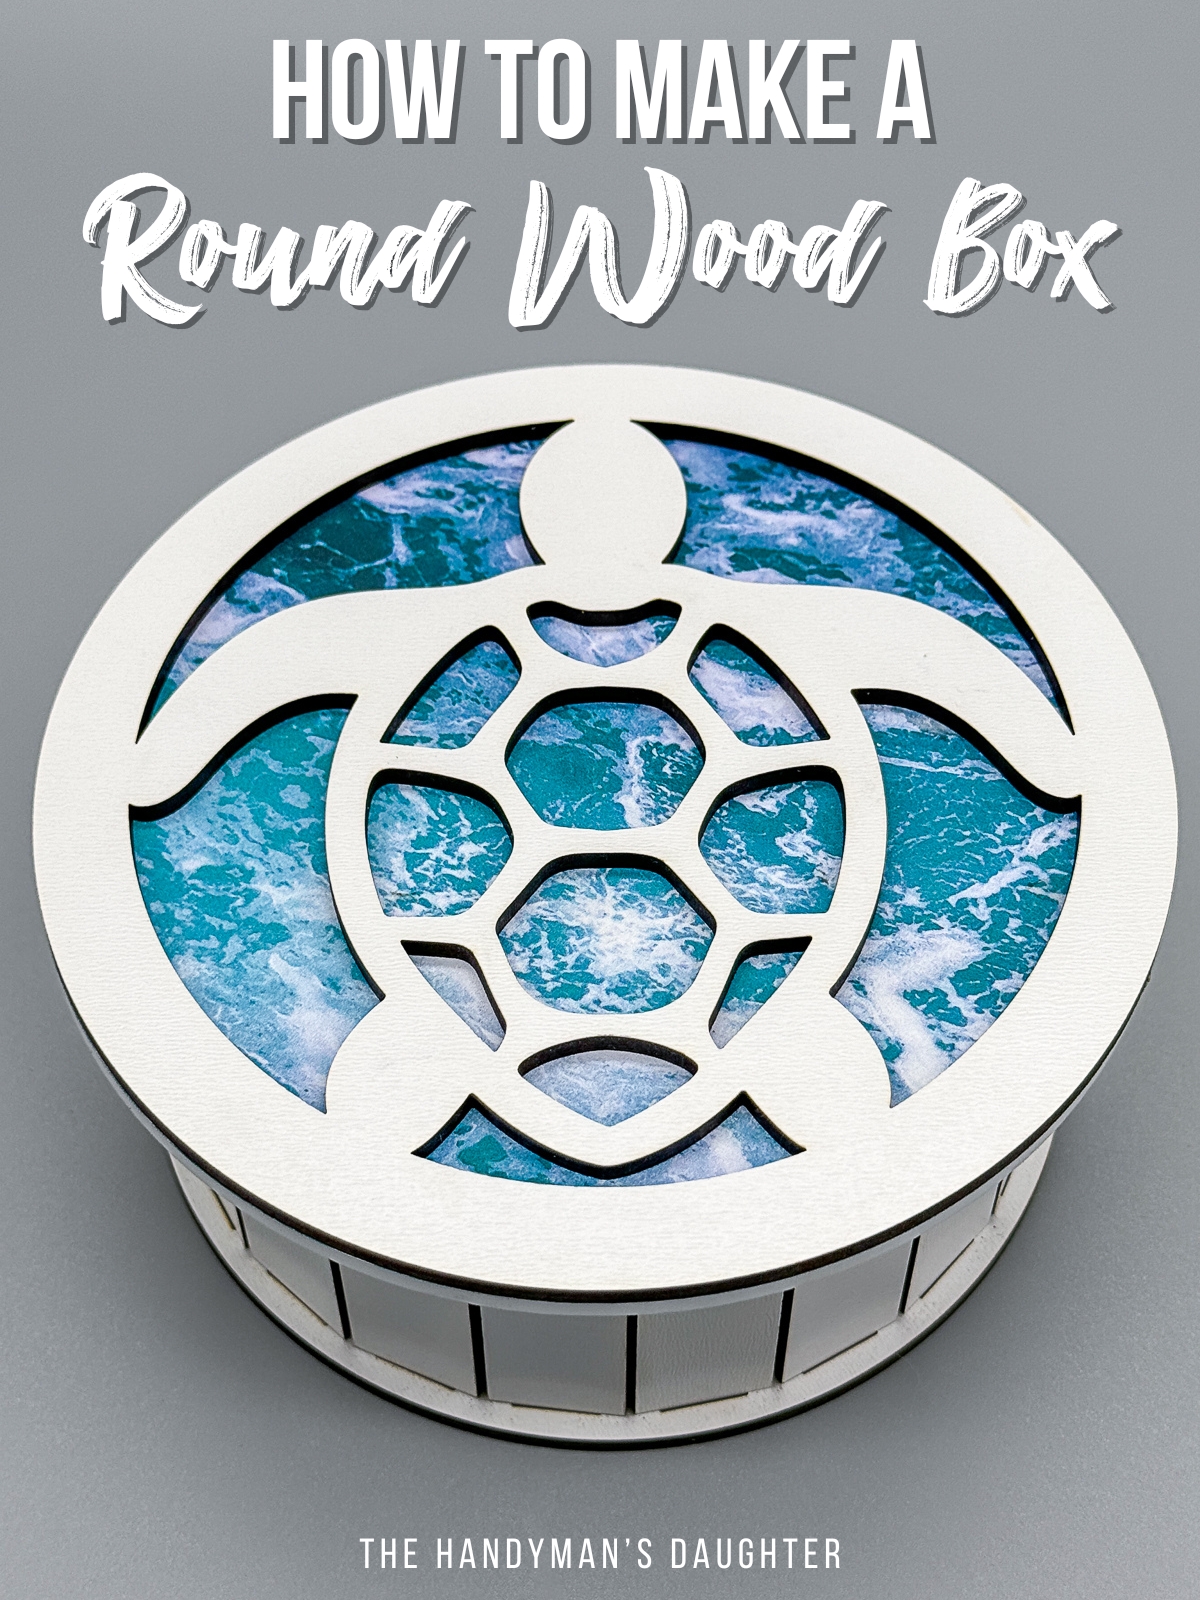
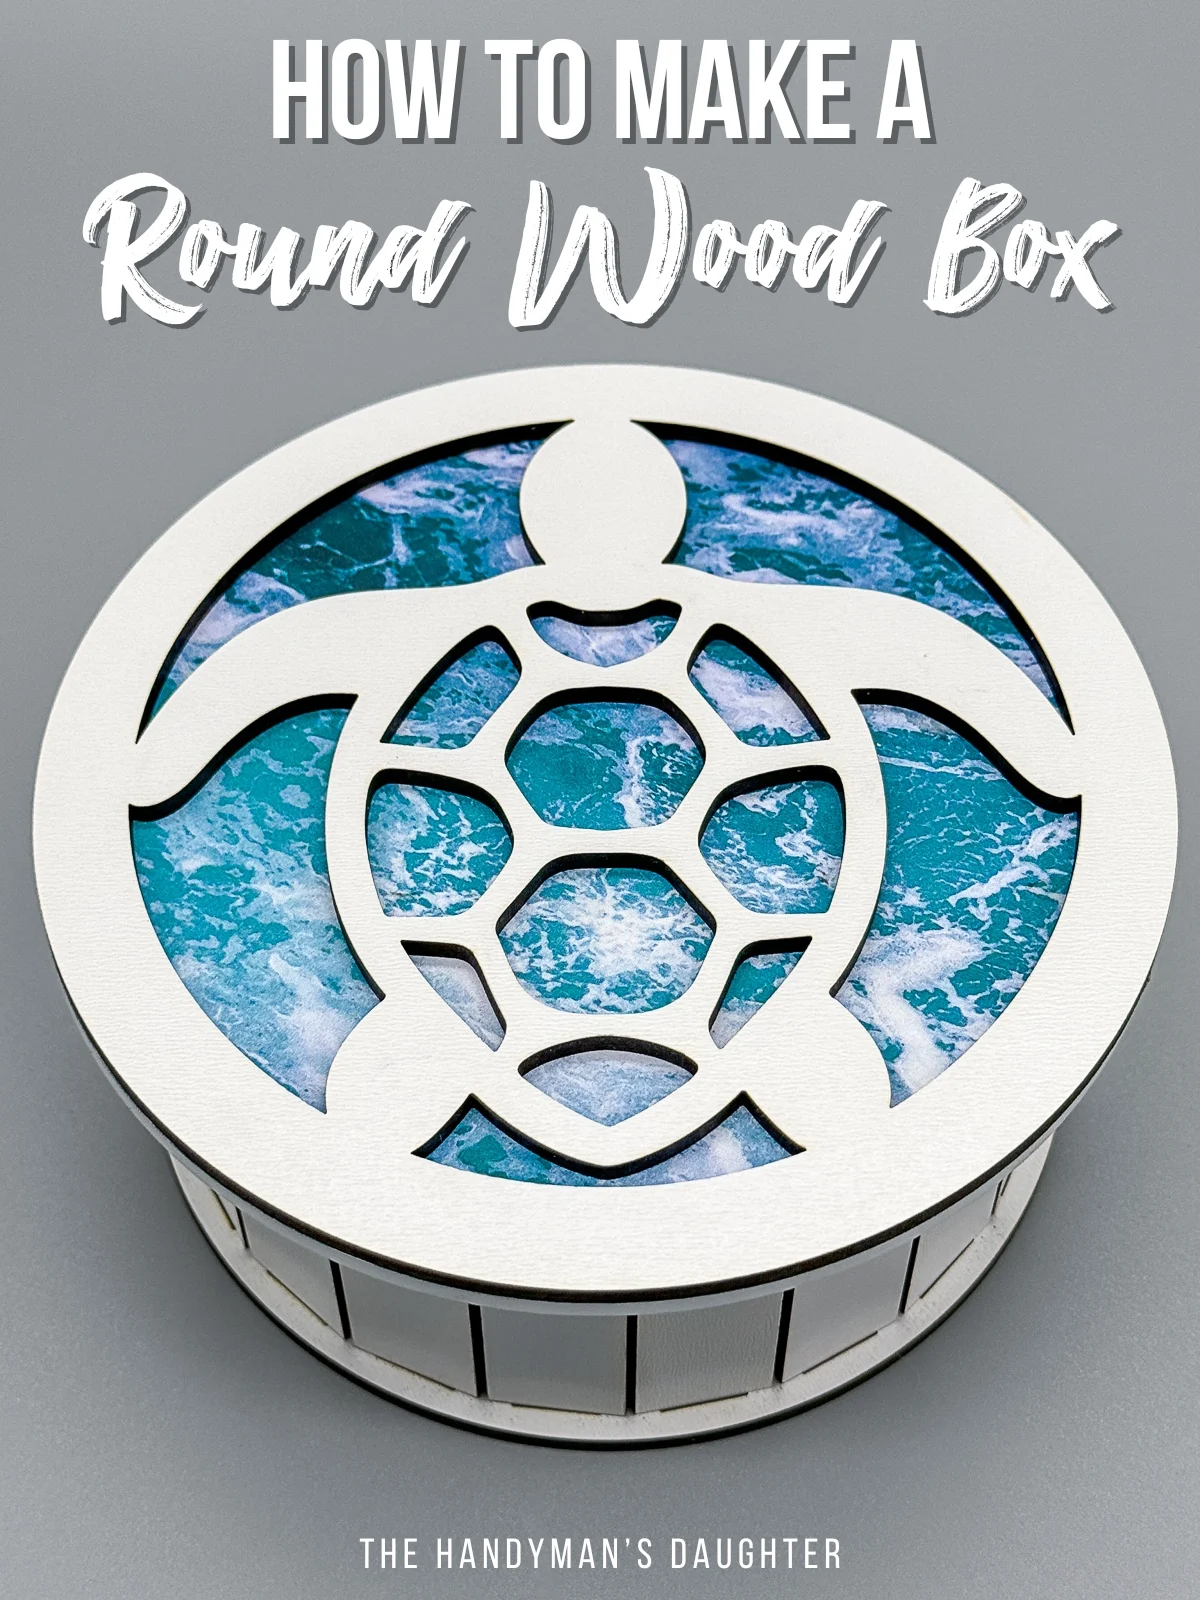
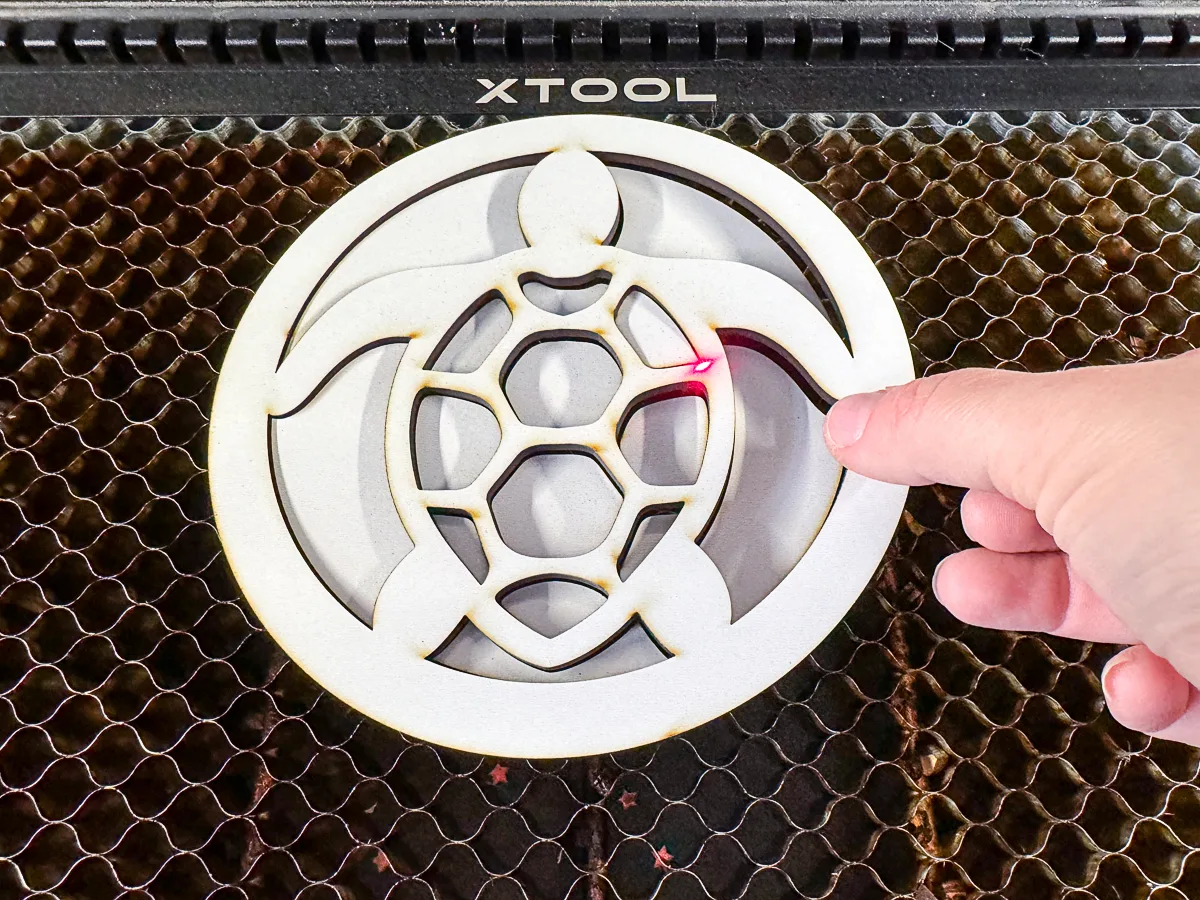
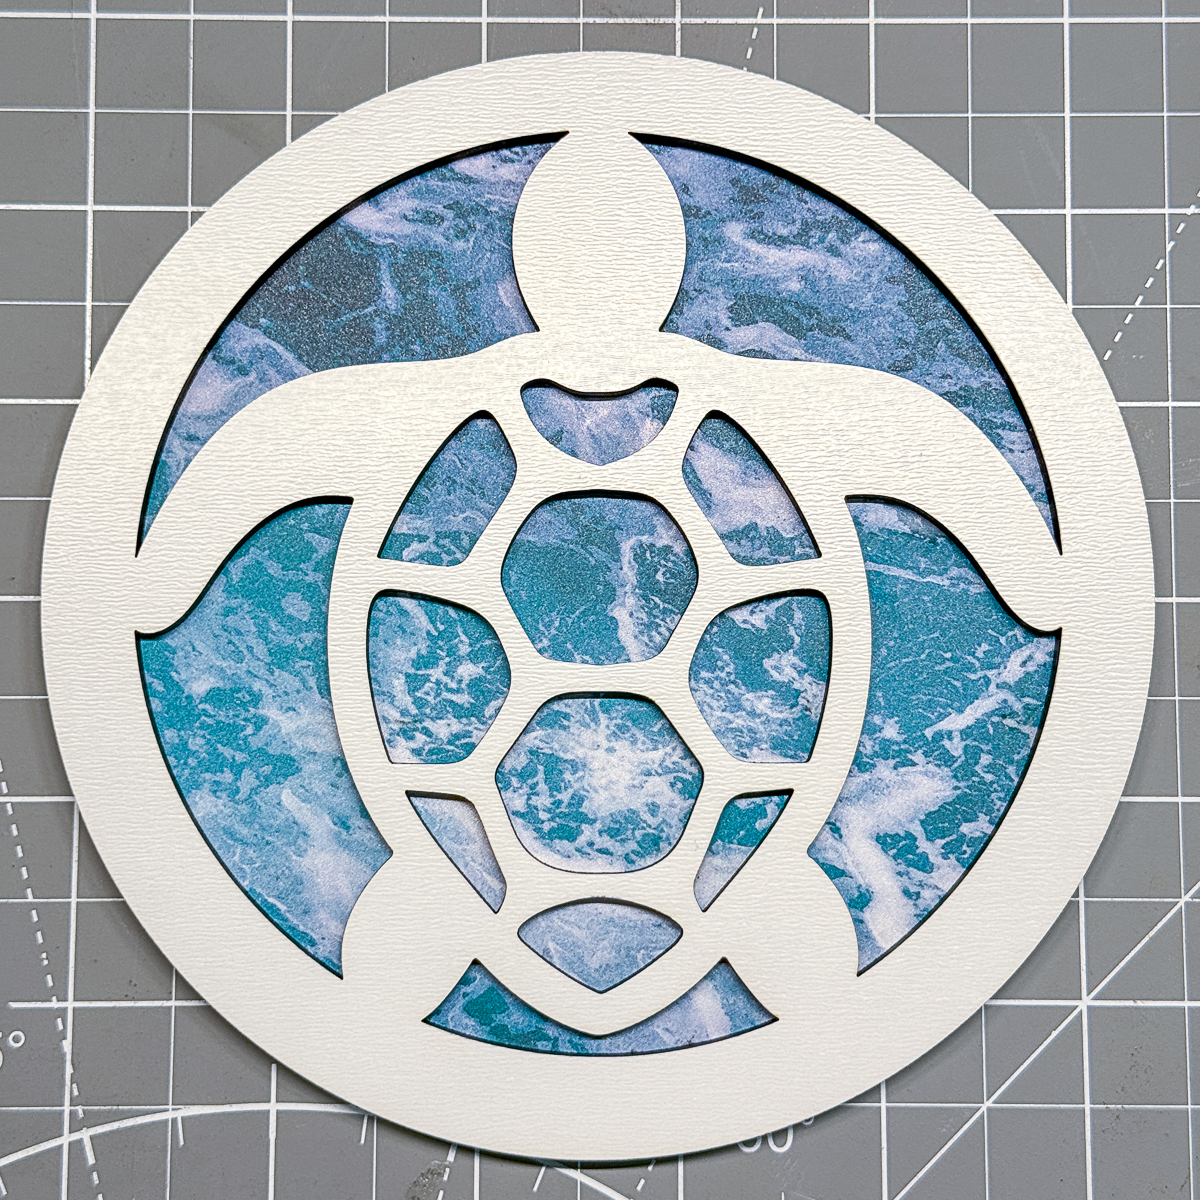
I'm using a layering method similar to the hummingbird suncatchers I made a few months ago. I combined two circles that are slightly bigger than the box with the silhouette of a sea turtle to create the top layer.

Underneath will be a circle of PatternPly with ocean waves that will show through the cutouts in the top layer. The core of this pattern is white acrylic, but you could also use MDF or black acrylic if you have a diode laser. You can even print and press your own designs with a sublimation printer and a heat press!

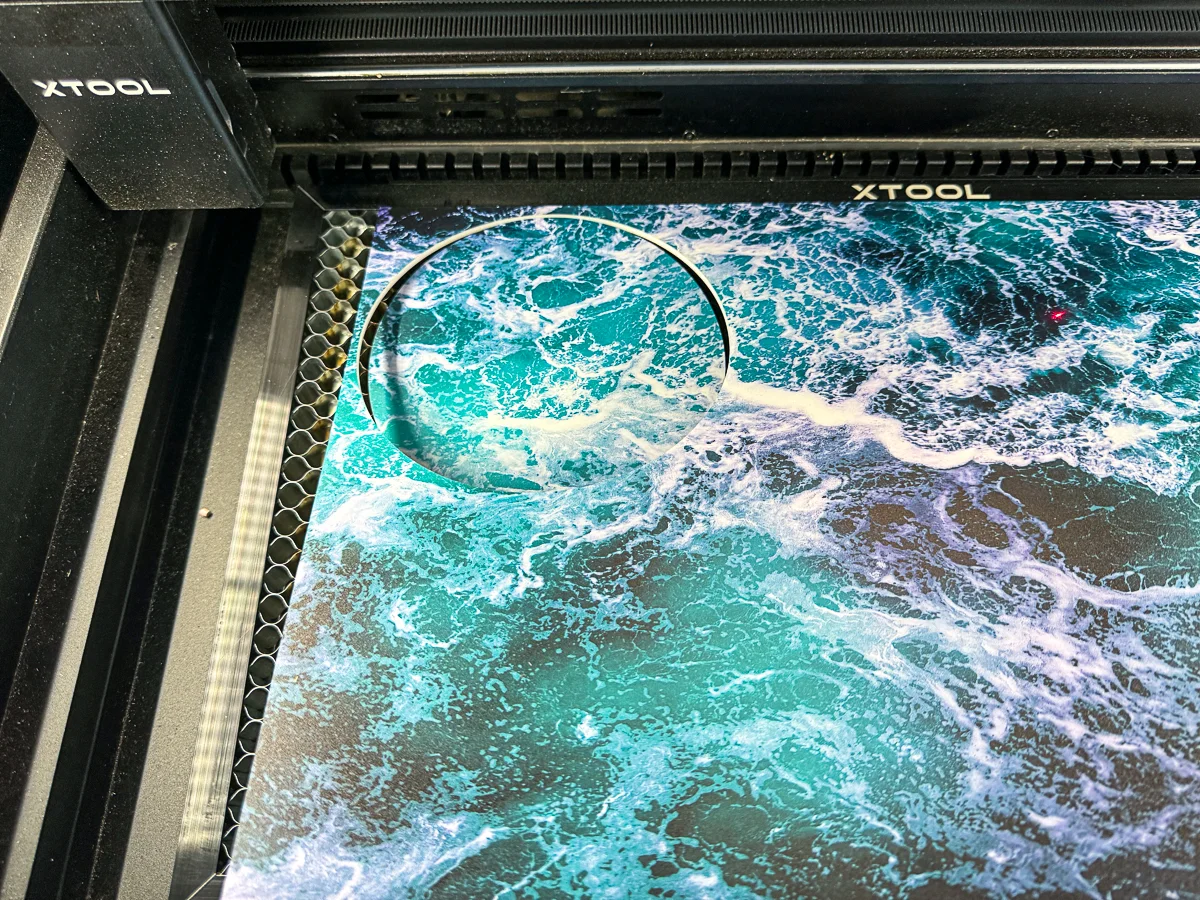
To prevent glue squeeze out, I applied 3M double sided adhesive tape to the back of the turtle layer before cutting it out. Then I popped the sheet into the xTool P2 and increased the power slightly to make sure it cut through the tape. It came out perfect!

After cleaning up the char, all I had to do was peel off the backing and stick it in place!

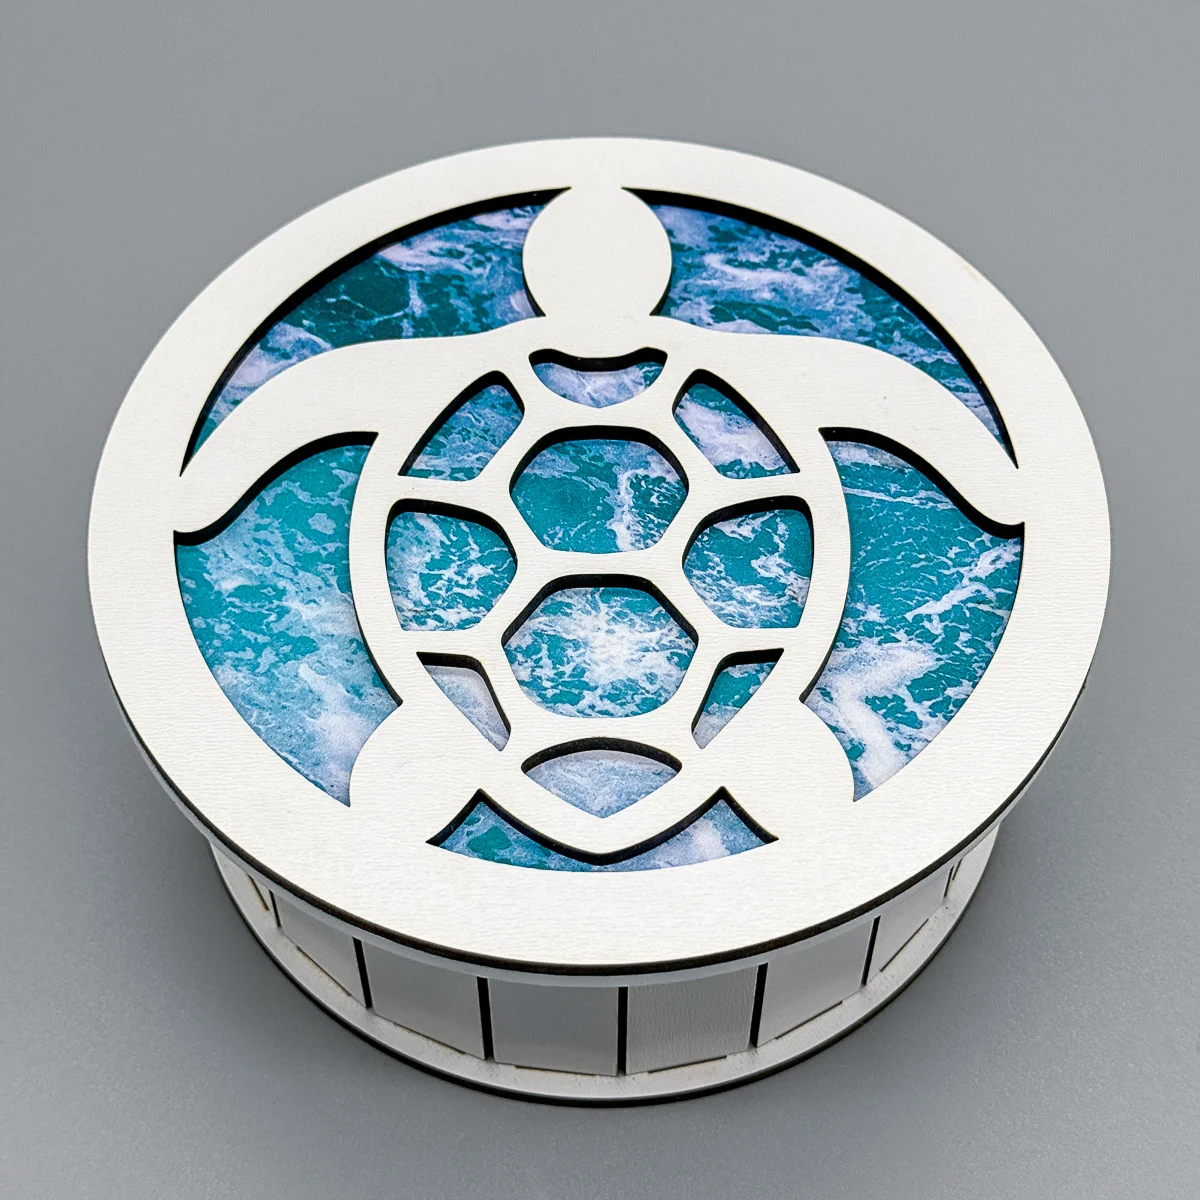
In order to keep the lid in place on the box, I glued the remaining circle cutout from the top cover to the underside. The lip around the outside edge makes it easy to remove the lid.


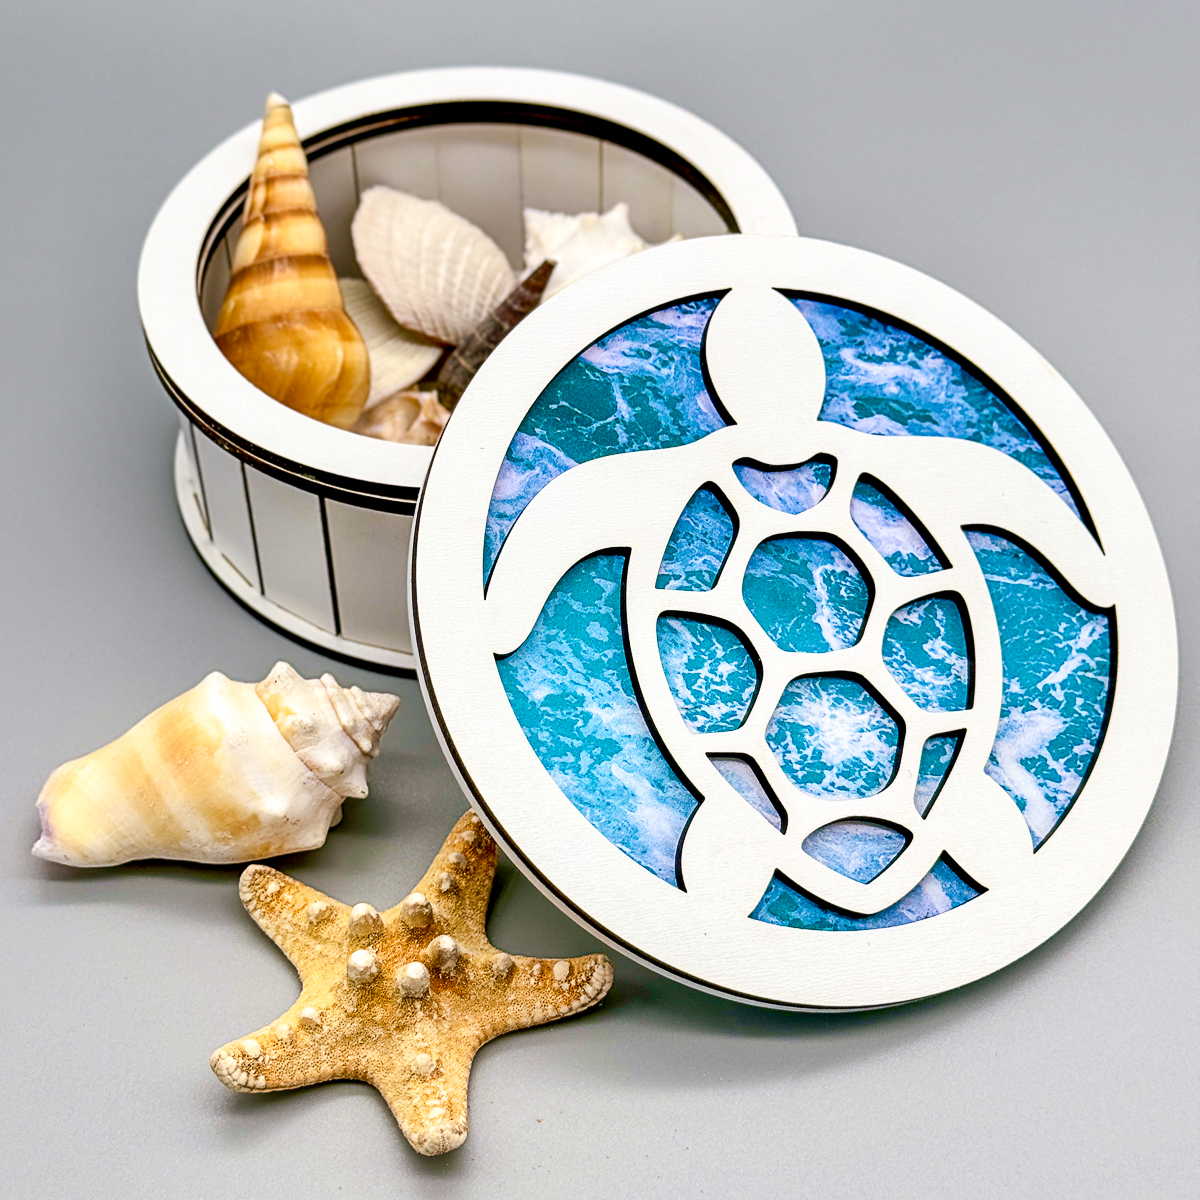
Now my sea turtle box is ready to fill up with treasures from the beach!

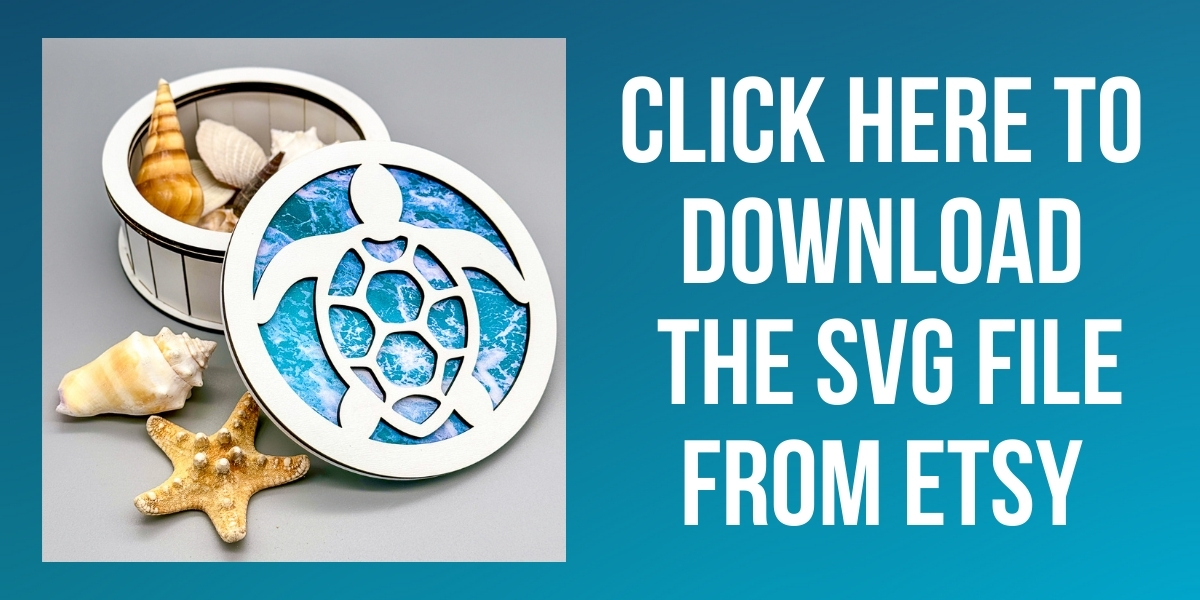
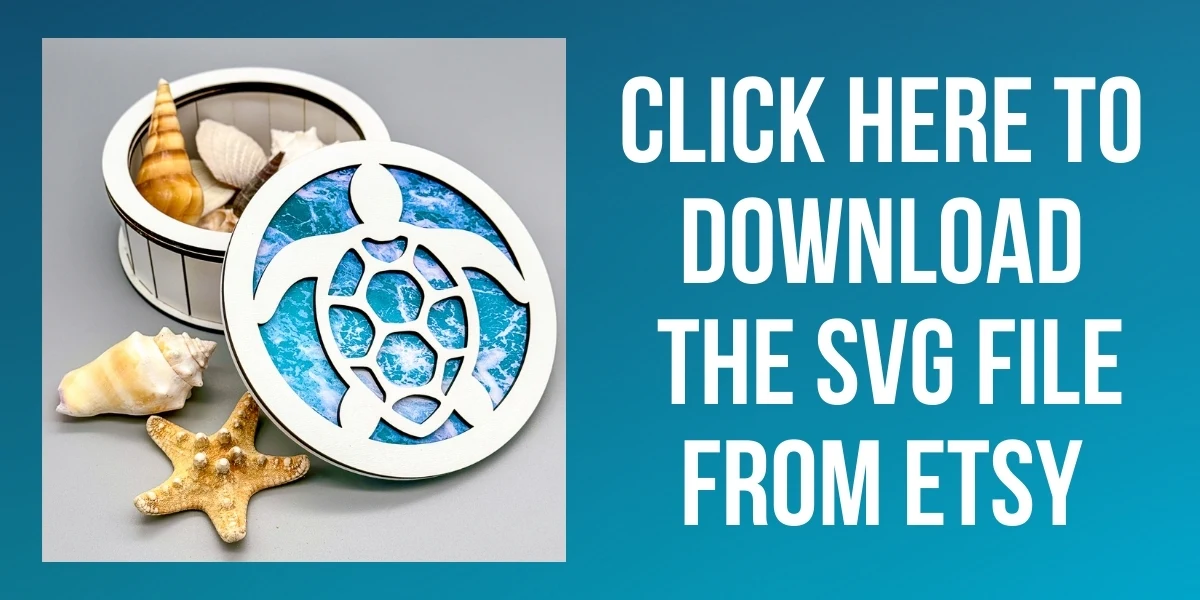
This project was really fun to make, and it's inspired me to make a bunch of different versions! You can find them all in my Etsy shop!

Want more laser project ideas? Check these out!