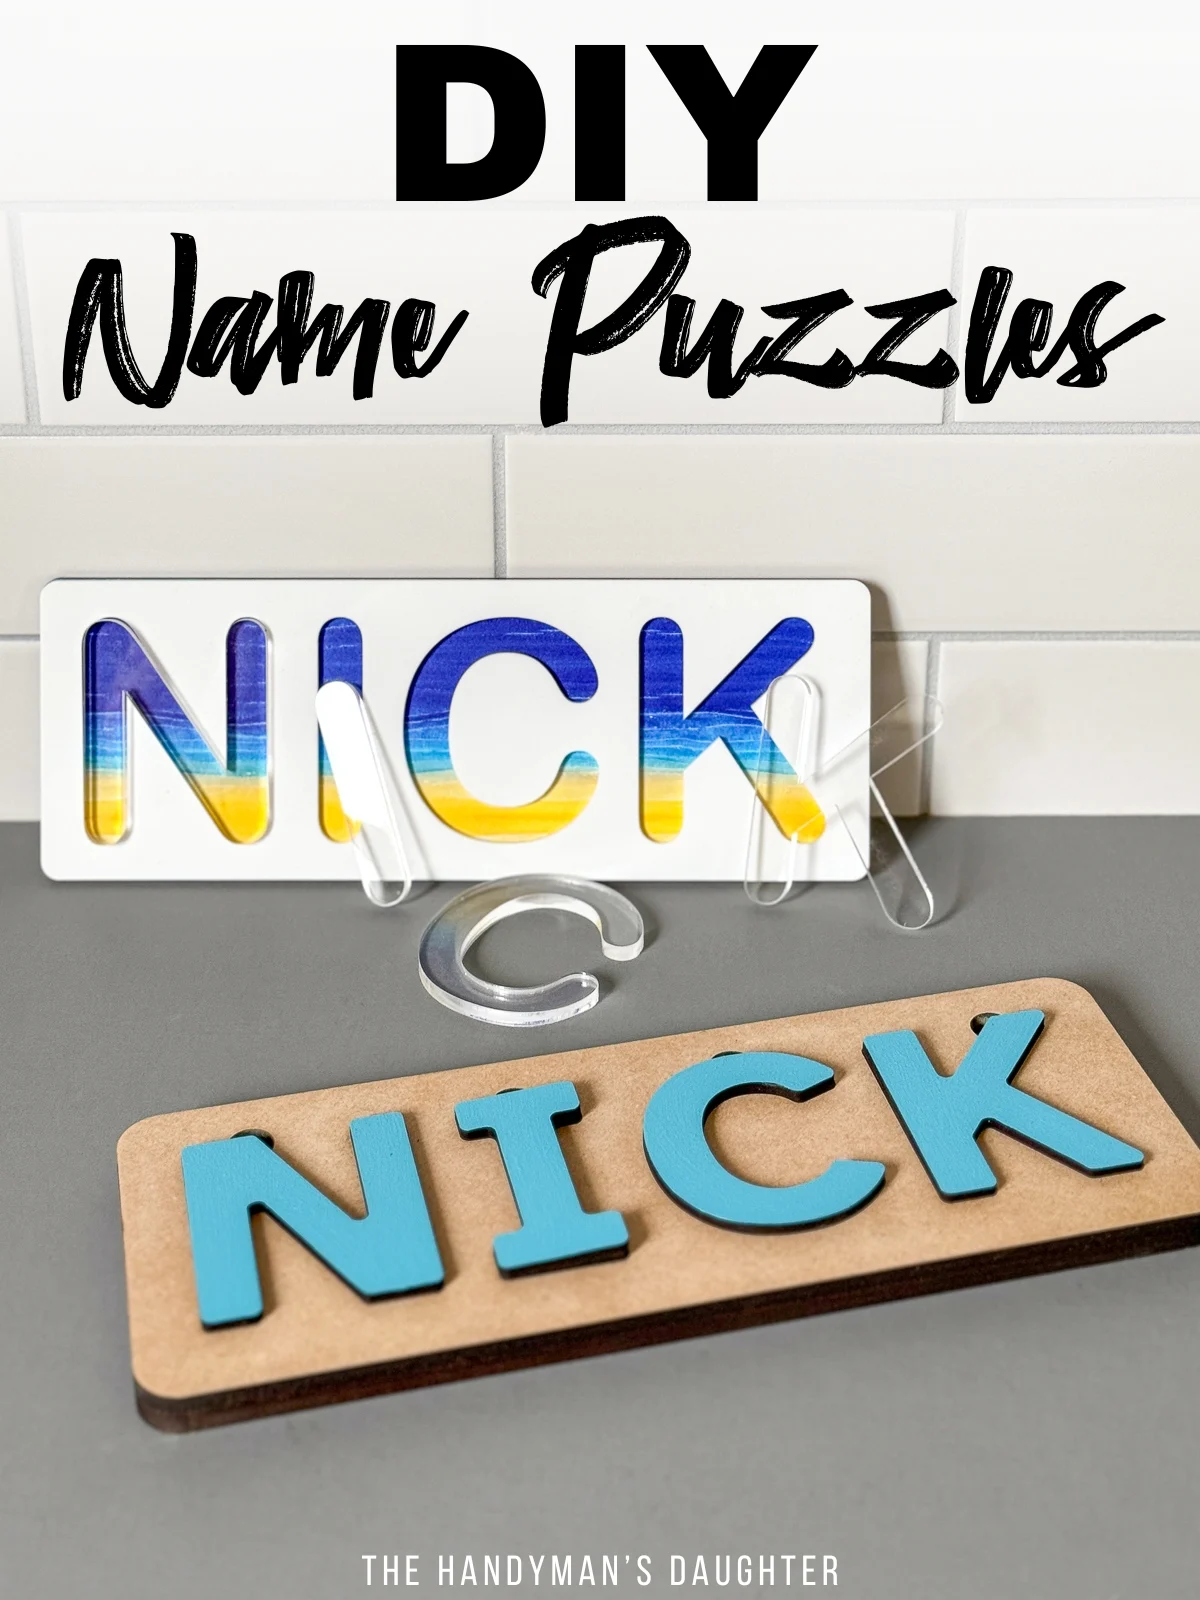
Make your own custom wooden name puzzles with a laser cutter! Add fun colors or patterns for a personalized name puzzle any kid will love!

Want to make a unique gift for kids that's both fun and educational? With a laser cutter and a bit of creativity, you can craft personalized puzzles that you can't find in the store.
The chunky pieces help children learn their names and practice fine motor skills at the same time. When they outgrow this simple puzzle, it can be displayed on a shelf in their room!
This project would be great to sell at craft shows too! You can create alphabet or simple shape puzzles that appeal to a wider audience than individual names.
Let's get started!
Don't have a laser, or looking to upgrade? Use the code VINETA100 for $100 off an xTool laser! Click here to check them out!
This post contains affiliate links for your convenience. Purchases made through these links may earn me a small commission at no additional cost to you. Please visit my disclosures page for more information.
Create your design
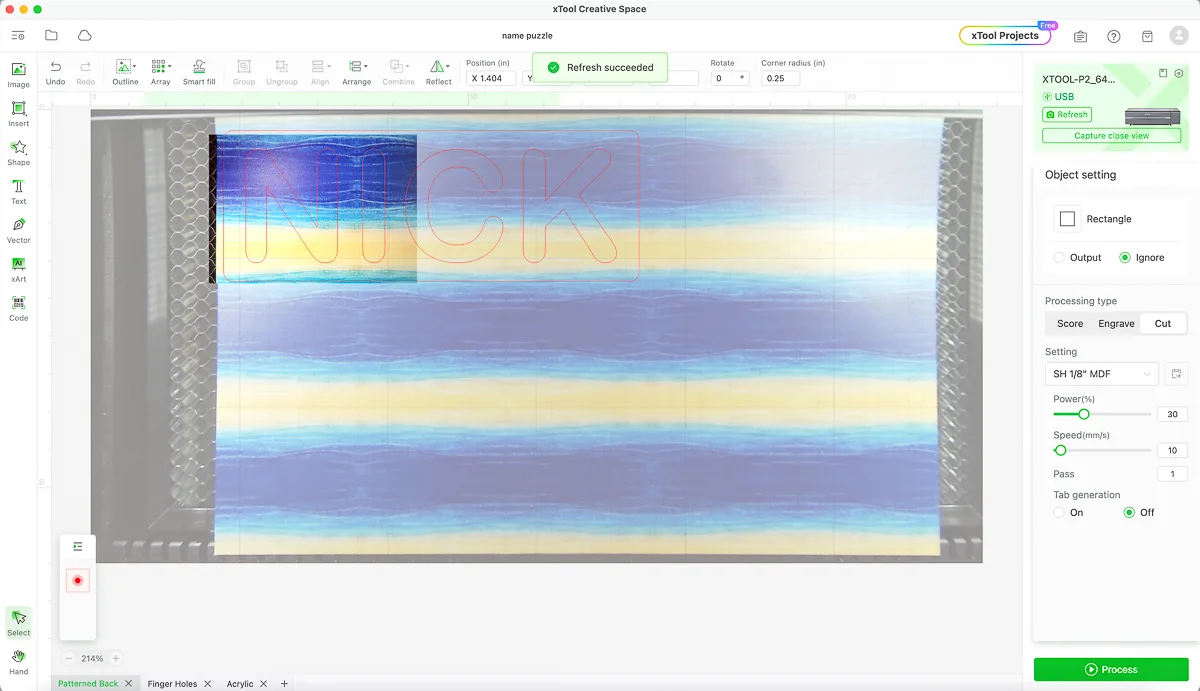
This project is really easy to make in xTool Creative Space, which is the software I use to run my xTool P2 and M1 machines. It only takes a few minutes to create the design!
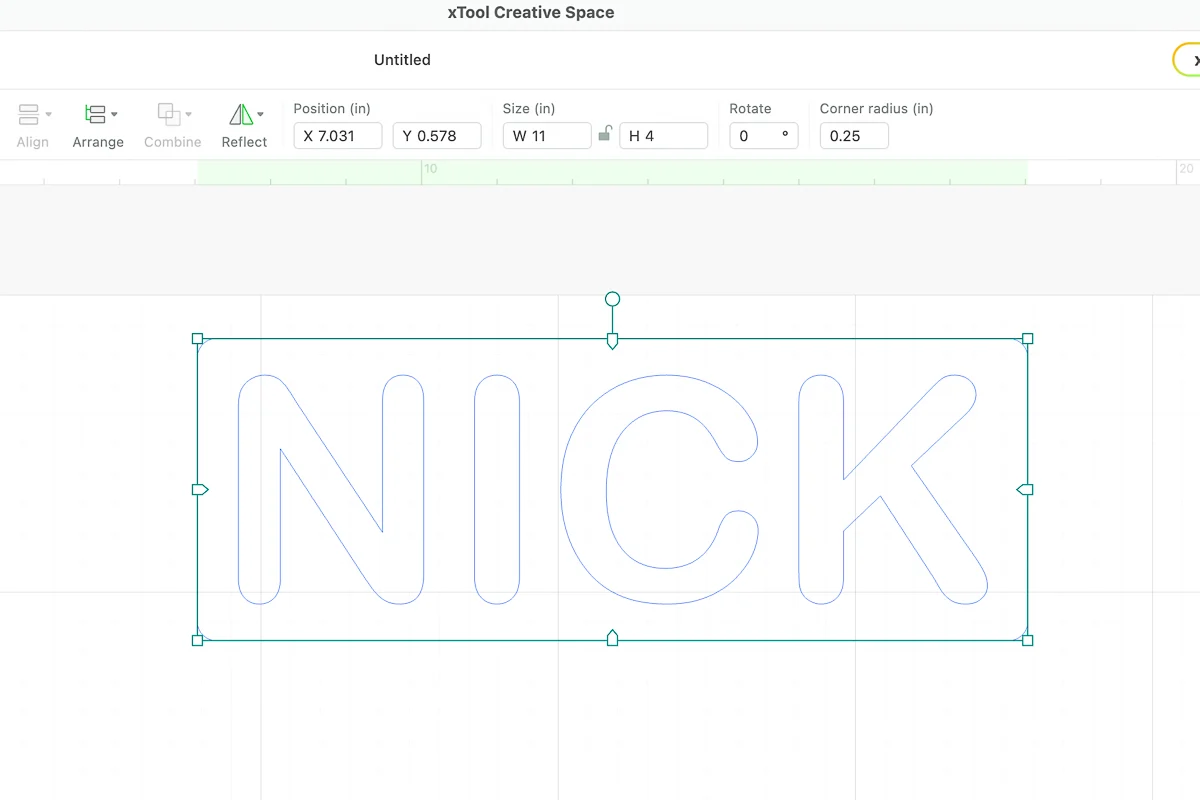
Start by choosing your font. You want bold, rounded letters to make it easy for little hands to grip each piece. I'm using Arial Rounded MT Bold, with a letter height of 3" tall.
Next, draw a rectangle around the letters. I made mine 11" wide and 4" tall, and rounded the corners by 0.25" to eliminate any sharp points. Align the name and the rectangle so the letters are centered within the frame

If you're cutting all the pieces from the same material, duplicate the rectangle and the letters as separate parts. One will be the backer, and the extra letters will be glued together so they stand out from the frame. I reduced the spacing of the letters to -1 to save material.

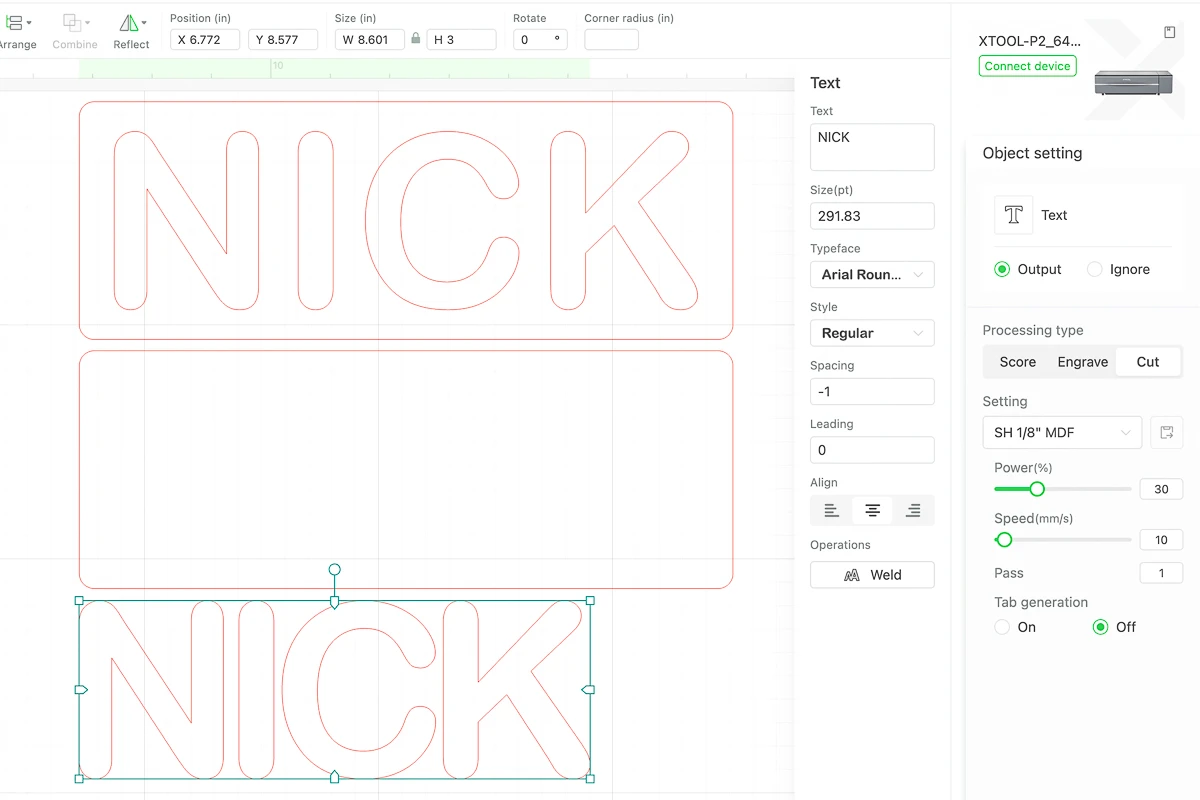
You can also add finger holes in each letter of the frame so they can be removed easily. This requires less material, since you'll only need to cut the backer and the top with the letters.
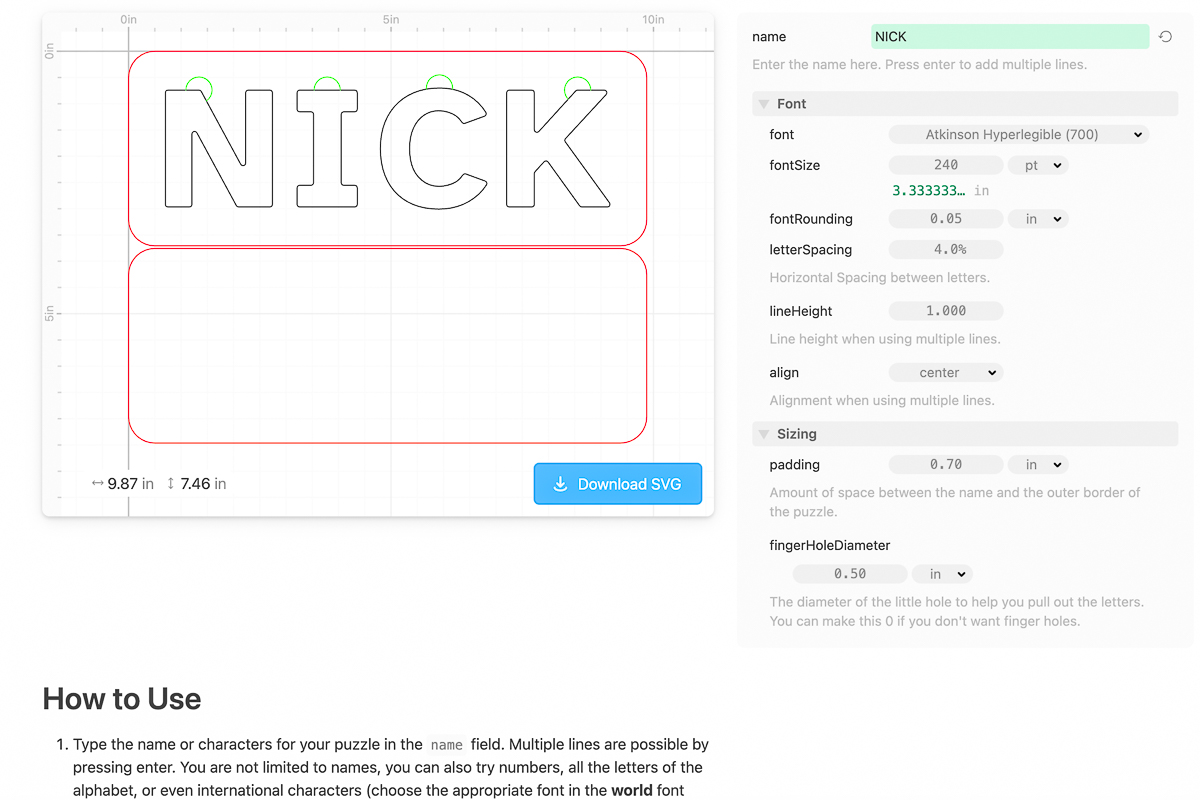
Cuttle makes a really easy template for the finger holes, so you don't have to mess around with merging half circles with the letters! This feature is only available with a Cuttle Pro account, but you can get 10% off your first month or a full year with the promo code THD10!
I'm making two versions of this puzzle, so you can see the difference. Let's get cutting!
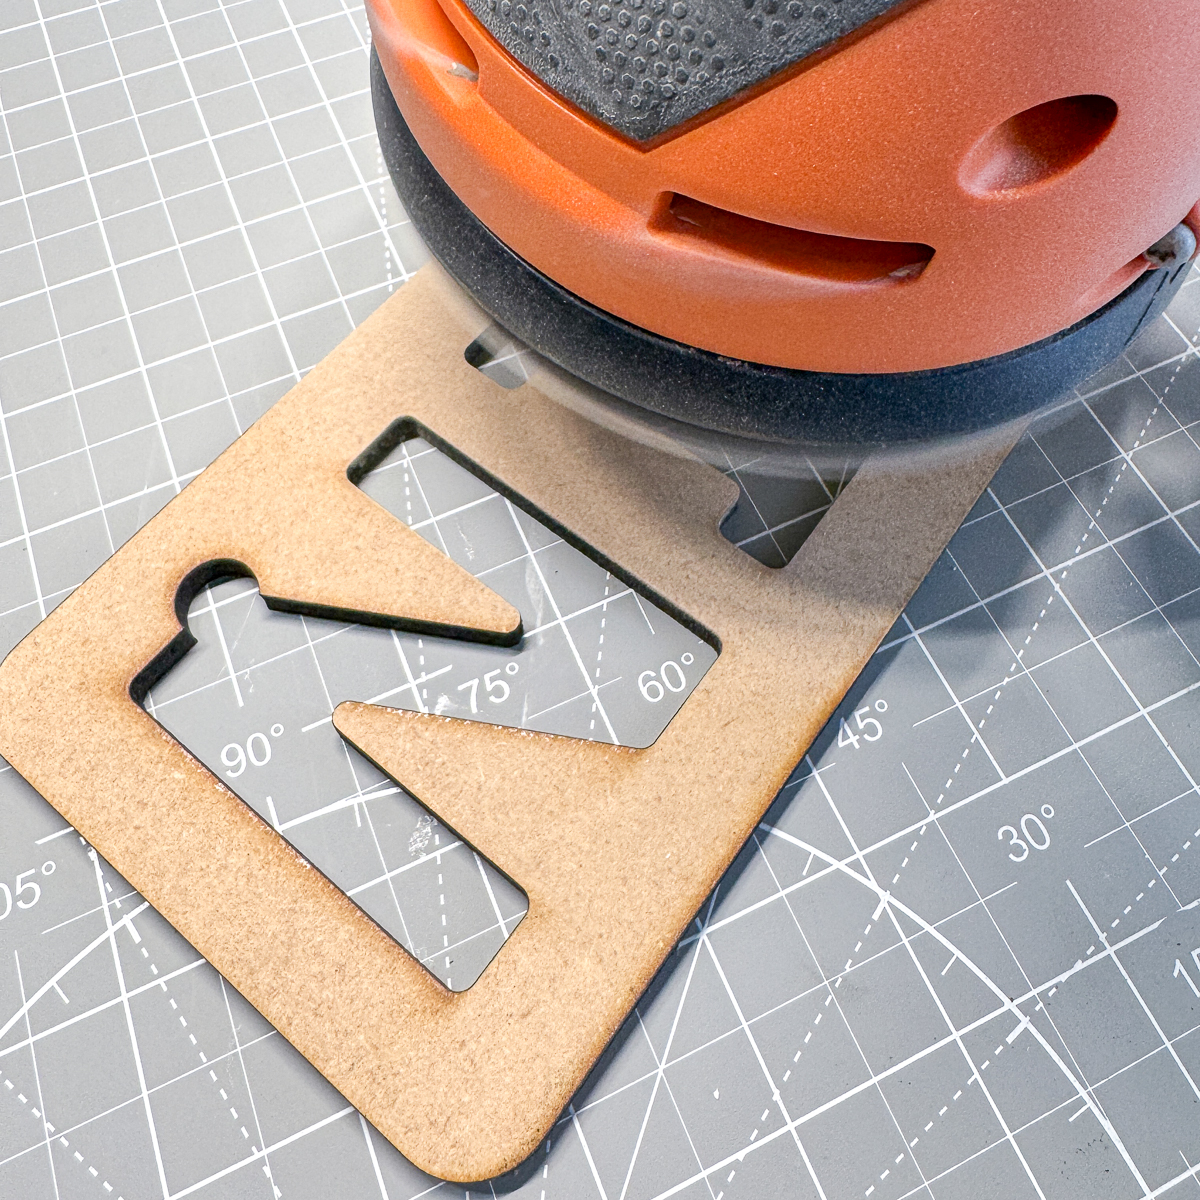
Cut the pieces on the laser
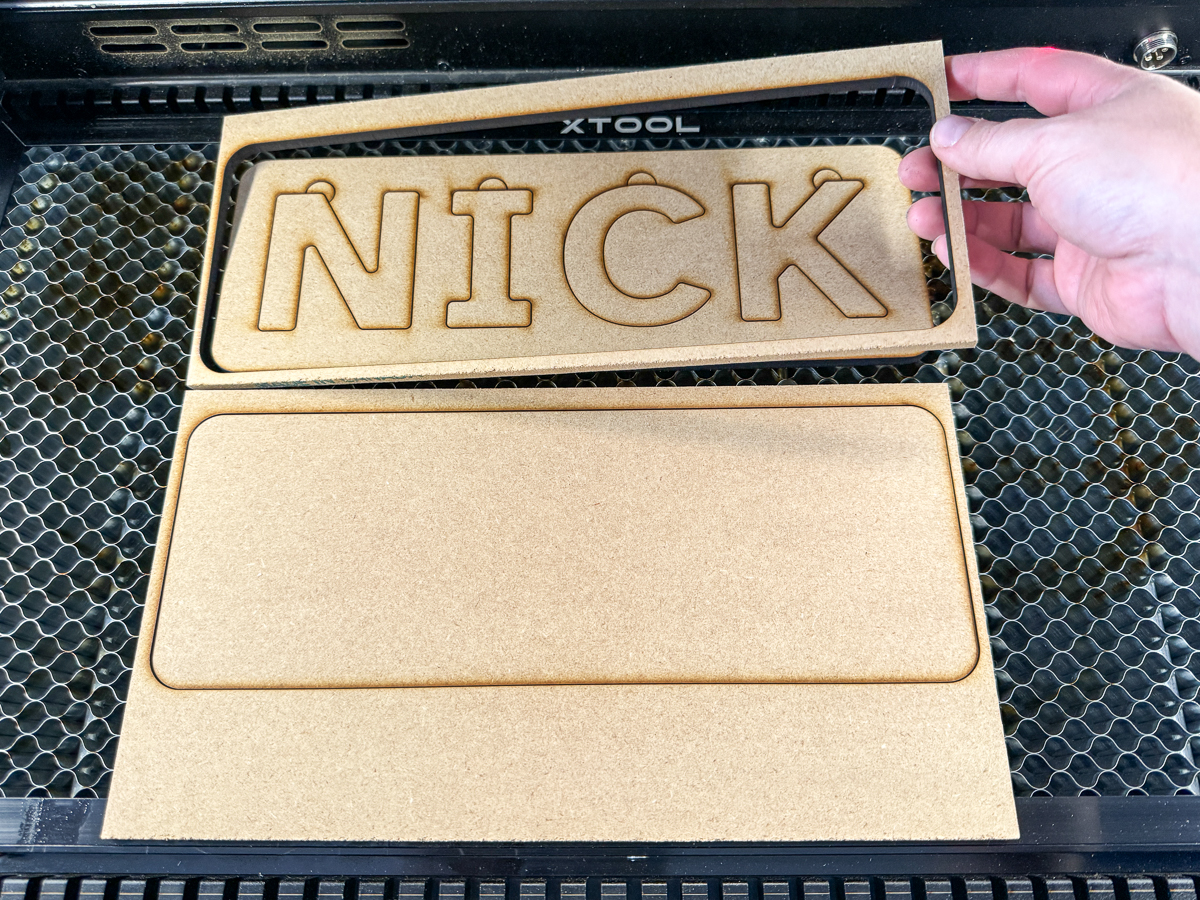
I'm making the one version of this puzzle out of acrylic on the xTool P2, and the other out of MDF if you have a diode laser like the M1. You can read more about the difference between these two types of lasers in this article.
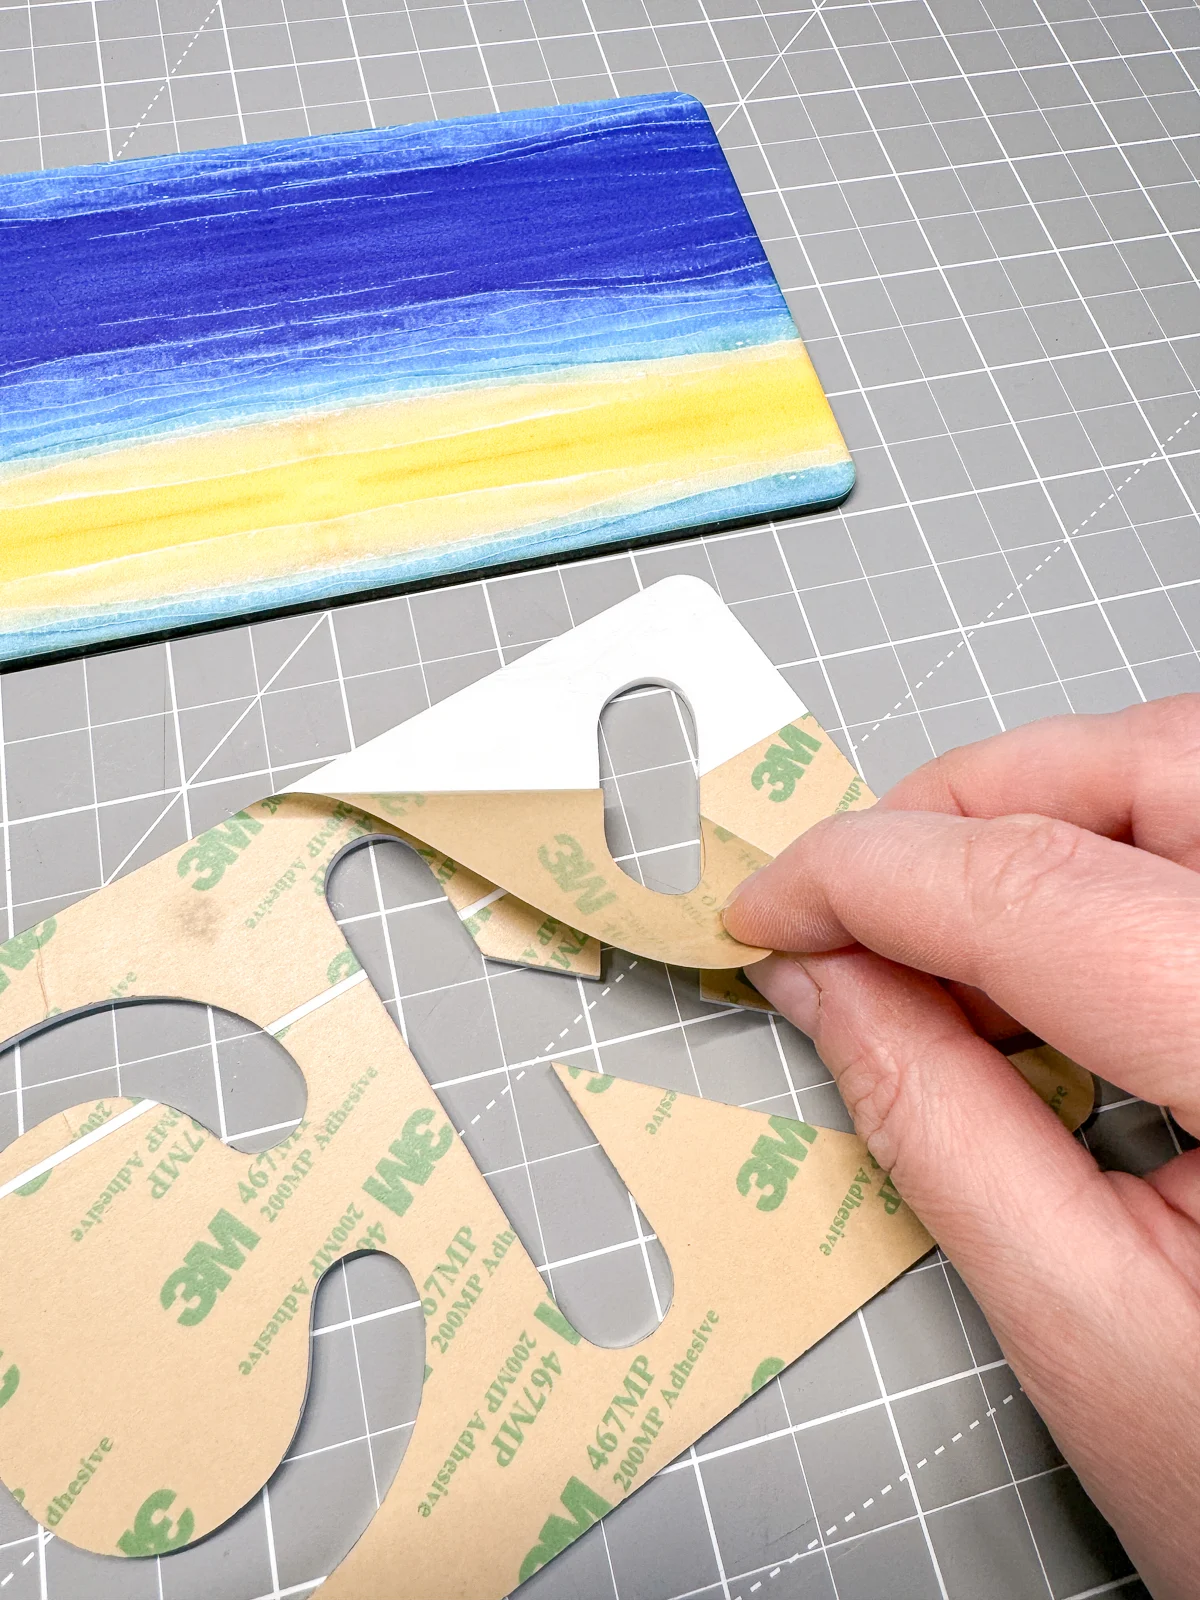
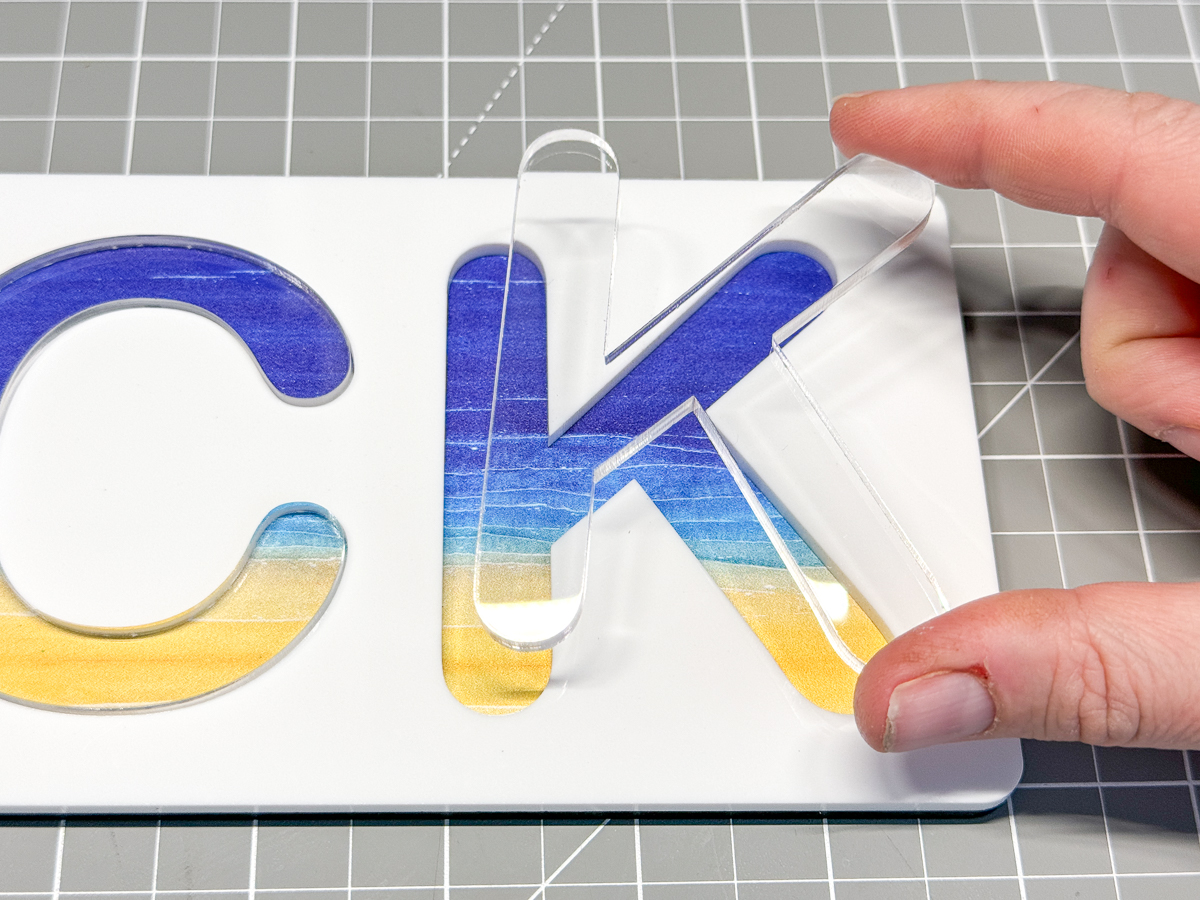
I applied 3M double sided adhesive to the back of the top layers before cutting.


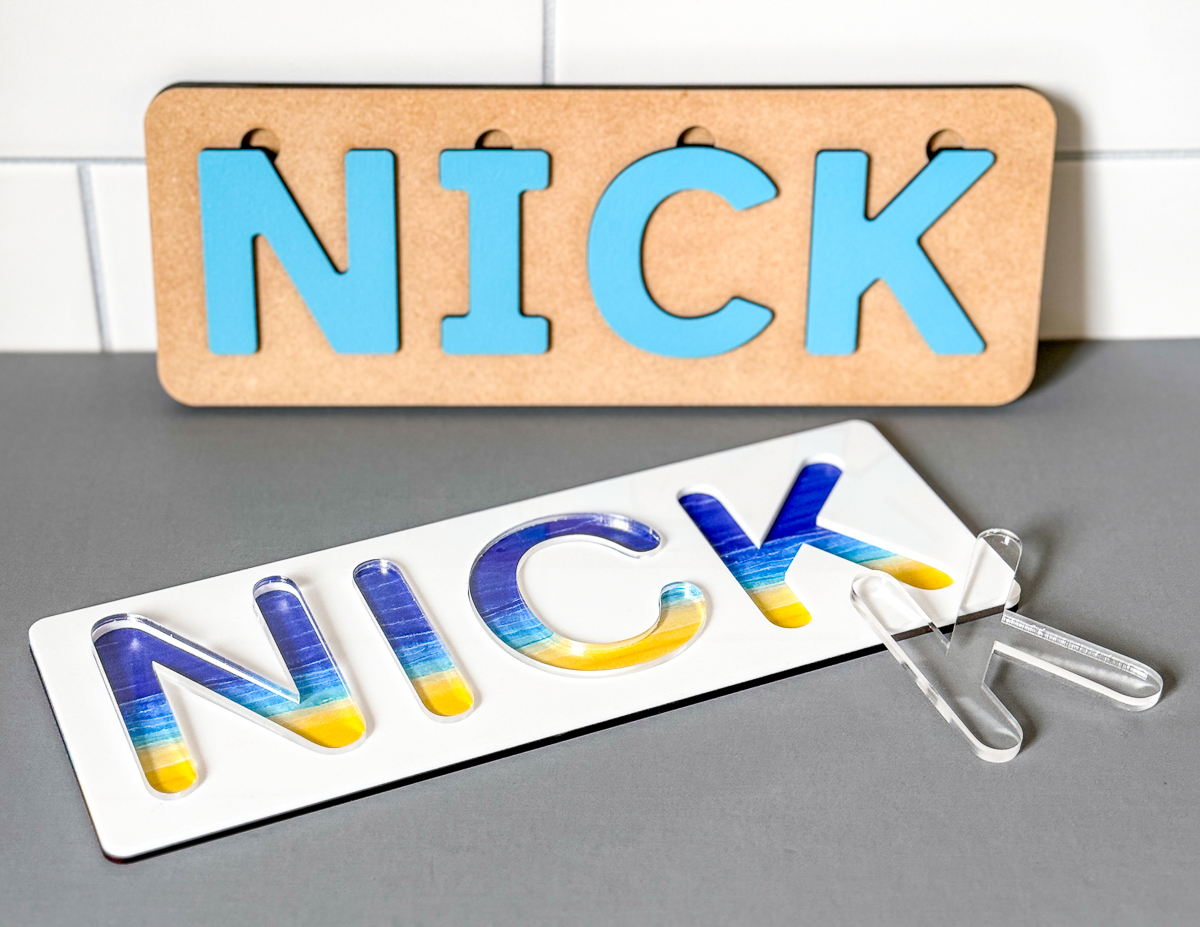
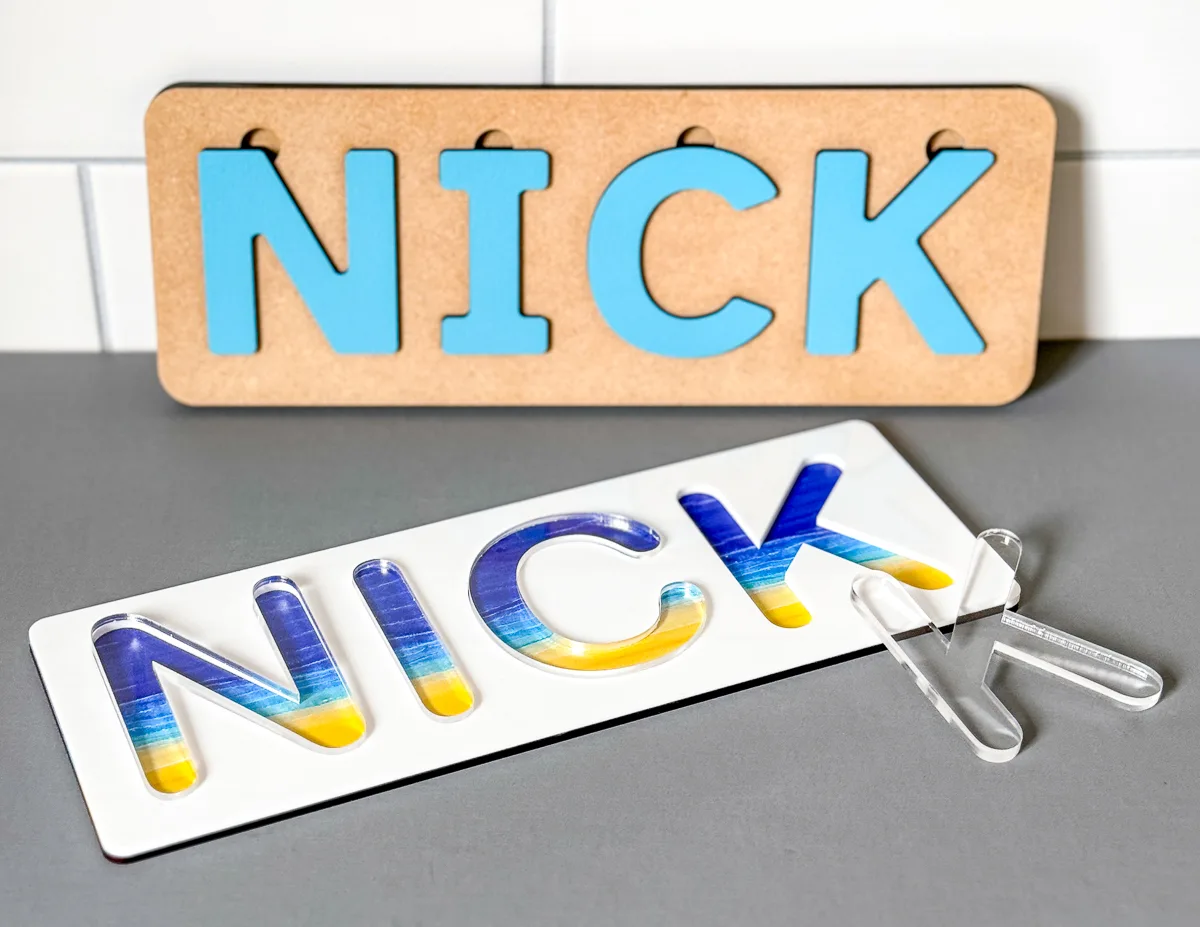
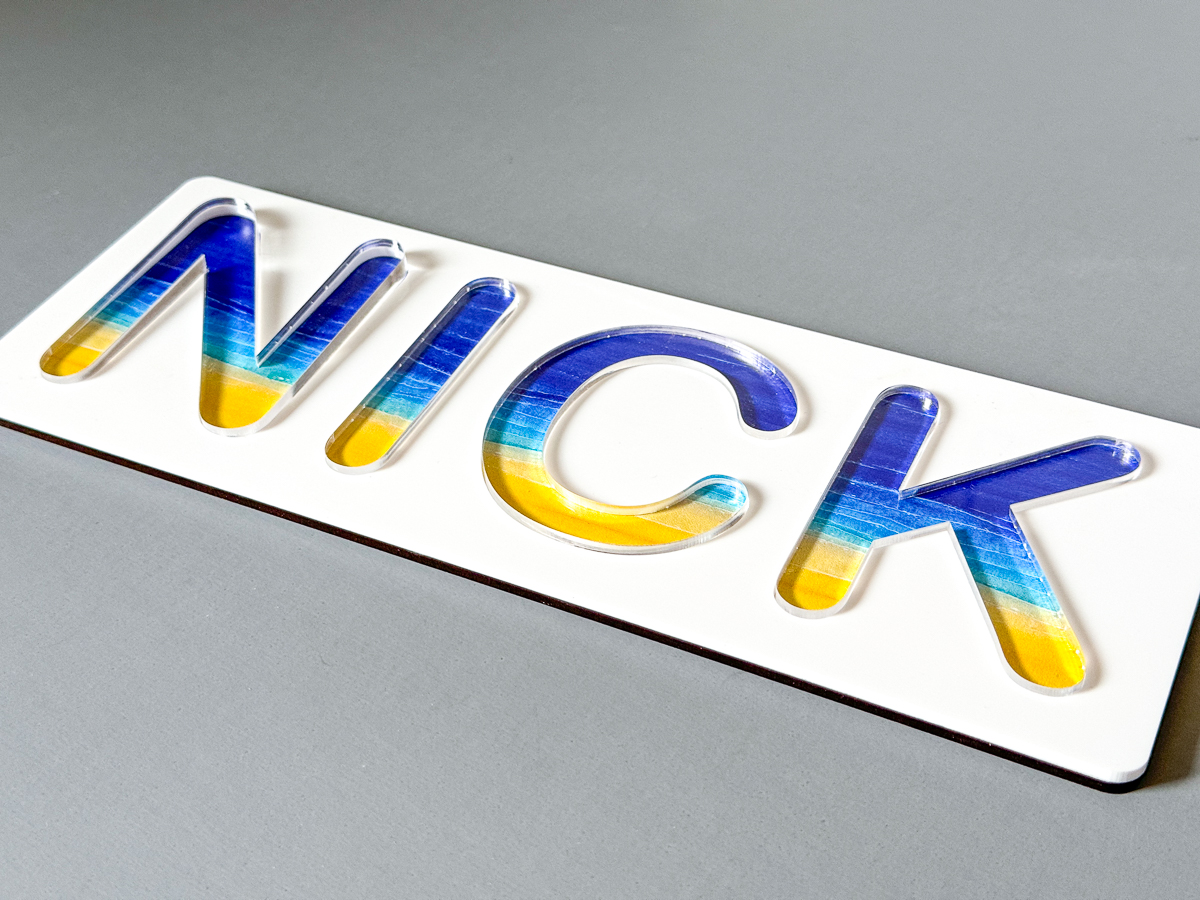
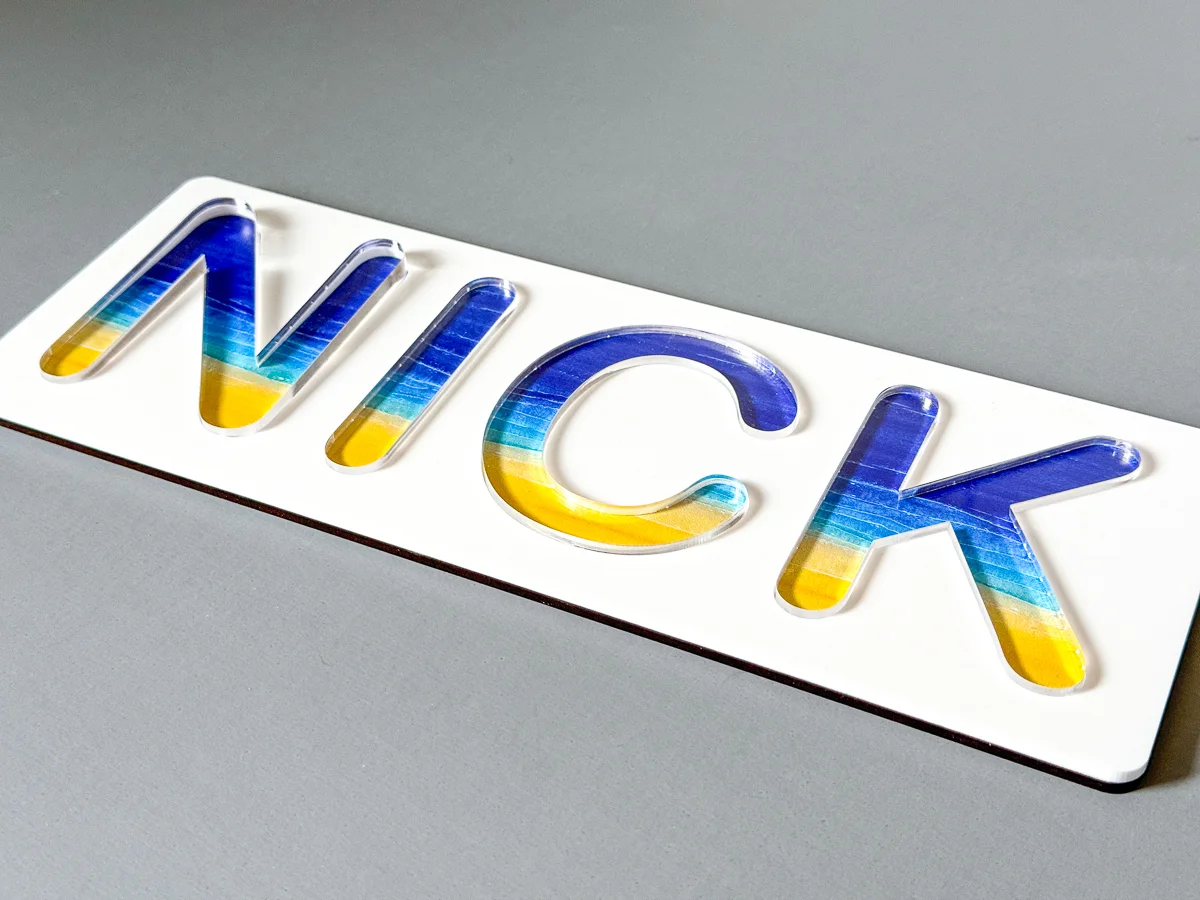
I'm using ¼" clear acrylic for the letters, which will show the patterned acrylic underneath when the puzzle is complete. The backer is cut from this watercolor beach patterned plywood from Smokey Hill Designs. You could also create your own design using a sublimation printer and a heat press!

After cutting the top piece, I used it to decide where to place the letters on the pattern. The camera on the P2 makes it easy to replicate this alignment so I could get the transition from sand to water within the cutouts.

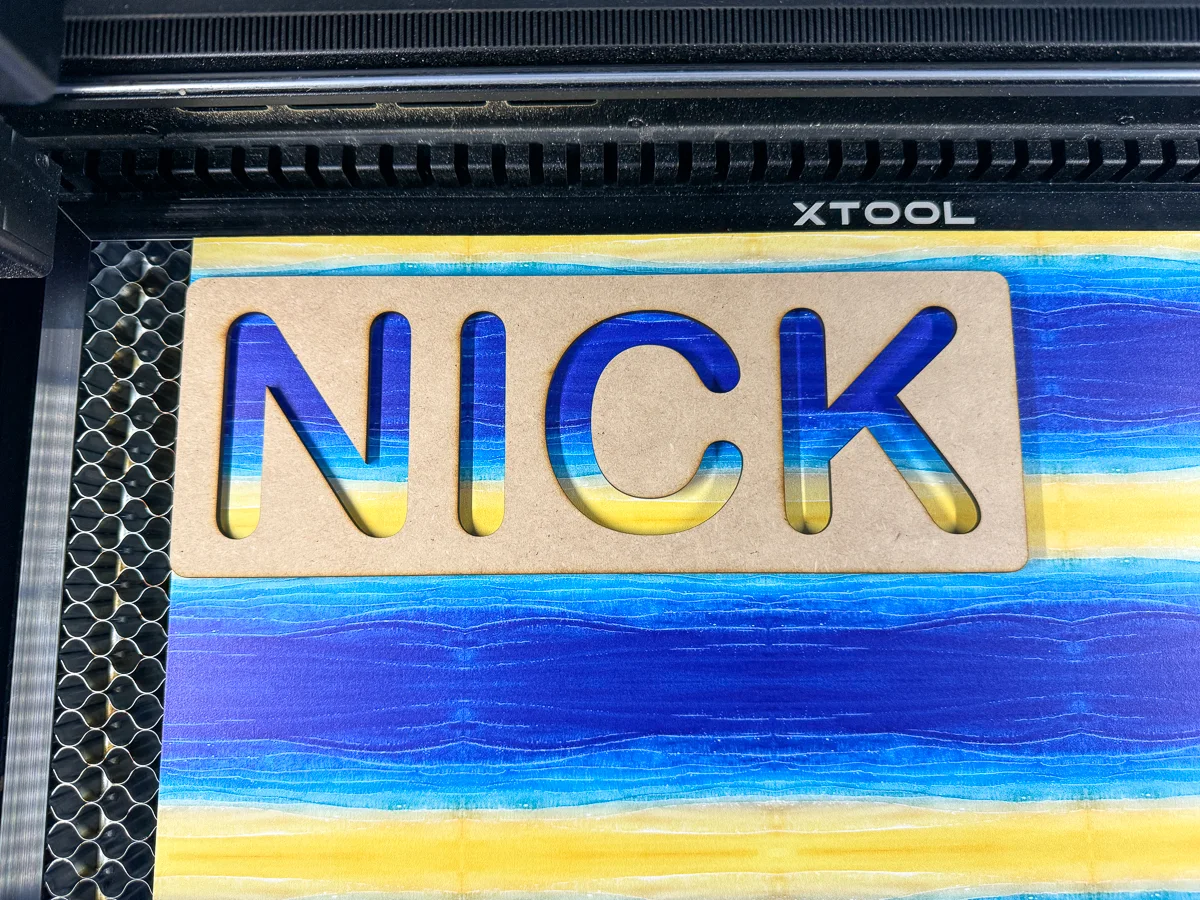
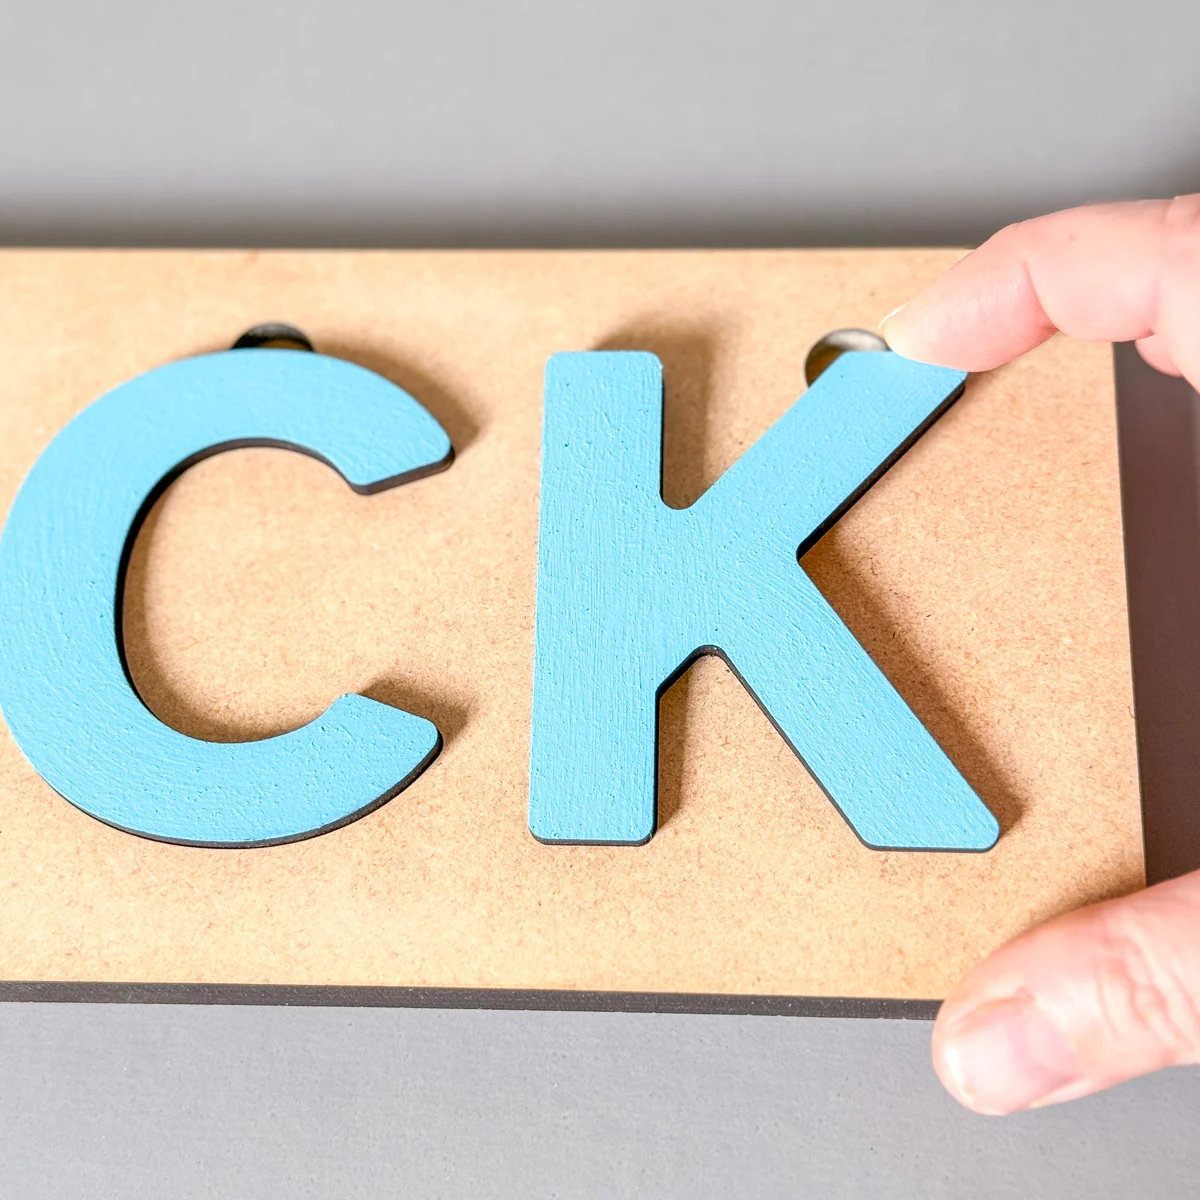
The other puzzle is made from ¼" MDF, which is easy to paint and won't create splinters like plywood. I used up a few scraps left over from building my kitchen cabinet doors, which were the perfect size for this project!

Assemble the layers
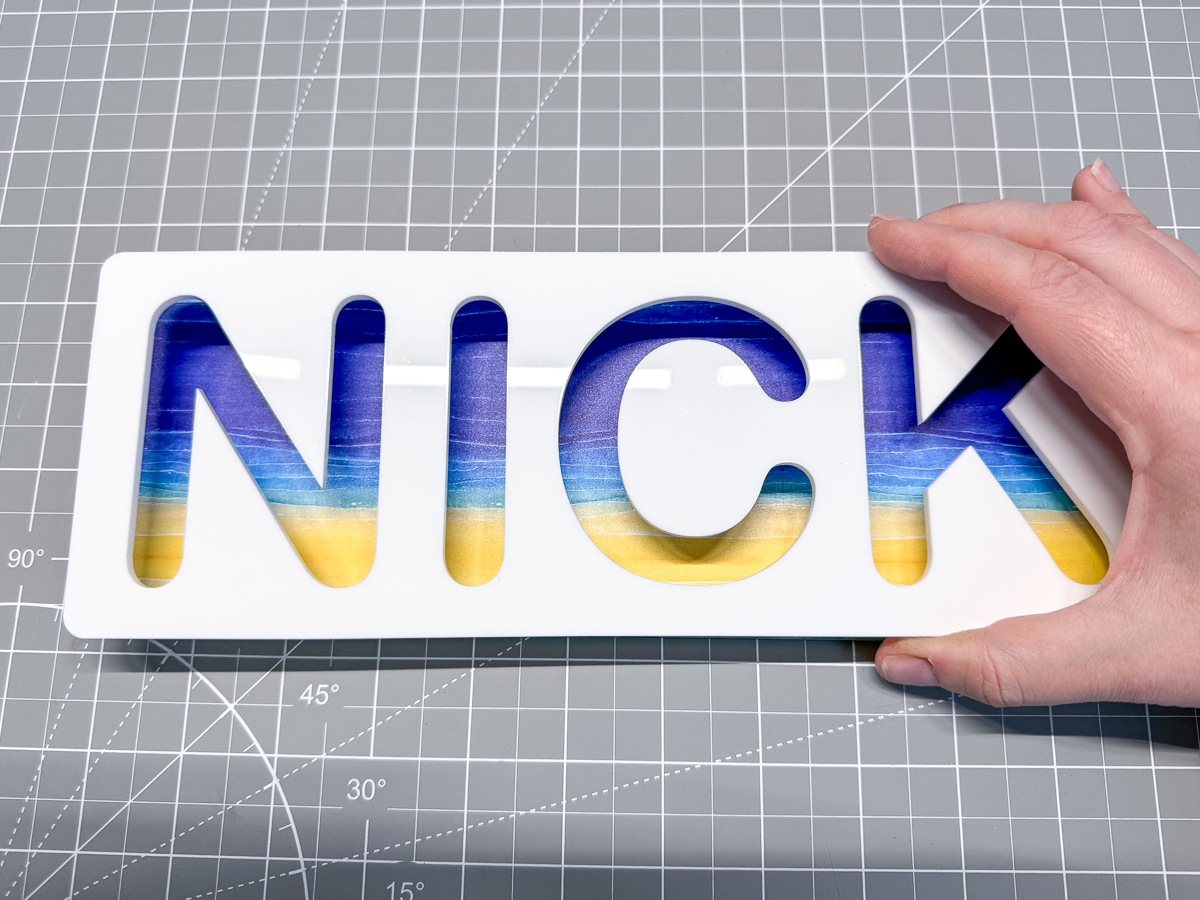
The acrylic version couldn't be simpler to assemble! Just peel off the paper backing from the top layer...

then stick it to the base. Done!

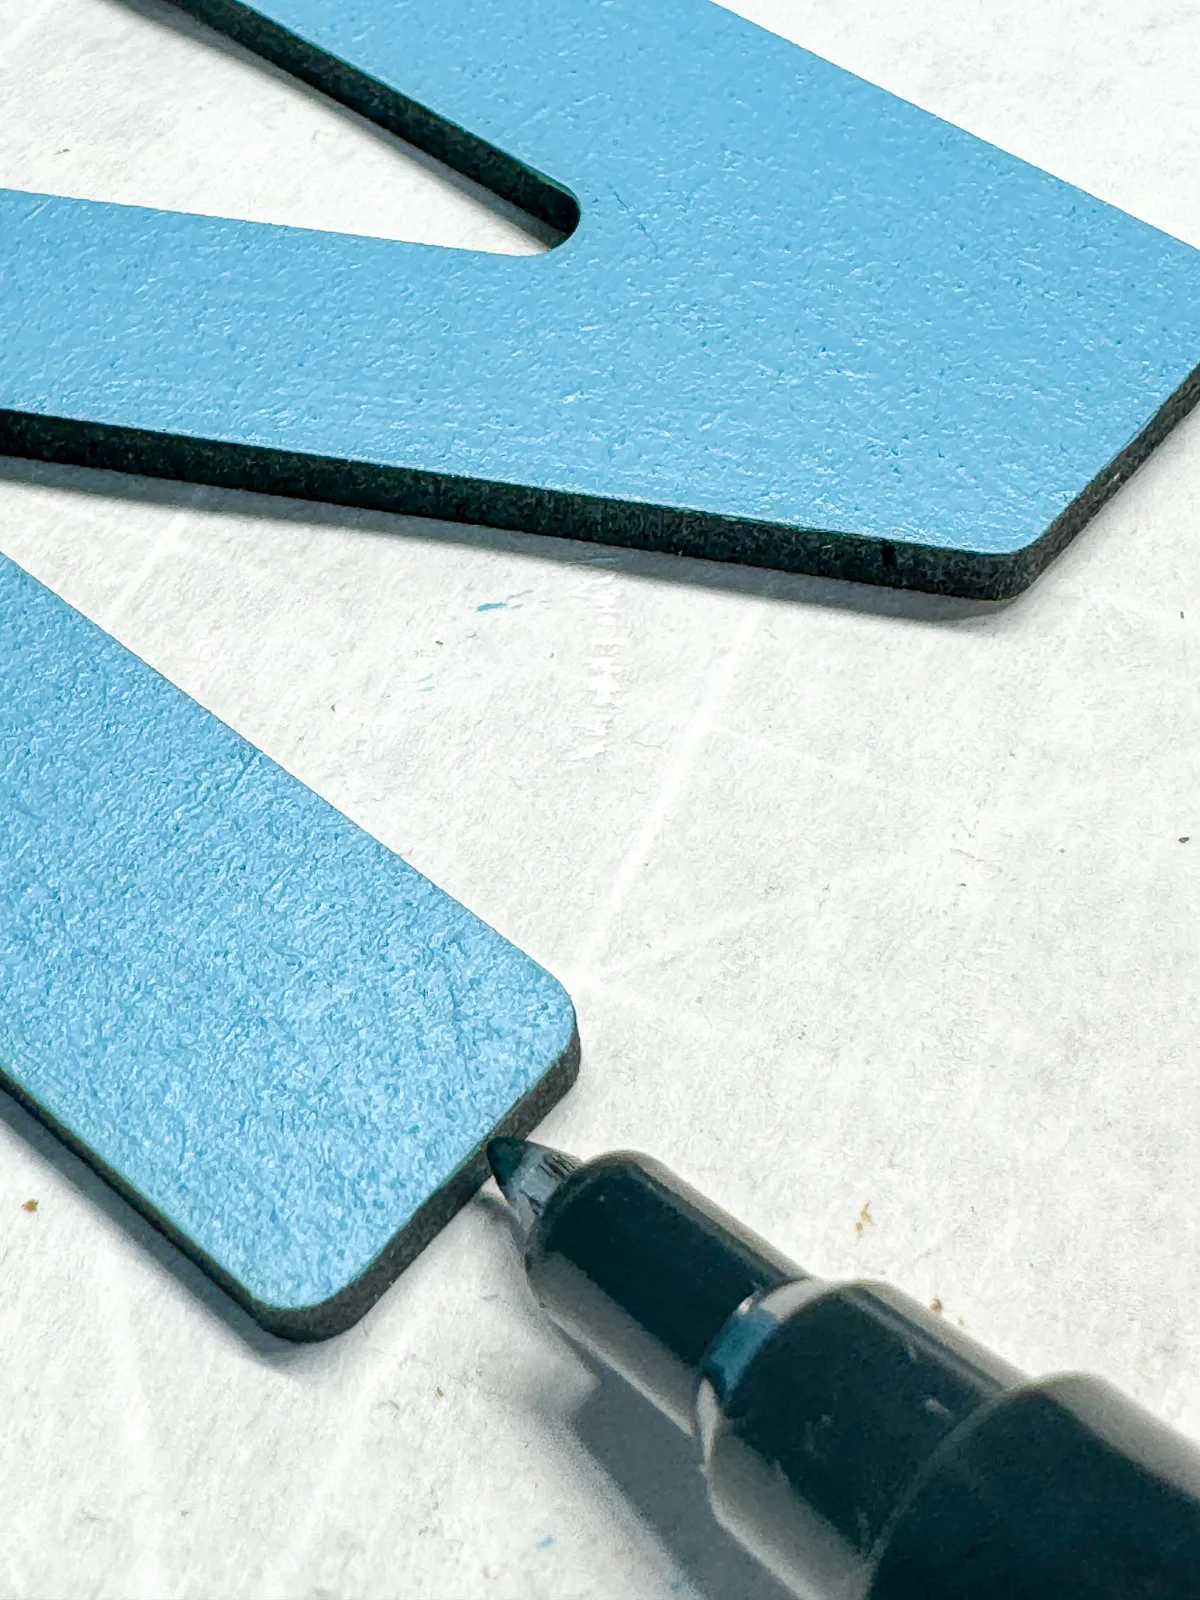
I left most of the MDF version unpainted. All these pieces got a quick sanding to remove any char marks on the surface.

I painted the letters blue for a little pop of color. Touch up the edges where the paint dripped with a black paint pen.

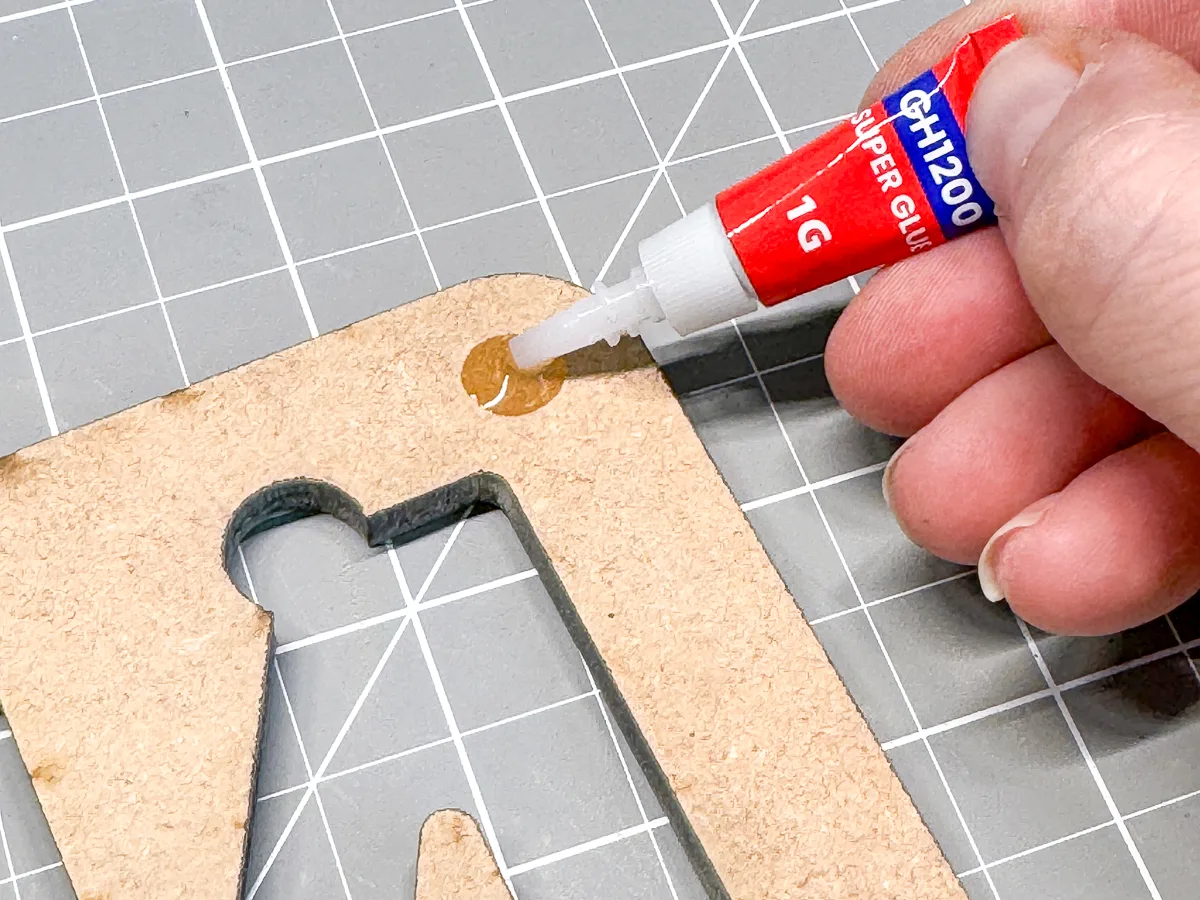
While the paint is drying, use CA glue or wood glue to attach the top to the backer.

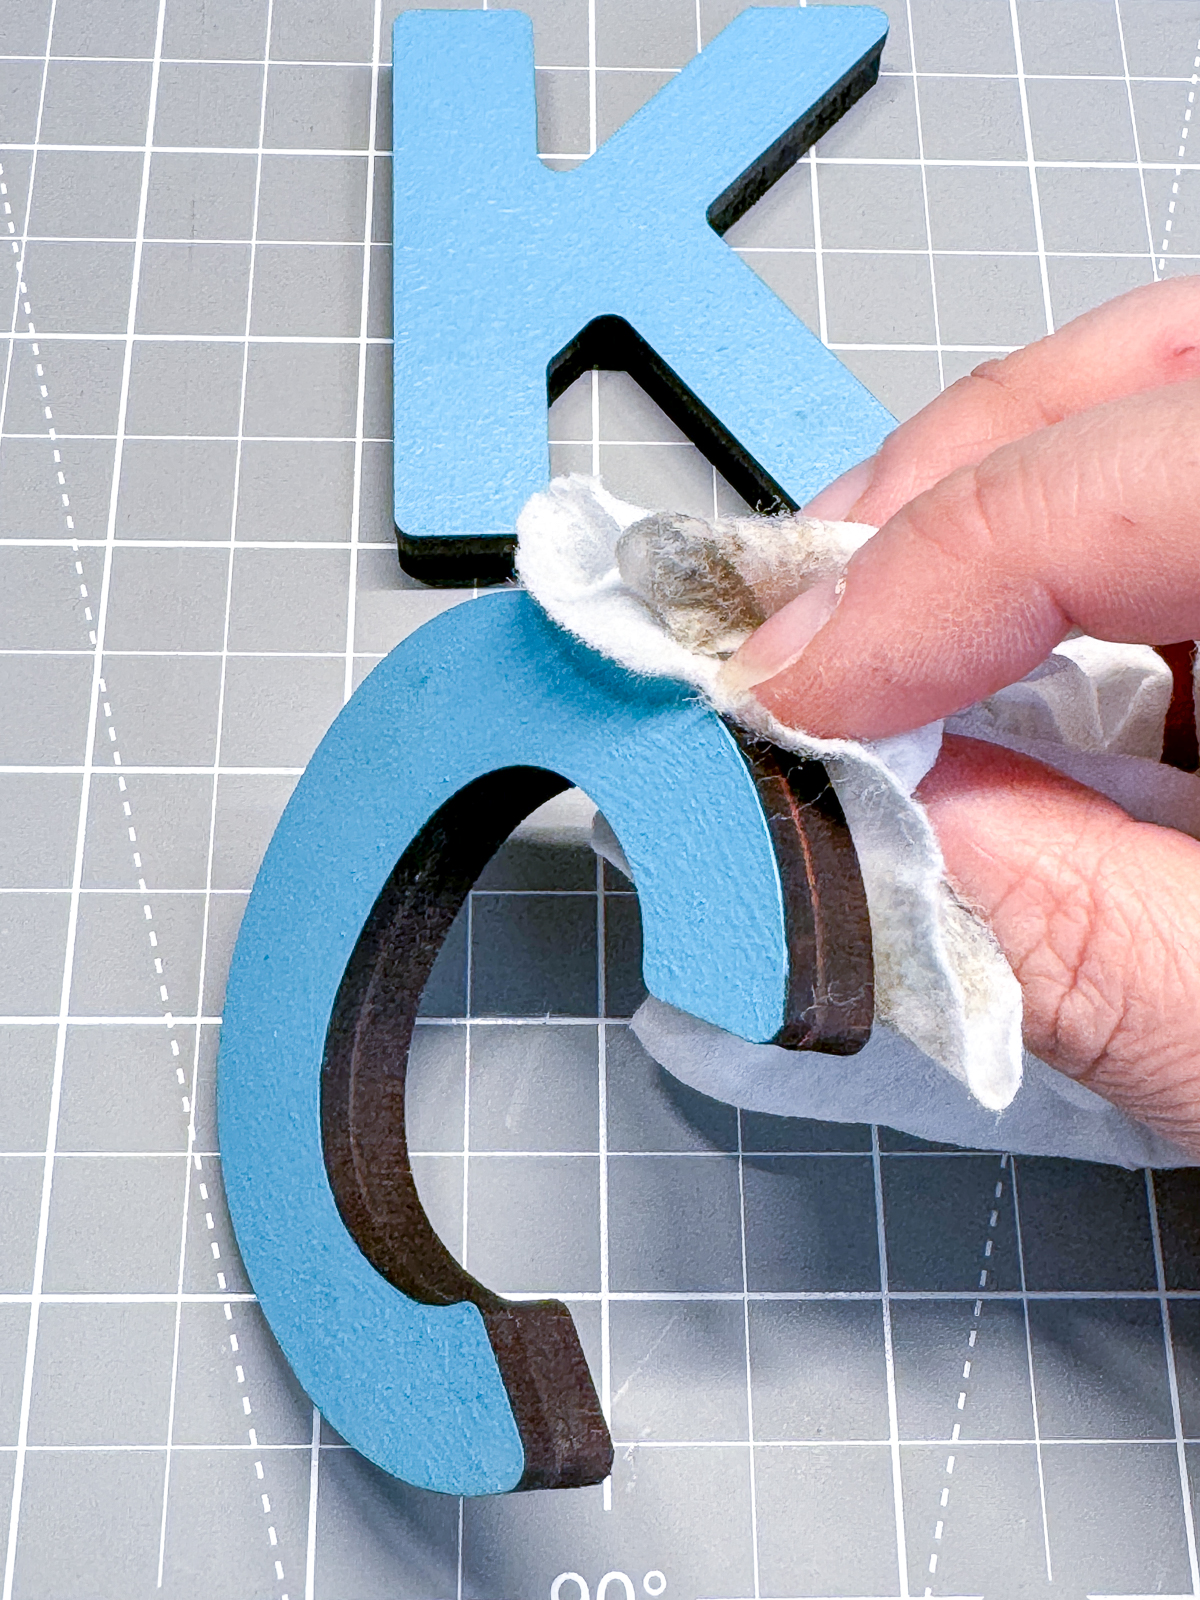
Then I cleaned up the char on the outside edges with a baby wipe. You don't want that mess on a little kid's hands!

Now you can just pop the letters into the puzzle and give it to that special kiddo!

I love how both versions turned out! While my son is well beyond the toddler stage now, the patterned acrylic version is nice enough to display in his room without looking like a little kid puzzle.
The finger holes on the MDF version make it easy to pop out the letters without dumping out the entire puzzle.

Which one is your favorite? Let me know in the comments below!