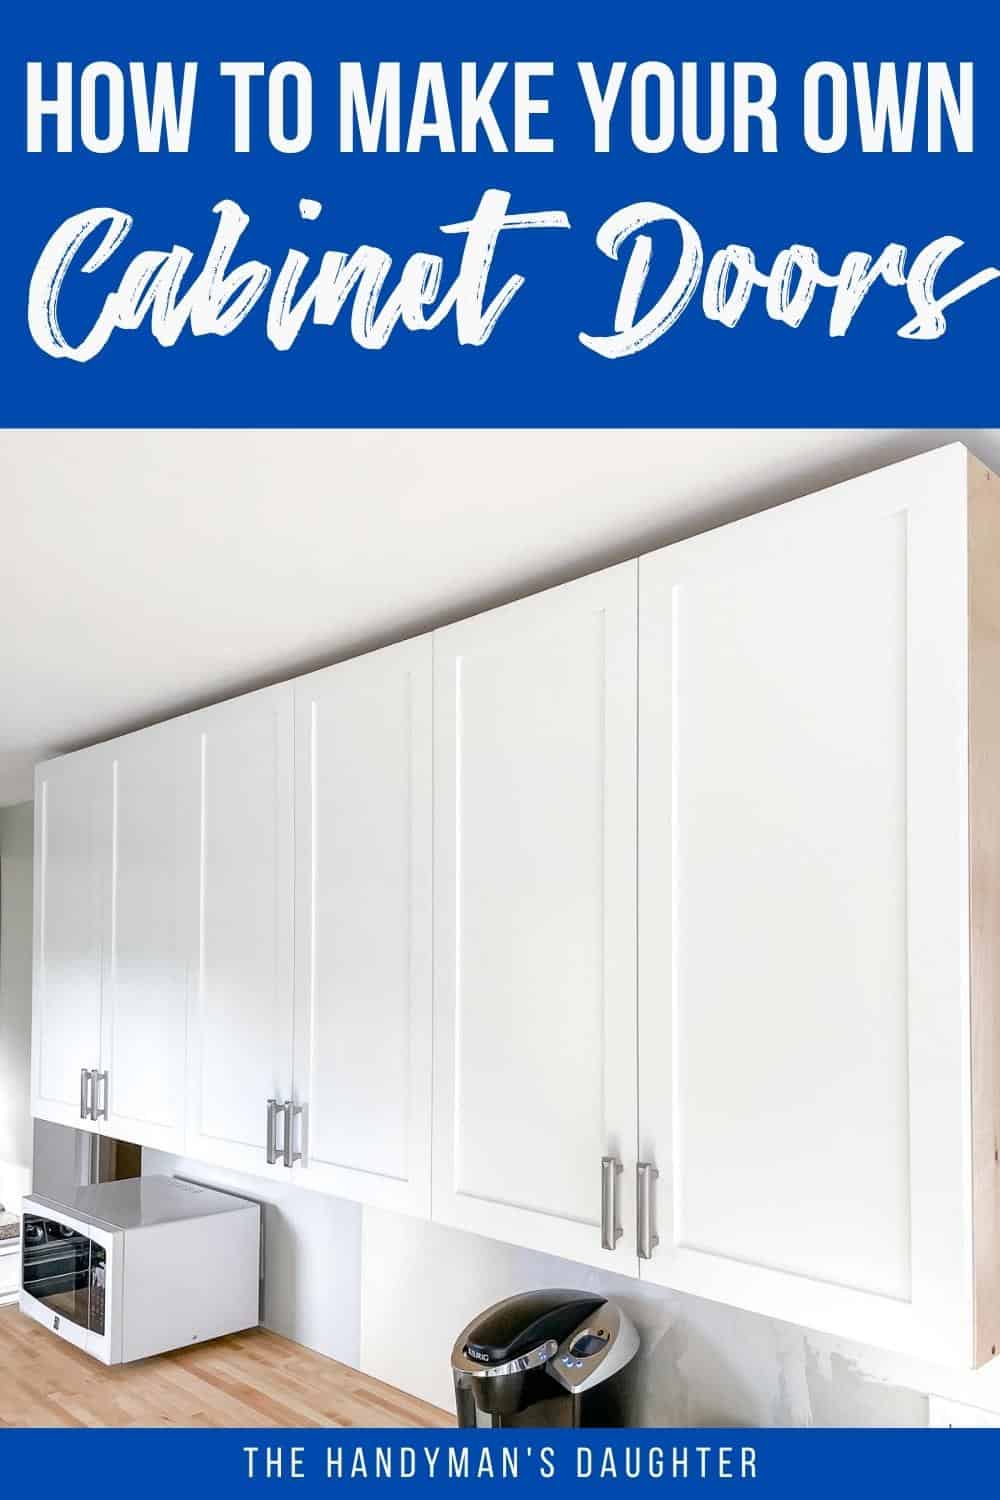
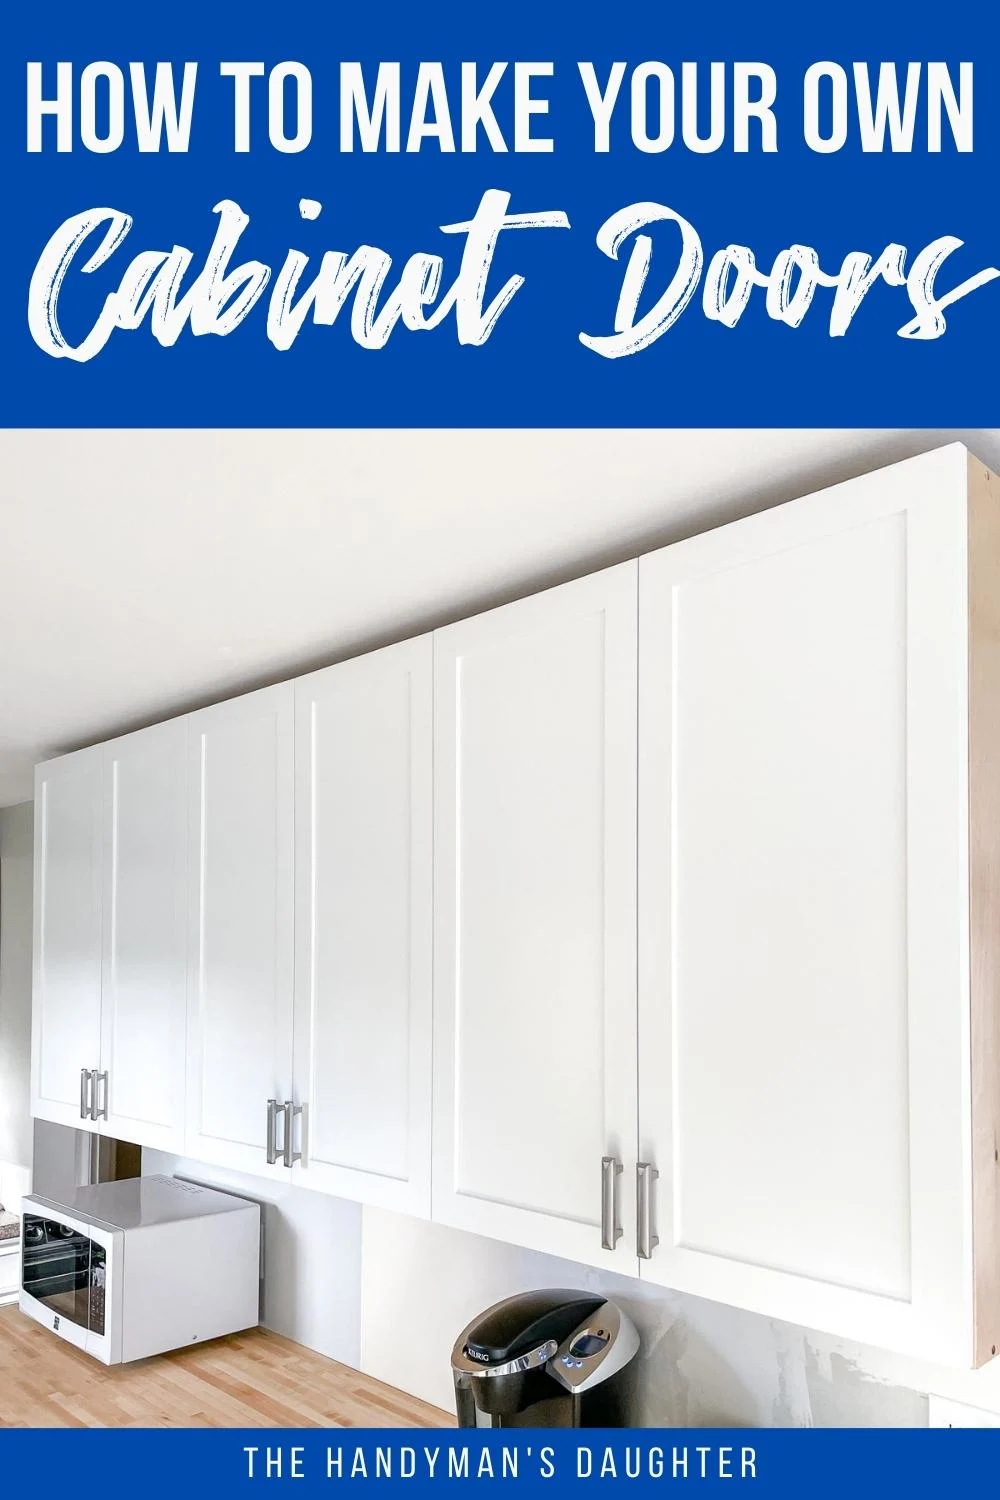
Making Shaker cabinet doors is easier than you think! I'll show you how to use a router table to build these DIY Shaker cabinet doors yourself!
There are a lot of tutorials on the Internet for how to make Shaker cabinet doors. But most of them involve a table saw and a lot of time cutting grooves and tenons with multiple passes on a single blade. That's fine for a couple of doors, but it would take days to process the pieces for an entire kitchen!
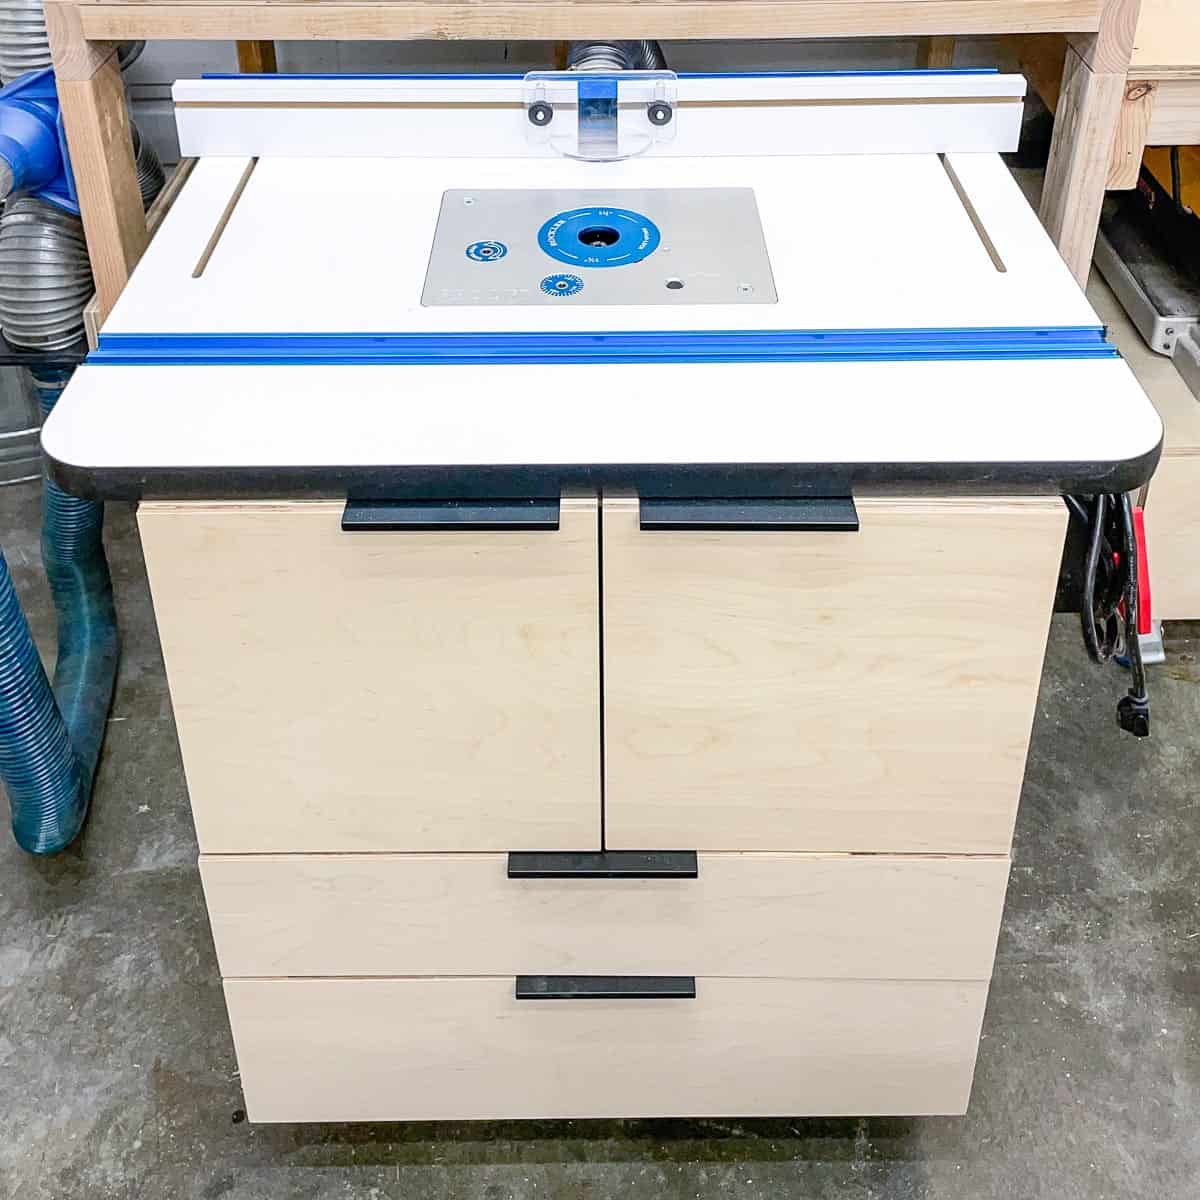
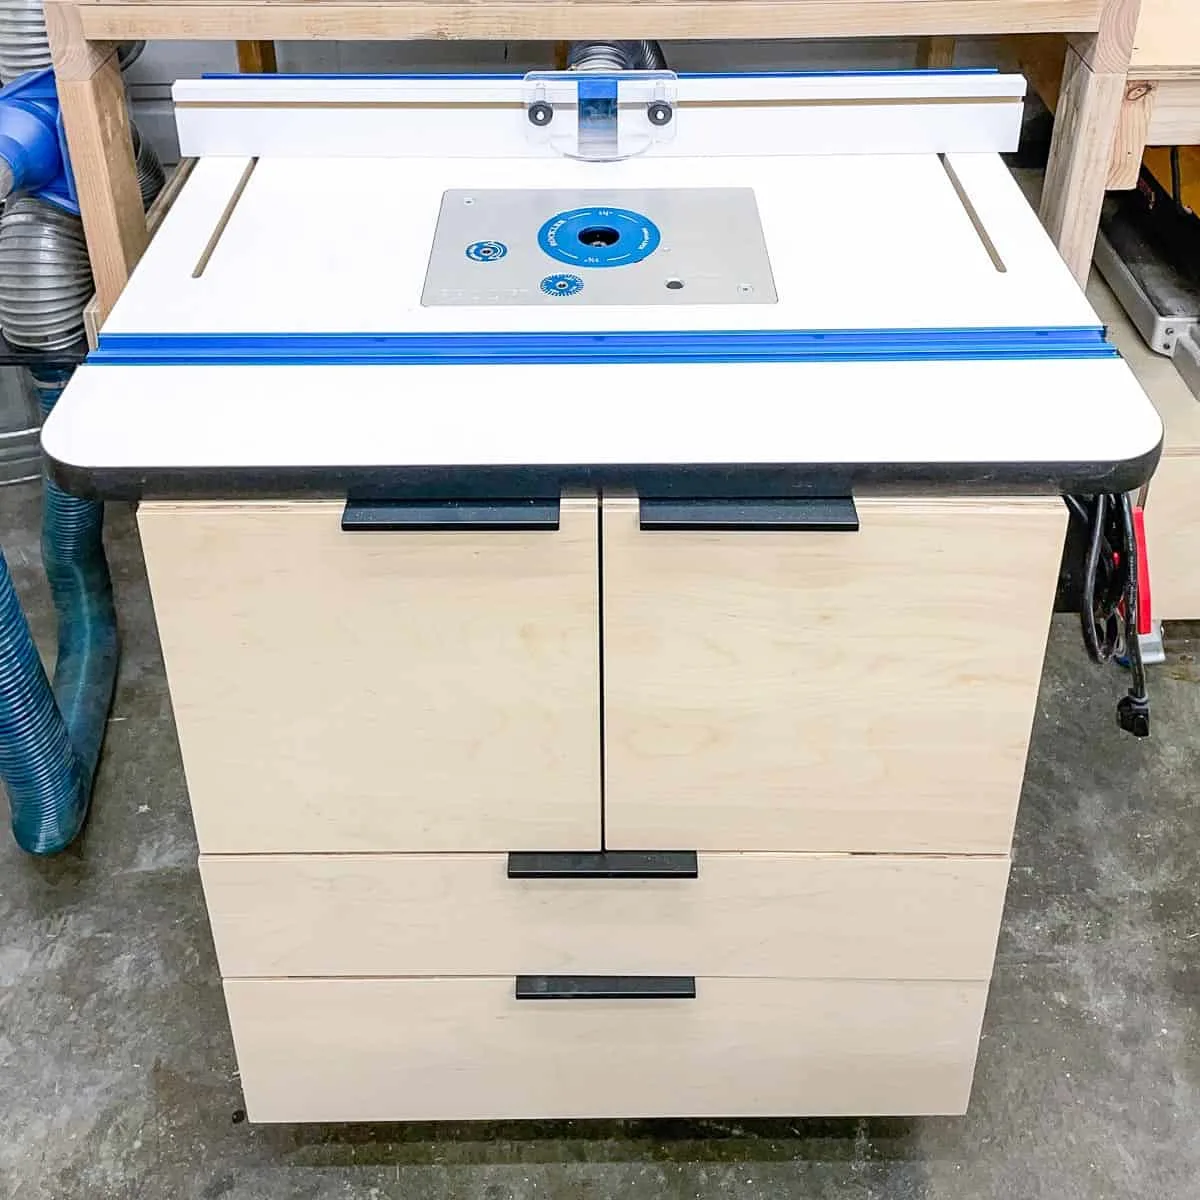
Most commercially available shaker style cabinet doors are made using a router table. Rail and stile router bits create the tongue or grooves in a single pass, so you can crank out an entire kitchen's worth of parts in a couple of hours! You can even add decorative profiles, such as bevels, to the inside edge for a custom look.
You can use this same method to make DIY Shaker cabinets at home! All you'll need is a DIY router table like this one, or a small benchtop model. Here's how!
This post contains affiliate links for your convenience. Purchases made through these links may earn me a small commission at no additional cost to you. Please visit my disclosures page for more information.
How to measure for cabinet doors
The most important part of building any cabinet door is to get the measurements right. While you could always trim down a door that's too big, there's nothing you can do if it comes out too small!
Check out this tutorial for an in depth look at how to measure for cabinet doors, and download the free worksheet to help you keep track of all the numbers!
Use rail and stile router bits
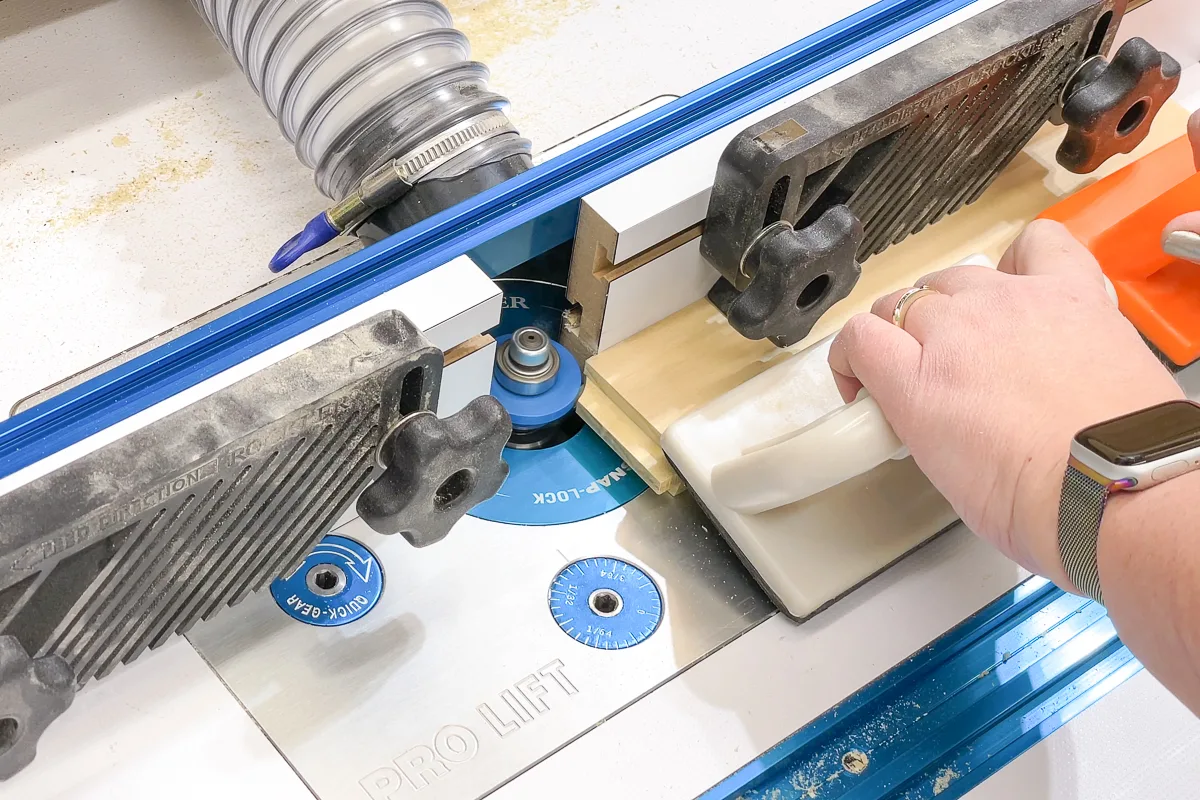
Rail and stile router bits come as a set. The rail bits cut the tongue on the ends of the rail pieces. The stile bit cuts the groove on the inside edge of both the rails and stiles for the center panel and the tenons. I go into more detail on how to use rail and stile router bits here.
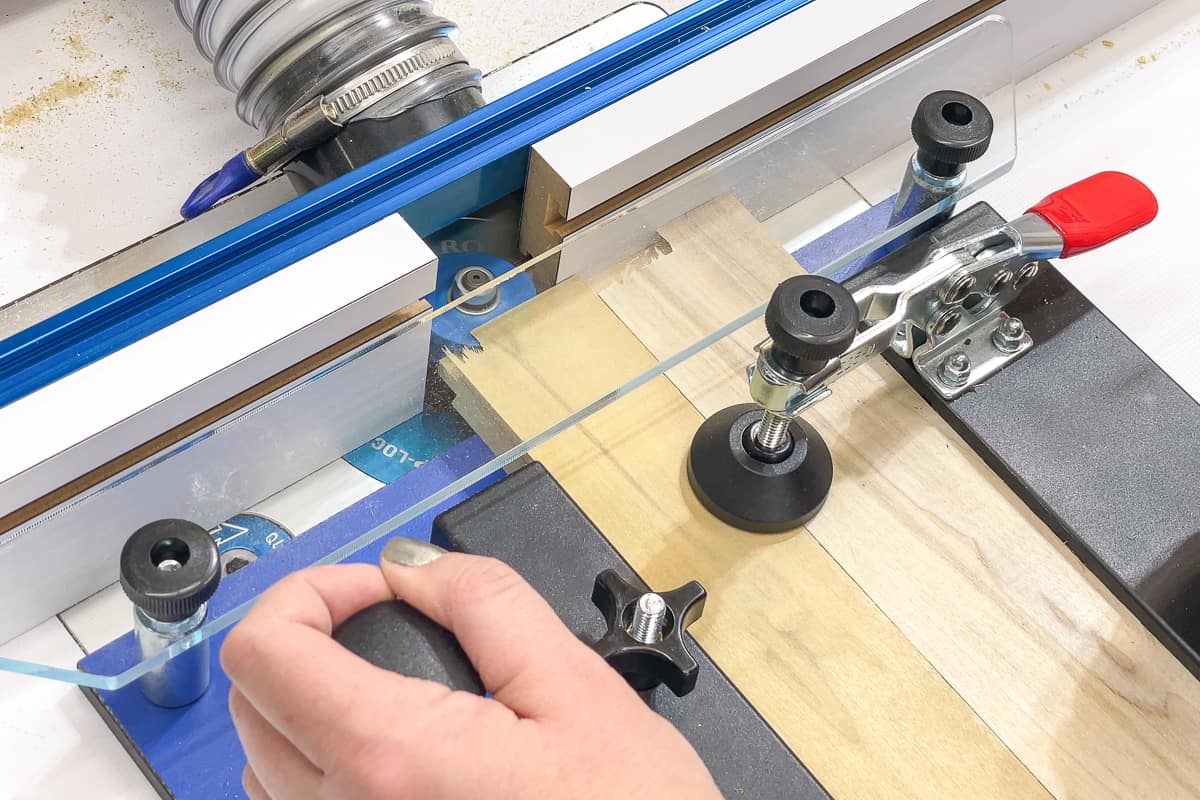
First, cut the tongue on both ends of the rail pieces. Use a coping sled to keep the board straight and flat as it passes the blade.

Next, run all the pieces through the stile bit to cut the groove and decorative profile.

Check the fit of the tenon in the groove, making sure that the tops are flush and there's no gaps. I run a test on a scrap piece before committing to the final setting, then save the test pieces to make set up easier in the future.


Cut the center panel and test fit
The center panel sits within the groove cut into the sides of the rails and stiles. It should be slightly smaller than the full length and width of the opening (plus the depth of the groove), so there's room for the wood glue. I usually subtract one millimeter (or 1/16") from my calculated dimensions to give myself a little wiggle room.
If you plan to paint your cabinet doors, I recommend using MDF for the center panel. It's super smooth without any grain, and it paints extremely well. It's also dimensionally stable, so it won't expand and contract with the seasons.
However, if you have your heart set on a natural wood look, you should go with plywood in the same wood species as the frame for the center panel. Like MDF, it's a stable material that won't swell in humidity like solid wood. Keep in mind, however, that plywood is typically undersized, so it may be a little loose in the groove.
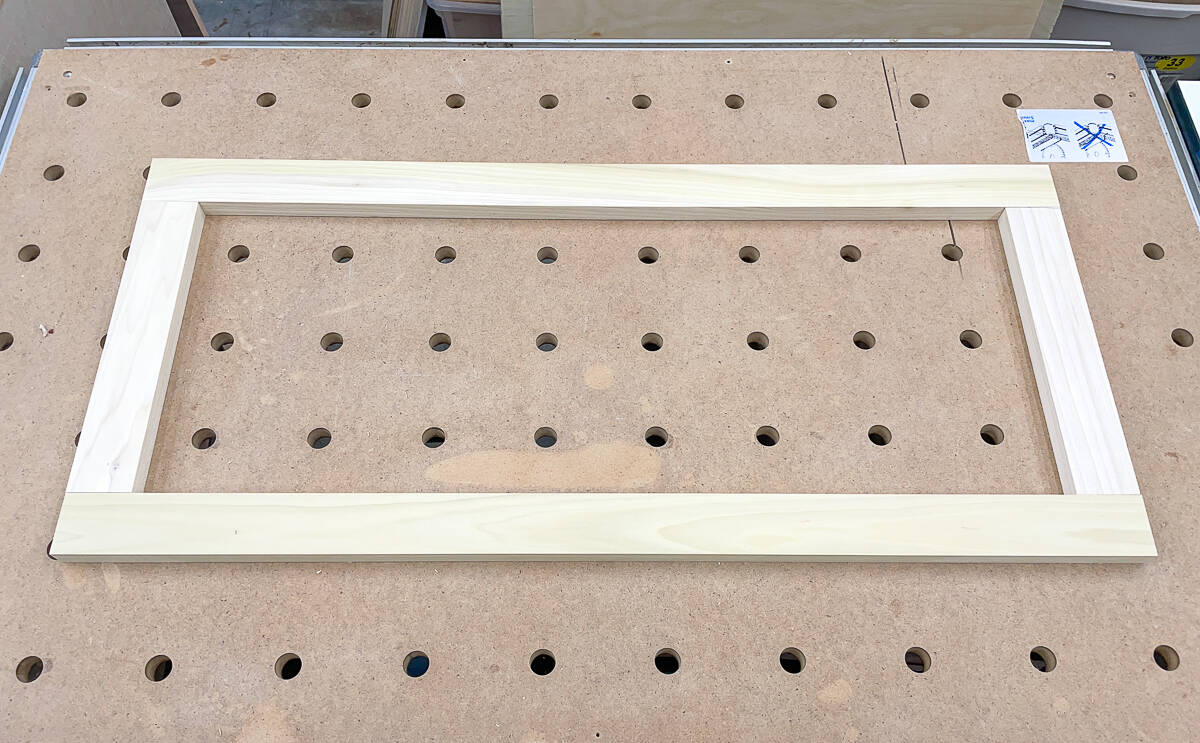
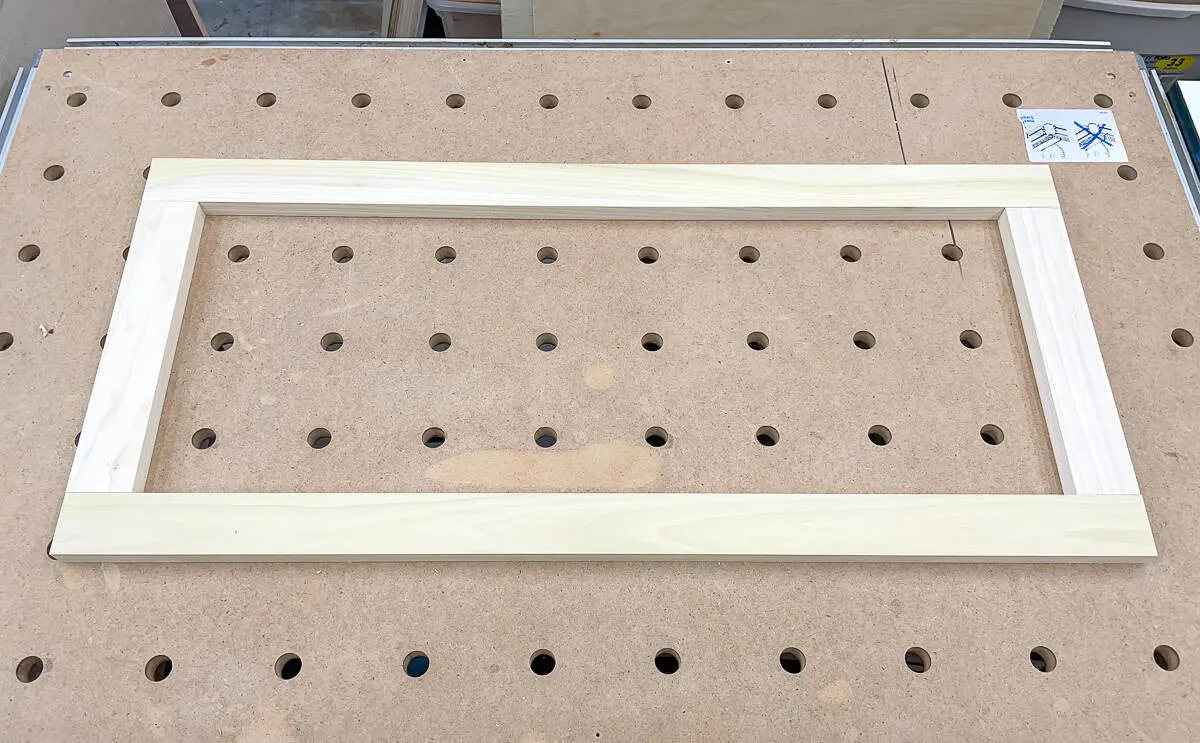
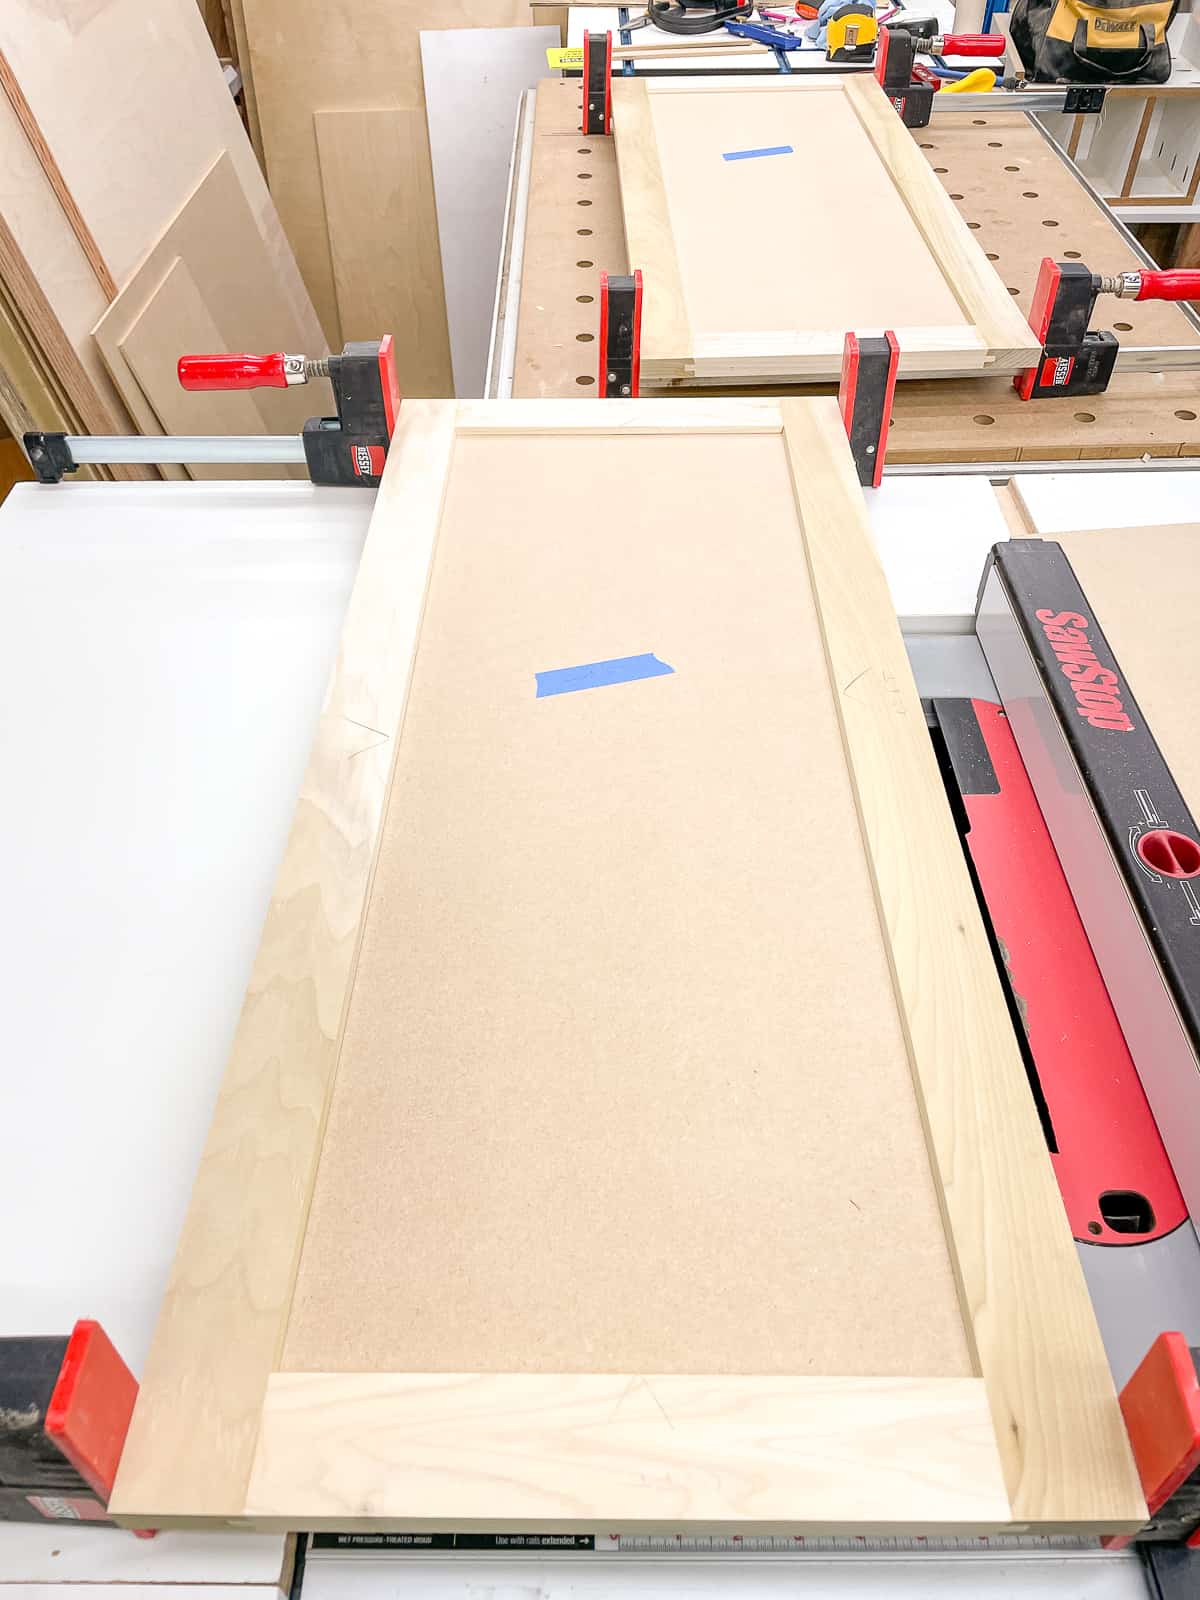
Before you start assembling your Shaker cabinet doors, do a test fit with all the pieces first. Compare the actual measurements to your calculated measurements to make sure they match up. It's easier to fix mistakes now, rather than after everything is glued up!
Apply wood glue
Shaker cabinet doors aren't held together with any screws or nails. The only thing you need to put them together is wood glue!
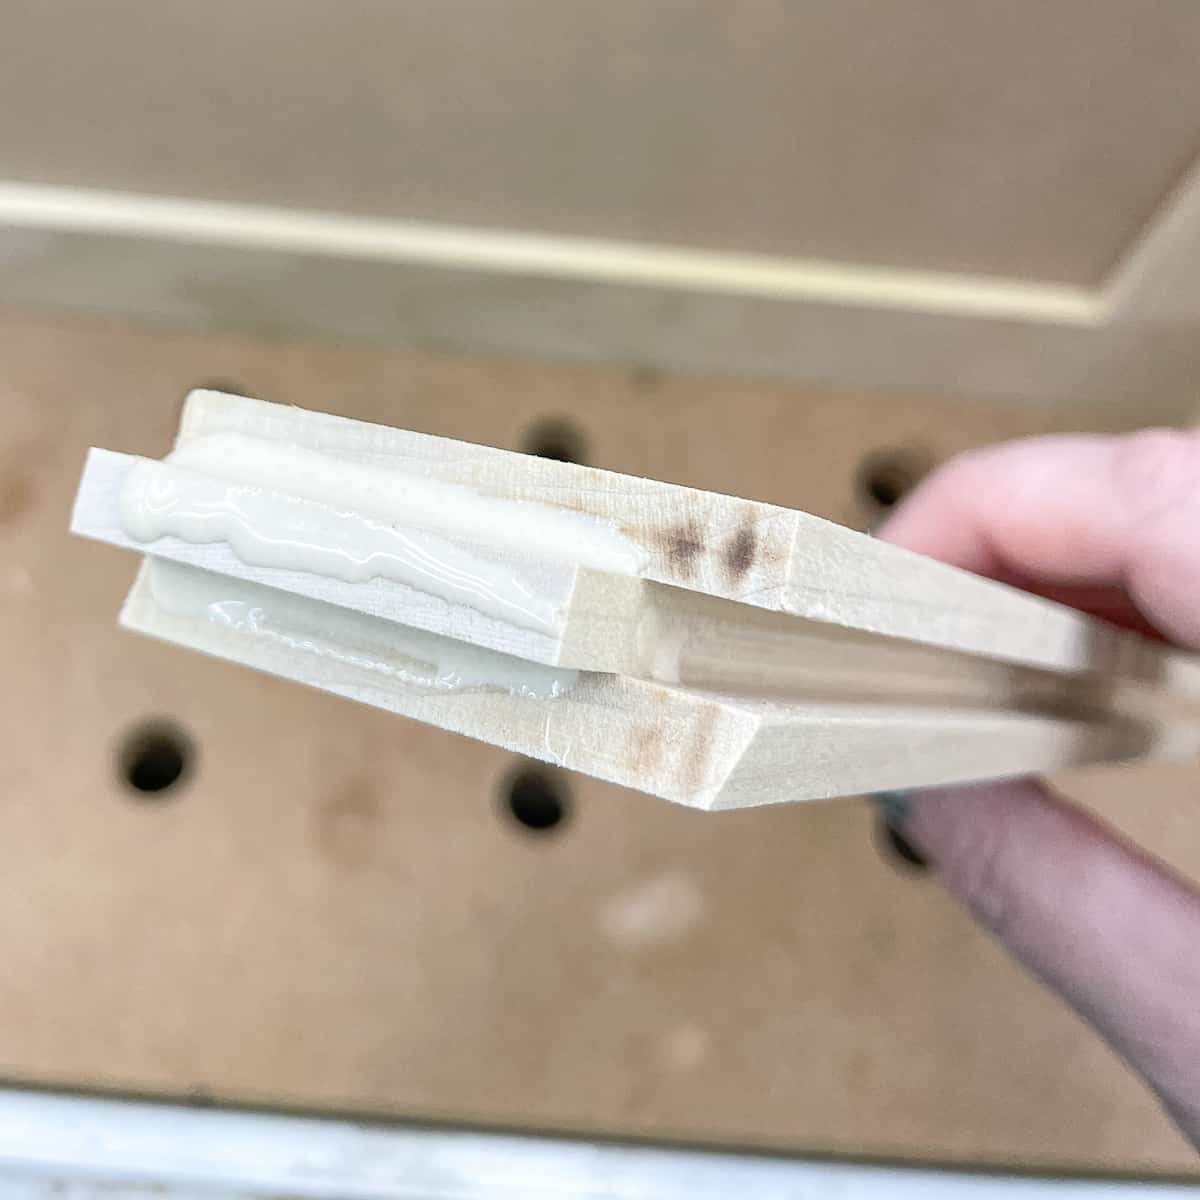
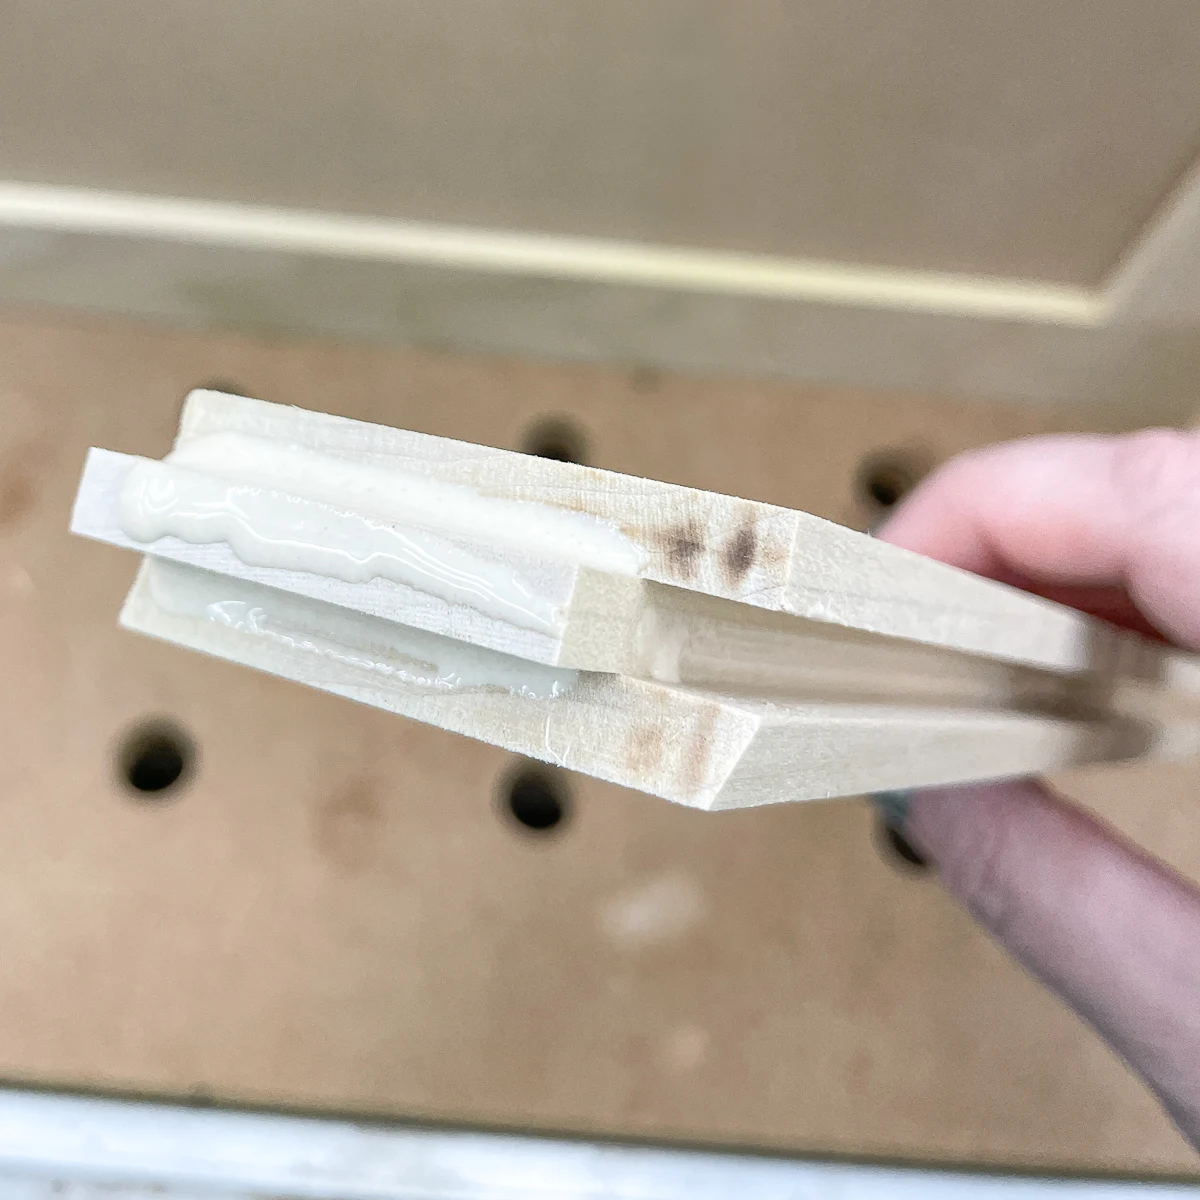
If you're using plywood or MDF for the center panel, apply a bead of glue to the inside of the groove on one of the longer stile pieces. If you're using a solid wood panel, skip the glue to allow the wood to float in the groove and expand and contract with the seasons.
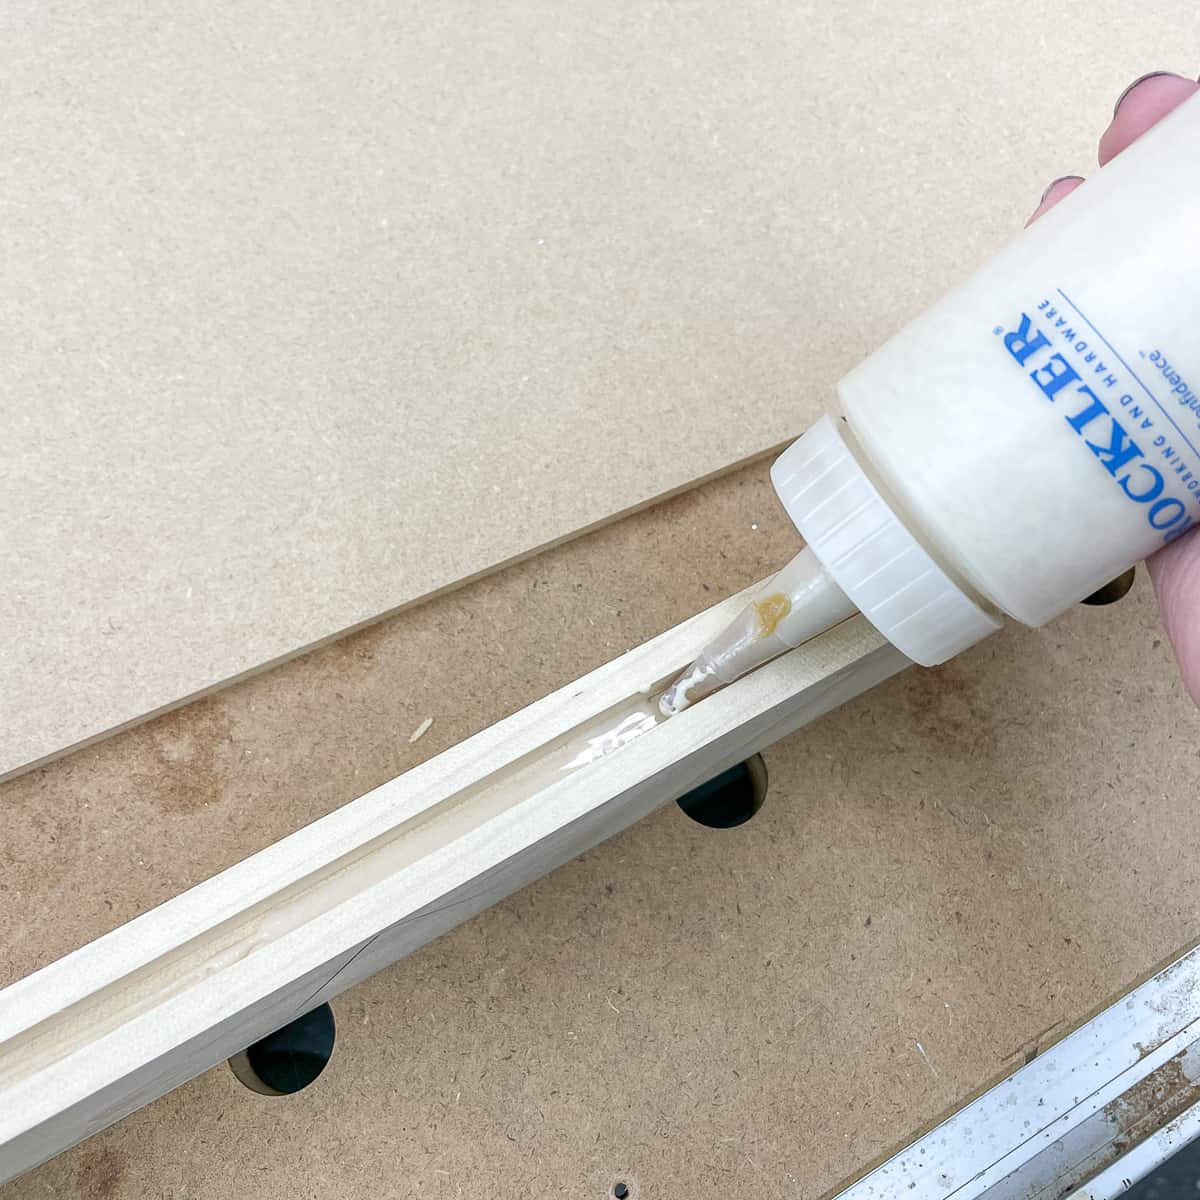
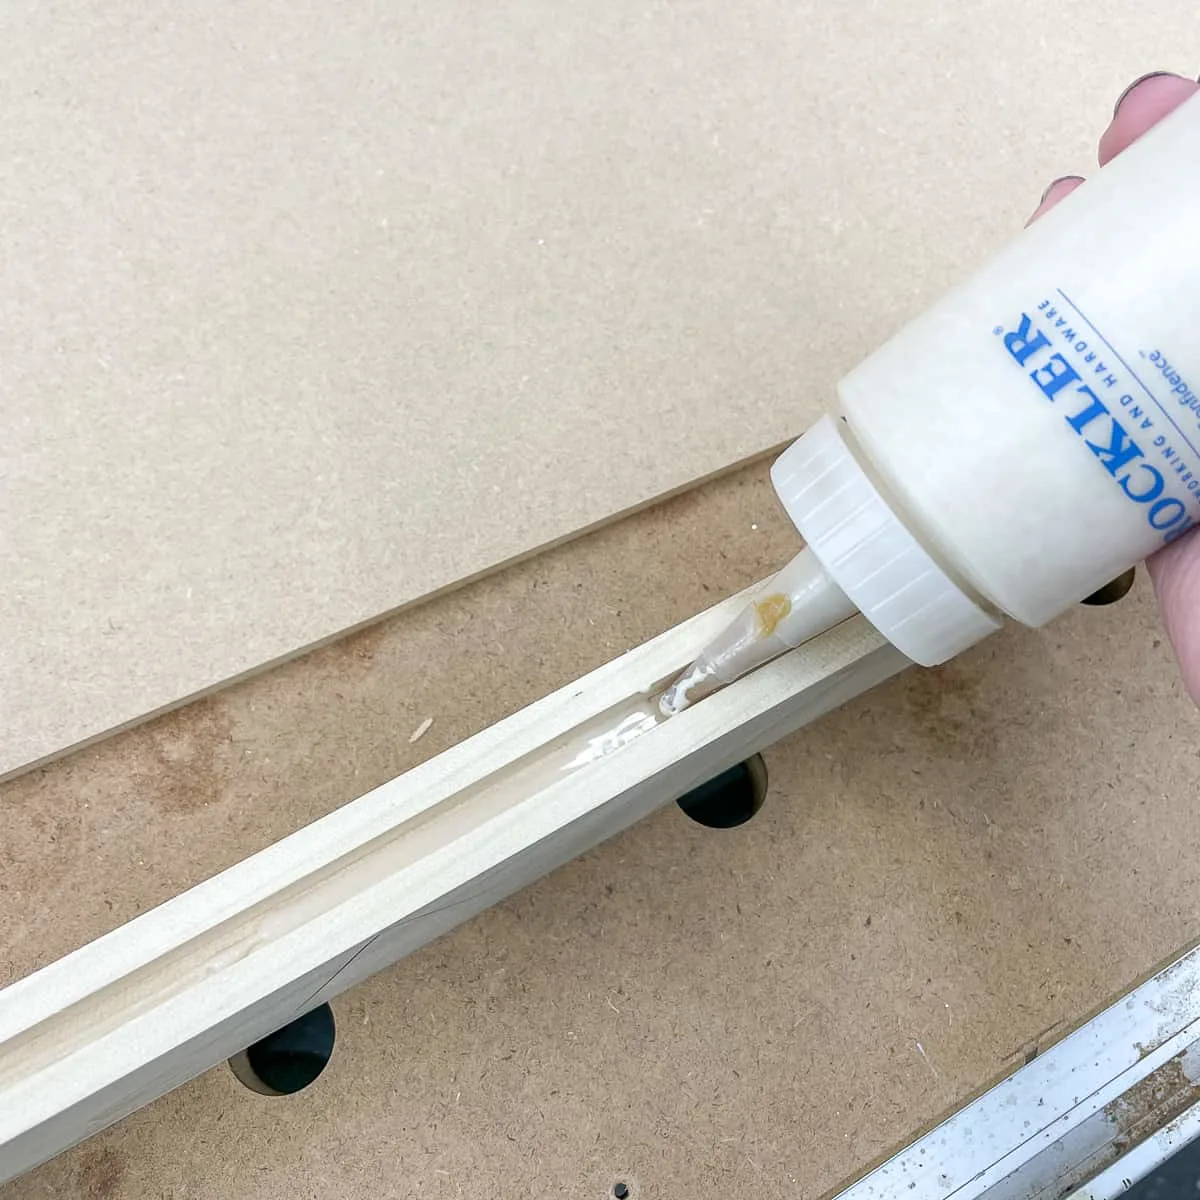
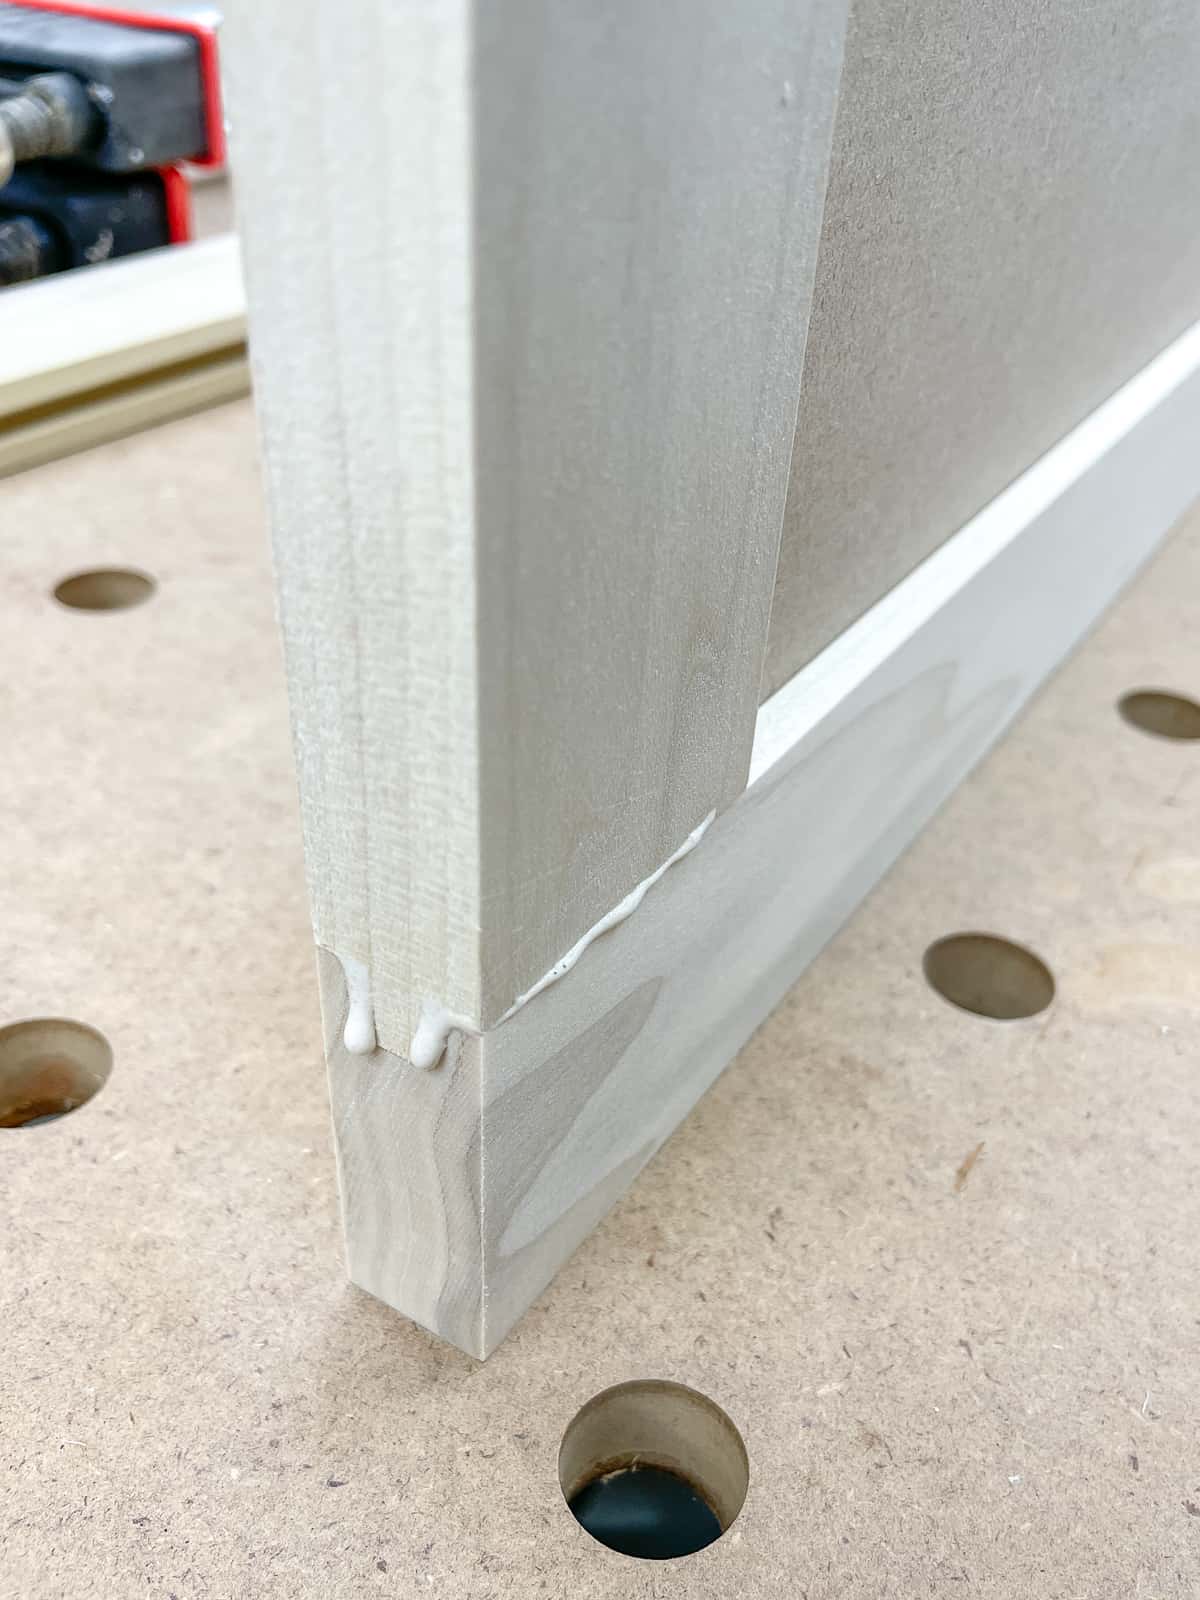
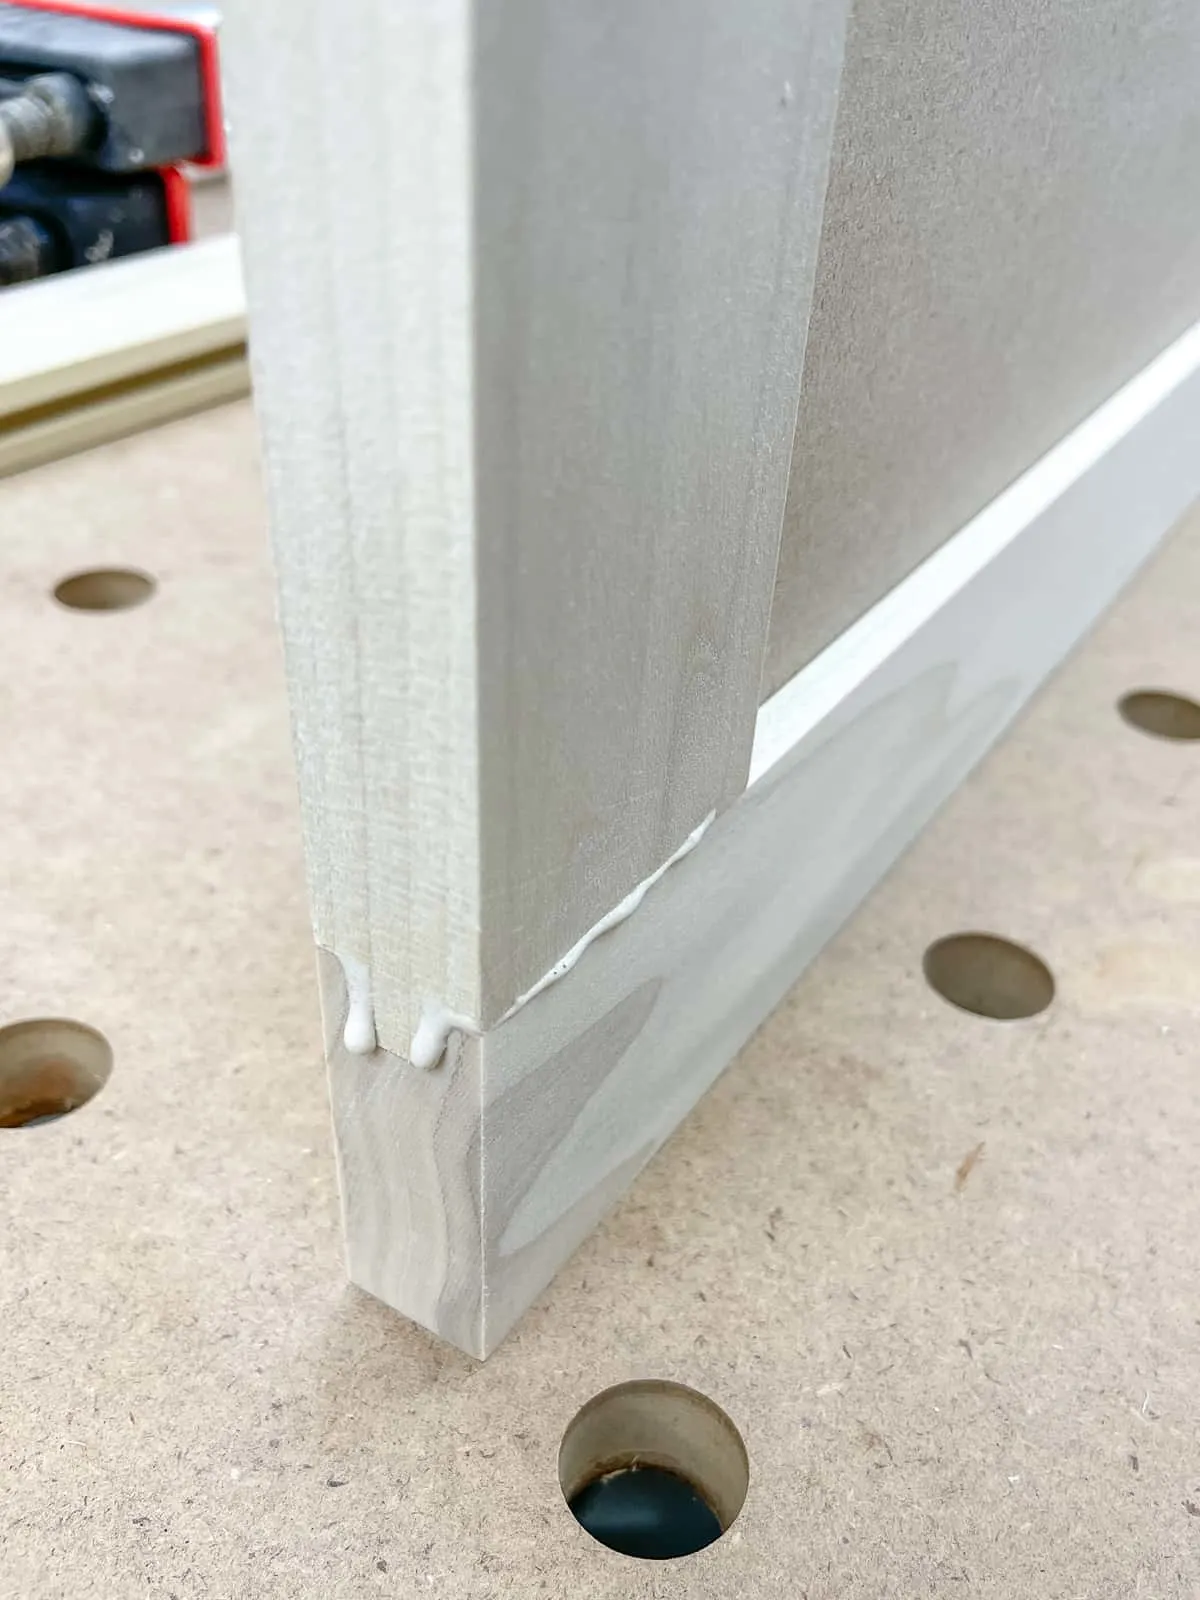
Then apply wood glue to the end and groove of one of the rail pieces. I like to use a silicone glue brush to spread it evenly over the entire surface without getting my fingers all sticky. Don't leave it like this, or you won't get good adhesion!
Assemble the cabinet door
Slide the center panel into the groove in the glued up stile first. Then insert the glued end of the rail into the groove. Make sure that all the decorative profiles are facing the same direction as you assemble the pieces!
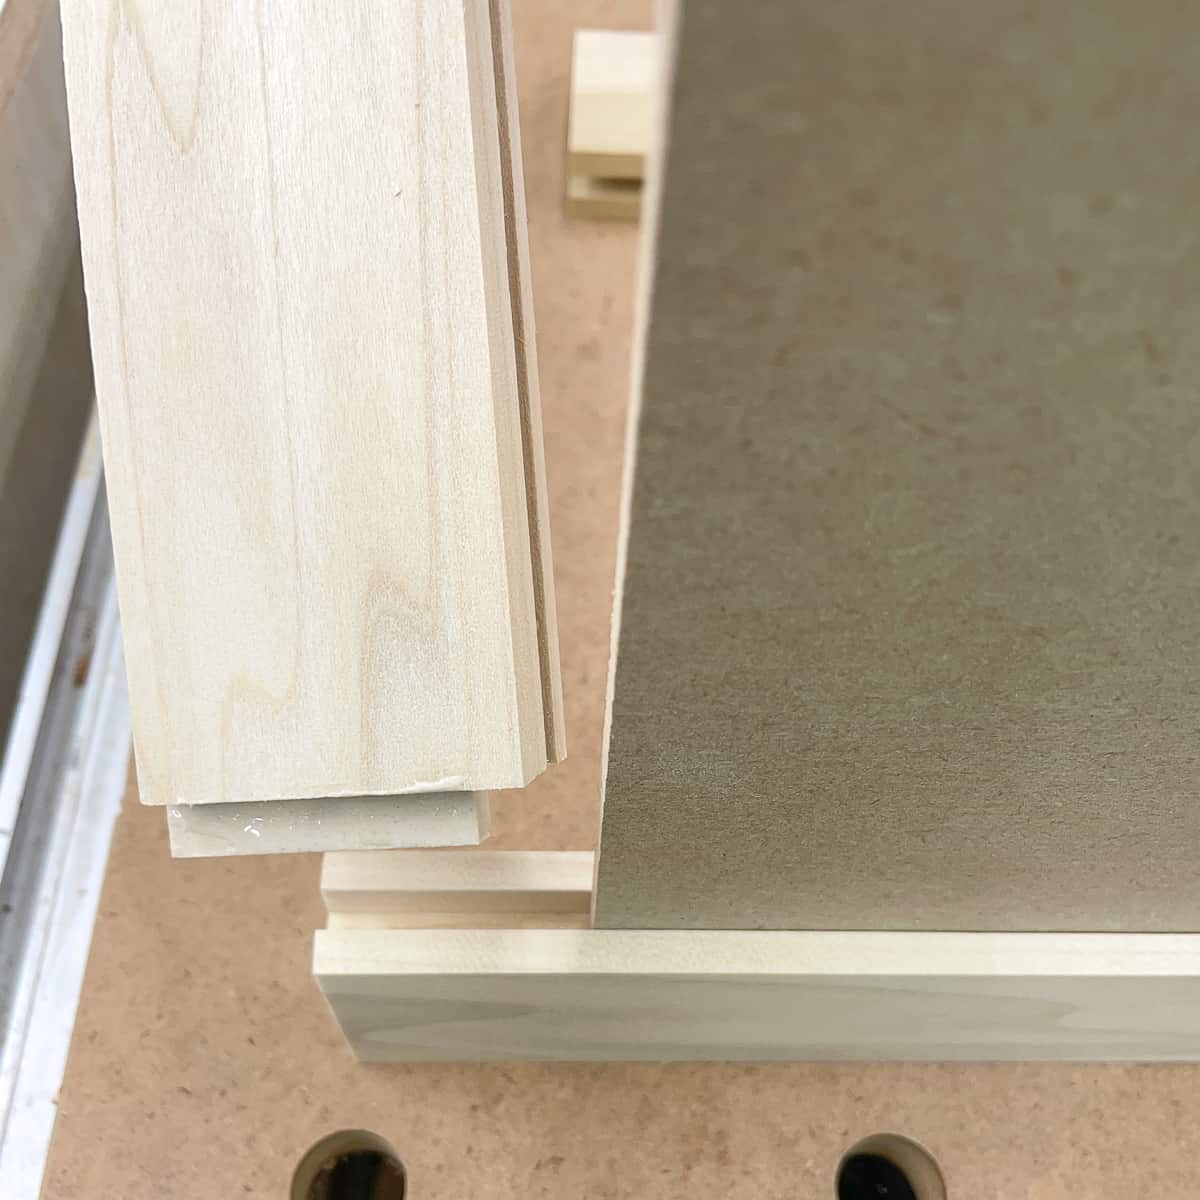
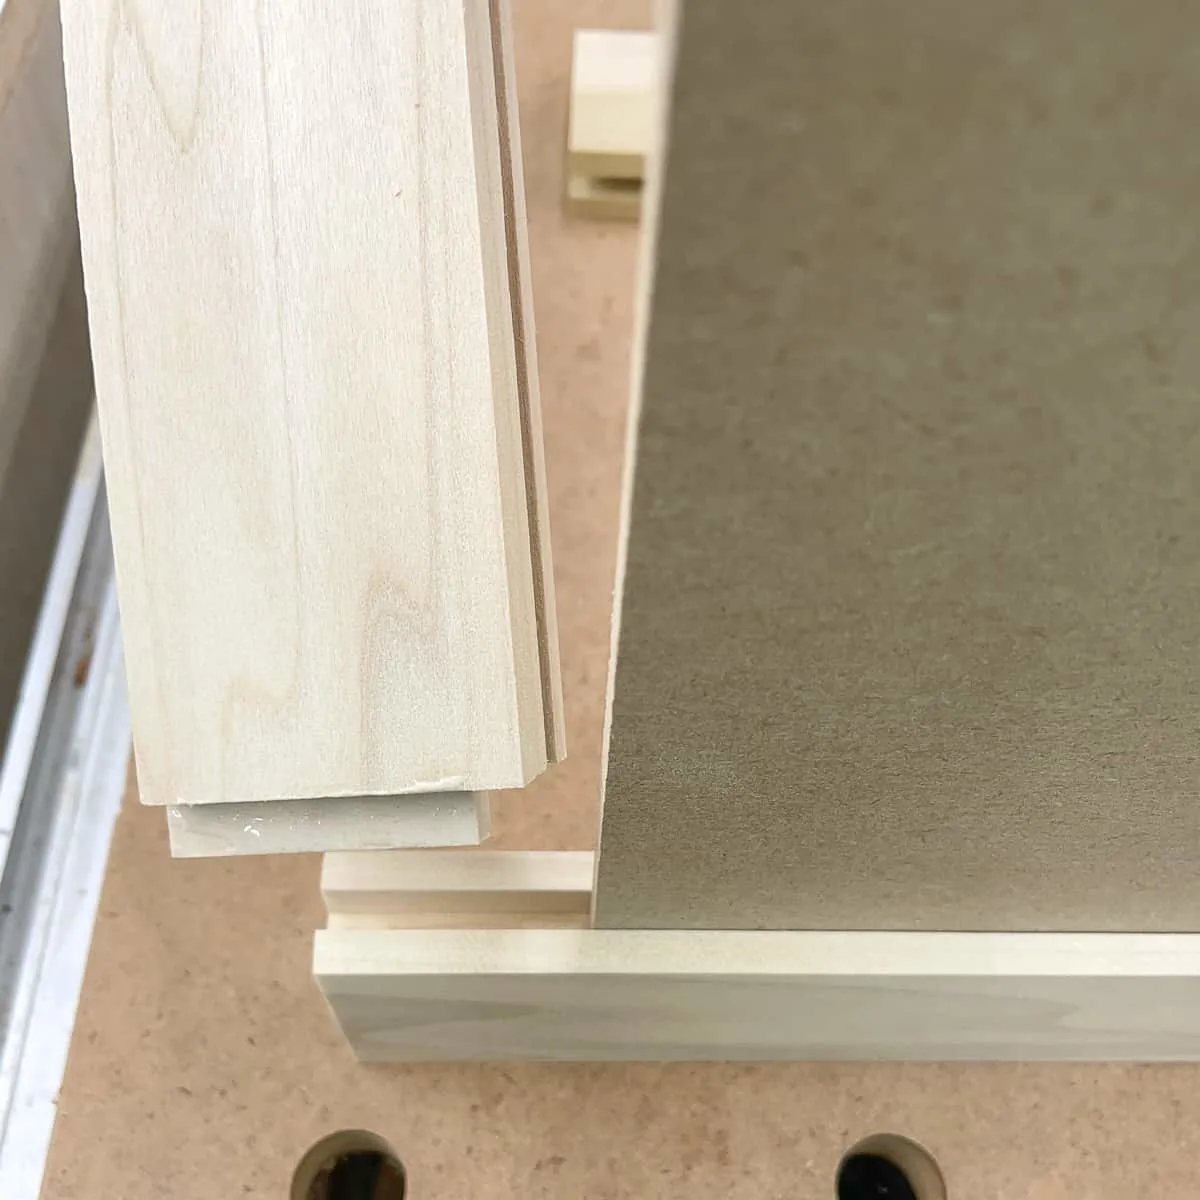
Adjust the fit until the edges are flush, then repeat the process for the other rail and stile. You'll need to work fast, because the wood glue sets up quick! You'll know you used enough glue when it squeezes out in a thin line like this.
Use a damp rag to wipe away the wood glue before it dries. Otherwise, you'll be spending a lot more time sanding later!
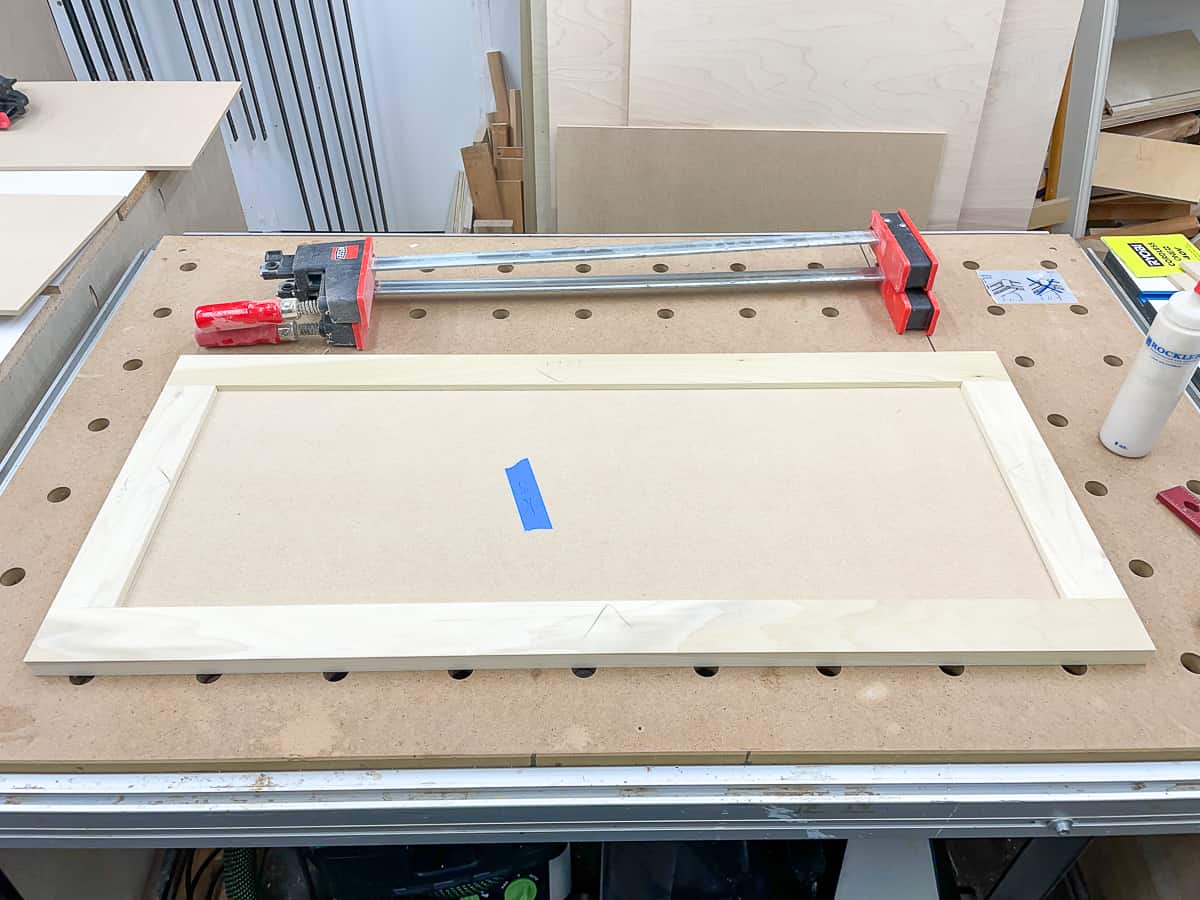
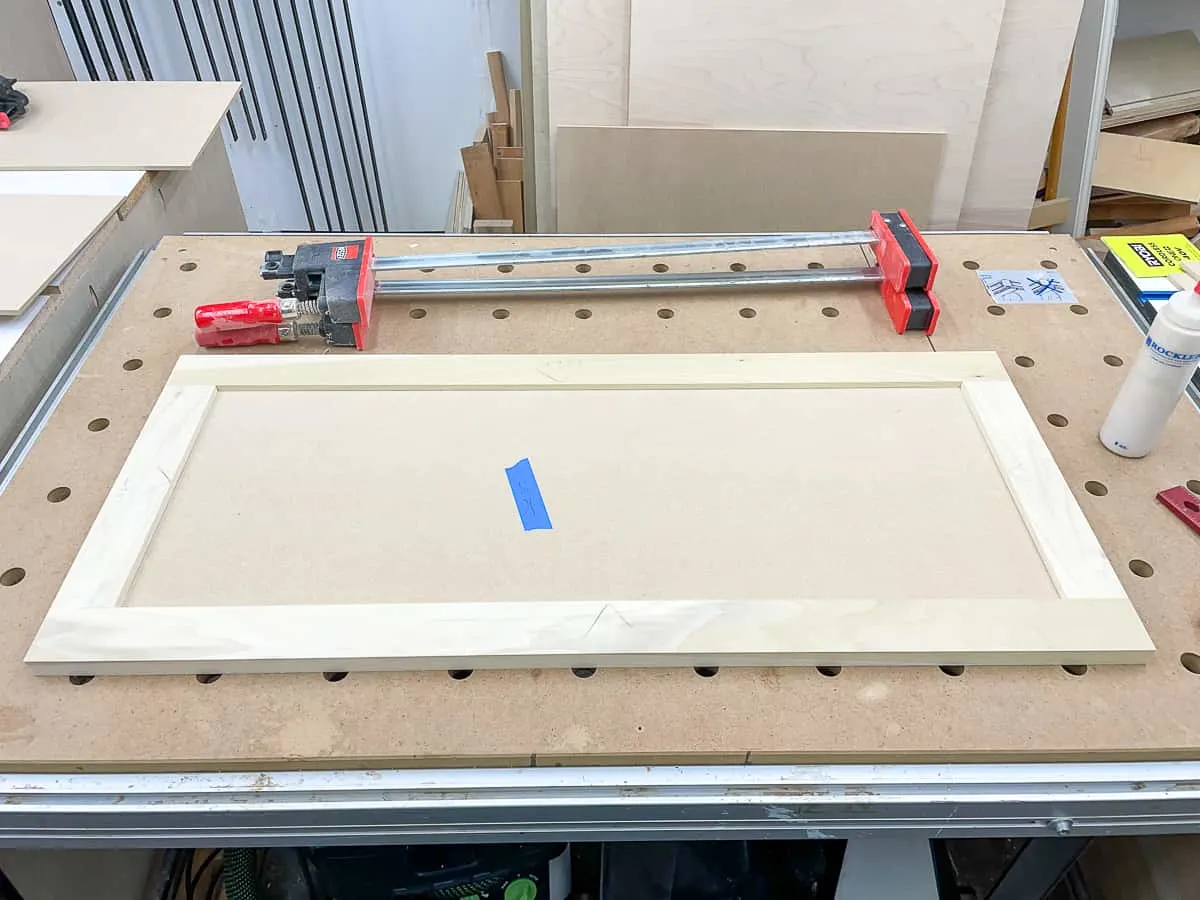
Clamp the cabinet door together
Once you have all the parts glued up, use clamps to apply even pressure while the glue dries. The clamps should span across the rail and two stiles, not at the top and bottom of the stiles. These Bessey REVO clamps hold the parts flat against the bar as well as parallel to each other.
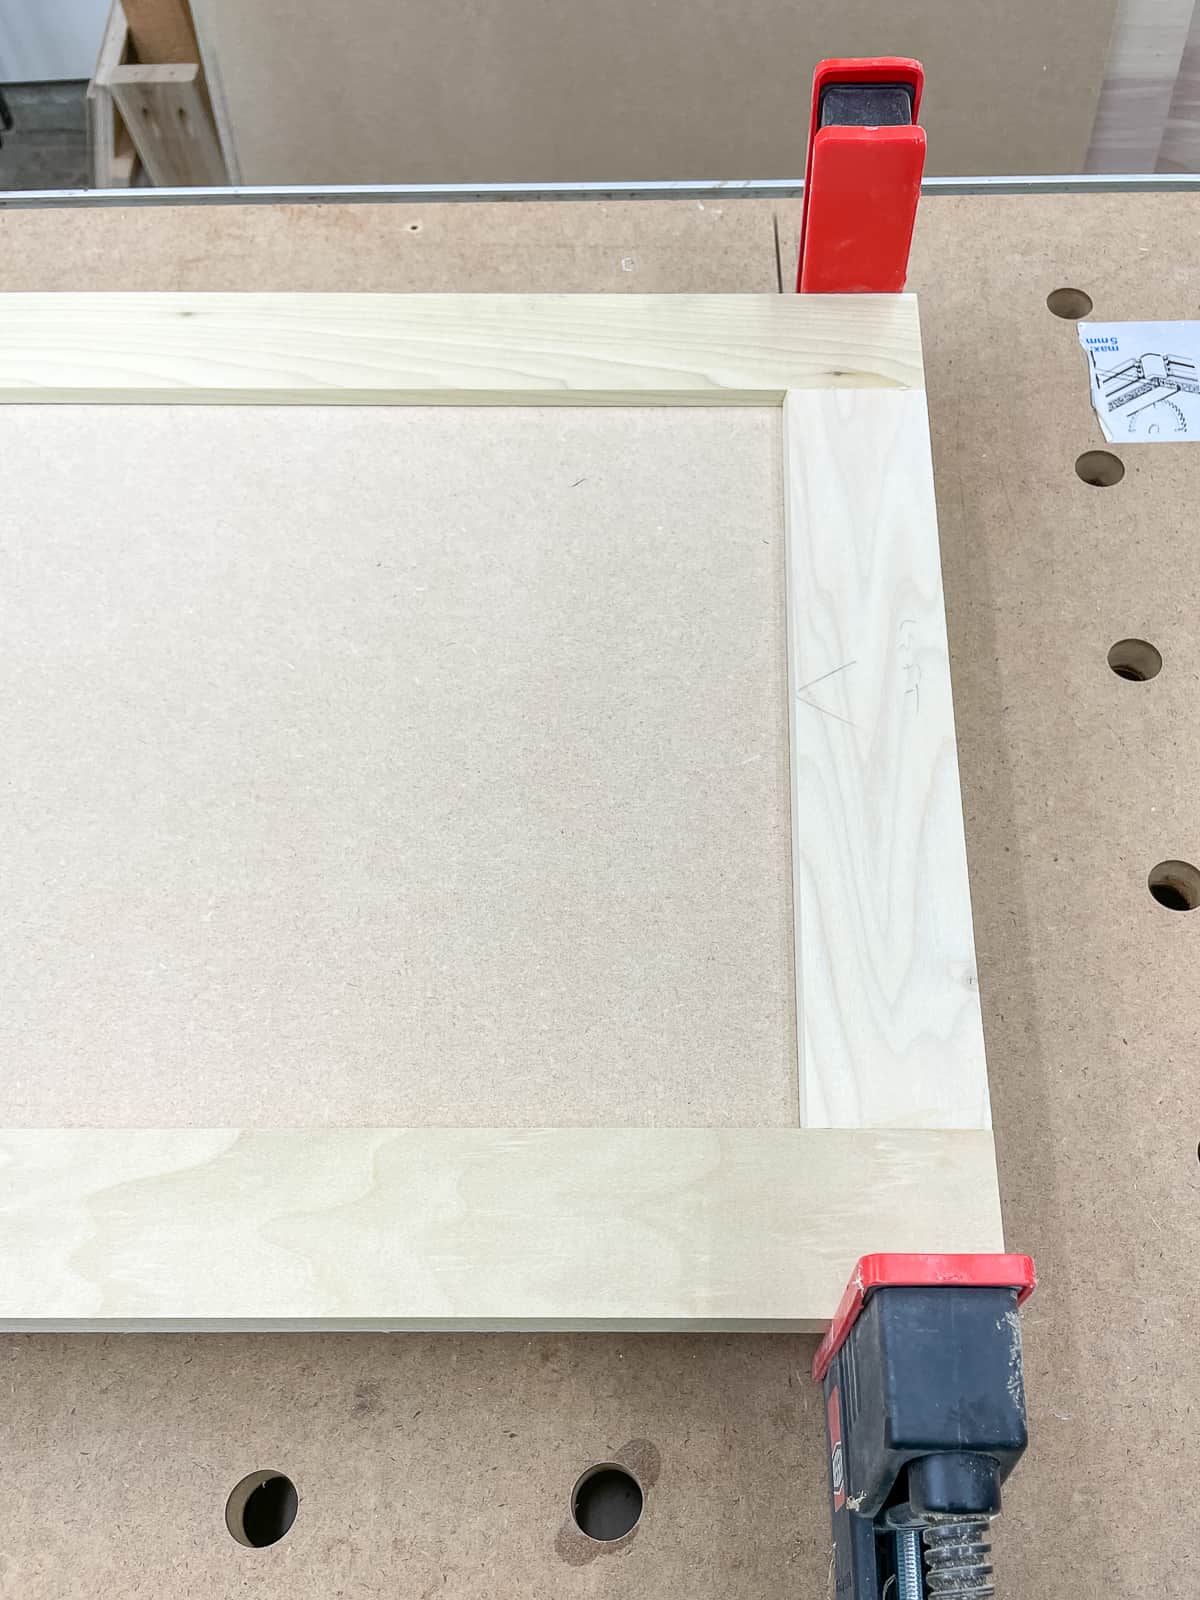
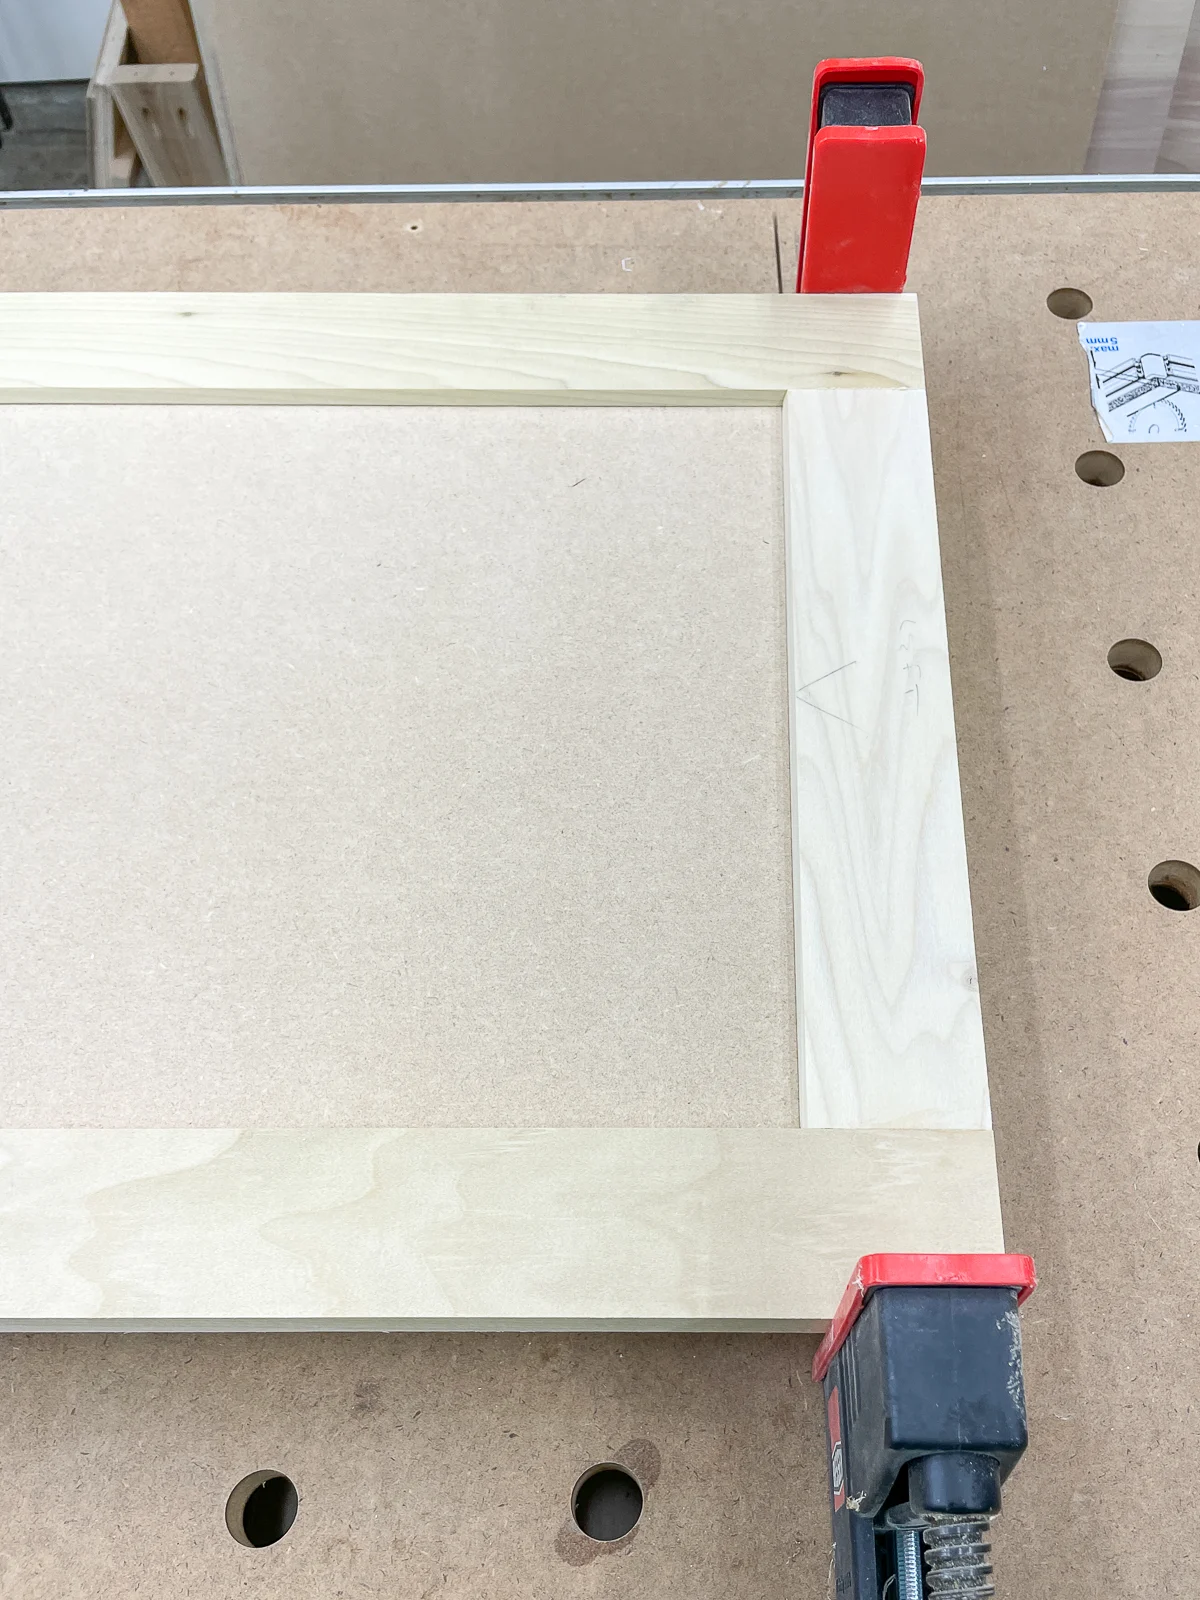
Once everything is clamped up, measure across the diagonal in both directions to check for square. If the dimensions are the same, it's square. If they don't match, remove the door from the clamps and apply pressure across the longer diagonal to shift things into square.
I usually leave the doors in clamps overnight, but most wood glue will be dry in a few hours. I prefer to assemble a bunch of doors at once, so they end up taking over every flat surface in the workshop!

Sand the cabinet doors
Once the glue is dry, you can remove the clamps. Then comes the not-so-fun part...sanding. Start with a quick pass with 80 grit sandpaper to clean up any glue squeeze out at the joints.
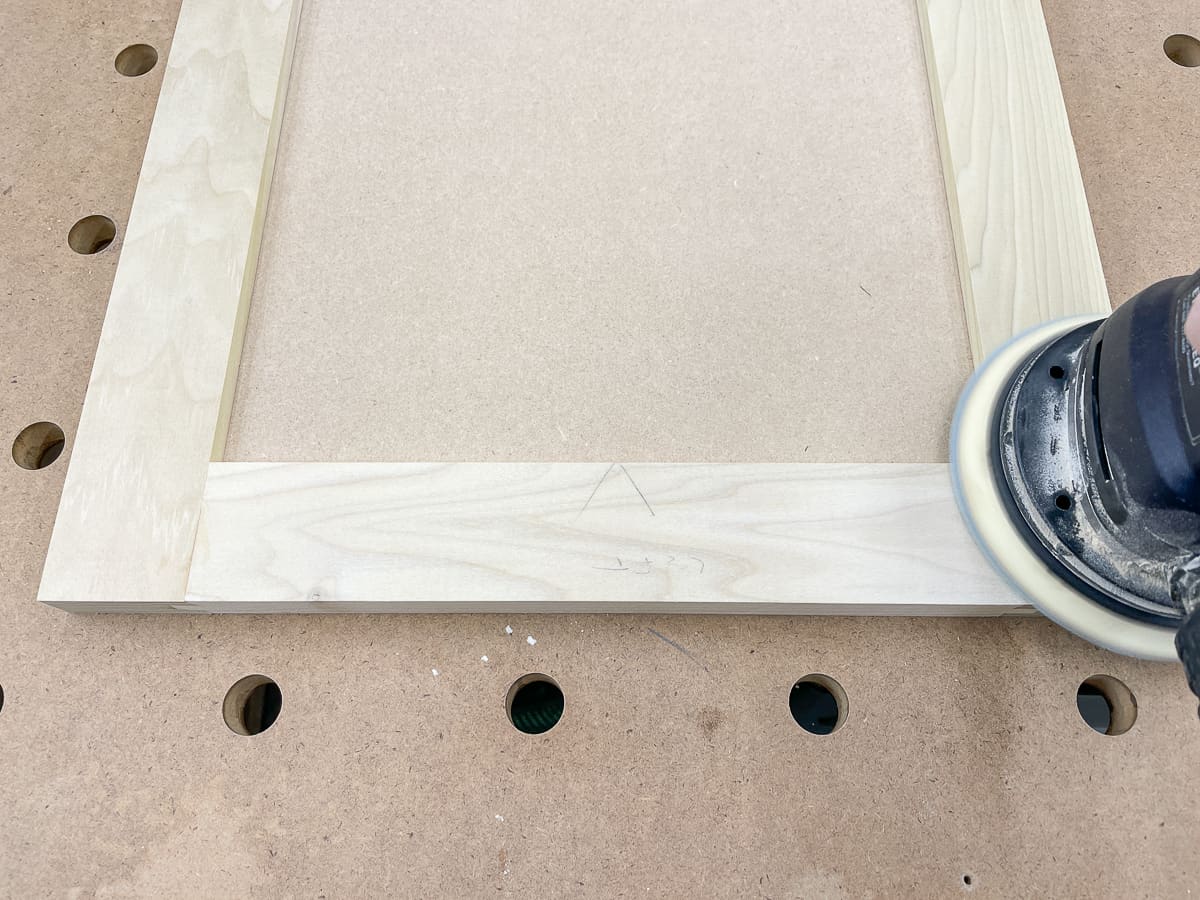
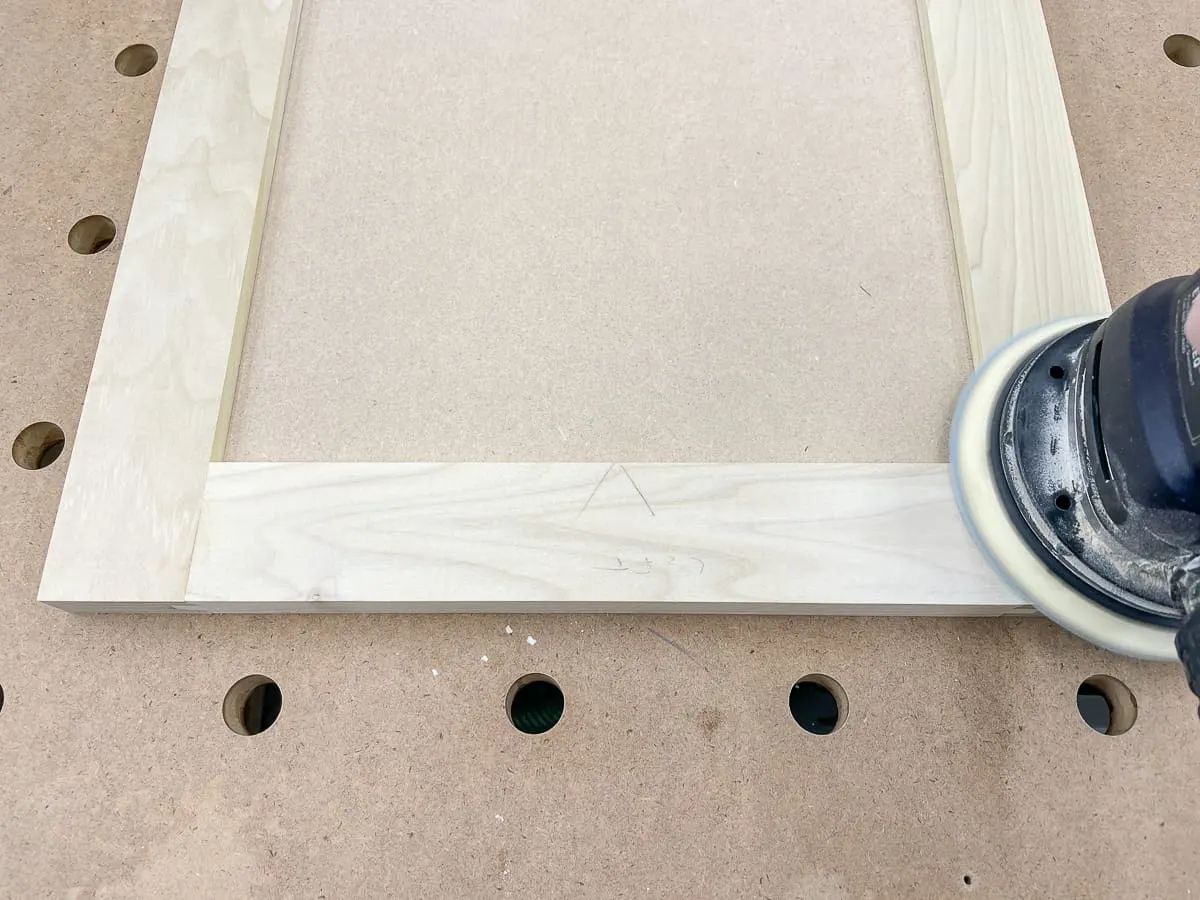
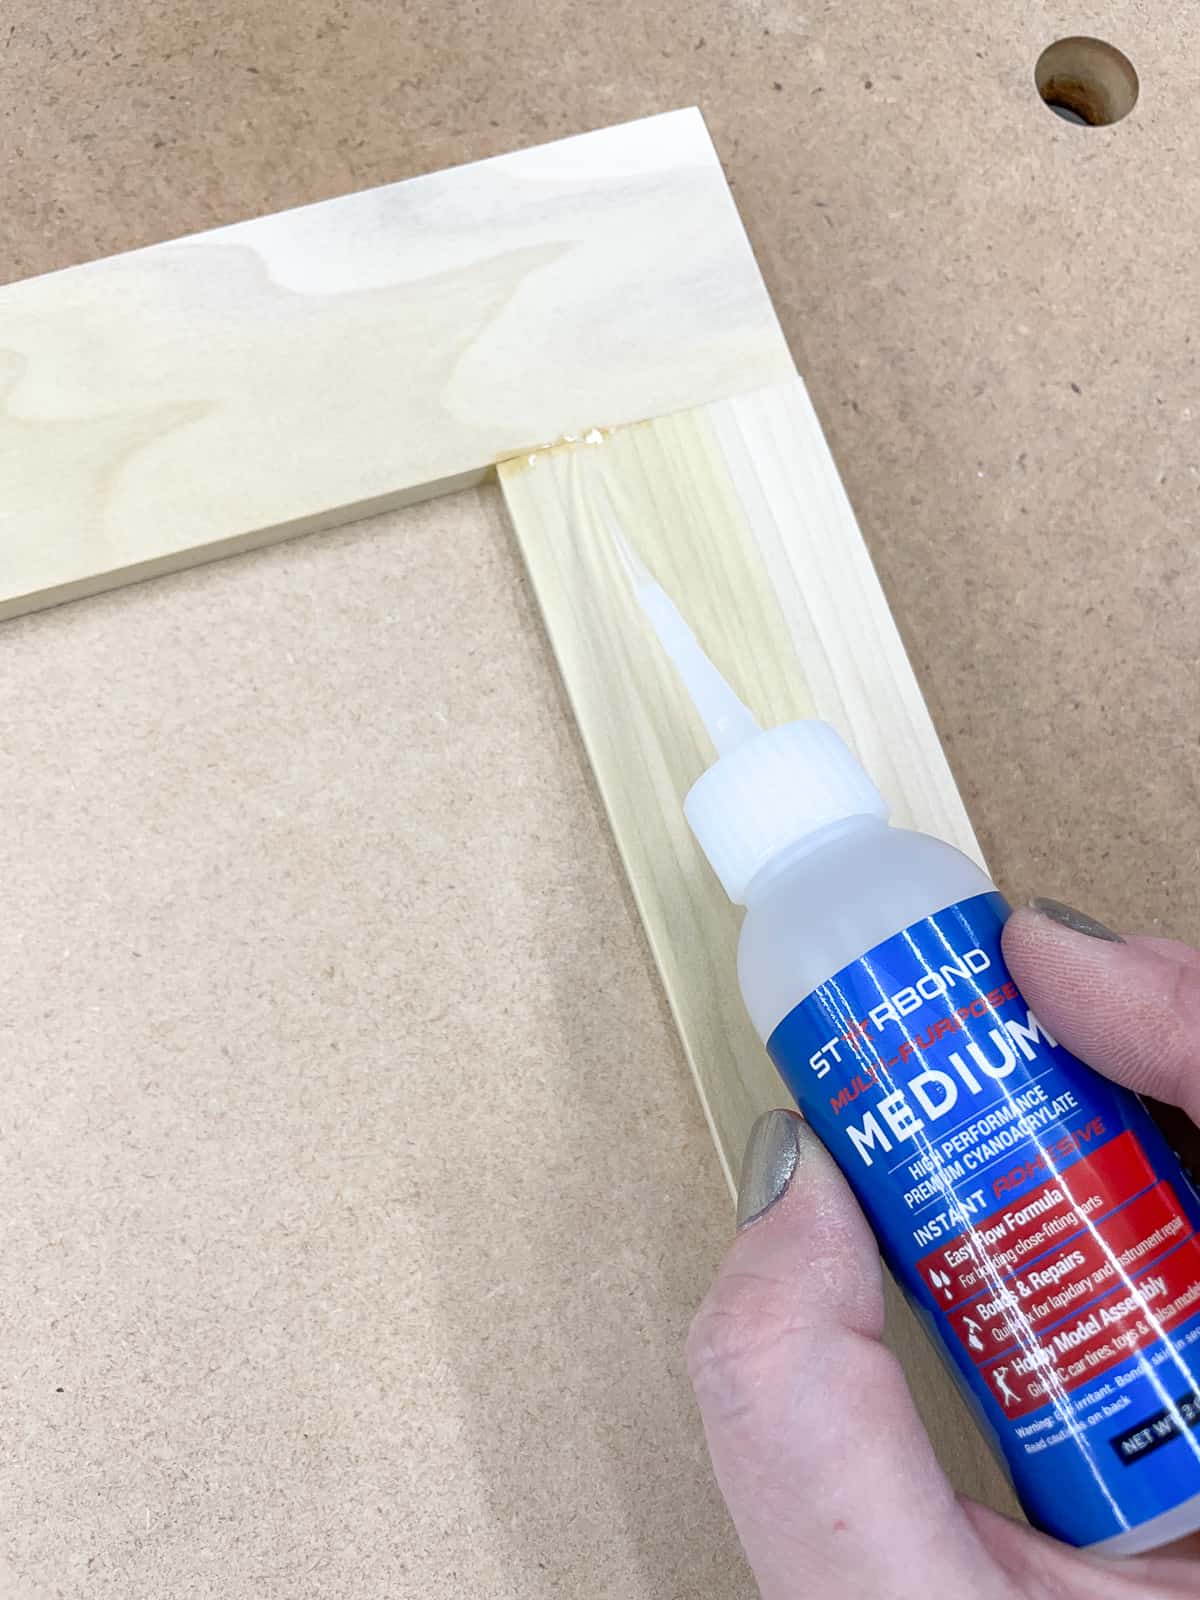
After the first round of sanding, take a good look at all the joints and the wood of the frame. Tiny gaps or knots will show up in the finished door, even under paint. You could use wood filler or wood putty to fill in those imperfections, but it's messy and can take a while to dry.
Instead, I prefer to use CA glue and activator spray to instantly seal up those gaps. Just apply a bead along each joint, then spray the activator to cure it within seconds.

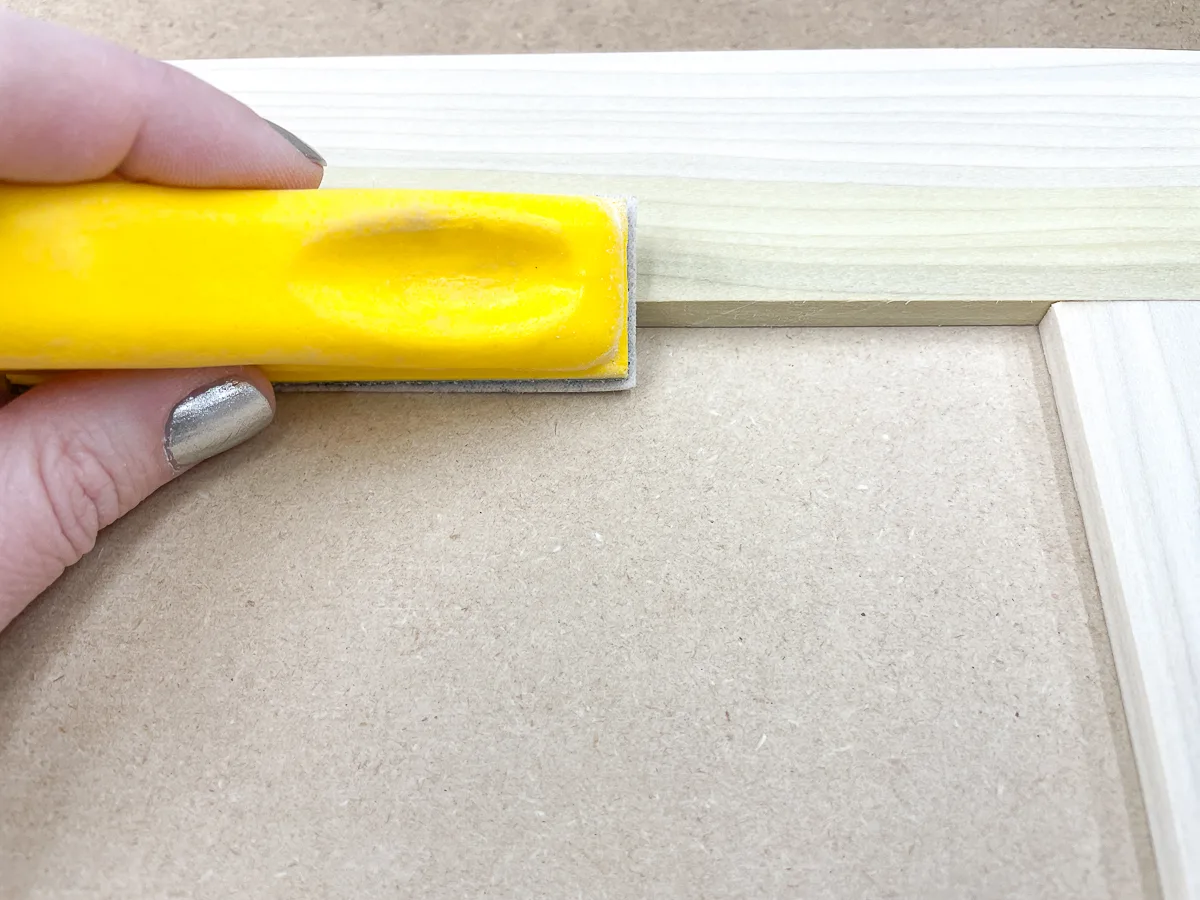
Once all the imperfections have been filled, continue through the sandpaper grits up to 220. You should also break any sharp corners with a few passes of a hand sanding block. This will make it feel more comfortable to the touch, and prevent dents.

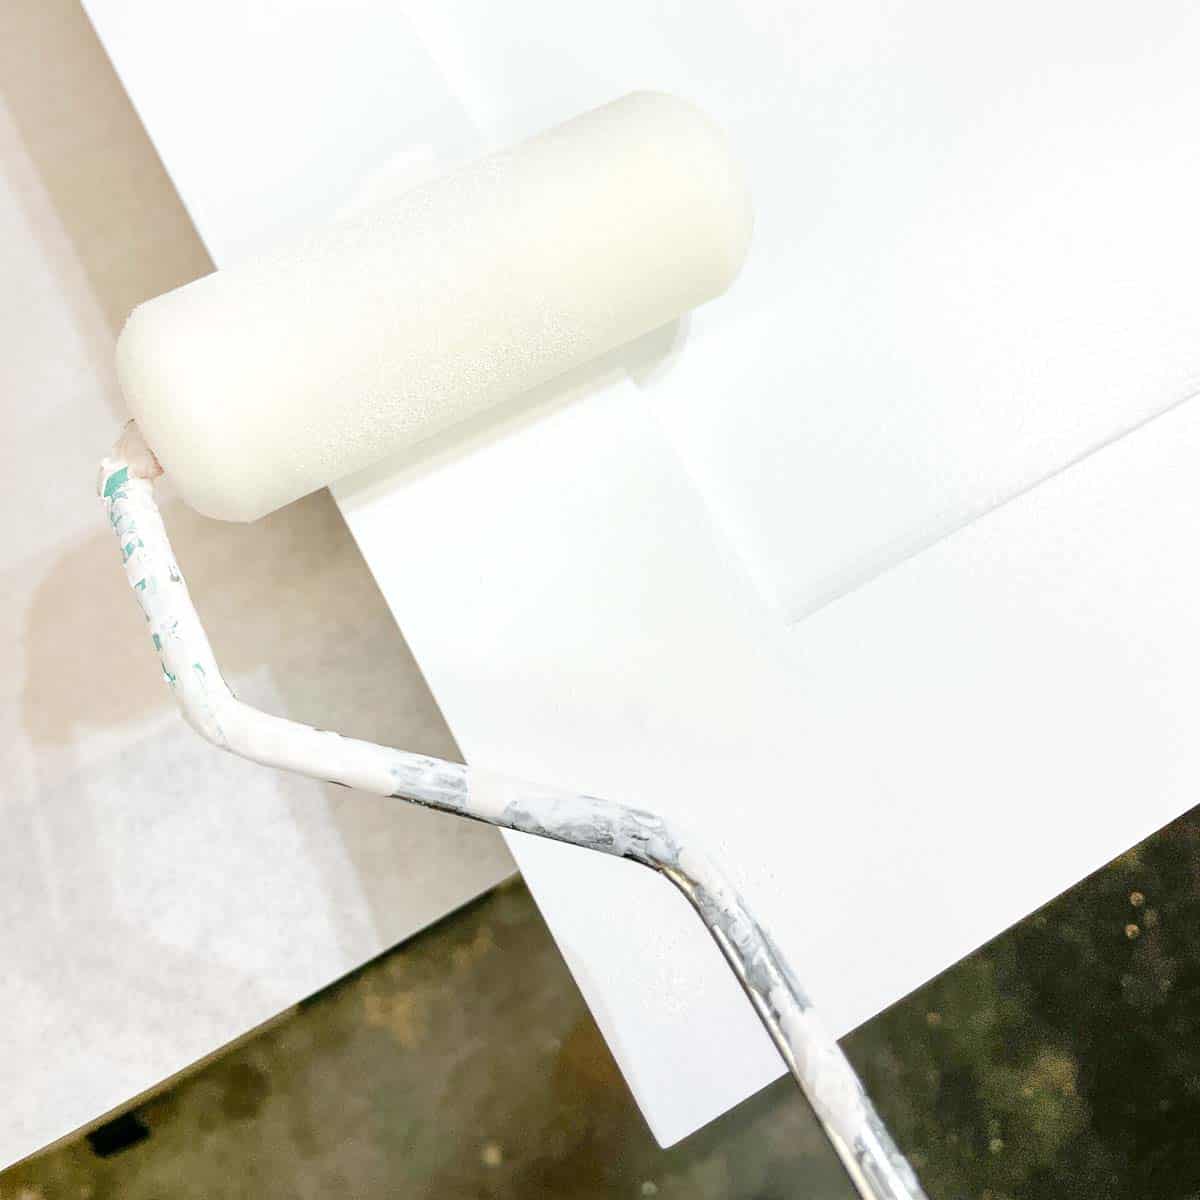
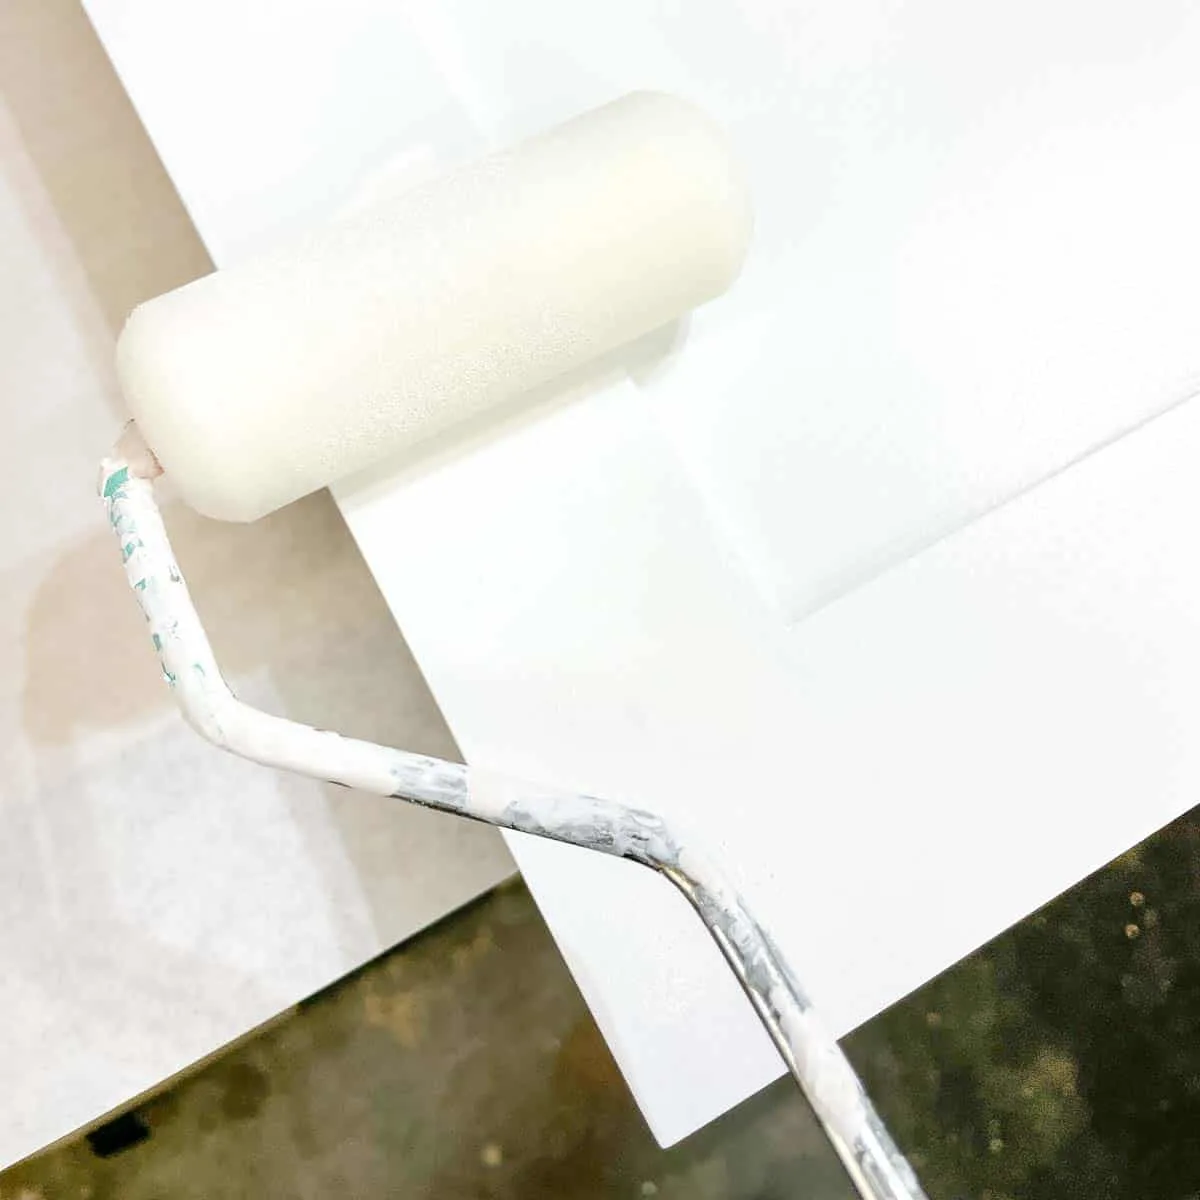
Apply paint or stain
After all that sanding, there's bound to be a lot of dust stuck to the surface of the cabinet doors. Before you paint or stain, remove all the dust with a tack cloth or microfiber cloth.


If you're painting, consider applying primer first. This will cut down on the number of coats of paint you'll need for even coverage. The primer you choose will depend on the paint you plan to use. Check out this article for all the details on oil based vs water based primers to help you decide!

If you're staining your cabinet doors, think about using a wood conditioner first. This will prevent blotchiness and give you a more even color throughout.
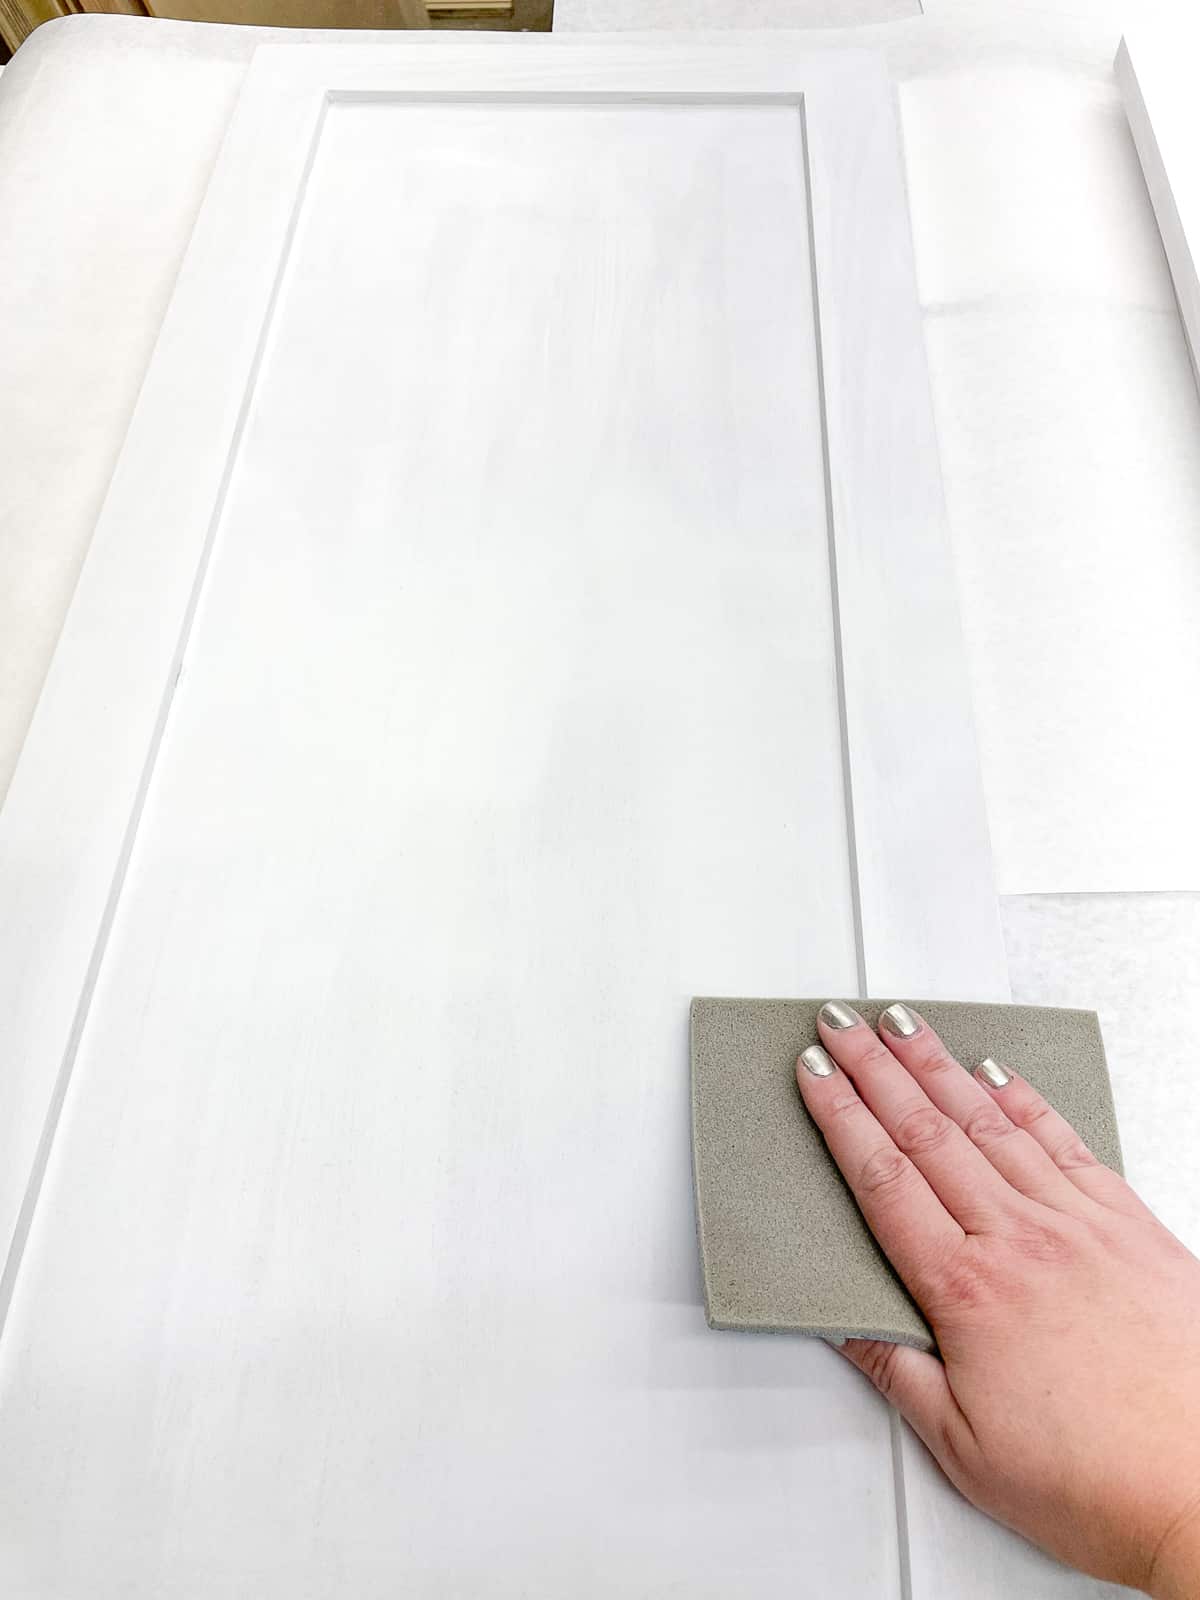
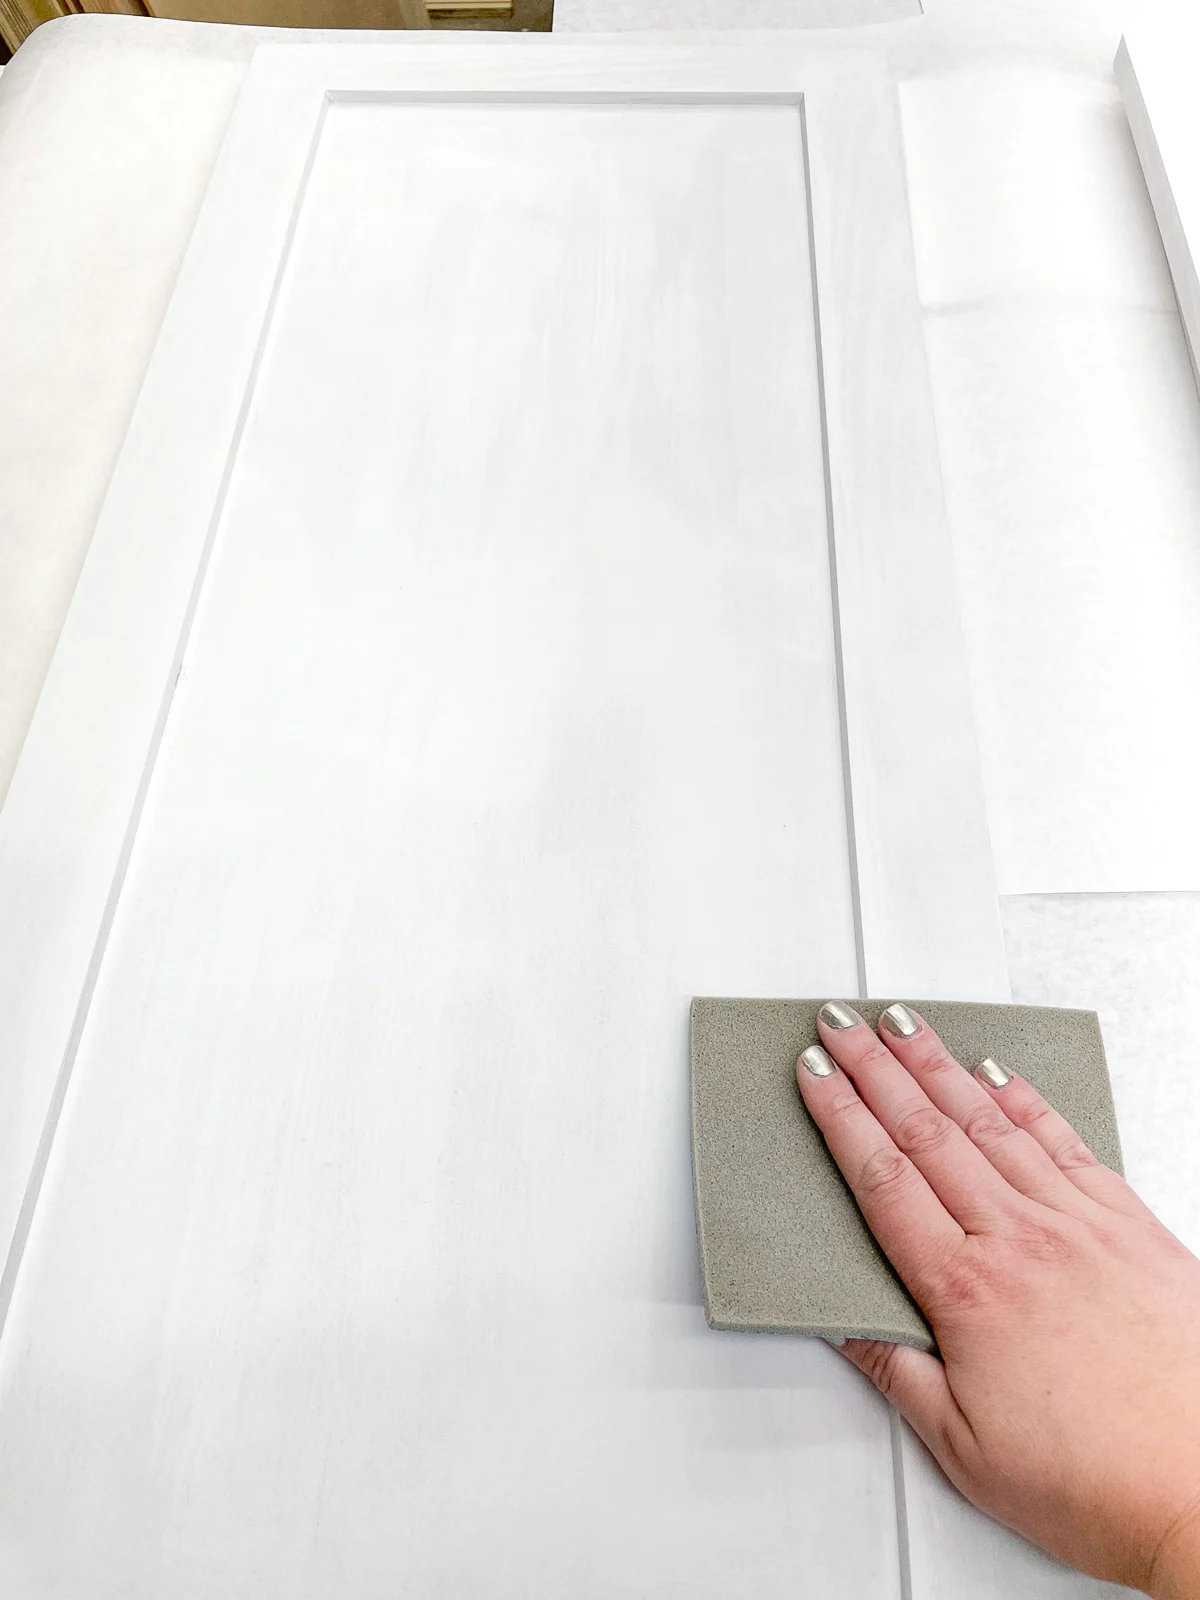
After the primer has dried, lightly sand the surface with 220 or 320 grit sandpaper. This will remove the rough texture left by the primer, and also knock down any brush strokes or dust particles that may have settled on the surface. Remember to remove the dust with a tack cloth!
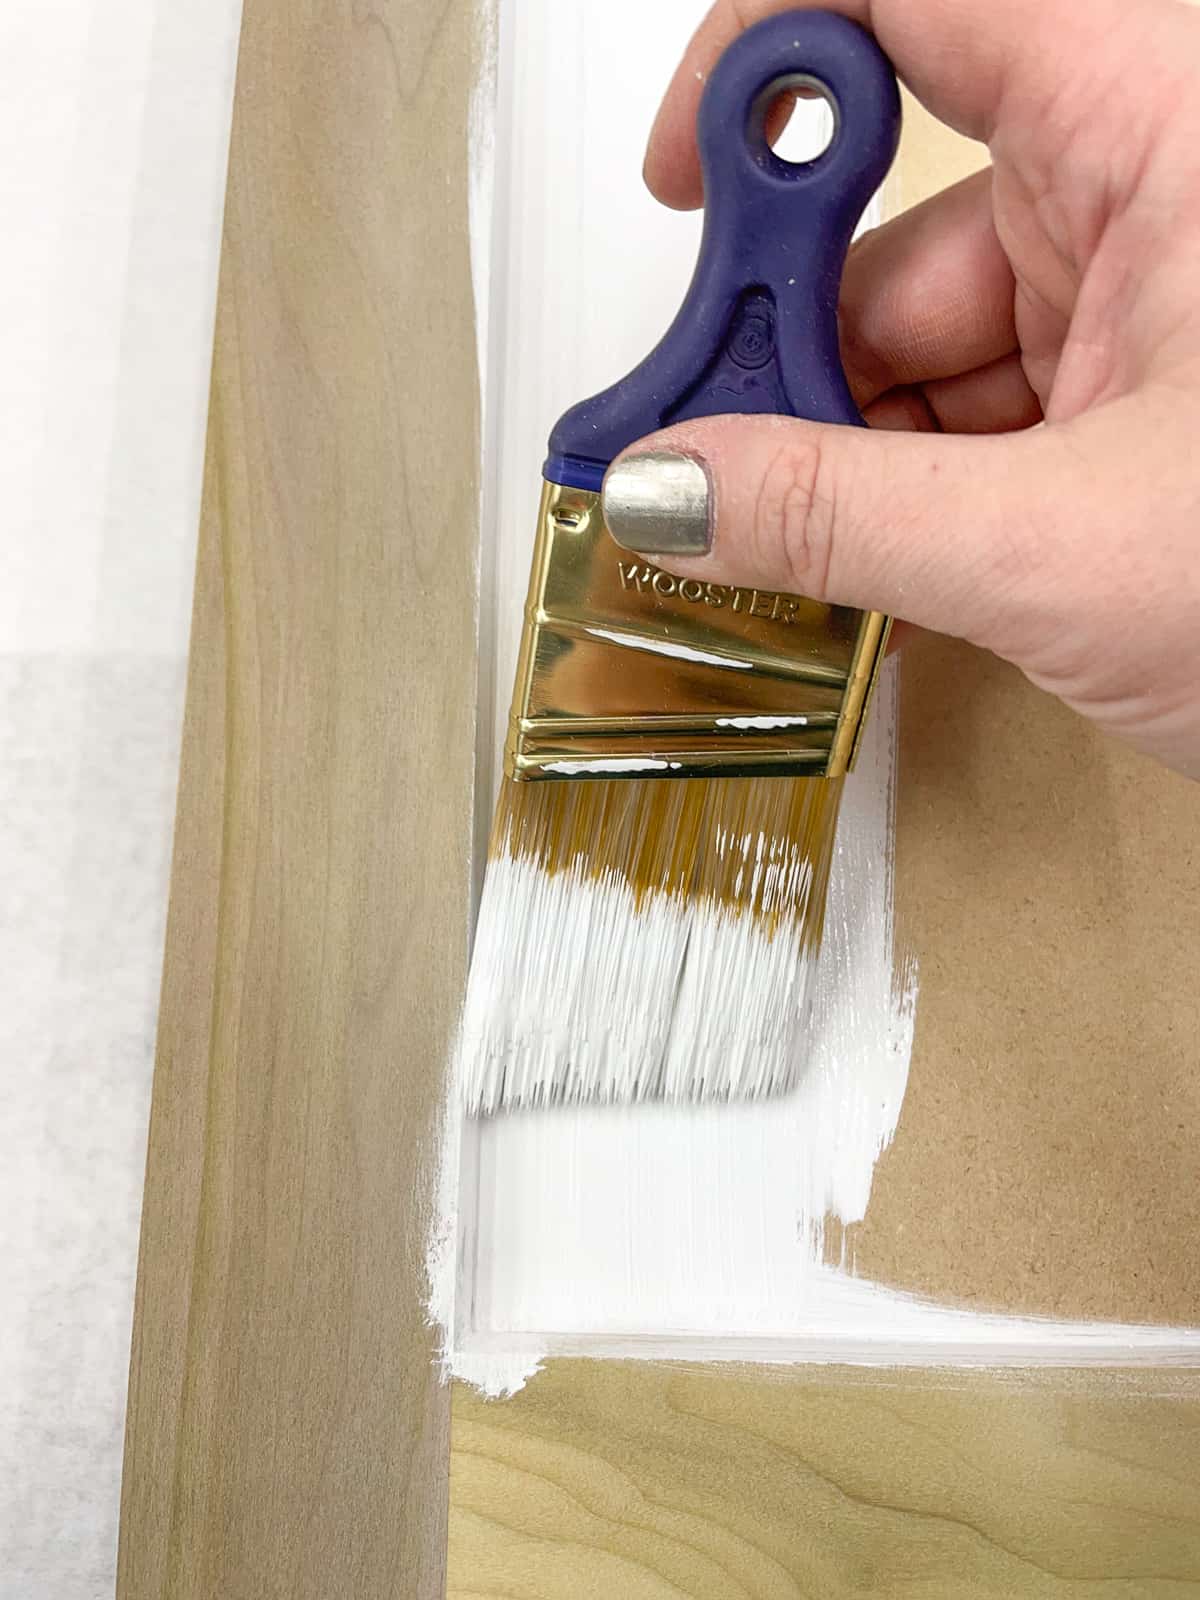
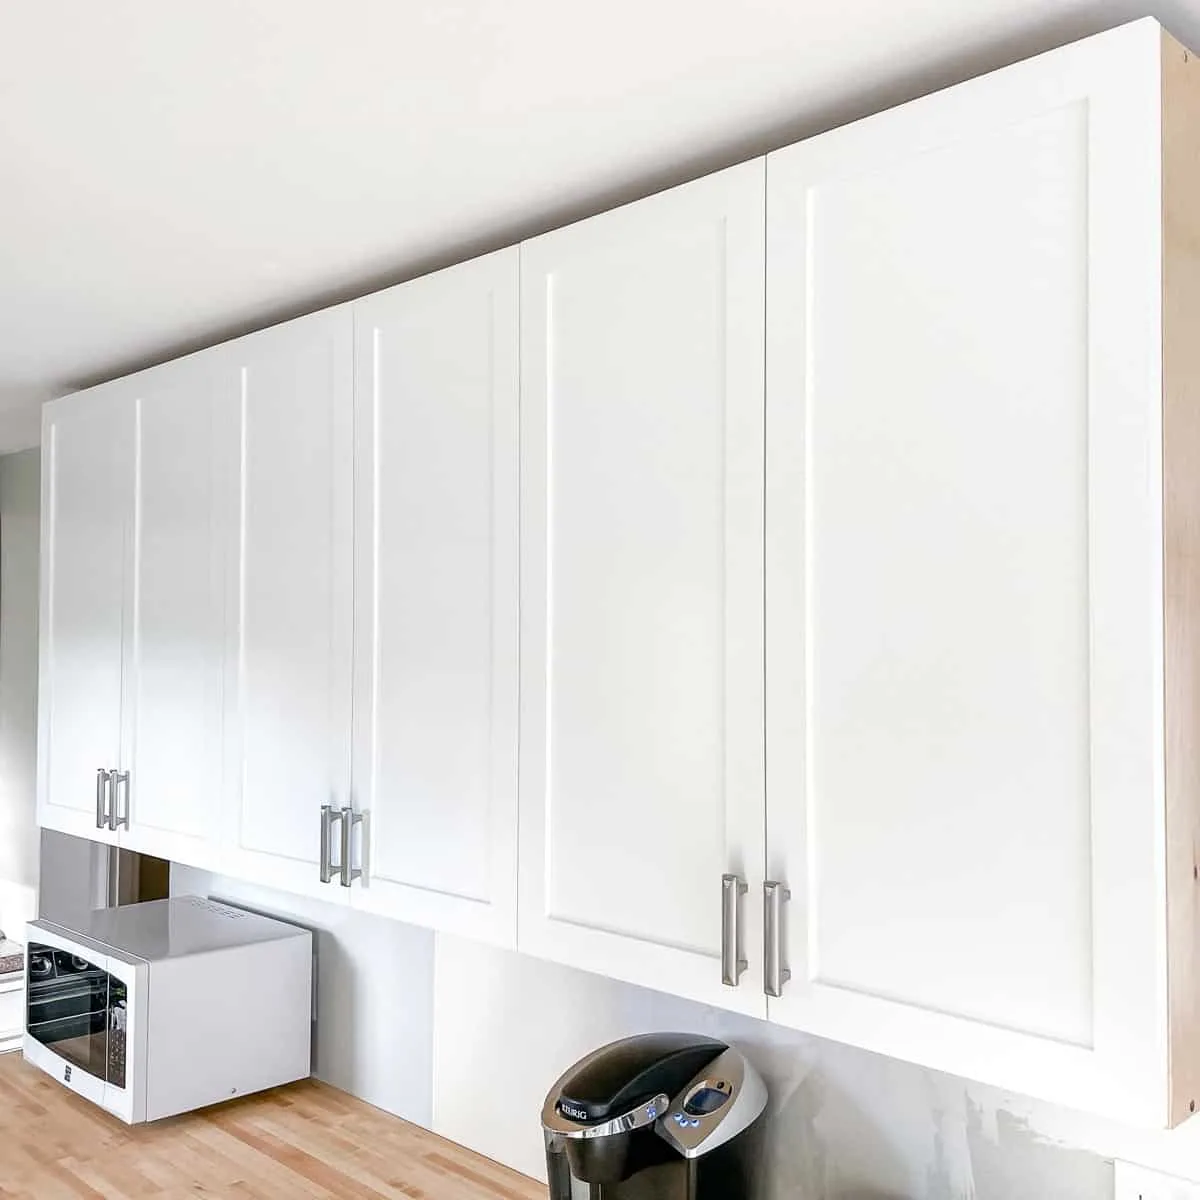
Now you can finally move on to paint! I'm using Benjamin Moore's Cabinet Coat in Decorator's White for my kitchen cabinets. It levels out quickly to prevent brush strokes and roller marks, and dries super hard and durable.
Make sure to note the recoat and cure times listed on the paint can label. While you can handle your cabinet doors after the paint is dry, I prefer to wait until they're cured before I install them. If the paint is still soft, you can easily dent or scratch it!
Install your new cabinet doors
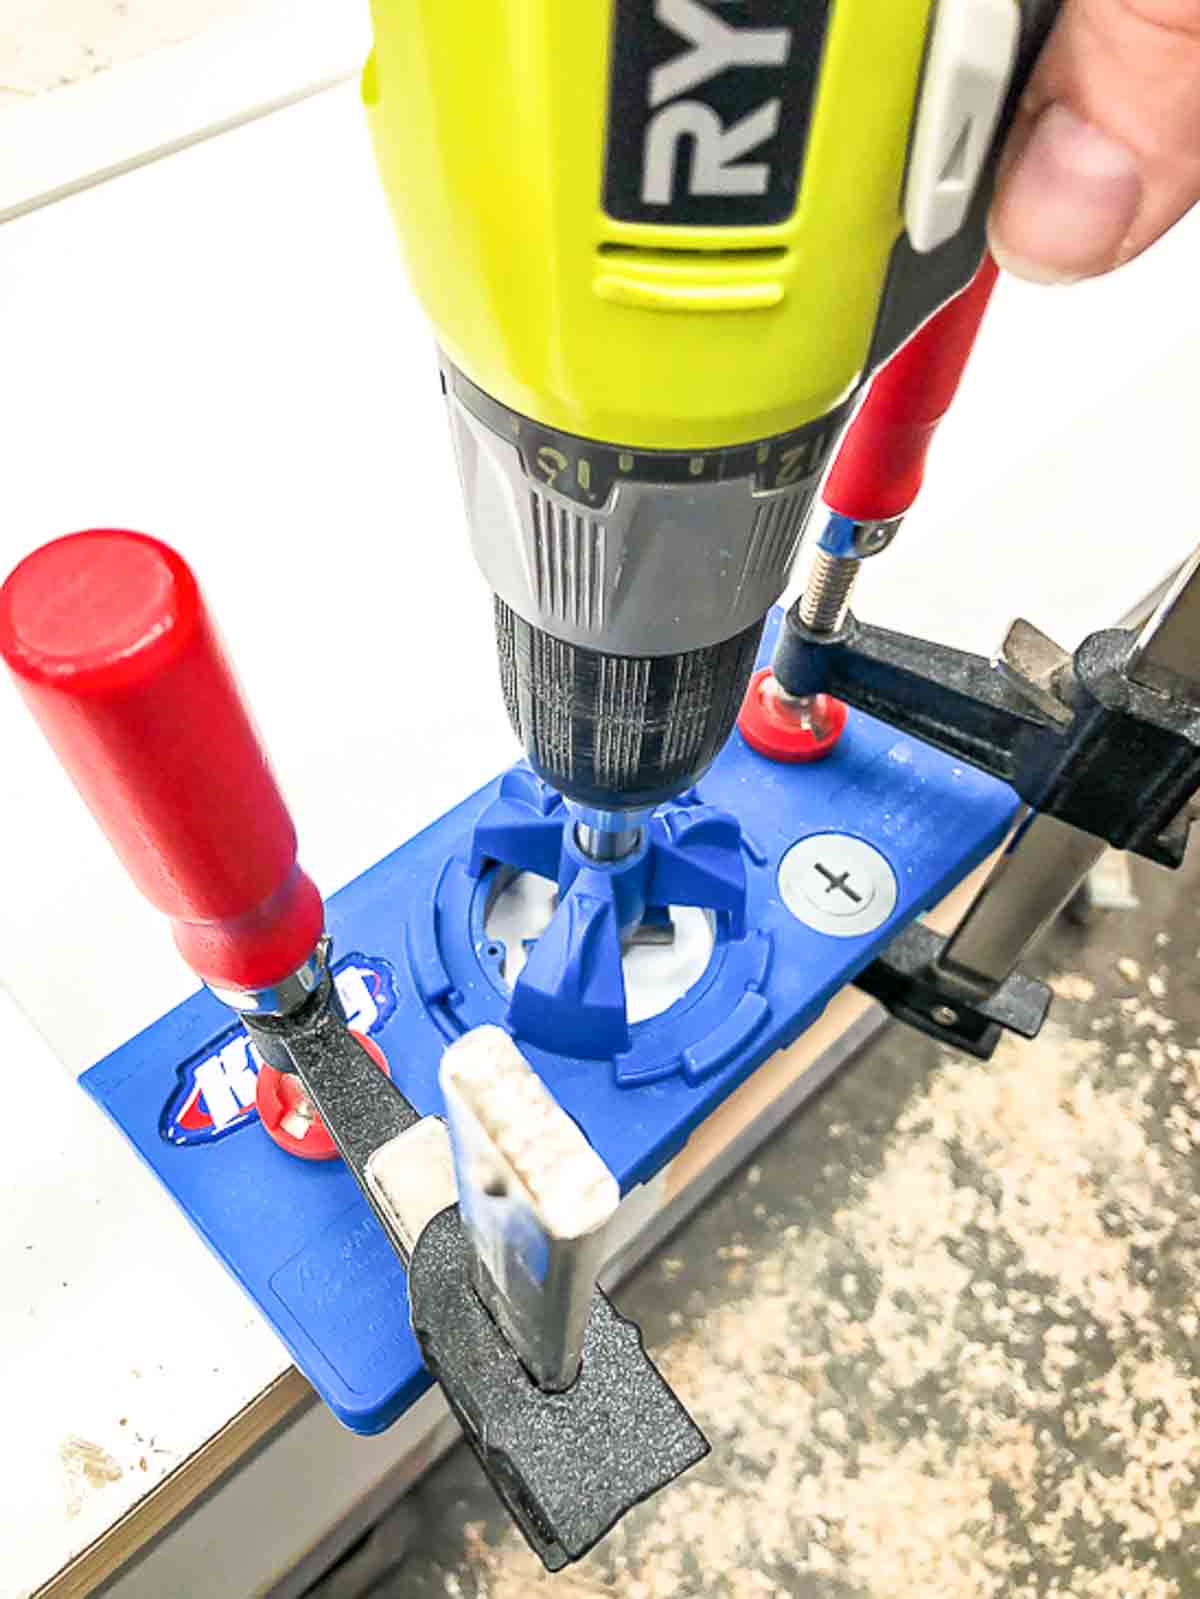
You're almost done! All that's left is installing the cabinet hinges and hardware. While it can be a little scary to make a big hole in your brand new cabinet doors, using a concealed hinge jig takes out the guesswork and makes it almost foolproof!

Once the hardware is installed, your cabinet doors are ready to hang! I'm so happy with how mine turned out.
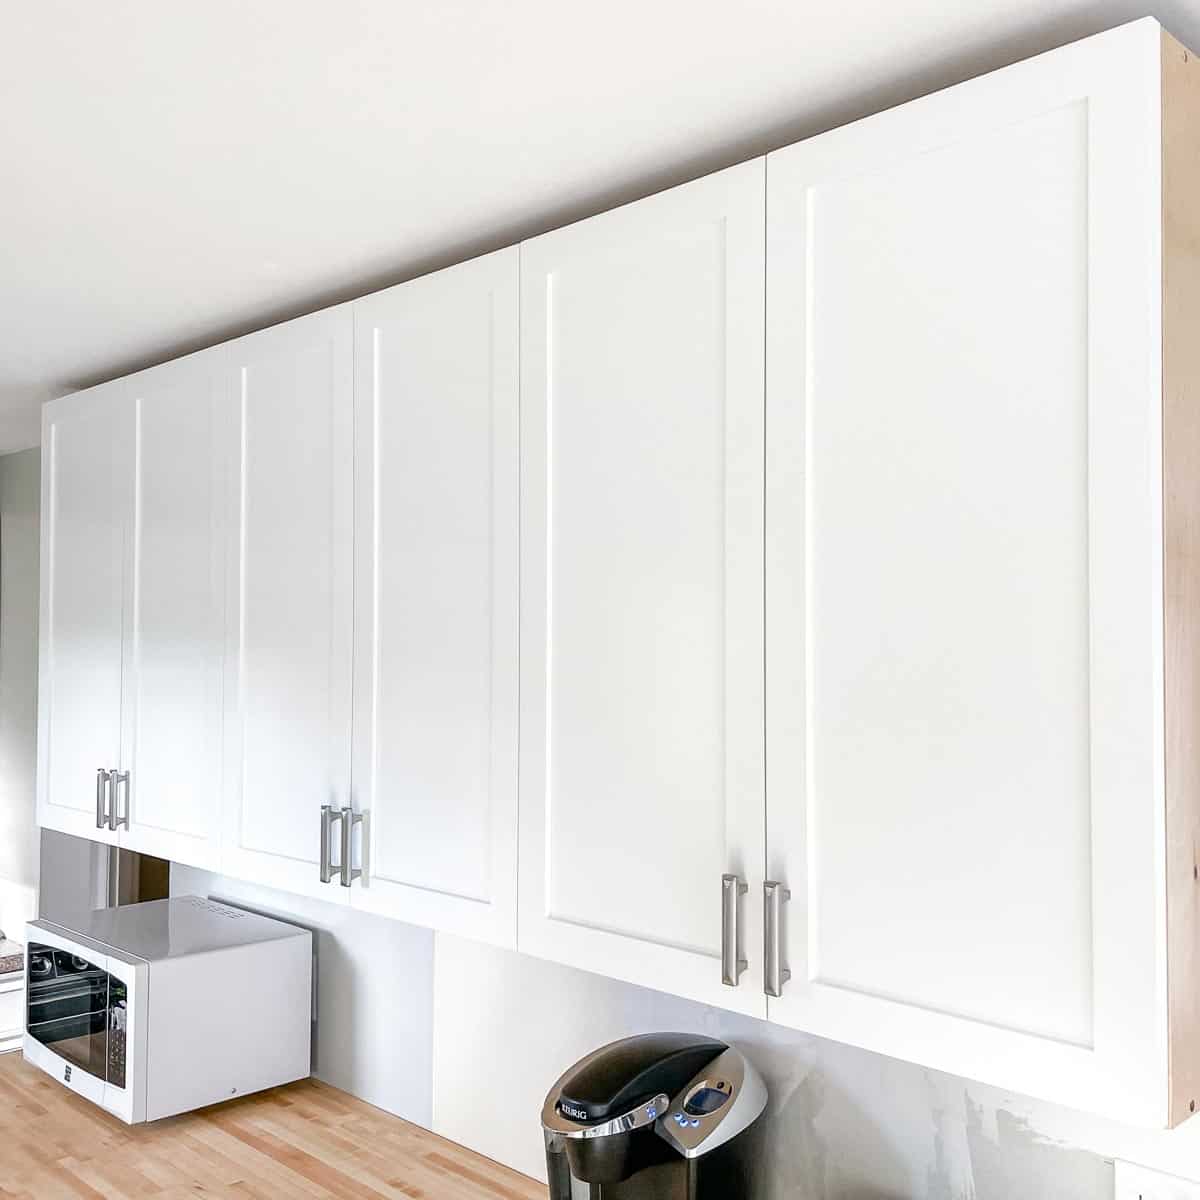
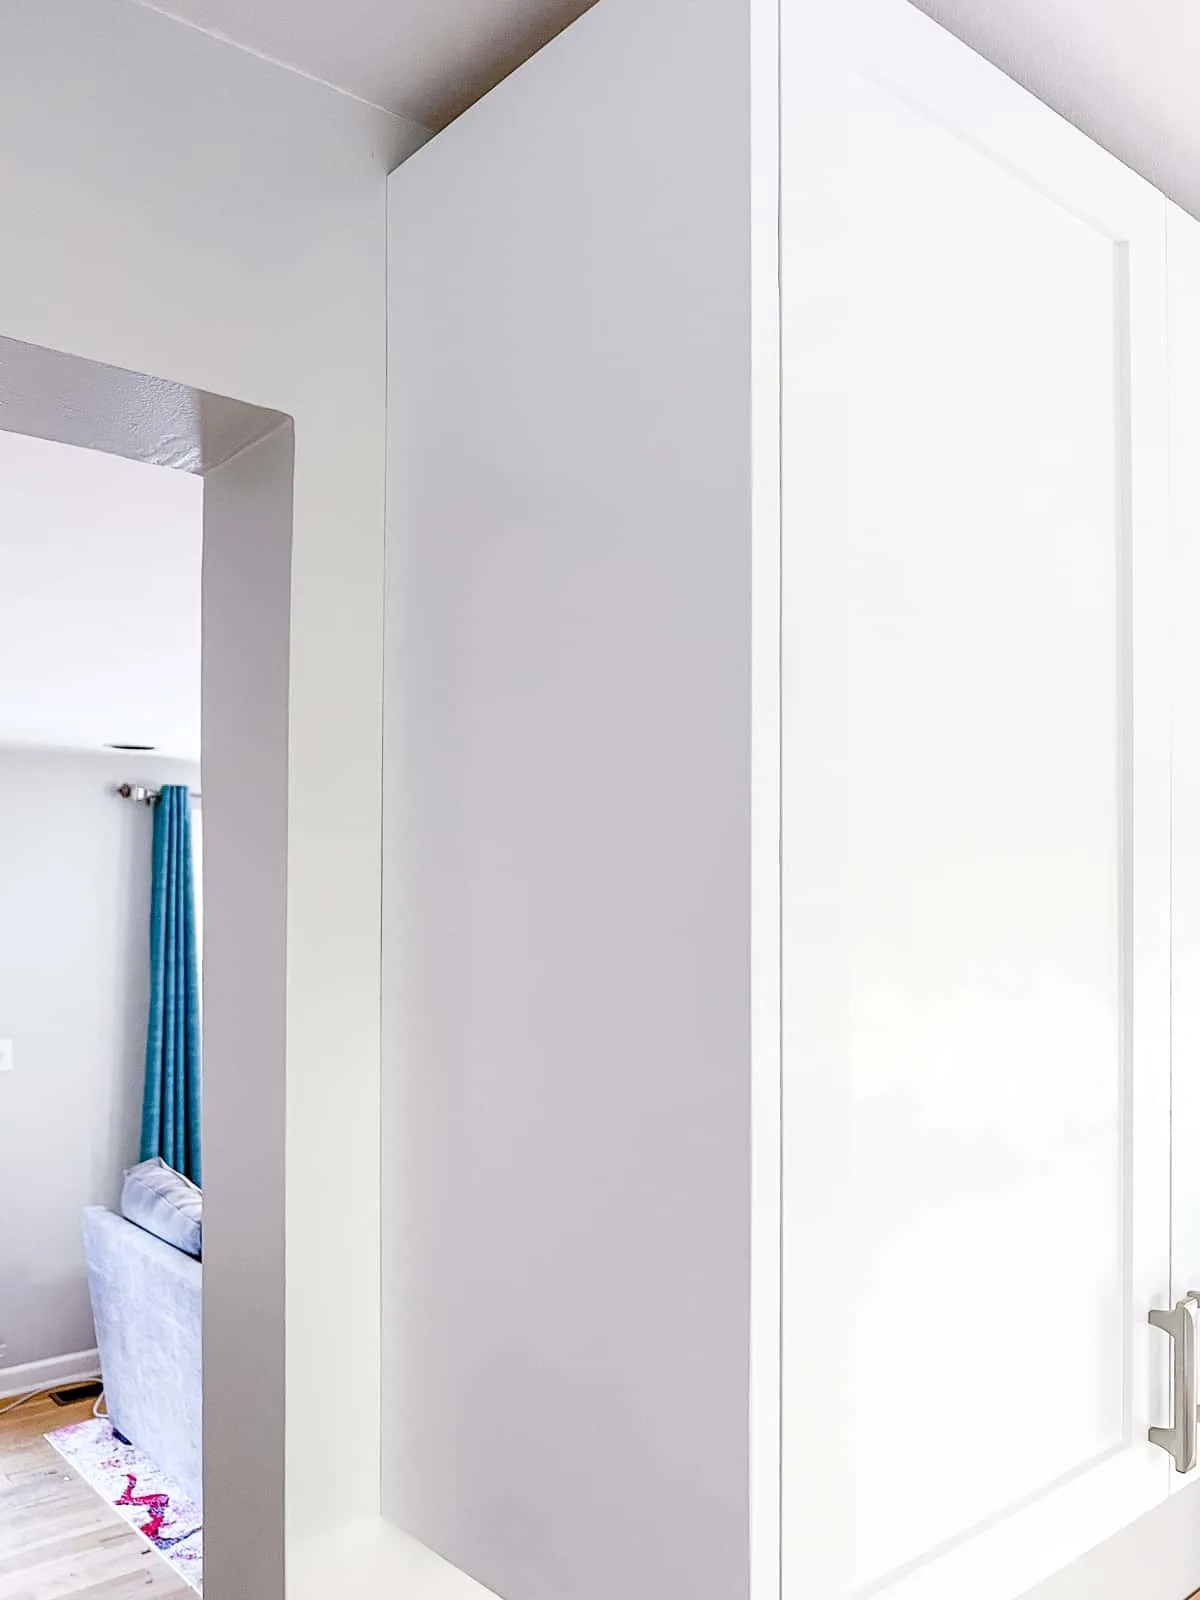
To finish off a bank of cabinets with exposed ends, you can add DIY cabinet end panels to the sides. This will cover up any gaps behind the boxes and hide the screw holes.

Buy vs DIY Shaker cabinet doors - Price Comparison
Building your own cabinet doors may seem intimidating, but it's not as difficult as you might think! Plus, it saves a ton of money! If the process I just showed seems like too much work, check out these other DIY cabinet door ideas for some easier options.
Here's a quick comparison, using these six upper cabinets as an example.
Price to buy
I used the Artesia cabinet doors from CabinetDoorMart.com for my pantry cabinet, which matches the style of the DIY cabinet doors I made here. I'll choose the same materials (solid wood frame and MDF panel) for this price comparison.
If you bought these cabinet doors online, each unfinished upper cabinet door would cost $93.39, for a total of $560.34 for all six doors. If you wanted to buy the doors already painted and the hinge holes drilled, it would cost $216.02, for a total of $1,296.12 for all six doors.
Price to DIY
In comparison, you would need six 1x3 poplar boards and one sheet of ¼" MDF to make all six cabinet doors yourself. I bought my lumber at a local lumberyard, but I'll use Home Depot pricing for this example.
Six 1x3 poplar boards would cost $91.20 and a sheet of ¼" MDF is usually around $30. So all six cabinet doors cost me a little over $120 to make myself, and I'd have some MDF left over for the rest of the kitchen.
Granted, I already had all the tools I needed in the workshop, except for the rail and stile router bits. If you don't have a router table, router and bits, you'll need to factor those into the final price. But that cost is spread out over the entire kitchen project, so if you need to make dozens of doors, it's still worth it!
And yes, time is money, and it took time to build these cabinet doors myself. But you could easily make all six doors in a weekend, then paint them the next weekend. If you have an entire kitchen to remodel, the savings really add up!
Check out these other DIY kitchen projects!
Larry
Thursday 1st of September 2022
They look awesome. I have been wanting to do this with my kitchen for a while. I don't have the bit but I know where to get them.