Learn how to install base cabinets yourself! This tutorial shows you how to level base cabinets and attach them to the studs and each other.

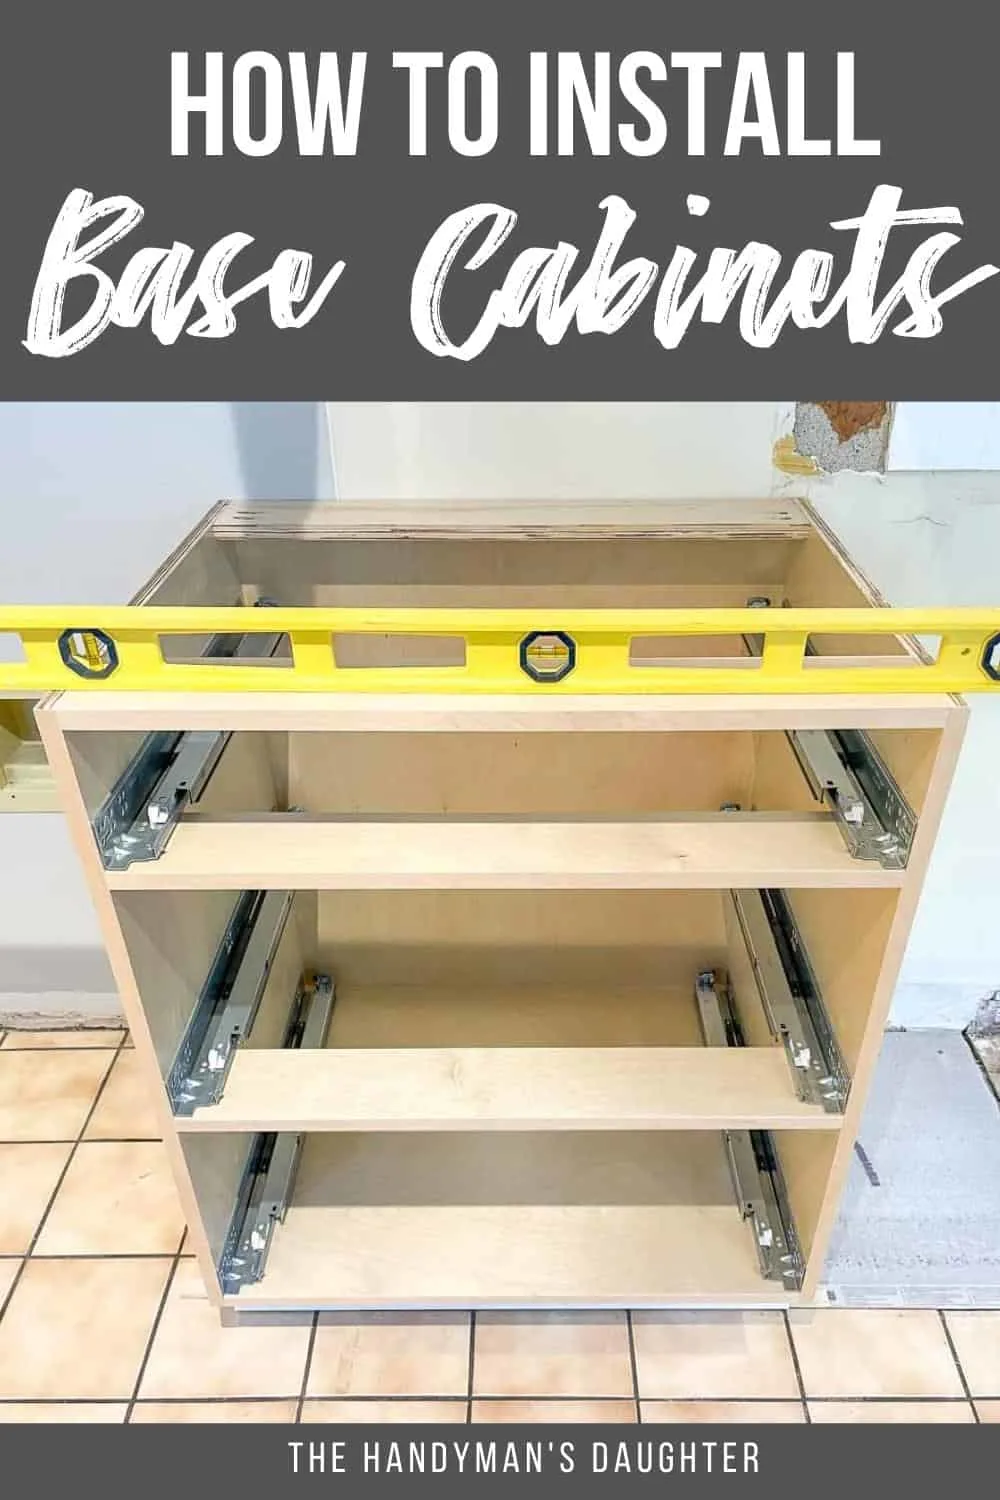
Whether you buy your cabinets off the shelf or build them yourself, you don't need to hire someone to install base cabinets! But it's a little more complicated than just plopping them on the floor and calling it good.
But with a little measuring and shimming to get things level, you'll be able to enjoy your new kitchen cabinets in no time! Here's how!
This post contains affiliate links for your convenience. Purchases made through these links may earn me a small commission at no additional cost to you. Please visit my disclosures page for more information.
Remove the old cabinets
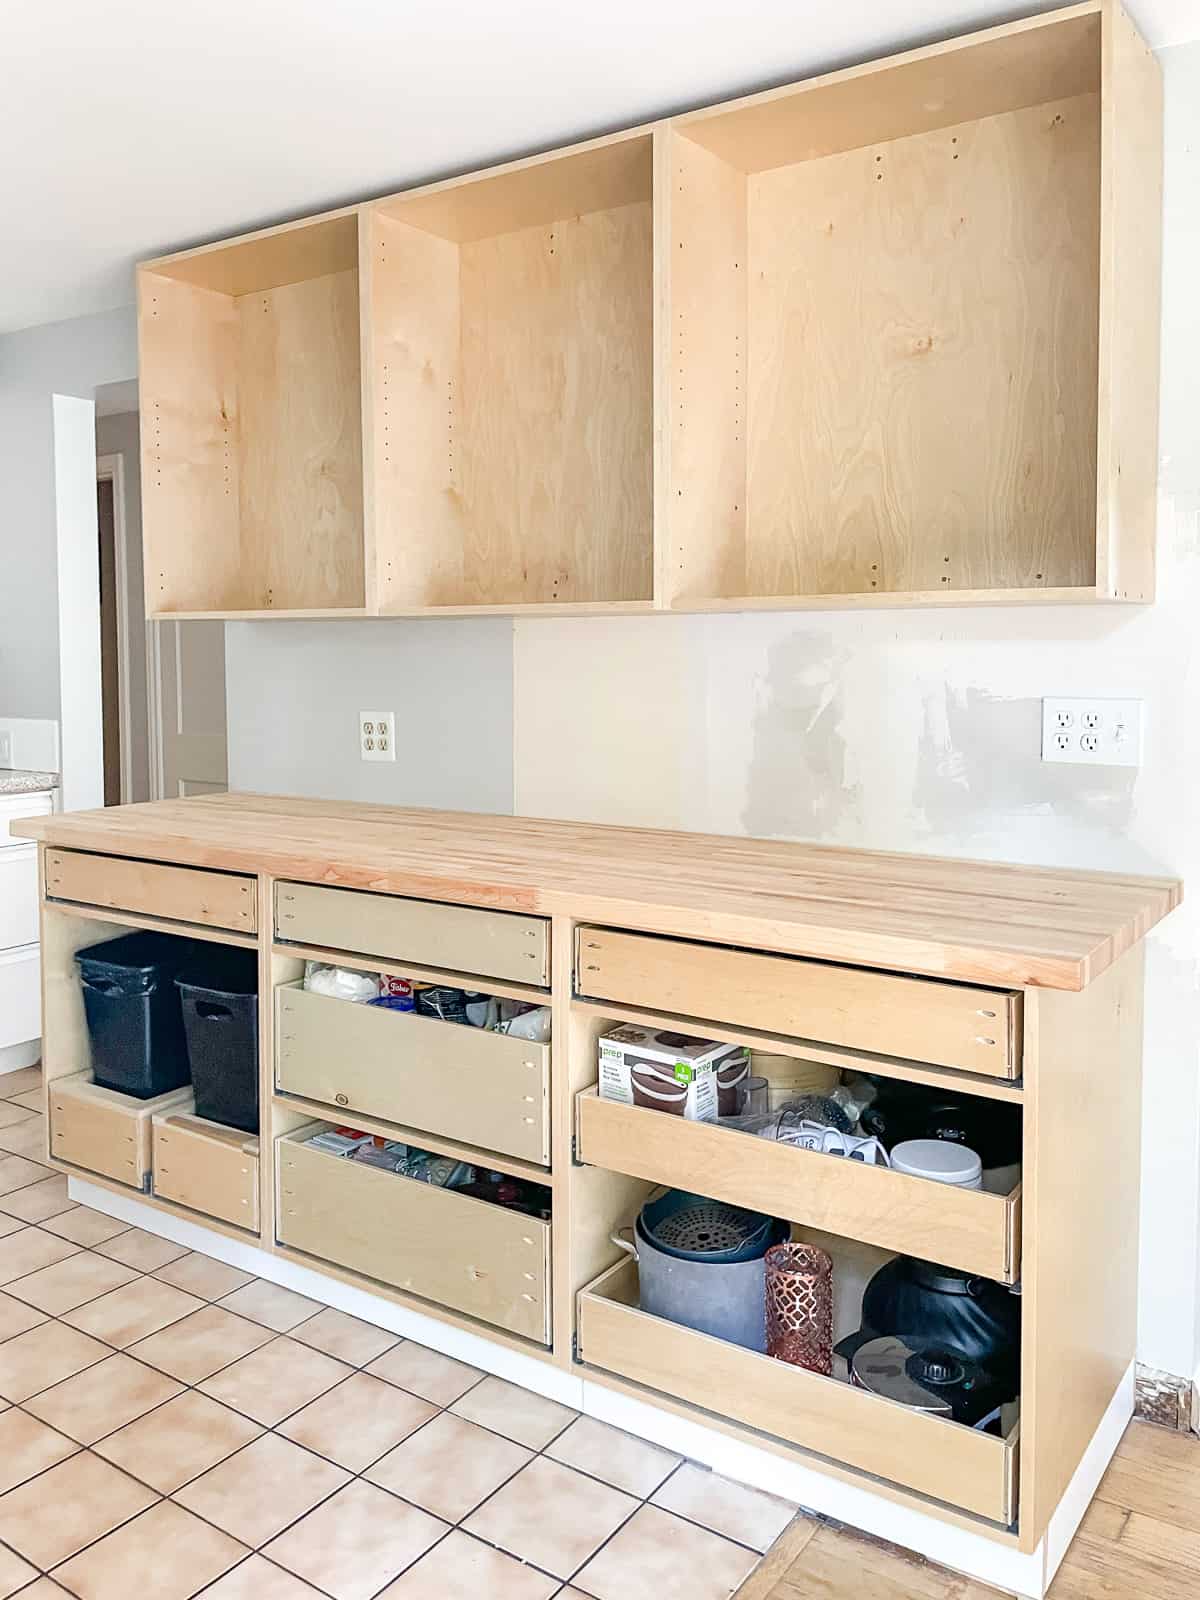
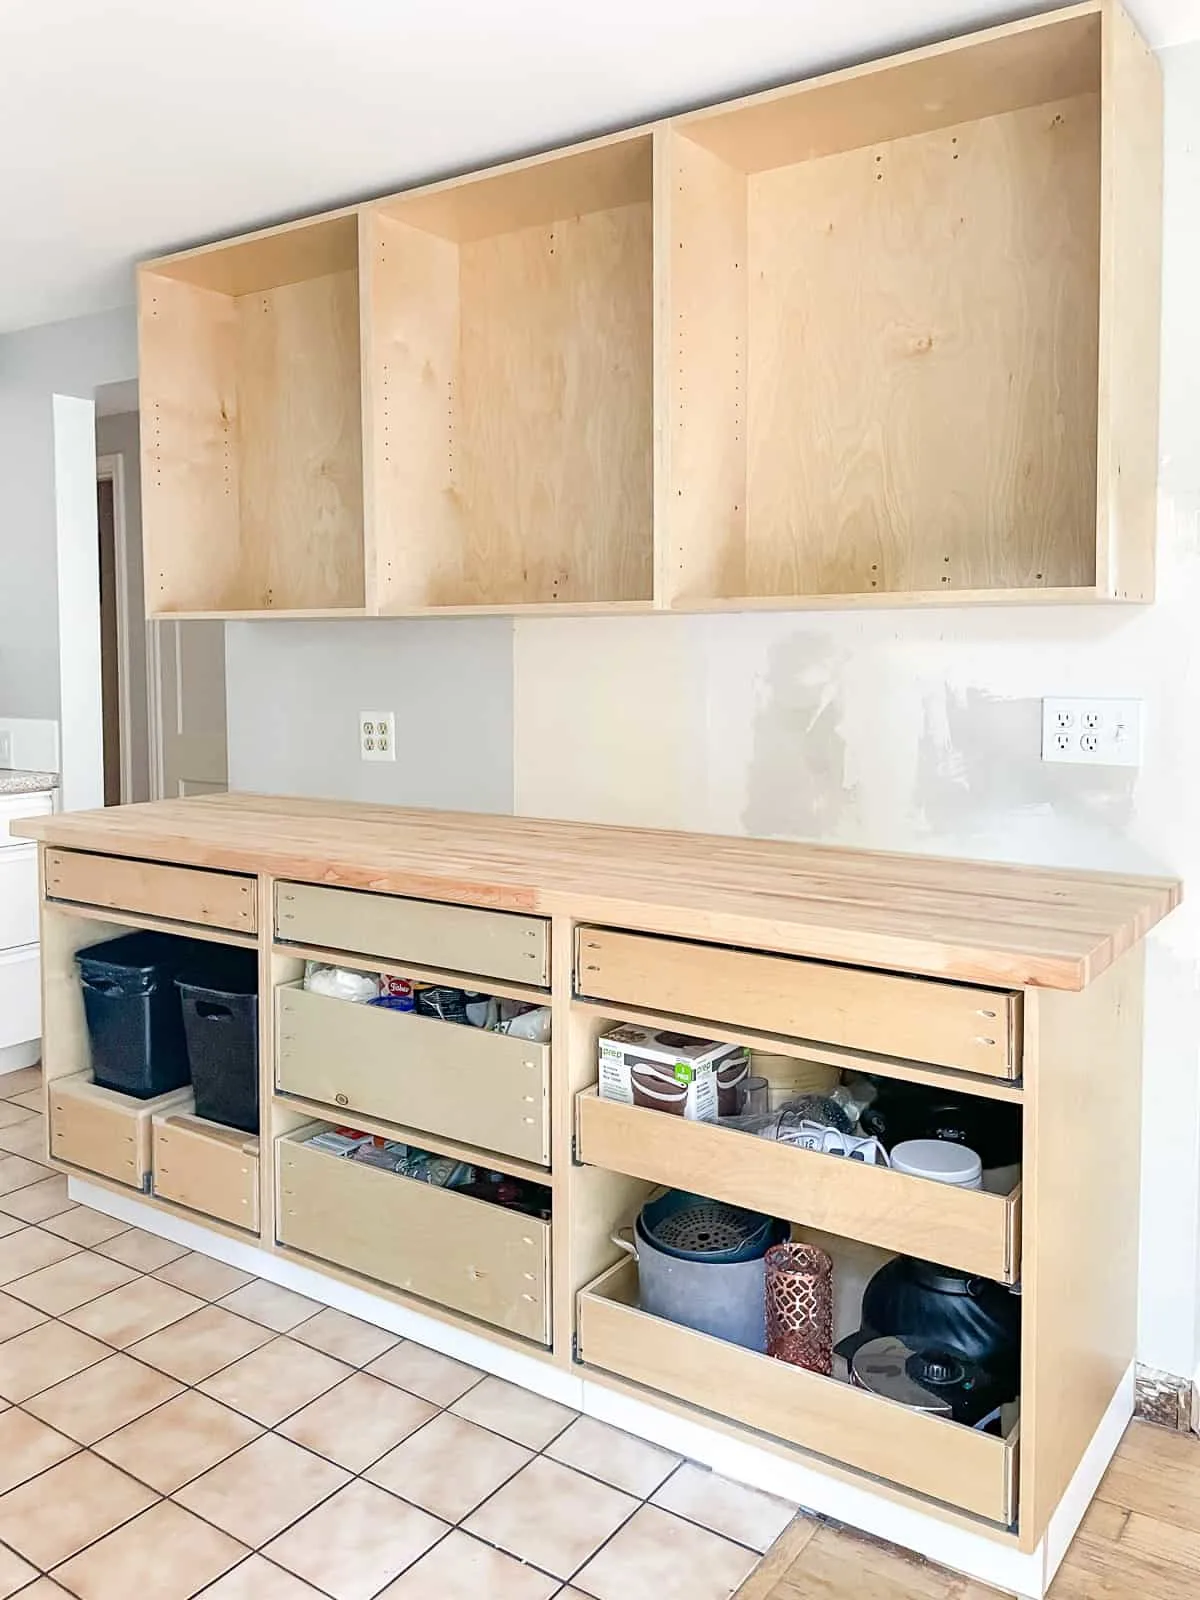
Instead of ripping everything out at once, I've been gradually swapping out each section as I finished building the base cabinets. I reused the old contact paper covered countertop, which allowed us to continue using the kitchen normally until all the cabinets were ready to be installed permanently.


I wanted to keep the old upper cabinets in place until I finished building the new wall cabinets, but the floor-to-ceiling pantry was in the way and couldn't be removed separately. I ended up cutting off the bottom half with a jigsaw so I could get that section out.

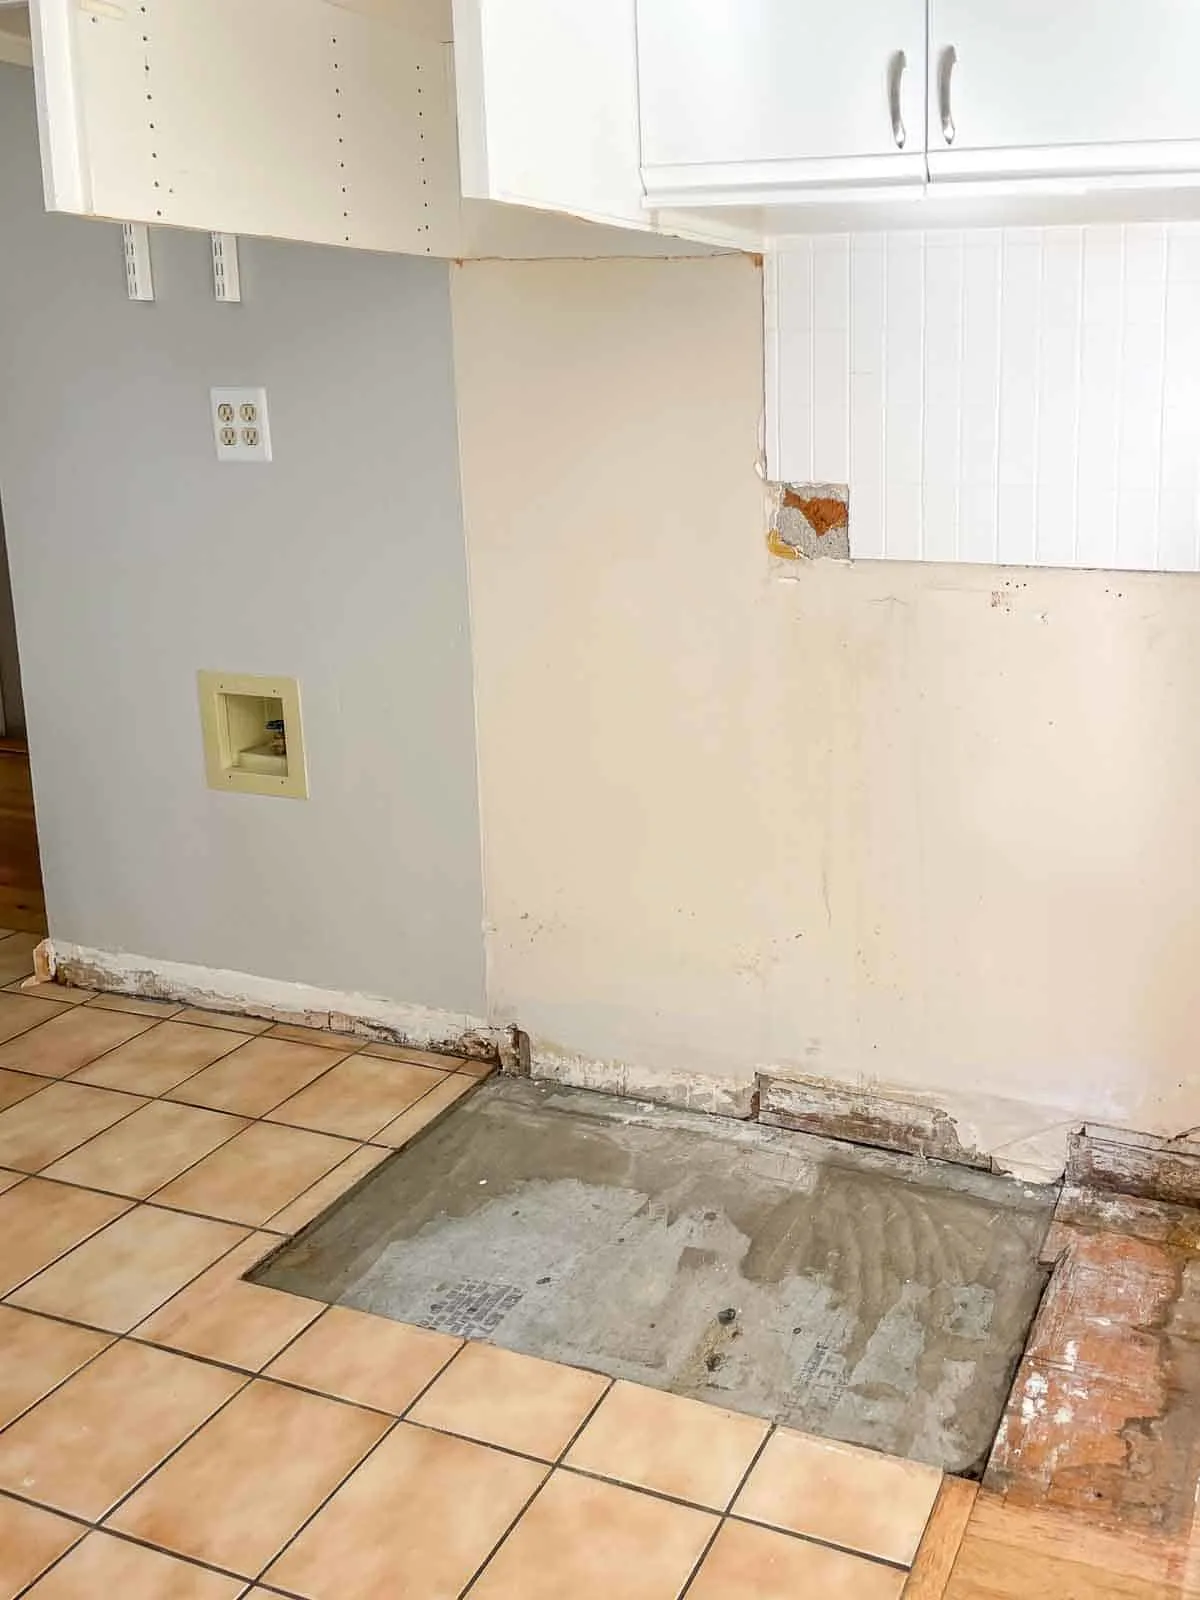
Unfortunately, I discovered that this small section of the floor was never tiled. Why????
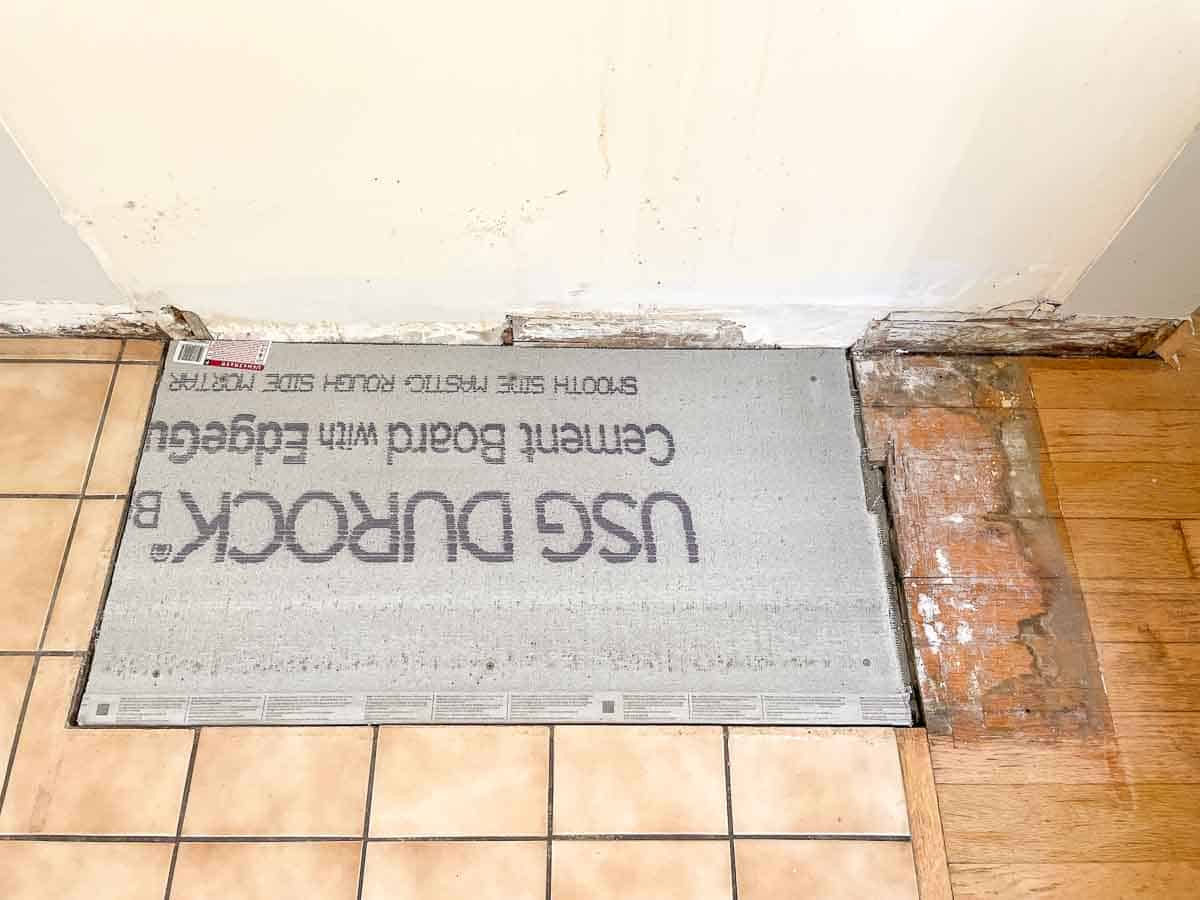
Luckily, the new cabinets will fit right over the gap and won't be visible. I decided to install a sheet of cement board in the hole to bring the floors more level. They're not perfectly even, but that's ok. This will just help with shimming later on.

Locate the high spots
Floors and walls are rarely perfectly flat, but you'll want your cabinets to be level so things don't roll off the countertop. It's much easier to raise the cabinets up to the highest spot with shims, rather than cutting them down to a lower point.
Use a four foot long level to locate the highest point along a run of cabinets. It will act like a see-saw when balanced on the high spot. Check from several points, both close to the wall and 18-20" away from the wall. You can also use a laser level to locate the high point, as shown in the video below.
If the highest point is close to the wall, measure and mark a line 34 ½" above the floor that point. If the highest point is further away from the wall, use the level to transfer that height to the wall, then measure 34 ½" above it.
Now use the level to draw a line down the length of the wall at the 34 ½" height. If you want to get fancy, you can use a laser level instead. All the cabinets will be shimmed up to this line, so they're even with the high spot.
Repeat this process with the wall to find any spots that bulge out. You can insert shims behind the cabinets to bring the backs level with these high spots.
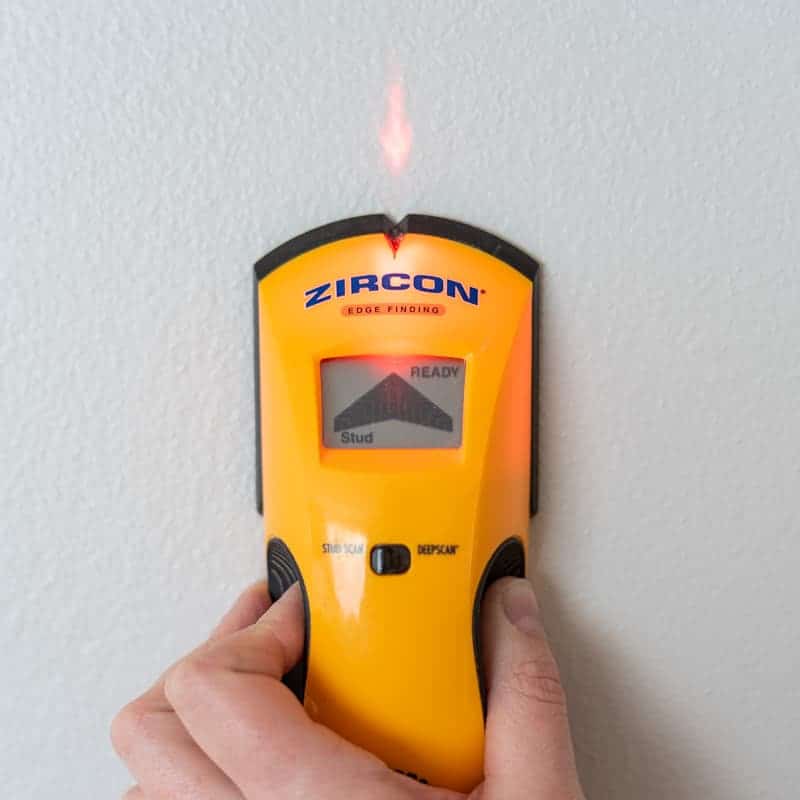
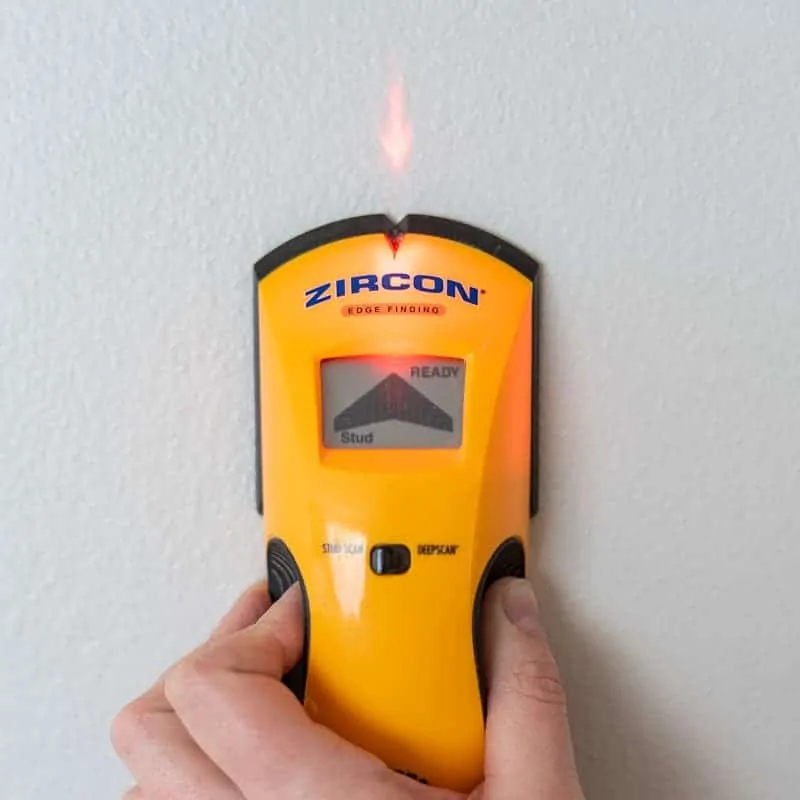
Mark the stud locations
Use a stud finder to locate each of the studs in the wall. Mark each side of the stud, then use the level to transfer the markings above the horizontal line you drew earlier. This way, you'll be able to see the stud locations when the cabinet is in place.
Level the first base cabinet
If your cabinets will span between two walls, start at one wall and work your way across. If they form an L shape, start at the corner.
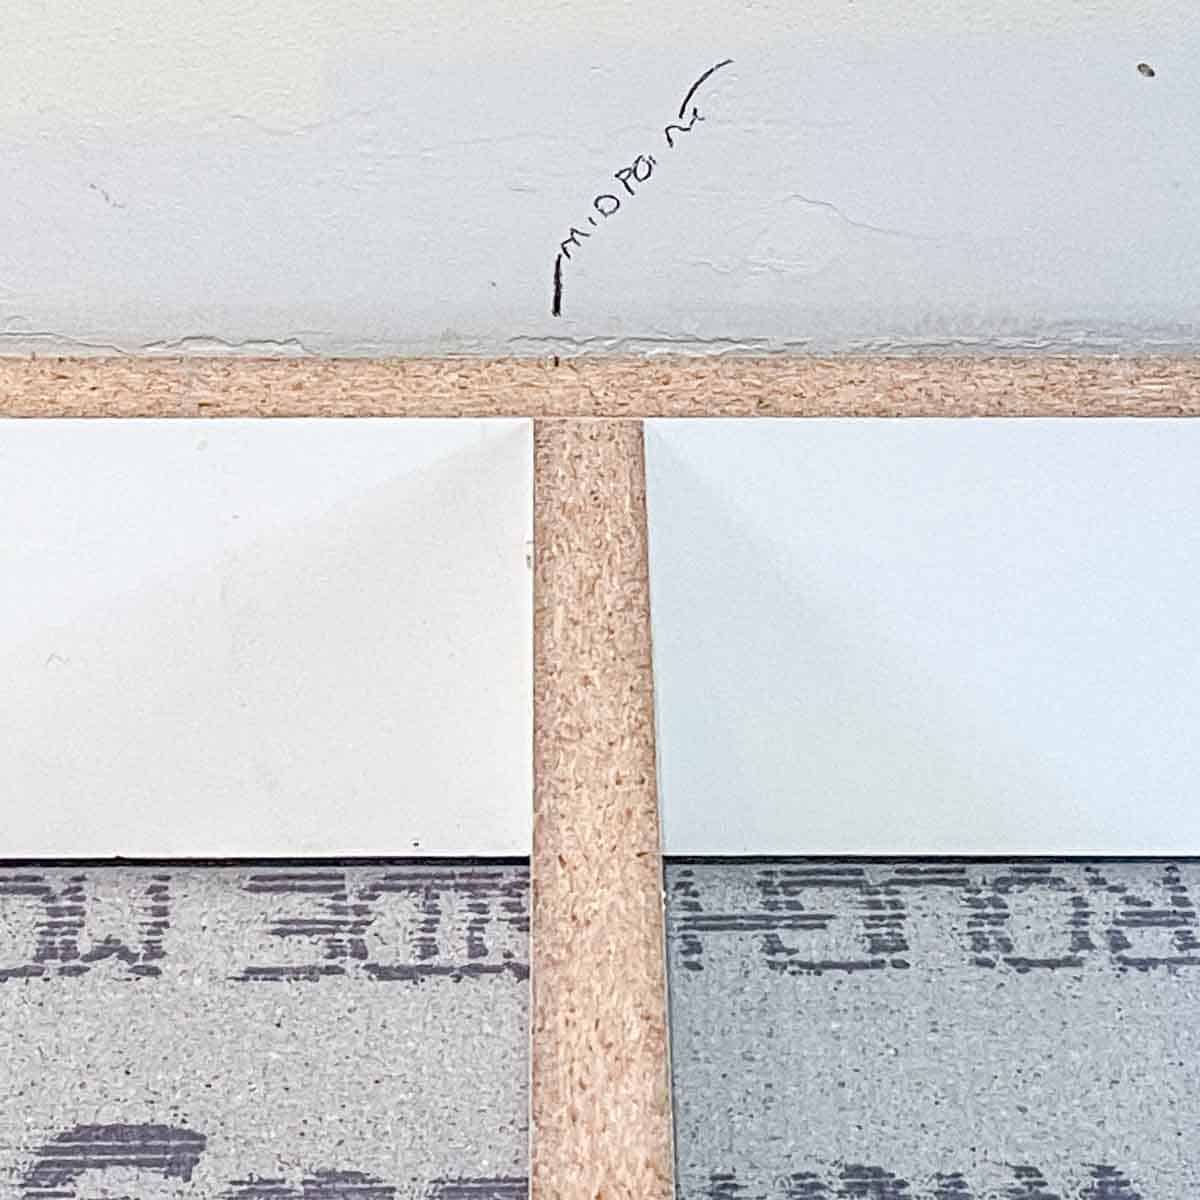
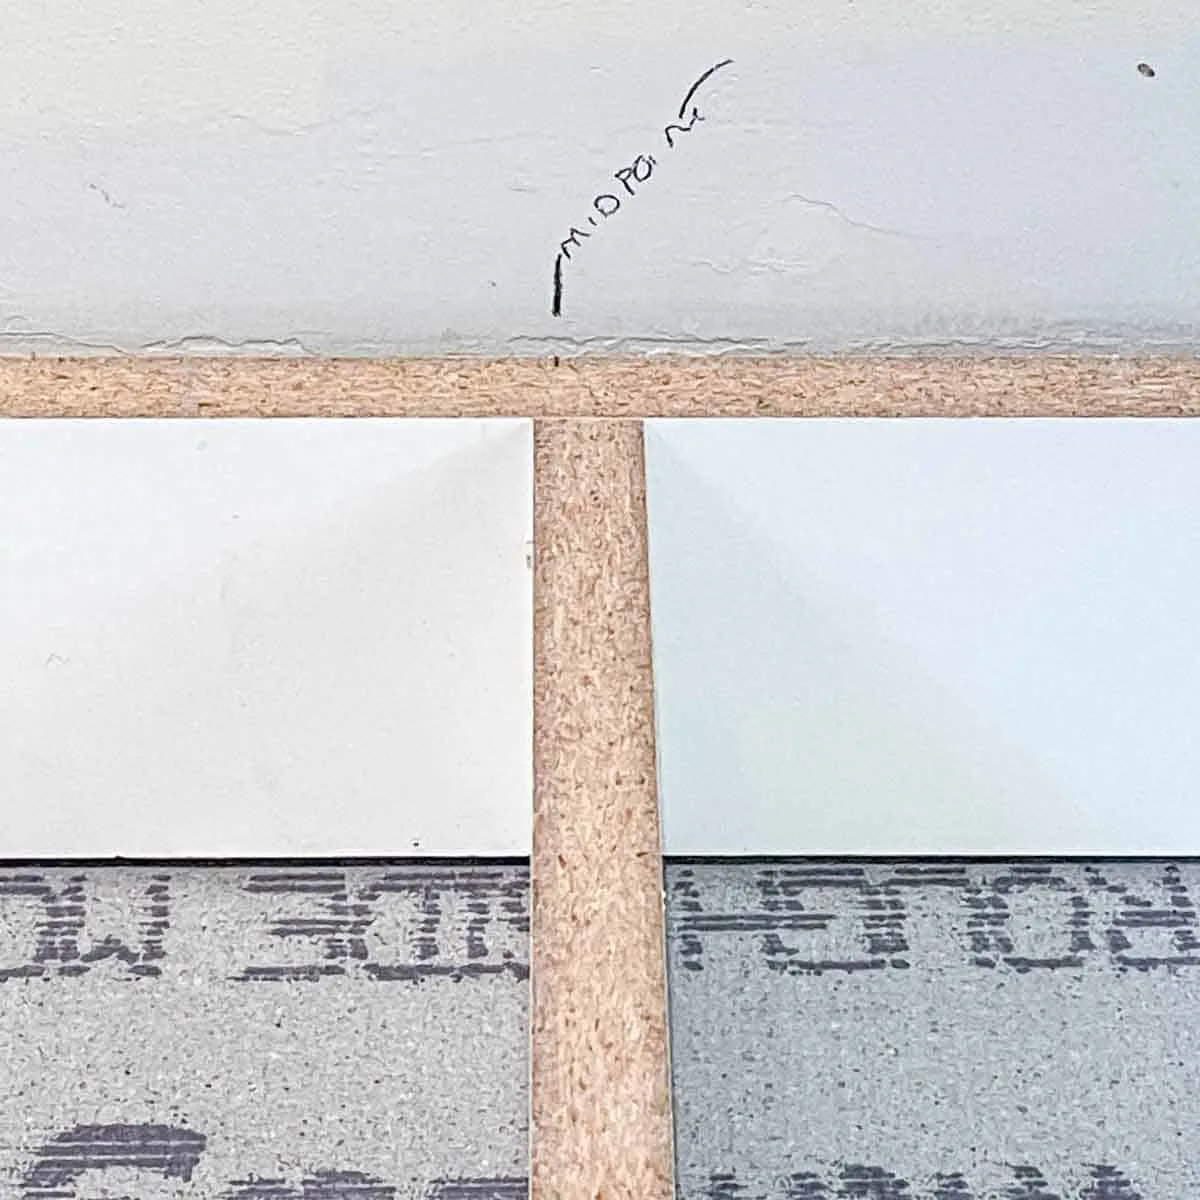
This bank of cabinets is on a wall with openings on either side, so I marked the midpoint of the wall and started with the middle cabinet. This will ensure that the cabinets are centered on the wall.
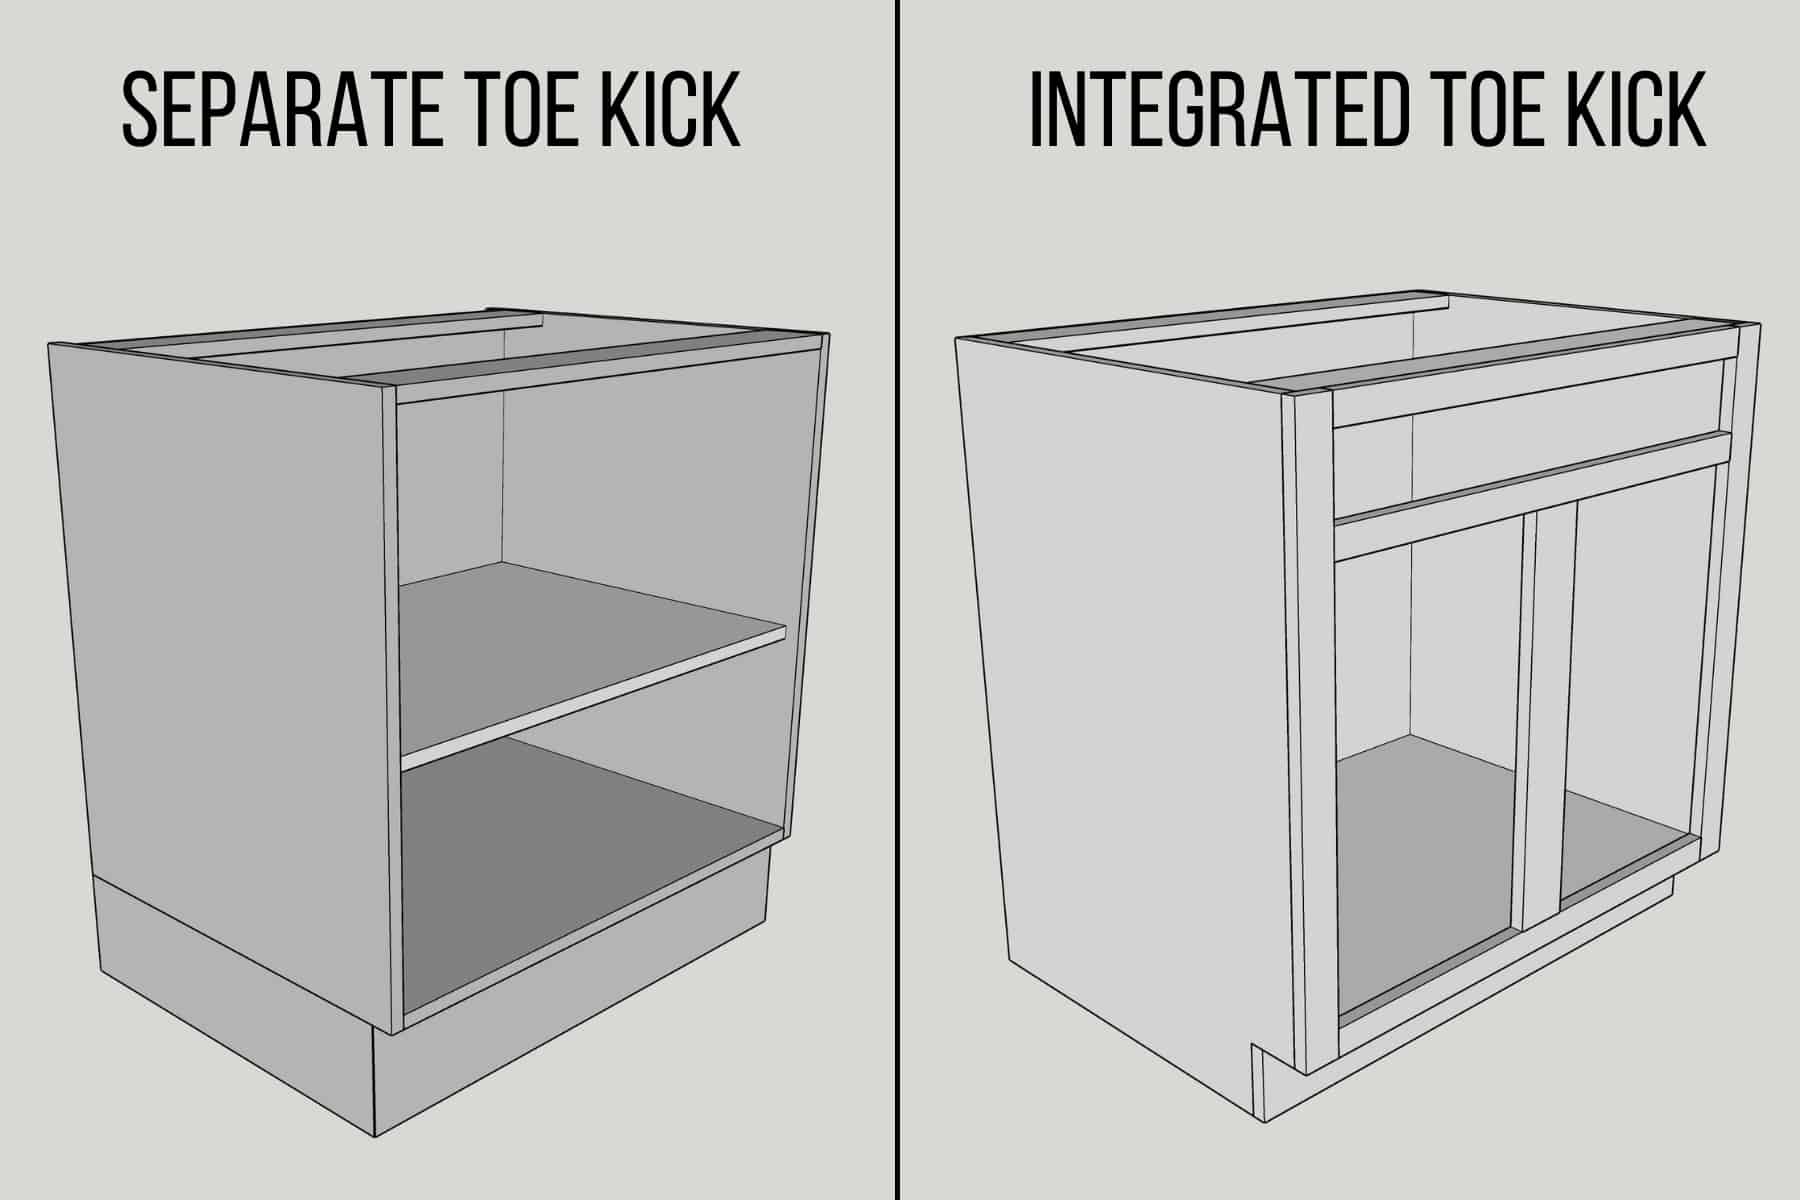
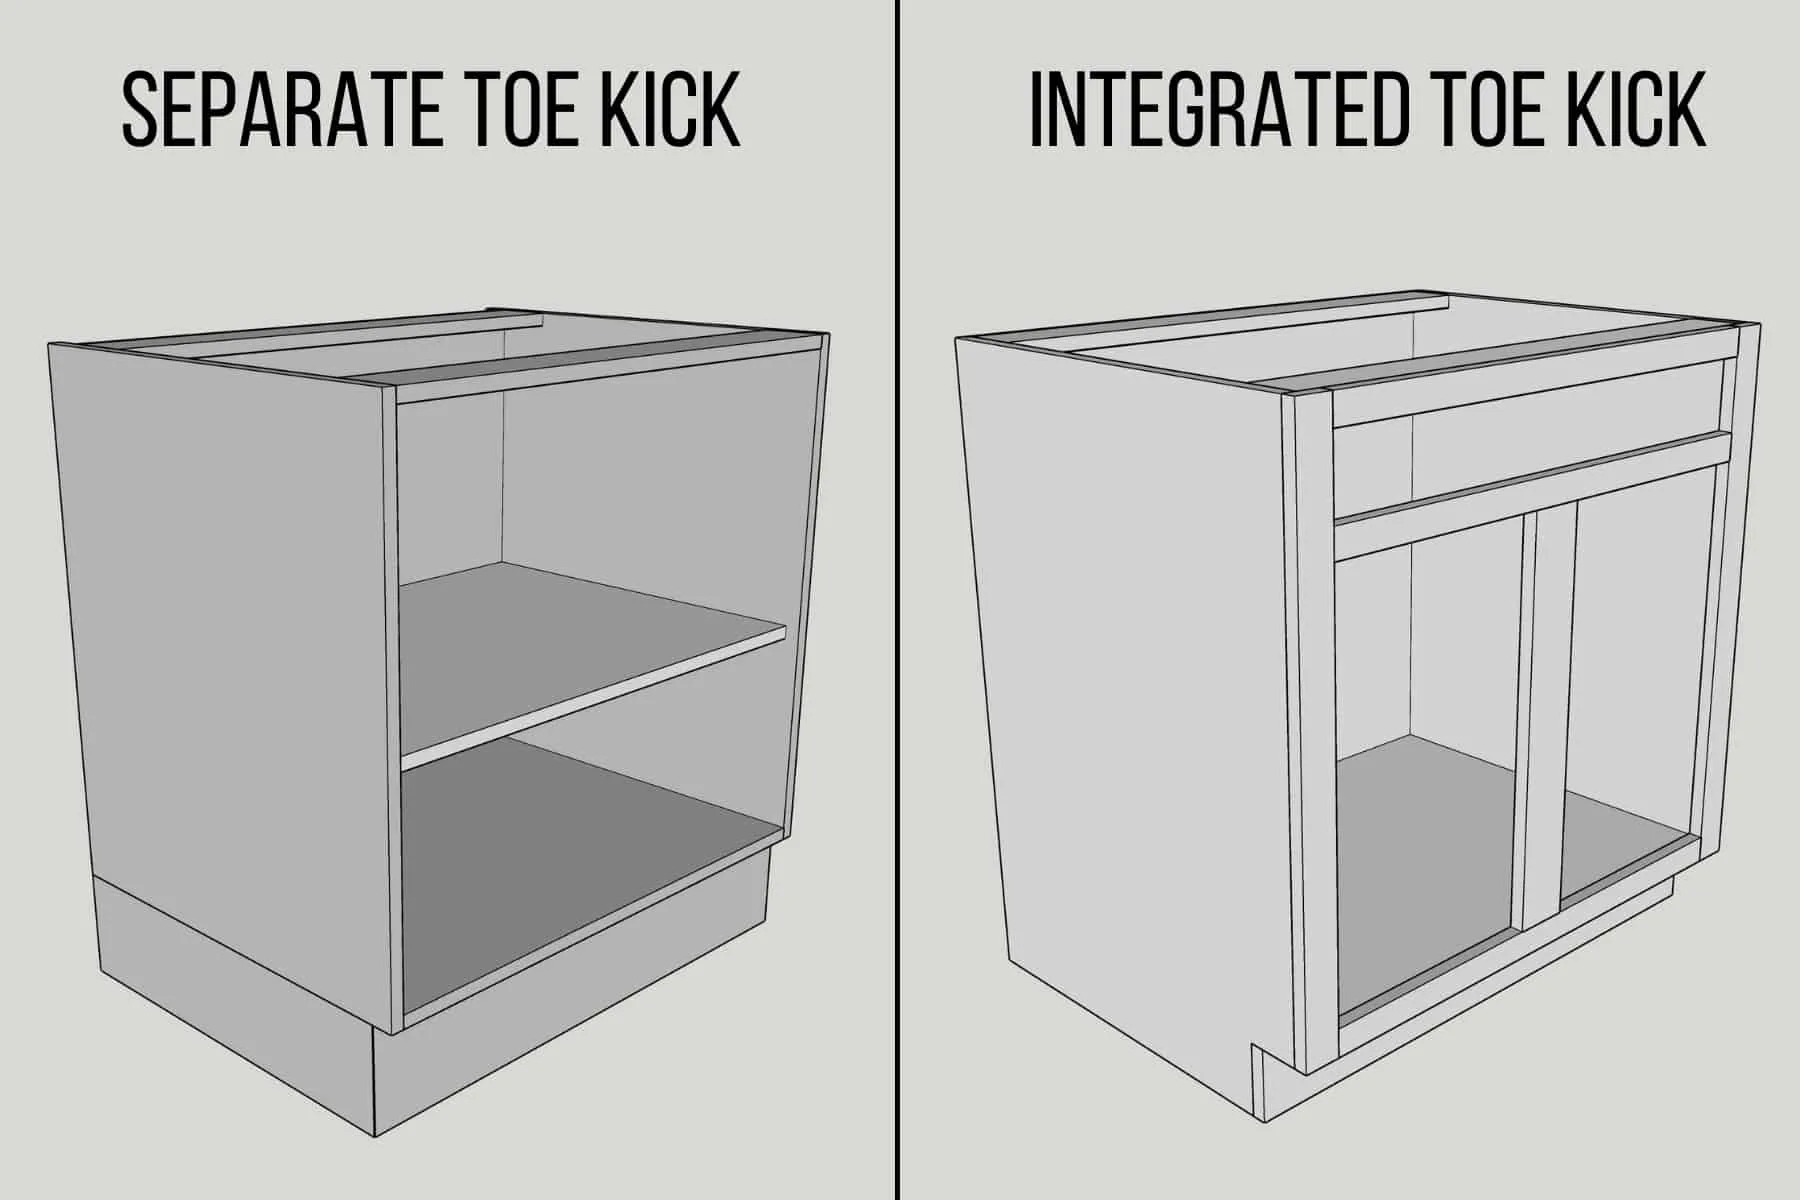
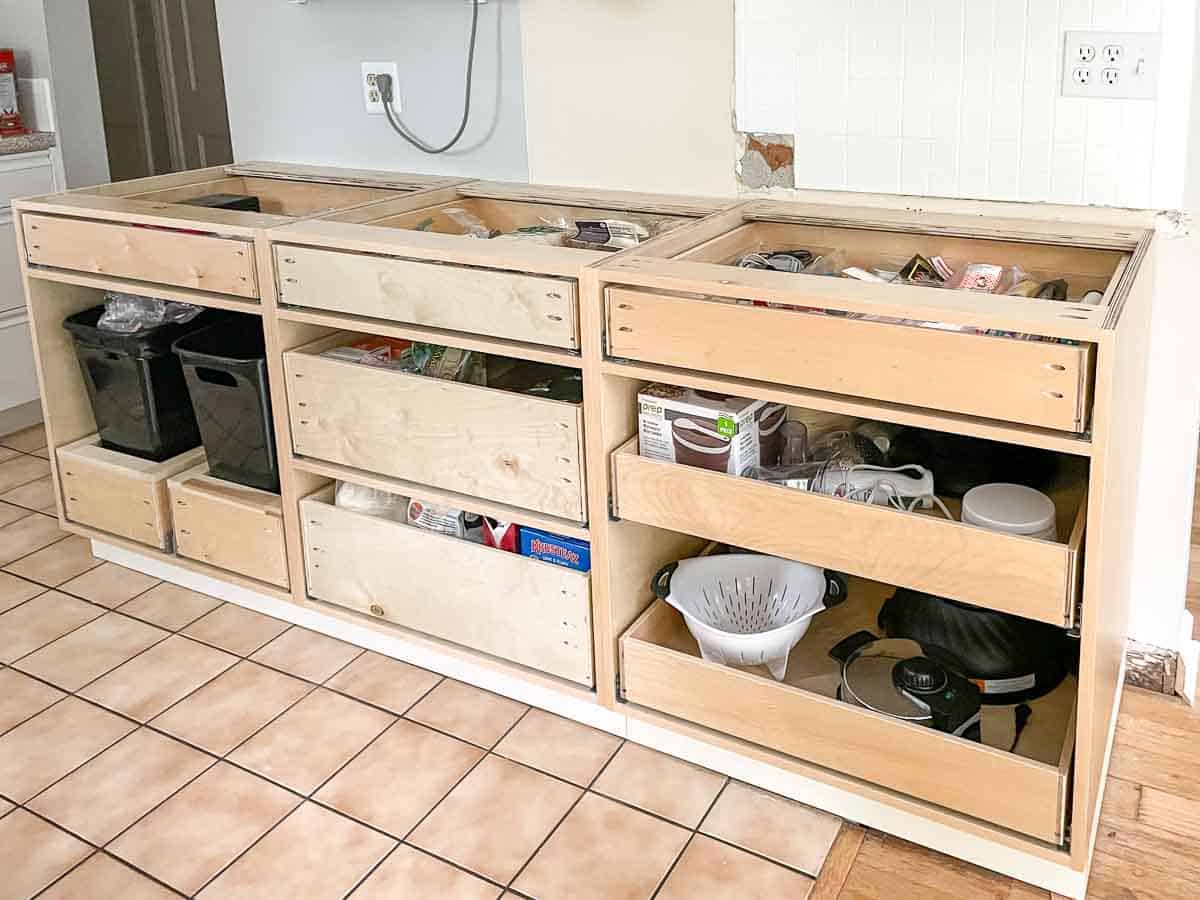
Base cabinets are either made with an integrated toe kick, or a separate toe kick base. I built my cabinets with a separate toe kick platform, which allowed me to get more cabinet pieces out of a single sheet of plywood.
First, I marked the midpoint of the toe kick base, and lined it up with the midpoint on the wall.
Then I placed the level on top of the base and used shims to level it, both side to side and front to back. Once it was just right, I screwed it to the wall at the marked studs. If you can't find a stud along this span, you can use hollow wall anchors instead.

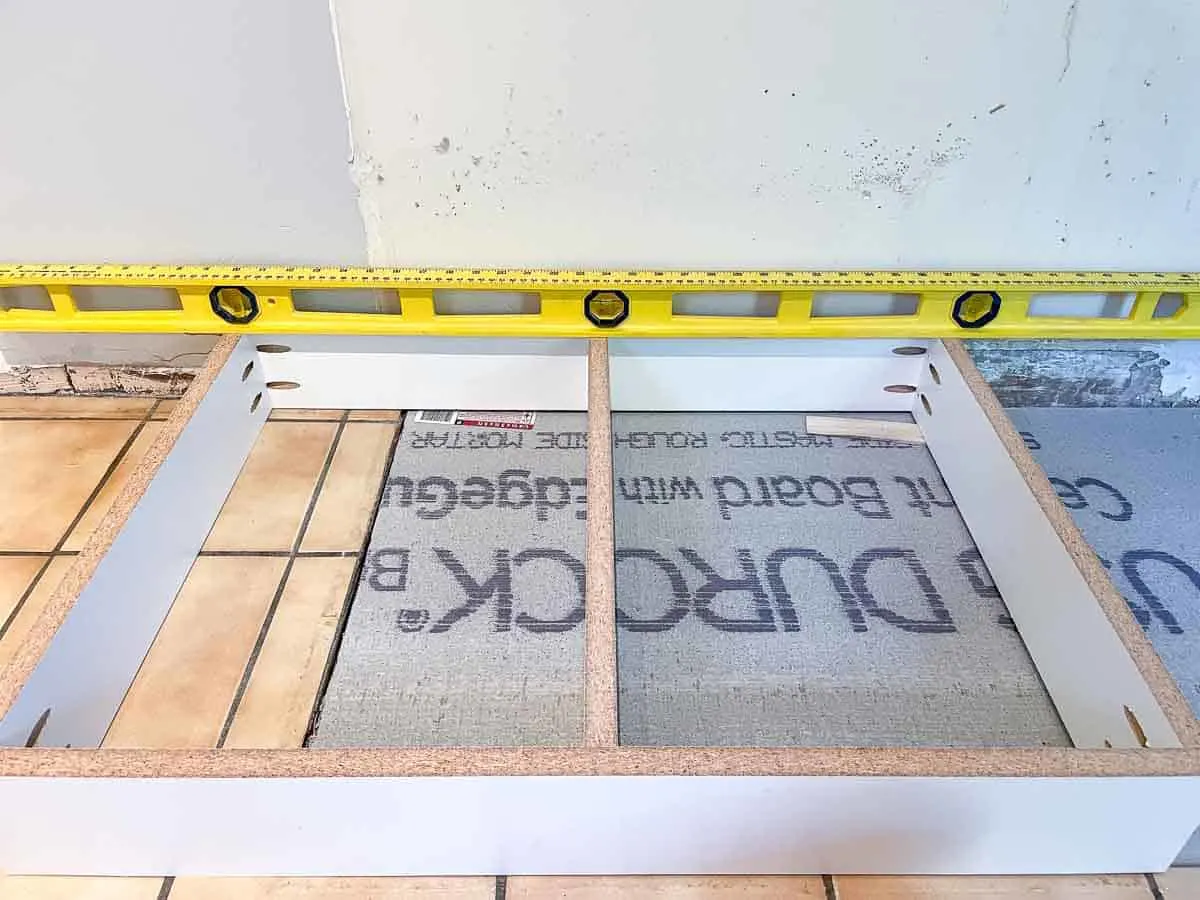
Now I can place the middle cabinet on top of the toe kick base. Since the base is already level, I just had to check to see if the height matched up with the high point line on the wall. It was only 1/16" off, so I used these plastic shims in the corners between the base and the cabinet box to raise it up to a consistent height on all sides.
Check for level one last time, then screw the cabinet to the wall through the cabinet back panel where the nailer strips are located. If there's a gap between the back of the cabinet and the wall, fill the space with a shim before driving in the screw.
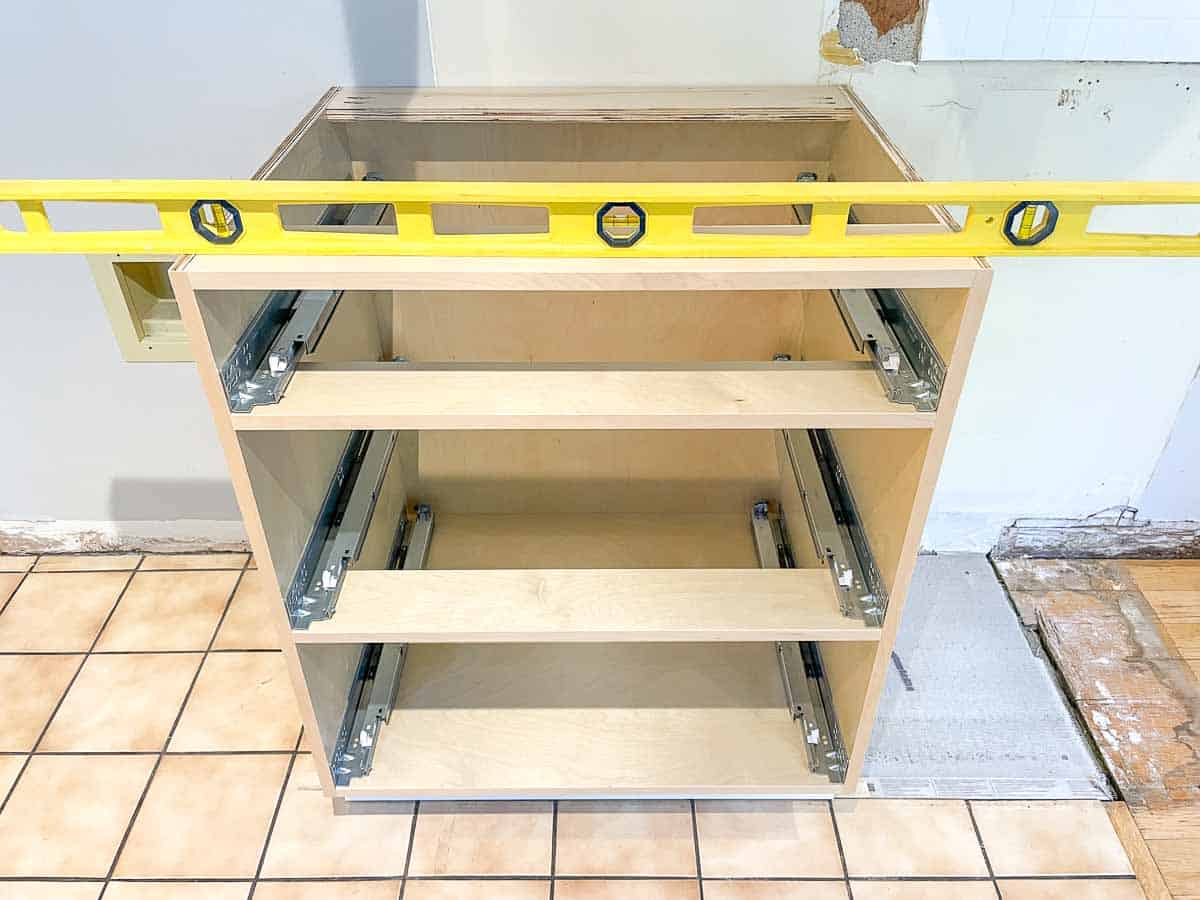

The screws should be long enough to go through the back panel, nailer strips, drywall and at least an inch into the studs. These 3" cabinet screws have a large, flat head that prevents it from getting pulled through the thin back panel.
Install the adjacent cabinets
If you take the time to install the first base cabinet correctly, the rest will fall into place!
The cabinet over the high spot in the floor was the easiest to level, since it didn't need to be raised up like the rest. It just needed a shim under the back corner to keep it from rocking.
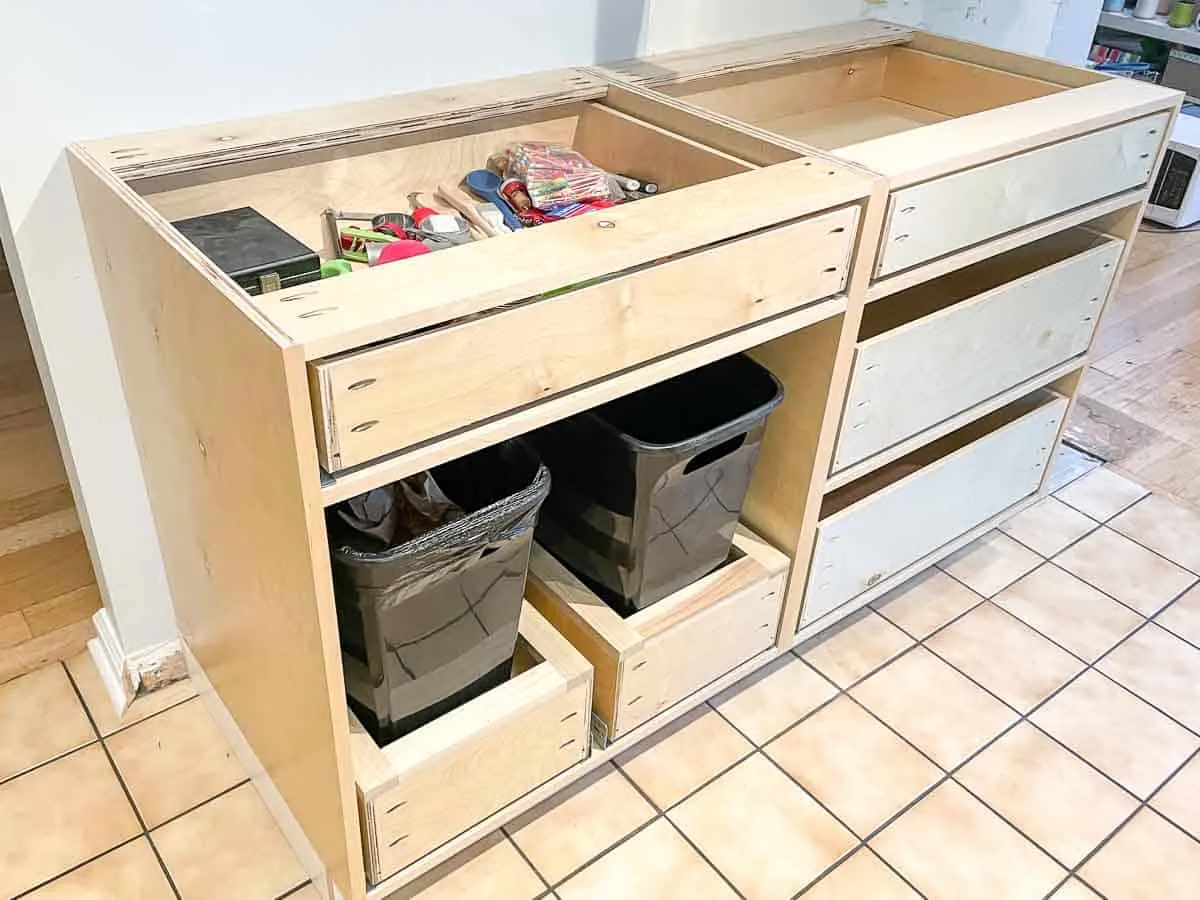
We've been using this cabinet for a while (which is why there's junk in the drawer already!) I just swapped out the old trash can cabinet for this new and improved version. I'll have a tutorial on how to make your own soon!

One reason why I like the separate toe kick platform is that you don't have to worry about both leveling and alignment at the same time. Once you level and attach the base to the wall, you can slide the cabinets around to get the fronts even. No one will notice if the toe kick is a tiny bit deeper on one cabinet, but they WILL notice if the fronts aren't aligned!

If your cabinets have face frames, the boxes won't touch. Align the face frames to each other, and shim behind the cabinet if necessary to bring them flush. Connect the two face frames together with countersink screws. The video below goes into this process in more detail.
My cabinets are frameless, so the sides of the boxes are screwed together to keep them aligned. You can learn more about the parts of a cabinet and the different types here.
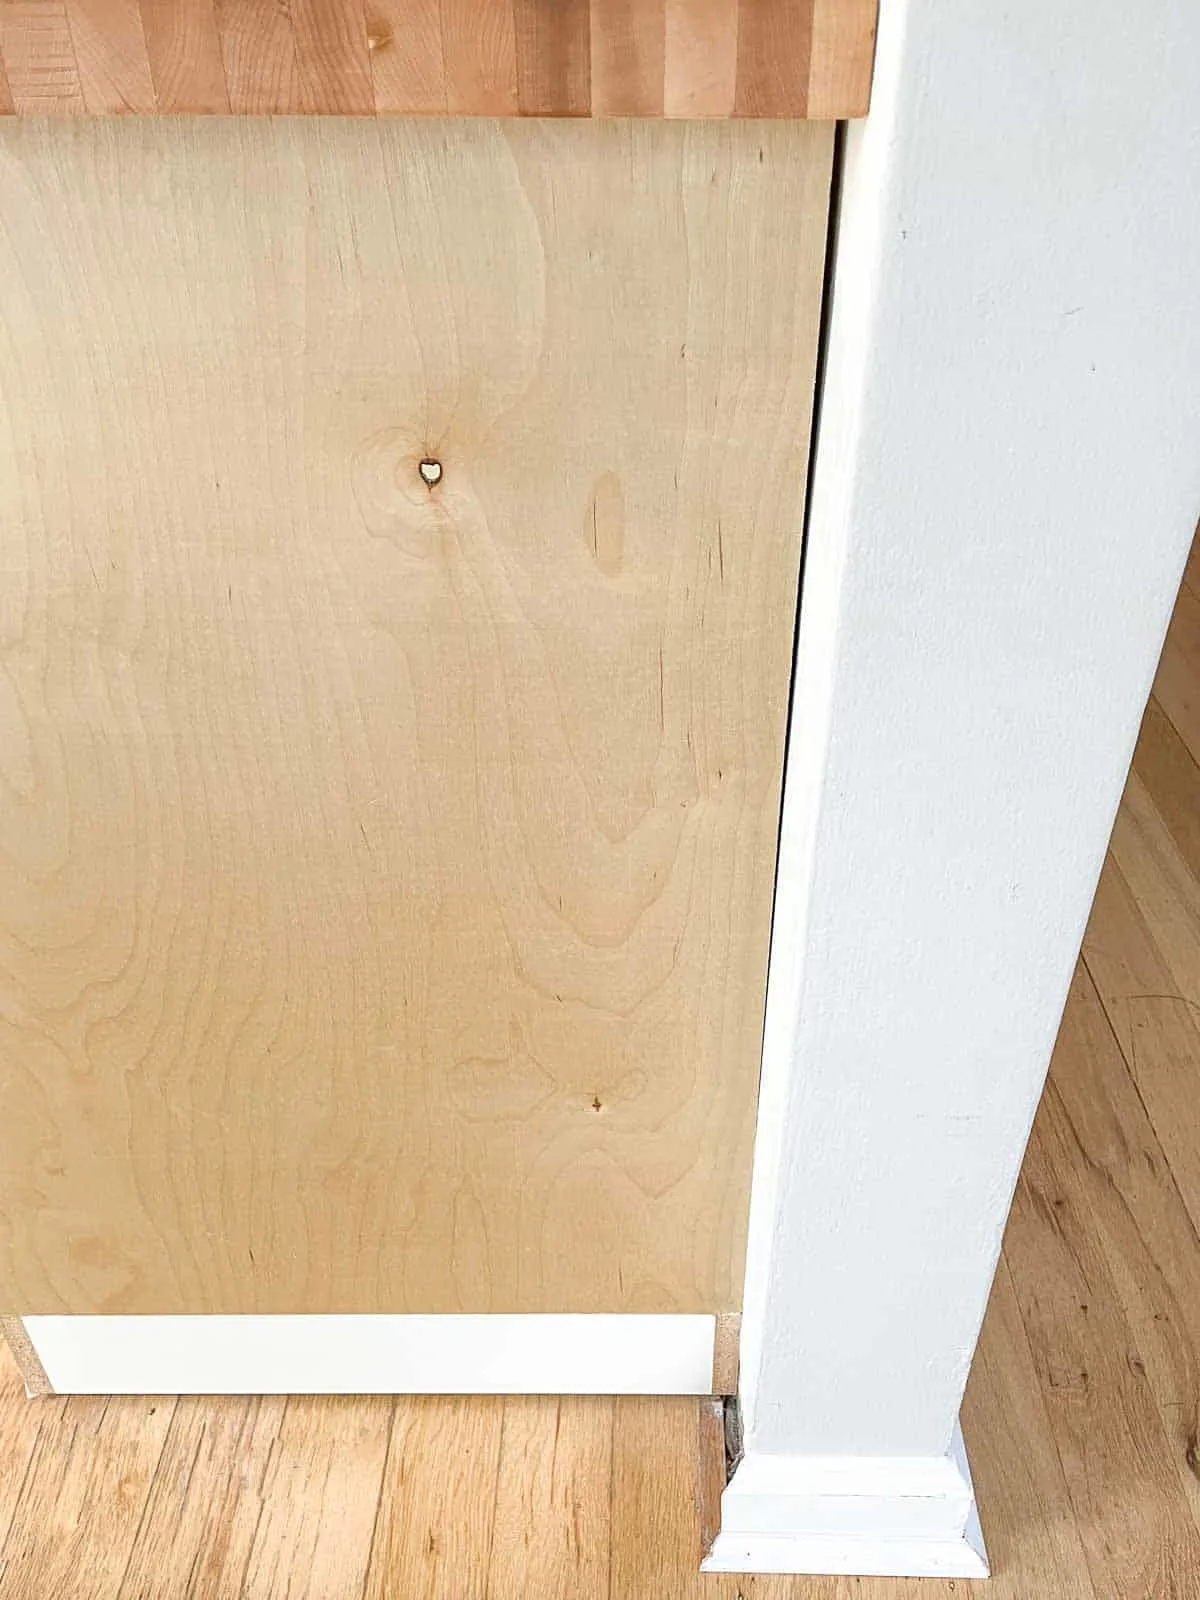
It may look like the cabinet in the photo below is installed crooked, but it's actually the wall that's bowed in! I slipped a shim between the nailer strip and the wall before attaching it to the stud to keep the cabinet level. Otherwise, the screw would force the back flush with the wall and the front of the cabinet would tip up. This gap will be covered up with a cabinet end panel later on.

Once everything is lined up correctly, use clamps to hold the two cabinets in place. Then use 1 ¼" screws to connect them together. This will prevent the fronts from getting out of alignment when the adjacent cabinets are attached to the wall.

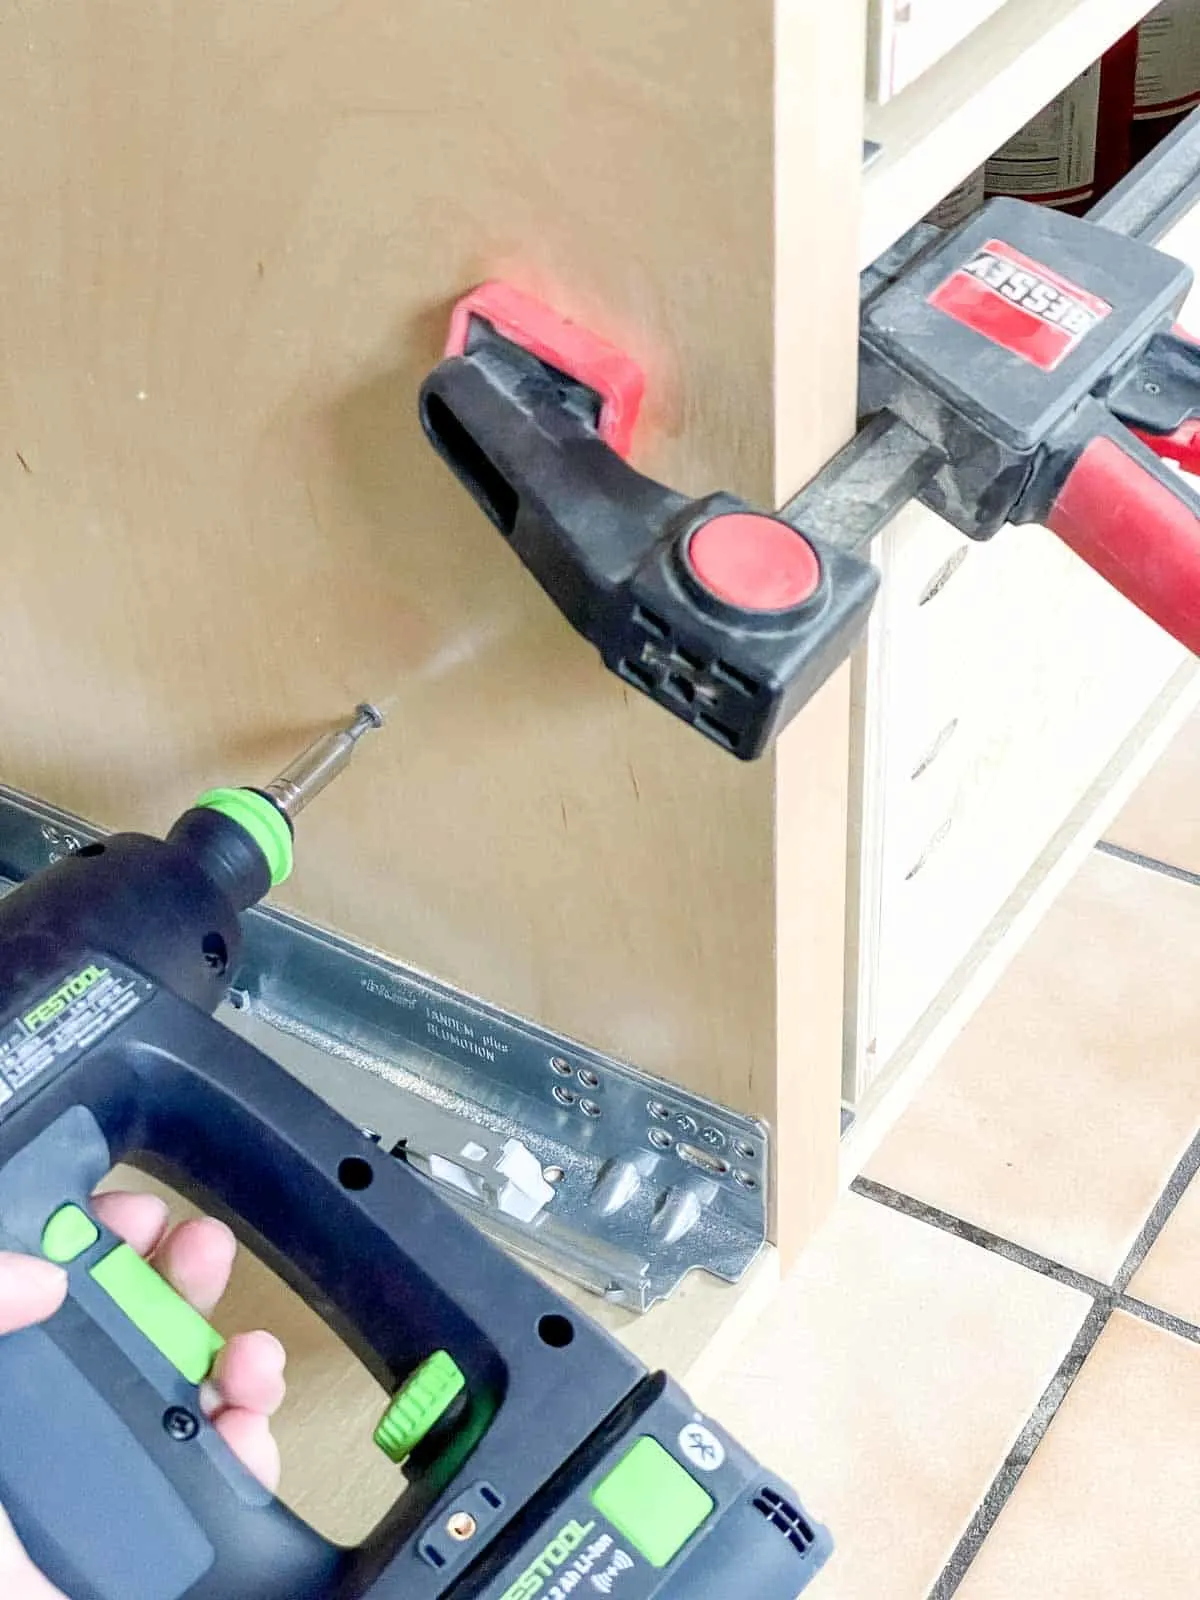
Now you can screw the cabinet box to the wall at the studs through the nailer strips. Make sure the shims fill the gaps snugly, so the box doesn't pull on the screws connecting the cabinets together.
Hide the gaps
If you have an old house with wonky floors and walls like mine, you'll have shims visible everywhere! Don't worry, you'll be able to hide them so it gives the illusion that everything is perfectly straight!

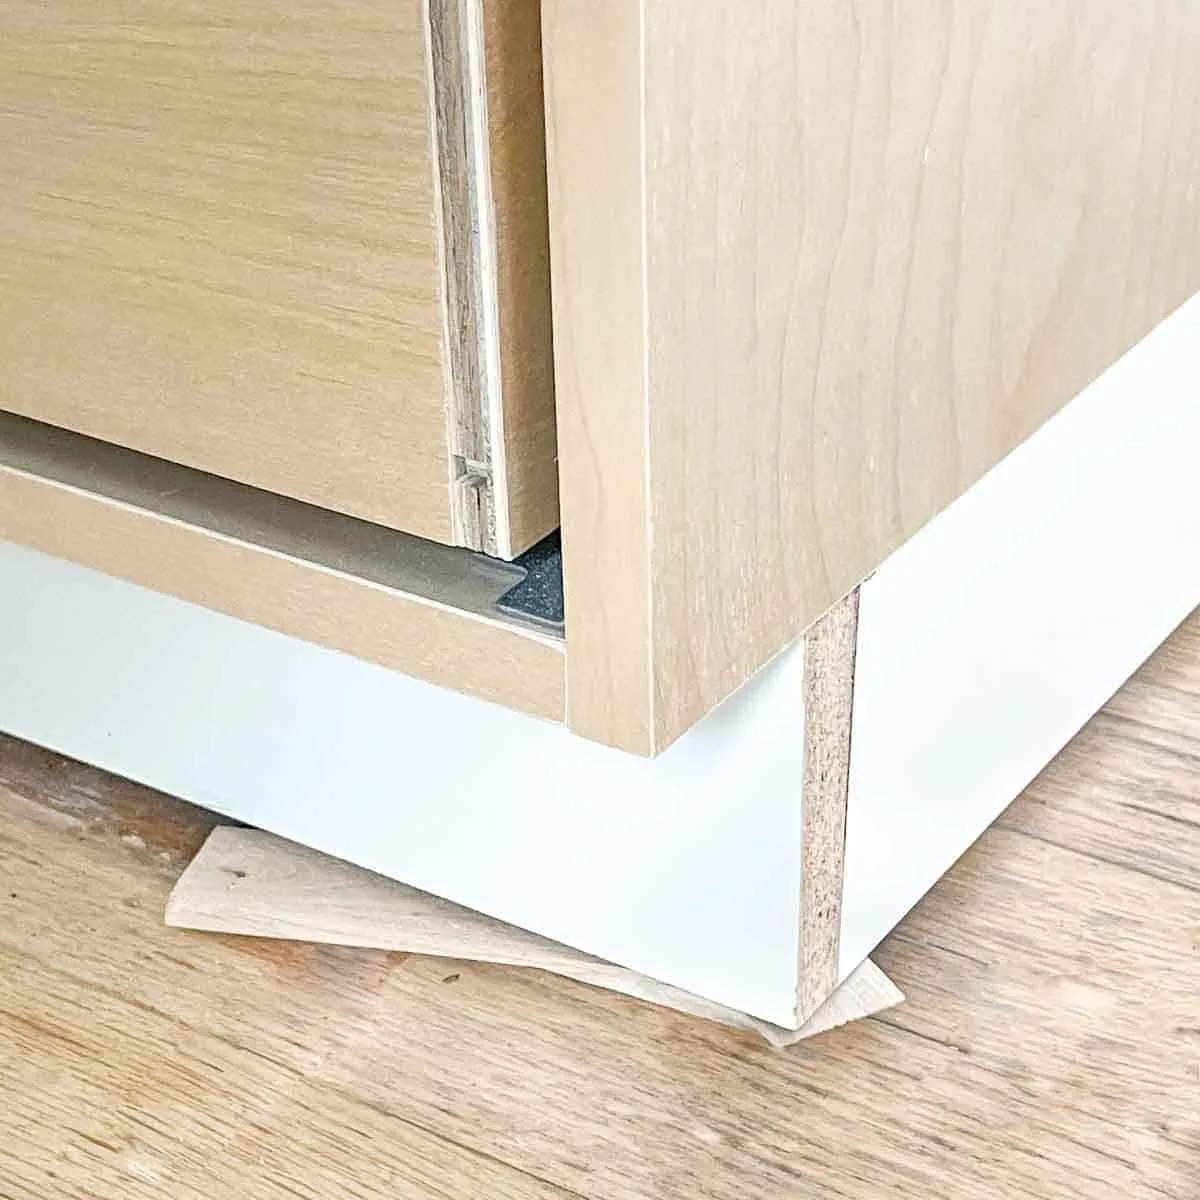
Use a utility knife to score the shims where they meet the cabinet, then snap them flush. You don't want any of the shim to stick out past the cabinets!
If the side of the cabinet is visible, you can hide the screws and shims with an end panel. Use a scribing tool to mark a line where the cabinet meets the wall so you don't have any gaps. Cut the back of the panel to that line, then screw it to the cabinet from the inside. I'll have a full tutorial on this process soon!
To hide gaps between the base cabinets and the floor, use toe kick molding. This is usually just a flat piece of ¼" or ⅛" trim that matches the cabinets. Instead of fiddling with scribing a line and cutting it to fit, just rest the trim on the floor and leave any gap at the top. No one will see it unless they're laying on the floor!
Now that you know how to install base cabinets yourself, you can start working on that dream kitchen! I have separate tutorials on how to build wall cabinets and how to hang upper cabinets by yourself to help you out. You can even make your own Shaker cabinet doors and drawer fronts!
Check out these other kitchen remodel ideas!