What is a cabinet toe kick? Why do you need them? What dimensions should they be? I'll answer all these questions and more!

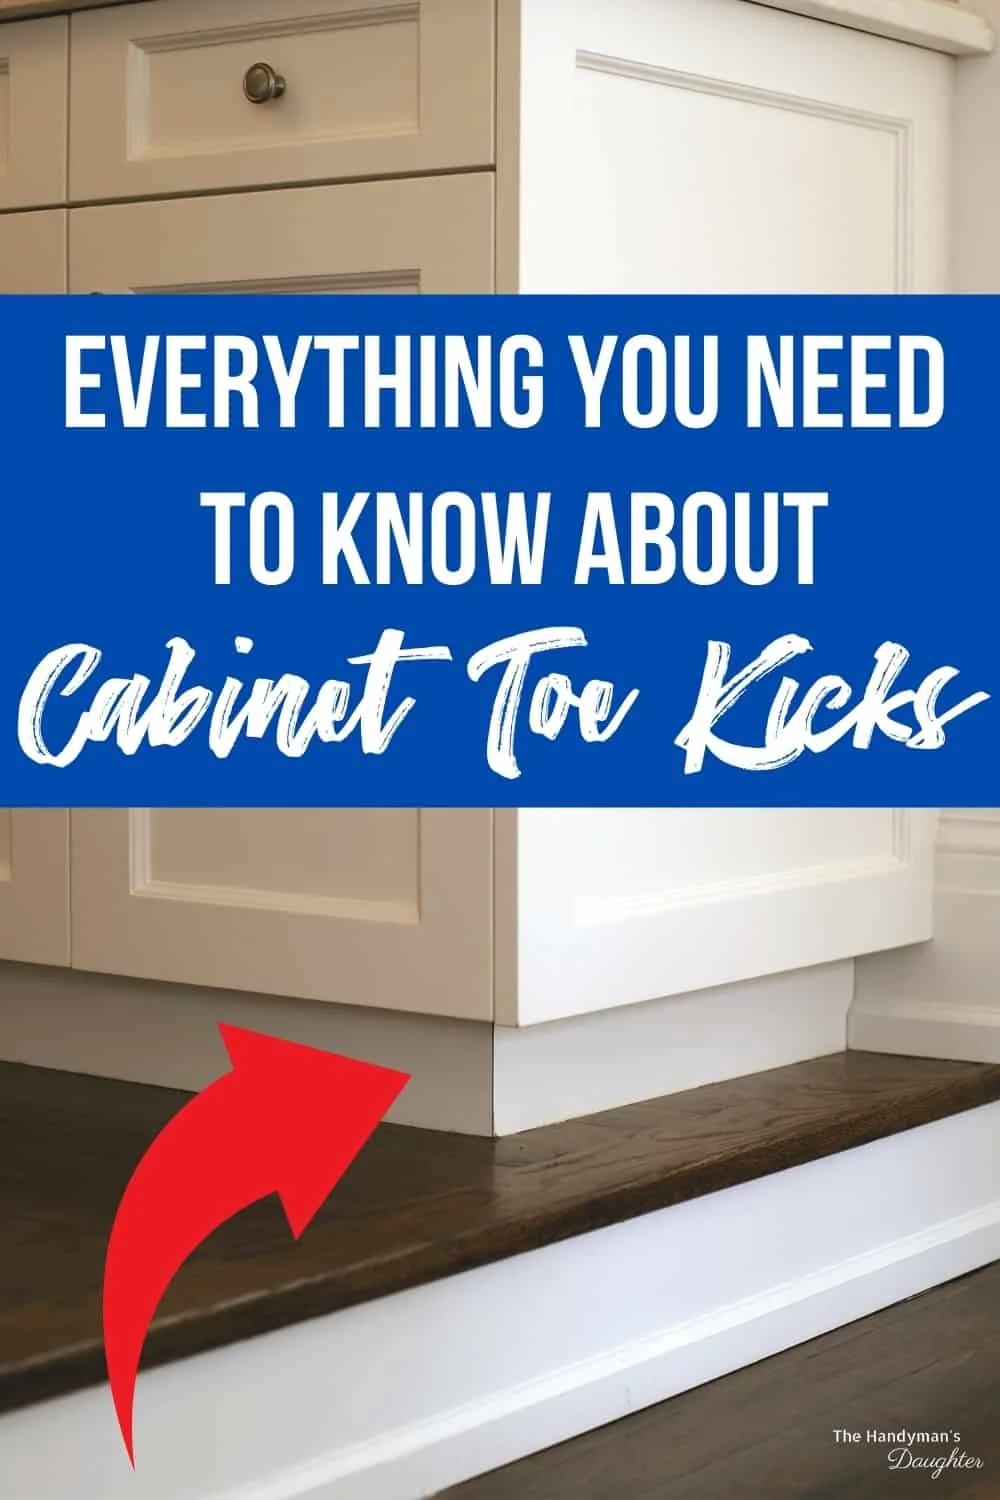
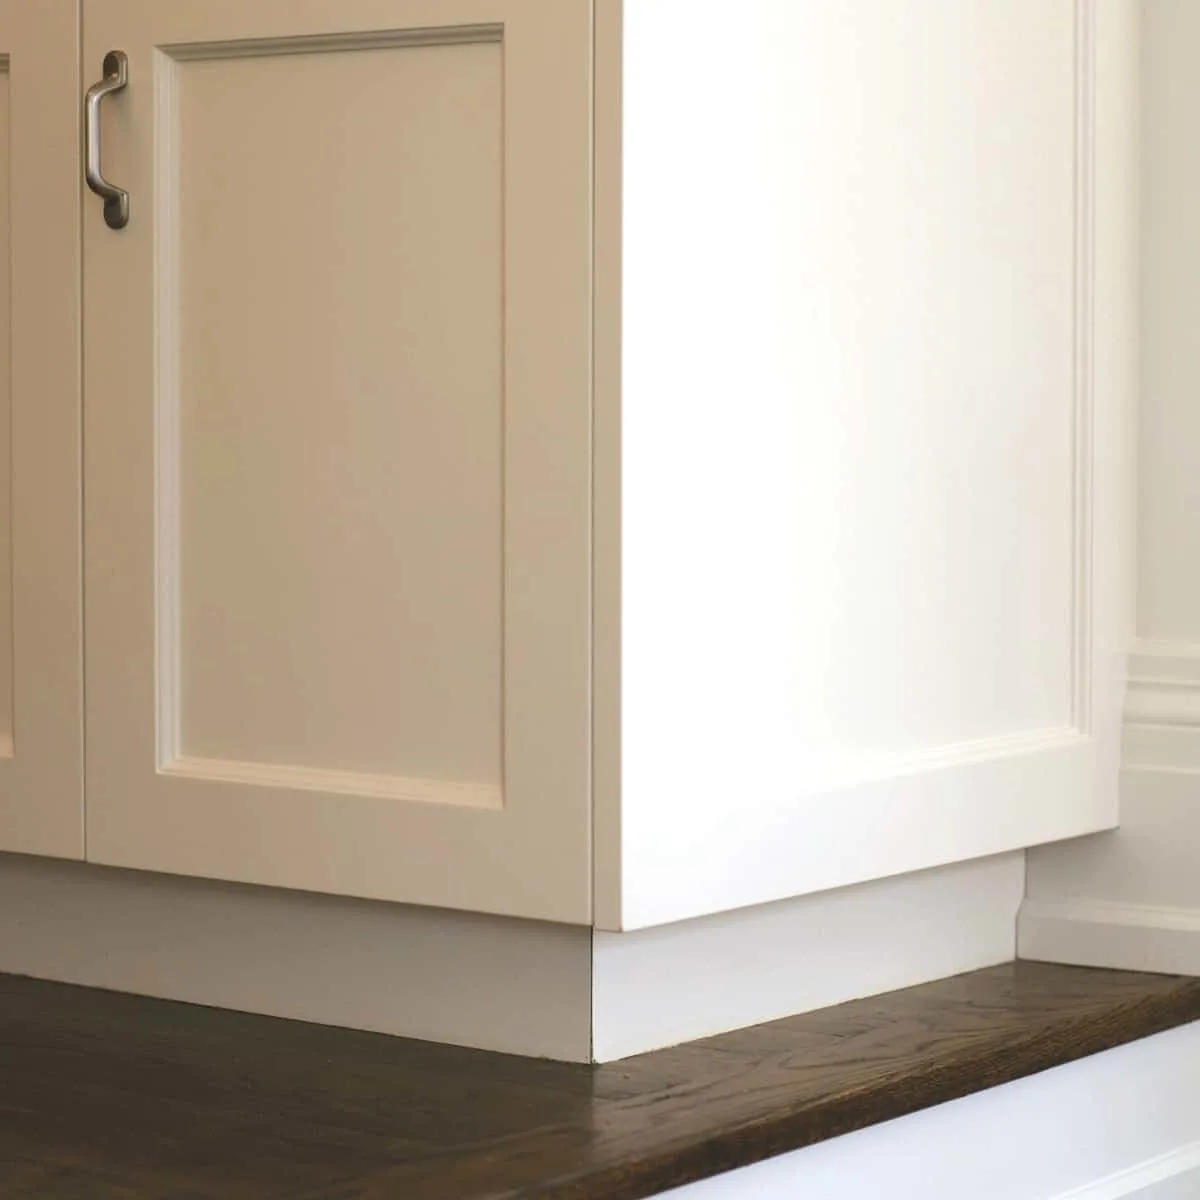
At the bottom of every base cabinet in your kitchen or bathroom, you'll notice a recessed area between the bottom of the door and the floor. This area is called a toe kick, and it's an ergonomic feature to make it more comfortable to work at the countertop or sink.
It gives you a spot to slide your toes under the cabinets without bumping into the front, so you can get up closer to your work. Without a toe kick, you'd have to bend forward and strain your back.


This post contains affiliate links for your convenience. Purchases made through these links may earn me a small commission at no additional cost to you. Please visit my disclosures page for more information.
Cabinet toe kick dimensions
The toe kick is usually set back 3-4" from the front of the cabinet and 3-4" from the bottom. It needs to be deep enough for your feet to fit, but not so tall that it wastes space that could have been used inside the cabinet.
The standard depth of a toe kick is 3", which is what you'll find on most commercially available cabinets. You can go deeper if you have big feet that need extra space, but you shouldn't go less than that.
The standard height of a toe kick is 3 ½", although you can go up to 4" without losing much space in the cabinet above. I built our base cabinets with 4" tall toe kicks simply because our Roomba tends to get stuck under anything shorter!
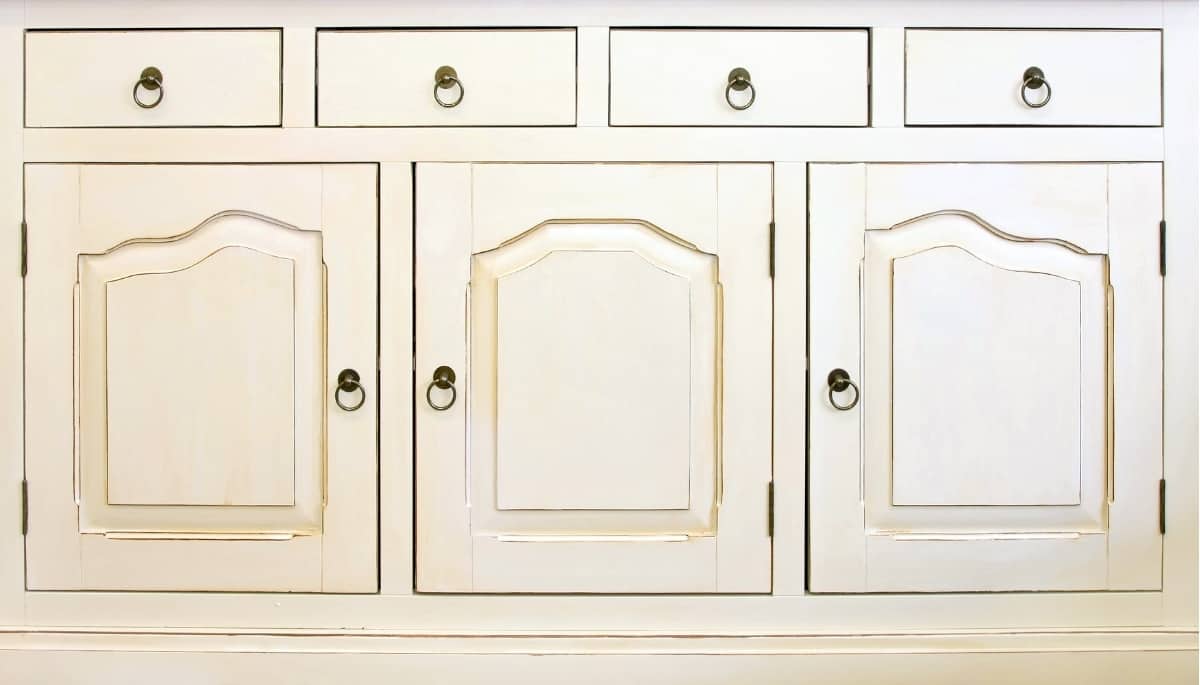
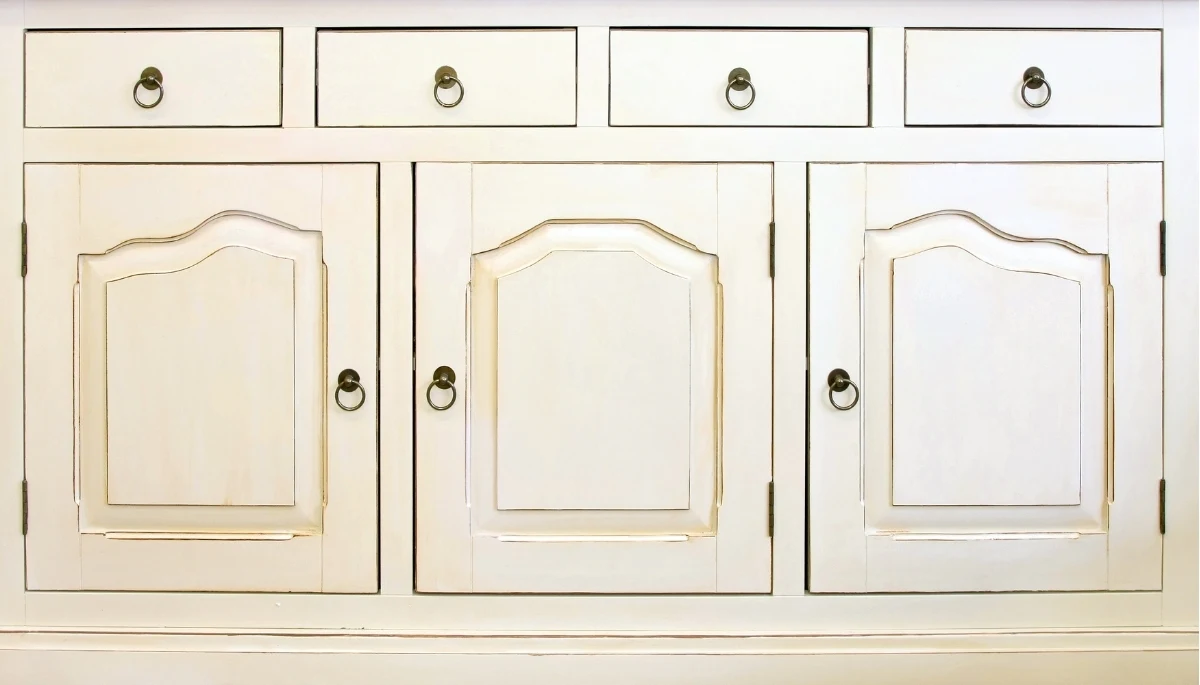
Cabinets without toe kick
Some people prefer the look of base cabinets without a toe kick, or an open bottom with legs. While this is fine for storage cabinets like the one below, it isn't recommended for a kitchen or bathroom.


Not only will a cabinet without a toe kick be uncomfortable to work at, but it will quickly get damaged. Even if you think you won't need it, you might find yourself scuffing the front with shoes or the vacuum cleaner more often than you might expect.
If you're thinking of making your cabinets look more like furniture by adding feet instead, consider the additional cleaning that you'll need to do underneath. Crumbs and pet fur can end up deep under your cabinets, and no one wants to clean under there! A toe kick seals off this area and makes cleaning the floors much easier.
Also keep in mind that the next owner of your home will expect a functional kitchen, and they might not appreciate your aesthetic choice to skip the toe kicks.
What is toe kick molding?
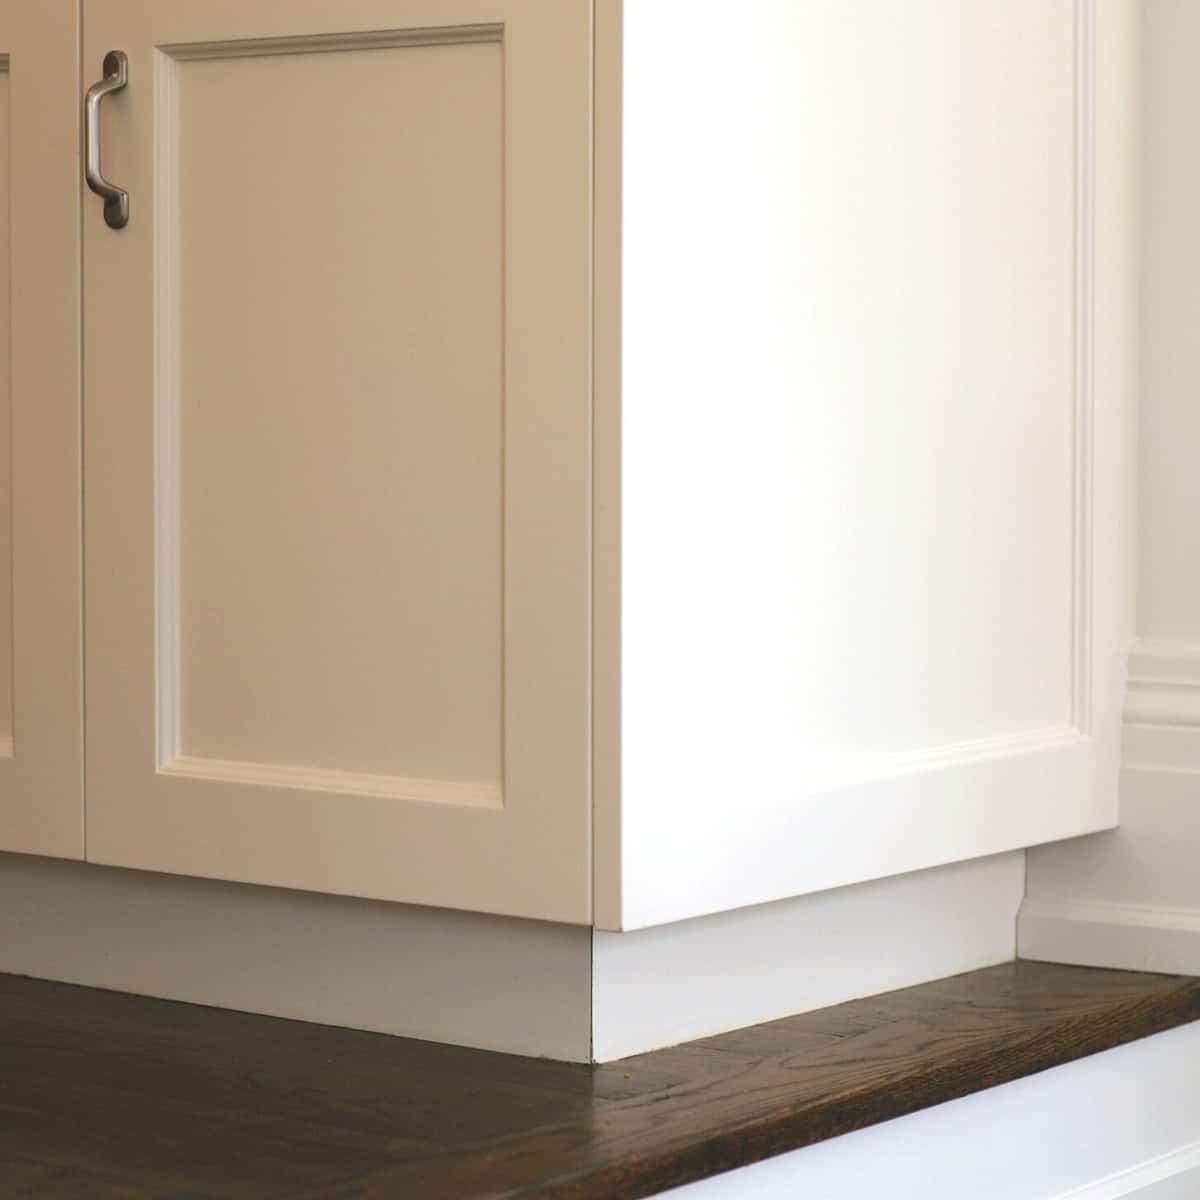
Toe kick molding is a piece of trim that matches your cabinets, and is used to hide the seams and gaps between the cabinets and the floor.
When you're installing base cabinets, shims are inserted to bring all the boxes level and plumb. Walls and floors are rarely perfectly straight, and the shims hold the cabinet boxes at the correct angle so the countertop is flat.

However, these shims can create unsightly gaps between the toe kick and the floor. My base cabinets span across both tile and hardwood, and there was more than a ¼" difference from one end to the other! It took quite a bit of shimming to get the countertop level.
I'll be using a thin piece of trim painted to match the cabinet doors to cover up these gaps. A scribe tool will help to transfer the irregular lines to the molding to create a perfect fit! Once it's installed, the height difference from one end of the cabinets to the other won't be noticeable.
How to install IKEA cabinet toe kicks
IKEA cabinets use feet under the cabinet box, which are easy to adjust to accommodate uneven floors. The feet come with little clips to attach the toe kick once you've cut it to size. The video below shows you exactly how to install it!
How to make a cabinet toe kick
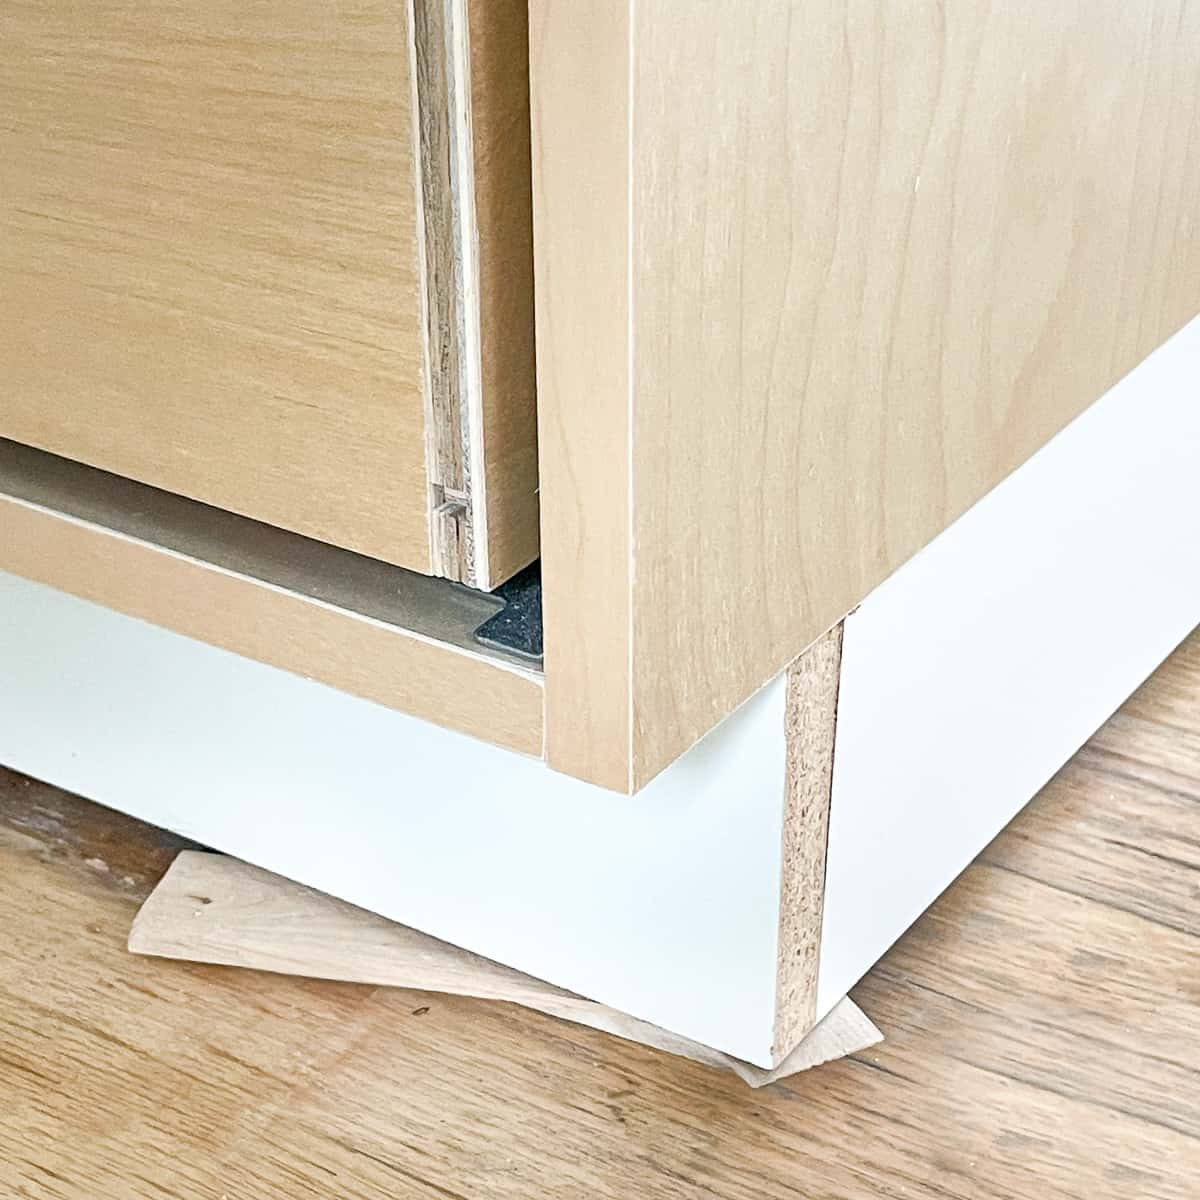
There are two ways to create the cabinet toe kick. You can build a separate platform for the cabinet to rest on, or you can integrate it into the side pieces and cut out a notch at the bottom.
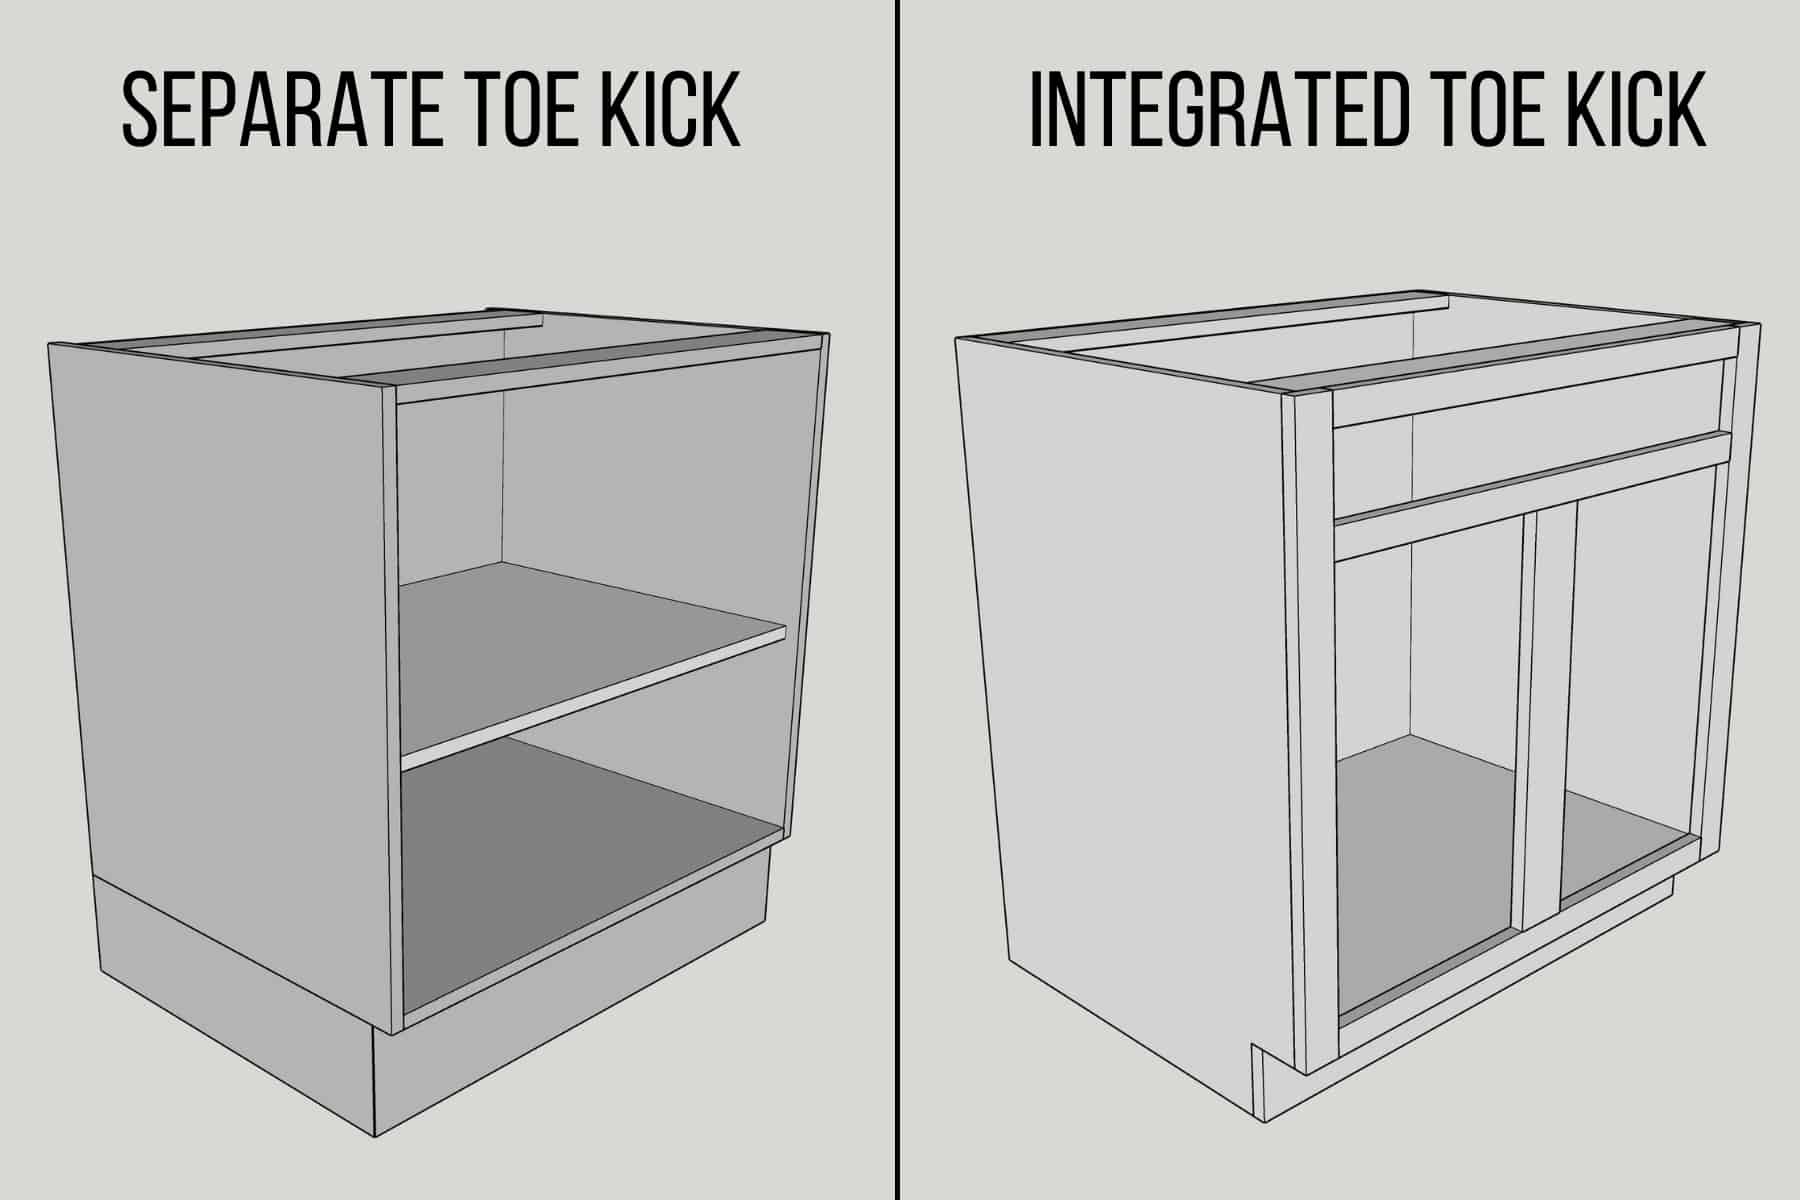
For my DIY kitchen cabinets, I'm building a separate toe kick platform instead of integrating it into the side pieces. This saves on materials, since I'm able to get most of two cabinets out of a single sheet of plywood and use scraps for the toe kick box. Plus, it's easier to level a small platform rather than a huge cabinet when it's time for installation.
For integrated toe kicks, you'll need to add 3 ½" - 4" to the height of the side pieces. Then cut a notch in the lower front corner to create the recessed area. The video below shows you how to use a jigsaw to complete this step.
The separate toe kick box can be made from 2x4s or any ¾" material. You can make one long platform for multiple cabinets, or individual platforms for each cabinet box. Just make sure to stick to one height throughout the entire kitchen!
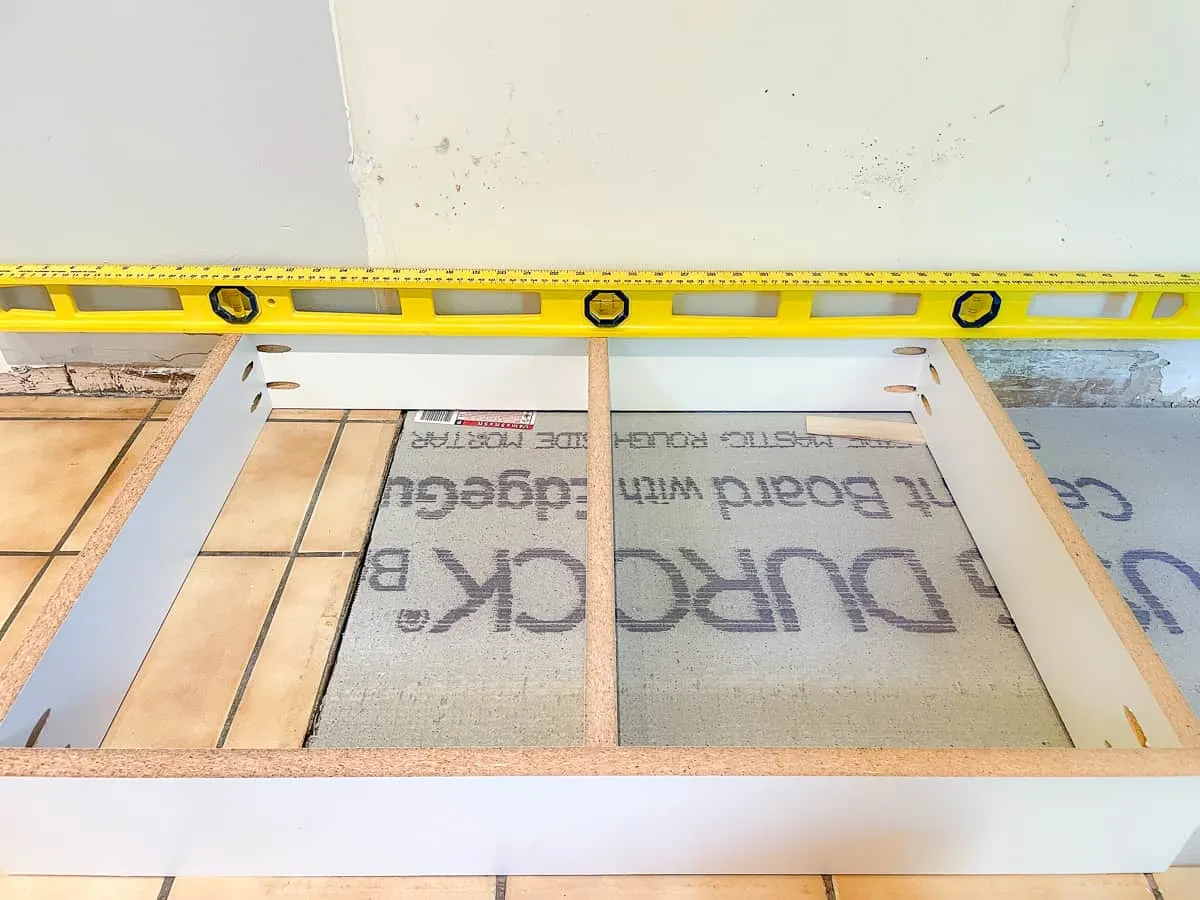
For cabinets that are 24" wide or more, you may want to consider adding a support down the center of the toe kick box to prevent the bottom from sagging. I assembled mine with pocket holes, since the inside of the platform won't be visible once the cabinet is installed.

If the outside corner will be visible (like on a kitchen island), you may need to cut both ends at a 45 degree angle to hide the board ends. You can learn more about how to make a mitered cut here.
Once the platform is level in all directions, it can be screwed into the wall through the back piece to hold it in place. Make sure to use a stud finder to locate the studs and mark them all the way up to countertop height. Once the cabinet is set on top, you'll need to attach it to the wall the same way, and it'll be easier to see the markings.
Kitchen cabinet toe kick ideas
Even though it's only a few inches high, you can put that space under your cabinets to good use! There are a lot of interesting features for toe kicks that will make your kitchen more functional.
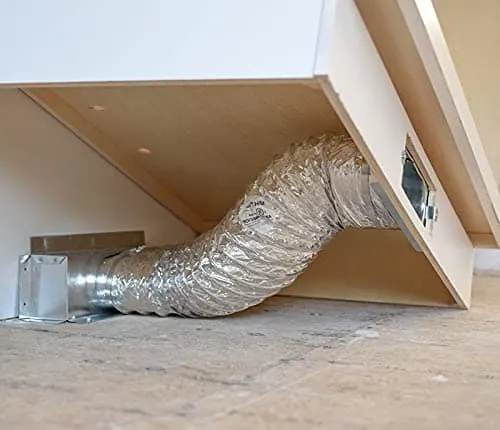
Toe kick heaters and vents
Your kitchen needs heat just like the rest of the house, but you may find the vent blocked by the cabinets. Typically, a hole is cut into the toe kick to allow the heat to escape into the room. A short register plate covers up the hole and prevents debris from getting inside.
The problem with this method is that it heats up the entire underside of the cabinet, instead of directing it out into the room. A short duct that connects the heating vent to the register funnels the hot air out where you need it!

Toe kick drawers
If you have a small kitchen, every square inch of space is valuable. Toe kick drawers are perfect for cookie sheets, cooling racks and other flat items, as long as you remember they're down there!
These small drawers are easier to install when you're putting together a new kitchen. Kraftmaid offers this feature on some of their cabinets, or you can build your own like the one in the video below. You can also retrofit existing cabinets with a few modifications.
Usually these drawers operate with push-to-open drawer slides. Keep in mind that using your shoe to press on the drawer front will quickly lead to scuff marks, and bending all the way down to the floor to retrieve items isn't great for your back. If you have pets, you may also discover that their fur finds its way into these drawers (ewww!)
Toe kick lighting
If your kitchen feels too dark, toe kick lighting is an easy way to brighten it up! Motion activated sensors can turn on the lights automatically when you walk into the room, so you can sneak to the fridge for a midnight snack.
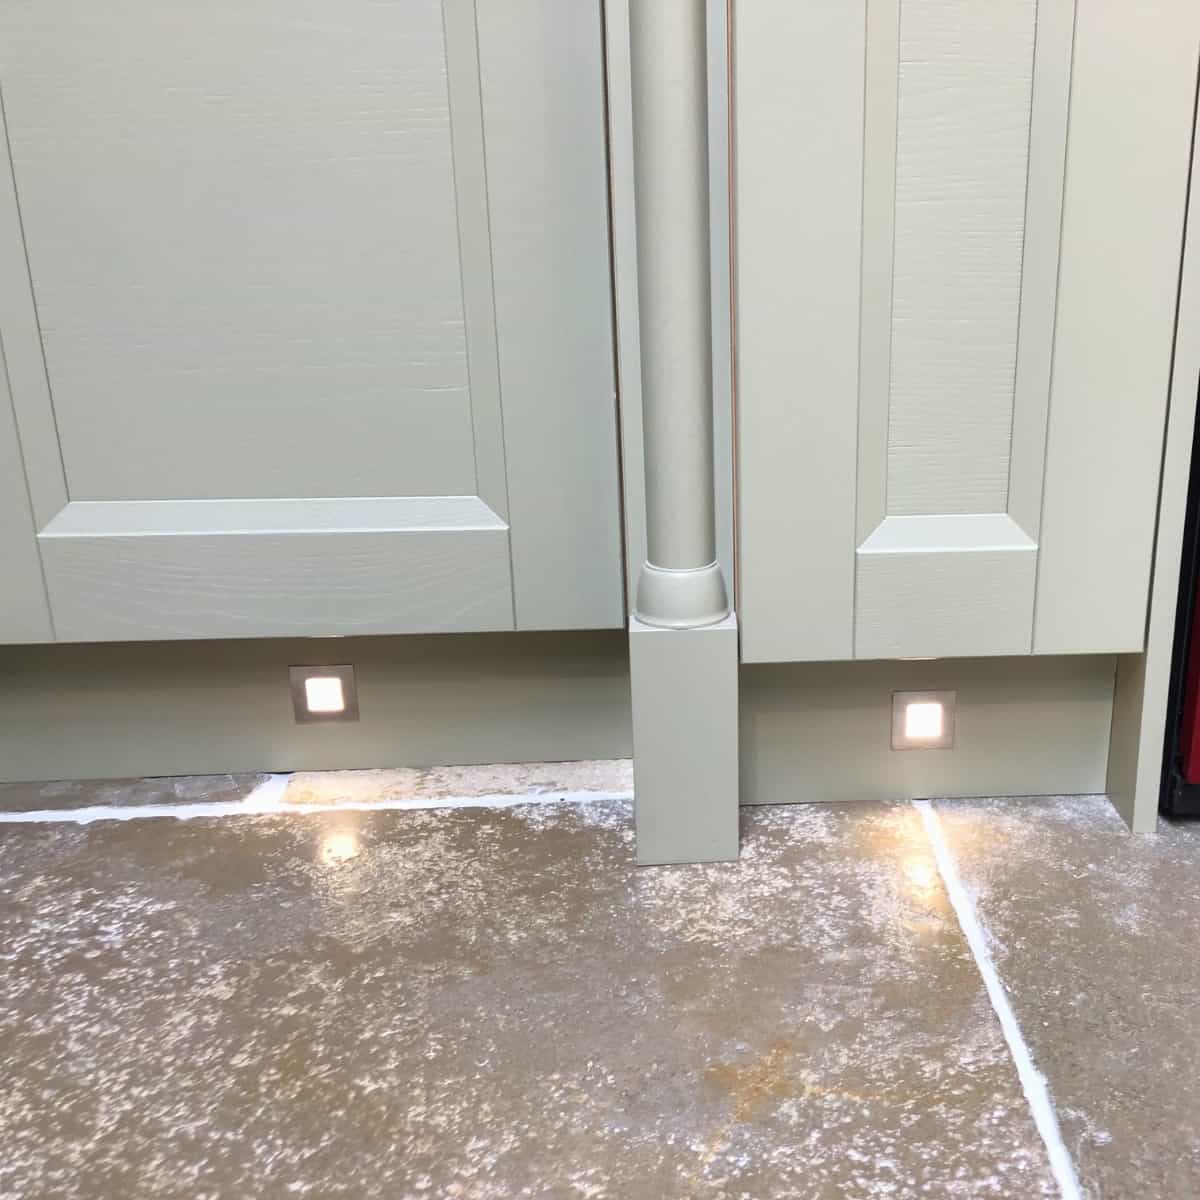

Toe kick lighting can be as simple as an adhesive LED light strip that sticks to the underside of the base cabinets and plugs into the wall. You can also hire an electrician to hard wire the lights to each cabinet for a more custom look.
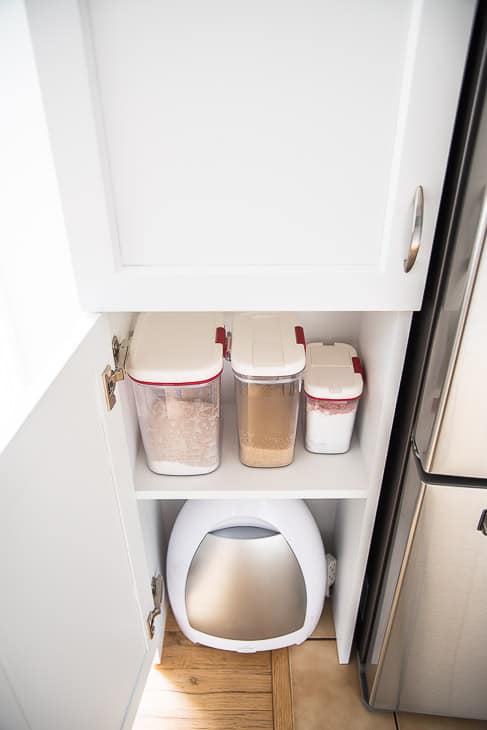
Toe kick vacuum
This is a great feature that I added to my pantry cabinet! I removed the bottom and the toe kick, and installed a motion-activated vacuum on the floor inside. Now we just sweep crumbs to the pantry and they're automatically sucked up without having to open the door!

There are also kits that incorporate the vacuum directly into the toe kick. This one may be easier to install when you're renovating an entire kitchen, so you can easily cut out the hole and wire it up.
Hopefully this article helped answer all your questions about cabinet toe kicks! If you're interested in learning more about building your own kitchen cabinets, check out the articles below!
June
Thursday 28th of October 2021
Great article! Thanks for the info.