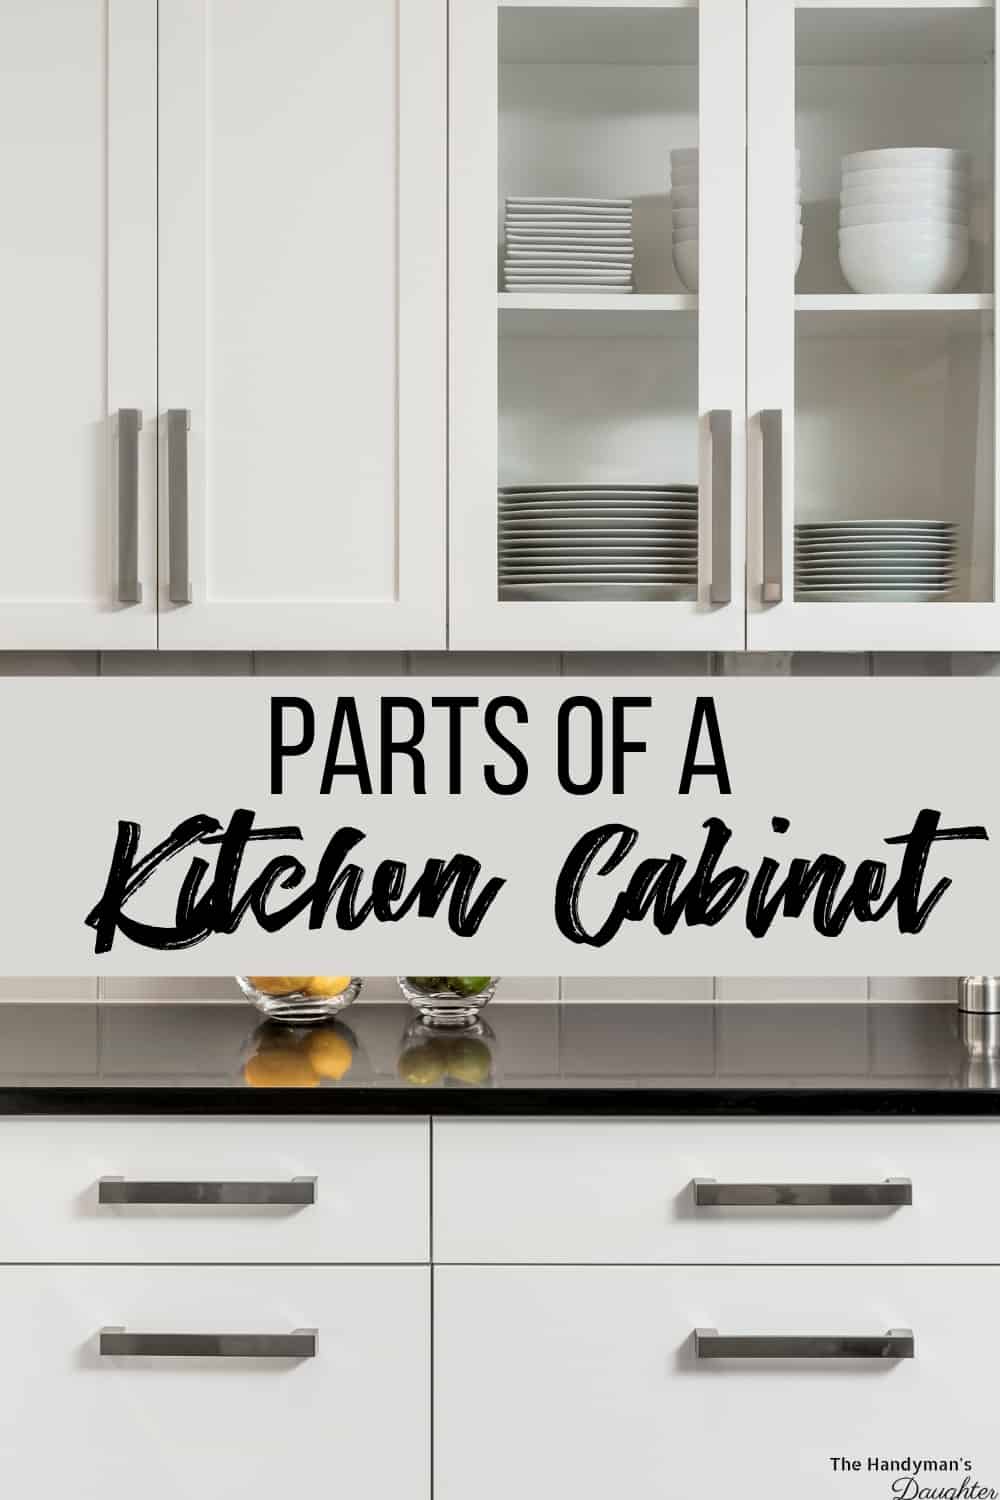
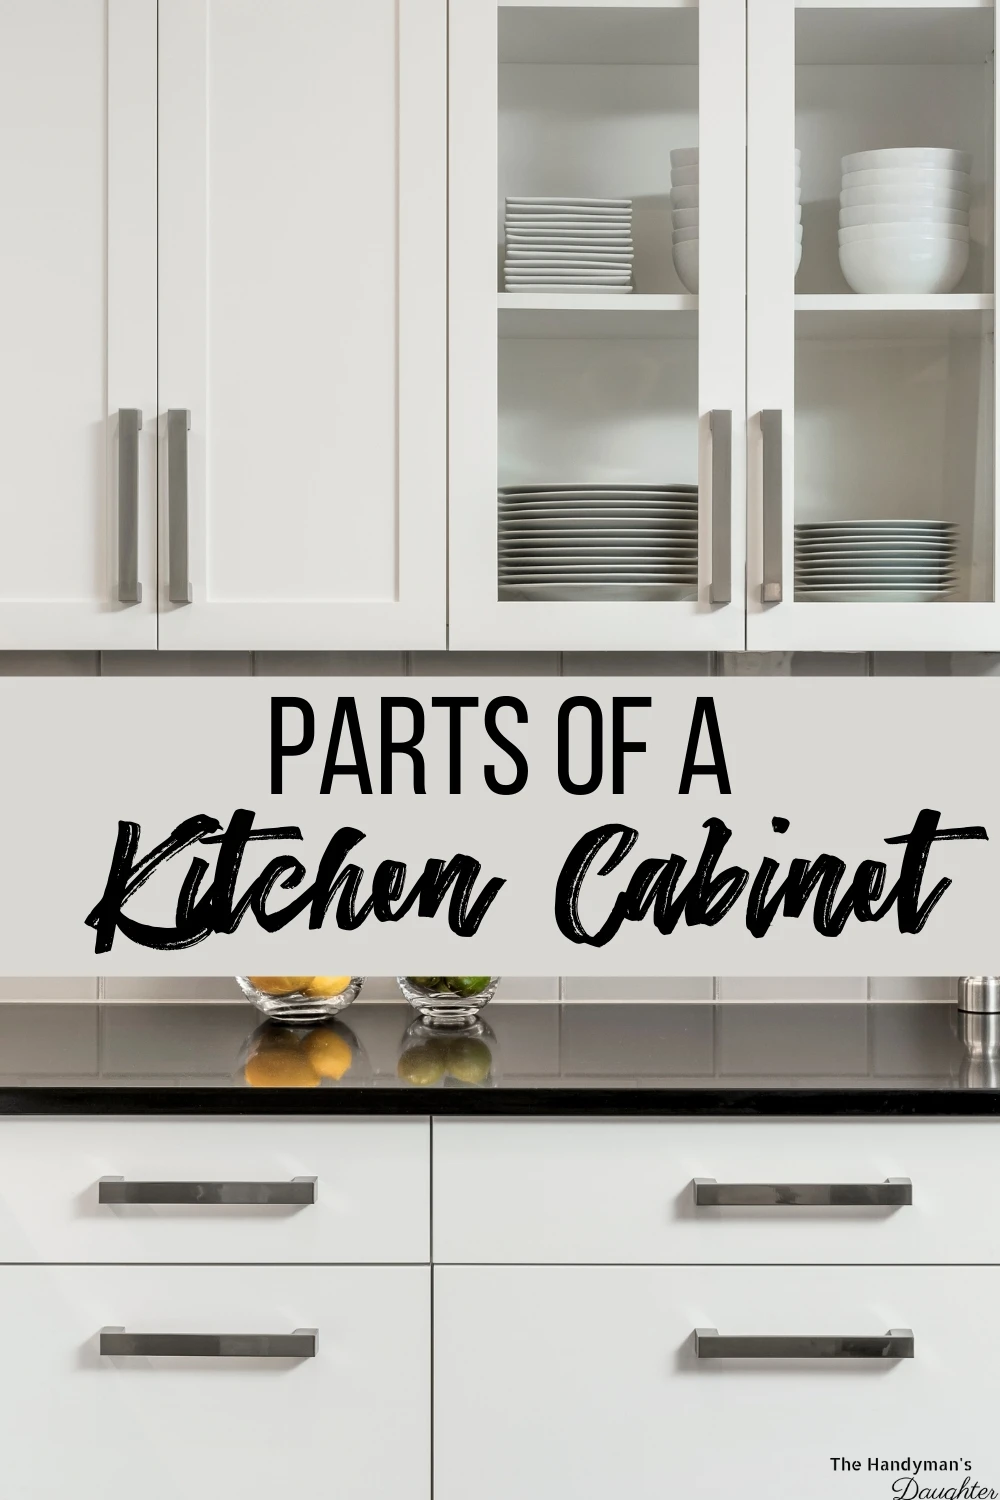
Kitchen cabinets are just a bunch of boxes. Knowing the parts of a cabinet and how they go together will take the mystery out of your remodel!
Making your own cabinets sounds like a big, scary project, but if you can build a box, you can build a cabinet! It helps to know the terms for the various parts, so you understand the difference between a stretcher and a toe kick.
Even if you're buying cabinets instead of building them, you should learn the terminology before heading off to the showroom floor. It can be overwhelming to see so many options in one place! Knowing the different types of cabinets and their components will make the decision process easier.
Face Frame vs Frameless Cabinets
Let's start with the two basic styles of cabinets: face frame vs frameless.
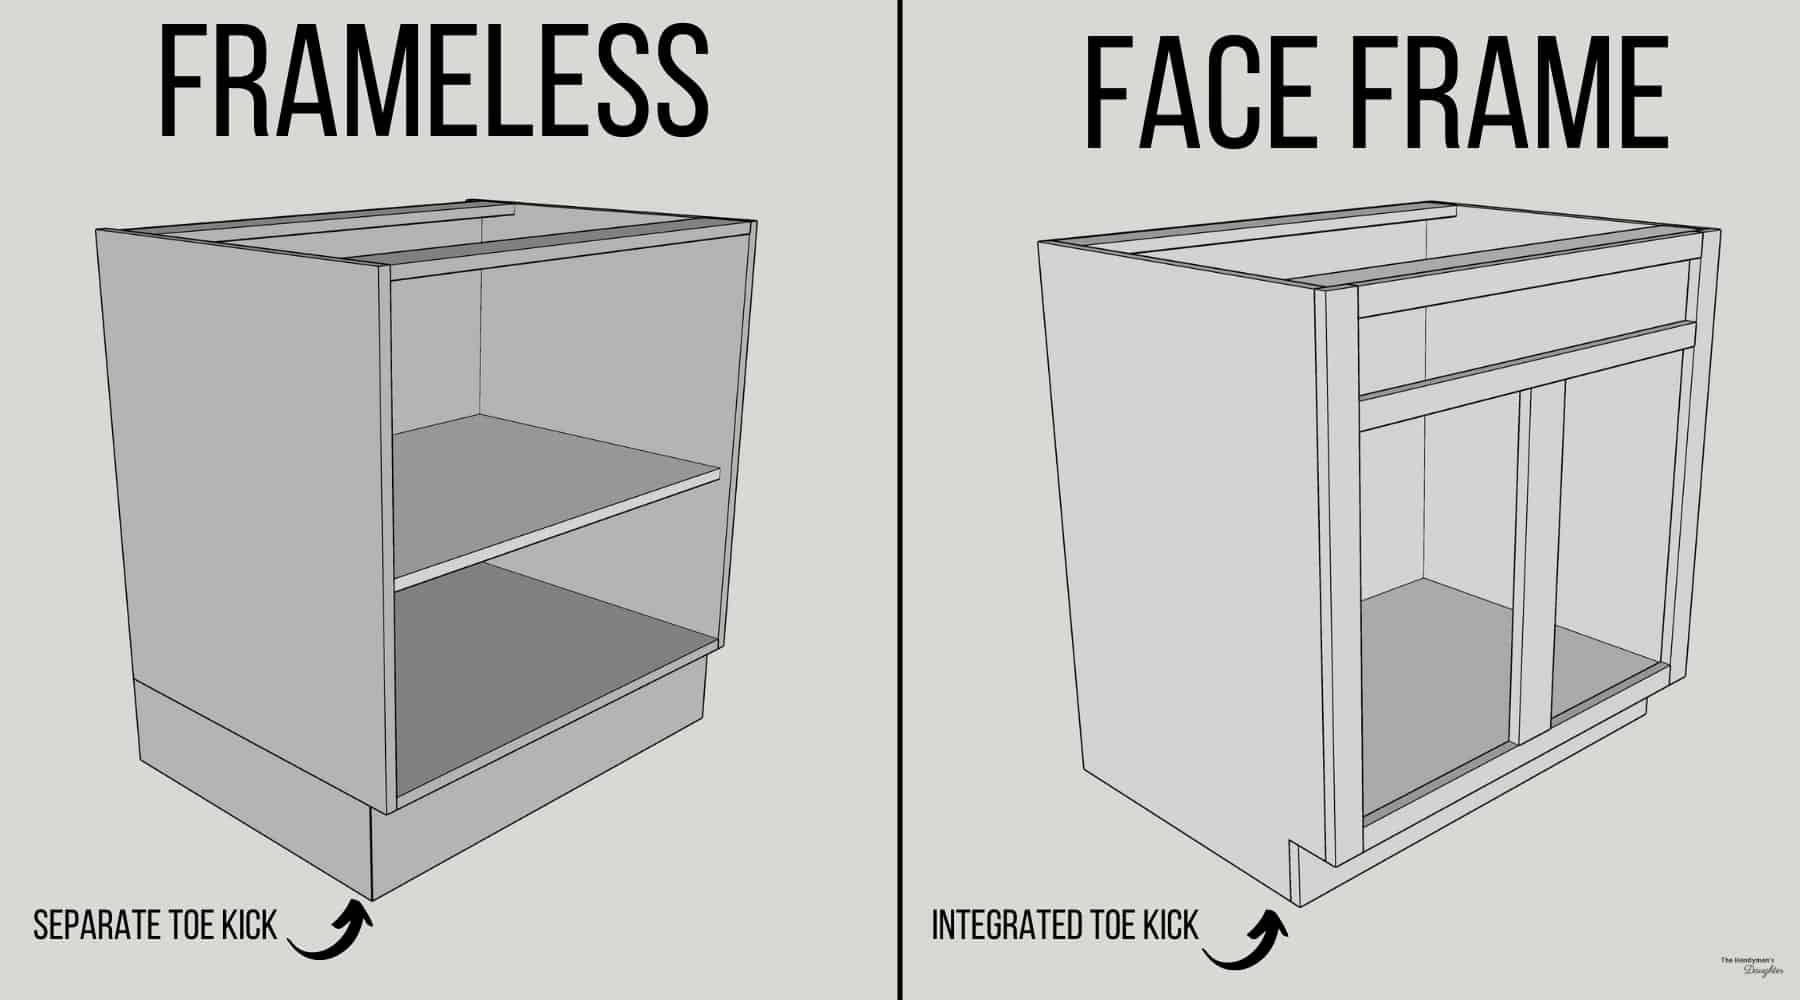
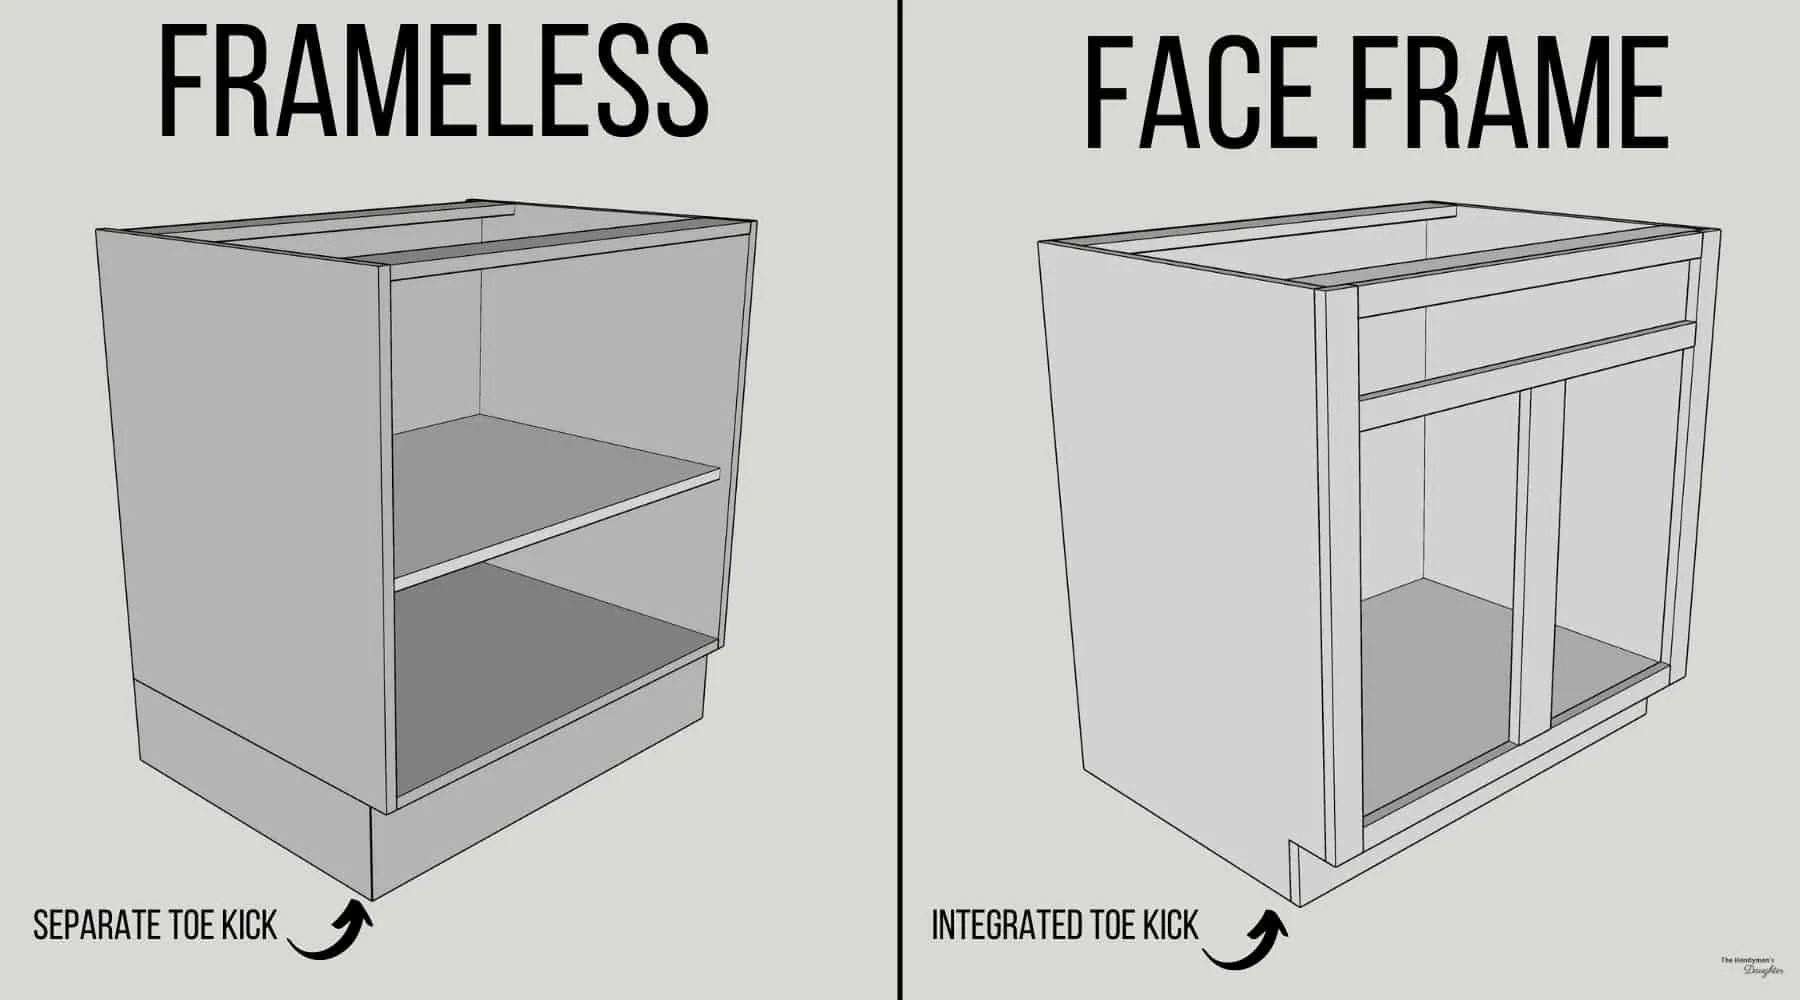
Face Frame Cabinets
Face frame cabinets have a frame covering the exposed plywood edges of the cabinet box. This frame is typically made of hardwood, and are painted or stained to match the doors and drawer fronts.
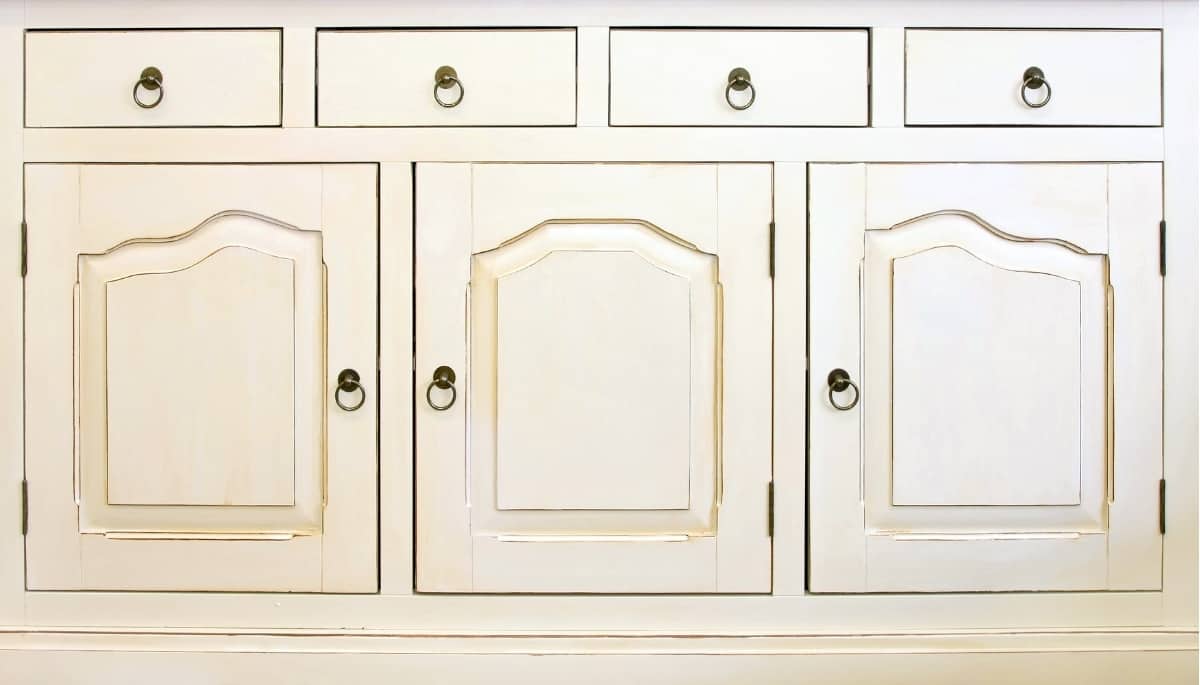
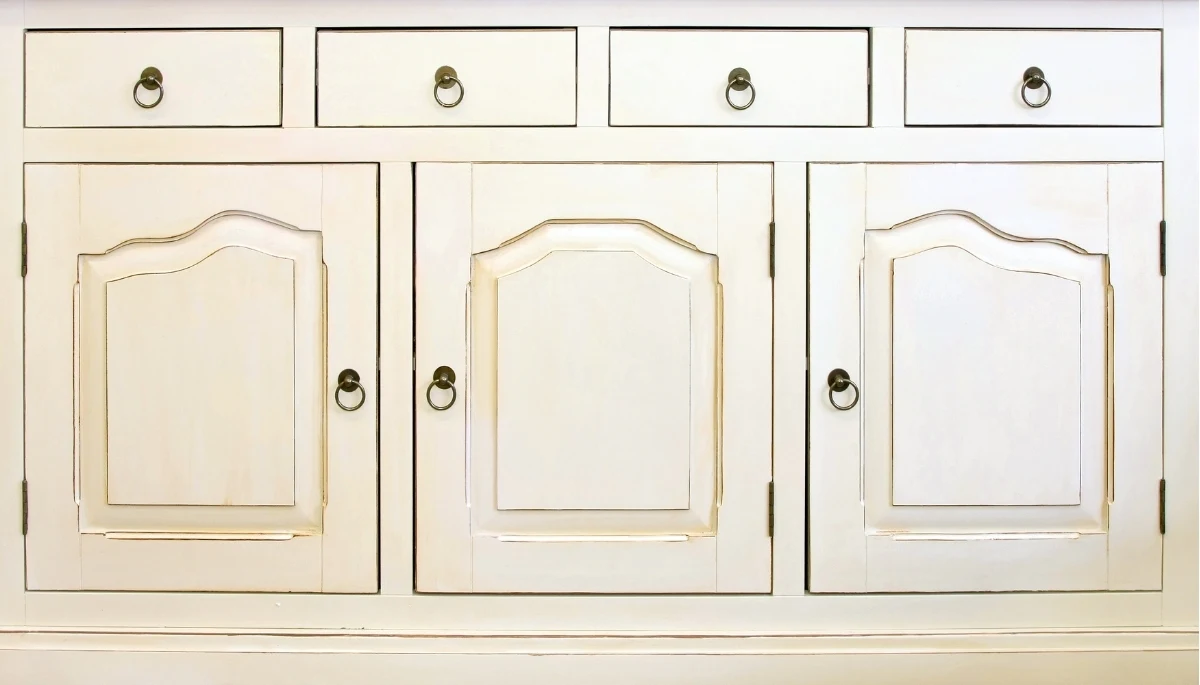
The benefit of face frame cabinets is that you can use either overlay doors or inset doors (like the ones shown above). They are also sturdier, because the frame helps to hold the cabinet square. However, the frame takes up space in the cabinet opening, so you don't have full access to every inch inside.
Frameless Cabinets
Frameless cabinets are also known as European style cabinets, and are becoming more popular. This style of cabinet covers up the plywood edges of the cabinet box with edge banding instead of a face frame.
The benefit of frameless cabinets is that you have more storage space in drawers and easier access within the box, because there's not a frame making the front opening smaller. However, you can only use full overlay doors with frameless cabinets.
I'll be making frameless cabinets for my kitchen remodel, because they're much easier to build. You don't have to assemble a face frame, and worry about it matching up exactly with your cabinet box. Just iron on some edge banding and you're good to go!
Learn how to make a simple cabinet box in this tutorial!
Parts of a Cabinet Box
Now that you know the different types of cabinet boxes, let's move on to the individual parts! The diagrams below are for a frameless cabinet, but a face frame cabinet is put together the same way.
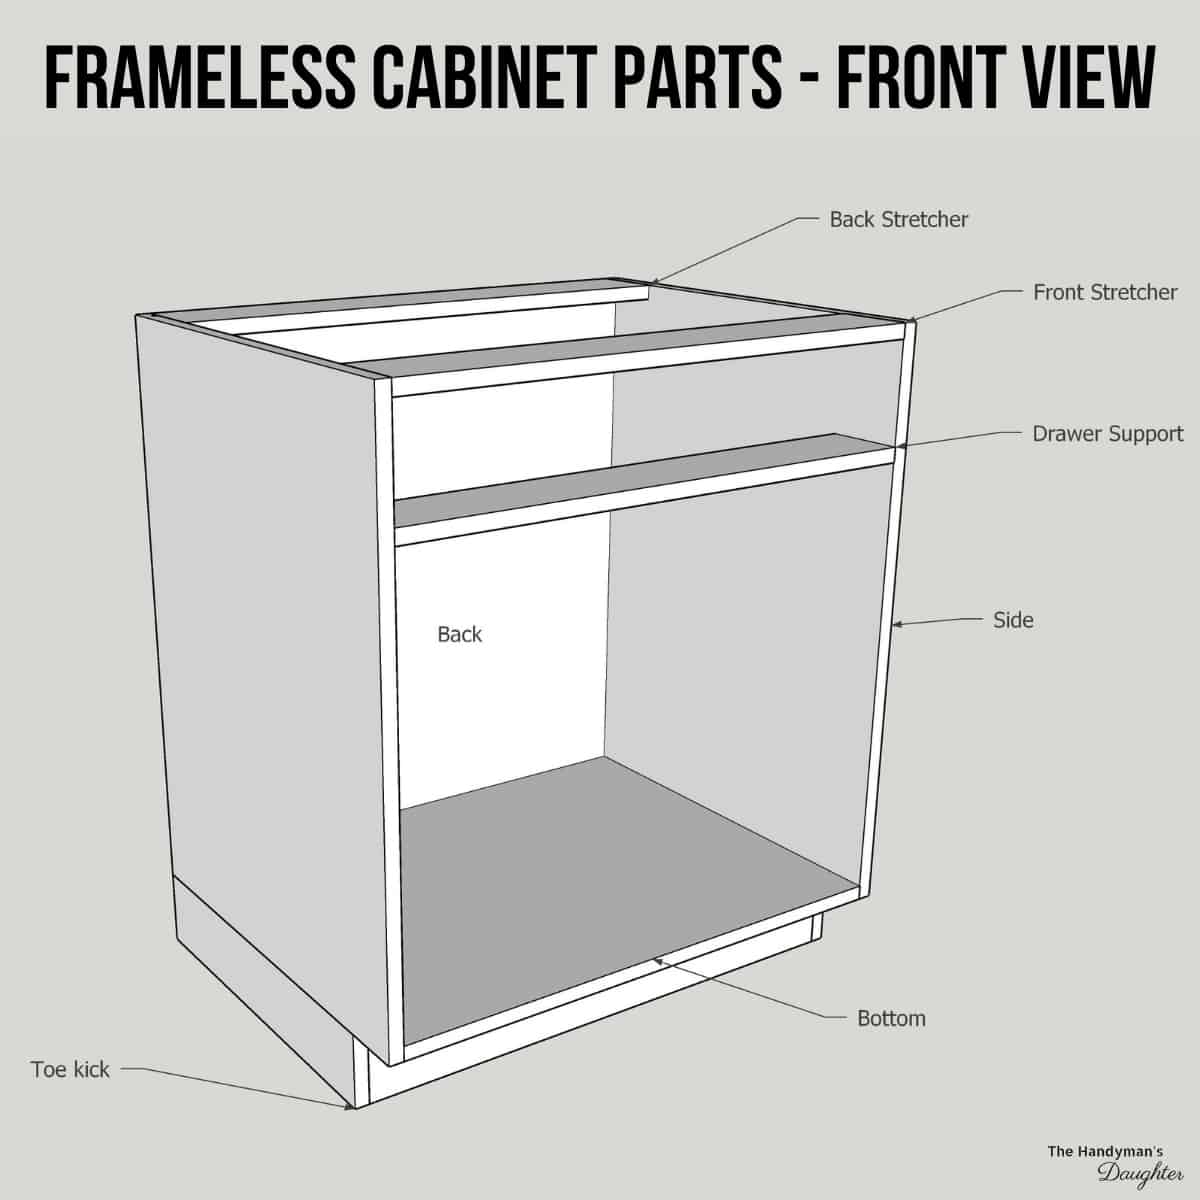
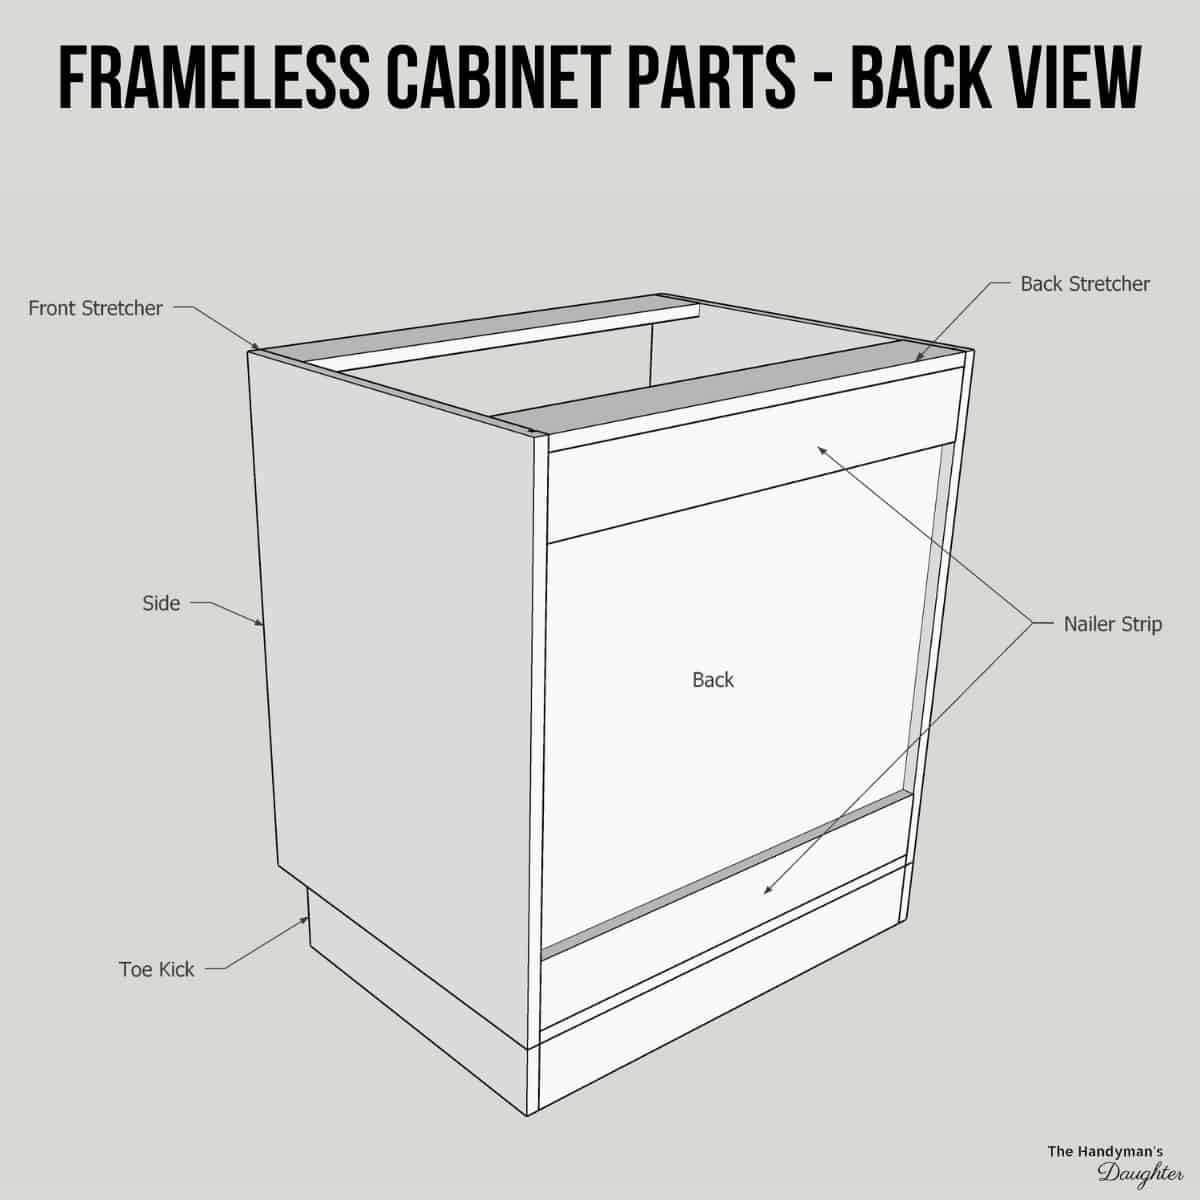
Sides
The sides of all the base cabinets should be the same height and depth. This makes it really quick and easy to cut them all out in one big batch!
The toe kick can be incorporated into the sides, or assembled separately with the cabinet box sitting on top. You can see the difference in the frameless vs face frame cabinet diagram above.
Bottom
The depth of the bottom is the same as the sides, but the width changes depending on how big you want your cabinet to be. In general, you don't want your cabinet to be more than 36" wide, or you'll start to get bowing in the middle.
One benefit to building your own cabinets is that you can make them any width you want! We needed a specific size for a cabinet that isn't a standard dimension you can find easily. A custom order would add hundreds to the price if we were to buy it from a showroom, but it doesn't cost anything more when you make it yourself!
Toe Kick
The very bottom of the cabinet is recessed to allow room for your feet while you work at the countertop. This is called the toe kick. You can cut notches in the sides to create this area, so long as you added the extra height to these pieces. The video below shows you how to cut out the toe kick notches.
I'll be using scrap plywood to create a separate toe kick for my base cabinets. This will allow me to cut out three sets of cabinet sides from a single sheet of plywood! You can also use 2x4 lumber to create a longer platform for all the cabinets to sit on top of. Any of these methods work, so just choose the one that's easiest for you!
On a long bank of base cabinets, the front of all the toe kicks will be covered up by a single piece of trim. This allows you to hide the shims from leveling, as well as the gaps between the cabinets.
Stretchers
The typical base cabinet doesn't have a solid top, because you'll be adding a countertop to it later. The stretchers serve three purposes:
- They give you something to screw into when attaching the countertop to the cabinets from the underside.
- They keep the sides from bowing in at the top.
- The front stretcher is attached to the face frame, or serves as the top edge for frameless construction.
Back
The back of the cabinet keeps the box square, and adds rigidity. It also protects the wall behind the cabinet from wear. It's usually made from thin ¼" plywood to save on weight and cost.
You can just nail the back onto the cabinet box, but this will add an extra ¼" to the depth unless you account for it before you start building. I'll be cutting a ¼" wide groove for the back panel to slide into on all the cabinet box pieces. You can find out more about the different methods for attaching a cabinet back panel here.
Nailer Strip
The nailer strips are attached across the back of the cabinet where it meets the wall. Base cabinets should be attached at the studs in the wall to prevent them from shifting out of alignment or tipping forward when the drawers are opened.
The ¼" thick back panel isn't sturdy enough to handle this task, so the nailer strip gives you something solid to screw through. These strips are usually hidden behind the back, so all you'll see is the nice, smooth plywood when you look inside the cabinet.
Face Frame
The face frame covers the exposed plywood edges of the cabinet box. It's typically made from a hard wood that is painted or stained to match the doors and drawer fronts. A frameless cabinet doesn't have a face frame, because the plywood edges are covered with edge banding instead.
Parts of a Cabinet Door
Cabinet doors are typically made out of five parts: two rails, two stiles and the center panel. Rails are the horizontal pieces and stiles are the vertical pieces. You can learn more about the different types of cabinet doors here!
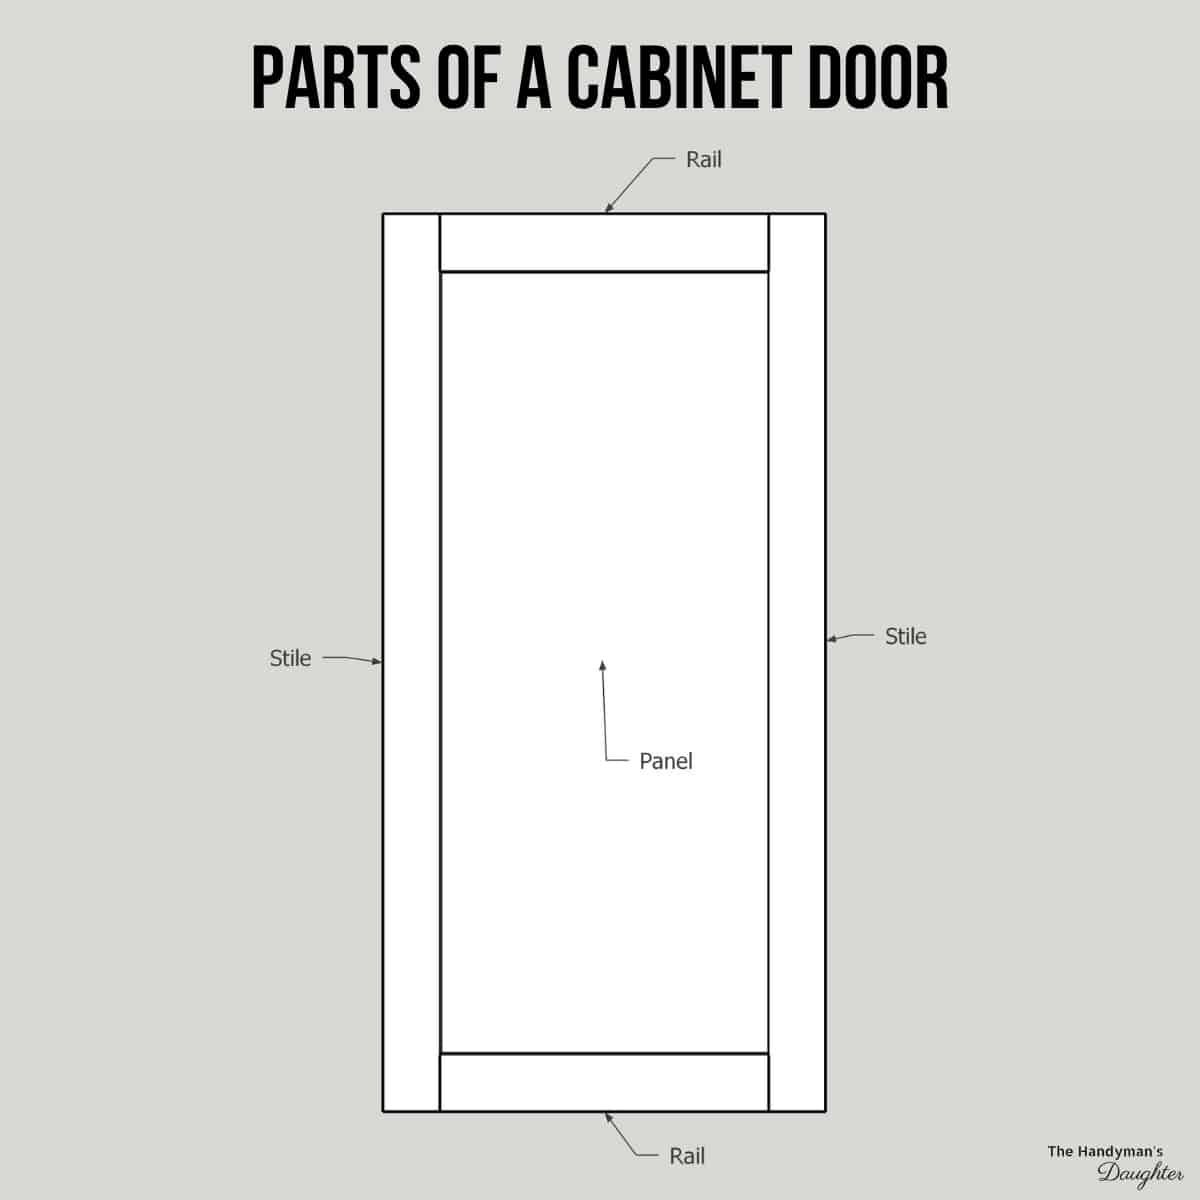
The parts of a cabinet door and a drawer front are the same. The door is just bigger! The diagram shows a simple Shaker style cabinet door, but you can add trim or different edge profiles for a more decorative look. Check out this tutorial to learn how to make Shaker cabinet doors yourself!
Overlay vs Inset Cabinet Doors
The best way to describe the difference between overlay and inset cabinet doors is that one overlaps each side of your cabinet box, while the other "insets" into the face frame so it's flat across the front.
Most kitchen cabinets use overlay doors and drawers. The spacing around inset doors can get skewed from continuous use, and can be difficult to adjust. As a result, inset doors are usually reserved for more decorative cabinetry that won't get daily abuse.
Hopefully this takes some of the mystery out of how cabinets are put together! I'll be referring to these terms throughout my kitchen remodel series, and it helps to know what I'm talking about! 🙂
I'm remodeling my entire kitchen using cabinets I built myself. We'll be saving thousands of dollars, and we'll get a custom kitchen that fits our needs perfectly! Sign up for my email newsletter to get all the updates on this crazy project, and my tips for how to tackle a DIY kitchen remodel!
[convertkit form=2420652]
Check out these other cabinet ideas and projects!