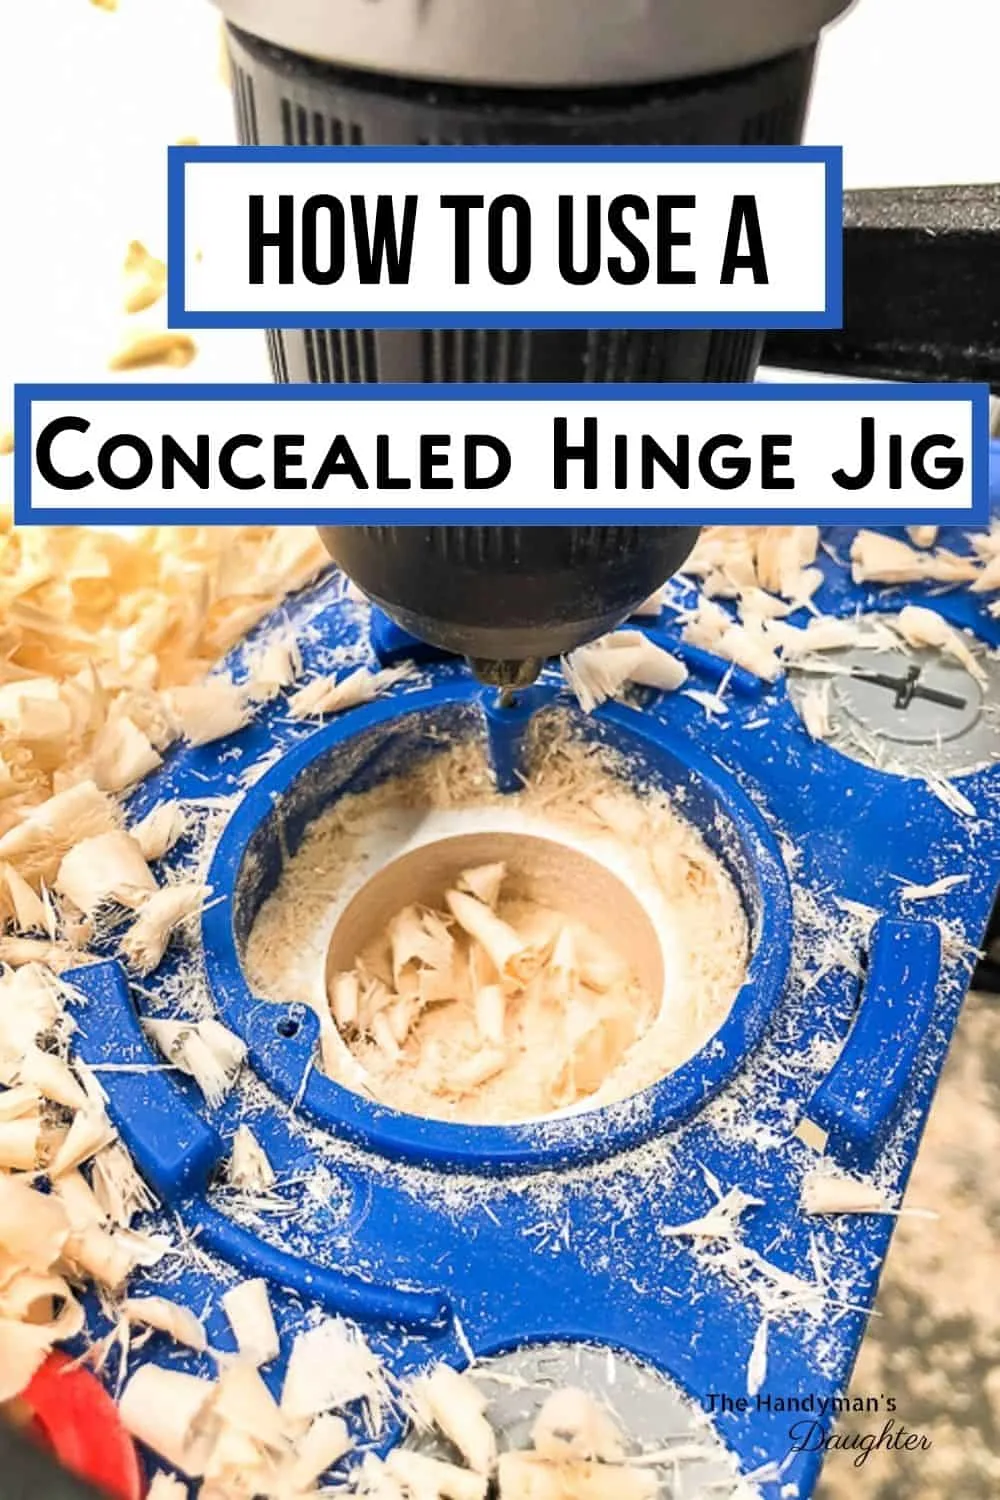
This tutorial will show you how to use a concealed hinge jig to drill perfectly sized holes for European style hinges in cabinet doors.

Kitchen and bathroom remodels are crazy expensive, and most of that cost is the cabinetry. But you can save a boatload of cash by updating just the cabinet doors!
I'll show you how to drill holes for hinges in your new doors with a simple jig, instead of paying an extra fee to have it done at the factory.
This post contains affiliate links for your convenience. Purchases made through these links may earn me a small commission at no additional cost to you. Please visit my disclosures page for more information.
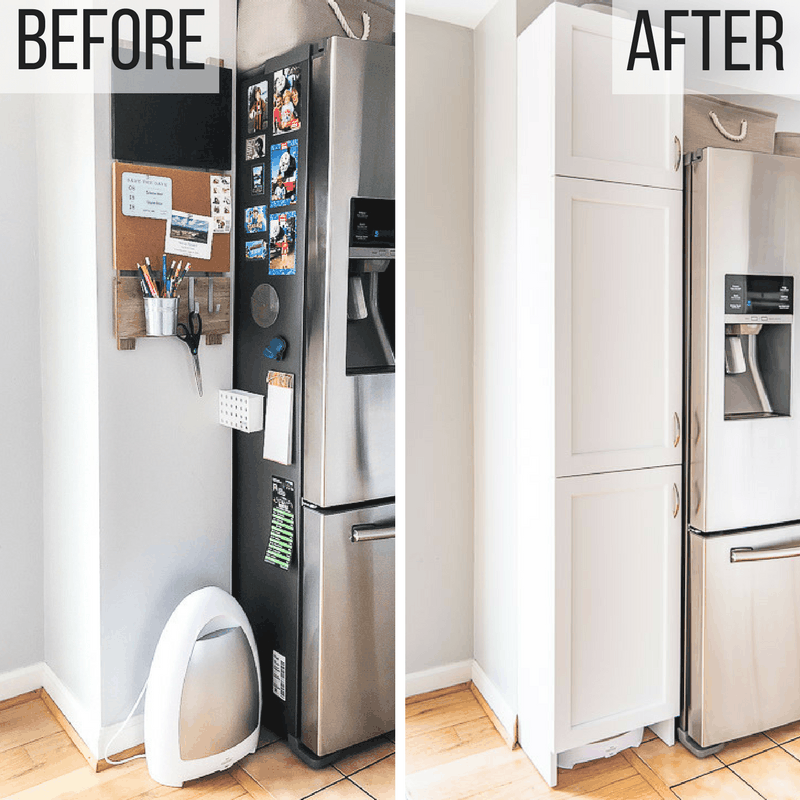
Our kitchen has been a work in progress since the day we moved in. This awkward space where the ductwork soffit and the fridge meet was the perfect spot for a shallow pantry cabinet. It hides away the clutter and looks like it was always meant to be there!
Cabinet Door Mart kindly provided me with their Artesia doors for this project. This modern take on traditional Shaker style doors is the perfect start to my kitchen remodel!
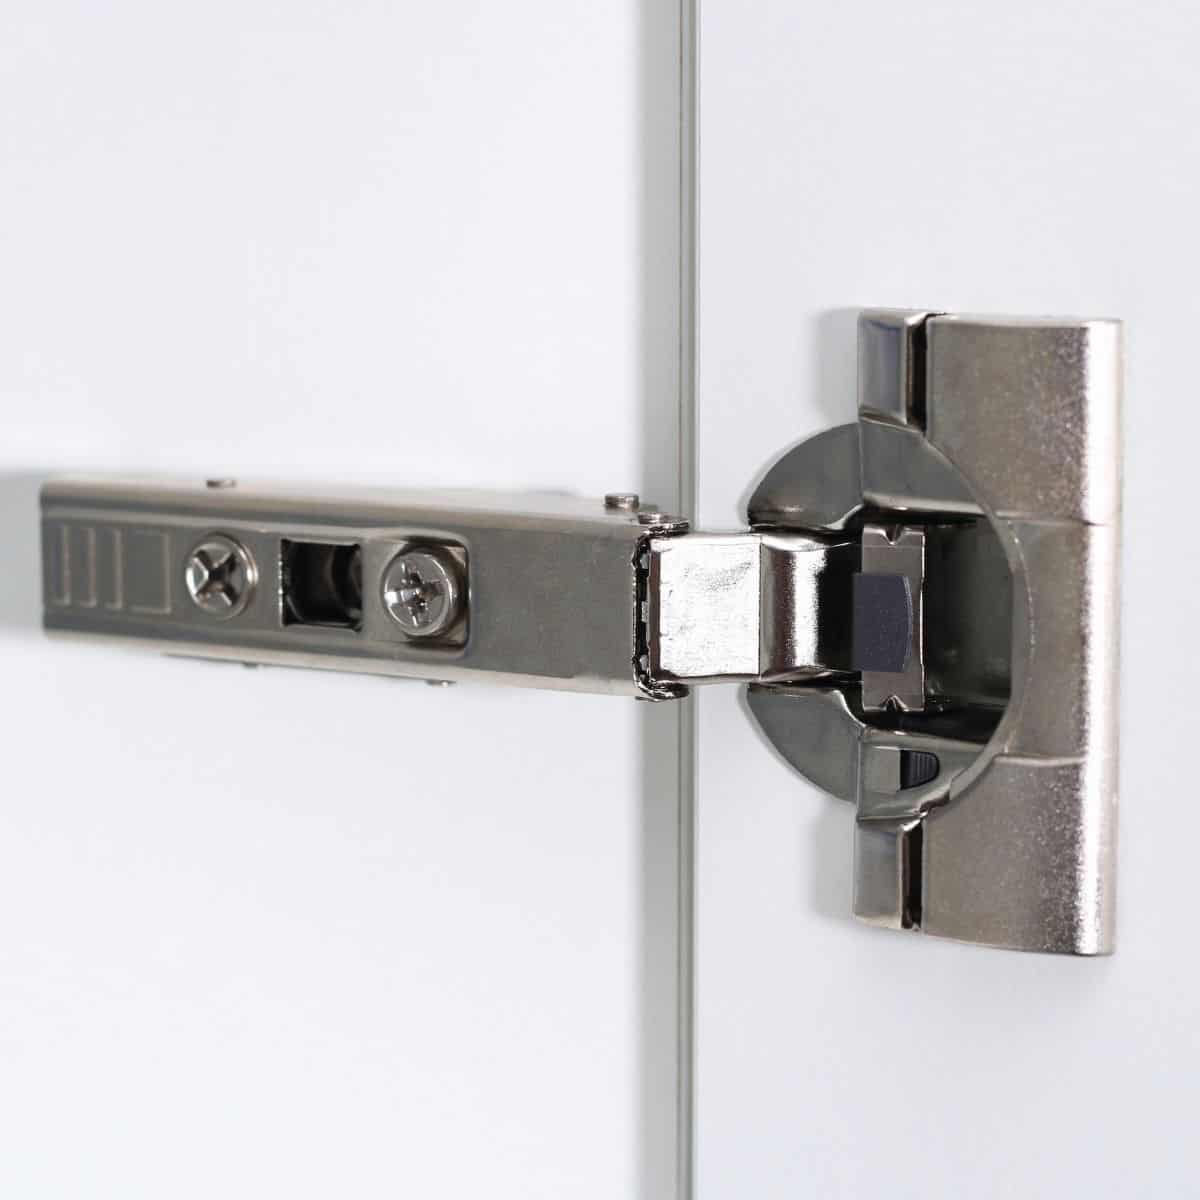
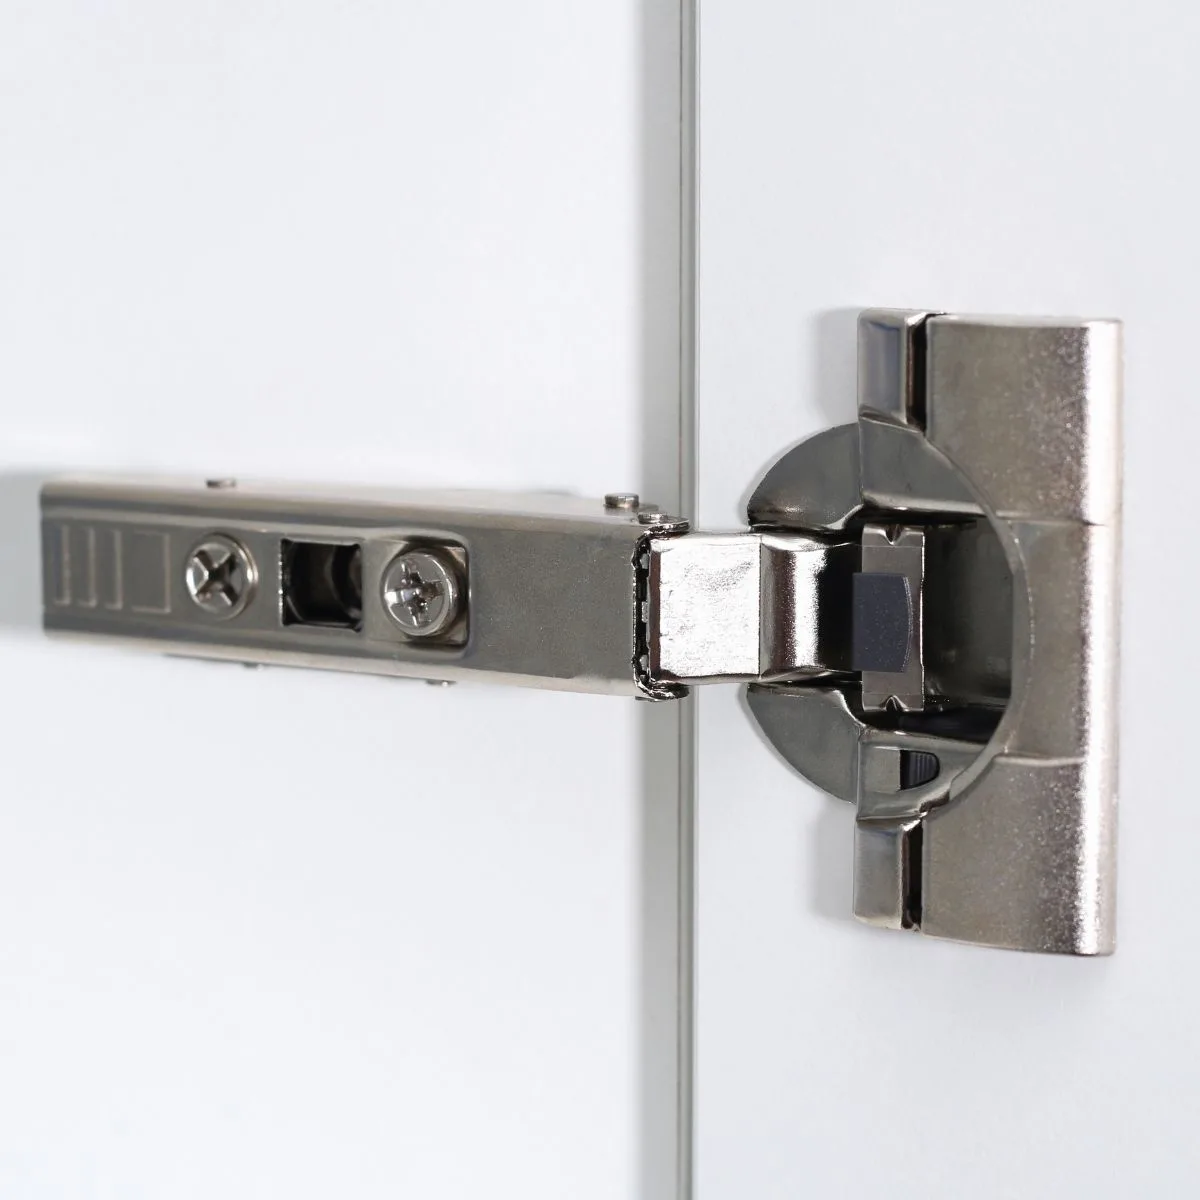
What is a concealed hinge?
A concealed hinge, also known as a European style hinge, is completely invisible from the outside of the cabinet when the door is closed. It features an arm that ends with a cup that is recessed into the back of the cabinet door, and a mounting plate on the cabinet box.
Check out this article on the different types of cabinet hinges for more details!
Why drill your own hinge holes
Most cabinet door companies offer hole boring for a reasonable fee. So why drill your own?
Flexibility
When I ordered the doors for the pantry cabinet, I wasn't sure where the hinges would go. Their placement depends on where the fixed shelves are, but the pantry hadn't been built yet!
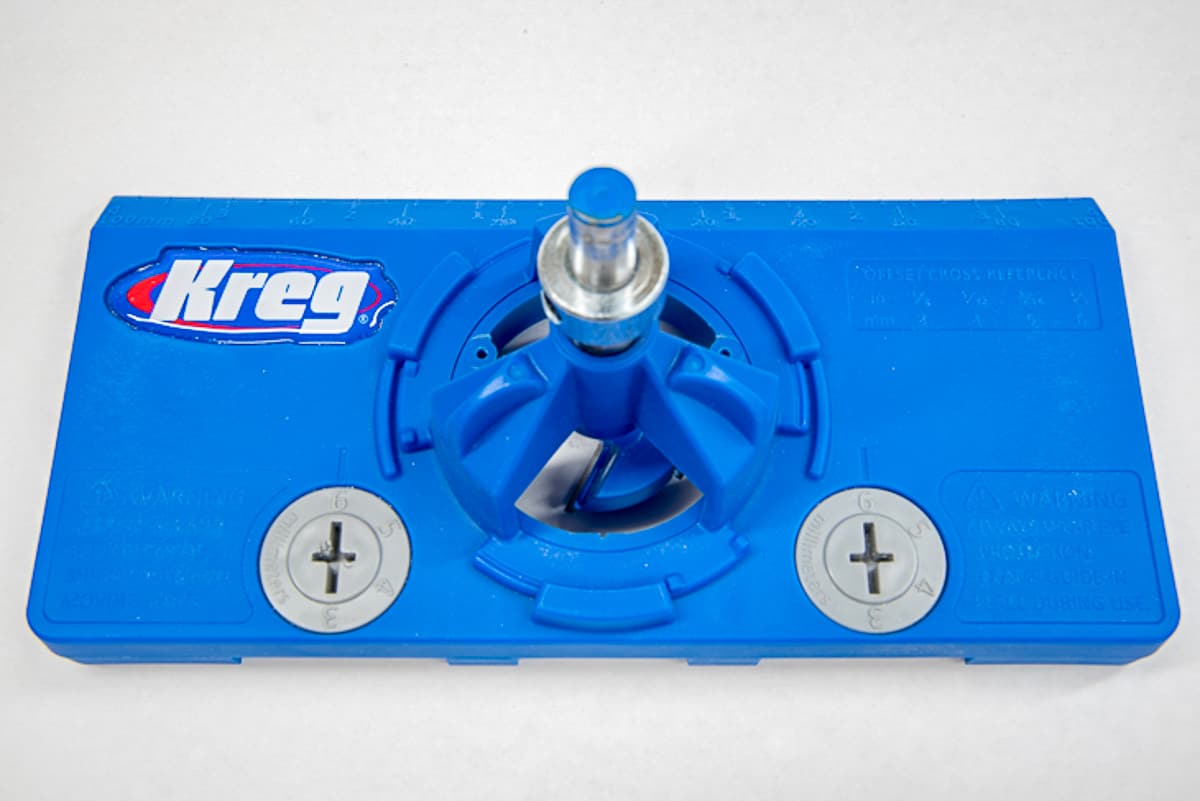
I ordered the doors based on the dimensions of another tall cabinet in our kitchen, but I wanted the flexibility to place the hinges where they wouldn't get in the way. Luckily, the Kreg concealed hinge jig makes drilling your own hinge holes easy!

Save Money
Drilling your own holes can be more cost-effective when you have a lot of doors to replace. It's an extra $10 per door to have the holes pre-bored, so I've recouped the cost of the Kreg concealed hinge jig after this one project!
How to Use the Kreg Concealed Hinge Jig Video
Check out the video below to see how easy it is to use the Kreg Concealed Hinge Jig!
Setting the Reveal Spacing
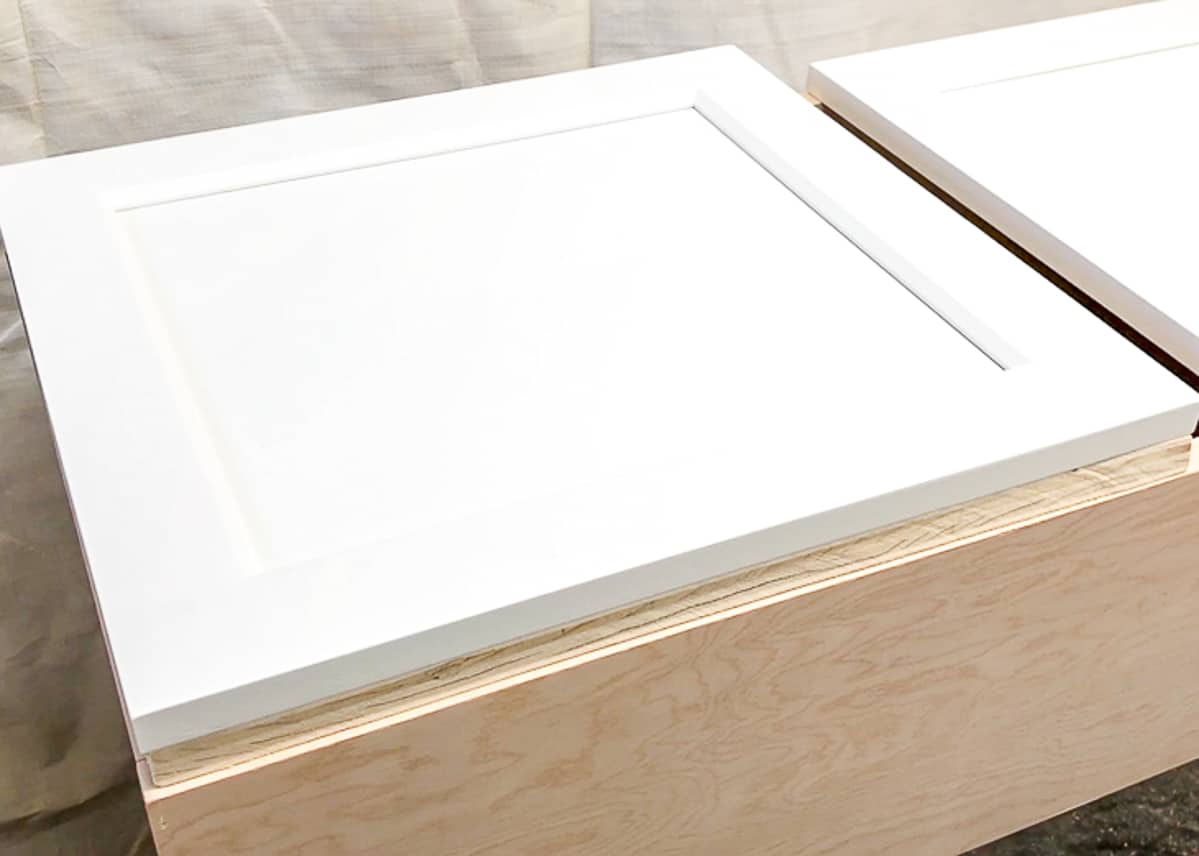
I didn't want to start boring holes in my gorgeous new doors all willy-nilly! I happened to have a scrap of plywood that was almost exactly the same size as the smallest door, so I used that to test out my holes.

I ordered these Blum soft close hinges, but they didn't come with any instructions! After reading way more about overlays and reveals than I cared to know, I decided to just test out a few different positions to see what worked best.
I drilled holes for hinges at both the 5 mm and 6 mm setting and installed the hinges on the plywood test piece.
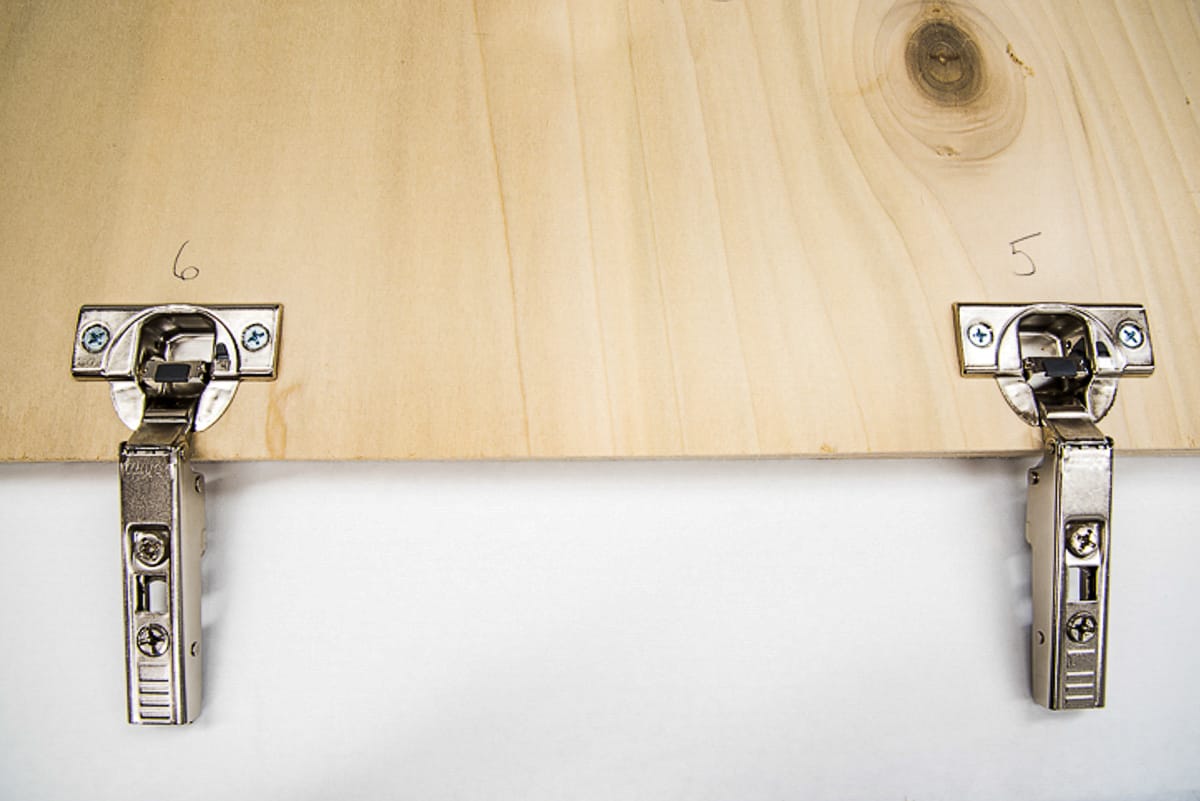
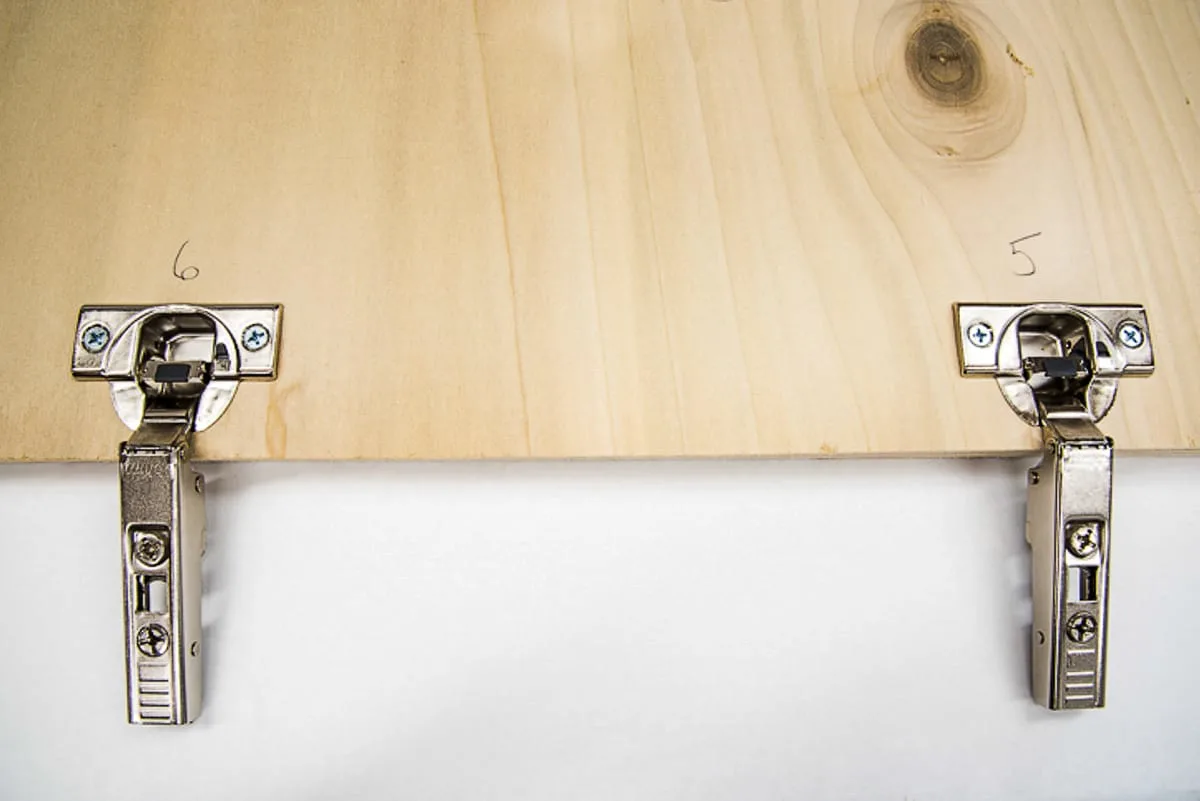
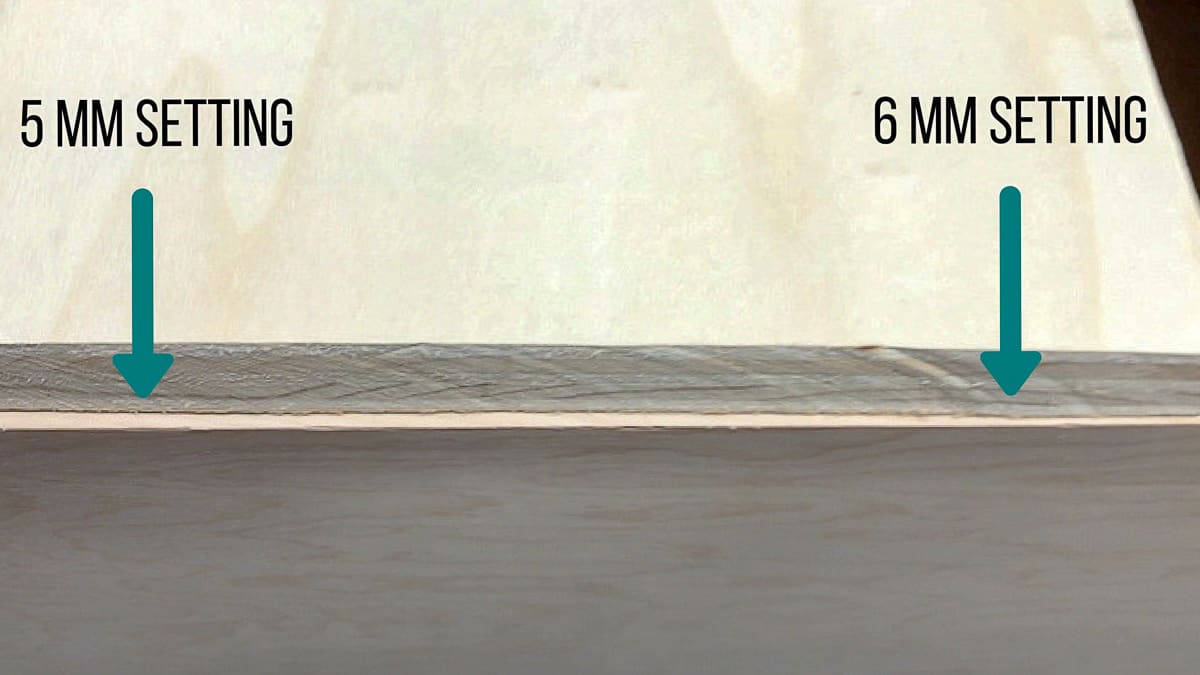
Where you install the cabinet hinges will affect where the cabinet door sits on the box. I wanted a minimal amount of space showing between the edge of the box and the edge of the door. This space is called the reveal.
Here you can see the difference in the reveal between the 6 mm setting on the right and the 5 mm setting on the left. If you have two cabinet doors next to each other, you need a little more space between them. But this is a single cabinet, so the 6 mm setting is the one I want!
Drilling with the Concealed Hinge Jig
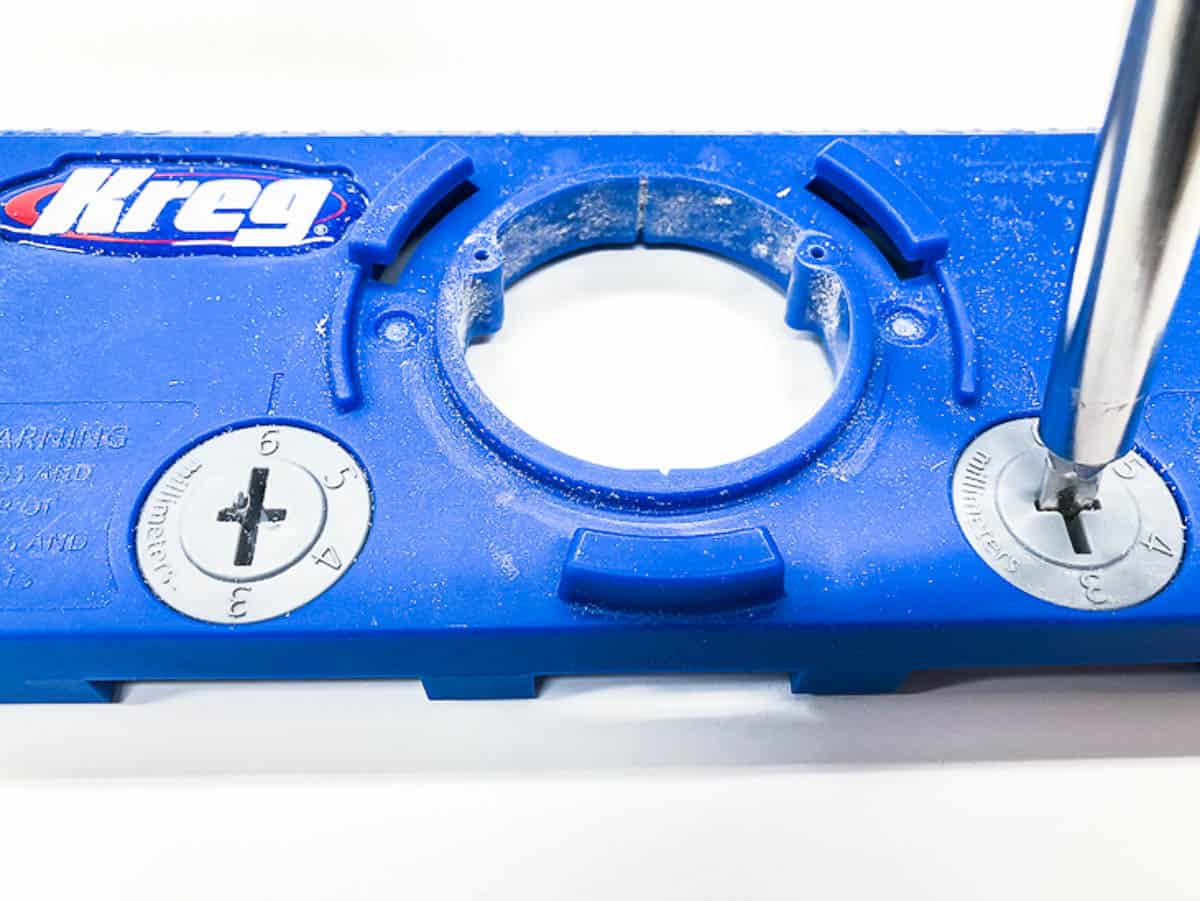
With the concealed hinge jig set to 6mm, I was ready to drill the holes in my cabinet doors. I'm glad I did a few tests first, because drilling into that beautiful new door was a little nerve-wracking! Keep in mind that if you mess up, you can use a 35mm hole plug to fill it in and start over.

To keep things simple, I set my hinges four inches from the top and bottom of the door. This is the distance from the edge of the concealed hinge jig to the center of the hole.
If you're replacing old cabinet doors, measure the spacing from the top and bottom of the door to the center of the hole on the previous doors. Then use the ruler on the top of the jig to ensure proper placement with the existing hinges.
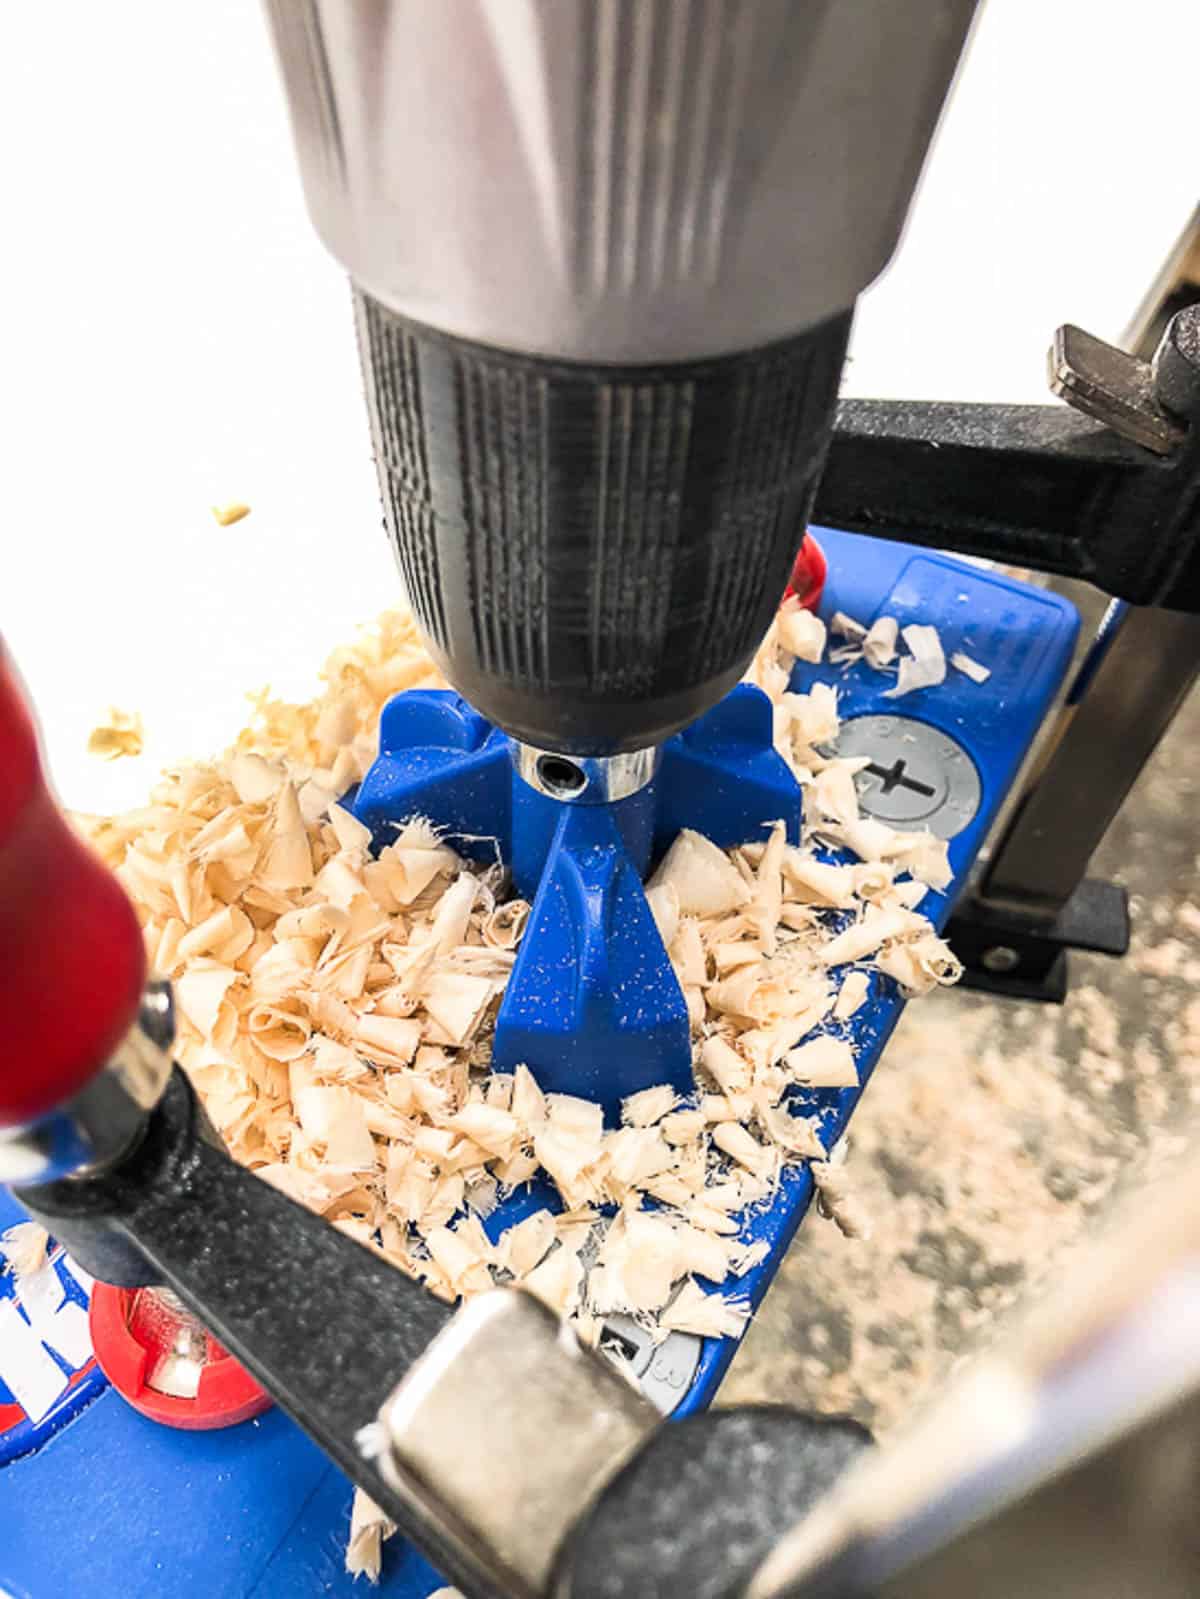
Use clamps to hold the concealed hinge jig in place on both sides of the hole. You don't want it twisting on you mid-cut!
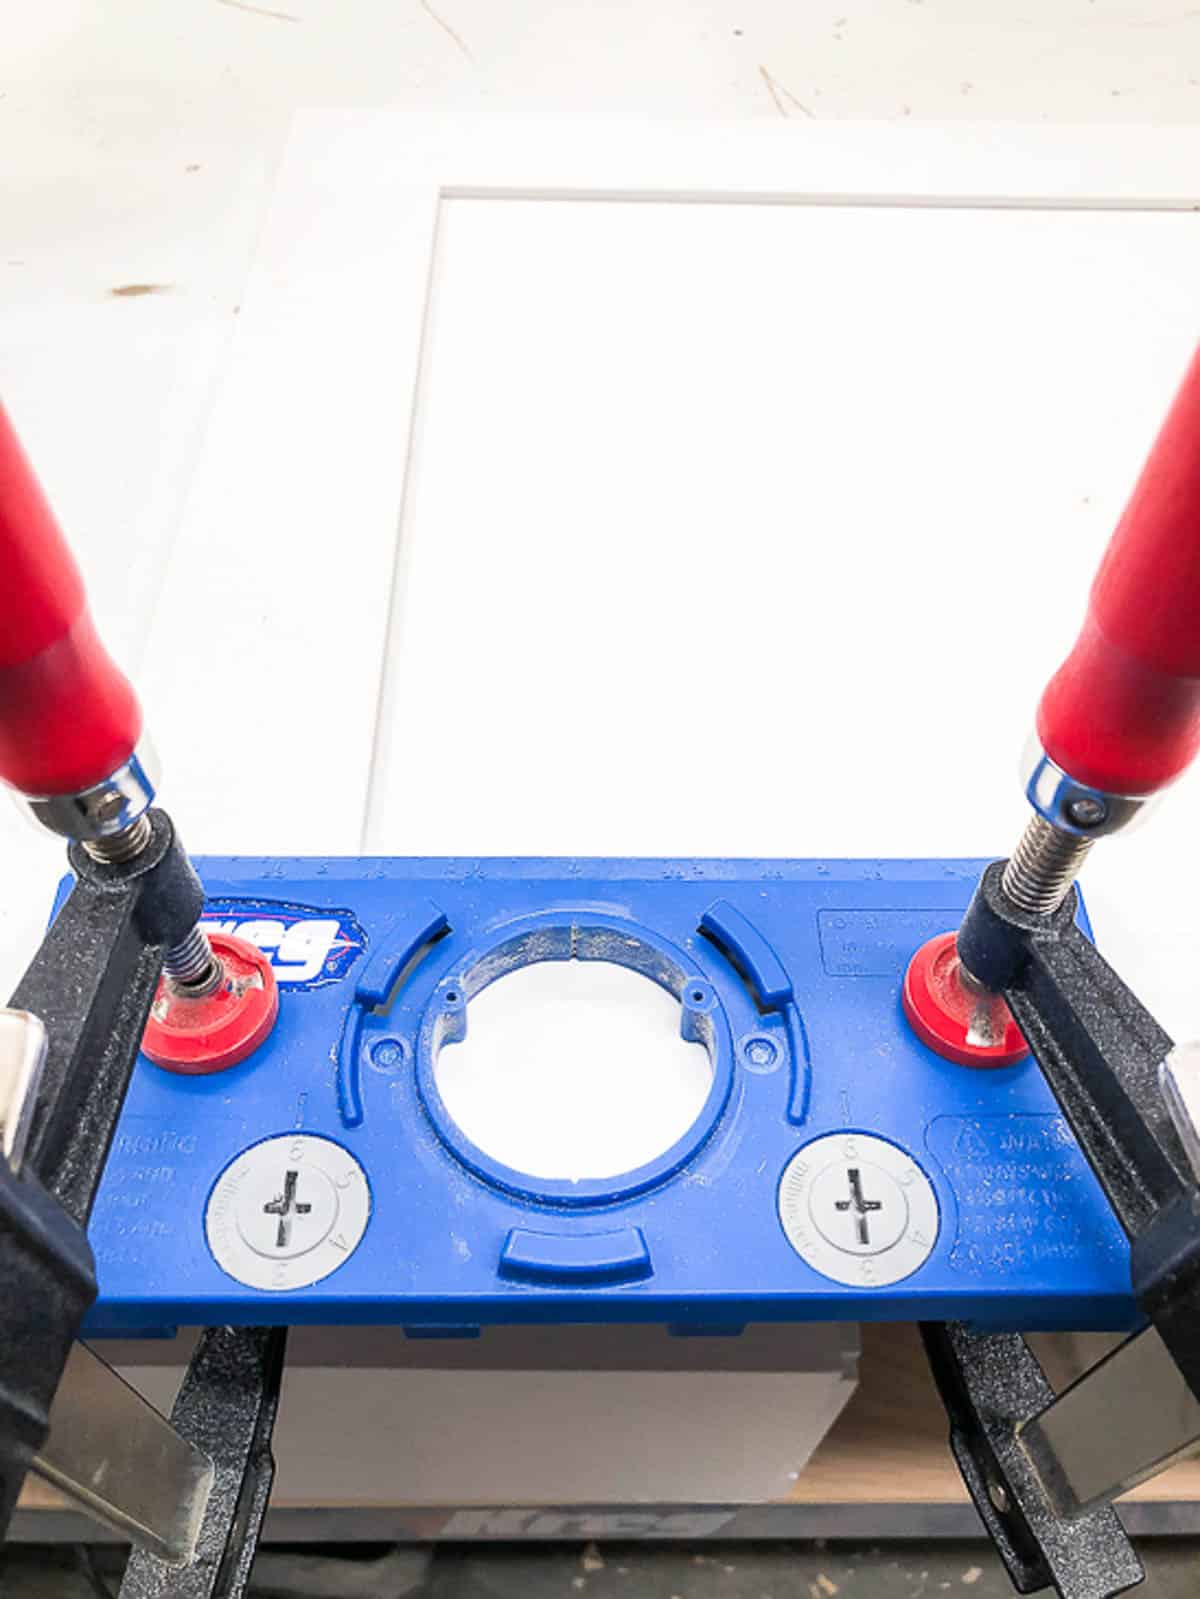
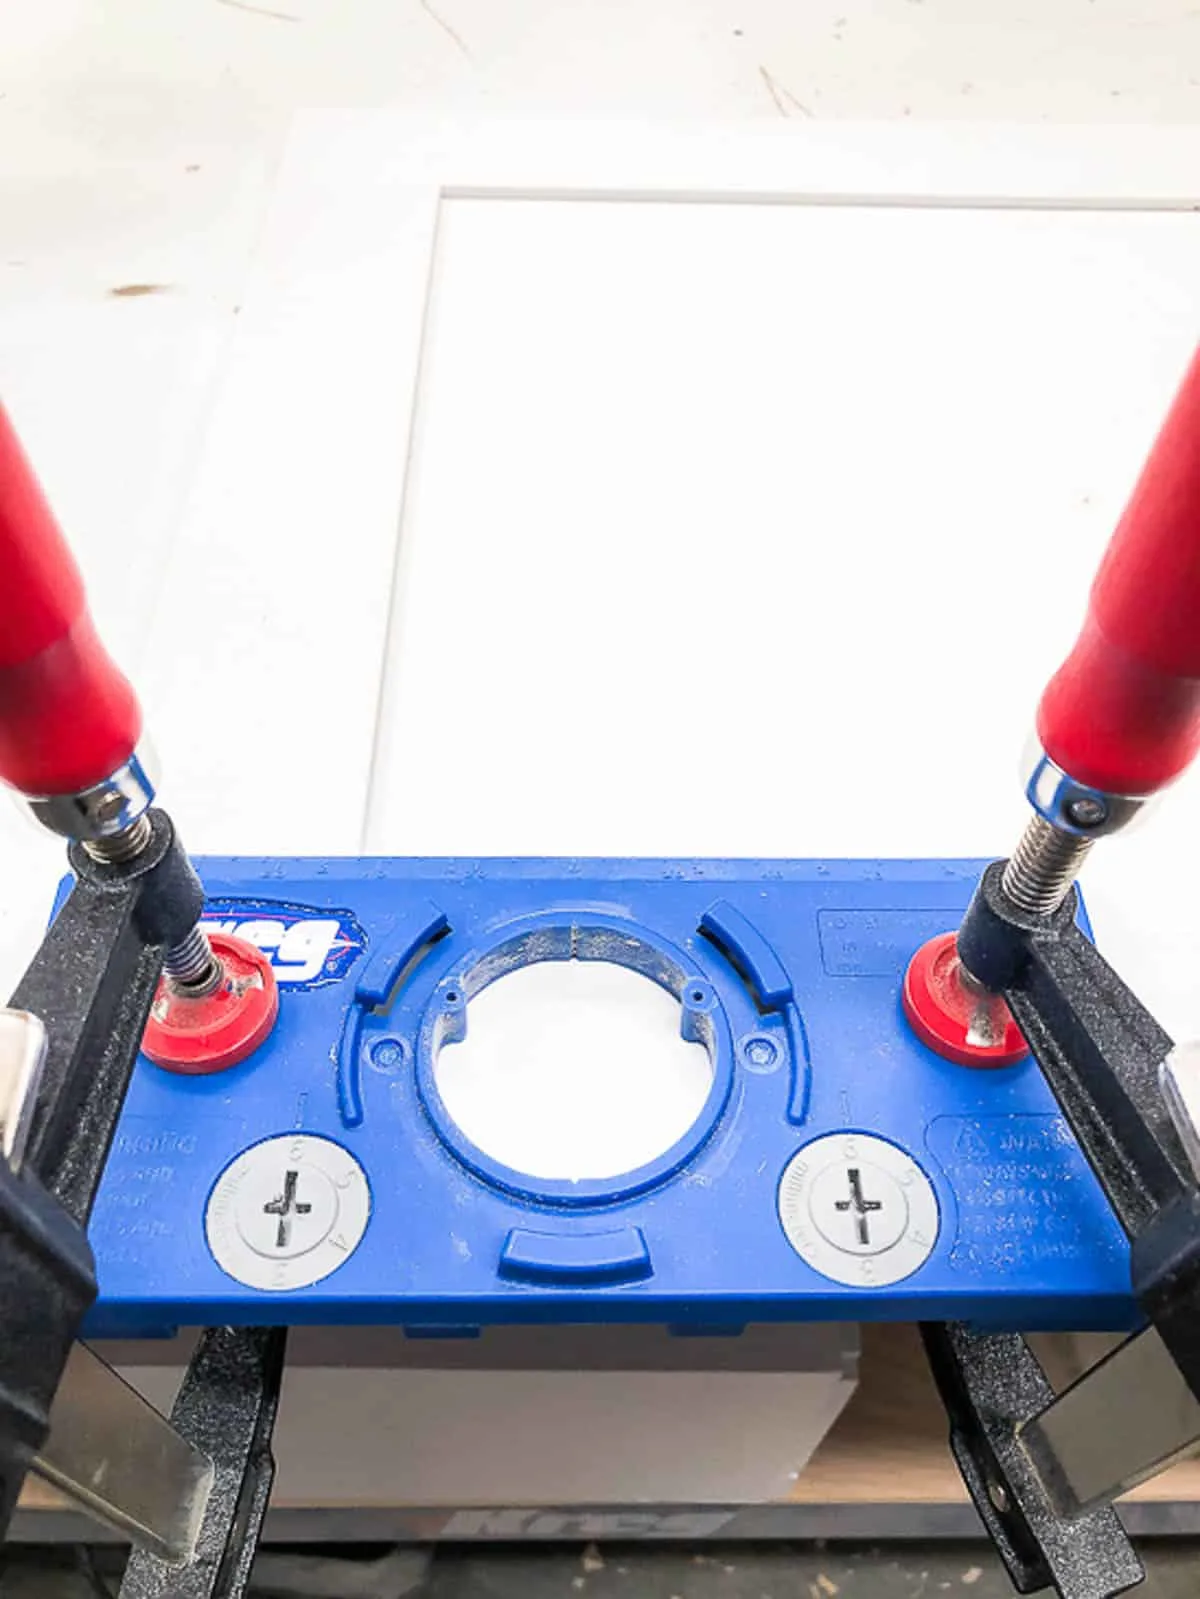
The drill bit comes with the jig, as well as the guide and a stop collar. Assemble all the pieces together according to the instructions, and tighten it into the chuck of your drill.

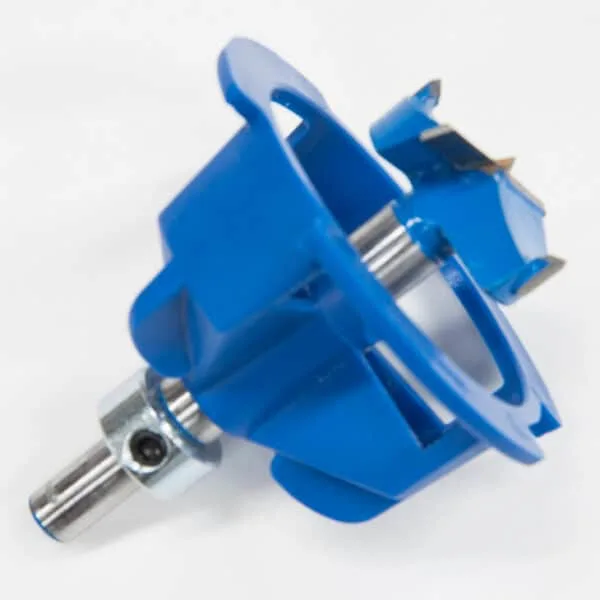
Insert the drill bit guide into the jig and rotate it to lock the guide in place. This will keep the drill bit perfectly vertical while you cut the hinge hole.
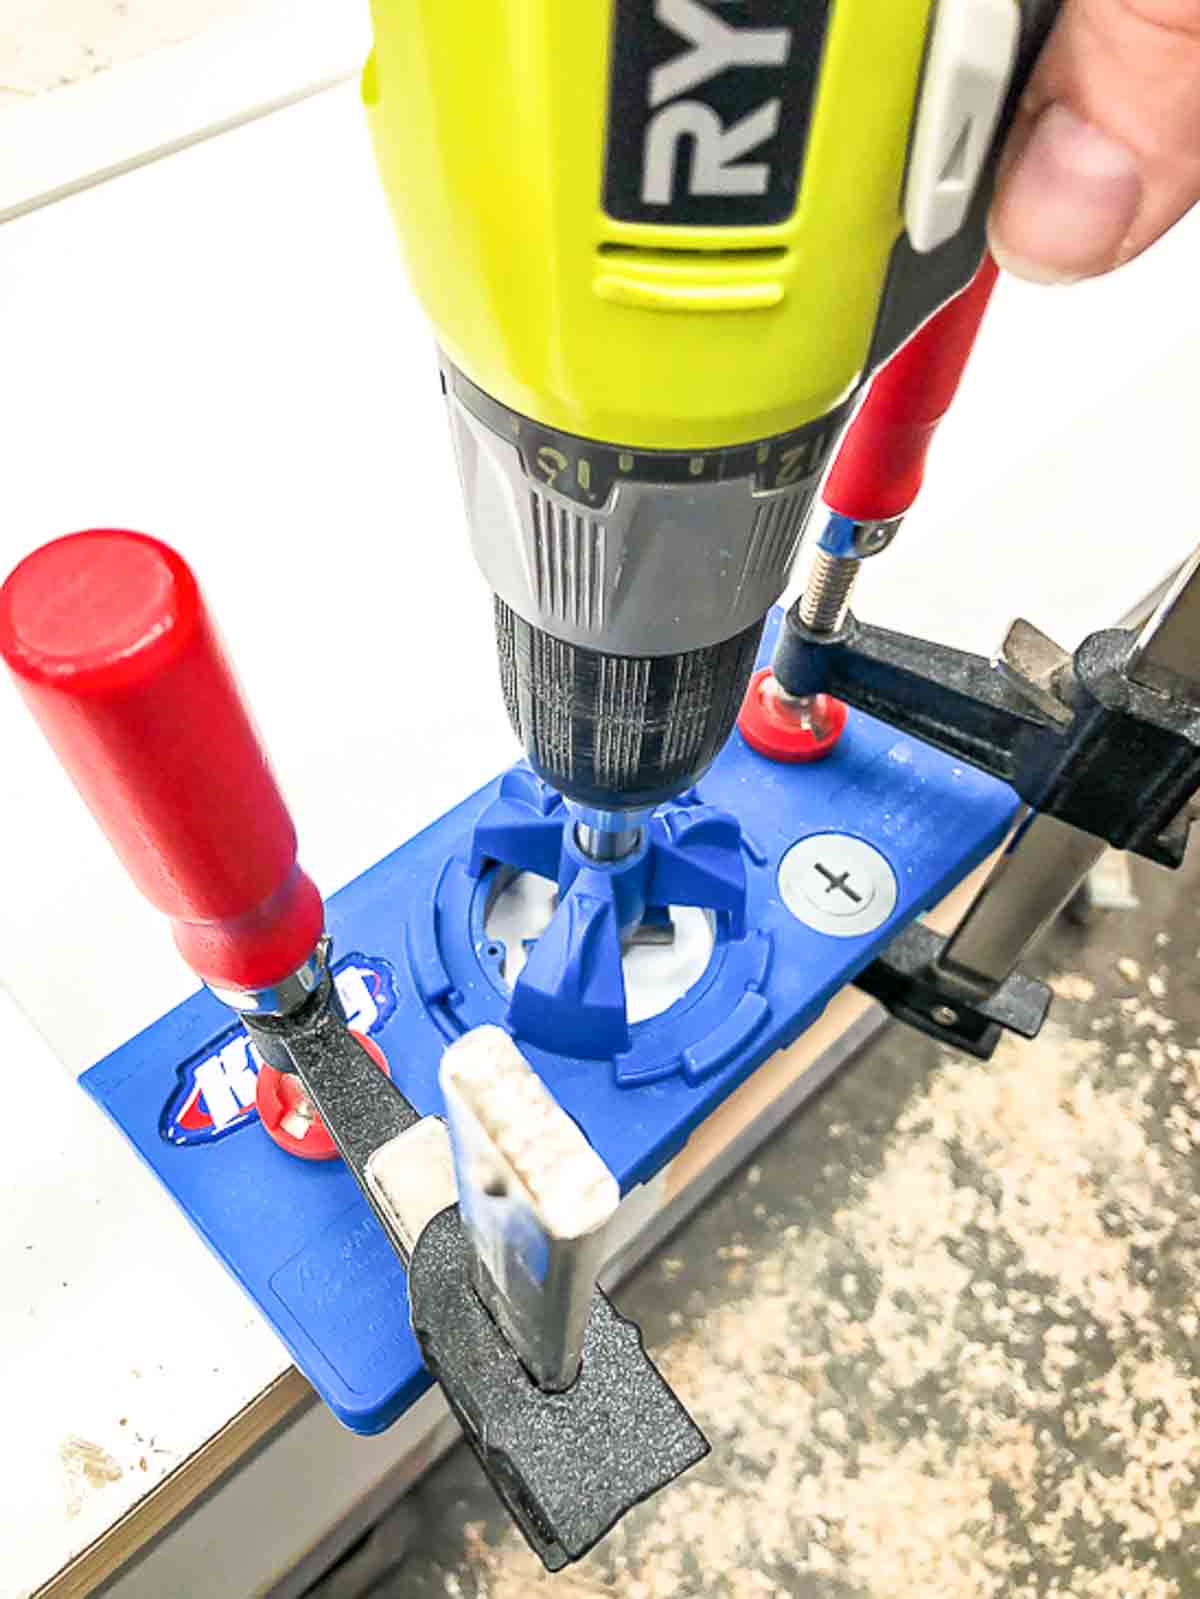

Set your drill to the fastest setting, and drill the hole. Make sure to bore all the way down to the stop collar for the perfect depth.

Back the drill bit out of the hole and remove it from the jig. But don't remove the clamps yet! Load a 1/16" drill bit into the chuck, and stick it into the tiny holes on the sides of the jig.
This allows you to drill pilot holes for the hinge screws in the perfect position! Make sure you don't drill too far and poke out the other side of the door. Just a little hole will help get the screw started.
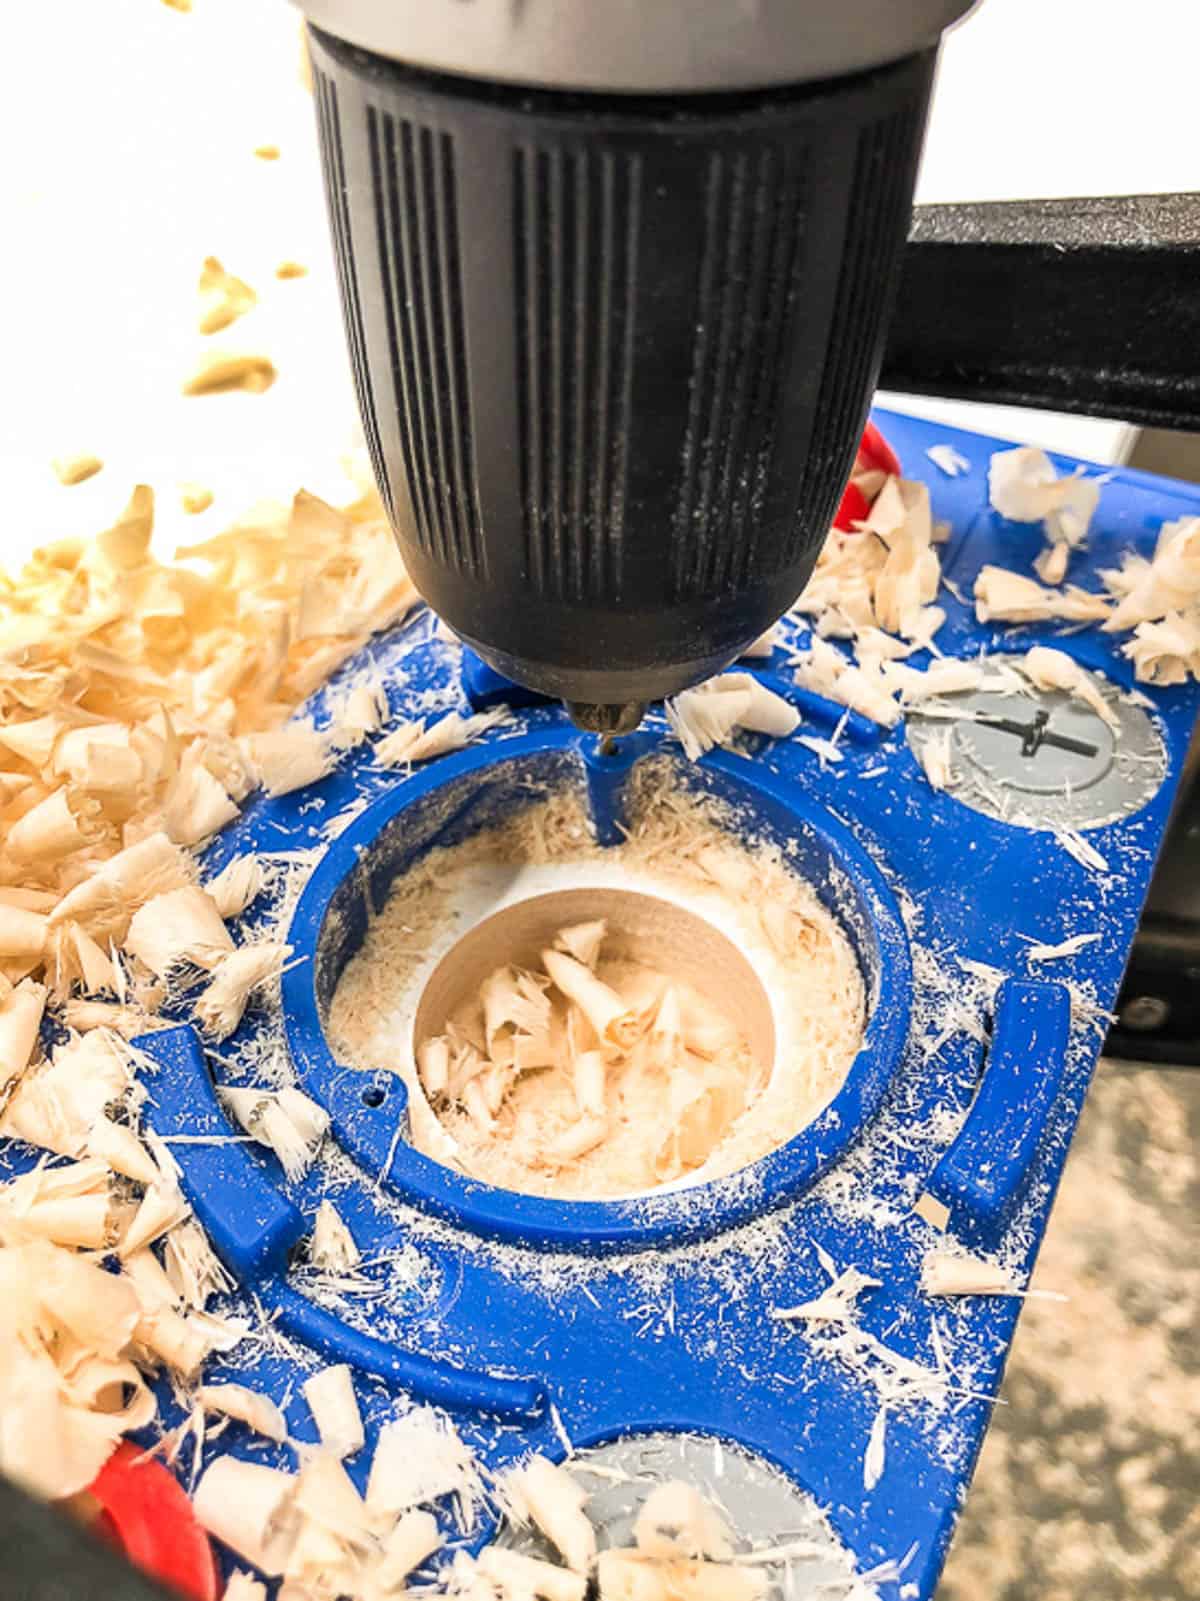

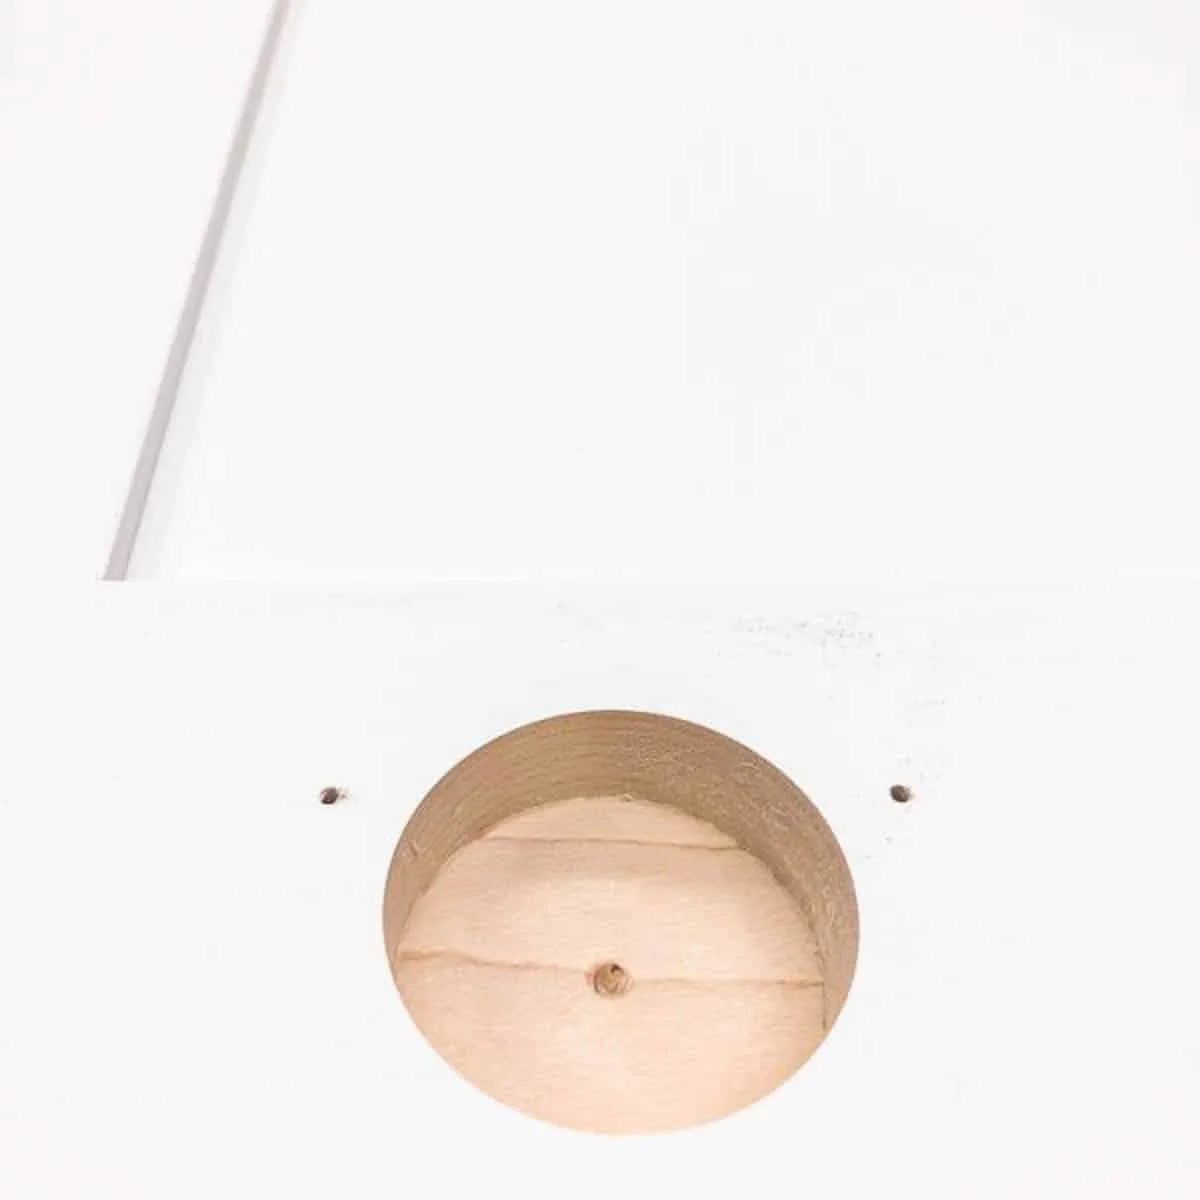
Ta da! The perfect hinge hole!

Install the New Hinges
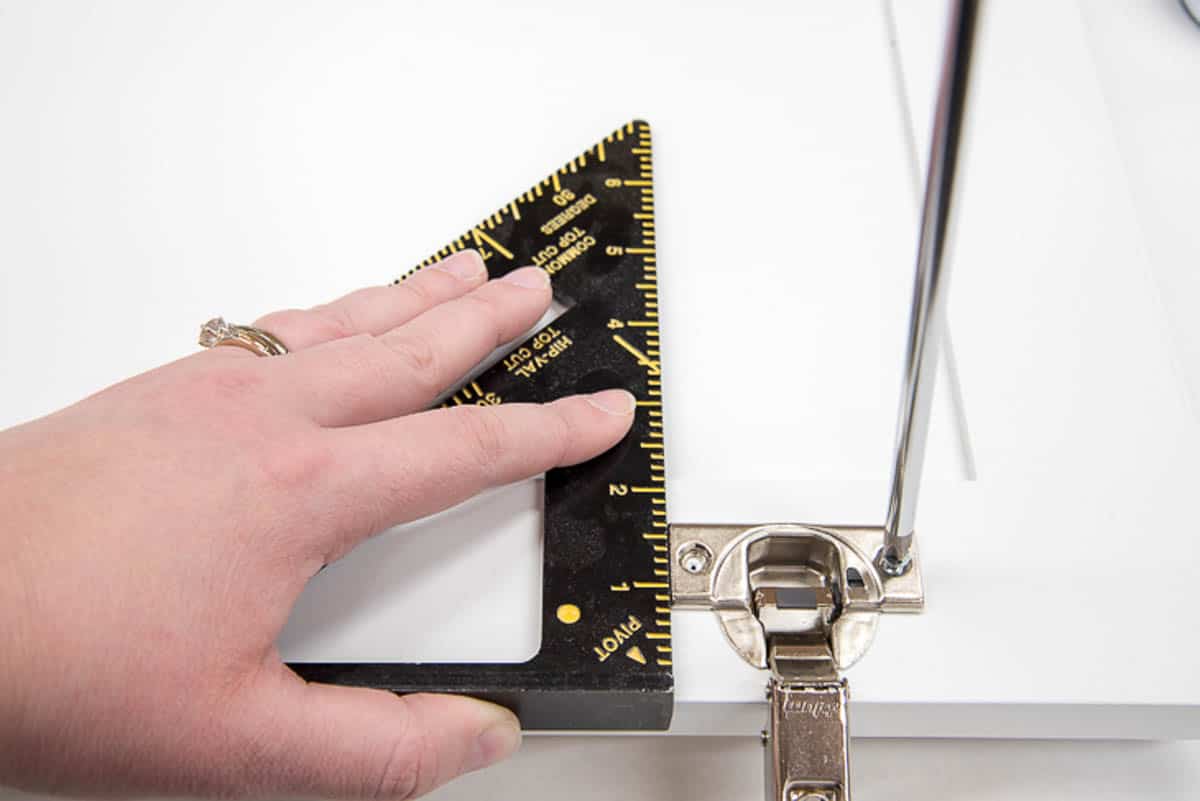
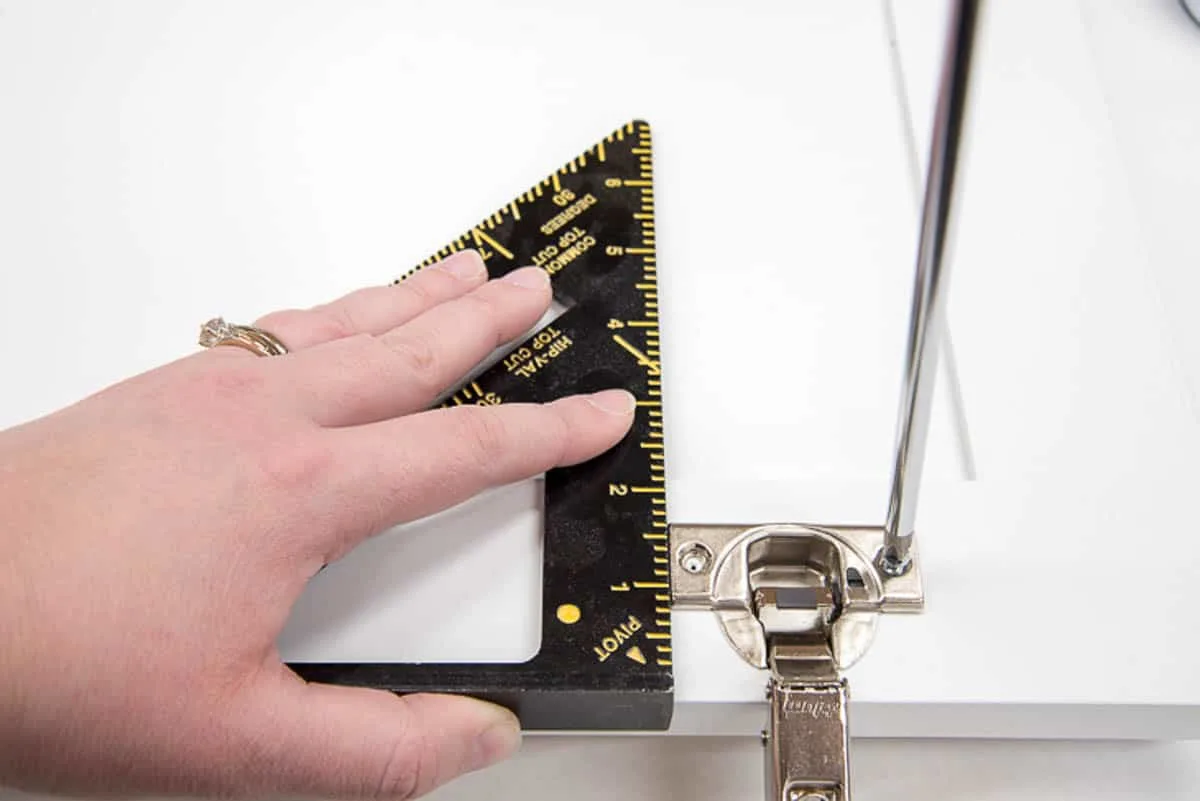
Now that the hard part is out of the way, it's time to install the cabinet hinges. Just drop the rounded end into the hole and screw it into place. Use a square to make sure it's installed parallel to the edge of the door.
If you're replacing your old cabinet doors, (and you measured correctly) the two hinge halves should clip together easily. You can read more about this process in my tutorial about replacing my bathroom vanity doors.
Once you get the hang of it, cutting holes for hinges is a breeze! Check out these other tutorials for more kitchen renovation project ideas!
Mother of 3
Thursday 5th of April 2018
We have those hinges on our cabinets and I love them. Pinned.
Jann Olson
Thursday 29th of March 2018
Very handy tool! Thanks for sharing with SYC. hugs, Jann
Debrashoppeno5
Friday 23rd of March 2018
This is a great tutorial for anyone that wants to take on DIY projects.
Toni | Small Home Soul
Wednesday 14th of March 2018
This is brilliant and I can't wait to see your new cabinet. You are so talented and such an inspiration to so many women who want to tackle some household projects!
Vineta
Wednesday 14th of March 2018
You're so sweet, Toni!