You don't need to tear out your entire bathroom vanity to get the look you want. Just install new cabinet doors! This simple bathroom update makes a huge difference for a fraction of the price of new cabinetry.

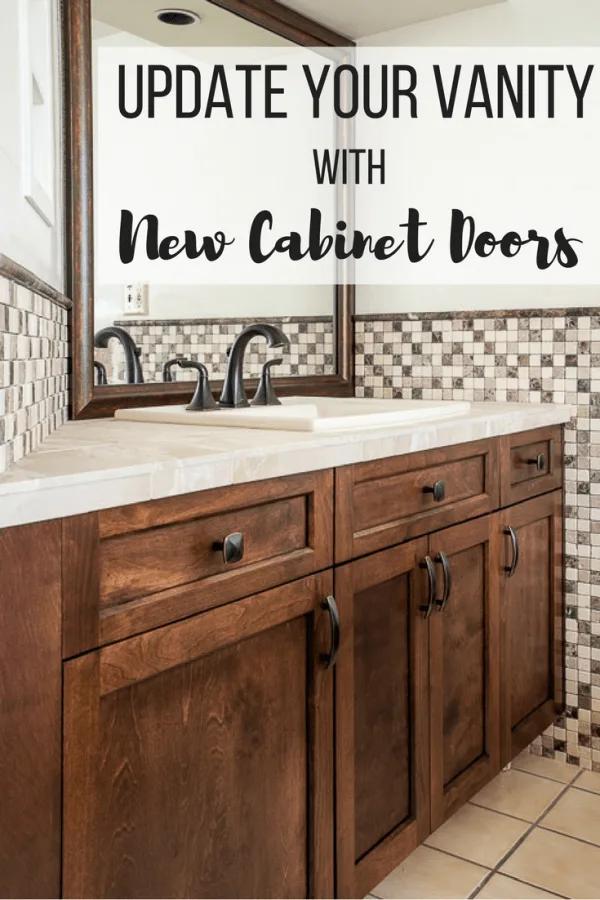
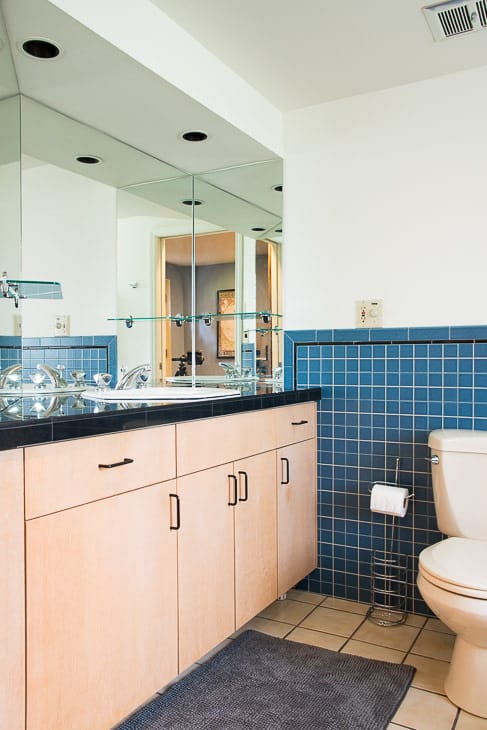
Our bathroom vanity was custom built to fit into this angled alcove in our basement bathroom. The cabinetry itself is pretty solid, but the doors were dated and bland. Time for an update!

Instead of building my own cabinet doors, I decided to save myself the time and hassle and just ordered new ones instead. It's not as expensive as you think, and it'll give your old vanity a whole new look without ripping everything out!
Check out this list for more DIY cabinet door ideas, including ways to update your existing doors for a brand new look!
This post was sponsored by Cabinet Door Mart, Jeffrey Court, and Liberty Hardware, and contains affiliate links for your convenience. Purchases made through these links may earn me a small commission at no additional cost to you.
How to Order New Cabinet Doors
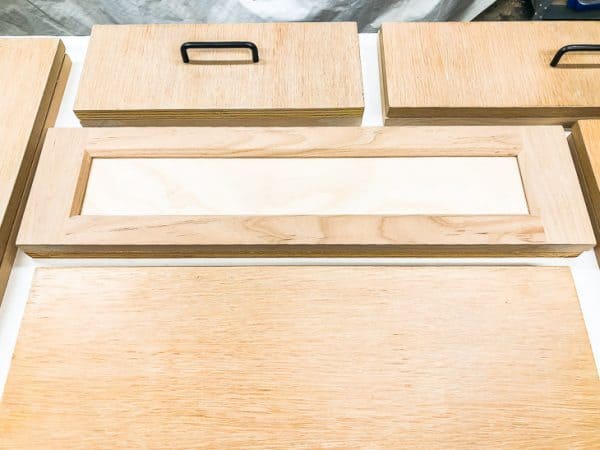
After taking careful measurements of each door and drawer front, I headed to the Cabinet Door Mart website. They have a ton of different styles of cabinet doors to choose from. They'll even duplicate the size of the existing doors so they fit exactly!
I wanted the same Artesia door style as the pantry cabinet I built for our kitchen, but this time I chose the solid wood version with a birch panel and alder frame. The back of the bathroom's sliding barn door is birch plywood, and I wanted the grain patterns to match.
As a bonus, the beveled inset panel is an exact match to the trim I used around the recessed bathroom shelves. I'm sure I'm the only one who will notice this detail, but it makes me happy. 🙂
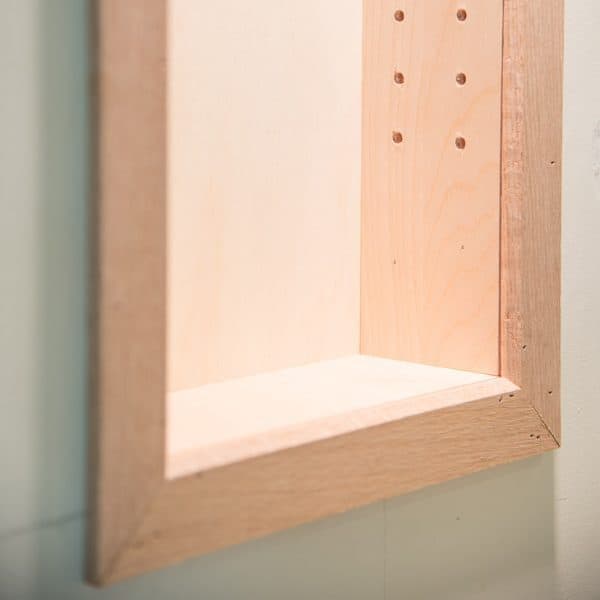
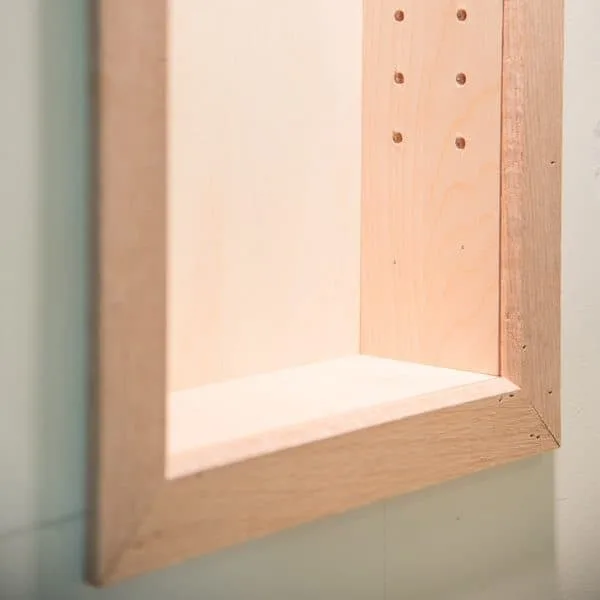
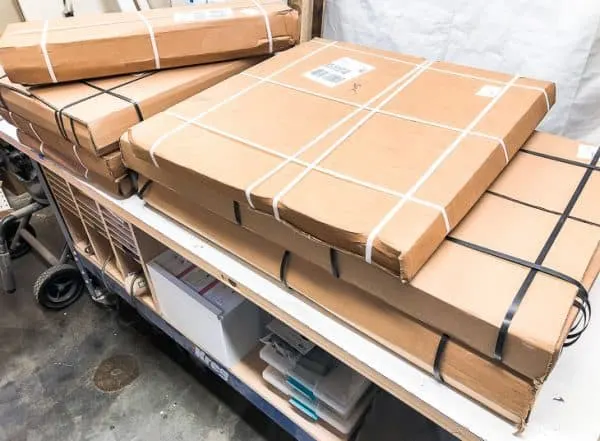
All my new cabinet doors arrived carefully packaged and ready for the finishing touches.

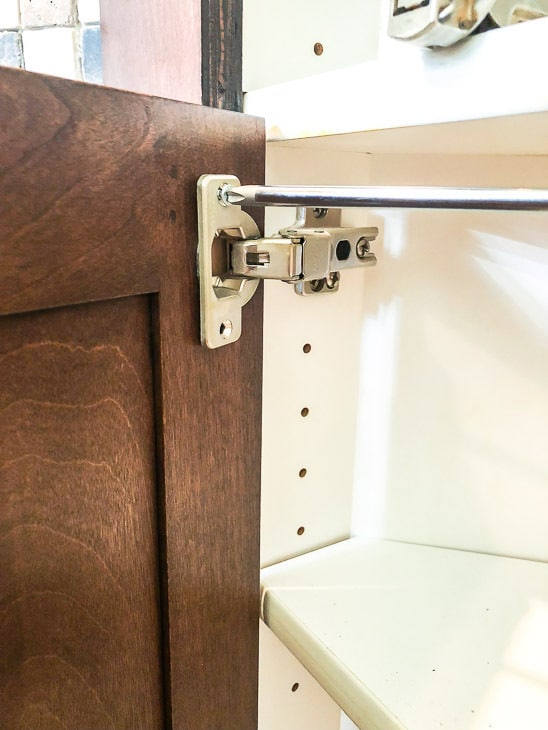
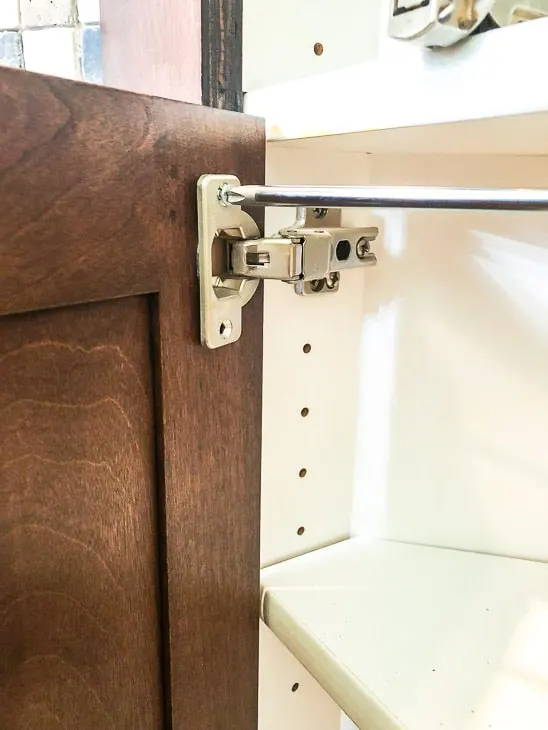
Drill Concealed Hinge Holes
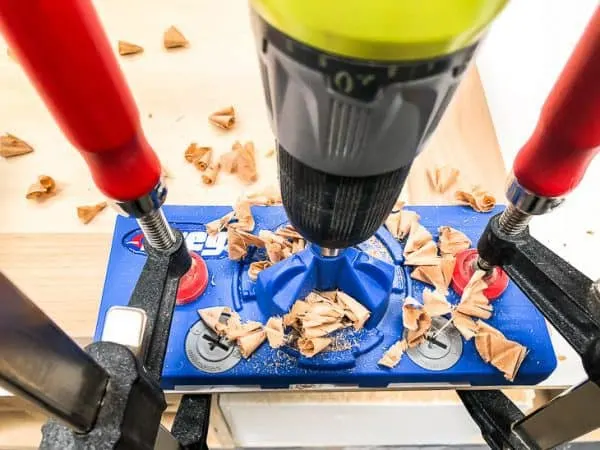
You can order your new cabinet doors with the hinge holes pre-bored into the back. But the old door hinges weren't located at the same spot at the top and the bottom, so I decided to drill them myself.
Make sure you save the old vanity doors until the new ones arrive. Match the old and the new cabinet doors to check the size and to keep them from getting mixed up.

I showed you how to use a concealed hinge jig back when I built my pantry cabinet. Here's my video of the process:
Selecting the hinge hole distance from the edge was easy, because I could work off of the old doors. I simply inserted the concealed hinge jig into the hole of the old door, and adjusted the dials until it was snug against the edge.
Then I measured the distance between the jig and the top of the door, and marked the same spot on the replacement door. This tool makes it easy to lock down the dimension and transfer it to the new cabinet doors.


Clamp the concealed hinge jig down, then drill the hole.

Apply Stain and Top Coat
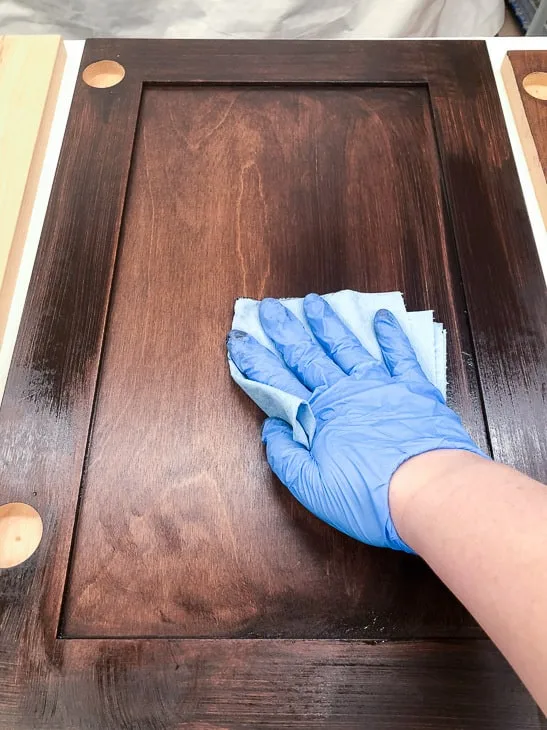
I'm a total sucker for General Finishes gel stain, ever since I used their grey wood stain on my dining table with amazing results! This time, I decided to try their Java color, which matches the sliding barn door I made for this bathroom.
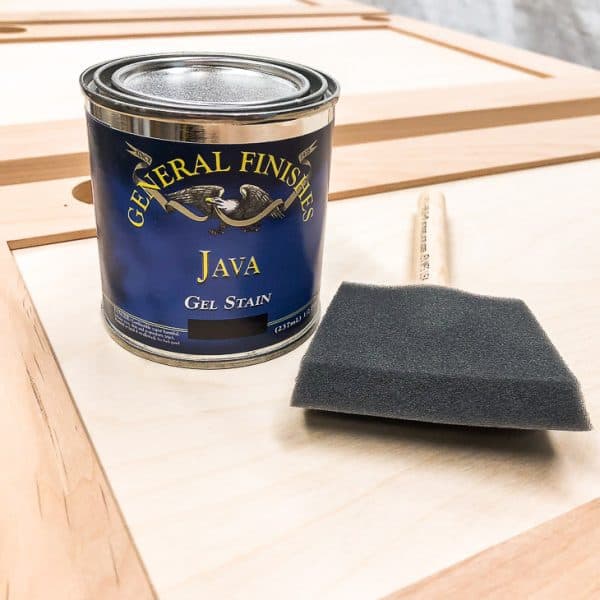

Just apply the gel stain to your new cabinet doors with a foam brush, then wipe off the excess with a rag or shop towel. In retrospect, I should have applied pre-stain wood conditioner first to get a more even color throughout the grain, but it turned out ok!

Gel stain is oil-based, so let it dry for a few days before applying a top coat. I used General Finishes High Performance Top Coat. It holds up well to moisture, which is important in a bathroom!
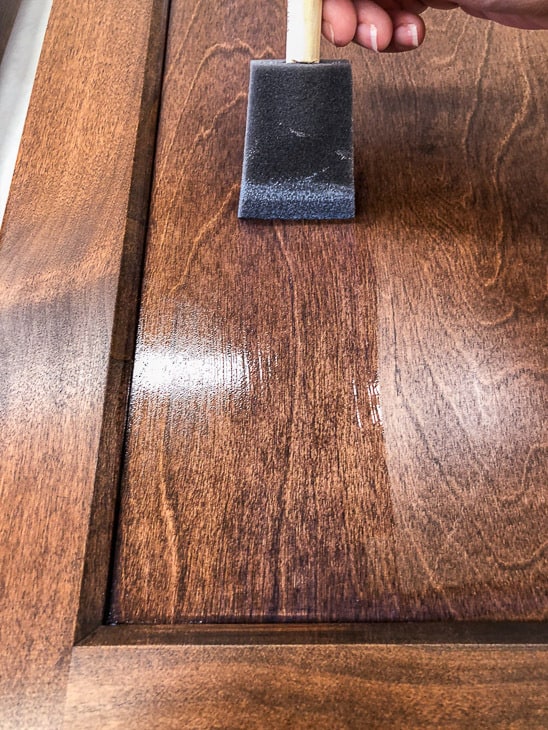
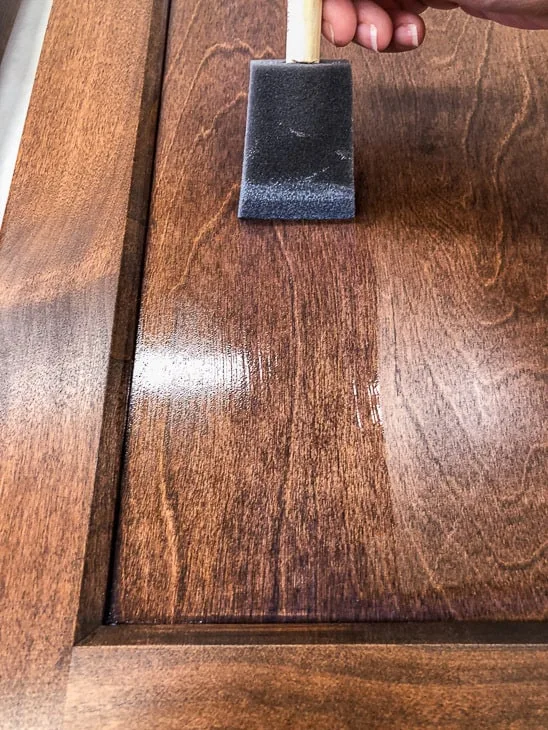
Allow the top coat to cure for as long as possible before installing the new cabinet doors. I'm under a tight deadline, so I only waited a couple days and handled them very carefully.
Add New Hardware
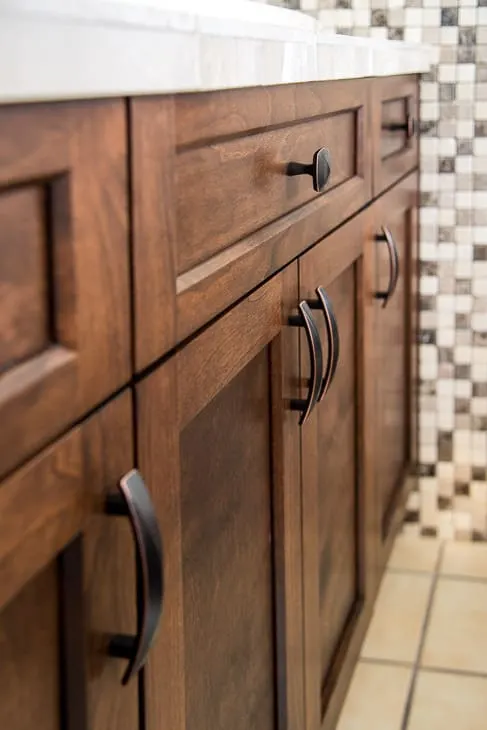
While everything is drying, it's time to shop for new door hardware! Liberty Hardware was kind enough to provide me with their gorgeous Devereux door pulls and knobs for this project. The bronze finish with subtle copper highlights matches the faucet I installed last week, and looks great against the wood.

I used this template to mark where to drill the holes for the pulls. If you make a mistake, don't worry! I have a tutorial on how to fill screw holes in cabinet doors so you can easily fix it.
The knobs were centered on the drawer fronts. I had to buy shorter screws for these, since the center panel is thinner than the outside frame.
Install Your New Cabinet Doors
Installing the new cabinet doors was pretty simple, since I used the same hinge placement as the old doors. I left the hinges screwed into the interior of the cabinet when I did demolition on the rest of the bathroom. All I had to do was pop the hinge cup into the hole in the door and screw it in place!
There should already be holes through the drawers from the old drawer fronts. Just mark those holes on the back of your new drawer front and drill a shallow pilot hole. Then screw the new drawer front in place.
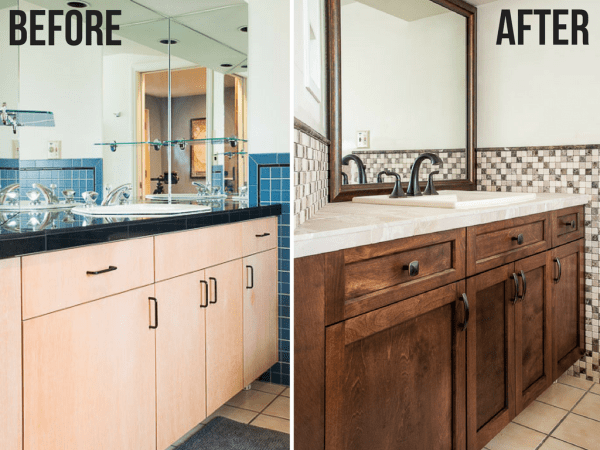
Bathroom Vanity Before and After
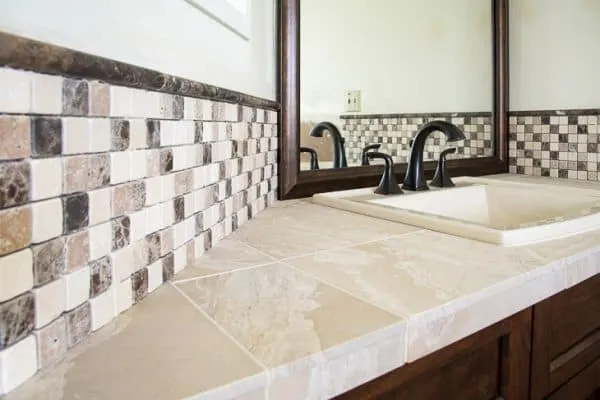
What an amazing transformation! Even without the new tile, this would have been a major update to our bathroom. I love how the dark doors really make the limestone tile pop, and they coordinate with the mirror frame perfectly!

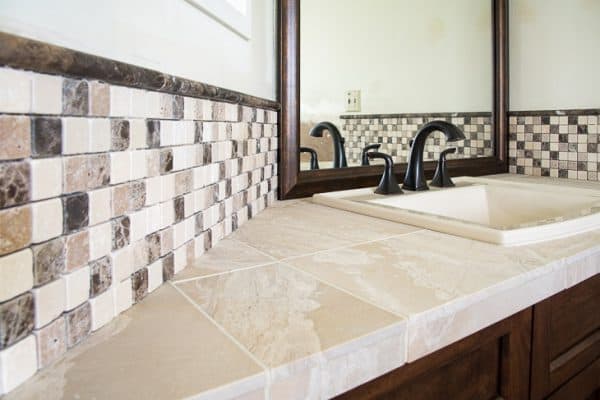
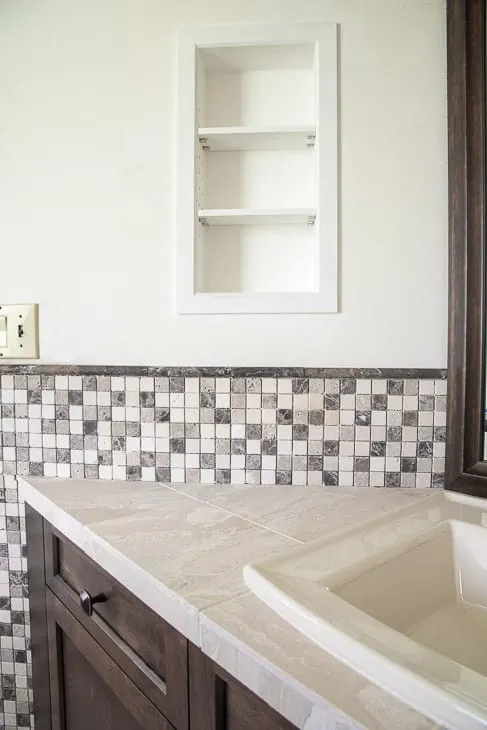
The vanity backsplash and wall tile all have this beautiful Emperador Mix Mosaic that brings together all the colors of my bathroom makeover. The coordinating dome trim caps off the edges and brings definition to the tiled spaces. I loooooove how it turned out!
I'm waiting until all the wall tile is installed before I grout, so I can do it all in one day.

Check out the rest of the bathroom makeover!
Paul
Thursday 27th of December 2018
Excellent makeover! Love the Shaker style doors. The finish you have applied is the icing on the cake. Looking forward to the next project. Happy Holidays!
KK
Wednesday 19th of December 2018
Nice. i want to do something similar even at my townhouse, but i was discouraged because everything instructional has all of these ways to measure cabinet openings and boxes. I am like, "why can't i just use the door measurements from the doors already on my cabinet?" no one just says, simply measure the current doors and use those measurements for your replacement doors. What did you do with the cabinet frame, because i assume if the doors were laminate then so was the rest of the cabinet?
Vineta
Saturday 22nd of December 2018
Replacing the cabinet doors is soooo much easier! I left the cabinet frame as is, so it's still white laminate inside. You can't really see between the gaps in the doors unless you're looking at it from the floor (or the tub).
Michael Lee
Tuesday 18th of December 2018
My wife and I have been planning on updating our bathroom in a remodel. The vanity cabinets look outdated also and we want to fix it up. And how your cabinets ended up looking, wow, they look great stained.
Two Chicks and a Mom
Tuesday 8th of May 2018
You are so handy lol. I really love the stain you used and the tiles on the wall. Thanks for sharing at Party in Your PJs.
Karen
Thursday 3rd of May 2018
I LOVE your cabinets! Did you also strip the wood down on the original shell and stain it too? Did you replace the drawer fronts as well? Great idea to replace the doors. If so, how was it hard to remove the old drawer fronts? You really did a great job!
Vineta
Friday 4th of May 2018
Thanks Karen! There were only two small sections on either side of the vanity that were visible with the doors closed. When I tried to remove them so I could tile behind them, they split. I cut duplicates out of plywood and stained them the same color as the doors. If you're staining the frame of the vanity in place, you can just give them a good sanding and stain them that way.
I replaced the drawer fronts as well. They were super easy to remove! There should be a screw on the inside of the drawer holding them in place. The false front in the center was screwed on from the inside as well.