Put the space over your refrigerator to good use! This DIY over fridge cabinet is easy to make and adds a ton of storage to your kitchen!
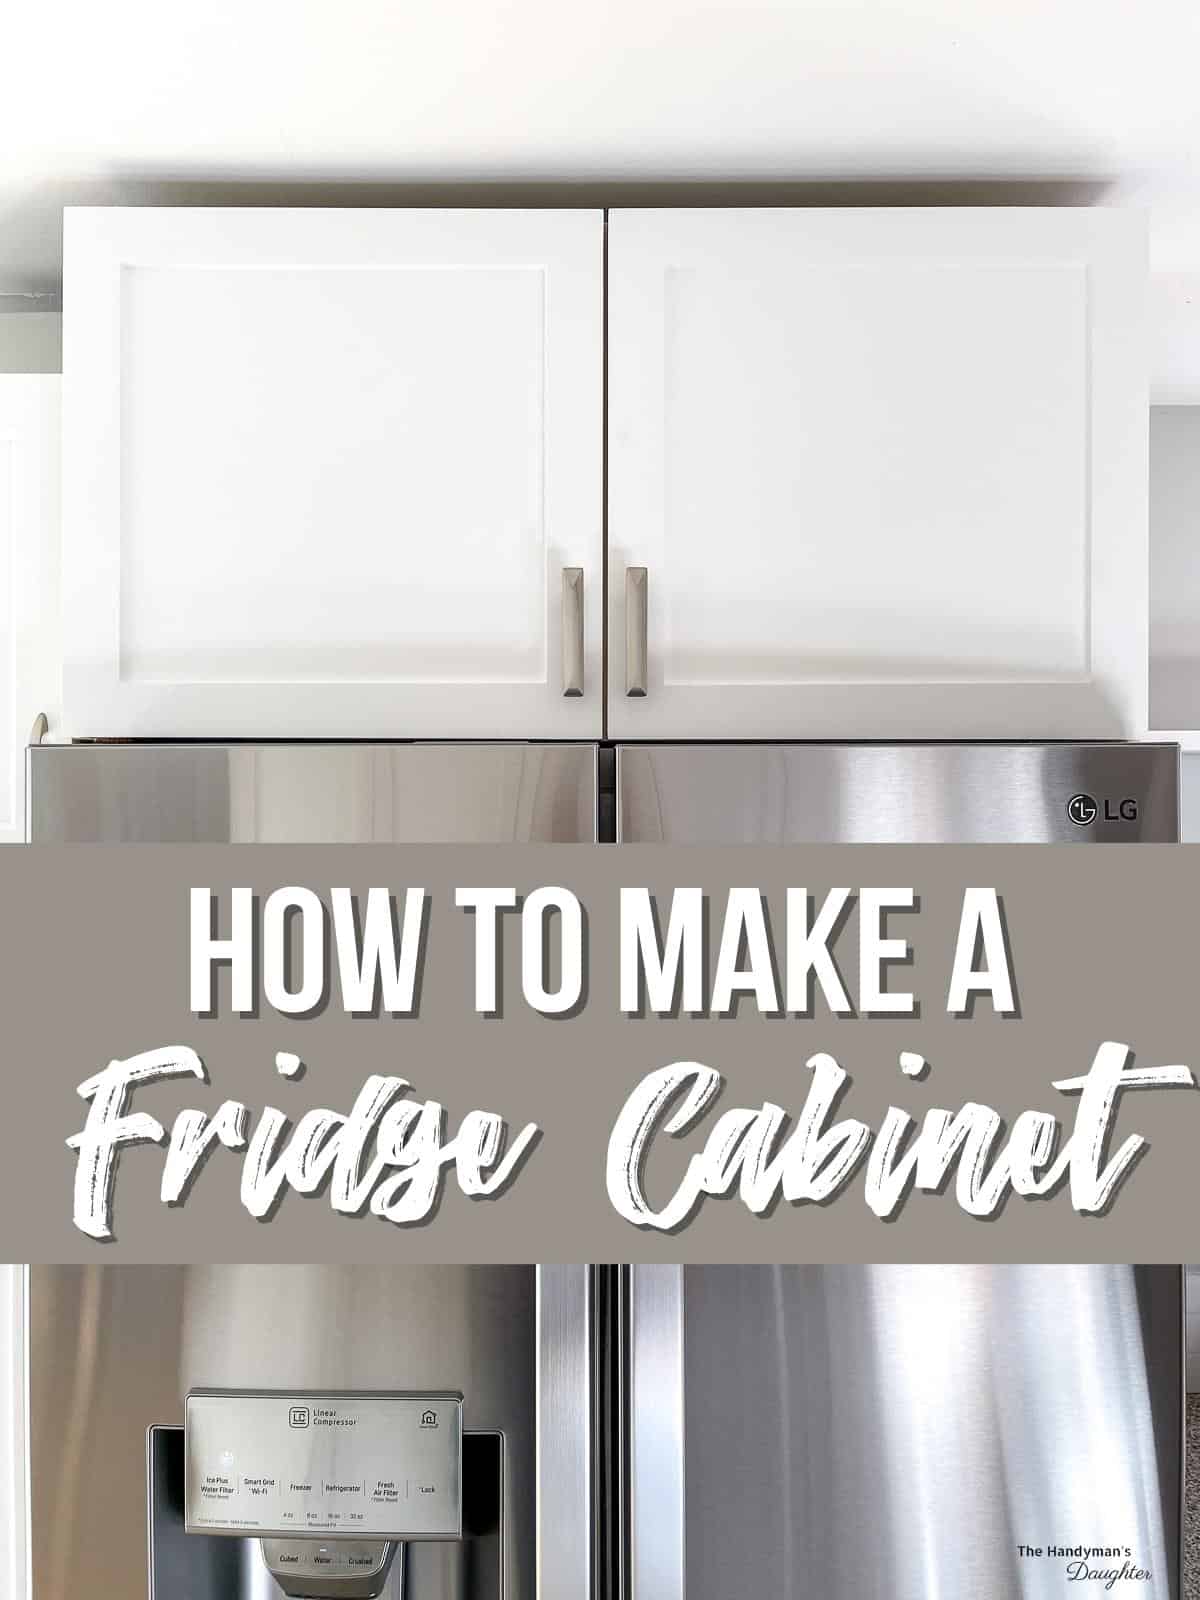

Is the space above your fridge a jumbled mess of cereal boxes and oversized bowls? Or maybe some baskets filled with who-knows-what? Mine was a catch-all for everything that didn't fit in a cabinet!
It can be difficult to find the right size cabinet for above the fridge, because ceiling heights and refrigerator depths vary so much. So why not make your own?
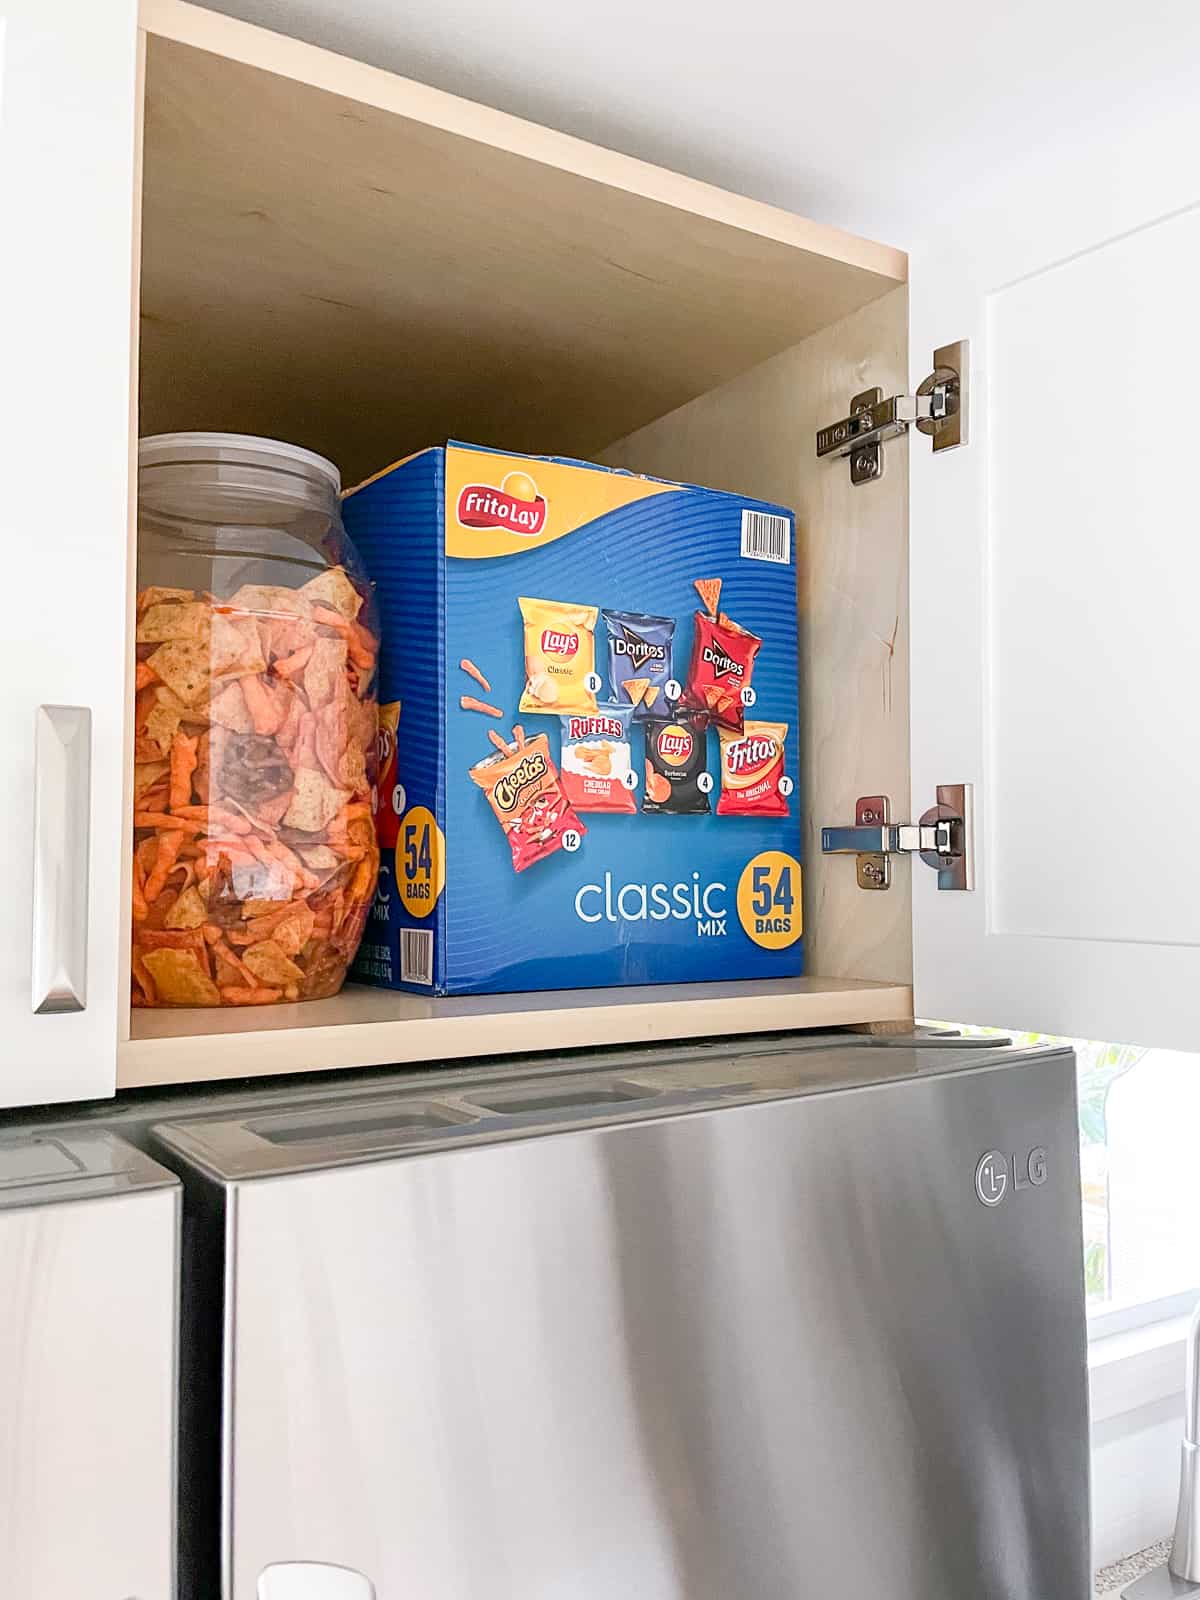
I just followed the same steps as building wall cabinets, but made it deep enough to come up to the front of our countertop depth fridge. It's the perfect spot to store all those baking sheets and muffin tins on one side, and big boxes of snacks from Costco on the other!
Here's how to make an above fridge cabinet yourself!
This post contains affiliate links for your convenience. Purchases made through these links may earn me a small commission at no additional cost to you. Please visit my disclosures page for more information.
Measure your fridge space
It's important to take accurate measurements of your space, so you don't make your cabinet too big or small. You'll also need to refer to your fridge manufacturer's requirements for spacing around the fridge for proper air flow and ventilation.
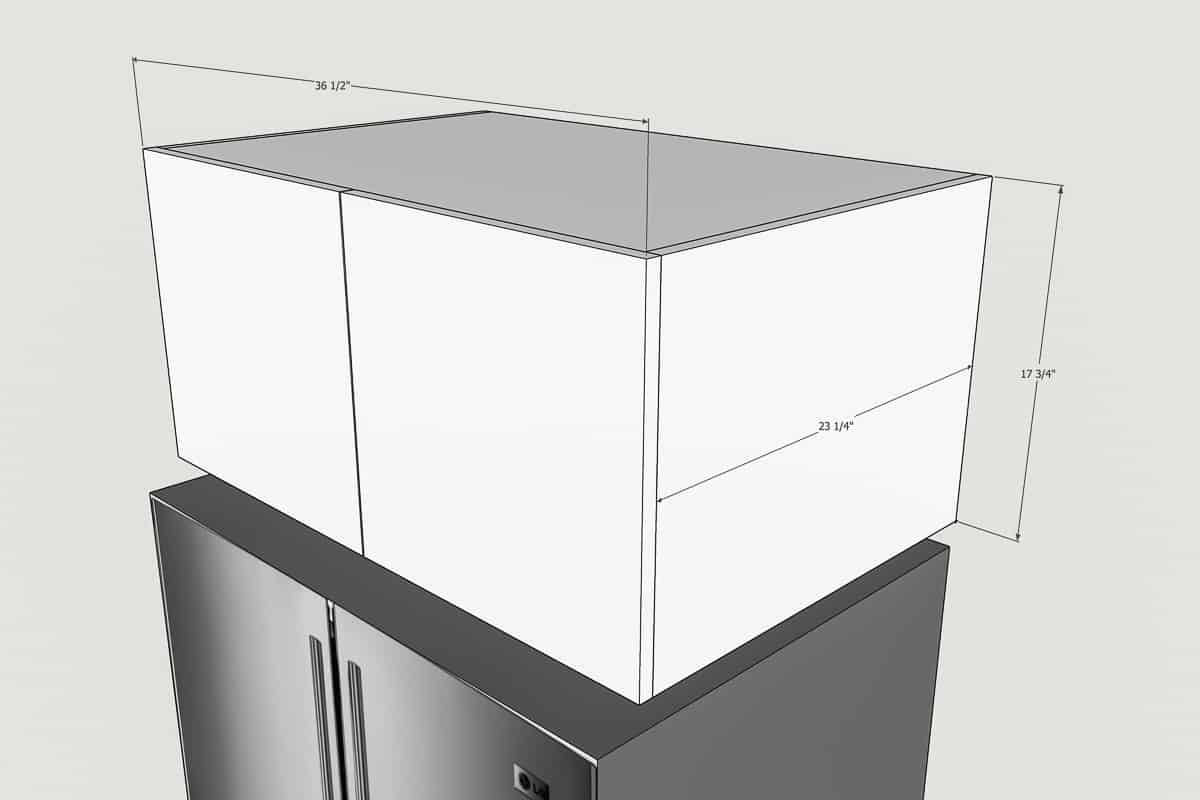
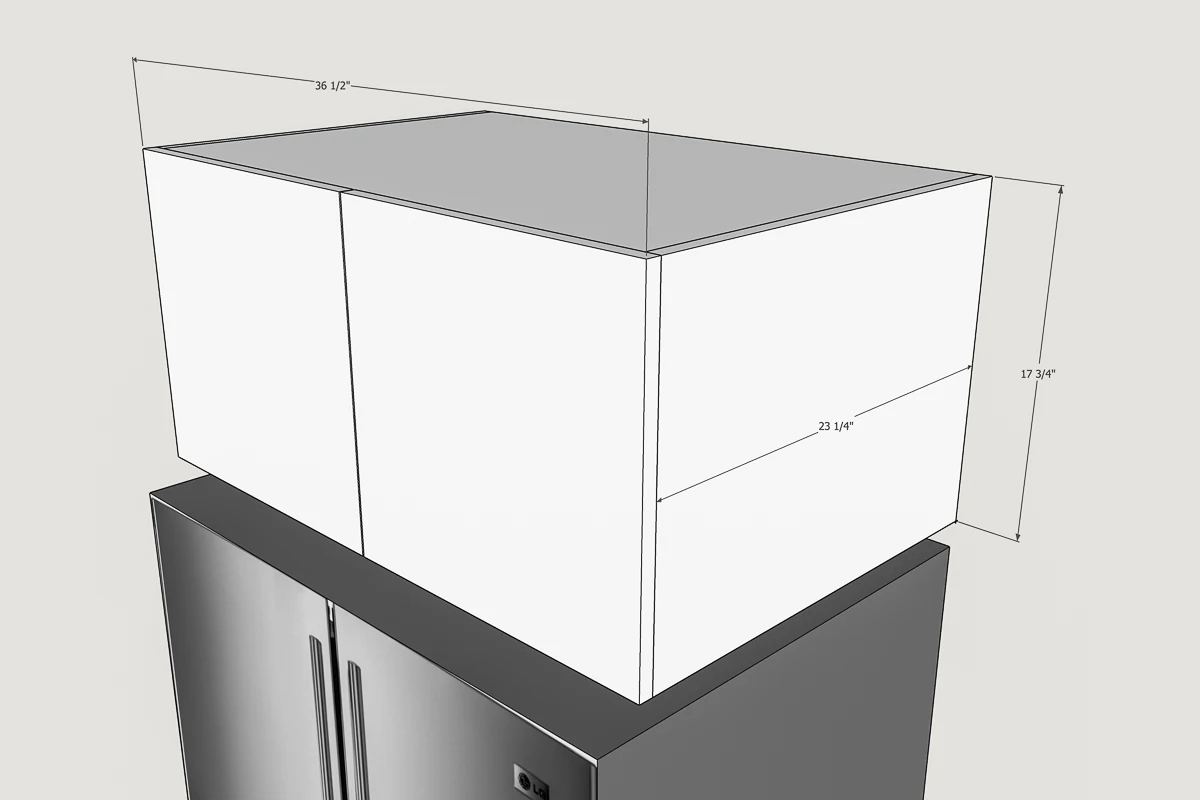
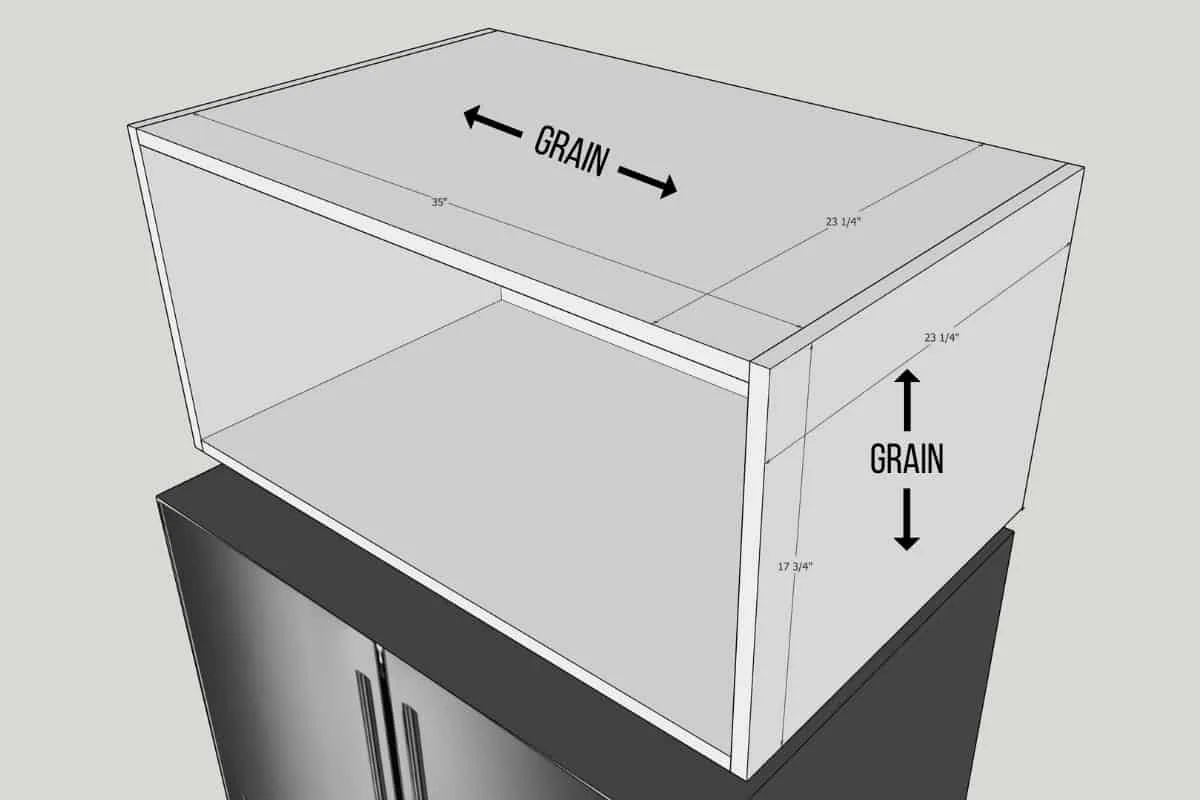
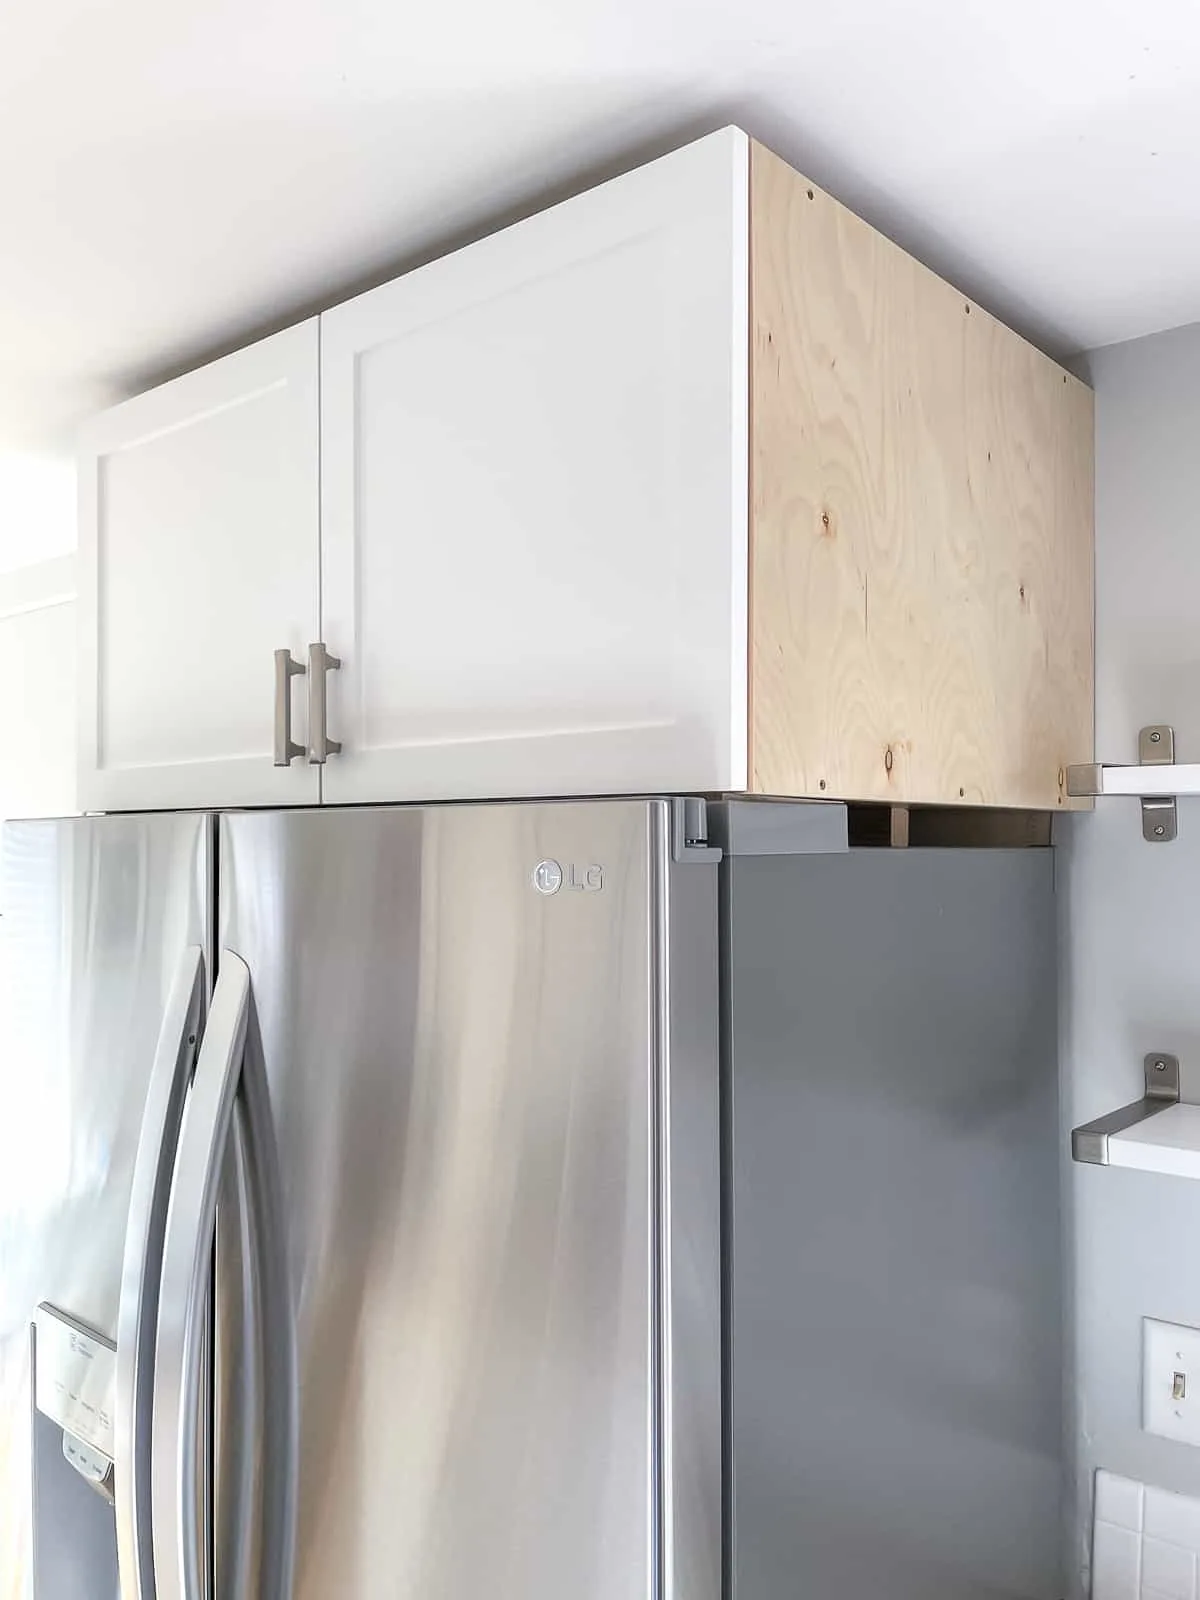
Your size may vary, but my above fridge cabinet measures 36 ½" wide, 17 ¾" tall and 23 ¼" deep. If you don't want to build your own over fridge cabinet, you can take these dimensions to a local cabinet store and have one made for you!
Measure the above fridge cabinet height
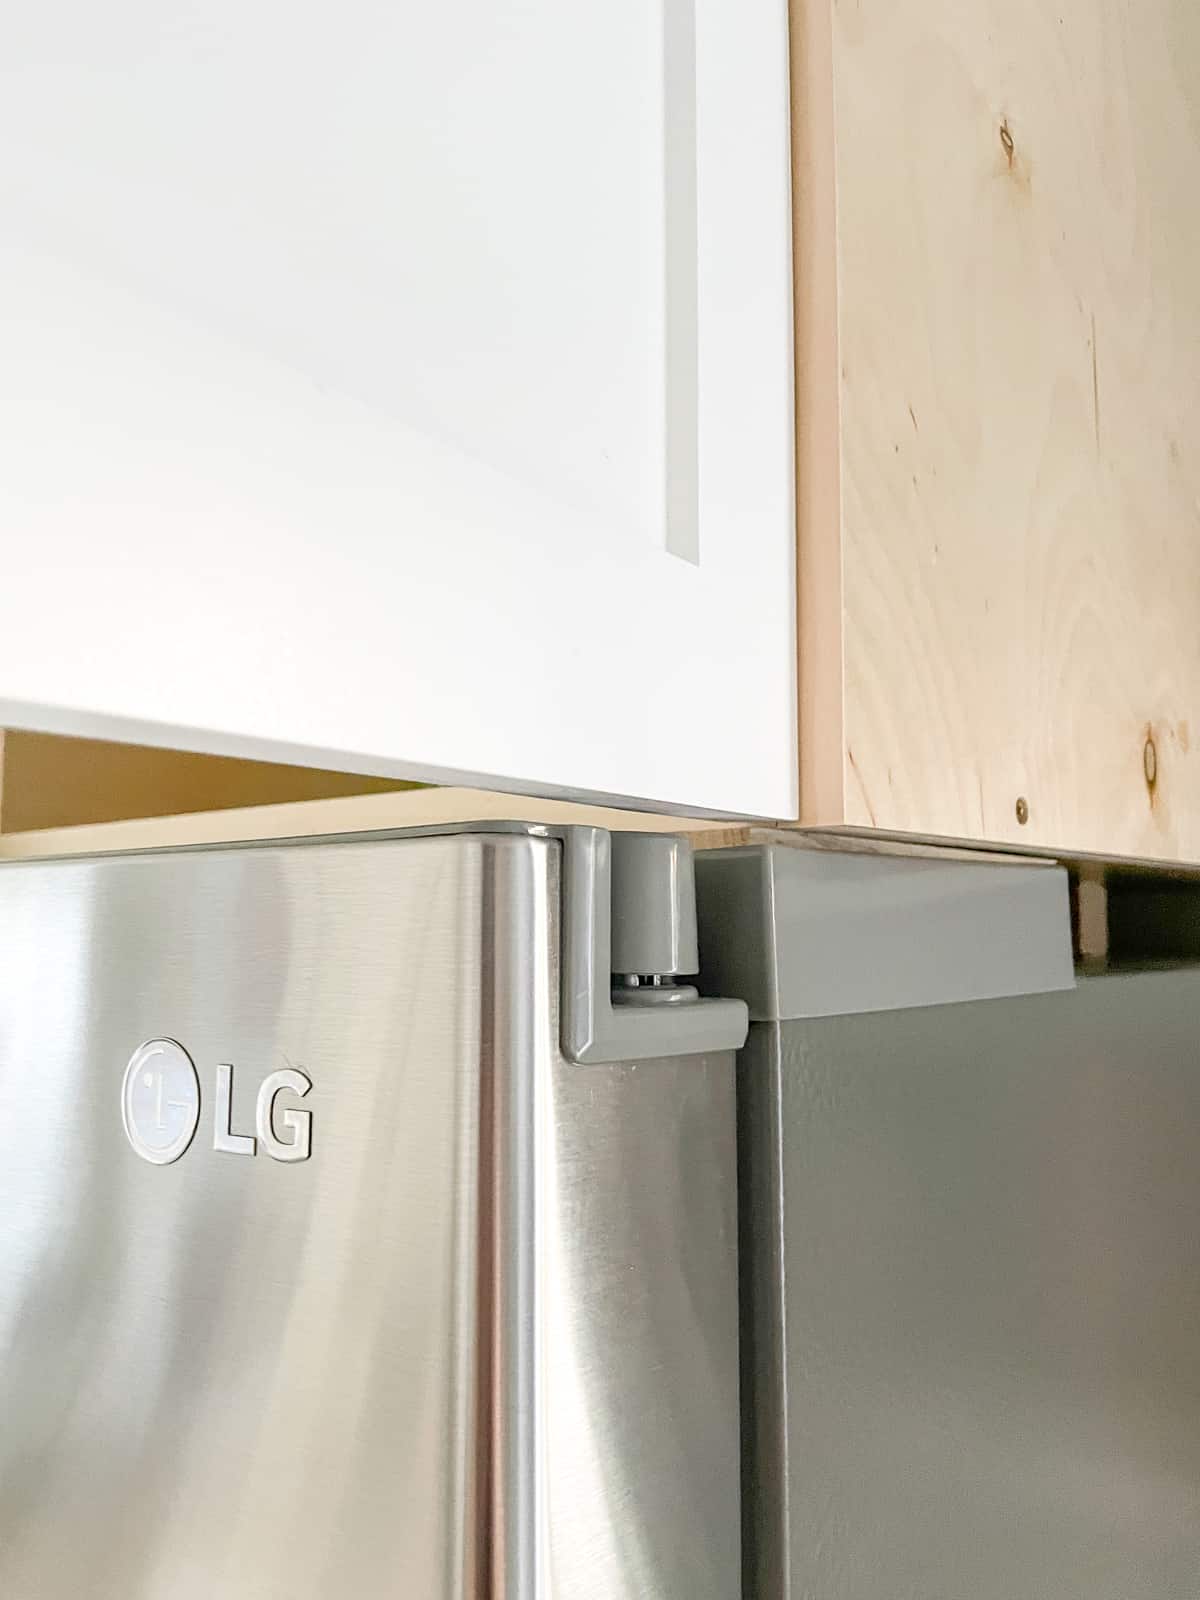
First, measure between the highest point of your fridge and the ceiling. Our fridge has a hinge that sticks up, so I measured from the top of that. If I measured from the flat top behind the hinge, the fridge cabinet doors wouldn't be able to open!

Next, subtract the height of the gap between the wall cabinets and the ceiling around the rest of the kitchen. If your cabinets have crown moulding, measure from the top of the cabinet box. Usually you can find a similar trim profile at a big box store or online, so you can make your above fridge cabinet match the rest.
Finally, subtract at least ¼" from your measurement (or whatever your refrigerator manufacturer recommends). You don't want the cabinet to sit directly on top of the fridge, or you won't be able to pull it out to repair or replace it! That extra wiggle room will allow it to slide out easily, and provide proper air flow.
Measure the above fridge cabinet width
The width of your fridge cabinet will depend on whether you plan to add a side panel, and if there are cabinets next to it that you want to connect to. If you're enclosing the fridge on all sides, you'll need to leave a gap around it for proper air flow. Check your manual or the manufacturer's website for their recommended spacing!
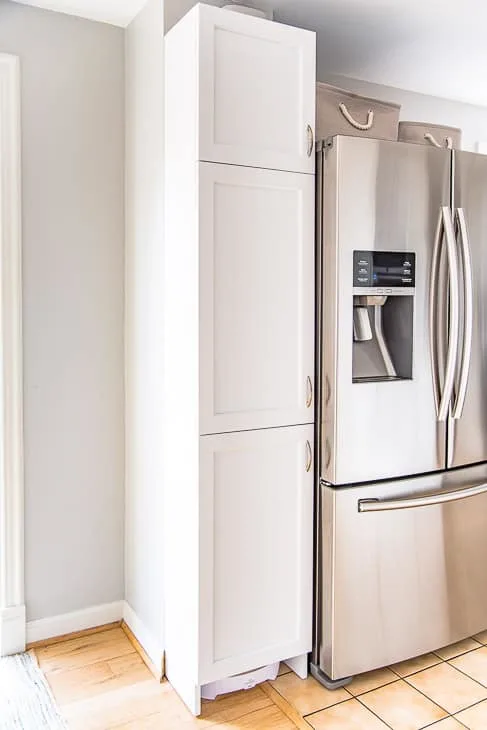
I have a chase next to the fridge with a small pantry cabinet that will attach to my above fridge cabinet on the left side. On the right, I'll be adding an end panel that covers the exposed side of the fridge to make it look built in.

I measured from the wall of the chase to the opposite side of the fridge, then added the recommended ⅛" spacing for ventilation.
Measure the above fridge cabinet depth
Your above fridge cabinet should be the same depth as your base cabinets. The standard size is 23 ¼", with ¾" thick doors.
We have a countertop depth fridge, so only the doors stick out past the base cabinets so they can open and close. If you have a full depth fridge, it will stick out much further!
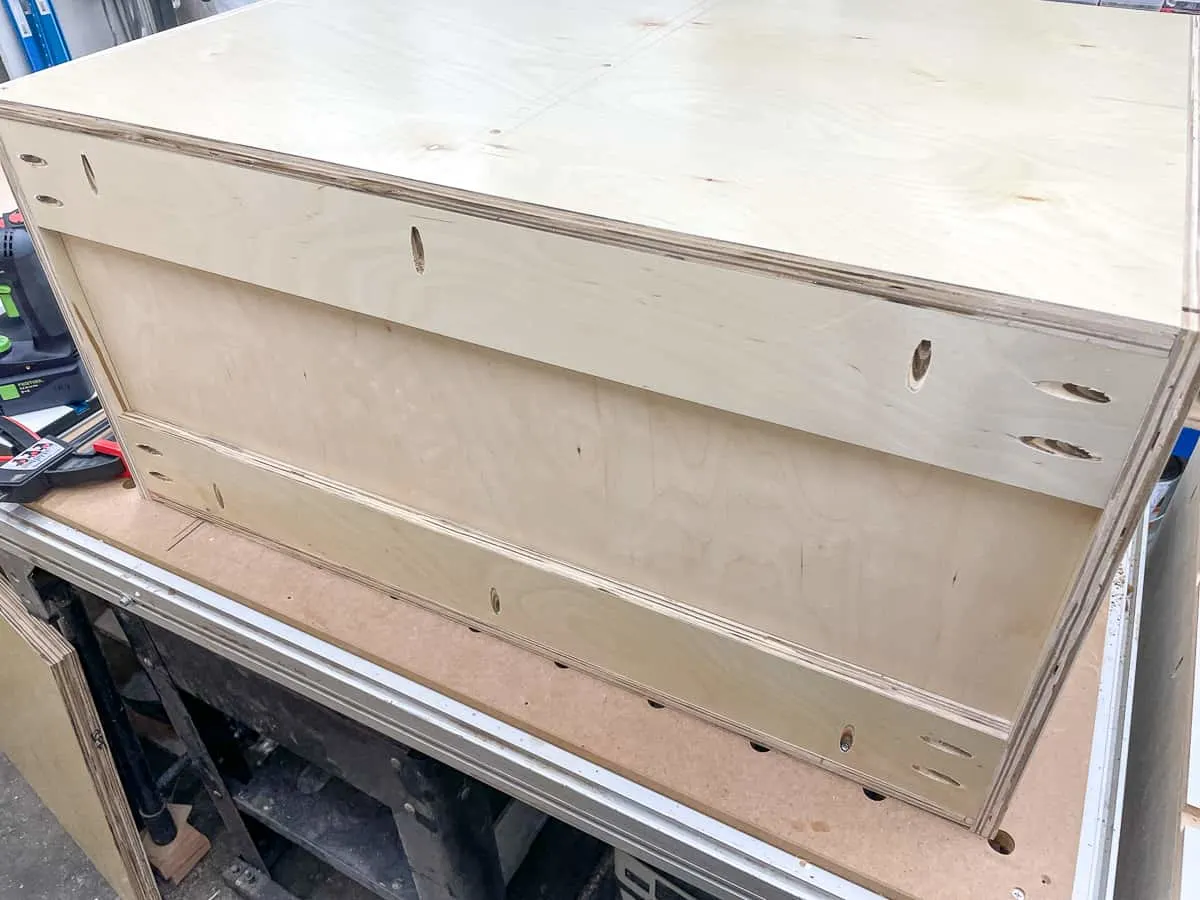
Cut the plywood pieces
I recommend using prefinished ¾" plywood for your cabinet box. It's stronger than MDF, and you don't have to paint or apply a finish to the interior! You can read more about the different types of plywood here.
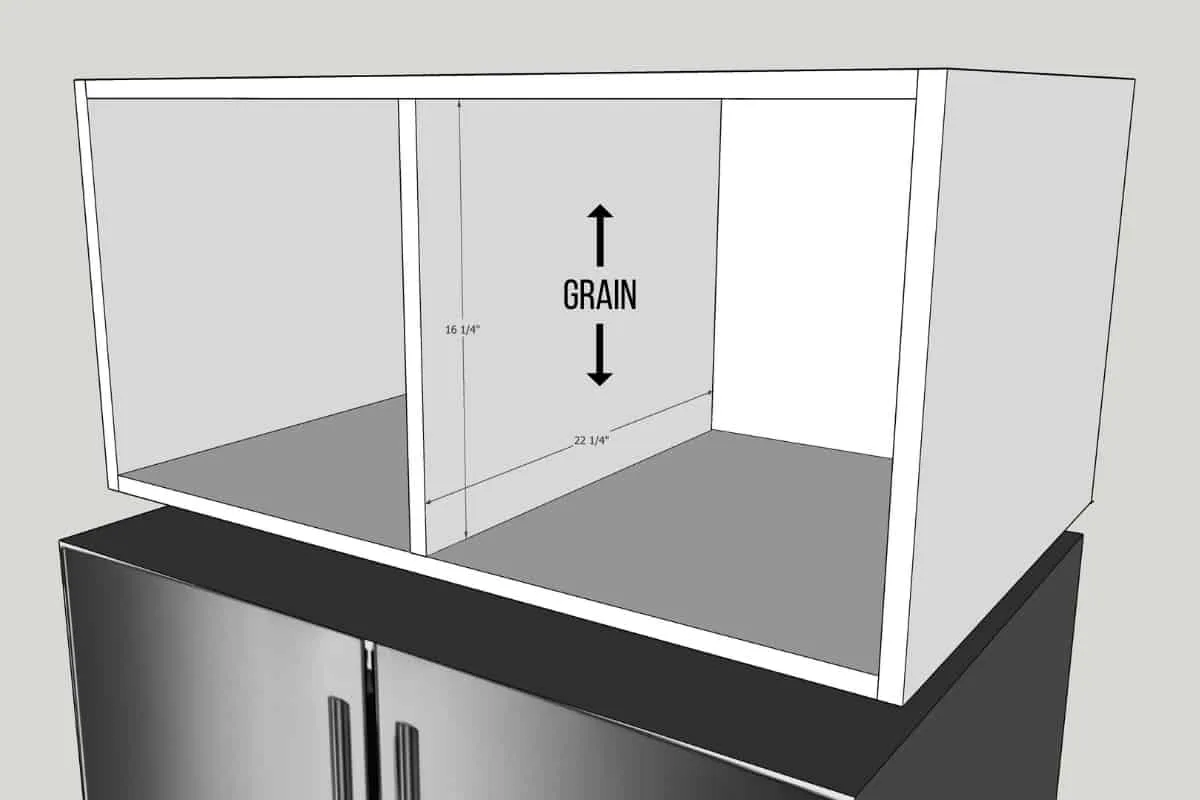
Cut the two sides to the exact height and depth of your cabinet box, with the grain running vertically. Then cut the top and bottom pieces to the depth of the cabinet box, and the width of the box MINUS the thickness of the sides. The grain for the top and bottom should be running across the width.
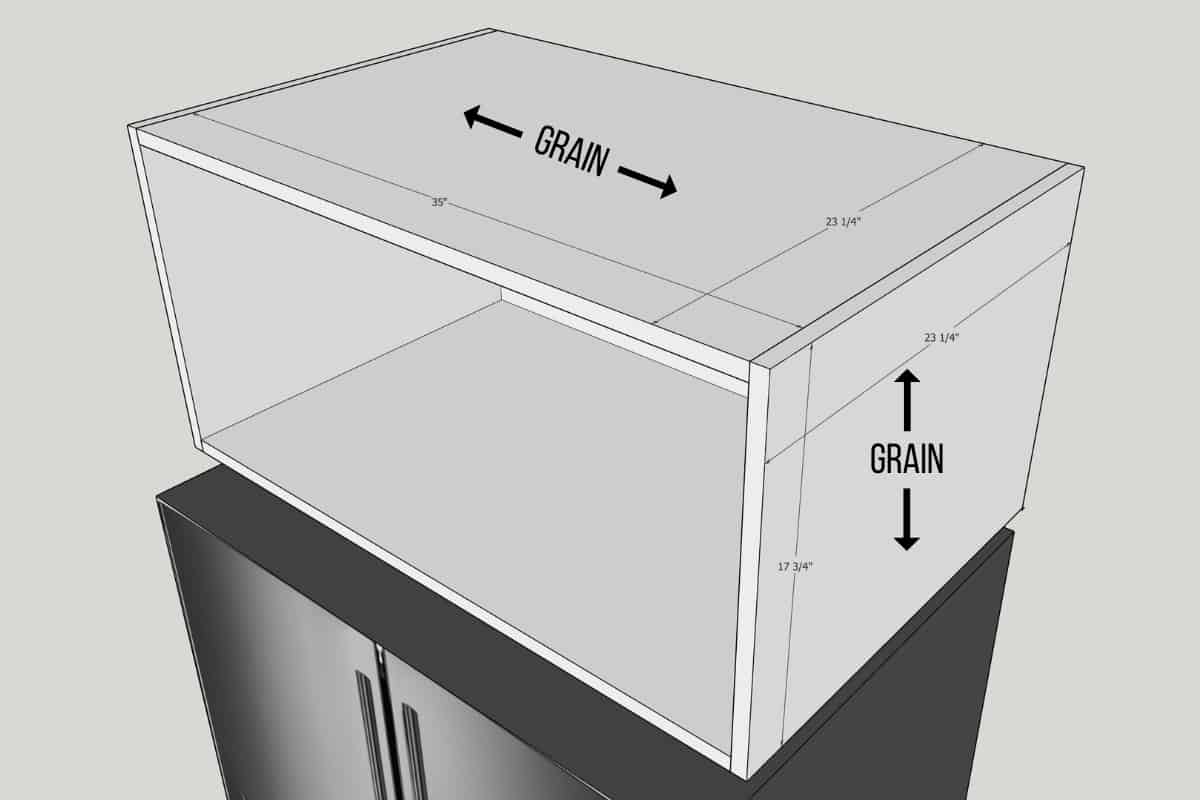
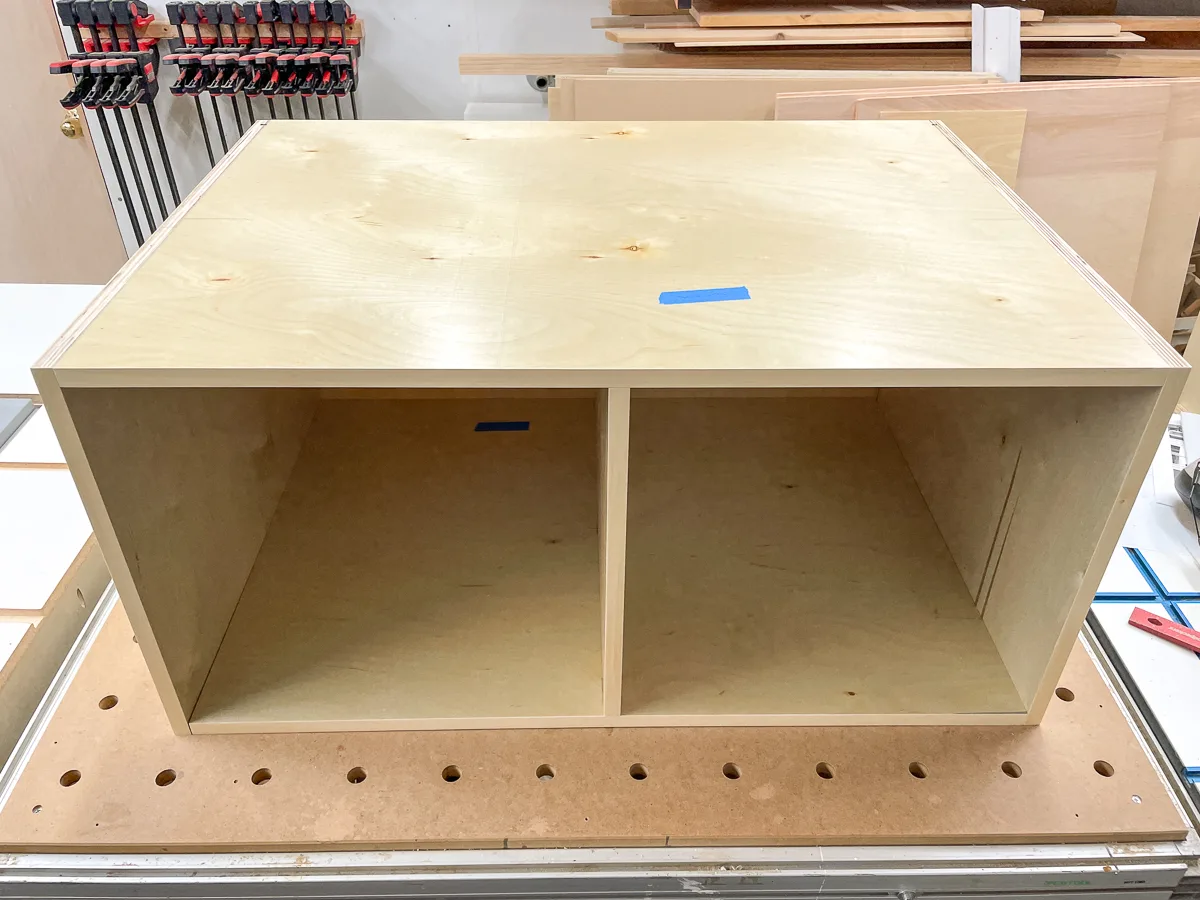
The center divider will be the depth of the cabinet box, minus 1" for the back panel and the nailer strips (more on that below). The height of the dividier is the height of the sides minus the thickness of the top and bottom. While you don't necessarily need a center divider, it will help prevent the middle from sagging over time.

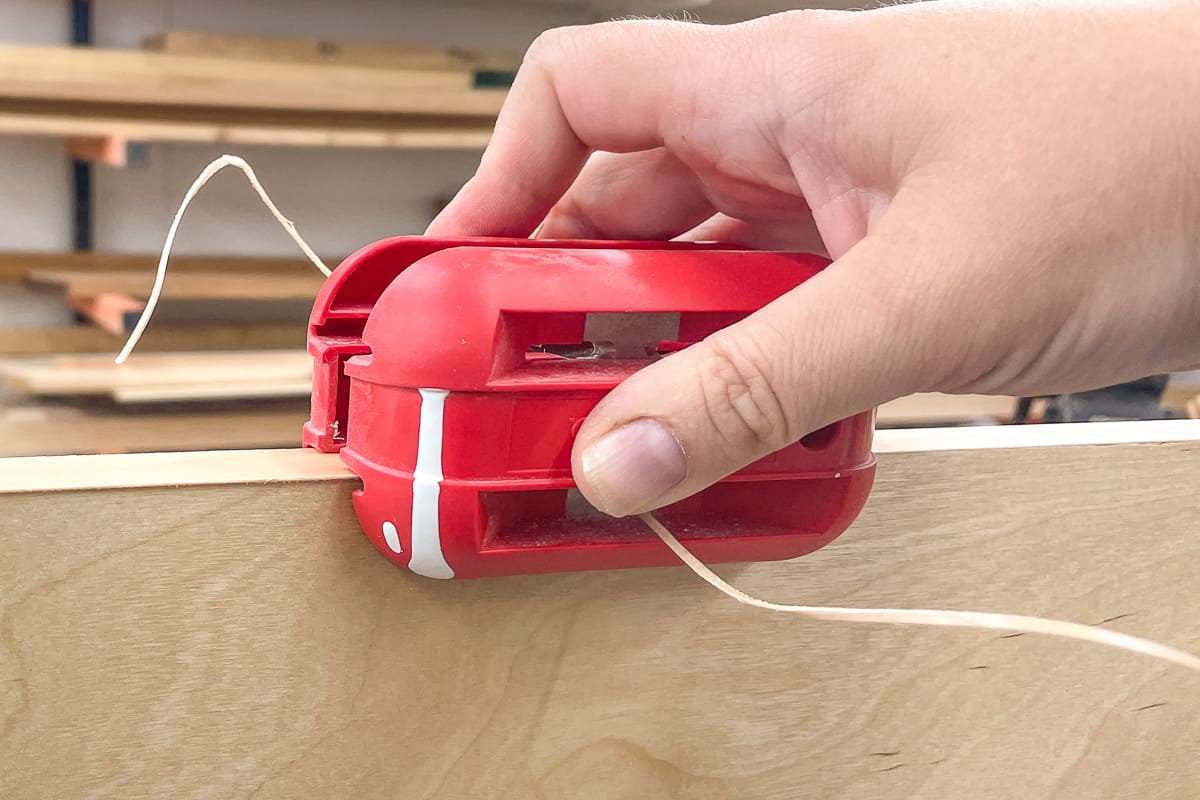
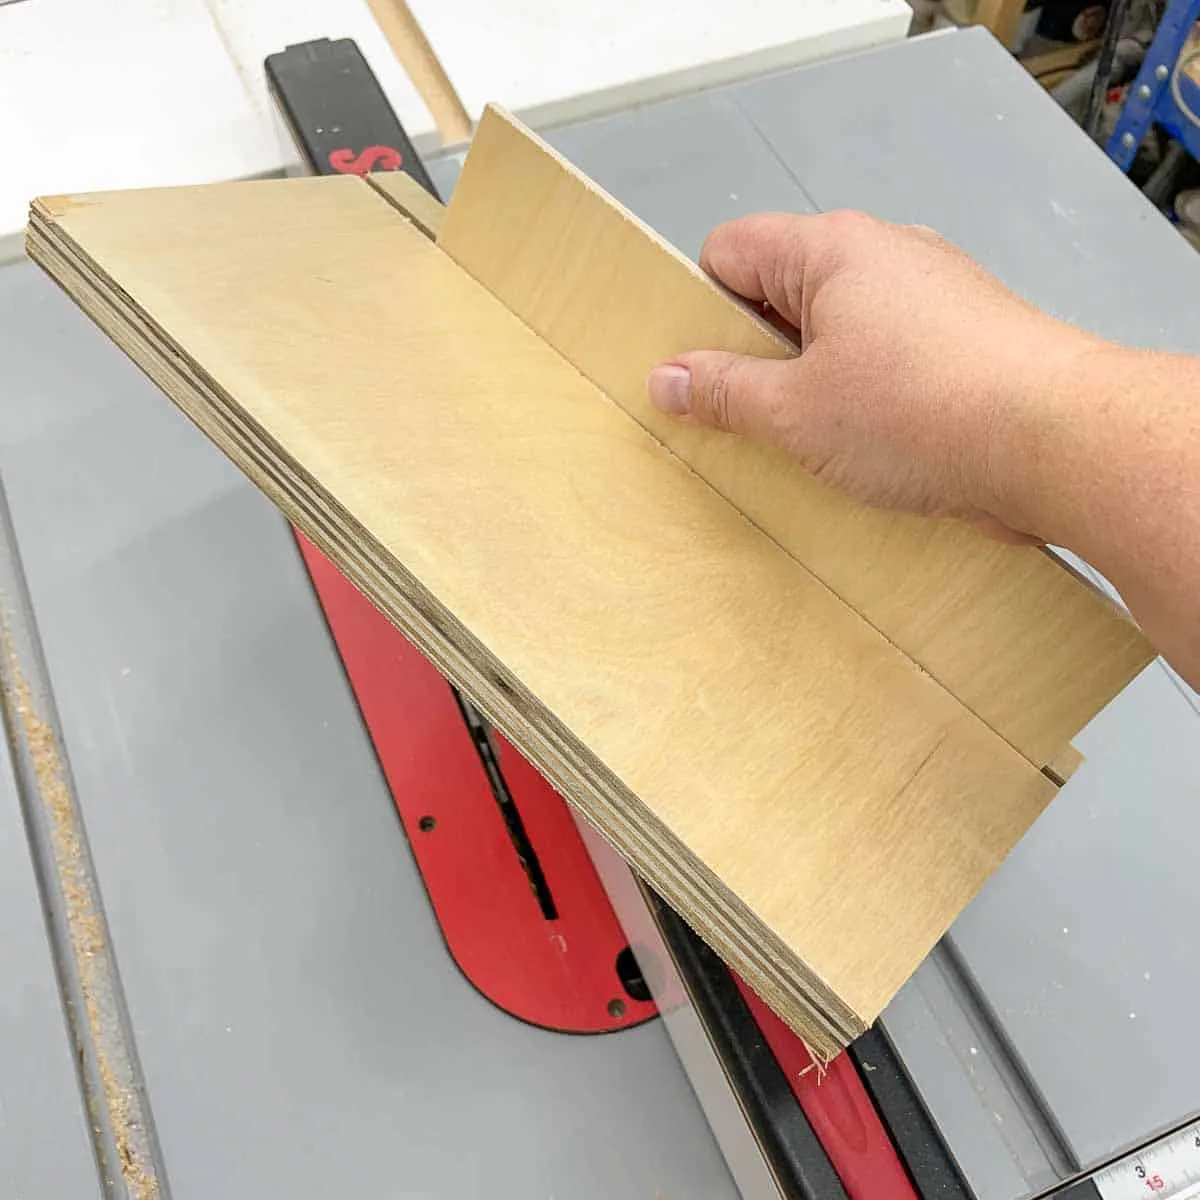
After all the ¾" plywood pieces are cut, apply edge banding to the front edges. This will make it look like solid wood and cover up those ugly exposed plywood layers.

Cut the grooves for the back panel
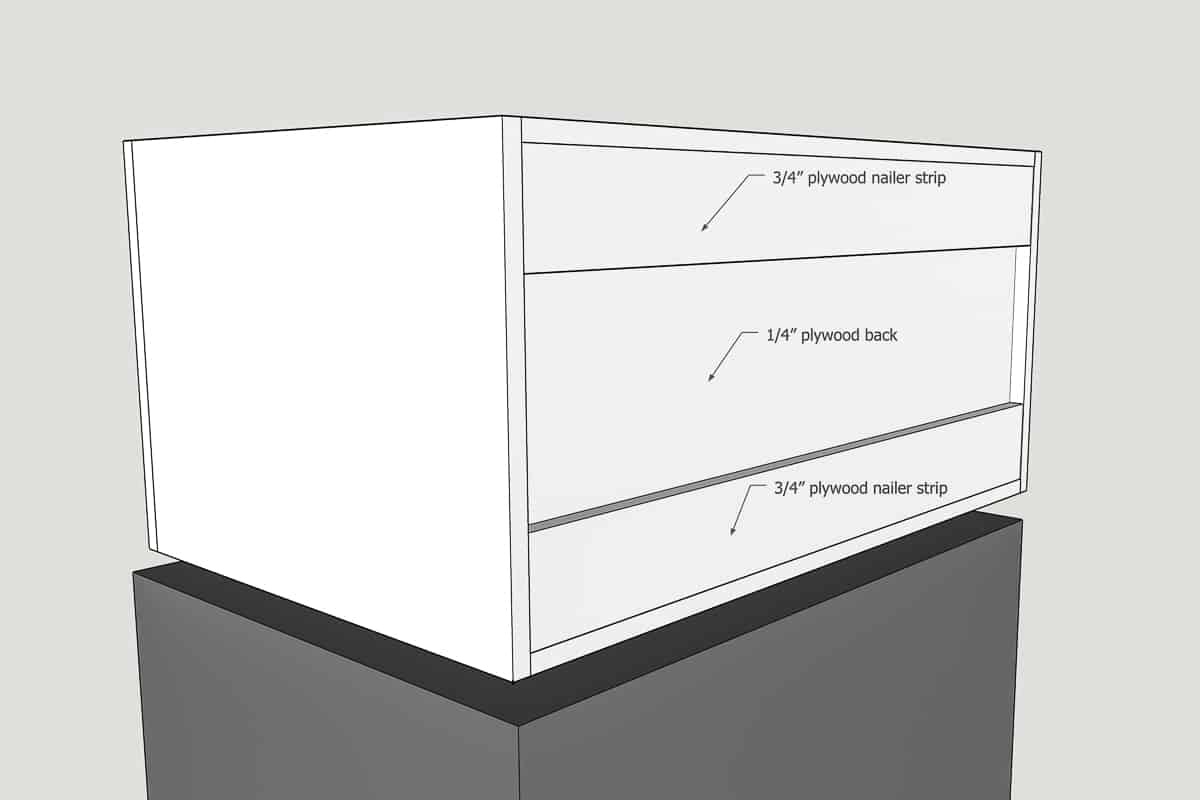
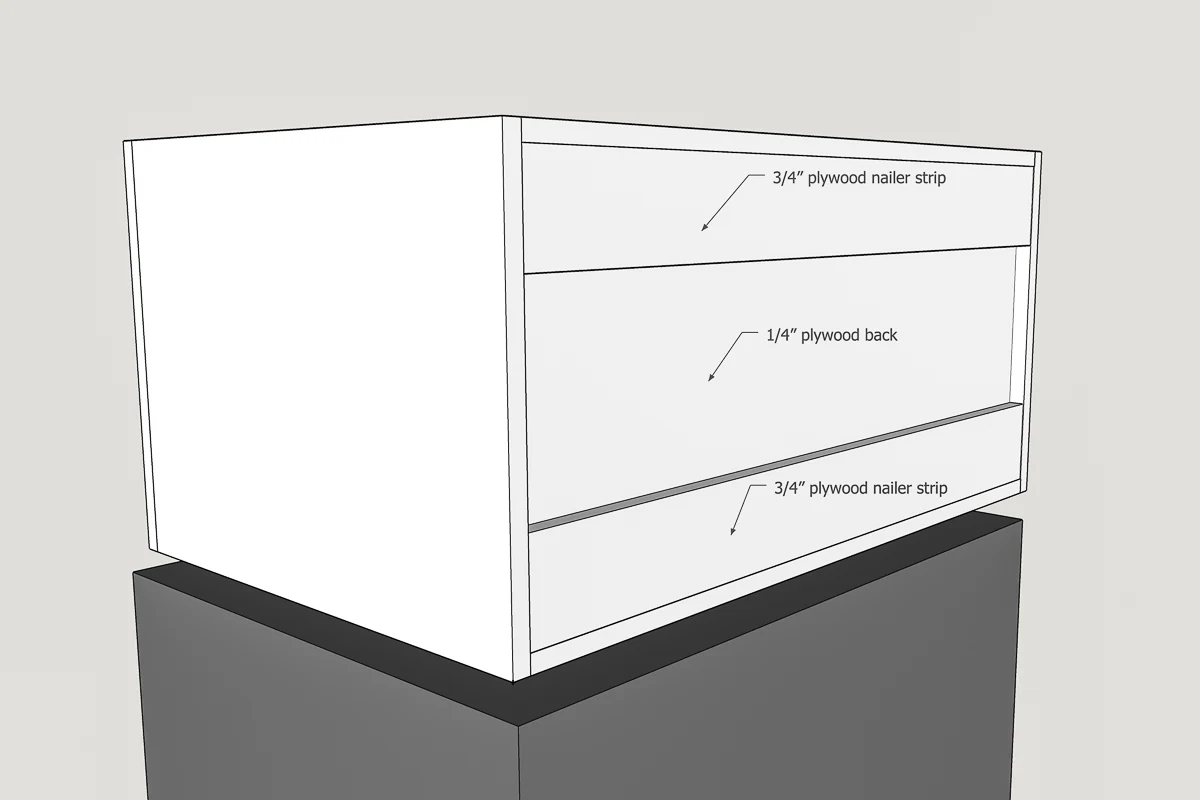
There are a few different ways you can attach the cabinet back panel. You could make a recessed back panel, staple it to the back and add nailer strips on the inside, or just fit another ¾" plywood piece inside the box and screw it in place from the outside. The recessed back panel has the cleanest look, and that's what I used for the rest of my wall cabinets.
Cut a ¼" wide groove, ¾" from the back edge of all the box pieces. The ¼" back panel will sit in the groove, with ¾" plywood nailer strips at the top and bottom that will attach to the wall at the studs.
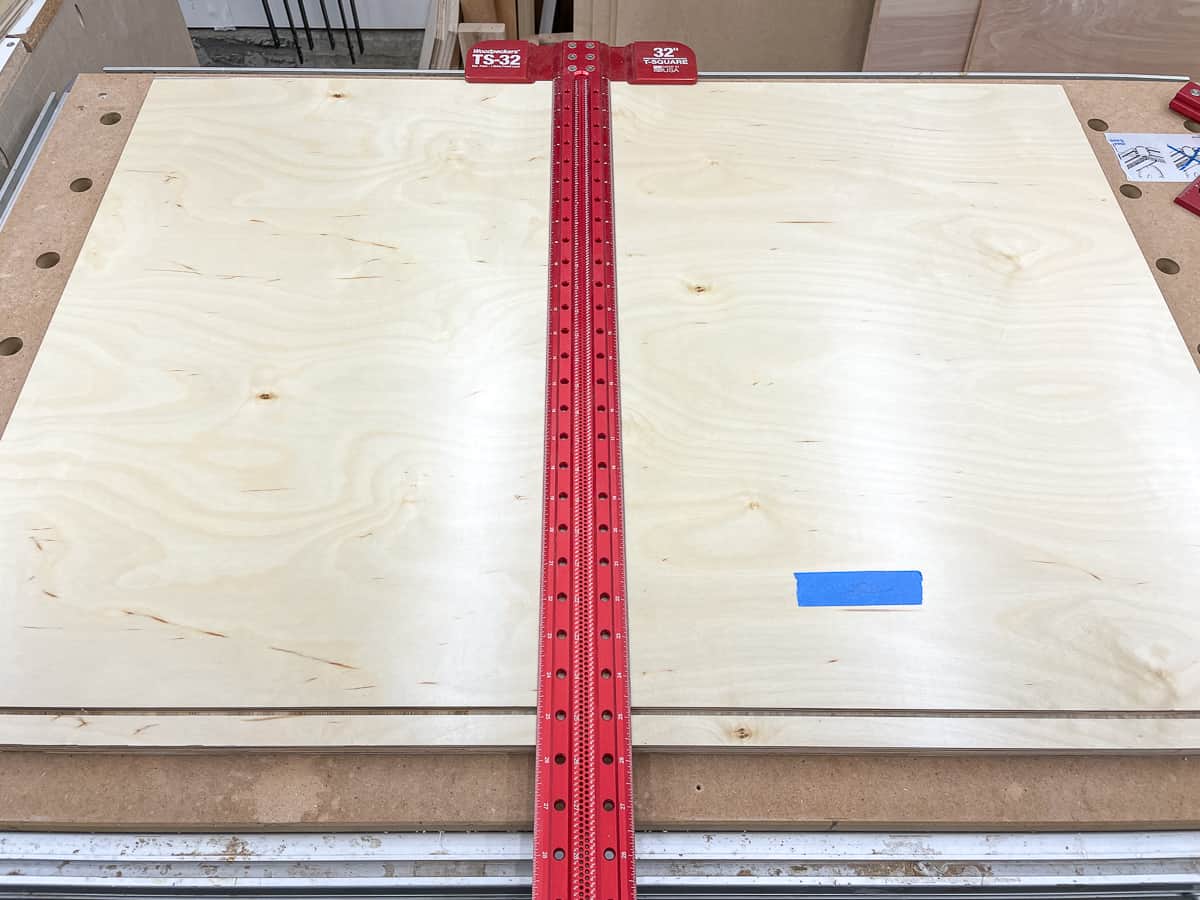
The groove is cut on the inside of all the cabinet box pieces, on the side opposite the edge banding. Set the table saw fence ¾" from the blade, and set the blade ⅜" high. Cut the groove along the back edge of all the box pieces (except the divider), then nudge the fence over a tiny bit and cut again.
Test to make sure the ¼" plywood back fits in the groove. I always cut a test piece first before making the final pass. It should be tight enough to hold the panel in place, but easy to slide in without buckling.

Now that you know the depth of the groove, you can cut the ¼" plywood back panel to fit.
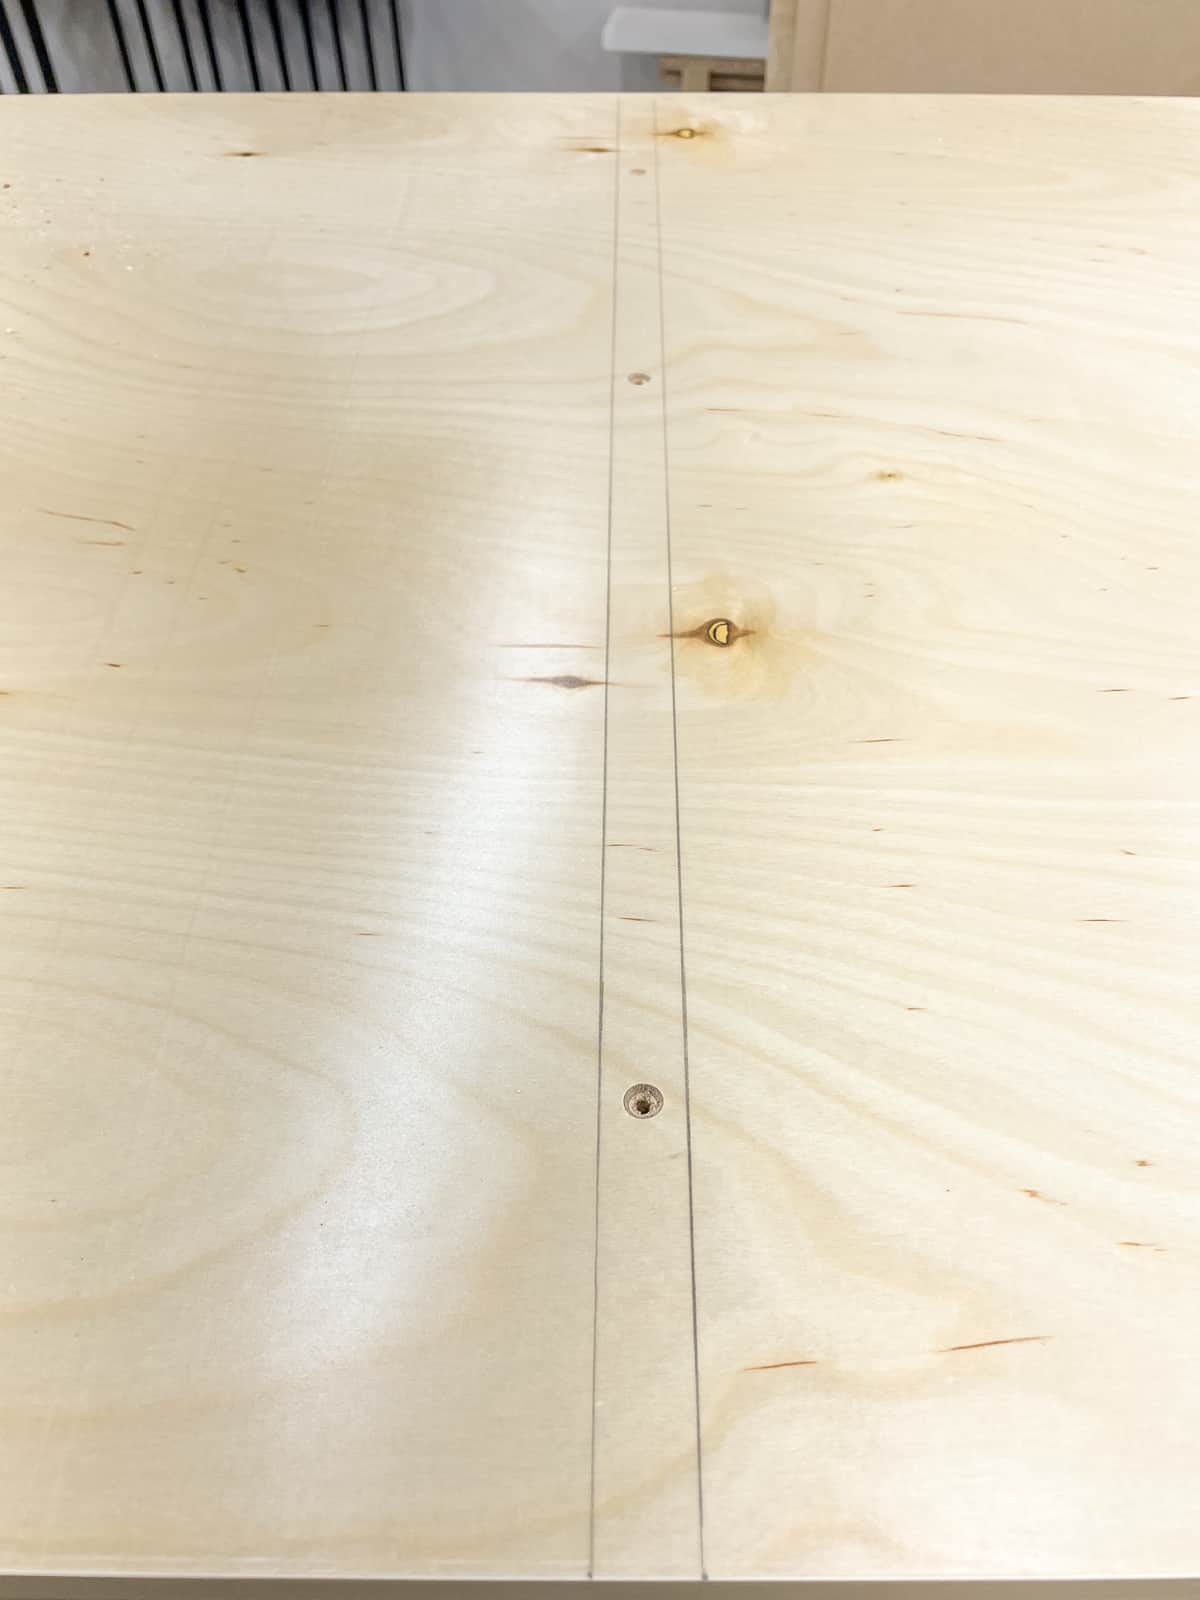
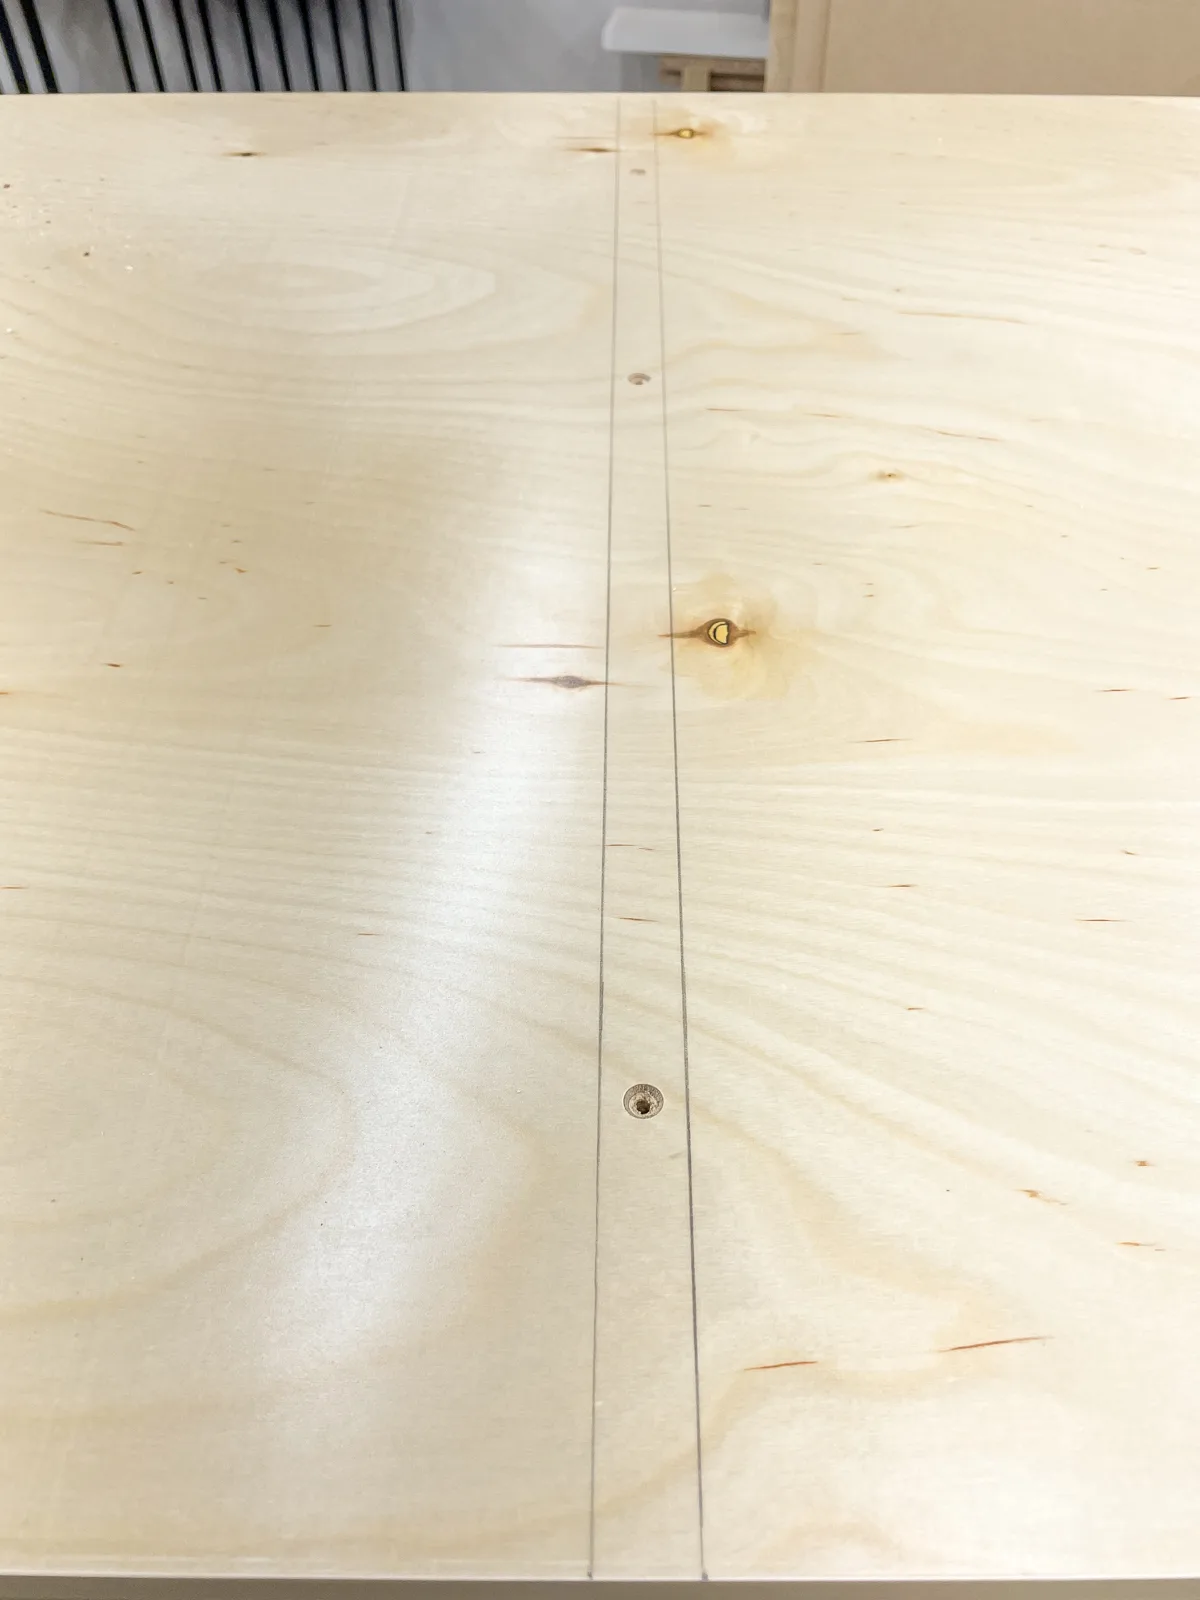
Mark the center divider position
It's much easier to mark out the position of the center divider before you start assembling the cabinet box. Find the middle of the top and bottom pieces, then draw two lines ⅜" from the center to mark the edges of the divider on the inside.
Repeat the process on the outside of the top and bottom pieces. Then predrill countersink holes in the middle of your two lines.
Assemble the over fridge cabinet box
Since the top and bottom won't be visible from the outside, pocket holes would be a great way to assemble this type of cabinet. You can also predrill countersink holes and screw it together from the outside if you'll be adding an end panel later.
Don't forget to slide the back panel into the grooves before you attach the top! Ask me how I know... 🙂

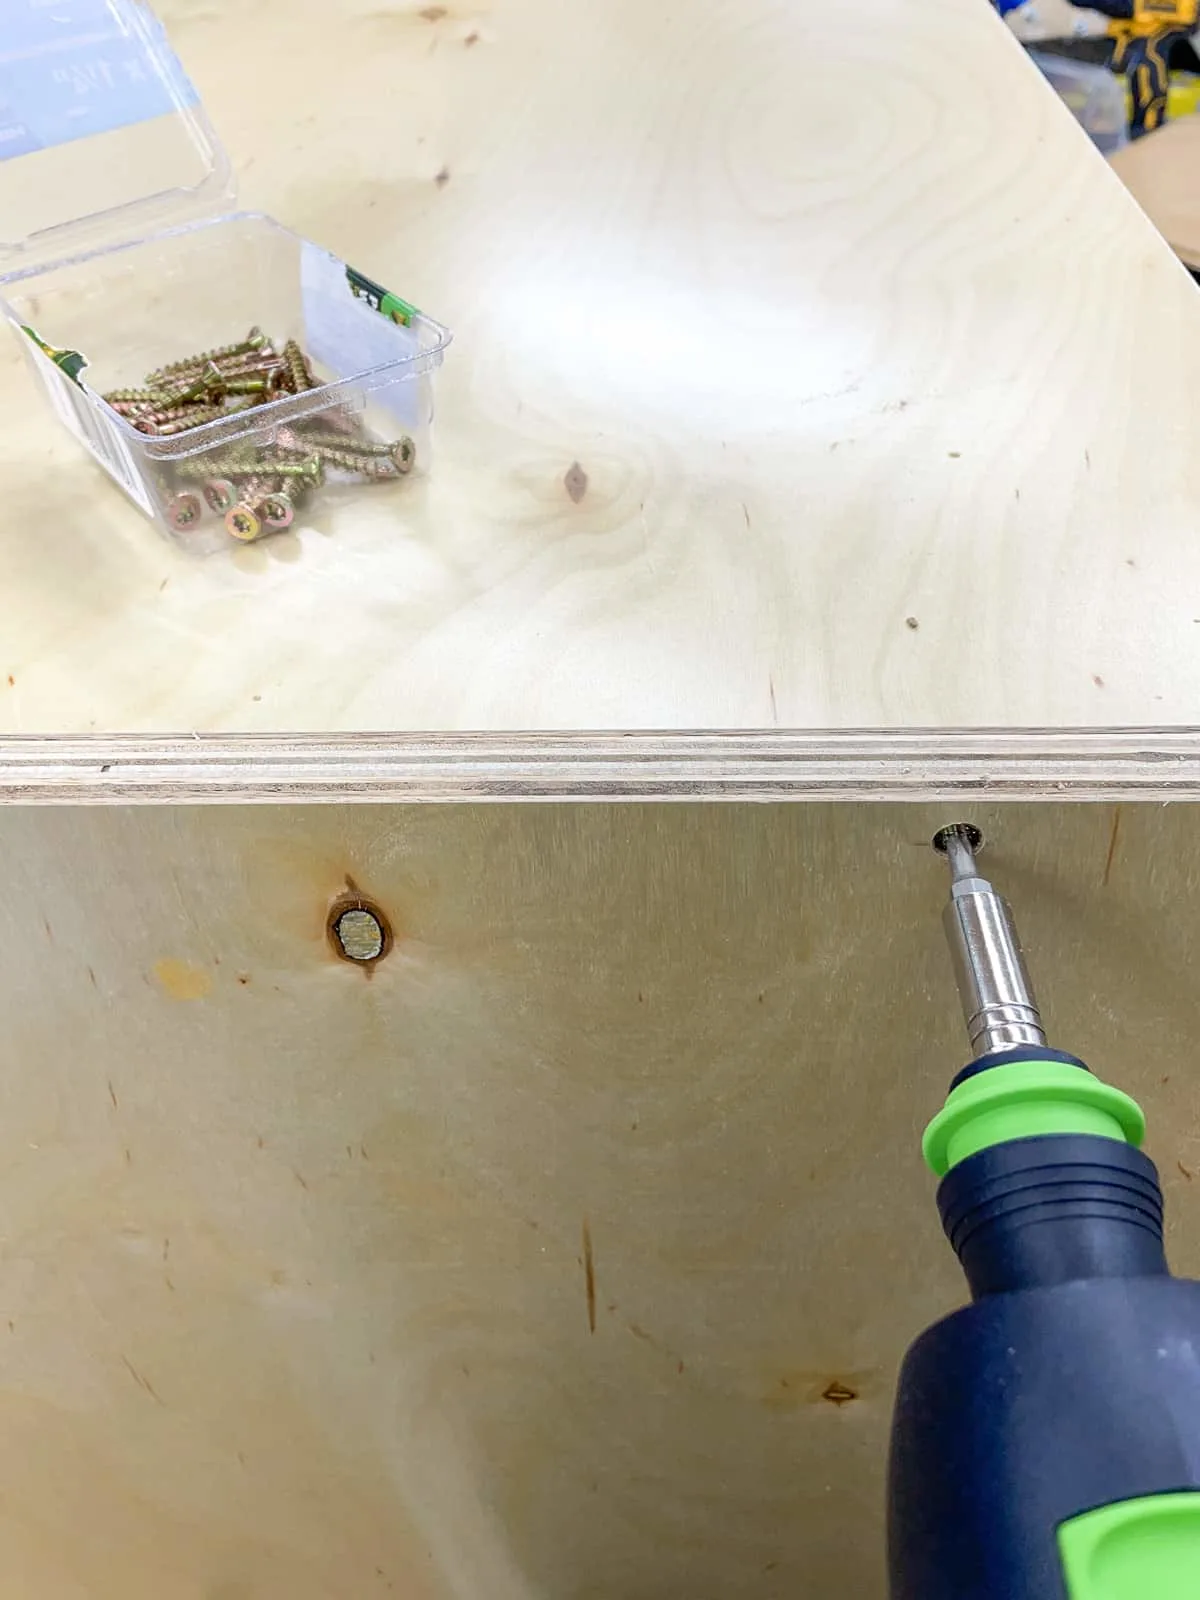
Slide the center divider into place, aligned with the marks you made on the inside. It helps to use a few clamping squares to hold it straight while you drive in the screws from the top and bottom.

Finally, add the nailer strips to the back with pocket holes or screws through the top, bottom and sides. These will help prevent the cabinet from racking and will give you a solid piece to screw to the wall at the studs.

Install your cabinet above the fridge
Now it's time to install your new cabinet! Grab a level, a stud finder and a few shims. Find the studs in the wall behind the fridge first, and measure their location so you can find them through the cabinet later.
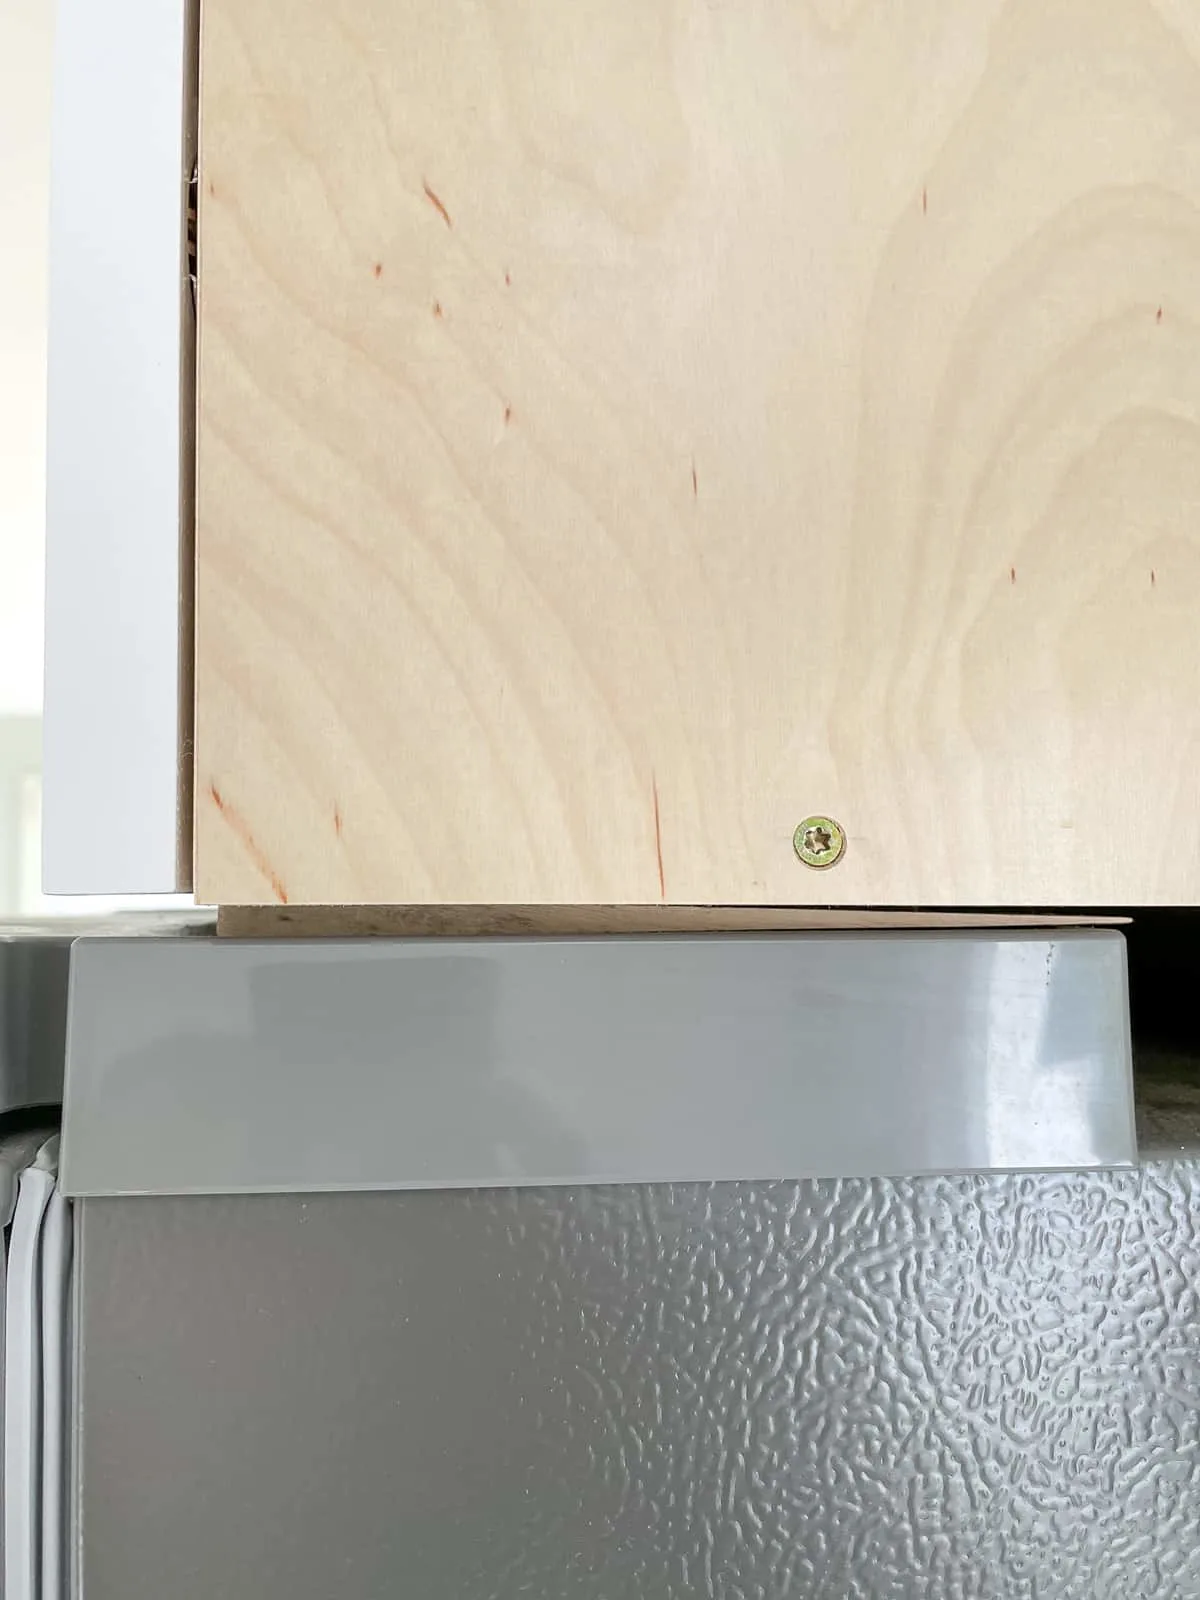
If you have a fridge with a hinge that sticks up like mine, you'll also want to cut a scrap piece of wood that's the same height as the hinge, plus ¼". In my case, a 2x2 scrap worked out perfectly!
Slide the cabinet over the fridge and push it all the way back to the wall. Prop up the back of the cabinet with the scrap piece of wood. It should be slightly higher than the front.
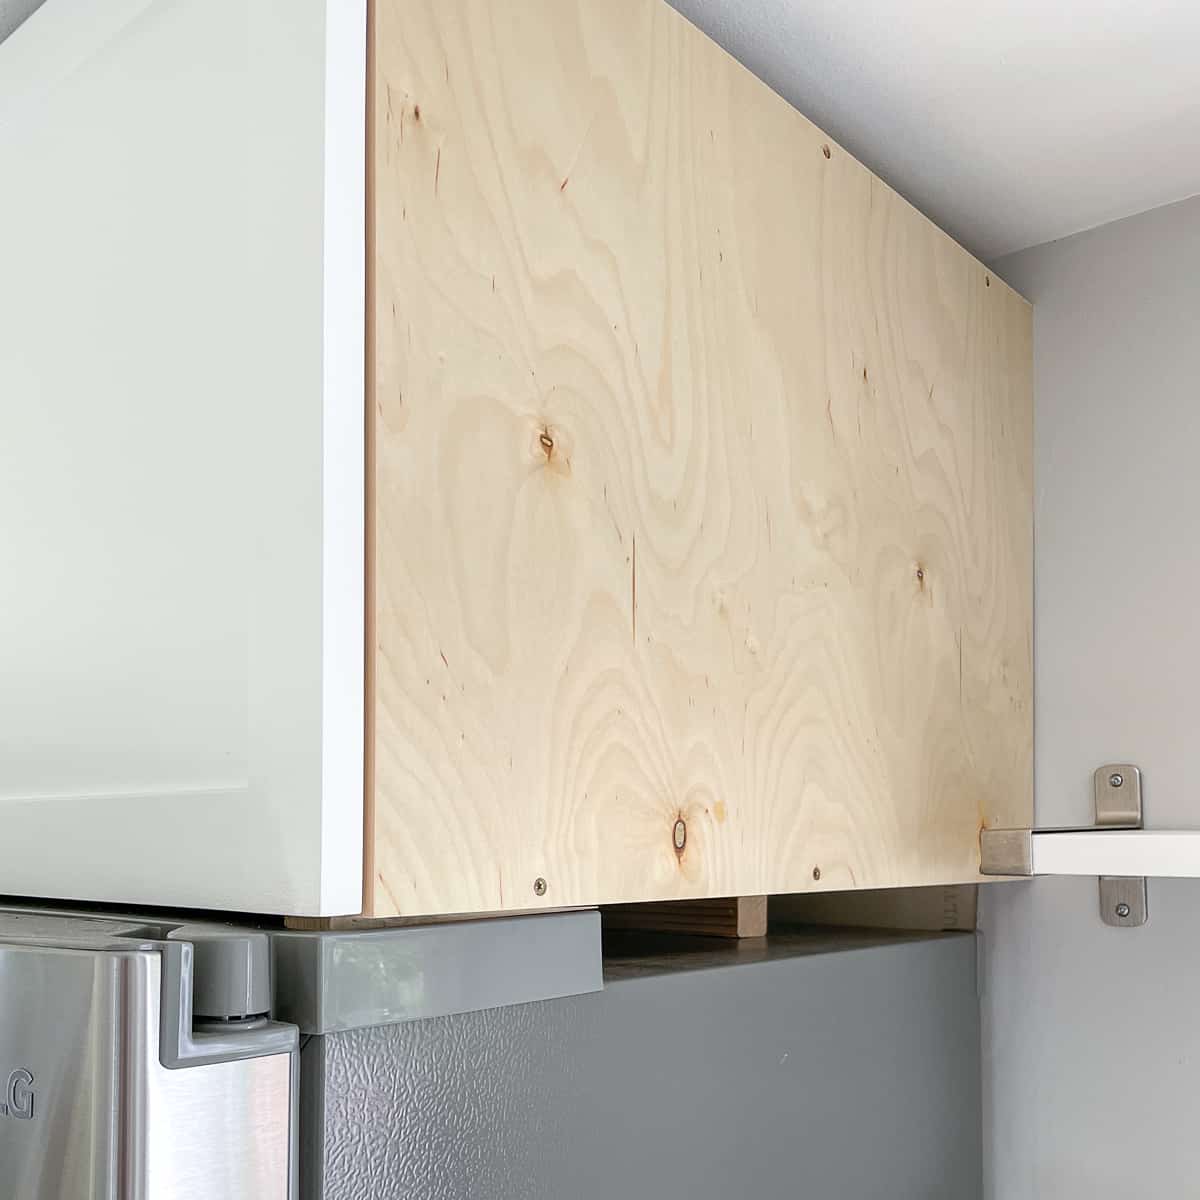
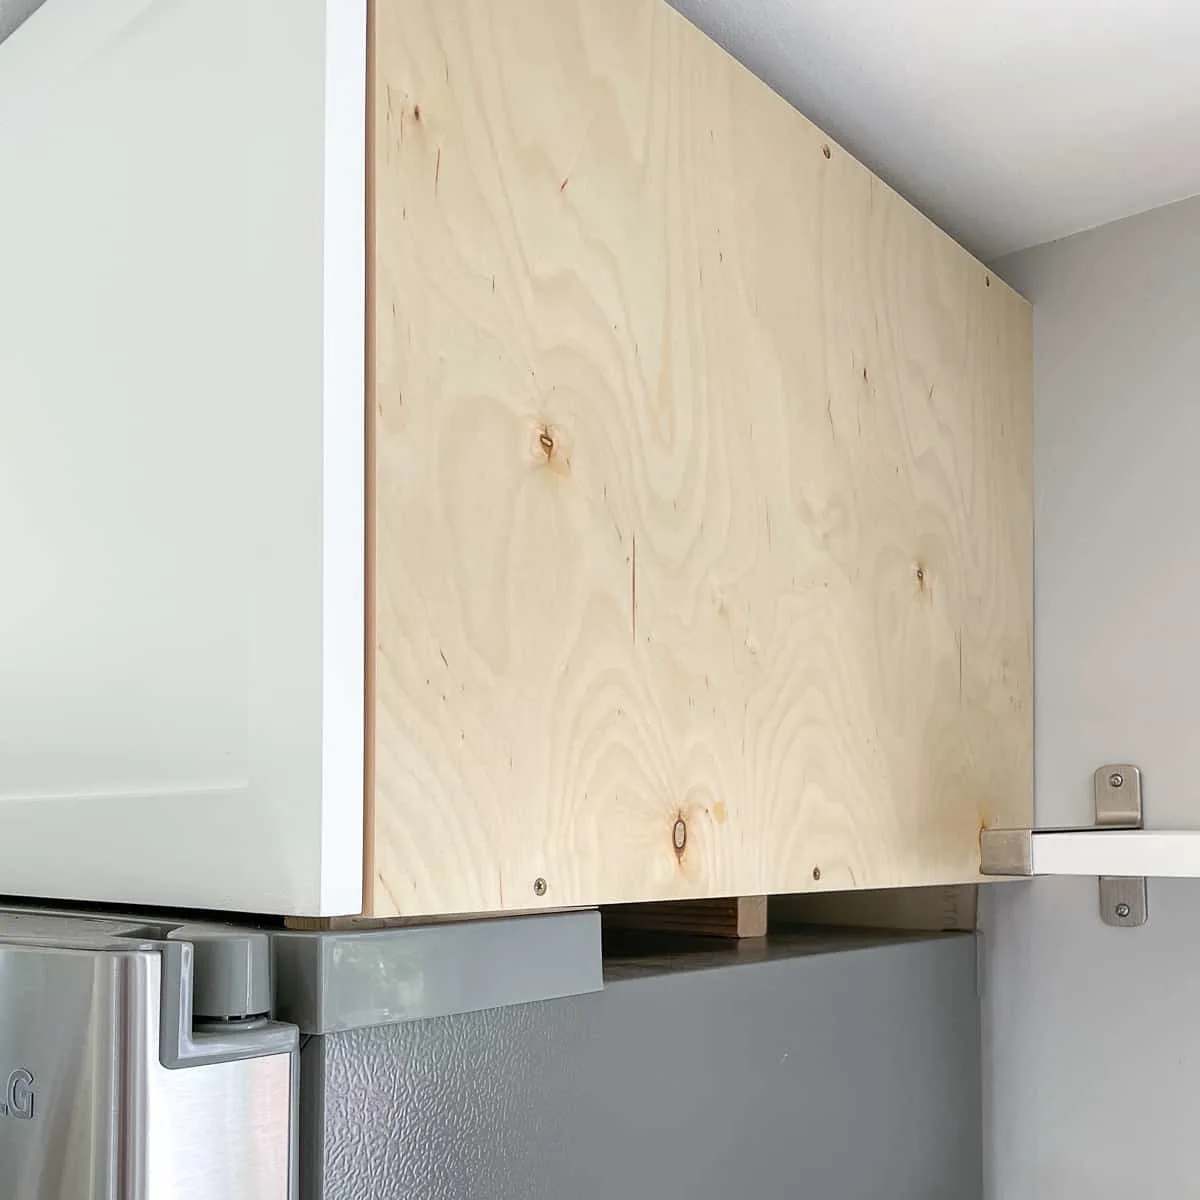
Then insert shims under the front of the cabinet to elevate it off the top (or the hinges). Check that the cabinet is level from front to back, and add more shims if necessary.

Once everything is in place, you can screw the fridge cabinet to the wall at the studs through the nailer strips in the back. I also screwed it to the side wall for extra support. Make sure you use screws that are at least 3" long so it can go through all those layers and hit the studs!
I built these Shaker style cabinet doors to fit my new above fridge cabinet, but you can also order custom sized cabinet doors online. You can also try one of these other DIY cabinet door ideas if you don't have a router table.

I'm almost done with my kitchen remodel now! Check out my progress in these other tutorials!
ellis moore
Monday 29th of May 2023
You hung/installed that above fridge cabinet by yourself?? Did you leave the 2x2 scraps and shims in place after installation? If not, were they easy to remove? Your cabinet didn't sag back to front after install. That is a large, deep cabinet (they all are above fridge).
Vineta Jackson
Wednesday 31st of May 2023
That sucker was heavy, but I got it installed myself! :) I just left the 2x2 and shims in place. Once the end panel is installed, you won't see them anymore. The cabinet is also screwed to the studs in the side wall, which helps support the weight in the front.