Learn how to make your own LED neon signs using a laser cutter! I'll show you how to create your own designs without soldering wires!


I've always loved the look of classic neon lights. But they require expensive glass tubes, insert gas and electrical currents to make, so they're not exactly a DIY project!
But you can create a similar design with cheap LED rope lights and your laser cutter for just a few bucks! You don't even need to make any electrical connections or solder any wires to make one!
I'm making this DIY LED neon sign for my son's bedroom, next to his climbing wall. He's a competitive rock climber, and if you've spent any time in a climbing gym or at the crag, you'll be familiar with the safety check that ends with "Climb on!"
Here's how I made this faux neon sign!
This post contains affiliate links for your convenience. Purchases made through these links may earn me a small commission at no additional cost to you. Please visit my disclosures page for more information.
Materials Required
You can use either a diode or CO2 laser for this project, such as the xTool S1 or P2. In addition, you'll need the following supplies:
- Battery powered EL wire
- Wide black electrical tape
- Two 12"x19" sheets of ⅛" MDF or plywood
- Wood glue or CA glue
- Paint
Don't have a laser, or looking to upgrade? Use the code VINETA100 for $100 off an xTool laser! Click here to check them out!
Create your design
You can use a line drawing or letters for this sign. When choosing a font, you want to look for a monoline version. This will keep a consistent thickness across all the letters.
I used Spectron, which is perfect for this type of project! Each 4" letter has a single line that fits the EL wire snugly. If you use a different font, you'll need to run a test cut to see if the size works for your wire.
You can either create a rectangle around the letters, or an offset that keeps the same shape. The offset should be large enough to connect all the letters together.
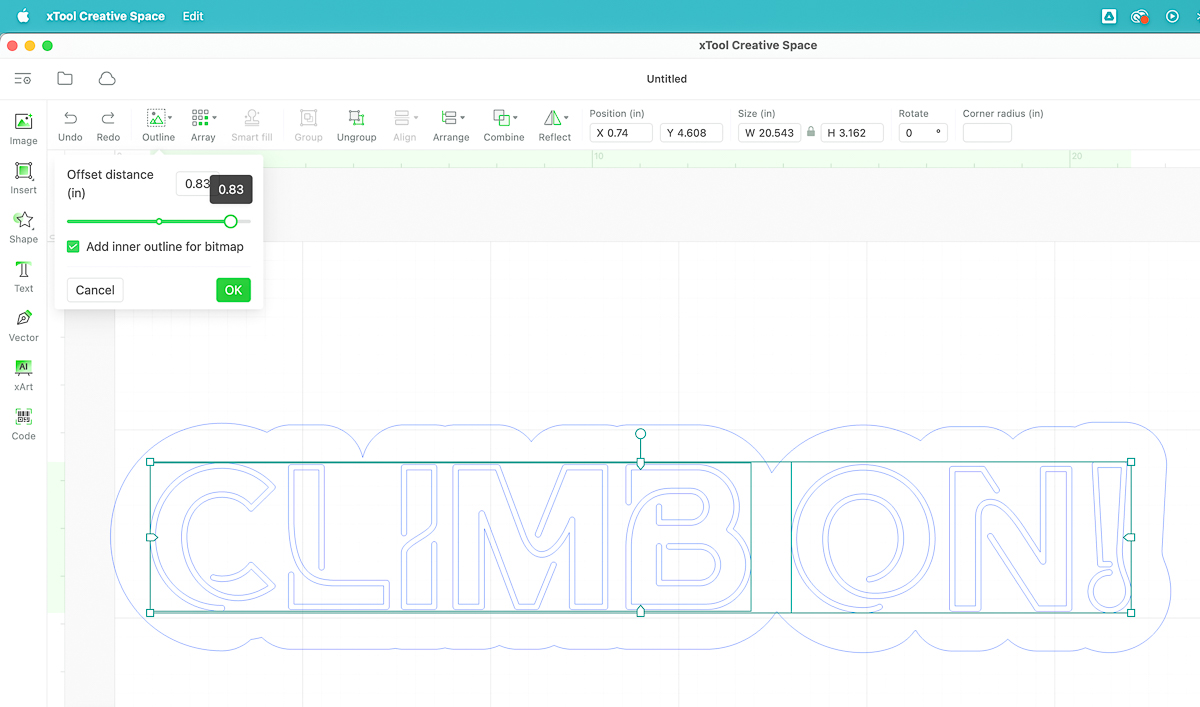
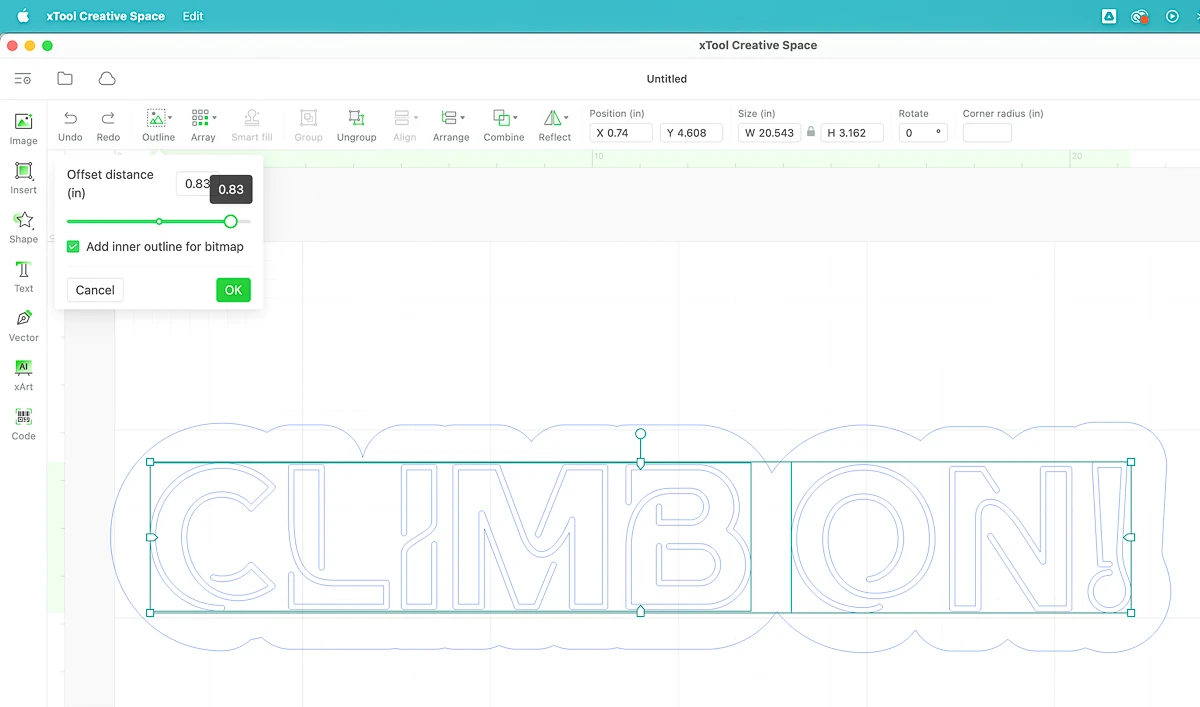
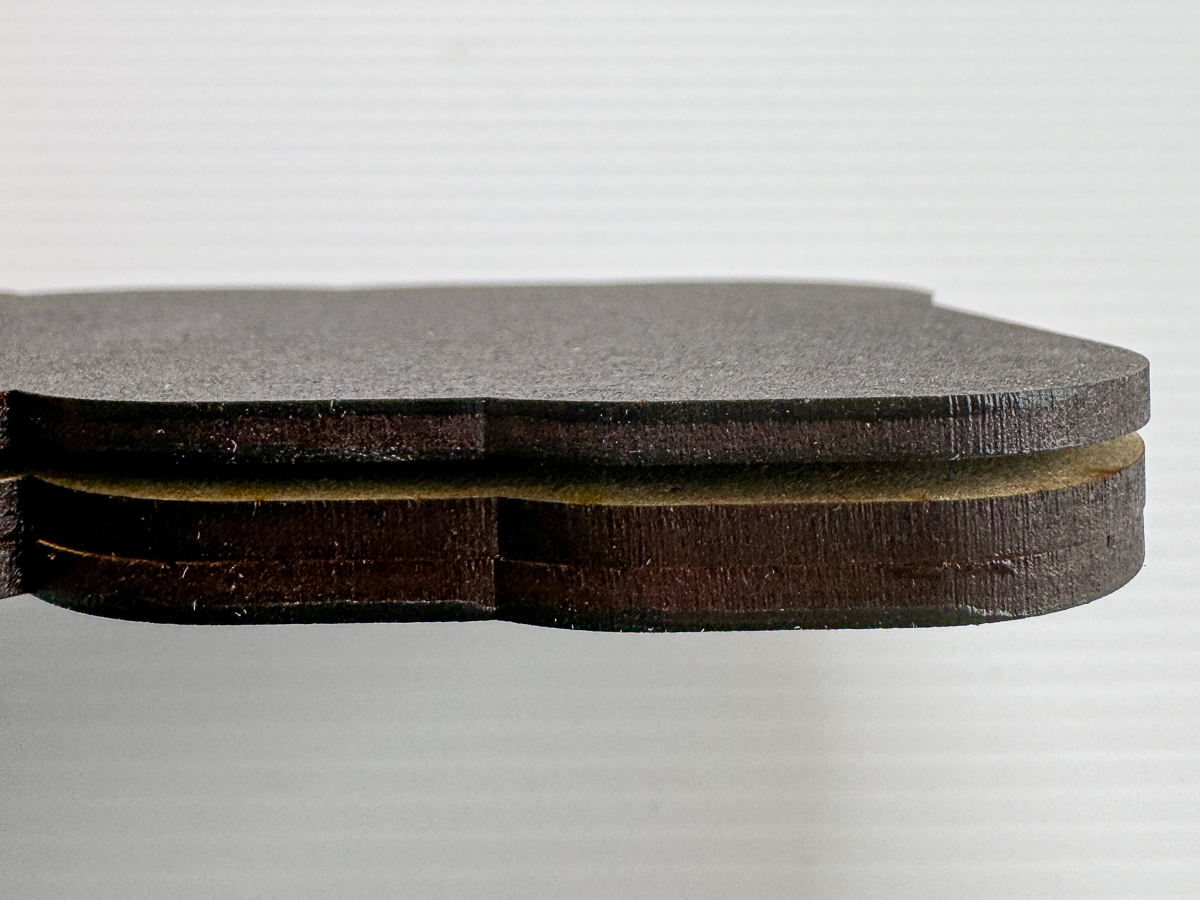
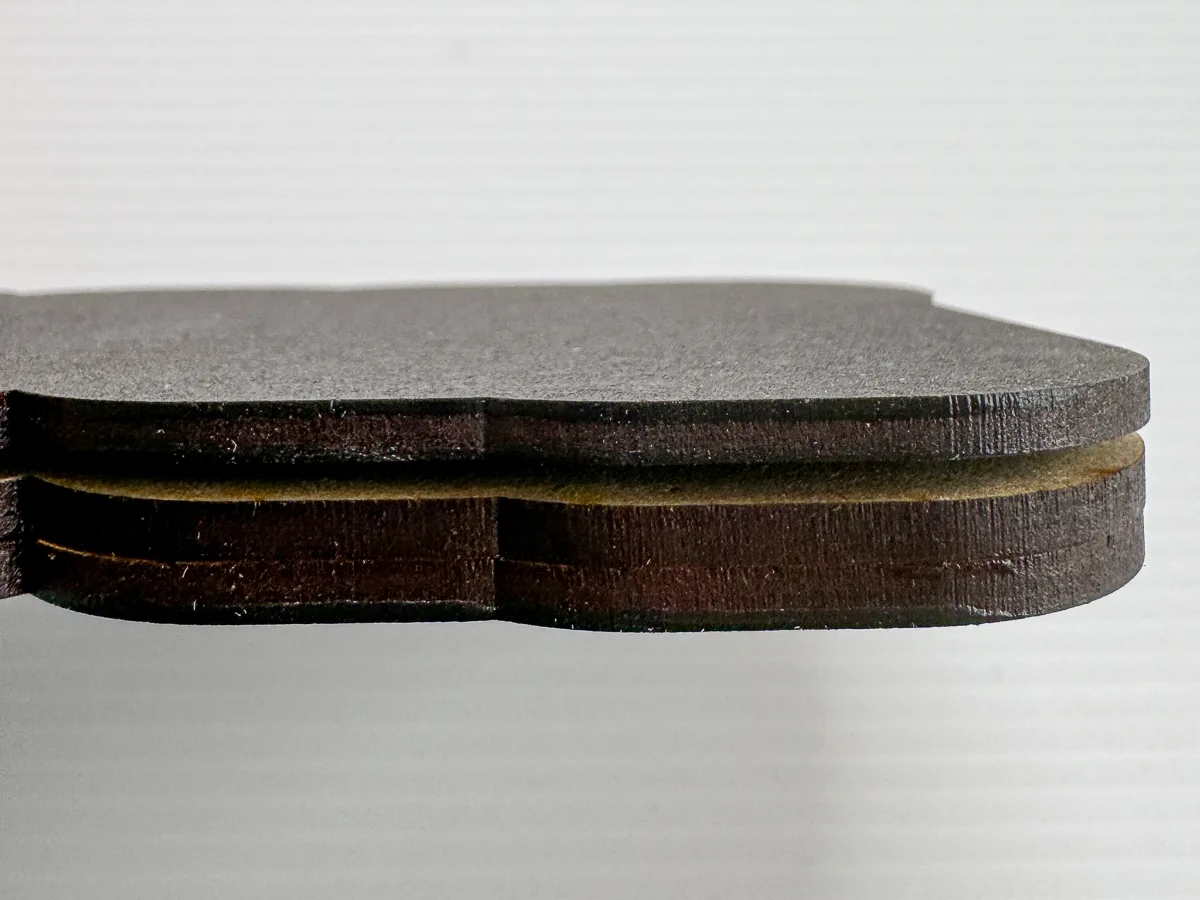
Next, select the outer line and create an inner offset. This will be for the spacer between the front and back. It should be at least ¼" wide, and shouldn't touch the letters on the inside.

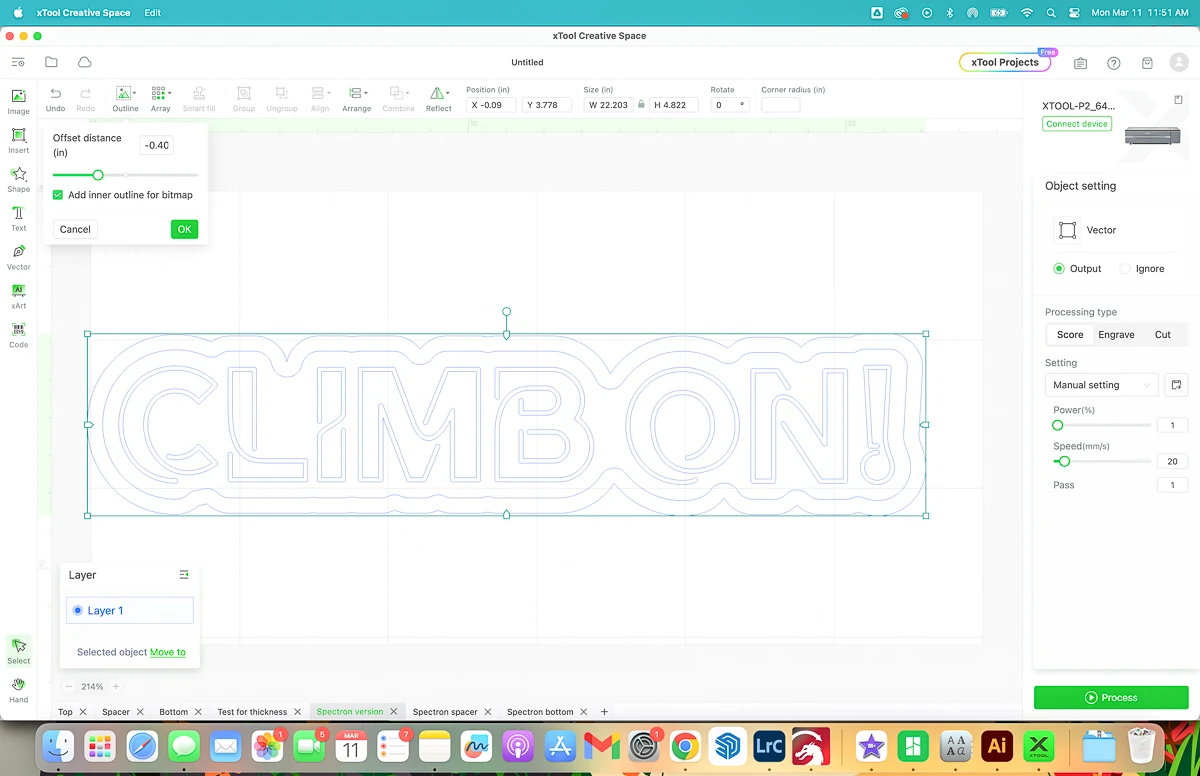
Select both offset lines and make a copy. This will be the spacer, which will give you room to move the EL wire from letter to letter behind the front.
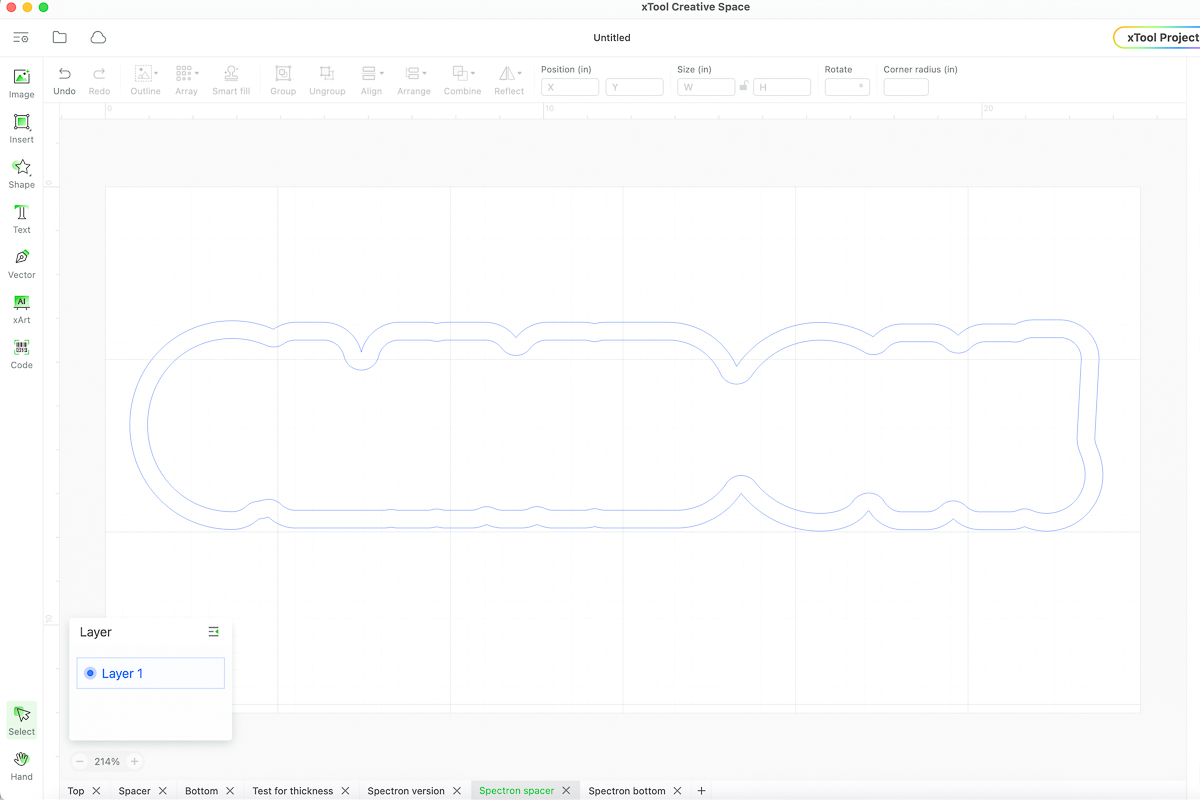
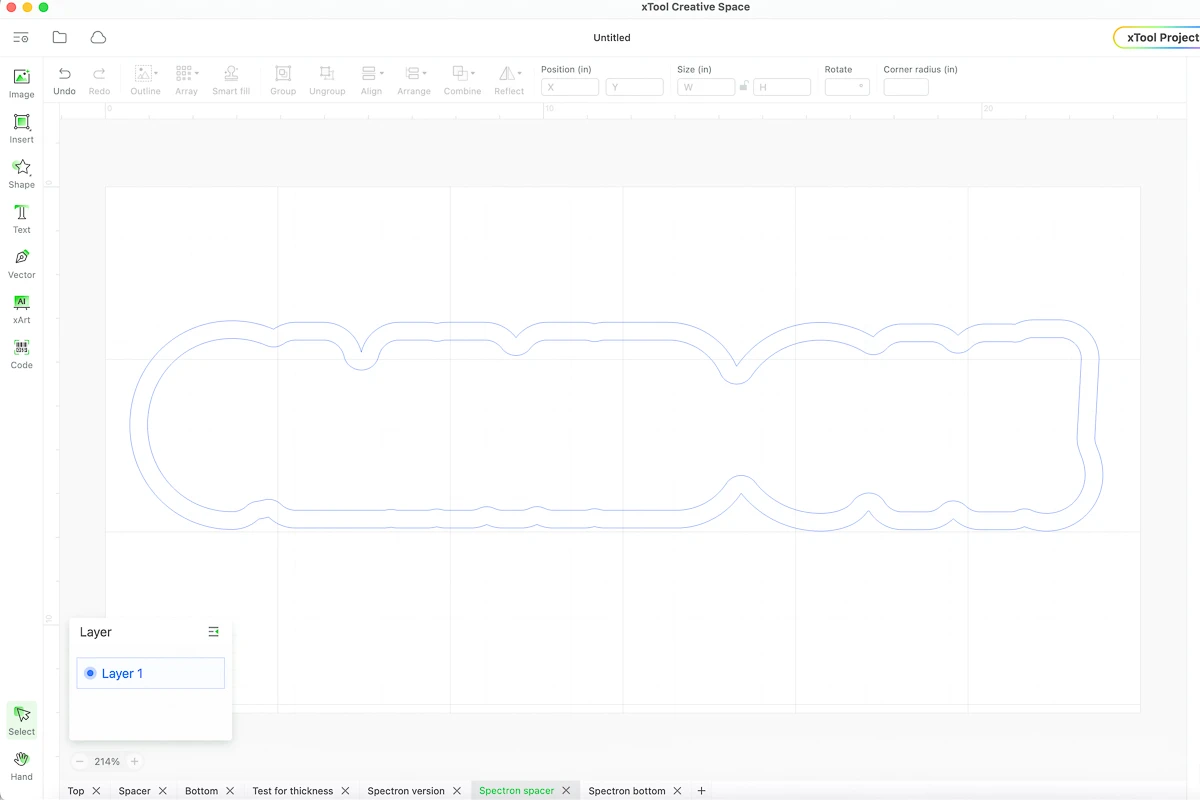
Then copy and paste just the outside offset line for the back. You should have three pieces that look like this...
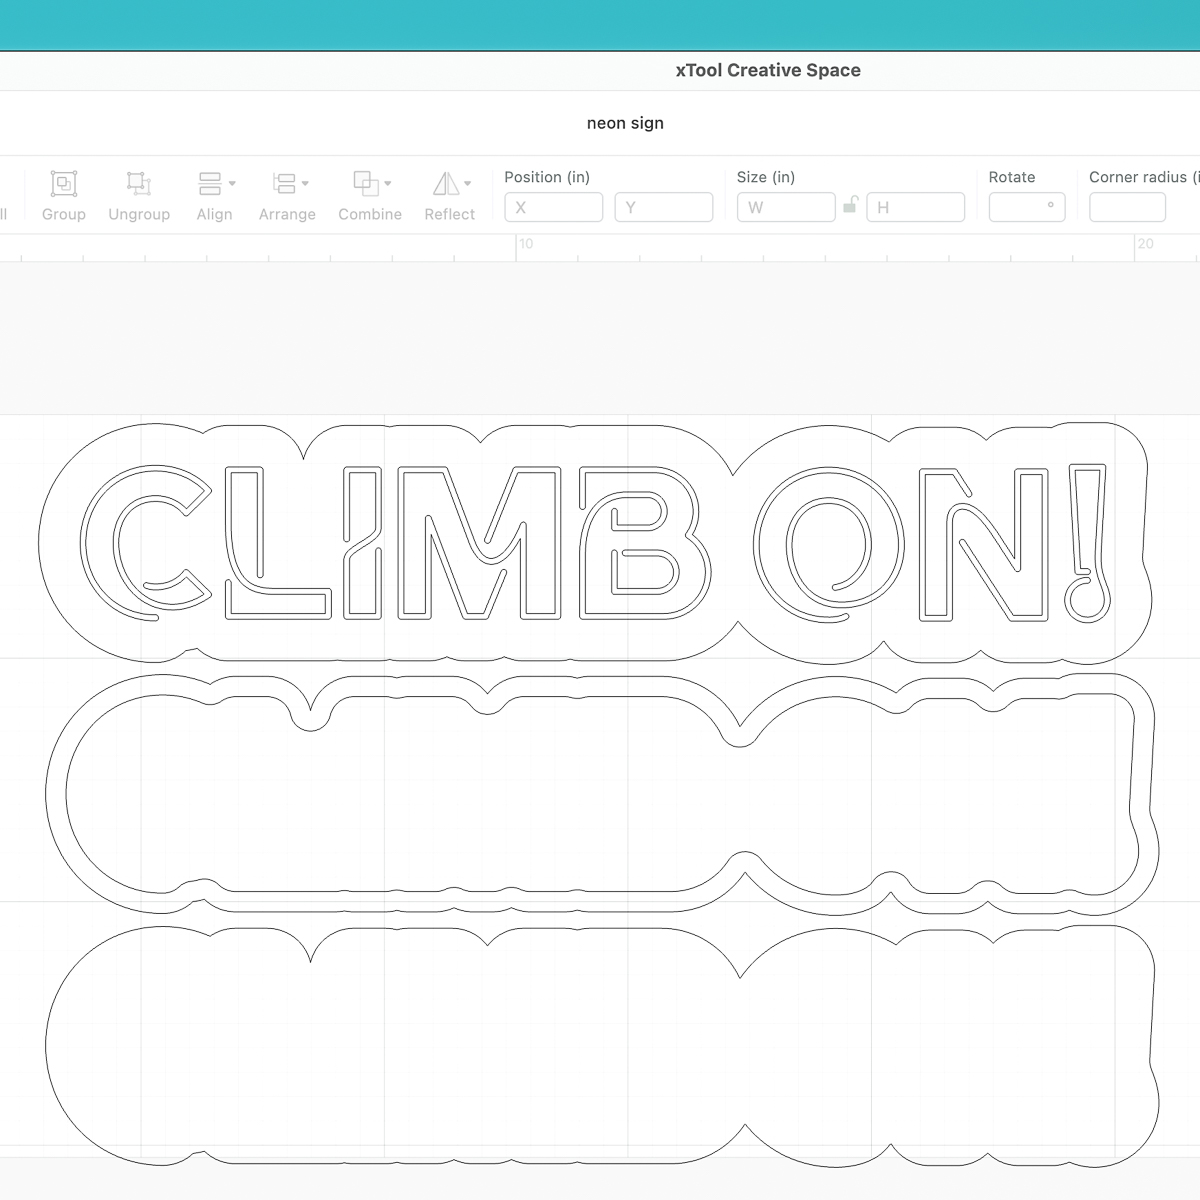

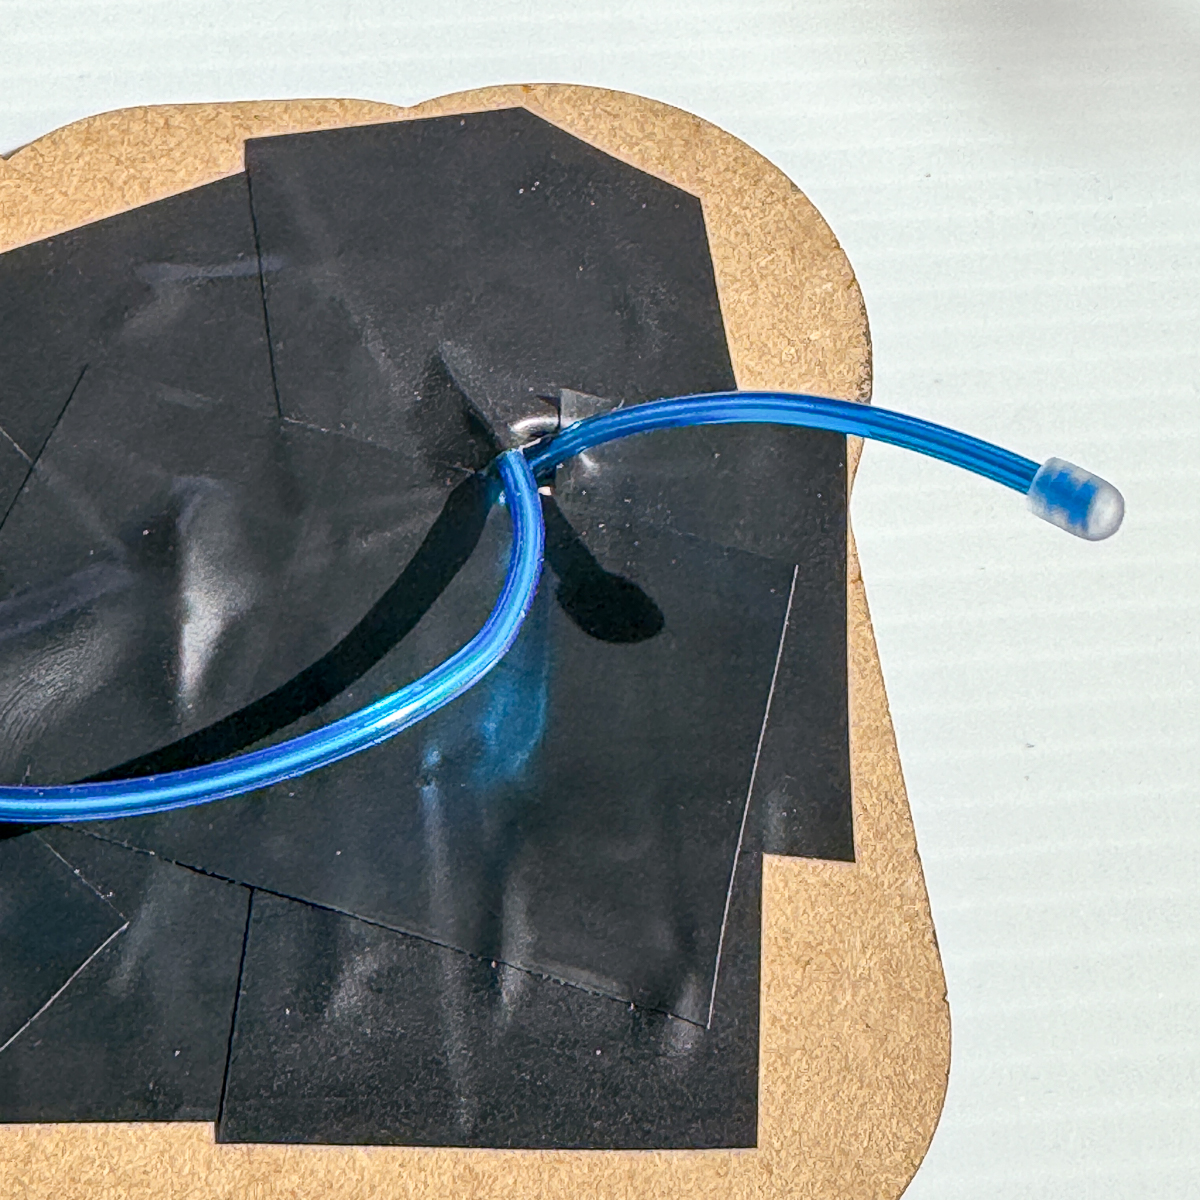
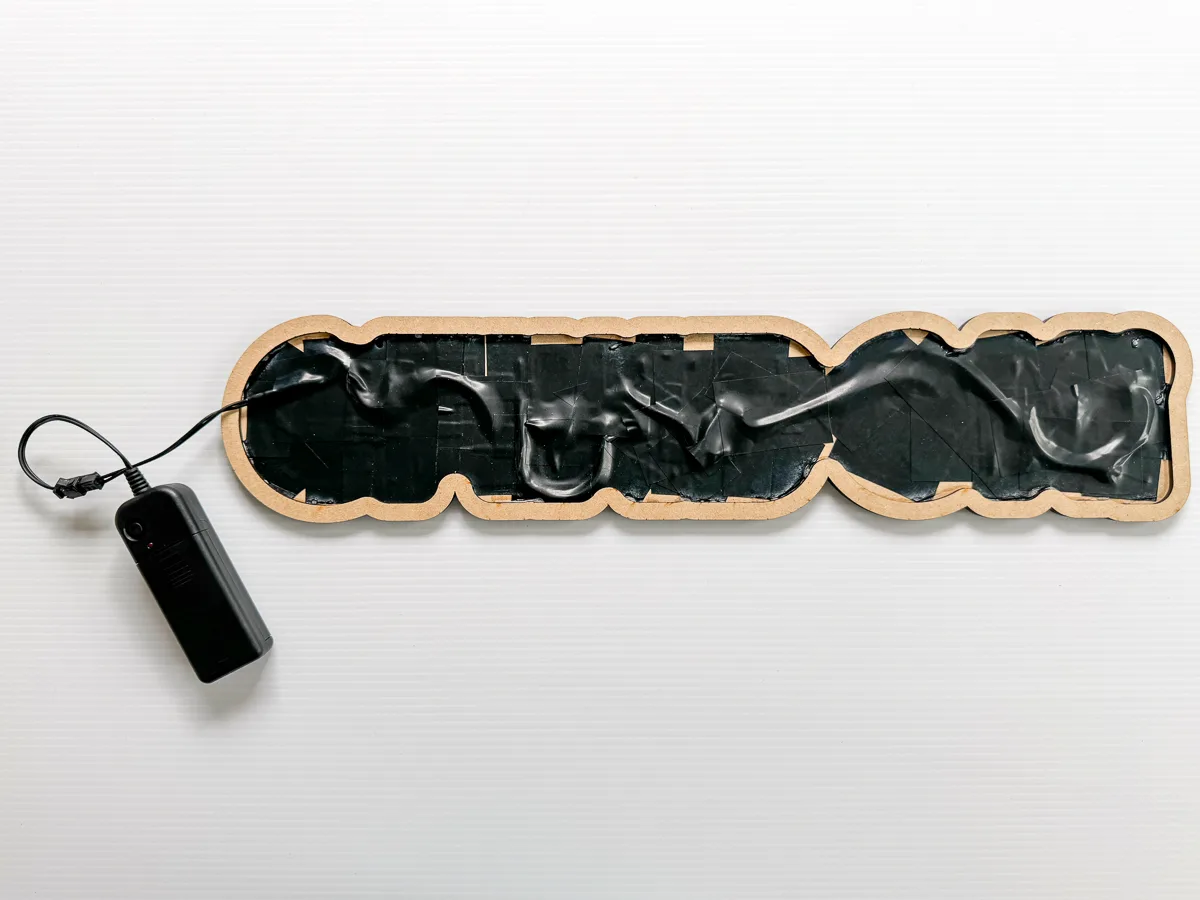
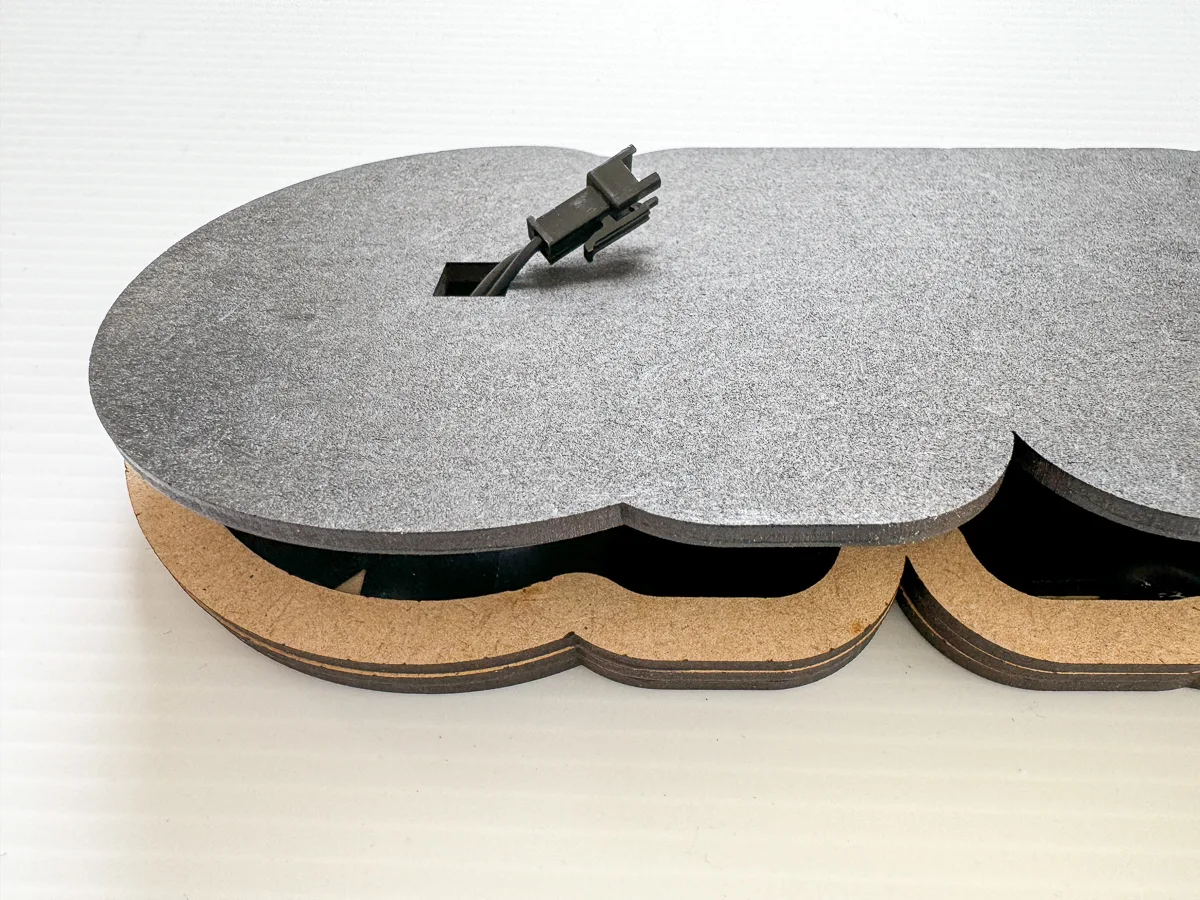
After I started putting my sign together, I realized that I needed a way to get the battery pack through the back! I cut a ⅜" square hole in the back piece to fit the connector through.
Set everything to cut with the best settings for your material and machine. Don't know what those settings are? Run a test cut grid to find out!
Cut the three layers with the laser
You can use either a diode or CO2 laser for this project. I'm using the xTool P2. The M1 bed might be a little small, but it would work fine for a short word or an image.
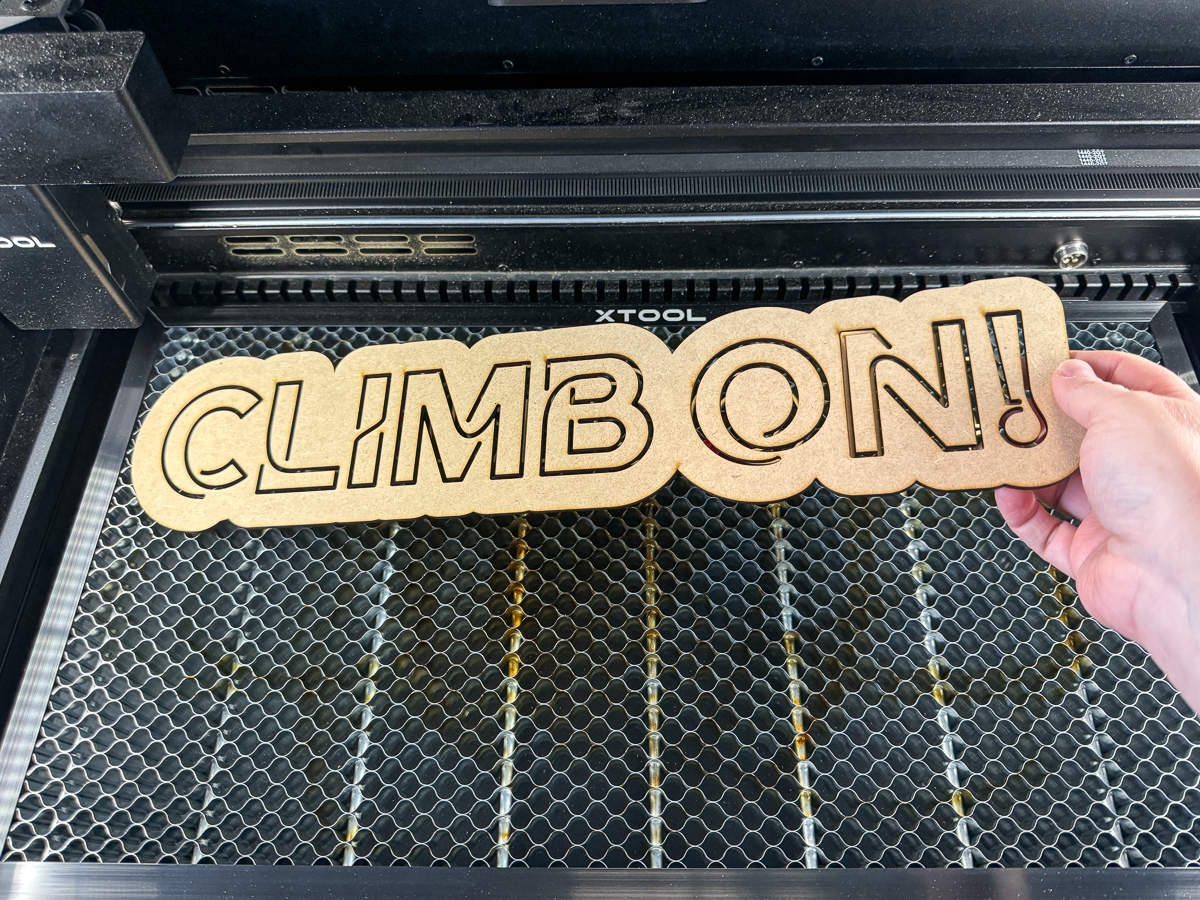
It only took a few minutes to cut out all the layers. I'm using ⅛" MDF because it paints well, but you can use ⅛" plywood if you want to stain it or keep it natural.
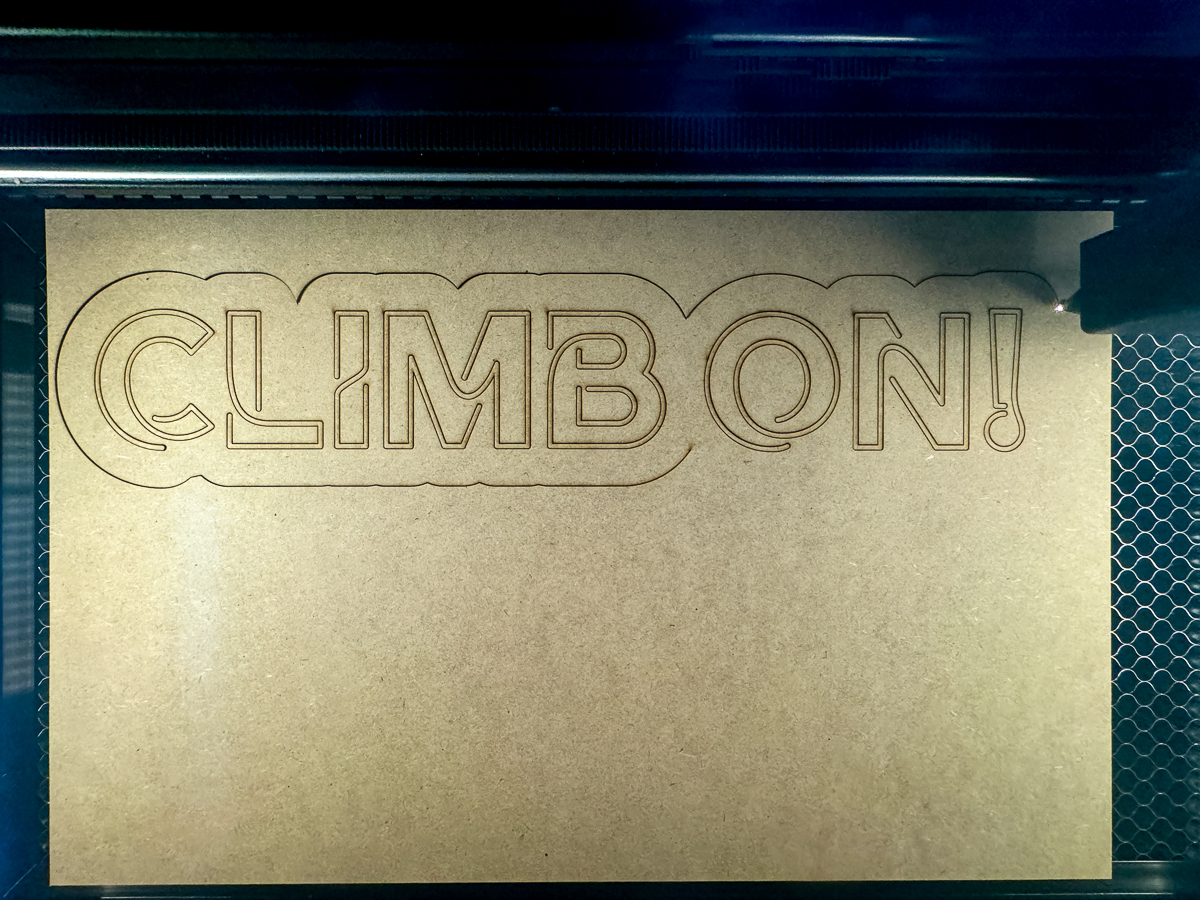
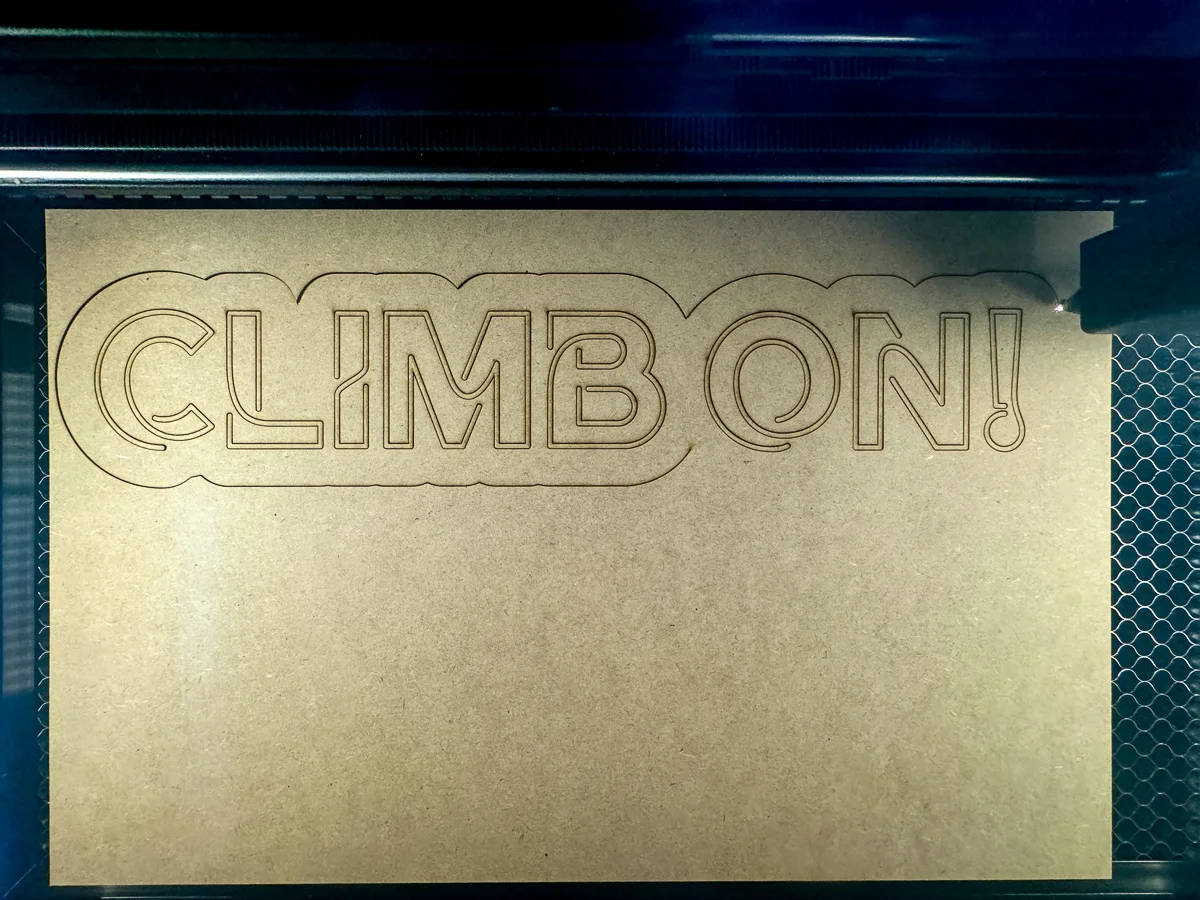
When you have all the settings dialed in correctly, all the letters should fall out cleanly with minimal char.

Add lights to the letters
If you're planning to paint or stain your sign, do that before starting assembly. Be careful not to get paint in the letters, or the wire might not fit.
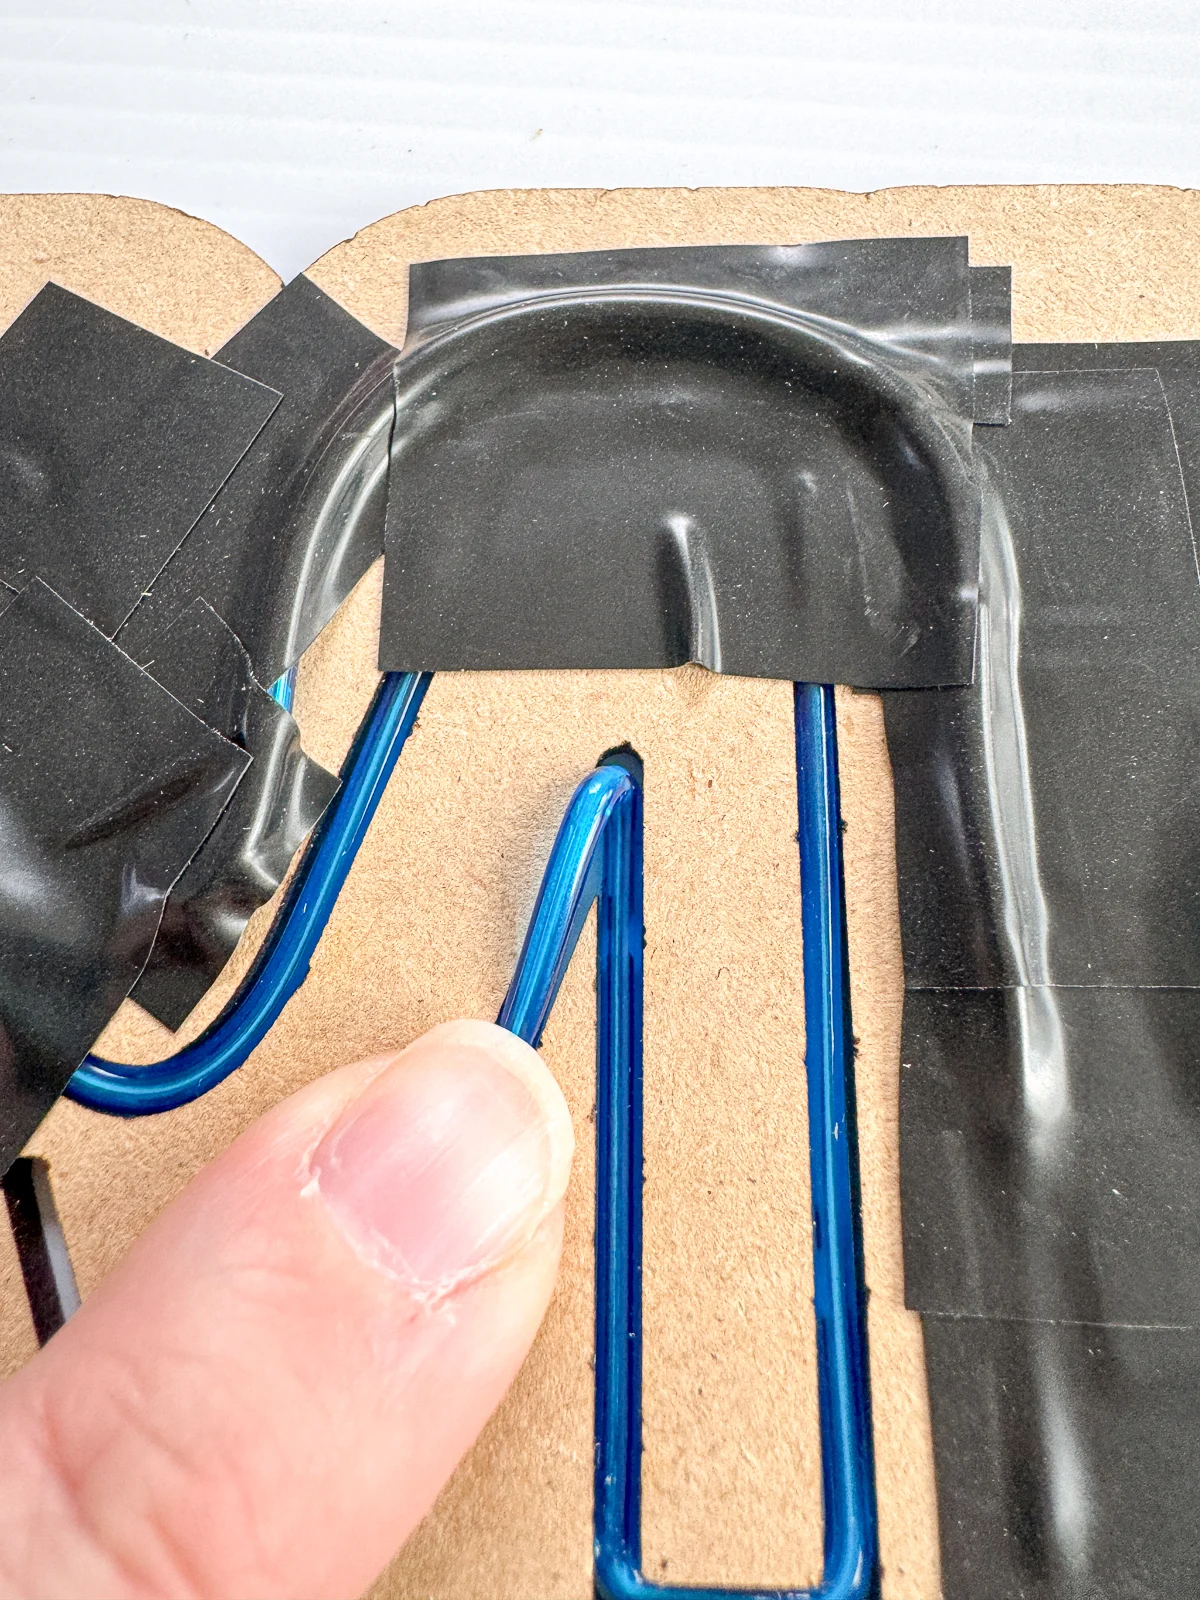
Start with the battery pack end of the EL wire, and press the wire into the first letter close to where the hole in the back will be.
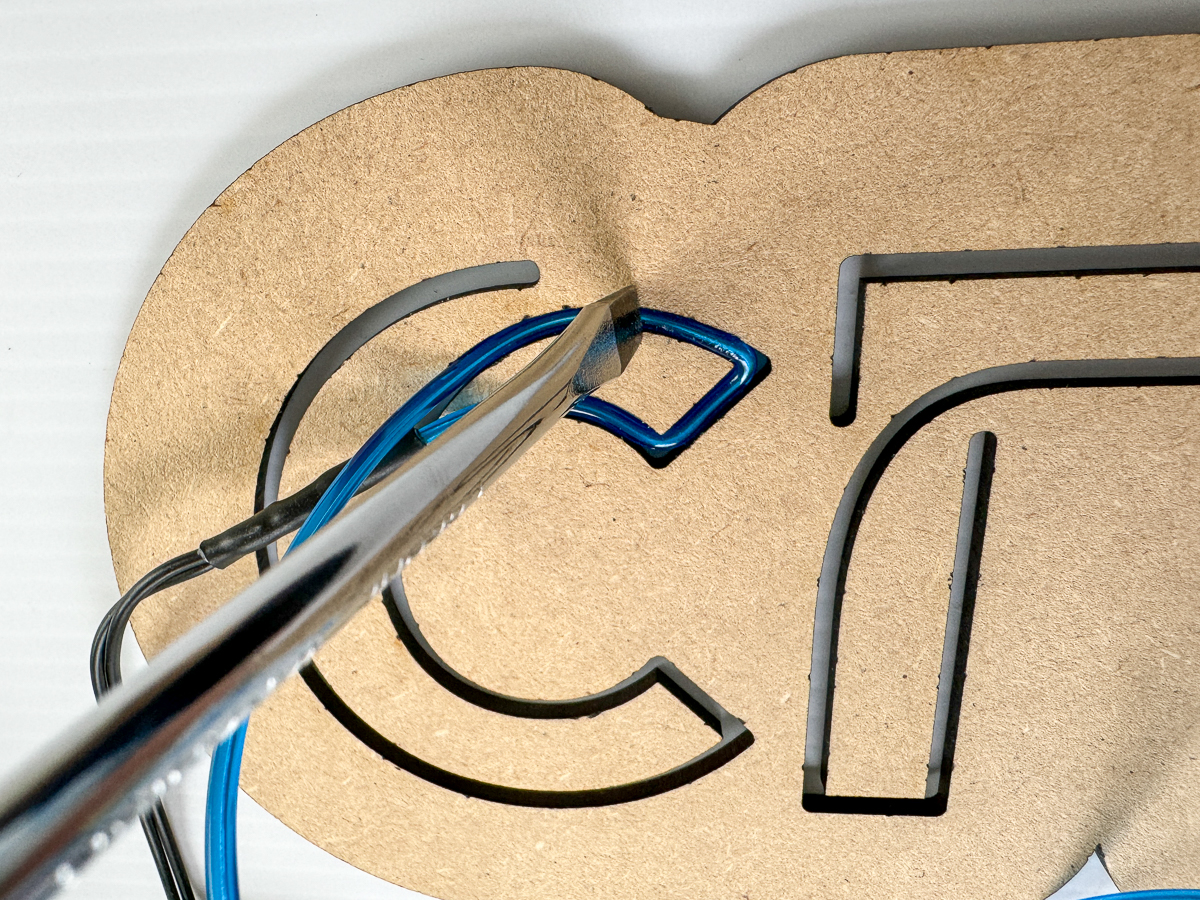

I used a large flat head screwdriver to push it into the tight spots. Just be careful not to damage the rubber coating on the wire.
Once you have a few inches in place, cover up the wire with black electrical tape. This will hold it down, and will also make the light glow brighter from the front!
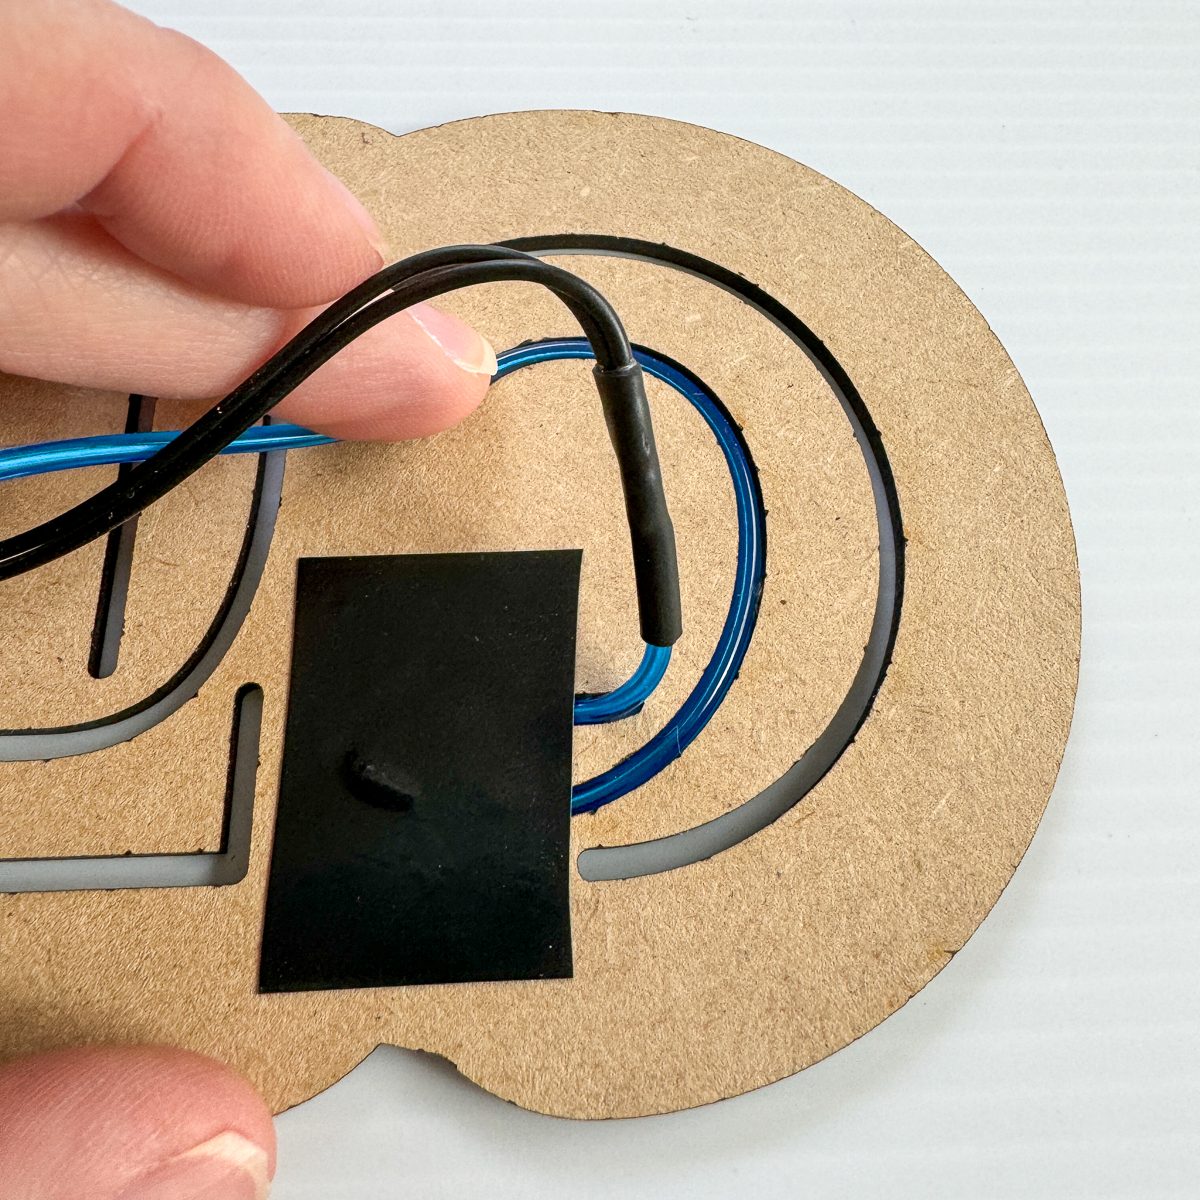
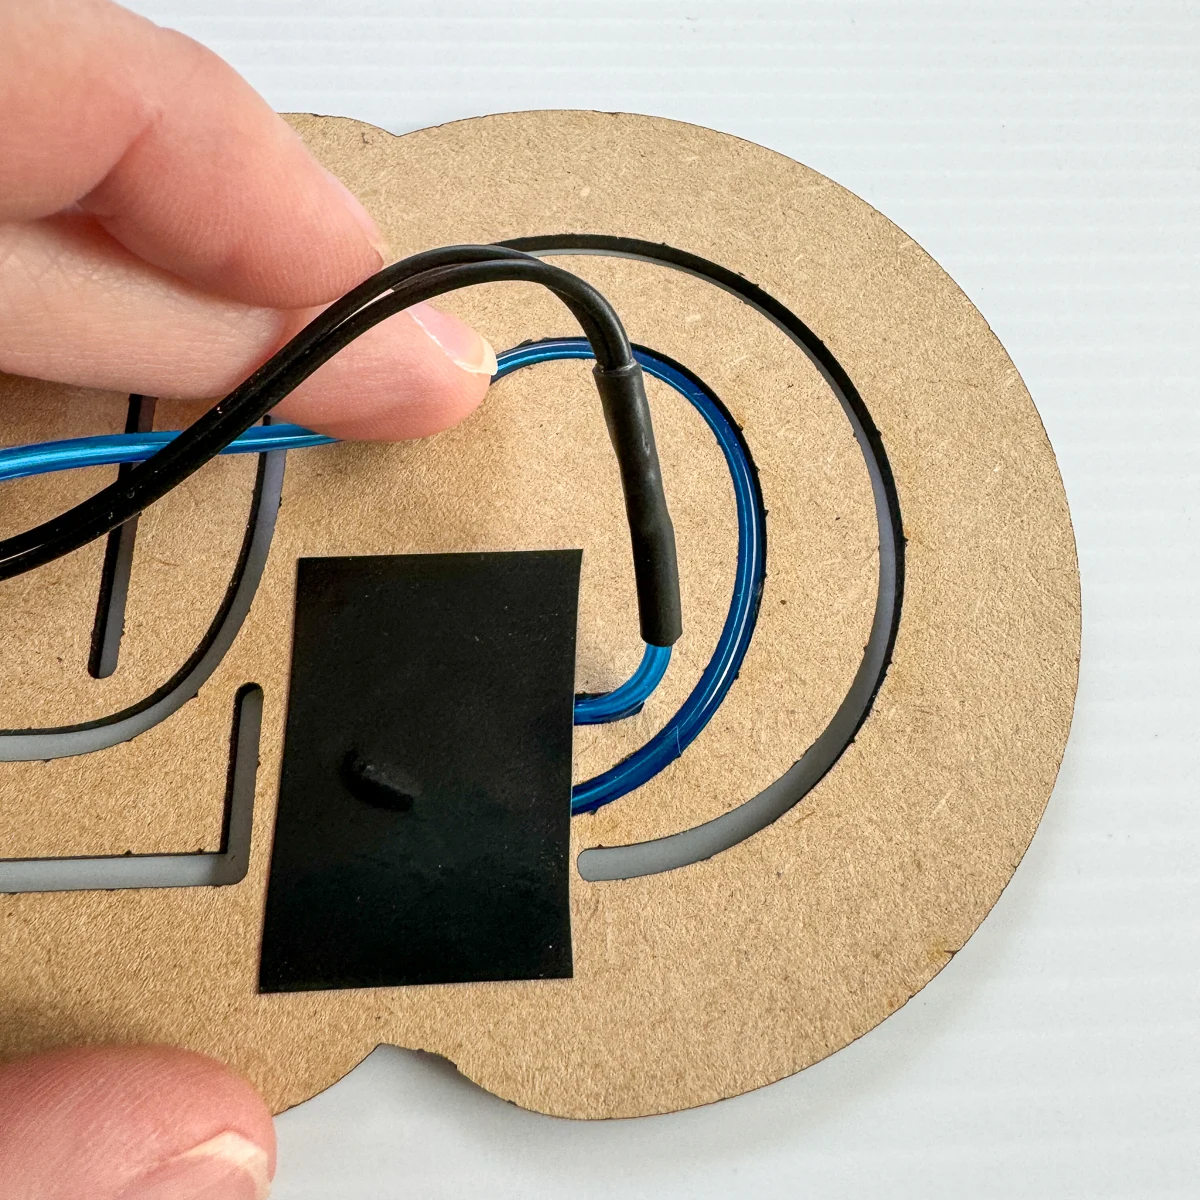
When you get to the end of a letter, choose the best entry point for the next letter. Sometimes you need to loop it in order to get it going in the right direction.

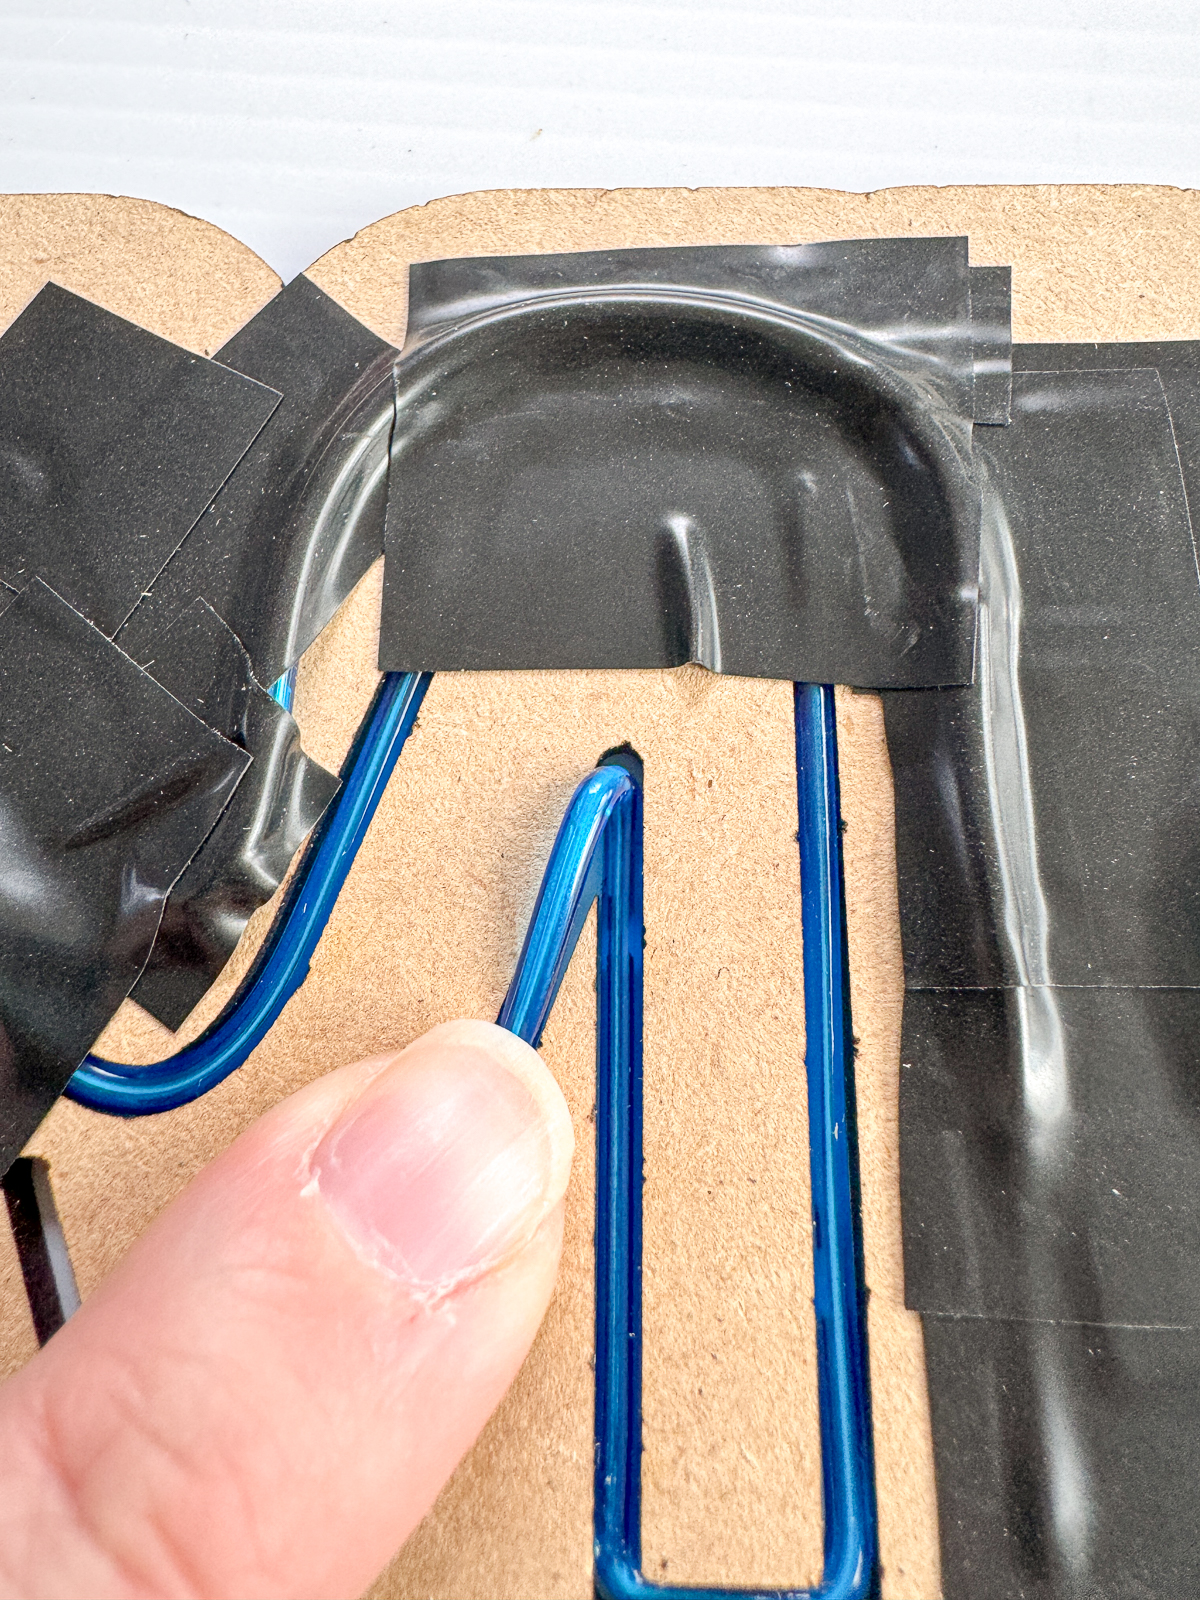
With sharp corners like this spot in the M, you can fold the wire back on itself and tape it in place.
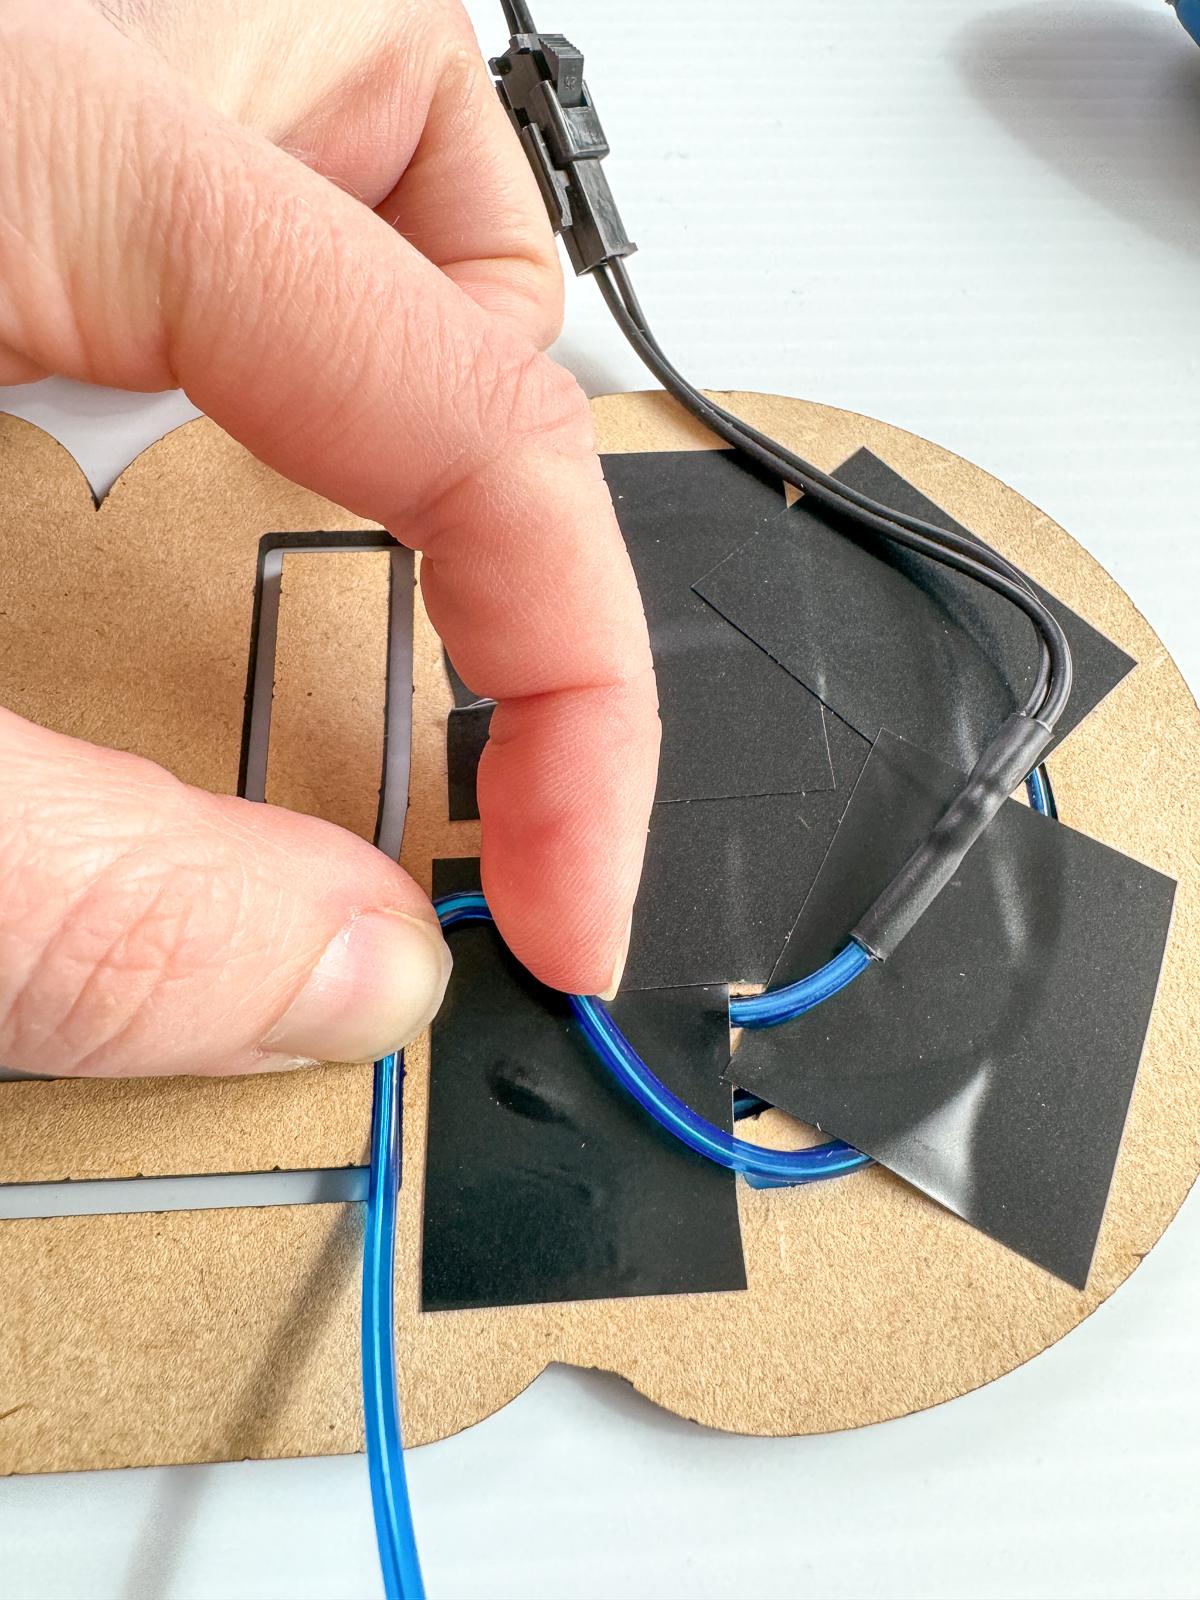
I started getting worried that I didn't have a long enough wire to finish all the letters. I only had a few inches left when I got to the exclamation point!
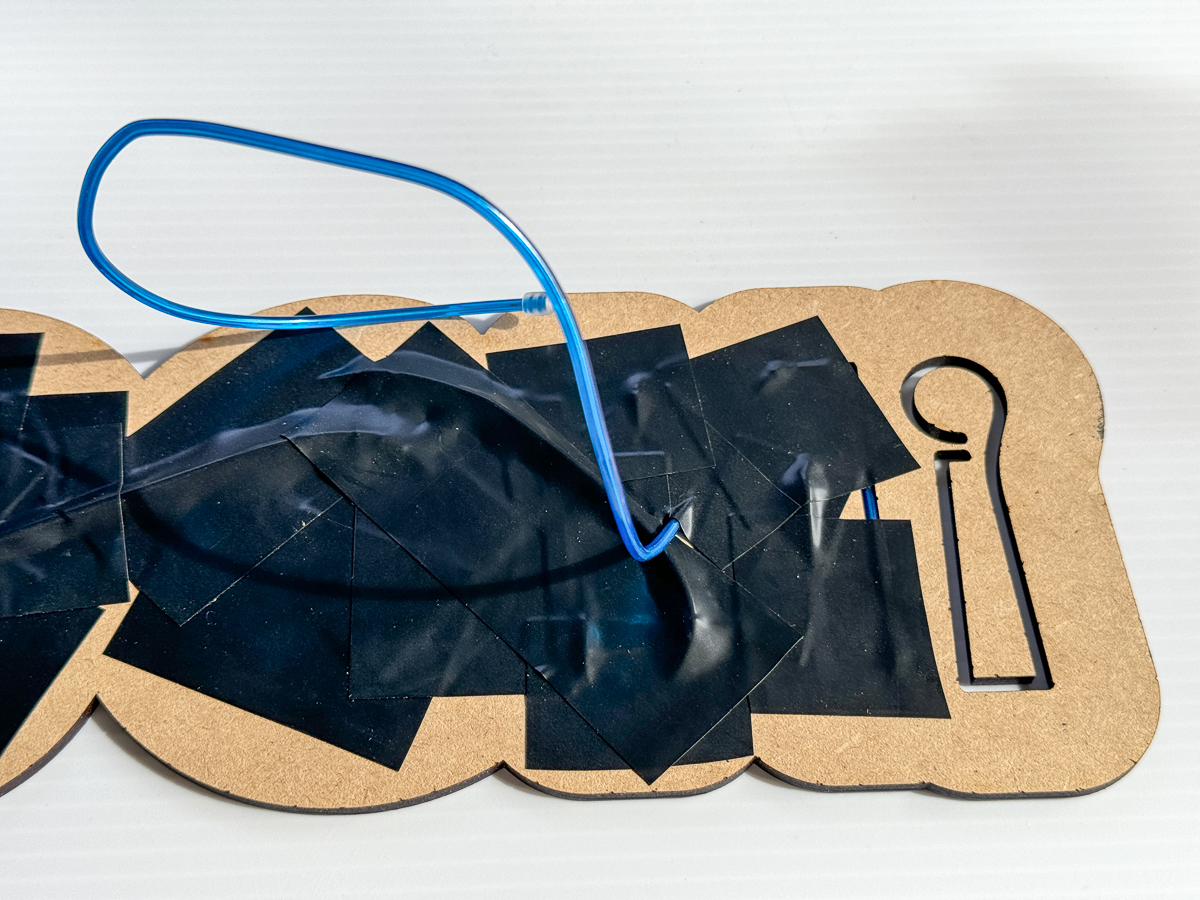

Luckily, I was able to complete the sign with just a couple inches to spare! Whew!

Cover up any remaining wire with the electrical tape. This will prevent light from leaking through to the inside of the sign so it shines brighter.
Add the spacers and back panel
The spacers make room for the crossing wires on the back of the sign. I used CA glue to attach it to the perimeter, but you can also apply 3M double sided adhesive before cutting it out with the laser.
Test to see if the back panel will sit flush on top of the spacer. Mine needed a little extra room, so I cut a second spacer and glued it on top.
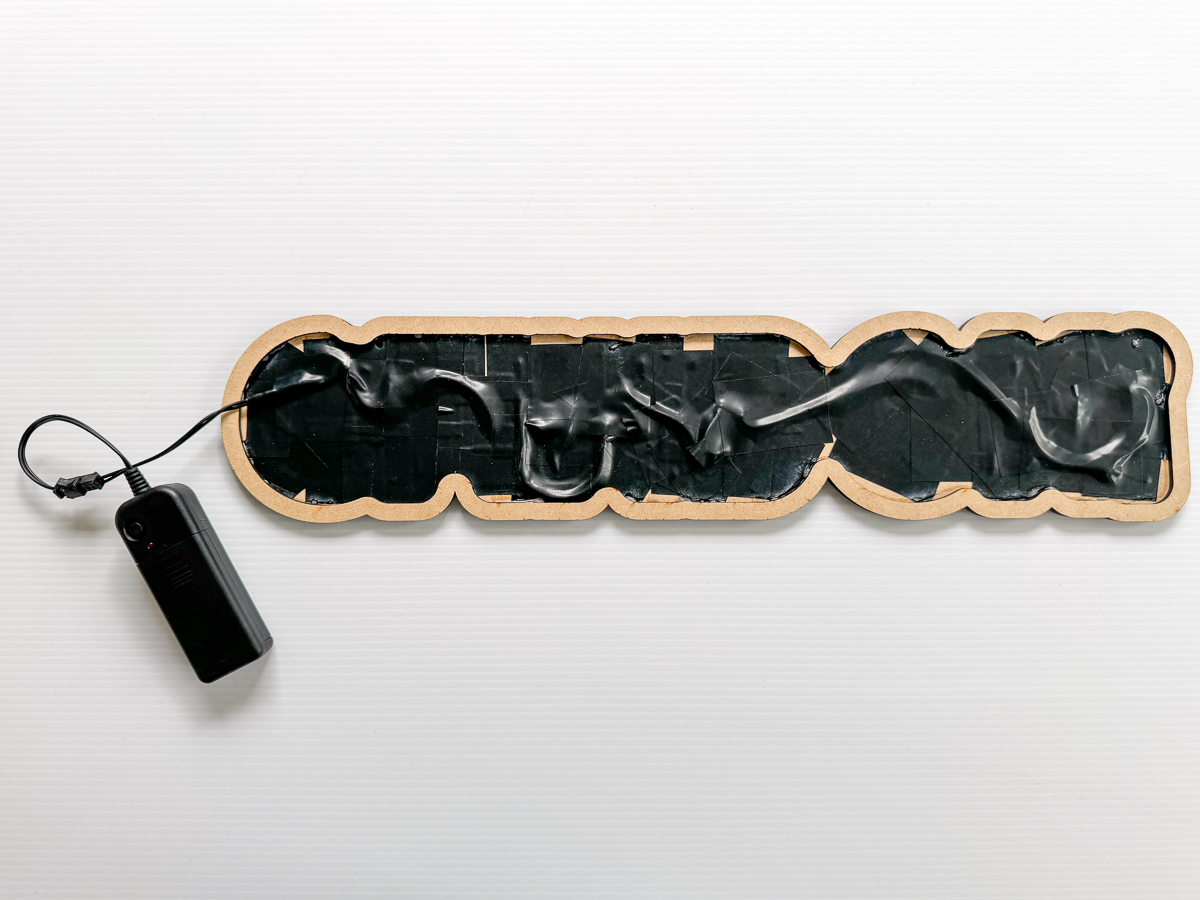
Once the glue between the spacers is cured, you can add the back panel. Stick the battery connector through the hole, then glue the back in place.

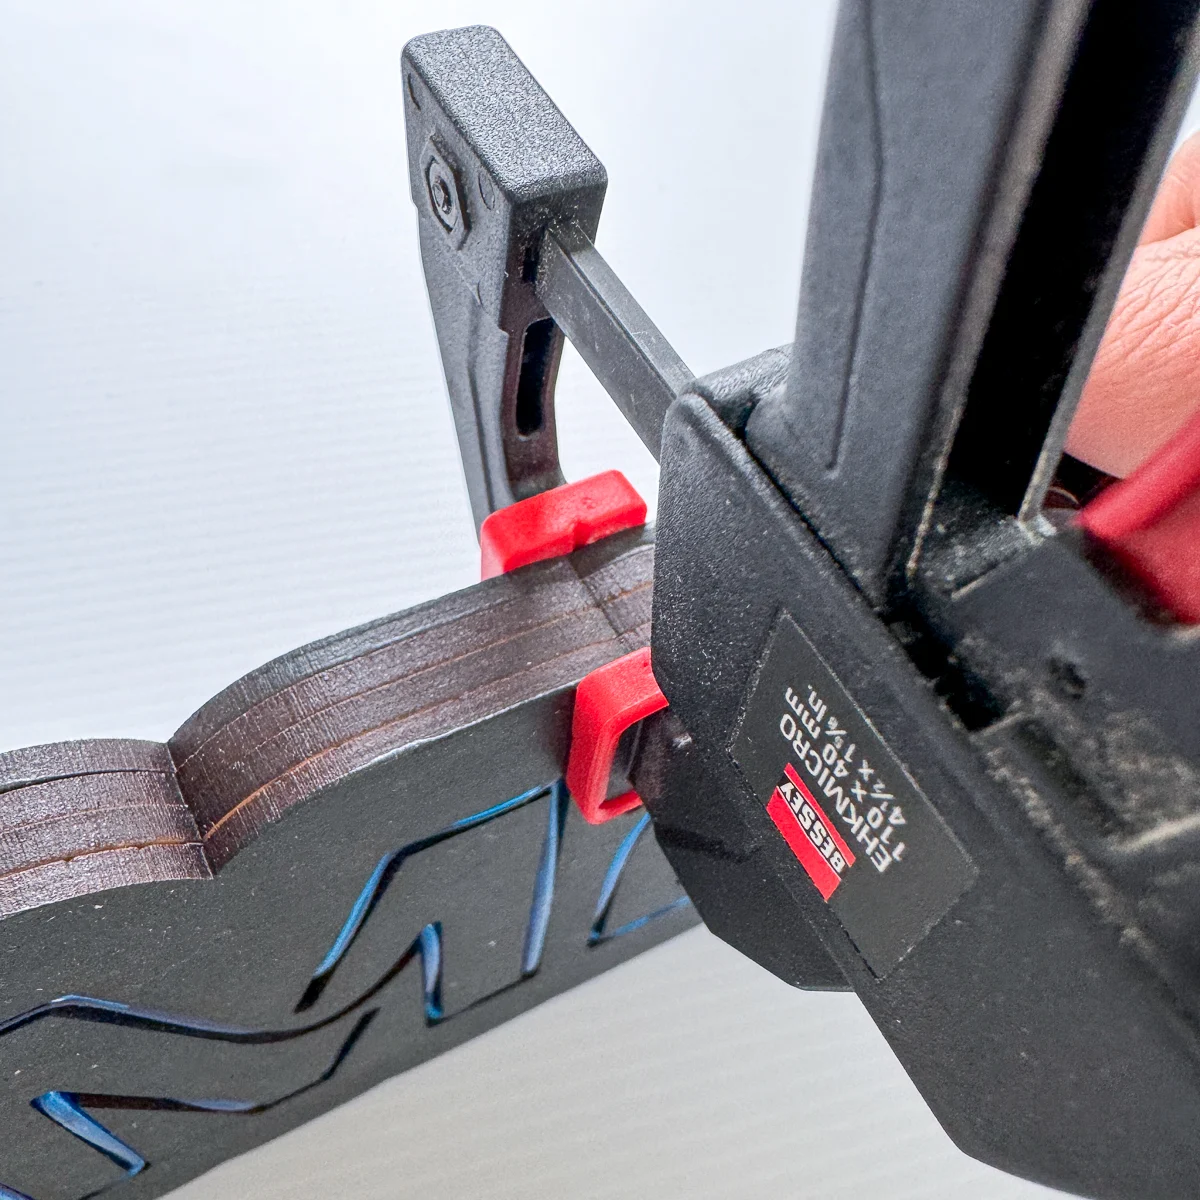
I used a bunch of these tiny Bessey clamps to hold all the layers together as the glue dried. You can also use binder clips as mini clamps!

Once the glue dried, I touched up the edges with more black paint. Then it was ready to go upstairs!
Display your new neon sign!
My original plan was to add standoffs to the back of the sign so you could access the battery pack while it was hanging on the wall. But when I was up in my son's room, I noticed the perfect spot to display it on his vertical laptop holder!
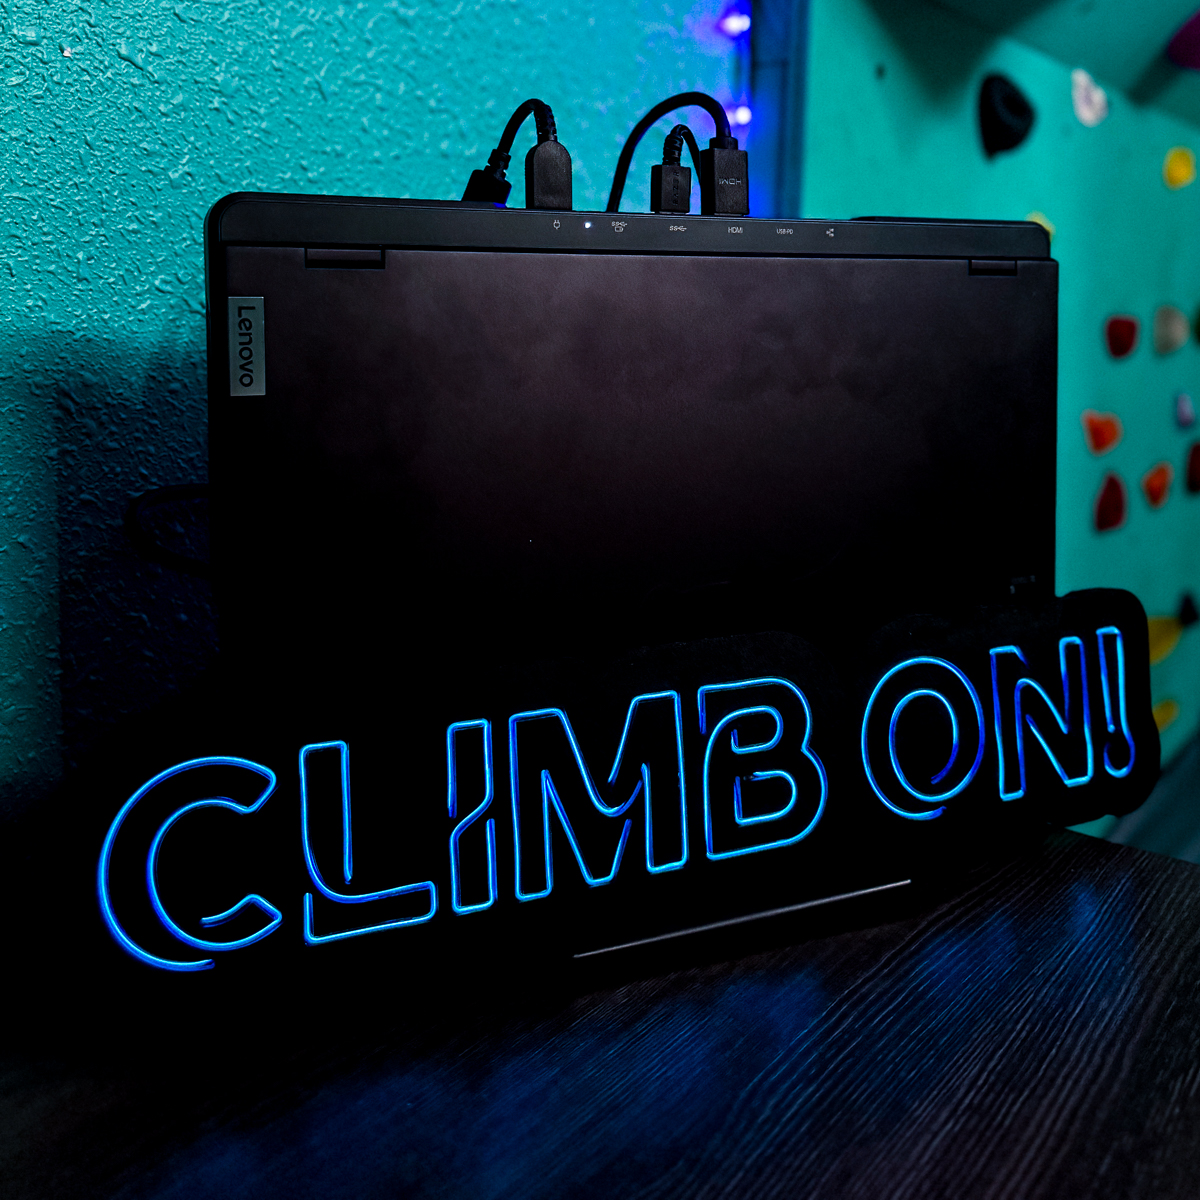

The battery pack is hidden behind the laptop, which he keeps on the stand most of the time. The blue LED lights match the ones surrounding the climbing wall, and it ties the two areas together.
What will your neon sign say? Let me know in the comments below!
Check out these other laser project ideas!