A DIY pea gravel patio is cheap and easy to make yourself! I'll show you how to make a gravel patio in just a few days for the perfect backyard hangout!
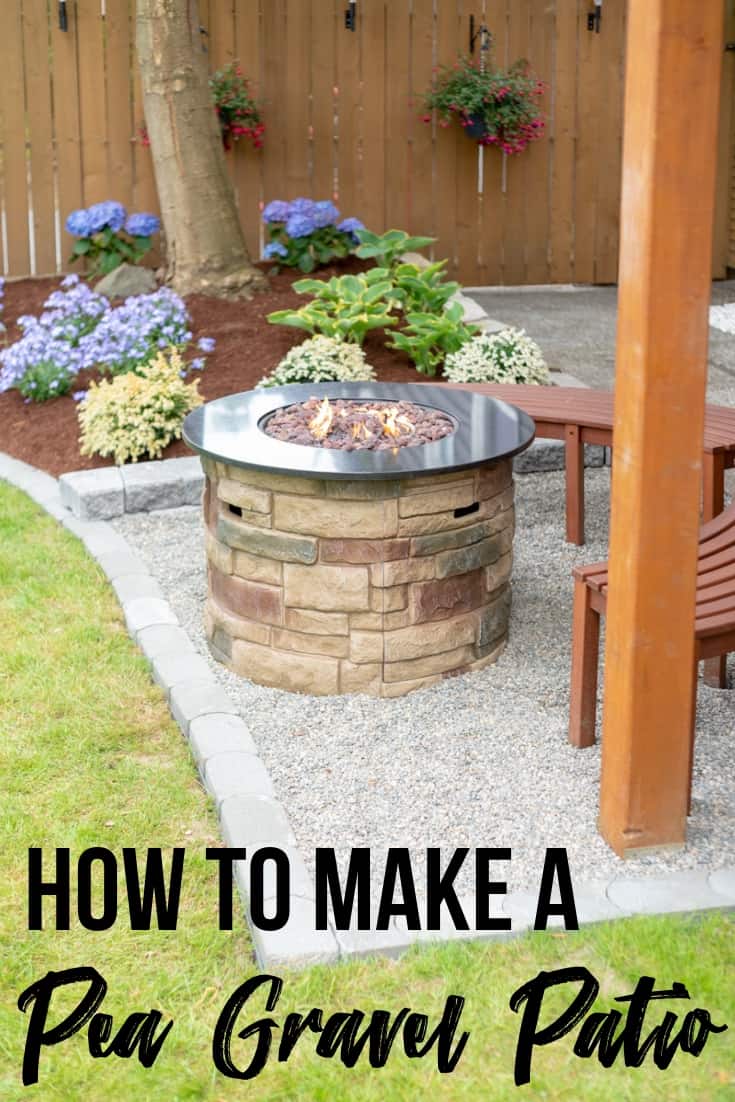

Looking for an easy DIY patio that doesn't cost a fortune? A pea gravel patio is just what you need! Instead of spending days leveling the ground and laying pavers, you could be relaxing on your new gravel patio in no time!
This post contains affiliate links for your convenience. Purchases made through these links may earn me a small commission at no additional cost to you. Please visit my disclosures page for more information.
Materials Needed
- Pea gravel
- One cubic yard is more than enough for 100 square feet at 3 inches deep.
- Border pavers
- These are the ones I used. The ends make it easy to create curved borders!
- Paver edging (optional)
- This plastic edging holds the pavers in place so they stay in a straight line without shifting.
- Straight edged shovel
- Metal rake
- Tamper
- Marking spray paint
- Cultivator (not necessary, but helpful for digging!)
- Landscaping fabric
- Landscaping fabric stakes
- Wheelbarrow or dump cart
Video
Check out this quick video first, then read the tutorial below for more details.
Remove the Grass (if Necessary)
Determine the shape of your gravel patio, then spray paint the desired line. Use marking spray paint that allows you to spray straight down.
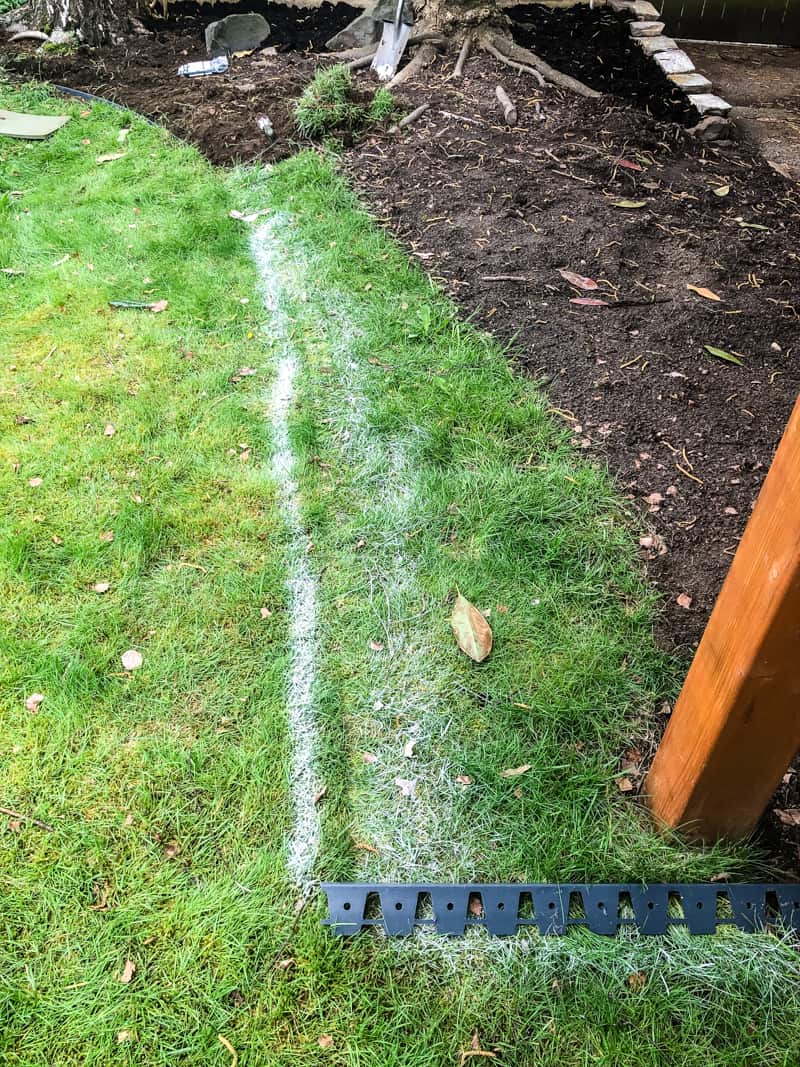

Use a straight edged shovel to cut away the grass along the line.

Then remove the grass to create a crisp line. This will make laying the paver edging much easier!
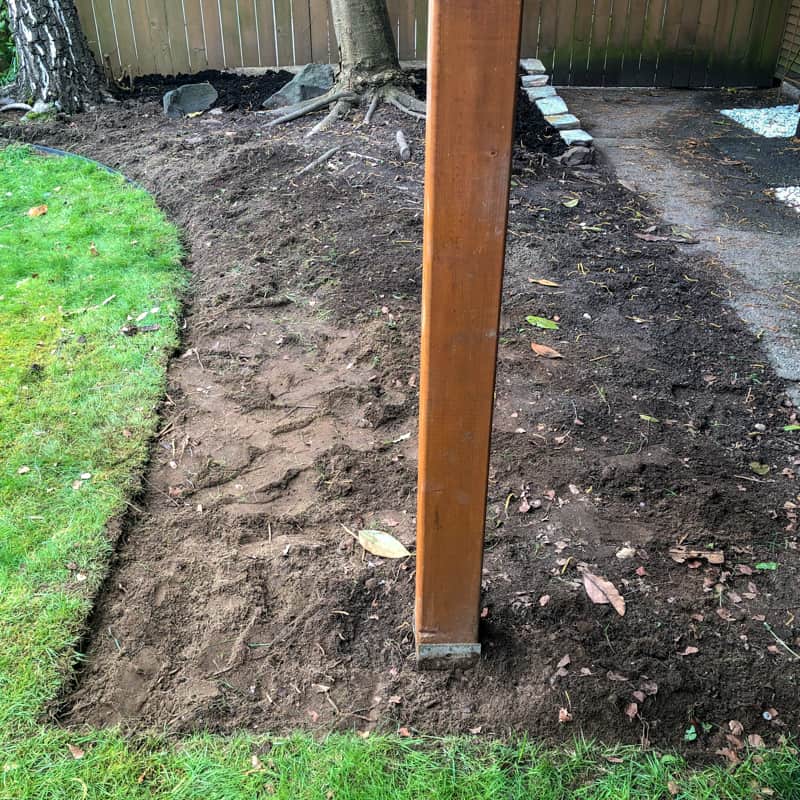

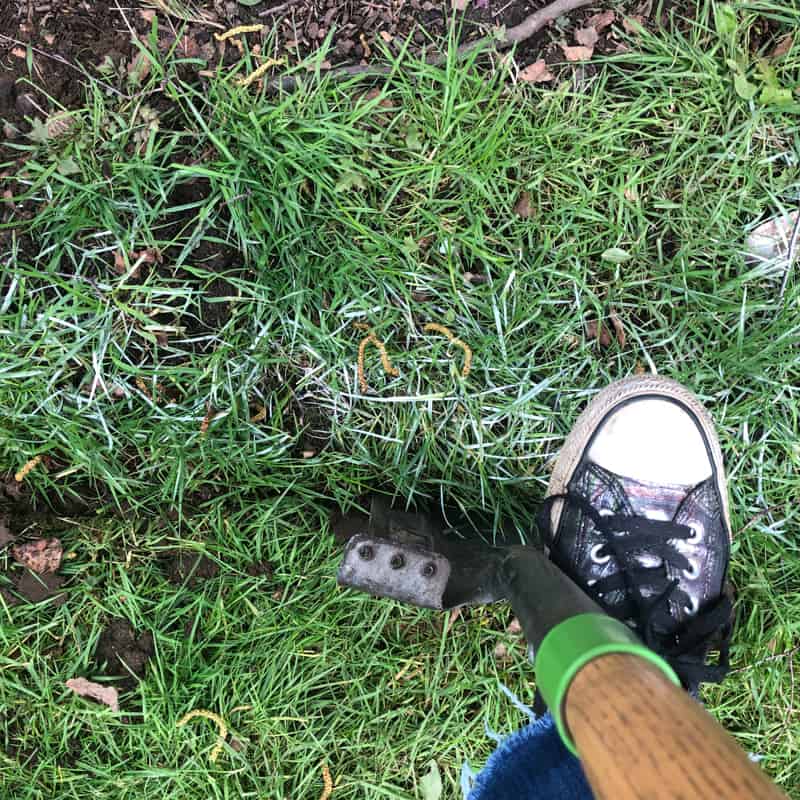
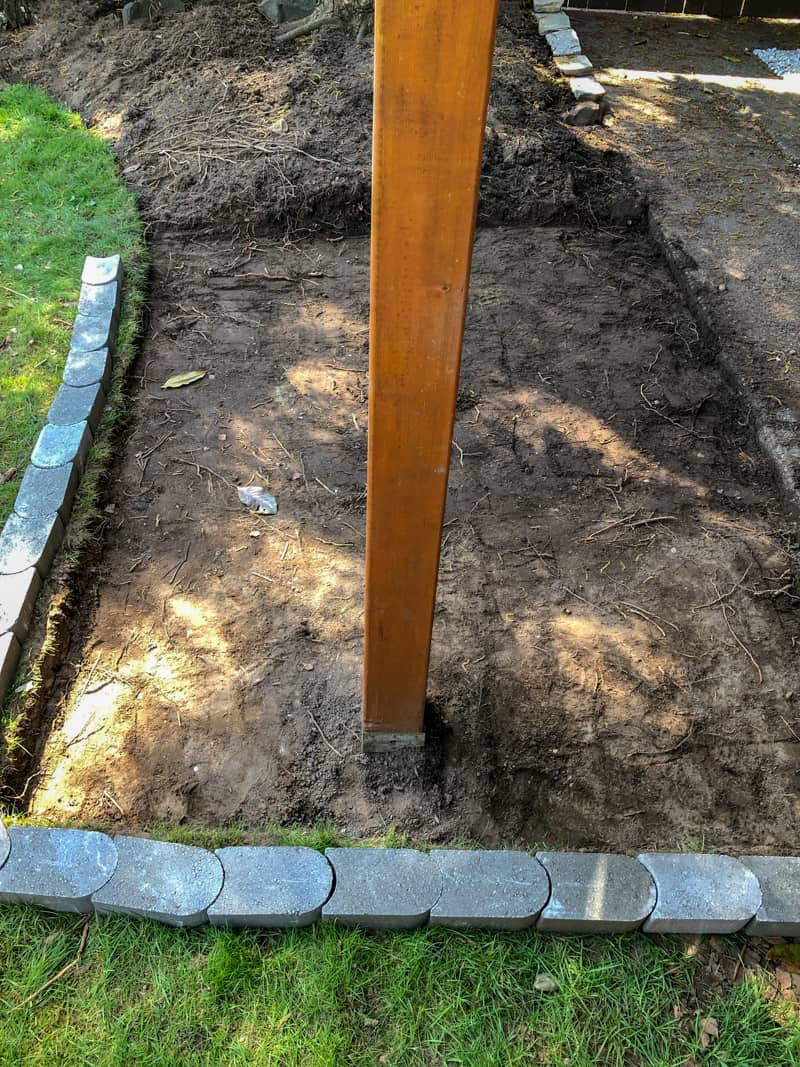
Dig Down Three Inches
Remove the soil until you have roughly three inches removed from the entire patio area. If the area is too shallow, you'll see the landscaping fabric underneath. Too deep, and it's hard to walk across.
To help dig out tough soil, I suggest using an electric cultivator like this one. Ryobi provided me with this handy tool for my backyard makeover project, and it made it much easier to dig out the patio area.
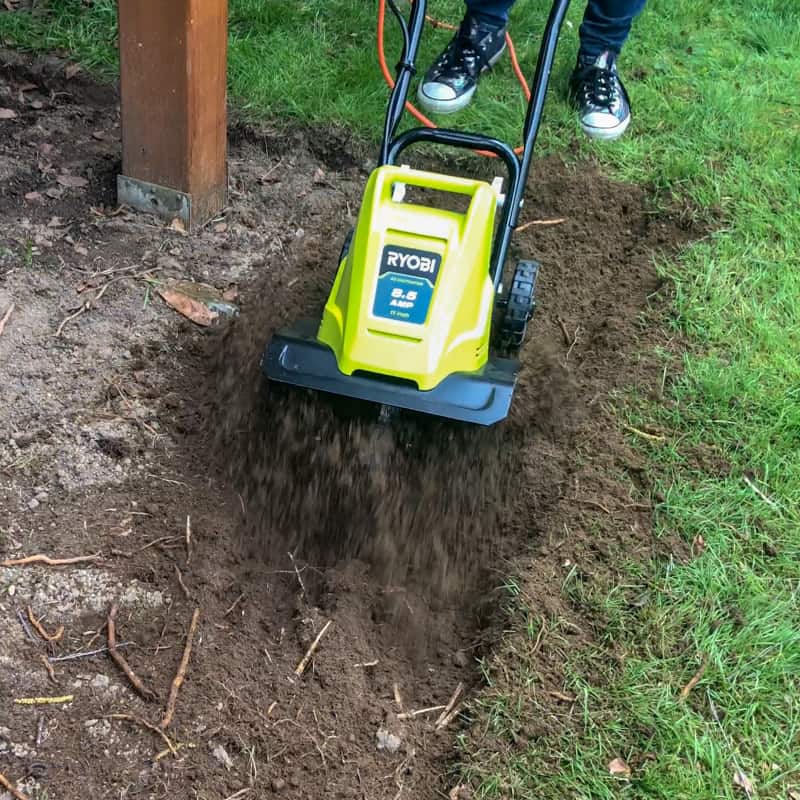

The ground doesn't need to be graded or perfectly level before you pour the stone. I tried to keep the depth consistent around the outside for the paver edging, but the middle varies between two and three inches depending on roots I encountered along the way.


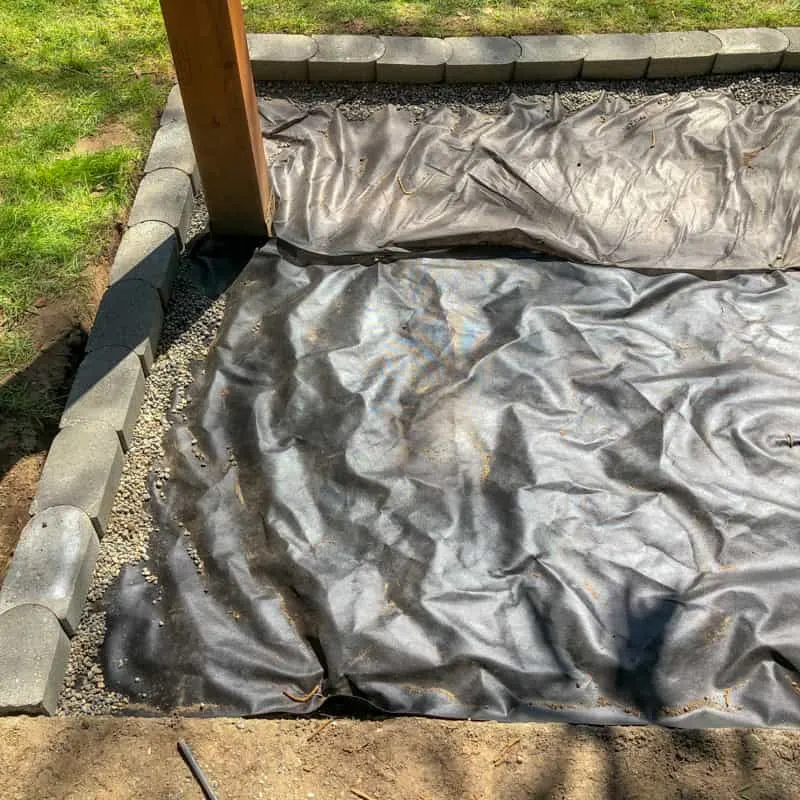
Compact the Soil and Lay Landscaping Fabric
Once you've got the soil cleared away, compact the soil with a tamper.
Then roll weed blocking landscaping fabric across the entire area and secure with landscaping staples. This will prevent dirt from mixing with the gravel and making a muddy mess in the rain, and will stop weeds and roots from growing through.

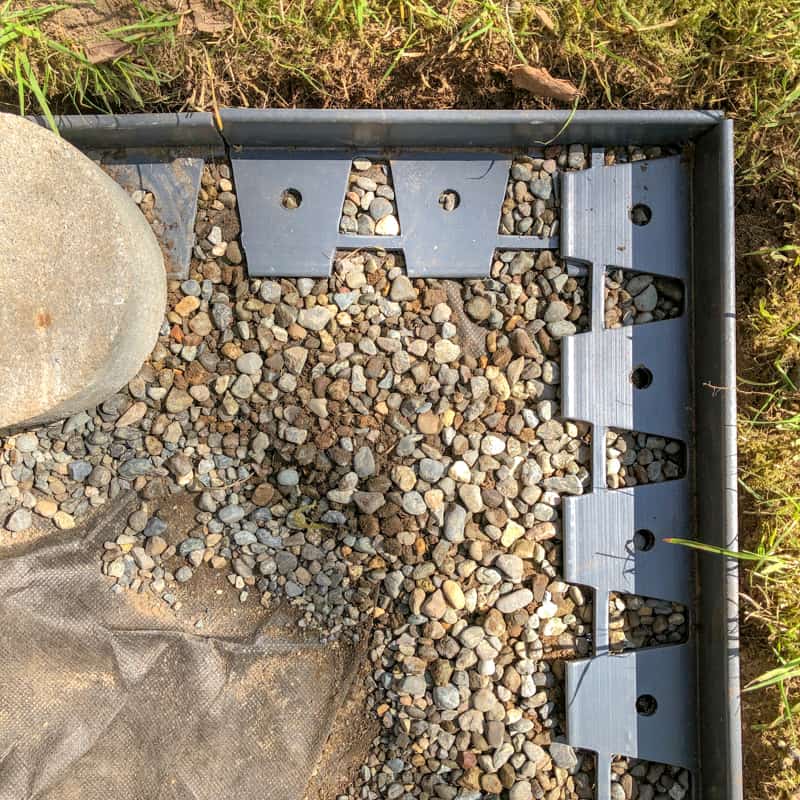
Install Gravel Patio Edging
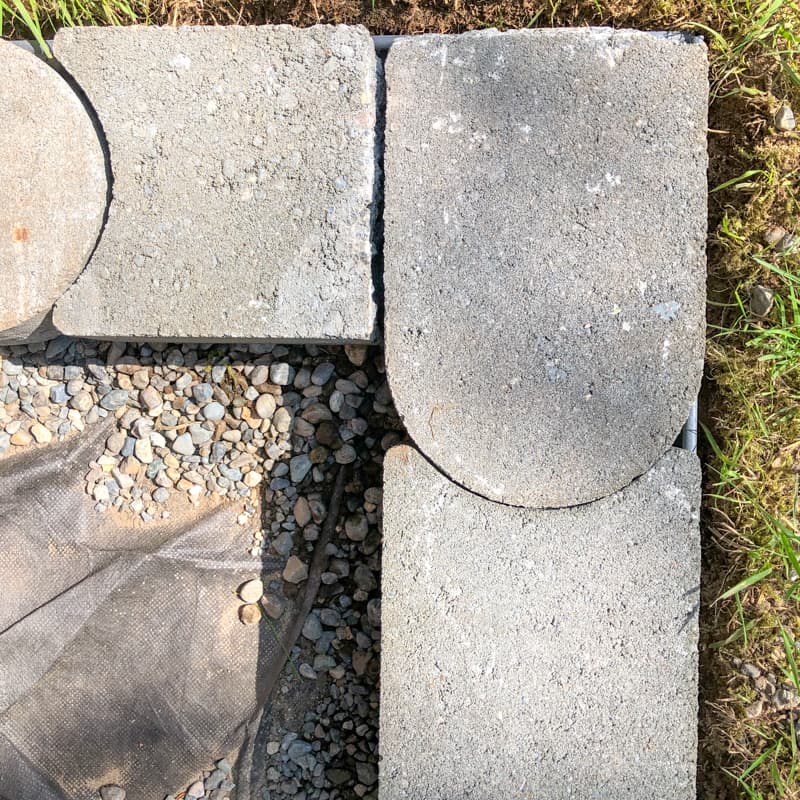
You can use any kind of edging to separate the gravel from the grass. I chose concrete pavers with rounded ends to make it easier to follow the gentle curves I cut out of the grass. If you're making a standard rectangular pea gravel patio, you could even use pressure treated lumber that's rated for ground contact.
To prevent the concrete pavers from shifting over time and coming out of alignment, I installed this plastic paver edging underneath first. The raised side goes along the grass, and makes it easy to create straight and curved lines with the edging blocks.

Use a hammer and masonry chisel to cut the bricks for a custom fit. I created a 90 degree corner by chopping the curved ends off two blocks. Then I worked backwards to reach the walkway and trimmed the last block to fit.

Make sure that the paver edging is level with the grass to prevent tripping and toe-stubbing. Dig out any high spots, and use the extra dirt to raise any low ones. I also put a thin layer of gravel underneath for added stability.
As you lay each paver, place a level on top. Mine tended to tilt in towards the patio because there wasn't anything holding them upright from that side yet. I used a hand trowel to poke pea gravel under the paver on the low side until it was level.


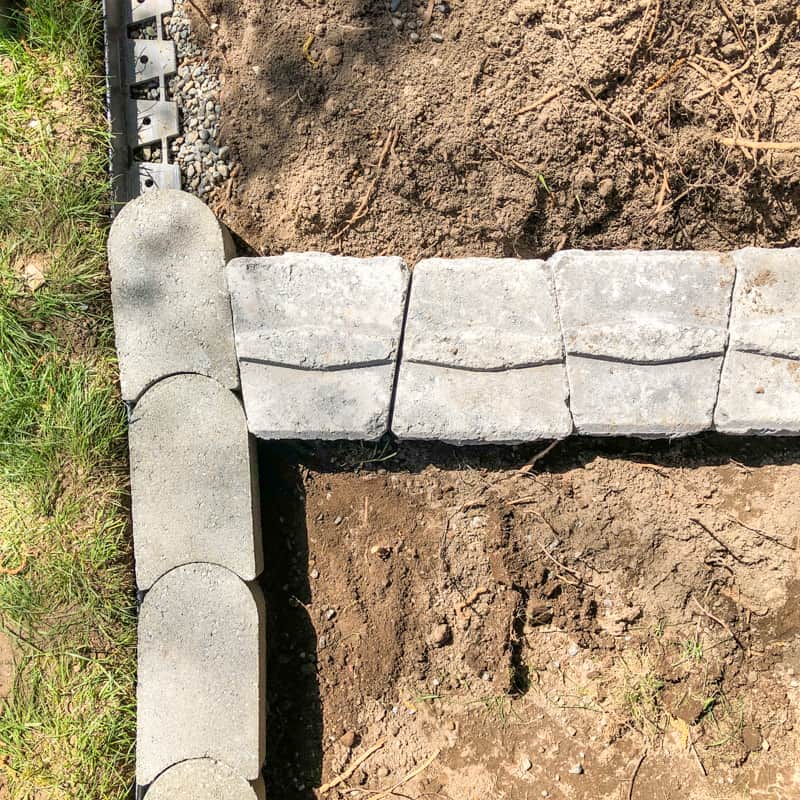
These paver blocks will eventually extend all the way around the yard. For now, they meet up with the edging I installed last year in the side garden bed.
Add retaining wall for garden bed (optional)
I wanted to create a clear division between the garden bed and the patio. A short retaining wall will keep the spaces separate, but doesn't block the flow between the two areas.
The first layer of retaining wall blocks is even with the paver edging and the concrete walkway. I totally lucked out and got a perfect fit without having to cut any pieces or adjust the edging!
That ridge along the top locks into a corresponding valley in the capstone blocks. Offset the top so each one straddles two of the base blocks.


Now I could fill in the garden bed behind the retaining wall with some of the dirt I dug out of the patio area!
Fill the Patio with Pea Gravel
Get your wheelbarrow ready, and start loading it up with gravel! I bought this dump cart with a quick-release specifically for this project to make the process easier. It felt like I made a million trips from the side of the house where the gravel was dumped to the backyard patio.
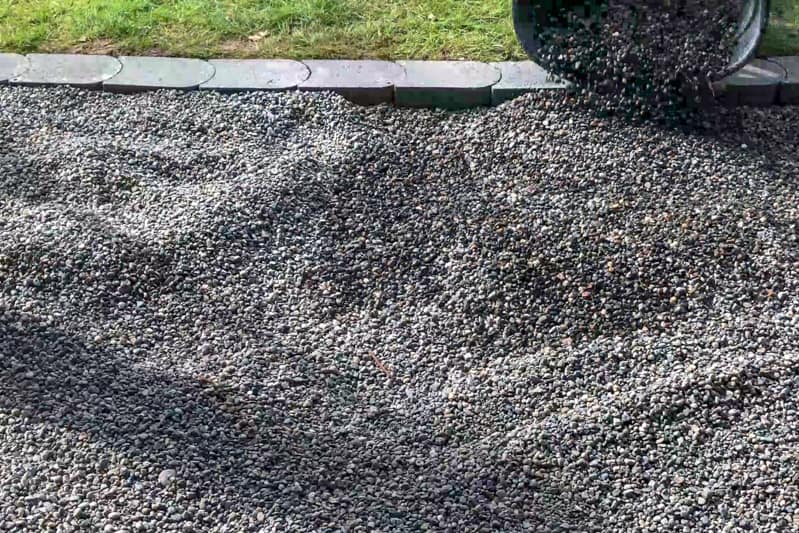

Spread out the rocks with a metal rake and fill in any low spots.
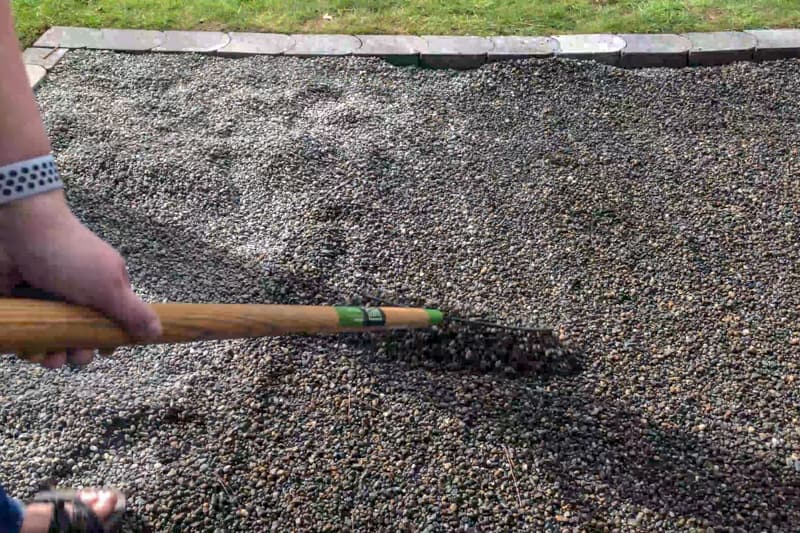
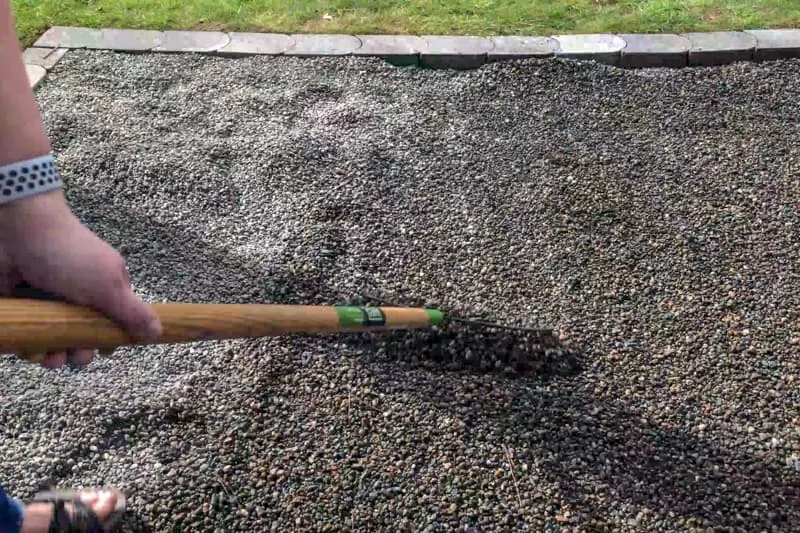
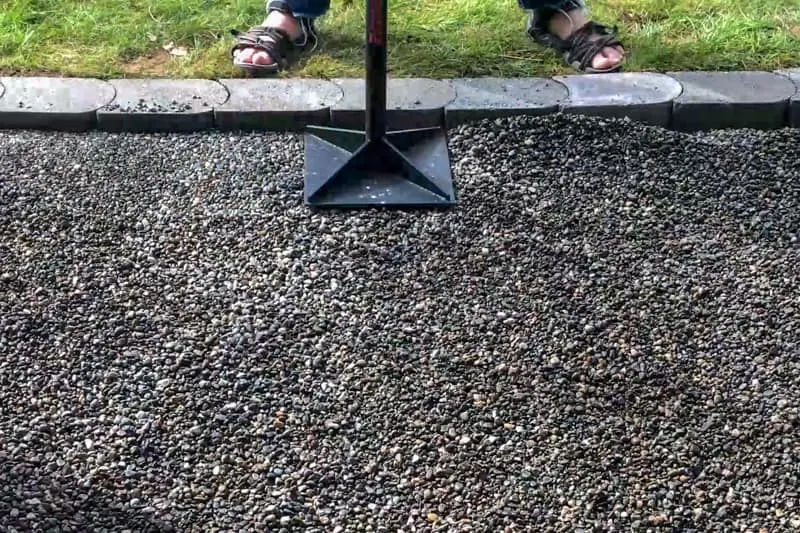
When you've filled it about an inch, use the tamper to stabilize and compact the gravel patio base layer.

Then fill the rest of the patio with even more pea gravel, and rake it smooth.
Add Fire Pit and Benches
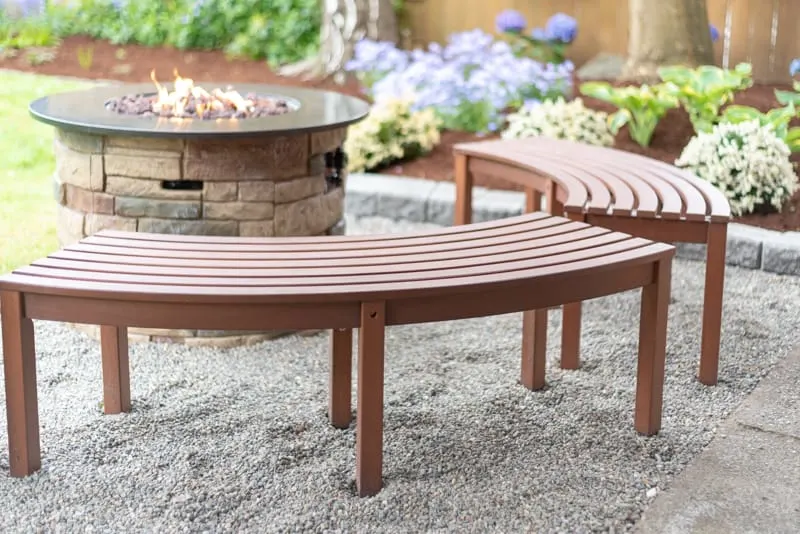
A pea gravel patio is perfect for a fire pit! I bought a propane fire pit, which doesn't produce embers that could accidentally catch the nearby trees or deck on fire. It starts up with the push of a button, and doesn't create obnoxious smoke that stings your eyes and seeps into your clothing!

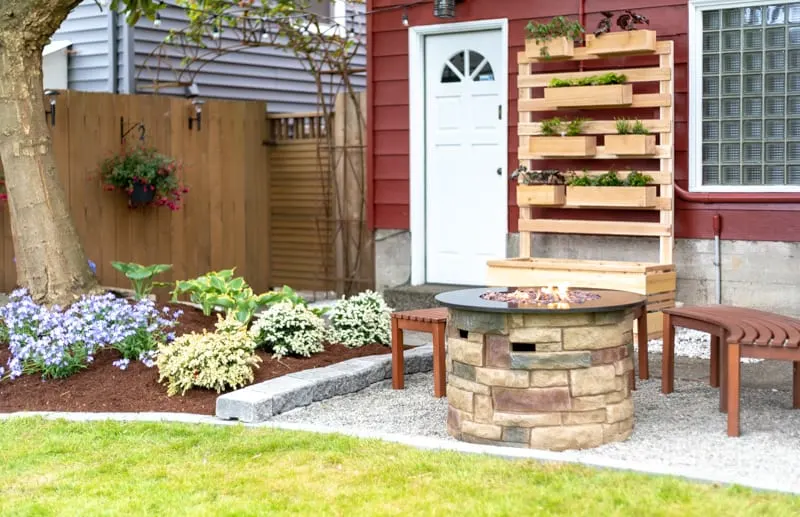
Curved benches fit perfectly around the circular fire pit, and sink into the gravel for more stability.

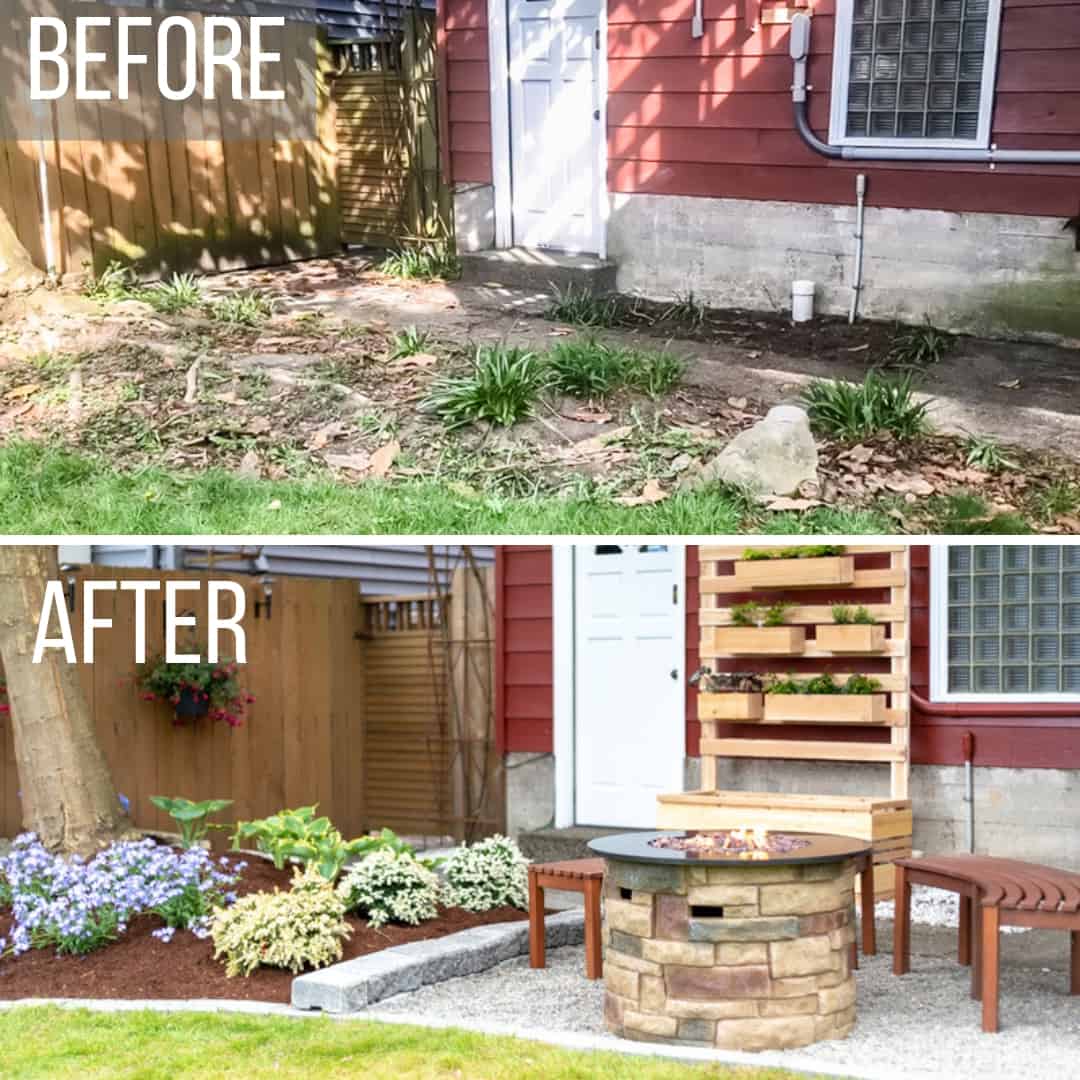
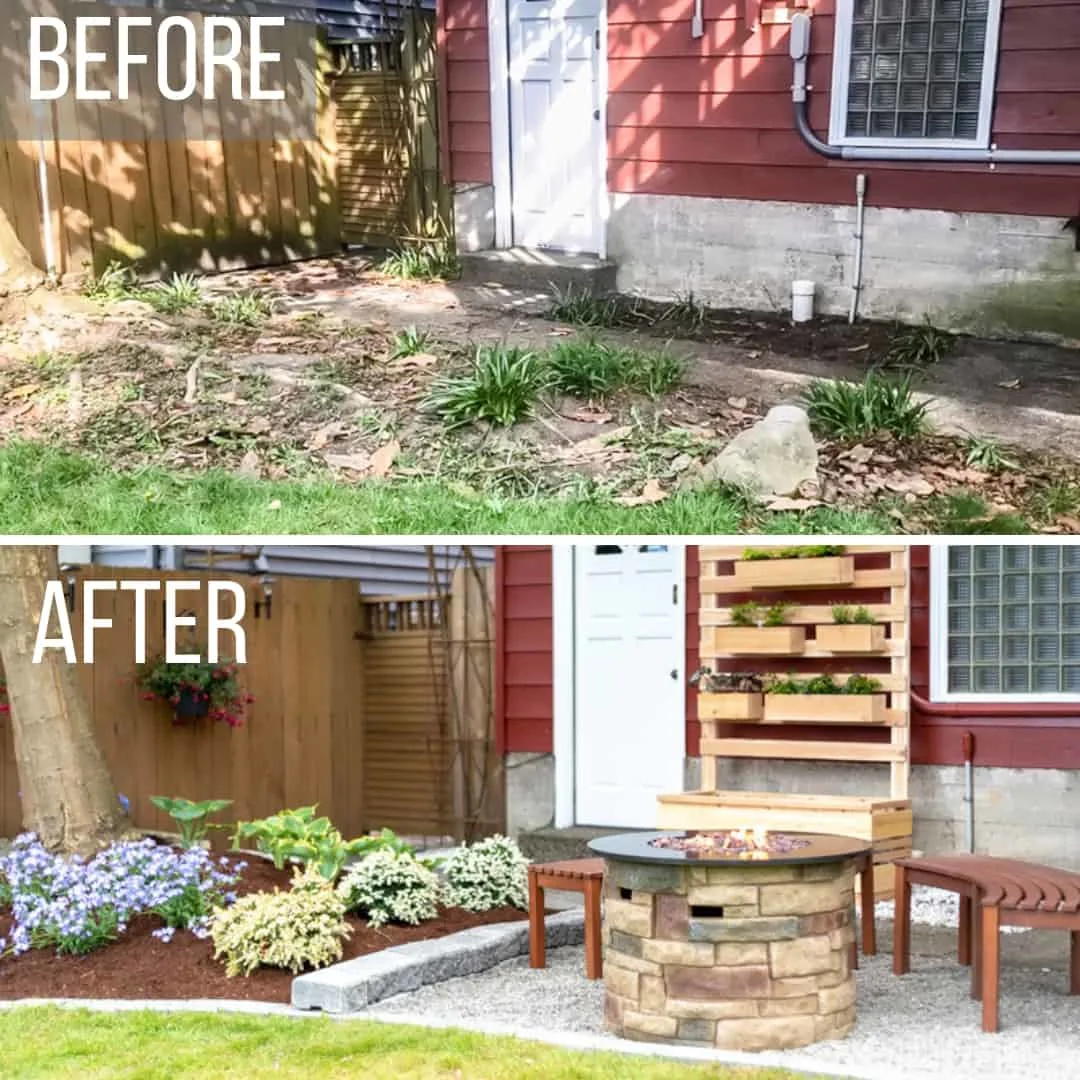
Enjoy Your New Pea Gravel Patio!
This backyard has been totally transformed! You can check out all the before and after photos of this makeover here. The dark, lifeless corner is now the highlight of the entire yard!
Check out these other backyard project ideas!