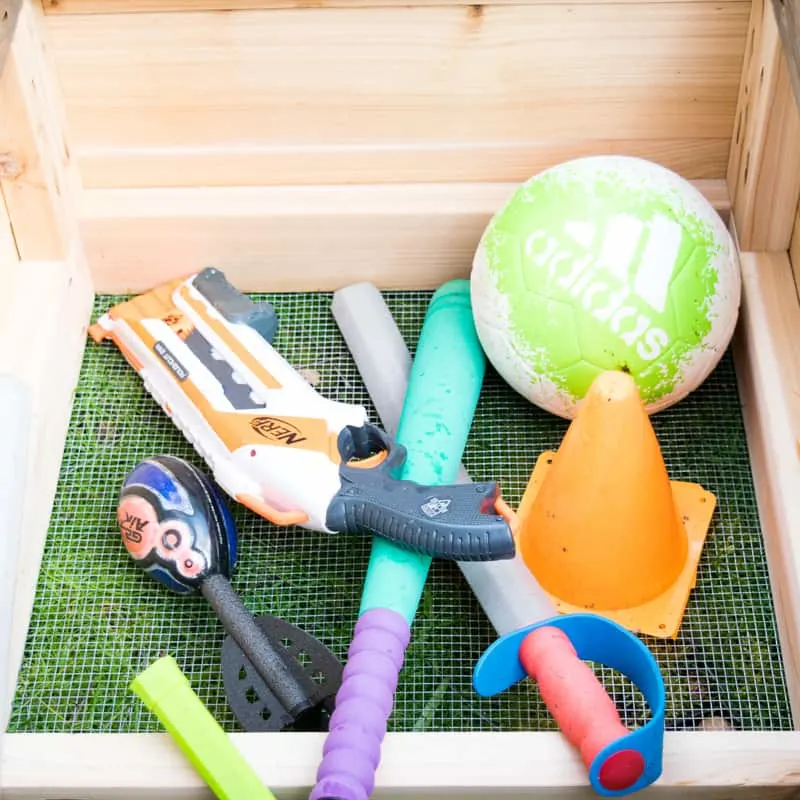
This DIY outdoor storage bench is large enough for three people, and holds all the outdoor toys and gear that clutter up the yard.

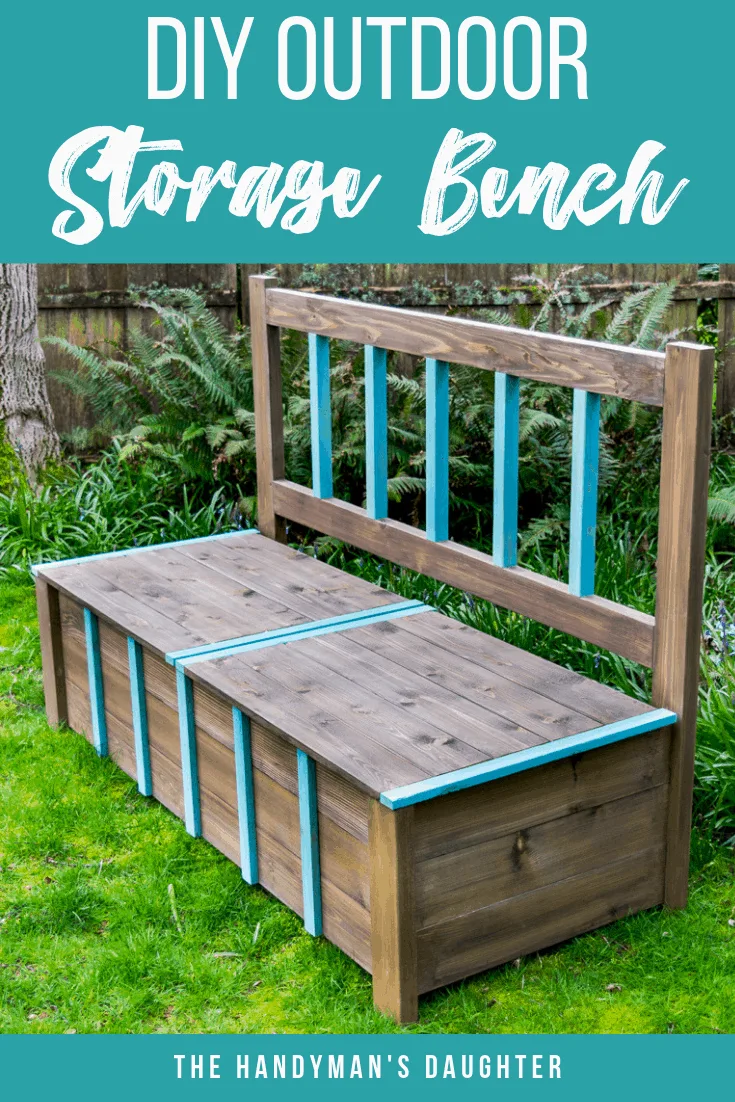
Need to hide away backyard clutter? This DIY outdoor storage bench is the perfect solution! It can fit all those toys and balls, and provide seating too. Download the plans and start building today!
This post contains affiliate links for your convenience. Purchases made through these links may earn me a small commission at no additional cost to you. Please visit my disclosures page for more information.
Our backyard is a dumping ground for outdoor toys. We have a shed, but it requires a key, so stuff gets left out everywhere. An outdoor storage bench would let me sit and relax during the impromptu soccer matches in a clutter-free backyard. Time to start building!
Want more DIY bench ideas? Check out this list for inspiration!
UPDATE: After a few years of abuse from kids jumping off it, slamming the lid and other destructive activities, the seat of this storage bench was toast. 🙁 Instead of fixing it, I decided to repurpose the materials into this potting bench!
Materials Needed
- 8 - 2 x 4 cedar boards (8 feet long)
- 1 - 2 x 2 cedar board (8 feet long)
- 6 - 5 ½" wide cedar fence pickets (6 feet long)
- 4 - 1 x 6 cedar boards (8 feet long)
- 3 - 1 x 2 cedar boards (8 feet long)
- 4 - 2" stainless steel hinges
- ¼" metal mesh hardware cloth (2' x 5')
- Titebond III wood glue
- Table saw
- Miter saw
- Check out my guide for how to use a miter saw here!
- 1" brad nails & nail gun
- Kreg jig
- Check out my post on how to use a Kreg Jig to help you decide which one is right for you.
- 2 ½" Blu-Kote weather-resistant pocket hole screws
- 1 ¼" pocket hole screws
- Staple gun and staples
Don't forget your safety gear when woodworking! Here are my recommendations for safety glasses and ear protection.
How to Make an Outdoor Storage Bench
Important Notes Before You Start
- I used cedar for this build because the bench will be exposed to the elements year round. You could also use pressure treated lumber, which tends to be cheaper. Learn the difference between cedar vs pressure treated lumber here!
- Sand all your cut pieces with 80 or 120 grit sandpaper before assembly. That way you can skip right to the finer grits when you're finished building.
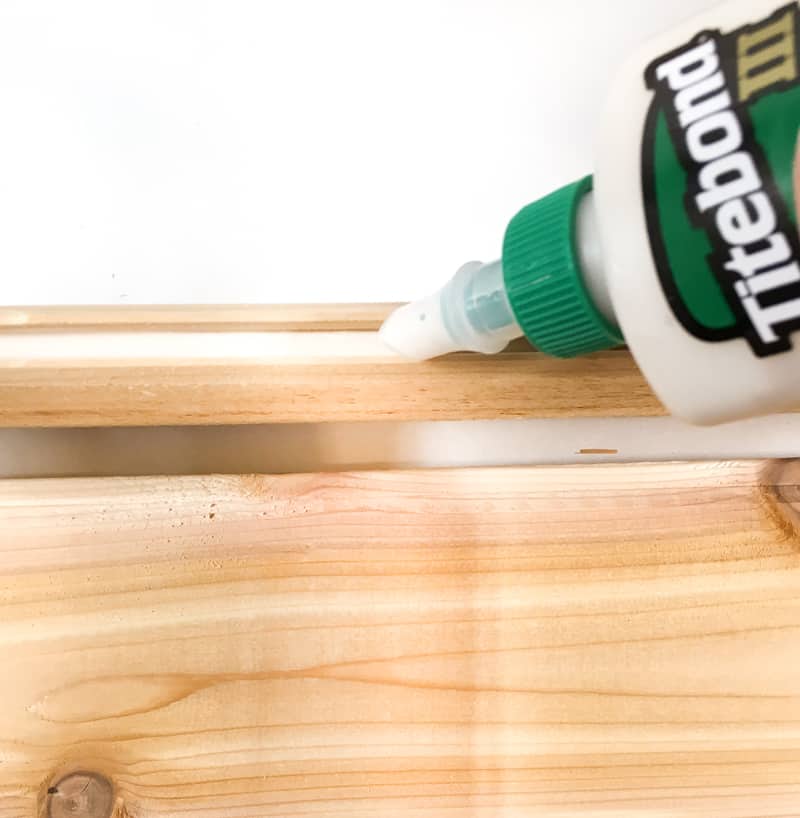
- Remember to check for square and use wood glue made for exterior use (I like Titebond III) at every joint.
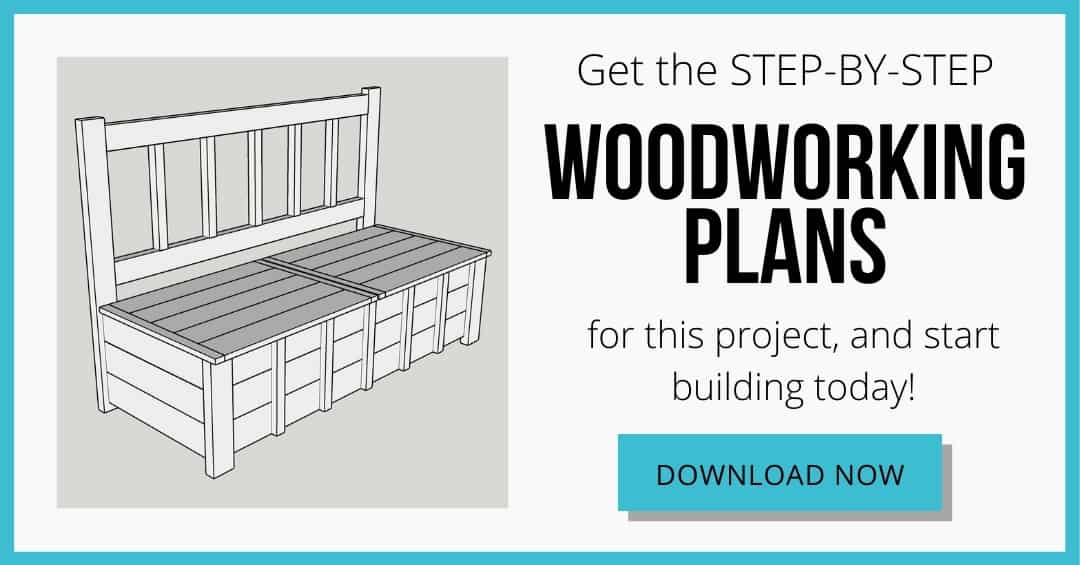
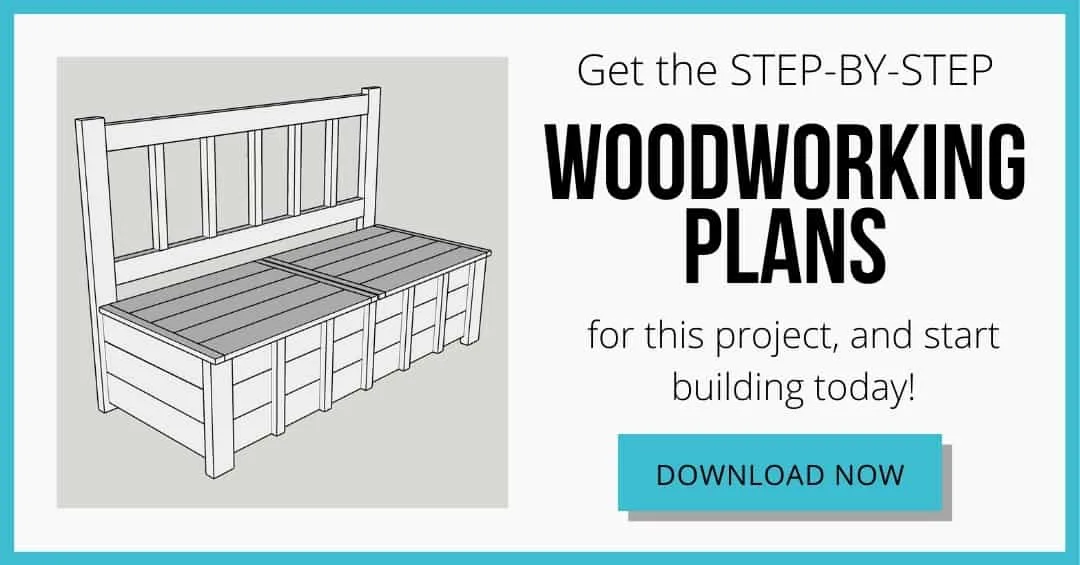
- Refer to the woodworking plans for a complete cut list and cut diagram, as well as clear step by step illustrations. Click the image below to download them now!
Build the Storage Box Frame
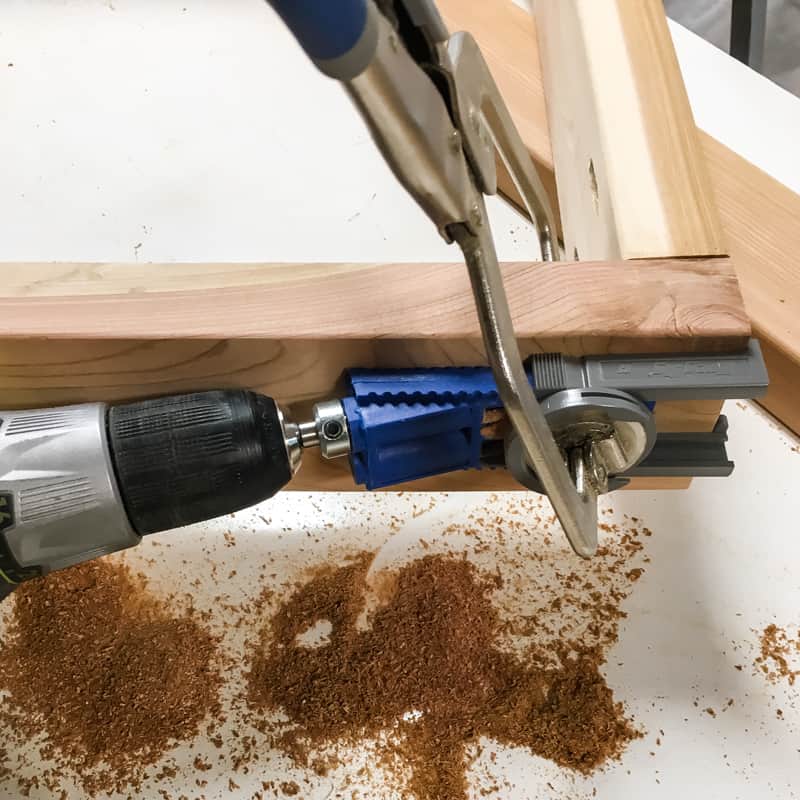
Start by creating the two frames that make up the top and bottom of the box. Drill two pocket holes in the ends of all four of the long pieces. I have short ceilings in my basement workshop, so I had to drill mine on the floor!

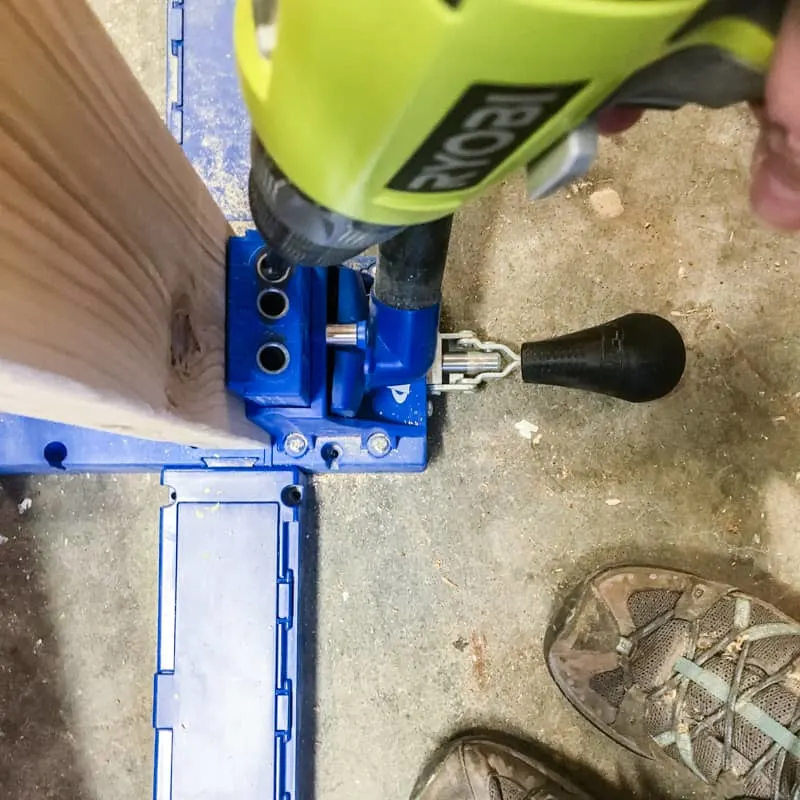
While you're at it, drill pocket holes into the end pieces as well. You won't be using these holes quite yet, but it's a lot easier to add them now!
You can see in the photo below that I forgot mine, so I used my Kreg Jig R3 to add them. Create two frames with 2 ½" pocket hole screws, with the extra holes you just drilled facing out.

Drill two pocket holes in both ends of the center supports, then attach them to the interior of one frame. Install the remaining support in the middle of the other frame.
This photo doesn't show the second frame correctly because I added the center support later. I was making it up as I went along!
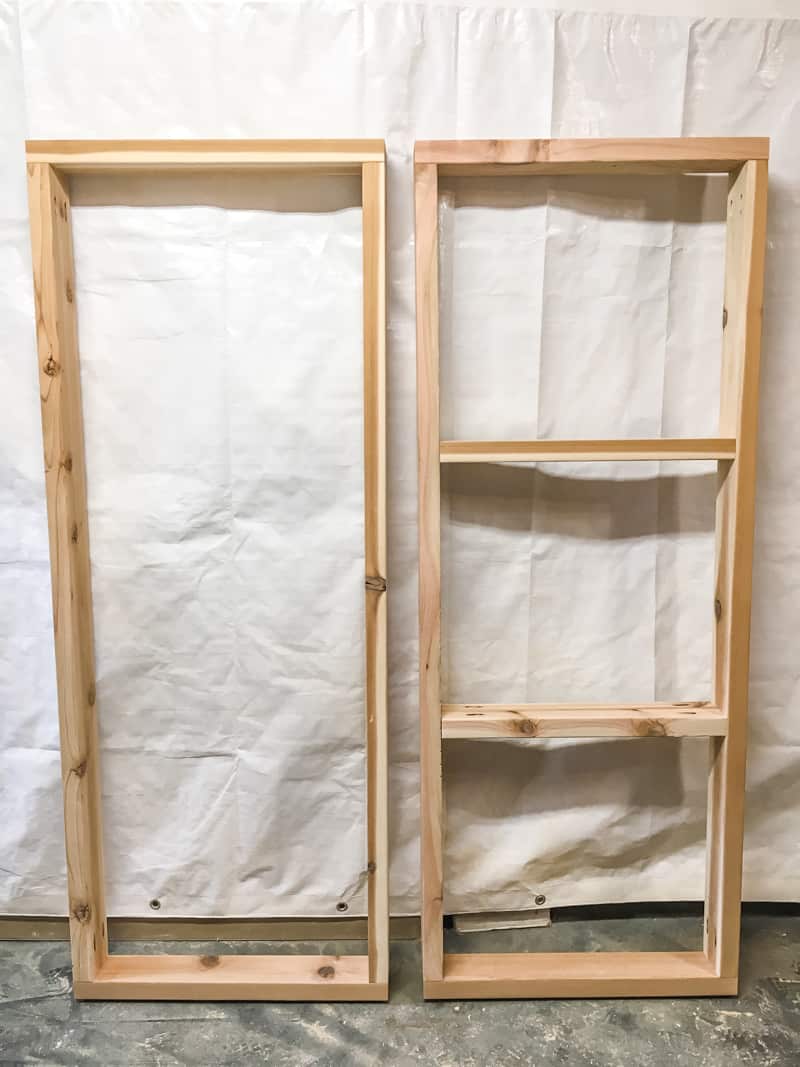
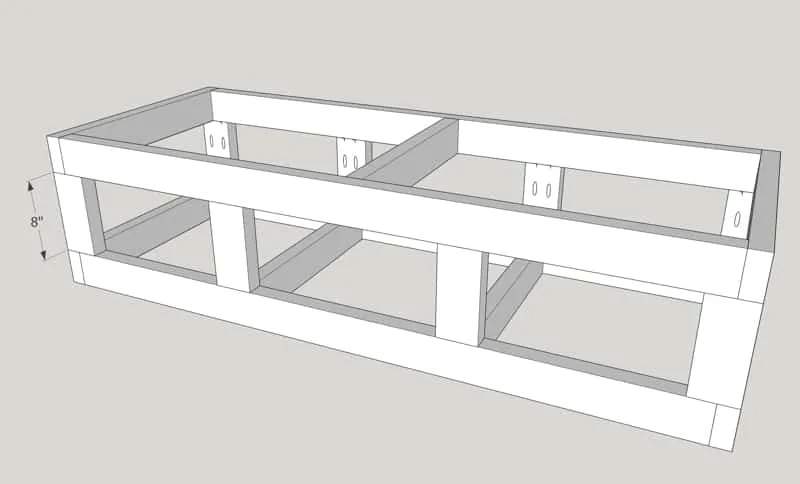
Drill pocket holes into both ends of all the short pieces then connect the top and bottom frames together to create the lower box. Again, I figured out this part after the fact, so here's the model of it from the plans.

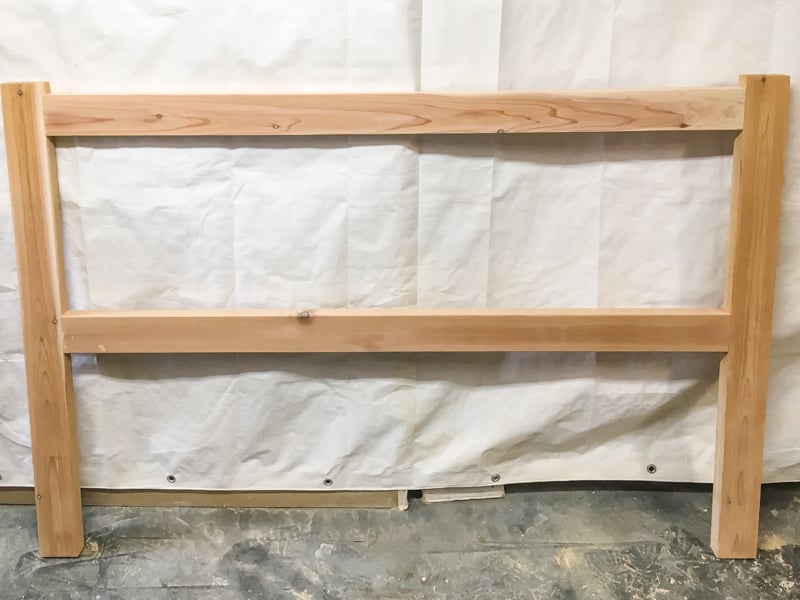
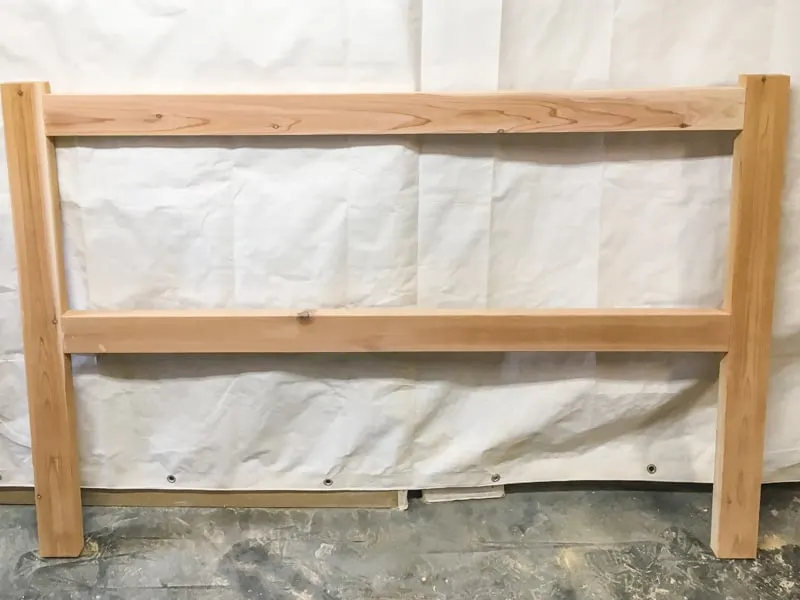
Build the Back
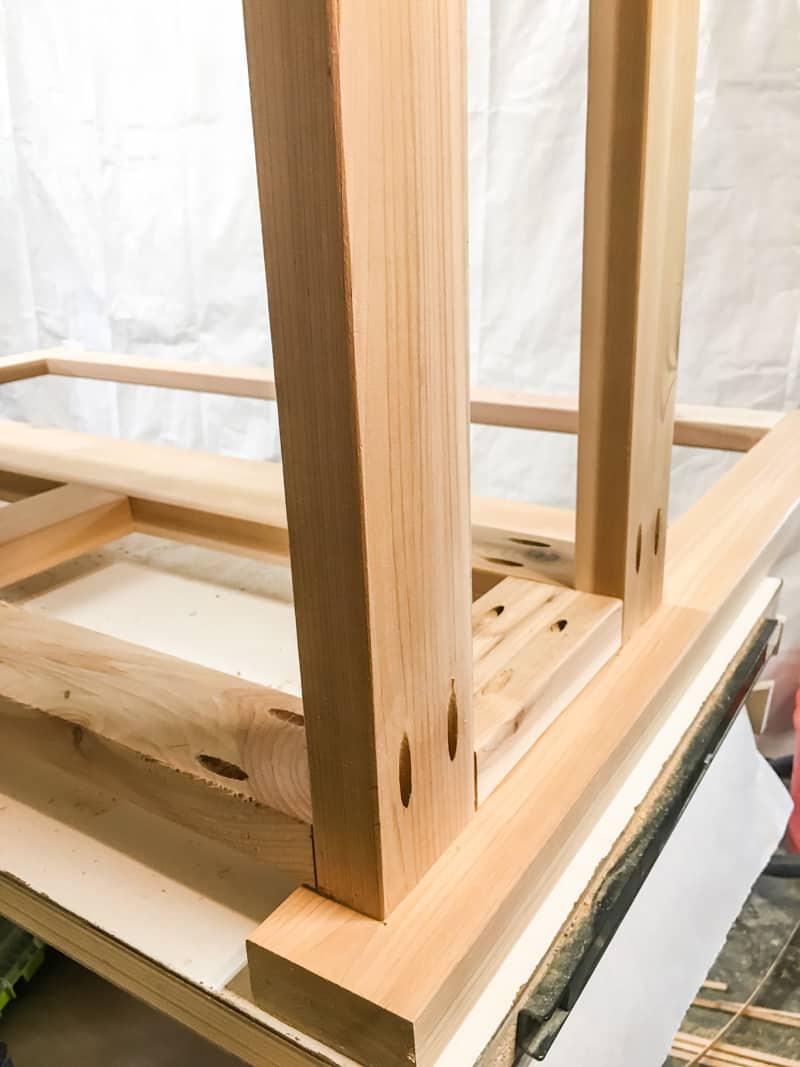
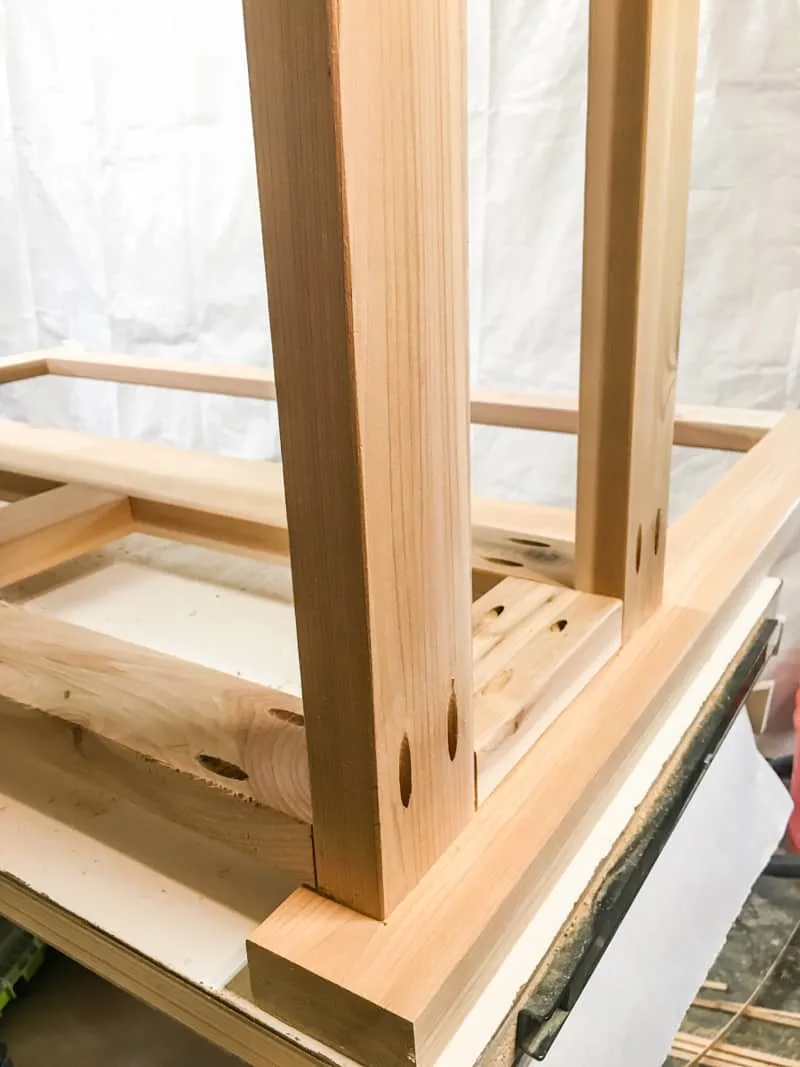
Drill pocket holes in each end of the two long back pieces, then attach them to the uprights.
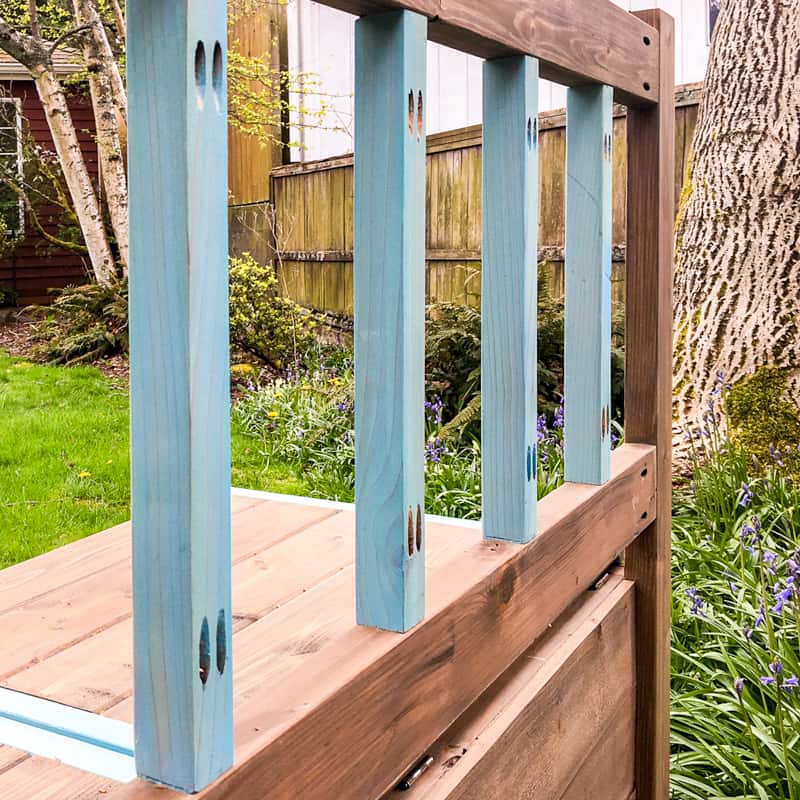
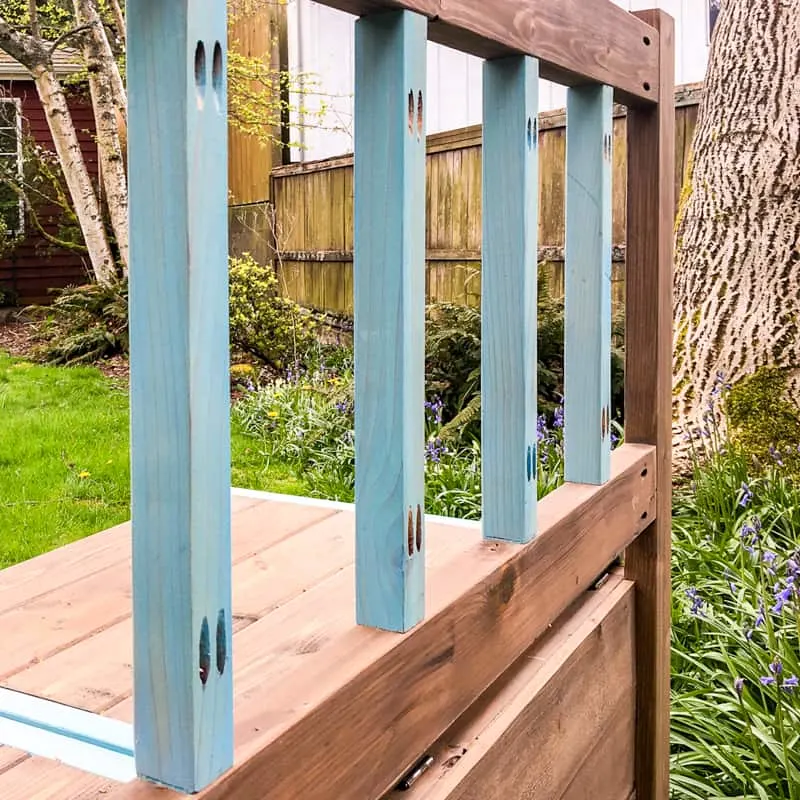
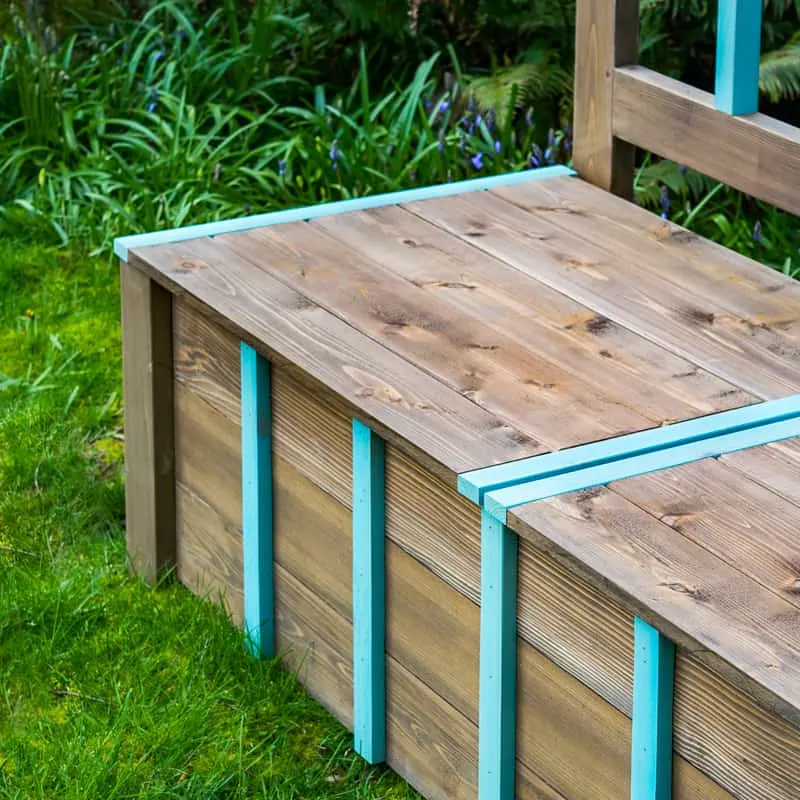
You can attach the decorative pieces now, or save them for later. I stained the entire bench dark brown when I was finished building, then stained these slats separately with Rustoleum's Vintage Aqua for a pop of color.
Drill pocket holes in the ends of each slat, and insert them in the back frame.
Attach Bench Back and Front Legs to Box
Lay your bench back on your worktable with the pocket holes facing down, then place the box on top.
Here's where those extra pocket holes you made earlier come into play. Attach the box to the bench back with 2 ½" screws. Repeat for the front legs, keeping the top flush with the top edge of the box.


Attach Cladding to Bench Box
With the frame of the box in place, now we're going to enclose it. I used inexpensive 5 ½" wide cedar fence pickets rather than more expensive cedar 1 x 6's. It gave me an excuse to finally use the new-to-me thickness planer I picked up used on Craigslist!
I planed each fence picket until they were ½" thick. It truly transformed them from rough, cheap wood to freshly milled lumber. You could easily skip this step and just sand them down as well.

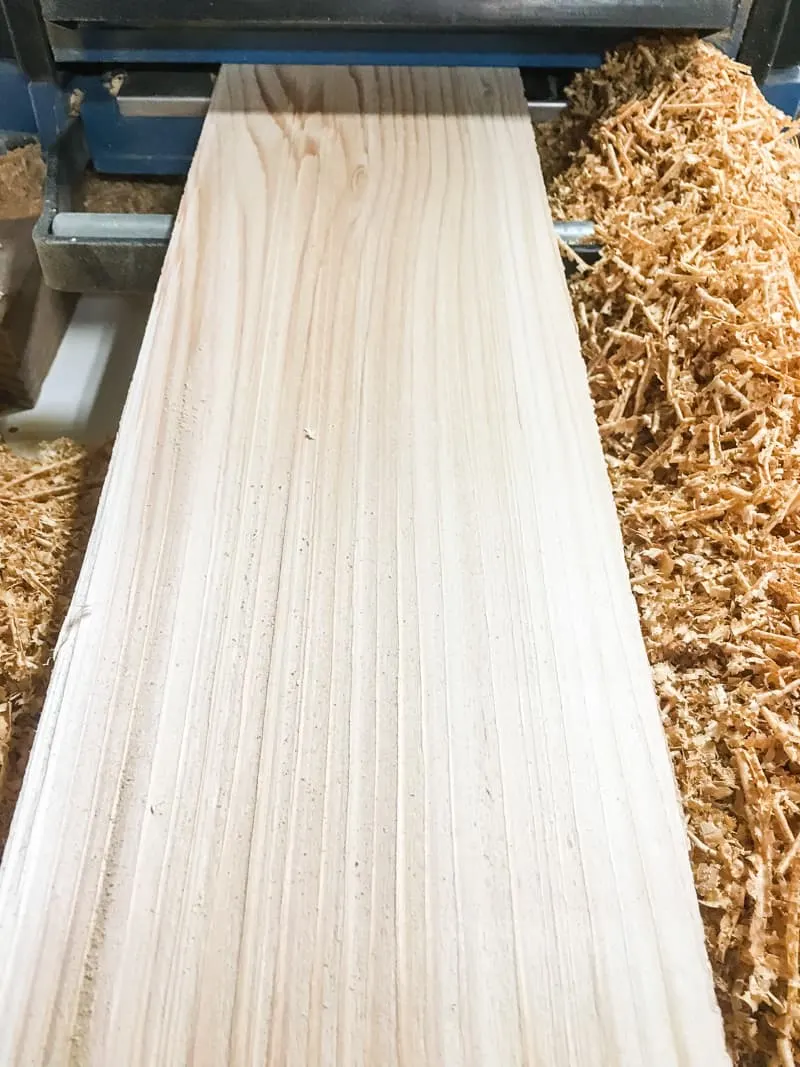
I trimmed off ¼" from each side with my table saw, leaving me with 5" wide planks. If you don't have a table saw, you could leave them full width, but the joint between the boards won't be quite as clean.
I attached these to the bench frame with my Ryobi Airstrike brad nailer and 1" nails. Make sure the top plank is flush with the top!


The decorative pieces on the front of the box echo the ones on the bench back. They were stained the same Vintage Aqua color and attached with brad nails.

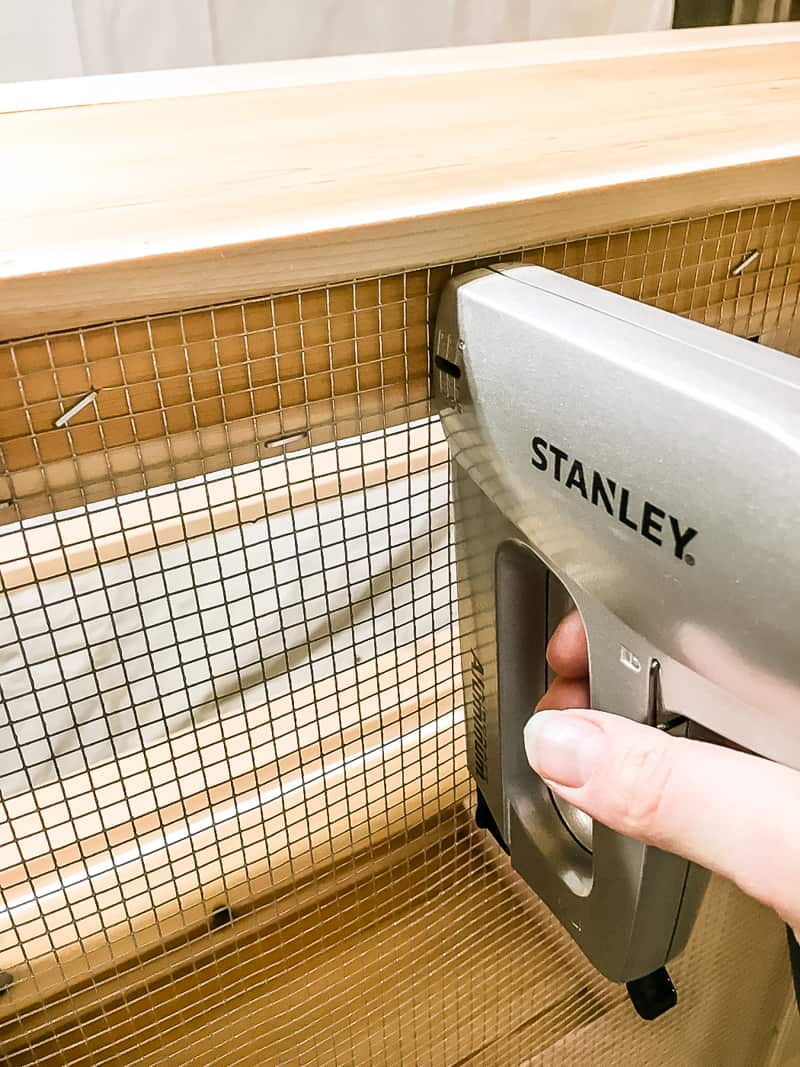
Attach the Mesh Bottom
I added mesh to the bottom of the storage area so that water and dirt can pass through instead of pooling up inside. If you prefer, you can attach wood planks here instead.
Flip the entire bench onto its back so you can easily access the bottom. Use tin snips or heavy duty scissors to cut the wire mesh to the width of the bottom.
I only needed to cut a few rows off the width and length for a perfect fit. Then use a staple gun to secure the mesh to the bottom of the frame.

Create the Bench Lid
You can create the bench lid two ways. Either plank together cedar 1 x 6 boards with pocket hole screws, or use cedar tongue and groove boards like I did here. After seeing the size of the bench, I decided to break the lid up into two separate ones to make it easier for kids to lift.
Apply glue to the groove before inserting the tongue part. I also attached 1 x 2 pieces to the back of each lid piece for extra stability, since the tongue and groove wasn't rigid enough by itself.

Drill pocket holes in the ends of the front, middle and back slats, then attach the 1 x 2 end pieces to finish off the edges.
I stained these aqua as well, but in retrospect I wish I had kept them the same brown as the rest of the bench to allow the pieces on the back to really pop.


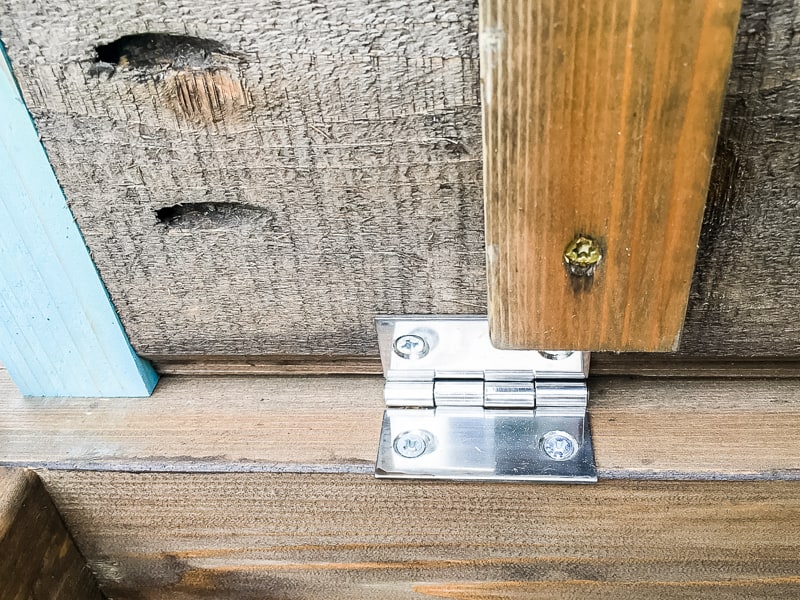
Finally, attach two hinges to each lid. I used 2" marine grade hinges, so I know they won't rust shut in a year or two!
Give the entire piece a coat of outdoor stain to protect it from the elements. Cedar will gray naturally over time if you want to give it a more weathered look.
Your Outdoor Storage Bench is Done!
When I finally got this beast of a project finished and out into the garden, I immediately started loading it up with all the miscellaneous outdoor toys that had been littering the yard. It's amazing how much storage space is in this thing!

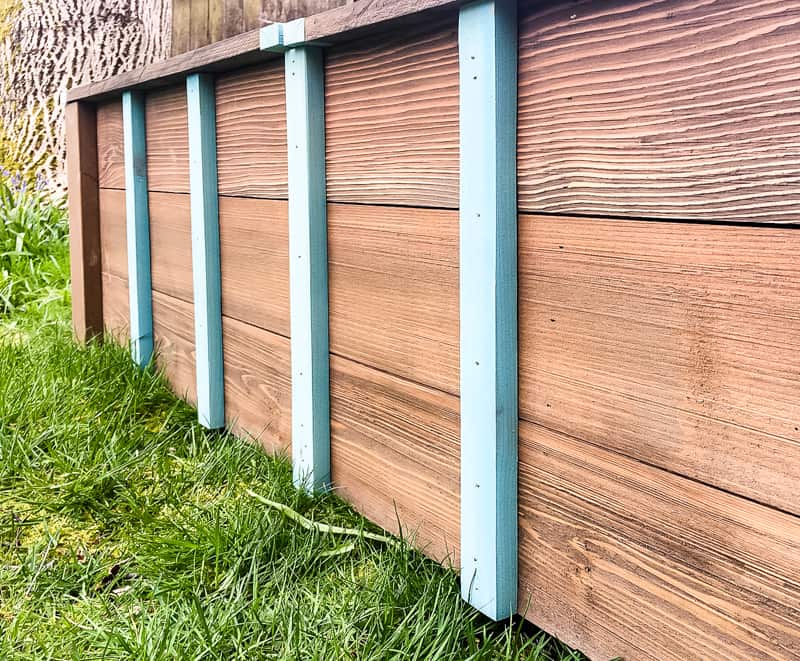
The vintage aqua color gives a nice pop of color to this dark corner of the garden. Once the flowers fade, I'll move it back a few feet and prop the legs up on concrete pavers so it won't sink into the dirt.

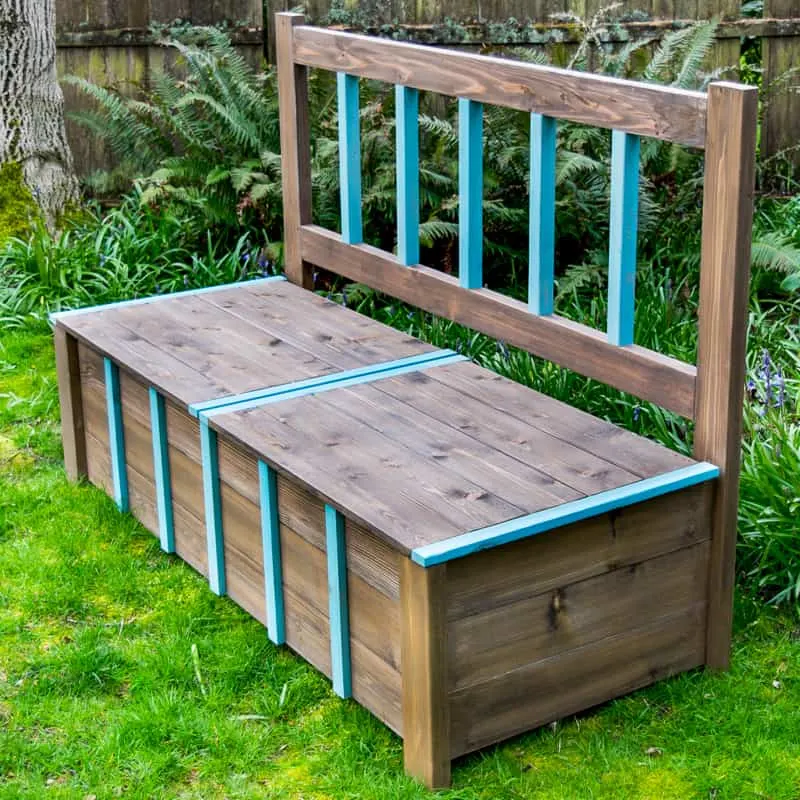
This long storage bench is big enough to fit three people comfortably!

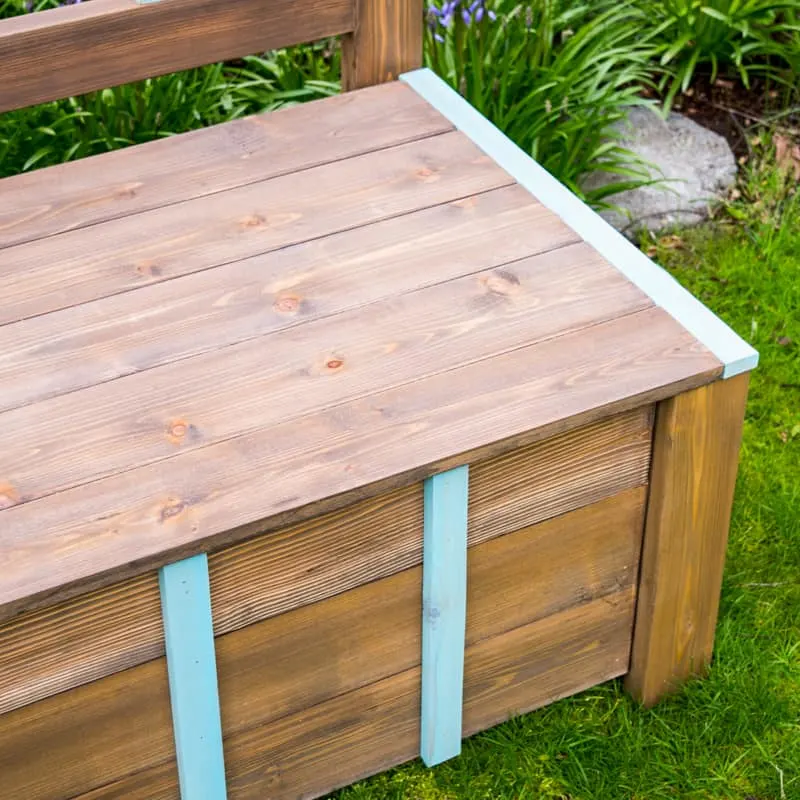
Add a fun pop of color with contrasting trim, or remove it completely for a cleaner look!

Want the full plans and cut diagram for this project? Just click the box below!
Check out these other outdoor project ideas!
Jann Olson
Tuesday 21st of August 2018
Great bench! Thanks for sharing it with SYC. hugs, Jann
Jenny
Tuesday 14th of August 2018
Great idea for storage & seating, I need this for the backyard. Thanks for sharing at Merry Monday
L-Shaped DIY Outdoor Bench for IG Builders Challenge 3 - Abbotts At Home
Tuesday 2nd of May 2017
[…] The Painted Key made this awesome porch swing with a flip down cup holder (left). And The Handyman’s Daughter built this amazing bench with toy storage (right). […]
Holly
Monday 24th of April 2017
This is super cute! I have a tiny house with little storage and no garage so I have toys strewn all over which drives me nuts! Thanks for posting it looks great!! Maybe one of my next projects!
Susanne
Saturday 22nd of April 2017
Your bench turned out great! I love the turquoise and that wire mesh in the bottom is GENIUS!! Anything wet can drain off. Well done :) Pinning and sharing!