Transform boring wood beads with spray paint! I'll show you how to paint wooden beads quickly and easily to create different looks!


A wood bead Christmas garland is the perfect way to fill in gaps between ornaments and complete your tree. But long strands are expensive, and aren't always in the right colors or finishes for your holiday theme!
This post is sponsored by Rust-Oleum and contains affiliate links for your convenience. Purchases made through these links may earn me a small commission at no additional cost to you. You can read more about how this site earns money on my disclosures page.
Spray paint is a quick and easy way to transform almost any material, including glass and wood. I've written an in-depth tutorial with all my spray painting tips and tricks for getting the best results.
You can turn those boring little spheres into a farmhouse garland, a strand of glam glitter or traditional shiny Christmas balls! But painting each wooden bead separately would take forever, right? I'll show you how I made a spray painting rig with scrap wood to paint dozens at once.
Materials needed
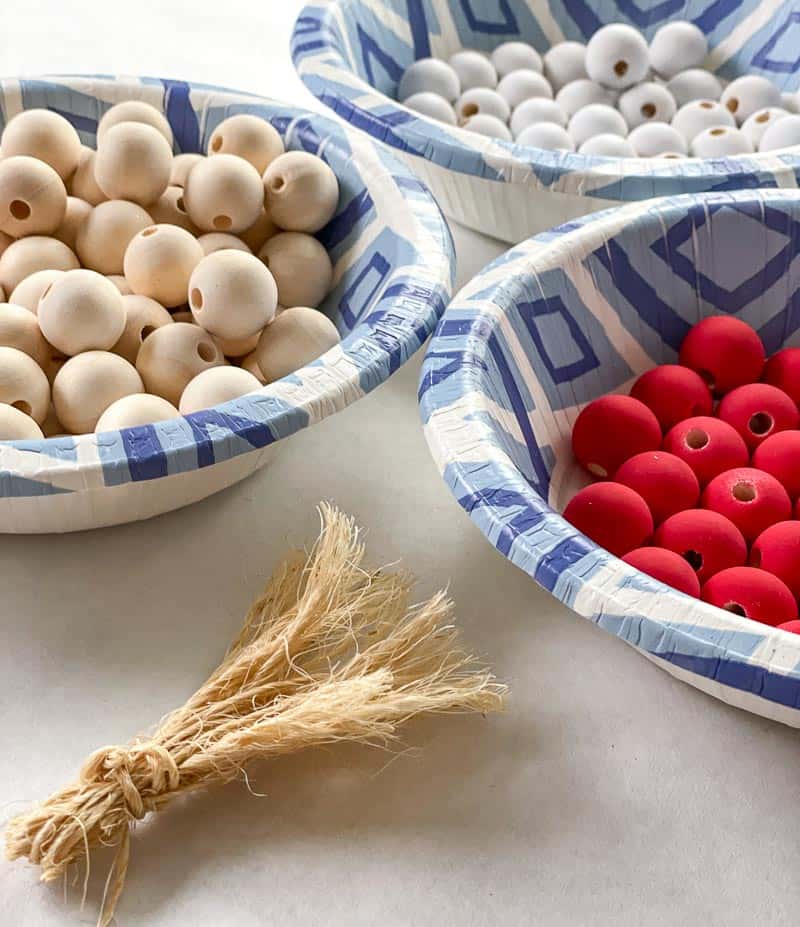
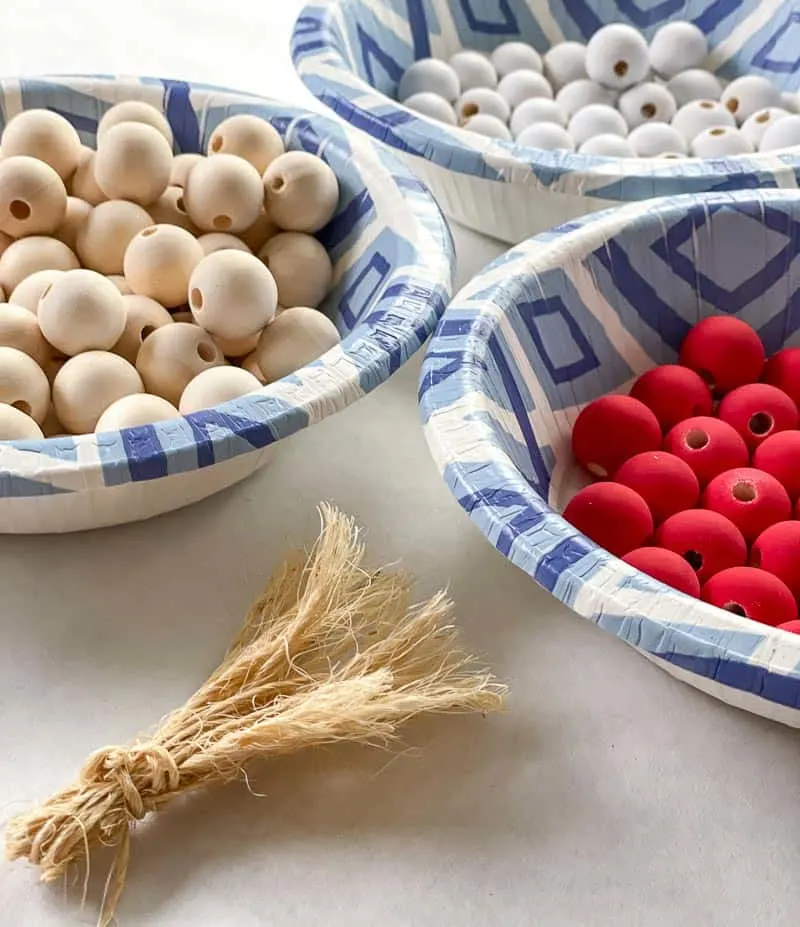
- Unfinished wood beads
- I used these larger 20mm beads so they would be easy to see among the tree branches and ornaments.
- Bamboo skewers
- We had short ones in the kitchen drawer, so that's what I used. The longer the skewer, the more beads you can fit!
- Painter's tape
- Spray paint
- Twine
- Scrap wood
- The size of the board doesn't really matter, so long as the base is wide enough so that it won't tip over.
- Jigsaw or band saw
- 1 ¼" screws
- Spray tent or drop cloths to protect the area from overspray
How to spray paint wooden beads
Make a spraying rig
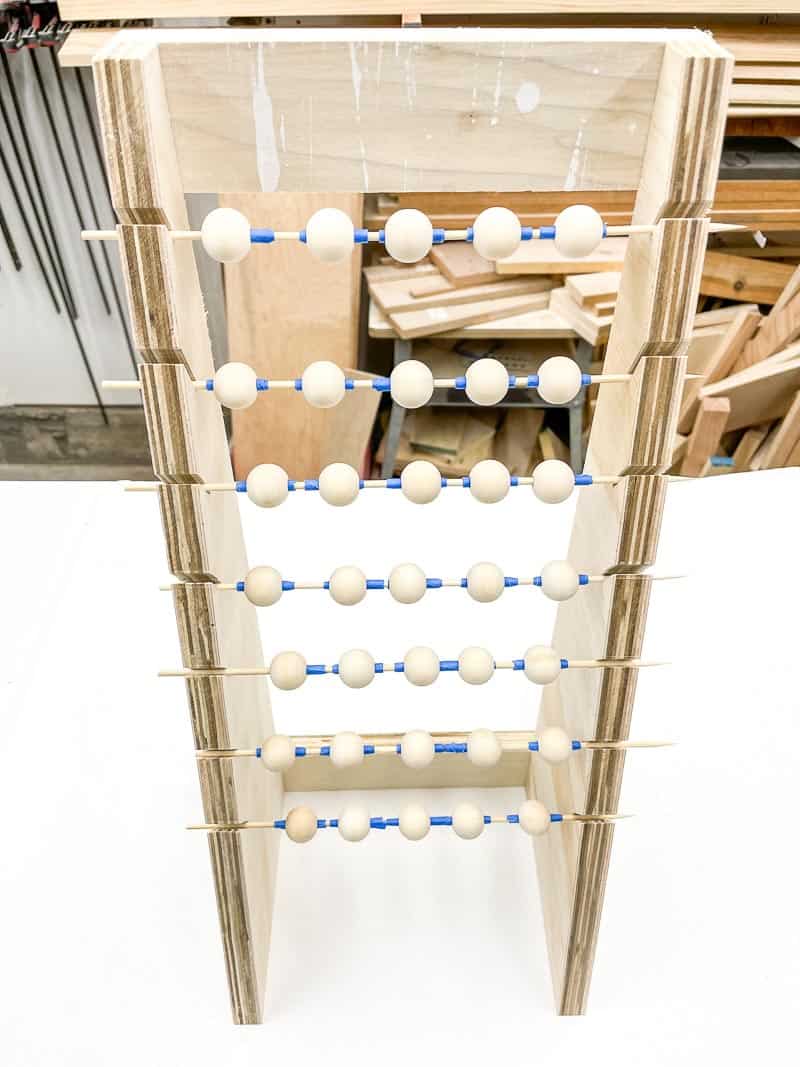
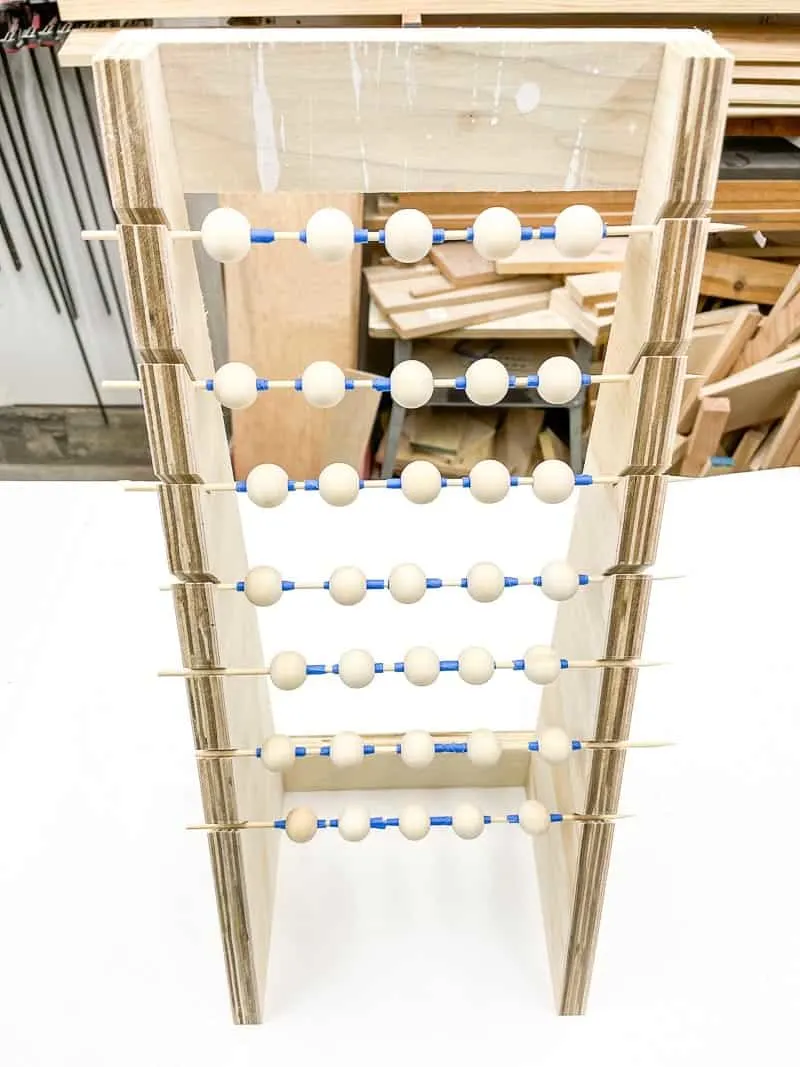
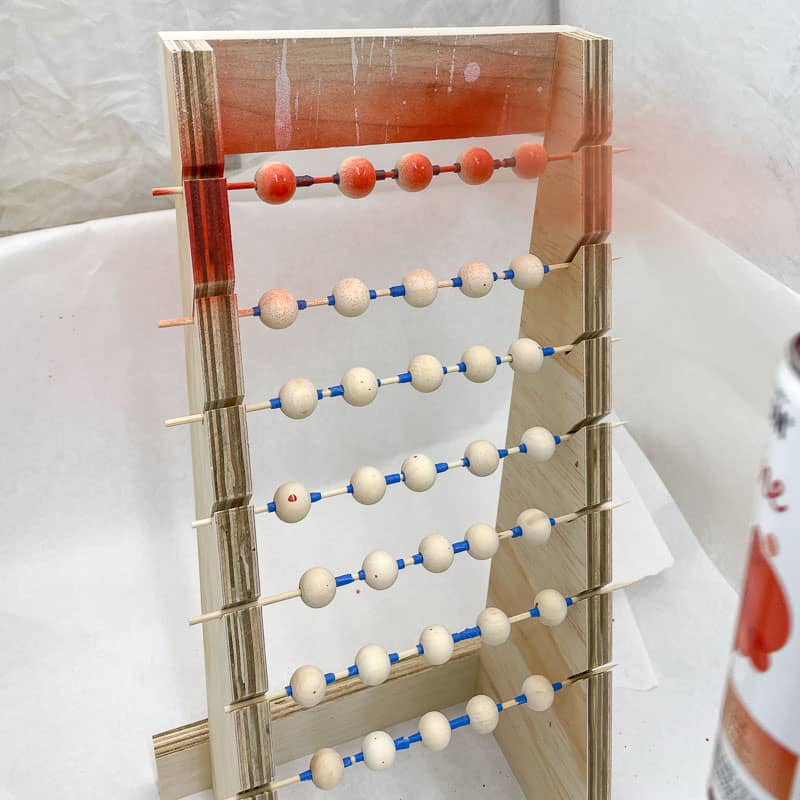
You don't really need to make a rig like this, but it makes painting lots of beads at once really easy! It offsets each row, so you don't get drips from one landing on the other. But you could just balance the sticks across two sawhorses or 2x4 boards.
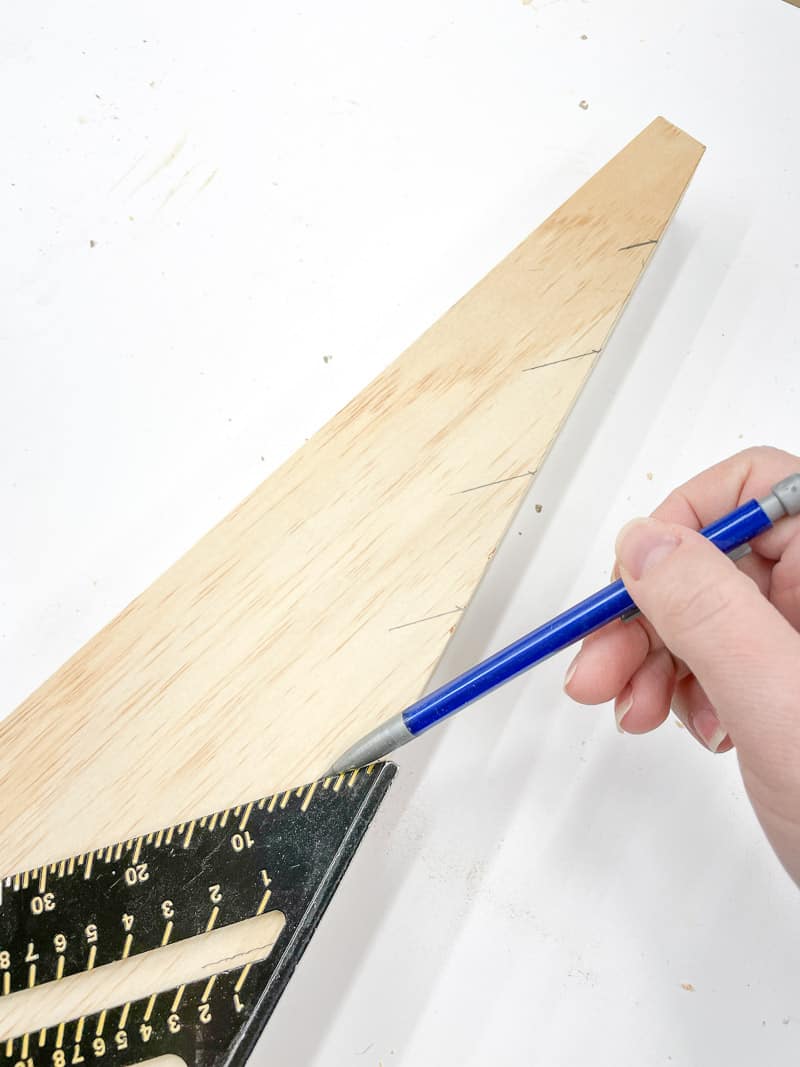
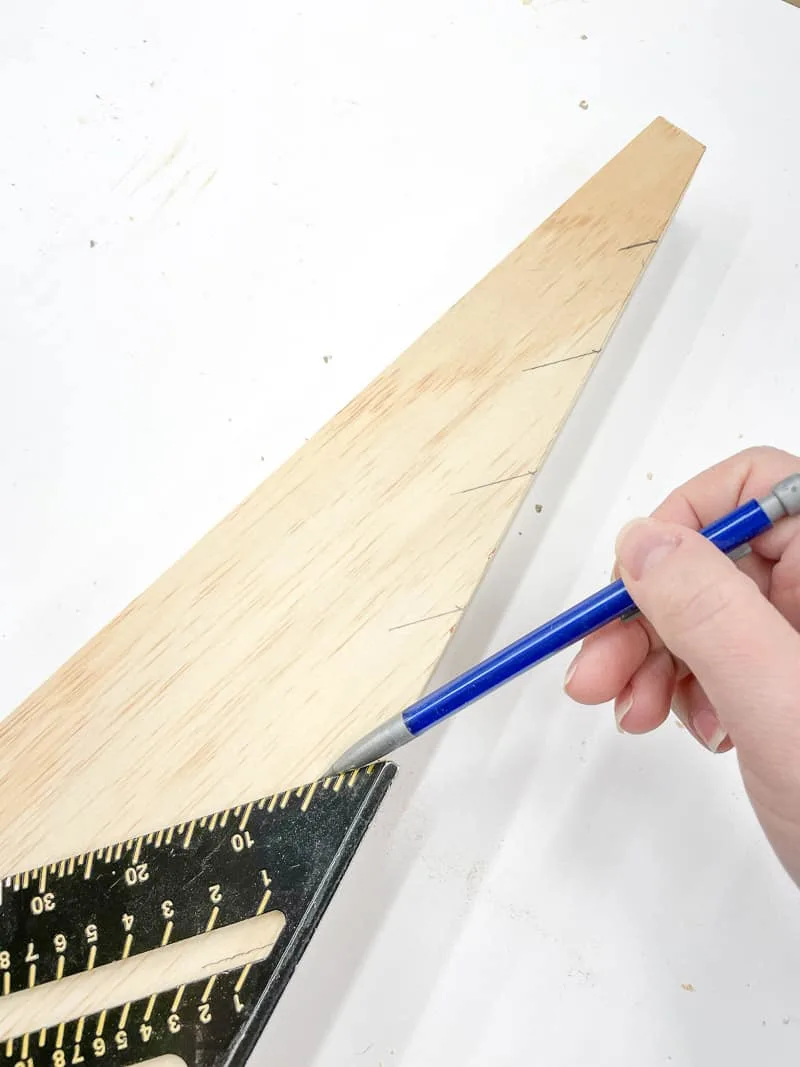
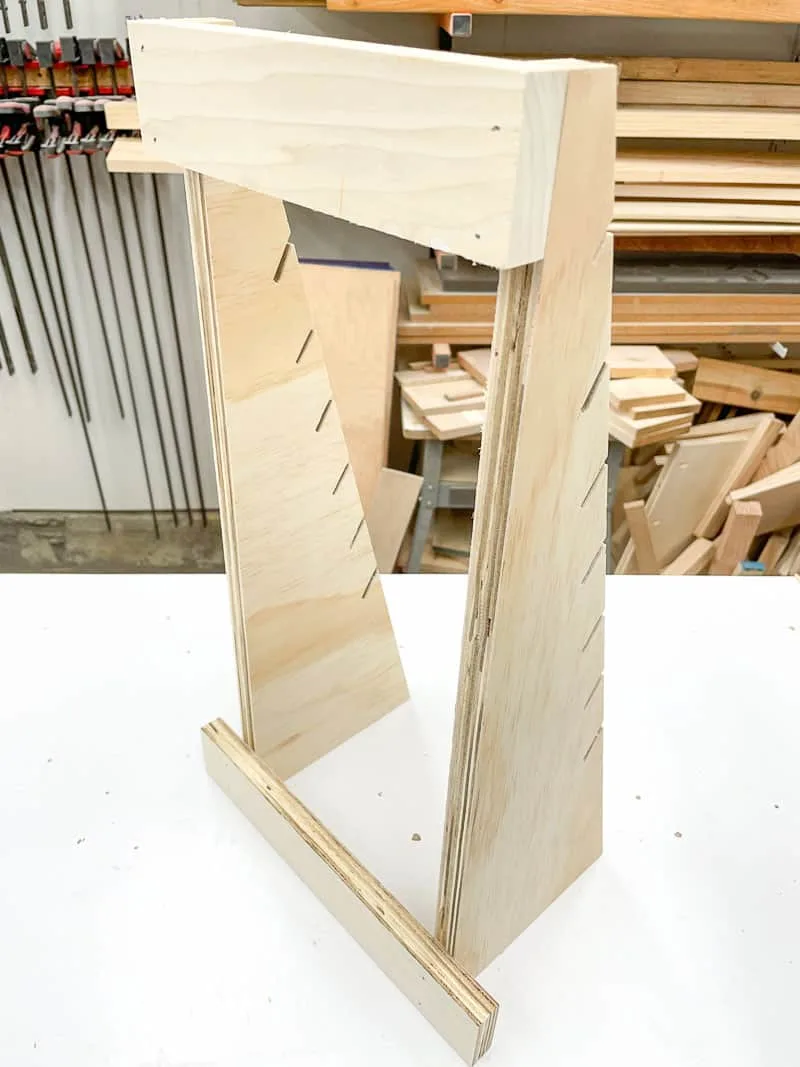
I found two angled pieces of plywood in my scrap wood bin that are offcuts from the sides of the bookshelf I made for my son They're the perfect size and shape for this rig!

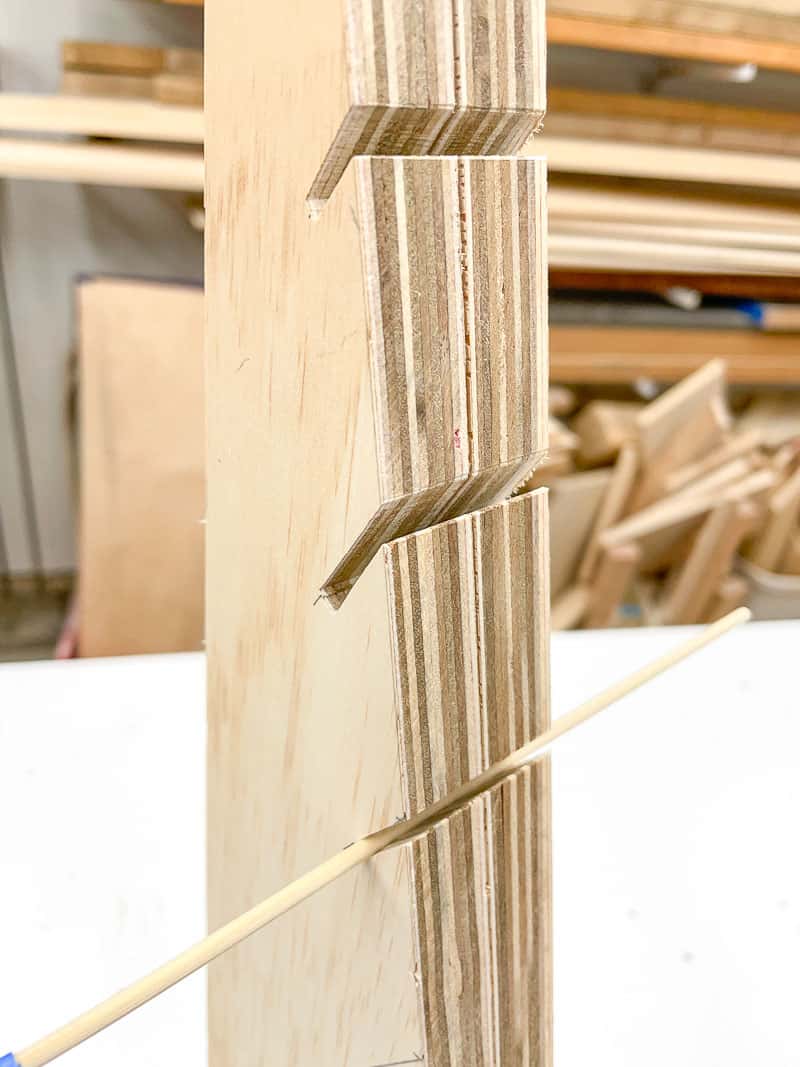
Cut your board into a long right angle triangle, with the base wide enough so the piece can stand up by itself. Mark out some notches along the angled side, about an inch apart and pointing down towards the back corner.
Use double sided tape or painter's tape to sandwich the two sides together. This way, you only have to cut the notches once and they'll be exactly the same on both sides! Cut one inch long notches on the angled side of the triangle with a jigsaw or bandsaw.
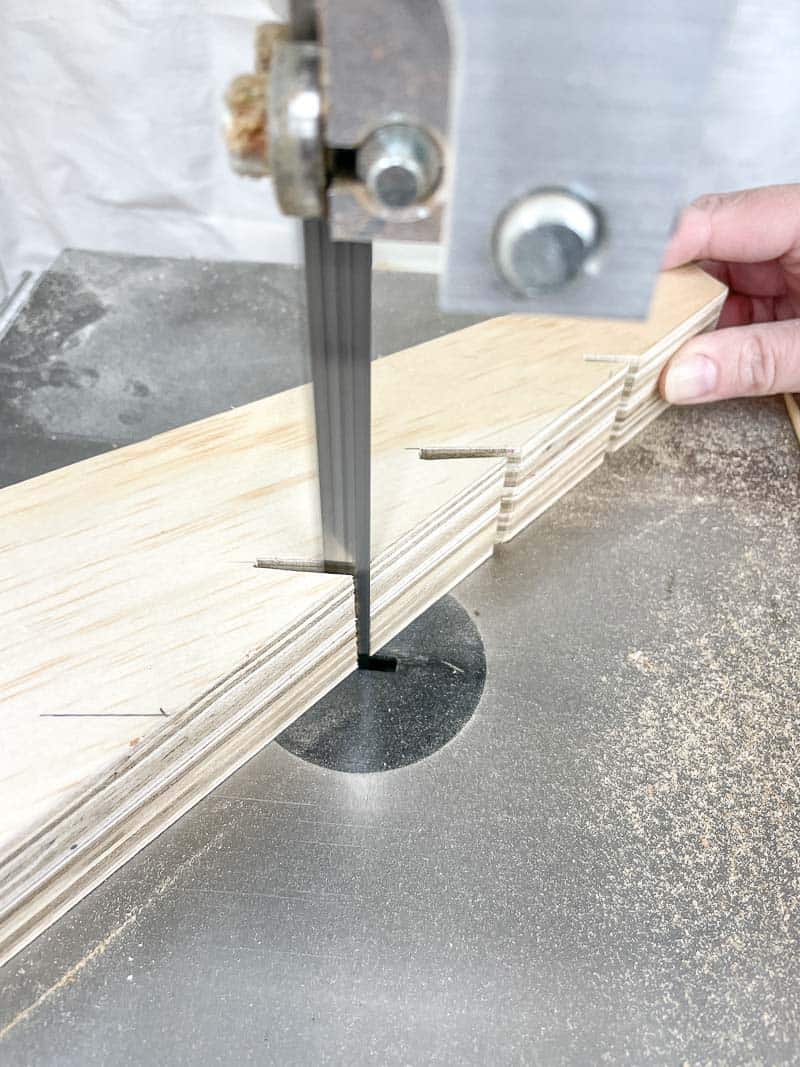

Test the fit of the skewer in each notch. It should be able to spin freely, but hold it securely in place. I found that the notches started to fill up with paint after a few coats, which made them harder to turn. I recommend making them a little wider than I did.

Insert a skewer into the notches on both sides, leaving about an inch of overhang on the ends. Measure the span, and cut two pieces of scrap wood to fit. Nail or screw them to the back at the top and bottom.

Prepare the sticks
The holes in these wooden beads are way bigger than the skewers, so the beads just roll when I turned the skewer. To solve this problem, I wrapped each stick with painter's tape to fill the gap.
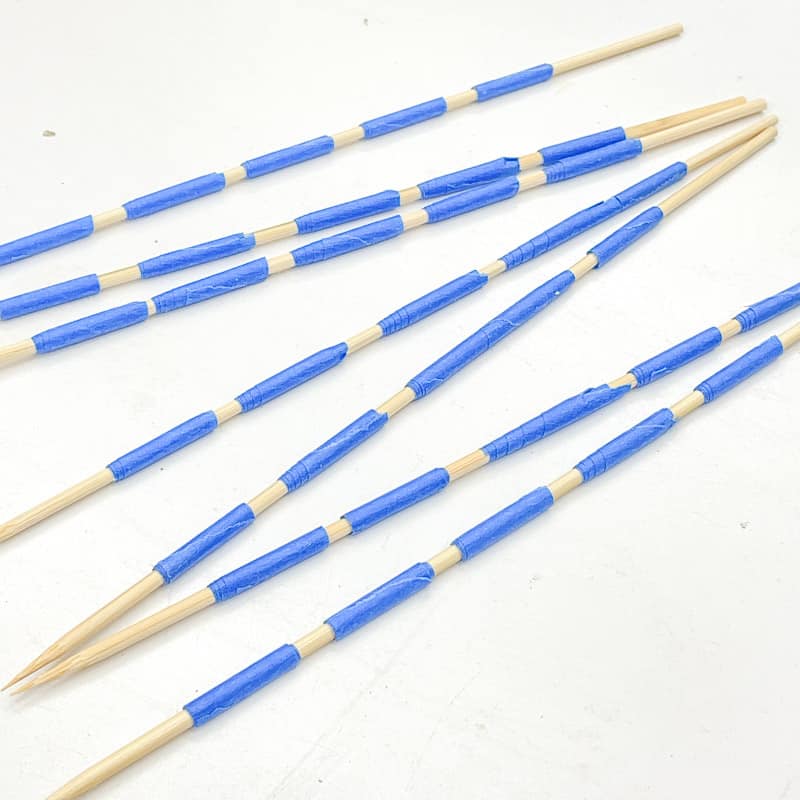
This process took a bit of trial and error at first, but once I had the right thickness, it worked perfectly! Tear off about three inches of tape, and wrap it around the skewer. Slide a bead over the tape to test the fit. It should slide on and off easily, but shouldn't spin when you turn the skewer.


I was able to fit five beads on each skewer with plenty of space in between for painting the sides. When it's all filled up, I could paint 35 wooden beads at a time (and I could probably have added a few more to the bottom)!
Spray paint the wooden beads
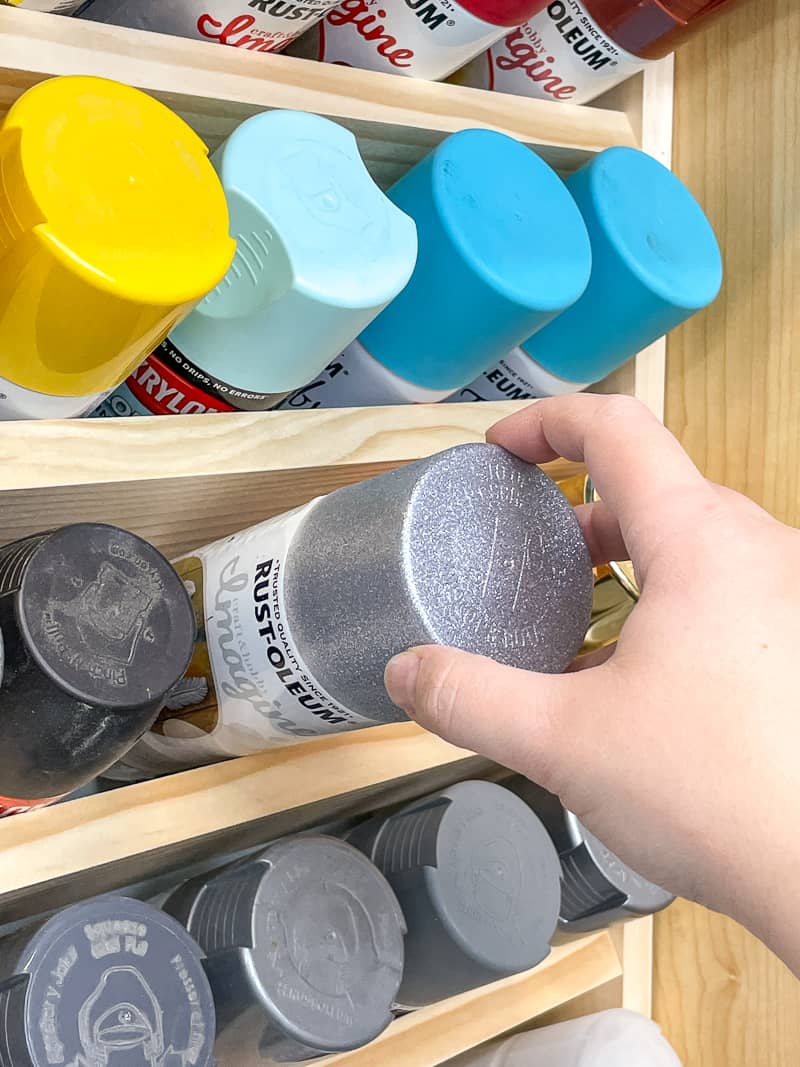
Now it's time to paint! I grabbed a can of each color and finish out of my spray paint storage rack and rounded up the rest of my supplies.

Since our weather calls for rain every day from now until April here in Seattle (I'm only kind of joking *sigh*), I set up my tabletop spray shelter in our shed instead of out in the yard. Luckily, it's heated, so the spray paint will still dry properly.
I recommend using a Rust-Oleum Comfort Grip spray paint handle for this project. It gives you more control, prevents your finger from getting painted, and also keeps it from cramping up after a long painting session!

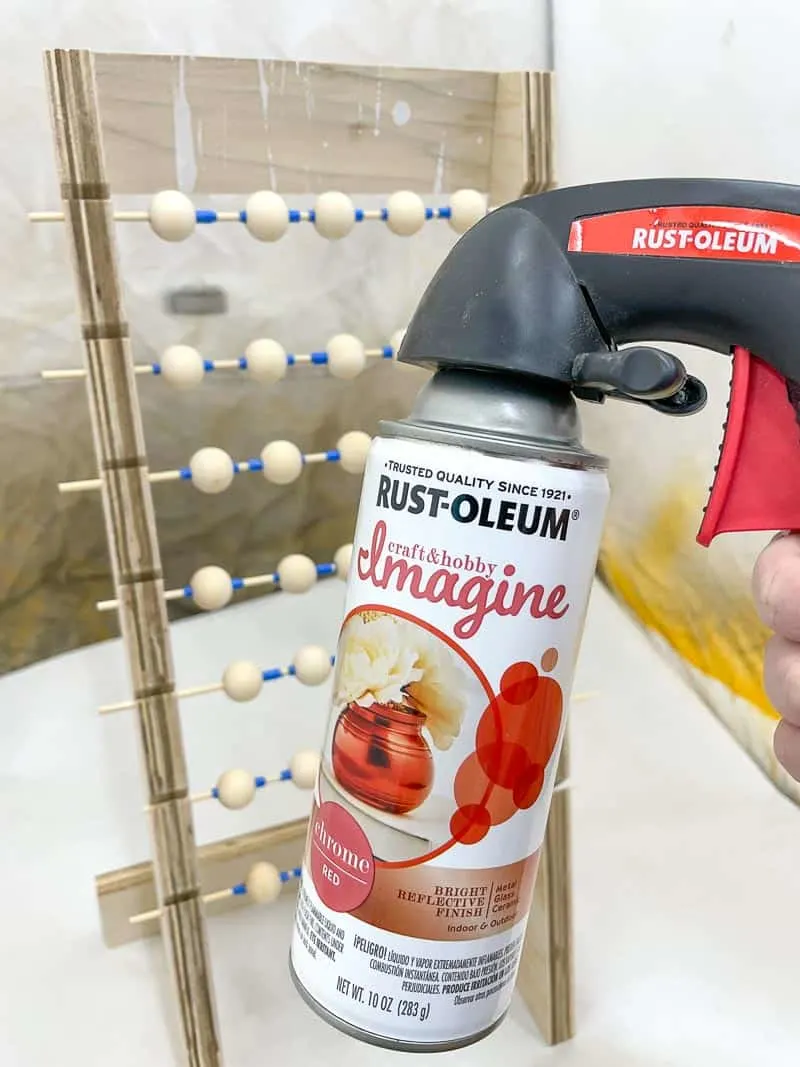
Apply a light, even coat of paint to the front of the beads. If you apply too much at once, you'll get drips!

Give the paint a minute to tack up a bit, then turn the sticks to expose the unpainted surface.
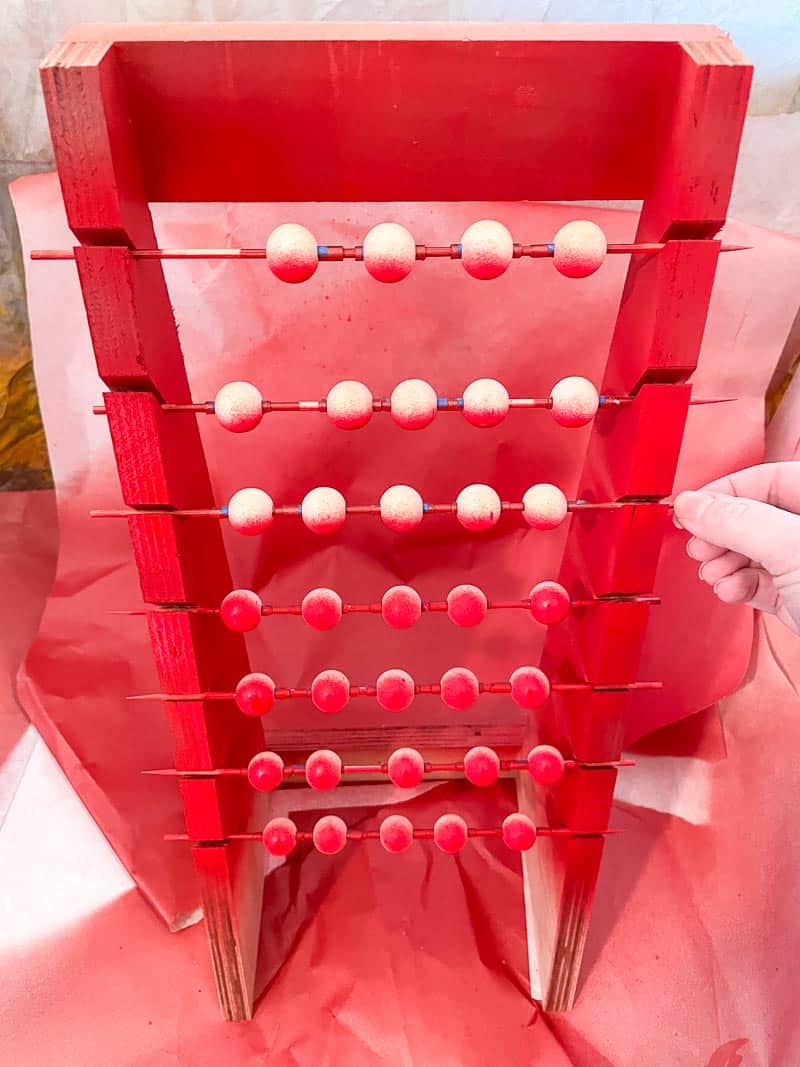

Keep painting and turning until you get back to the beginning. If you need to add a second coat, wait a few minutes for the first coat to dry before repeating the process. Don't forget to spray the sides too!
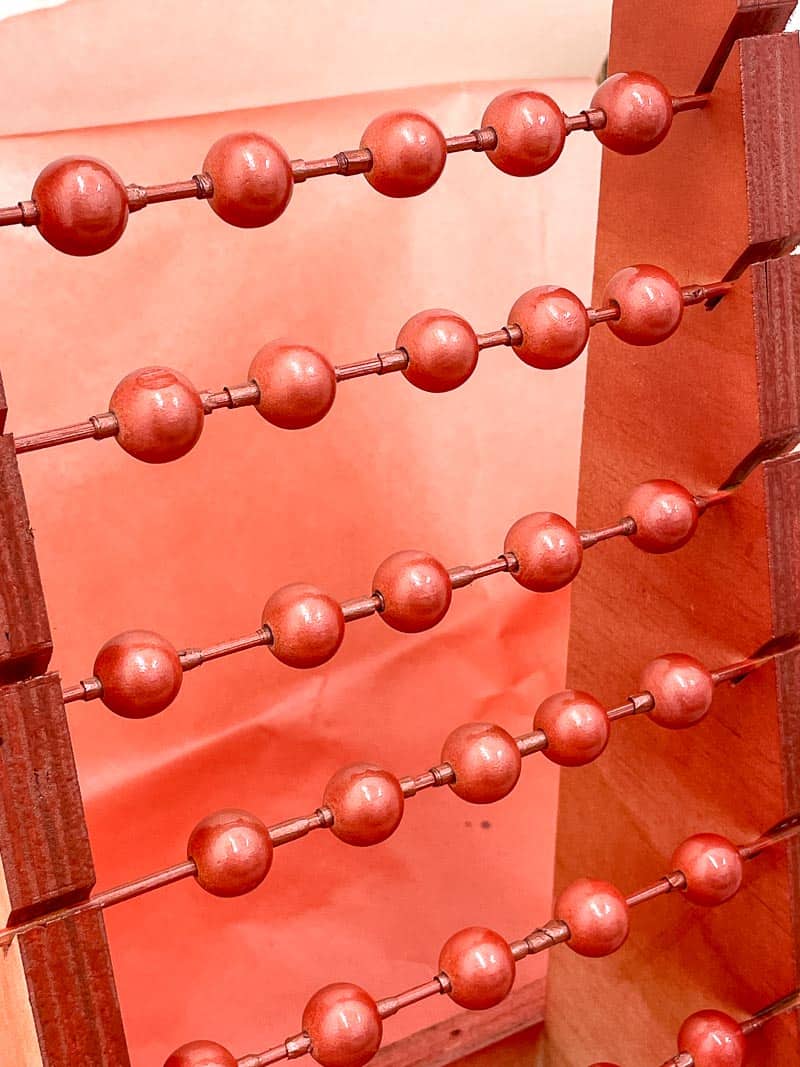
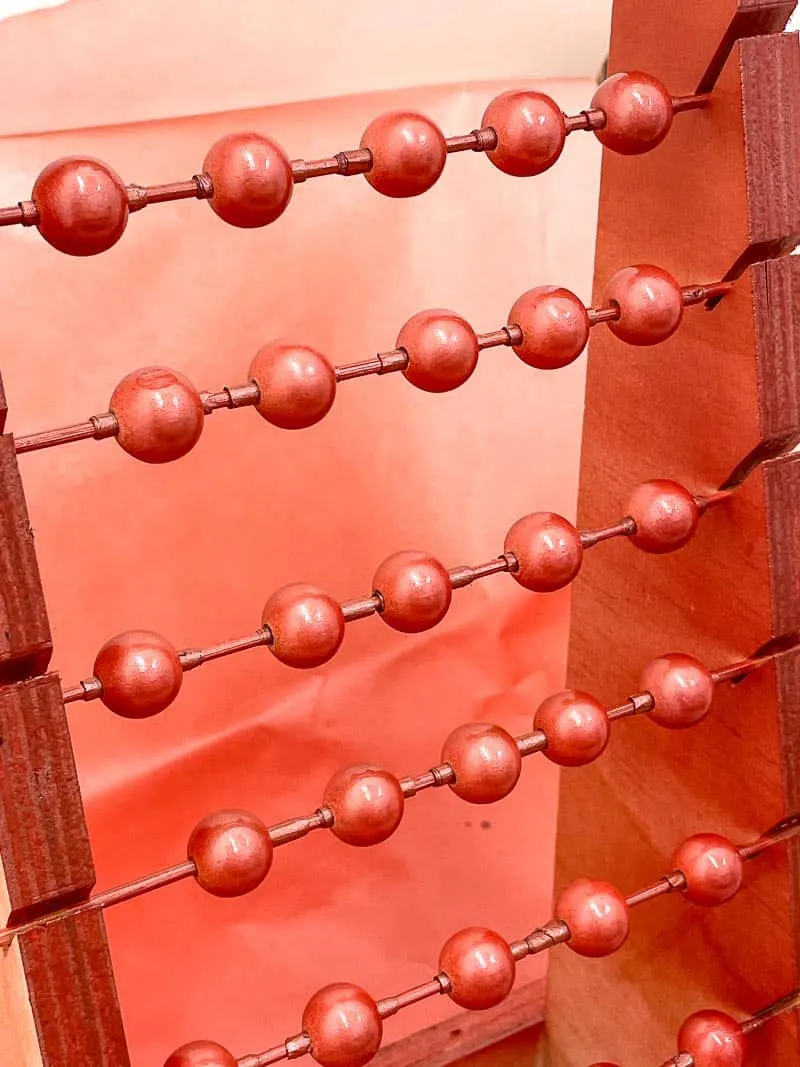
The chrome and chalk finish spray paints had good coverage with two coats. The glitter spray paint needed several more to get that sparkly finish throughout. I should have sprayed a base coat of a solid color first, then applied the glitter finish on top.

Once the paint is fully dry, just pop the beads off the skewer and load up the next batch! I was able to get three rounds of beads out of one set of sticks before they started getting too gunked up with paint. I did all the red paint first, then made a new set for the silver and white ones.


How to make a wood bead garland
Now that I have an assortment of painted wooden beads, it's time to string them up! You can dress these garlands up with smaller spacer beads, ribbon or fancy twine for different looks.
Farmhouse wood bead garland
For a more natural, farmhouse style garland, I used the red and white chalk finish paint beads, mixed with some unfinished ones. I made a tassel at the end of the jute twine by making a bunch of loops, tying off the top and cutting the loops at the bottom.
Wrap the loose end of the twine with tape to make it easier to thread through the hole. You can give the painted wooden beads a quick swipe of sandpaper to give them a more rustic look, but I liked them as is.


The matte finish of the farmhouse garland doesn't compete with the other ornaments for attention, but give a nice pop of color to the bare spots on the tree.


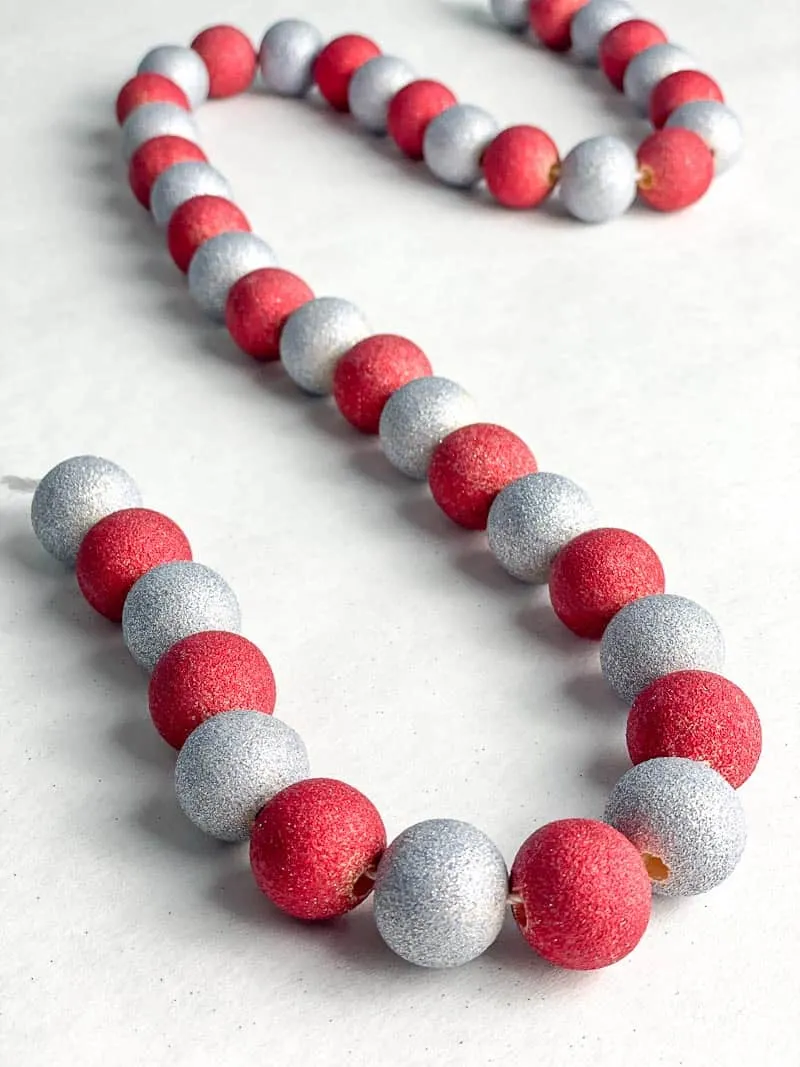
Traditional wood bead Christmas tree garland
The colored chrome spray paint beads remind of me of traditional red and silver Christmas tree ball ornaments! For this look, I used white mason twine instead of jute. It's a little on the shiny side, so it pairs well with the shiny wooden beads.

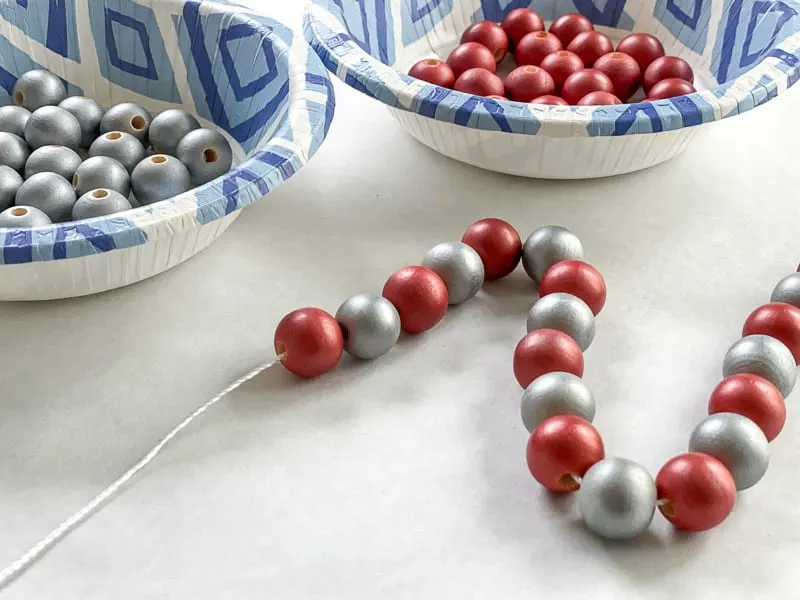
This version might be my favorite! It's hard to believe these beads are solid wood!


We have a lot of shiny metallic ornaments, and I can't wait to see how they look with this garland!


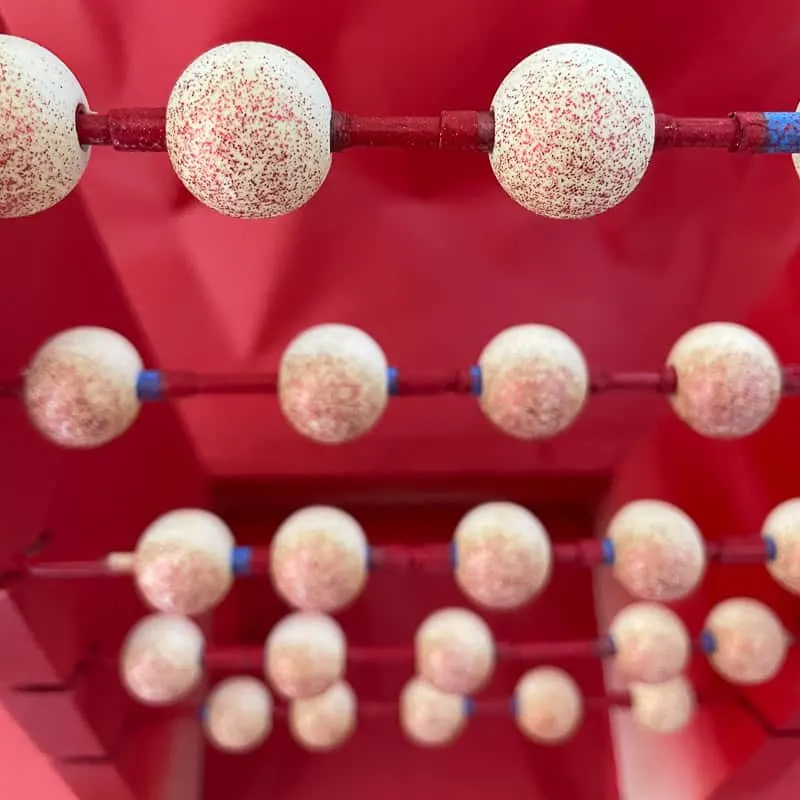
Glitter bead garland
If you really want to make your Christmas tree sparkle, this is the one for you! The red and silver glitter spray paint turned those unfinished wood beads into tiny disco balls!


The glitter stayed on the wood beads surprisingly well, but there was still a bit of a mess after making this strand. It made our entire dining table sparkly!

I really like how the Christmas tree lights make the glitter shimmer and shine. If you're going for glamorous holiday decor, this is the finish to choose!


So which style of Christmas tree garland do you like the most? I'd love to hear your favorite in the comments below!
Check out these other Christmas project ideas!


Carole
Sunday 22nd of November 2020
Amazing brain you have makes it easier to do these projects. My preference is the sparkly ones
Ruth
Friday 20th of November 2020
They're all gorgeous but i like the red and silver one the best.
Ginger
Sunday 22nd of November 2020
Ditto!